6. Large format CNC (computer controlled Machining)
This week was one of the interesting weeks. It about going out of the box and moving from small thing to some thing bigger. in this week we design, cut and form a useable thing, that we need it for our daily use or as decoration. for me I design a shoes cabinet, it looks easy to design it but it is not as you think when you do it for the first time, also that I will have sliding door for this cabinet. all this with out any hinges or/and wheels to make the sliding door move.
group assignment
what we have
We have one plywood sheet for every member. so, Our design should not exceed the size of the plywood sheet we have been given (12mm thick ,122cm width, 244cm height). we have to have 20mm from all side as a space for error.
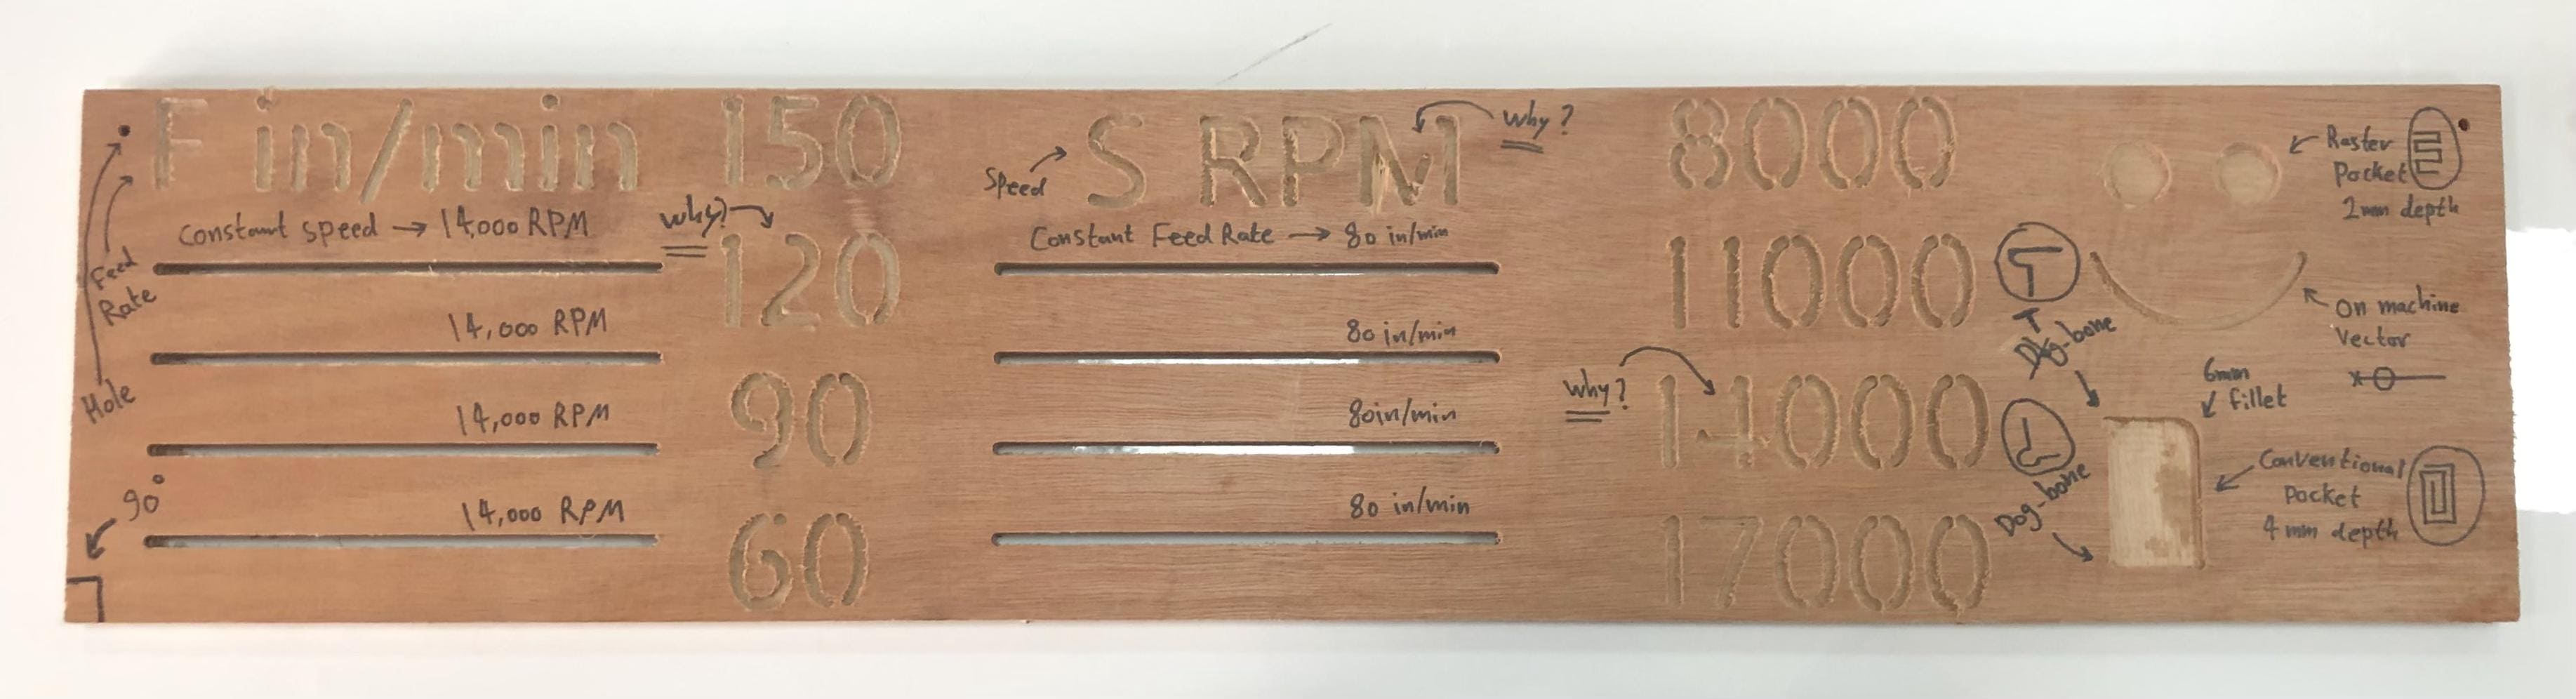
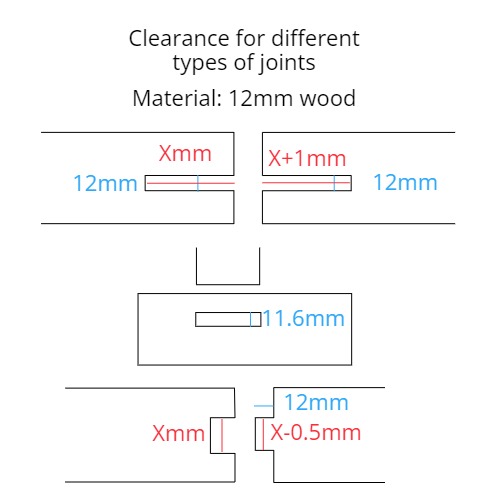 we have to follow this guides to insure that the joints are applicable to be joined together and make sure it is not loose.
machine main component
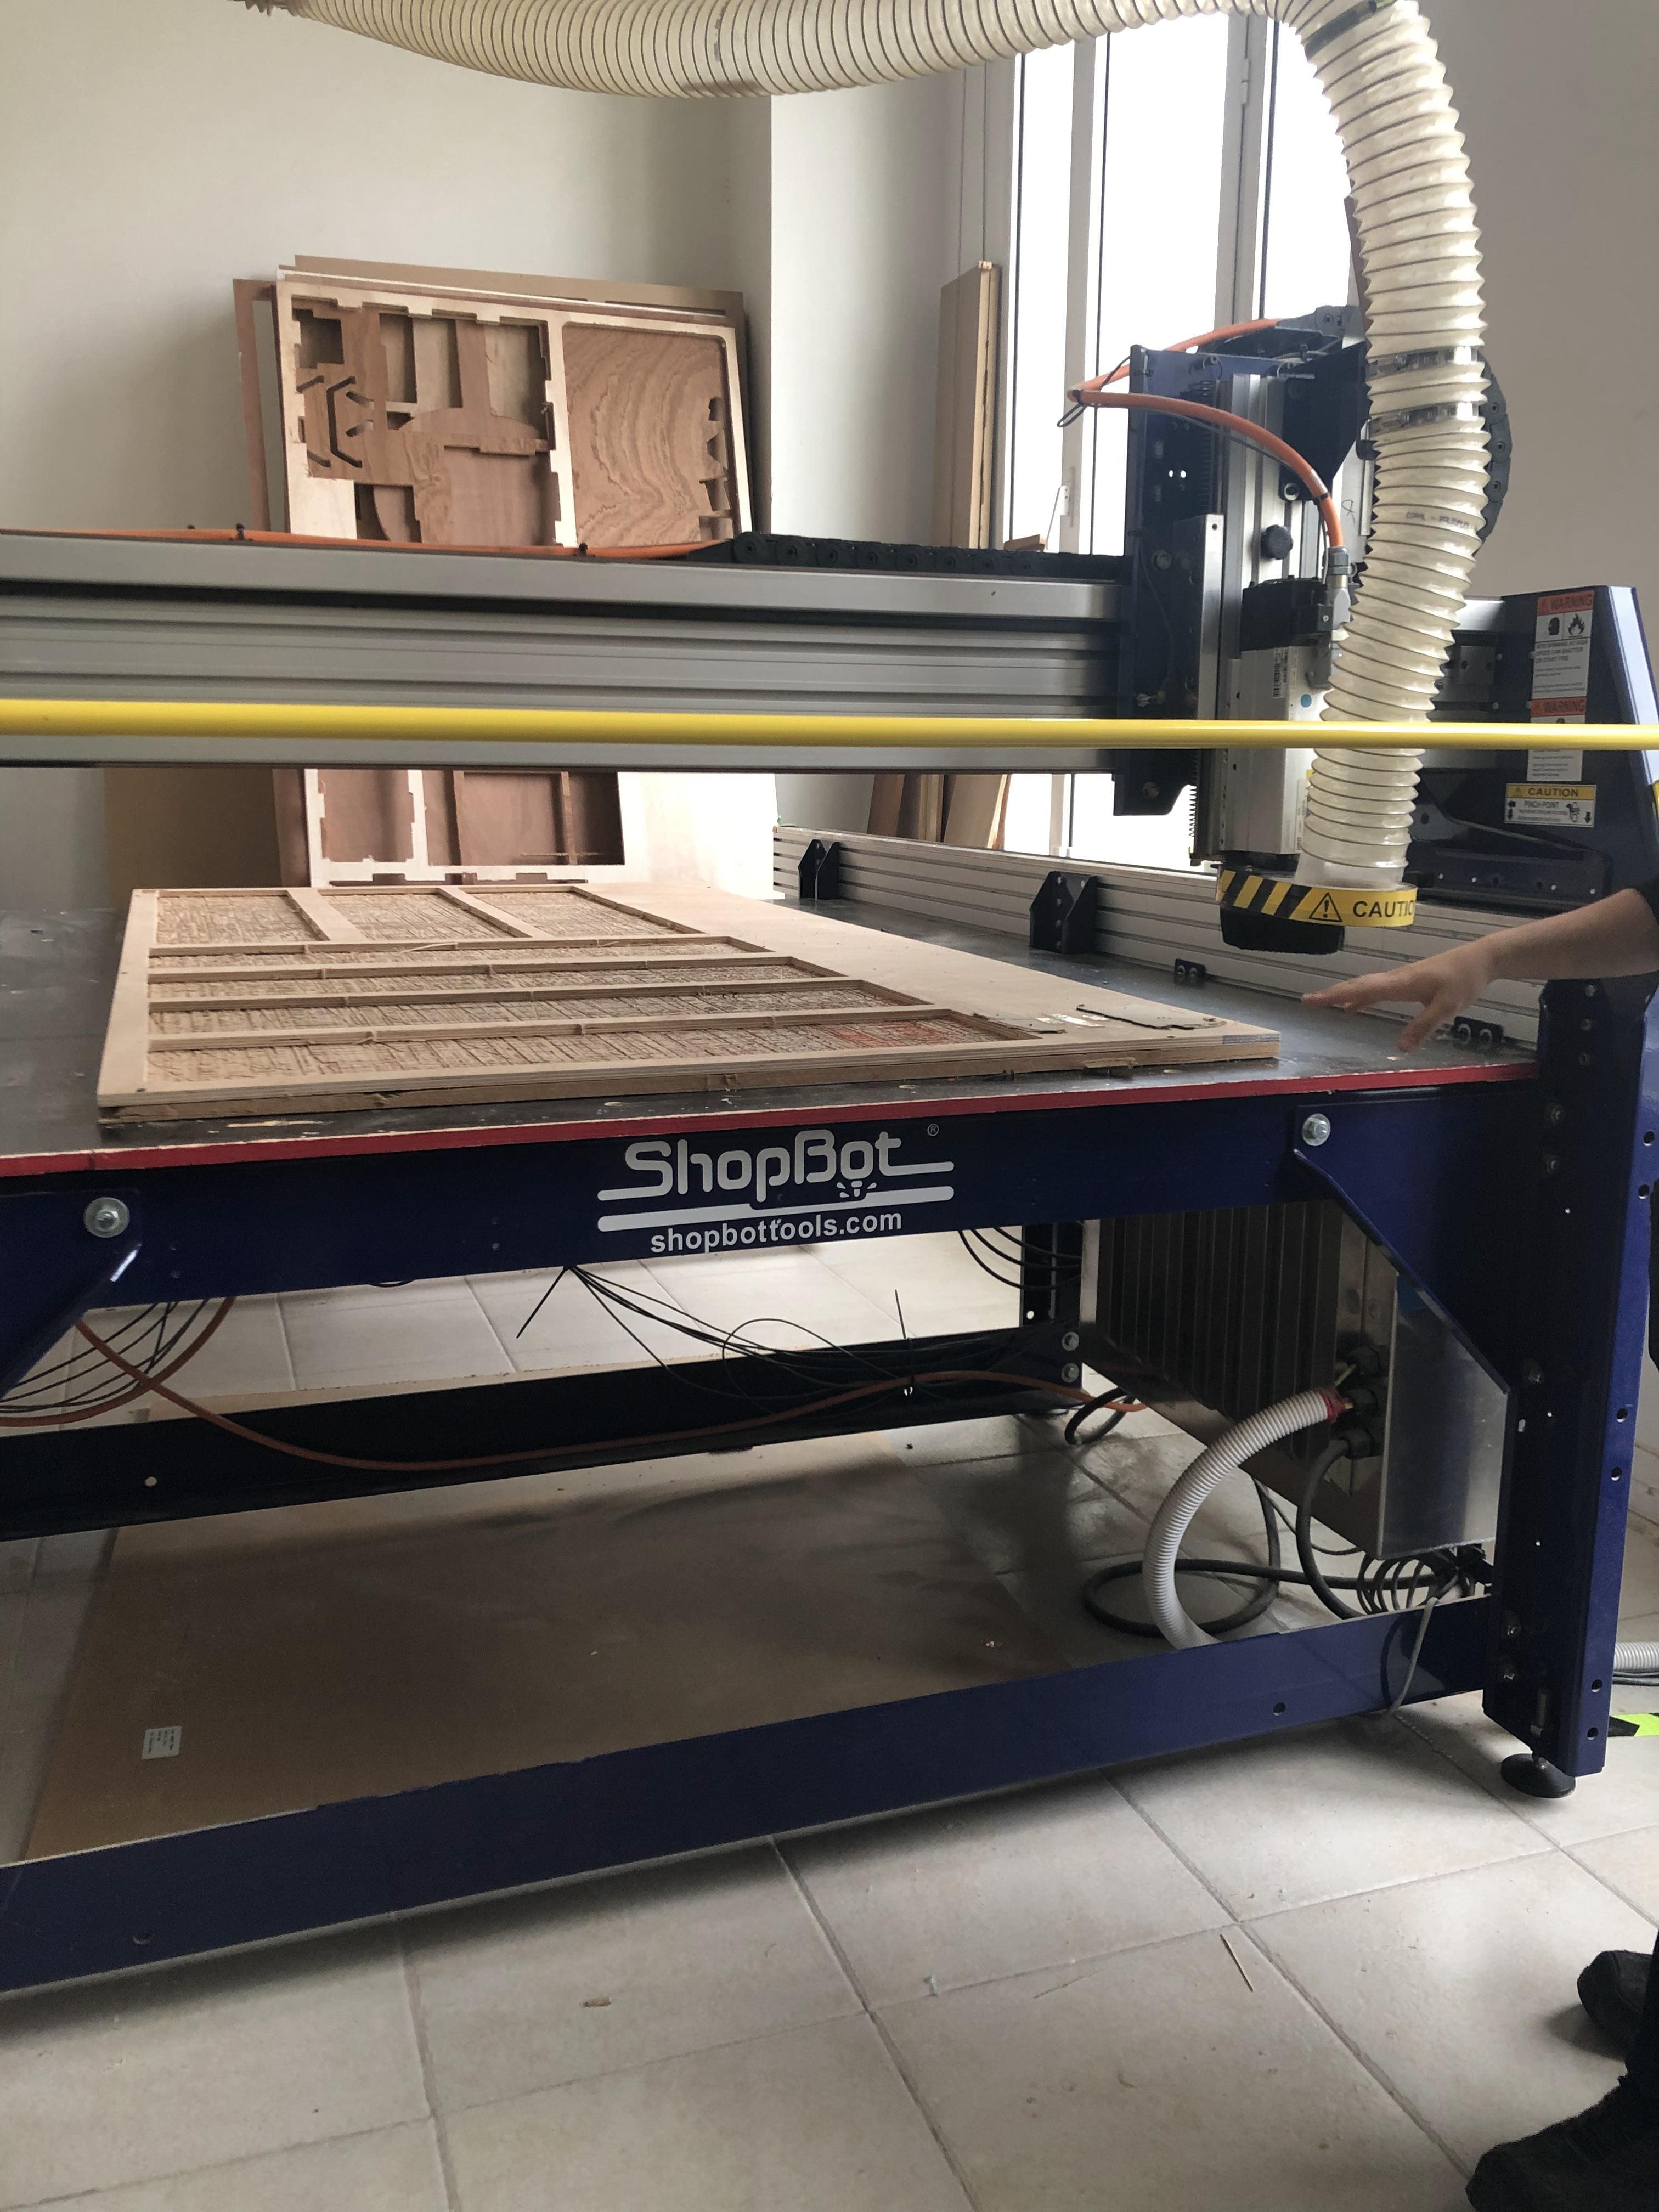

this big machine has many components as it shown in the image above. the main parts of it is: - the cutting hand - x, Y and Z axis. - support frame - start and stop buttons
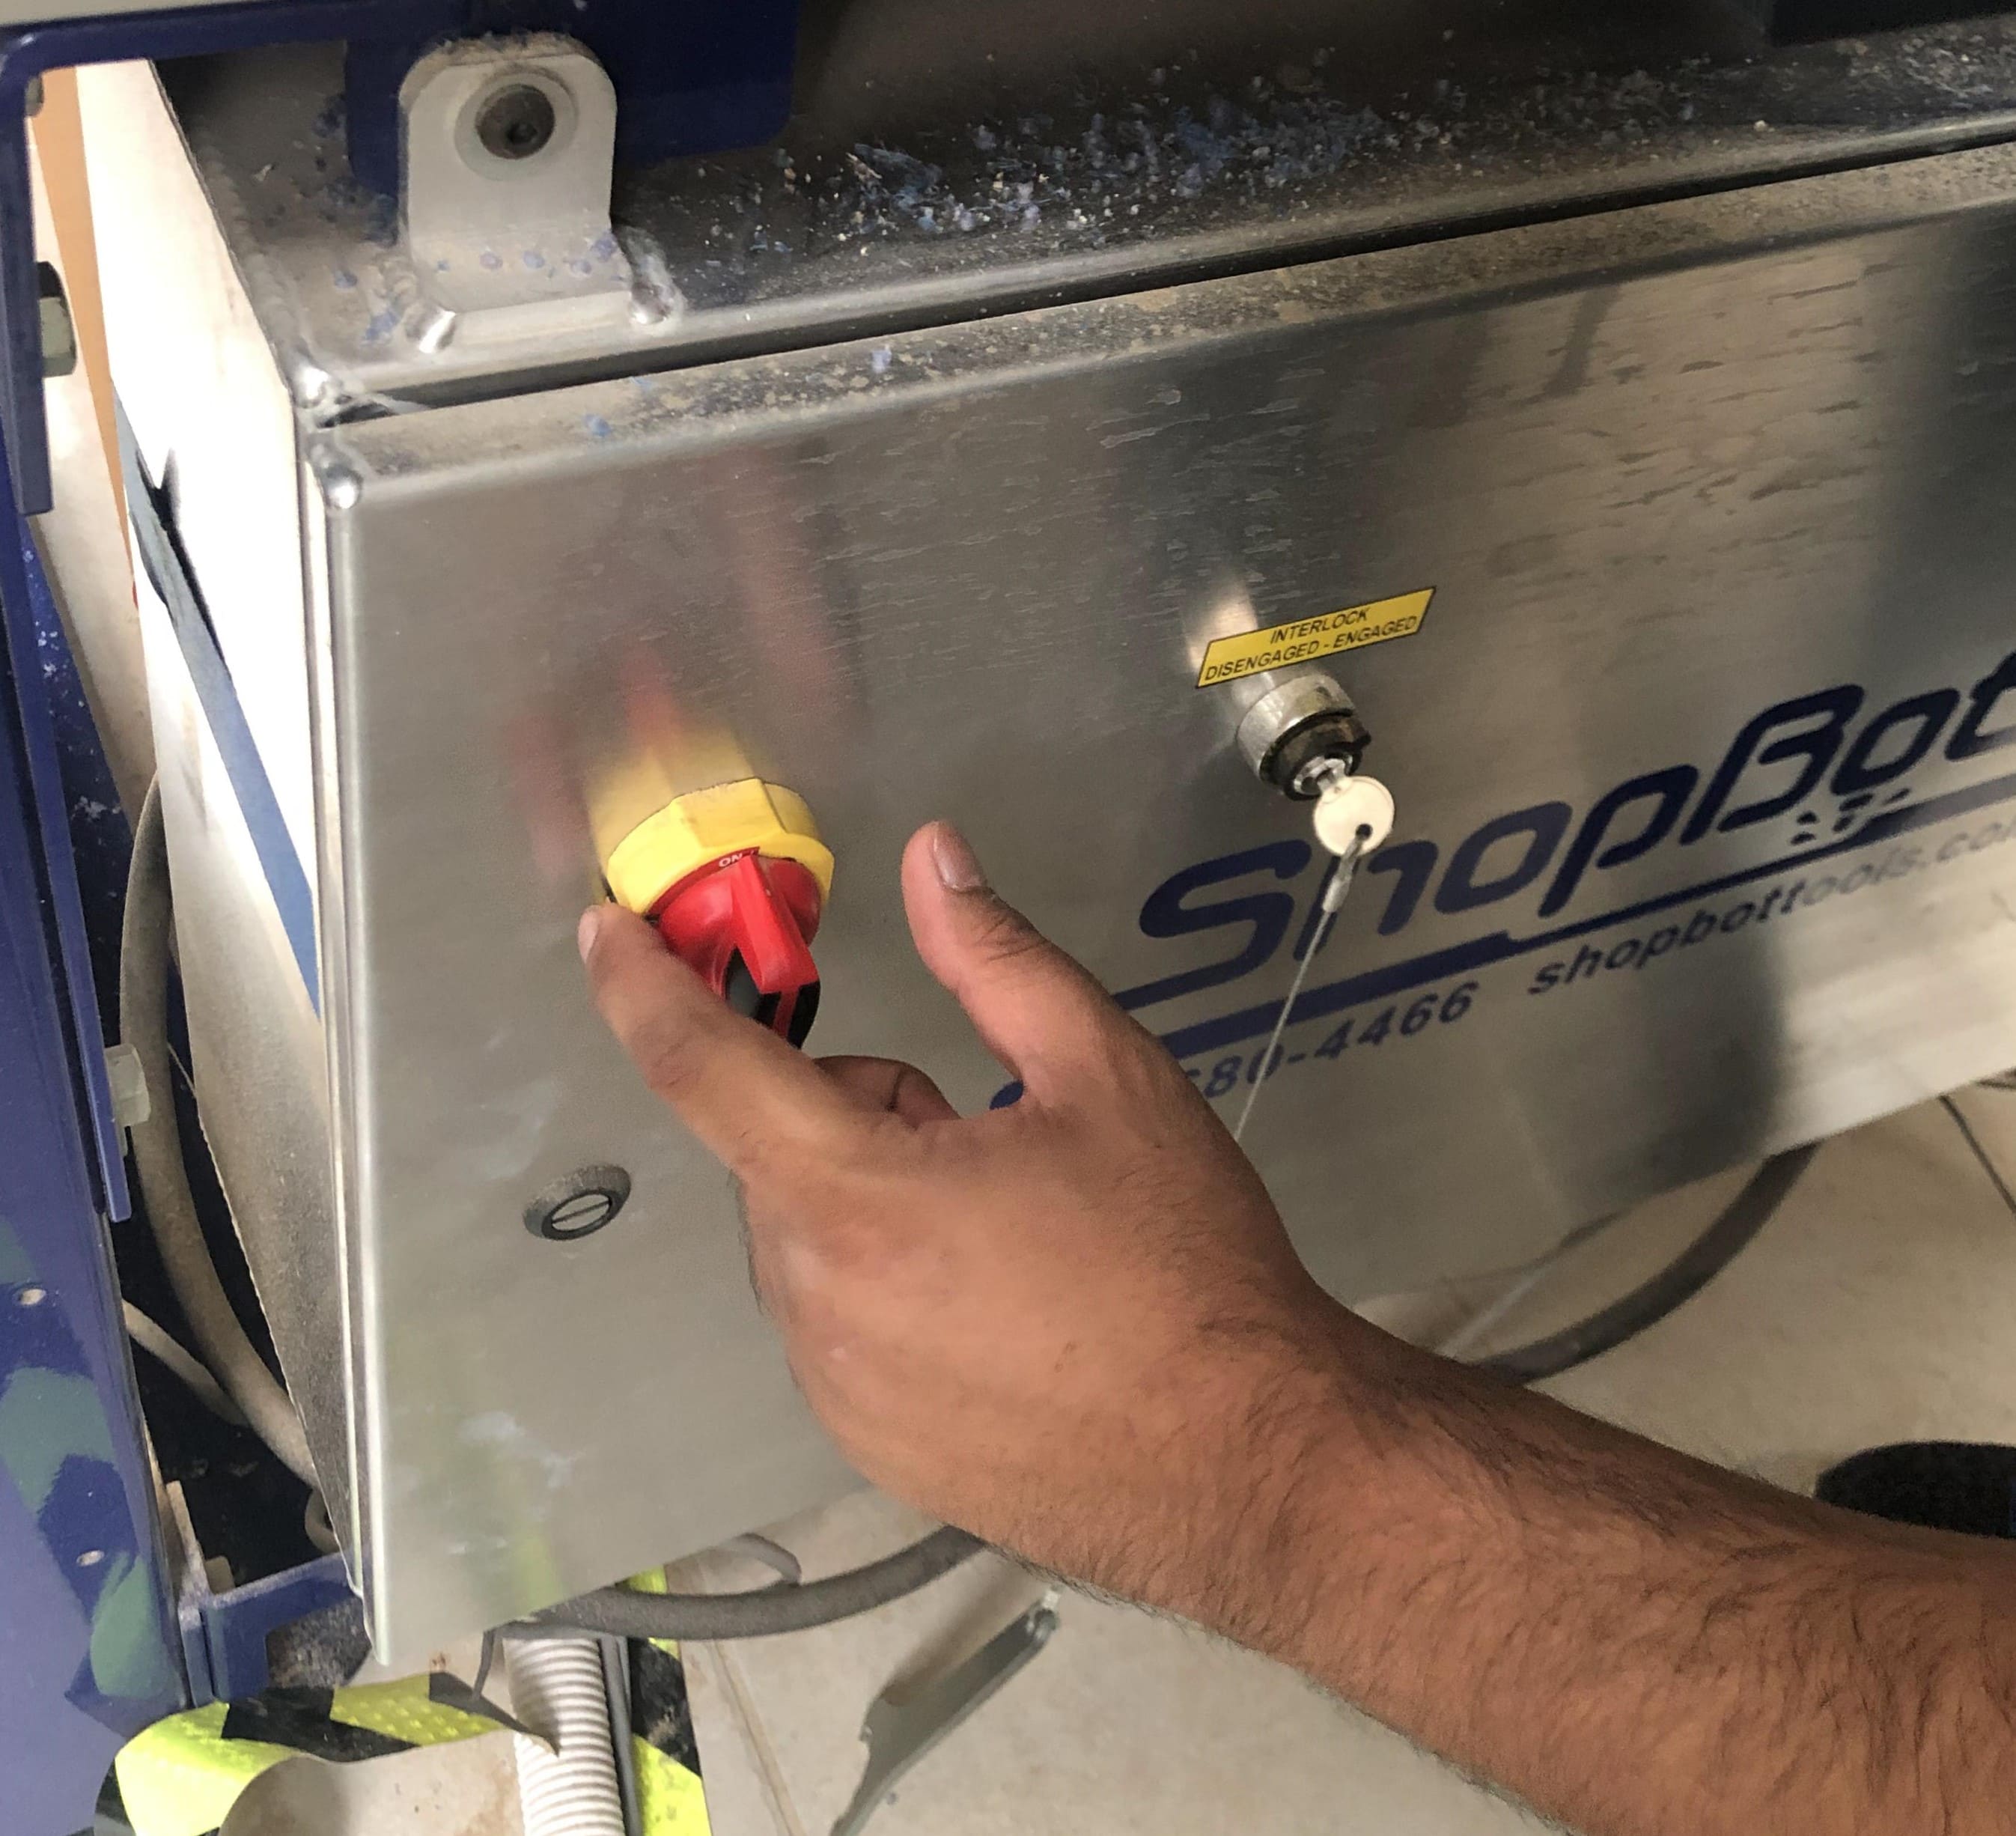
emergency guides
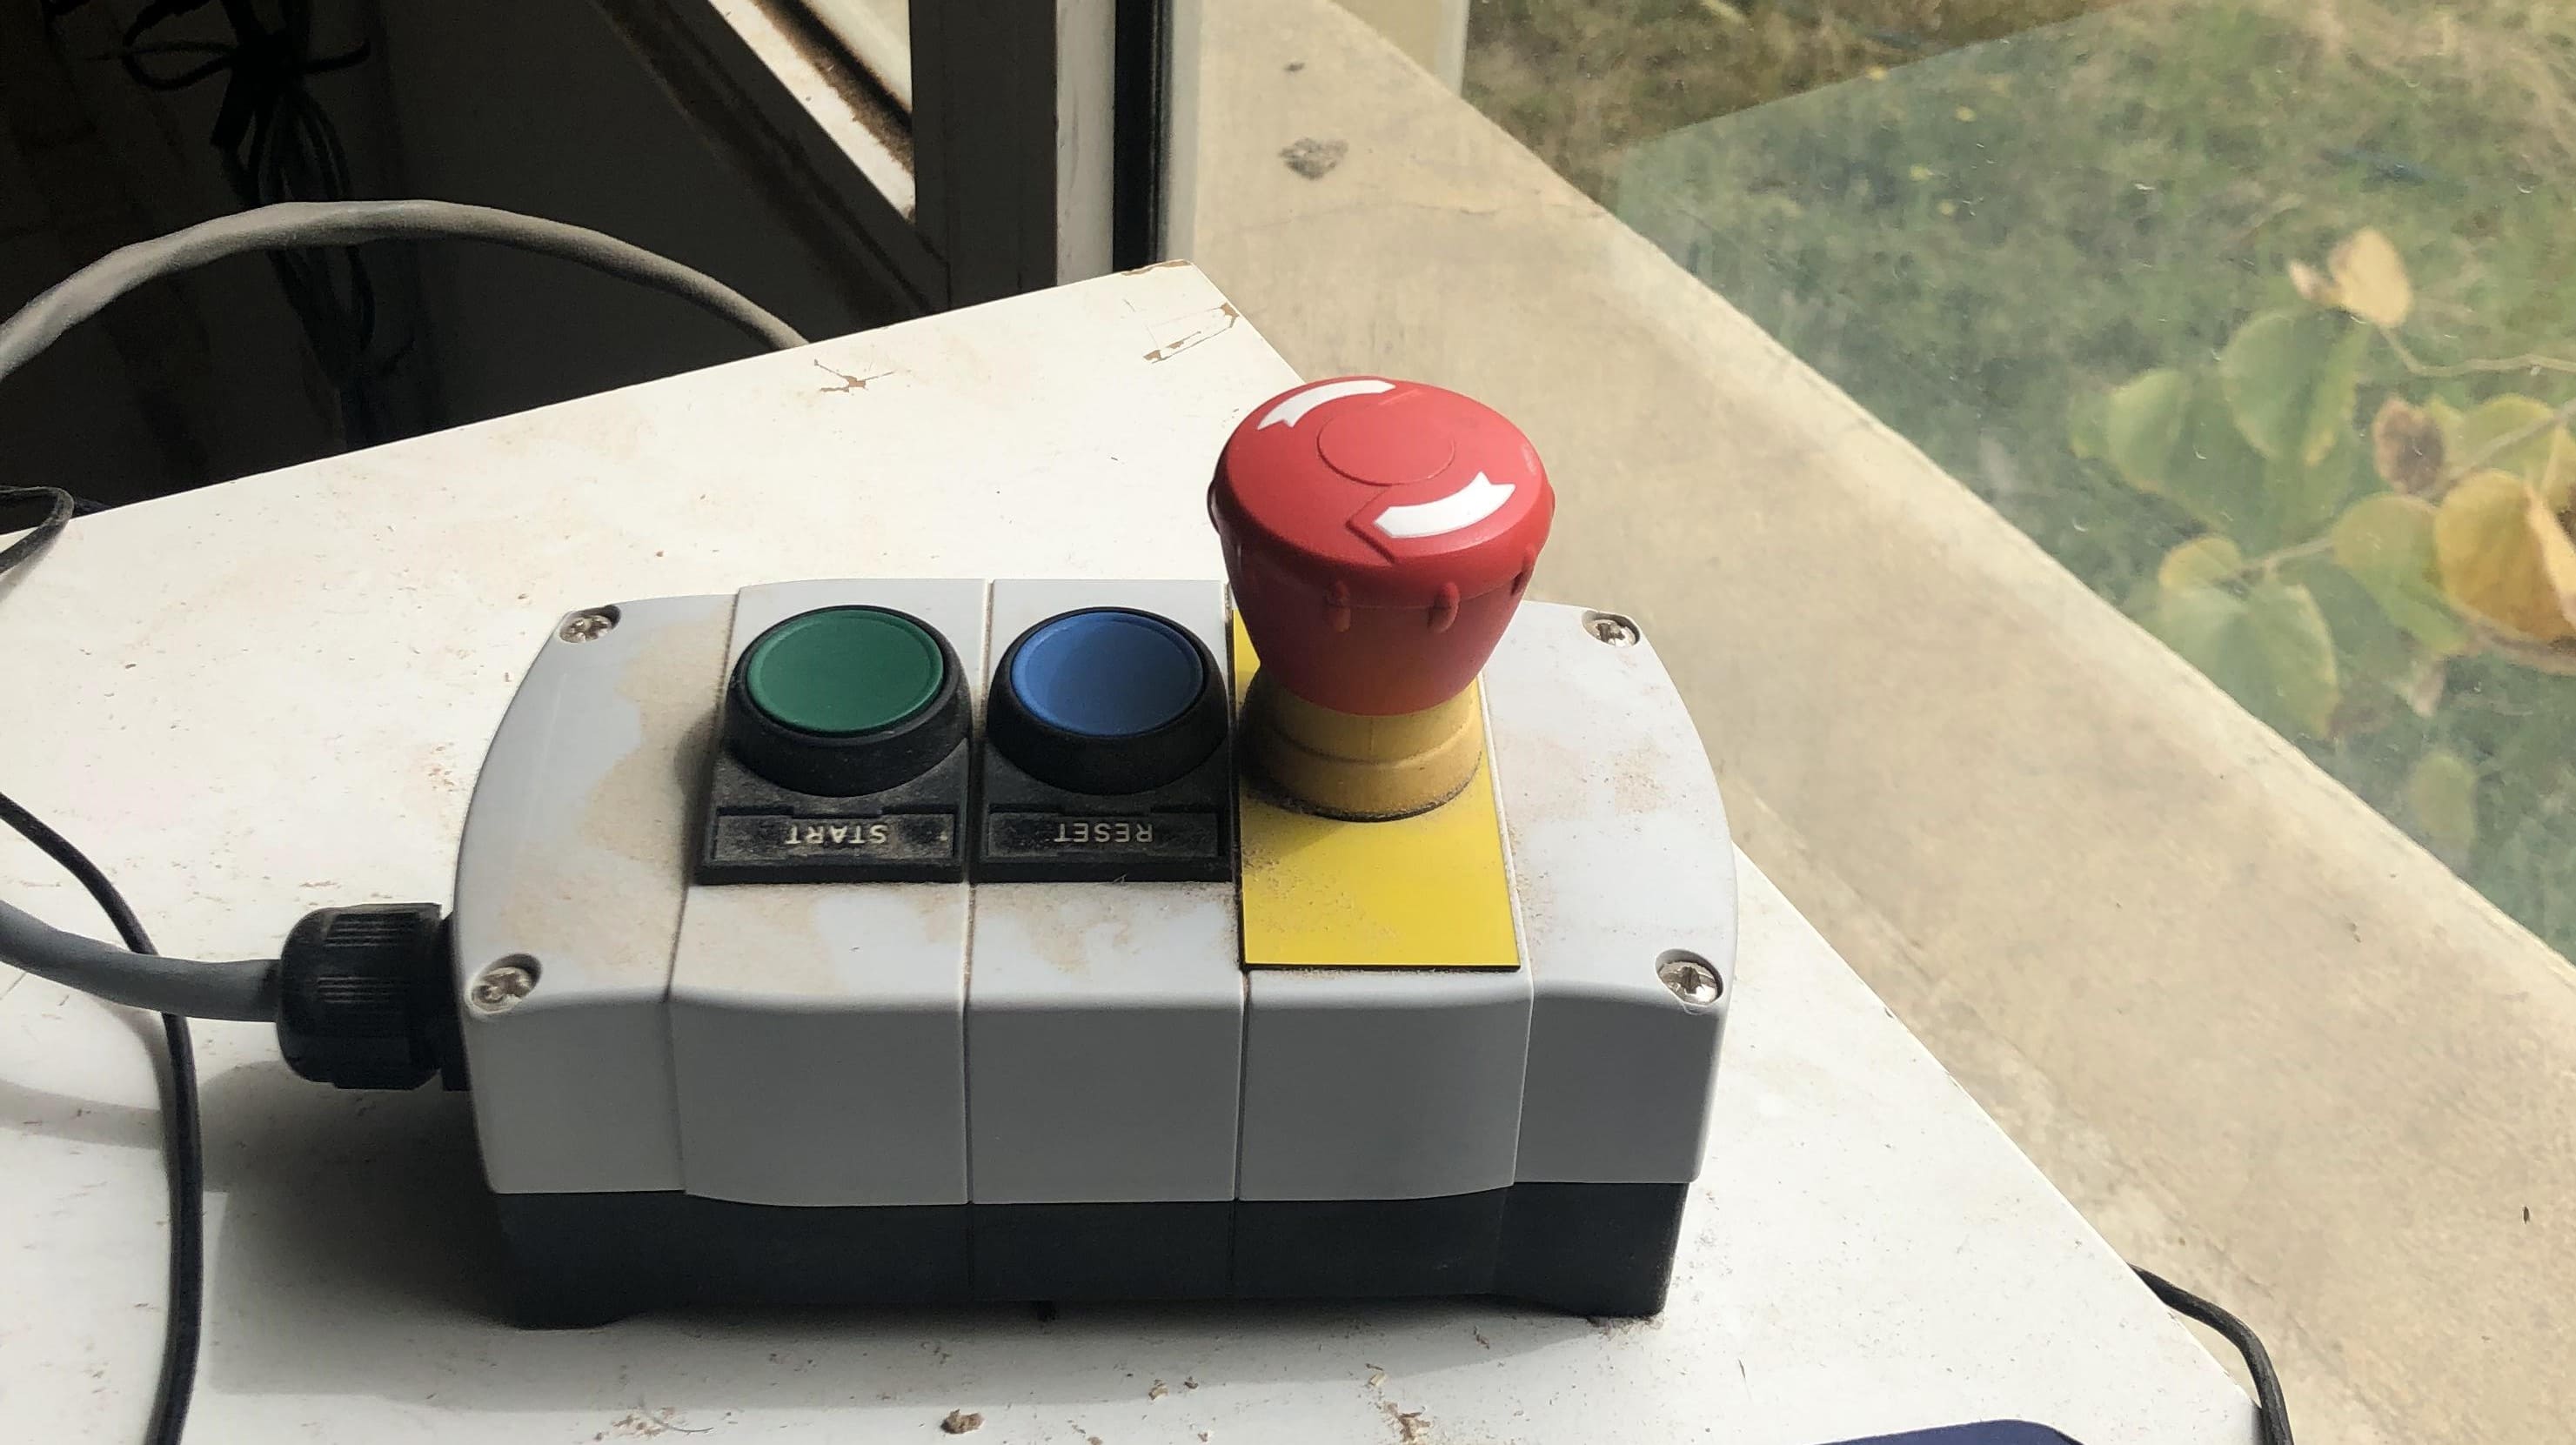
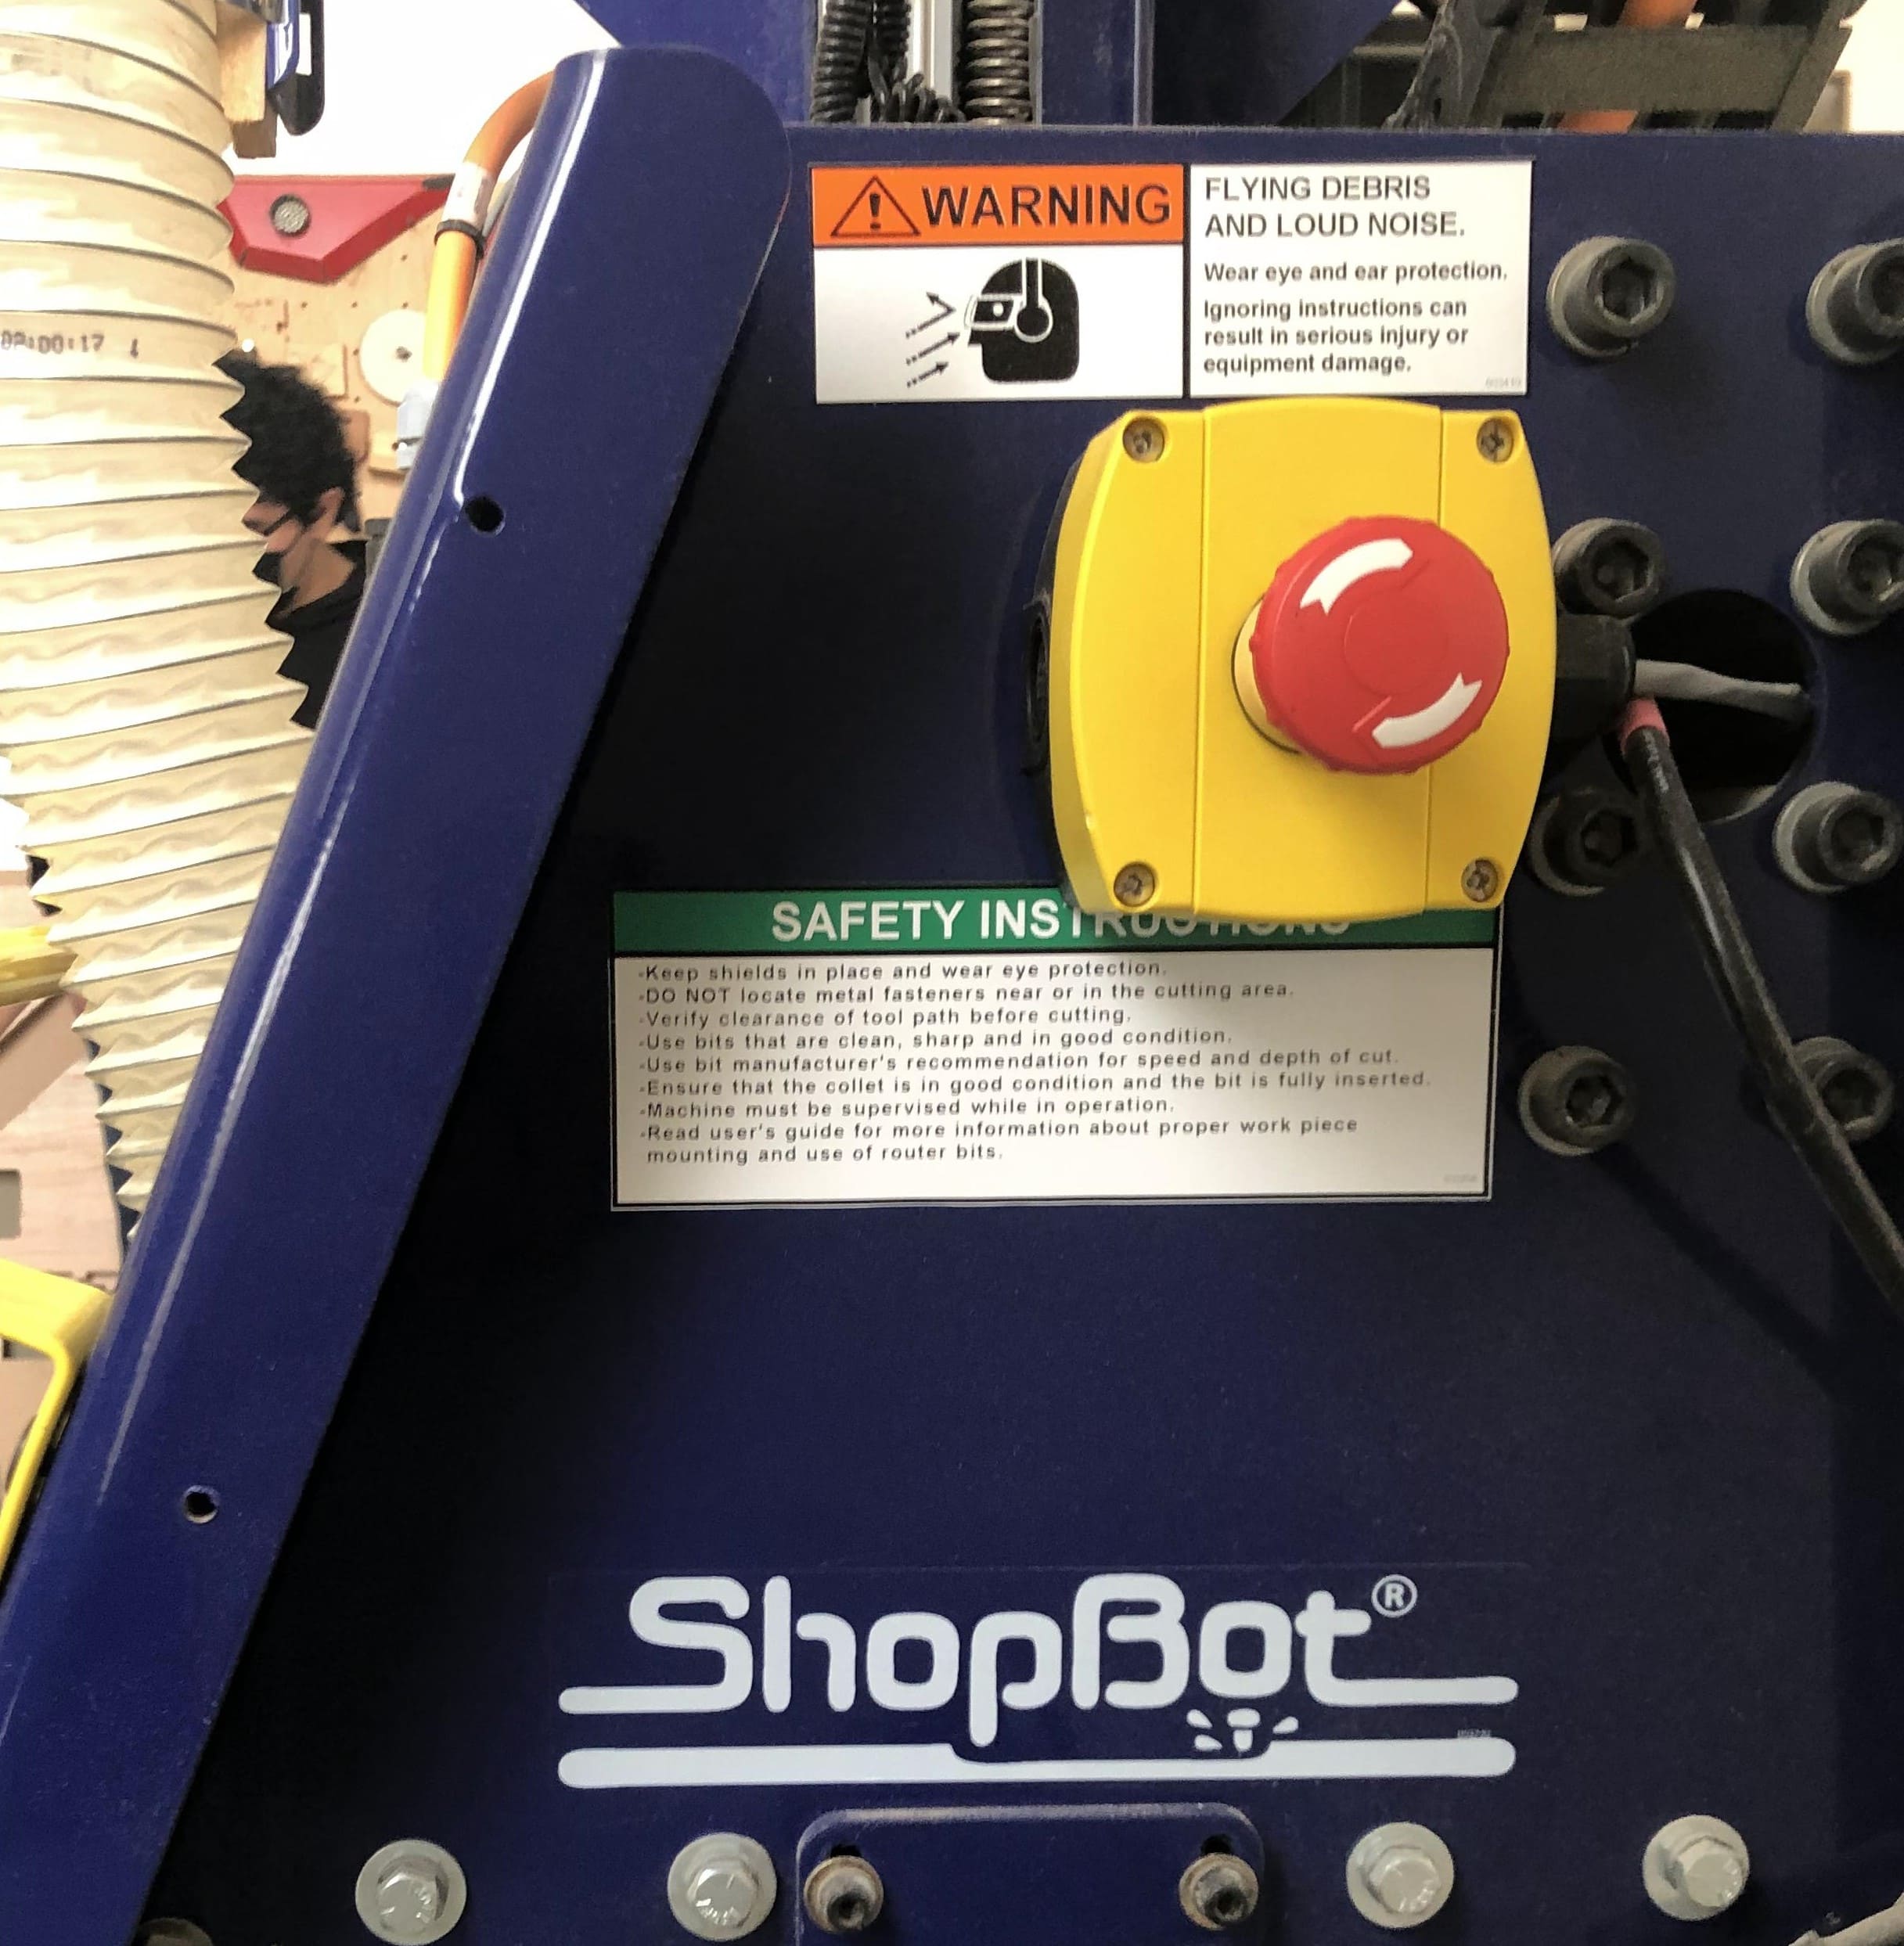
there are two emergency stop ways. one is a button fixed on the side of the machine it self. and the other one is closer to the machine man as shown in the images above.
shoe cabinet
I did my design on Revit program. It is an easy program for design 2D a7 3D shapes.
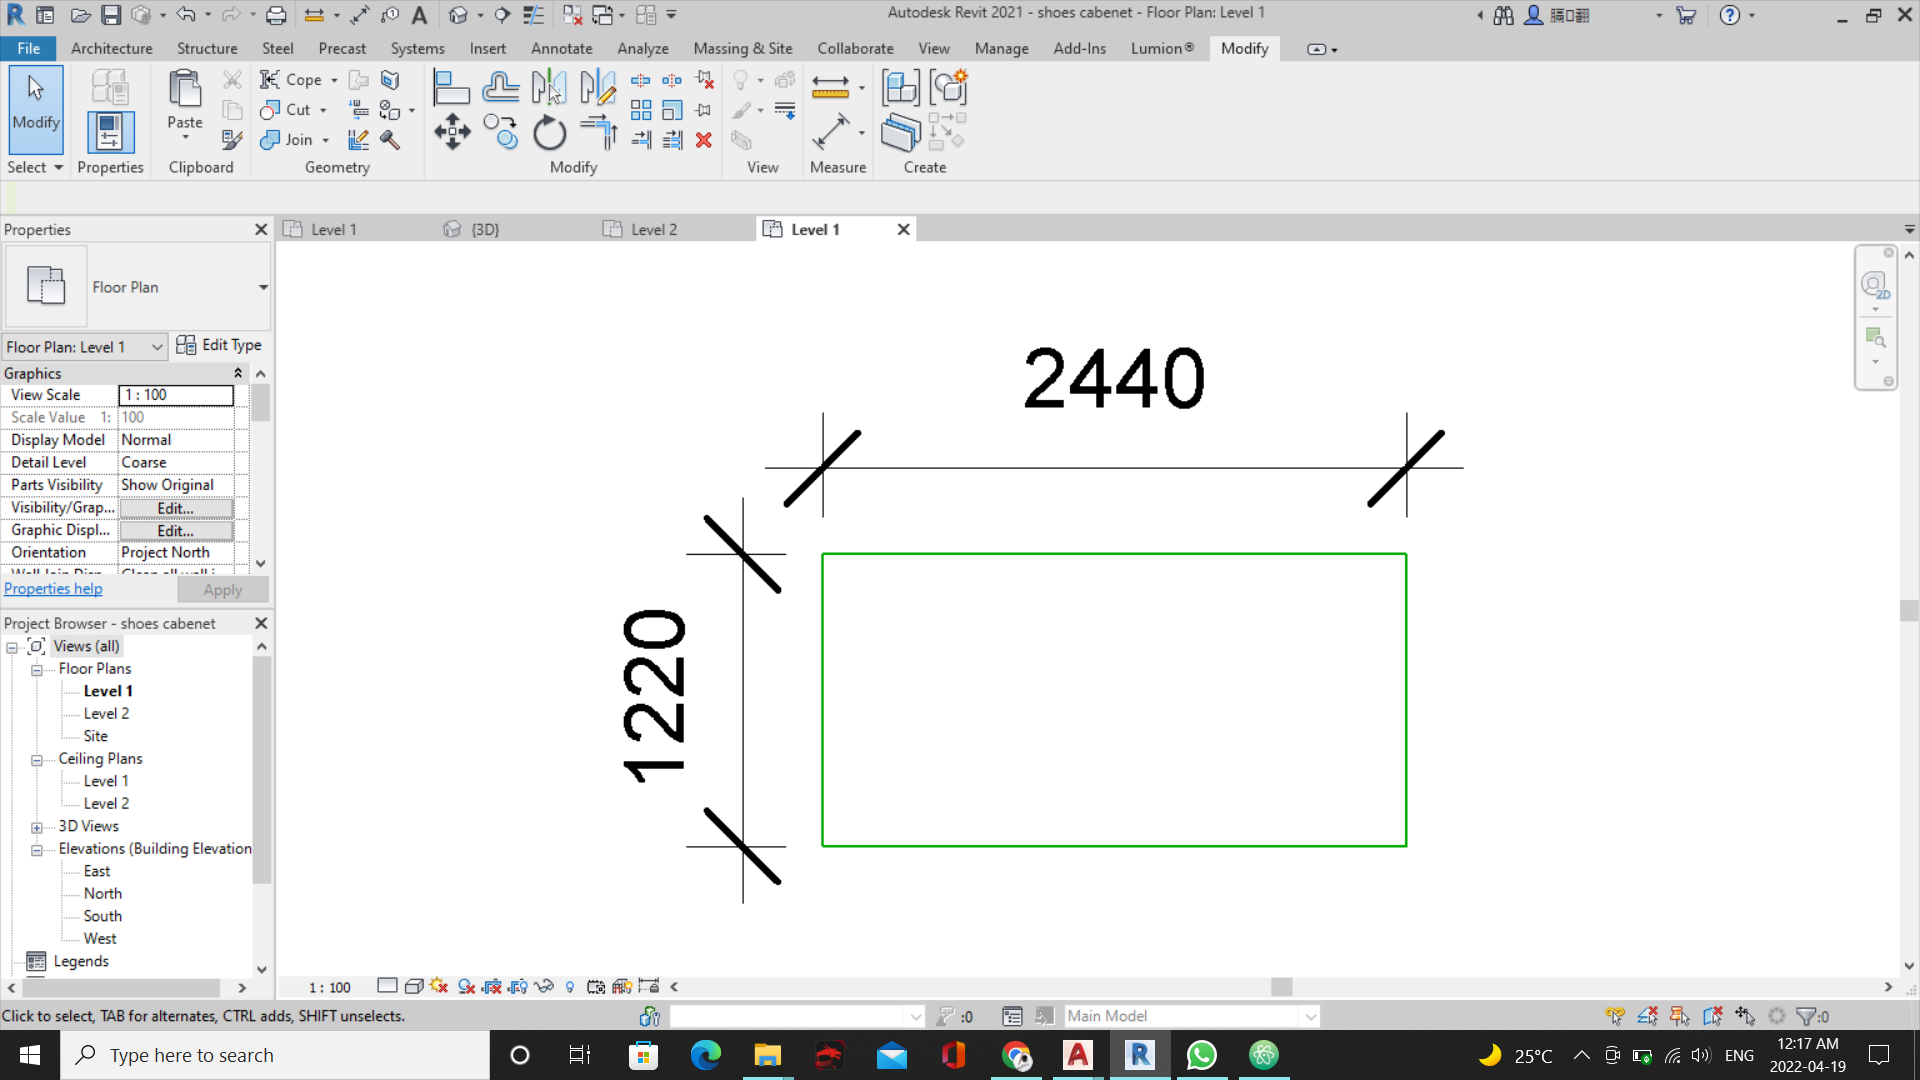
first I start with the boundary of the design which is the size of the plywood sheet we had. this will help me to insure that my design will follow the dimensions of the sheet and not exceeding it.
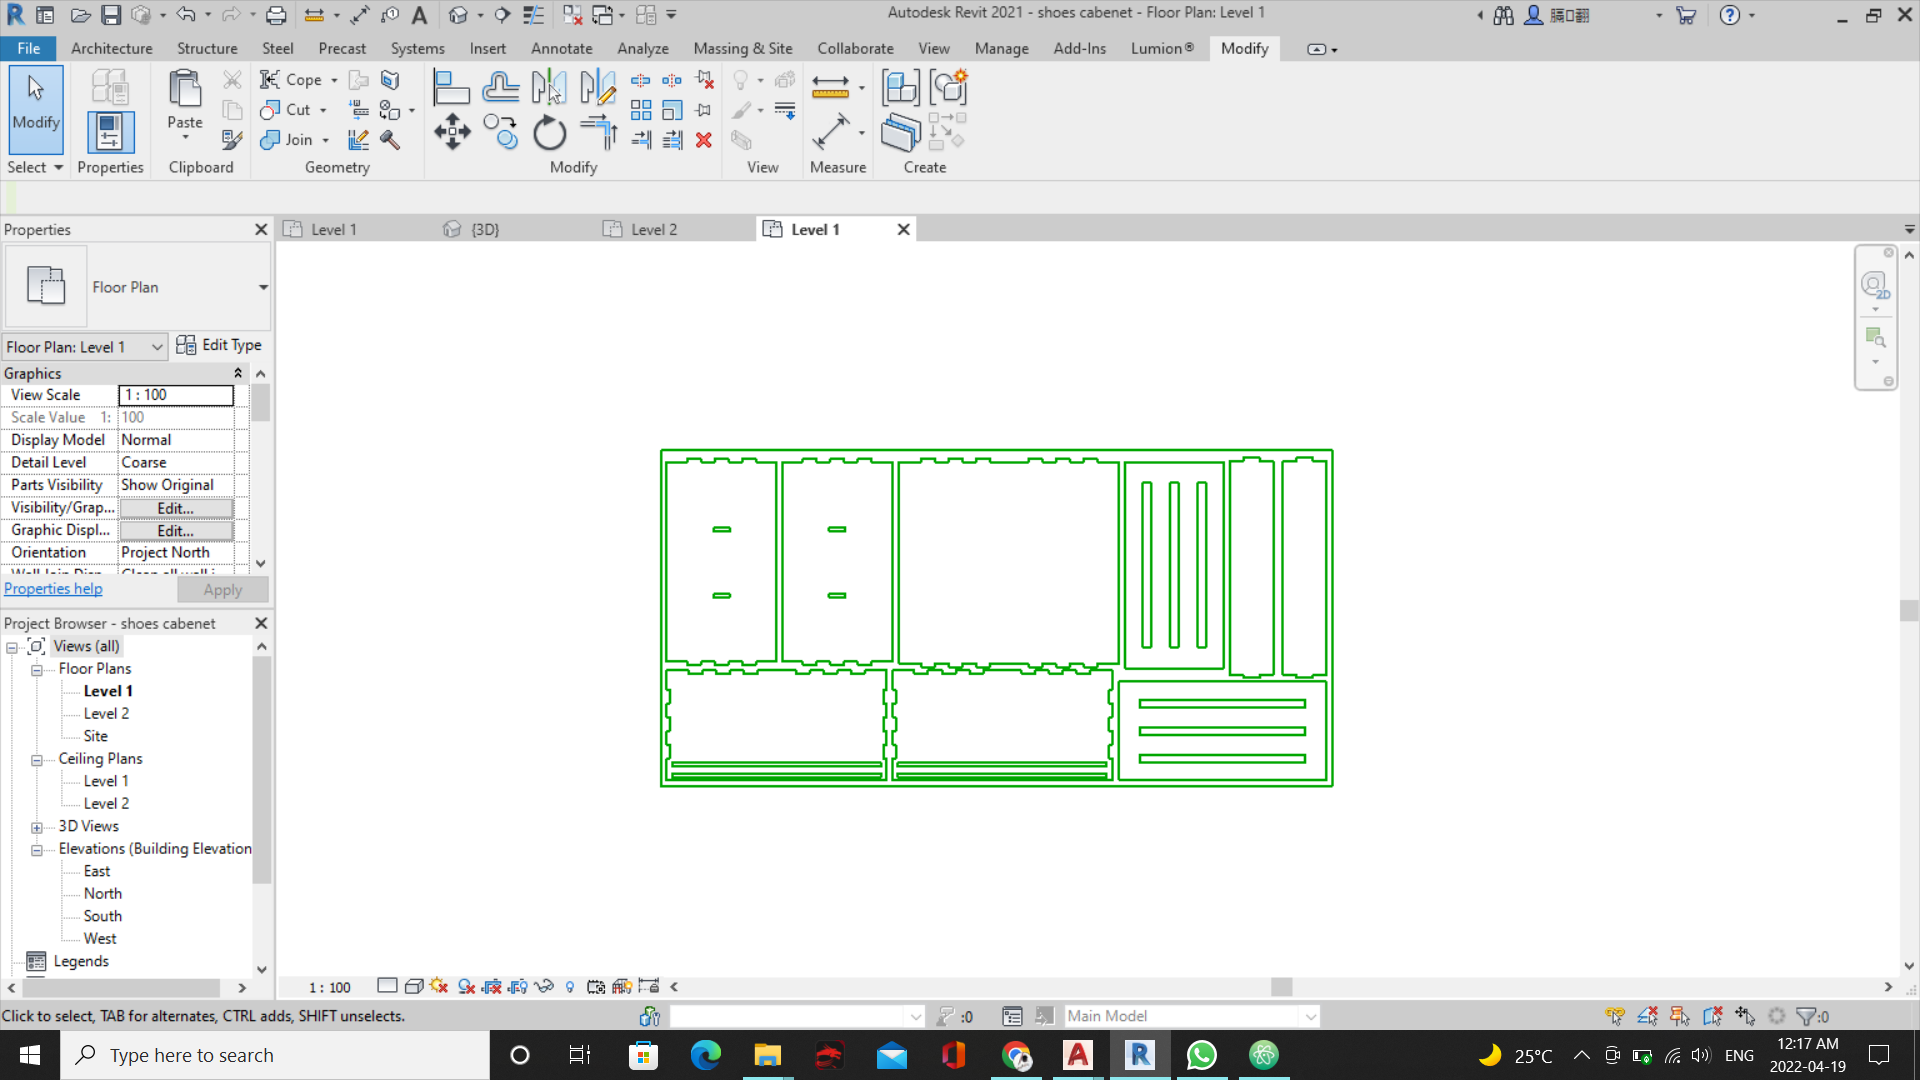
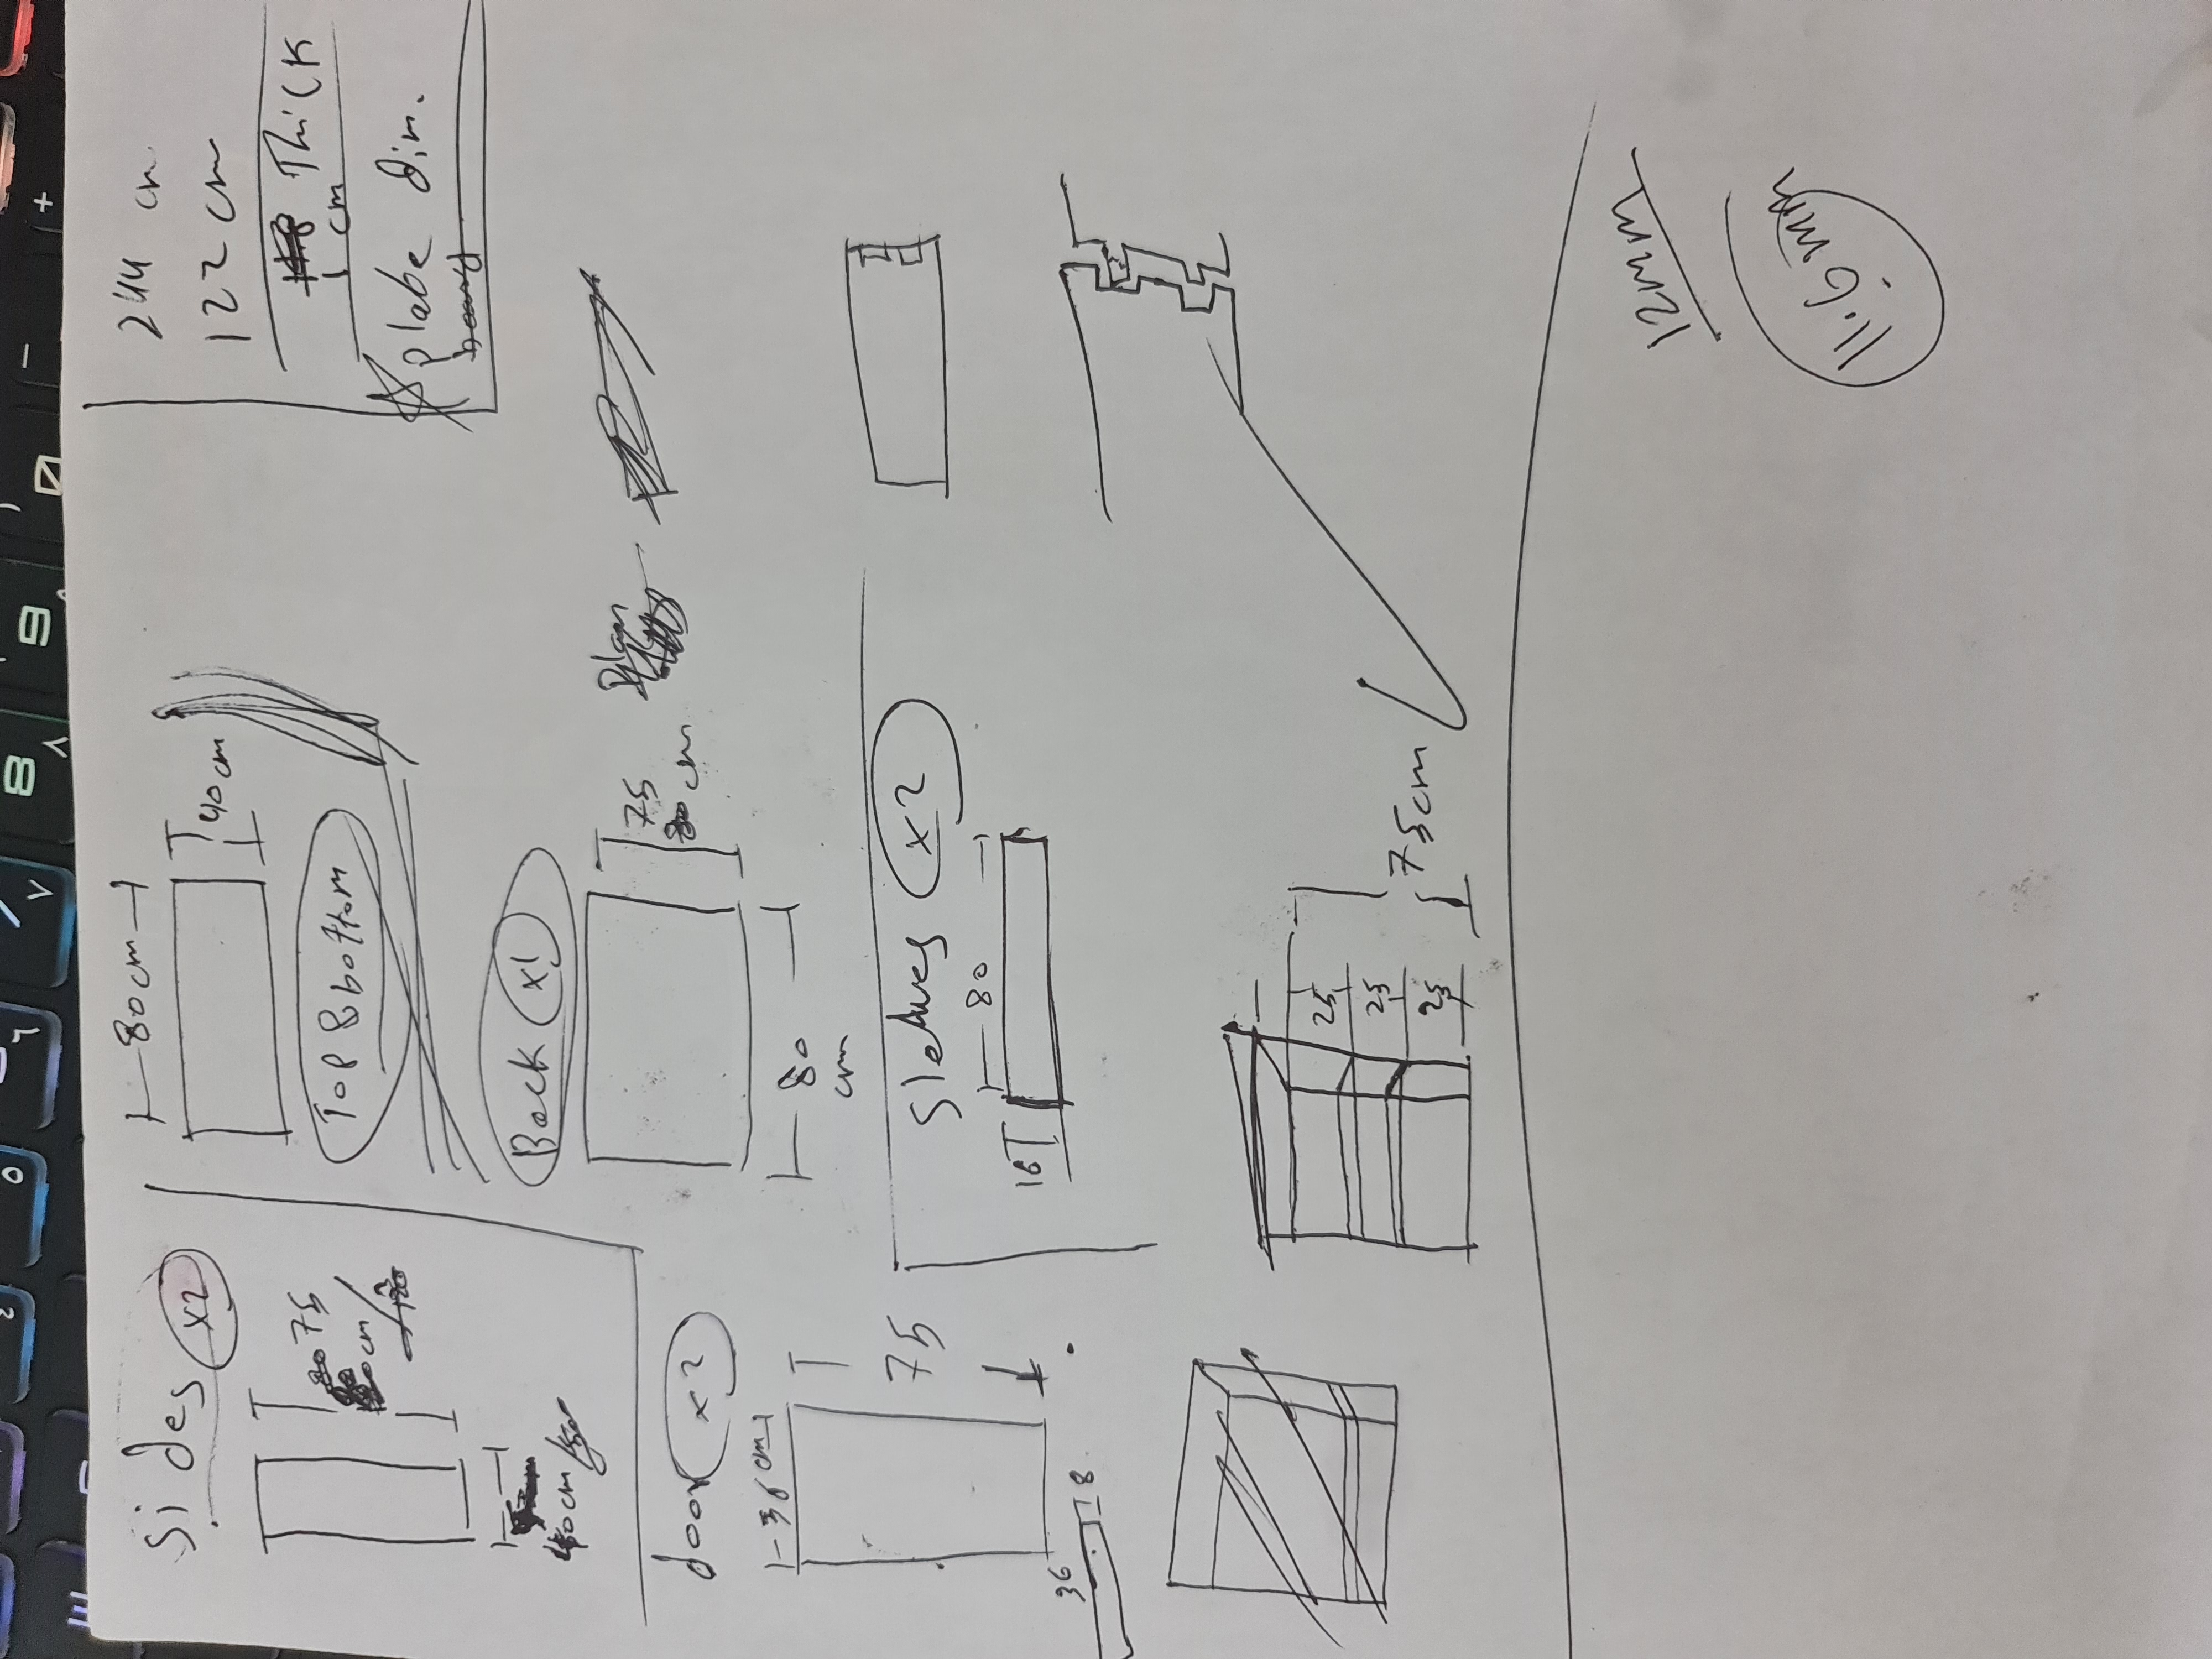
I start do my sketch and figure out how the design will look like. also, I calculate the dimensions to make sure it will fit together. then I made the joints with a 0.2cm tolerance.
Tool Path
This step is the cutting step by the machine. there are few steps we have to know about it and do it before cutting the design.
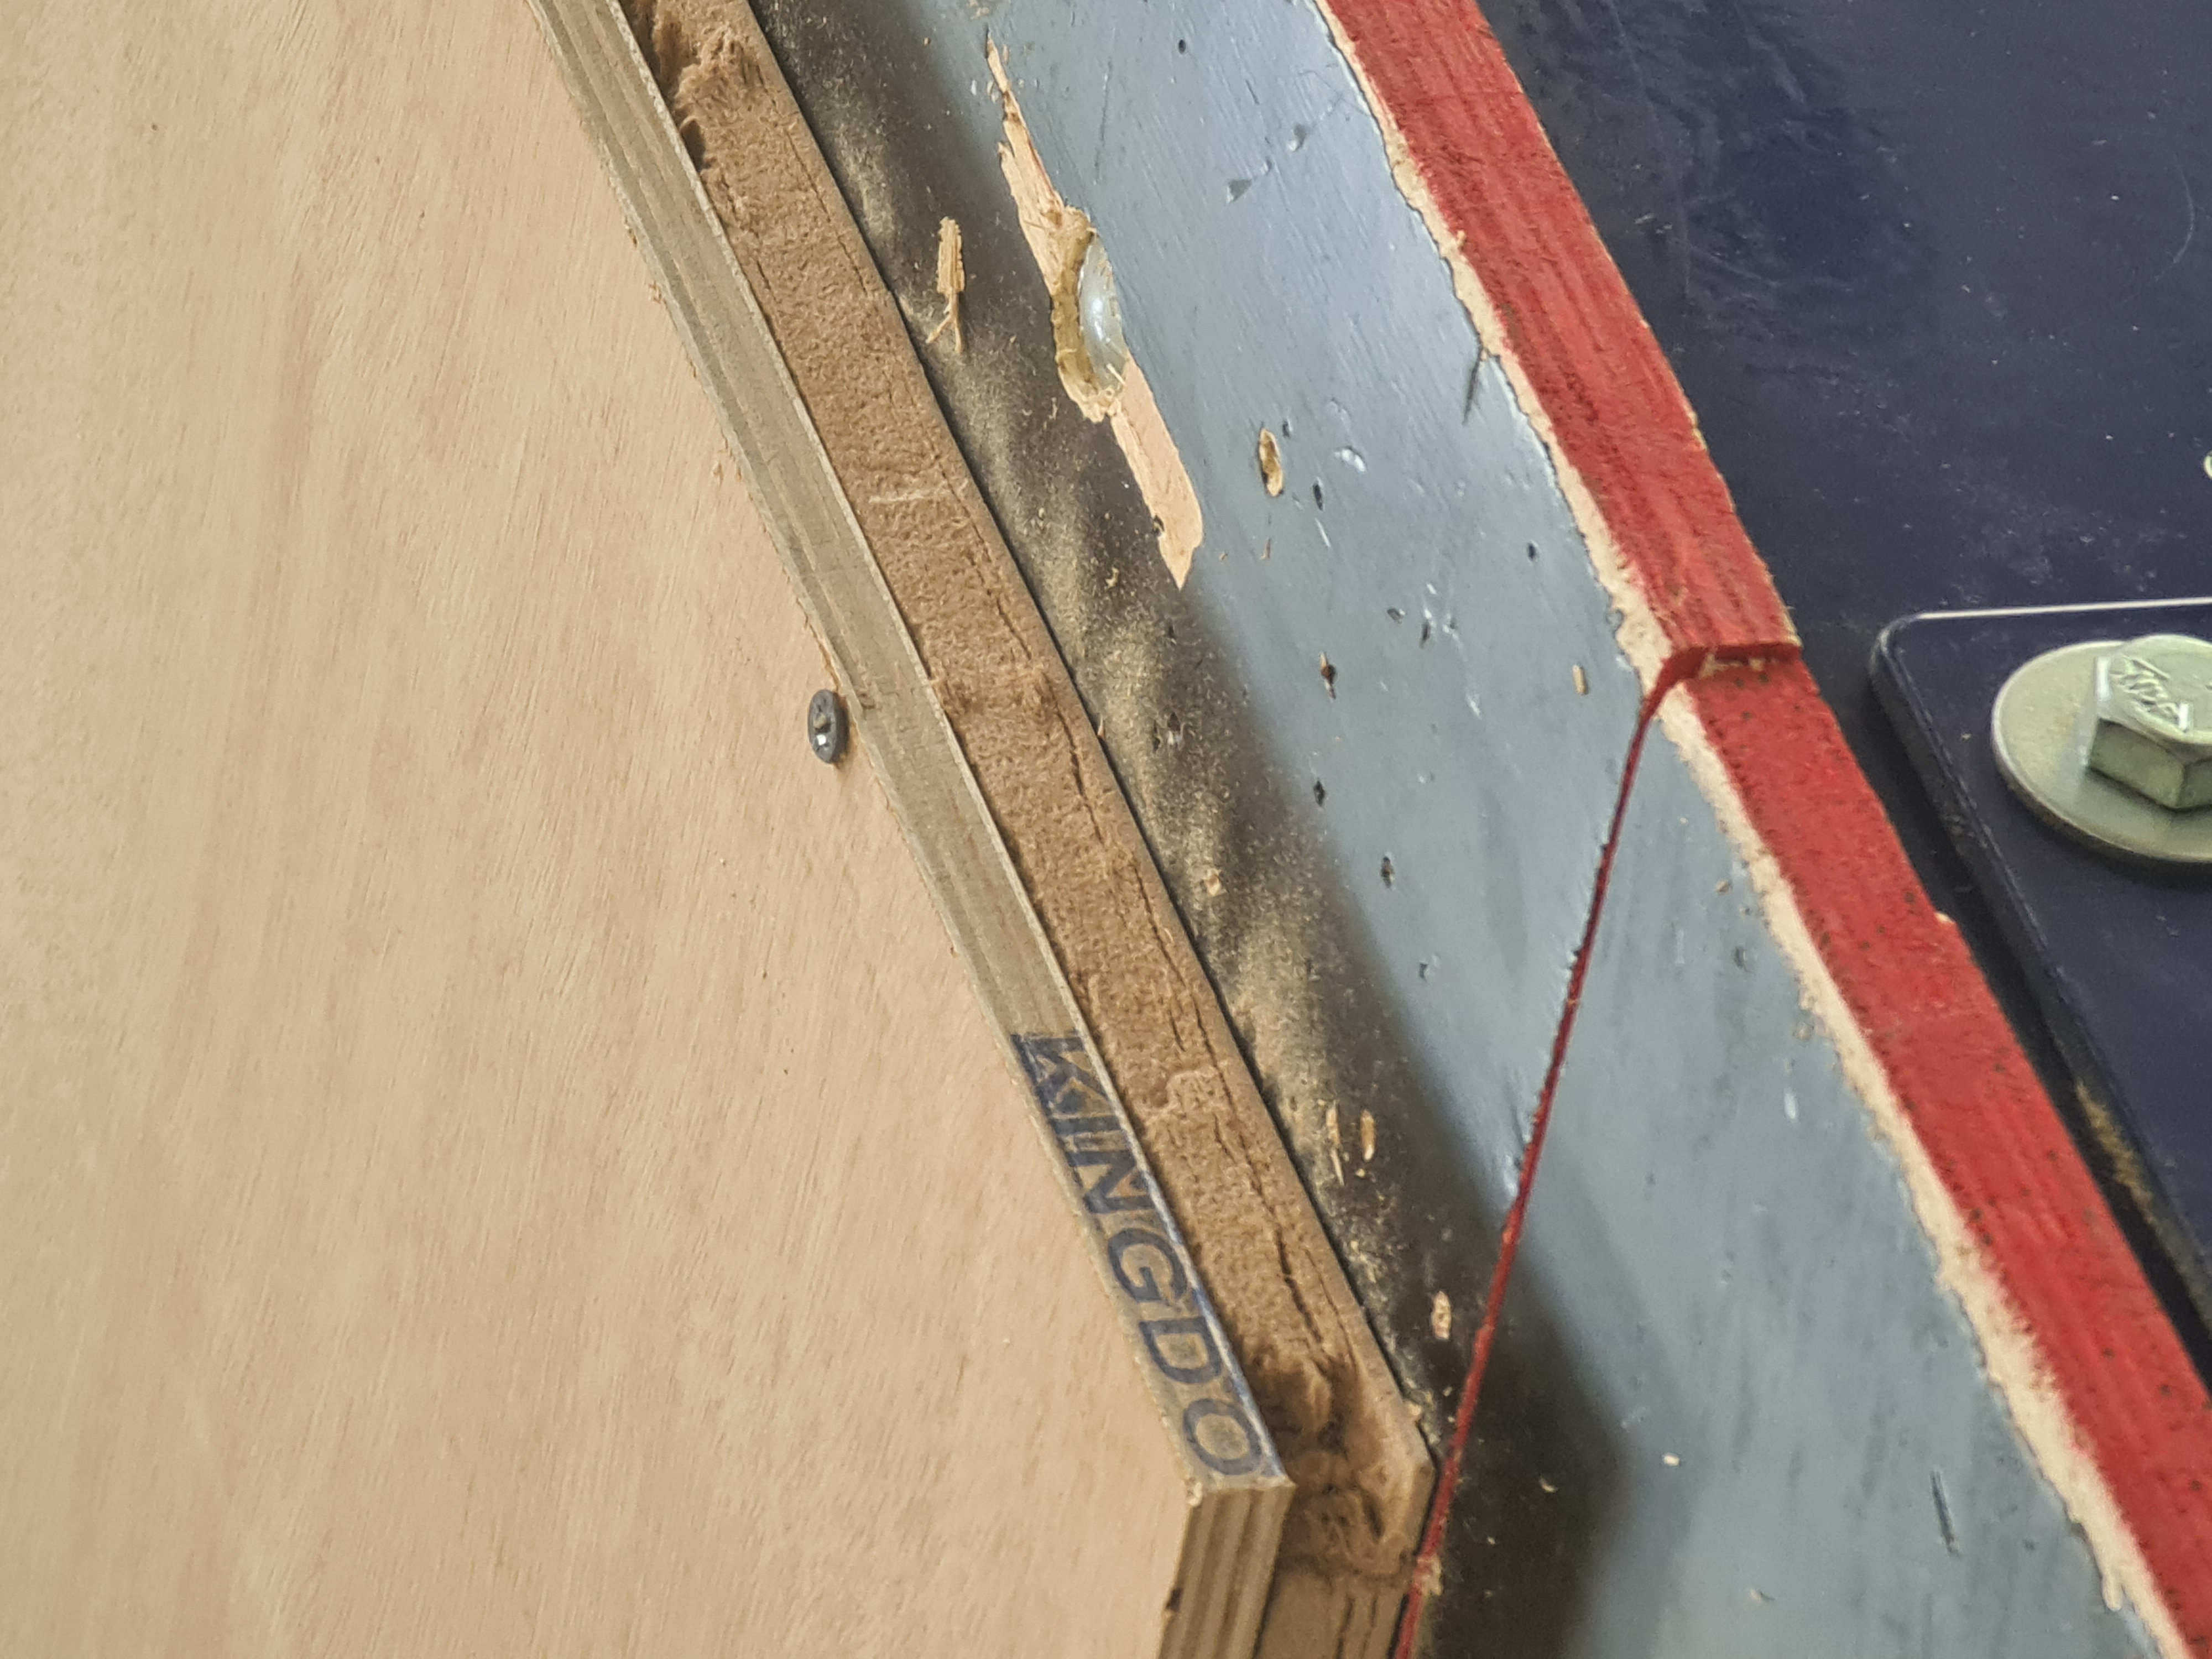
we have to stick the wood sheet to a wooden sheet with nails. the nails should be as close as we can to the edges, to prevent the machine from cutting over it. also, to make the sheet stable during cutting process.
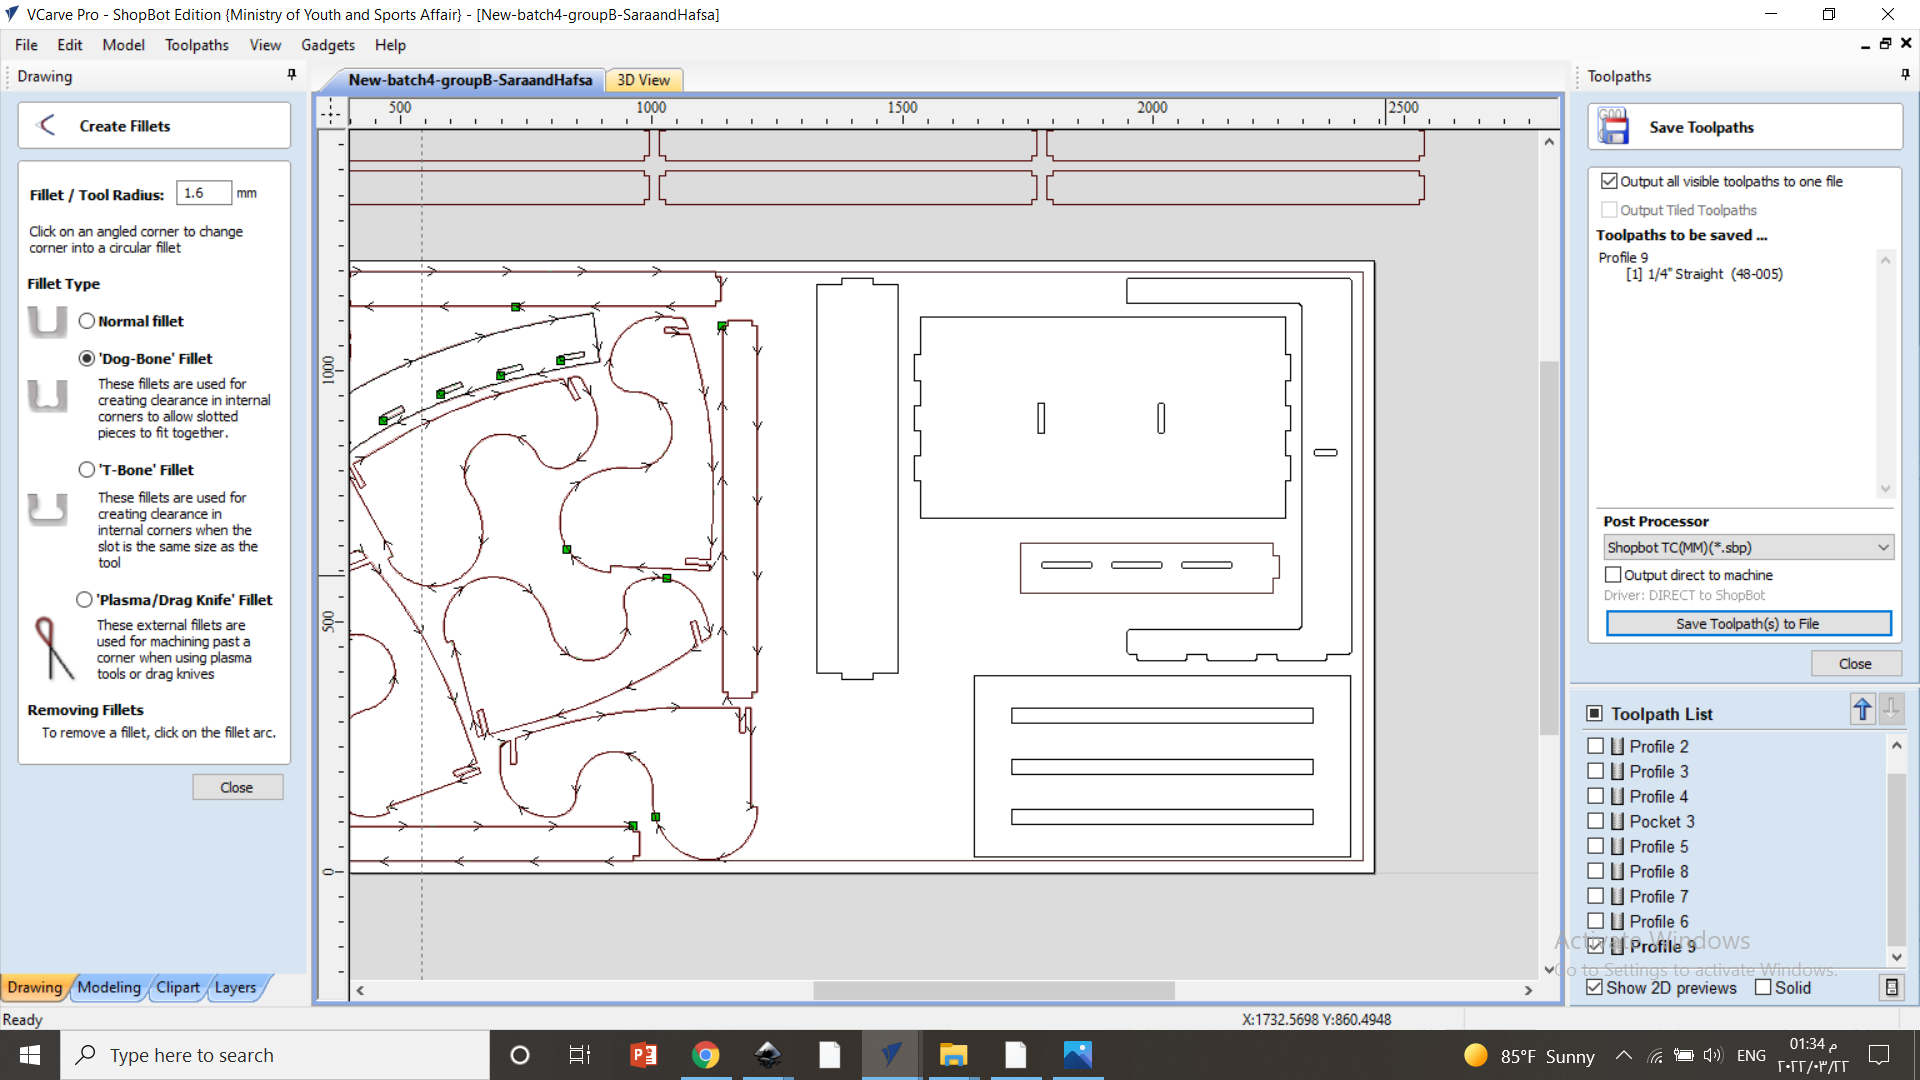
we have to upload our design on a program called VCarve to setup the toolpath for the machine to start cutting the design. we have to set a 2cm gap as a safety space.
we have to select the external/ outer lines of the design and set a separate toolpath for it.
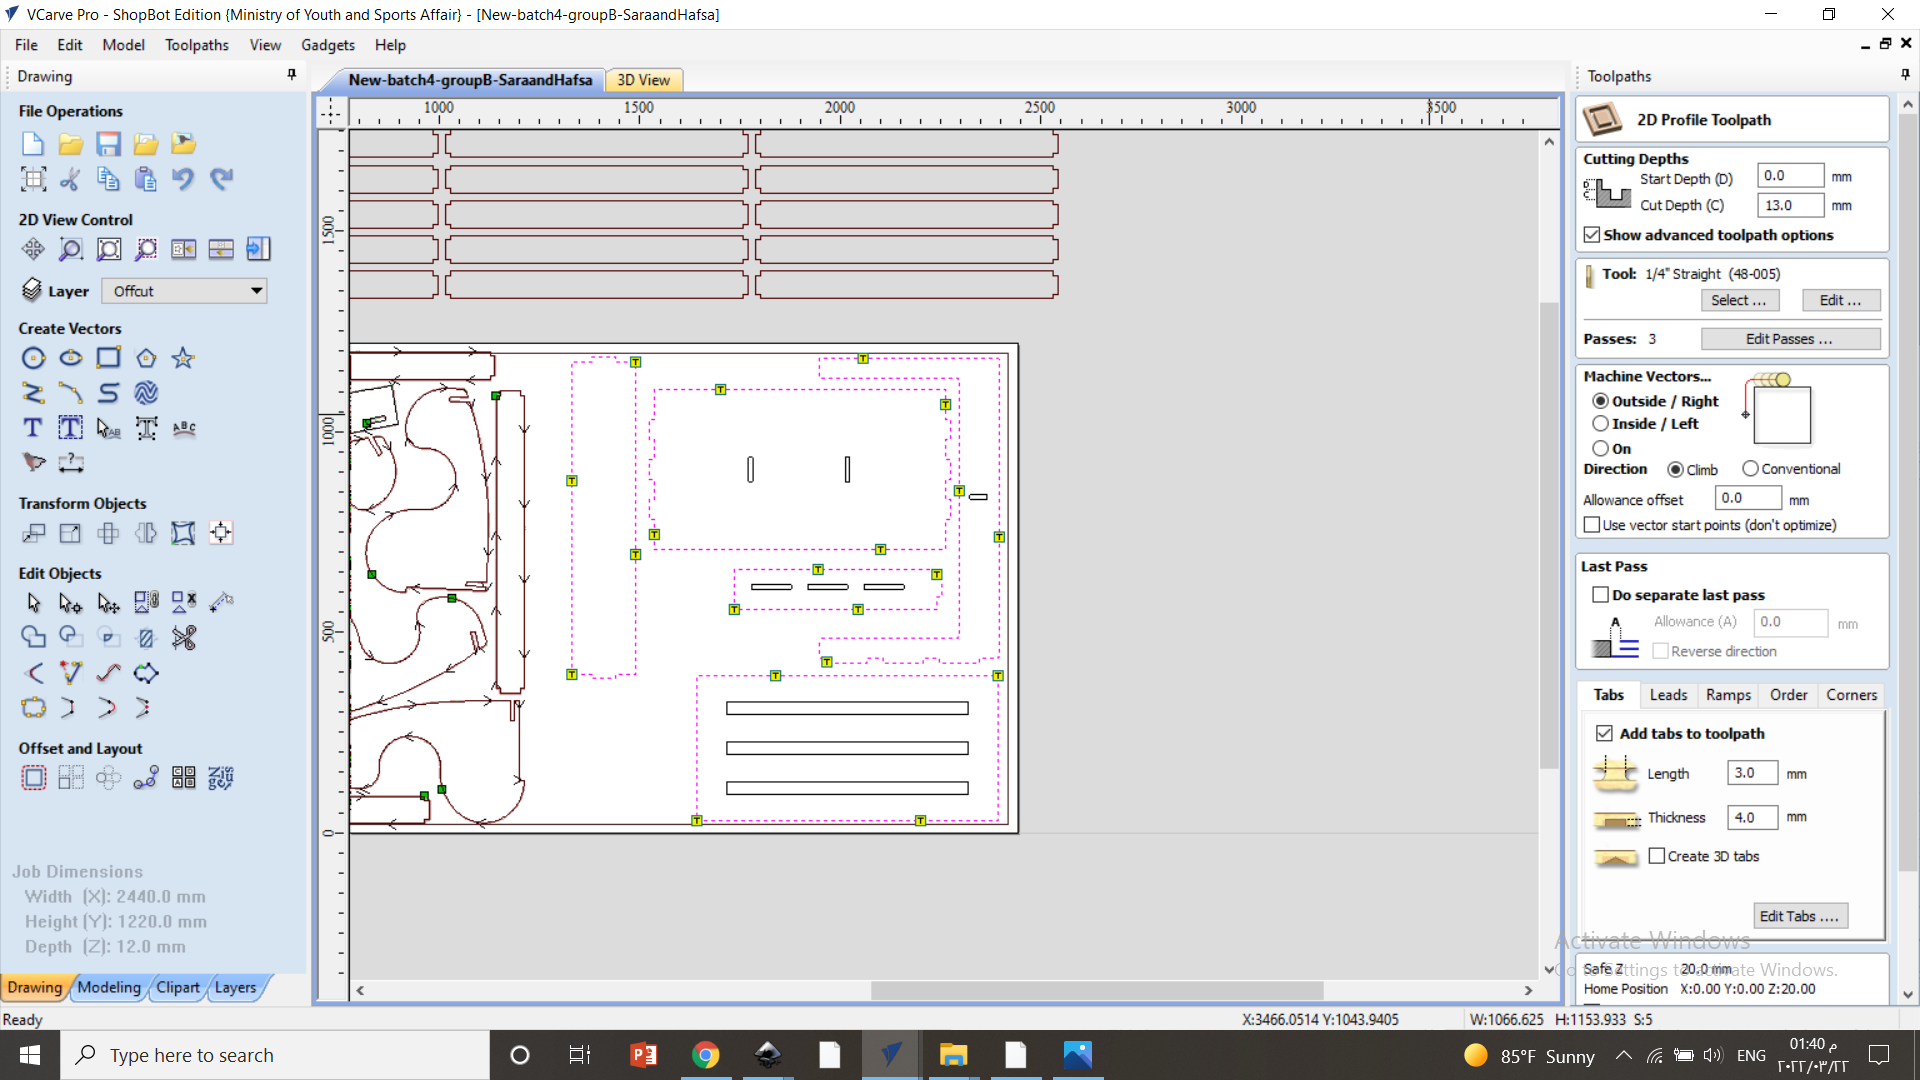
for the external lines of the design the toolpath for the machine while cutting process should be counter clock wise.
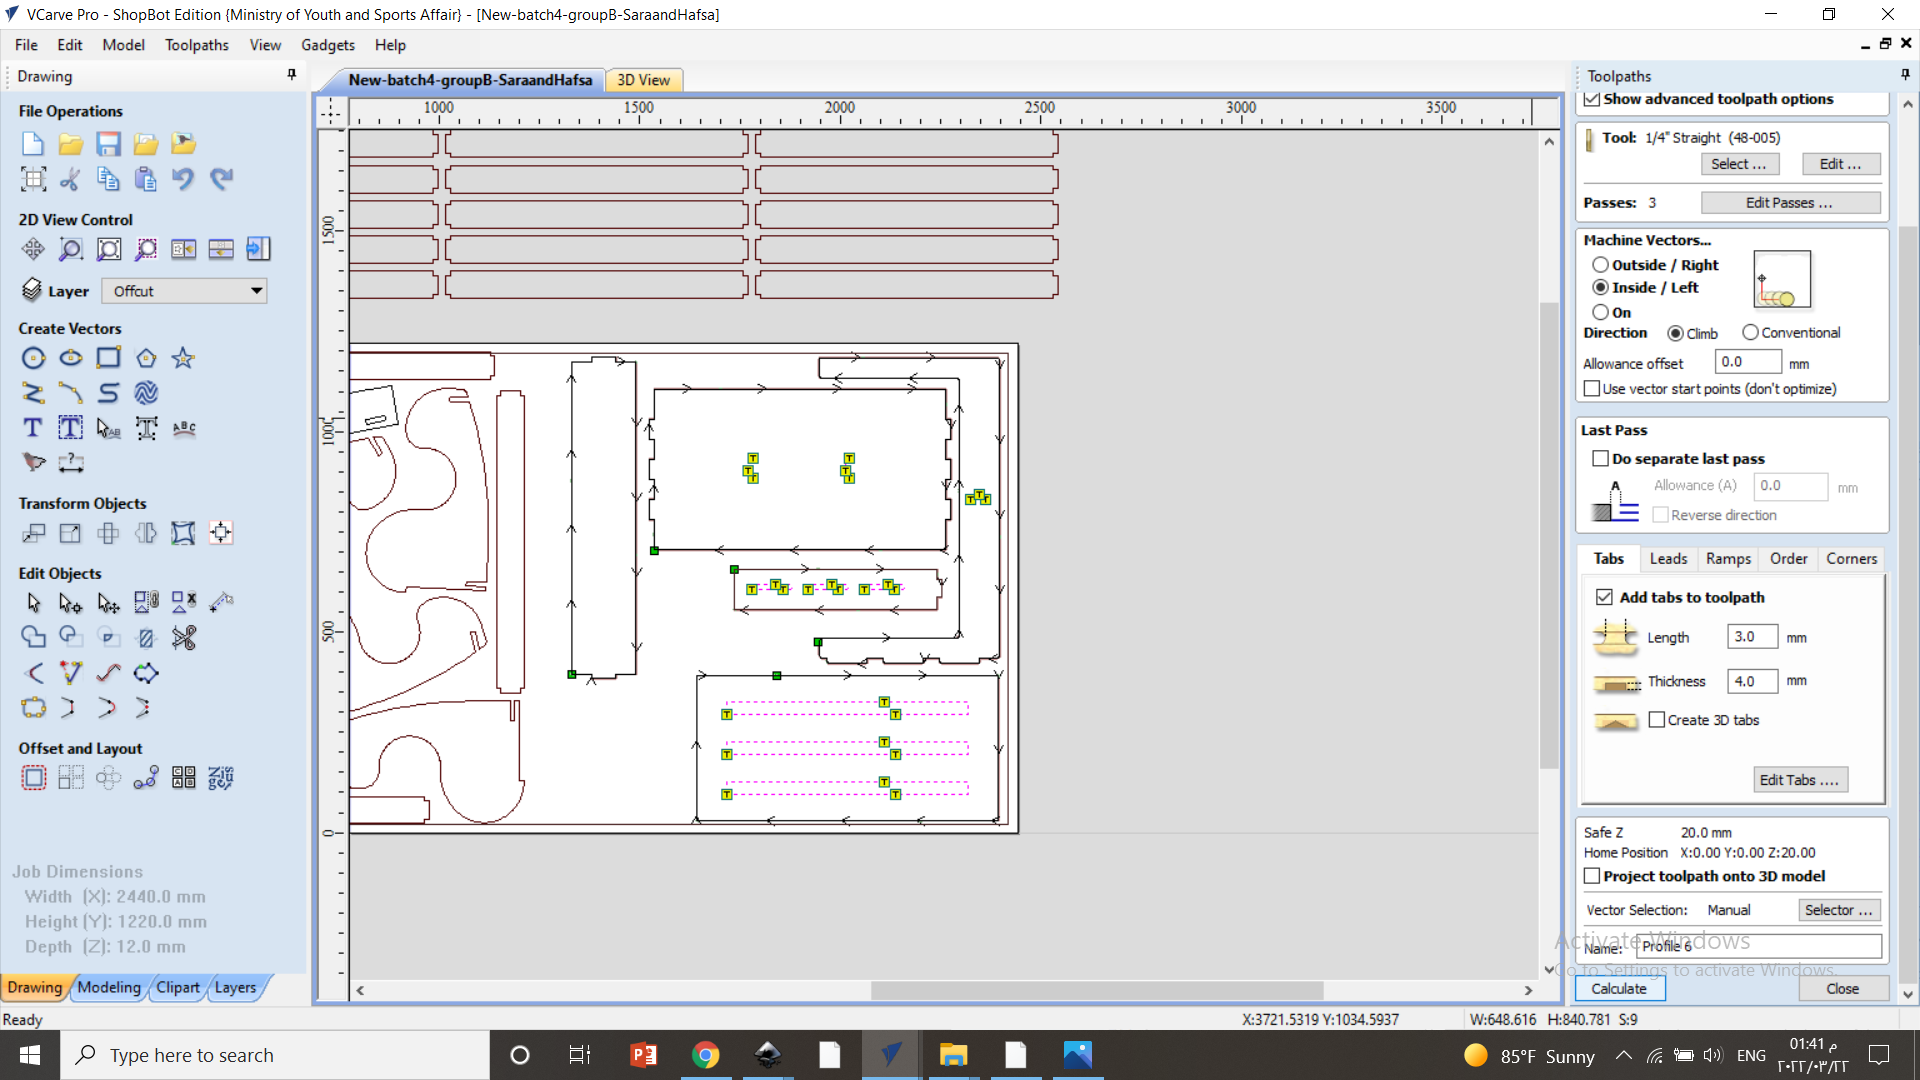
then we have to select the internal elements where we need to cut and make a toolpath for it. it is the same as what we did for the external lines but the different is that the toolpath cutting should be internally.
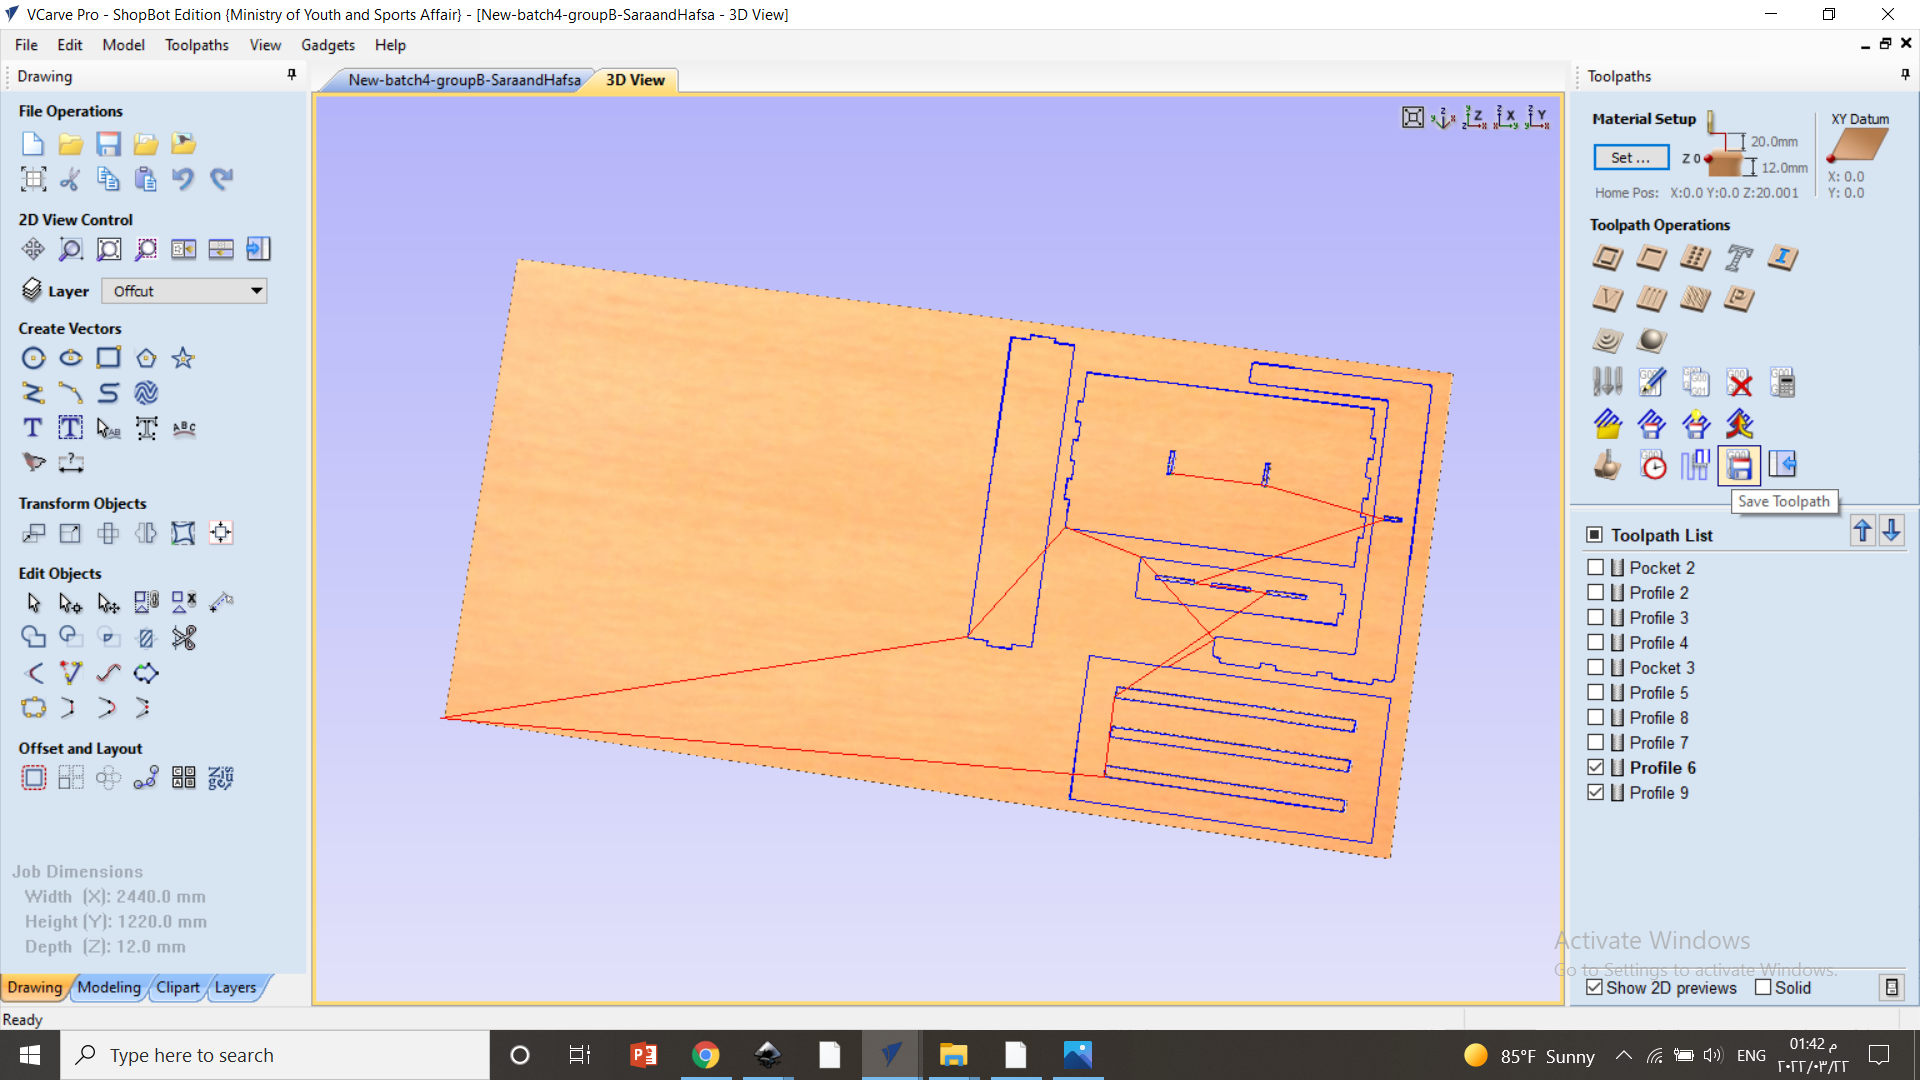
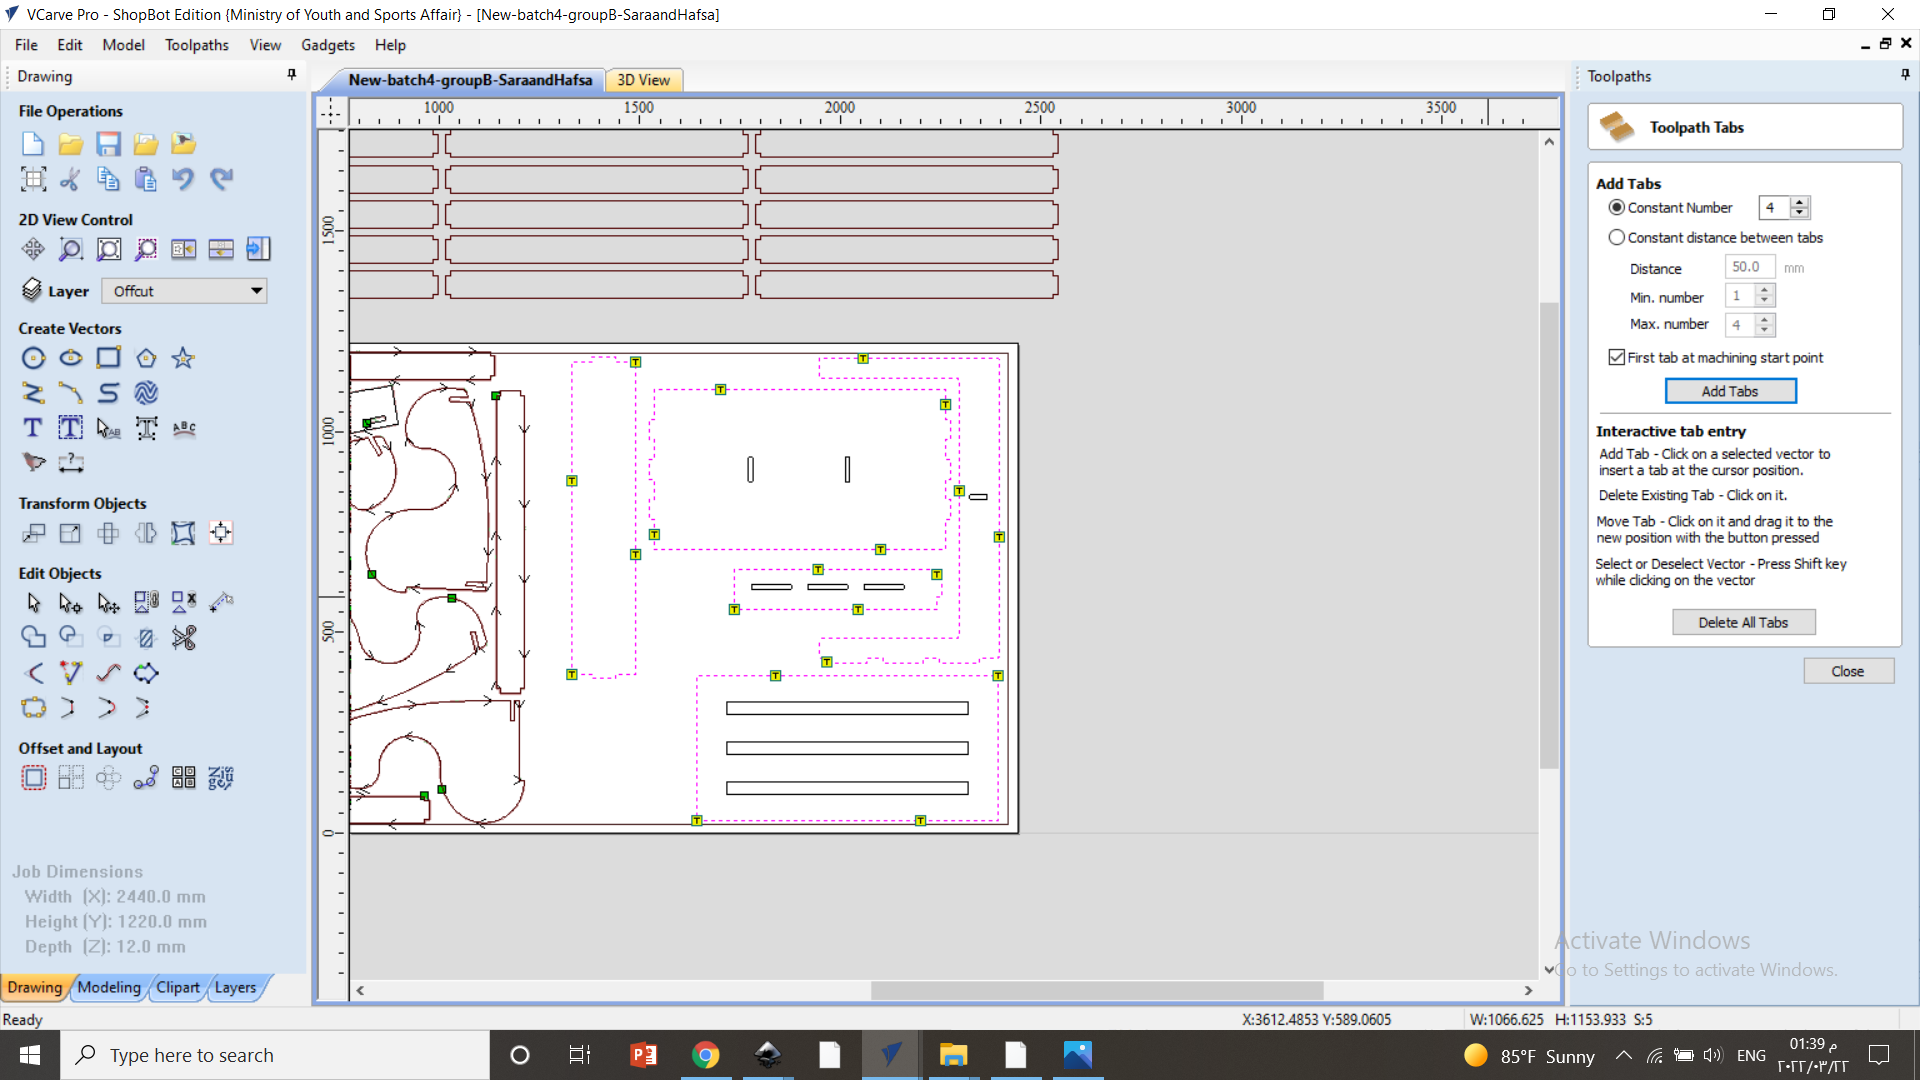
we have to select a start cutting point for every piece and linked them together.
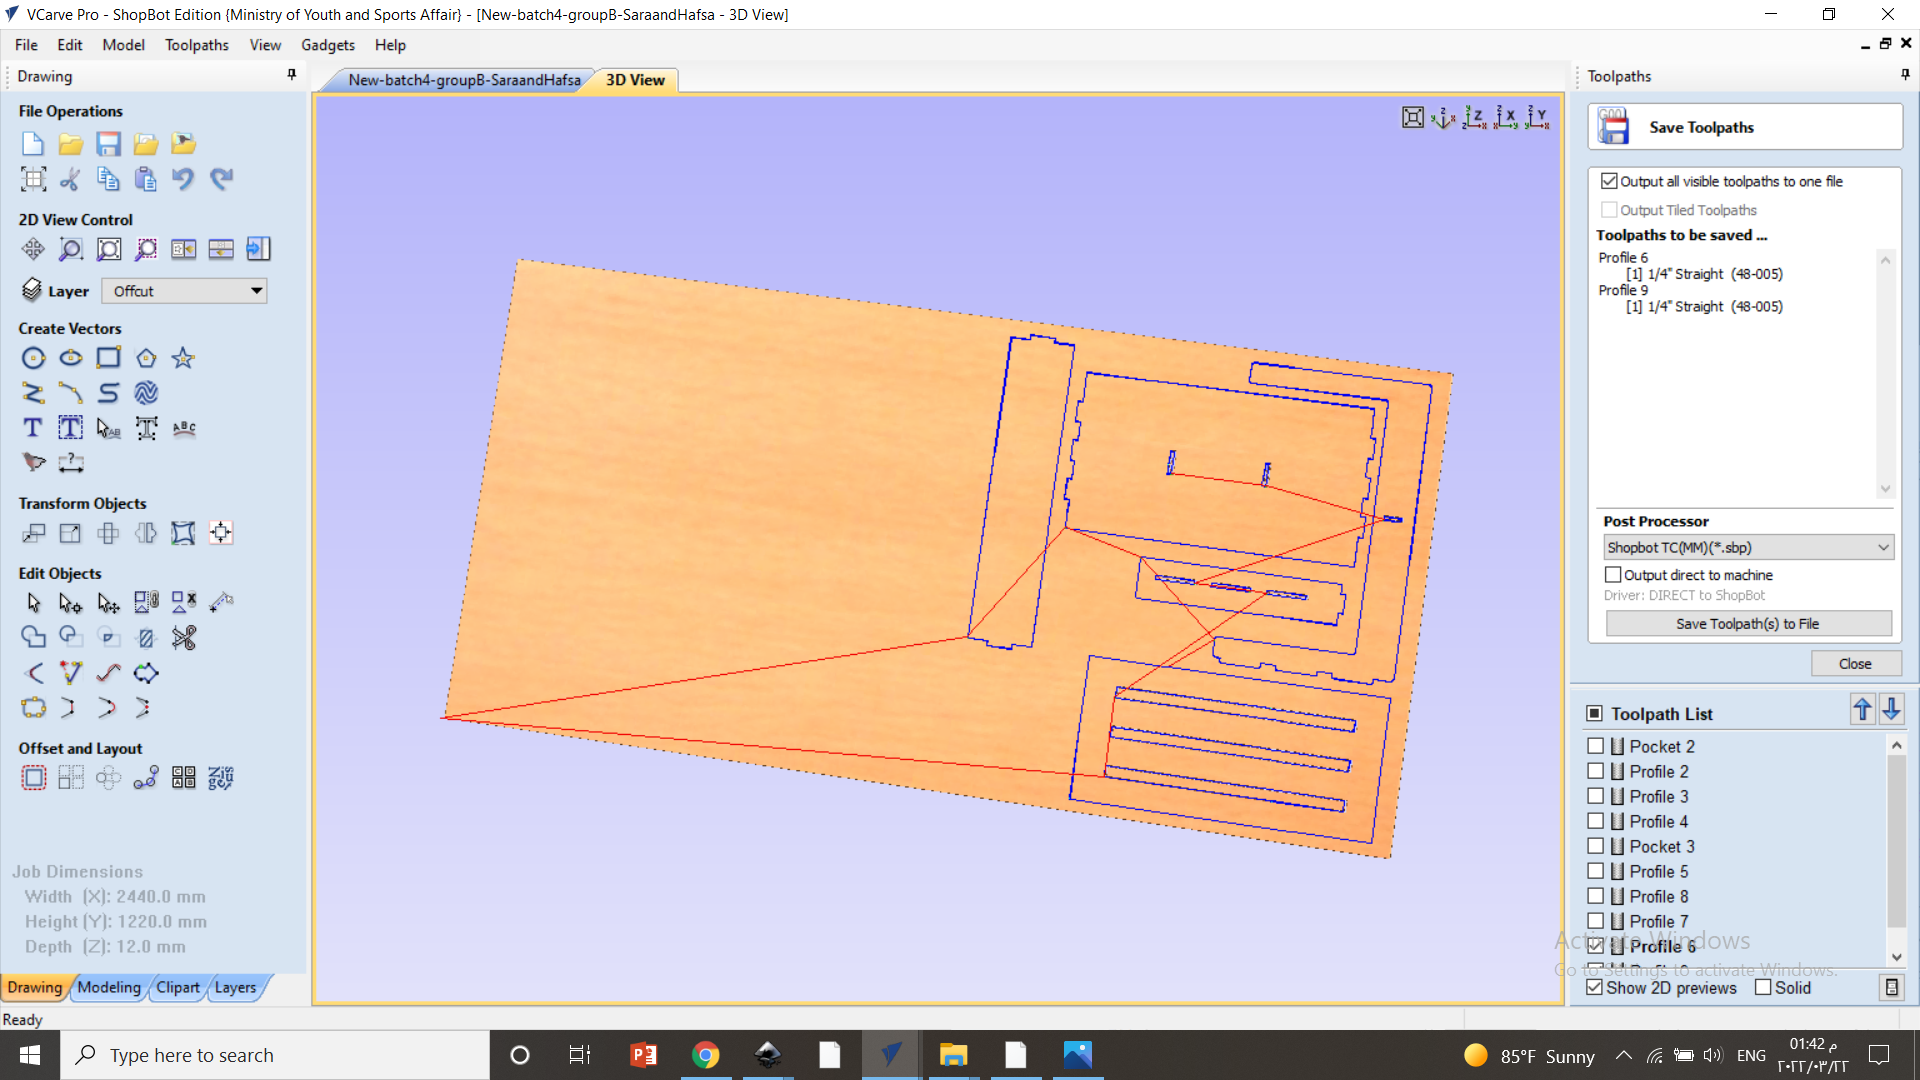
last we have to insert the dimensions of the wood sheet and save the setups.
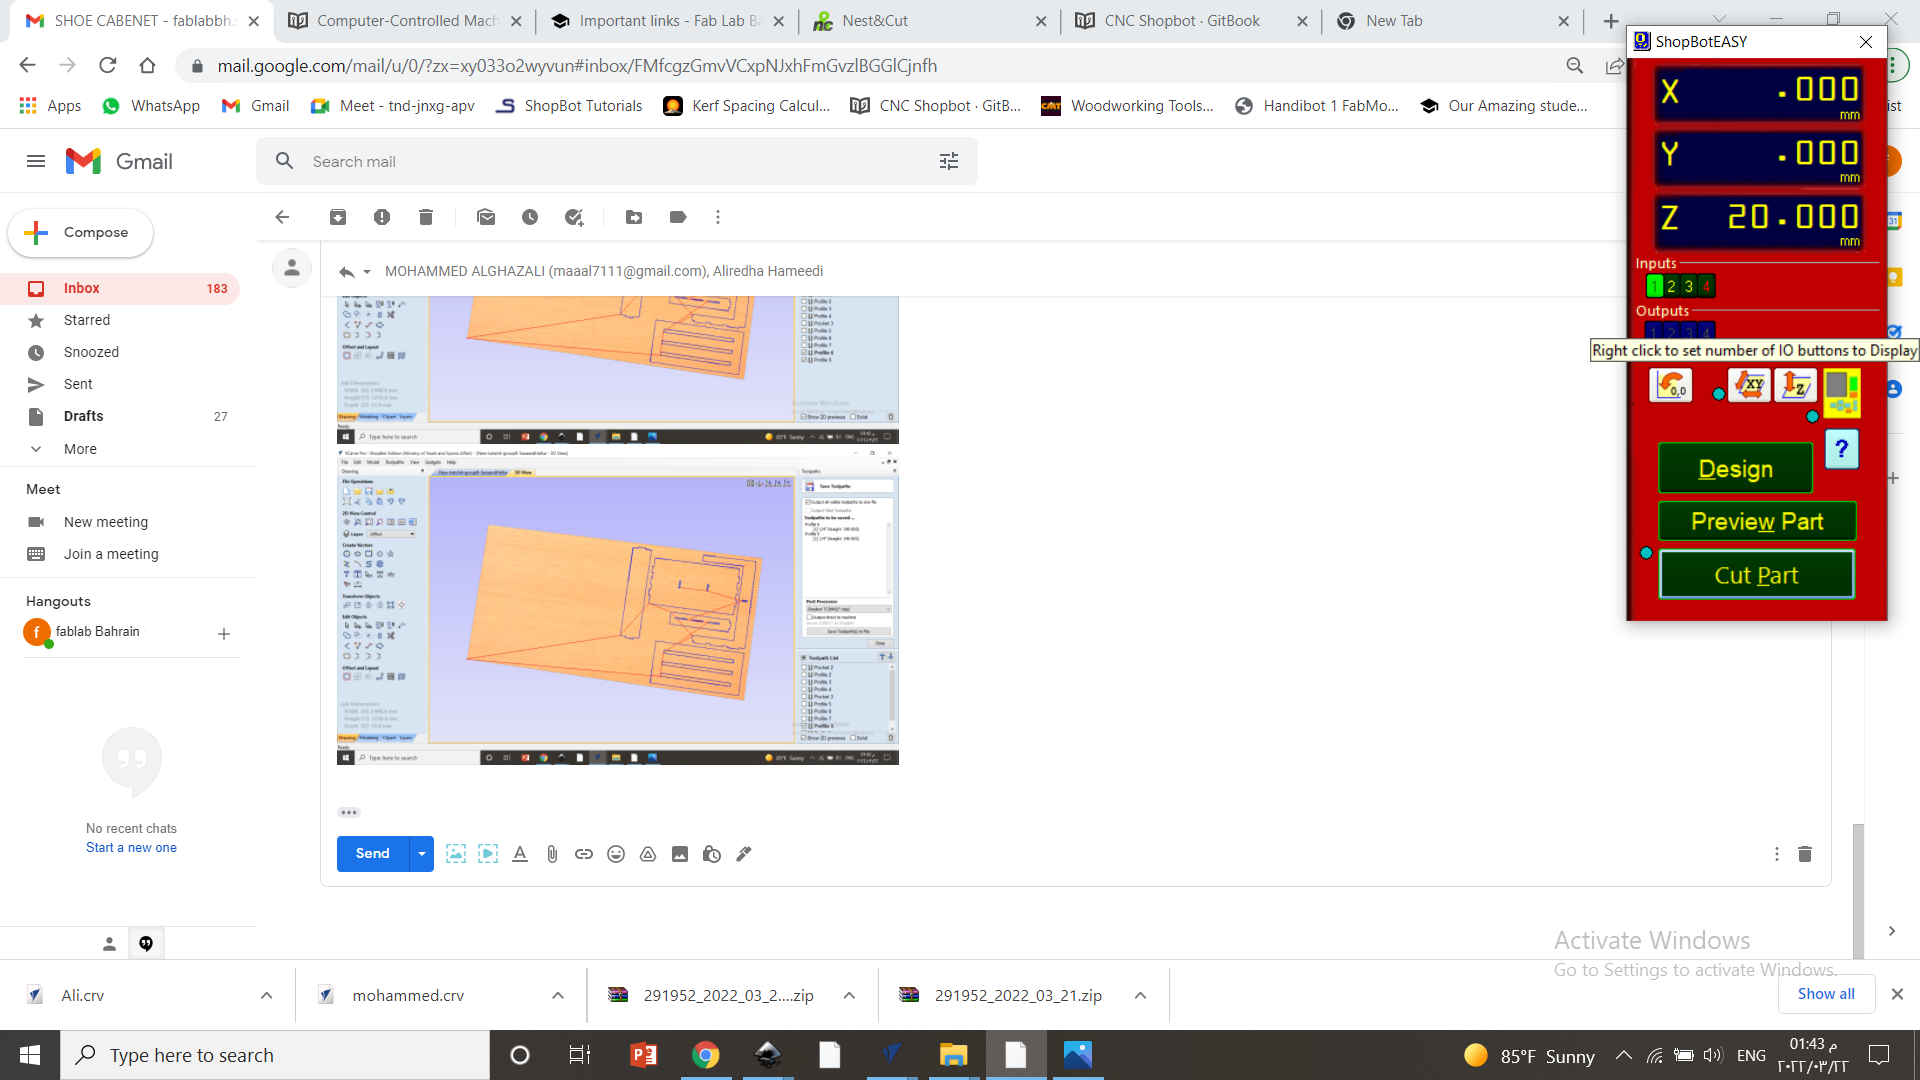
we have to set the coordinates (x , y & z ) and start the cutting process.
Final Result
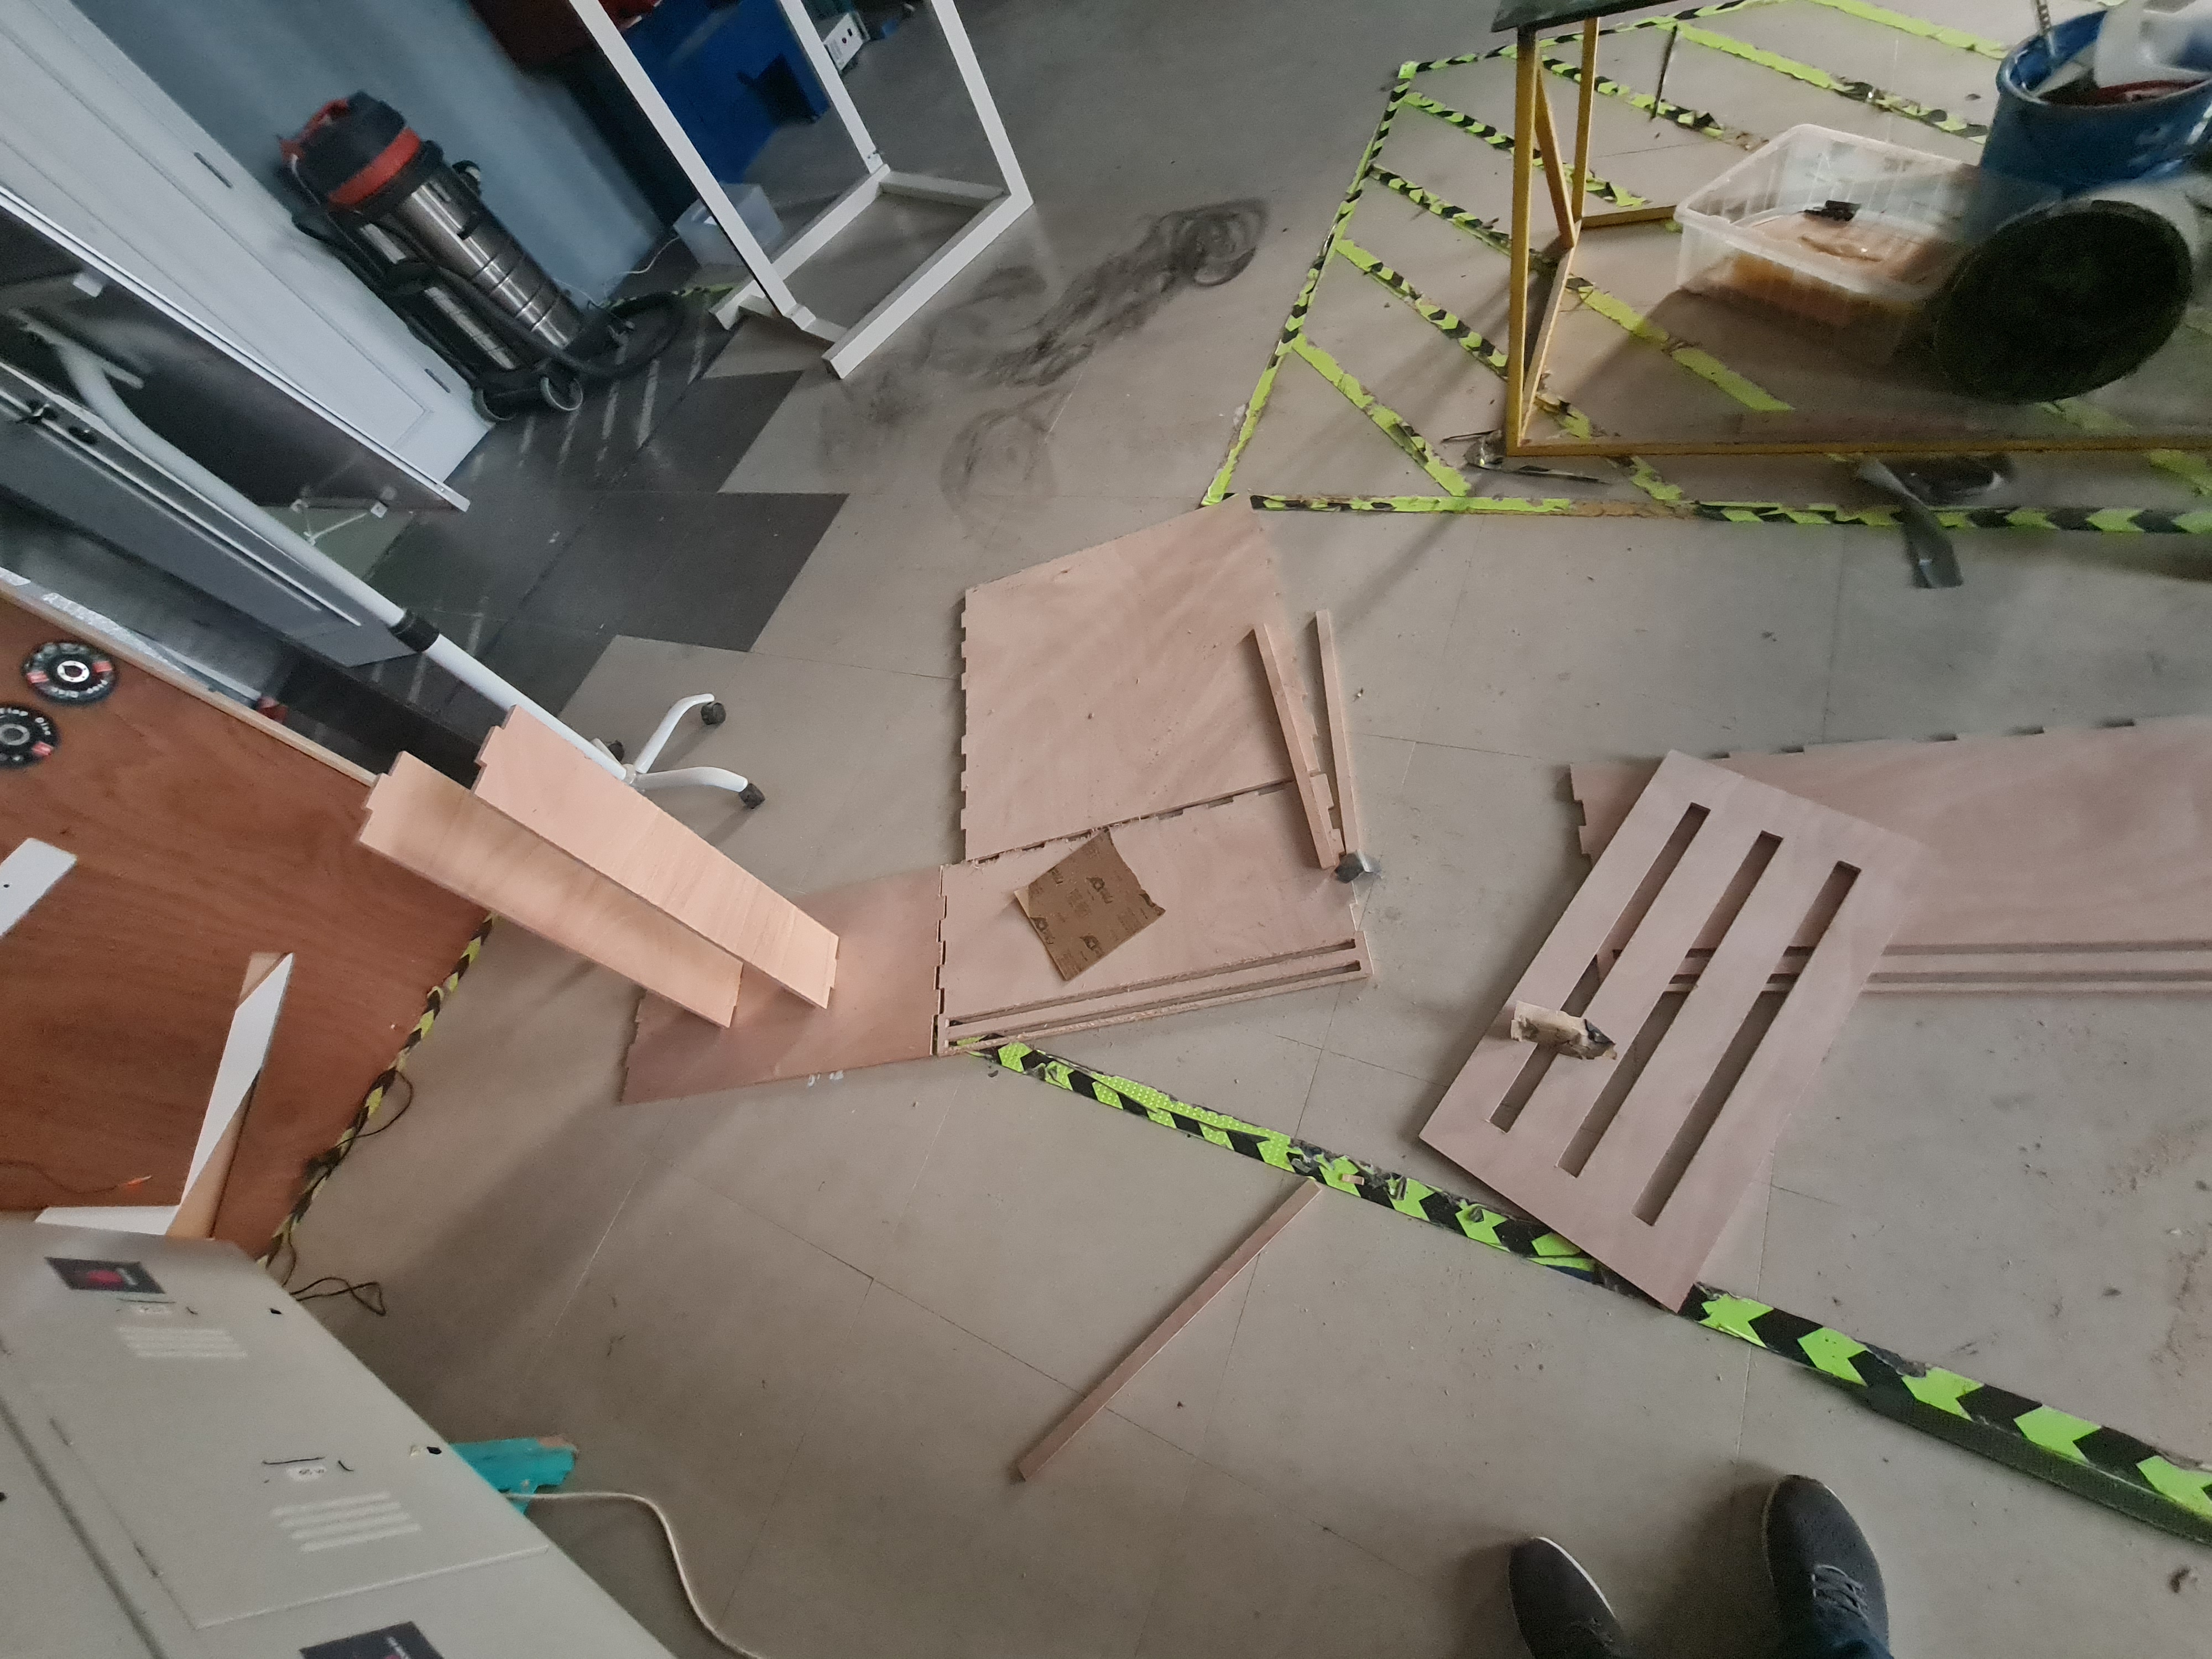
this image shows the final result after cutting the parts of the cabinet before I assembling them.
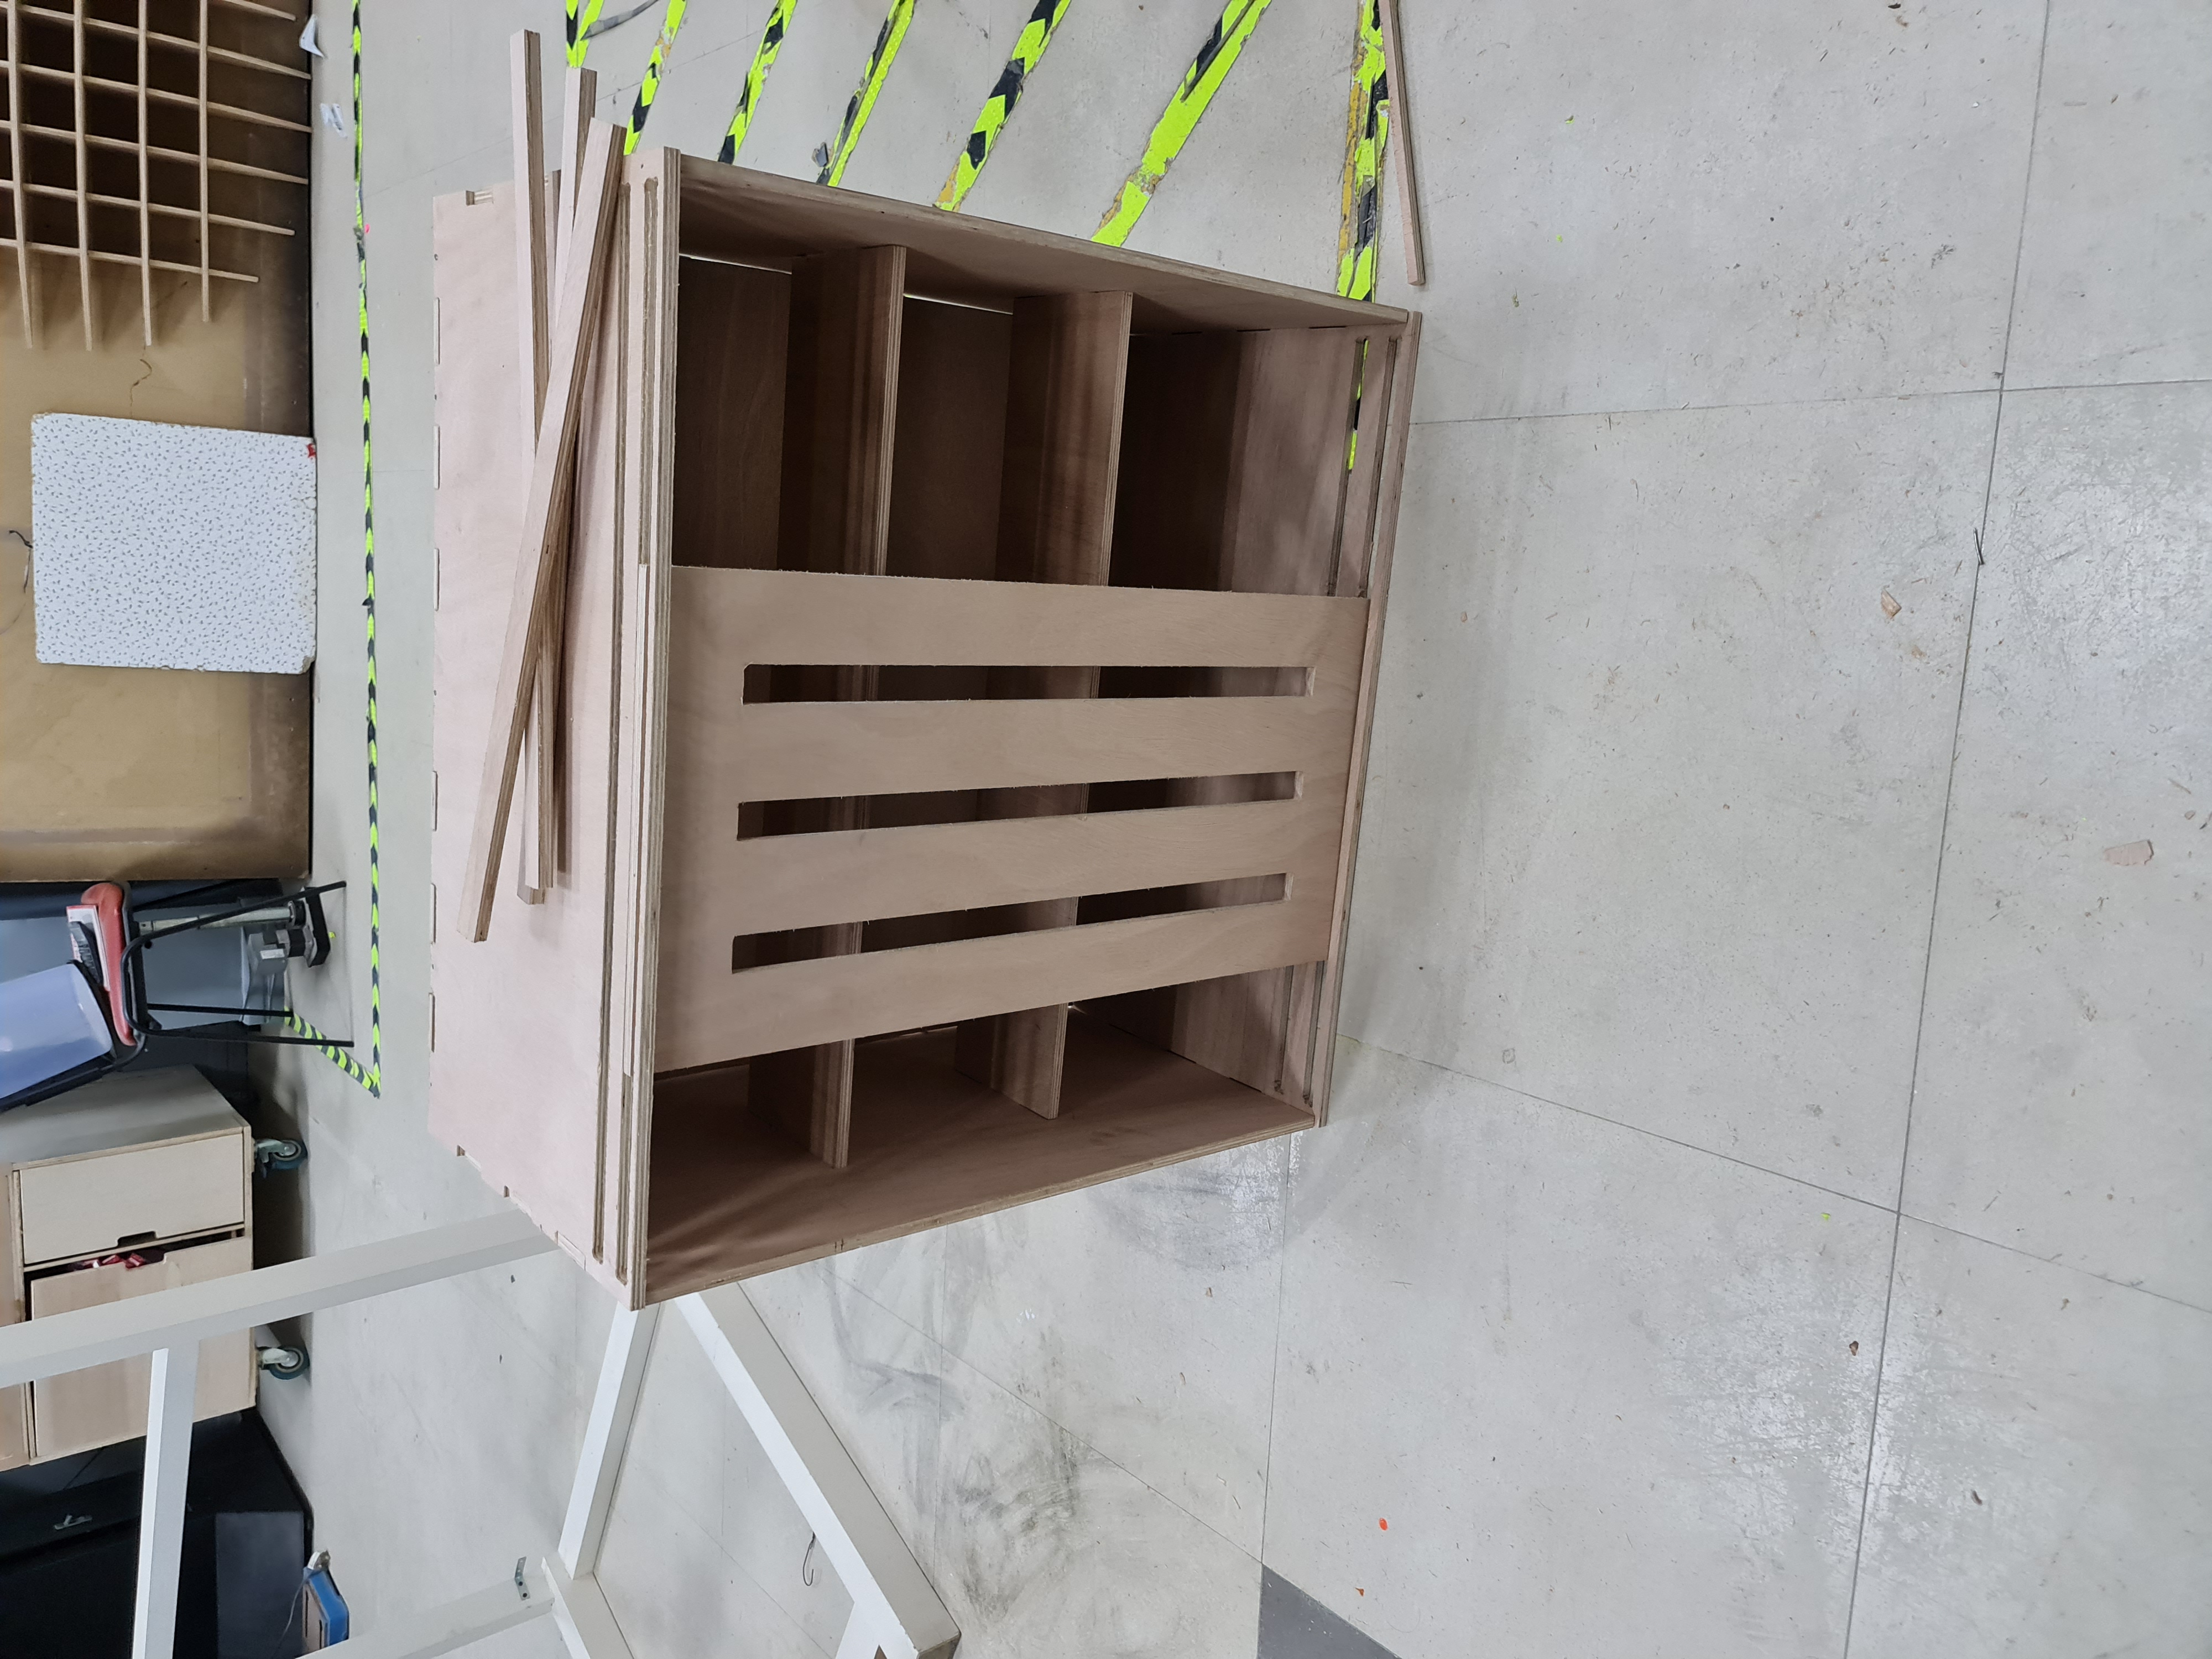
this is the final result of the design after assembling.