Final Project
If you went through my website you will definitely notice that I like space - I made a planet design for 3 different assignments accidently- that is why I wanted my project to be something related to space. Here I present to you NoorSat!
Idea and Purpose
My idea was to make a model of a cubeSat but what is a cubesat? “A CubeSat is a square-shaped miniature satellite (10 cm × 10 cm × 10 cm—roughly the size of a Rubik’s cube), weighing about 1 kg. A CubeSat can be used alone (1 unit) or in groups of multiple units (maximum 24 units)” Canadian Space Agency
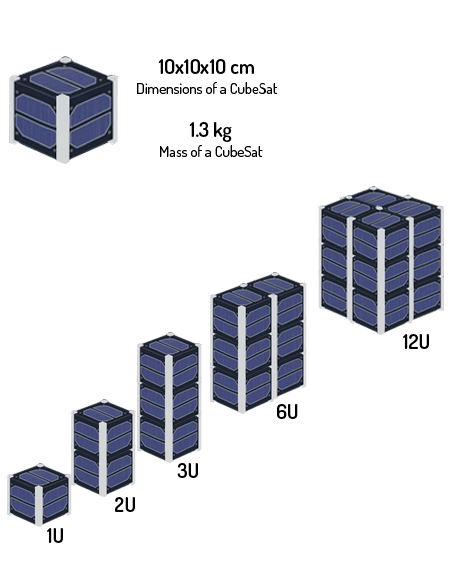
- What can a small thing like this do?
It can do the job of big satellites! However, the capacity would be different. CubeSats can be used for demonstrating technology, conducting experiments in space, providing telecommunication services and much more.
If you are interested in the topic you can check the references for further information
-
Project purpose: To educate students about space technology especially CubeSats.
-
Project description: A structure of a 2U CubeSat with a simple antenna that is deployed with the push of a button.
Drafts
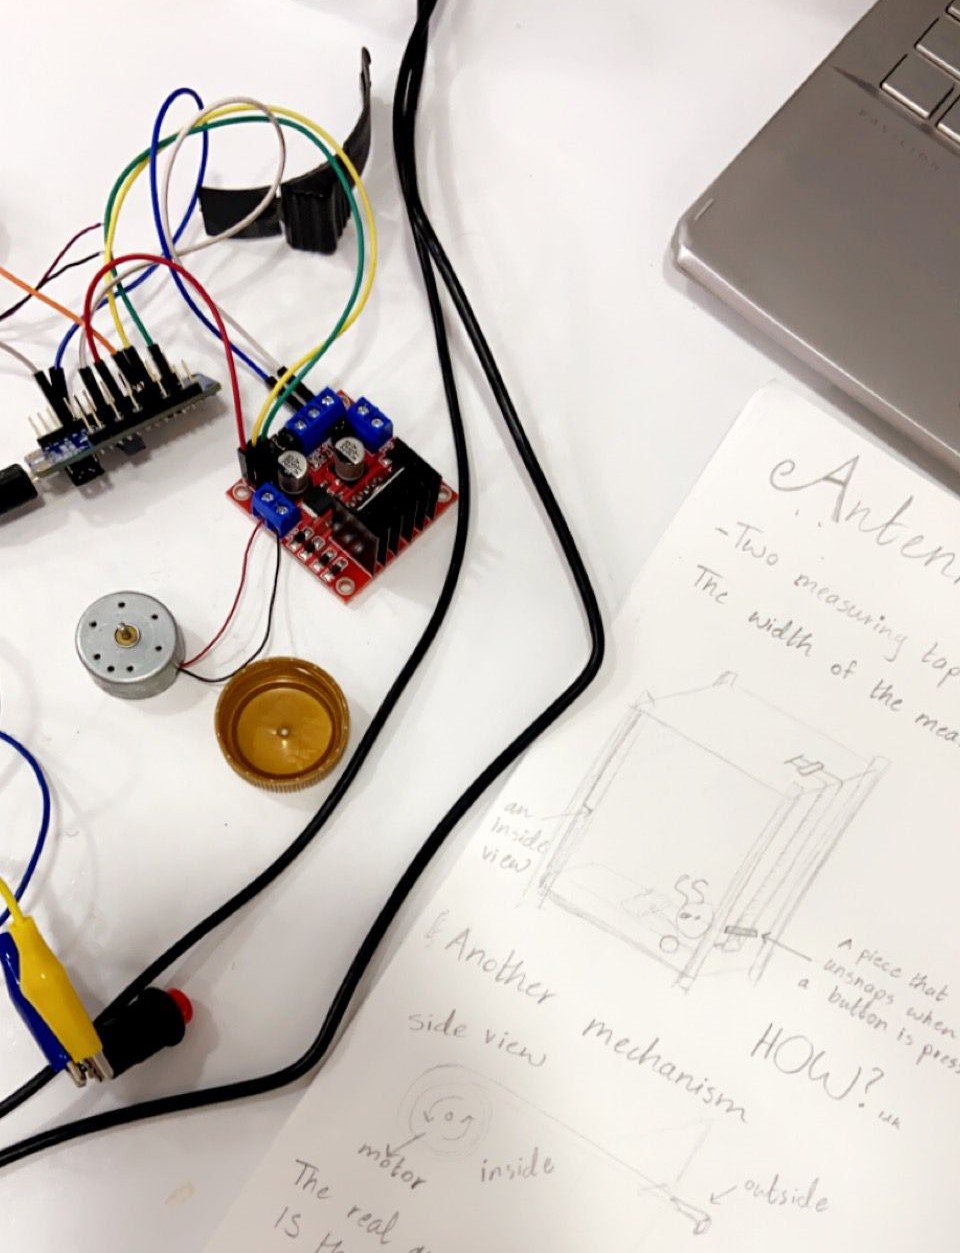
I started working on the deployable antenna mechanism. I drew what I had in mind on a piece of paper to discuss the possibility of the mechanism with an instructor.
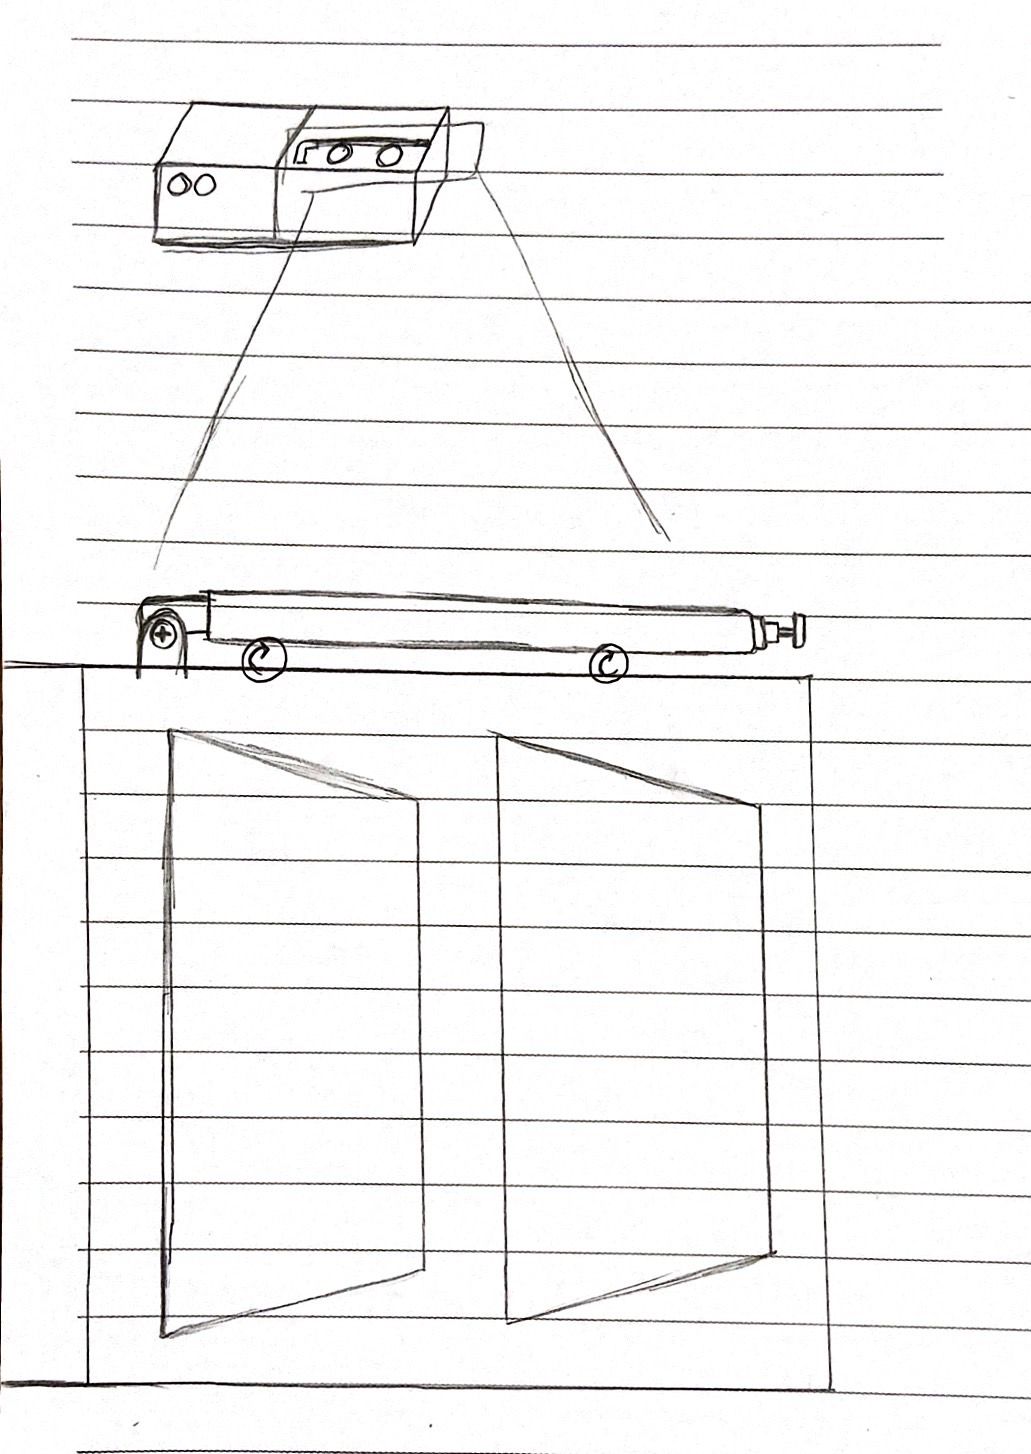
I thought about using an AM/FM radio antenna and use the help of two motors with a head piece that I’ll design to extend the antenna when a button is pressed and return it to its initial position when the button is pressed again.
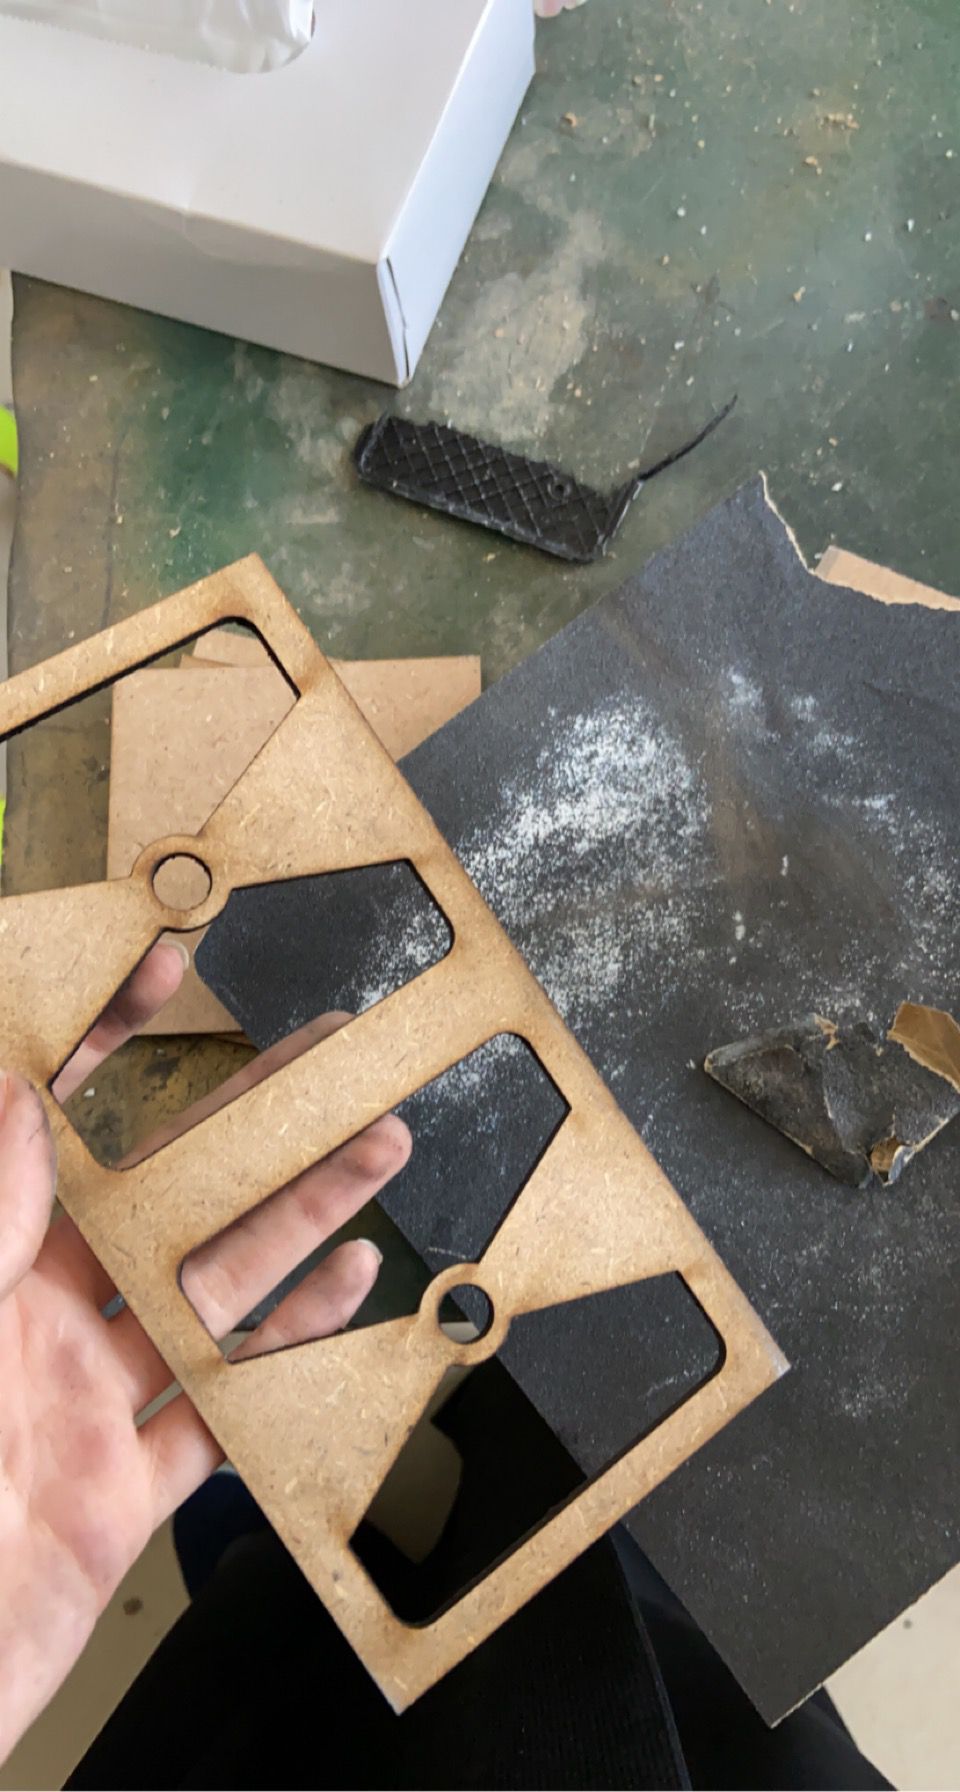
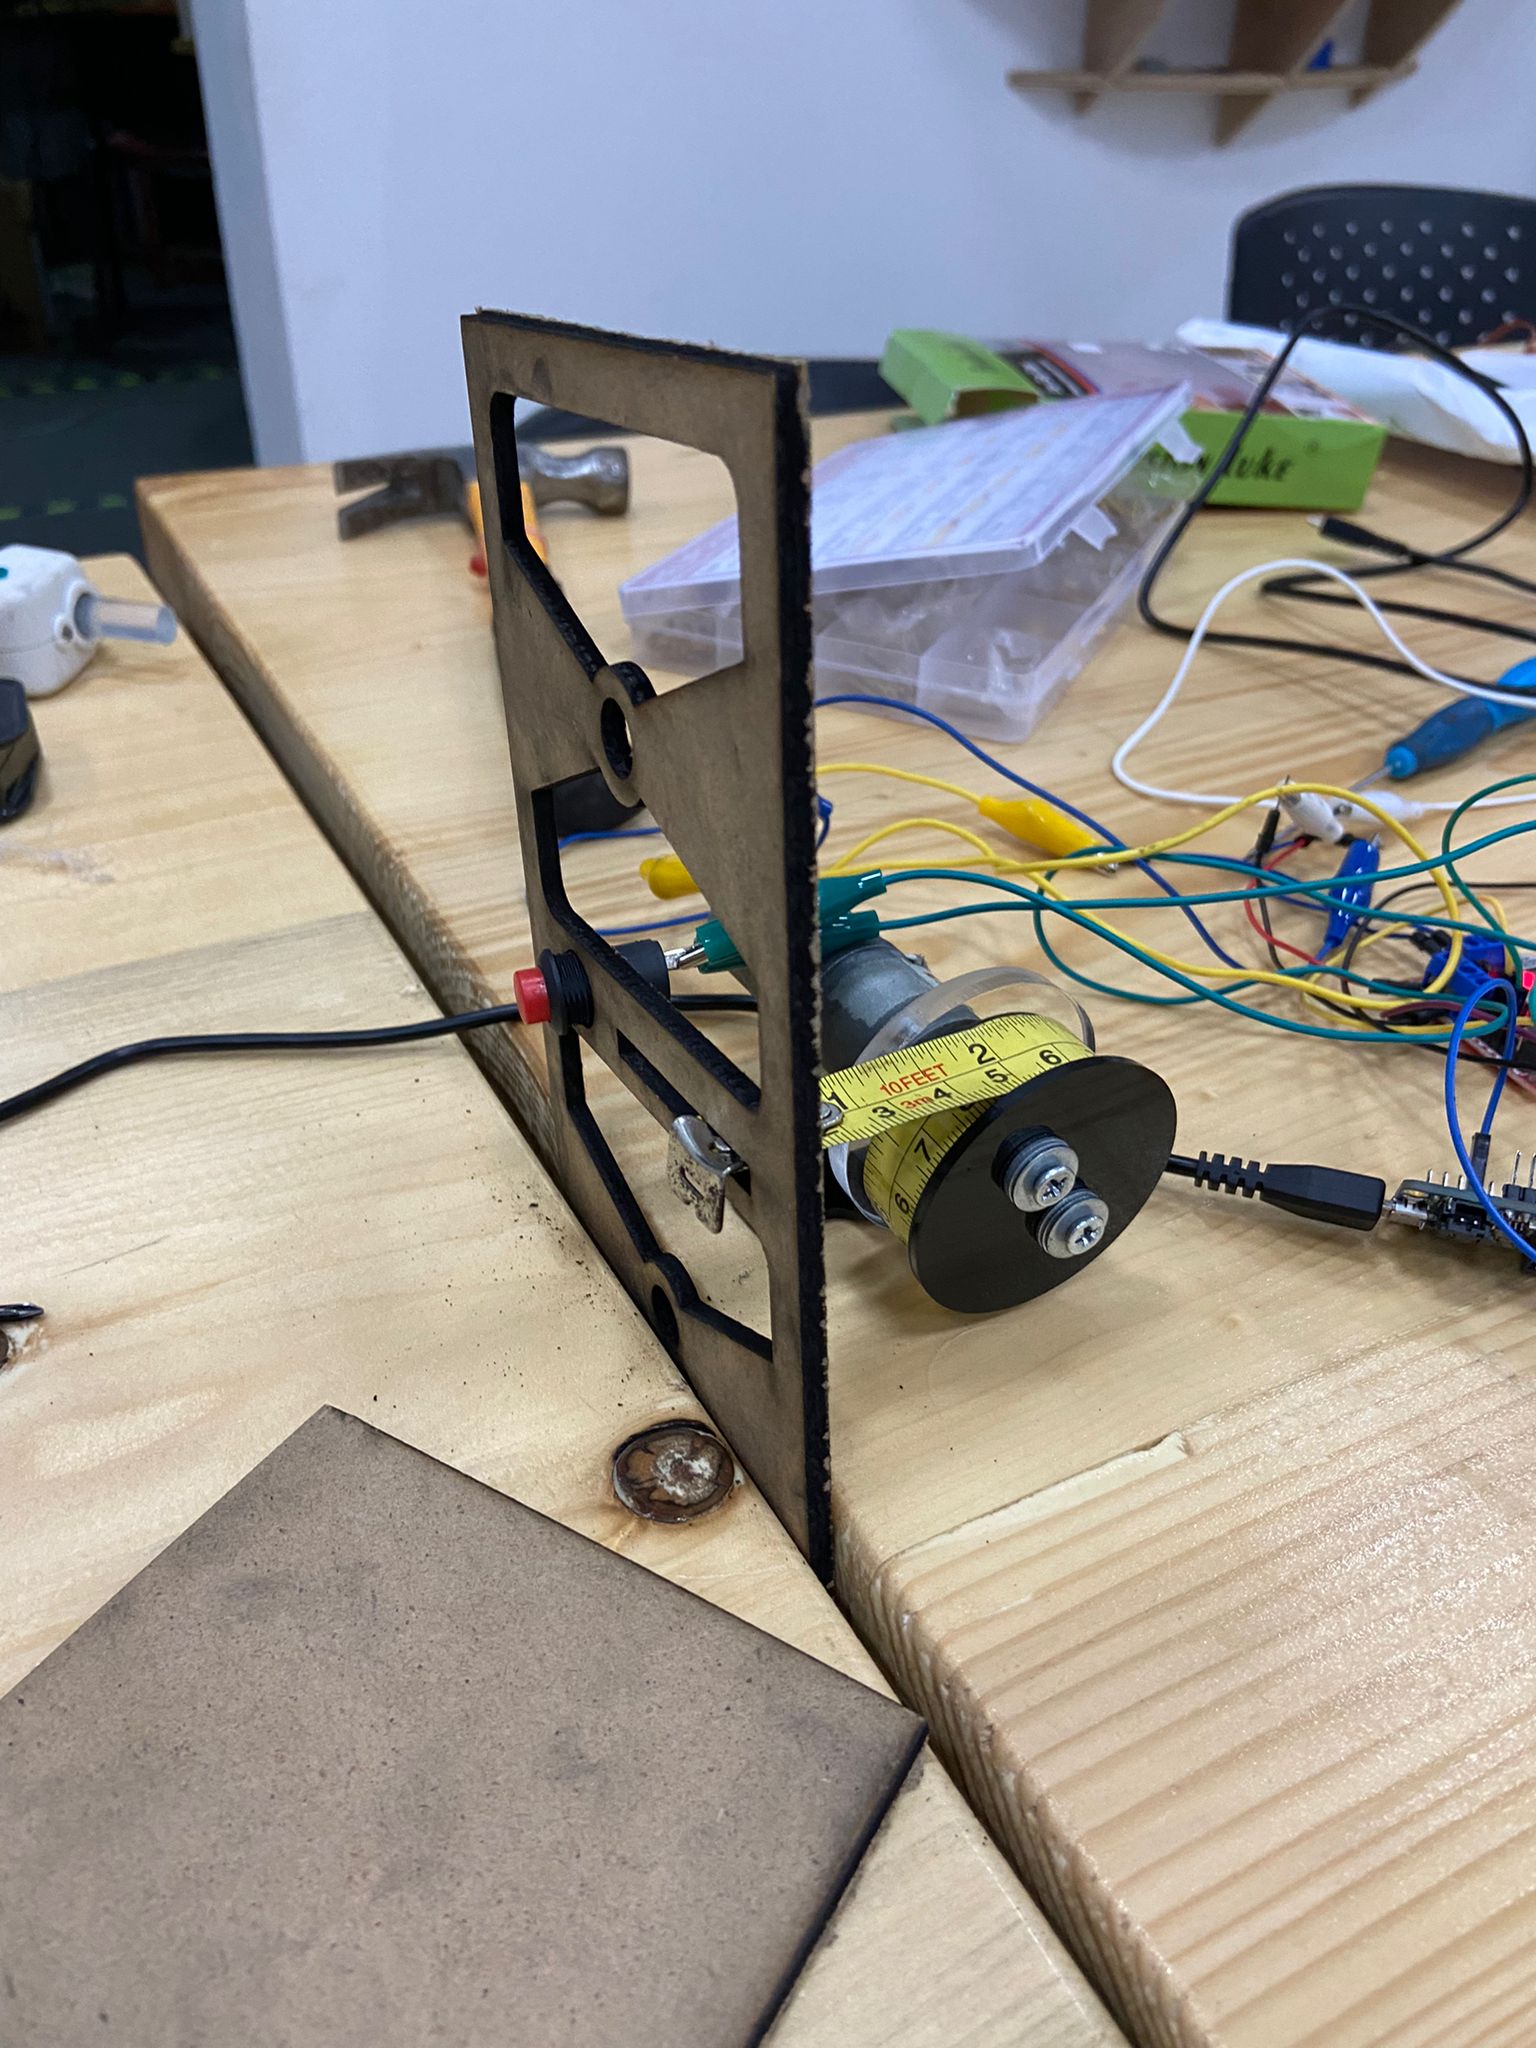
To test this mechanism, I got the antenna from my mother’s radio. As for the motor piece, I designed it in fusion 360 to see what it looks like then used cuttle.xyz to create the 2D design.
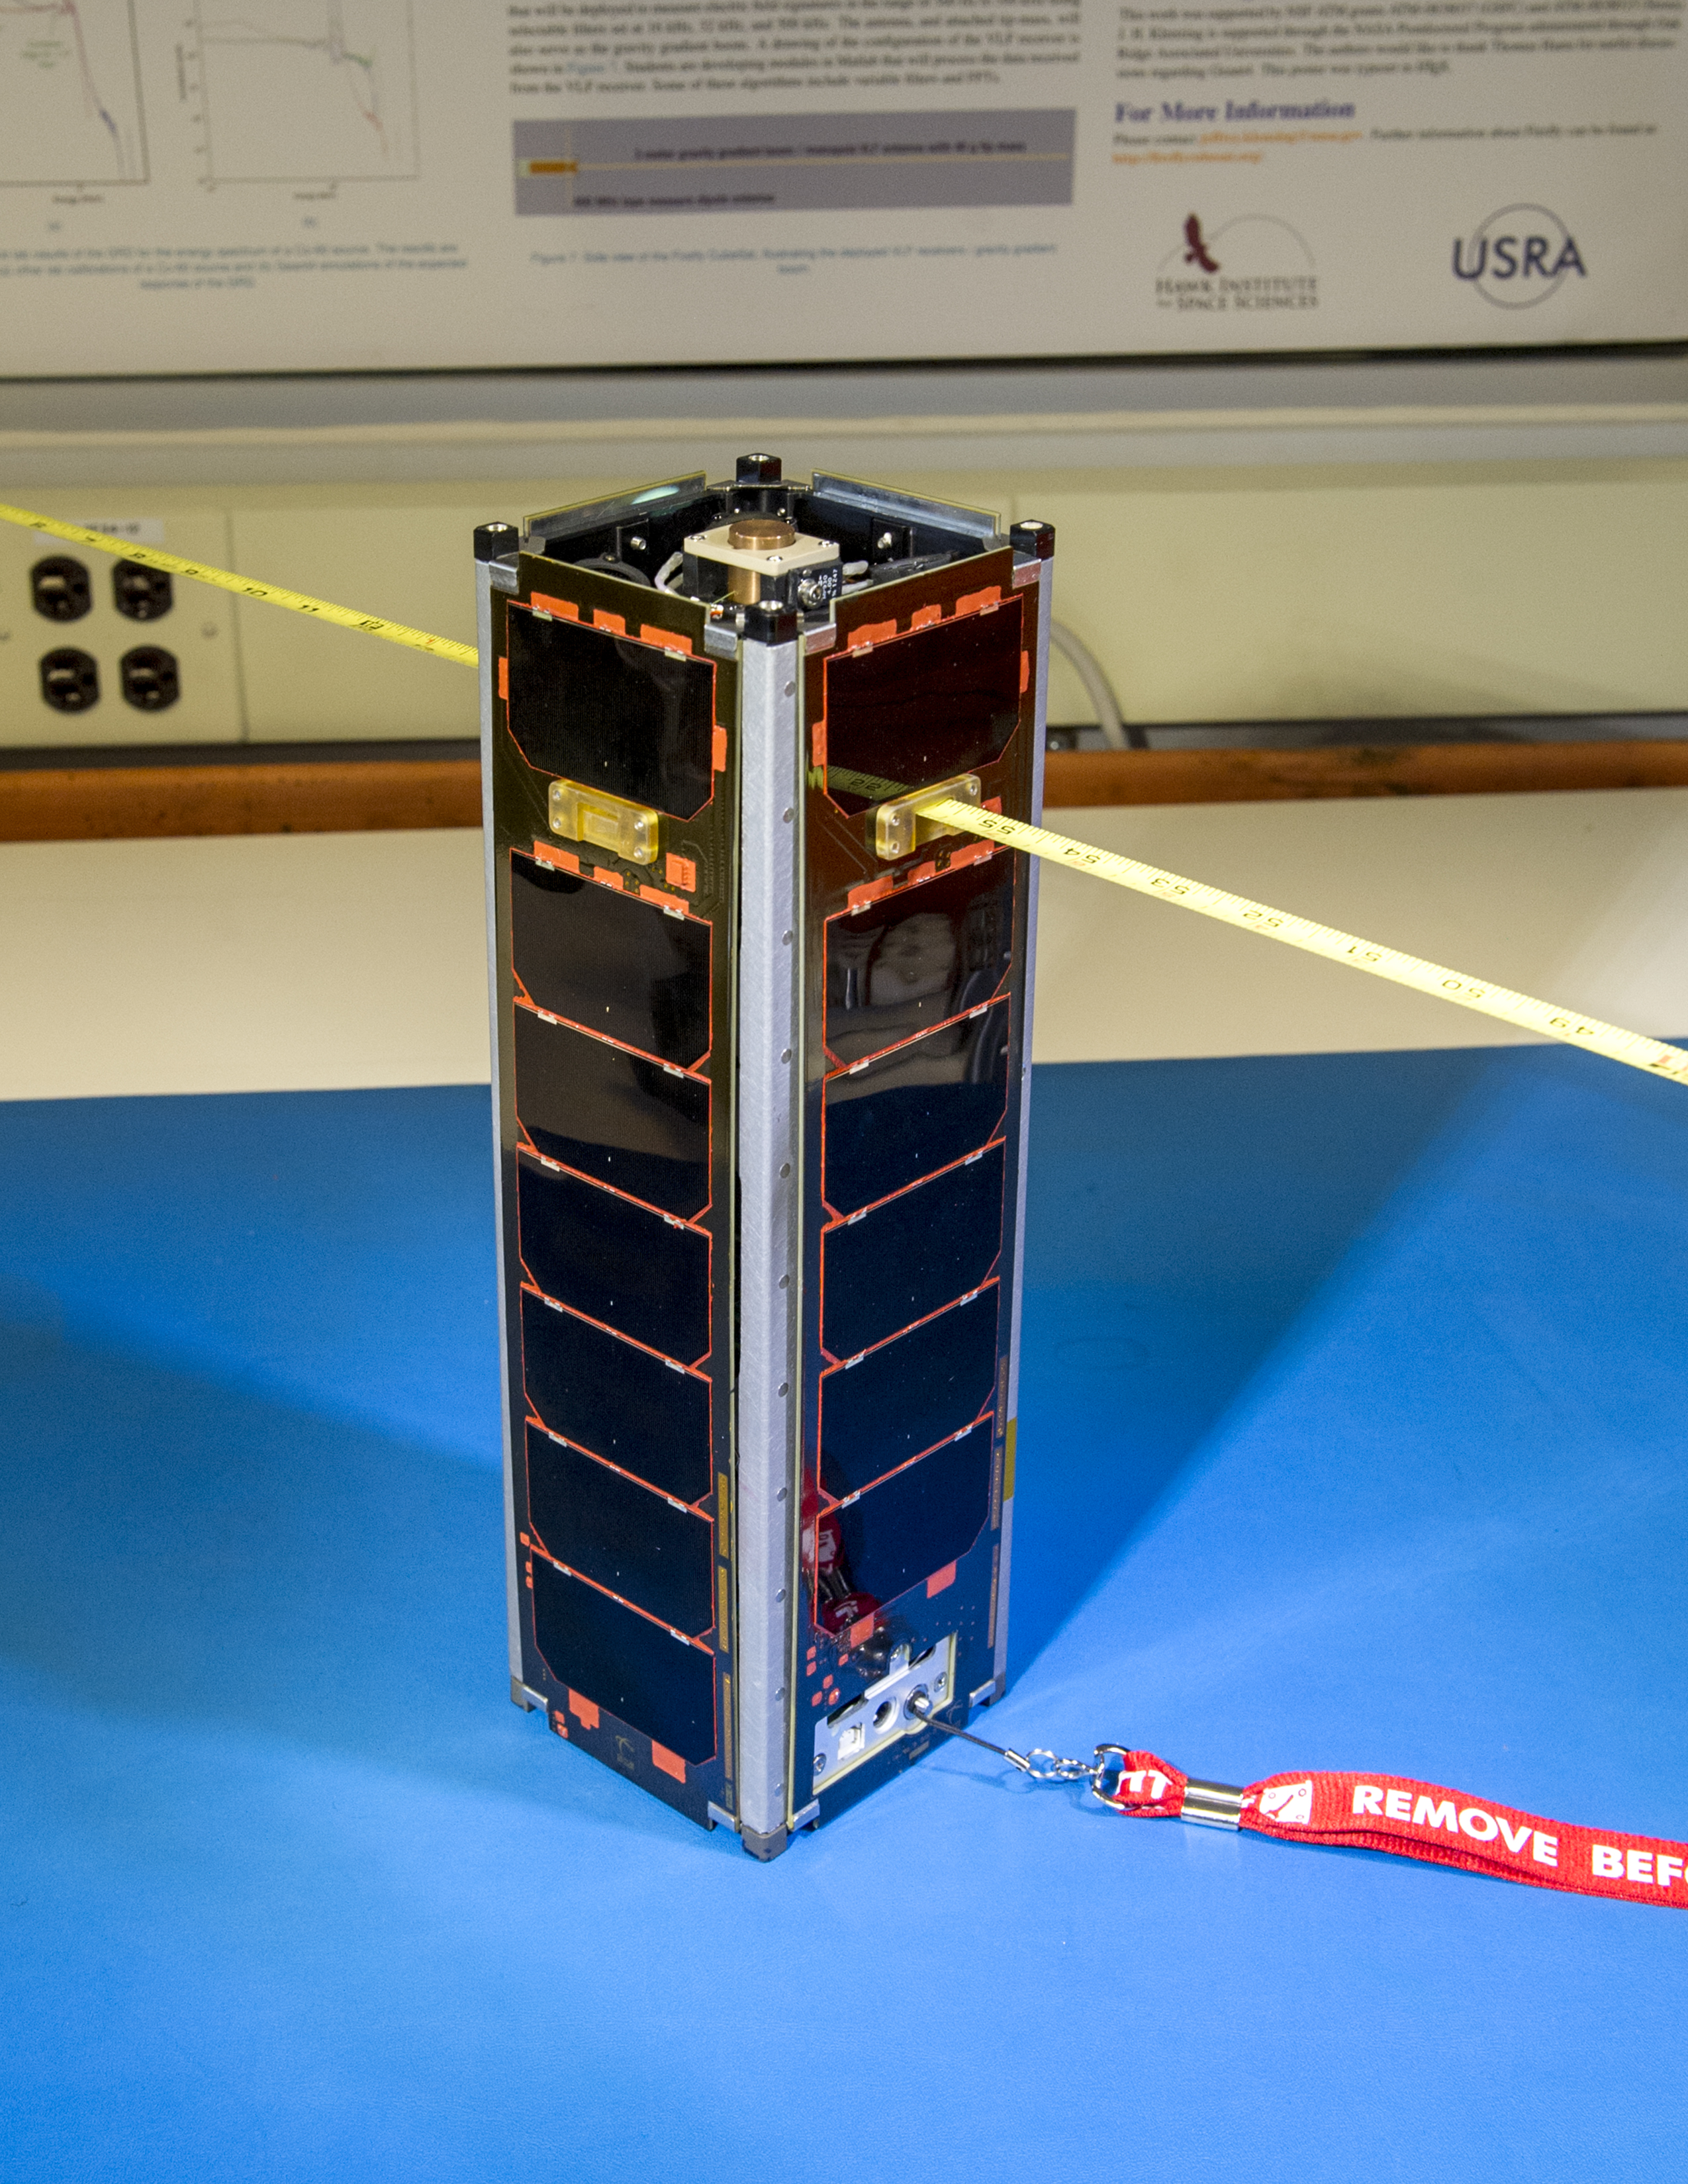
I had to change the mechanism because the motor piece will not have enough grip to pull the antenna. I also changed the antenna to a measuring tape antenna like the one in the photo.
Then, I thought about extending the antenna from the top of the cubesat to the bottom and fix it in place by a piece that unsnaps when a button is pushed. When the piece unsnaps the antenna is deployed.
However, I changed the mechanism again and I settled on a rotating antenna.
Final Idea’s Design
Structure
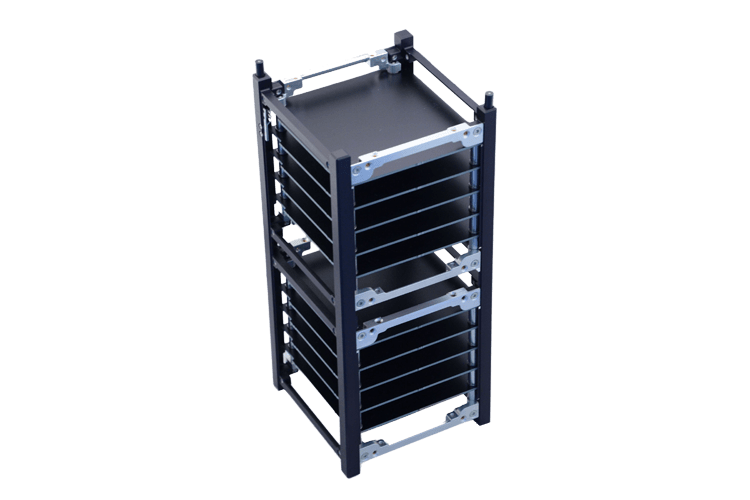
To make the structure of the CubeSat I broke it into 3 components. The rails, sides of the CubeSat and the slides that will be inside it.
Rails
I designed the rails using Fusion 360. I made one rail and mirrored it. I fabricated the rails using a 3D printer. Those are the printed rails.
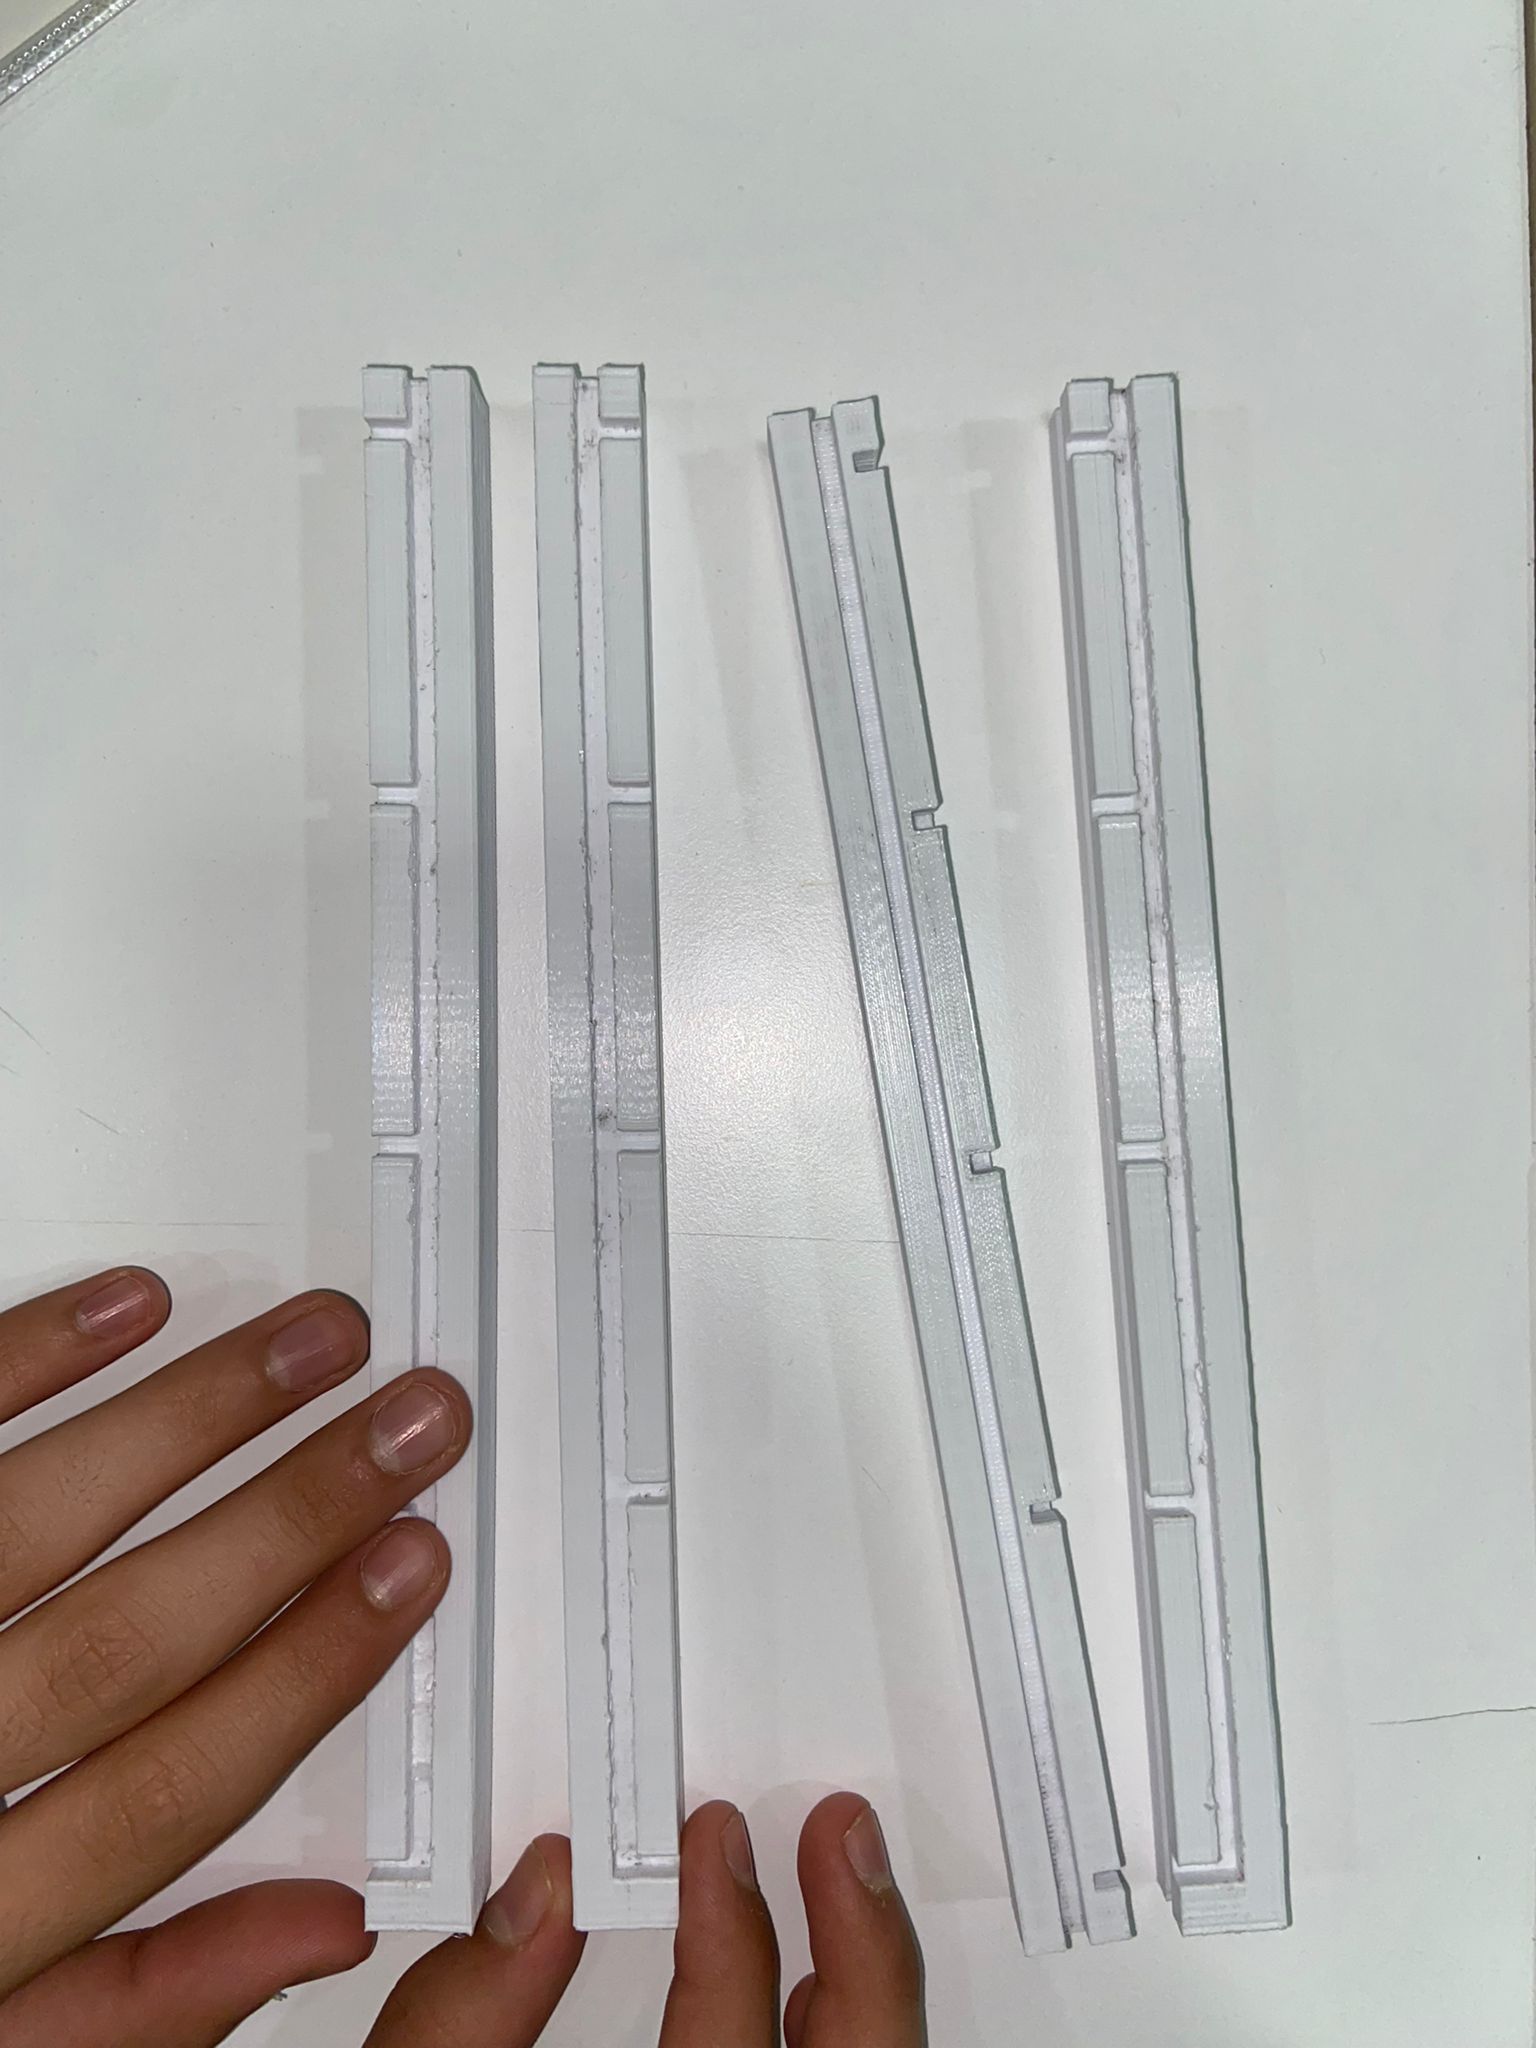
The rails were printed with support so I had to remove the support manually. I could not clean some of the rails properly which created unwanted friction that made the assembling process harder.
I used a metallic spray paint to paint the rails. It did not have the cleanest finishing but I thought about it positively by thinking it gives a semi authentic metal look :)
You can download the rail here
Sides and Slides
For the sides of the CubeSat, I created the design to be somewhat similar to this picture.
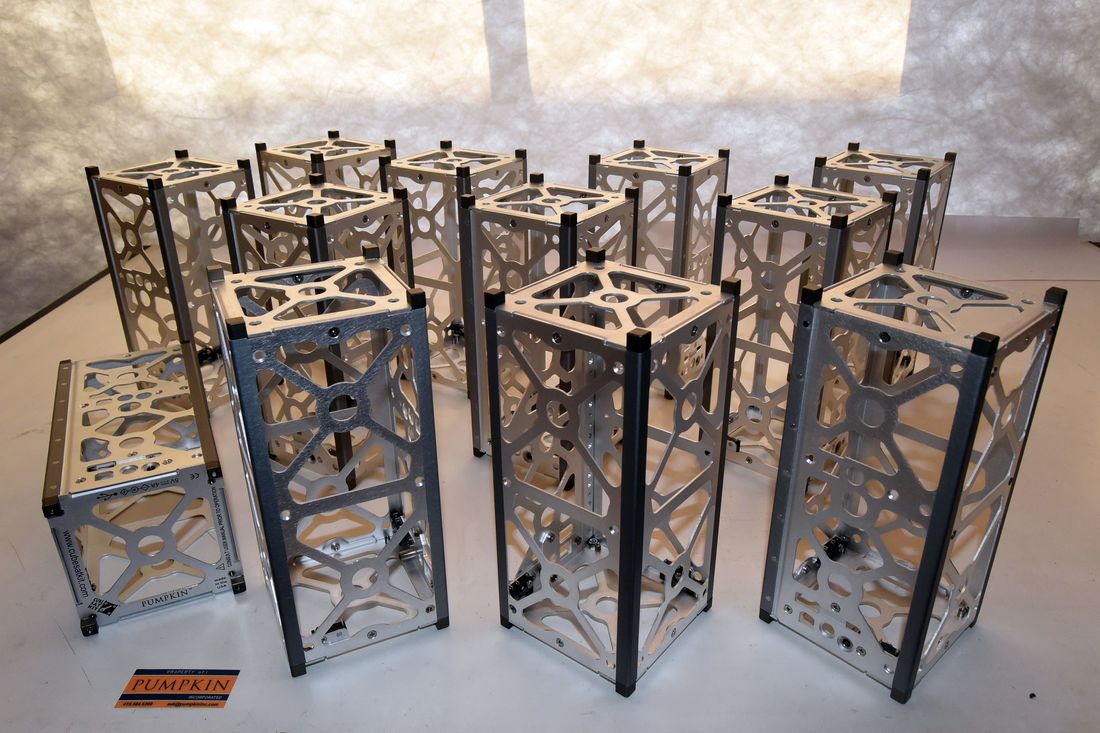
I made three identical sides and then made 2 holes in the fourth for the button and the antenna. As for the slides, they were simple squares to be put inside the structure.
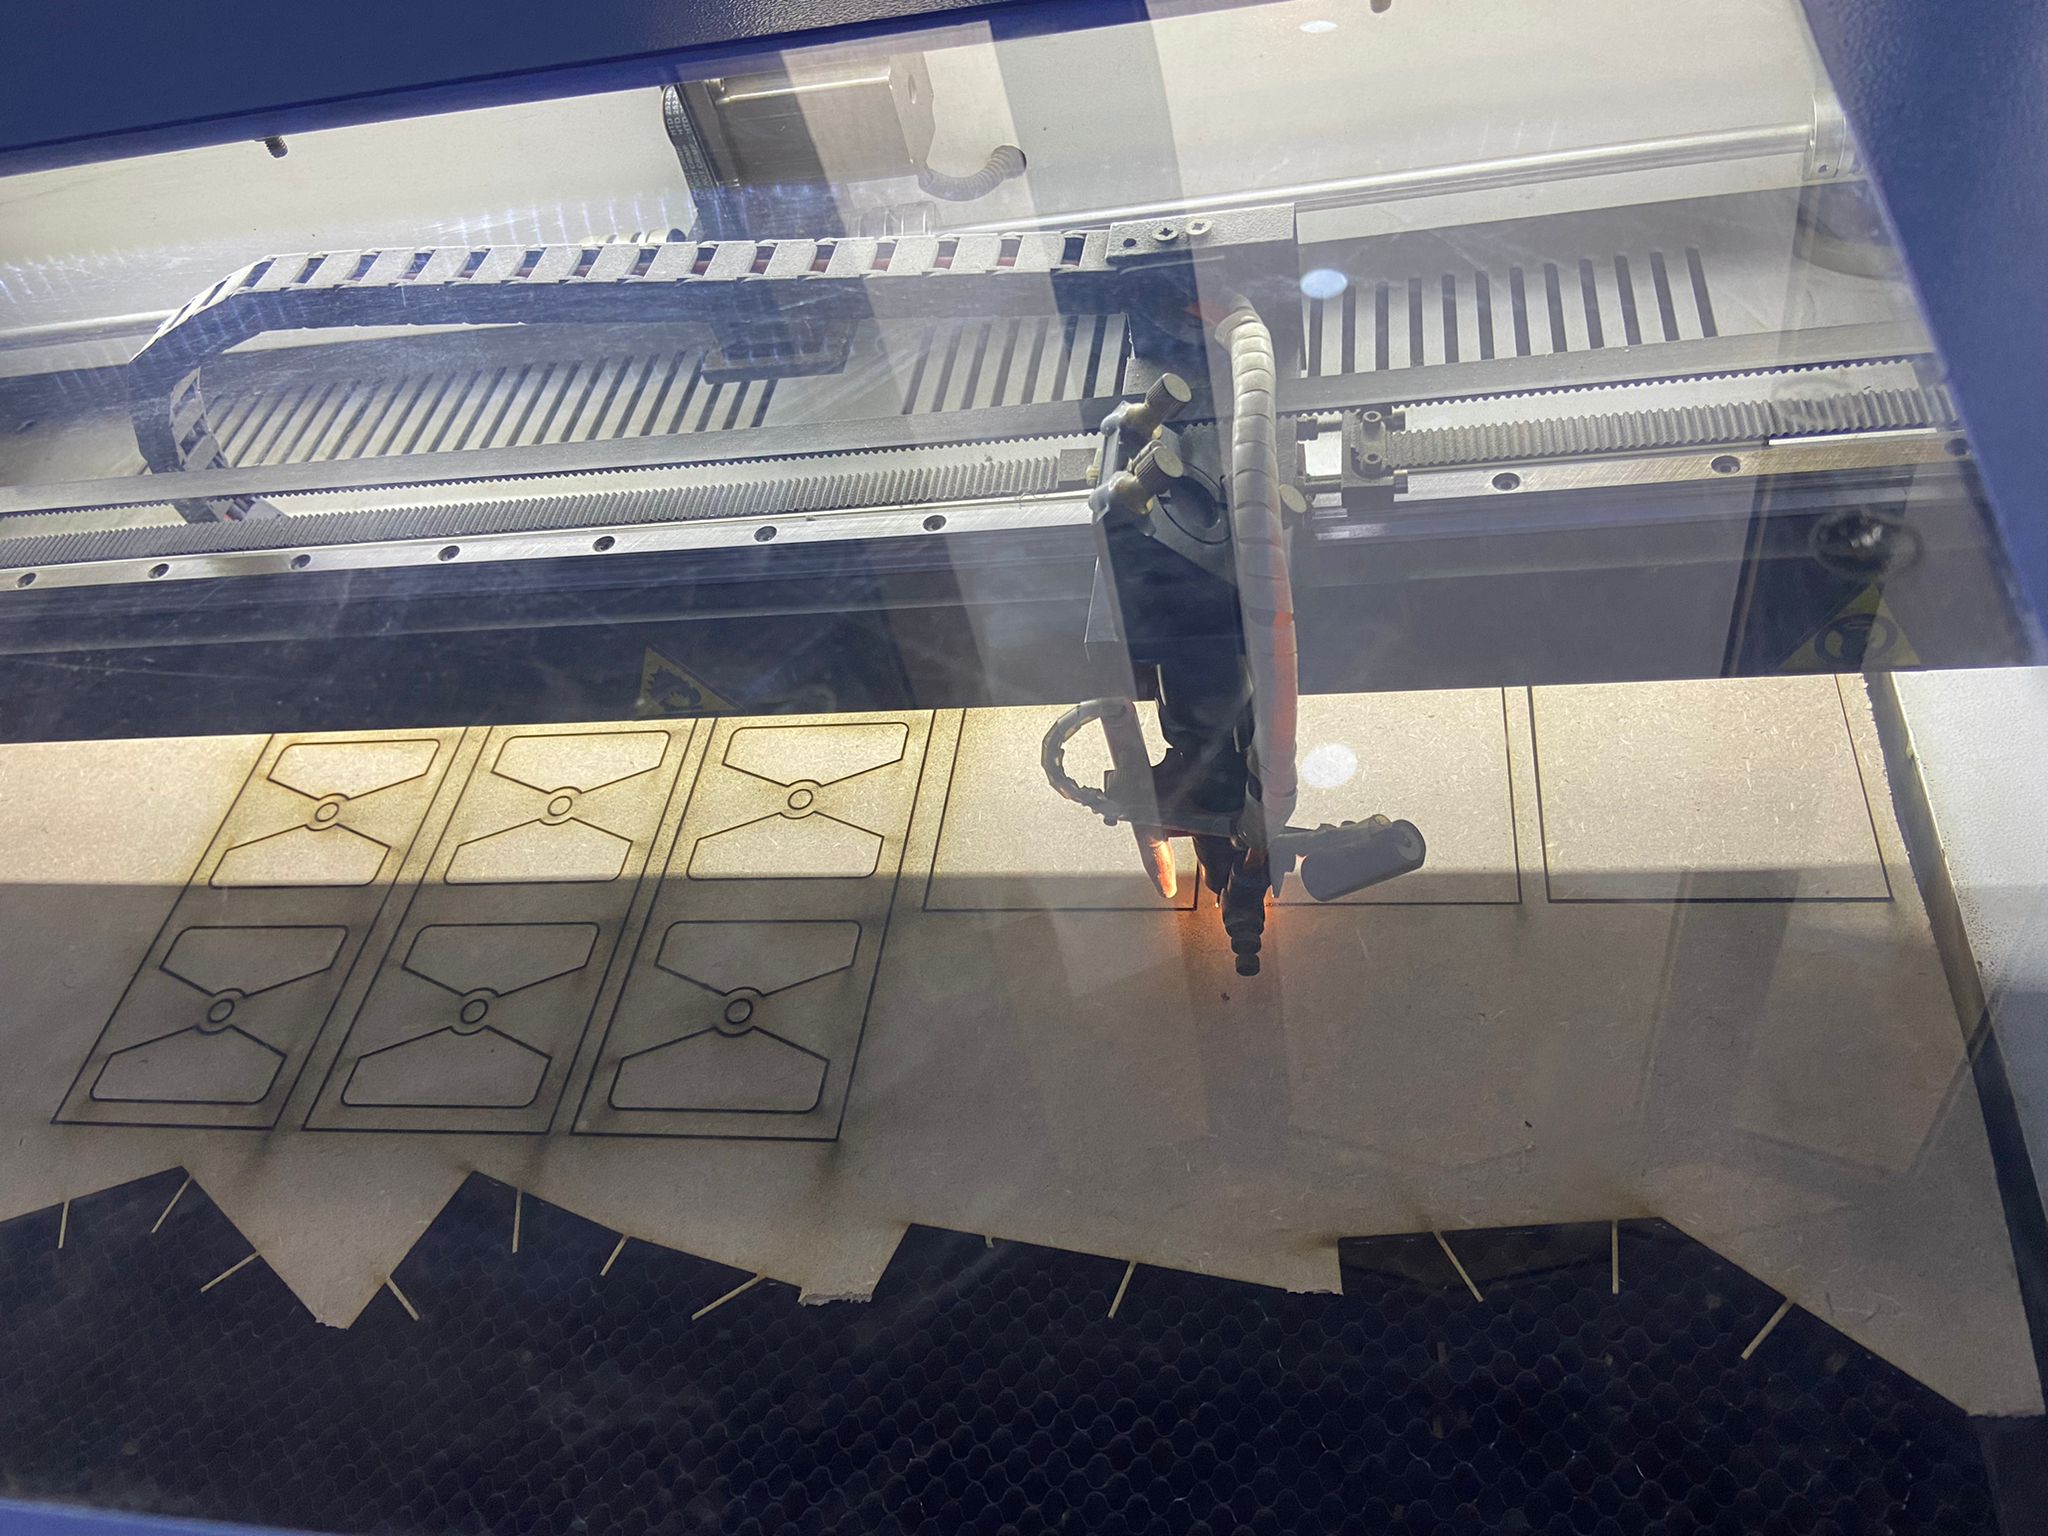
For the sides and slides, I used a sheet of 3mm MDF and cut the design using the laser cutting machine.
You can download the side here and the button side here
DC Motor
First, I got a DC motor and L298N motor driver which is needed for controlling DC motors using Arduino.
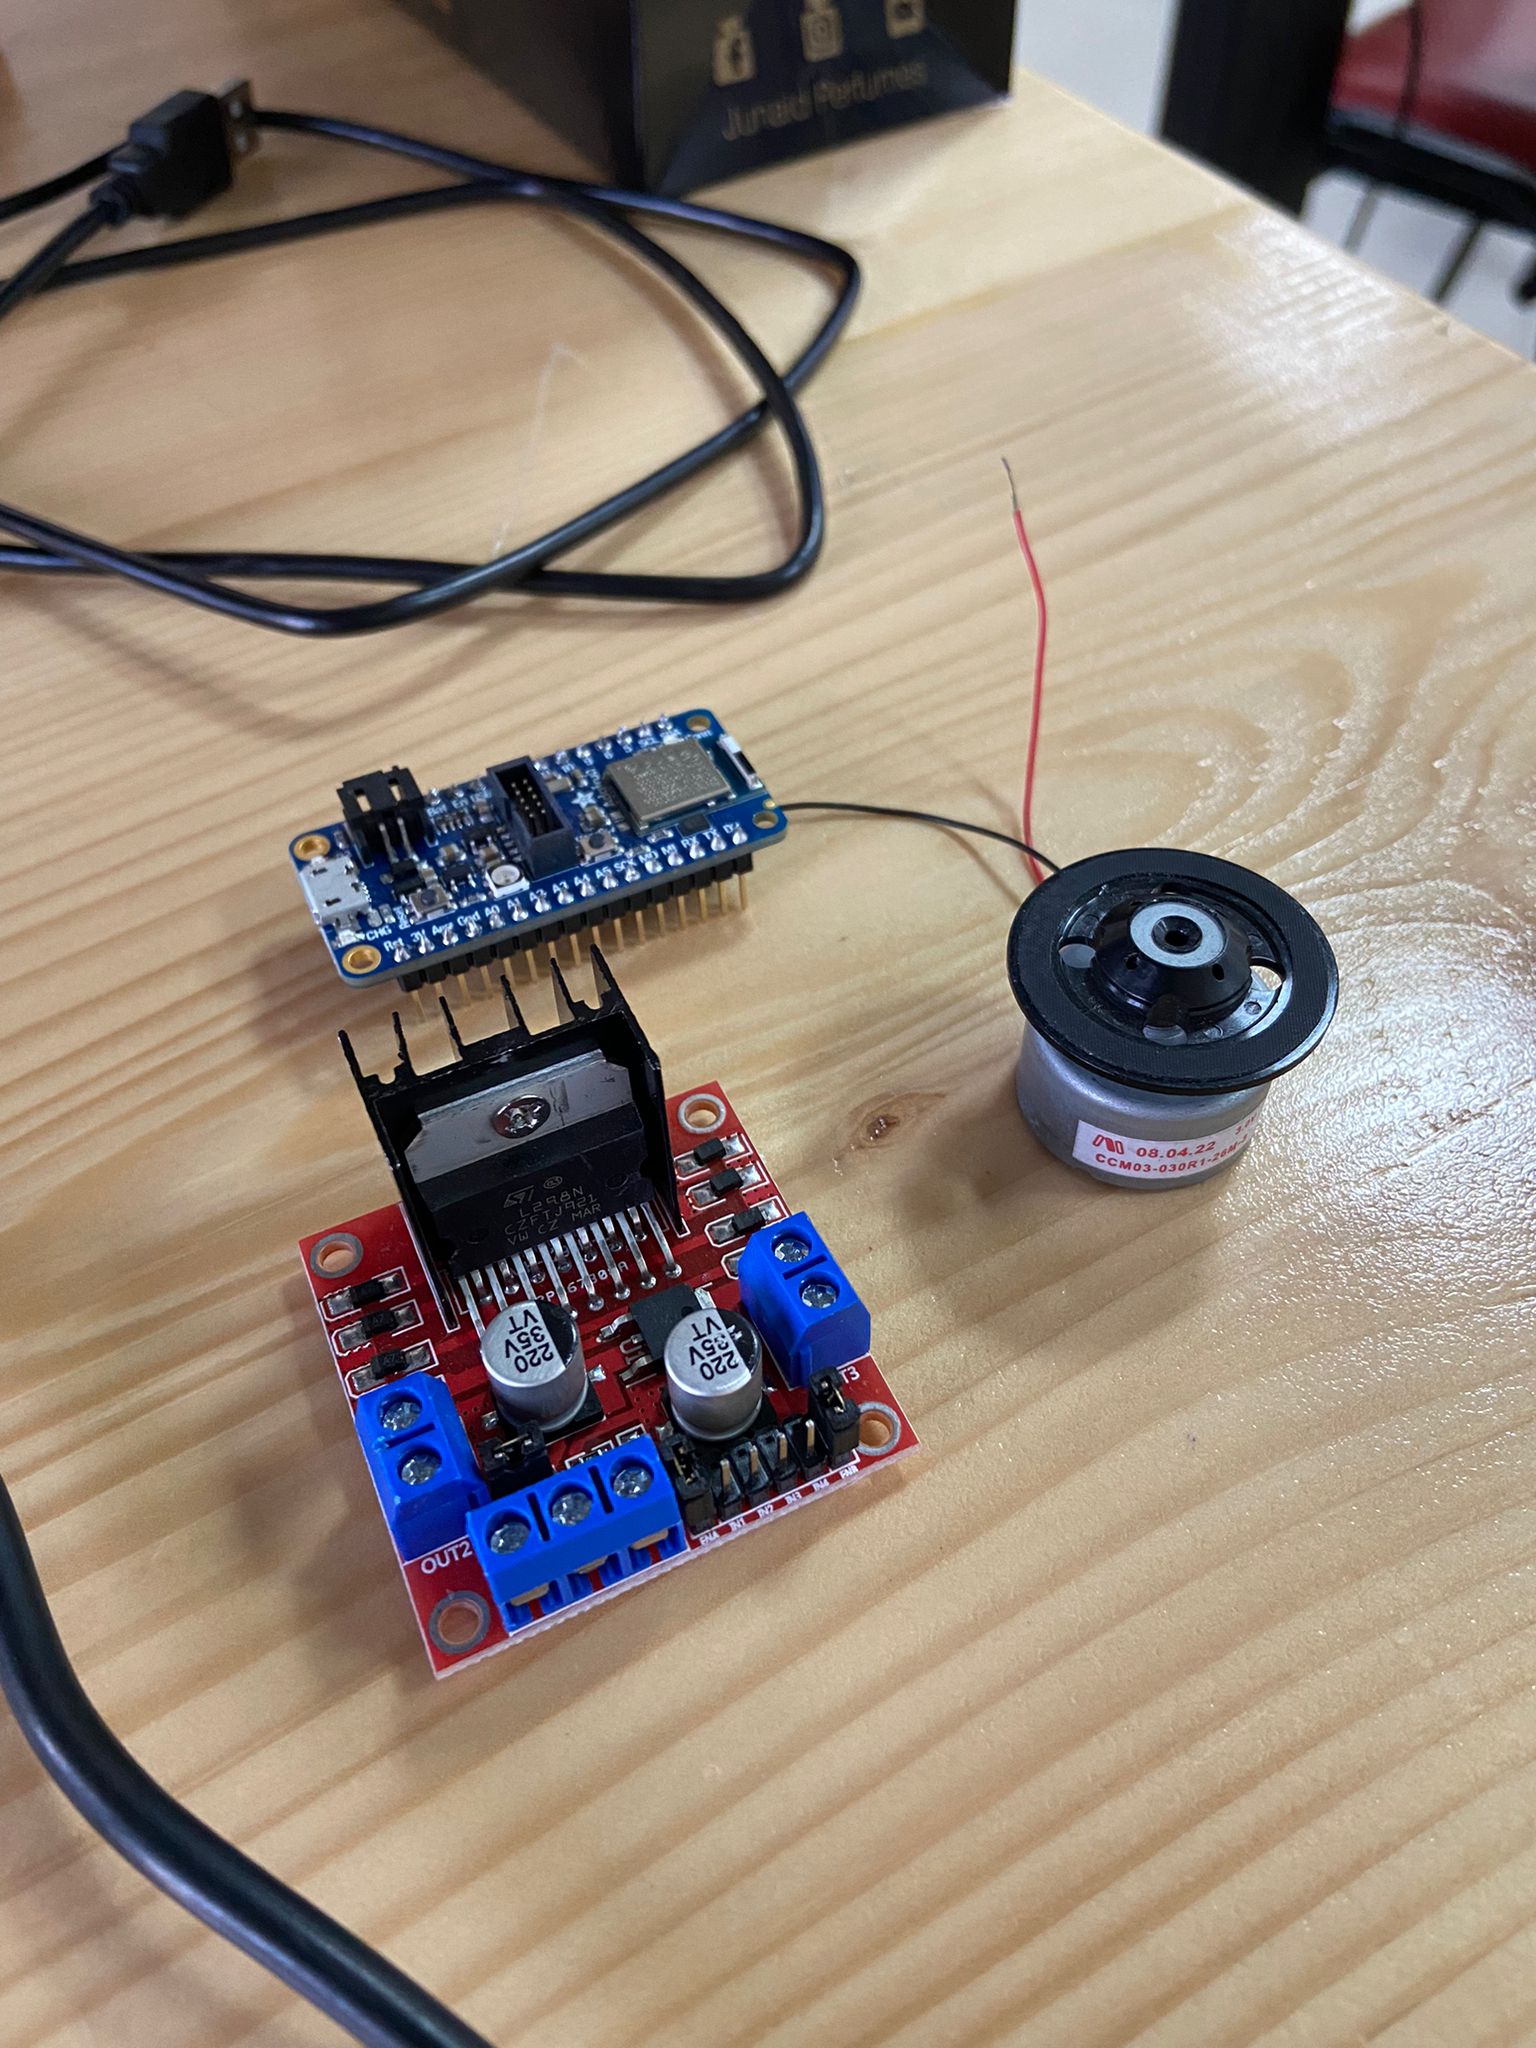
I started by reading about the L298N motor driver and how to connect it to the microcontroller and the DC motor. With the help of an instructor, I connected the parts and started experimenting with the code.
After testing the code and seeing the rotation of the motor, I realized that it will not be suitable for my purpose since it was very fast and fixing its speed to low speed was not possible. In addition, this motor would not be able to rotate a measuring tape. I needed a motor with high torque but low speed. When I told the instructor about that, she gave me a big DC motor which had the properties I mentioned.
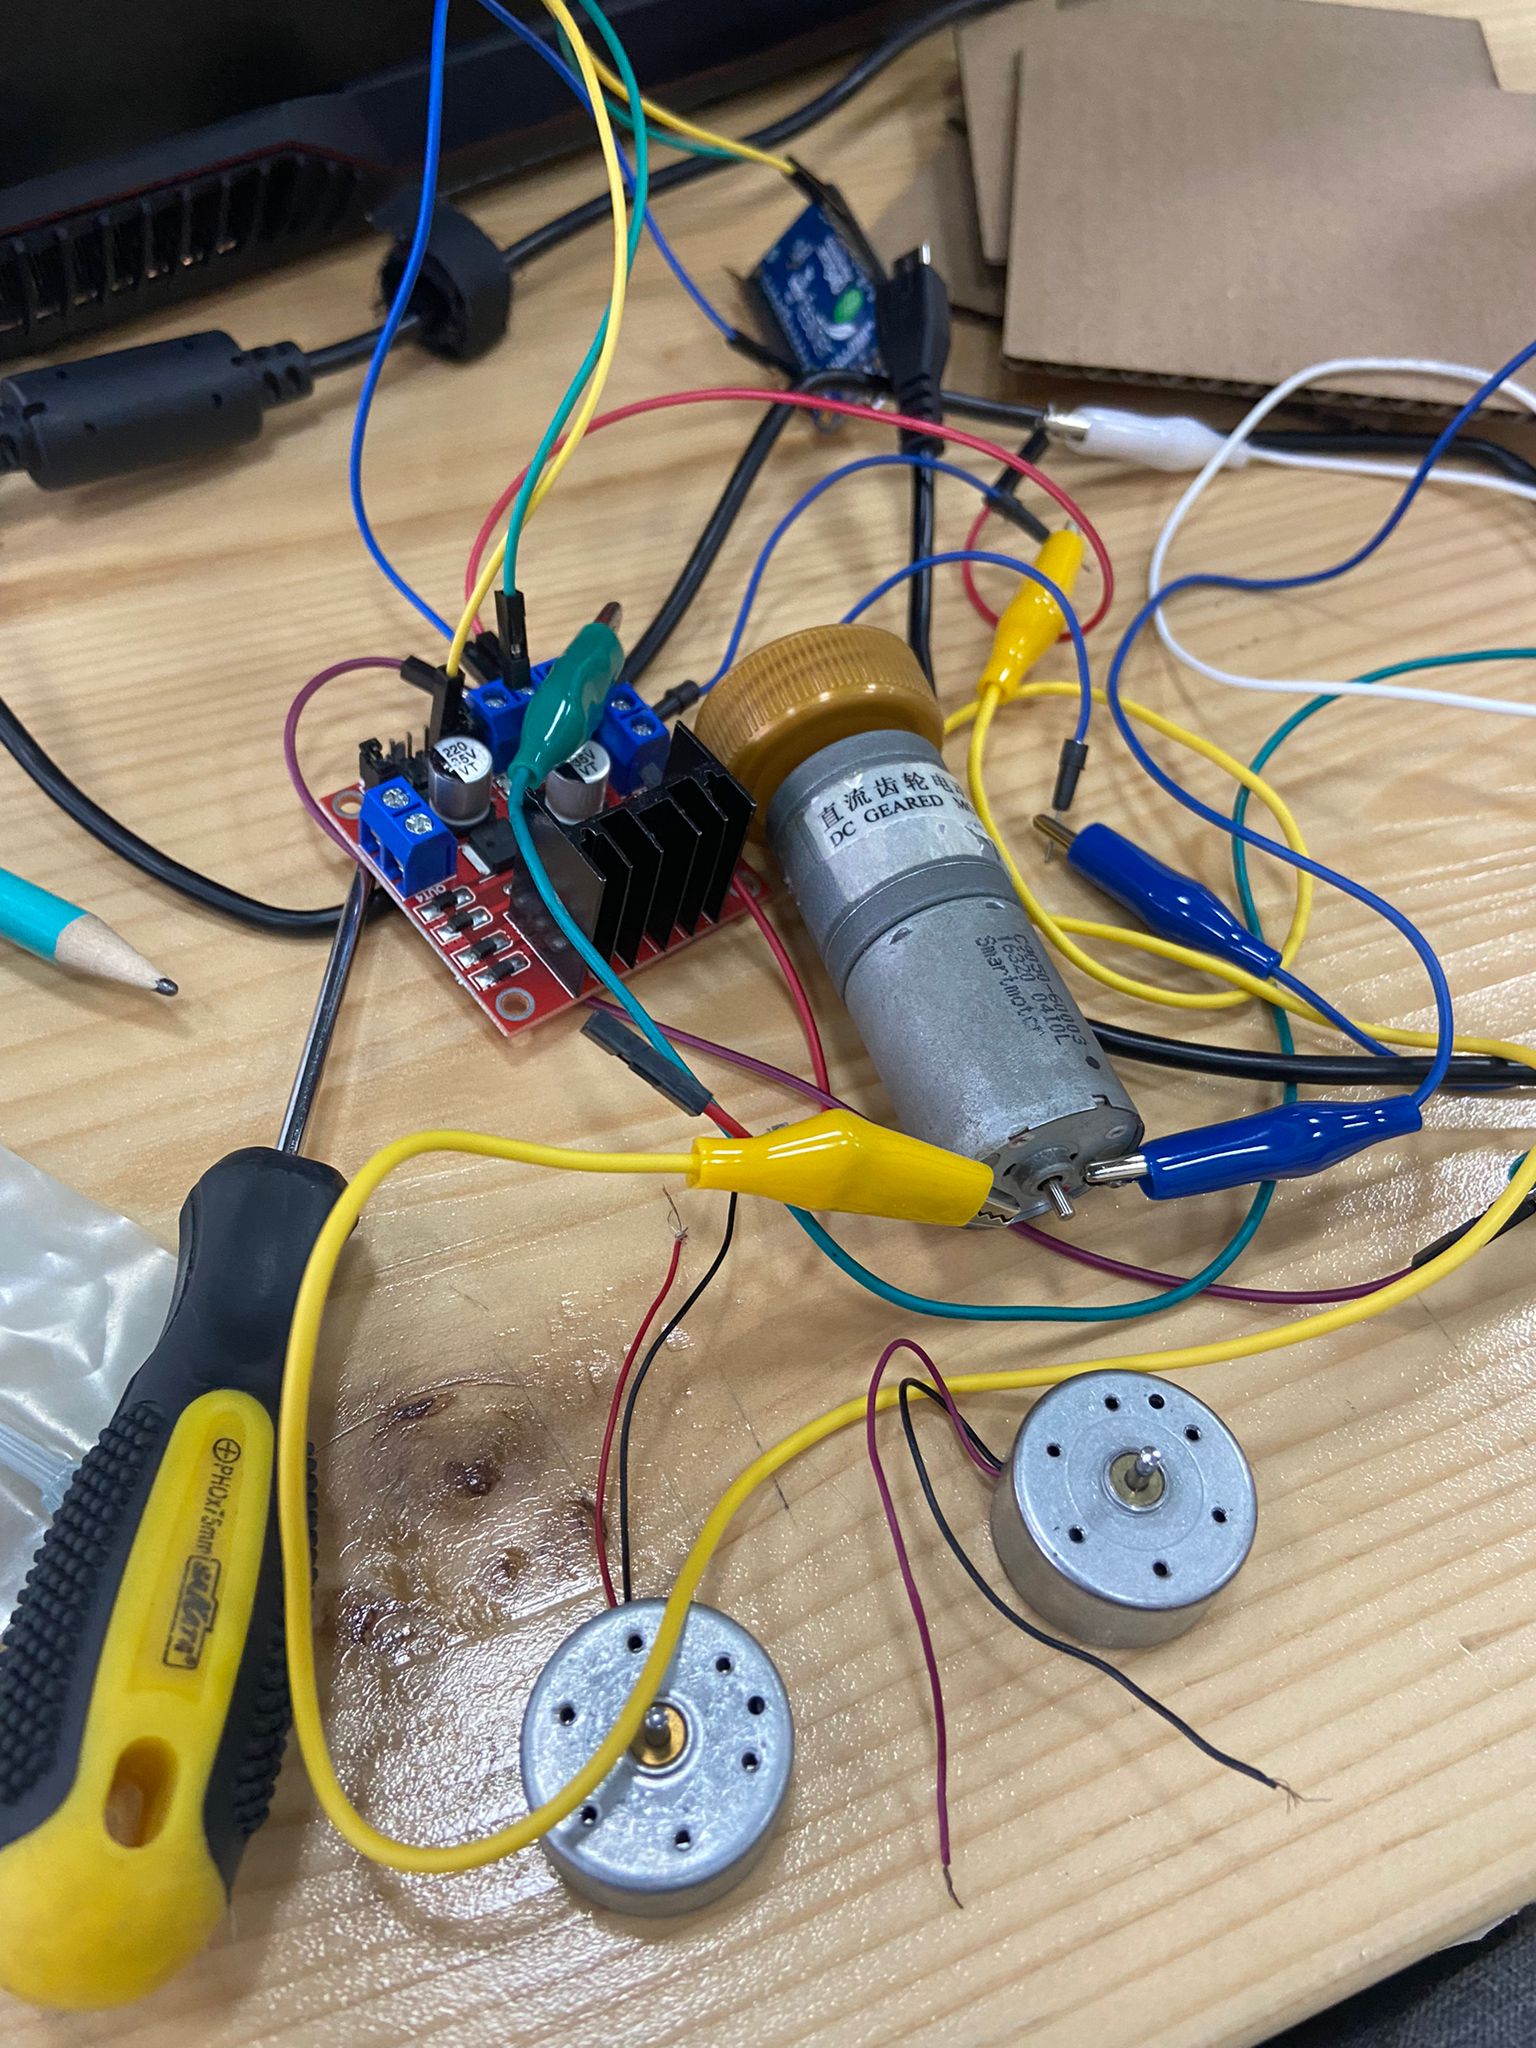
I ran the code and the rotational speed was exactly what I needed for the deployable antenna. This motor needed 12v to run so I had to connect to an outer power source.
Then, I had to make the motor piece that will rotate the antenna. I used Fusion 360 as well to make the design. The piece on the right is for holding the motor while both the middle and the right pieces are for the motor head.
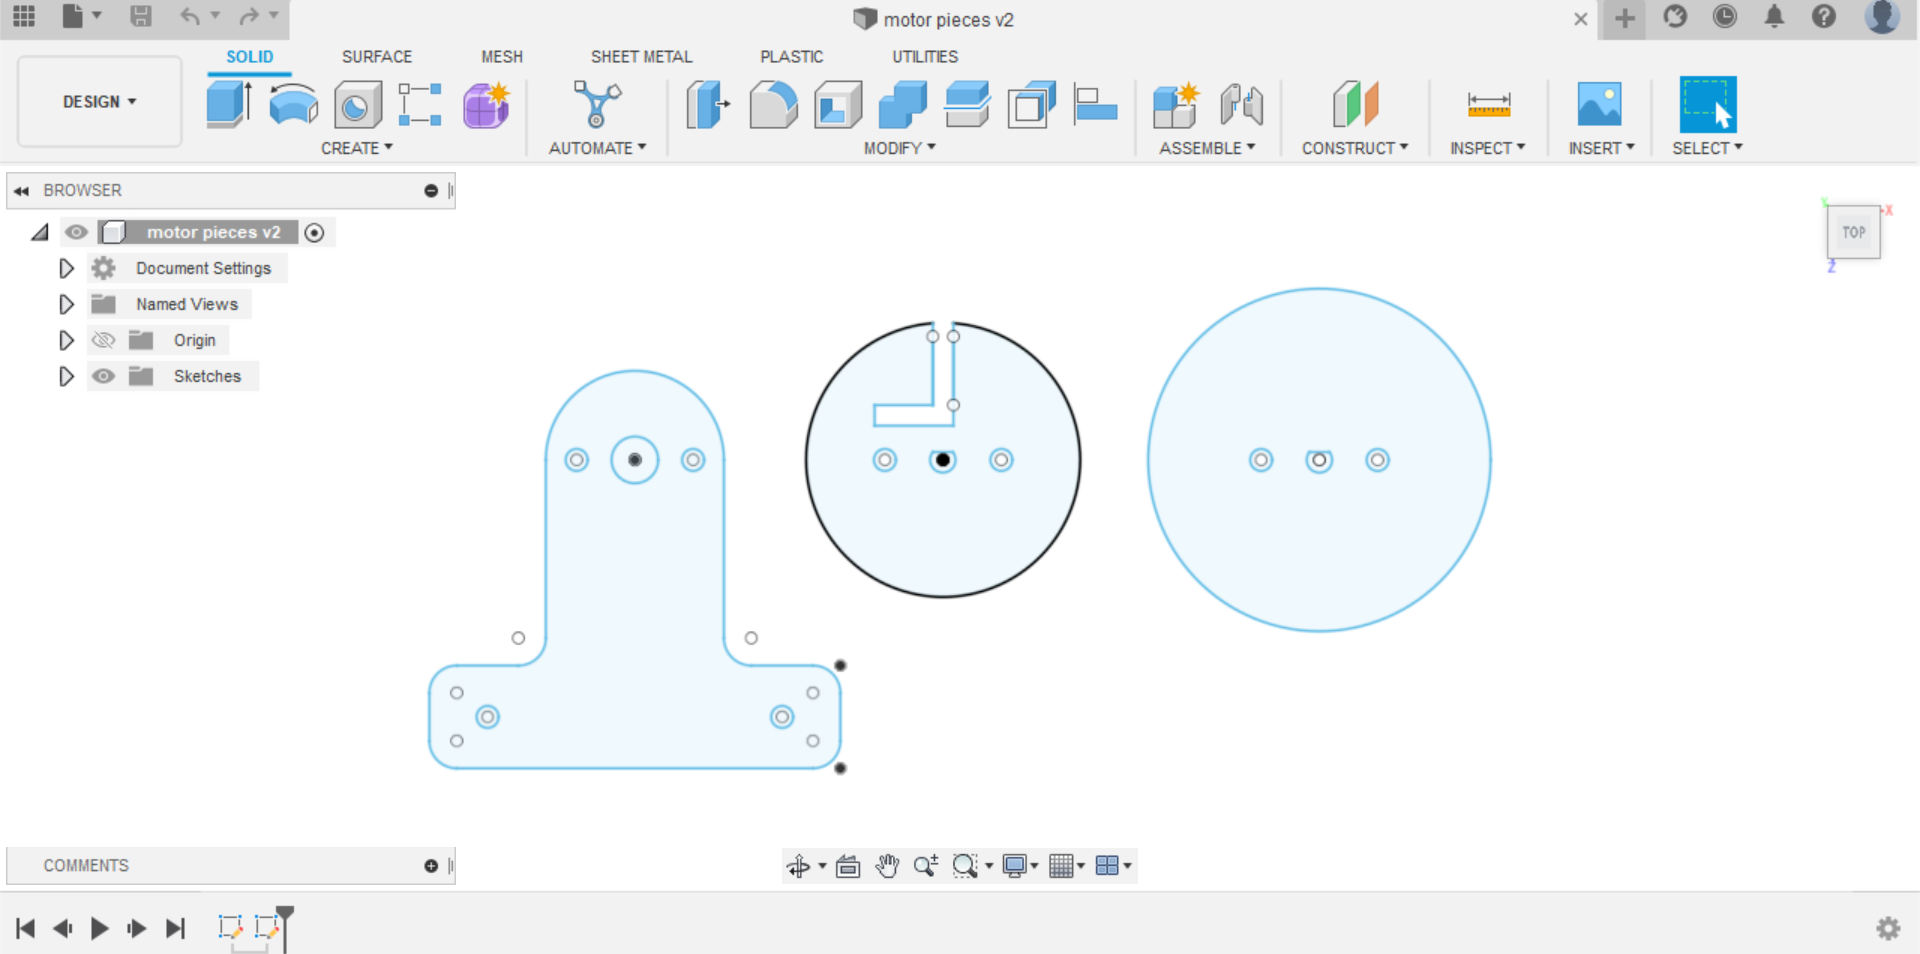
You can download the holder here
You can download the motor head here
For the pieces to be sturdy I was advised to use an acrylic sheet and laser cut them.
Now that the pieces are ready, the holder piece was bent with heat and then everything was assembled.
Circuit Diagram
Here is a diagram of the electronics I used for my project. Some parts are different than the ones I used but they do the same job -I didn’t find them in TinkerCAD-
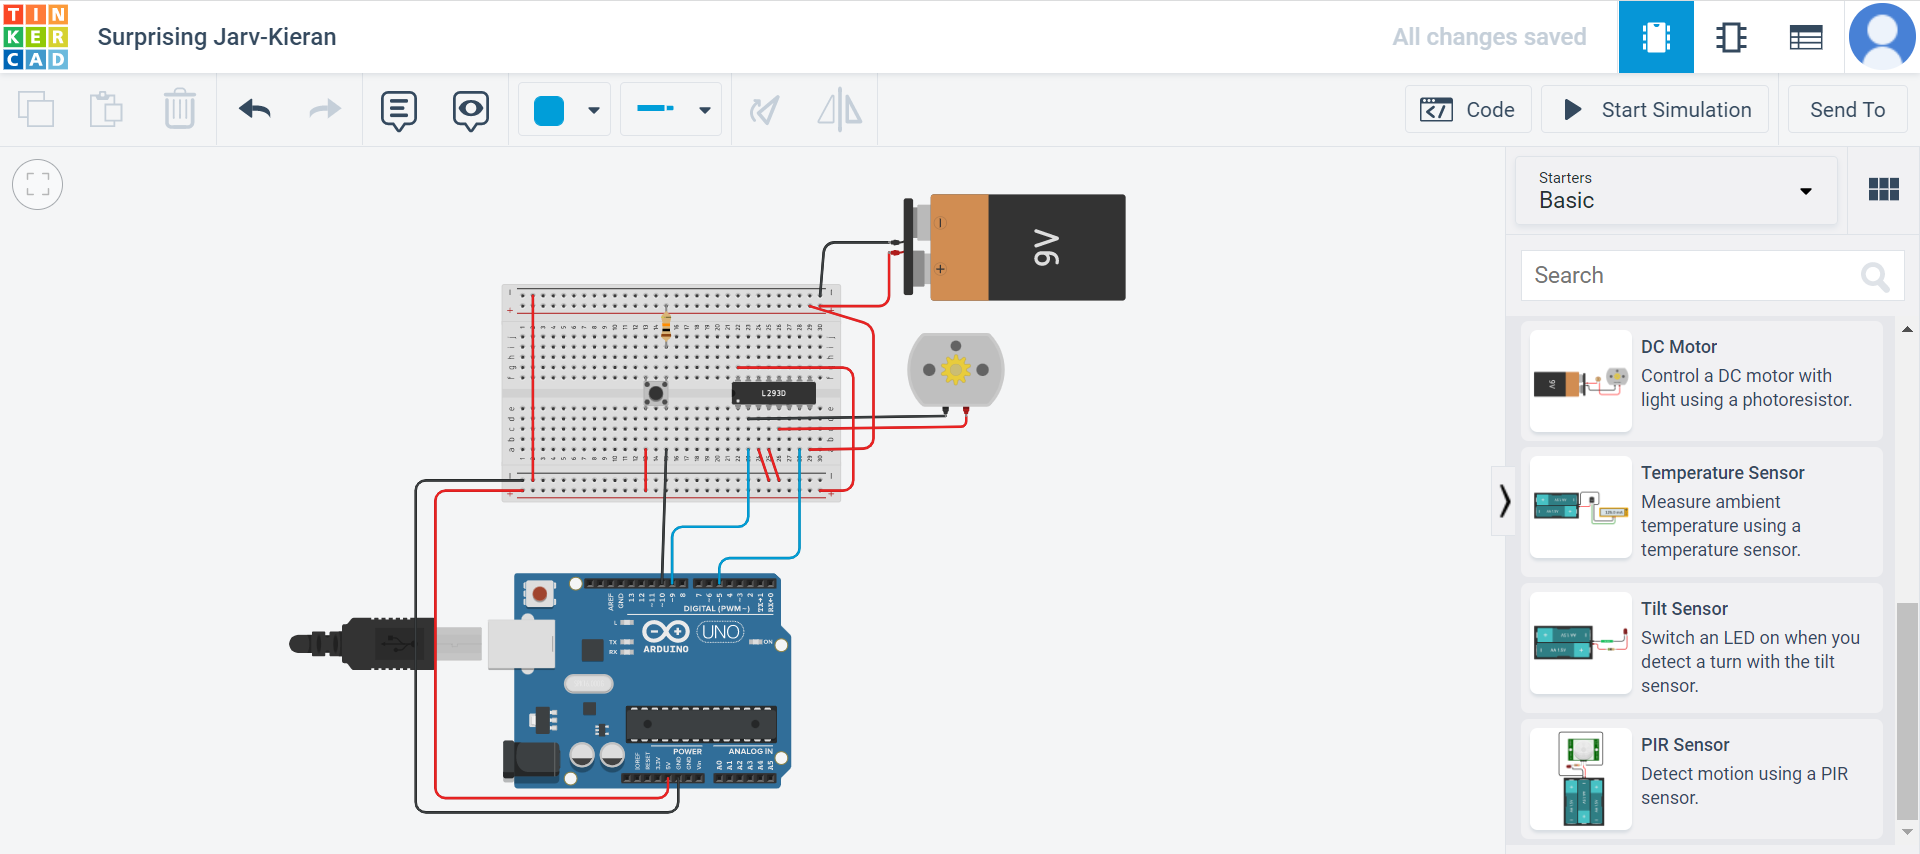
This is the Motor driver I used.
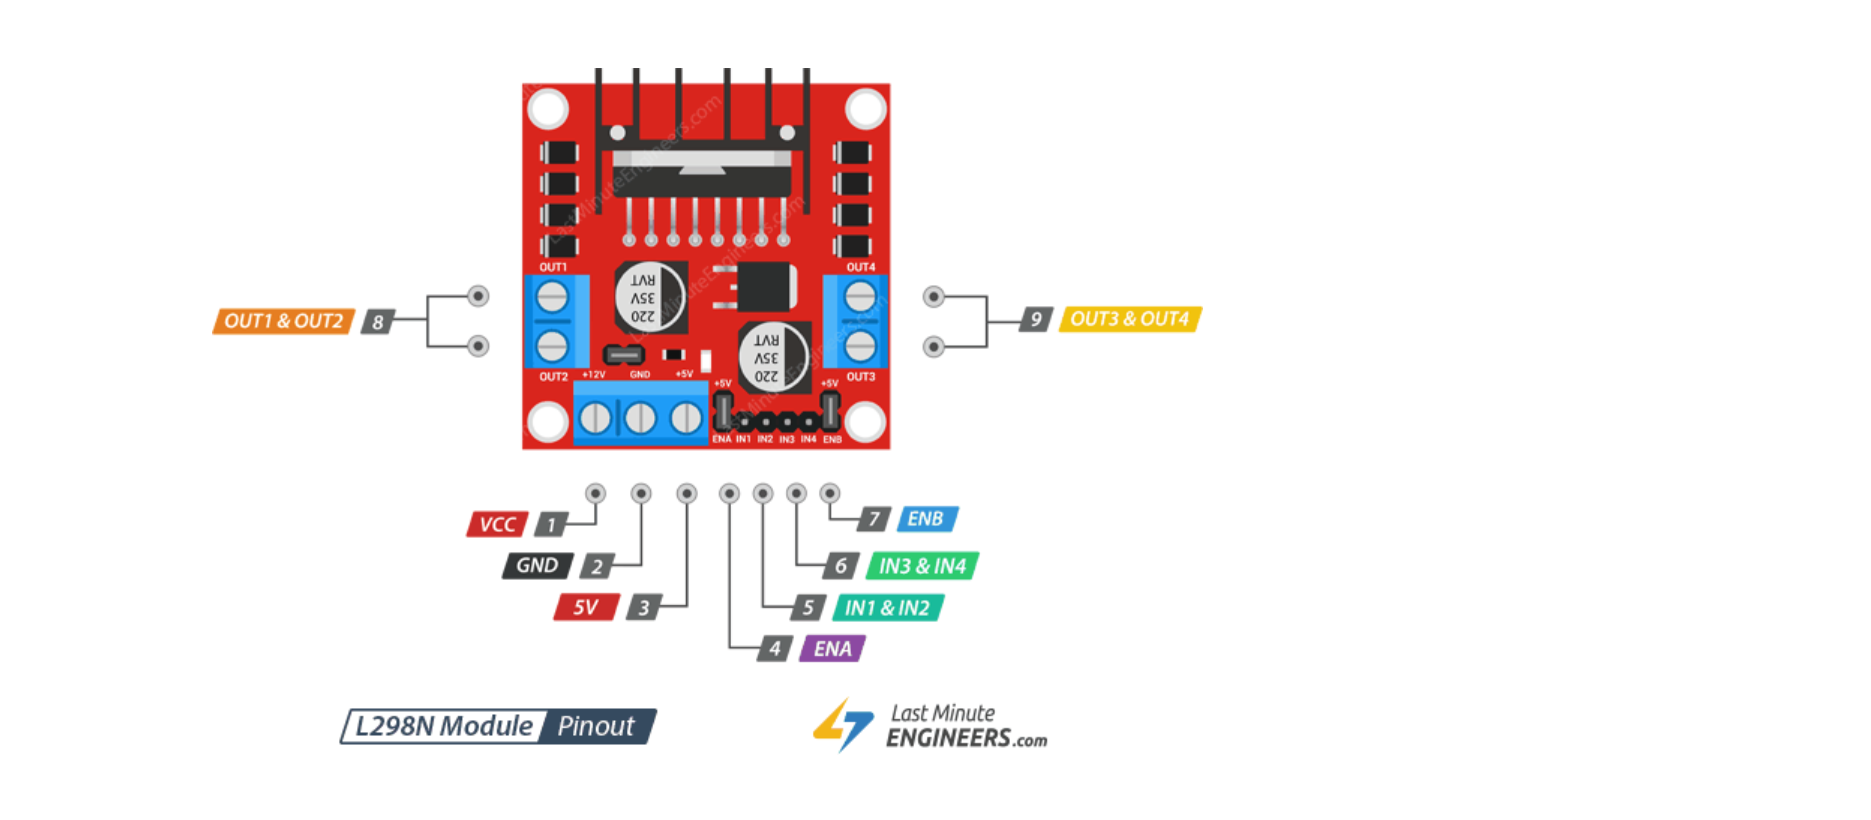
It is important to know that the connections are also different
Mechanism Test and Soldering
I connected the motor with the push button to run a test to ensure that everything is running as intended.
After the test I noticed that the antenna extends in a weird unorganized way. I tried thinking of a way/piece that could reduce this motion. I wanted to use the plastic body of the measuring tape but it was too big. I ended up gluing a bit of the measuring tape on the acrylic motor piece and it worked!
Then, I did some soldering with the help of an instructor to get rid of the unwanted clip wires.
Assembly
2 holes were made in an inner slide to fix the motor on it. Then, I slid the sides on the rails and put the slides in their intended place. With that my project is done! -for now-
Hero shot
Here is a photo of the project:
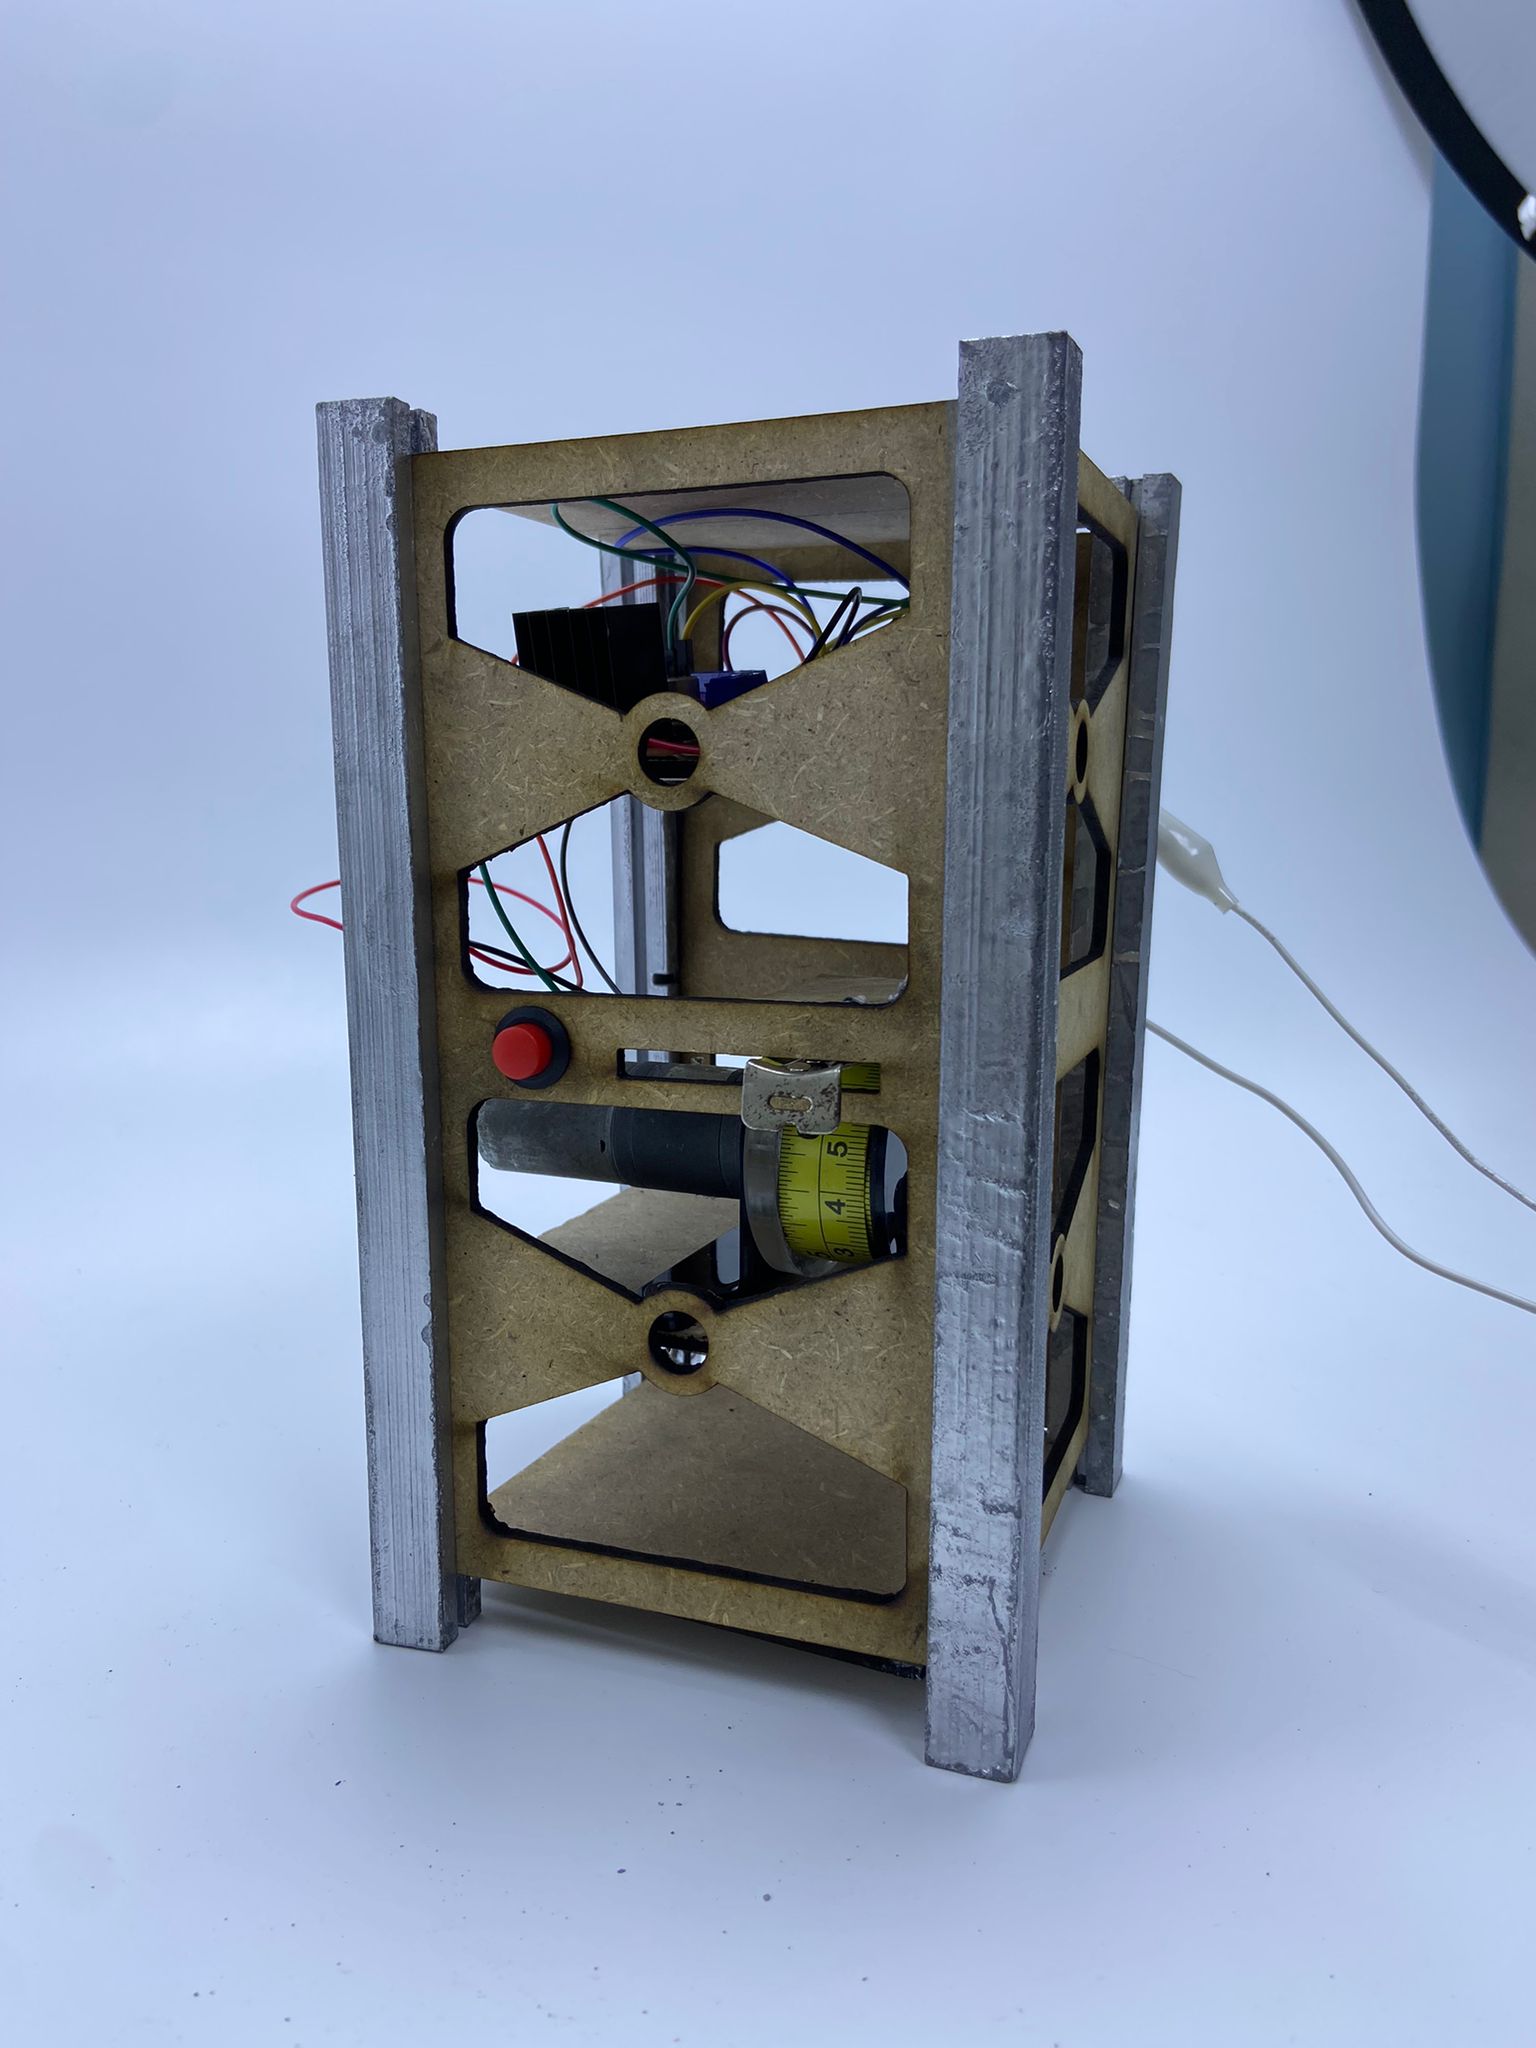 Unfortunately, I did not get the chance to paint the sides but I intend on doing so soon
Here is a video of the deployable antenna working:
It is important to know that deployable antennas in real CubeSats do not use this method, real antennas need to be deployed once only. To see the video of a simple deployable antenna refer to the references
Materials
| Qty | Description |
|---|---|
| 1 | 3mm MDF sheet |
| 1 | DC Motor |
| 1 | Push Button |
| 1 | Grey Spray Paint |
| 1 | 3mm Acrylic sheet |
| 1 | White PLA |
| 1 | 6mm Acrylic sheet |
| 1 | Measuring tape |
The Final Code
After extensive search about the code used with a DC motor and a push button and after running multiple tests, this is the code I used for programming adafruit express microcontroller for my deployable antenna.
#include <SoftwareSerial.h>

int button = 10;
int motorP1 = 9;
int motorP2 = 5;
int buttonState = 0;
bool state=0;

void setup() {
  pinMode(button, INPUT_PULLUP);
  pinMode(motorP1, OUTPUT);
  pinMode(motorP2, OUTPUT);
  Serial.begin(9600);
}

void loop() {
 buttonState = digitalRead(button);
 if (buttonState == HIGH && state==0) {
  //clock wise - extend
   digitalWrite(motorP1, HIGH);
  digitalWrite(motorP2, LOW);
  Serial.println("open roller");
  Serial.println(buttonState);
  delay(4000);
  state =  1;}
    else if (buttonState == LOW && state==1){
    //anti clock-wise - close
      Serial.println("close roller");

    digitalWrite(motorP1, LOW);
    digitalWrite(motorP2, HIGH);
    Serial.println(buttonState);
    delay(4000);
    state=0;}
    digitalWrite(motorP1, LOW);
    digitalWrite(motorP2, LOW);
      Serial.println("turn off motor");
          Serial.println(buttonState);


}
Note: The code includes extra lines we used for checking the button states with a serial monitor
Future Enhancements
Possible enhancements that can be added to the project:
- Add 3D prints of the subsystem components inside the model
- Add solar panels
- Add different deployable components: Different types of deployable antennas or deployable solar panels to demonstrate the technology
- Make a family of CubeSats with different sizes
Lessons Learnt
Technical:
-
Testing, testing and always testing: Sometimes mechanisms that are supposed to work do not work so make sure to test all the time.
-
Make your design parametric because you don’t know when will you need to change the dimensions of your design.
-
When designing, keep even the smallest detail in mind and think about how will the parts fit in your project constantly.
-
Even if it takes more time, make a prototype to ensure that everything fits perfectly (cardboard + laser cutting machine = magic!)
-
If there is a problem with the design -or anything- that is taking an awful lot of time to solve you can maneuverer around it and find something else instead of wasting your time.
References
- What is a cubesat?
- DC motors and Arduino
- Push button code
- TinkerCAD
- CubeSat Deployable Antenna
- CubeSats Subsystems