3. Computer controlled cutting
Week 4
A form of manufacturing method in which the machine is controlled by a computer is known as digital fabrication. Processes operating on the physical and/or chemical characteristics of the materials utilized are classified to: Additive: Like the 3D printer. If you feed it plastic, it will dissolve and make the design you choose. This form of production has the disadvantage of producing a lot of waste material as compared to the other. Subtractive: This sort of production is used by CNC and laser cutters to cut out/engrave or score the pattern onto the material supplied. This is the one we will be working with this week.
Group assignment
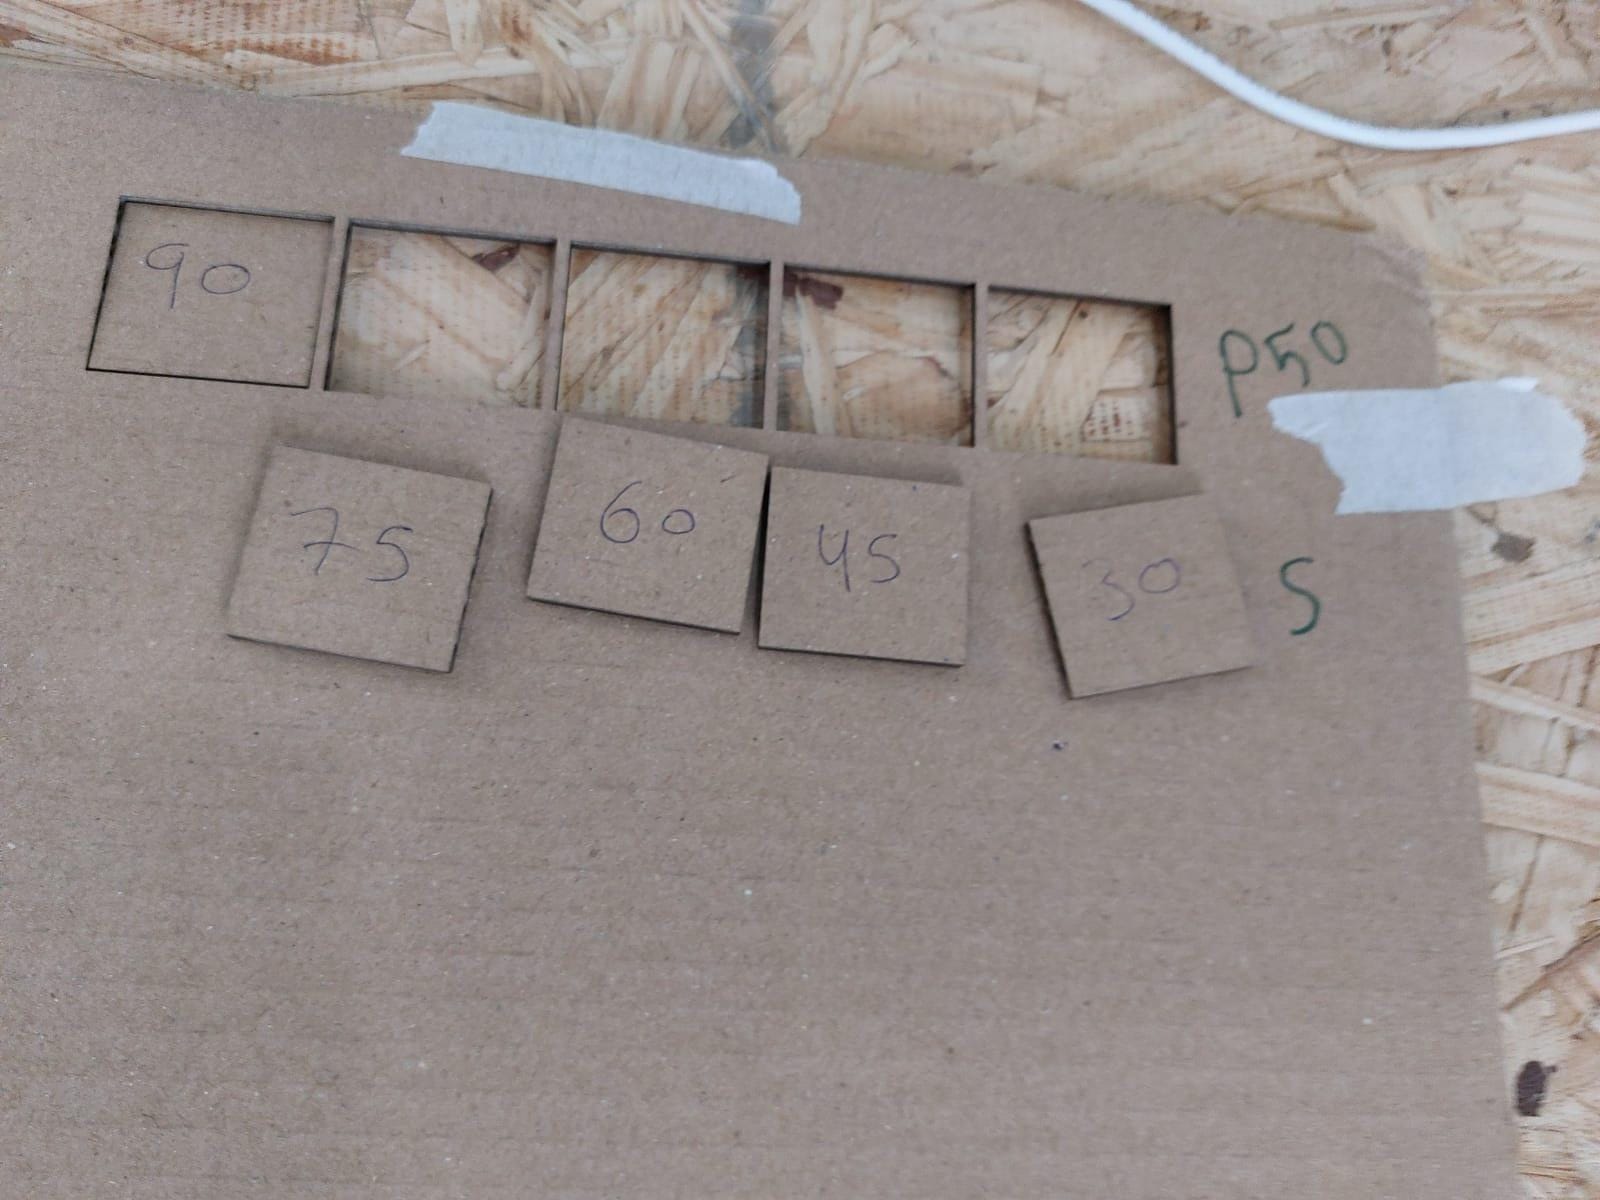
We were separated into four groups for this week’s group assignment, and each group had to try out different characteristics and features of the laser cutter before we could start designing and laser cutting. Group 1 was given the job of identifying the best power and speed for laser cutting on cardboard. The focus of the laser cutter was to be tested by group 2. The Kerf was to be tested by group 3 (me and Noor), while the joint clearance was to be tested by group 4. Before we start the design process, we need to test all the critical components. Here are the outcomes of all the testing:
1- Power and speed:
Power=50
Speed= 75
2- Focus:
focus laser cutting needs to be accurate and to check everything before executing so the cut will be as neat and clean as possible. also, the closeness of the laser to the object effects the result of the cut because if the laser is far from the object, the laser will not cut the object, but it will reheat it which can lead to reshaping the object depending on its material. plus, the object must be placed on
a surface to elevate it so the laser can cut it.
You can find the rest of the results from Noor’s page.
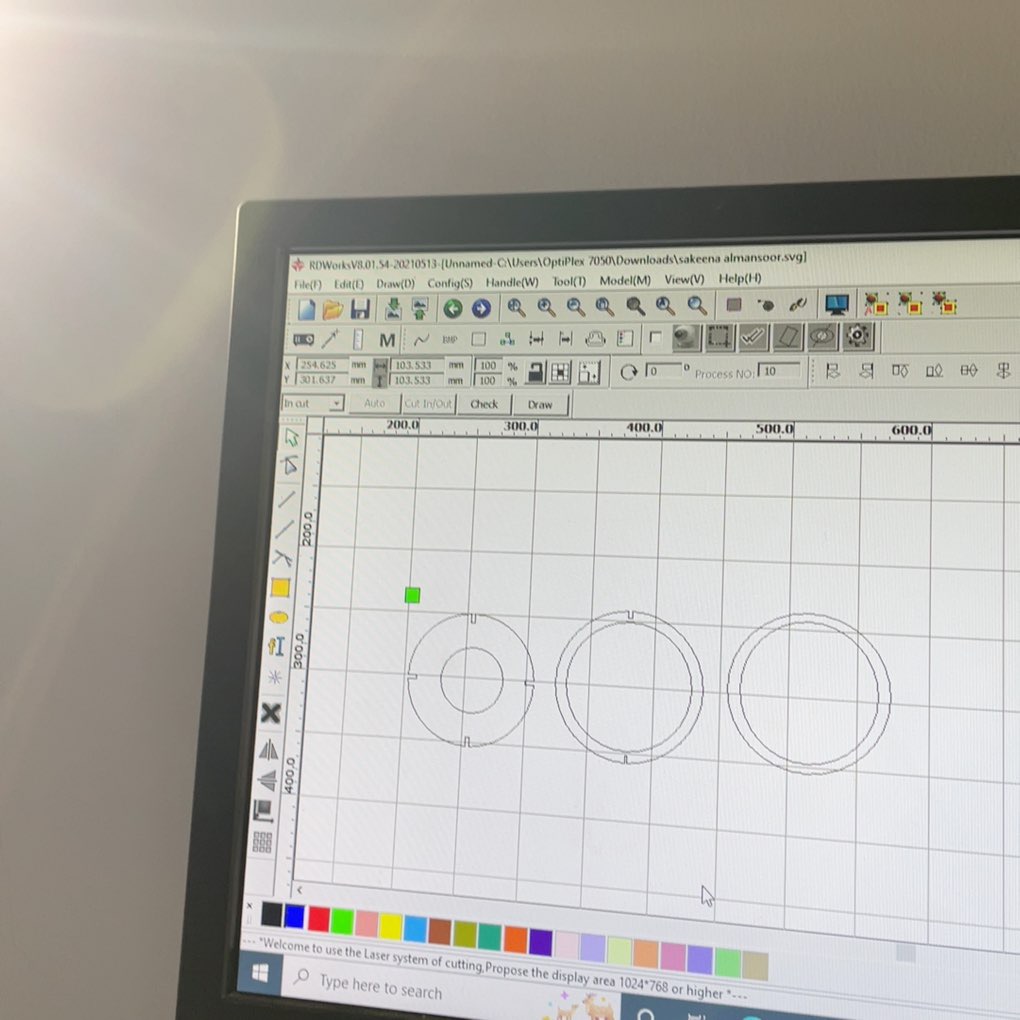
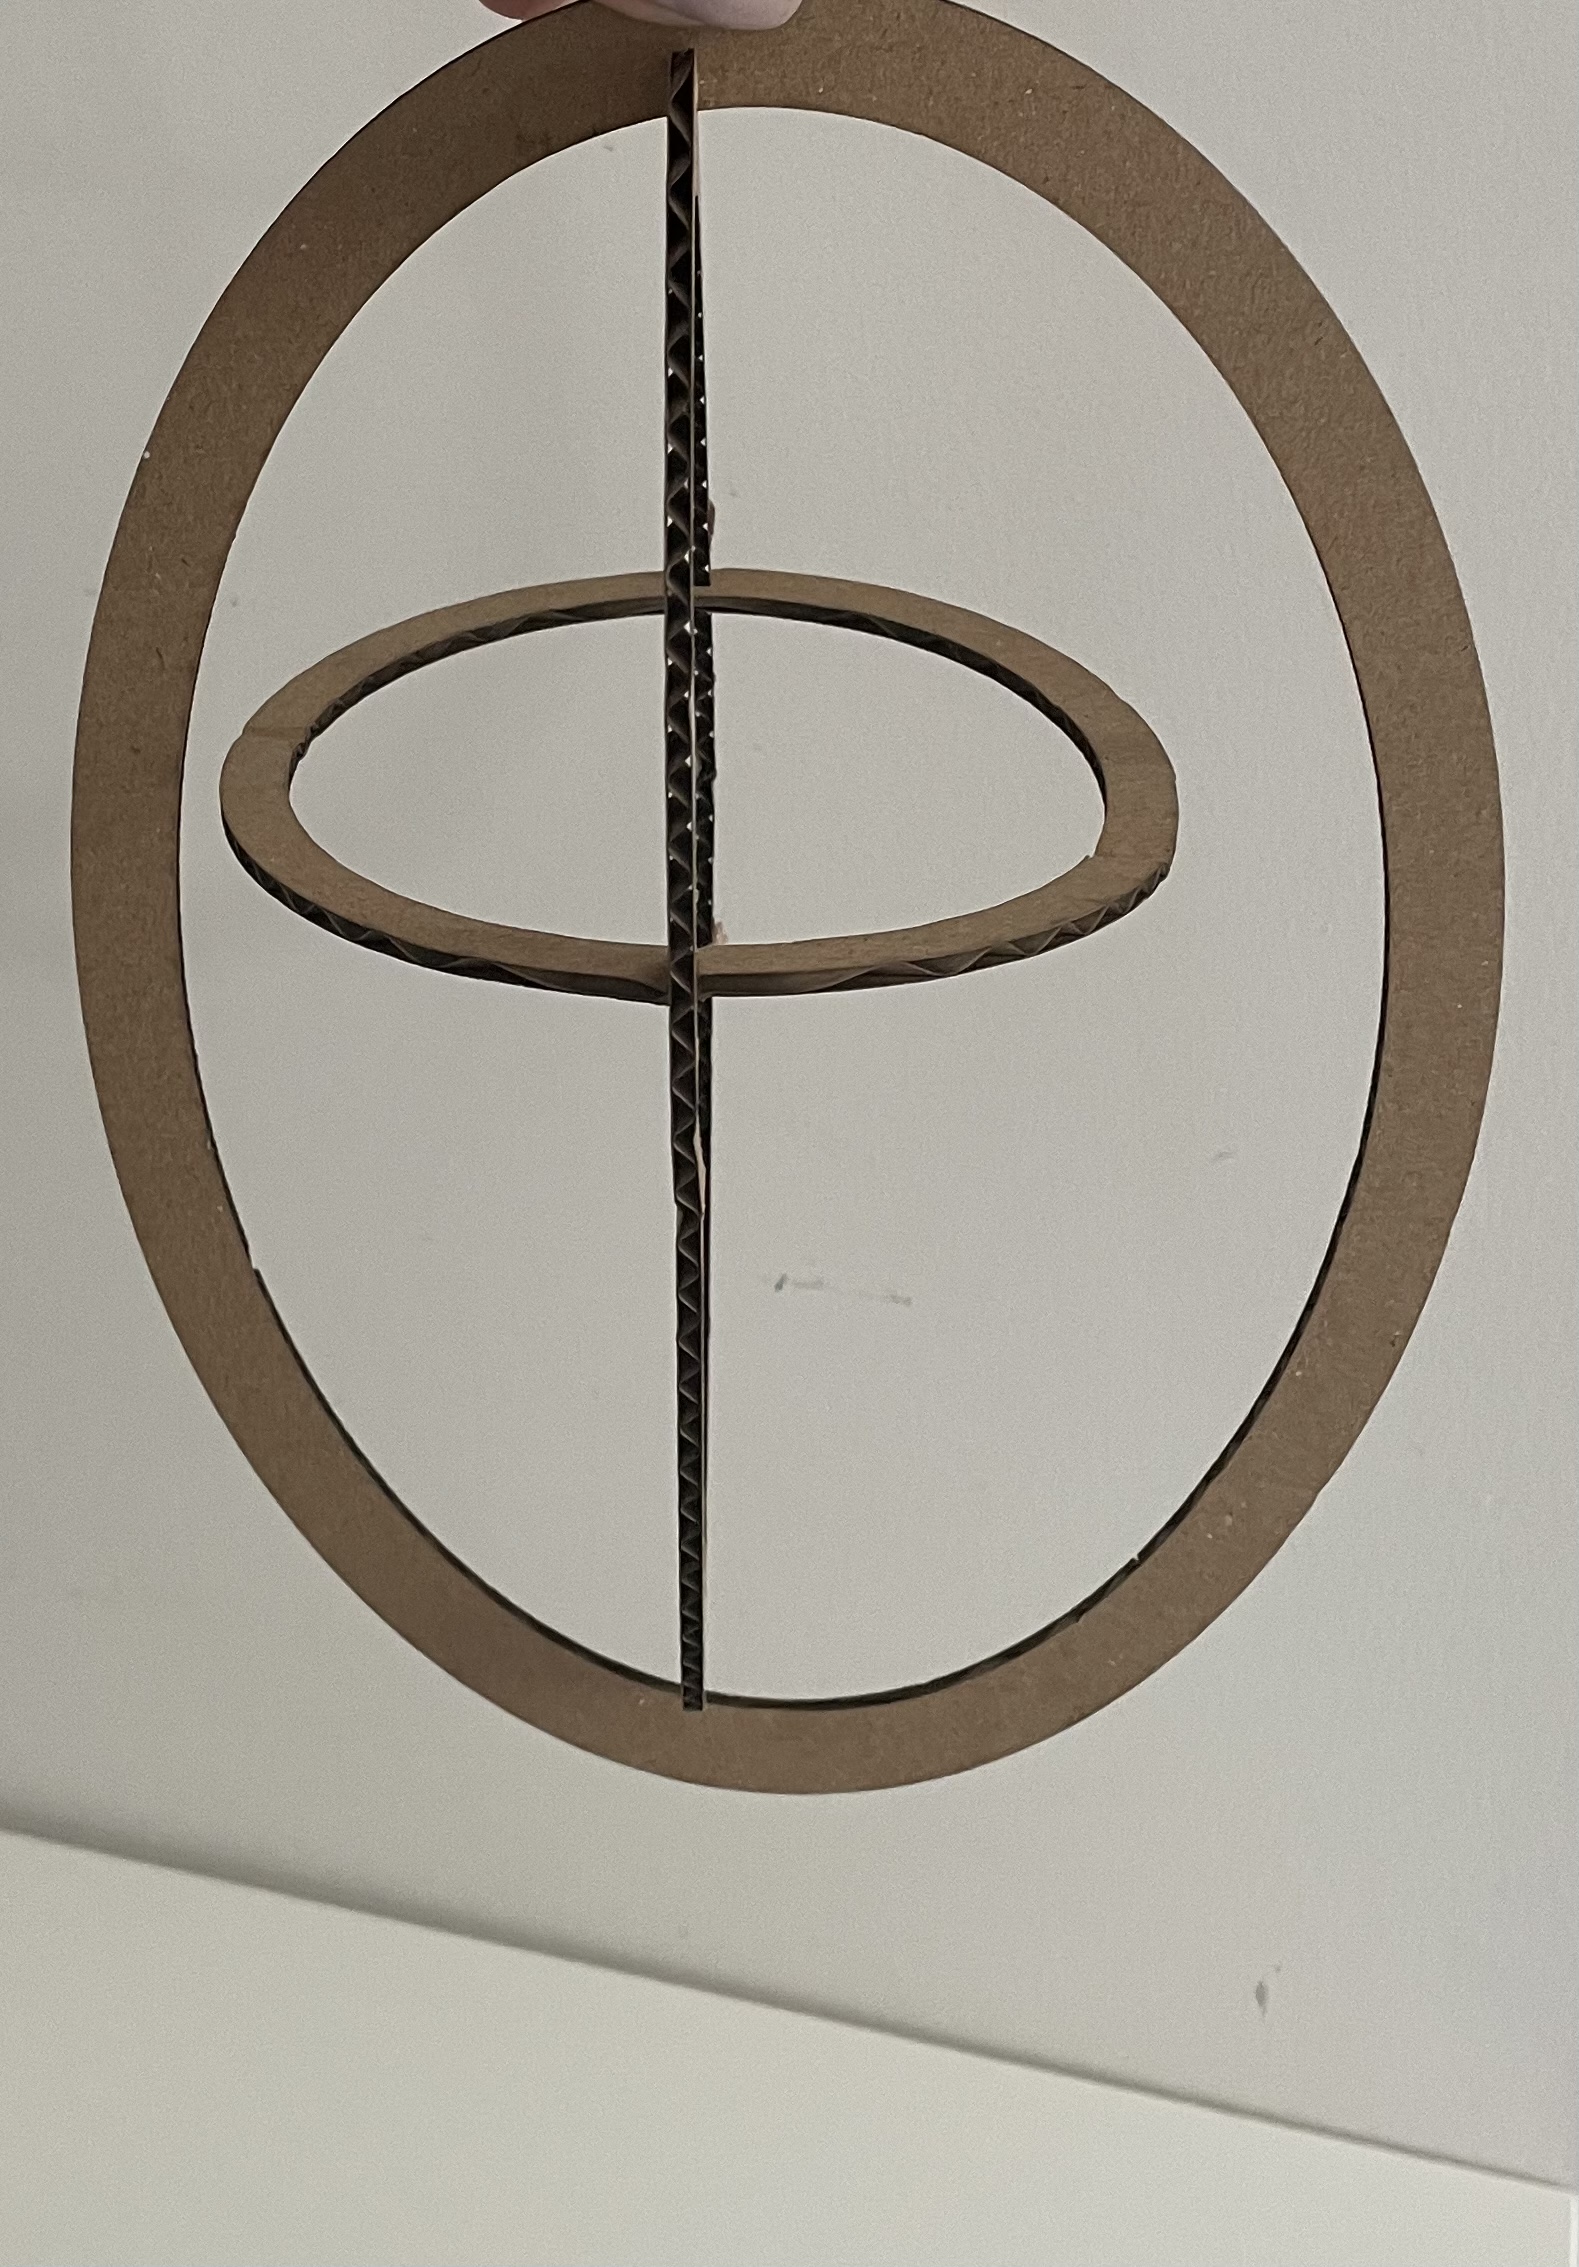
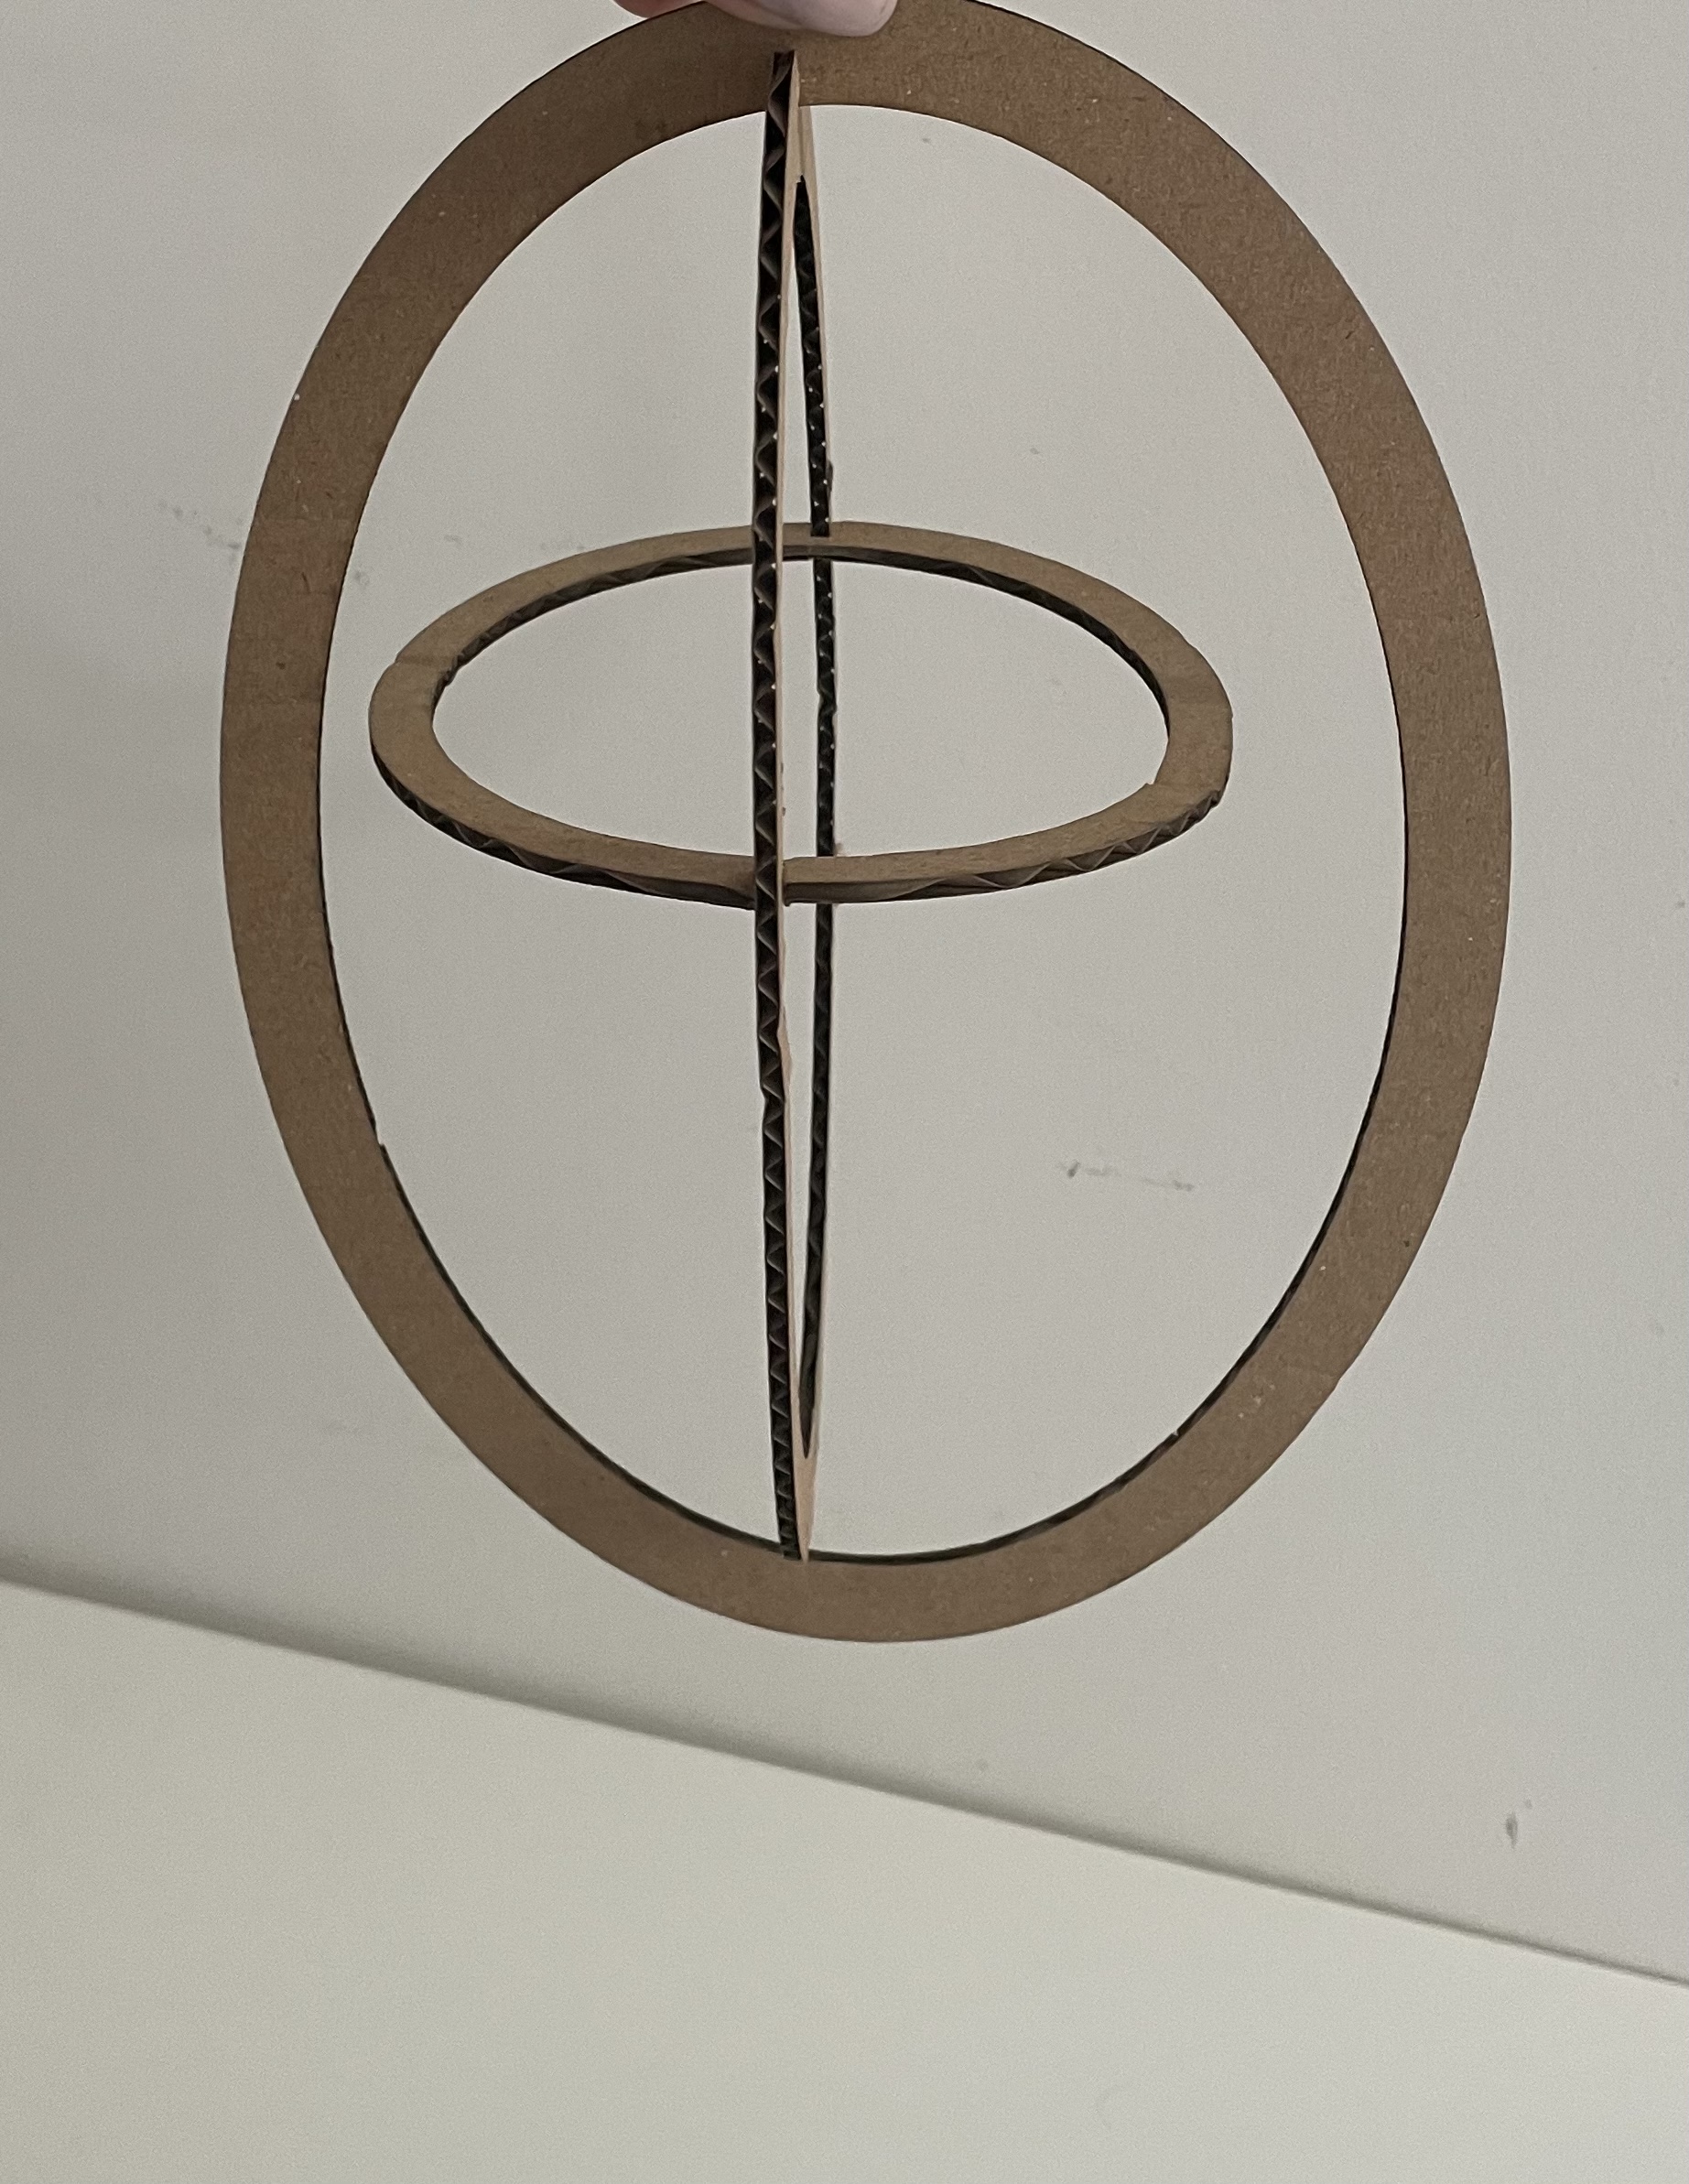
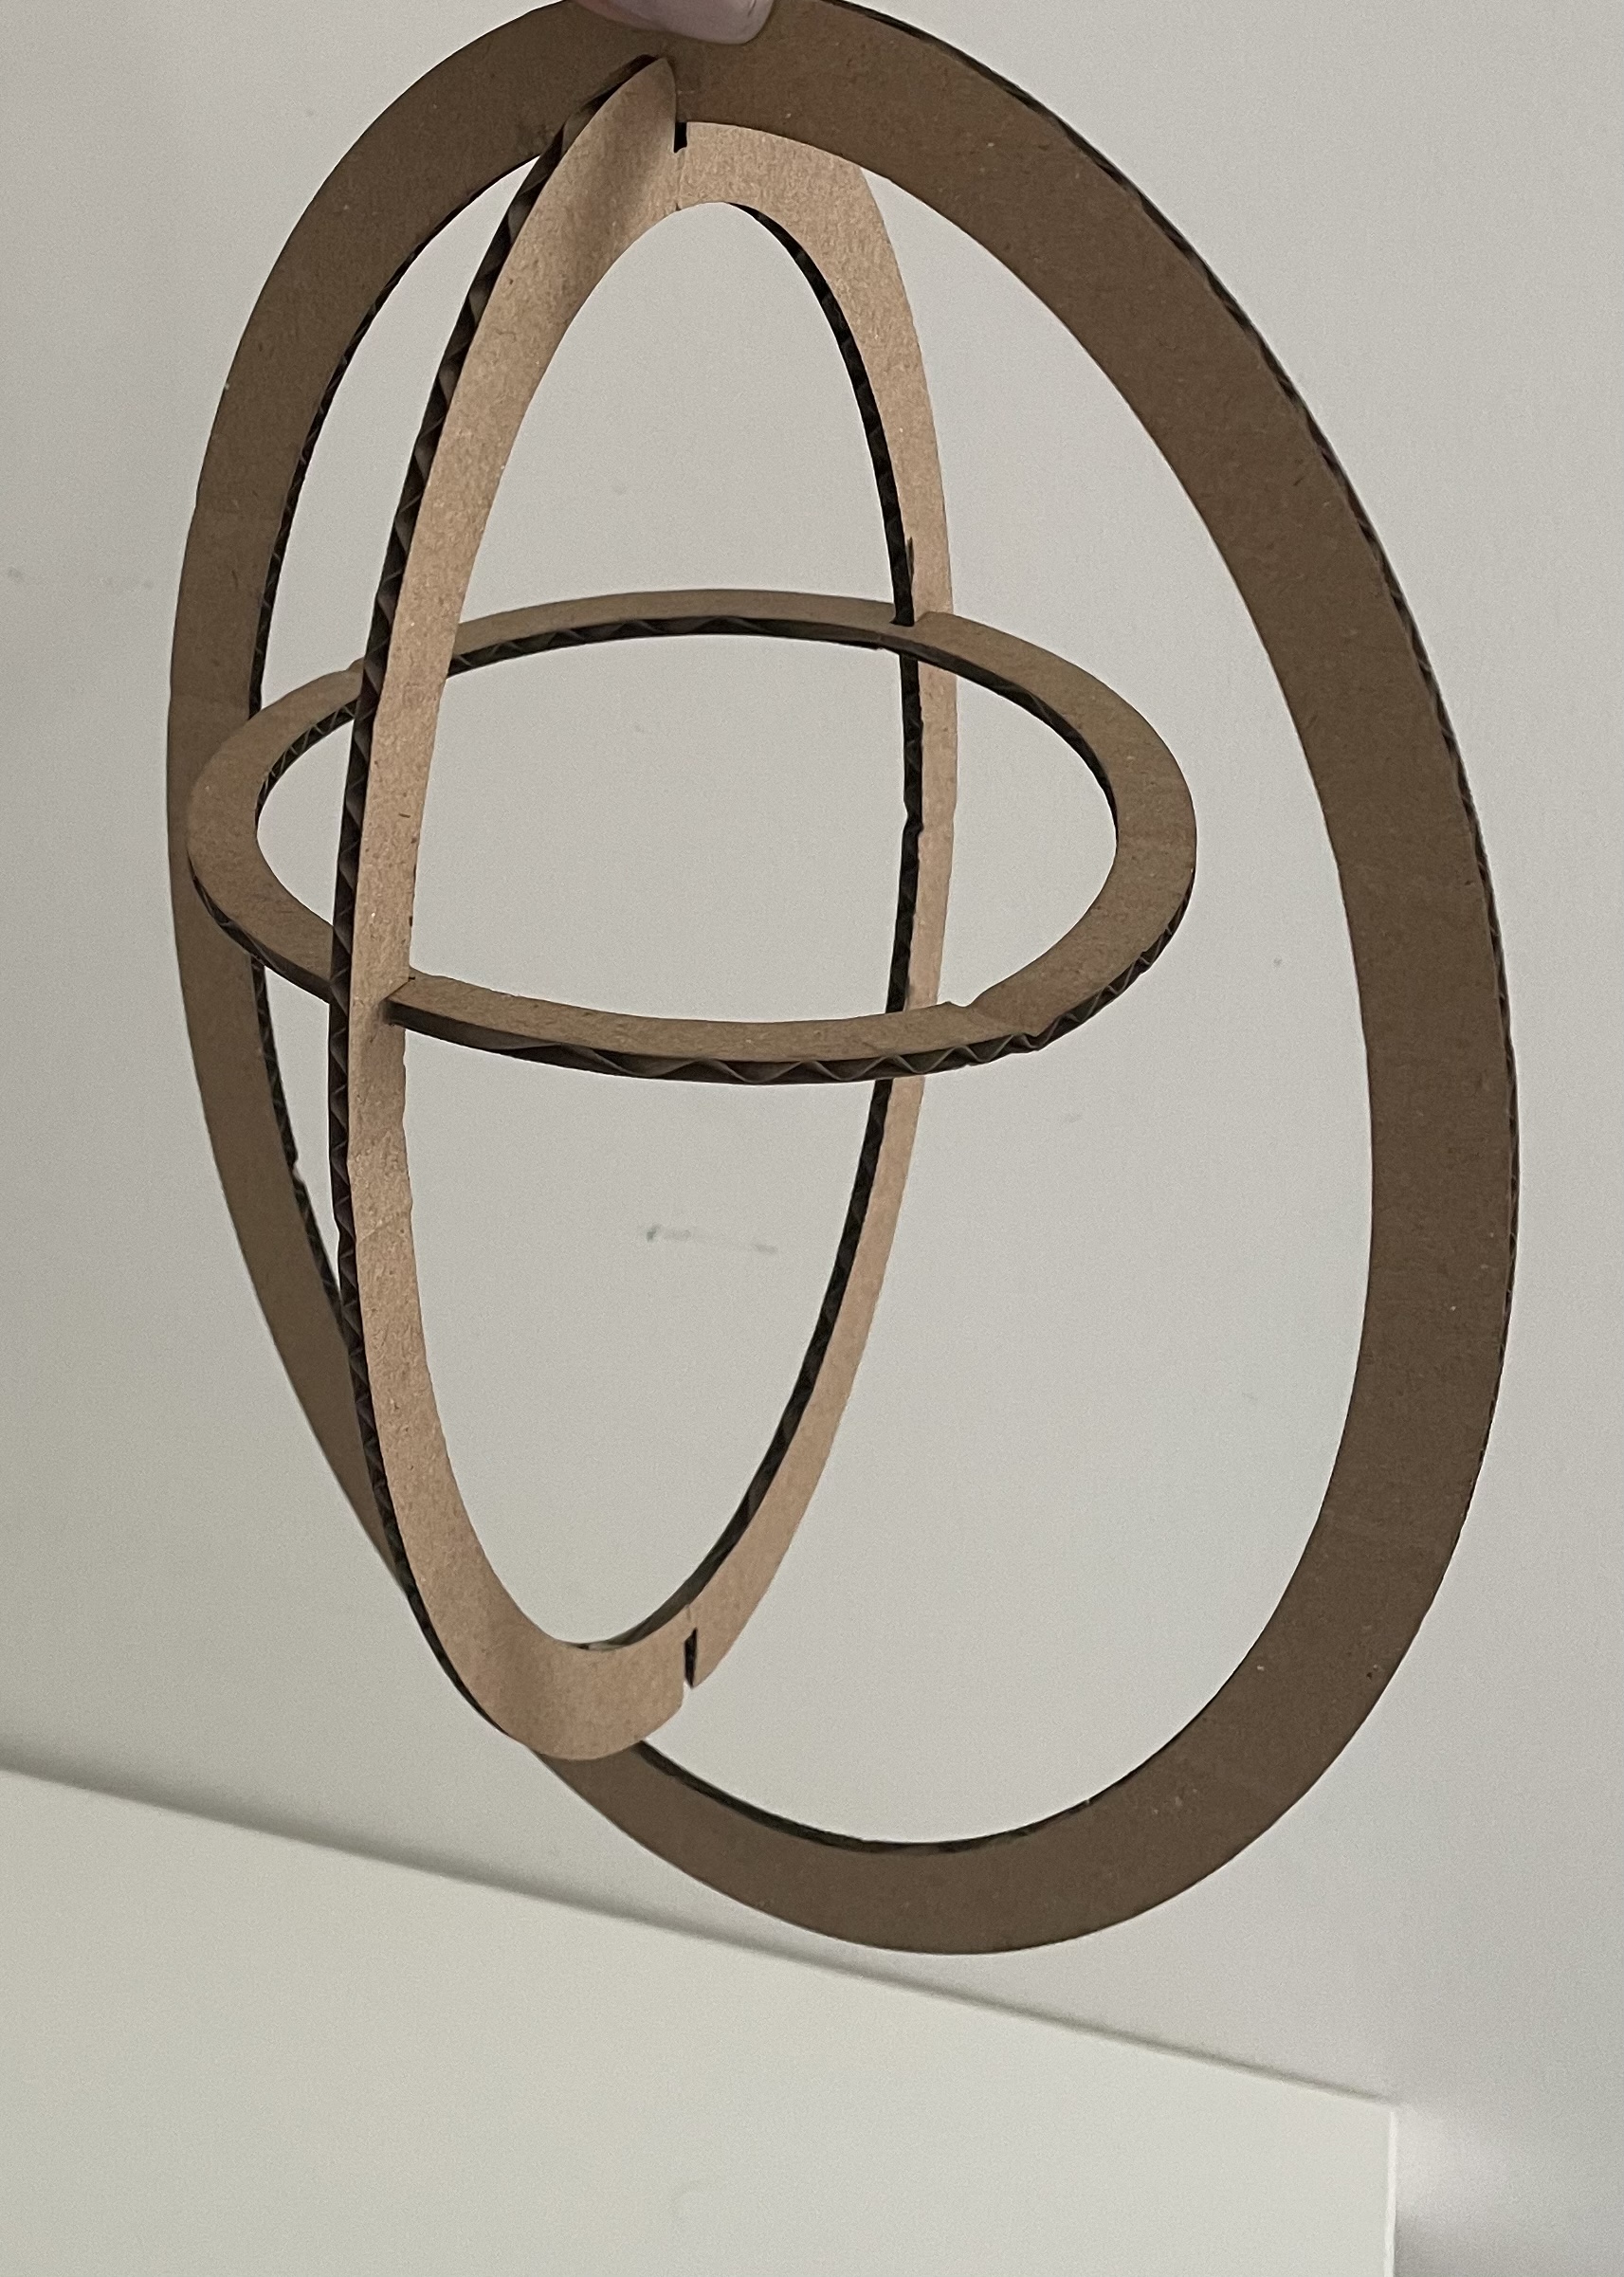
My parametric design
In contrast to being directly designed, features (such as architectural and engineering components) are shaped using algorithmic procedures in parametric design. This approach establishes the connection between design response and design intent using parameters and rules.
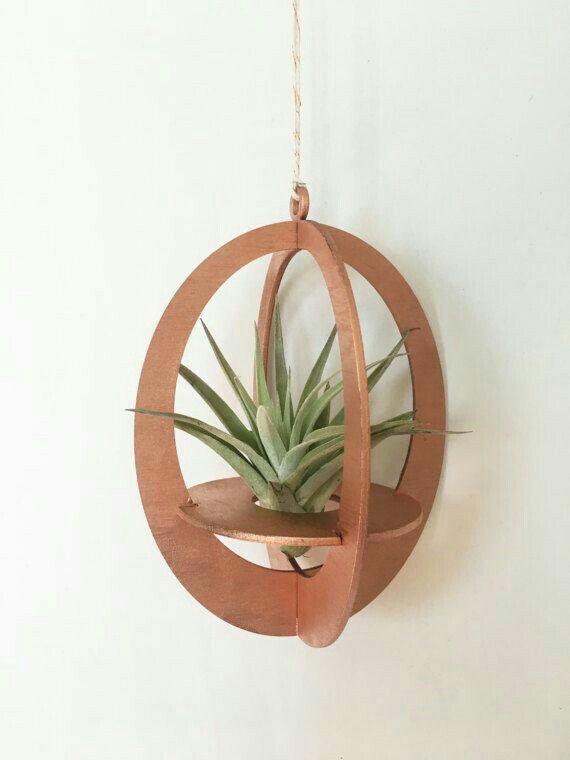
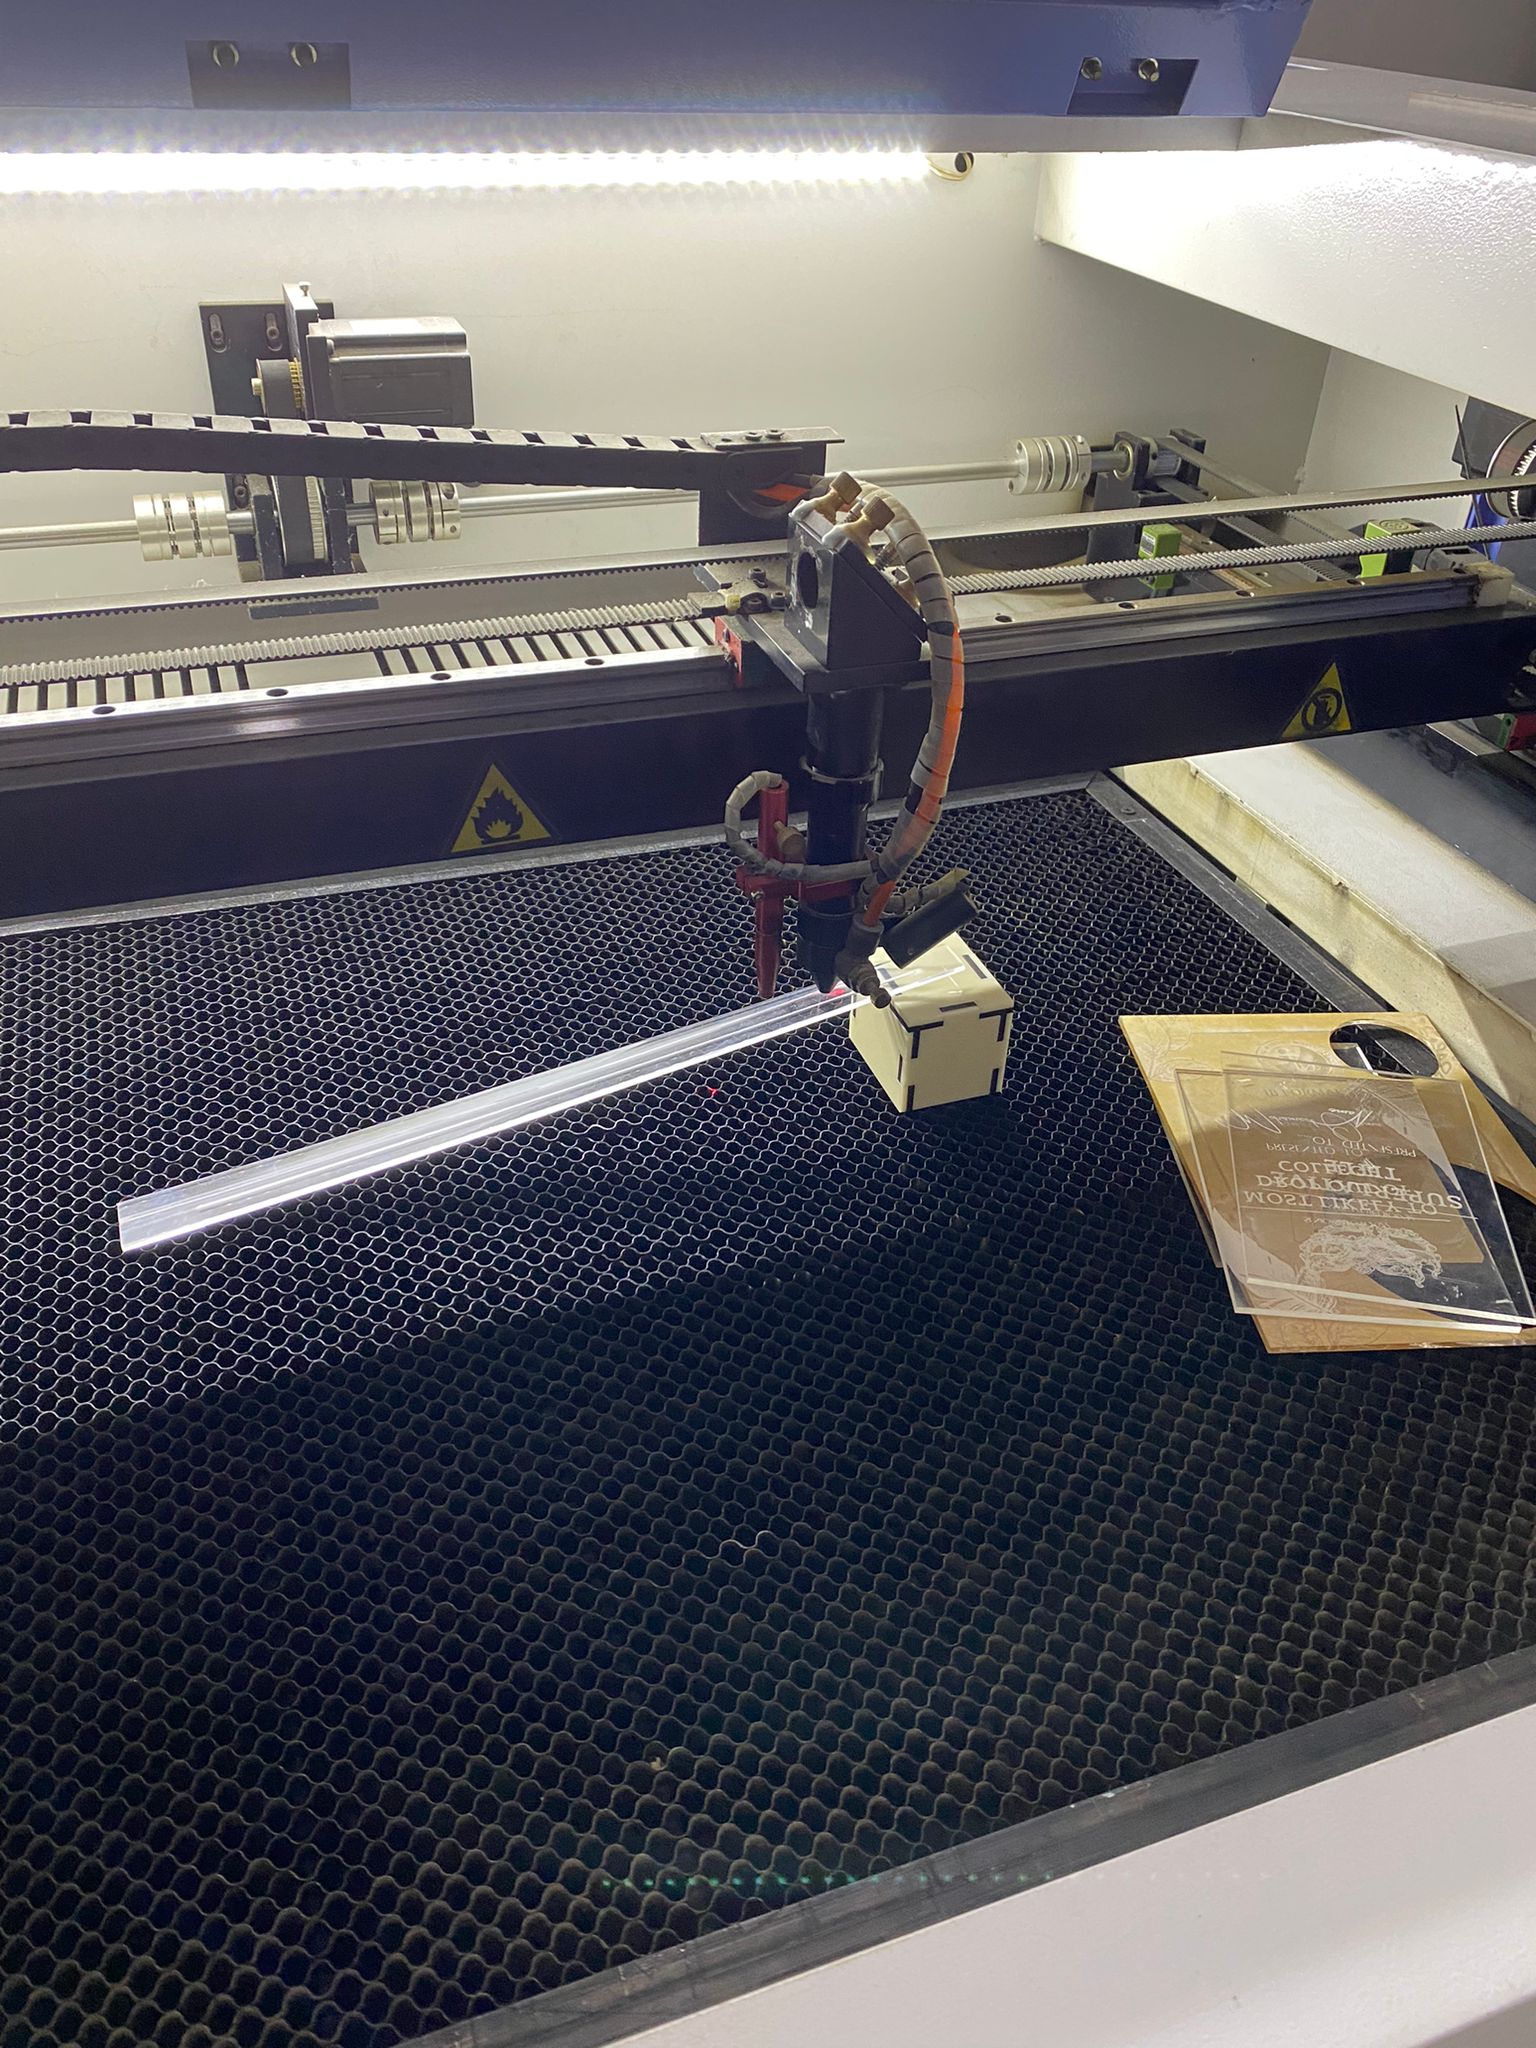
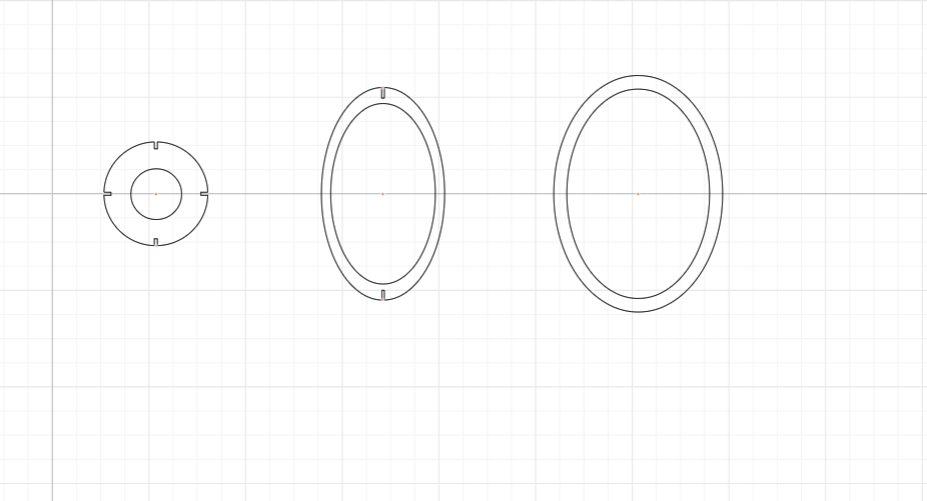
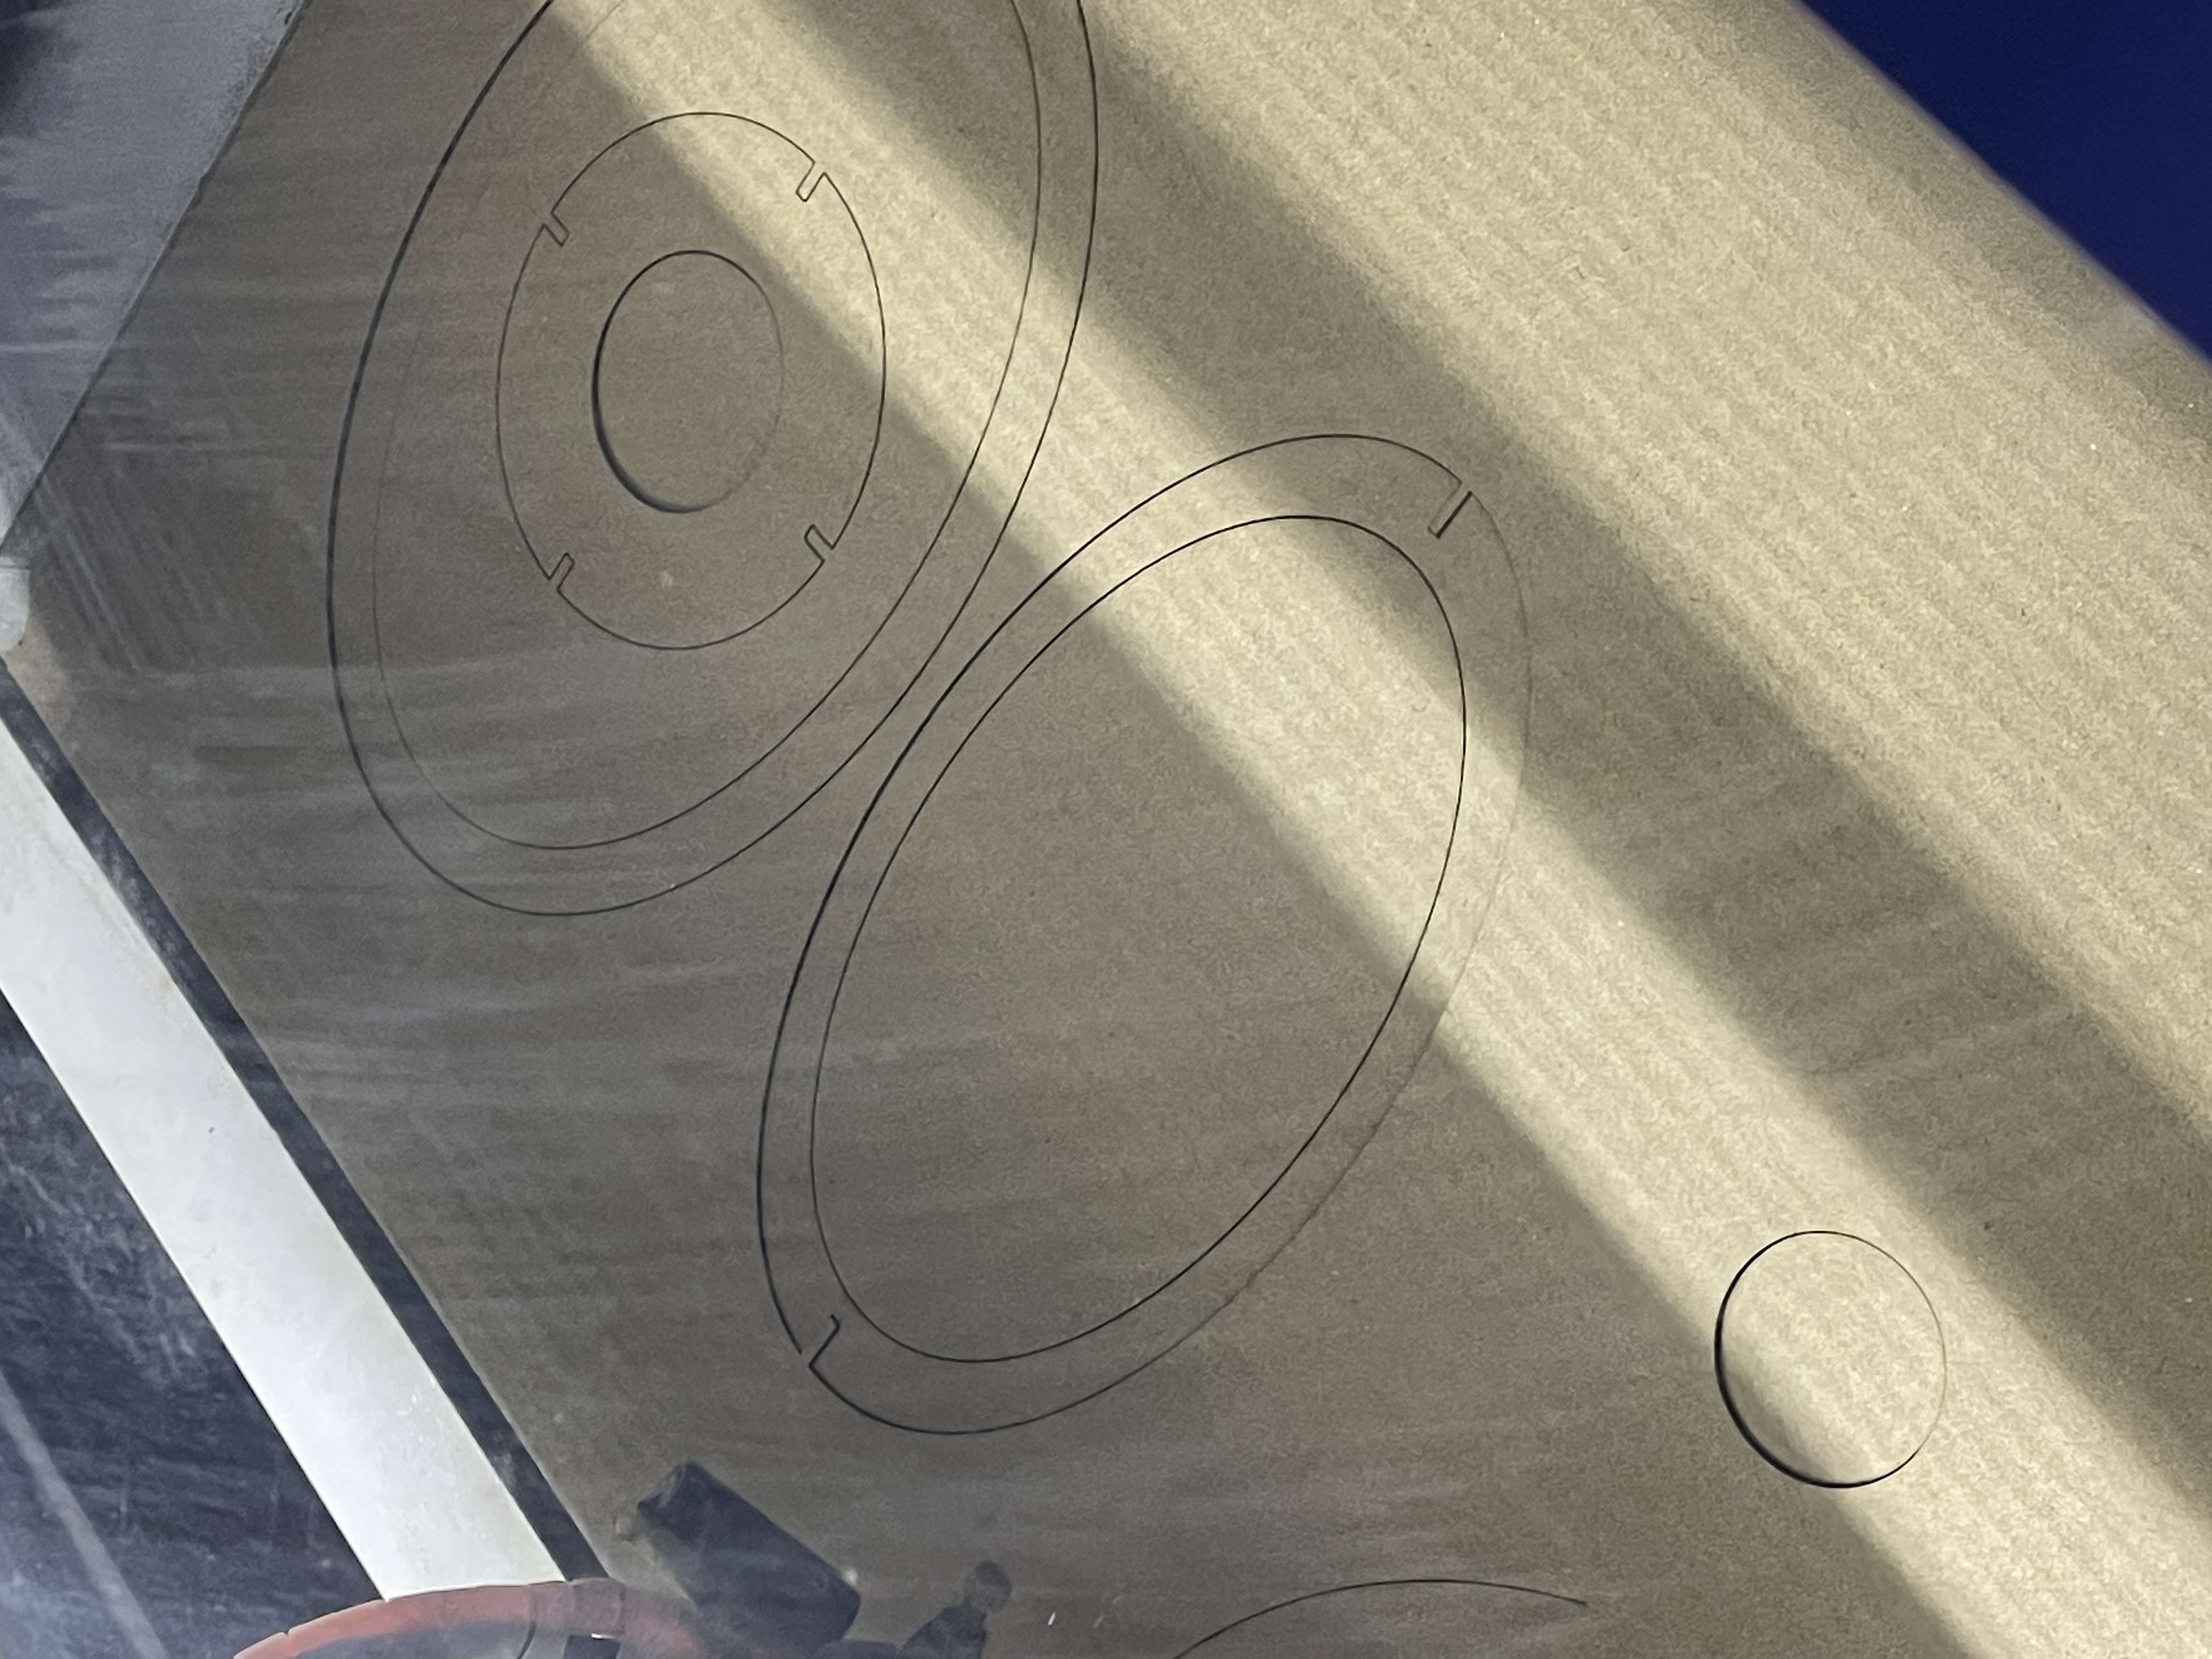
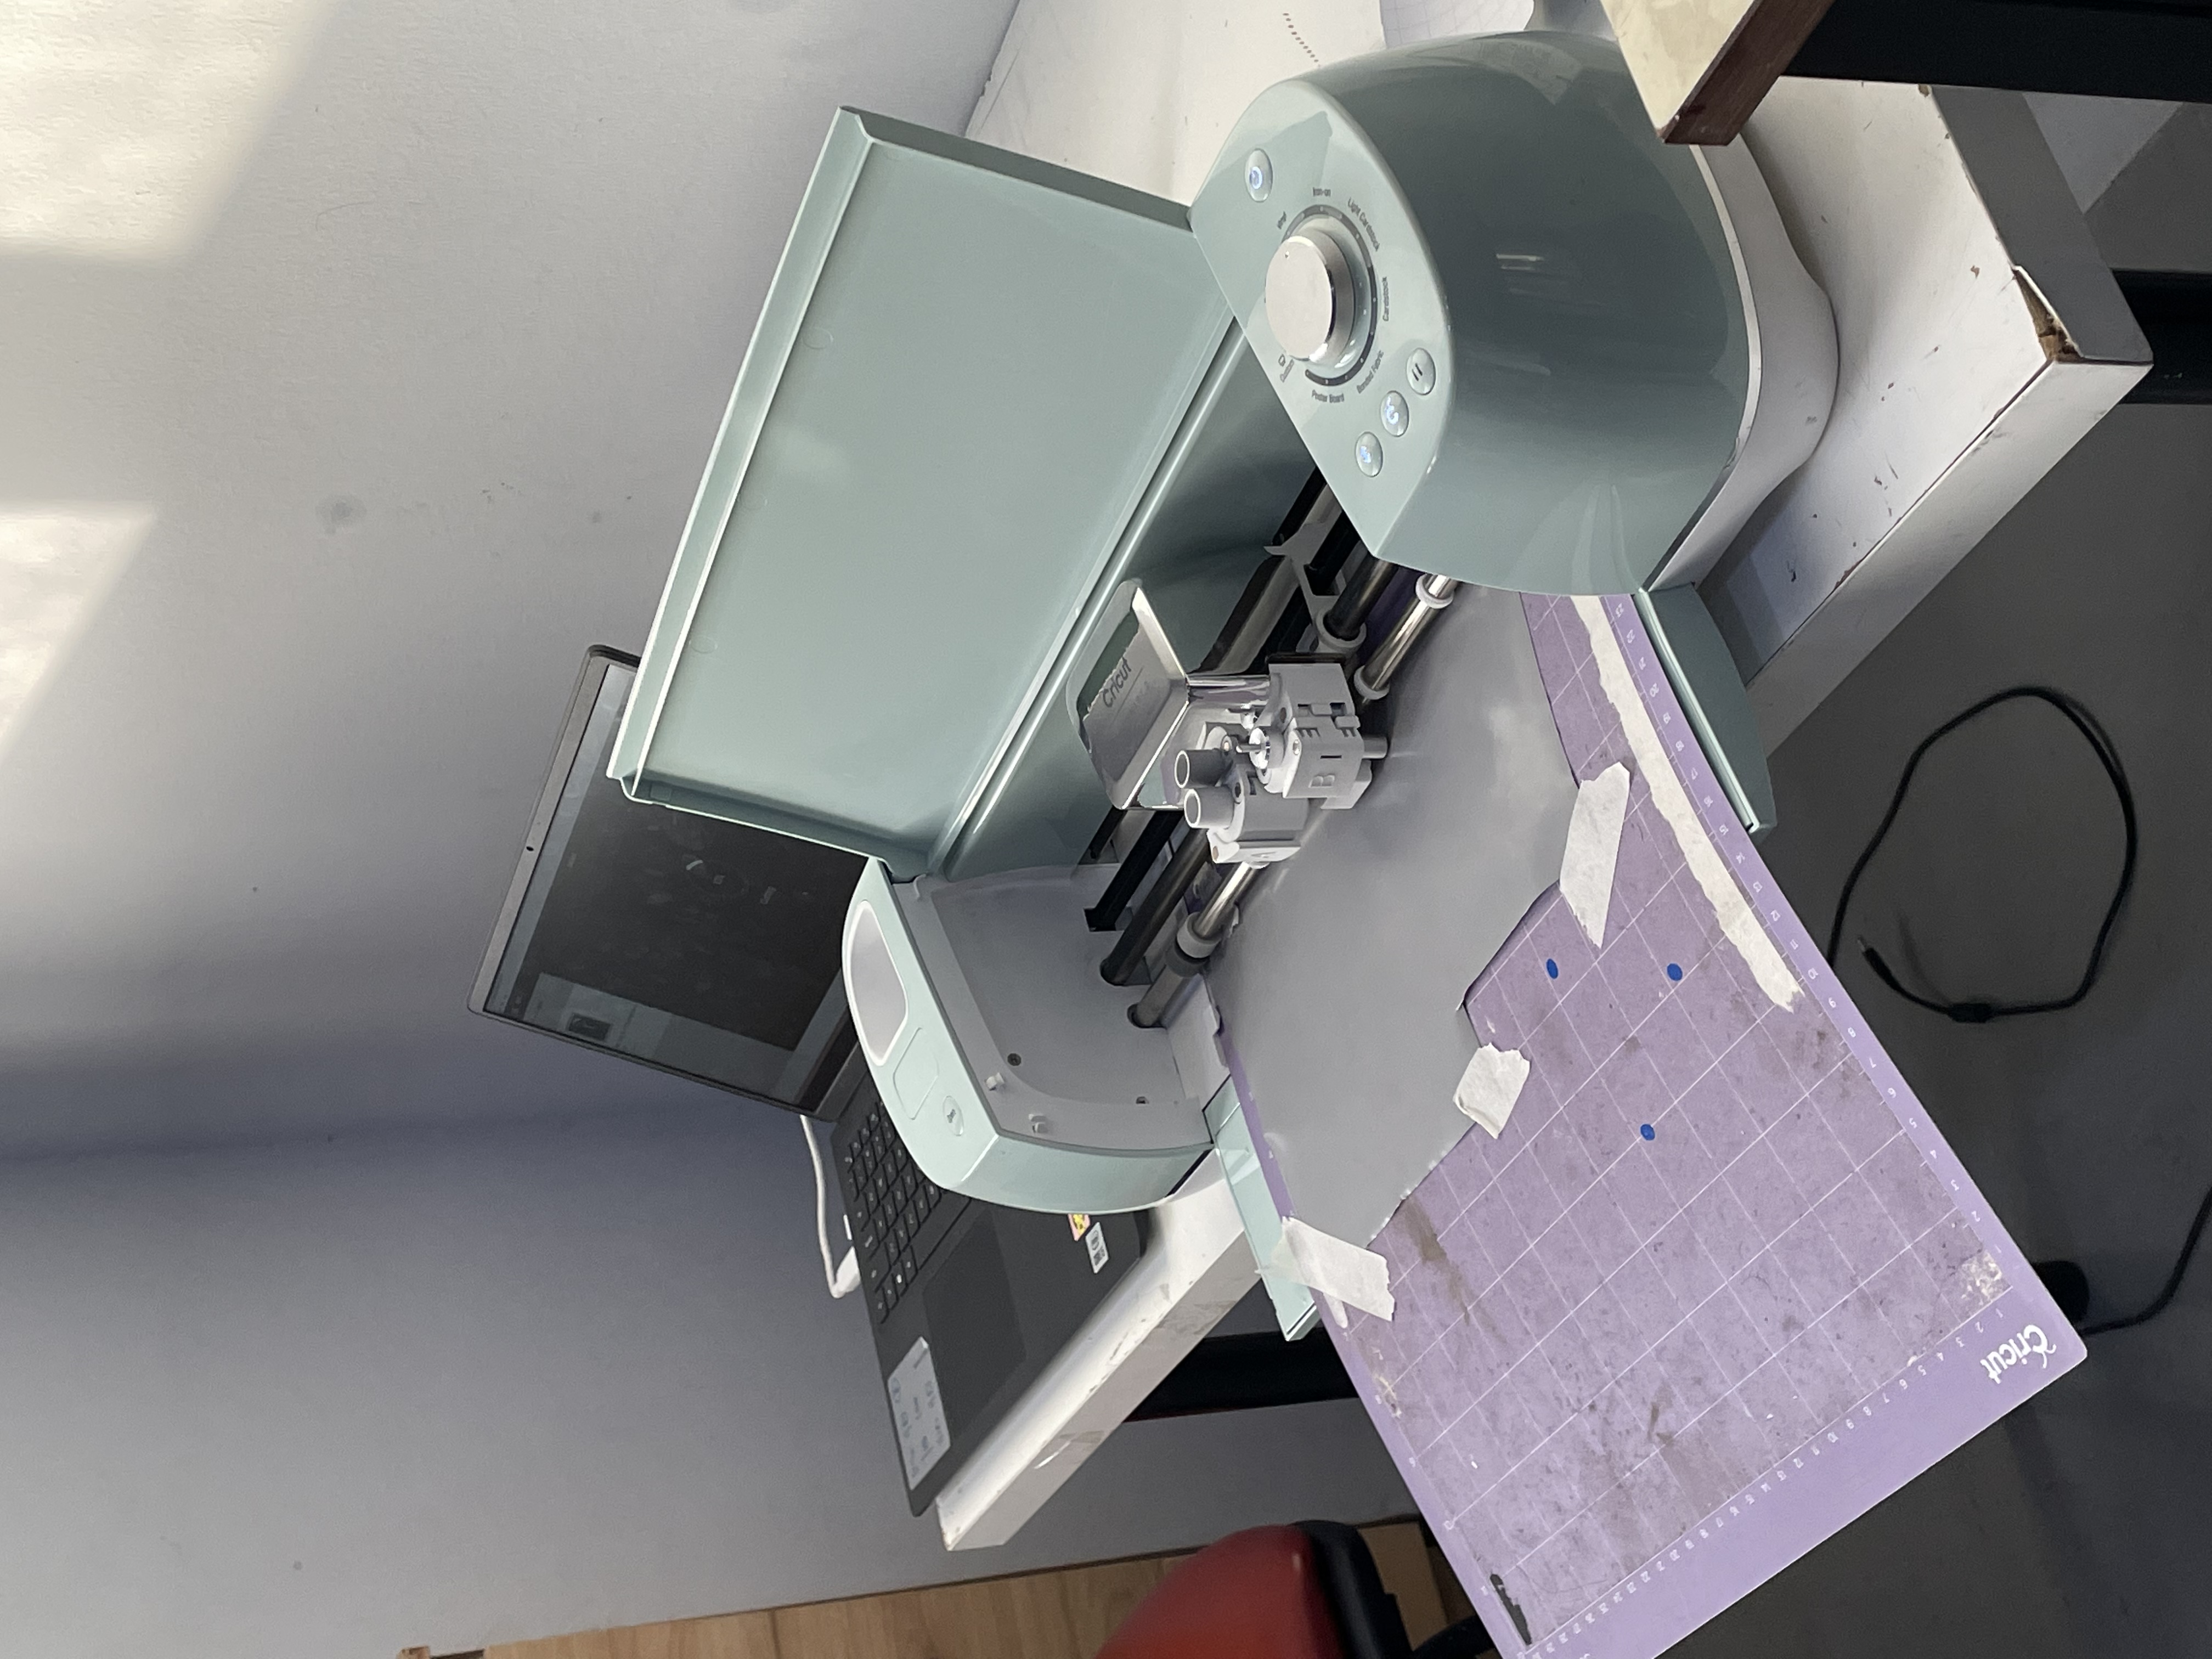
I got inspired by this and decided to design it using Cuttle software. After I finshed the design I sved it as a SVG file to ptint it. How to use the machine? Uploading your SVG file is the first step. After downloading it to the printer, click on origin to check whether the laser is sufficiently close to the material. After that, click the frame to see the laser’s projected path as it prints the design. Finally, press Start.
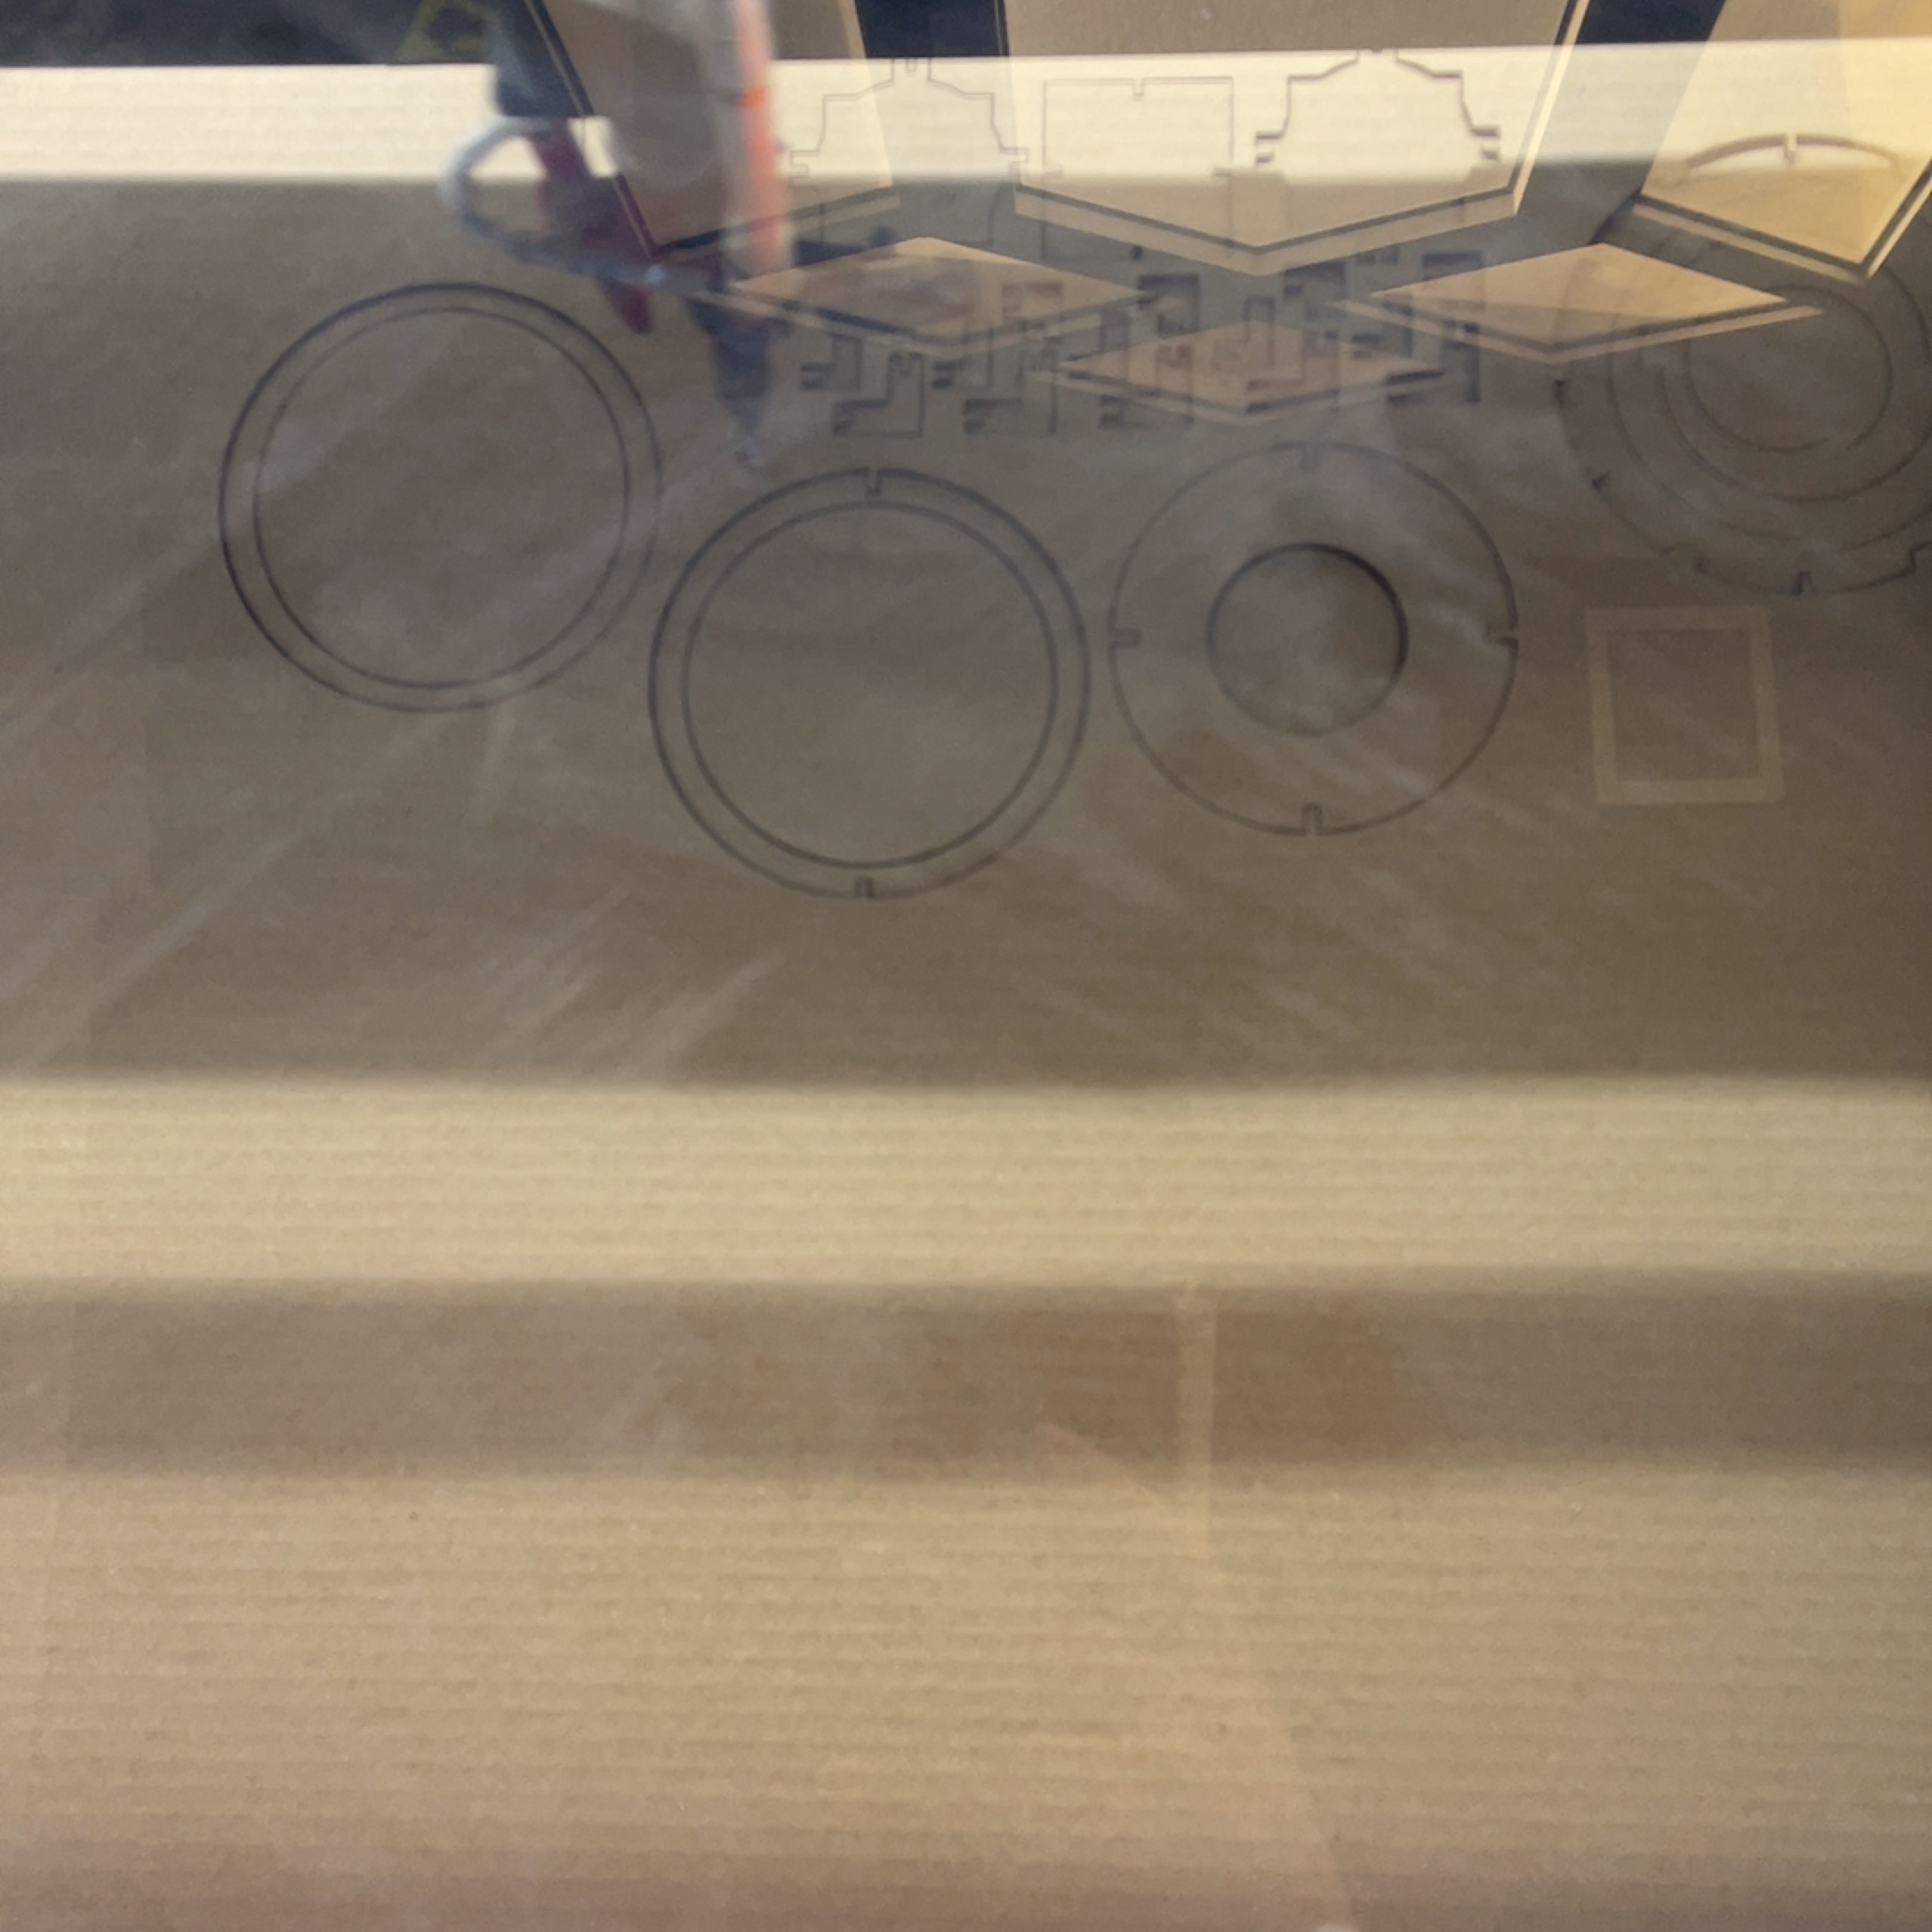
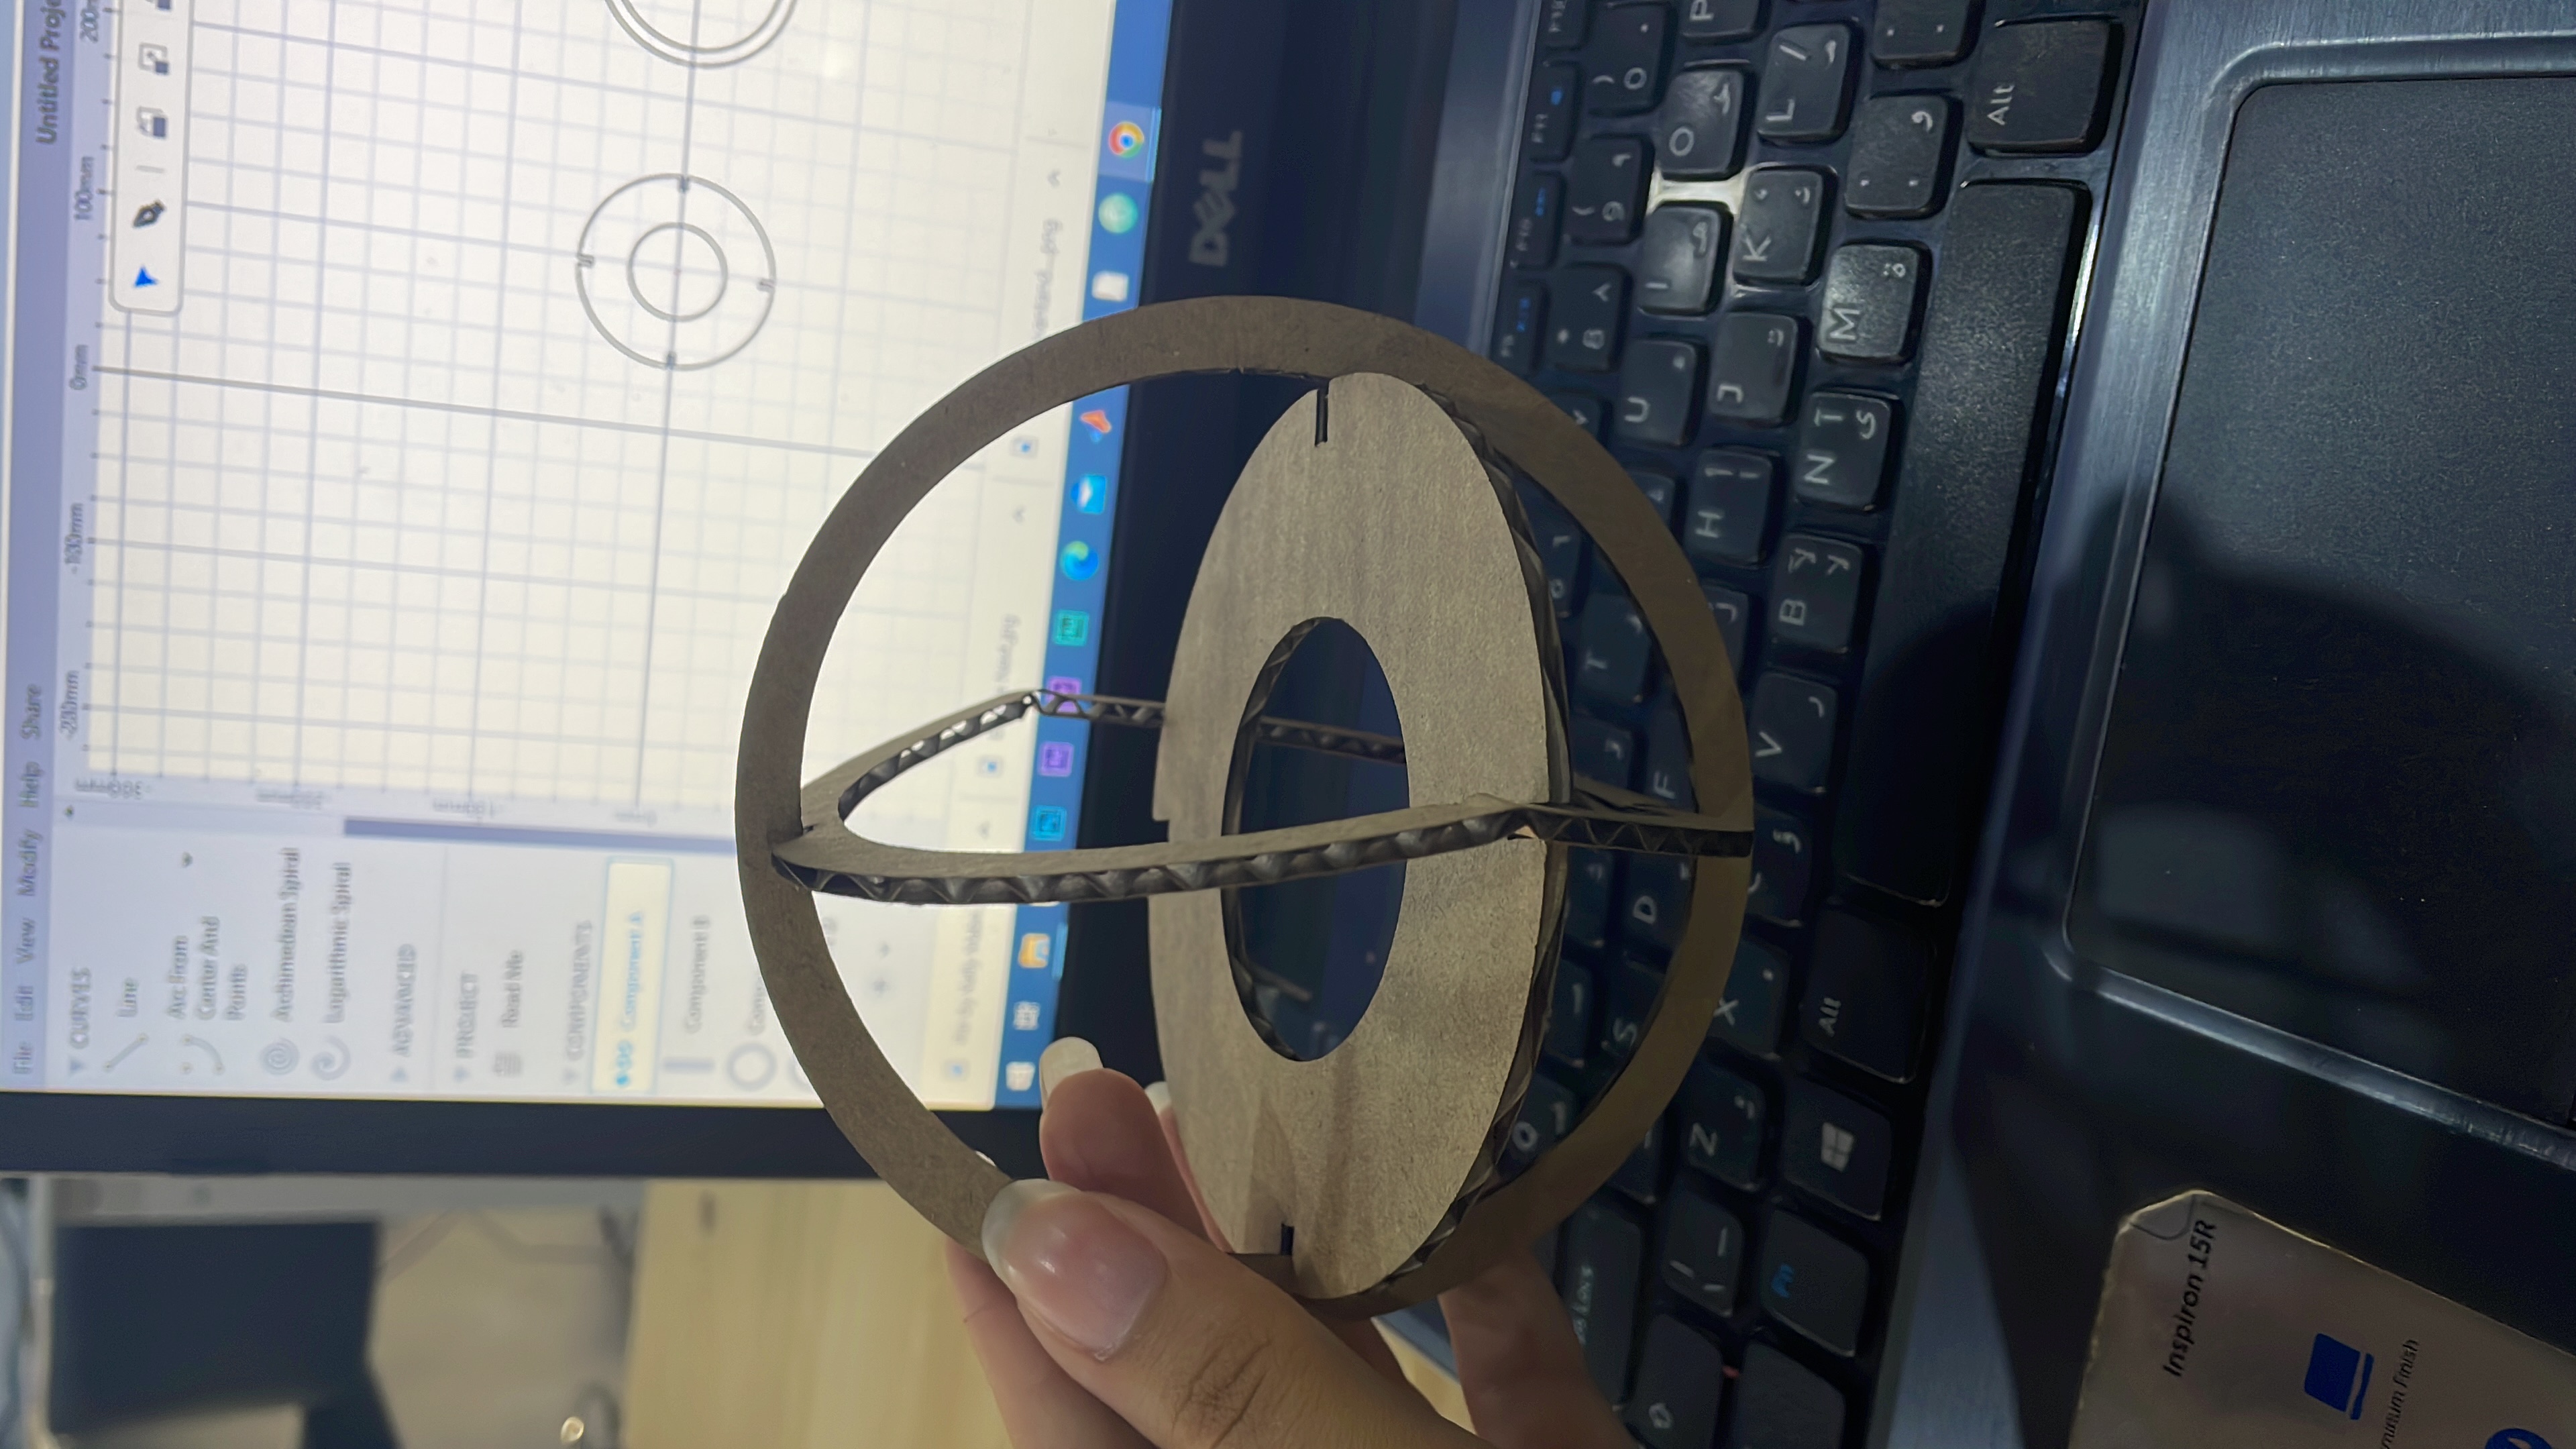
This was my initial attempt, and as you can see, it failed, so I made some changes to fix it. Here is the outcome.
results:
 Download
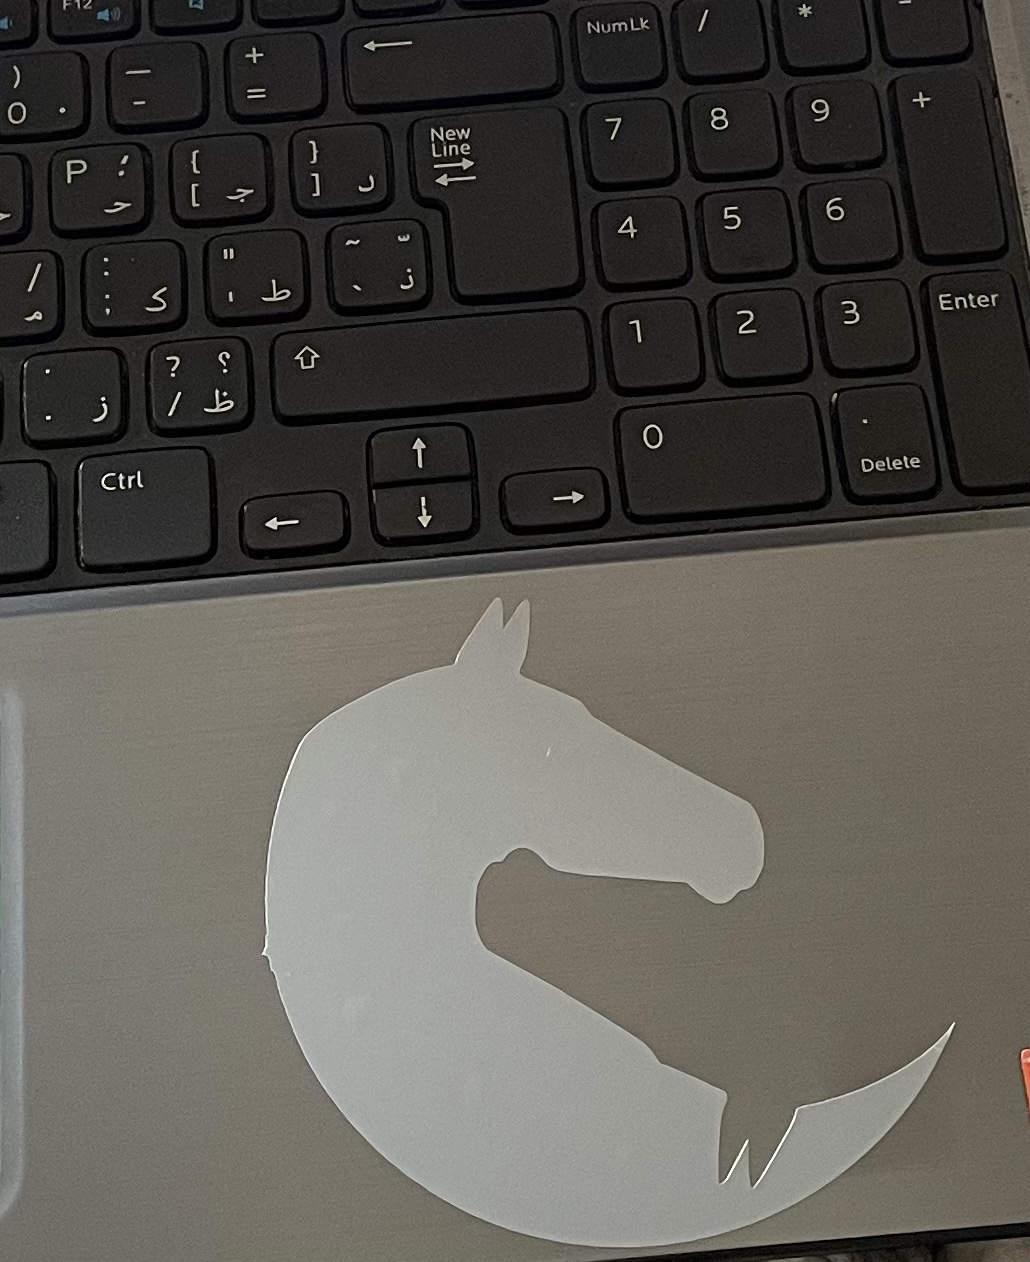
Vinyl Cutting
First, I look for a design on Pinterest because I actually love horses, and I settle on this one.

Before sending the images to the machine, I used Inkscape to convert their format from PNG to DXF. Download
On the platform, a piece of the selected material was cut and taped. Then, the machine began to cut. To make sure the sticker was cut, we went through the process twice. I then cut off the excess paper with scissors so that I could load it instantly onto the laptop.
Final result:
How do I feel about this week?
This week was enjoyable and enlightening, and I am looking forward to the coming weeks.