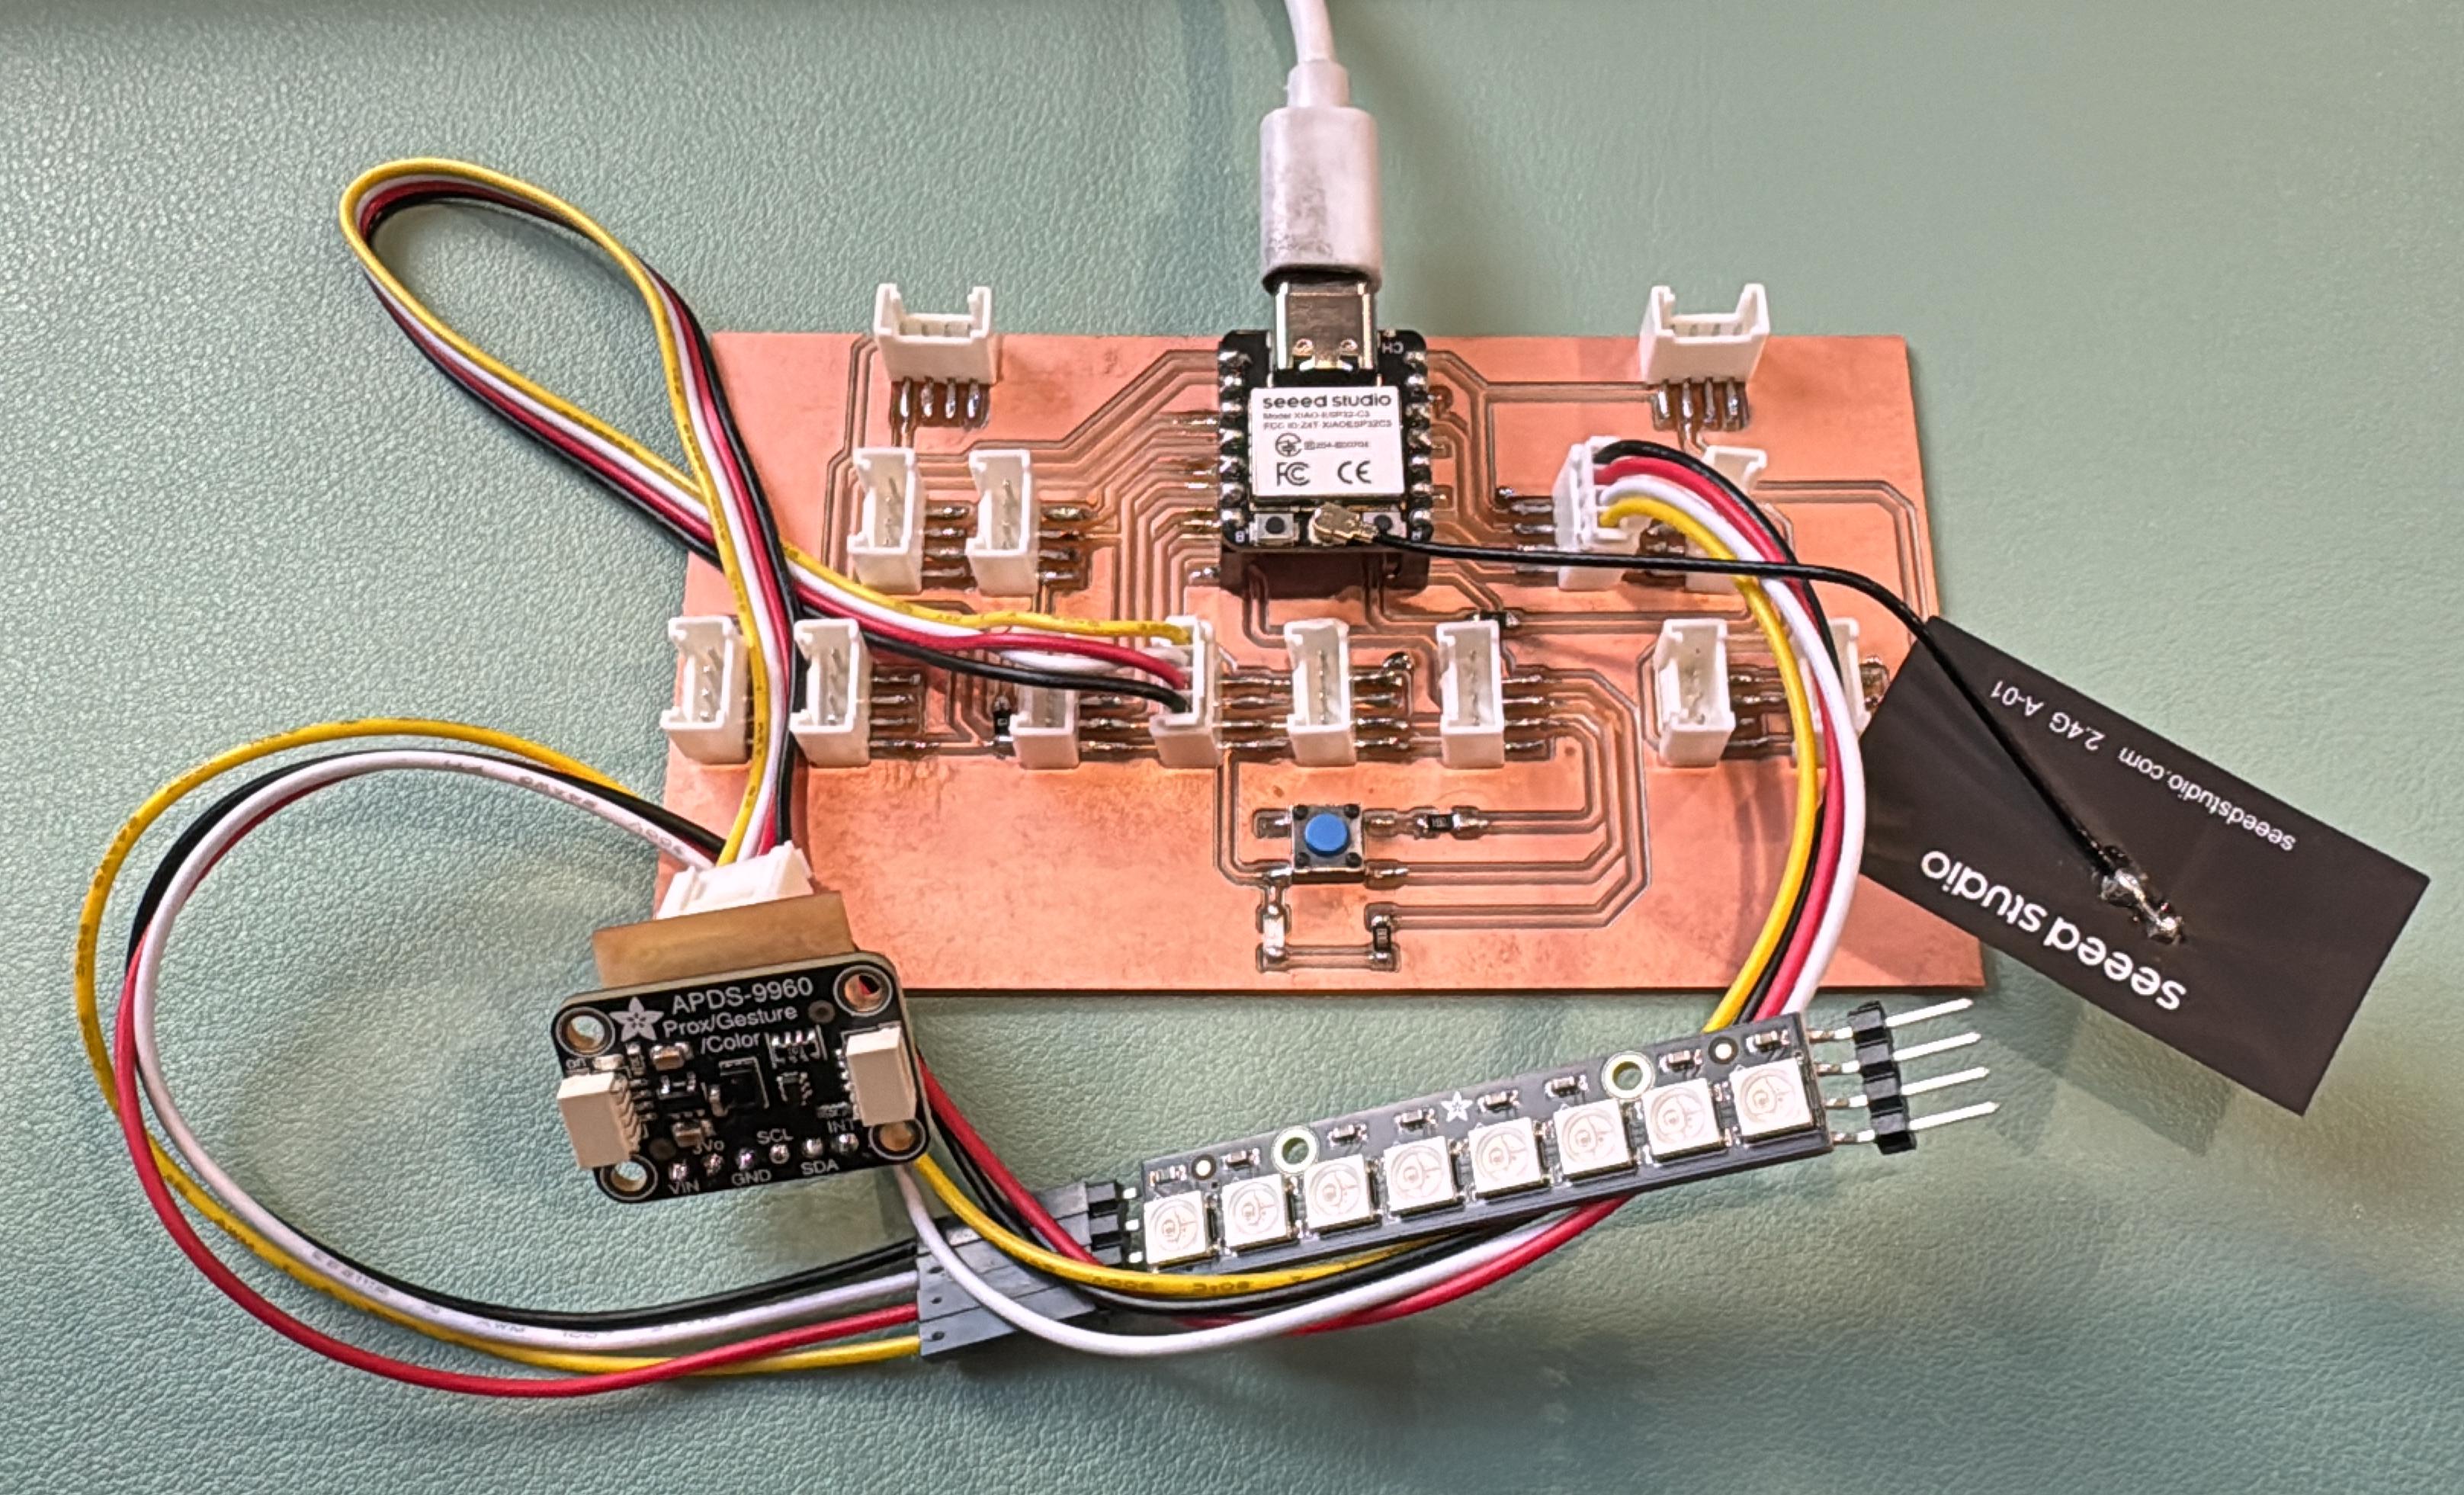
This week I focused on creating a web-based interface that communicates directly with my custom XIAO ESP32C3 board. The goal was to control an RGB LED strip based on color input from the APDS-9960 sensor and view it in real time on a local webpage.
The ESP32C3 acts as a standalone web server. When accessed through a browser, the interface displays:
The webpage auto-refreshes every 2 seconds for live updates.
Here's a step-by-step guide on how to set up the system from start to finish:
#undef WAIT before including <FastLED.h> to resolve macro conflict with APDS9960.http://192.168.X.X).This step-by-step setup ensures full communication between your ESP32C3, sensors, outputs, and browser interface.
#include <WiFi.h>
#include <Wire.h>
#include <SparkFun_APDS9960.h>
#undef WAIT  // Fix macro conflict with FastLED
#include <FastLED.h>
#include <WebServer.h>

// Wi-Fi credentials
const char* ssid = "BSC-GF";
const char* password = "bsc@2030";

// LED settings
#define LED_PIN 9
#define NUM_LEDS 8
CRGB leds[NUM_LEDS];
bool ledsOn = true;

// Color sensor
SparkFun_APDS9960 apds;
String currentColor = "Unknown";
uint16_t r = 0, g = 0, b = 0;

// Web server
WebServer server(80);

void setup() {
  Serial.begin(115200);
  Wire.begin();

  FastLED.addLeds<SK6812, LED_PIN, GRB>(leds, NUM_LEDS);
  FastLED.clear(); FastLED.show();

  if (!apds.init()) {
    Serial.println("APDS-9960 init failed!");
    while (1);
  }
  apds.enableLightSensor(false);
  delay(500);

  WiFi.begin(ssid, password);
  Serial.print("Connecting to Wi-Fi");
  while (WiFi.status() != WL_CONNECTED) {
    delay(500); Serial.print(".");
  }
  Serial.println("\nWi-Fi connected. IP address: ");
  Serial.println(WiFi.localIP());

  server.on("/", handleRoot);
  server.on("/toggle", HTTP_POST, handleToggle);
  server.begin();
  Serial.println("Web server started");
}

void loop() {
  server.handleClient();
  uint16_t c;
  if (apds.readRedLight(r) && apds.readGreenLight(g) && apds.readBlueLight(b) && apds.readAmbientLight(c)) {
    currentColor = detectColor(r, g, b);
    Serial.print("Detected: ");
    Serial.print(currentColor);
    Serial.print("  | R: "); Serial.print(r);
    Serial.print(" G: "); Serial.print(g);
    Serial.print(" B: "); Serial.println(b);

    if (ledsOn) {
      showColor(r, g, b);
    } else {
      FastLED.clear(); FastLED.show();
    }
  }
  delay(500);
}

String detectColor(uint16_t r, uint16_t g, uint16_t b) {
  if (r > g && r > b) return "Red";
  else if (g > r && g > b) return "Green";
  else if (b > r && b > g) return "Blue";
  else if (r > 200 && g > 200 && b > 200) return "White";
  else return "Unknown";
}

void showColor(uint16_t r, uint16_t g, uint16_t b) {
  for (int i = 0; i < NUM_LEDS; i++) {
    leds[i] = CRGB(r / 4, g / 4, b / 4);
    FastLED.show();
    delay(50);
  }
}

void handleRoot() {
  String state = ledsOn ? "checked" : "";
  server.send(200, "text/html", htmlPage(state));
}

void handleToggle() {
  if (server.hasArg("led")) {
    ledsOn = true;
  } else {
    ledsOn = false;
    FastLED.clear(); FastLED.show();
  }
  server.sendHeader("Location", "/");
  server.send(303);
}

String htmlPage(String state) {
  return "<!DOCTYPE html><html><head><meta charset='UTF-8'>"
         "<meta http-equiv='refresh' content='2'>"
         "<meta name='viewport' content='width=device-width, initial-scale=1'>"
         "<title>ESP32 Color Sensor</title>"
         "<style>body{font-family:sans-serif;text-align:center;padding:40px;} .switch{margin-top:20px;}</style></head><body>"
         "<h2>🎨 Detected Color: <span style='color:" + currentColor + "'>" + currentColor + "</span></h2>"
         "<p>🌈 RGB Values → R: " + String(r) + " G: " + String(g) + " B: " + String(b) + "</p>"
         "<form action='/toggle' method='POST'><label>💡 LEDs On/Off</label><br>"
         "<input type='checkbox' name='led' onchange='this.form.submit()' " + state + "></form>"
         "</body></html>";
}
#undef WAIT before #include <FastLED.h> fixed it.delay(500) in the loop and a 2s page auto-refresh leads to visible lag. Replacing auto-refresh with AJAX/WebSocket can greatly enhance UI responsiveness.