Molding and Casting
👥 Group Assignment Reflection
For this week's group assignment, we explored different materials used in molding and casting.
You can check out our group's detailed documentation
here.
We tested and evaluated four materials:
-
🧁 Silicone Plastique:
A food-safe molding material, ideal for chocolate or ice cream molds. It’s user-friendly with a 1:1 mixing ratio and quick work/cure times.
-
🪨 Gypsum:
The water-to-gypsum ratio is key — too much water makes it runny, too little makes it stiff. I also learned it needs to be stored in a dry environment to maintain quality.
-
🧪 RTV2 Silicone Rubber:
Great for flexible molds. The 1:1 mixing ratio worked well. It’s essential to mix thoroughly to avoid air bubbles, and to pour gently and close to the surface to minimize air entrapment.
-
🎨 Resin:
Requires safety precautions like gloves and a mask. The correct mix ratio (5:3 resin to hardener) is important for proper curing. Adding pigments and decorative flakes was a fun way to personalize the casts.
Overall, the group assignment highlighted the importance of understanding the properties of different materials, their safety requirements, and the correct mixing ratios and procedures. This knowledge will definitely help me in my individual assignment and future projects!
Overview
This week, we're diving into the world of molding and casting! It's all about creating a mold (a negative impression) of an object and then using that mold to create a copy of the object by pouring liquid material into it. Pretty cool, right?
For this assignment, I needed to design a mold, produce it with a smooth finish, and then cast parts using it. Here’s how it went down:
Wax Setup
- First up, I gathered all the available wax, including leftovers from previous projects. I tossed it all into the oven. The goal was to melt it all down into one solid block.
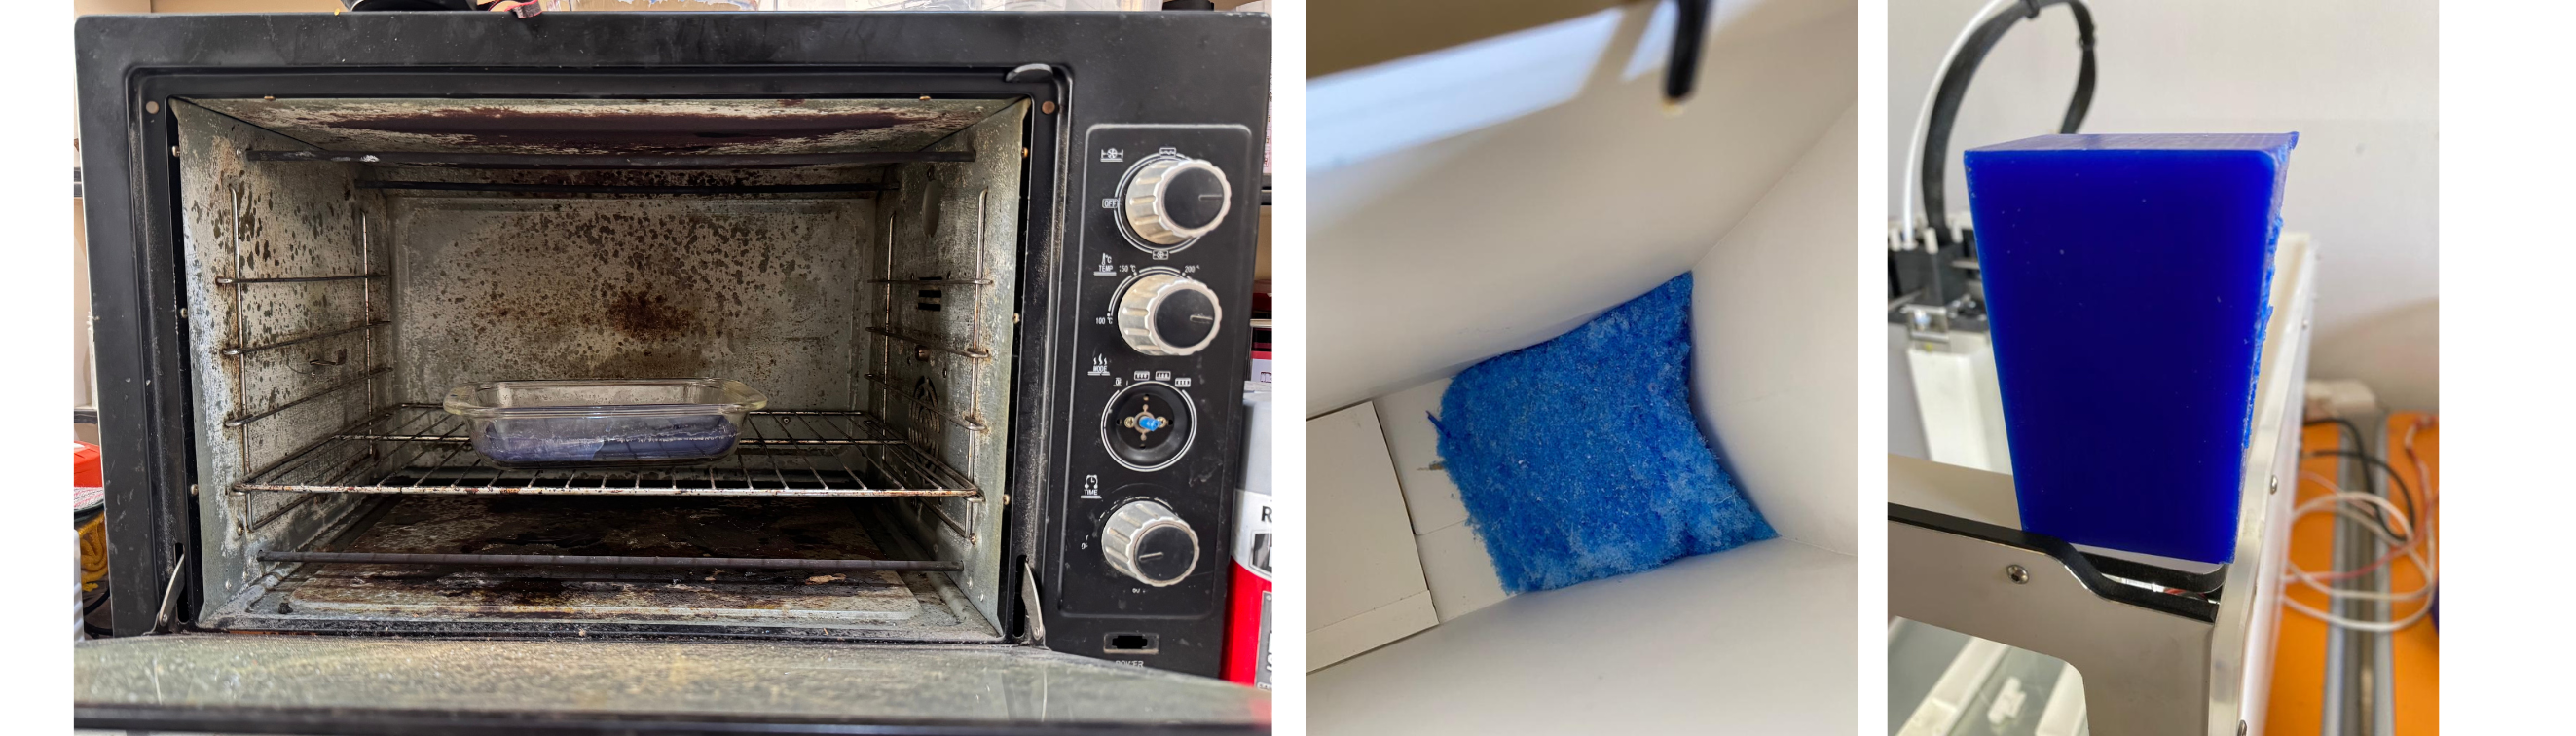
- Next, I took the wax block to the Roland SRM-20 milling machine to flatten and smooth the surface. This ensures a good base for the mold.
TinkerCad Preparation Setup
- Now for the fun part: designing the mold! I used TinkerCAD to create a 3D model of a keyblade from Kingdom Hearts. Since I wanted a two-part mold, I basically designed half of the keyblade on each side.

Download My Design: Kingdom Hearts: Sora's Keyblade
Edit on My Design: Kingdom Hearts: Sora's Keyblade
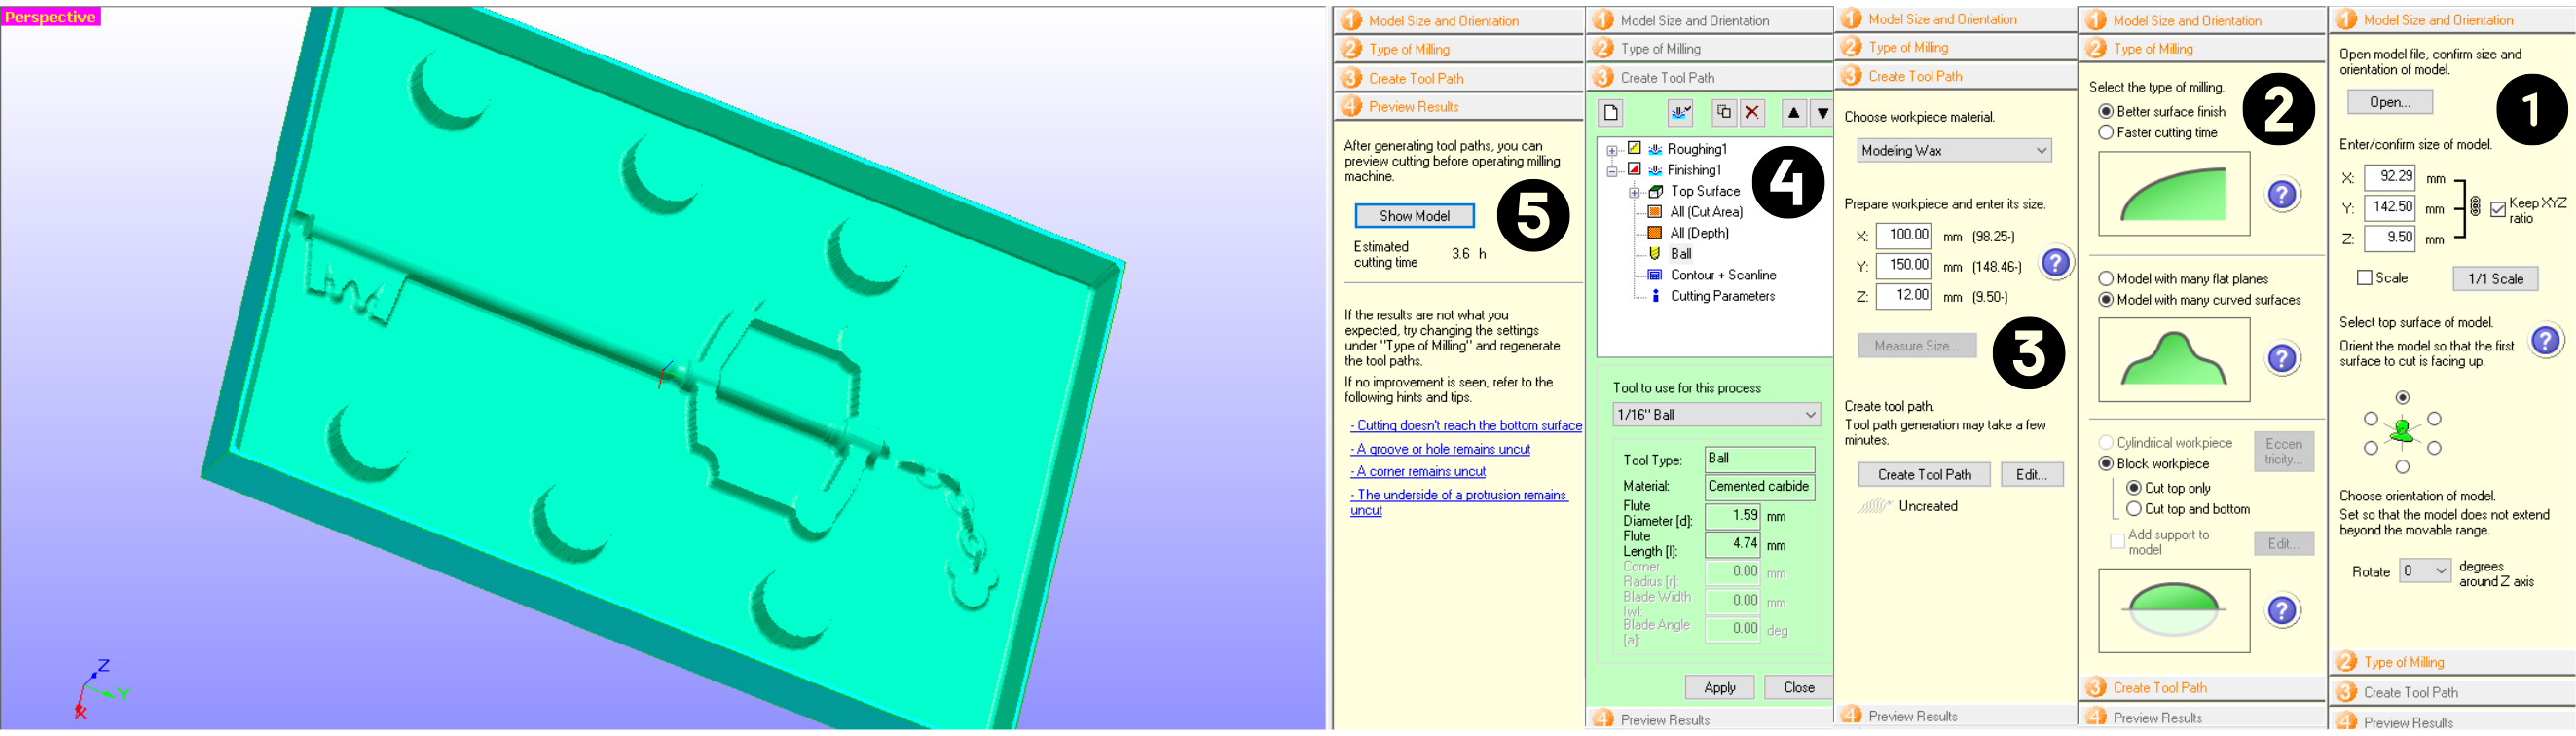
- With the design ready, I loaded the wax block into the Roland SRM-20 again. Using a 1/16 SE 2FL BN drill bit, I milled the keyblade design into the wax. I followed the easy steps in the SRM software for uploading the file, remoanding drill bit, generating toolpathand setting up the machine.

Molding Setup
For the mold itself, I used Silicon VBS26A/B. It's a two-part silicone elastomer that's pourable and cures at room temperature. Mixing is key! The ratio is 1:1 (A to B). I carefully measured the parts using a scale, mixed them thoroughly, and then poured the silicone into the wax mold. I made sure to get into all the nooks and crannies.


Casting Setup
Once the silicone mold was cured, it was time to cast! I experimented with two different materials:
Soap Setup
- Processes & Time: (1) I chopped up a Pifito Melt and Pour Soap Base into small pieces. (2) Then, I microwaved the soap in 20-second intervals, stirring in between to prevent burning. (3) After it melted, I let it cool slightly and added some essential oil for scent.
- Mix Ratio: I used about .25 fl. oz. of essential oil per 1 lb of soap base.

Plaster Setup
- Processes & Time: (1) I slowly added the plaster powder to water (never the other way around!) in a clean bucket. (2) I aimed for a mix of approximately 32L of water to 40kg of Mada plaster. (3) I let the powder soak for about a minute. (4) Then, I mixed it all together thoroughly by hand.
- Mix Ratio: The ideal ratio is around 2:3 (water to plaster), which is roughly 40% water and 60% plaster.

Problems and Fixes
Okay, so things didn't go perfectly smooth. My first attempt at casting the plaster resulted in a lot of breakage when I tried to remove the keyblade from the mold. I think this was because the plaster was too brittle and the keyblade design had some thin, delicate parts. To fix this, I'll try a different type of plaster or maybe add something to the mix to make it a bit more flexible. I might also try a different design that's less prone to breakage.
Also, getting a truly smooth surface finish on the wax mold proved to be a bit tricky. Even after milling, there were some slight imperfections. For future projects, I might experiment with sanding or polishing the wax to get a smoother surface before molding.

