1. Project Management
This week I worked on developing my website page, and learned how to edit it. The website is used to document my journey with Fab Lab.
The main ideas covered:
- The definition of important terms including: MkDocs, Markdown, Git, GitLab and more.
- How to create an account in fablab.io, cloning the website, and edit in Markdown.
Important Terms
- MkDocs: MkDocs is a static site generator written in Python language, it is fast and simple.
- Markdown: Markdown is the language the website is written in.
- HTML: HTML, or Hypertext Markup Language, is a markup language for the web that defines the structure of web pages. It is the most basic building block of the Web.
- Git: All the changes made are saved under Version Control using GIT. Fast, scalable, distributed revision control system. Git is a free and open source distributed version control system designed to handle everything from small to very large projects with speed and efficiency.
- GitLab: The software used to turn simple text files written in Markdown format, into the website you currently navigating. Open source self-hosted Git management software. GitLab offers git repository management, code reviews, issue tracking, activity feeds and wikis.
- Push: After you save a local copy of a repository and modify the files on your computer, you can upload the changes to GitLab. This action is known as pushing to the remote, because you use the command “git push”.
- Pull: When the remote repository changes, your local copy is behind. You can update your local copy with the new changes in the remote repository. This action is known as pulling from the remote, because you use the command “git pull”.
- Cloning: A repository is the same as downloading, except it preserves the Git connection with the remote repository. You can then modify the files locally and upload the changes to the remote repository on GitLab.
- Pixels: Pixels are the dimension of the image.
- Kilobytes: Kilobytes is the size of the image.
How To … ?
How To Create An Account In Fablab.io?
- Step 1, sign in fablab.io.
- Step 2, you will recive an email to invite you to join GitLab. Click on join now.

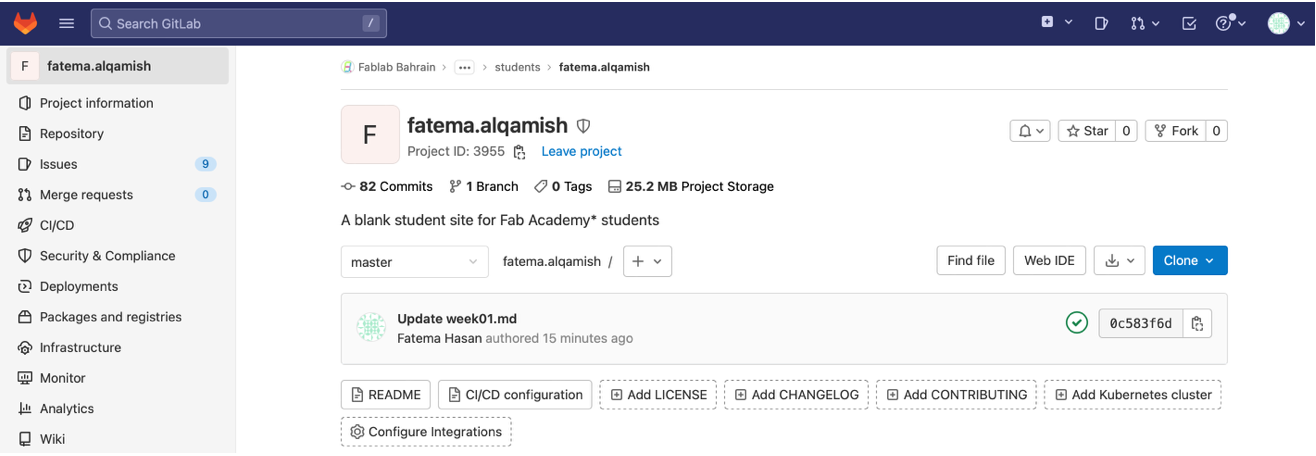
- Step 3, a new window will open. Click on the project.

- Step 4, your project page will appear, you can edit your website using this page.
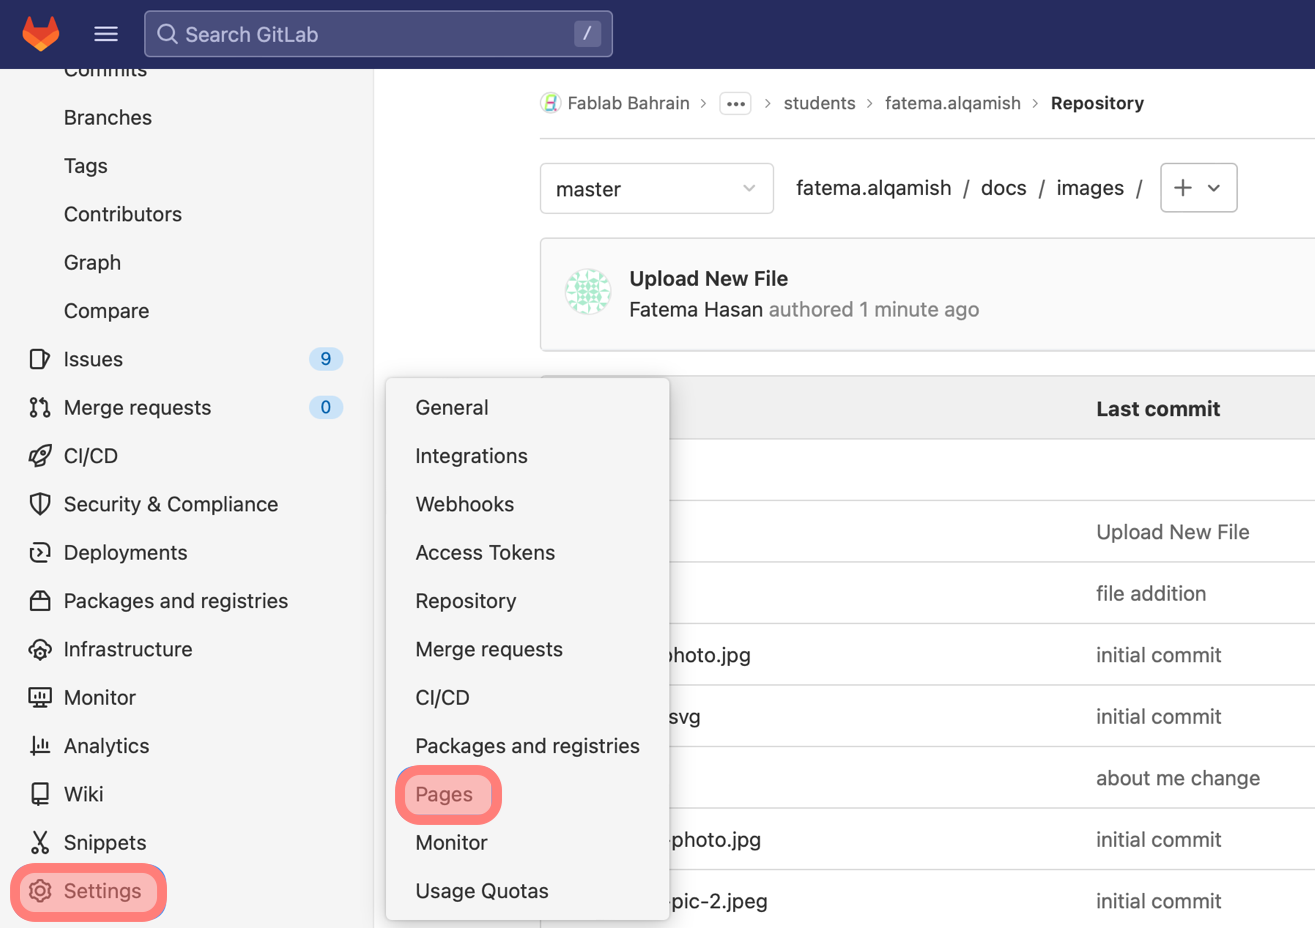
- Step 5, to view your website, go to settings then pages.
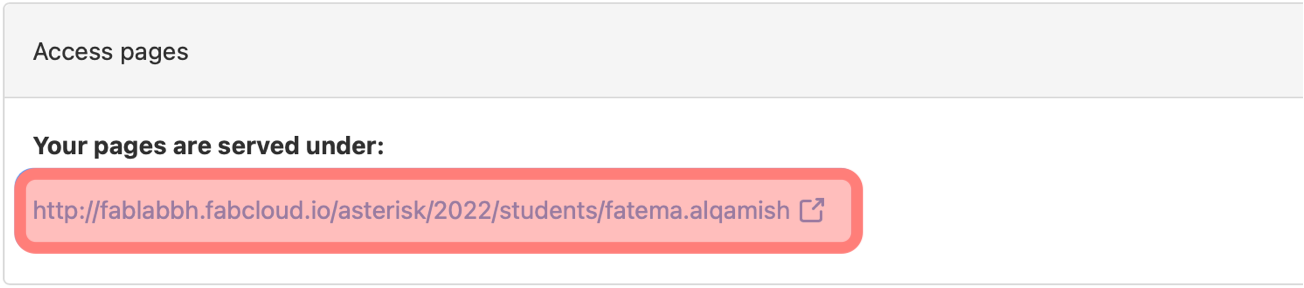
- Step 6, by clicking on this link you can open your website.
How To Clone Your Website?
Cloning the website means that you will be able to modify the files locally / offline and then upload / push the changes to the remote repository on GitLab.
- Step 1, download Atom.
How to download Atom?
1. Open this link https://atom.io2. Click on download, it will start downloading and it takes some time
3. Place Atom on your desktop for easy access

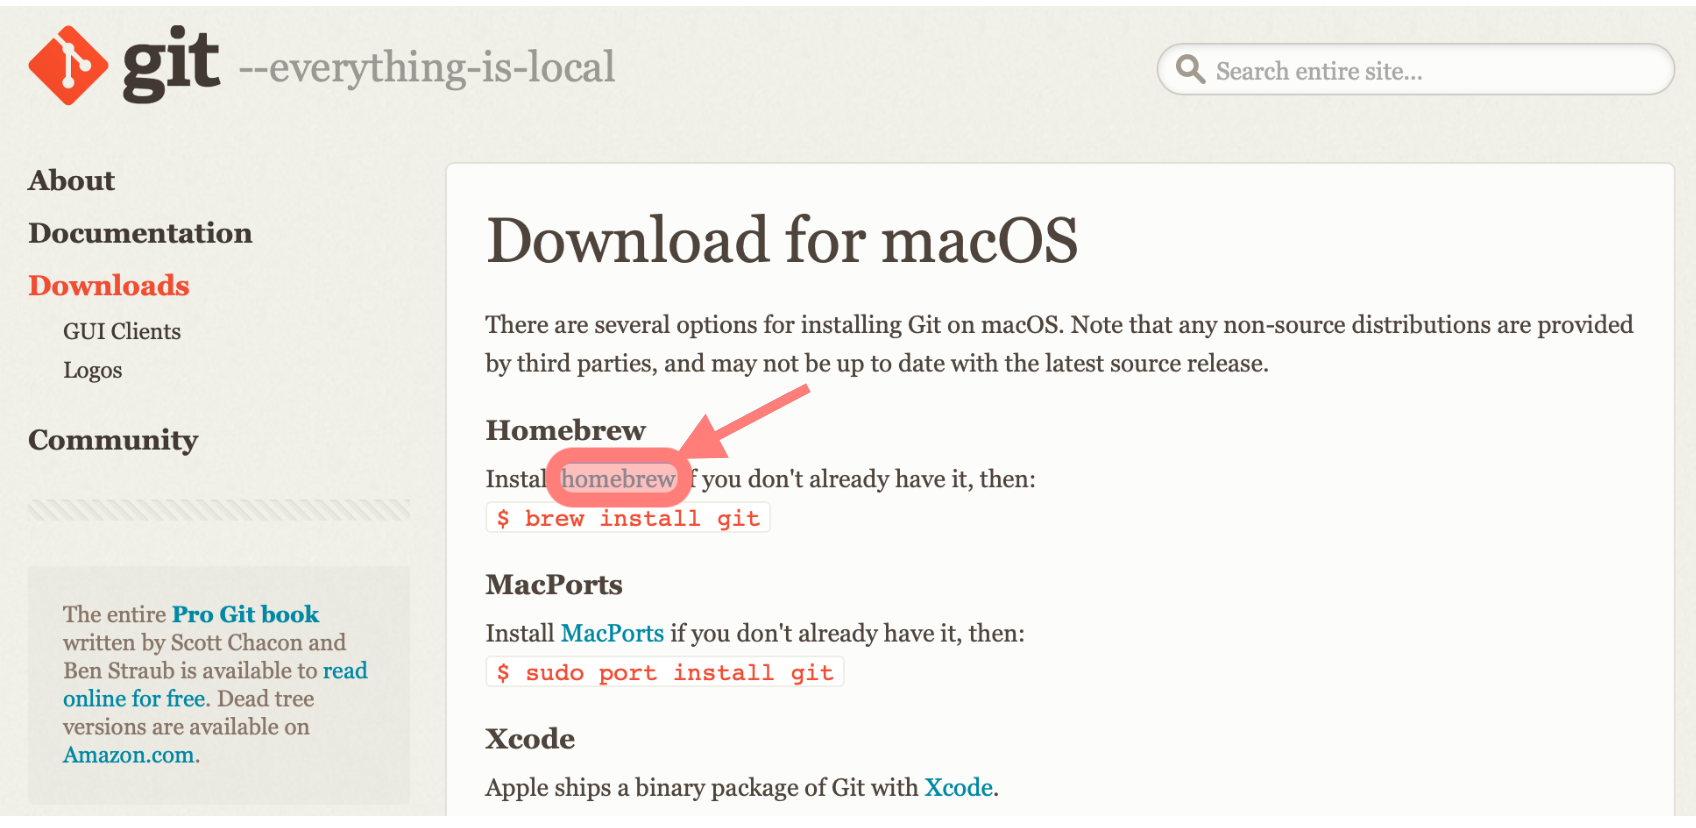
2. Step 2, download Git using Homebrew Website.
How to download Git?
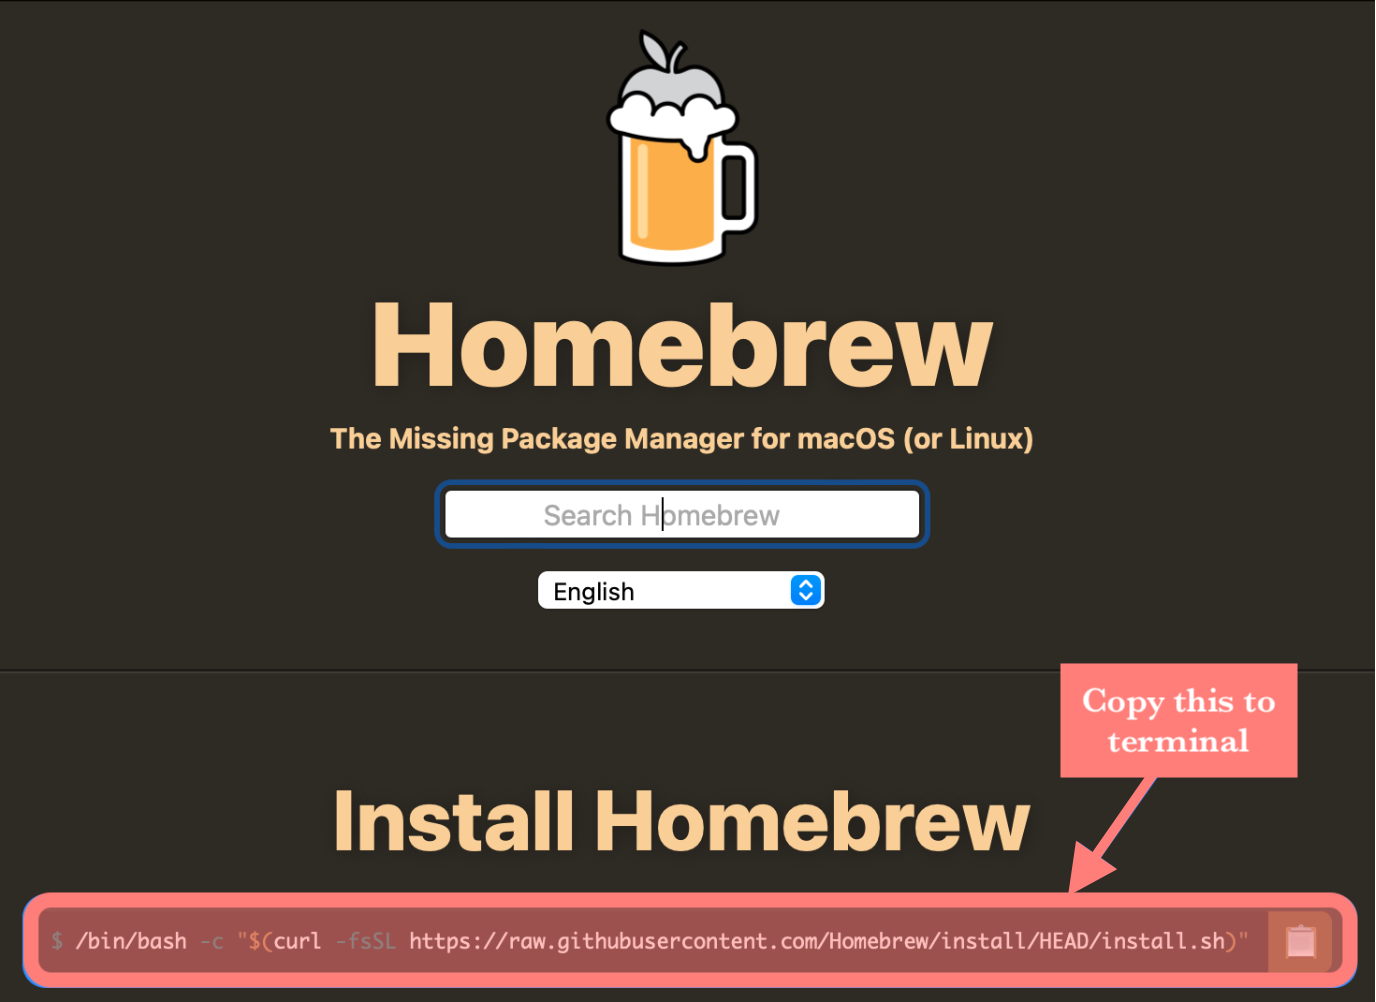
1. Open Git from https://git-scm.com/download/mac2. Click on download for mac
3. Then choose Homebrew
4. Copy the link from Homebrew
5. Open terminal on your computer
6. Paste the copied link then Enter
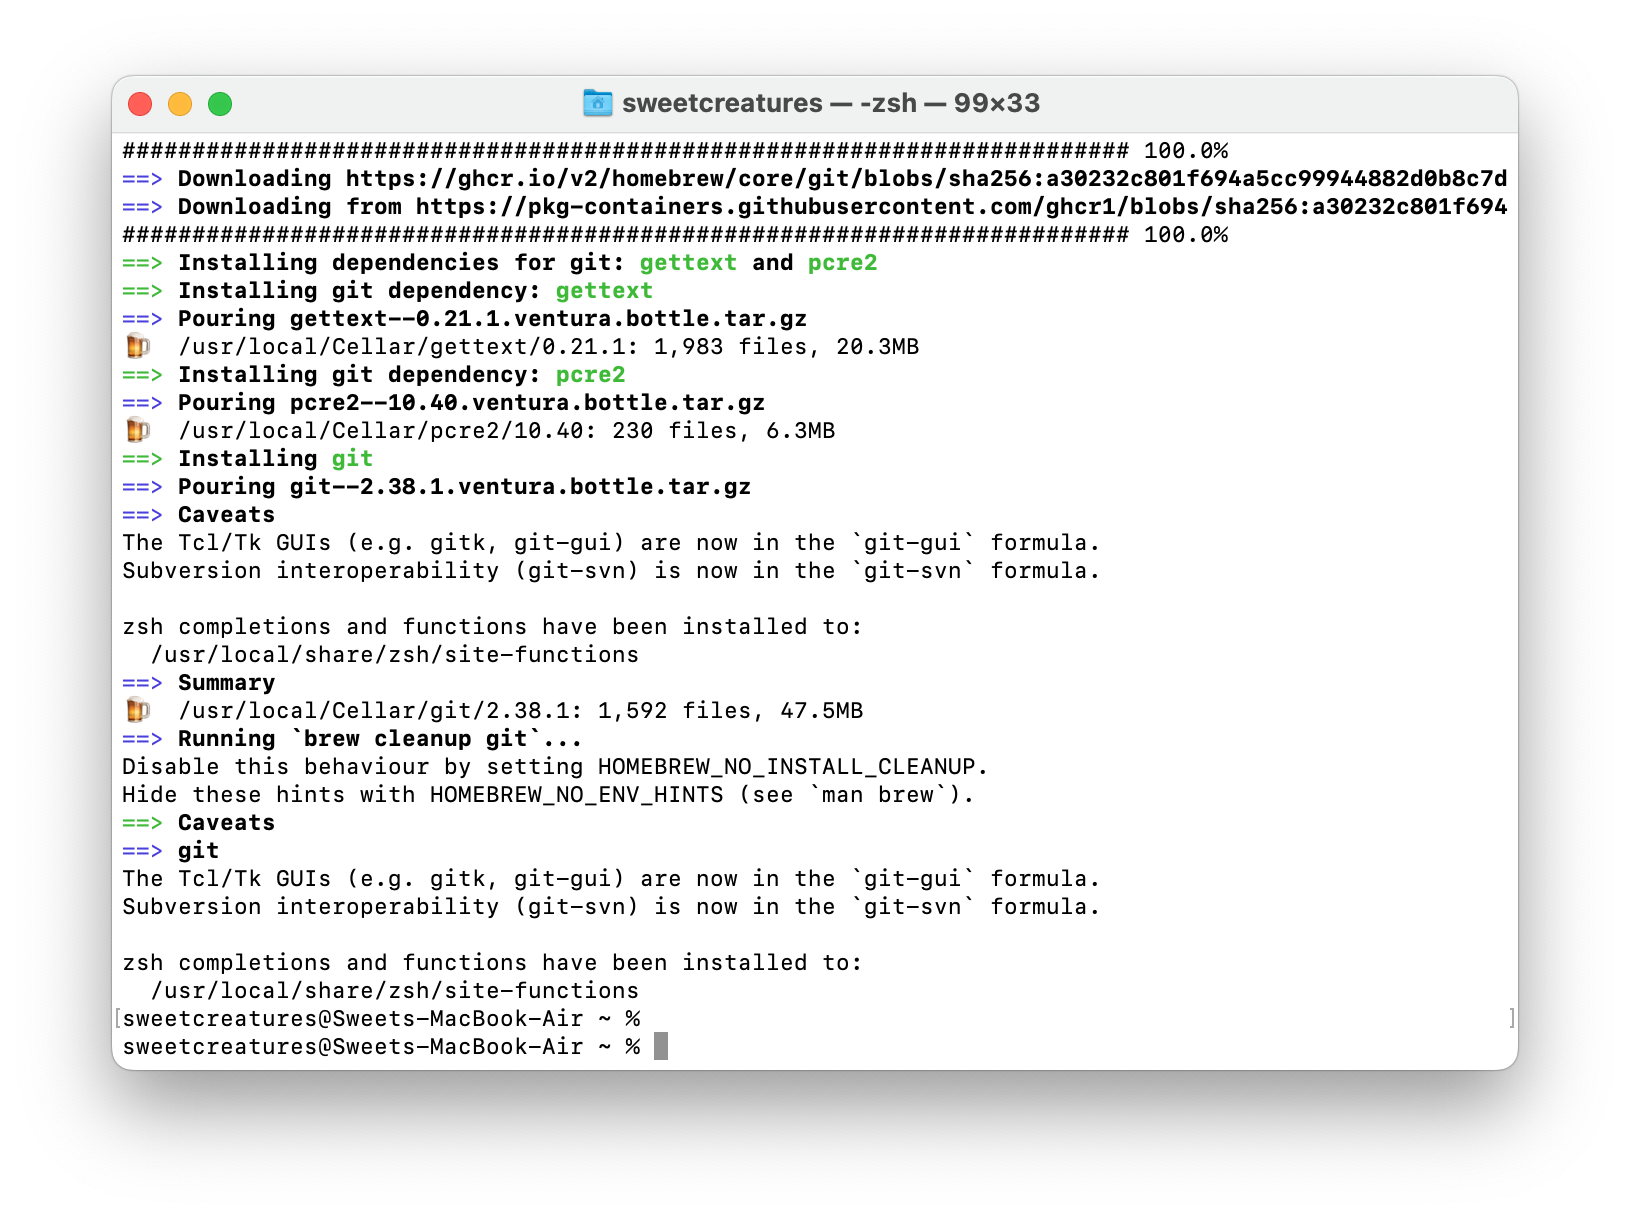
7. Enter your password then Enter, after that Homwbrew will start installing, it takes a lot of time :)
8. One homebrew installation is done, type "brew install git" in terminal then Enter
9. To find the git file, go to your home file on your computer, then click on Command, Shift and period "." to show the hidden files
How To Edit Your Website In Git Lab?
The website is in Markdown language, editing using Git Lab is online which means that it need wifi connection.
1. Step 1, in Git Lab, choose the file you want to work
2. Step 2, click on edit and make your edits

3. Step 3, click commit changes

4. Step 4, finally, you can make sure of your changes by doing the following: go to commits after that the commit a green tick

How To Edit Your Website In Atom?
Atom let you edit your website offline and locally on your computer. And then you can push the changes to Git Lab. So to edit your website using Atom follow these steps:
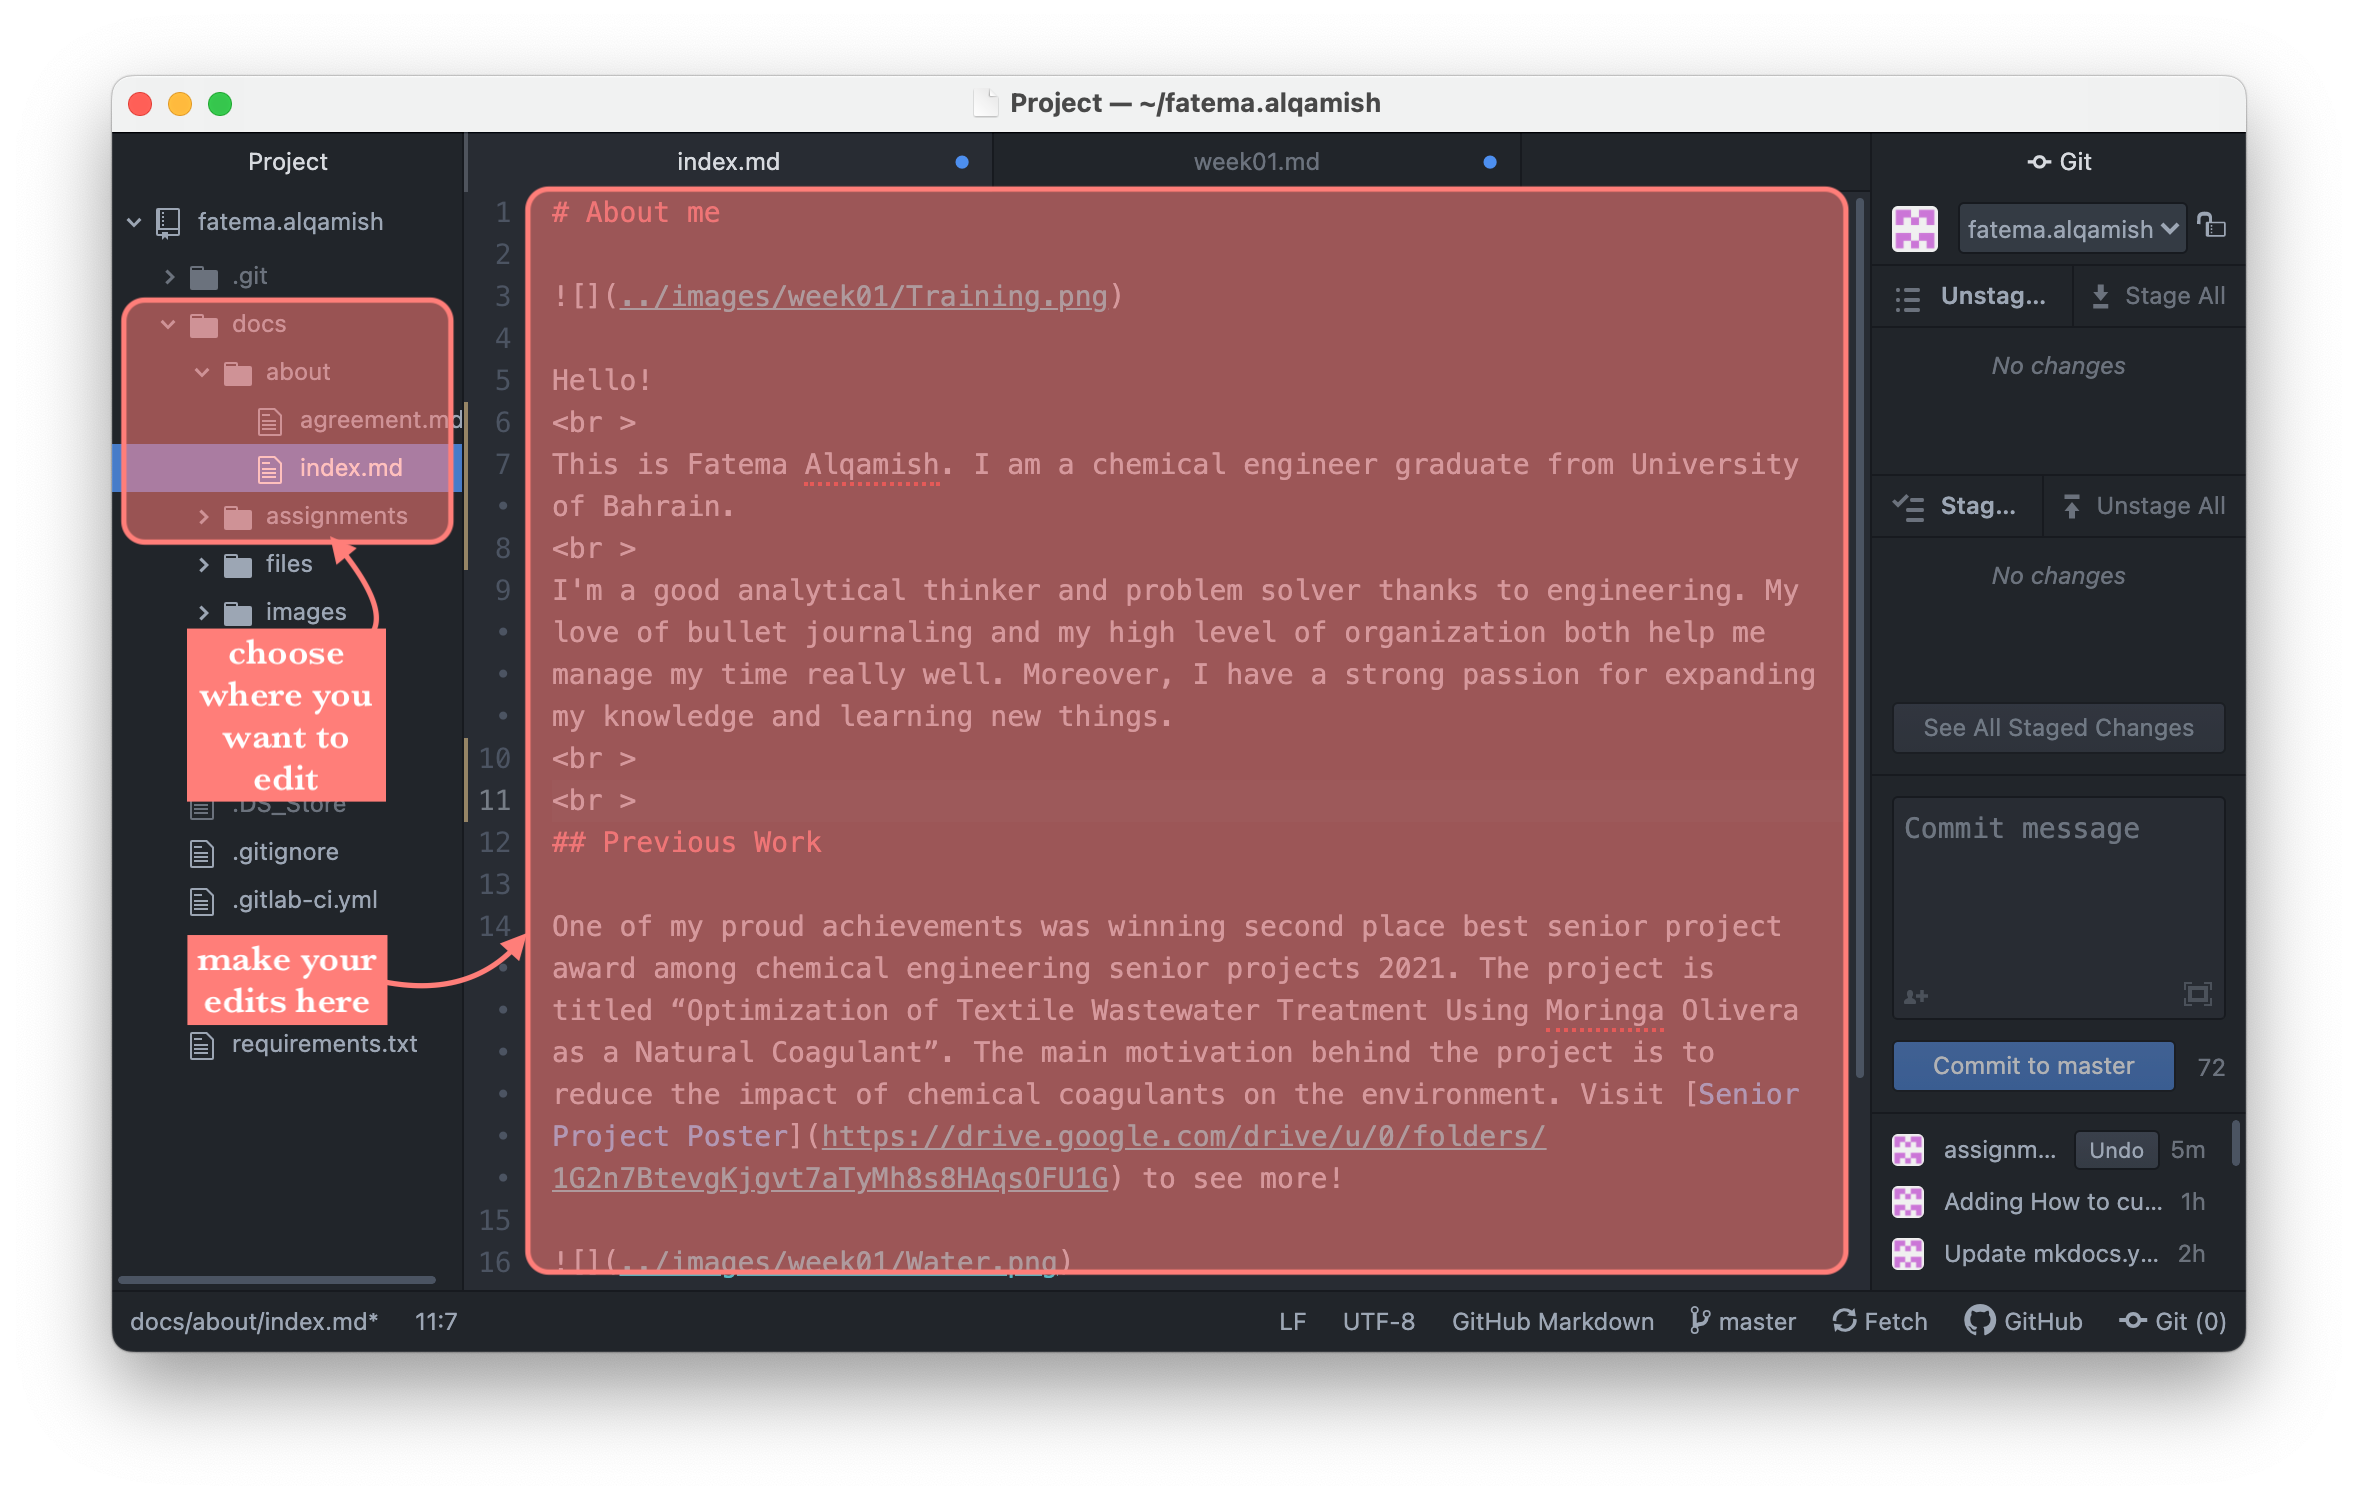
1. Step 1, in Atom, choose the file you want to work on then make your edits
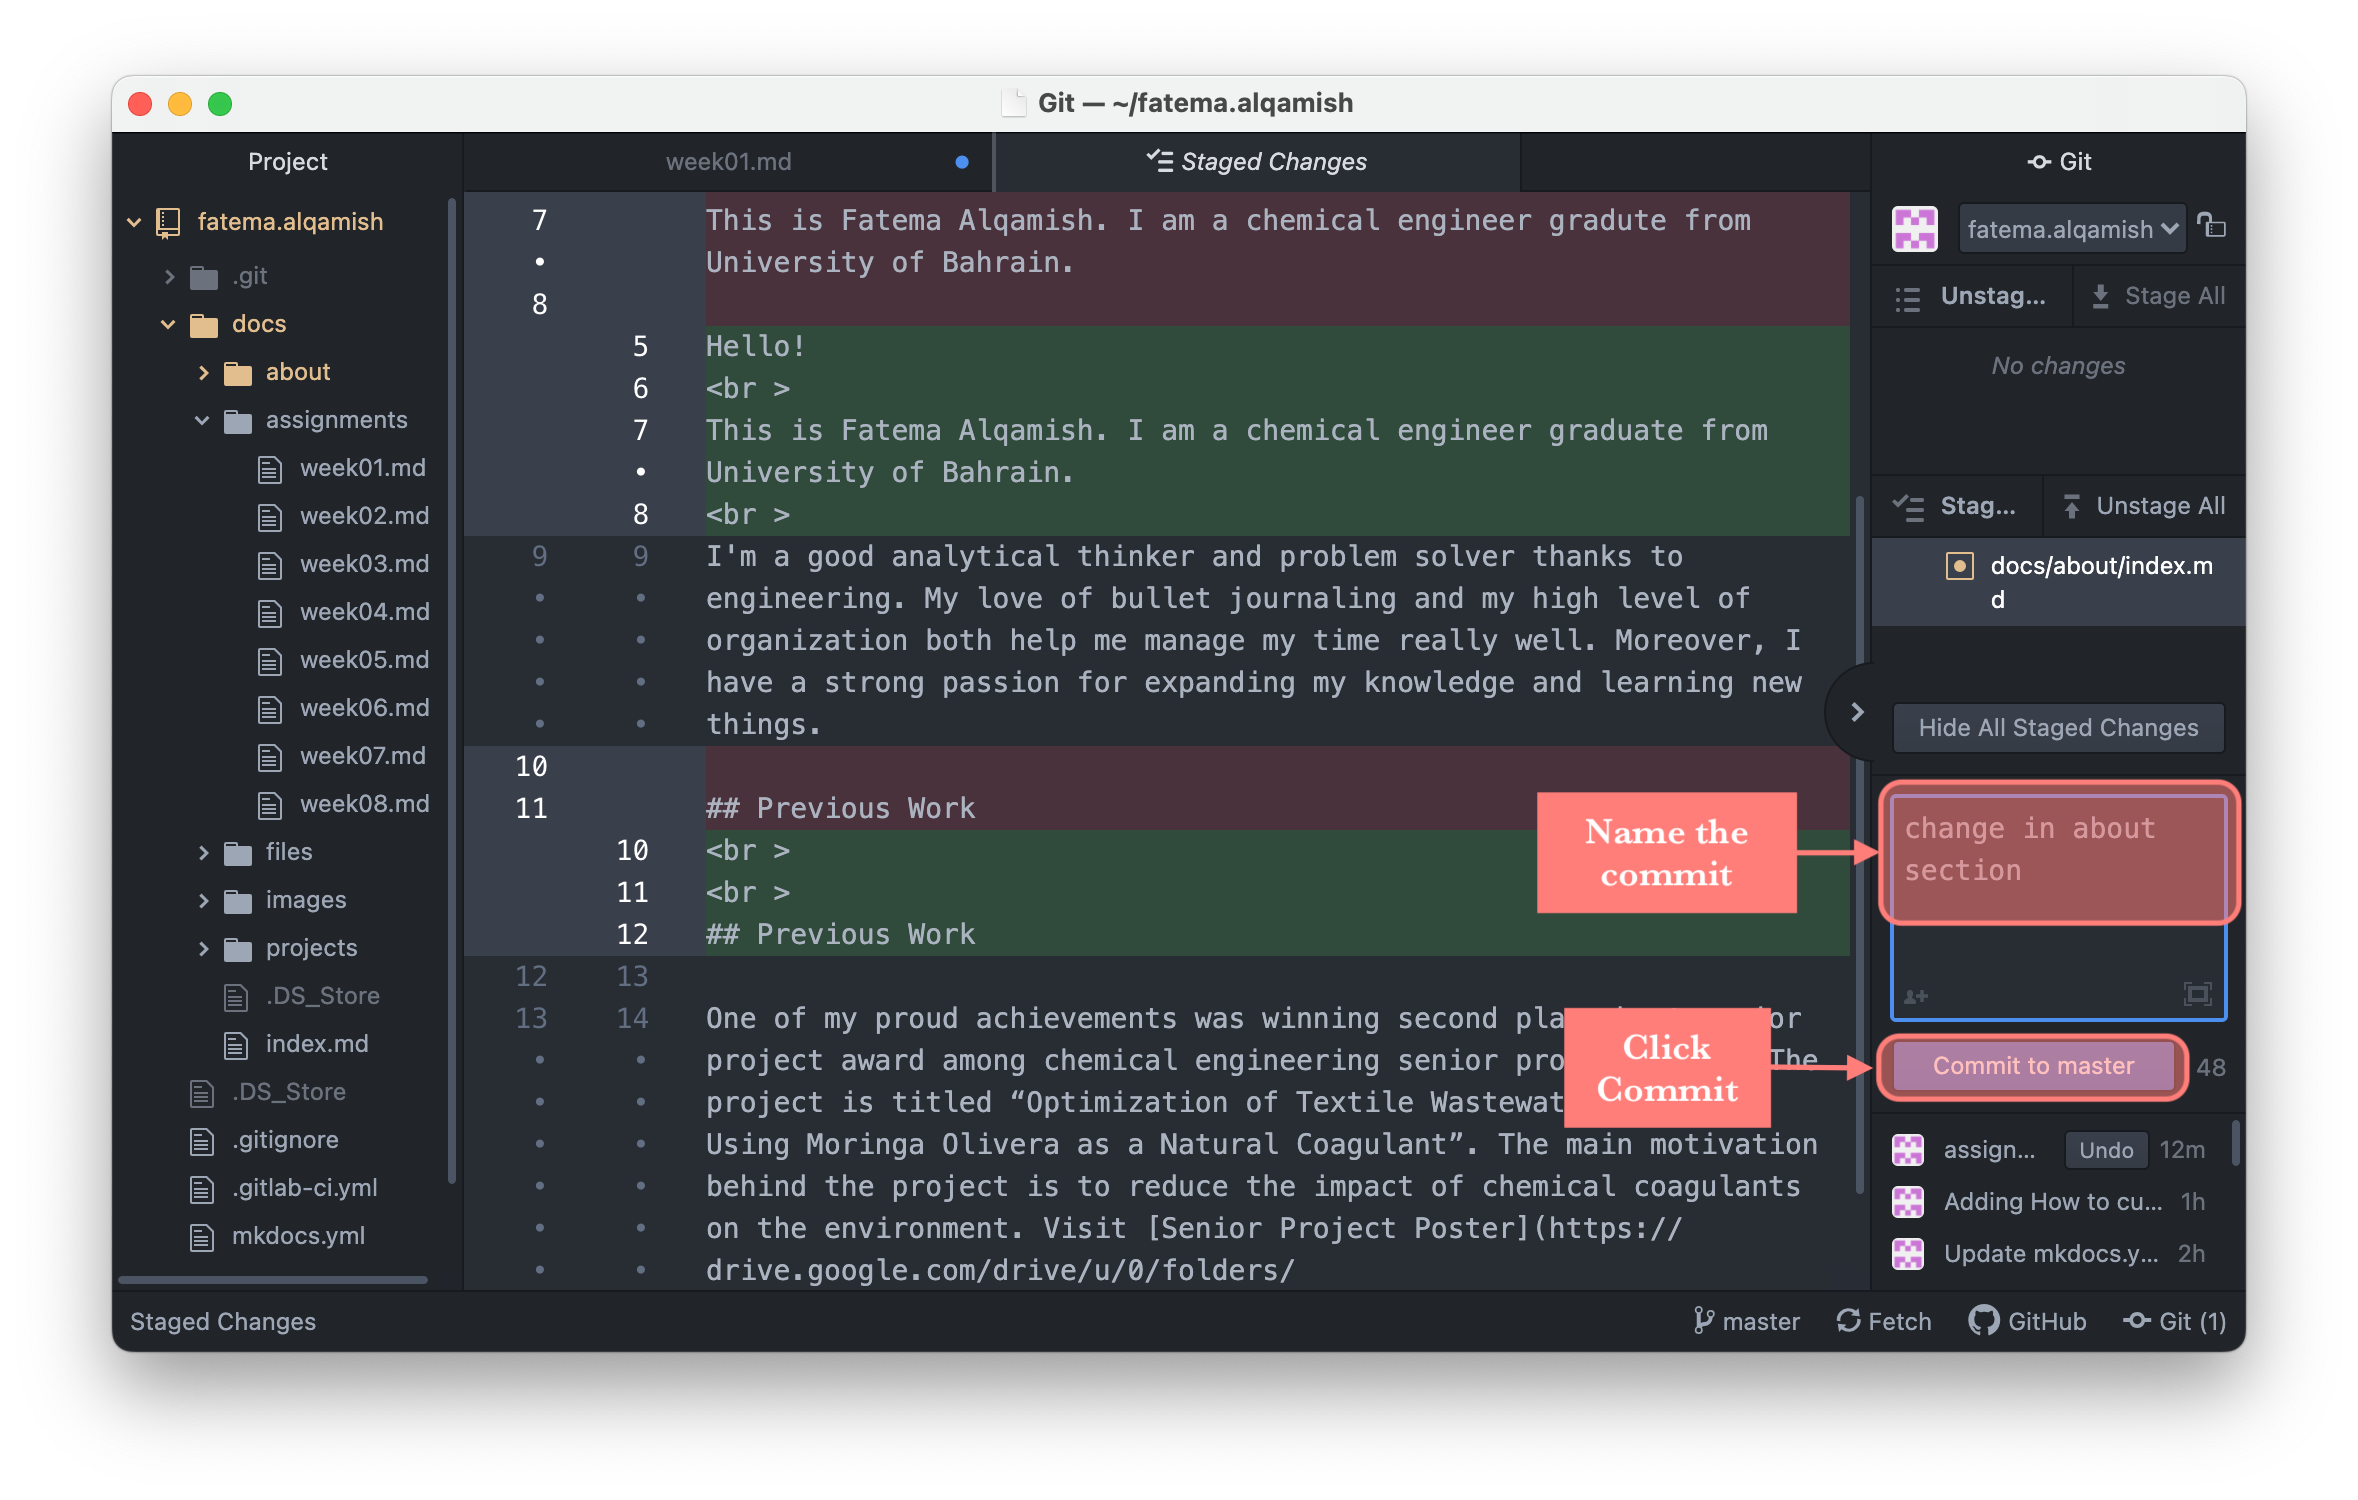
2. Step 2, after making the changes, save your work, then click stage all, at this step you can see your changes by clicking see all staged changes

3. Step 3, now you have to name your commit, after that click commit to master
4. Step 4, click push
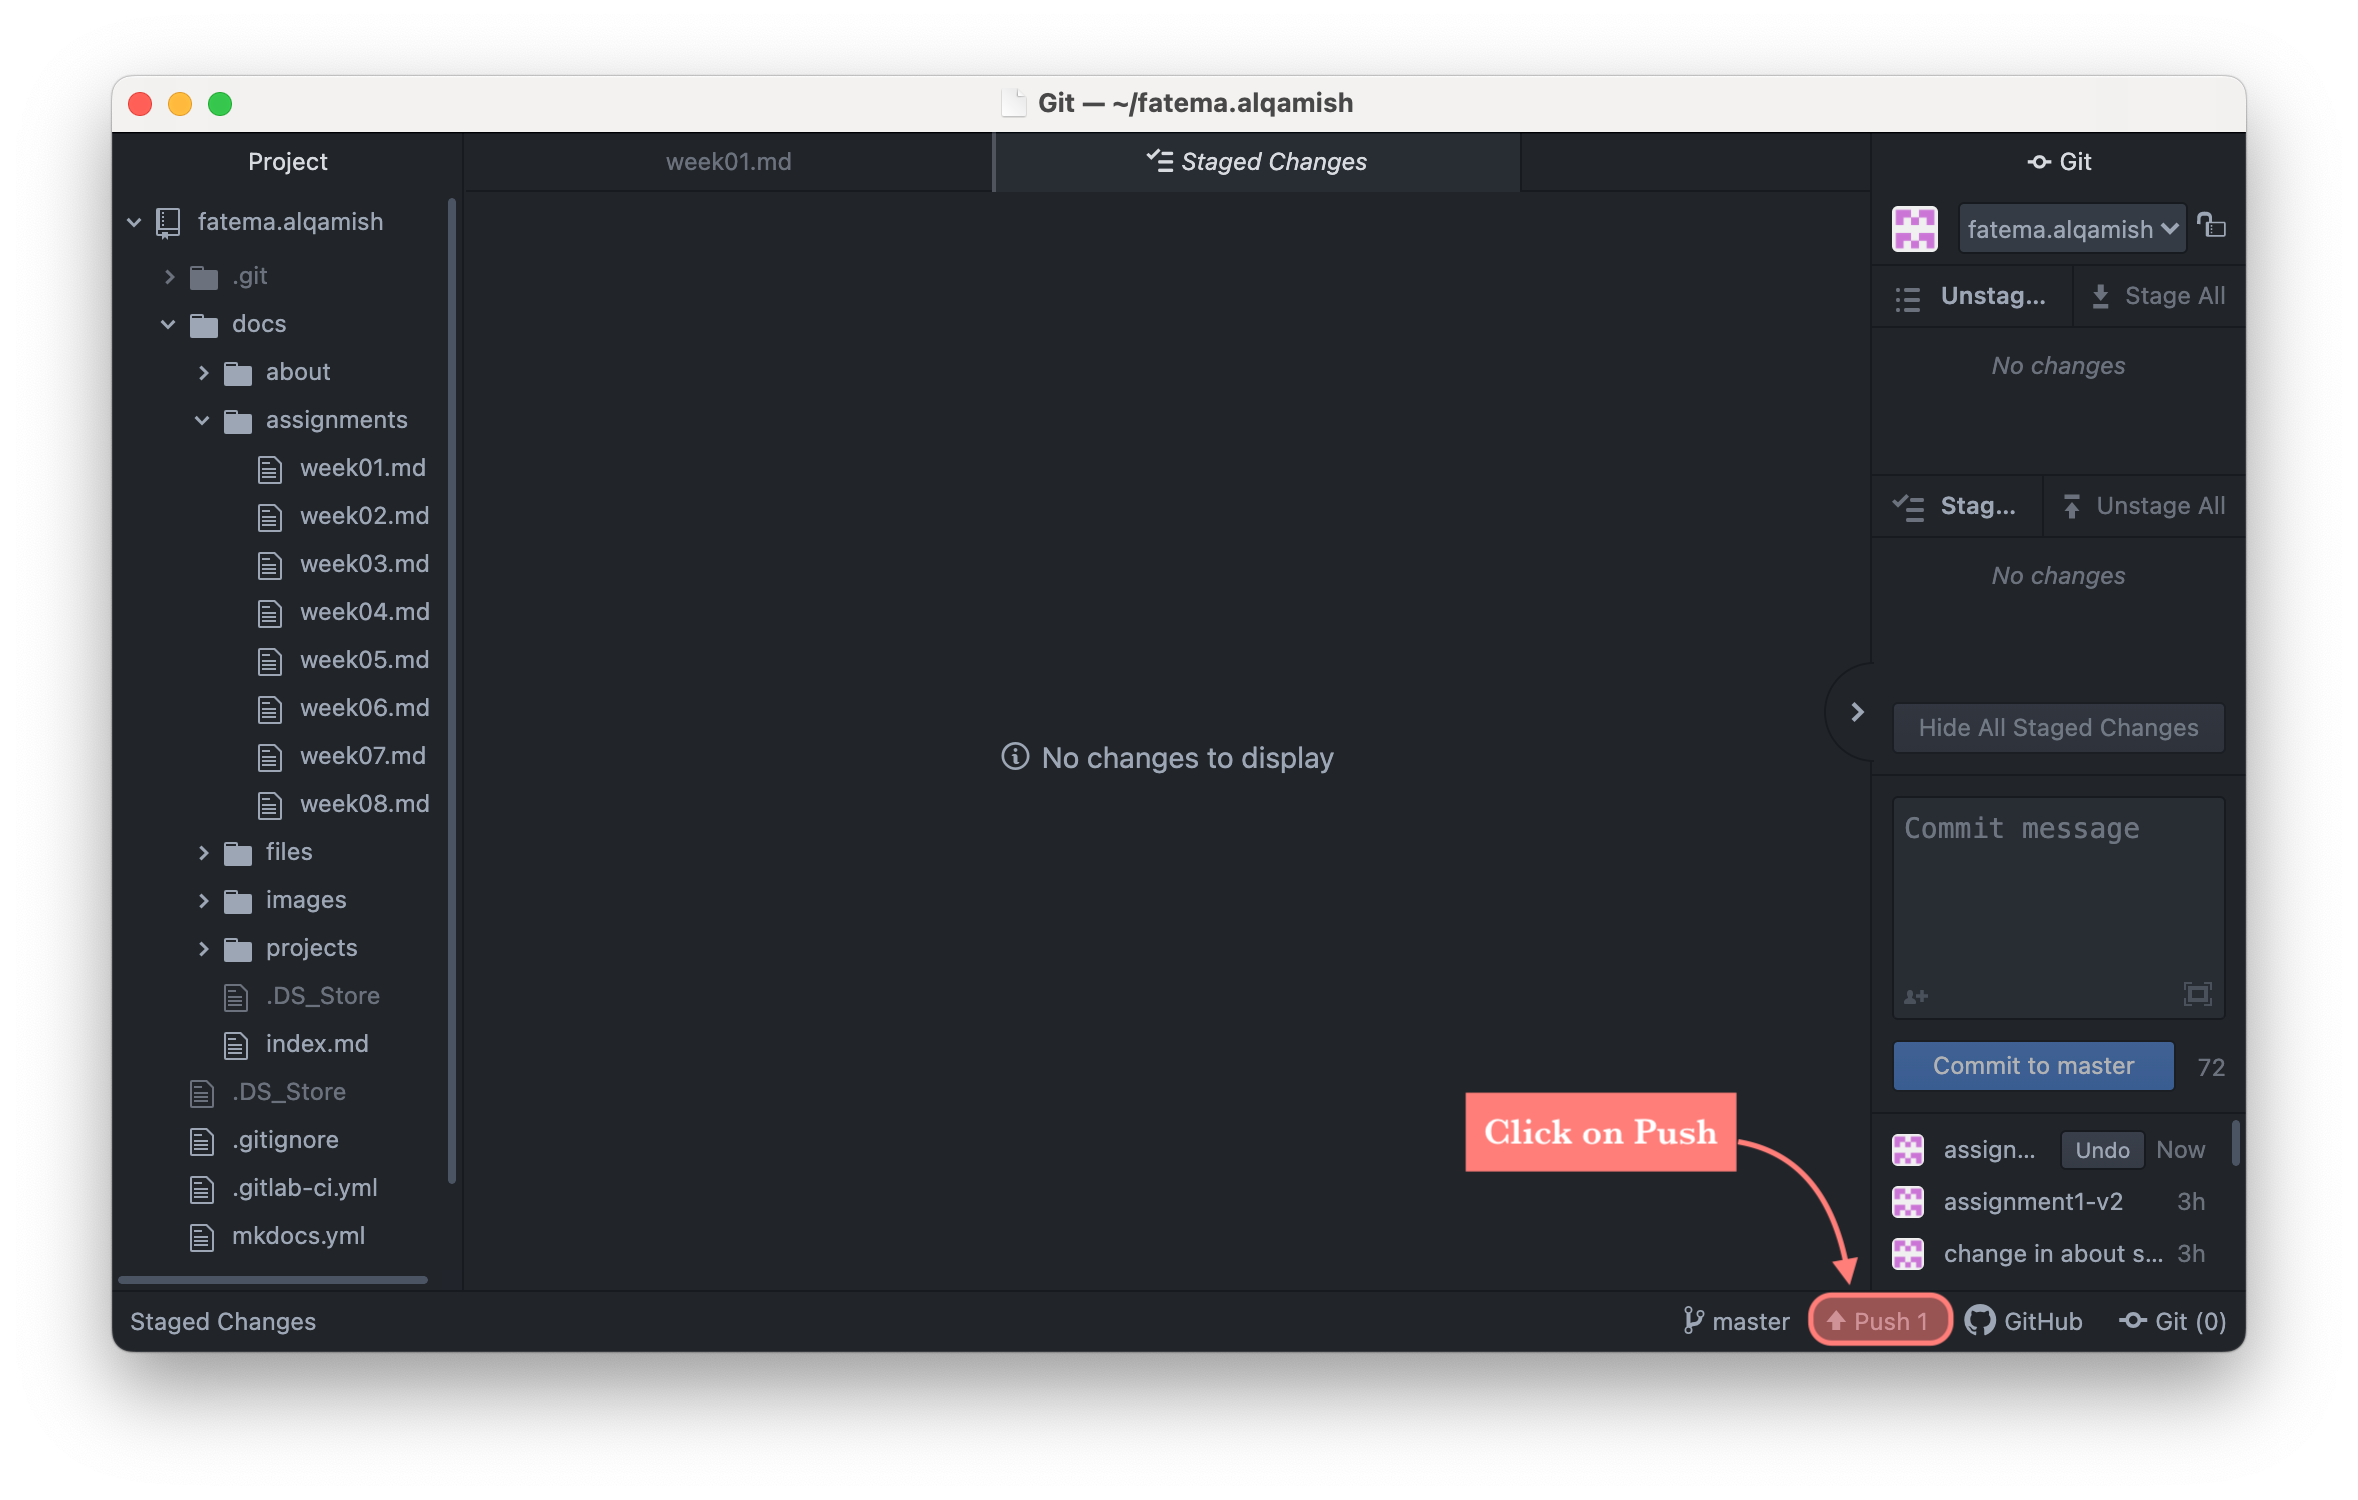
5. Step 5, finally, you can make sure of your changes by doing the following: open Git Lab then go to commits after that make sure that the name of your commit is there with a green tick
How to add images?
1. open the file you created when cloning, got to docs, images, then week01 for example2. grab the images you want into the files
3. In Atom, they will appear on the right, then click stage all, write a commit message, after that click commit to master then push
By doing this, your images will be uploaded and now you can use them 4. To add an image, in atom script write ""
5. Then, save your changes, stage all, write a commit message and push
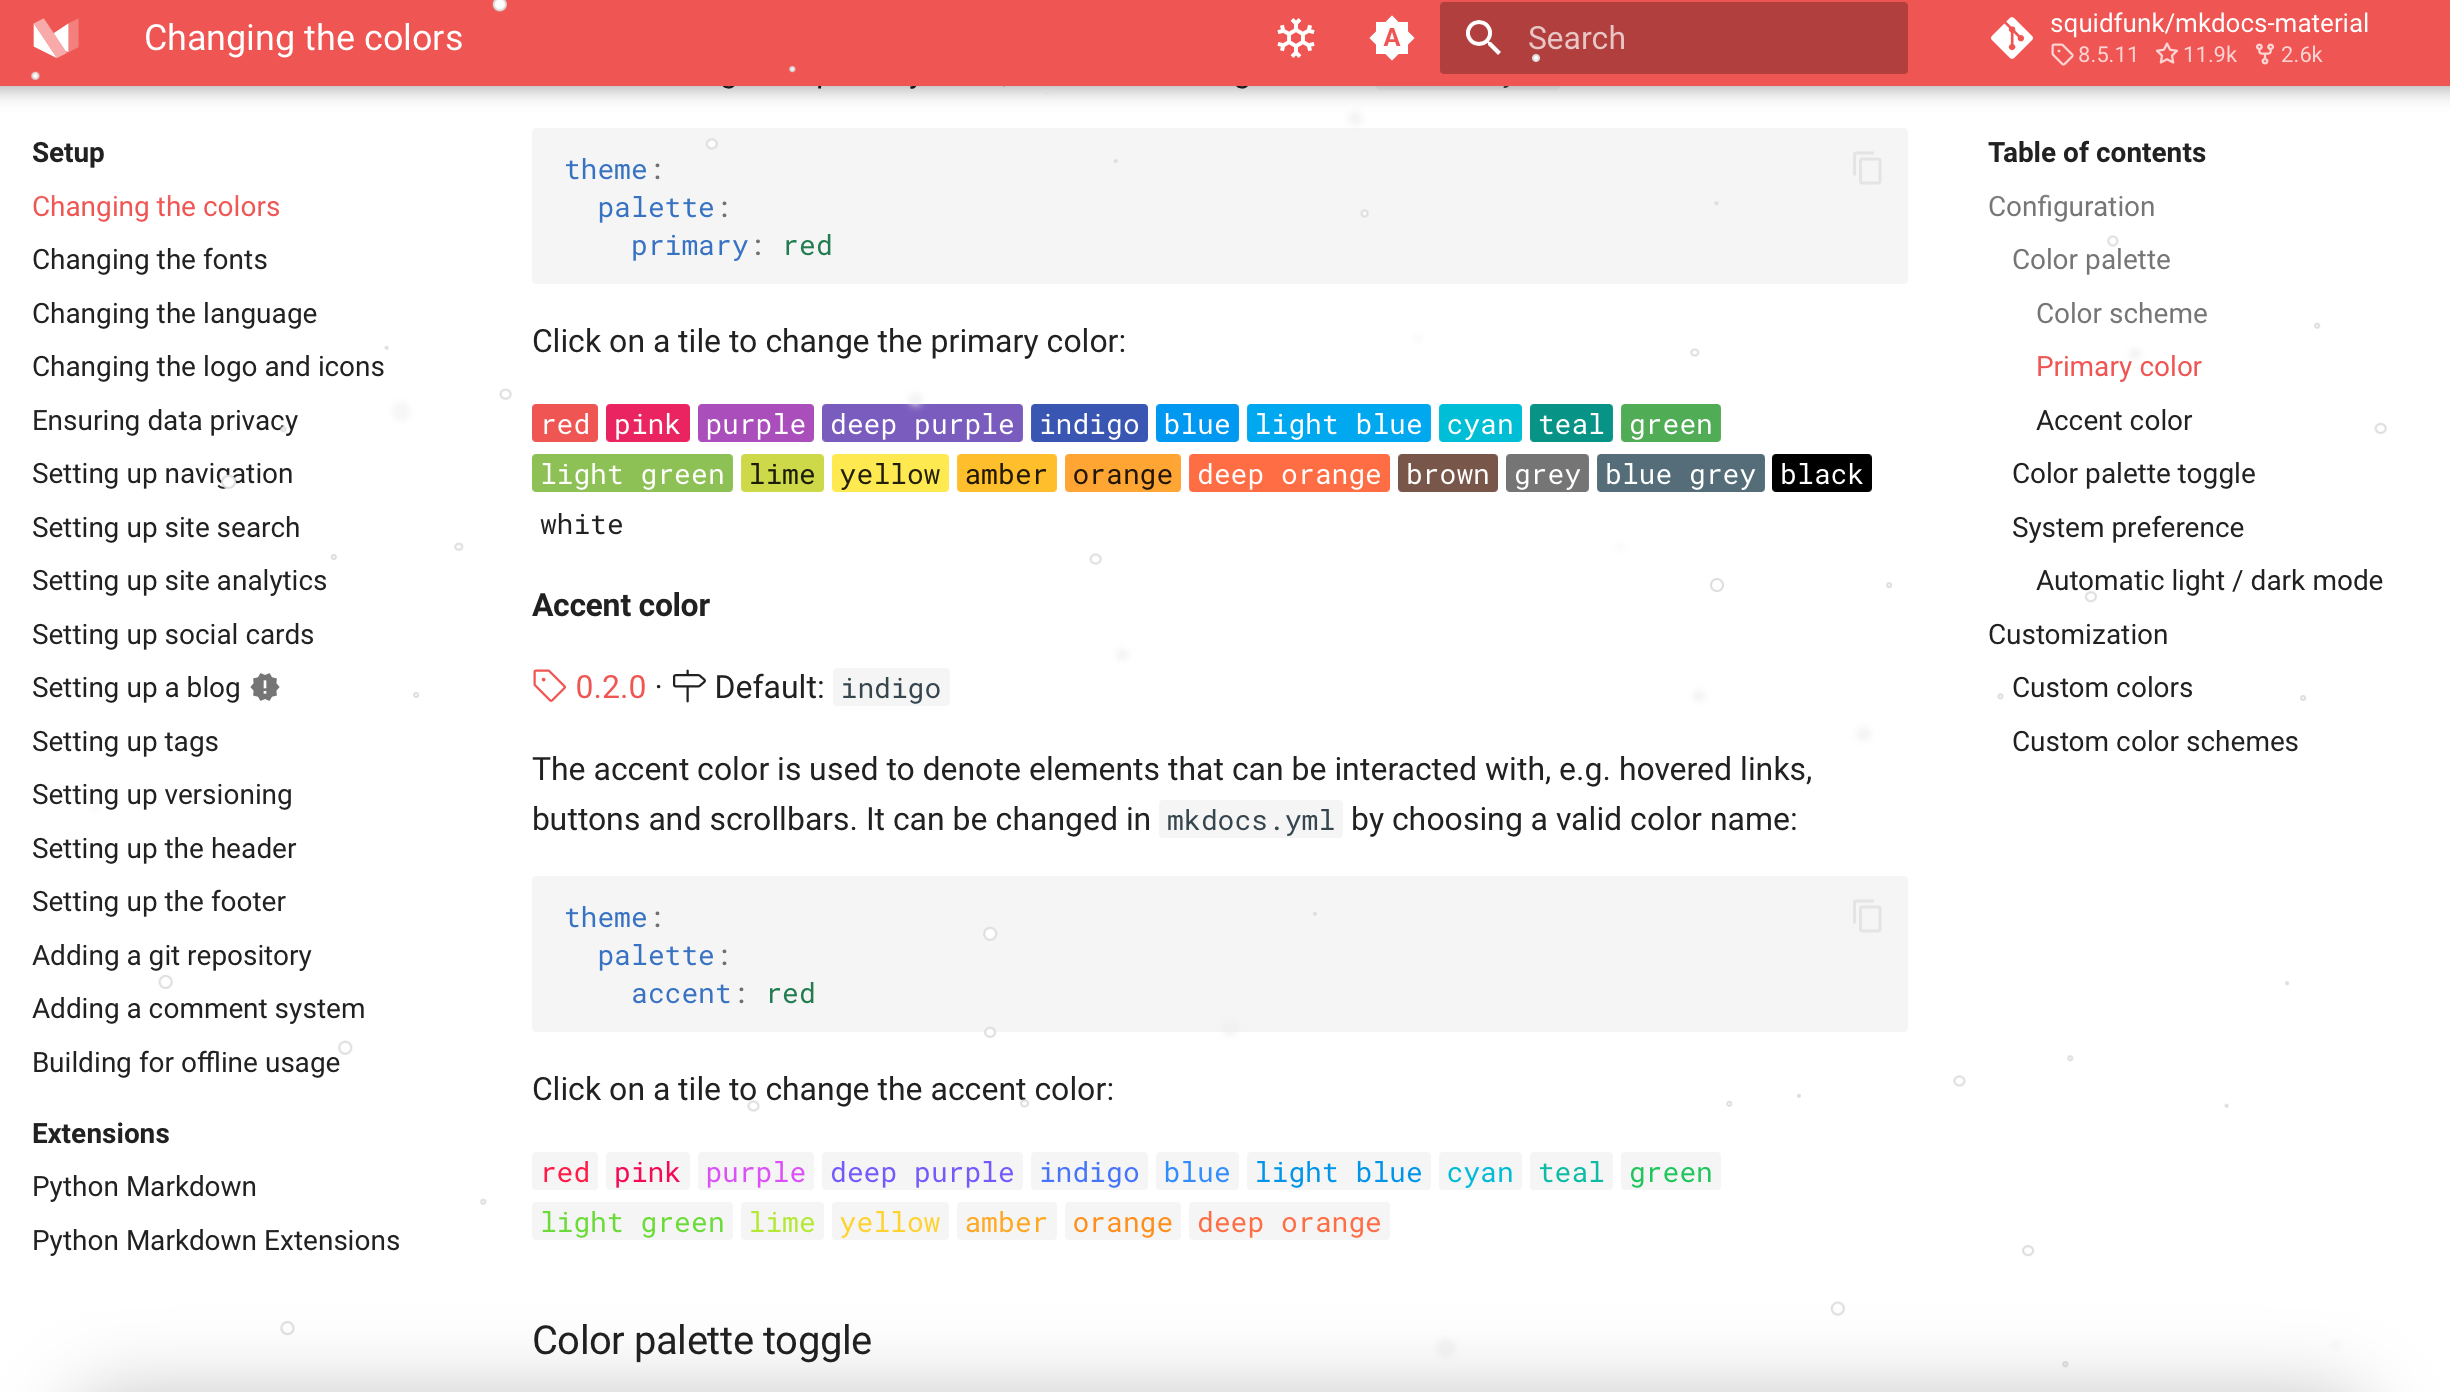
How To Customize Your Website?
- Step 1, visit this website to see how to customize your website, for example it will help you to visualize the color of your website
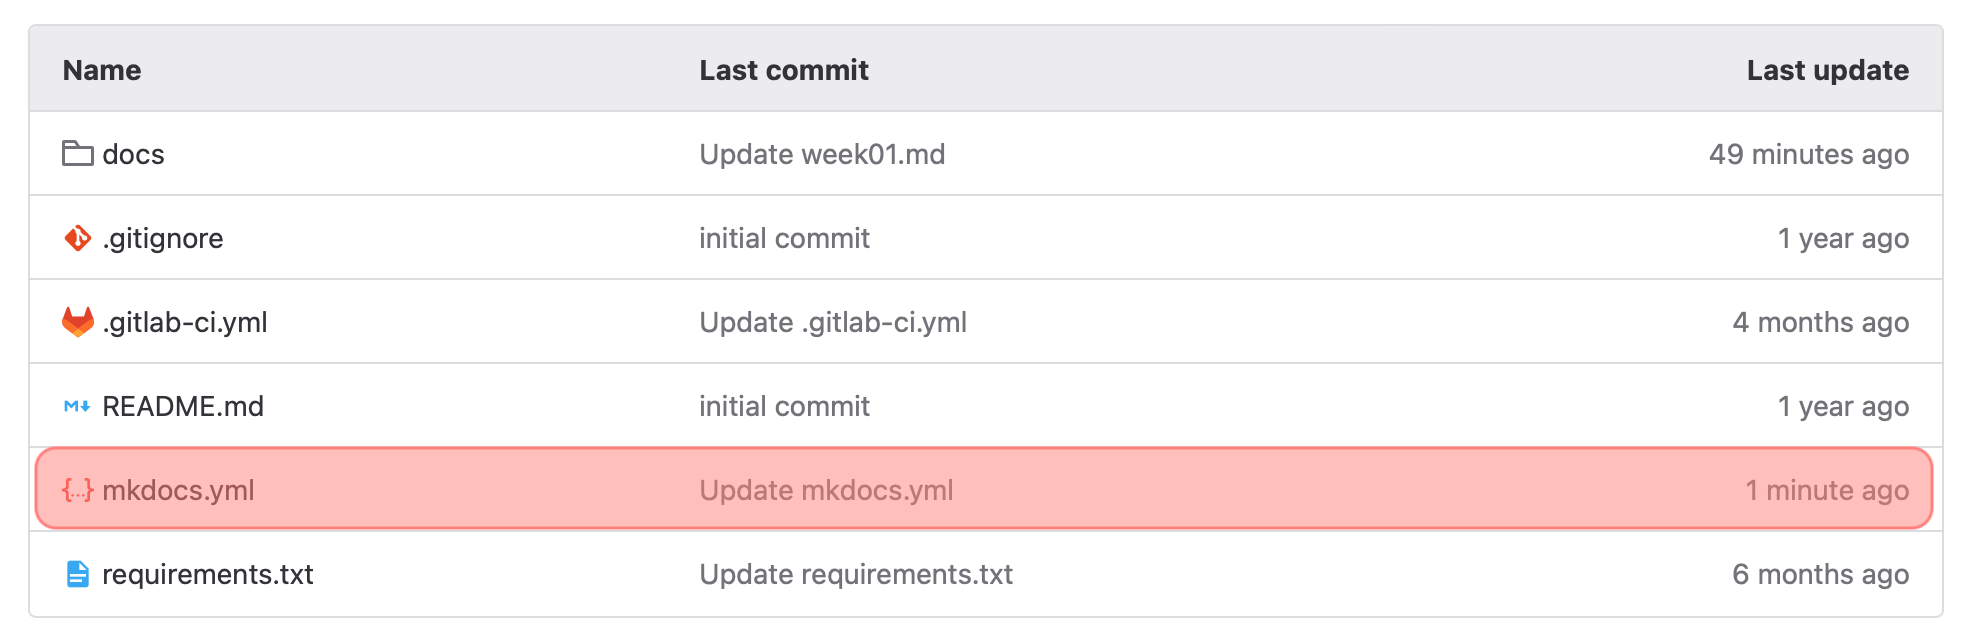
- Step 2, on your Git Lab open mkdocs.yml, then click on edit
- Step 3, you can change the color, font and more by typing it here, depending on the website
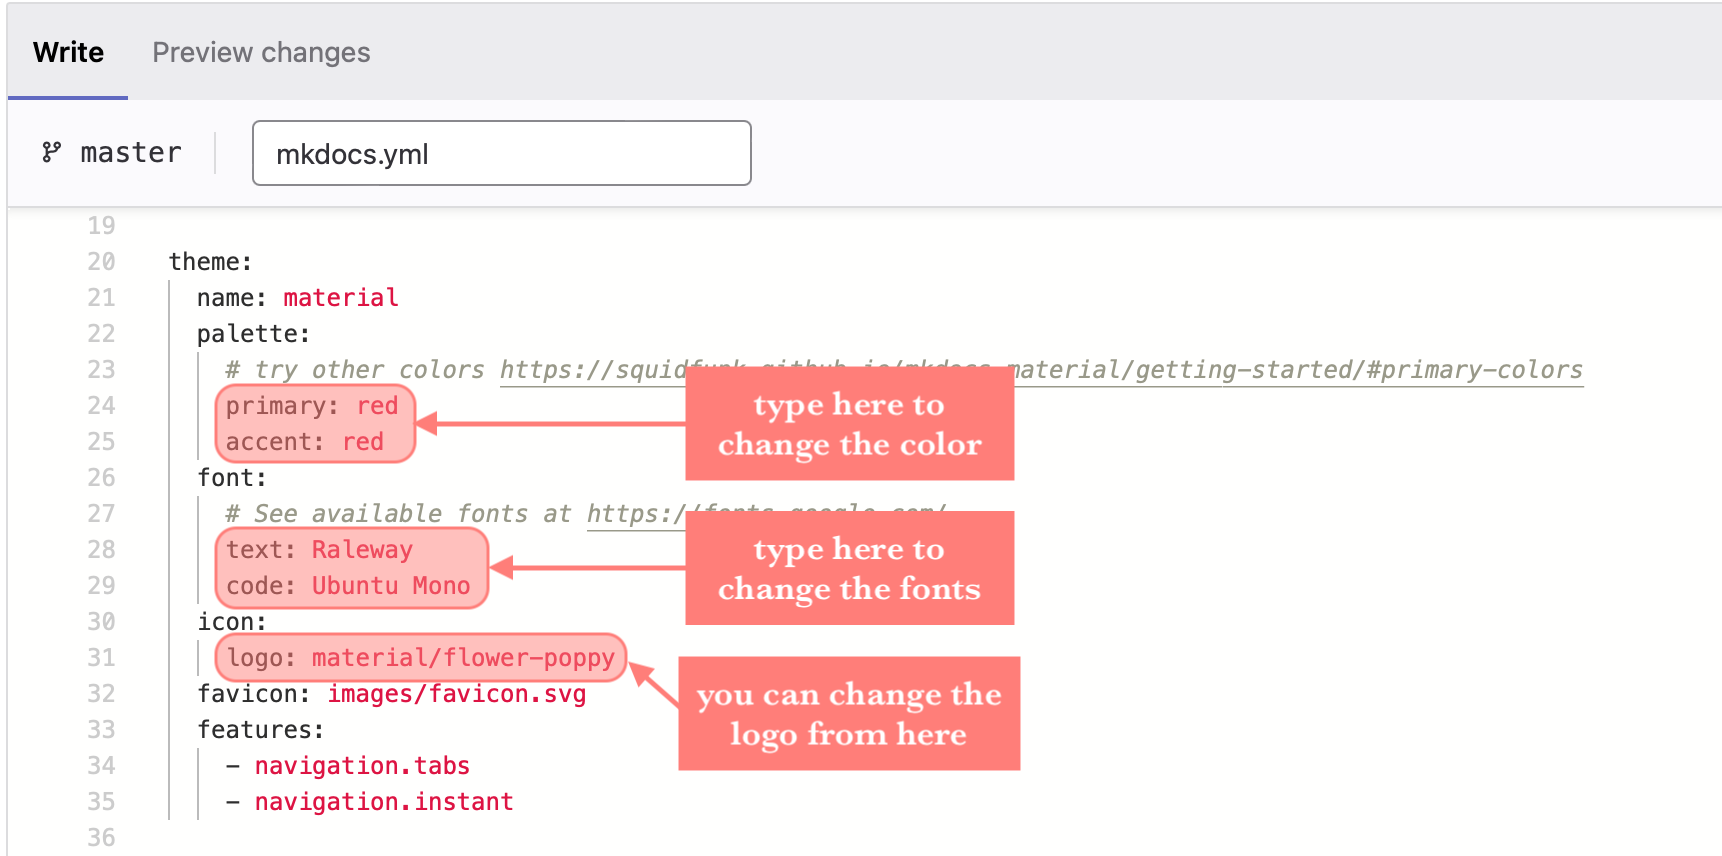
- Step 4, click on commit changes, then go to your website to make sure of the changes
How To ..?
To make a list
- list item number 1
- list item number 2
To add a horizontal line
<hr/>
To add a break
<br>
To make a heading
#Heading1
##Heading2
###Heading3
To make the text bold
**text**
To make the text italics
-text-
To make the text bold and italics
***text***
To add a strikethrough text
~~text~~
To insert a quote
> write a quote here
To add a link
[title](link)
To add an image

To add a collapsible section
<details><summary>Add The Title Here</summary>
add text Here
</details>
To make buttons
[title](link){.md-button}
To add an emoji ✨
command+control+space