2. Computer Aided Design
This week I explored multiple 2D and 3D computer aided design softwares.
What Is CAD?
Before a product is ever made, it is possible to digitally develop 2D drawings and 3D models of it using Computer Aided Design (CAD). CAD enables professionals to produce more precise design representations. By replacing manual design drafting with CAD, design development, modification, and optimization were made possible. Engineers can create more accurate designs and alter them virtually in CAD. Before any prototypes are created, it is now much easier to look into faults, identify issues, and solve them.
Raster And Vector
Raster files are images built from pixels — tiny colour squares that, in great quantity, can form highly detailed images such as photographs. The more pixels an image has, the higher quality it will be, and vice versa. The number of pixels in an image depends on the file type (for example, JPEG, GIF, or PNG).
Vector files use mathematical equations, lines and curves with fixed points on a grid to produce an image. There are no pixels in a vector file. A vector file’s mathematical formulas capture shape, border, and fill colour to build an image. Because the mathematical formula recalibrates to any size, you can scale a vector image up or down without affecting its quality.
Raster and vector files are the two most popular file types for graphic content. They use different methods to represent images. Resolution, file size, and extension types are a few of the main differences between raster and vector.
2D Softwares: Cuttle & Inkscape
Cuttle
Cuttle is a 2D design tool for digital cutting machines on the web. A vector editor with features for cut design like live modifiers, parameters, reusable components, and scripting. It allows you to make interesting 2D designs quickly like logos. Click here to open cuttle. You only need to make an account.
I followed an easy tutorial to make a layered snow flake ❄️, here is how I did it.
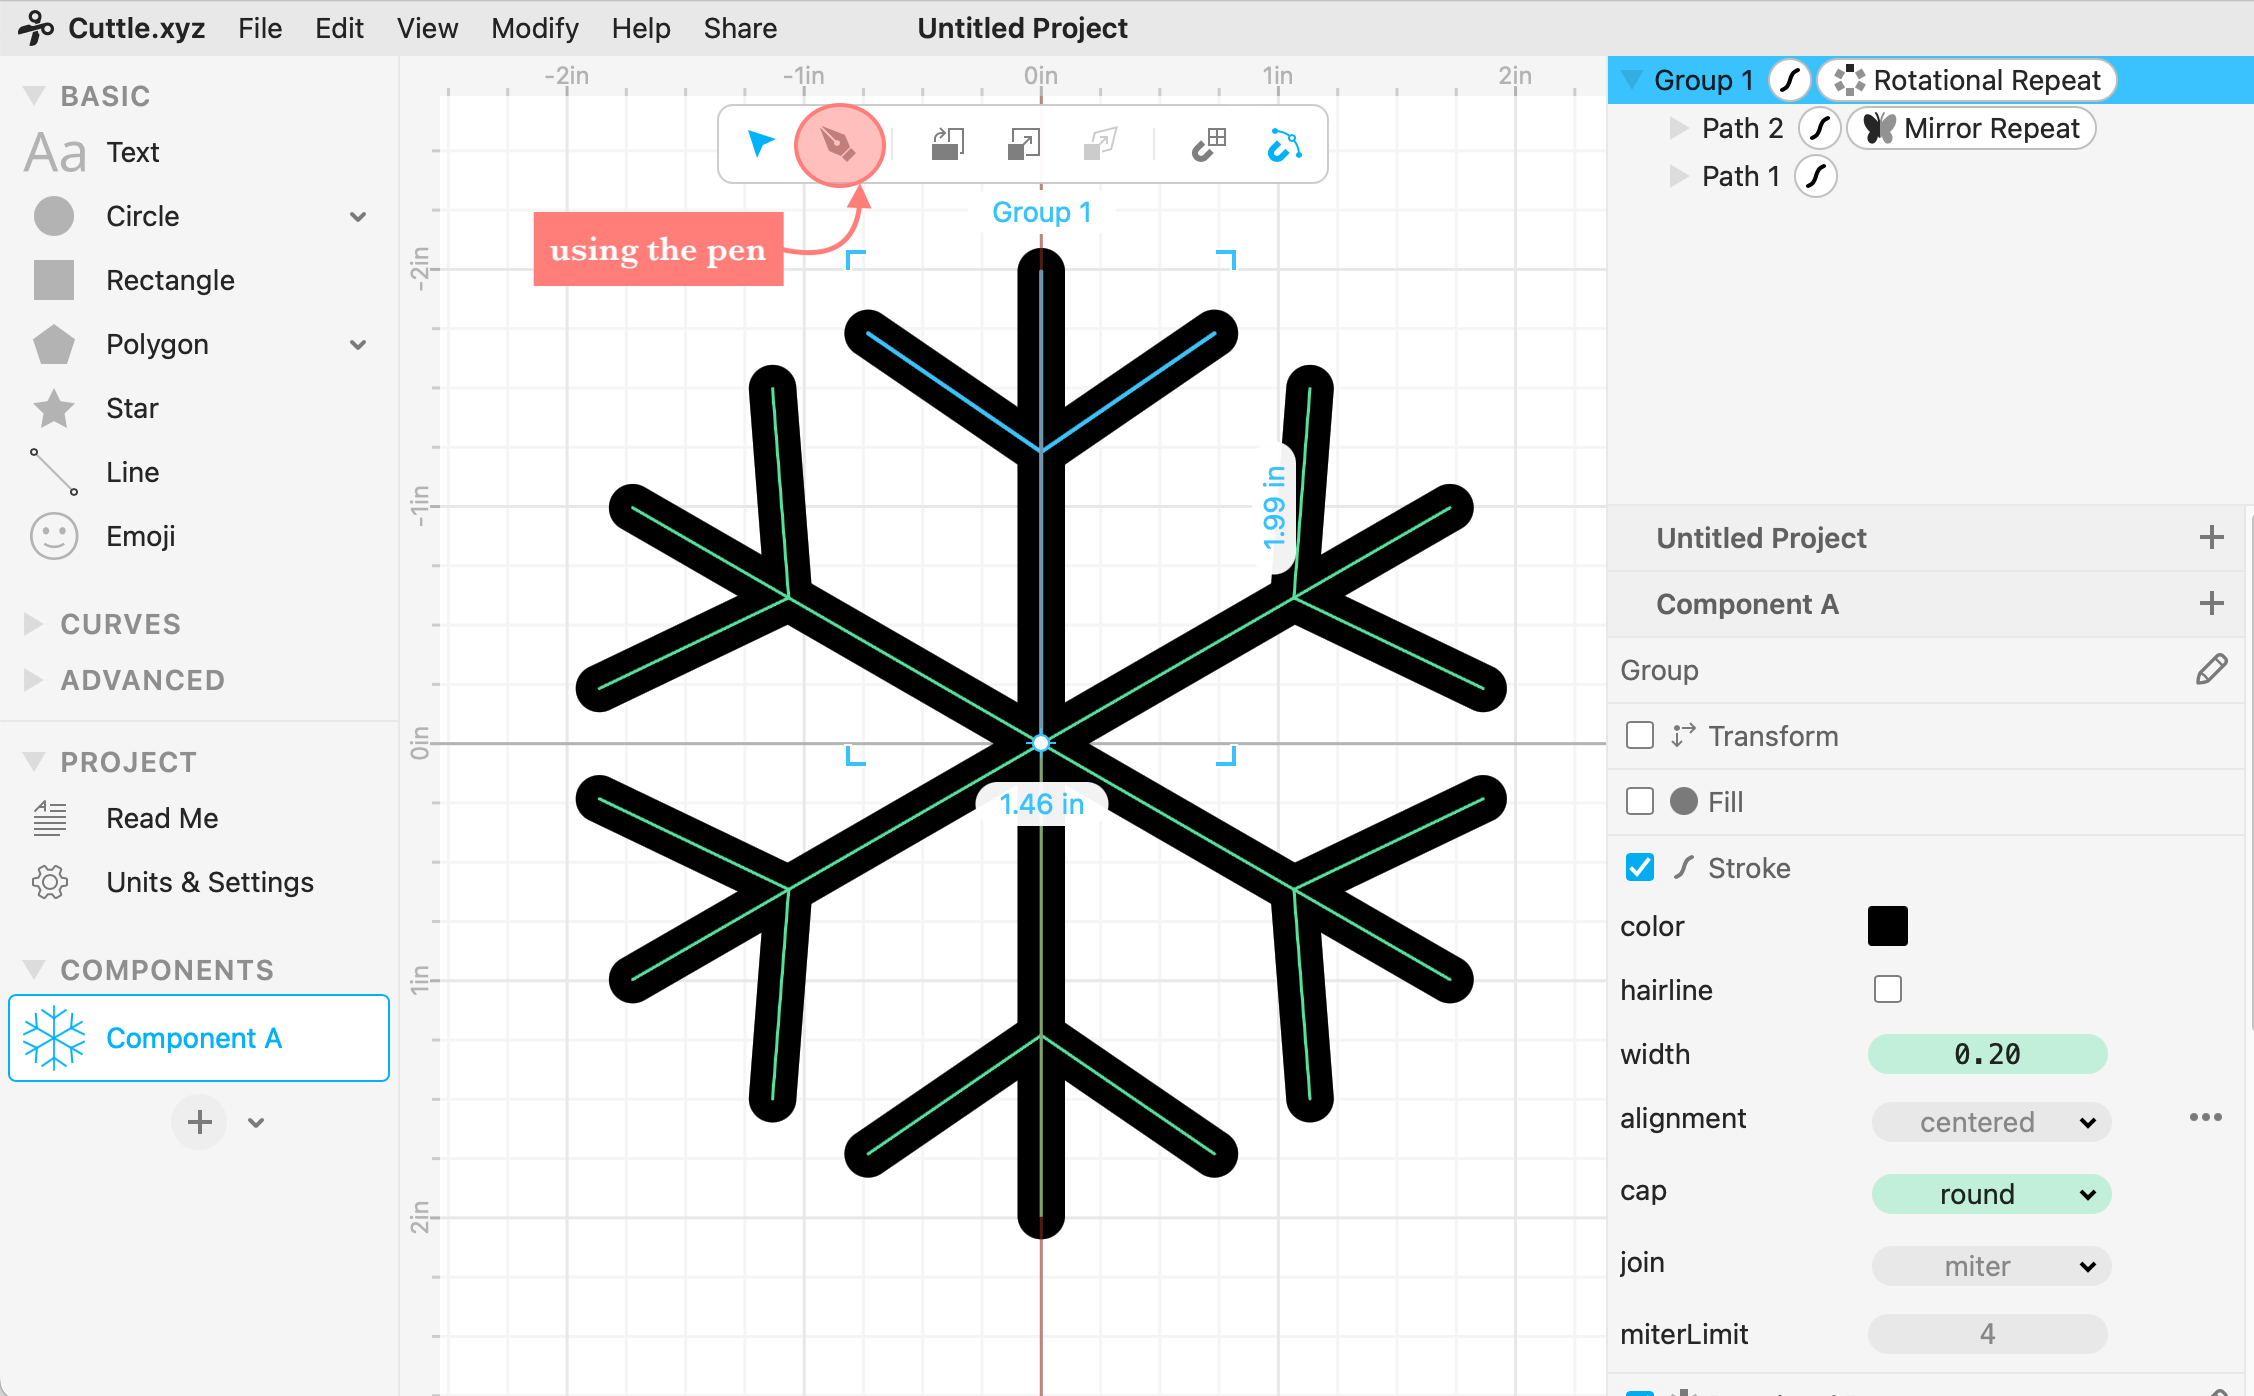
1. Step 1, using the pen I drew a line in the center, then I drew a slanted line, next I mirrored it, after that I used the rotational repeat.
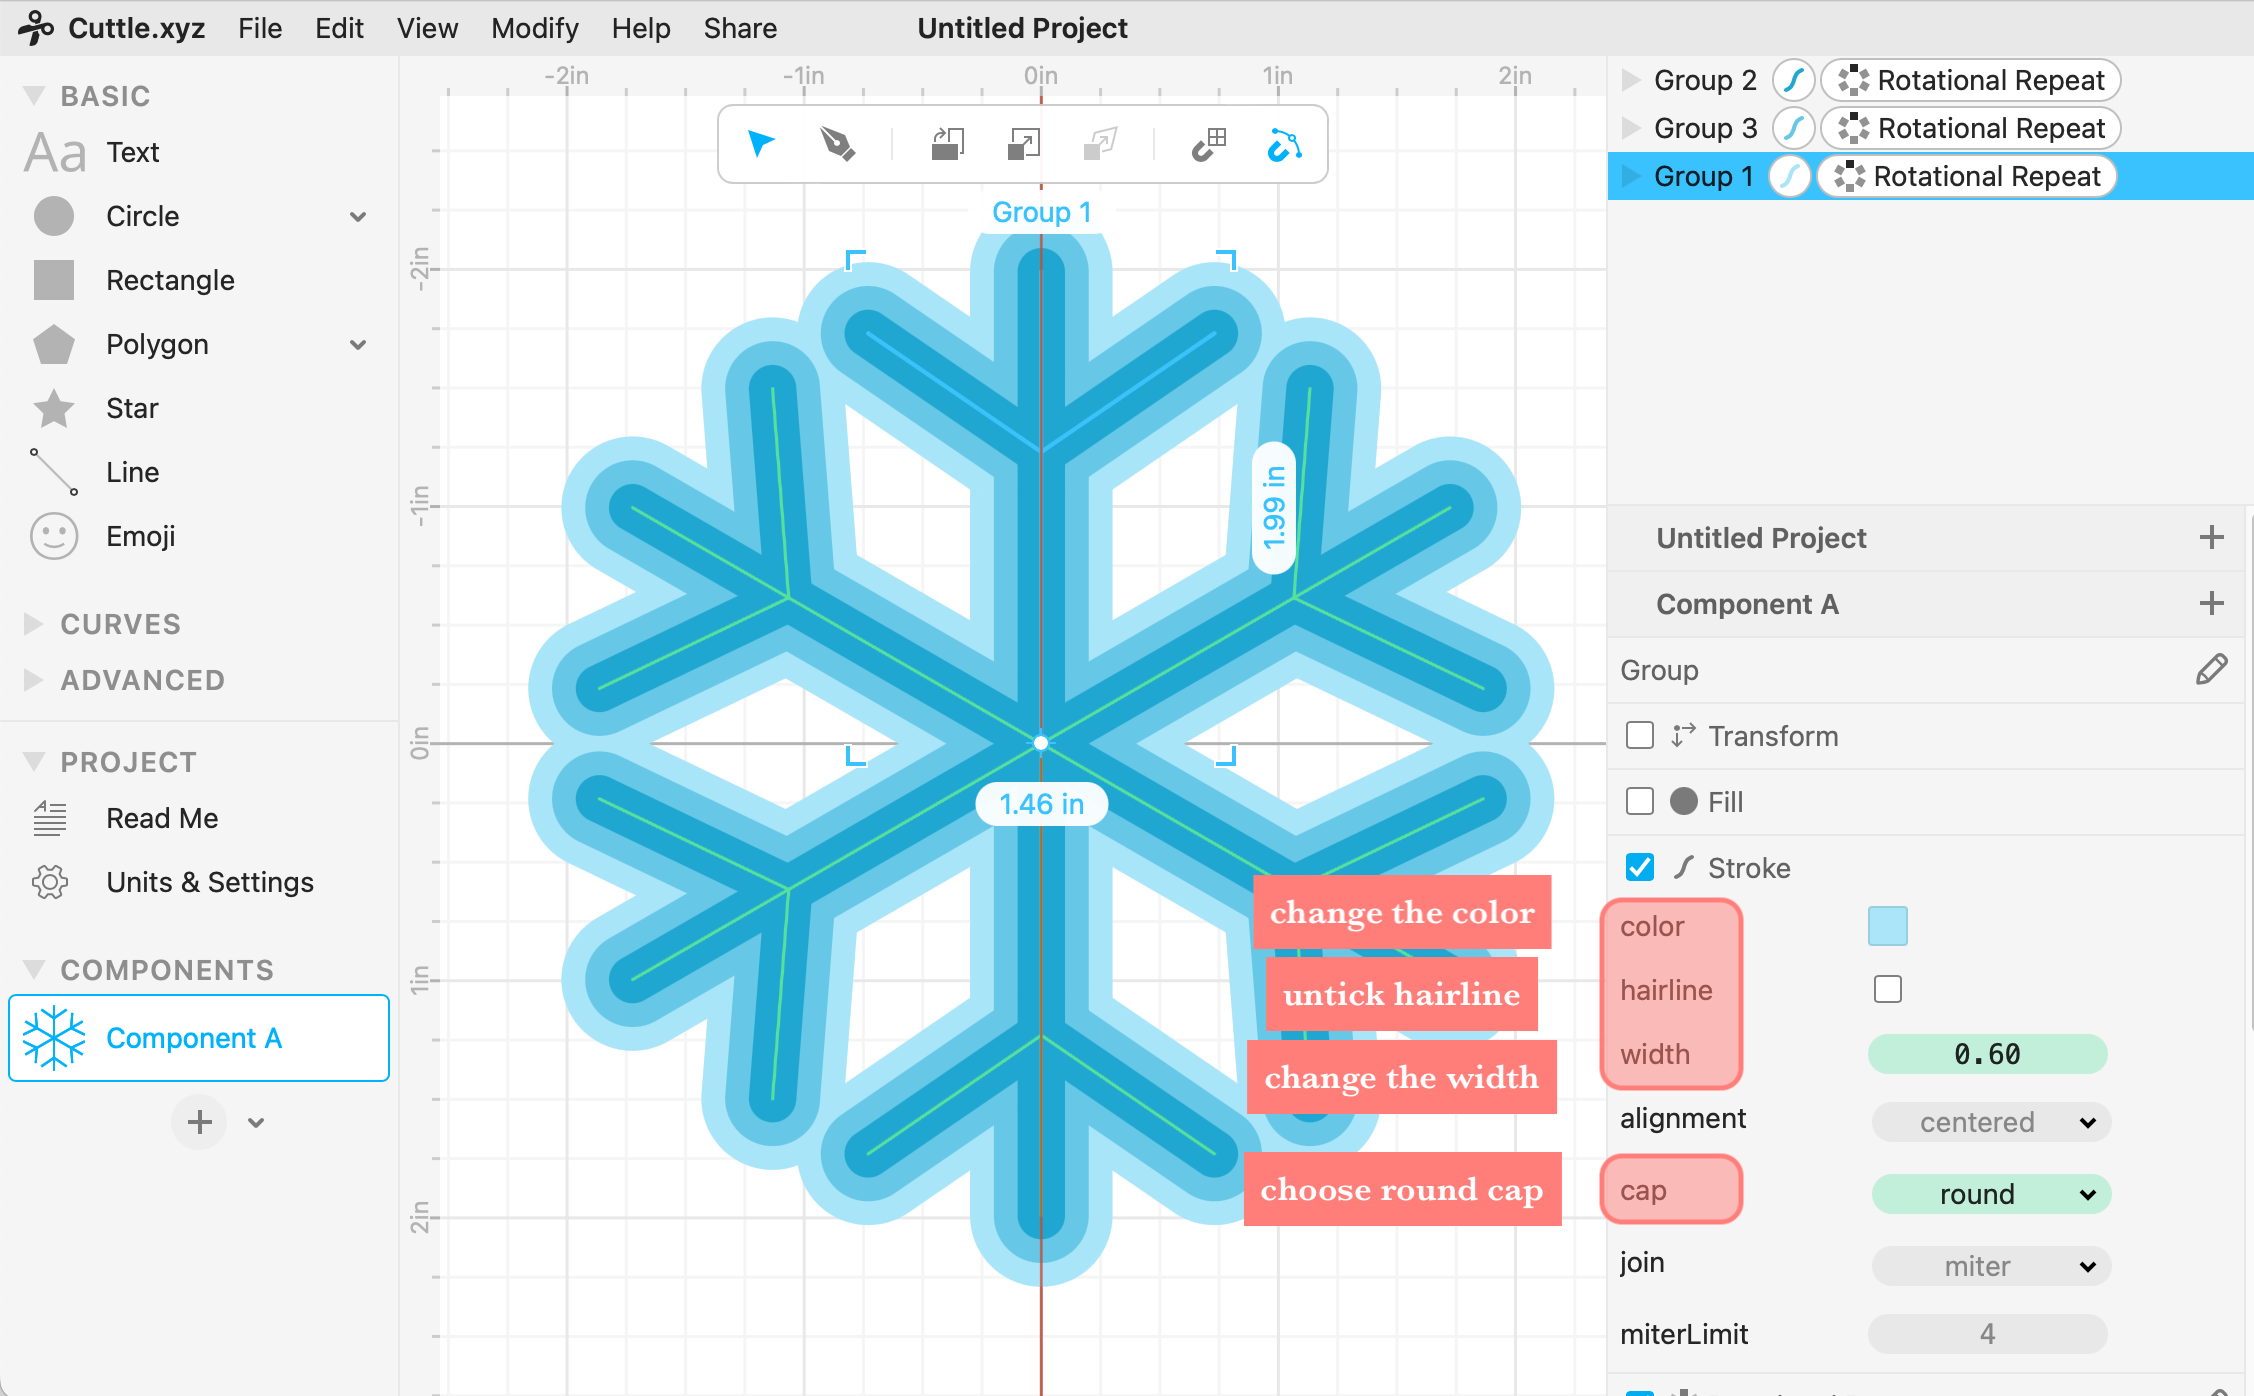
2. Step 2, from stroke part at the right, untick hairline, change the color, change the width, change the cap to round.
3. Step 3, duplicate the group twice, make each group different width and different color.
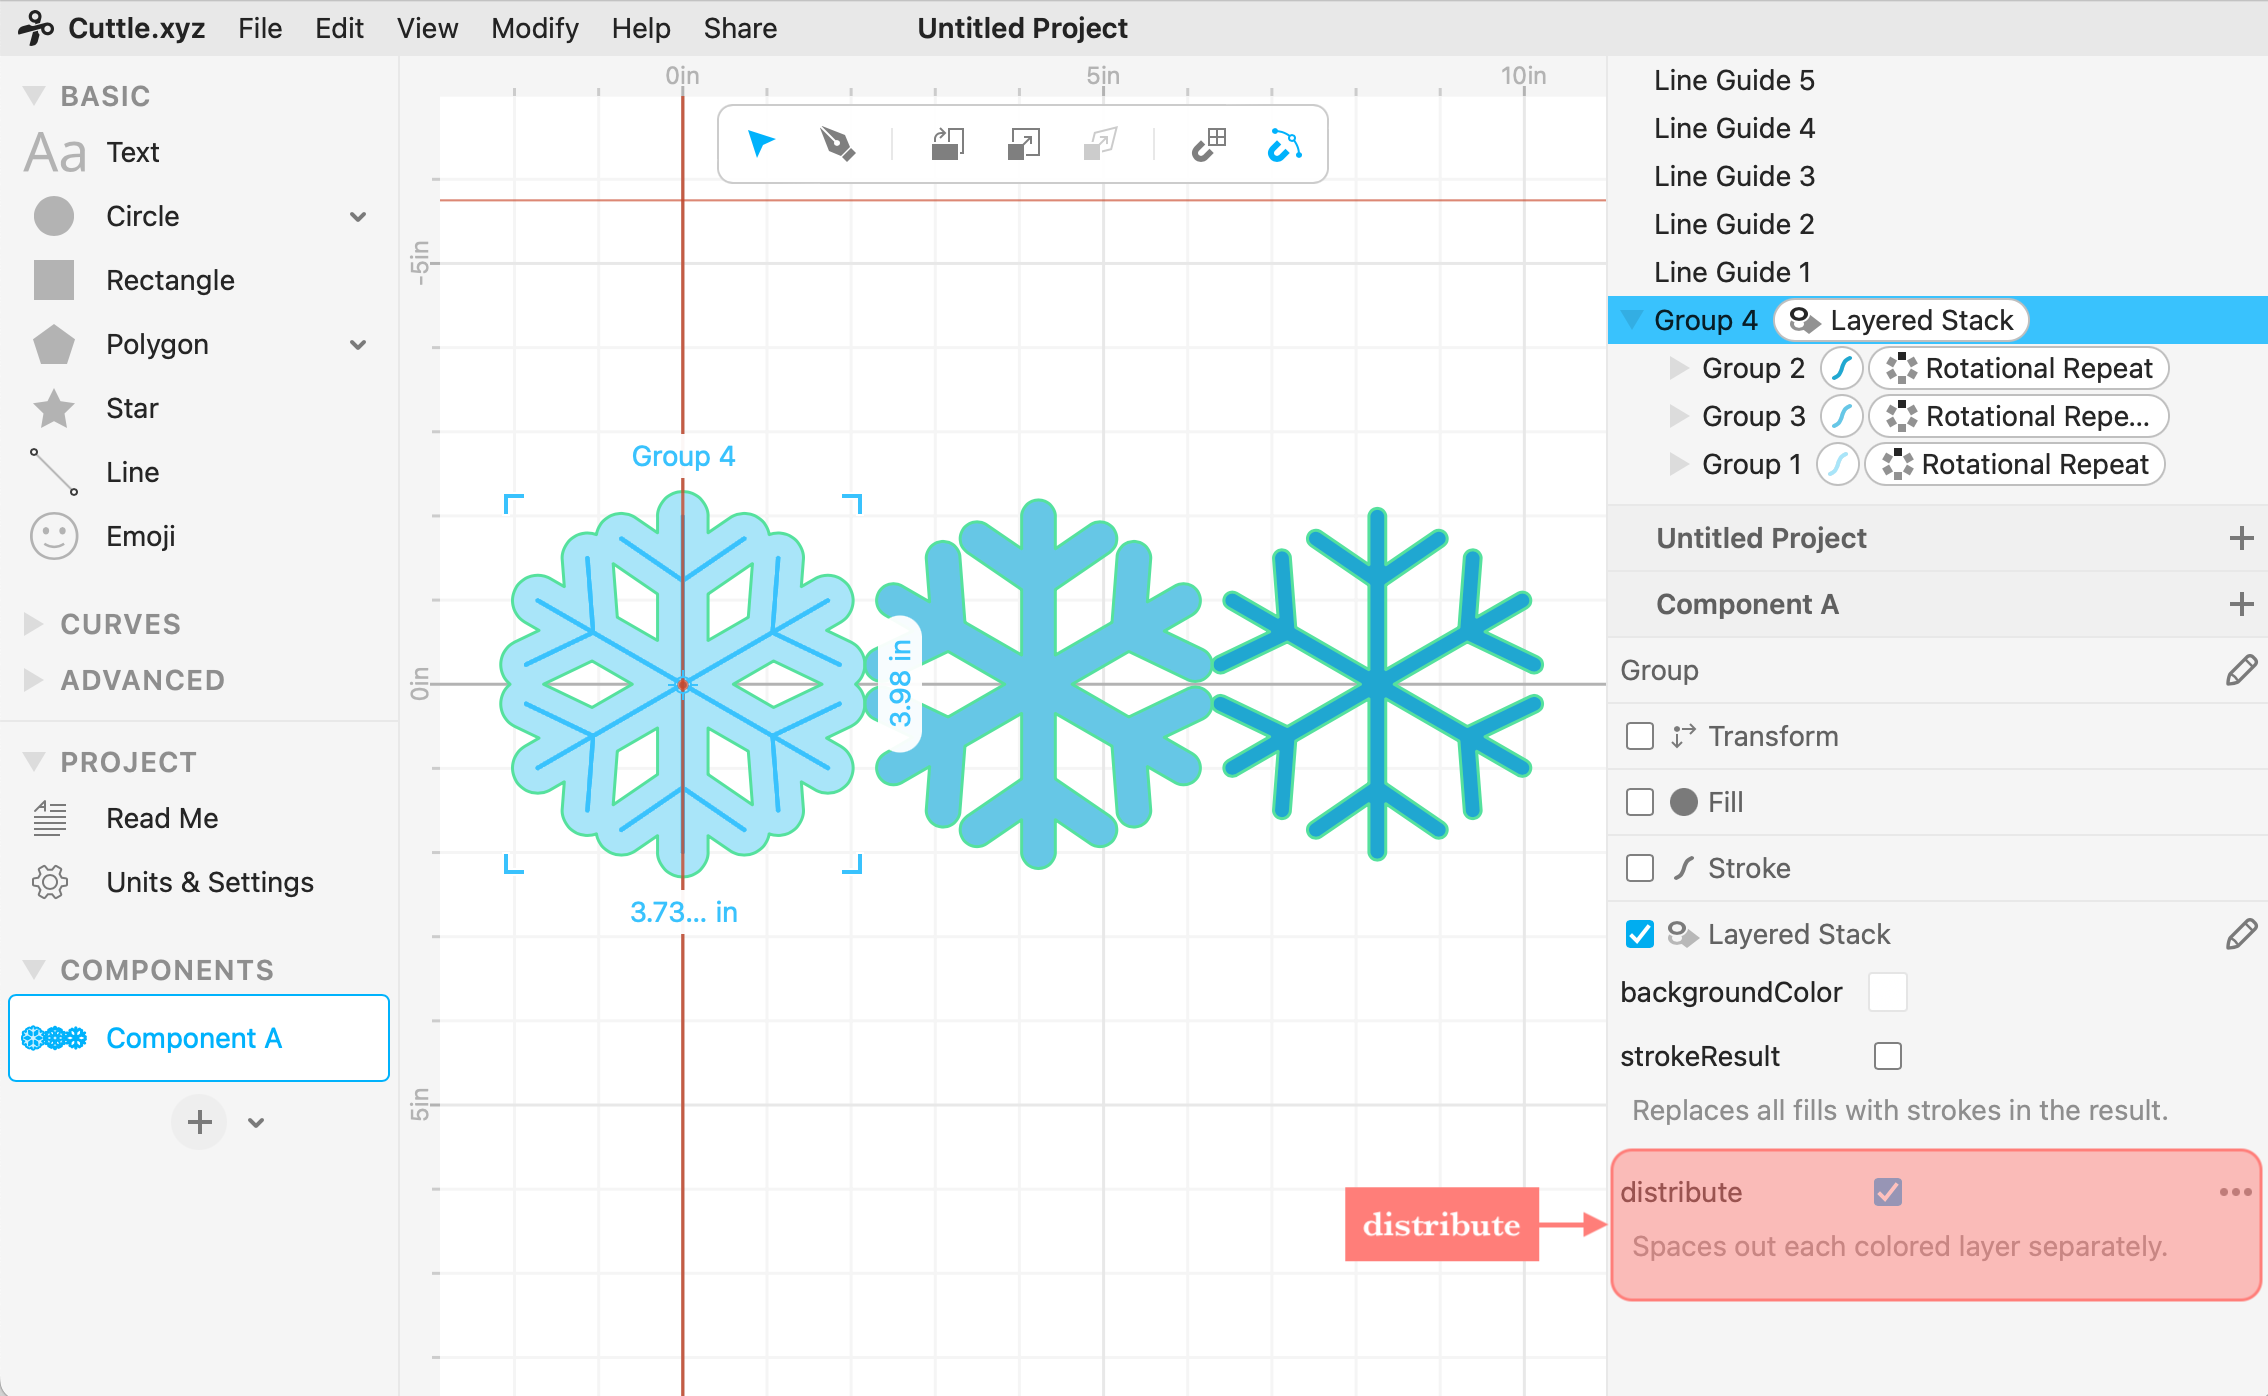
4. Step 4, from modify choose layered stack.

5. Step 5, choose distribute to space out each colored layer separately.
It was my first time to use Cuttle, it was really easy to use and straight forward.
At the end, this how the snow flake ❄️ turned out.


Inkscape
Inkscape is a 2D design tool. It is a free and open-source vector graphics editor used to create vector images, primarily in Scalable Vector Graphics format. Other formats can be imported and exported. Inkscape can render primitive vector shapes and text. Click here to download Inkscape. It is pretty easy to download.
I created a very simple flower 🌸 in Inkscape, follow these step to replicate it.
1. Step 1, the whole flower is created from a star, before finishing the flower change the spoke ratio and the rounded.

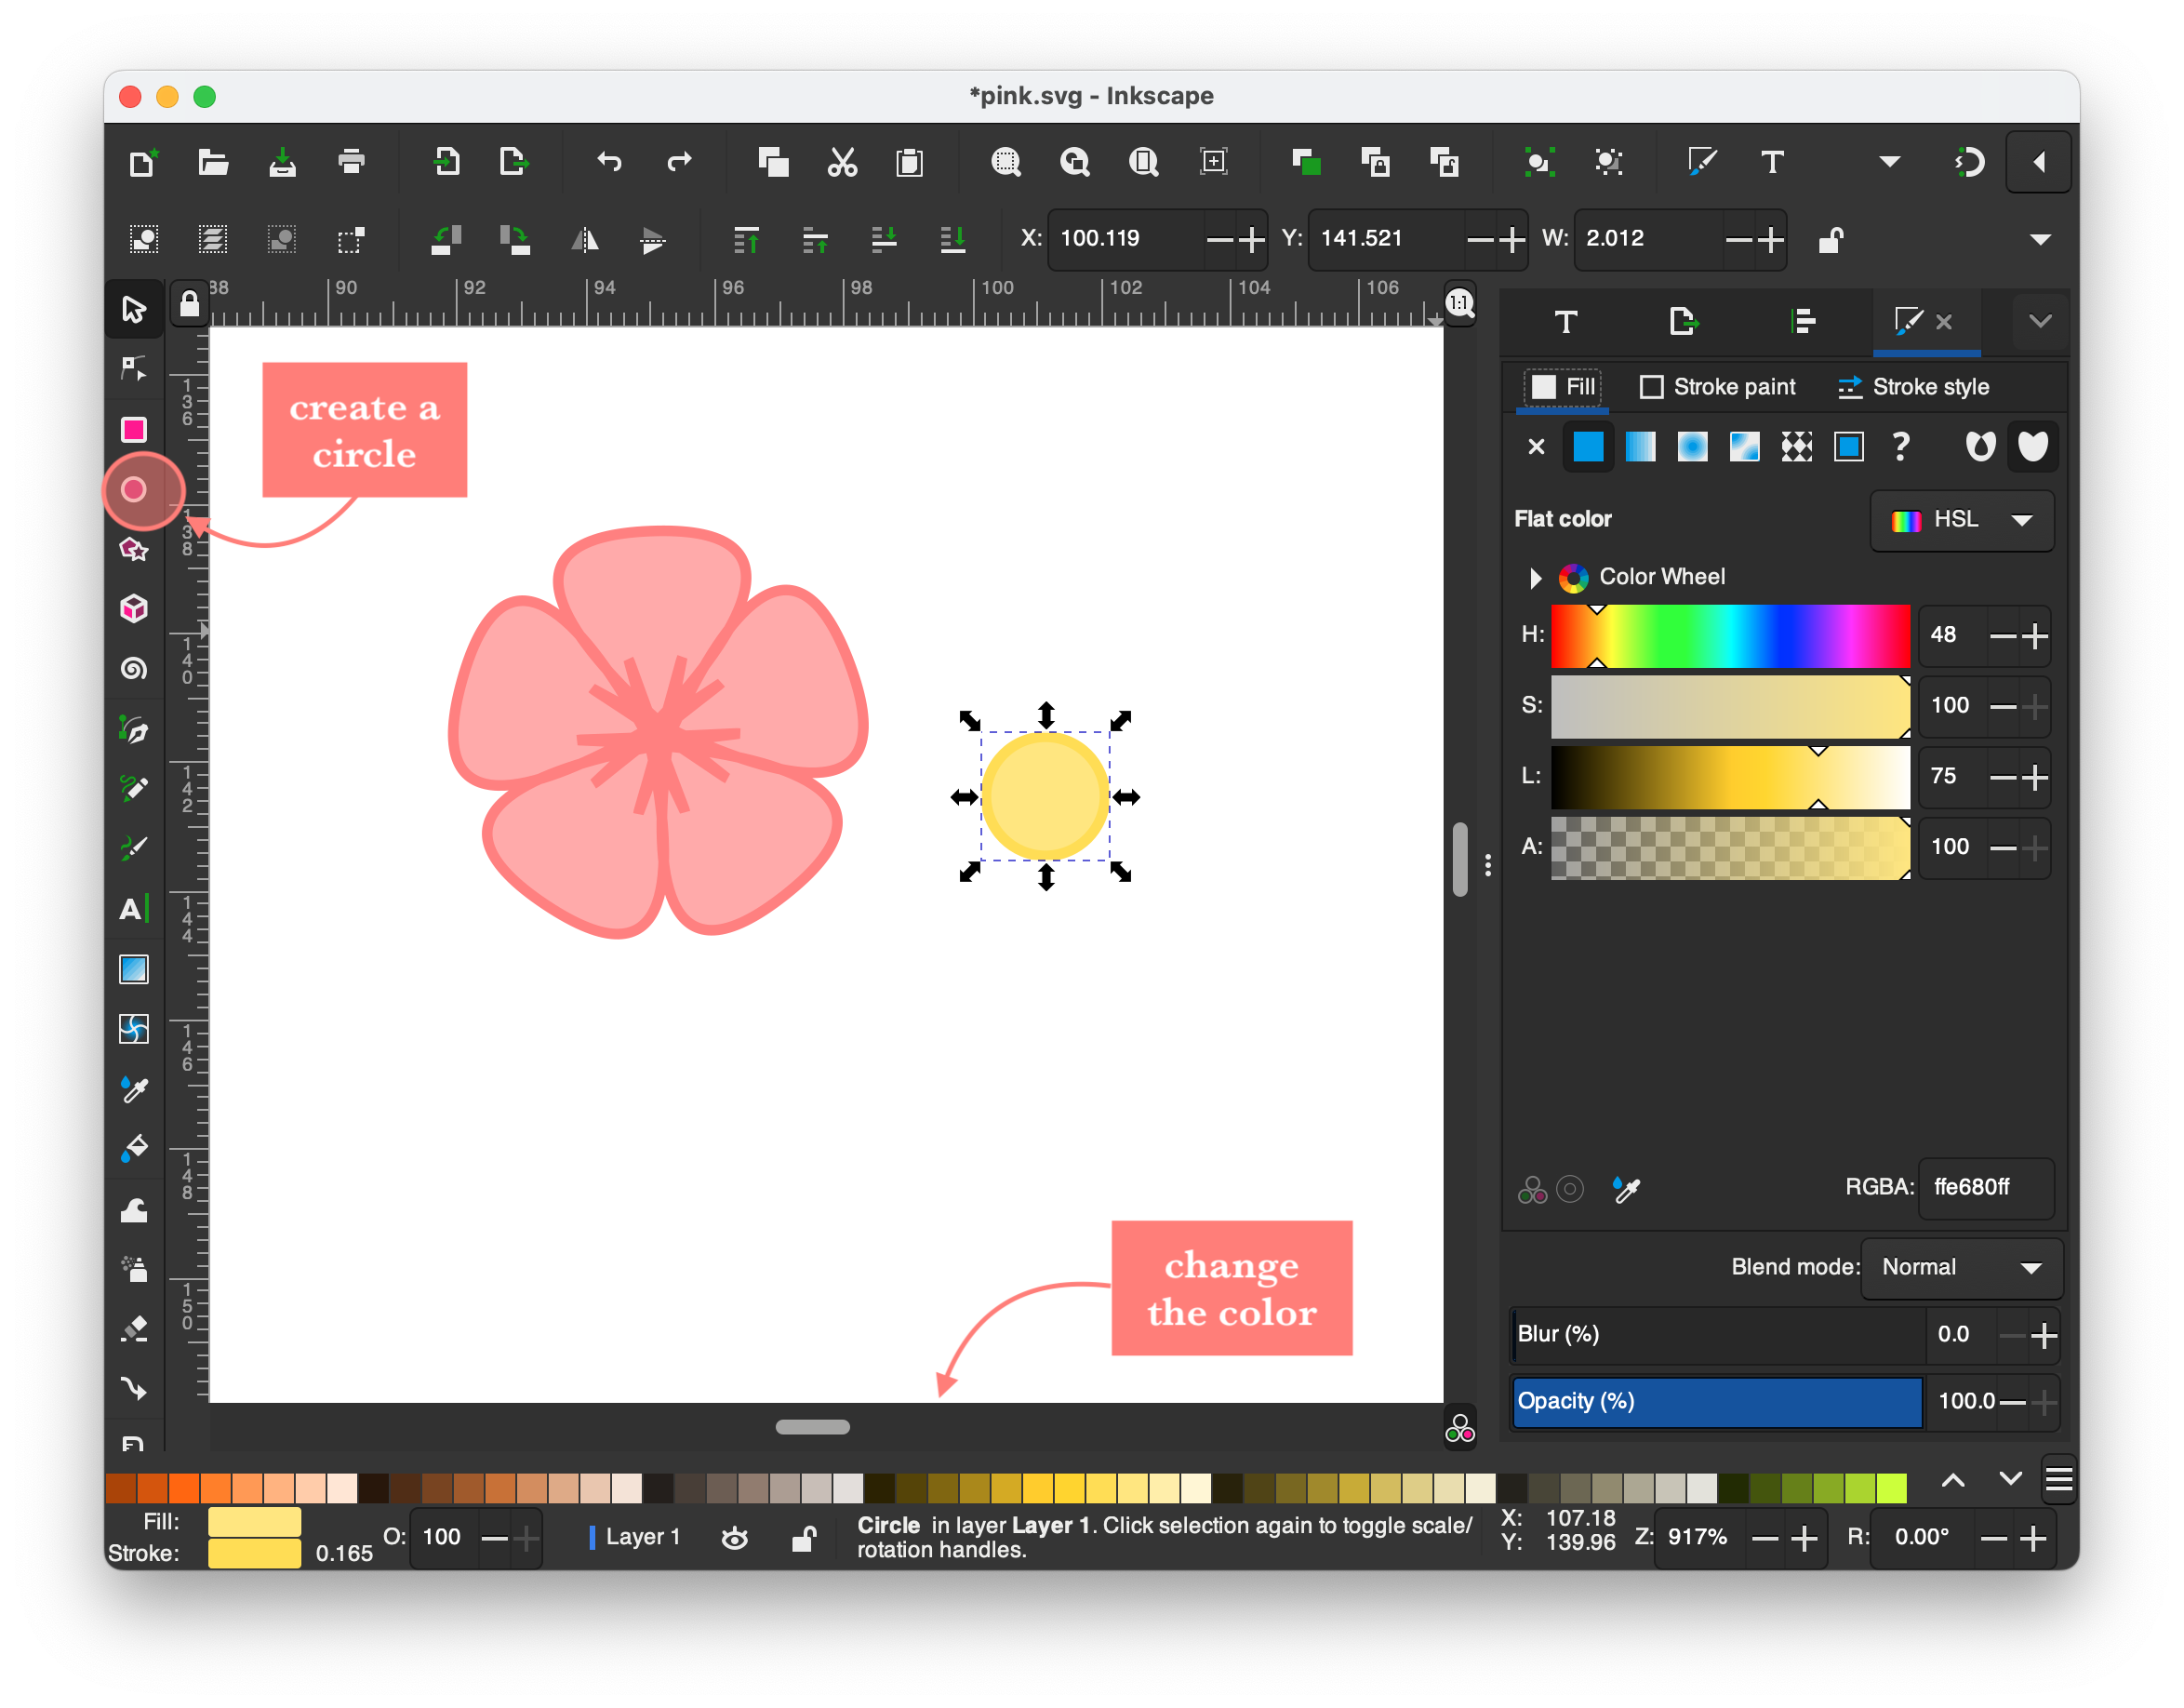
2. Step 2, create a circle, hold control while making the circle, change its color from the color swatch, to change the fill color just choose the color however you should hold shift to change the color of the outline.
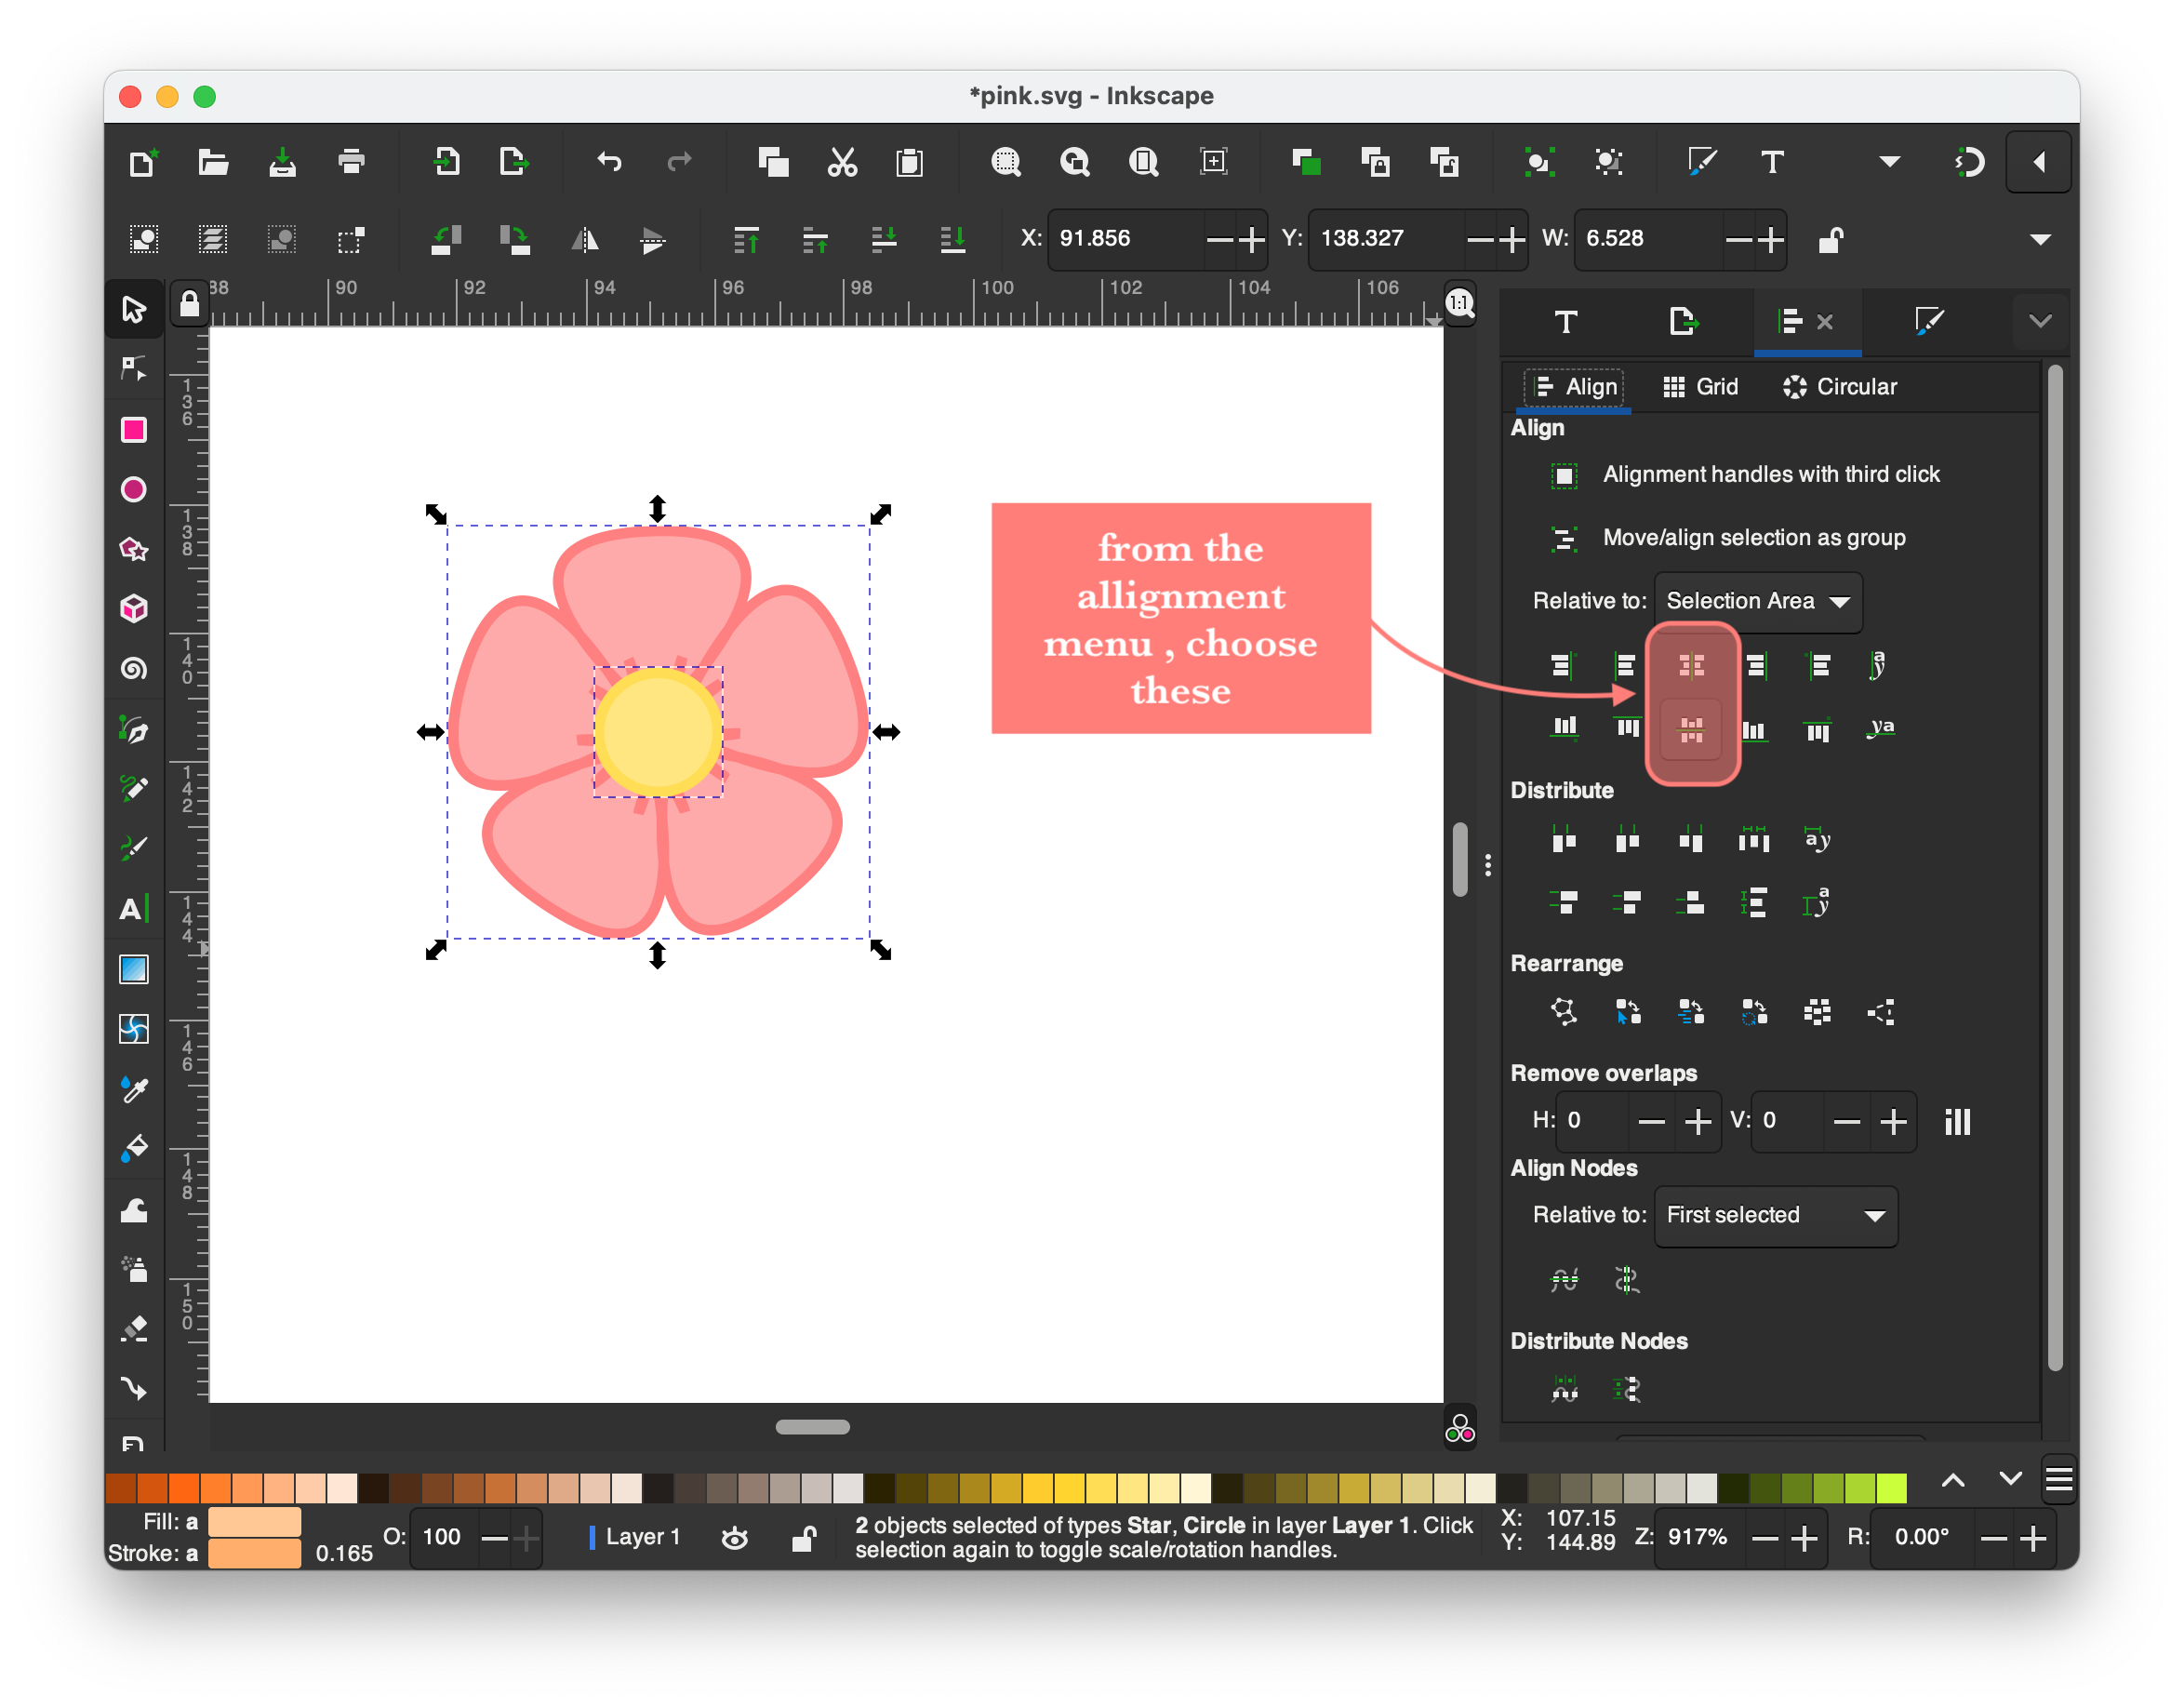
3. Step 3, place the circle in the middle, make it centered using the alignment tools.
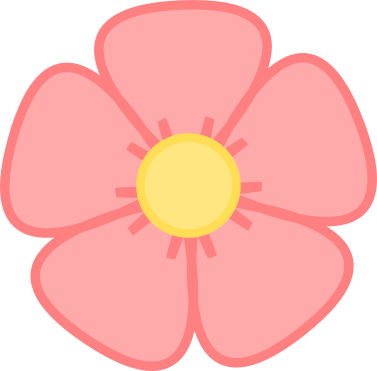
This is how the flower 🌸 turned out.
It was my first time to use Inkscape too, at the beginning I found it hard because it uses a lot of keyboard shortcuts. However, I ended up liking it even more than Cuttle and I wanted to do more.
Therefore, I created a logo by following this tutorial, it is very detailed with a lot of steps, but it was a really good practice.

3D Softwares: Fusion360 & Blender
Fusion360
Fusion360 is a 3D modeling CAD software platform for product design and manufacturing.If you are a student you can get a one year free trial. I downloaded Fusion360 using Autodesk after getting the educational license. Click here to download Fusion360.
I followed this tutorial to make a mug ☕️, here is how I did it.
1. Step 1, make a sketch using rectangles, you can change the dimensions, then click finish sketch.

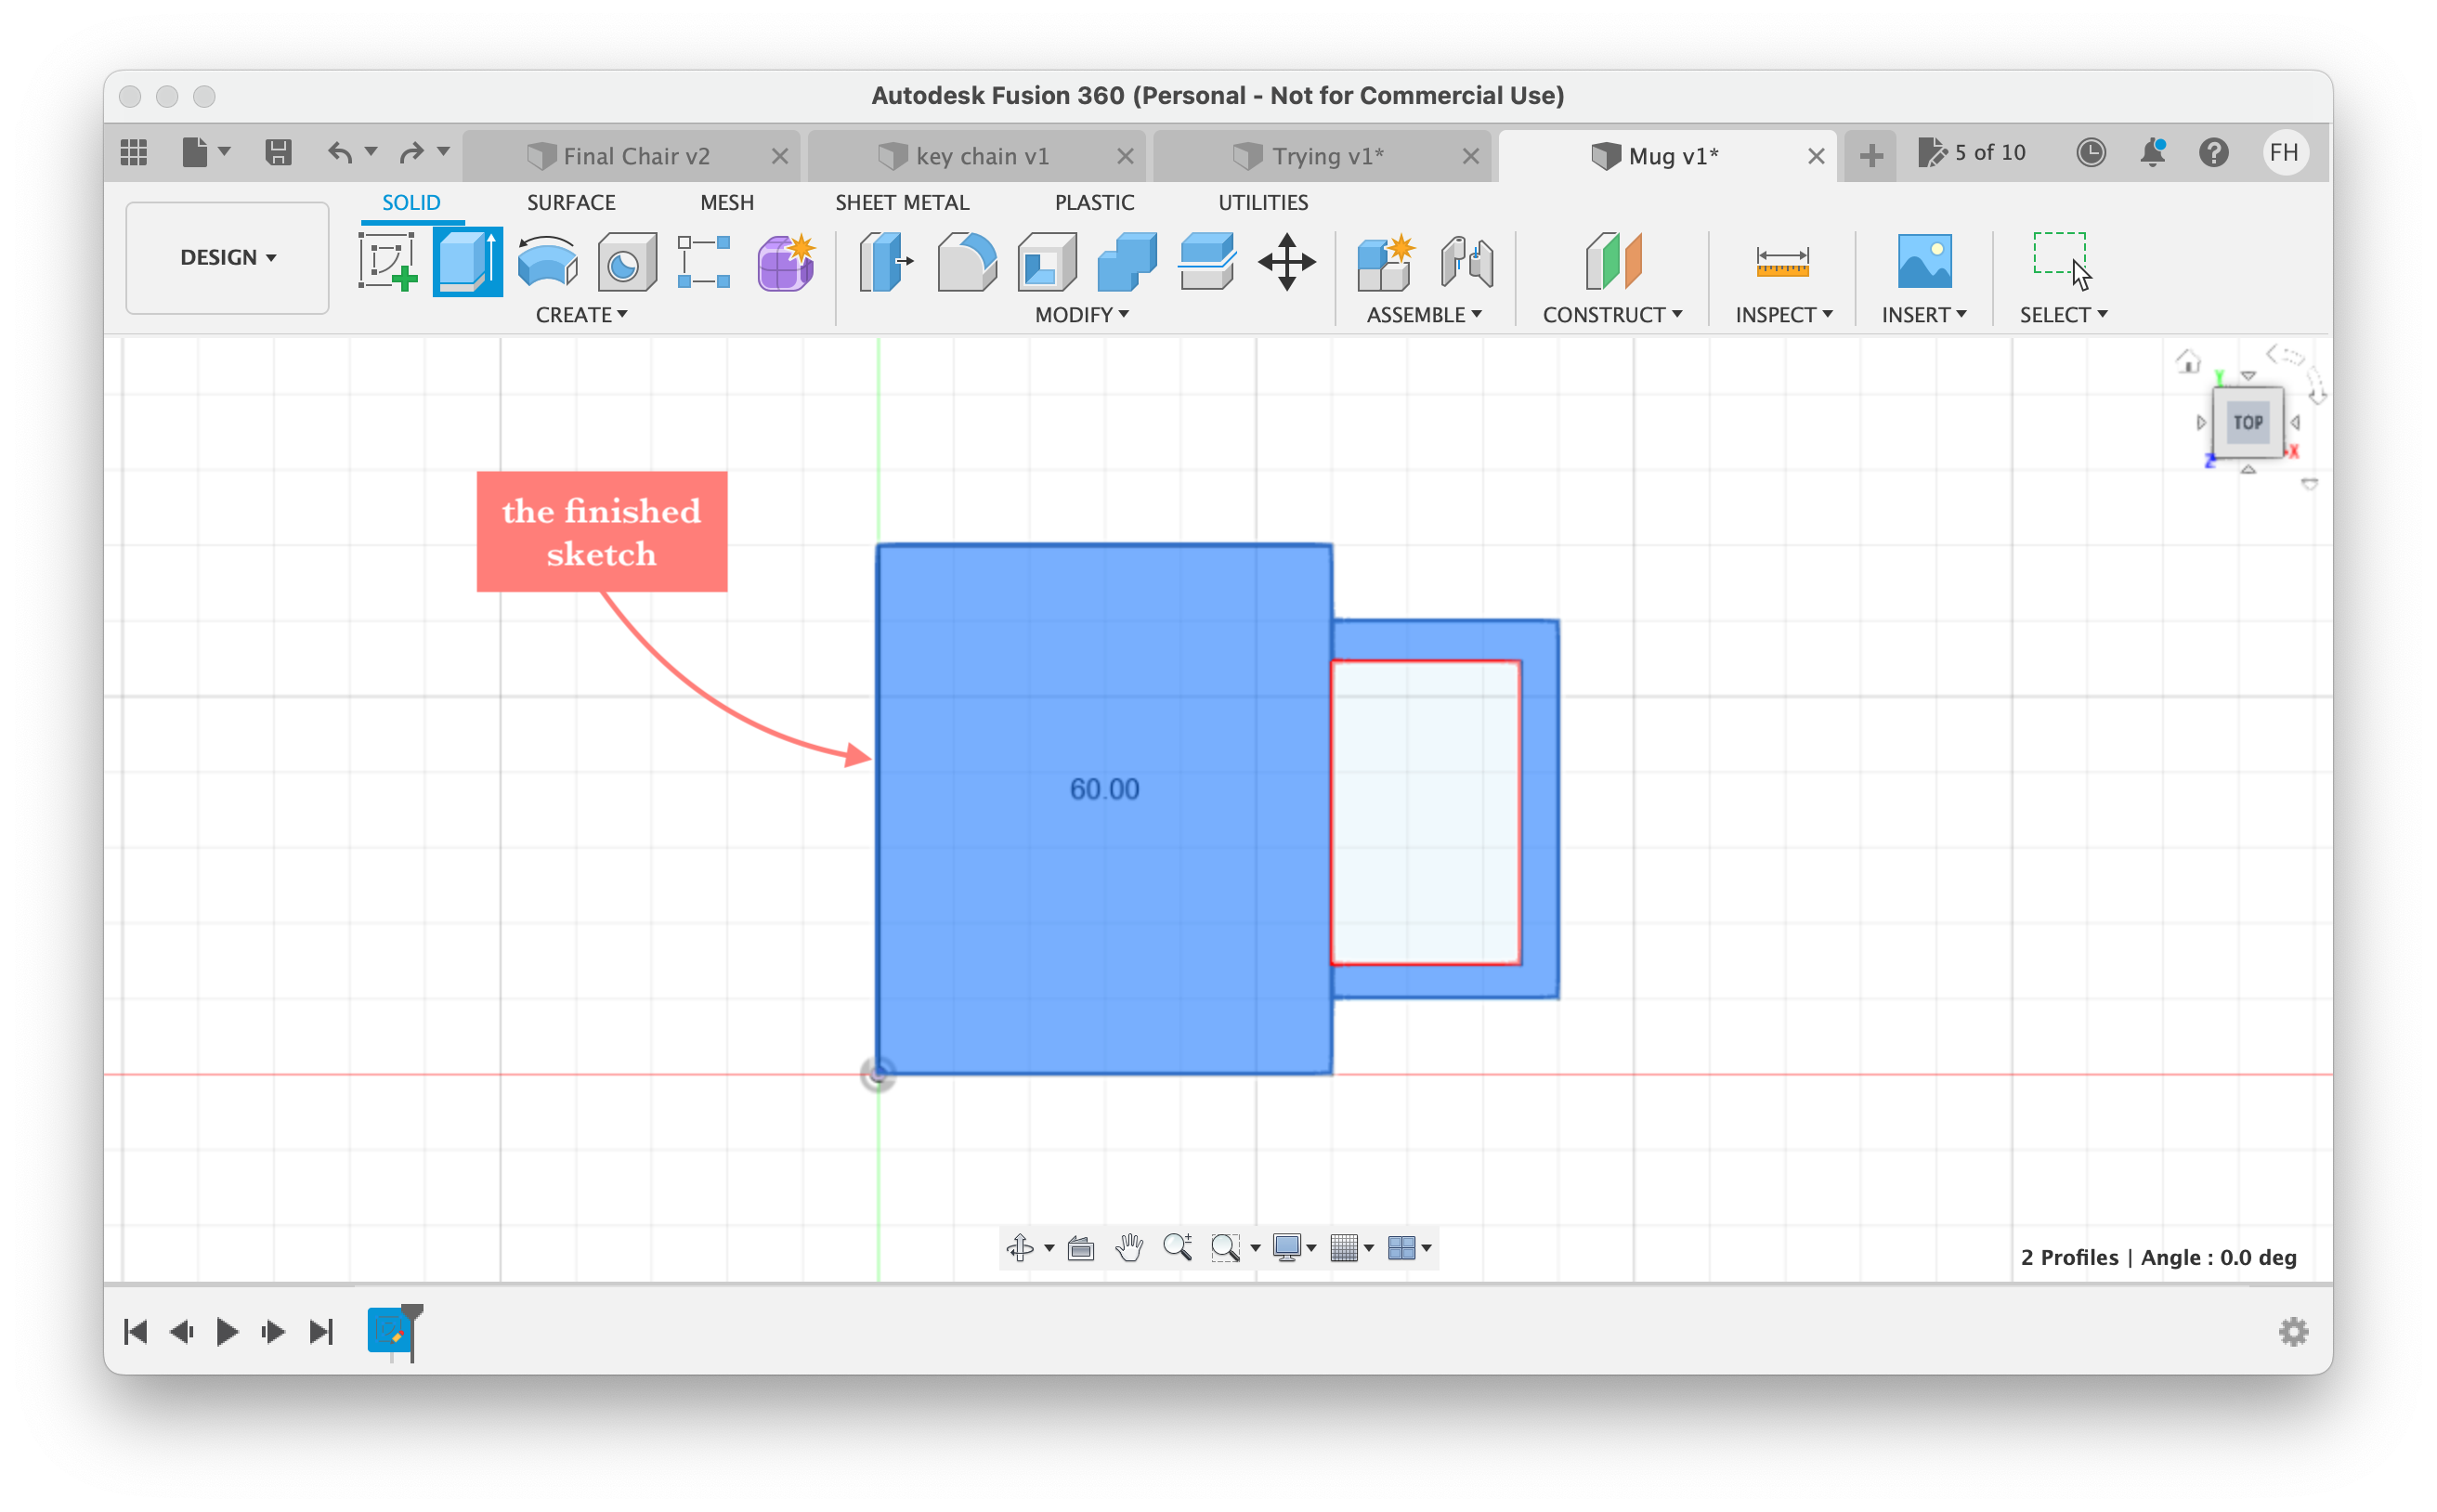
2. Step 2, this is the finished sketch.
3. Step 3, extrude the selected shapes; the mug and the handle.

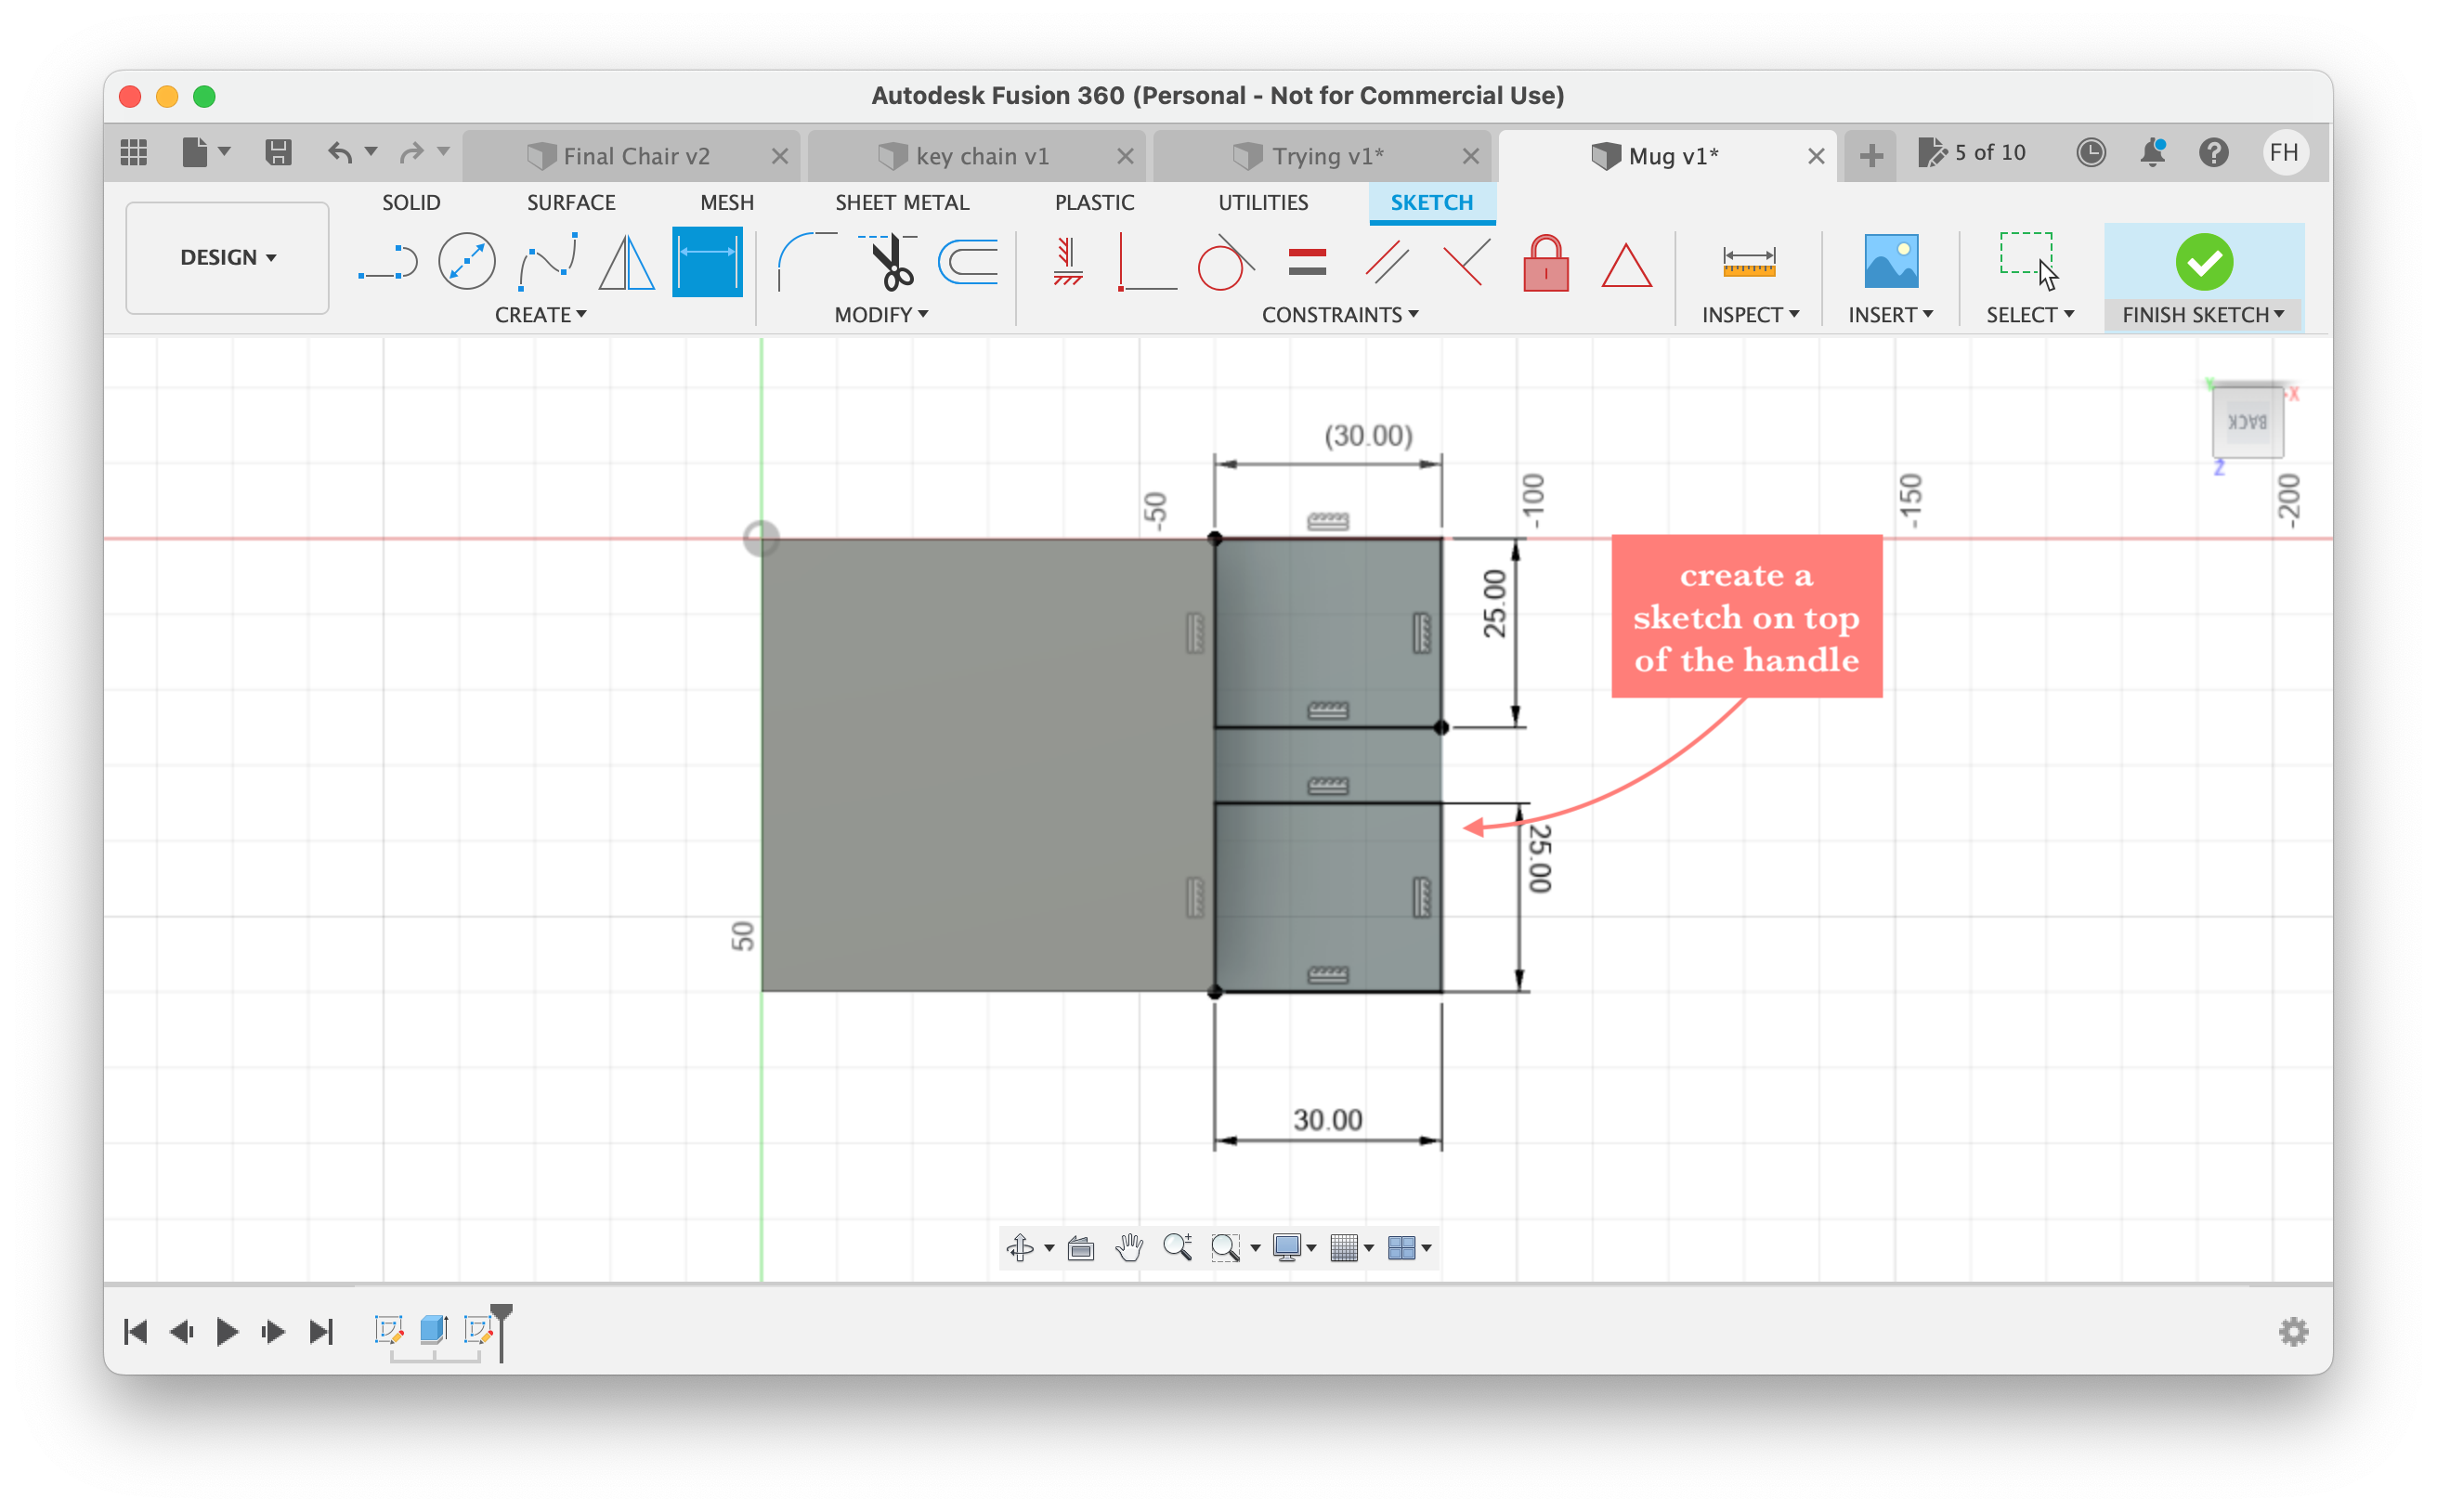
4. Step 4, create a sketch on the handle part.
5. Step 5, extrude the sketch on the handle part, where the operation is to cut.
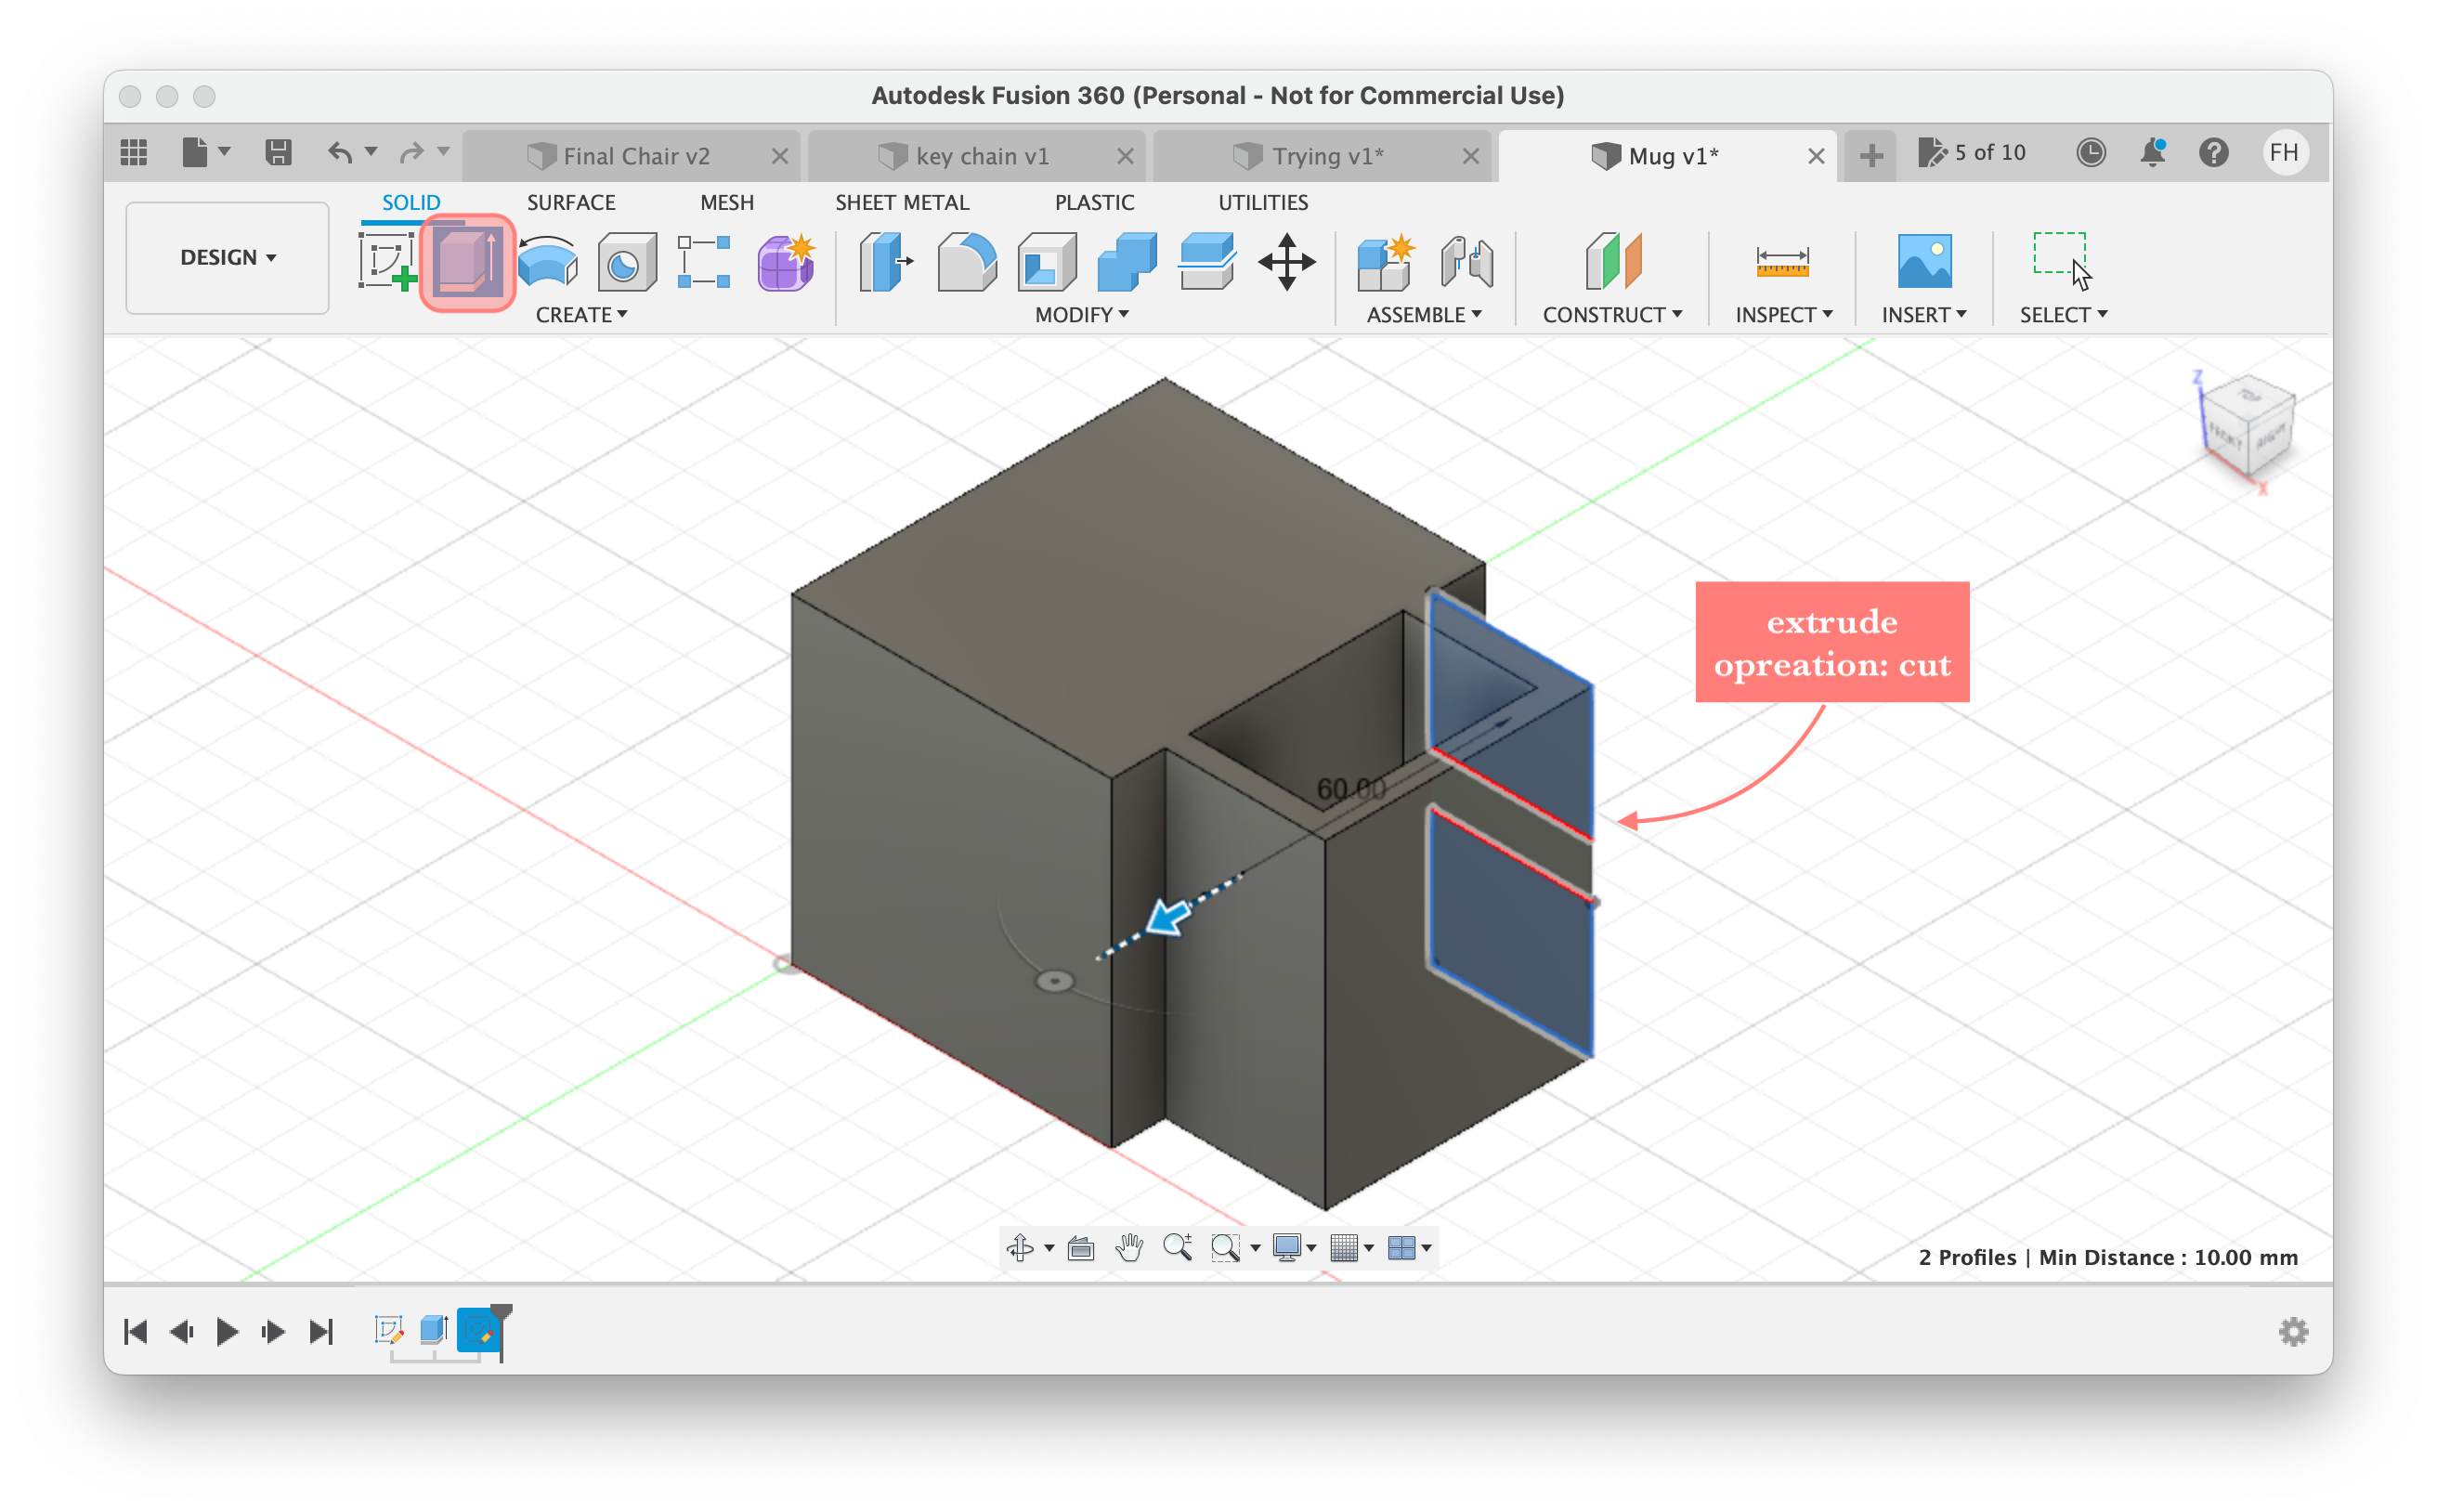
6. Step 6, the handle after extruding, next use fillet to round the edges.

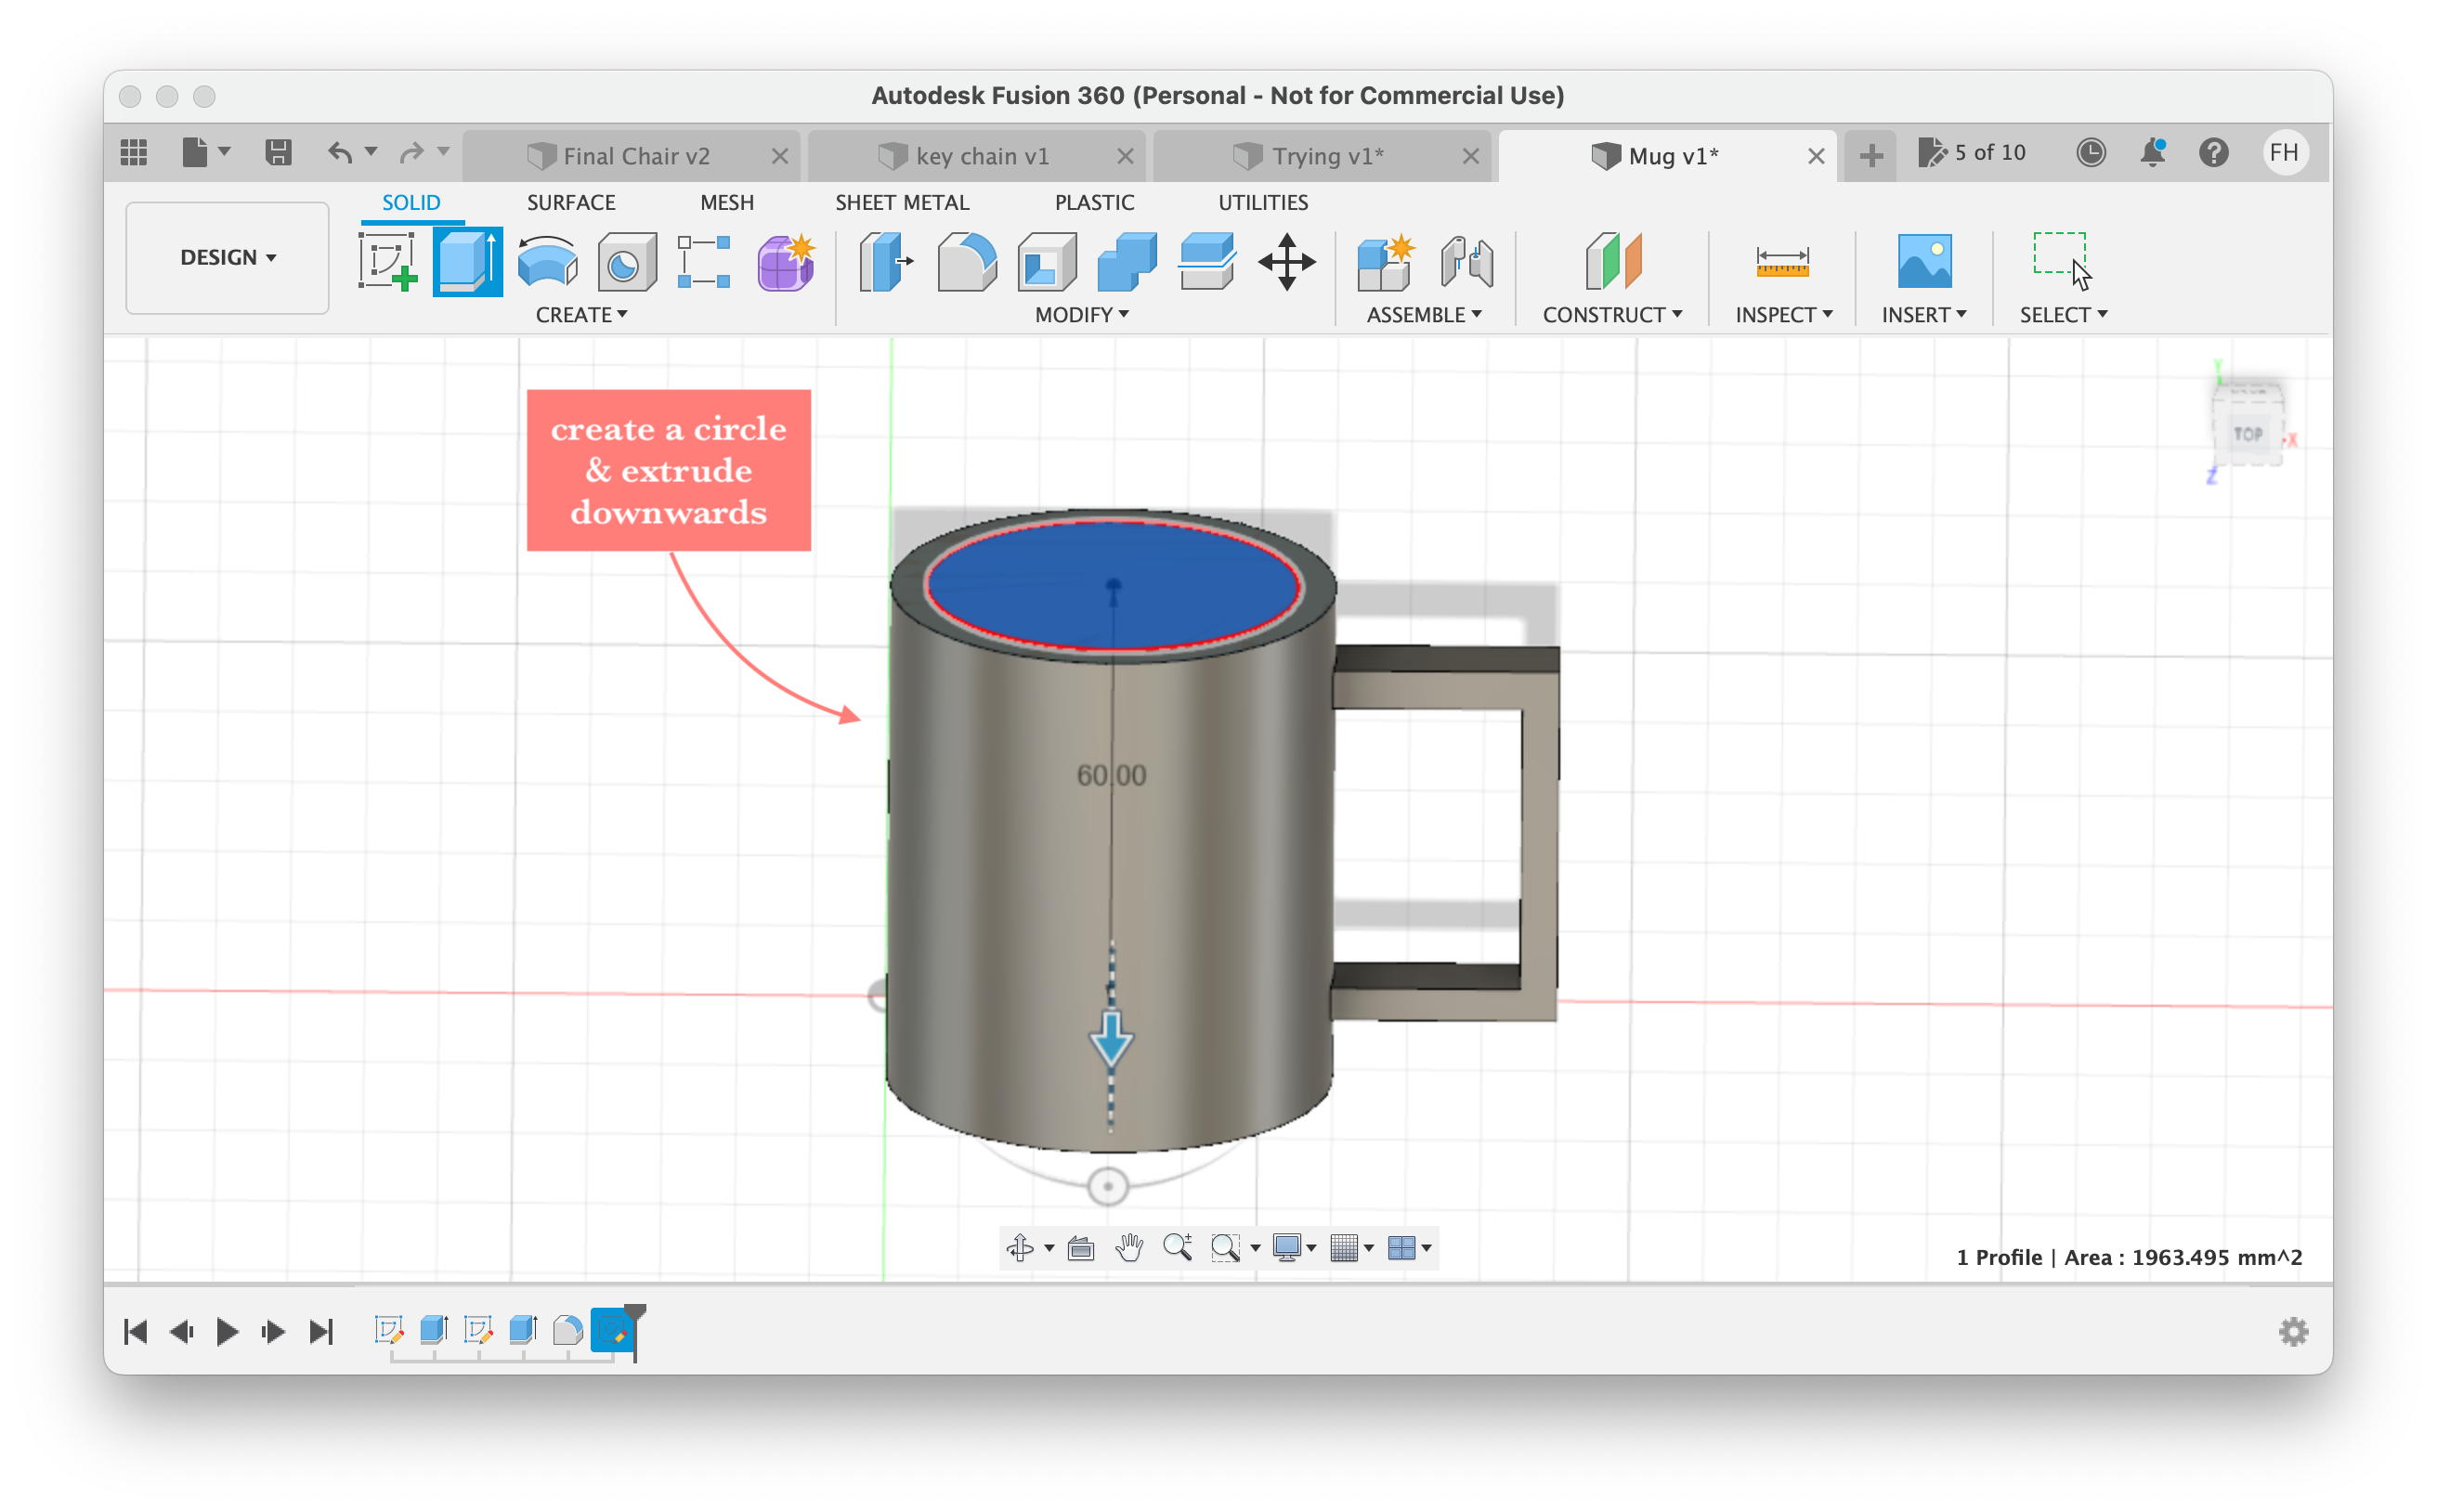
7. Step 7, create a sketch of a circle then extrude it inwards to create a void in the mug.
8. Step 8, finally round the edges using fillet.
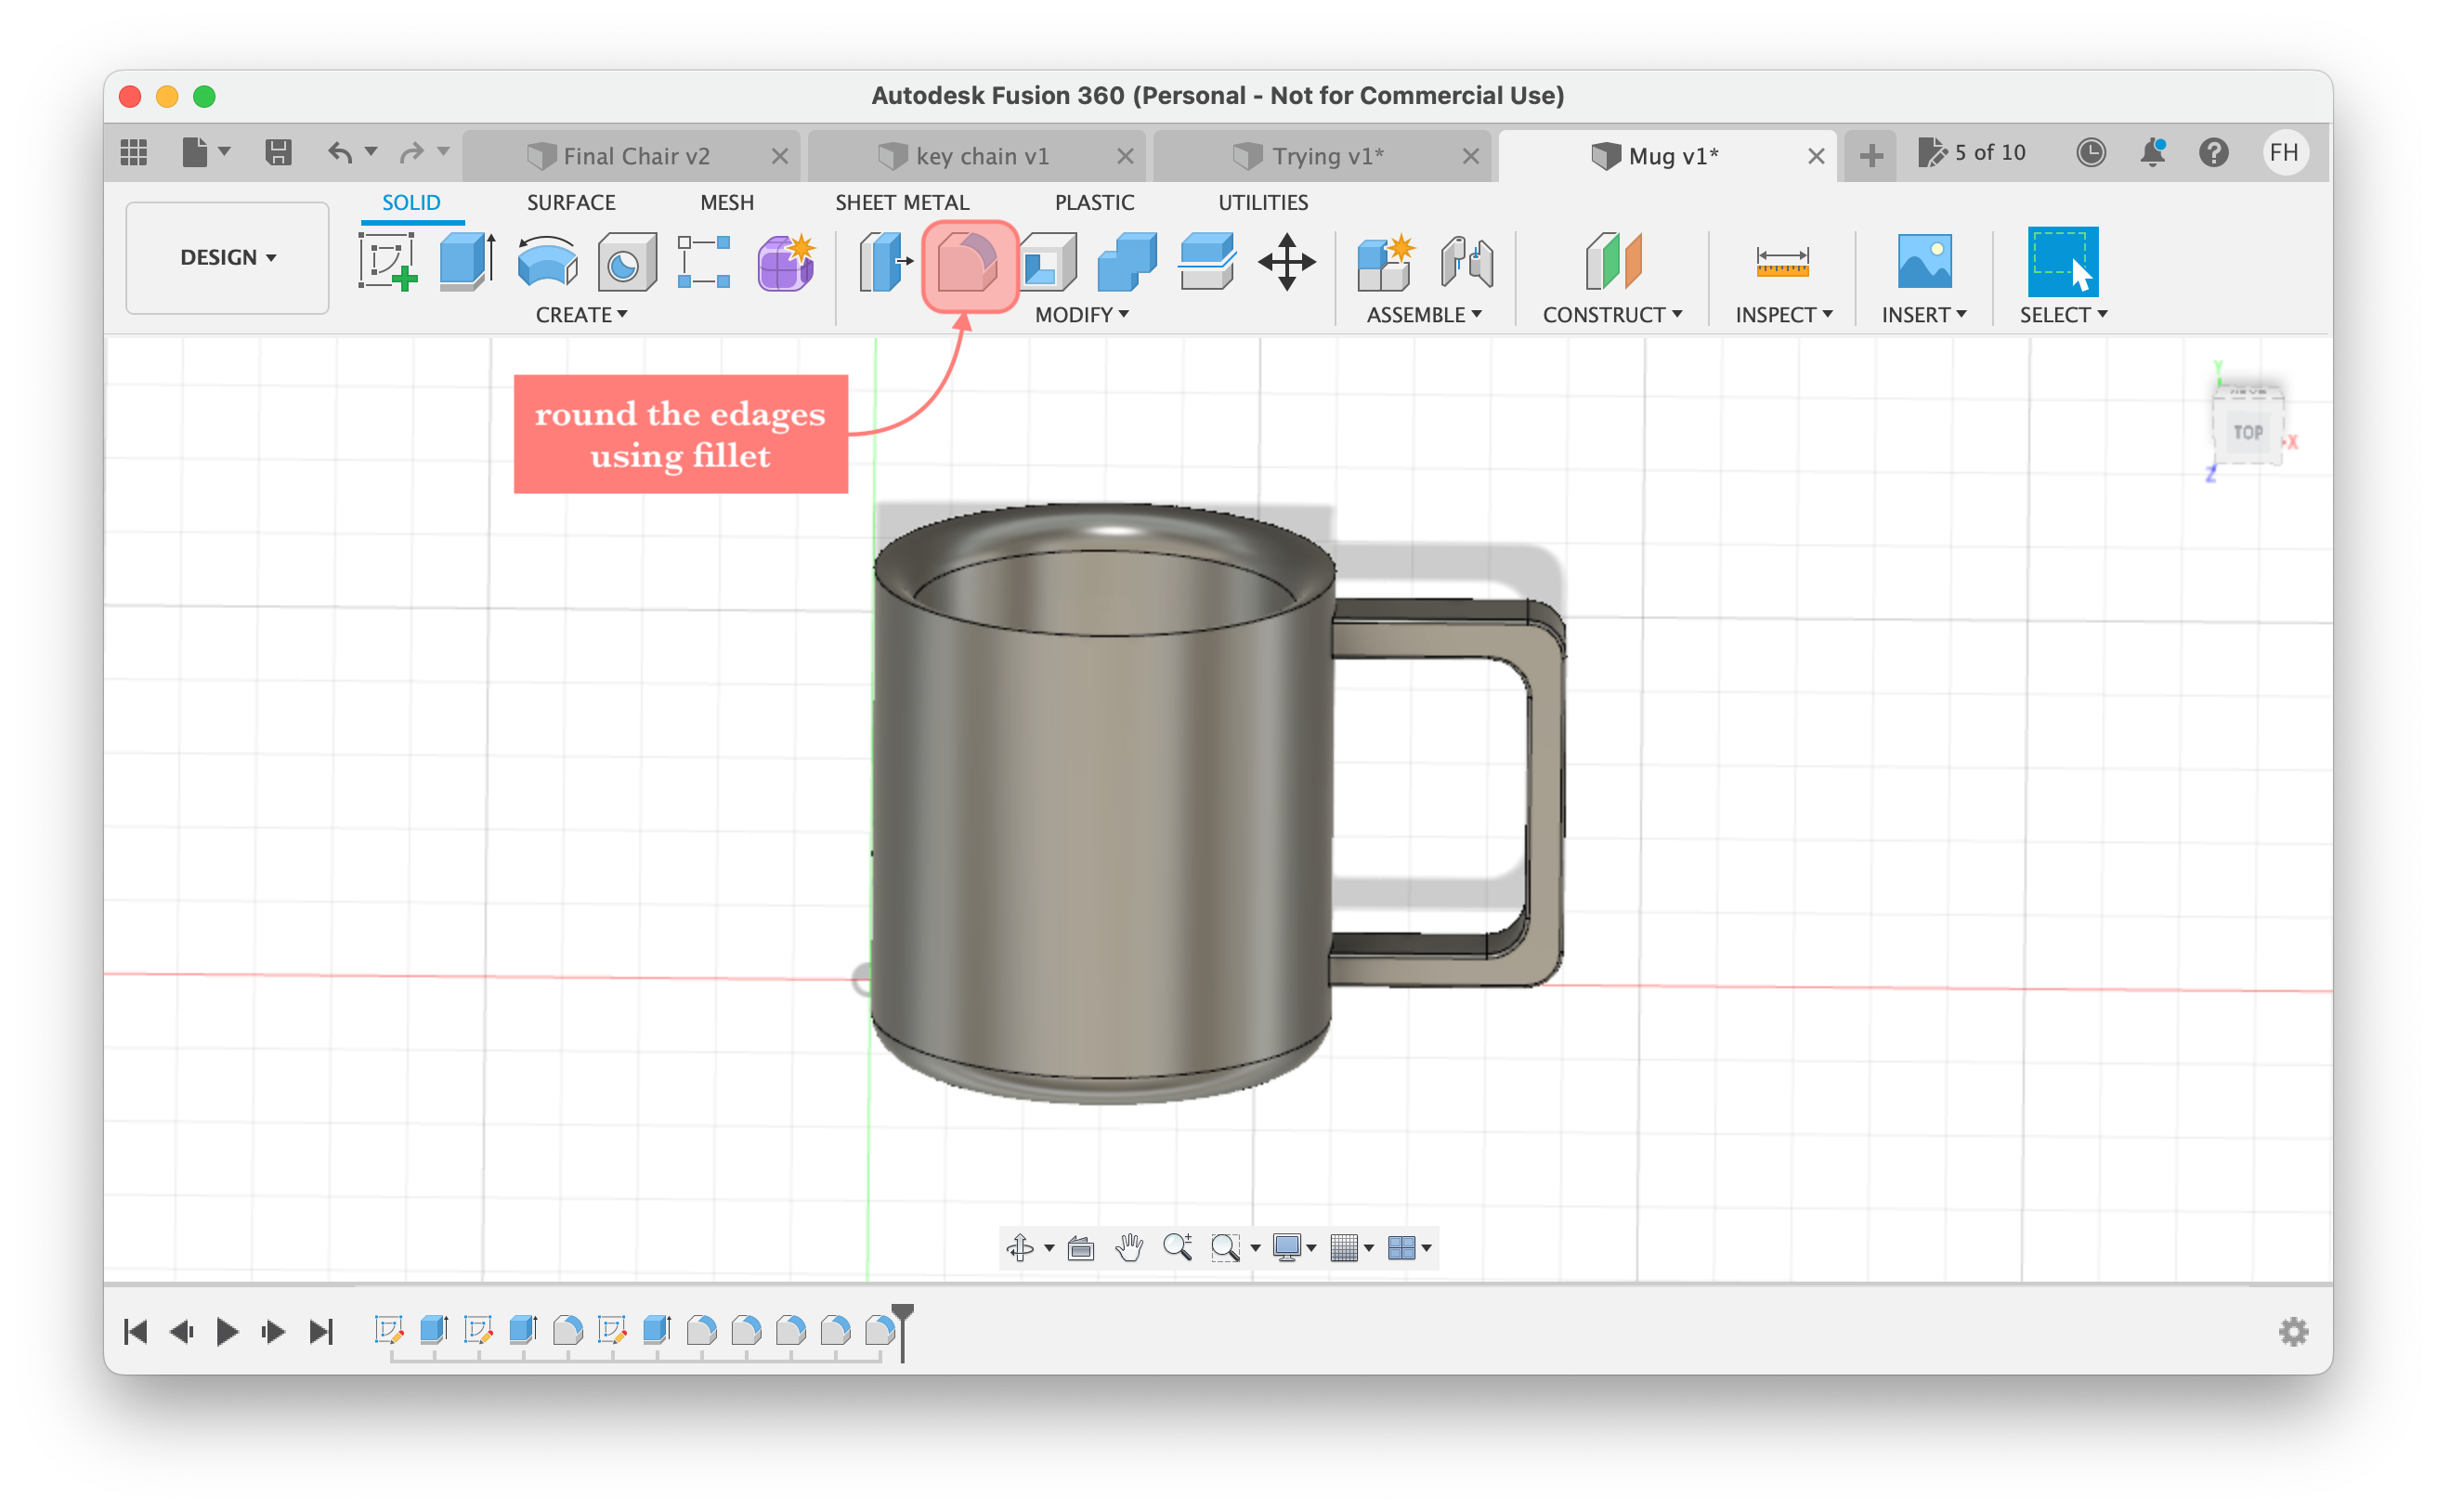
At the end, this is the finished mug ☕️.
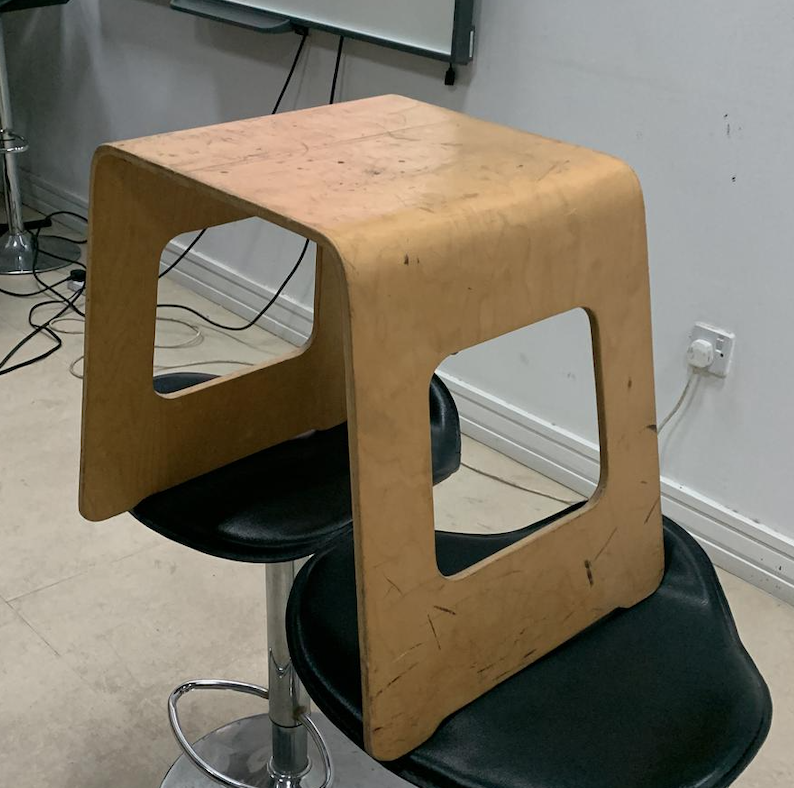
During the session this week we were asked to replicate a chair 🪑 using Fusion360. It was a really fun and challenging experience.
This is the chair 🪑.
This is the result of the chair 🪑 from Fusion360.
Again this is my first time using Fusion360, after doing the mug and the chair I still think that I need more practice and I feel like there is so much to unfold in this program.
What is parametric design? & How to use it in Fusion360?
With parametric modeling, you can easily change dimensions of a model without having to painfully go over individual steps and correct it there.Go to modify then change parameters, here you can create new parameters and assign its value, you can use this parameter whenever you're defining dimensions in a sketch. Also, you can do basic math with them; for example you can define that an edge should be thickness*2 long.
Using parameters you can quickly resize your model and see the changes happening in real time.
Method of saving: save as mesh > stl binary > high resolution
Blender
Blender is a free and open-source 3D computer graphics software tool set used for creating animated films, visual effects, art, 3D-printed models, motion graphics, interactive 3D applications, virtual reality, and, formerly, video games. Click here to download Blender, it is pretty easy to download.
I created a small mushroom 🍄 in Blender, follow these step to replicate it.
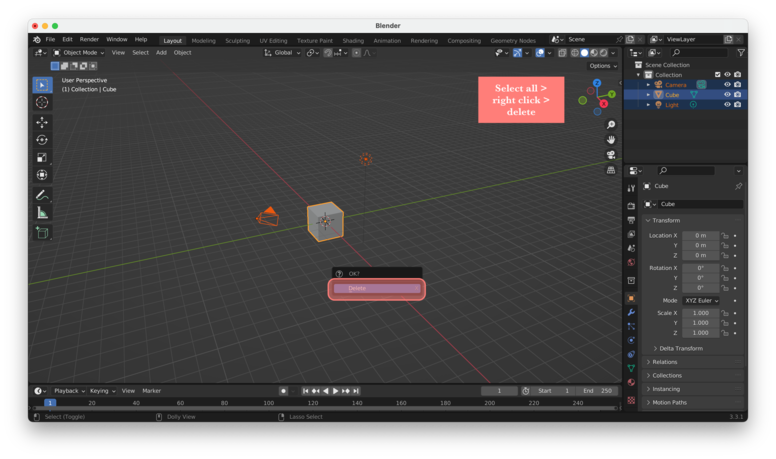
1. Step 1, select all objects already exists, click X then delete
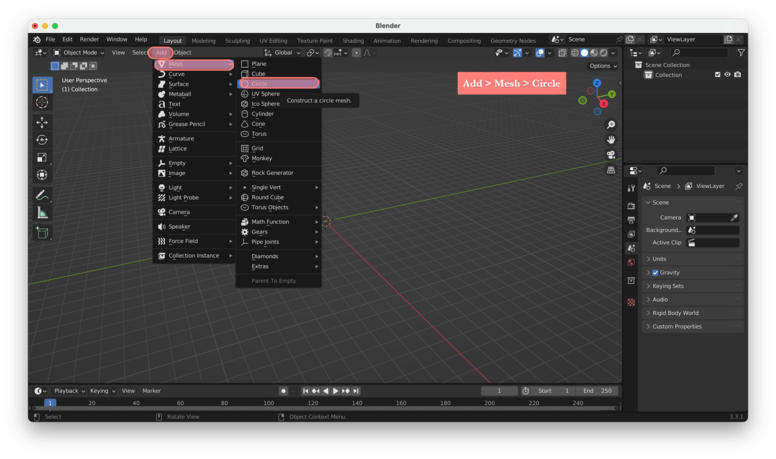
2. Step 2, add a circle from add, mesh then choosing a circle
3. Step 3, adjust vertices of the circle to 12

4. Step 4, click S to scale down the circle, make sure you are in edit mode then click F to fill the circle, click E to extrude the circle

5. Step 5, click E to extrude the circle, then S to scale up again

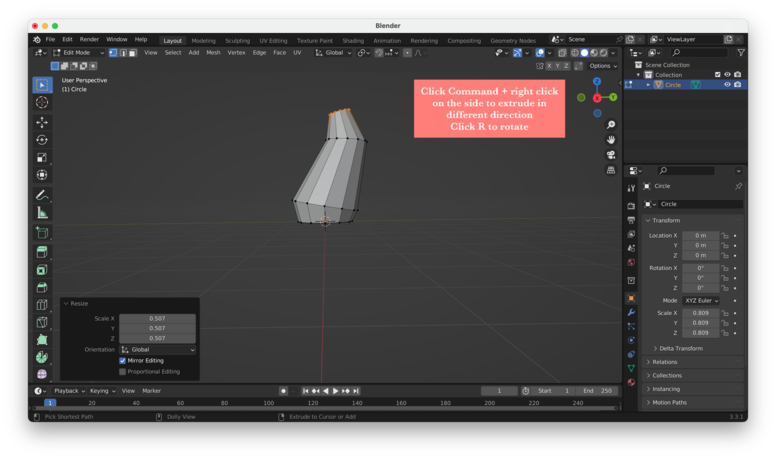
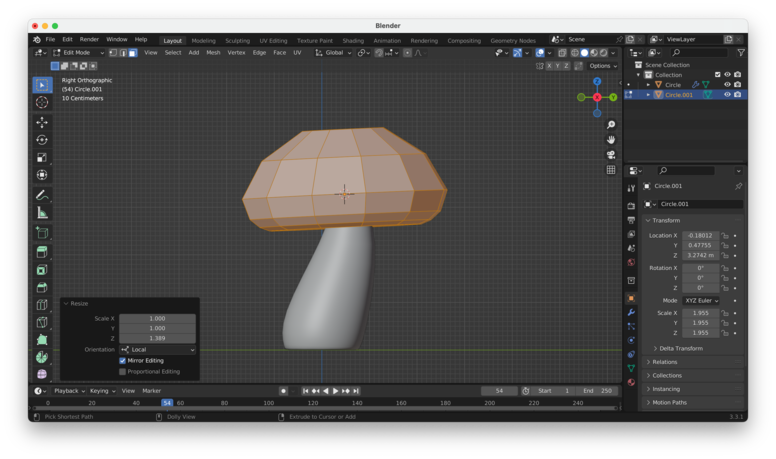
6. Step 6, now we want to extrude in a different direaction, to do that click Command + right click on the side, then click S to scale down,

7. Step 7, repeat one more time, click Command + right click on the side,click S to scale down, click R to rotate it a little
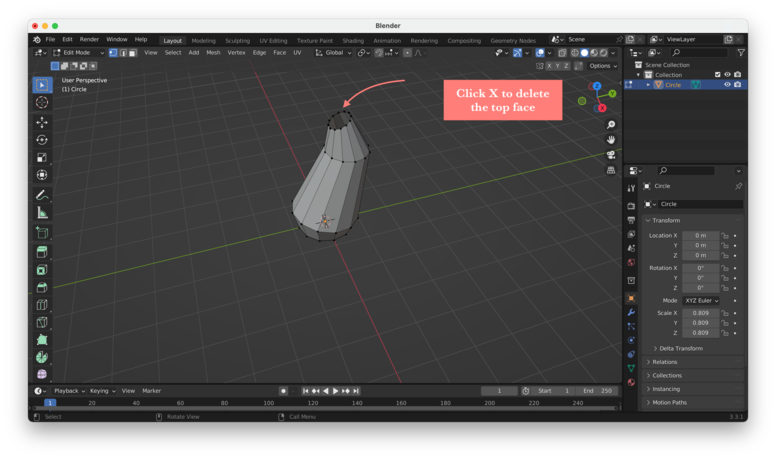
8. Step 8, after that click X to delete the top face and to make it open
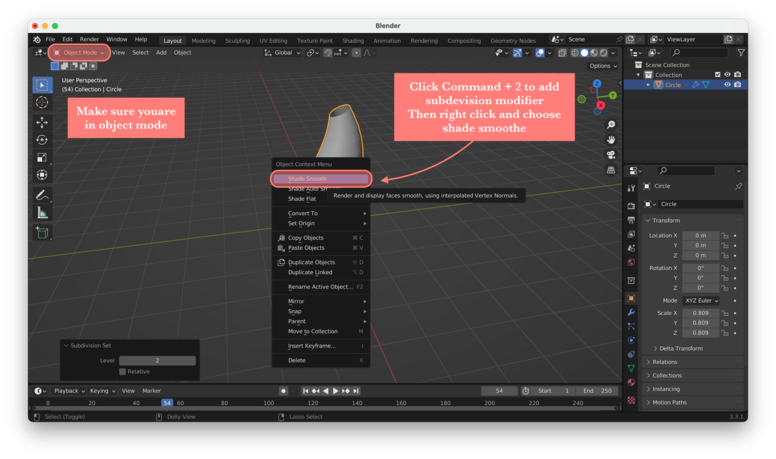
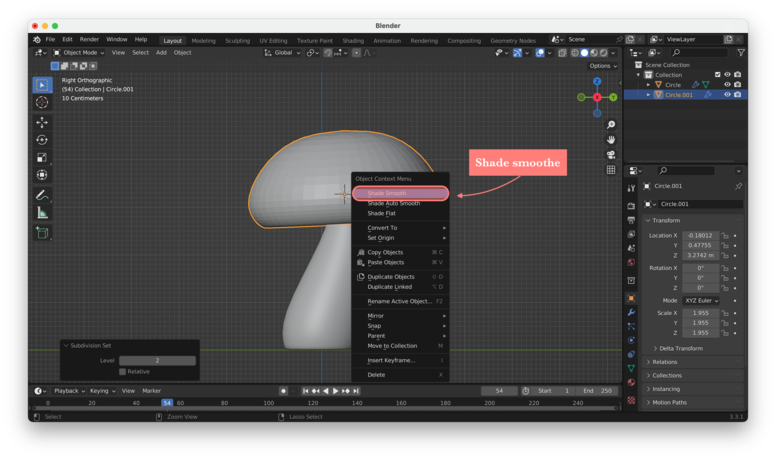
9. Step 9, in object mode, click Command + 2 to add a subdevision modifier, then right click and choose shade smoothe
10. Step 10, in edit mode, click Option + select the top opening, then click shift + S and choose curser to selected

11. Step 11, in object mode add>mesh>circle, then in edit mode; click S to scale up then E + Z to extrude up, scale again, extrude again, next click F to fill, finally click Command + B to bevele so it is more rounded

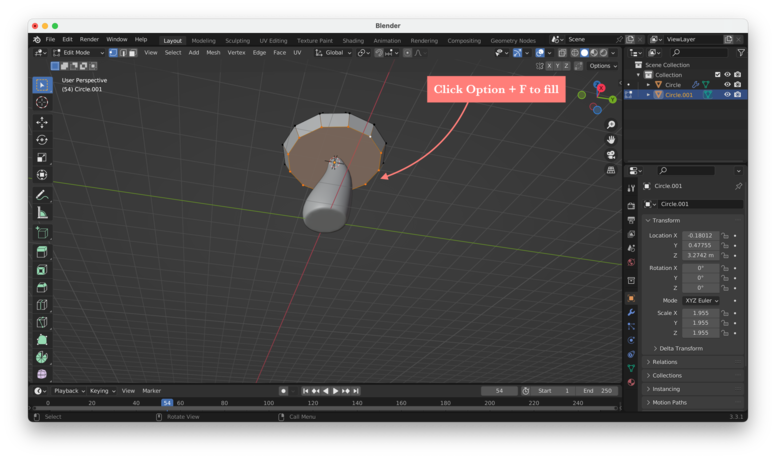
12. Step 12, click Option + F to fill the bottom
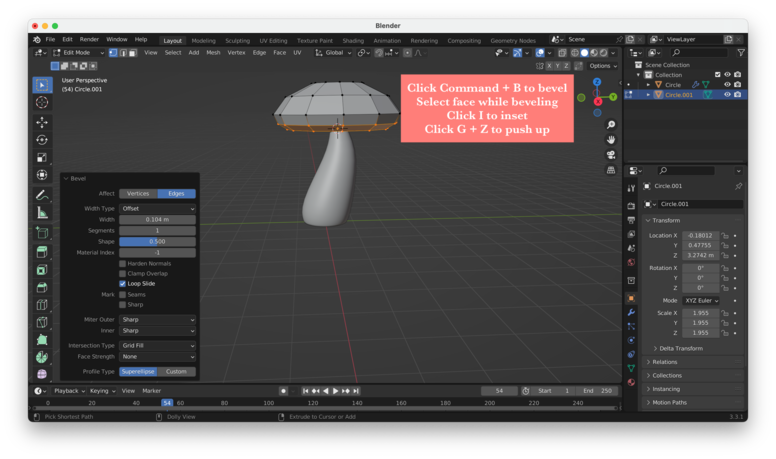
13. Step 13, click Command + B to bevele the bottom, bevele twice, and while beveling select the face, then click I to inset, click G + Z to push up

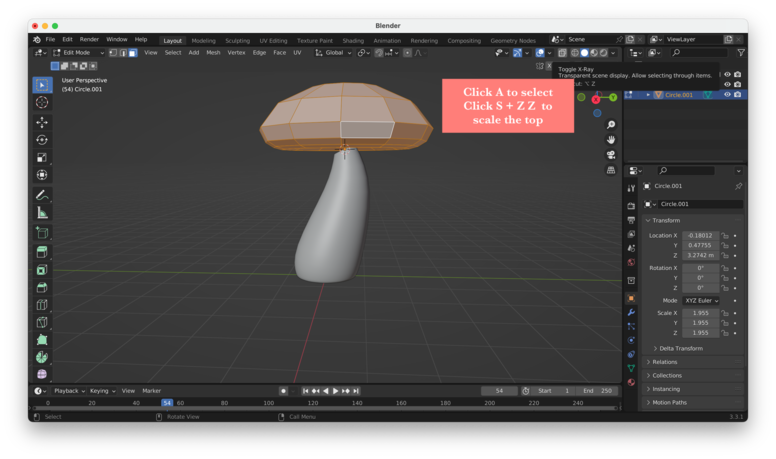
14. Step 14, click A to select the top part of the mushroom, look from the side and move it down by clicking G + Z, you can rotate it by clicking R, you can also scale it by clicking S + ZZ (Z twice)
15. Step 15, in object mode, click Command + 2 to add subdevision modifier then right click and choose shade smoothe


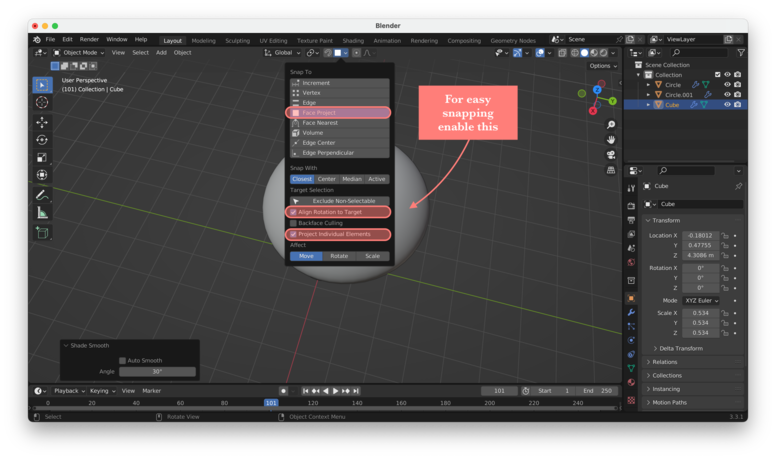
16. Step 16, now we want to add dots on top of the mushroom, click Shift + click on top of the mushroom, in object mode add>mesh>cube, then in edit mode click S to scale the cube, click G + Z to move up. For easy snapping, go to face, enable allign rotation to target, and enable project individual elements, you can move the dot easily now
17. Step 17, click Option + D to duplicate the dot, click Control to move it, click S to scale it
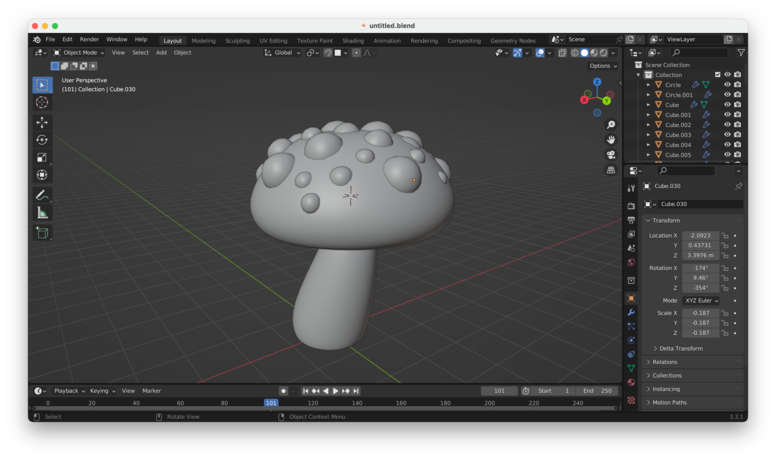
This is the result of the mushroom 🍄. Using Blender was really complicated as it requires a lot of keyboard shortcuts.

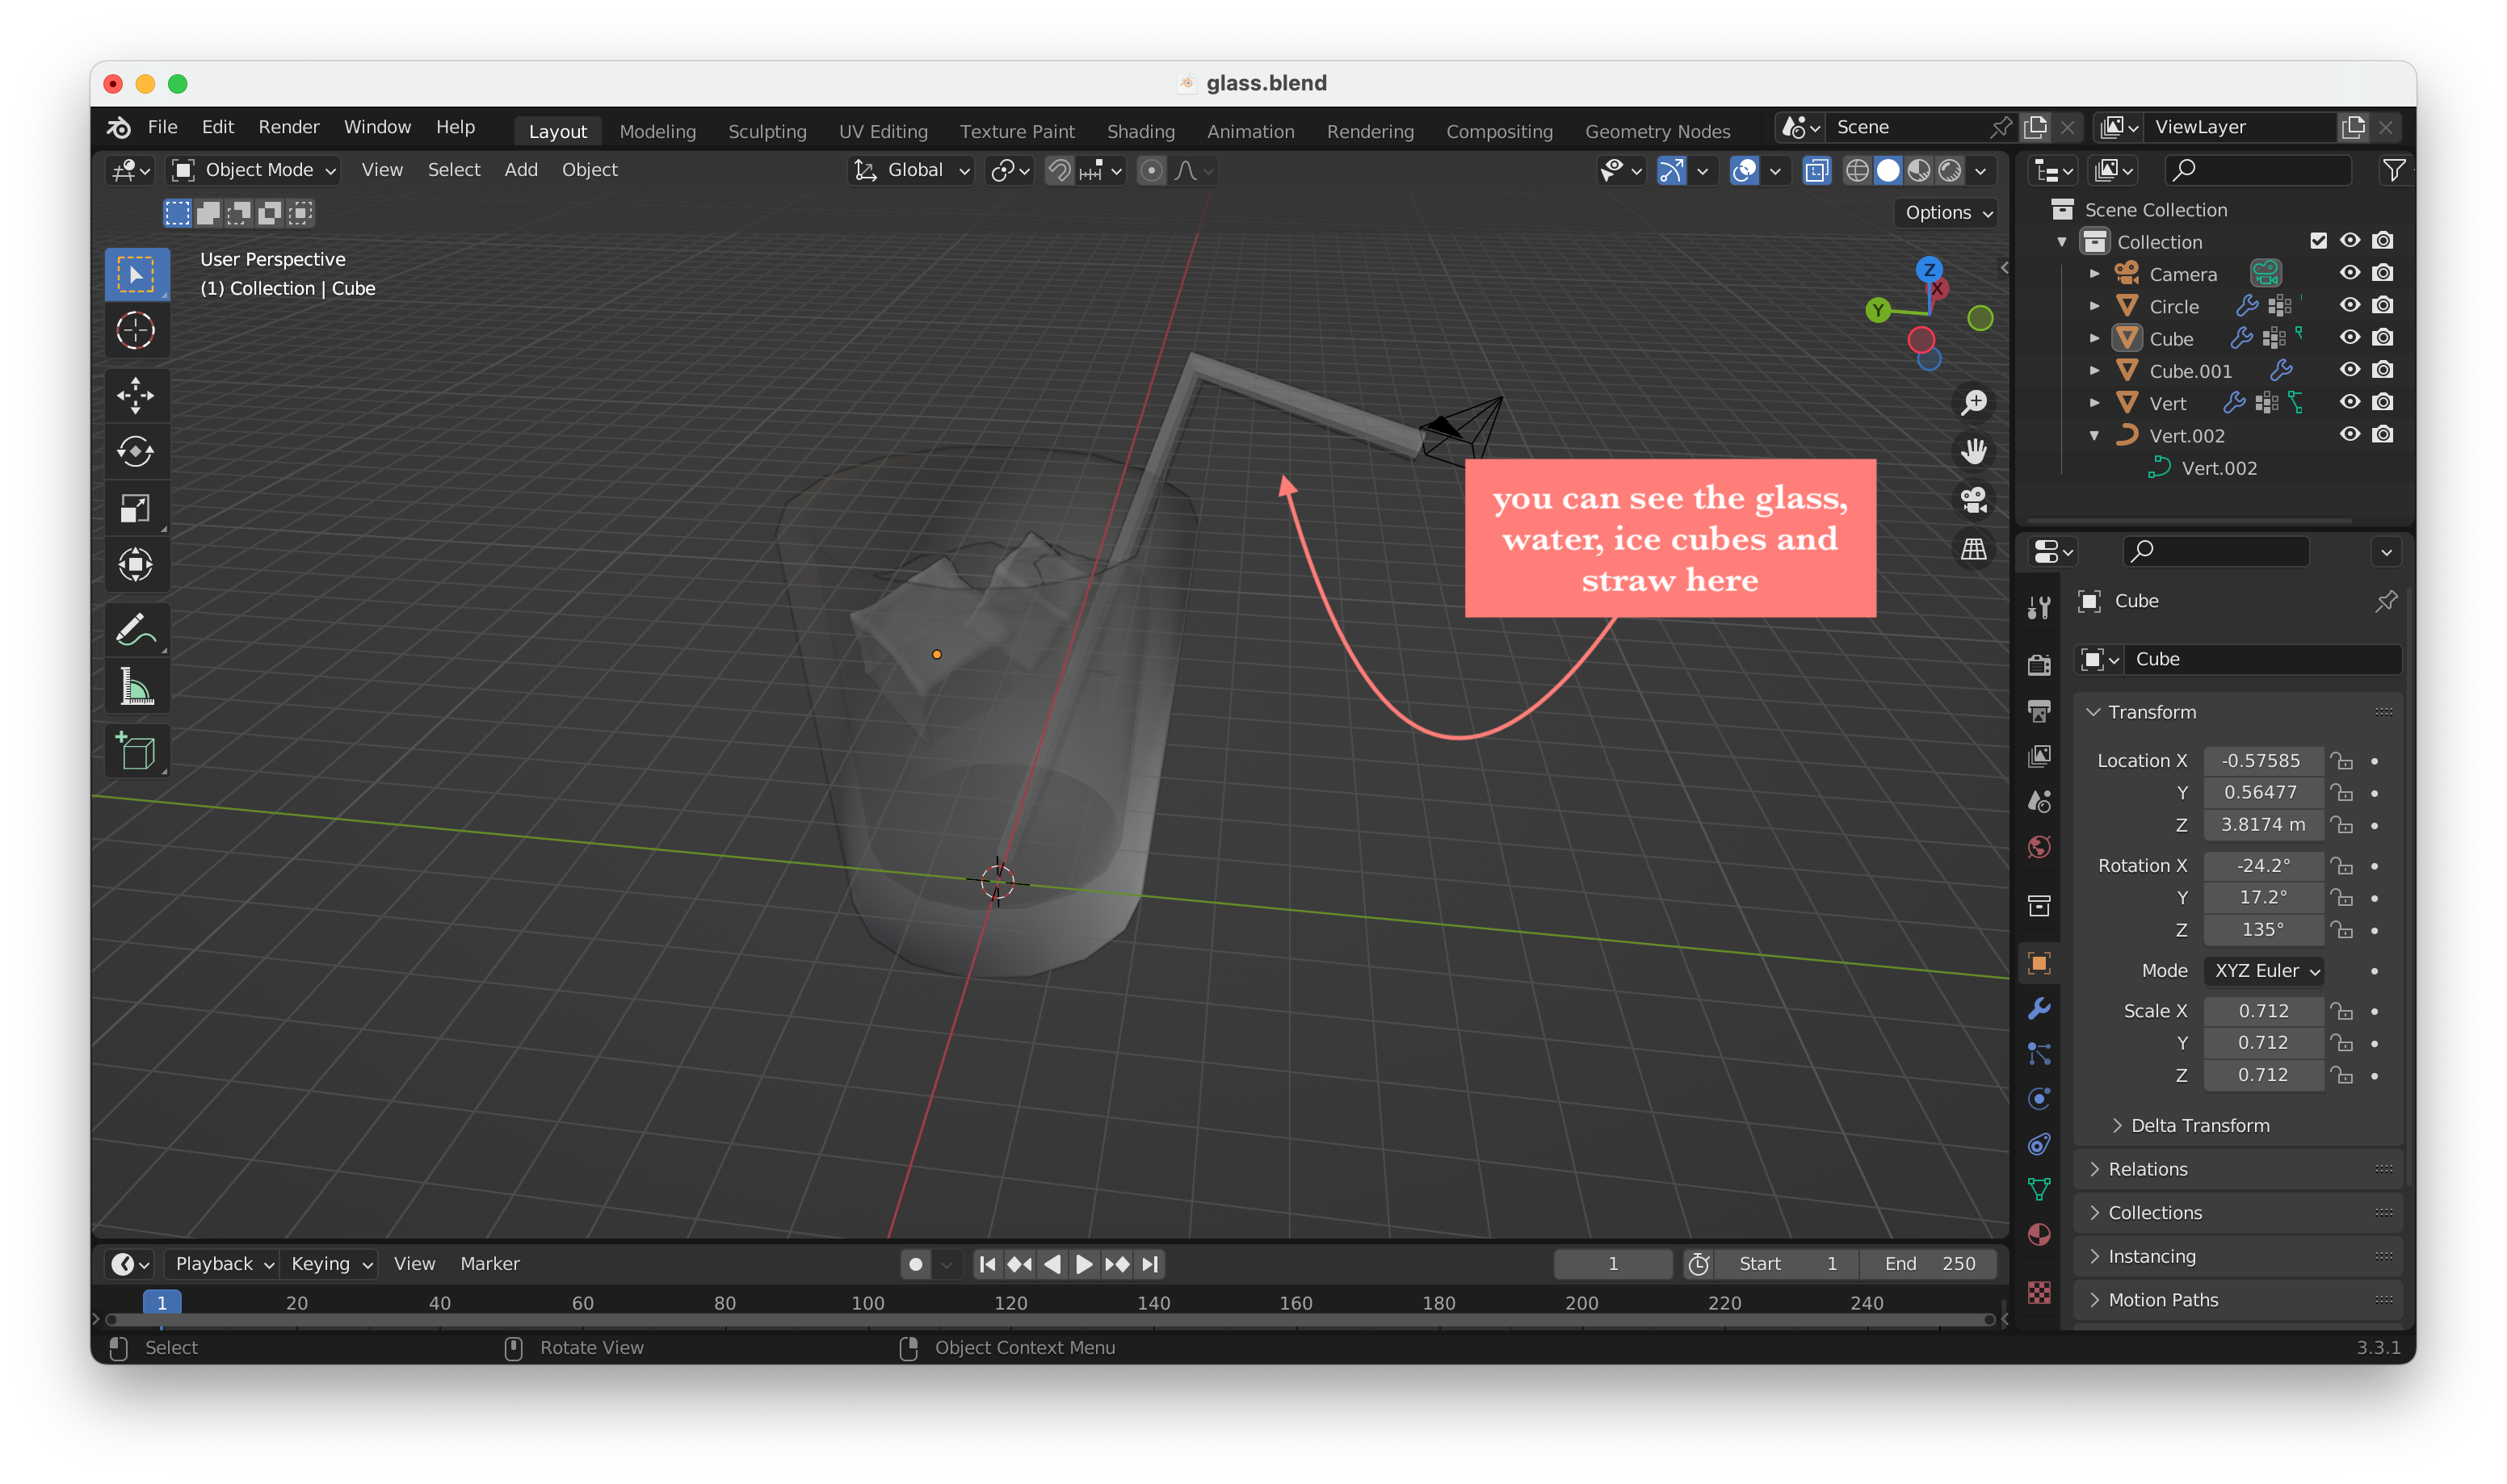
Also, I made a glass of water 🥛 using Blender, to follow step by step you can see the tutorial here. This is the design, it has multiple components including glass, liquid, ice cubes, and straw.
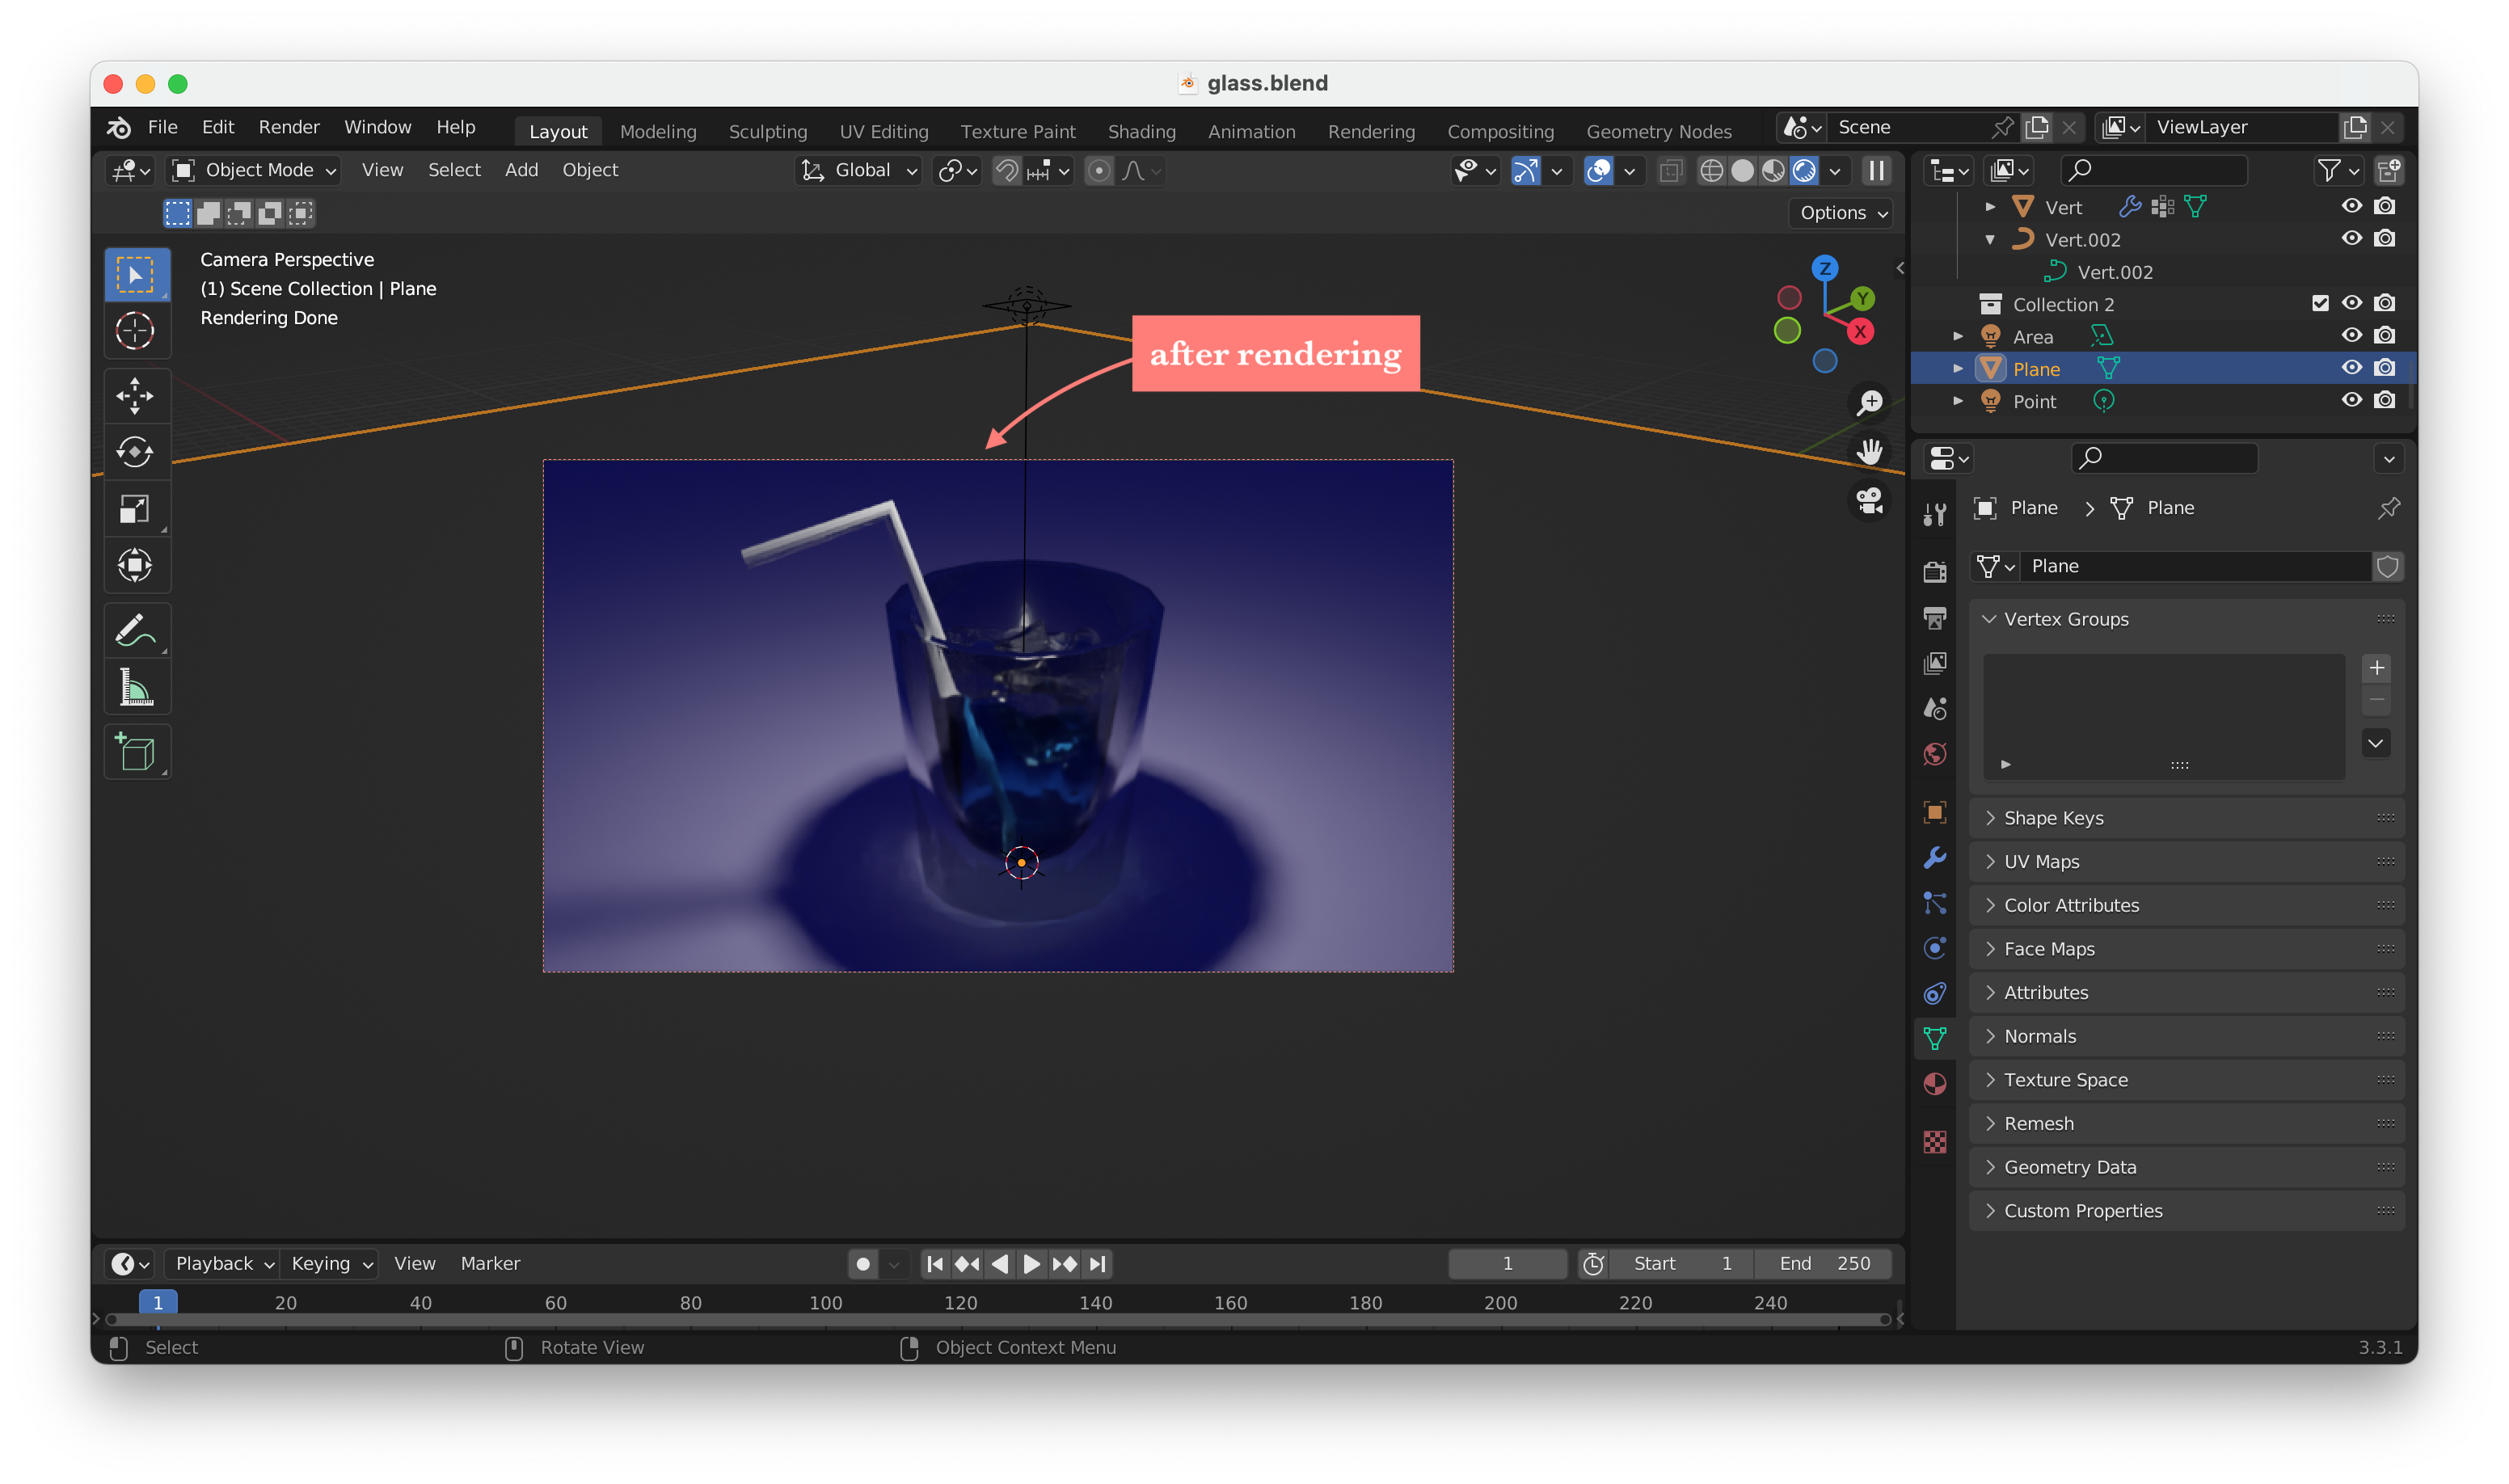
After finishing the design I tried rendering too, to be honest it was pretty complicated. This is how rendering tured out.
Method of saving: save as stl
How to embed your files?
For Fusion360:
First method is to link the files just like linking an image
Second method, use the code to include your files
Follow theses steps:
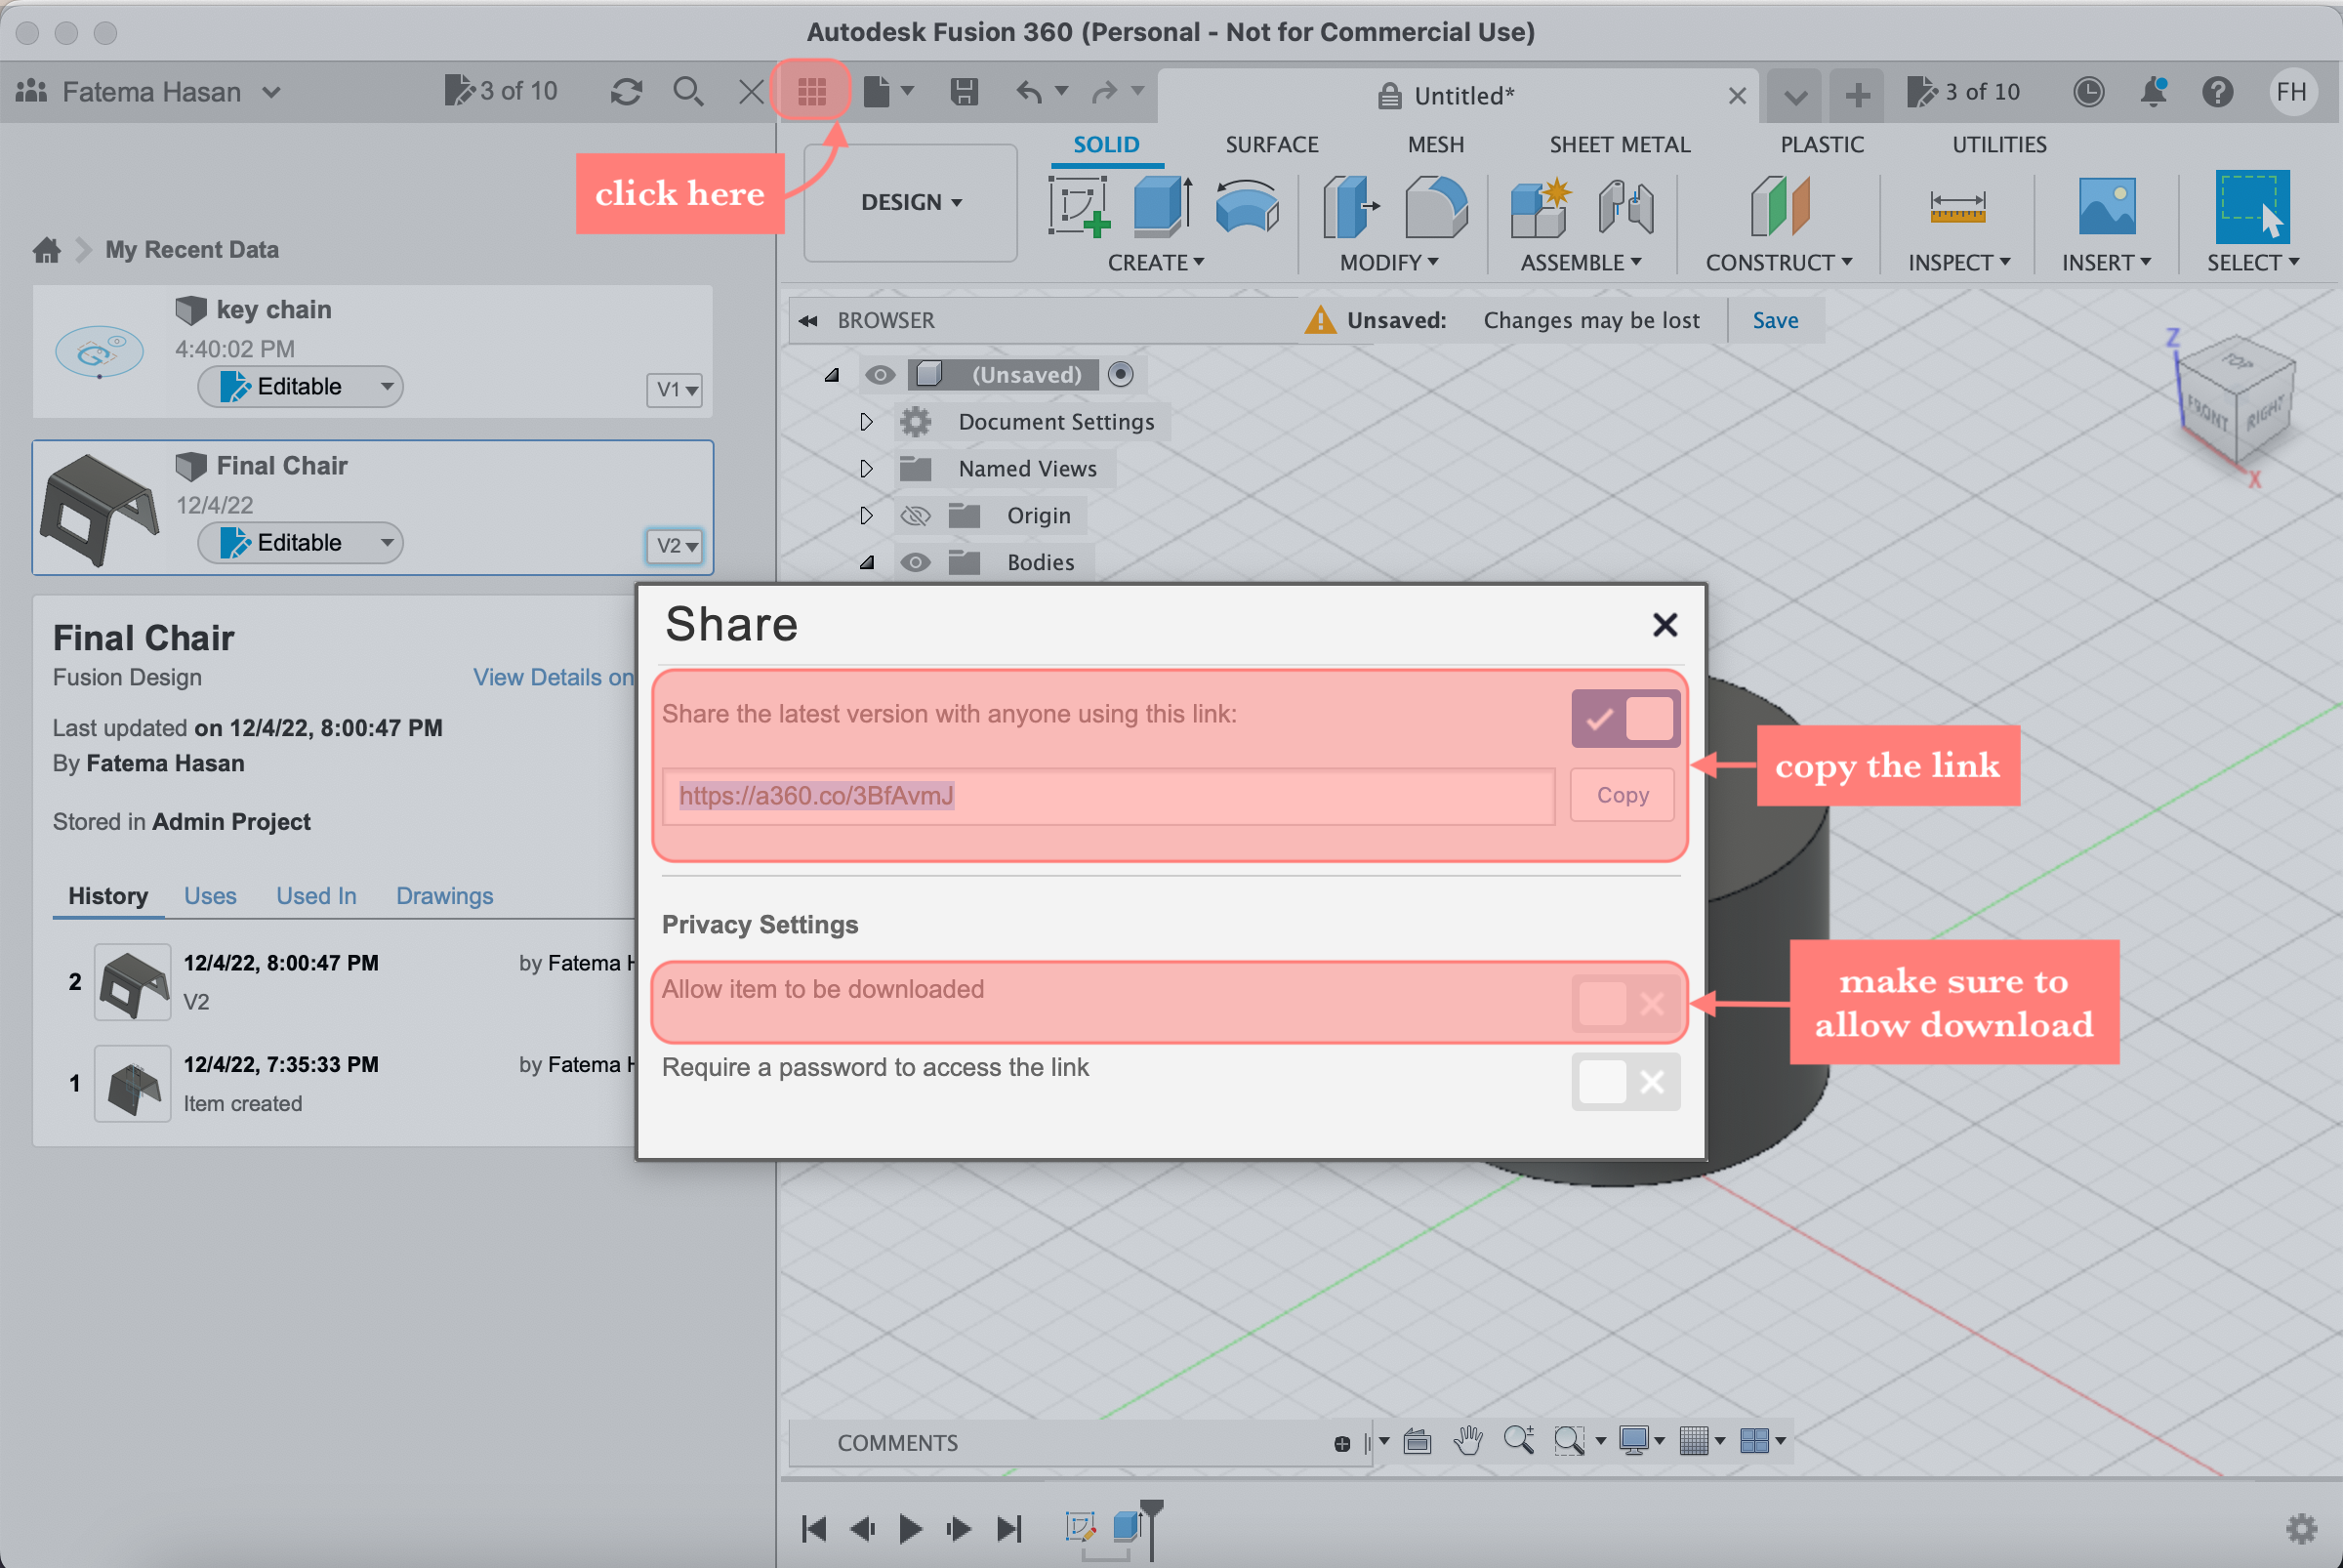
1. Step 1, after saving your file, click on data panel, from there you will see your work
2. Step 2, right click on your selected project, choose share link
3. Step 3, copy the link and paste it in the following link, and make sure to allow downloading
<div class="fusion"><iframe width="640" height="480" src=" YOUR LINK " frameborder="0" allow="autoplay; fullscreen; vr" mozallowfullscreen="true" webkitallowfullscreen="true"></iframe> </div>
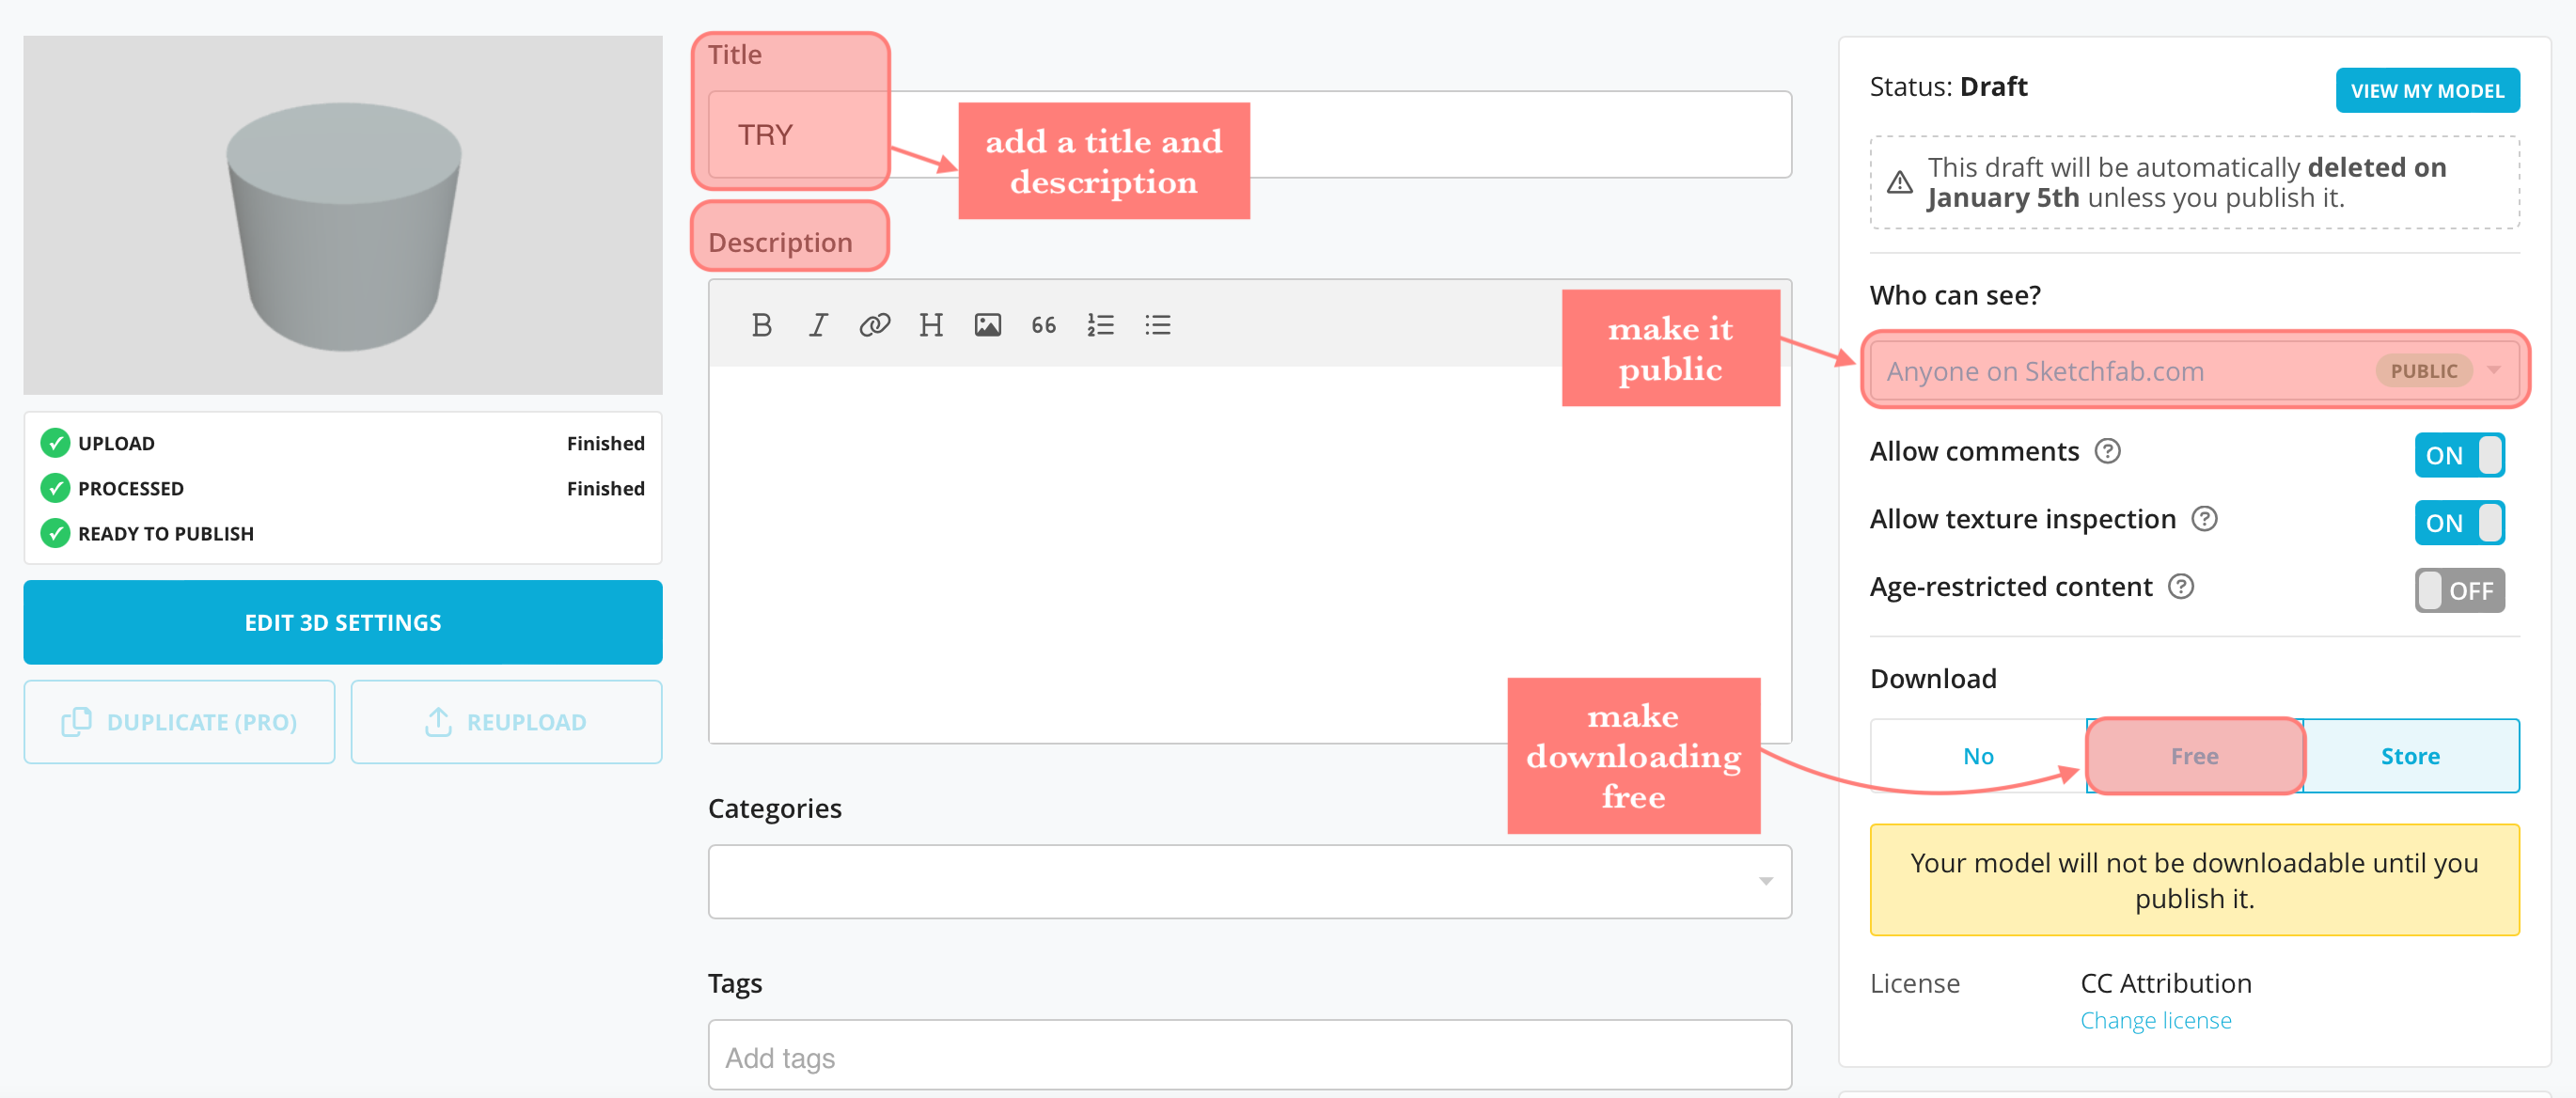
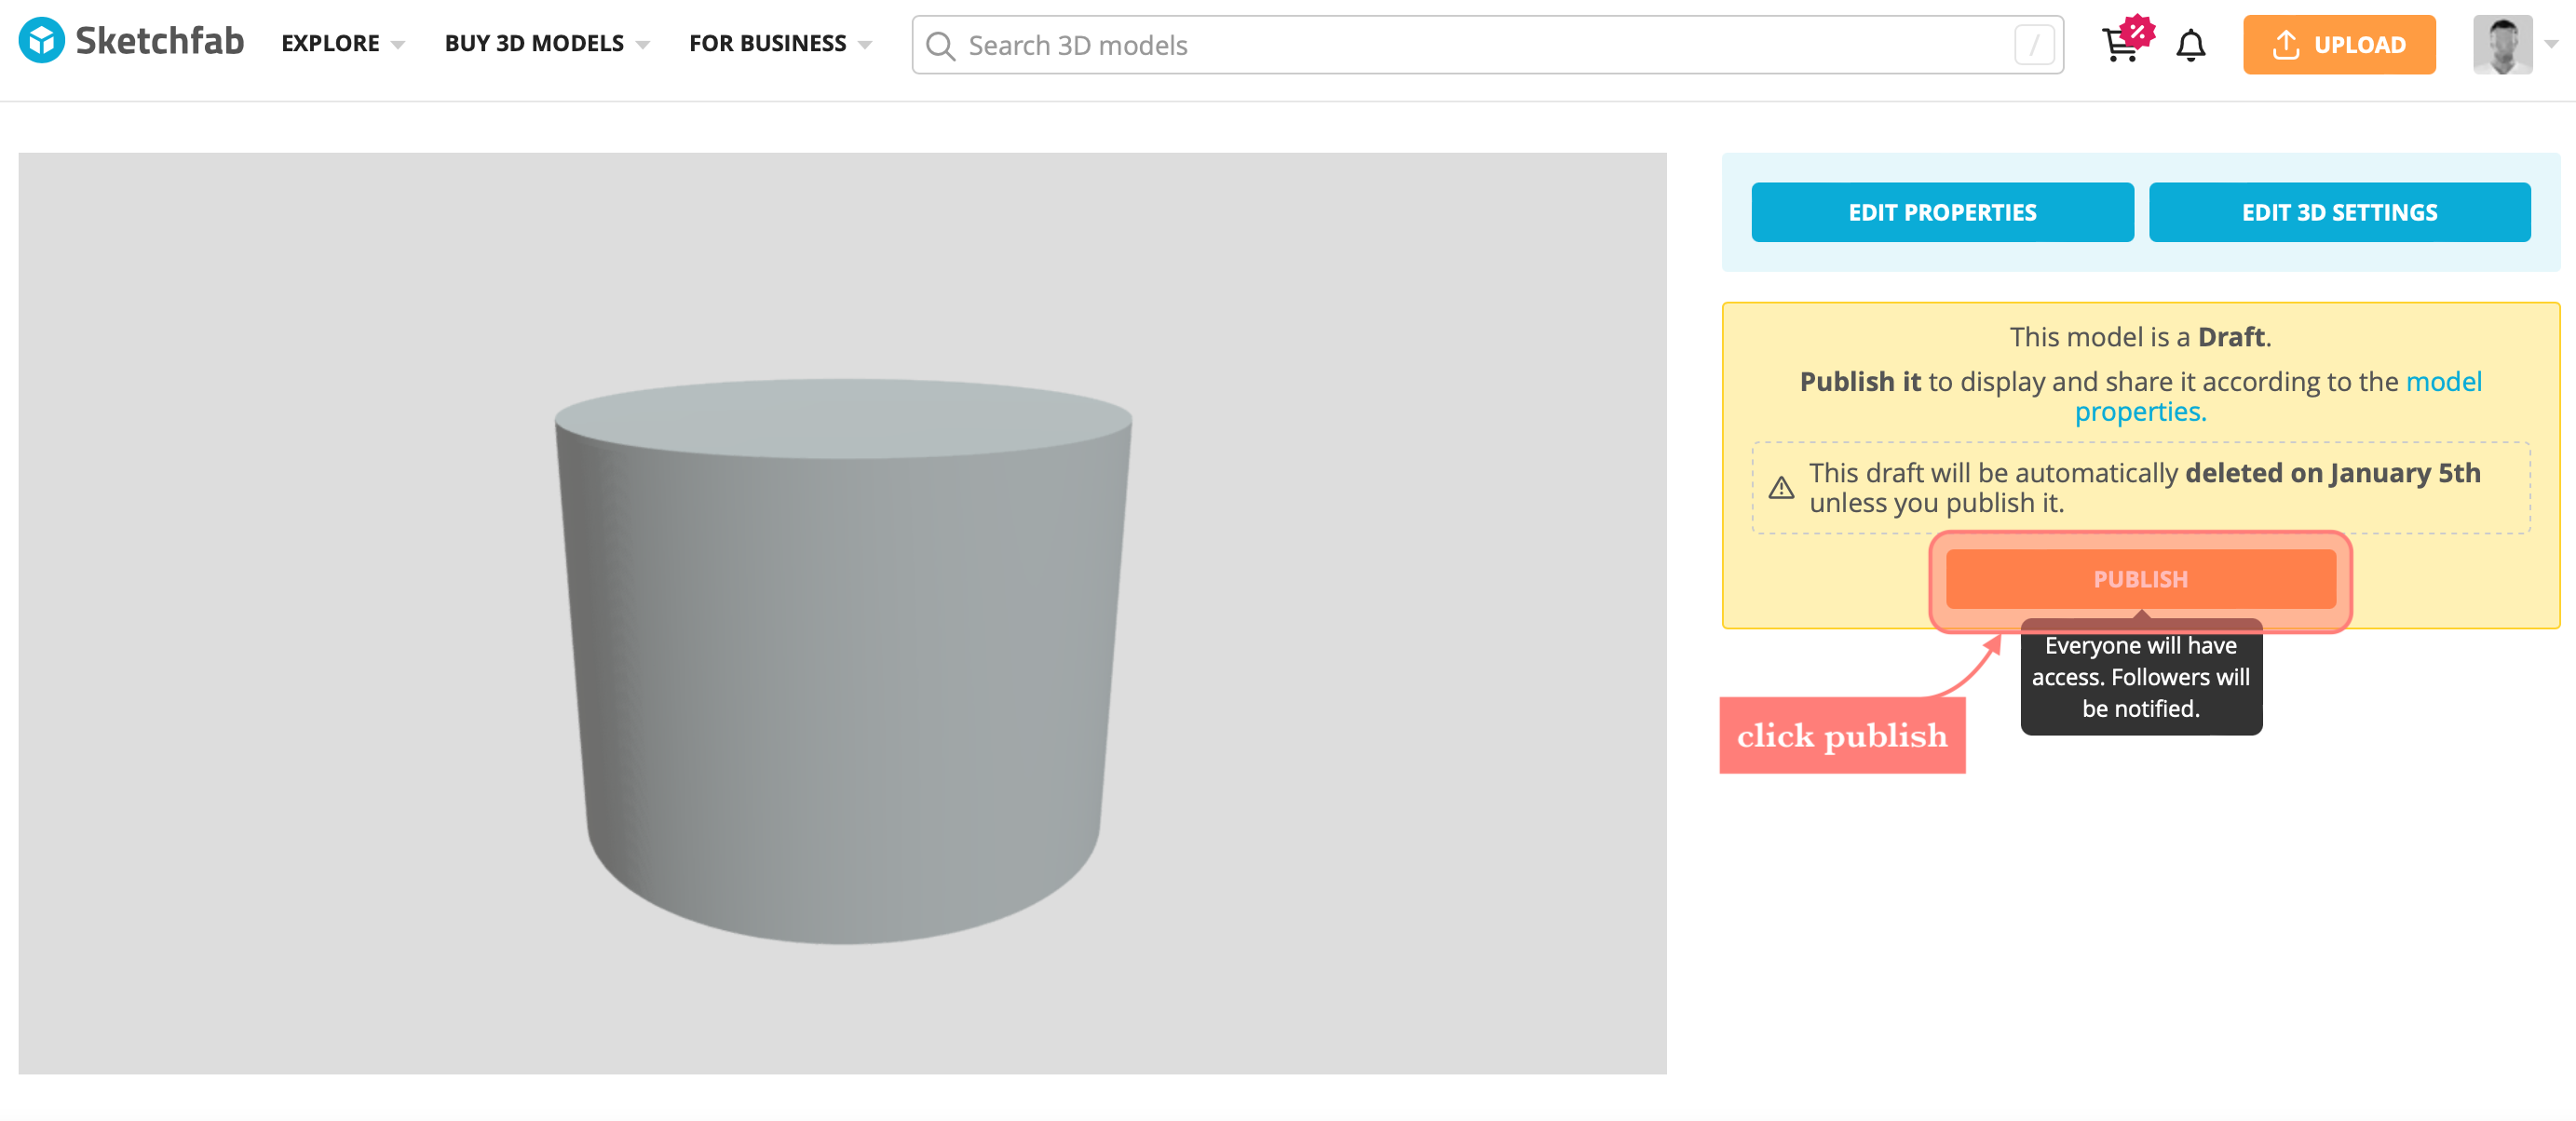
Third method, use sketchfab to embed your files, here is the steps
1. in sketchfab upload your work file then make it public, and download for free, make sure to add a name and description, at the end click view my model
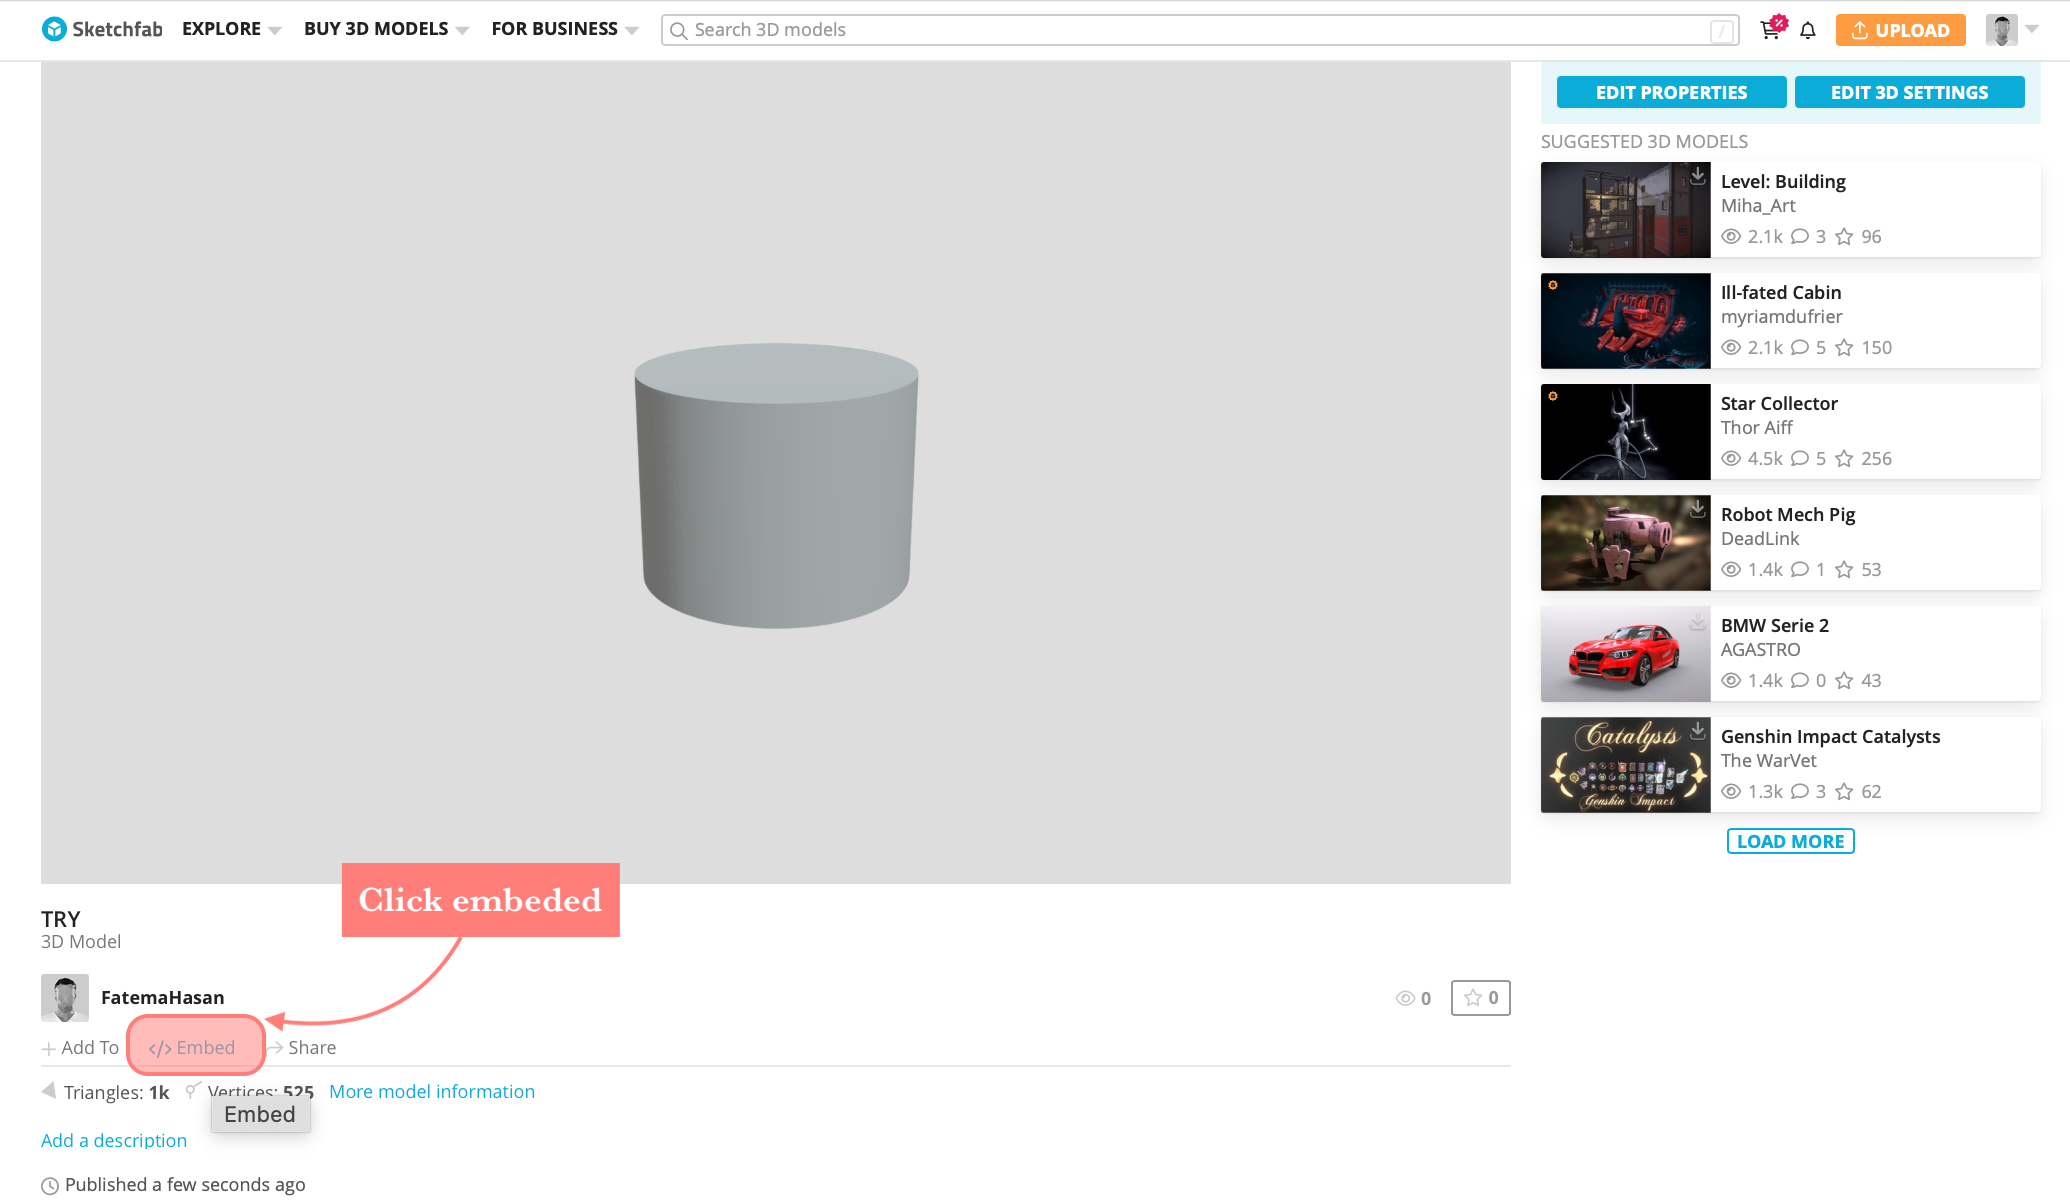
2. click publish
3. click embedded
4. copy the link and paste directly

Work Files
Here the original design files are linked:
- Snow flake ❄️ using Cuttle
- Flower 🌸 using Inkscape
- Logo using Inkscape
- Mug ☕️ using Fusion360
- Chair 🪑 using Fusion360
- Glass 🥛 using Blender
- Mushroom 🍄 using Blender