4. 3D Printing and Scanning
This week I explored multiple 3D printers, and tried scanning too.
Group Assignment:
- test the design rules for your printers
- document your work and explain what are the limits of your printers
Individual Assignment:
- design and 3D print an object that could not be made substactively
- 3D scan an object, try to prepare it for printing
About 3D Printers
What is 3D Printing?
3D printing or additive manufacturing technologies create three-dimensional parts from computer-aided design (CAD) models by successively adding material layer by layer until physical part is created.
Why the design could not be easily made subtractively?
In 3D printing the material is added with the required amount layer by layer before the final 3D object is printed. And this is called Additive Manufacturing. While on the other hand, Subtractive Manufacturing the material is processed by material‐removing machines such as Shopbot, laser cutter, etc.. as per our digital design before acquiring the final 3D product. Another reason, is that the design has undercuts, overhangs, nested parts, meshes etc and this can be made additively only. Therefore, the design could not be easily made subtractively.Type of 3D Printers
Stereolithography - SLA, selective laser sintering - SLS, and fused deposition modeling - FDM are the three most popular types of 3D printers.
Stereolithography - SLA
The first 3D printing method ever created was stereolithography - SLA, it is still a favorite among professionals. In a procedure known as photopolymerization, SLA 3D printers use a laser to cure liquid resin into hardened plastic.
Because of its ability to create high-accuracy, isotropic, and waterproof prototypes and parts in a range of advanced materials with precise details and excellent surface finish, SLA resin 3D printers have become incredibly popular.
SLA is ideal for:
- Rapid prototyping
- Functional prototyping
- Concept modeling
- Short-run production
- Dental applications
- Jewelry prototyping and casting
Selective Laser Sintering - SLS
Selective laser sintering 3D printers use a high-power laser to sinter (bond) small particles of polymer powder into a solid structure. The unfused powder supports the part during printing and eliminates the need for dedicated support structures. Parts produced with SLS printing have excellent mechanical characteristics, with strength resembling that of injection-molded parts. The most common material for selective laser sintering is nylon.
The combination of low cost per part, high productivity, and established materials make SLS a popular choice among engineers.
SLS is ideal for:
- Functional prototyping
- End-use parts
- Short-run bridge, or custom manufacturing
Fused Deposition Modeling - FDM
Fused deposition modeling (FDM) is the most widely used type of 3D printing at the consumer level. FDM 3D printers work by extruding thermoplastic filaments, such as ABS or PLA, through a heated nozzle. They are well-suited for basic proof-of-concept models and low-cost prototyping of simple parts.
FDM is ideal for:
- Basic proof-of-concept models
- simple prototyping
Type of Filaments
Polylactic Acid - PLA is to 3D printing what training wheels are to bicycles. It’s incredibly easy to print on even the cheapest 3D printers. Print temperatures beginning as low as 180°C, you don’t need an all-metal hot end. PLA doesn’t even require a heated bed, as long as the ambient room temperature is maintained above 20°C.
Polyethylene Terephthalate Glycol - PETG is the perfect compromise between PLA and the much superior ABS. It’s slightly tougher, significantly more heat resistant and exhibits excellent creep resistance. PETG is hygroscopic, so drying it before printing is necessary if you live in a humid area. The sticky, viscous nature of the molten filament makes it a poor choice for bridging and steep overhangs.
Thermoplastic Elastomer - TPE comprises a number of plastics with rubber-like properties. TPE and TPU are regularly used to 3D print gaskets, phone covers, and wristbands for wearable devices.
Acrylonitrile Butadiene Styrene - ABS is a terrific material with unmatched price-to-performance ratio and good heat resistance. Most ABS filaments require nozzle temperatures of around 250°C, making all-metal hot ends mandatory for safe printing.
Acrylonitrile Styrene Acrylate - ASA is a modified form of ABS that is easier to print and exhibits improved UV resistance. Large ASA prints are easier thanks to their tendency to warp less than ABS. Most ASA filaments also tend to off-gas less VOCs while printing. ASA can be used for the same applications as ABS, with the added versatility of maintaining durability and color integrity despite heavy exposure to sunlight.
Polyamide - PA, better known as its brand name Nylon, is found in consumer durables in the form of gears, hinges, and sliding components. PA is indispensable in powder-sintered 3D printing processes employed in commercial SLS 3D printers. The material’s high glass transition temperature and tendency to warp make it difficult to print on cheap, unenclosed printers.

| Filament Properties | PLA | PETG | TPE | ABS | ASA | PA |
|---|---|---|---|---|---|---|
| Printability | Excellent | Good | Average | Average | Good | Poor |
| Color Selection | Excellent | Good | Average | Average | Average | Poor |
| Heat Resistance | Poor | Average | Average | Good | Good | Good |
| Tensile Strength | Excellent | Good | Average | Good | Good | Good |
| Toughness | Poor | Good | Excellent | Good | Good | Excellent |
| UV Resistance | Excellent | Excellent | Good | Average | Excellent | Average |
| Moisture Resistanc | Excellent | Poor | Poor | Good | Good | Poor |
| Creep Resistance. | Poor | Good | Good | Excellent | Excellent | Average |
From the comparison table above, we can notice that PLA is a really excellent filament and it is what we used to do our 3D printing.
3D Printer Work Mechanism
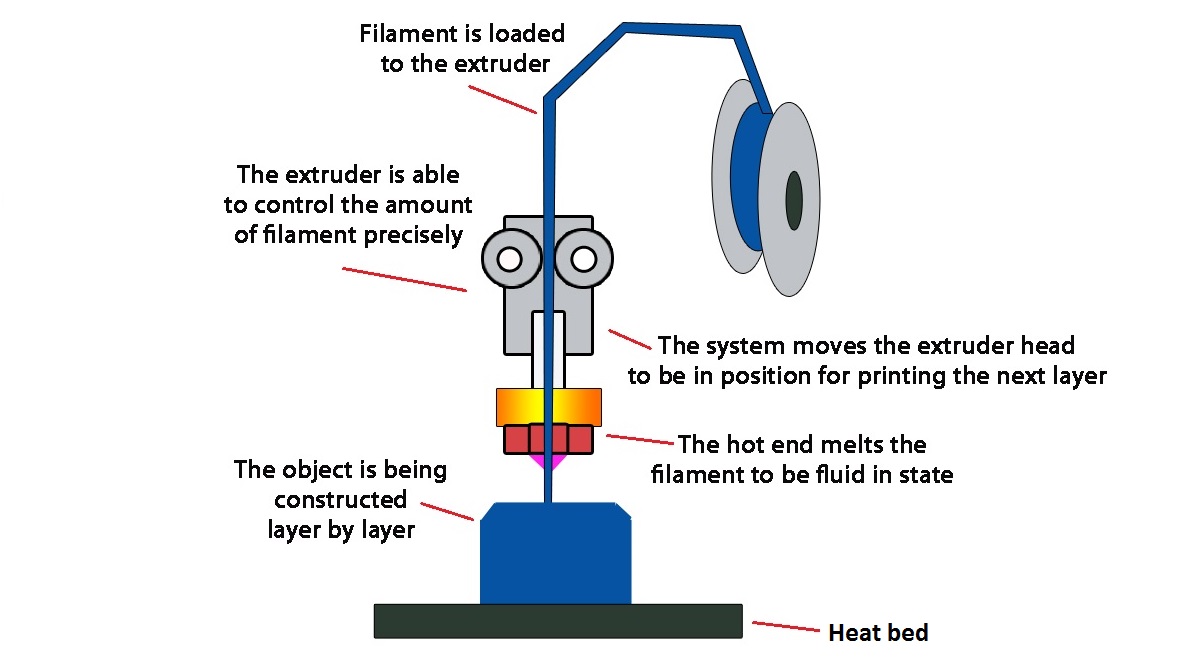
3D printing is additive manufacturing. In the 3D printing process, multiple layers of material are laid down by the 3D printer until object creation is completed. Here is how a 3D printer work:
Step1: a 3D image is created using a computer aided design software.
Step2: the CAD file is sent to the printer.
Step3:
- the filament is loaded to the extruder,
- the motor draws in the plastic filament,
- the extruder is able to control the amount of filament precisely,
- the system moves the extruder to be in position for printing the next layer,
- the hot end melt the filament/plastic and pushes the melted plastic through the nozzle,
- the printer lays down successive layers of the material on a heat bed and bulids the model from a series of cross sections.
Common Problems with a 3D Printer
3D printing can be very useful, but there are many common problems that people experience with their 3D printers including: Warping, First Layer Adhesion, Under Extrusion, Over Extrusion, Ghosting/Ringing, Stringing, and Blobs & Zits.
Prints Not Sticking or Detaching from Bed (First Layer Adhesion)
A common issue that people experience in 3D printing is when their 3D prints don’t stick to the build plate properly. I used to have 3D prints fail and get knocked off the print bed due to not having good first layer adhesion, so you want to fix this issue early on.
To improve first layer adhesion you can:
- Increase printing bed temperature
- Reduce drafts in the environment
- Use an enclosure
- Level your print bed properly
- Use an adhesive on the print bed
- Use a Raft, Brim or Anti-Warping Tabs
- mprove first layer settings
Testing 3D Printers
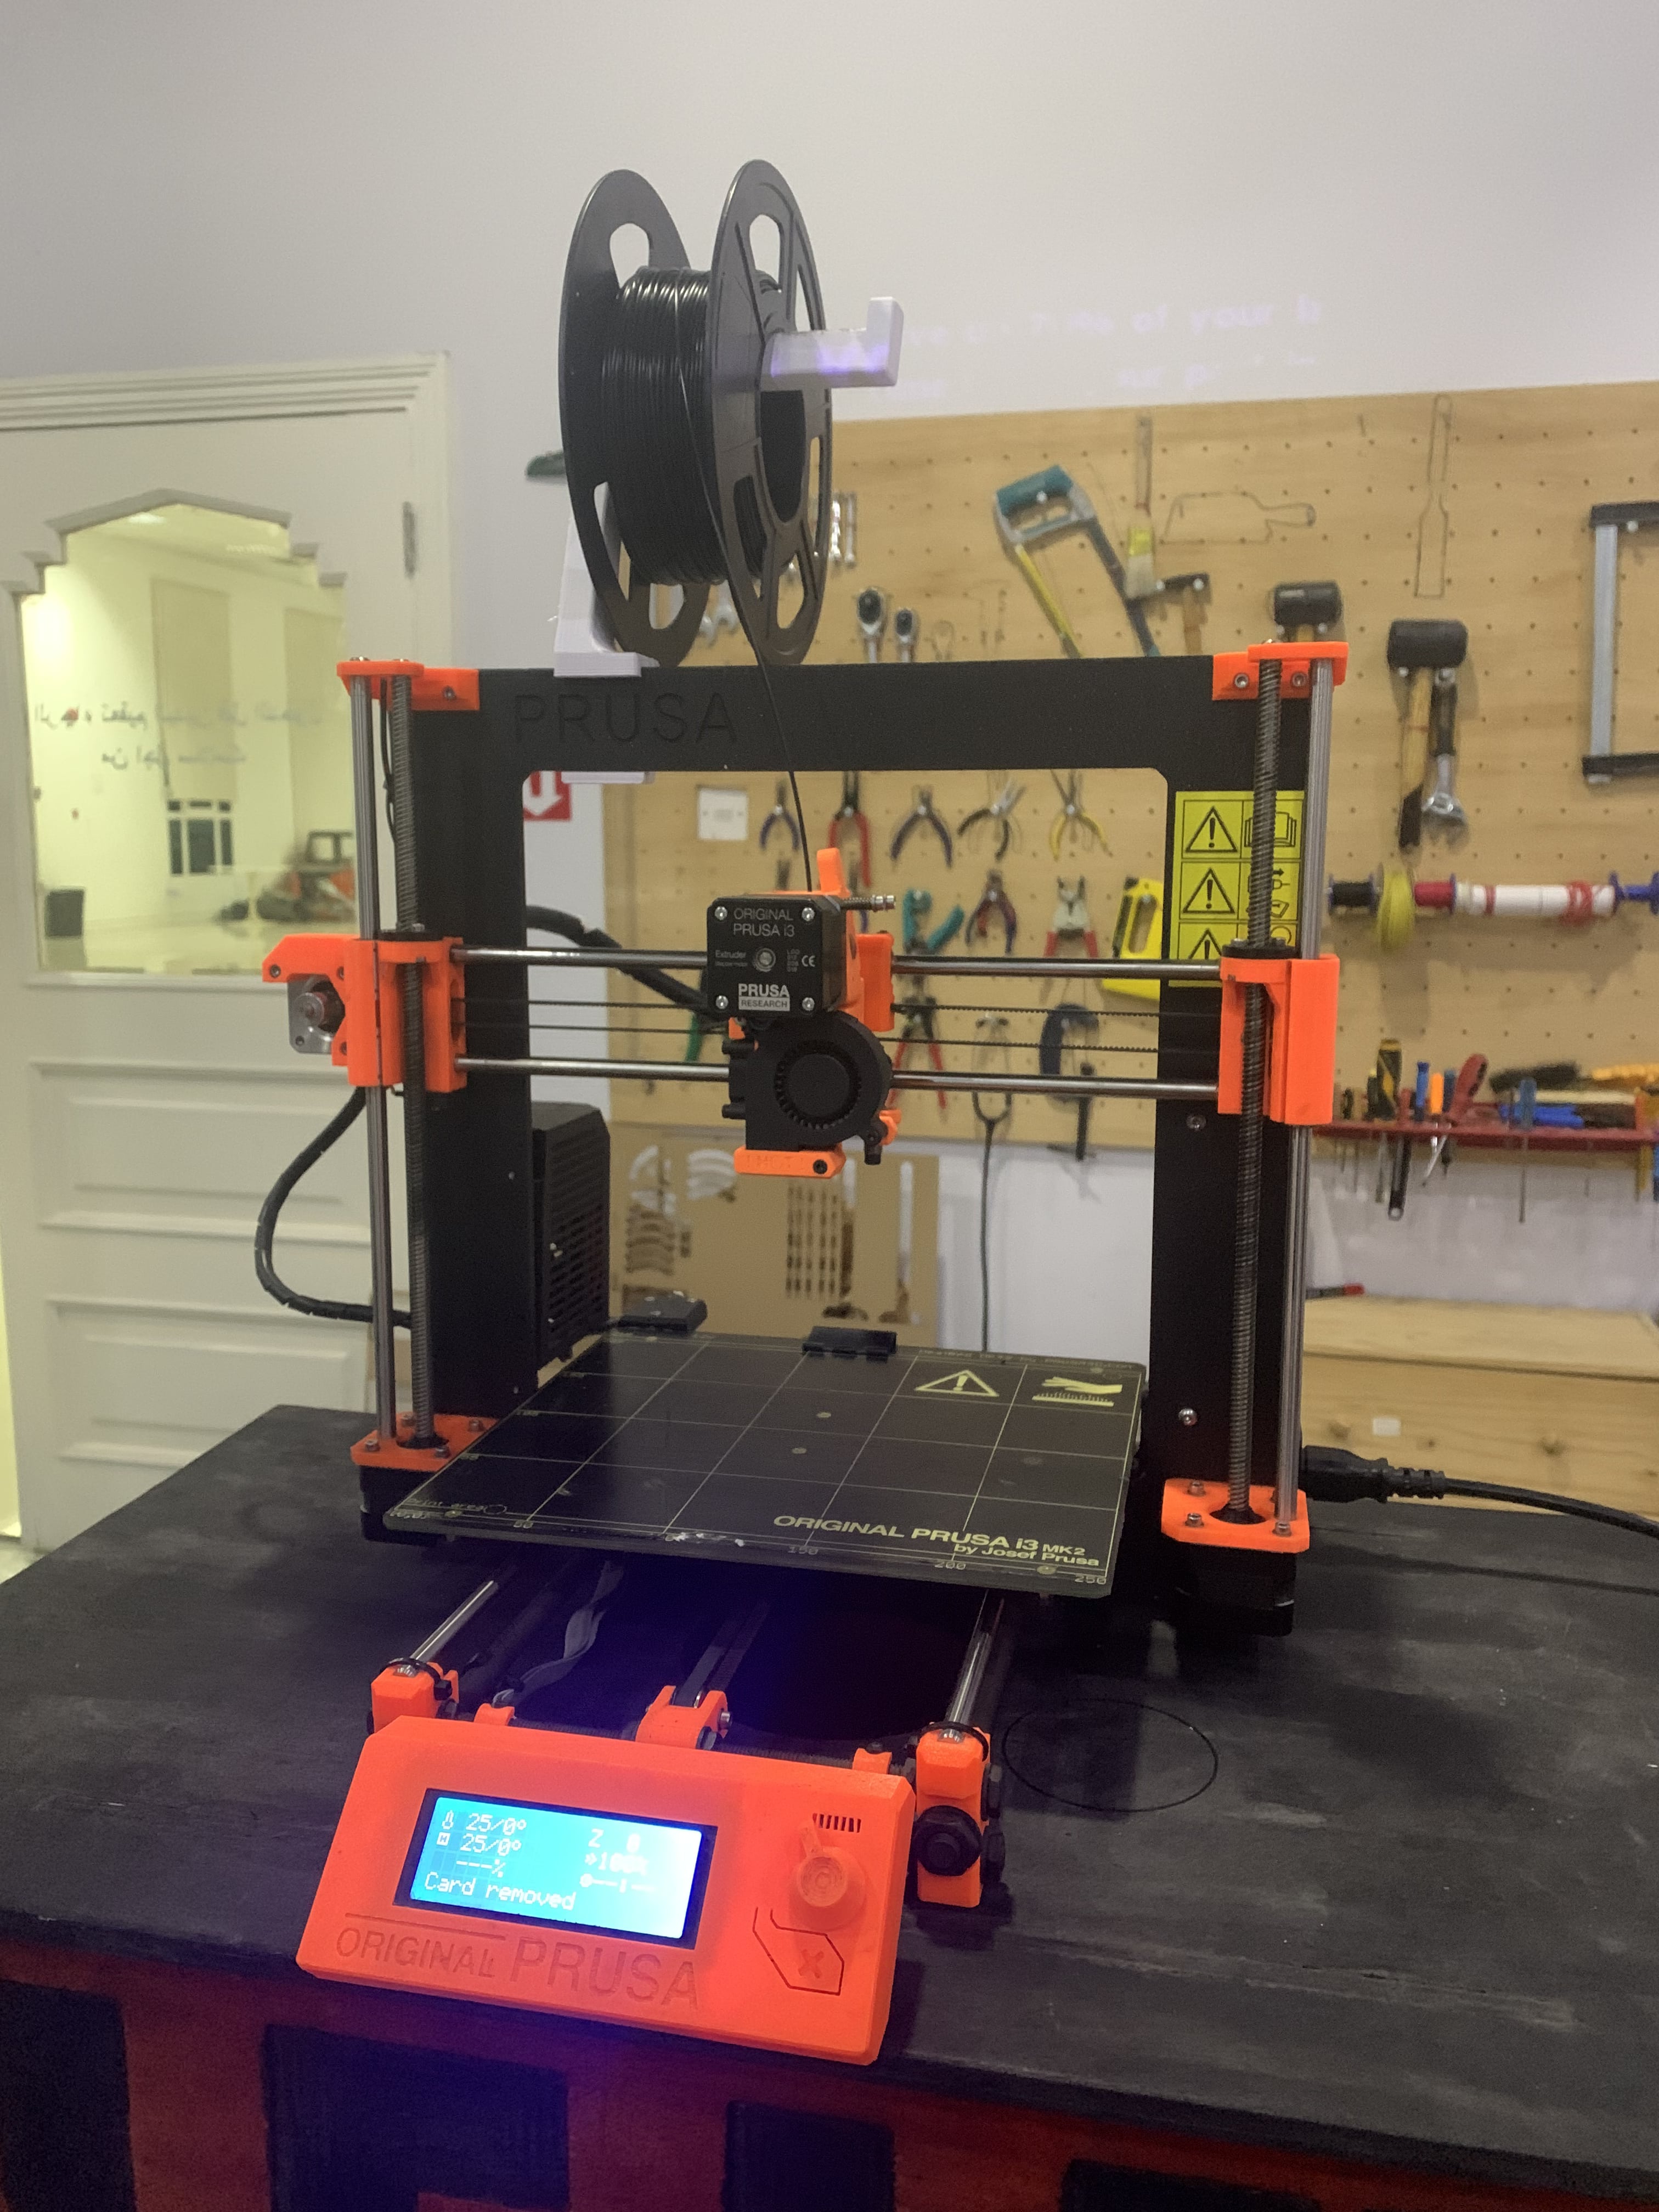
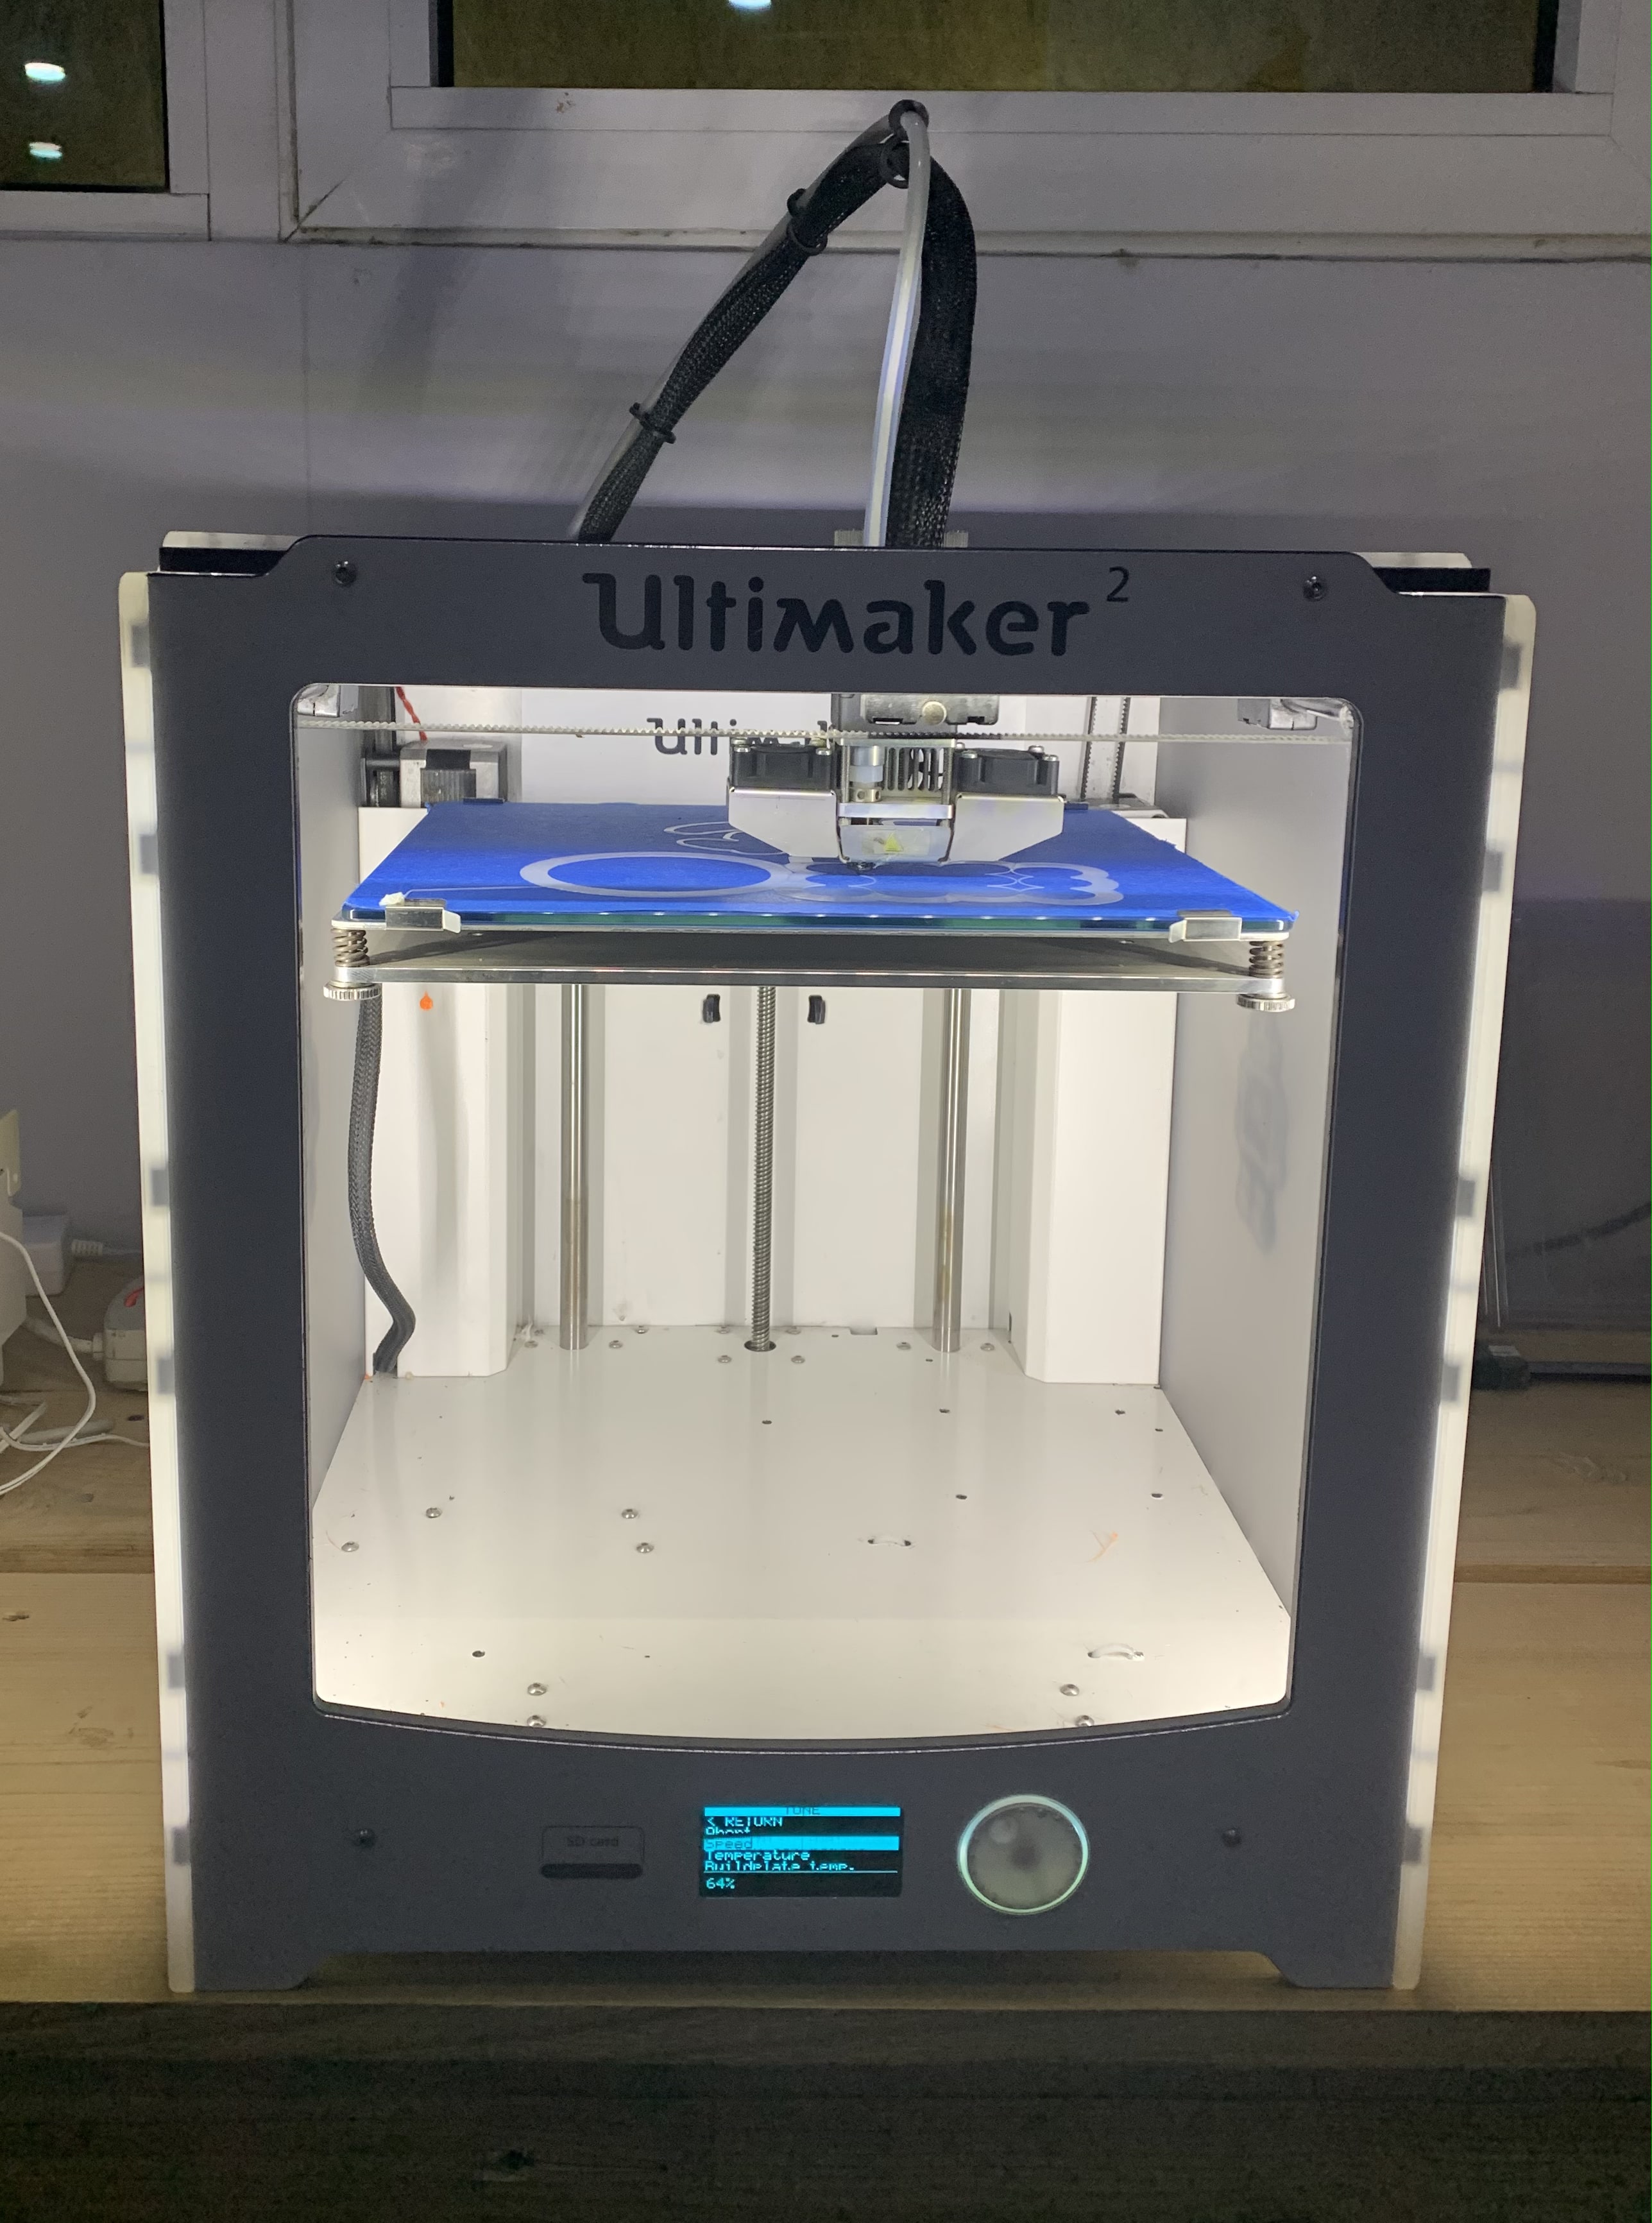
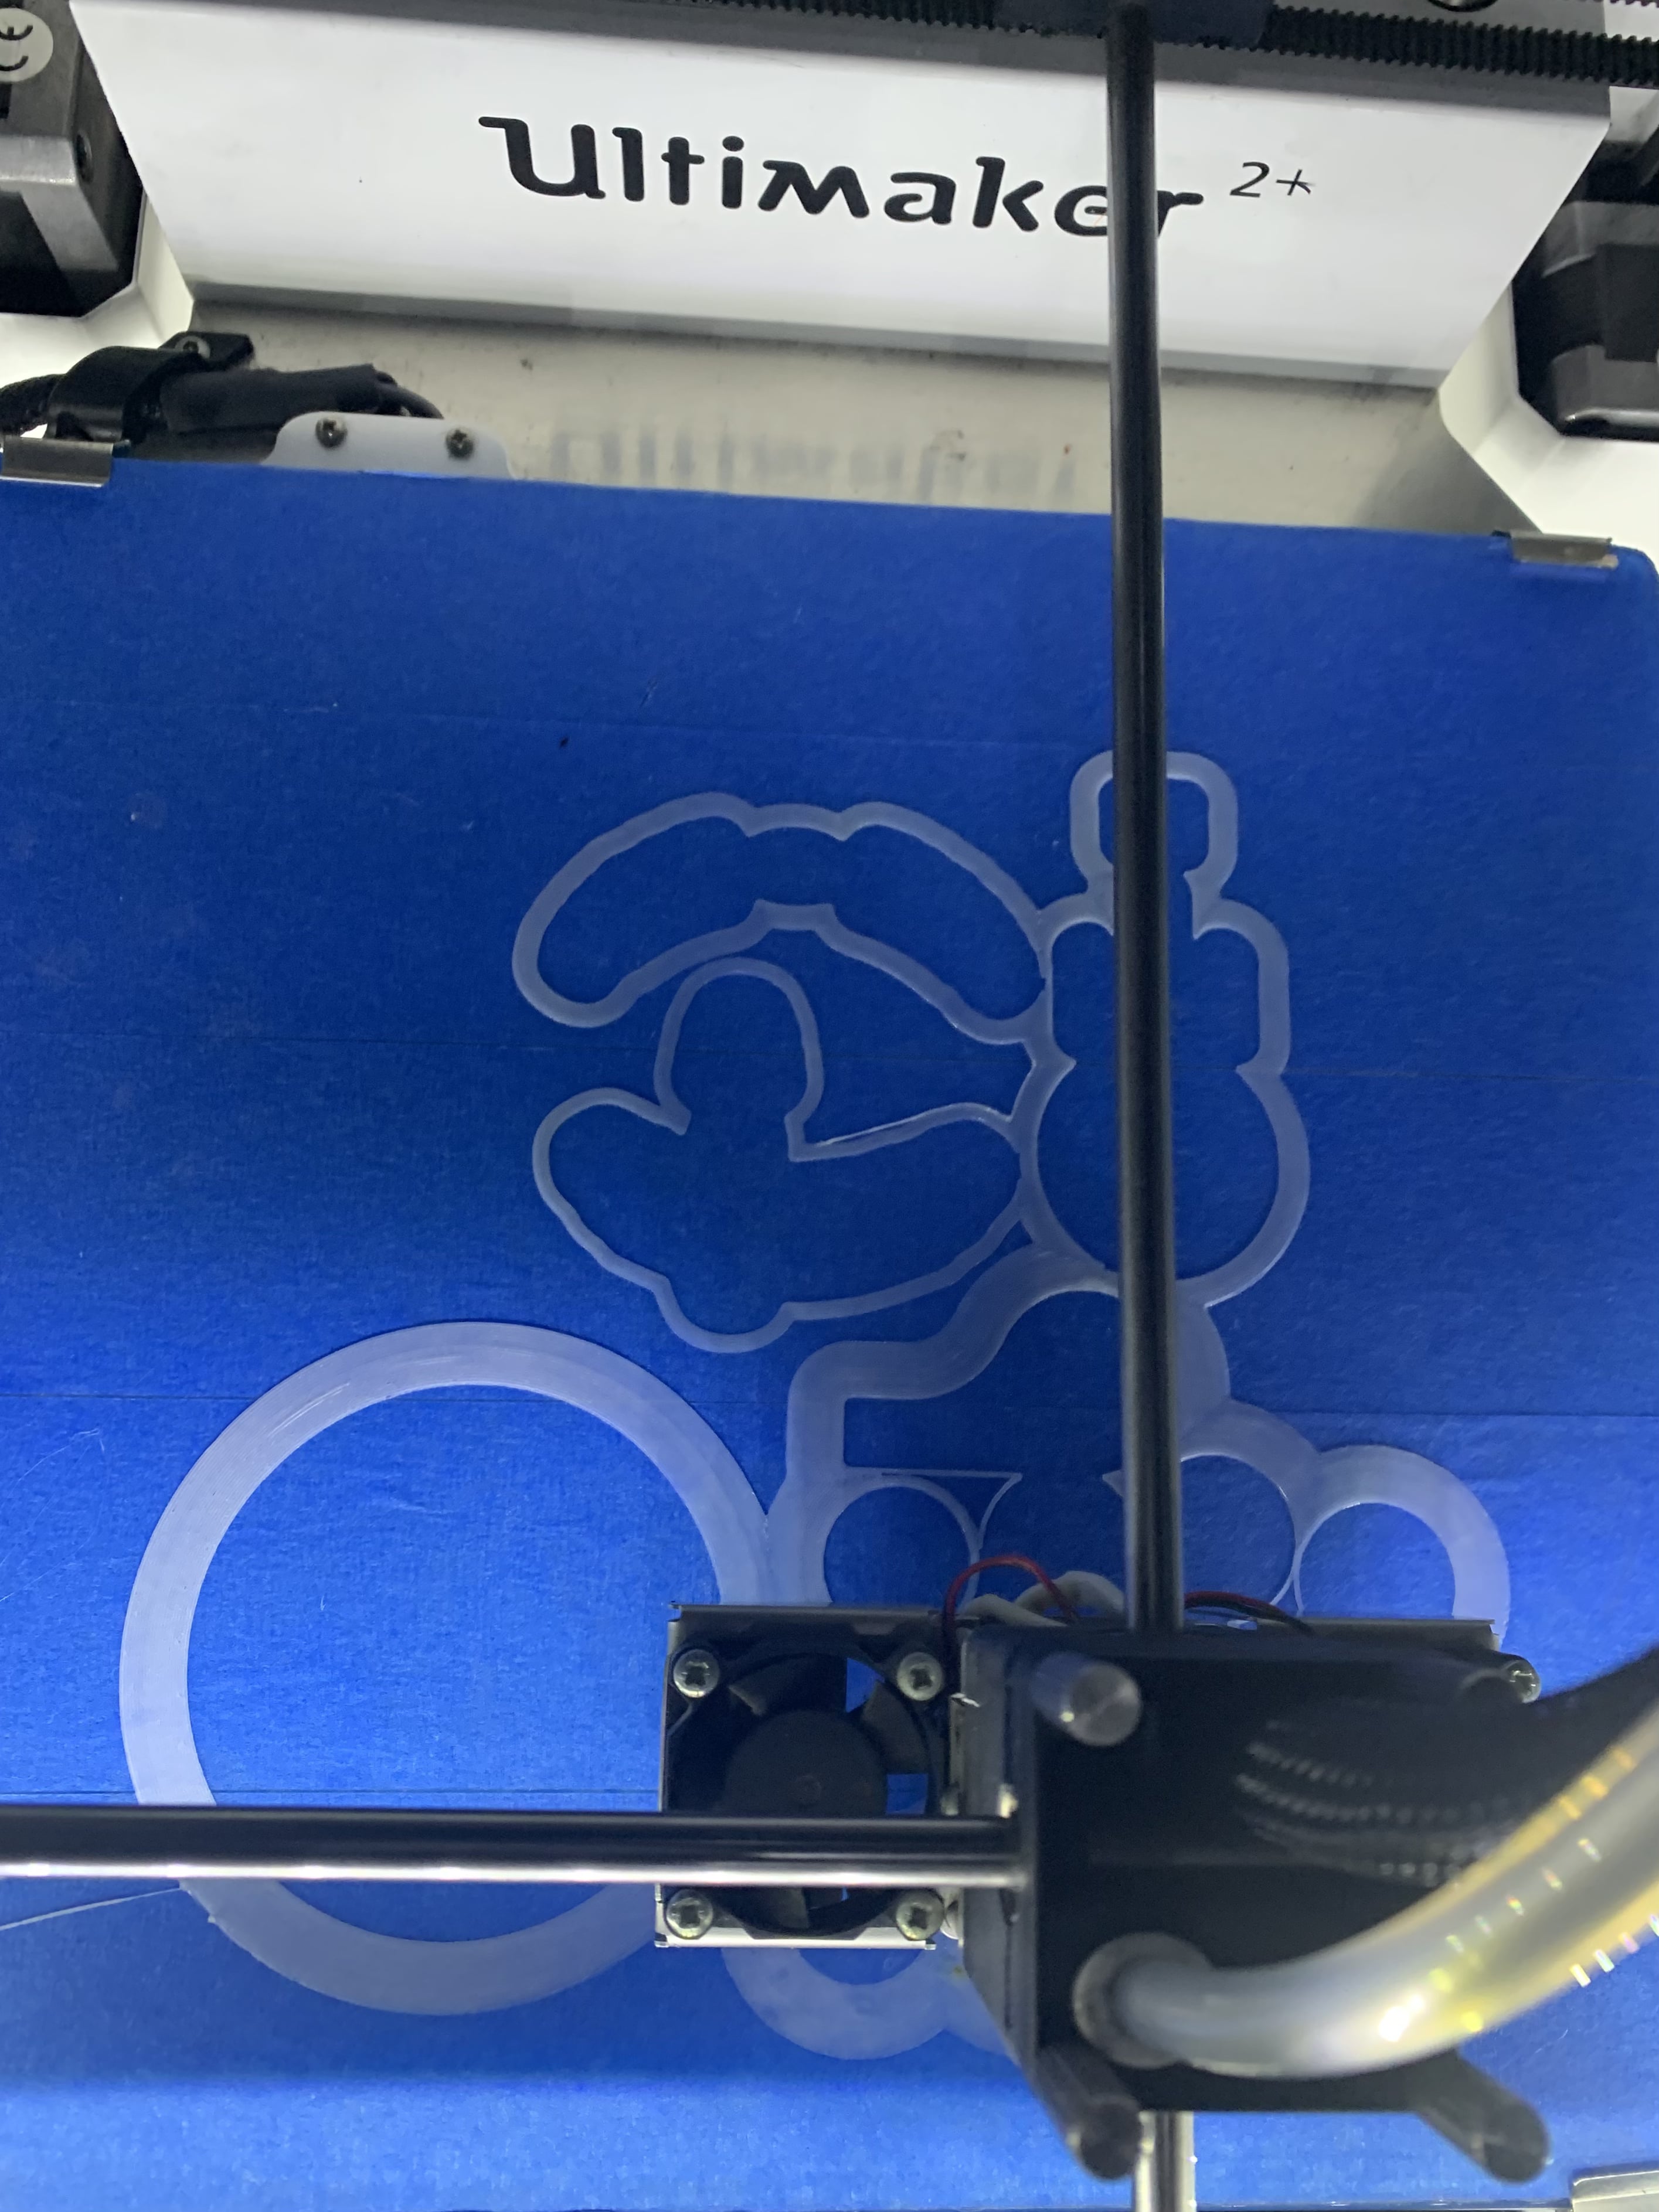
We will compare 3 different printers in terms of time to print, resolution, and quality; the printers are:
| Prusa i3 Mk2 | Maker Bot Replicator Z18 | Ultimaker 2 |
|---|---|---|
 |
 |
 |
| Me & Sara Albalooshi | Sara Hashem, Sara Hasan & Basel | Roaya & Sakeena |
Group Assignment
Our group worked on Prusa i3 Mk2, here are the steps of what we did:
- Step 1, we downloaded stl files of the boat, the cube, and we choose to print a dinosaur 🦕
you can download stl file for the boat from here
you can download stl file for the cube from here
you can download stl file for the dinosaur 🦕 from here
- Step 2, download Ultimaker Cura
- Step 3, open the stl files in Cura, and try to place the items as close as possible to each other; this will decrease the printing time
- Step 4, change the stettings, quality 0.2, infill 30%, material 215C and 60C, speed 50, bulit plate: brim, and no need for support
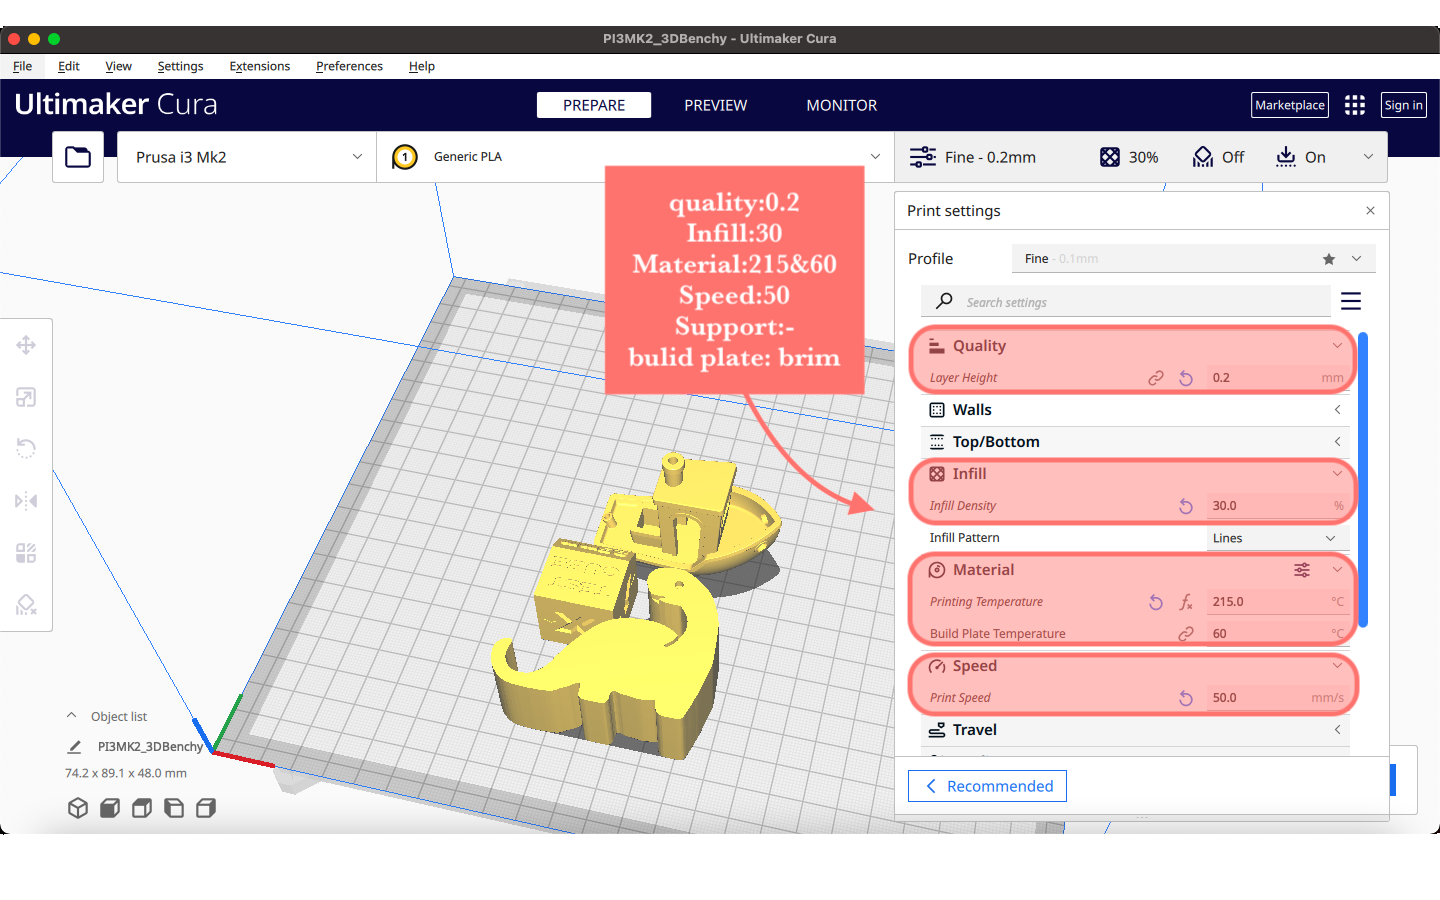
- Step 5, click slice
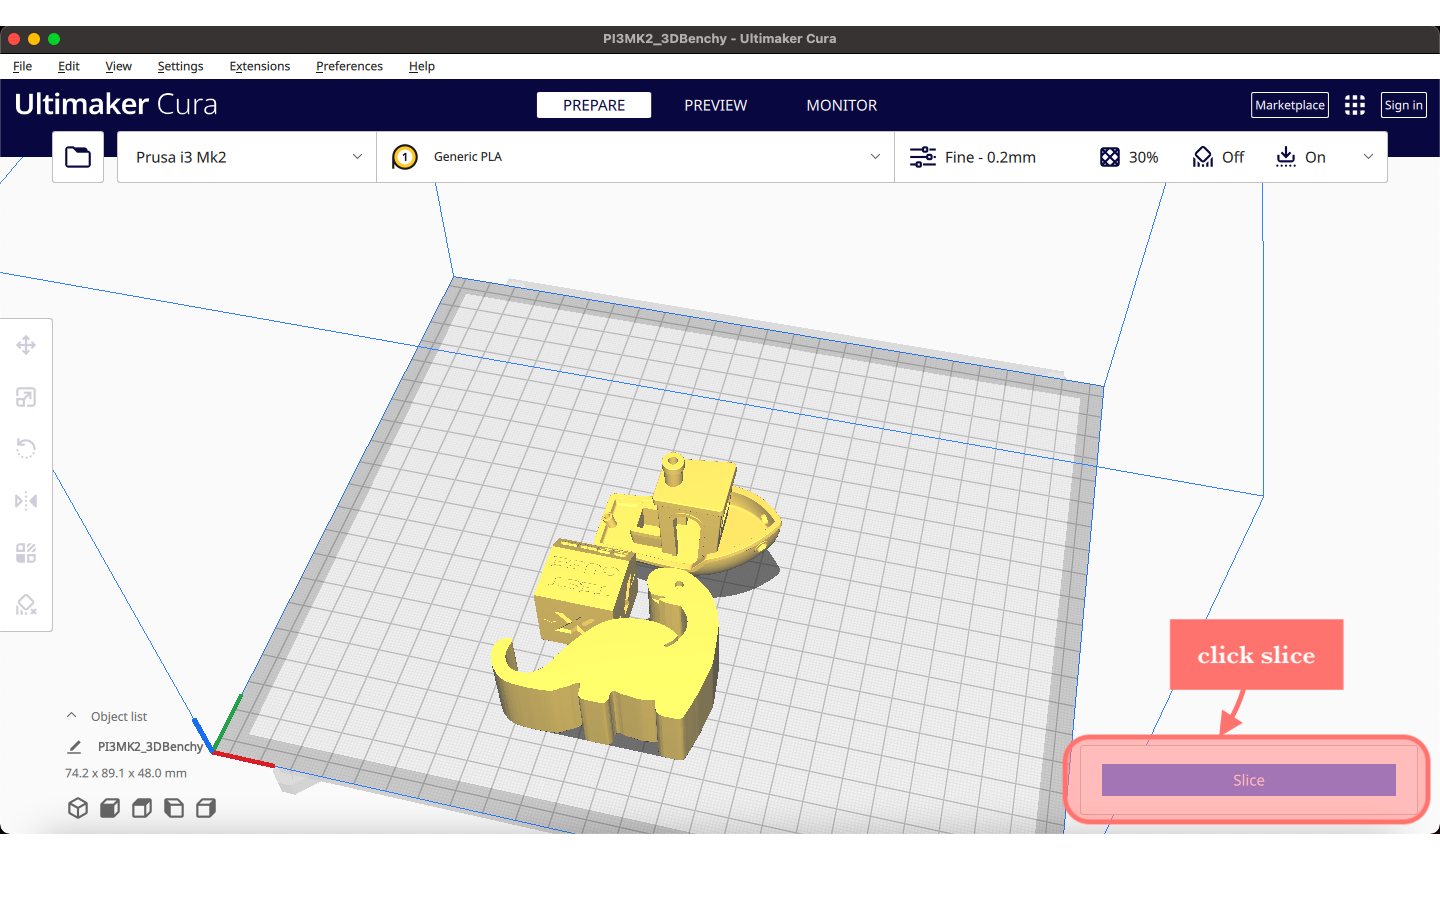
- Step 6, the estimated time for printing will show up, it was 4 hours and 25 minutes

if we change the quality from 0.2 to 0.06 the estimated time for printing will increase from 4 hours & 25 minutes to almost 15 hours!
- Step 7, save the Cura file, the file will include G code that is readable by the printer, then import it to an SD card
- Step 8, insert the SD card into the 3D printer in this case Prusa i3 Mk2
- Step 9, calibrate the printer
- Step 10, load the filment (PLA)
- Step 11, now print, the printer is going to heat up slowly
This the result of 3D printing the boat, the cube, and the dinosaur 🦕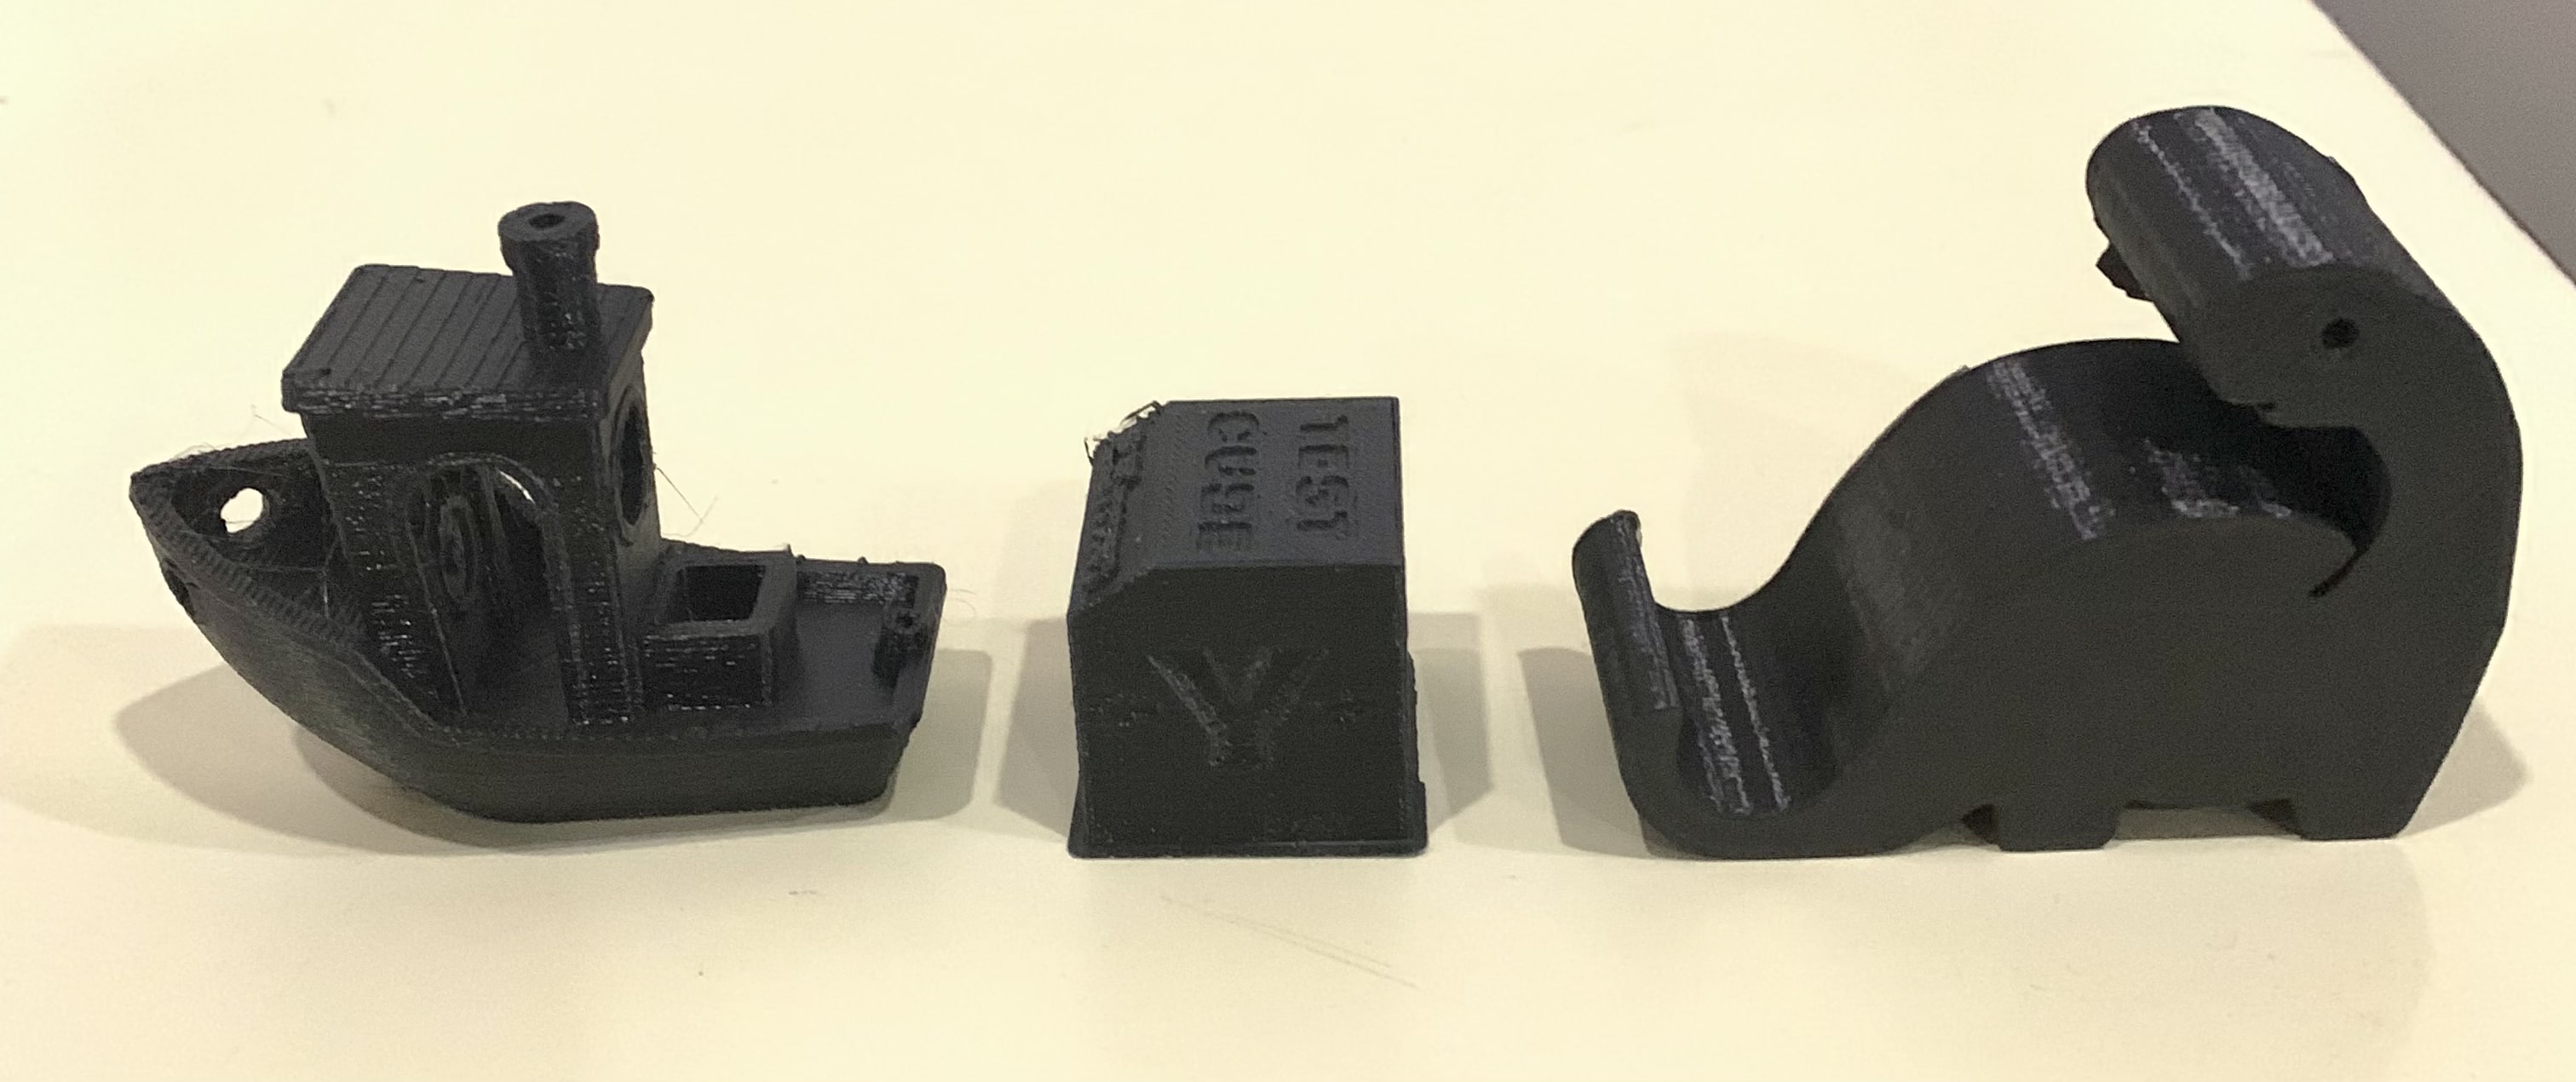
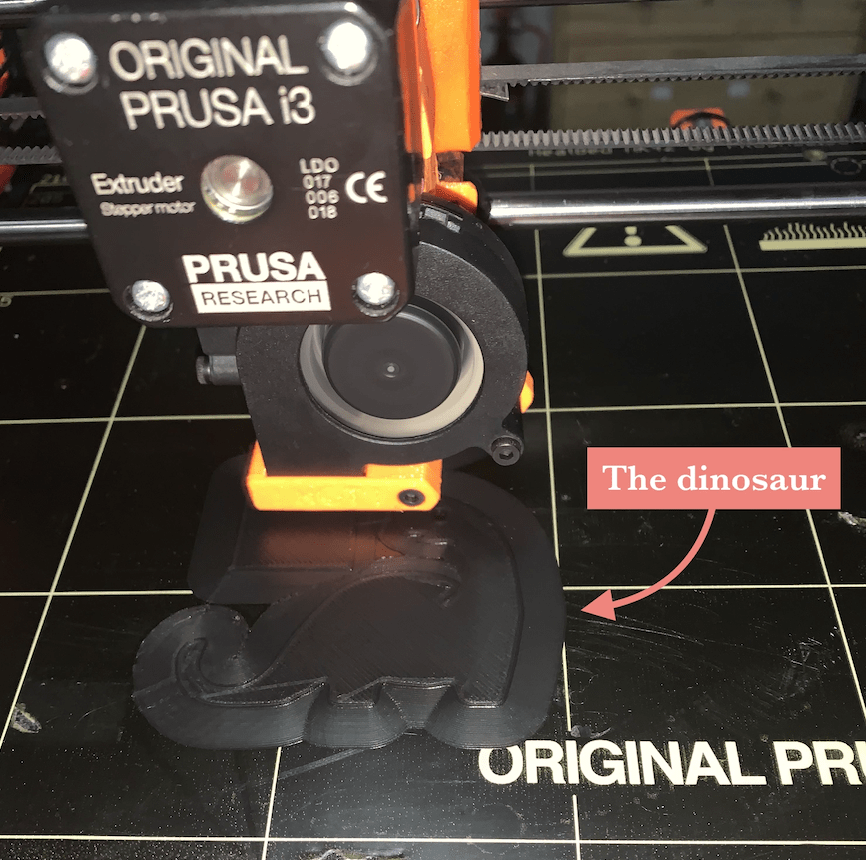
The dinosaur as phone holder 🦕
Comparison Between The Three 3D Printers
Comparing between the results of the three 3D printers
| Prusa | Maker Bot | Ultimaker | |
|---|---|---|---|
| Time for Printing | 4 hours & 25 minutes | almost 3 houres | almost 4 houres |
| Resolution or Quality | 0.2 mm | idk, need to ask | 0.2 mm |
| Result |  |
need to add | 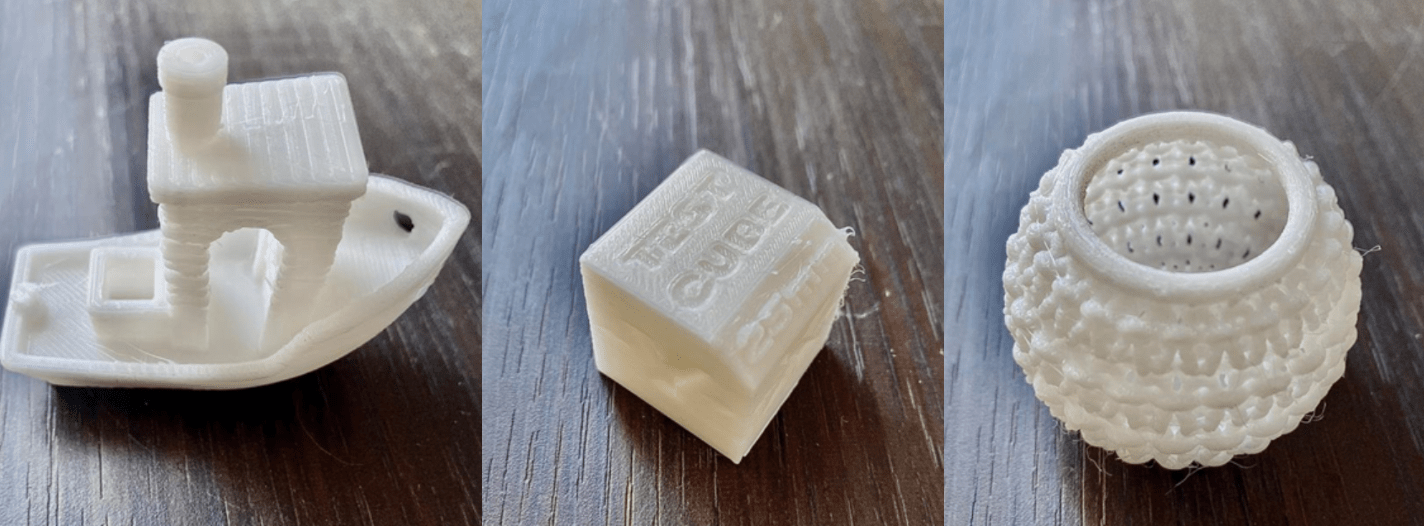 |
Individual Assignment
- design and 3D print an object that could not be made substactively
- 3D scan an object, try to prepare it for printing
3D Printing
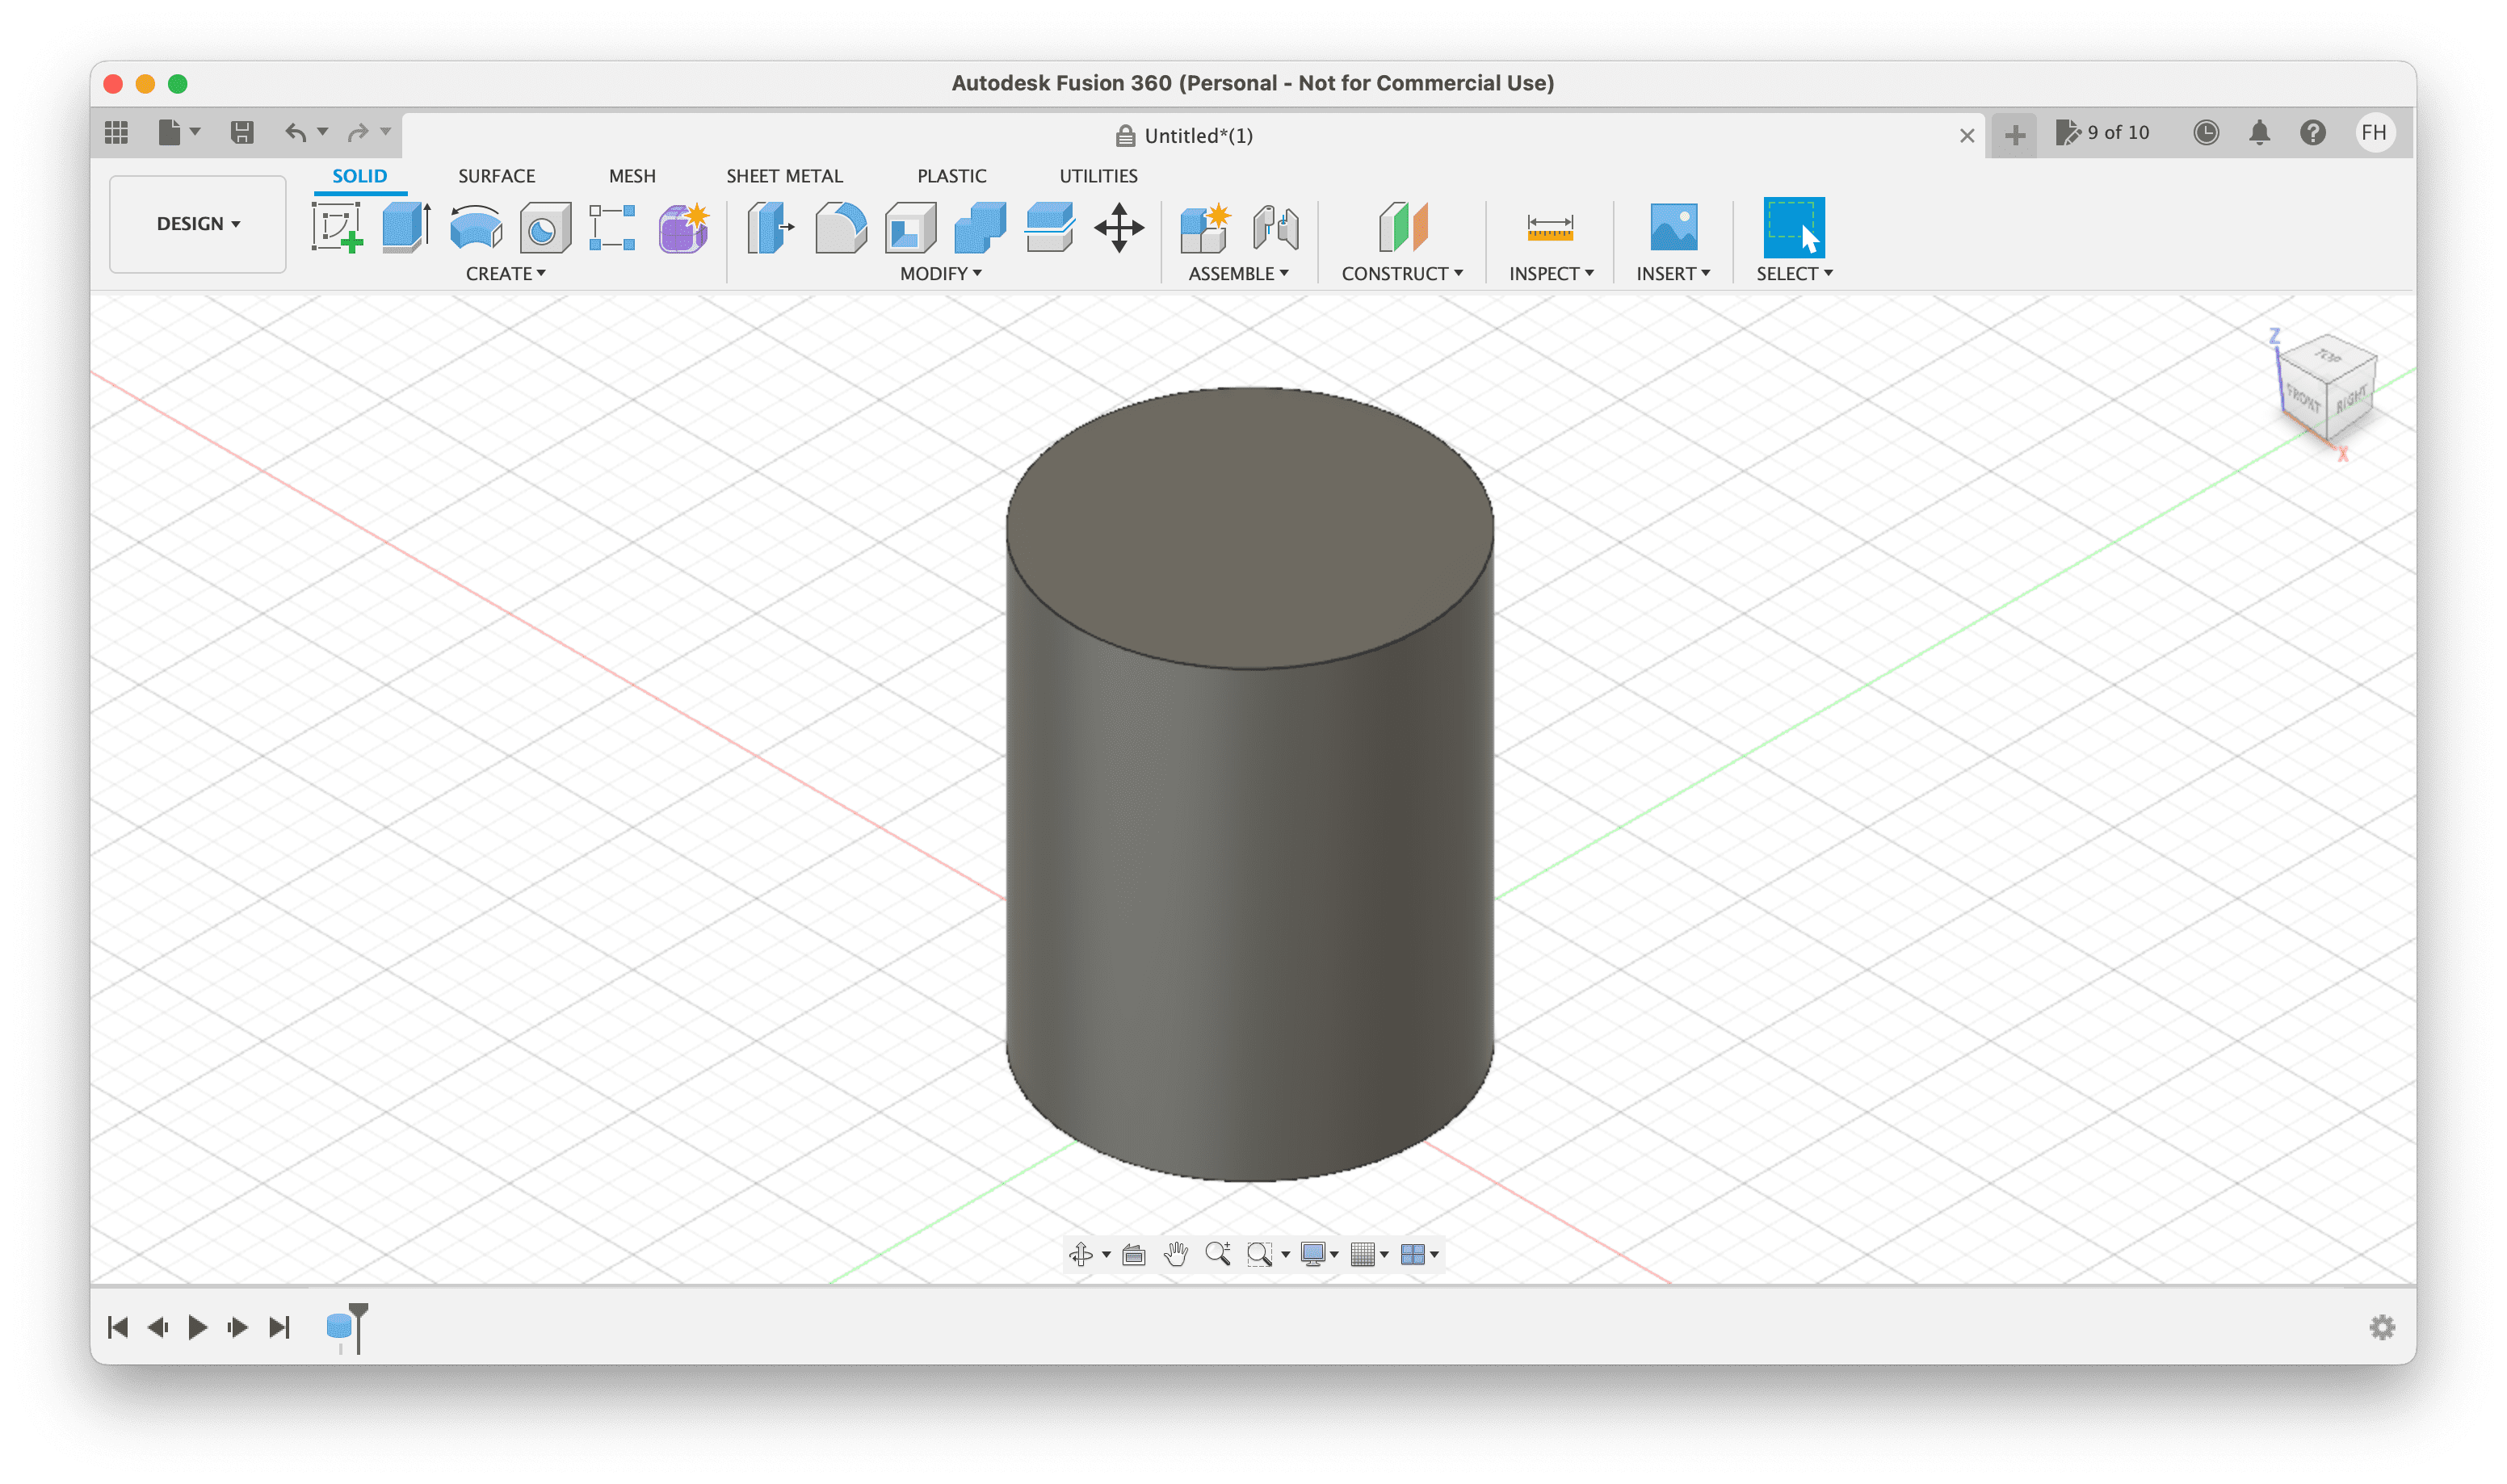
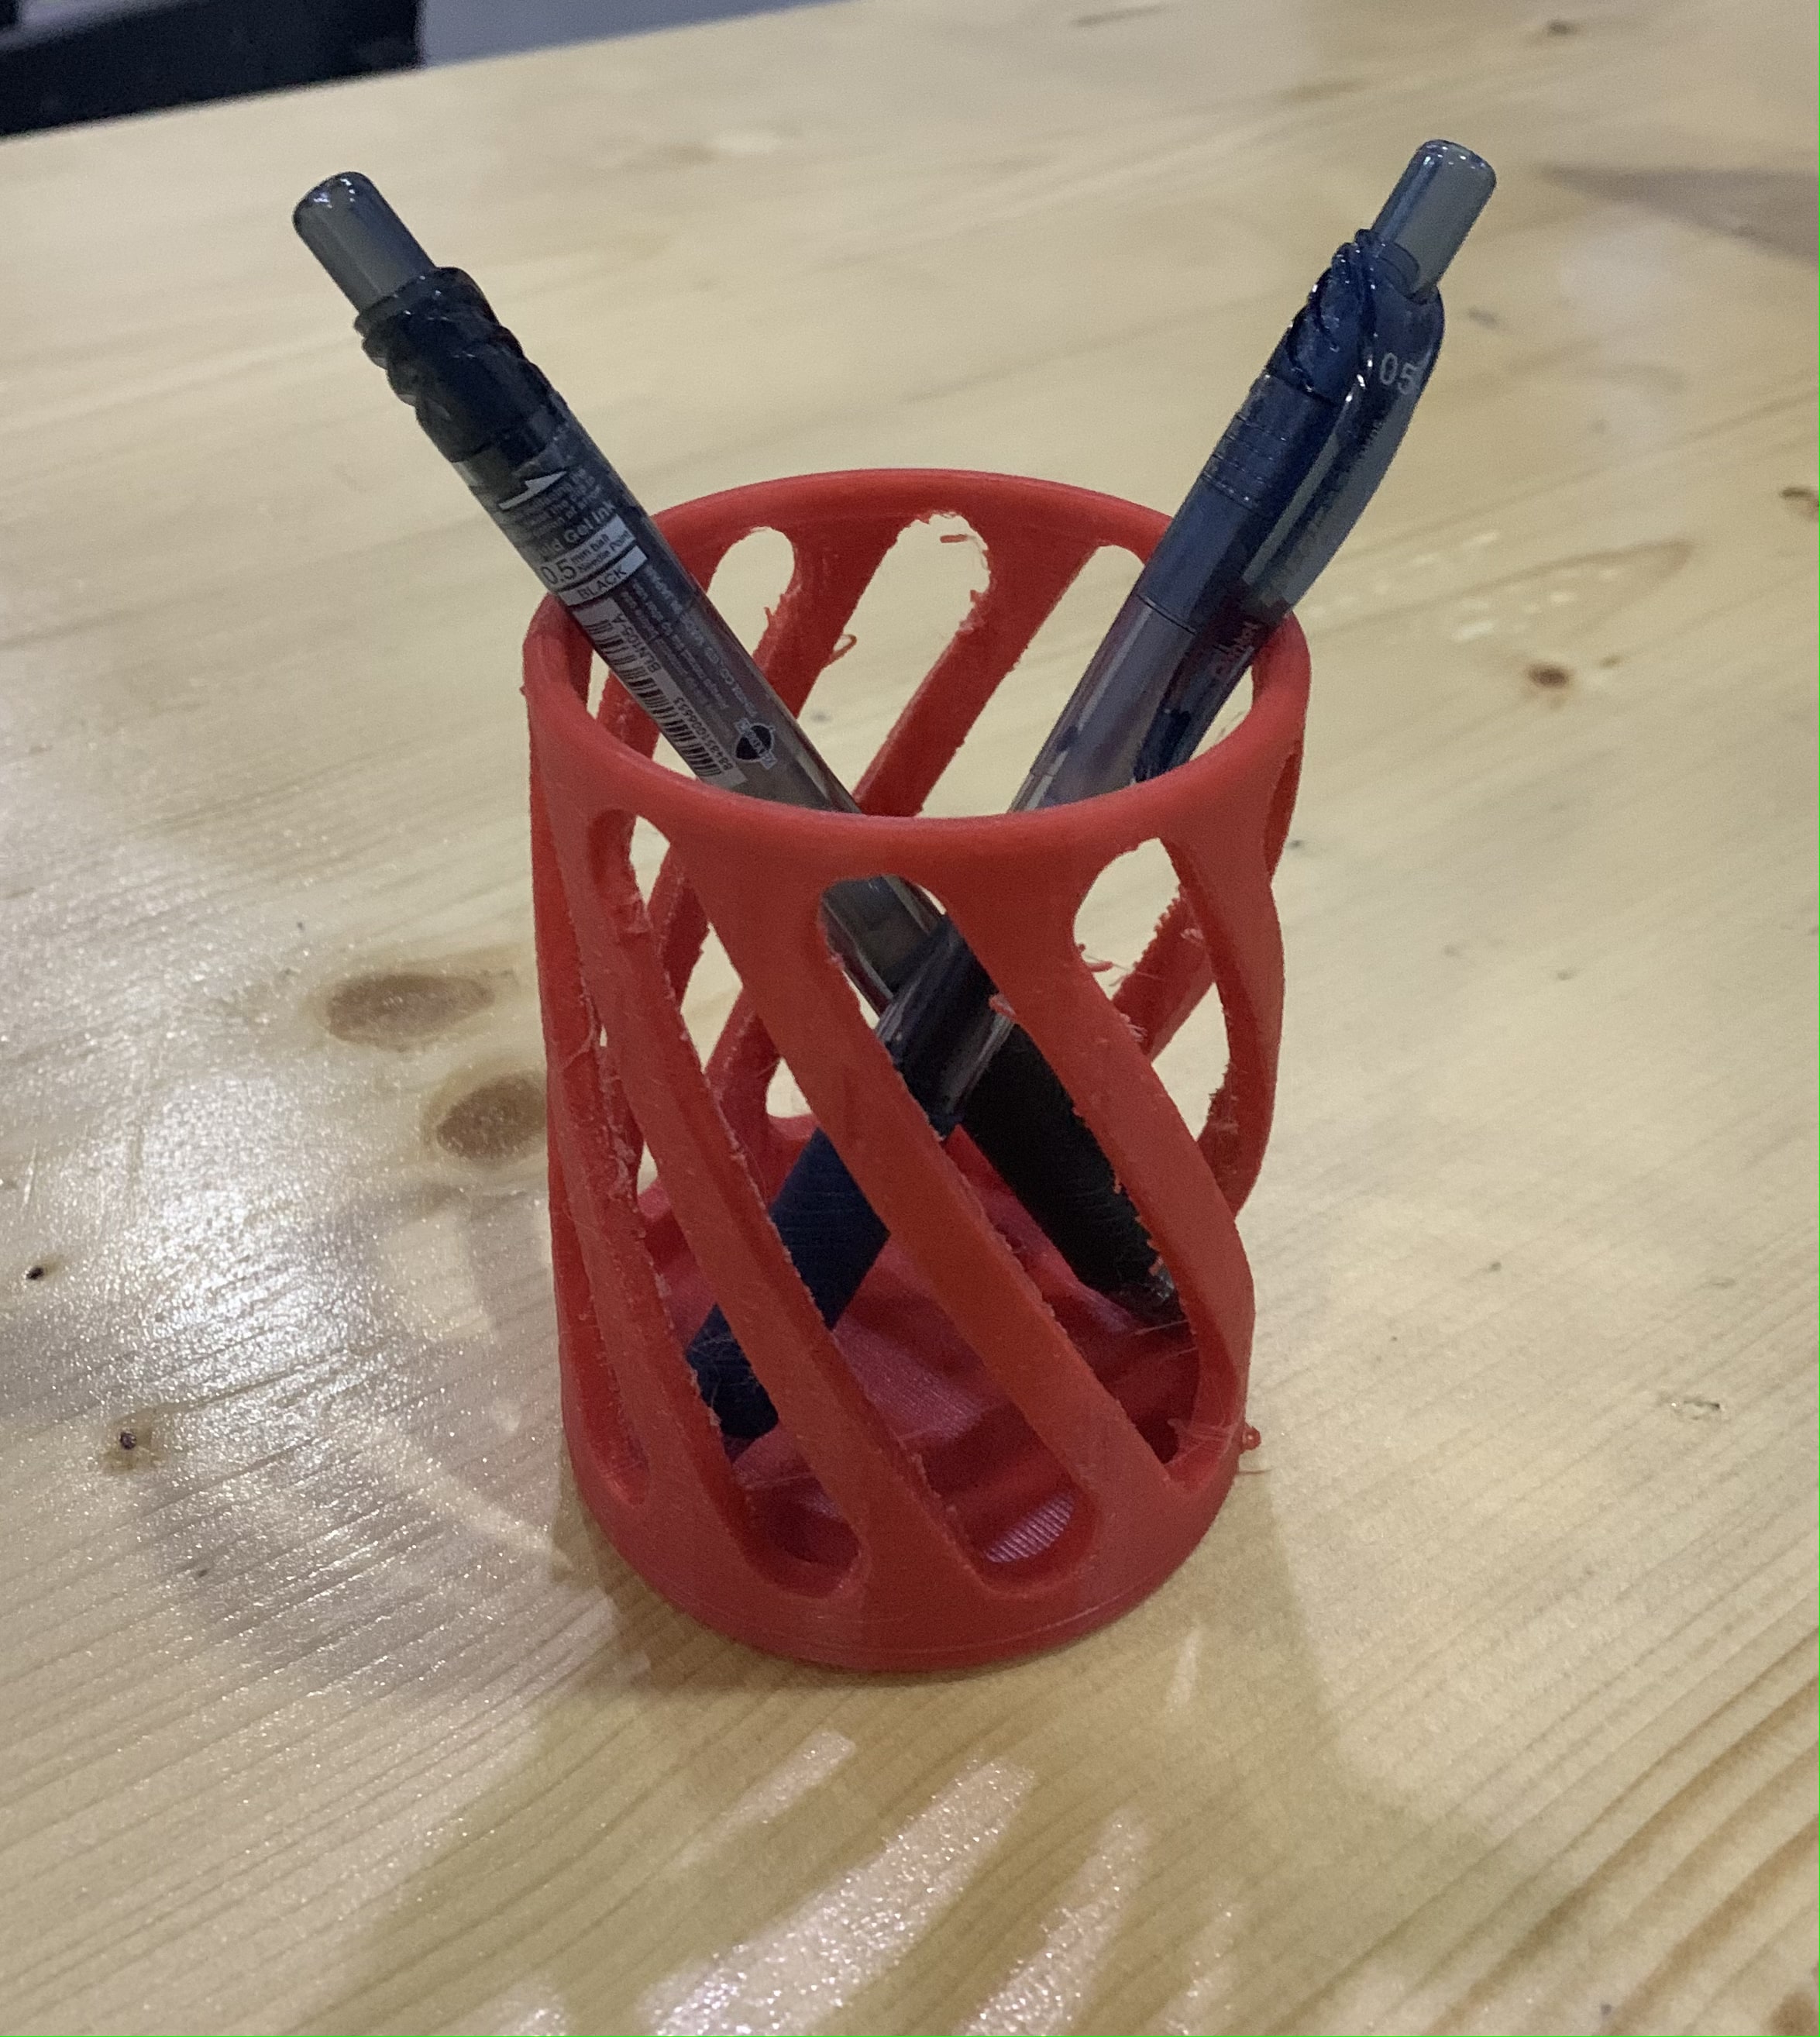
I designed a pencil holder ✏️ in Fusion360, here are the steps of making it:
1. Step 1, create a cylinder (70×90mm)
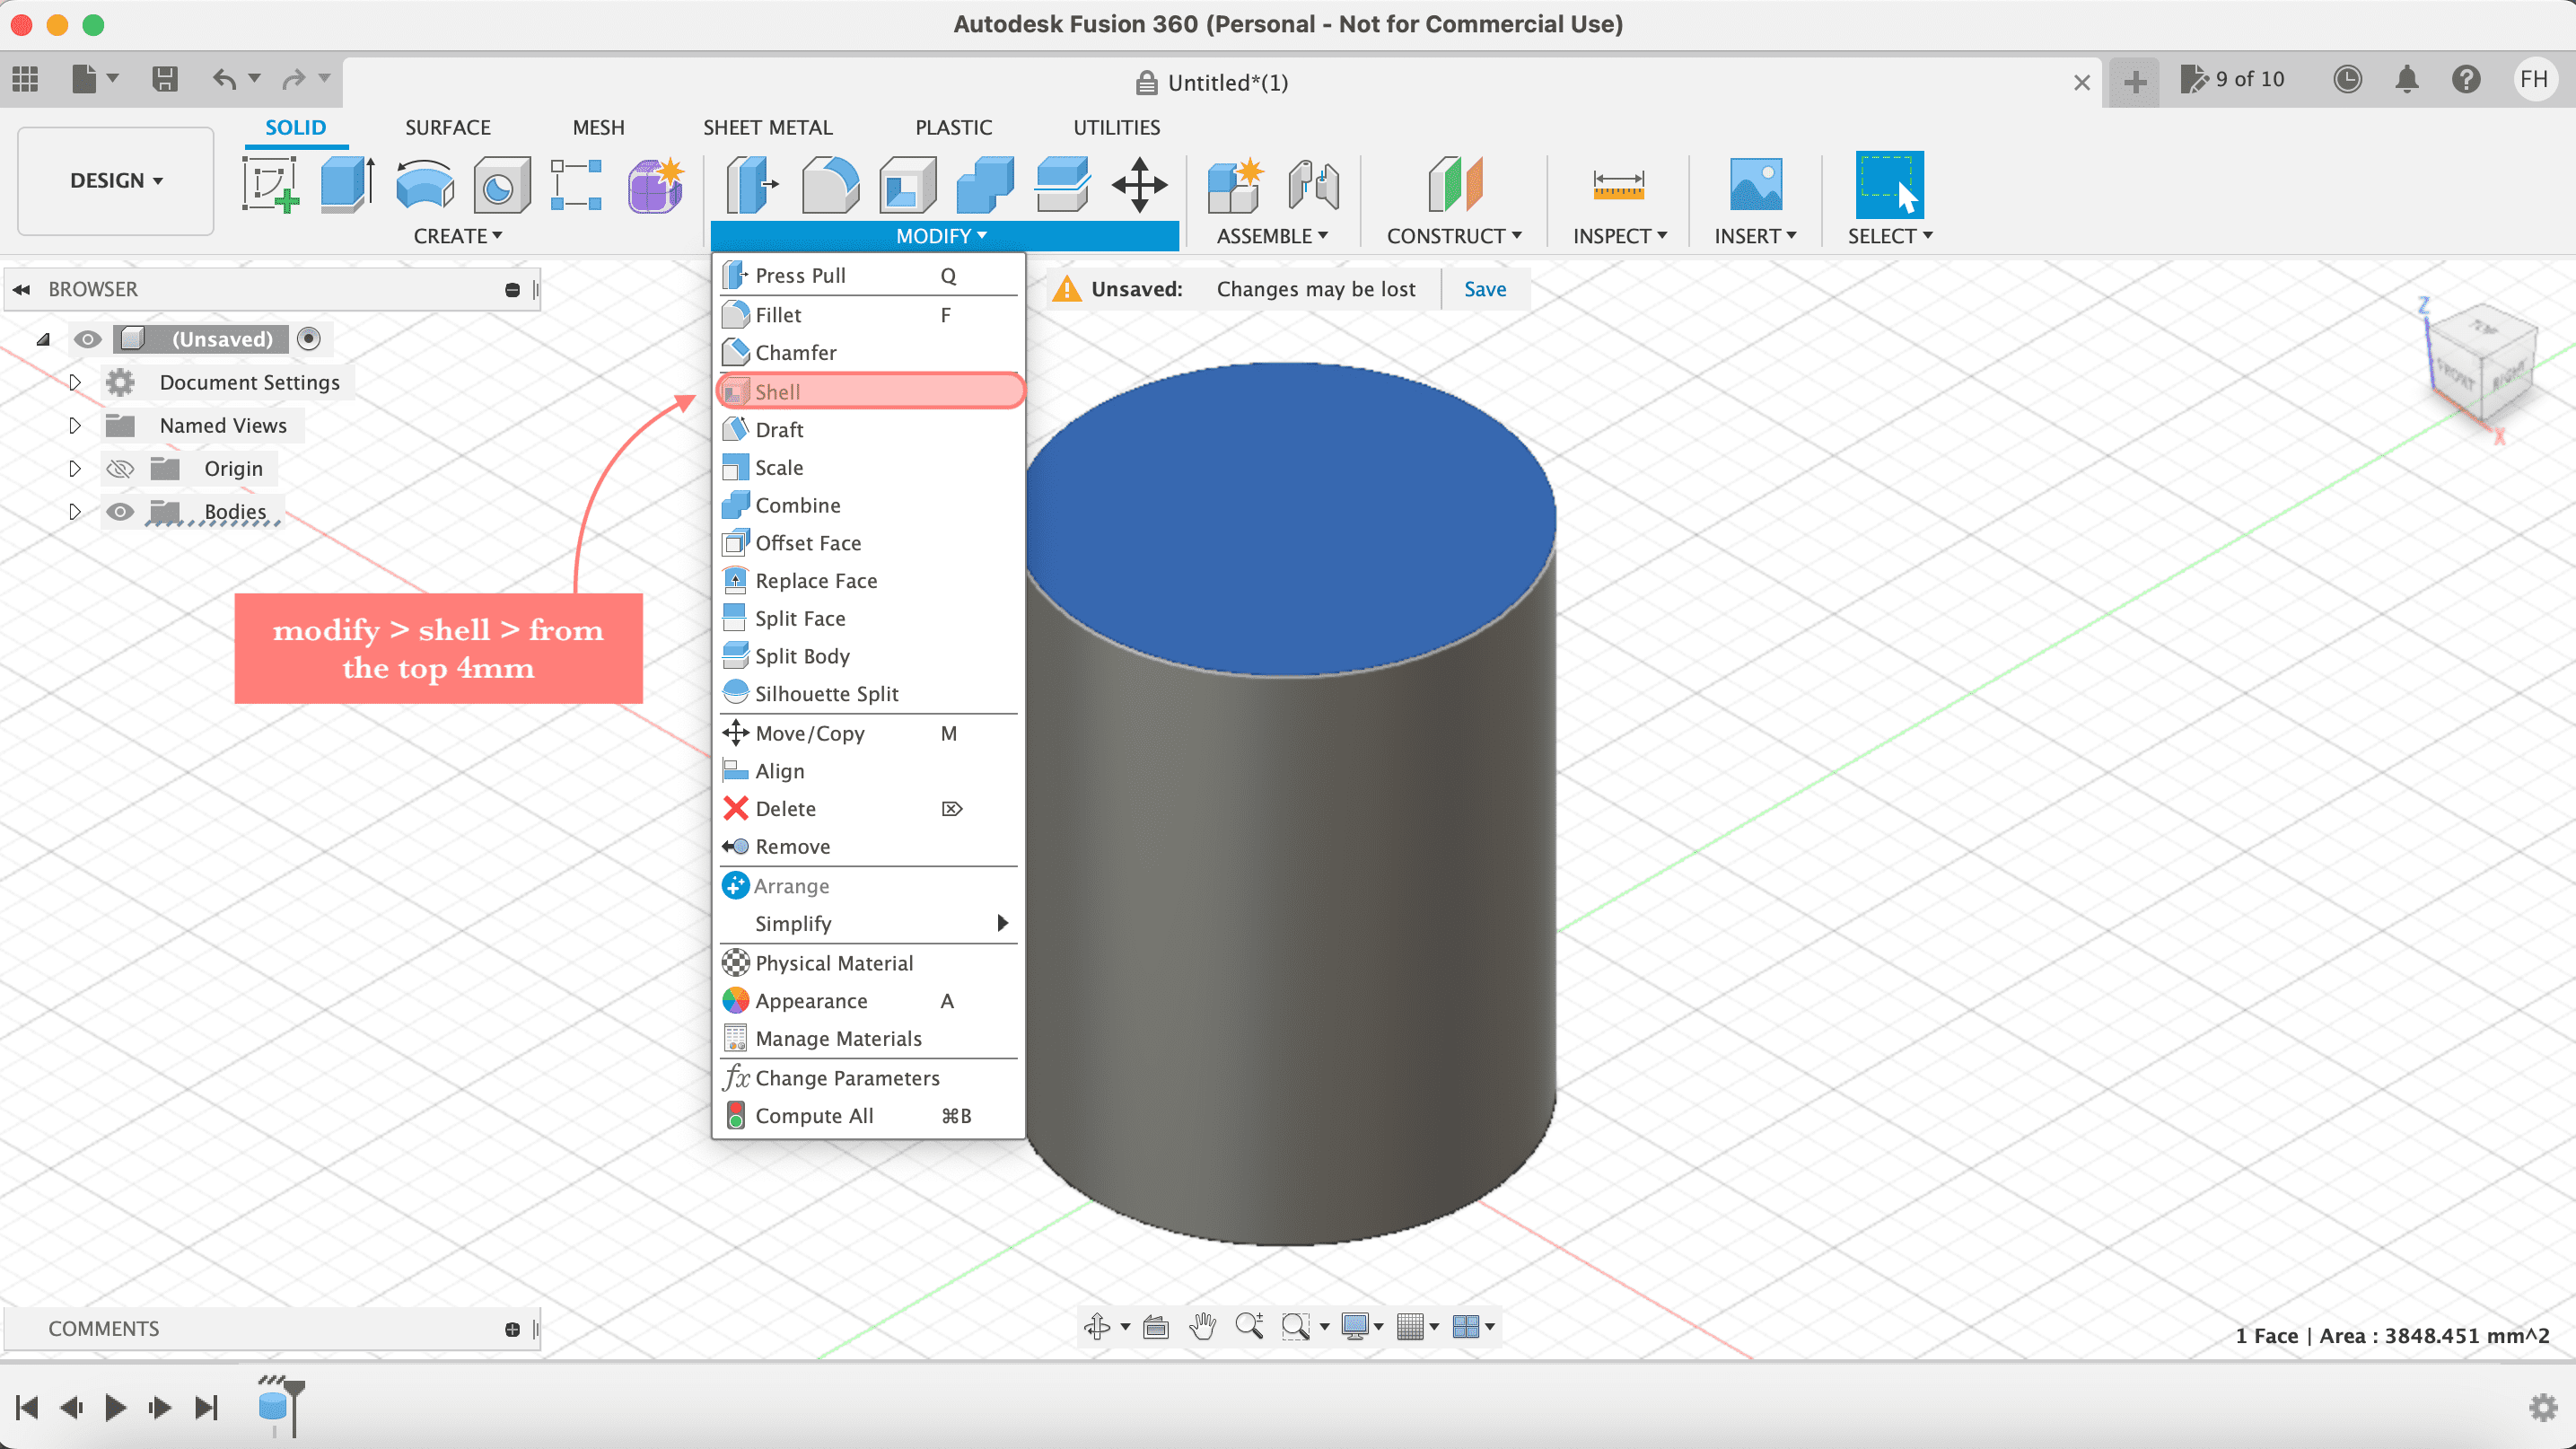
2. Step 2, from modify add a shell to the top of the cylinder (4mm)

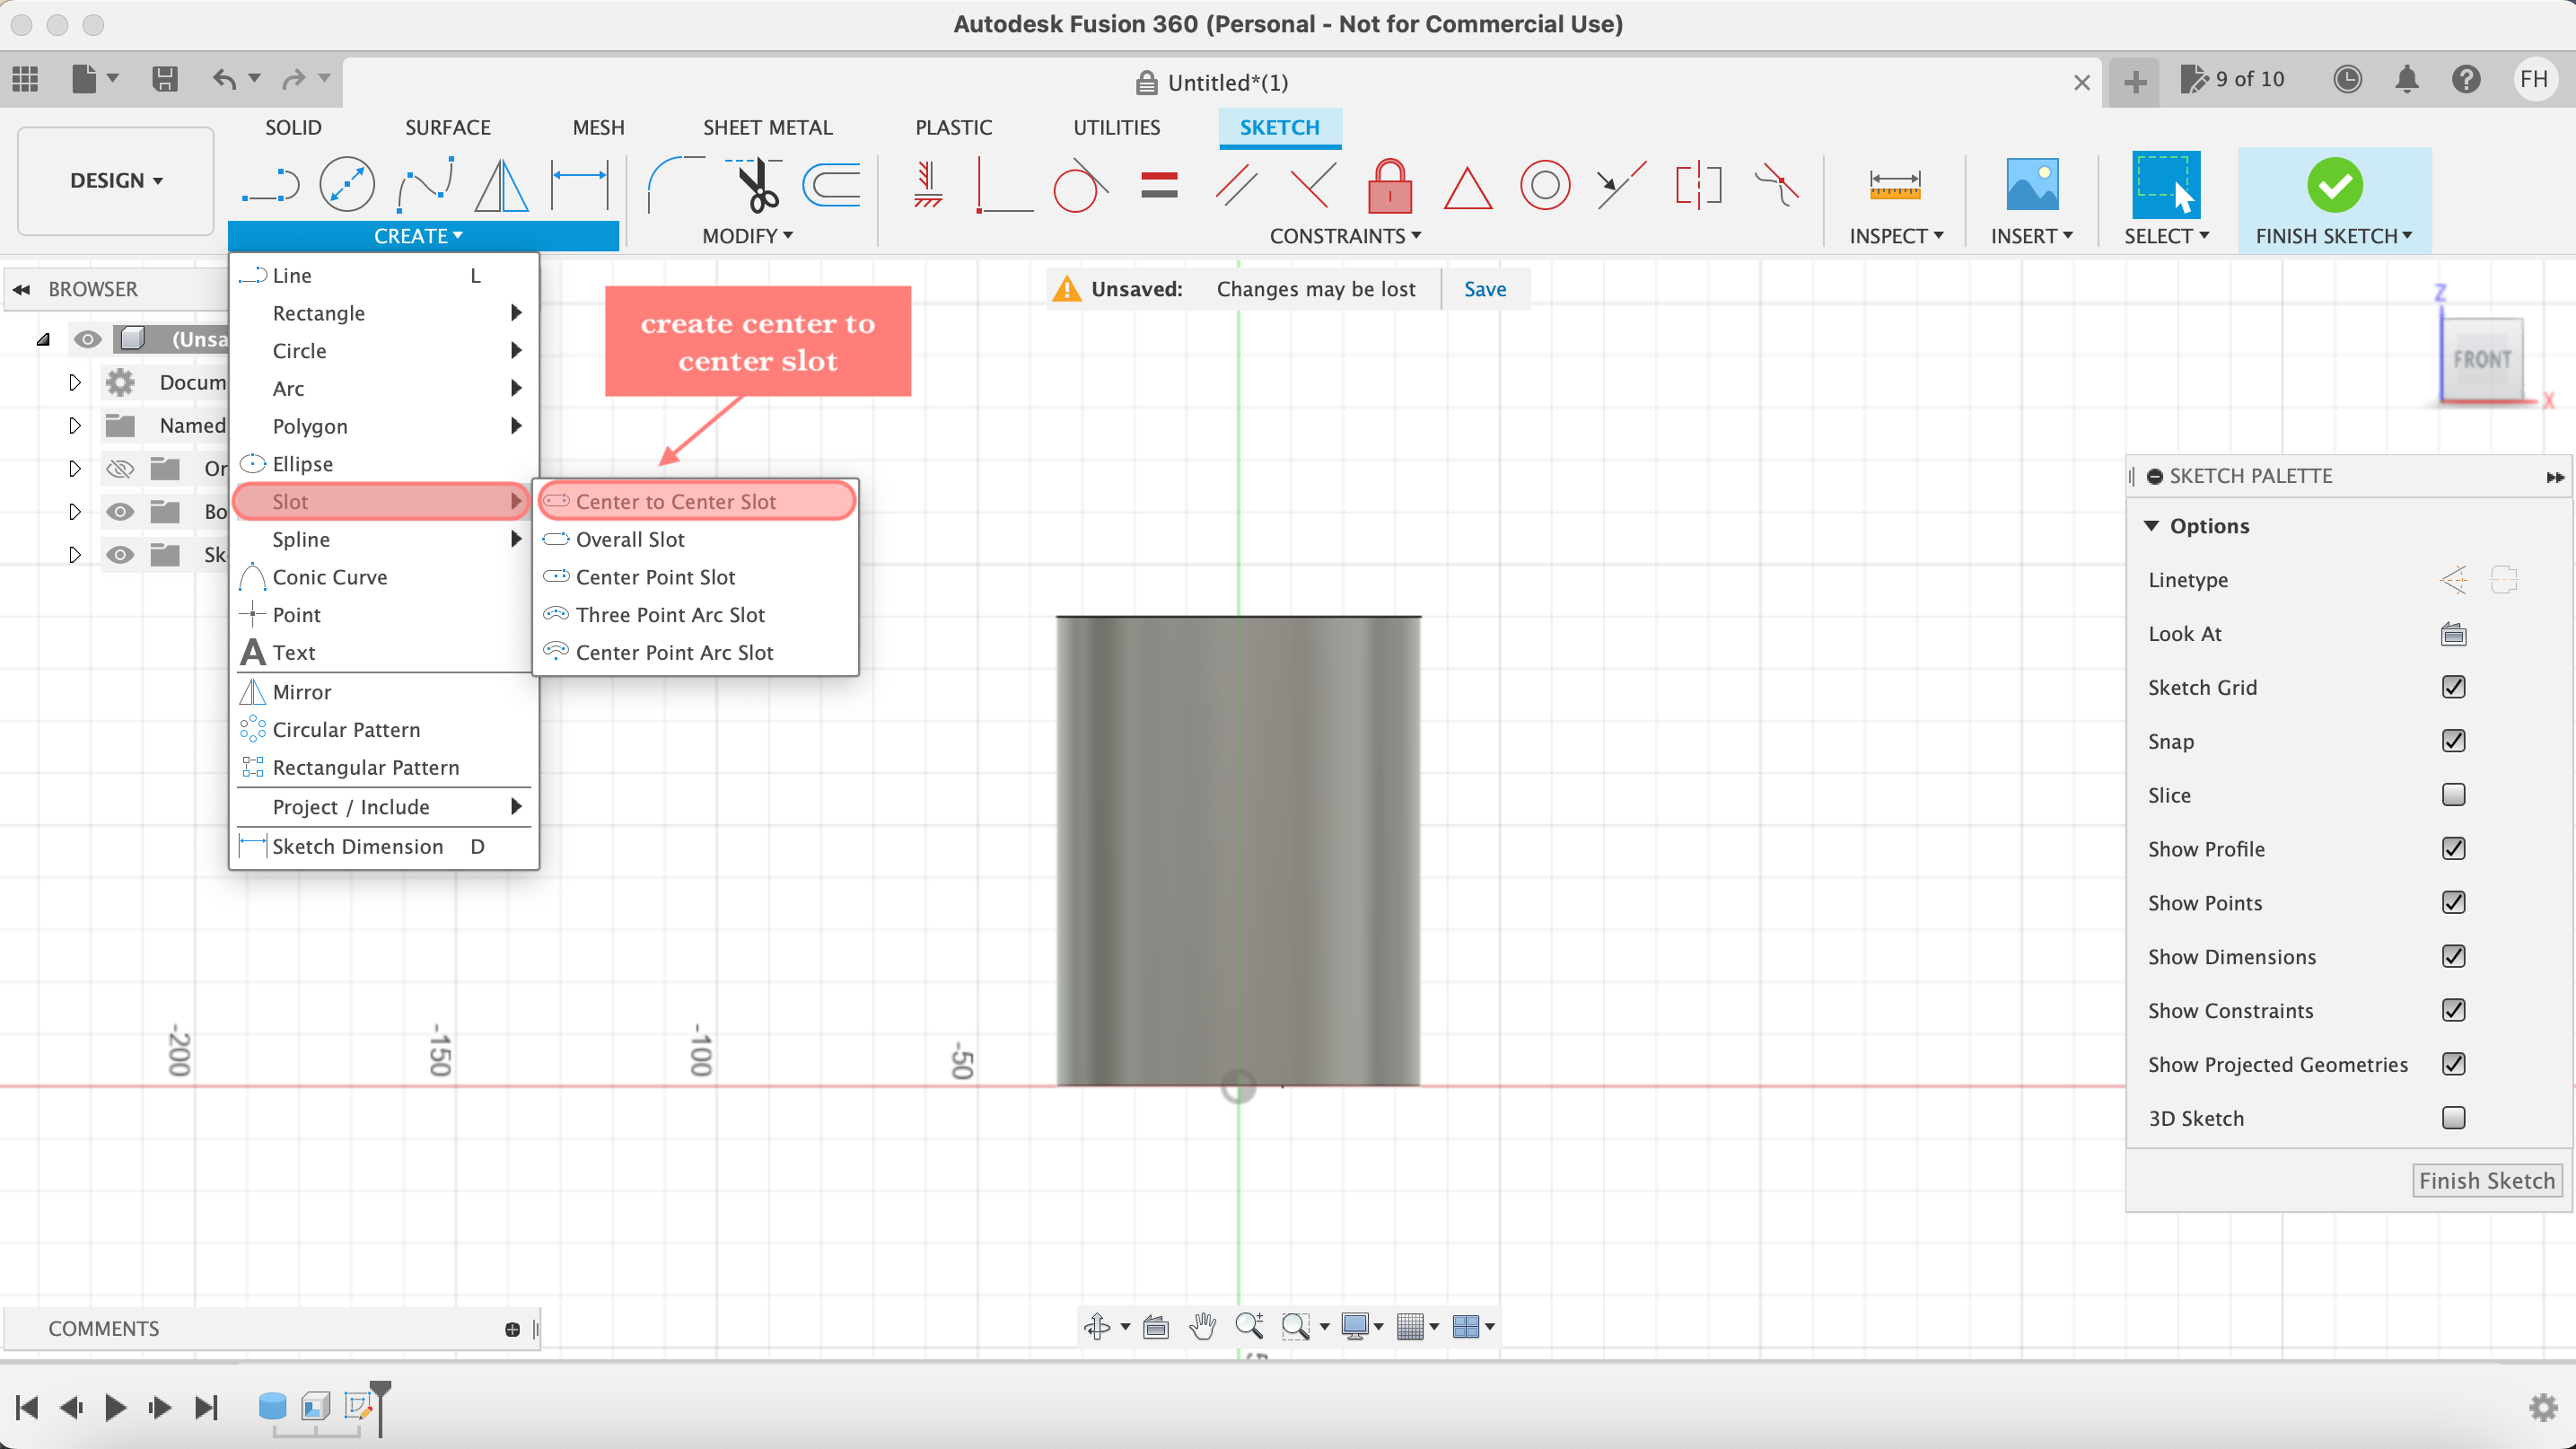
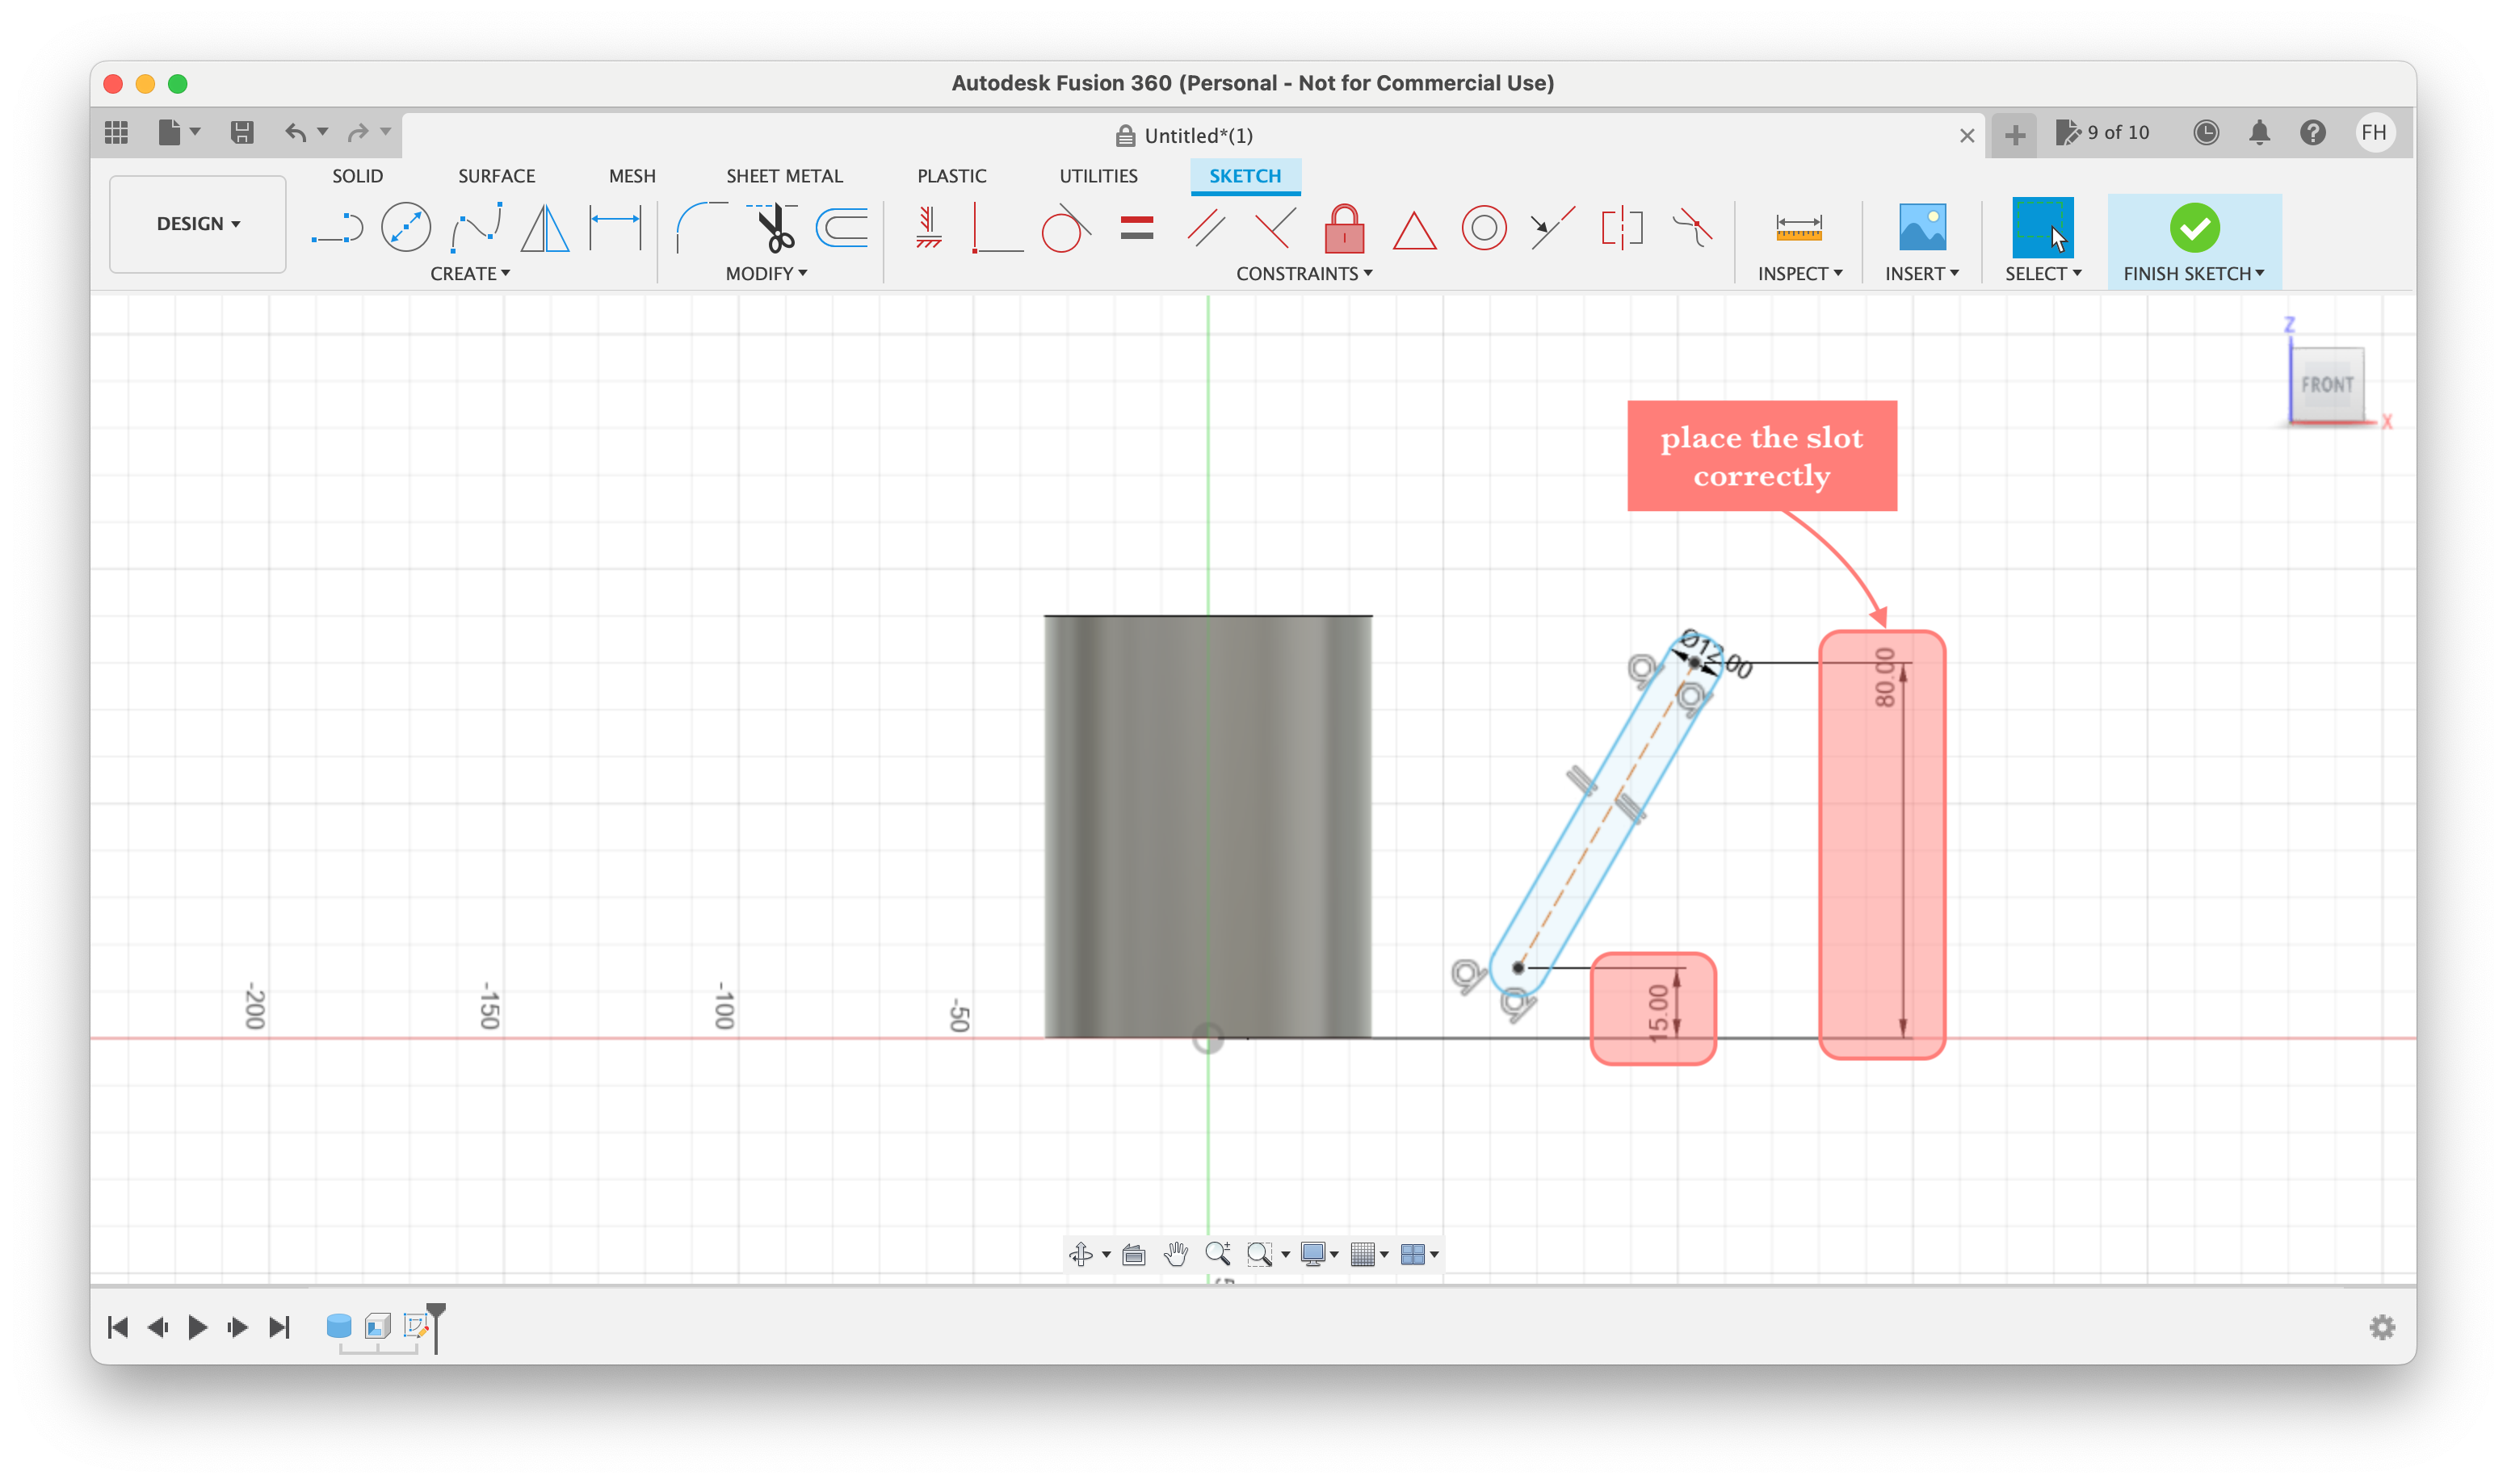
3. Step 3, do a sketch on the x axis, create a center to center slot (60 degrees & 12mm), make sure using dimentions that the bottom of the slot is 15mm above the bottom of the cylinder, and the top of the slot is 80mm above the bottom of the cylinder, then finish sketch
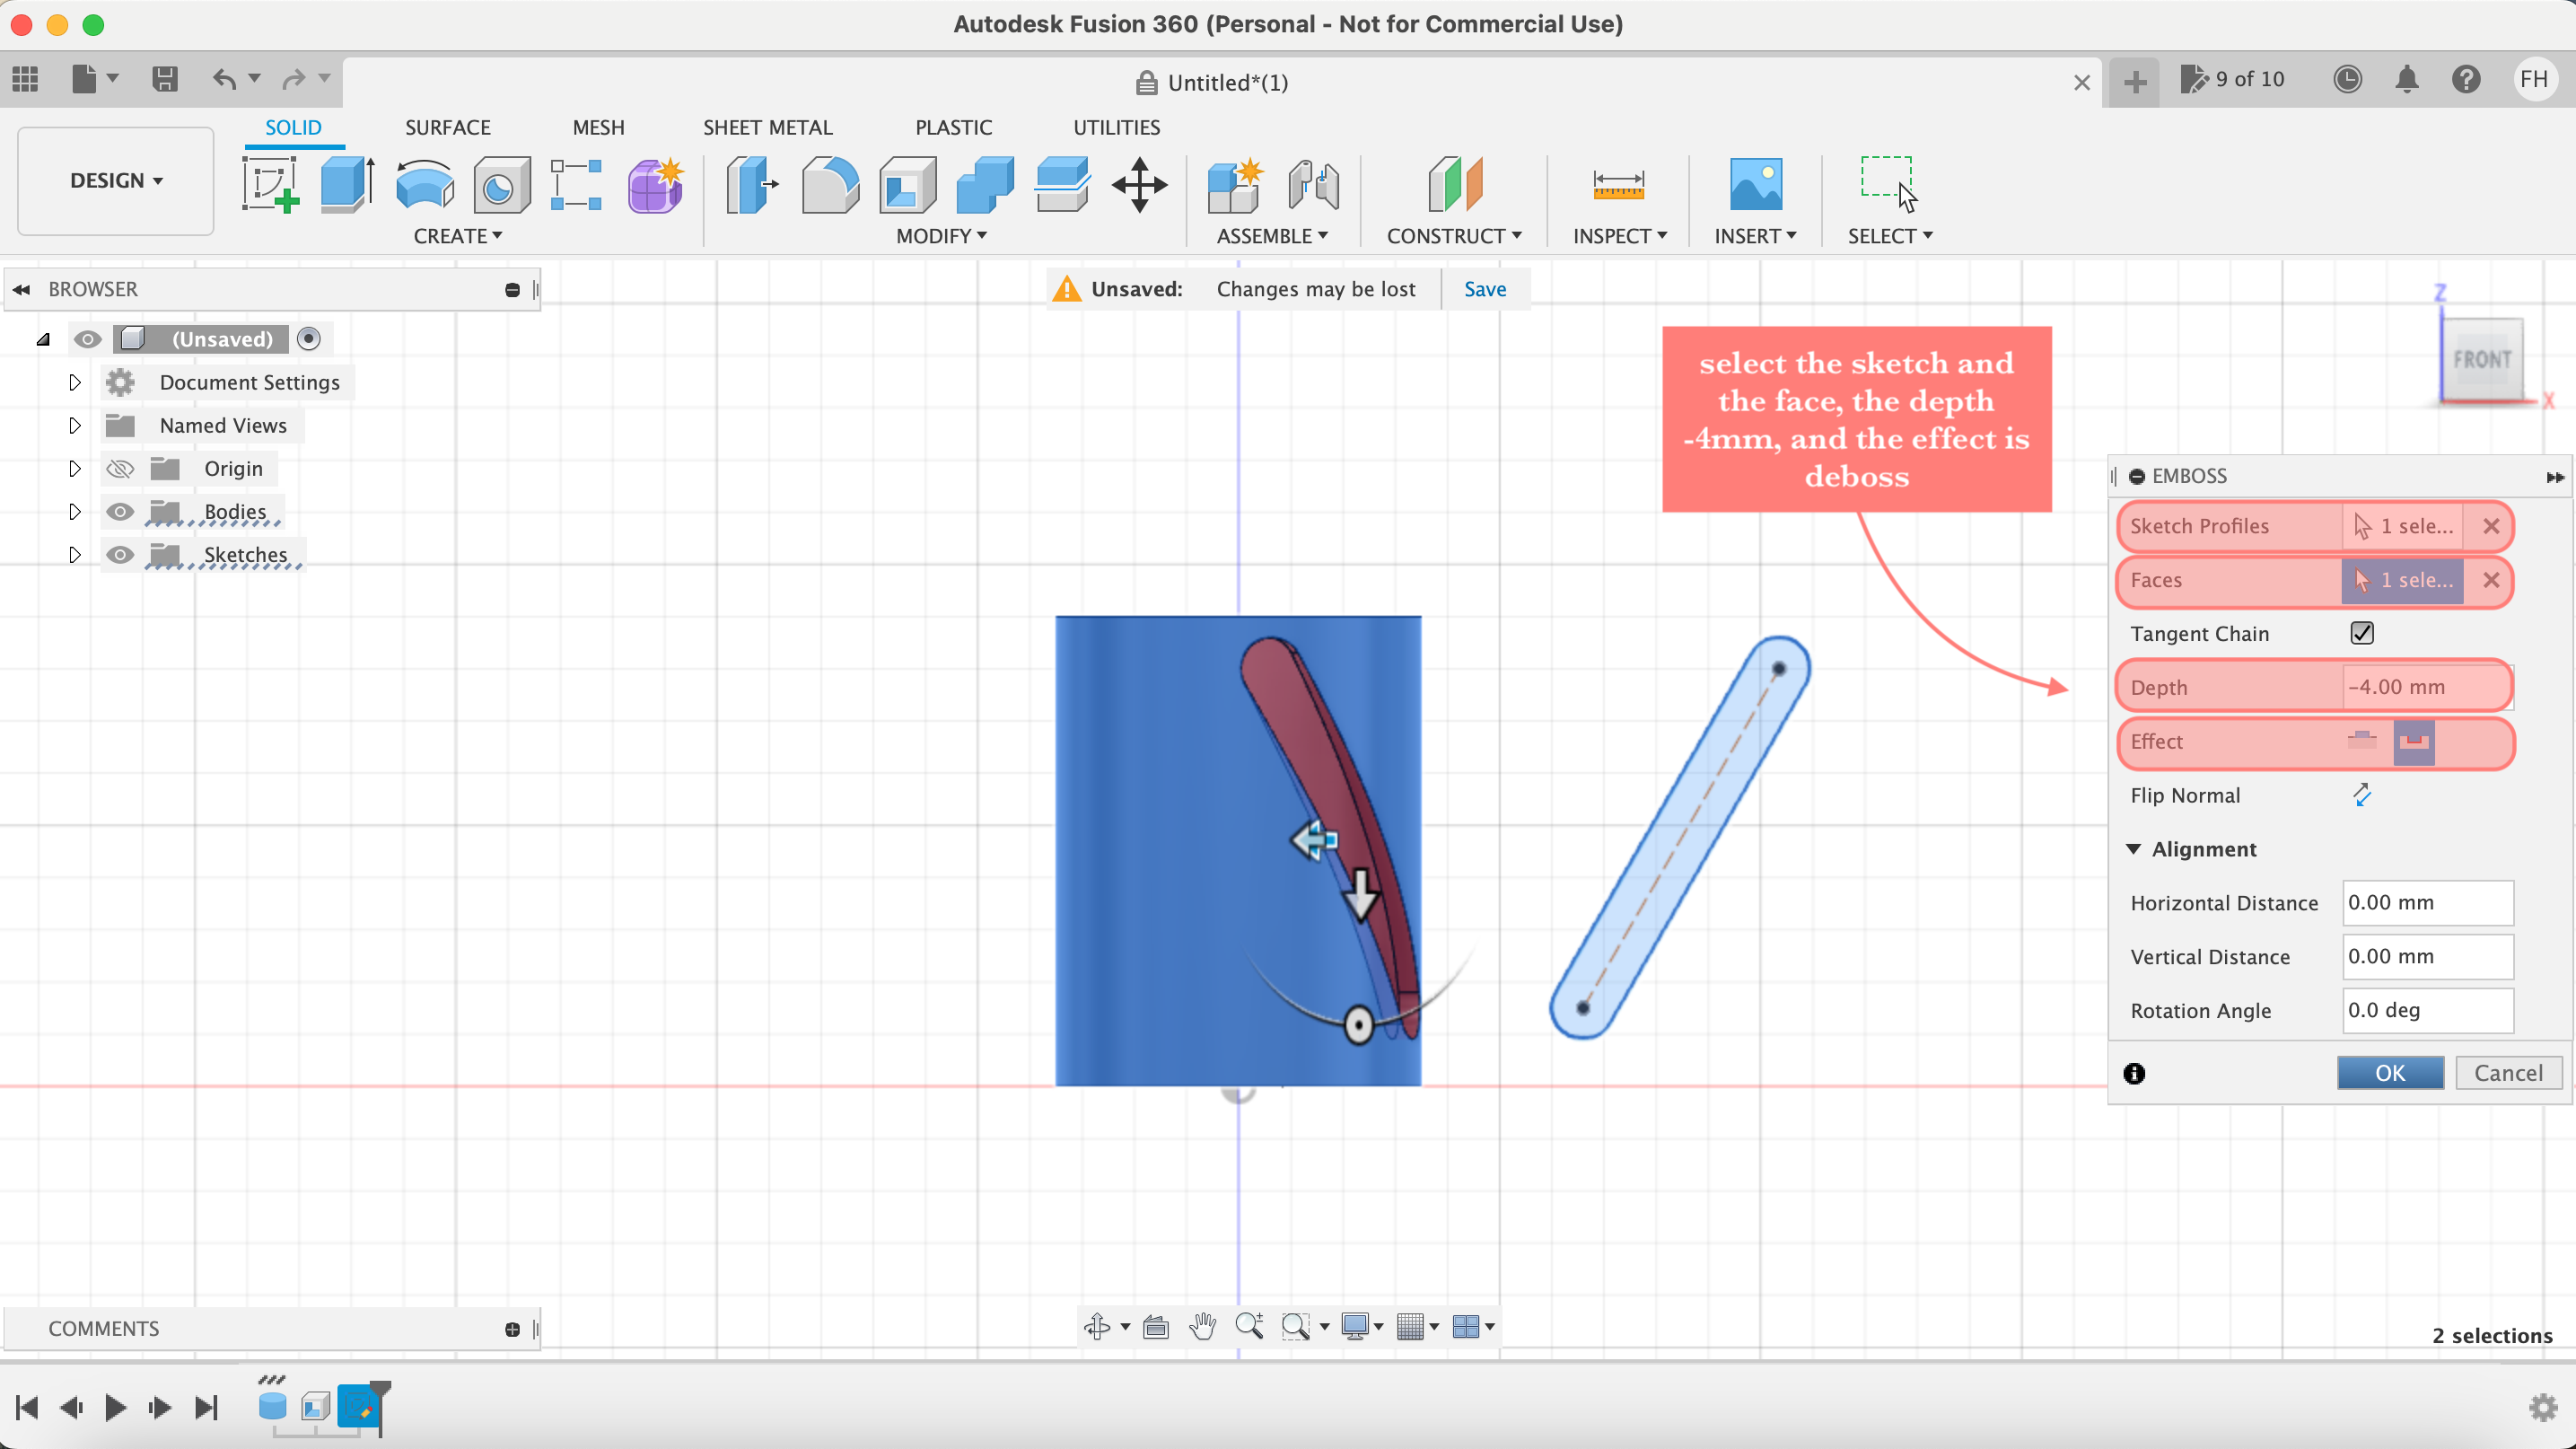
4. Step 4, create emboss, select the slot sketch then select the cylinder face, make the depth -4mm and choose the deboss effect

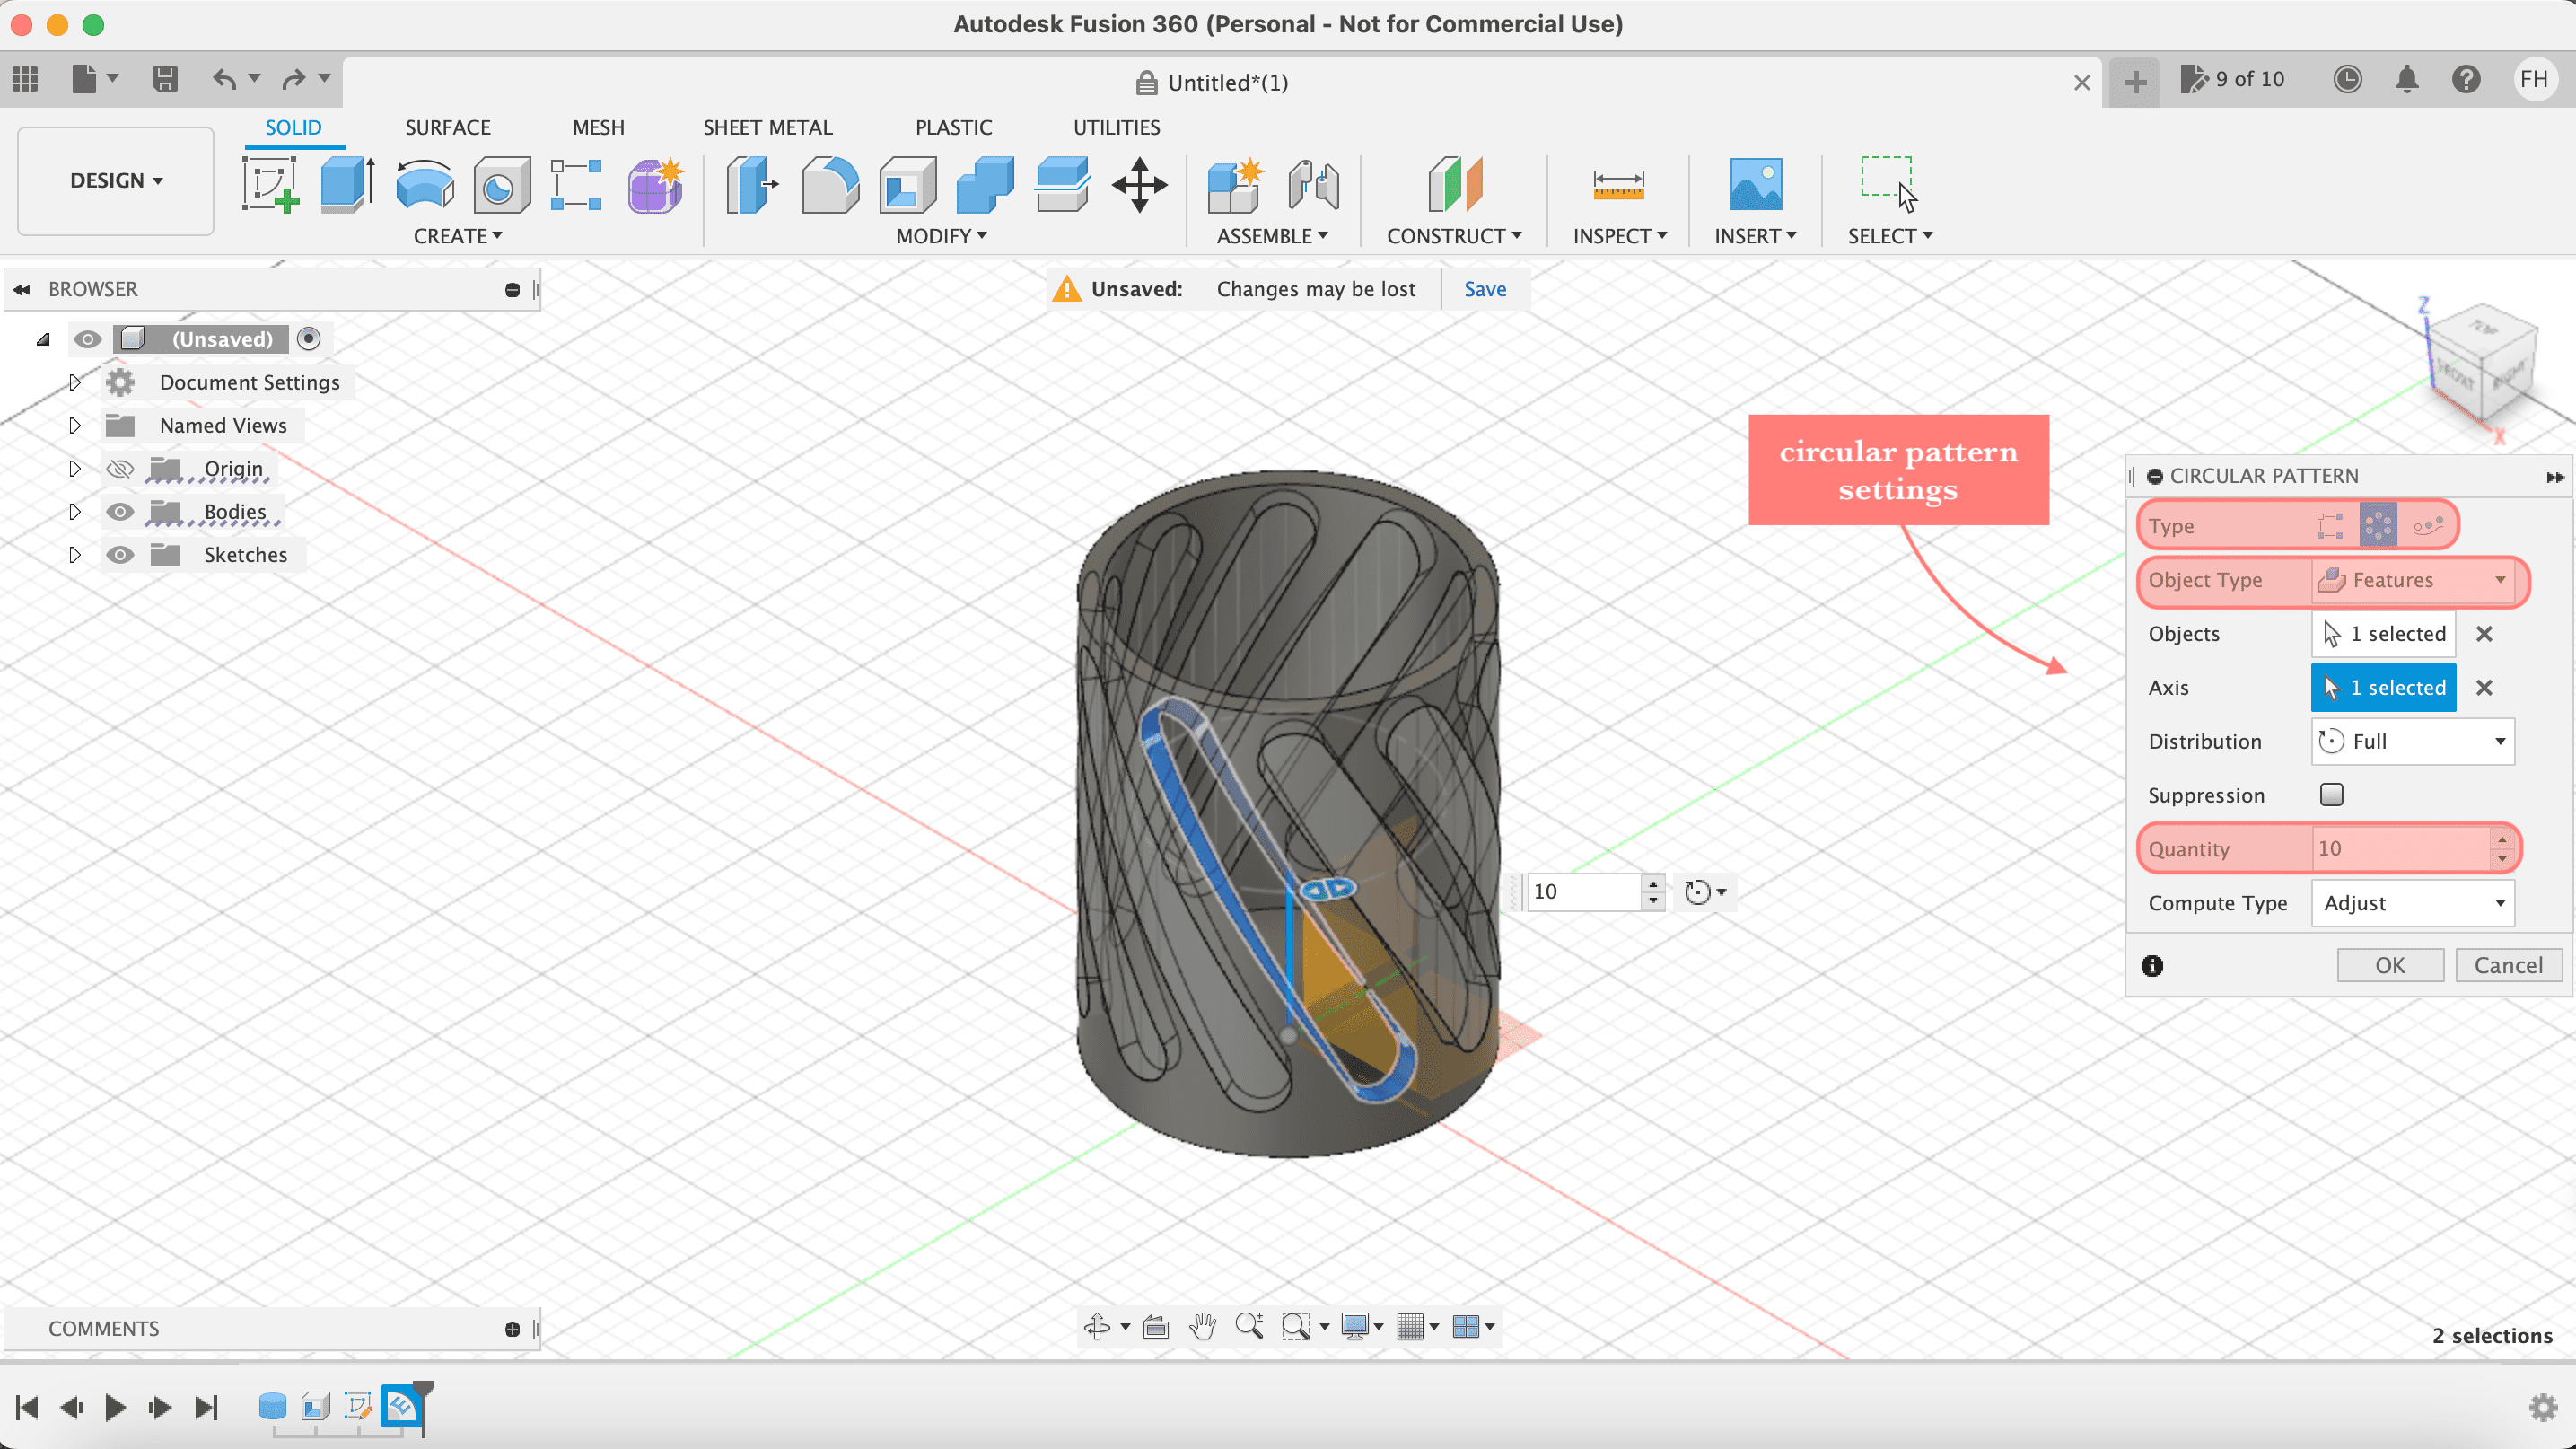
5. Step 5, create a circular pattern to the slot, apply the same settings shown below

6. Step 6, finally, finish the design using fillet (2mm), then go to body and right click, choose save as mesh to save the file as stl


Click here to download the stl file
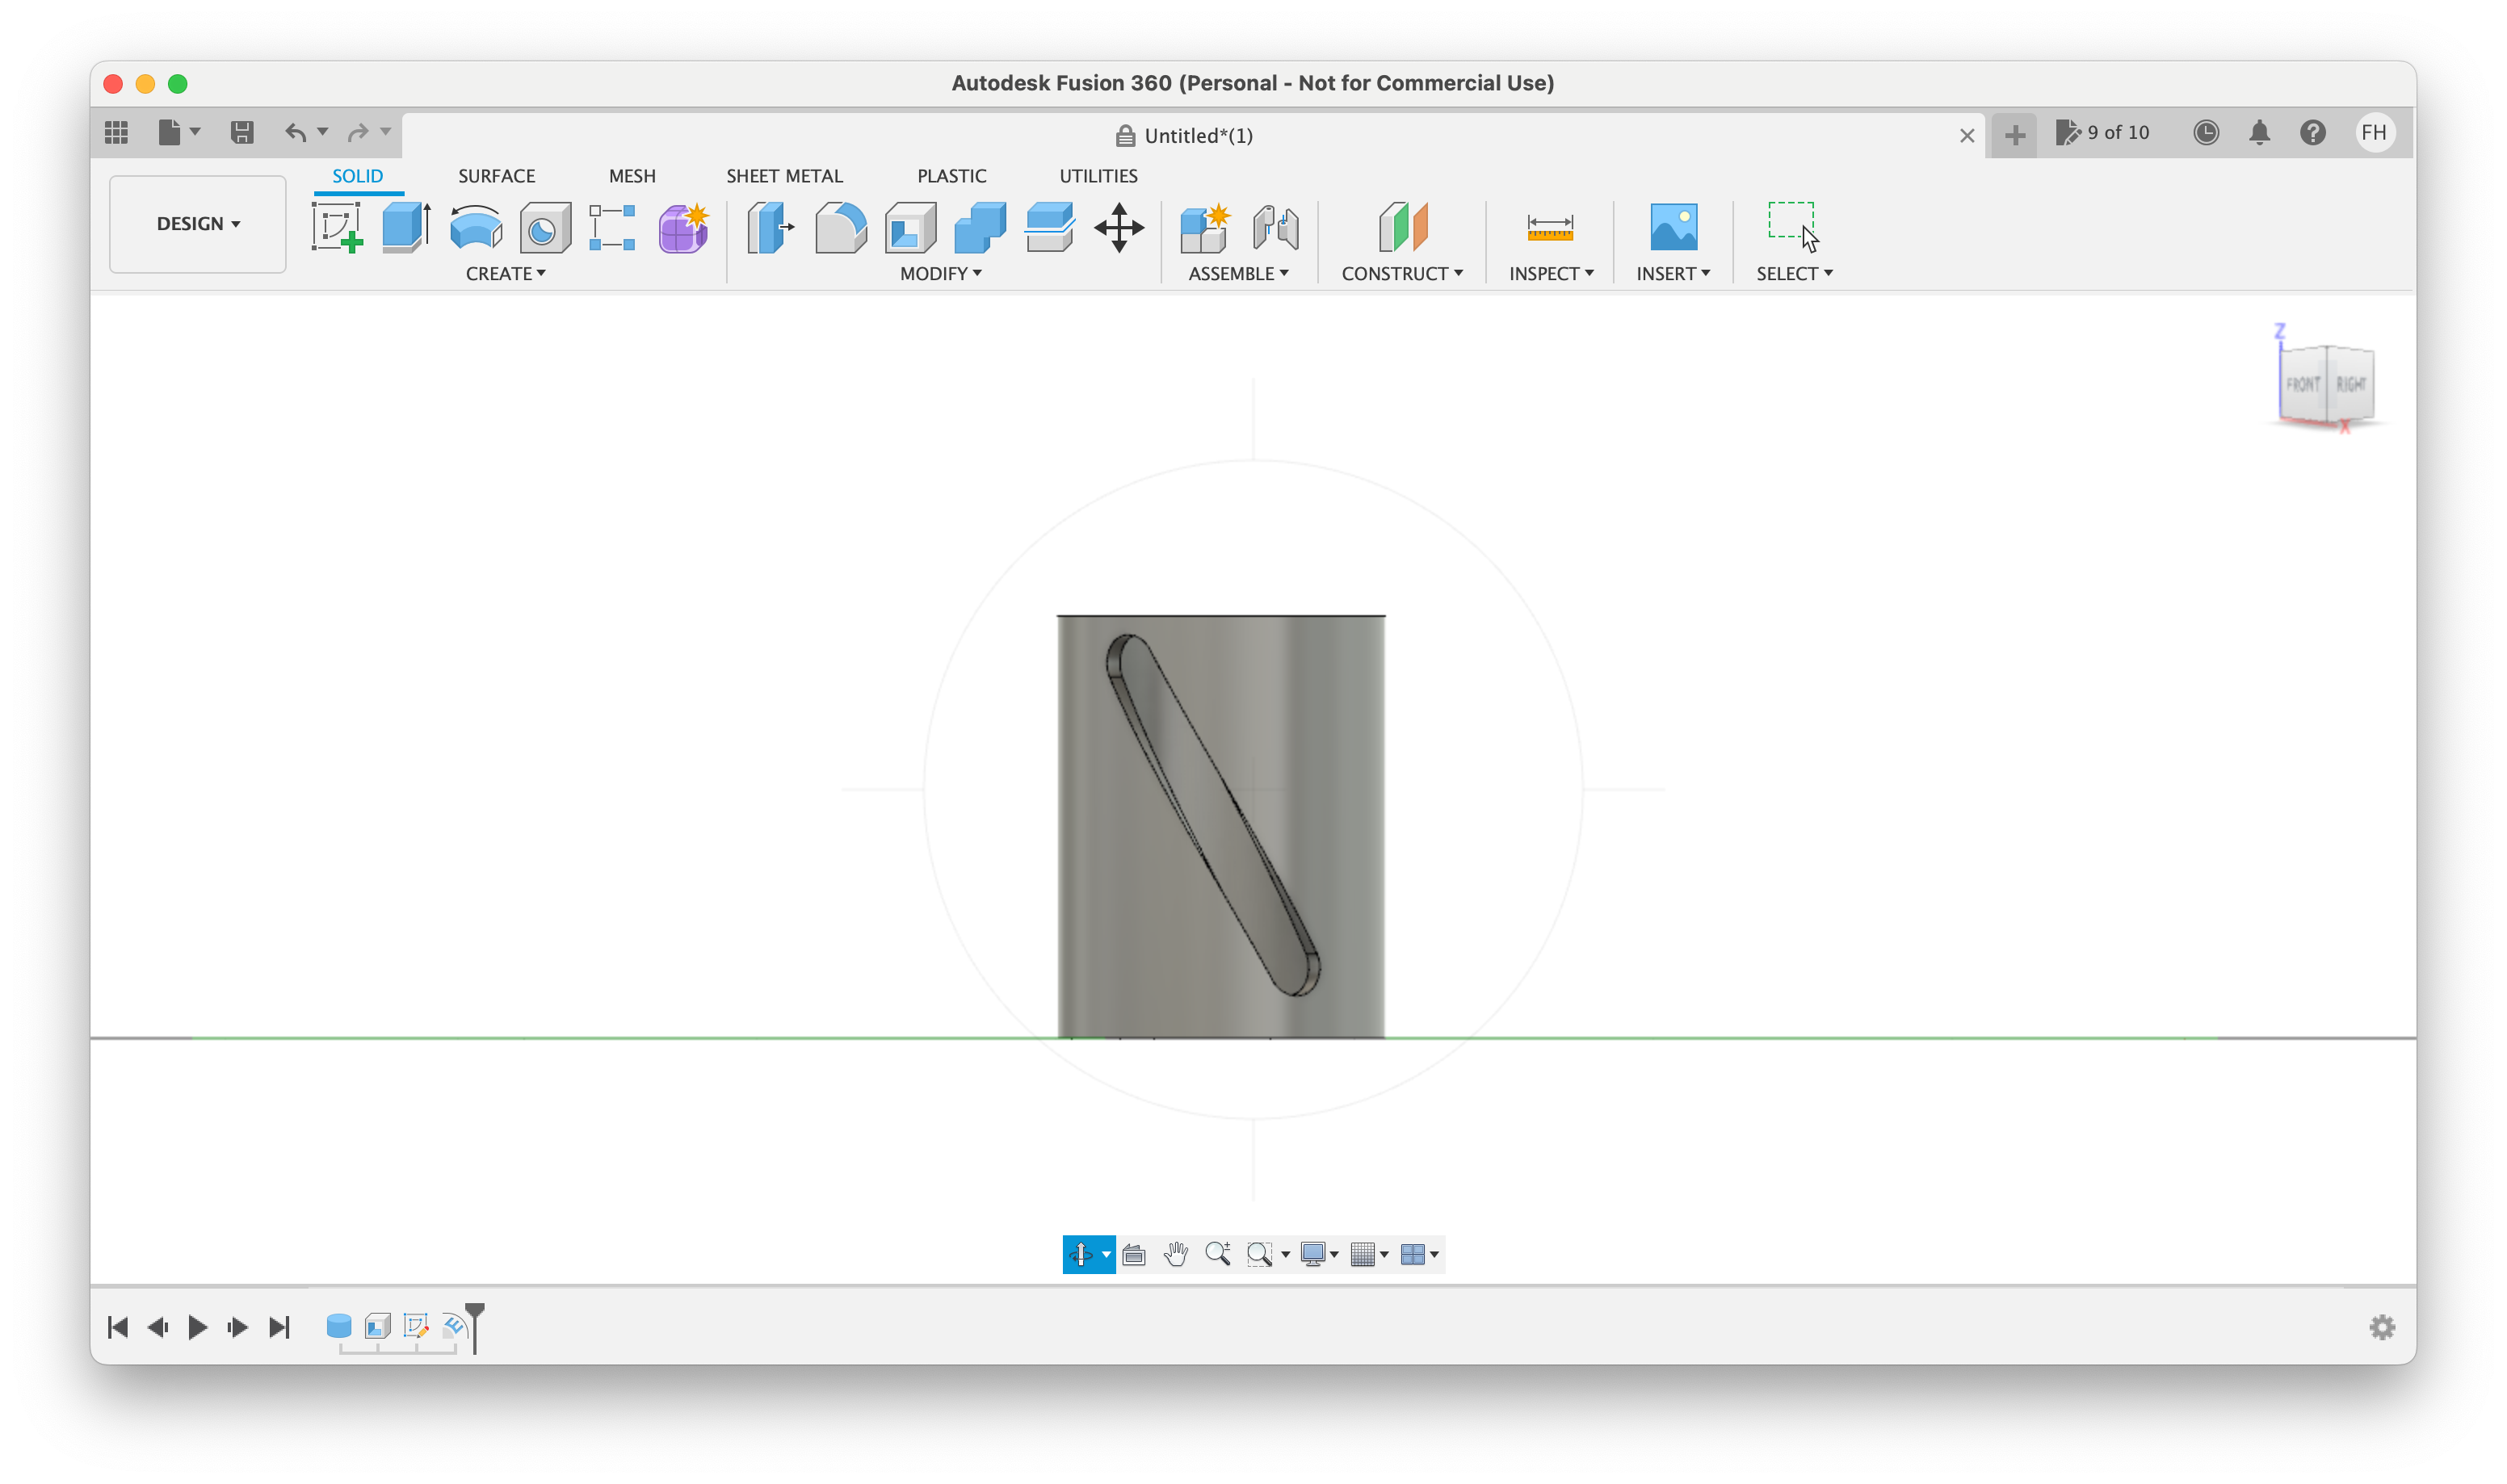
Here is how the pencil holder in Fusion360 tured out ✏️
7. Step 7, in this step we collected all the designs on one labtop, then we opened the stl files in Cura, and try to place the items as close as possible to each other
8. Step 8, change the stettings, quality 0.15, infill 20%, and bulit plate: brim
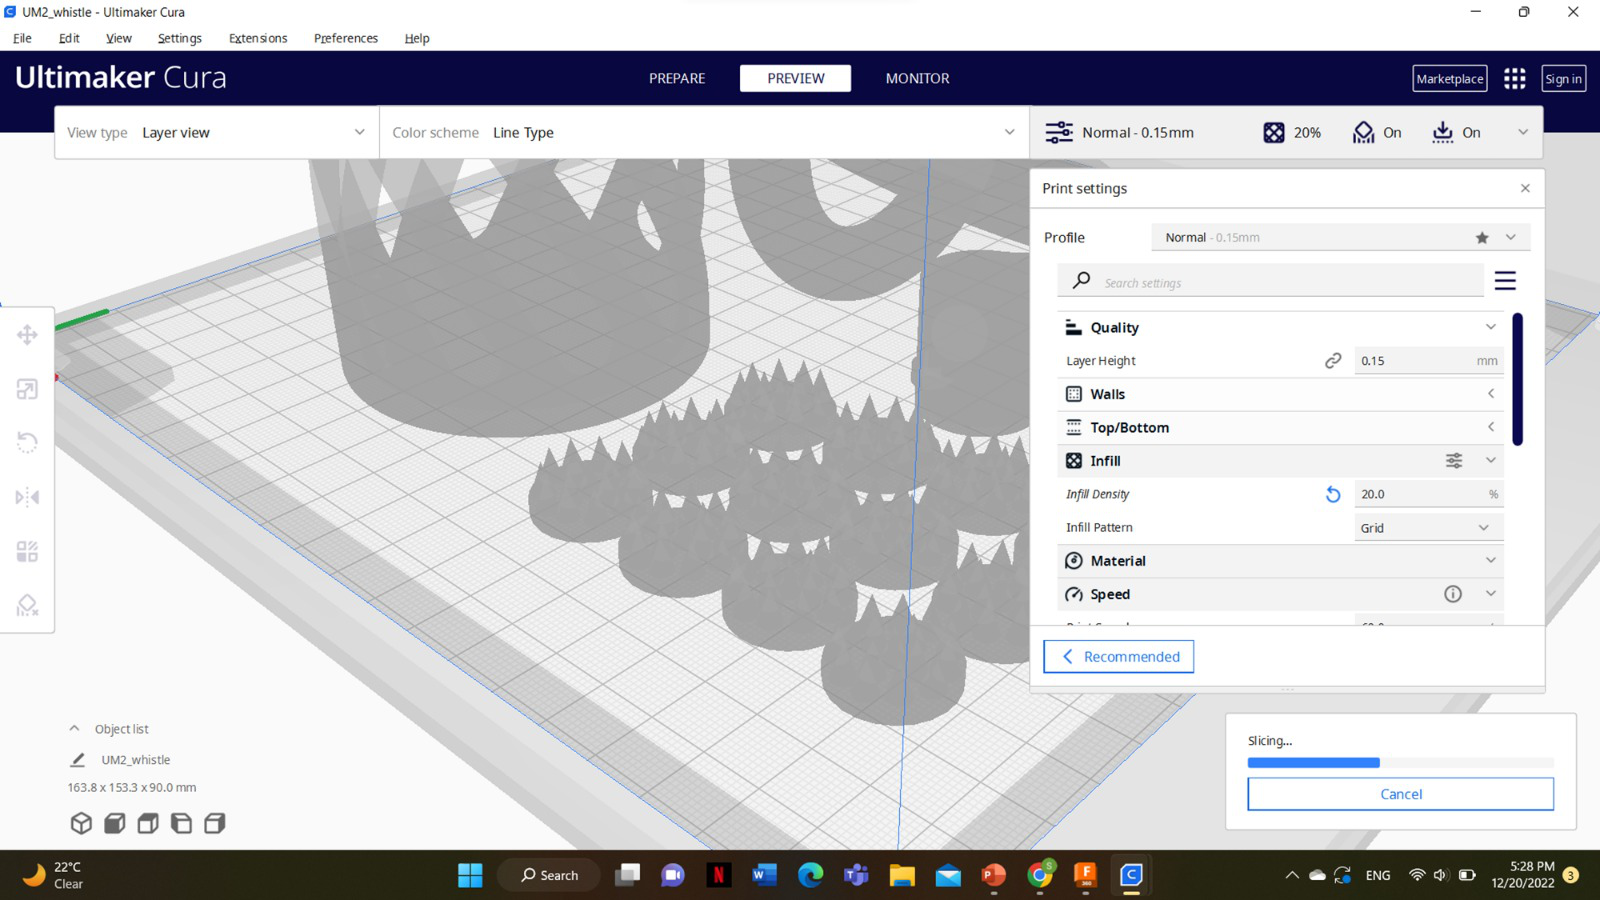
9. Step 9, click slice, the estimated time for printing will show up, it was 13 hours and 56 minutes

10. Step 10, save the Cura file, and import it to an SD card, insert the SD card into the 3D printer in this case Ultimaker
11. Step 11, we left the printer over night, however an error occurred while printing - I think it was under extrusion. So, we splited the designs between the 3 printer and my design was printing on Prusa printer
12. Step 12, the design printing using Prusa printer
13. Step 13, the progress of printing

This is how the the pencil holder tured out ✏️
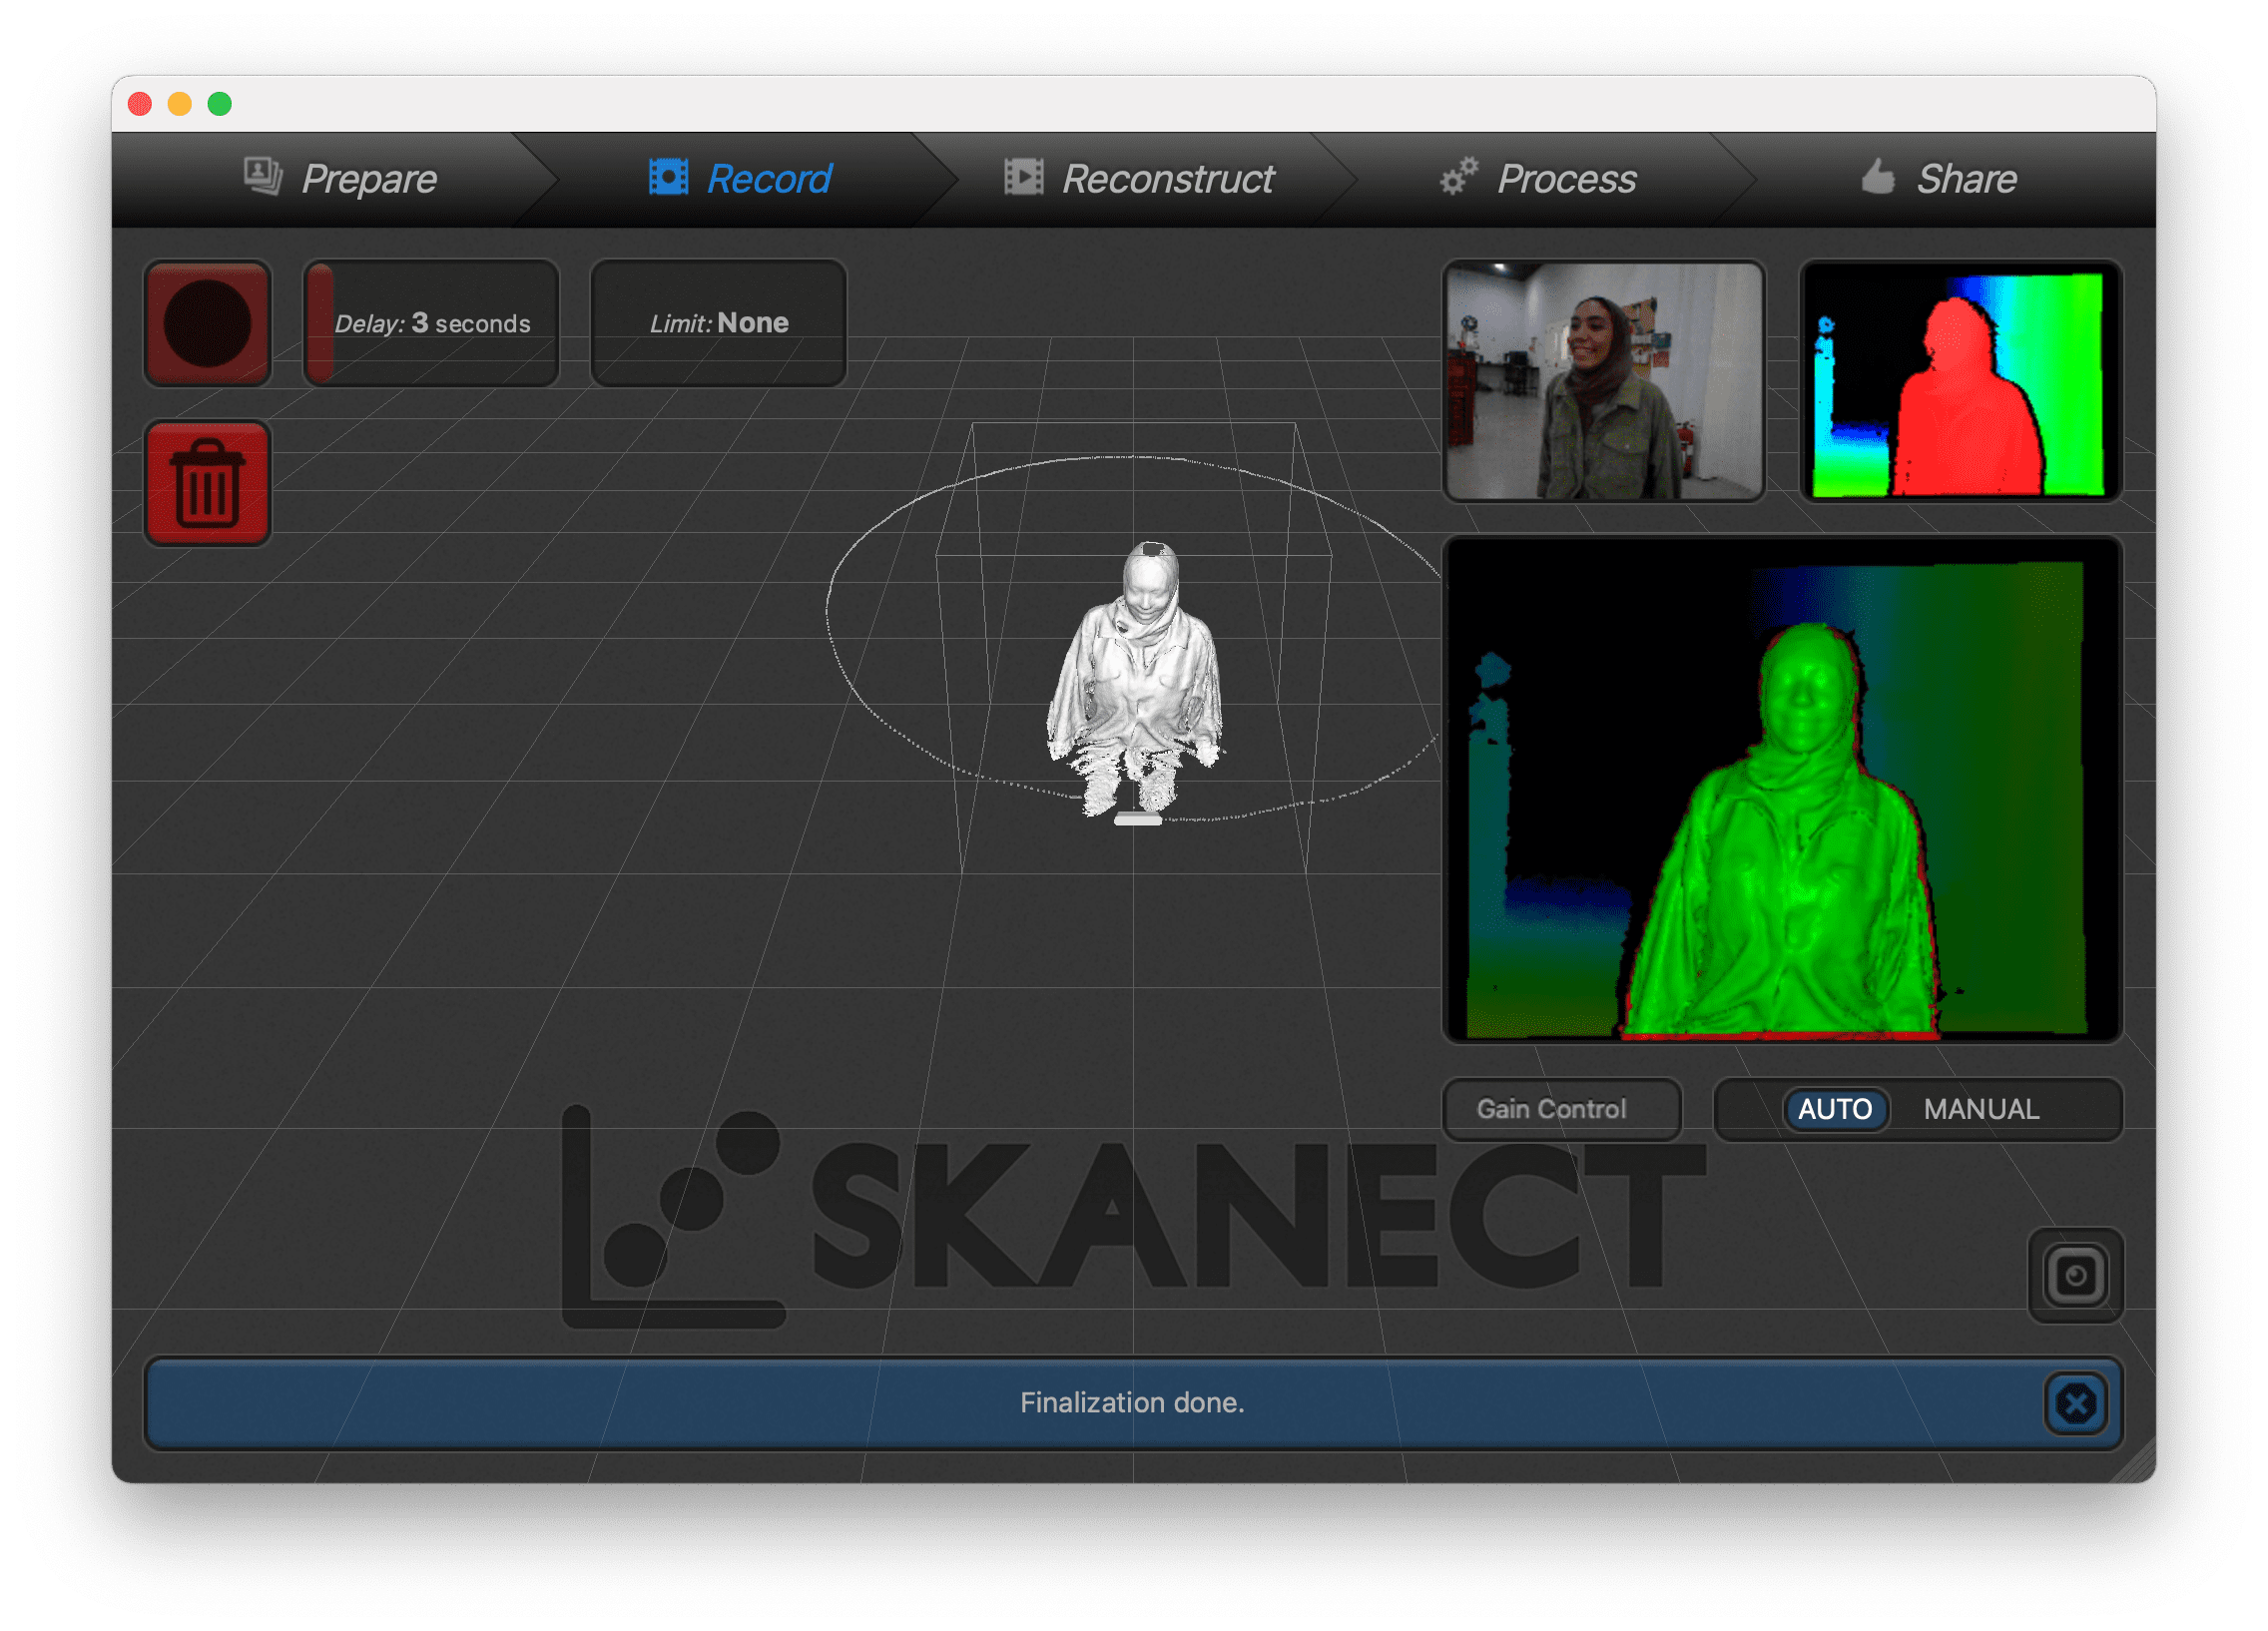
3D Scanning
We took turns to do scanning for each other, I did a 3D scanning for my colleague Sakeena. Here are the steps:
1. Step 1, download Skanect through this link or this link
2. Step 2, in Skanect open a new file, place the camera where the body show green highlights
3. Step 3, start recording by pressing space at the start and at the end, while they are rotating slowly

4. Step 4, after the record the scanning will show up
5. Step 5, from process you can fill the holes
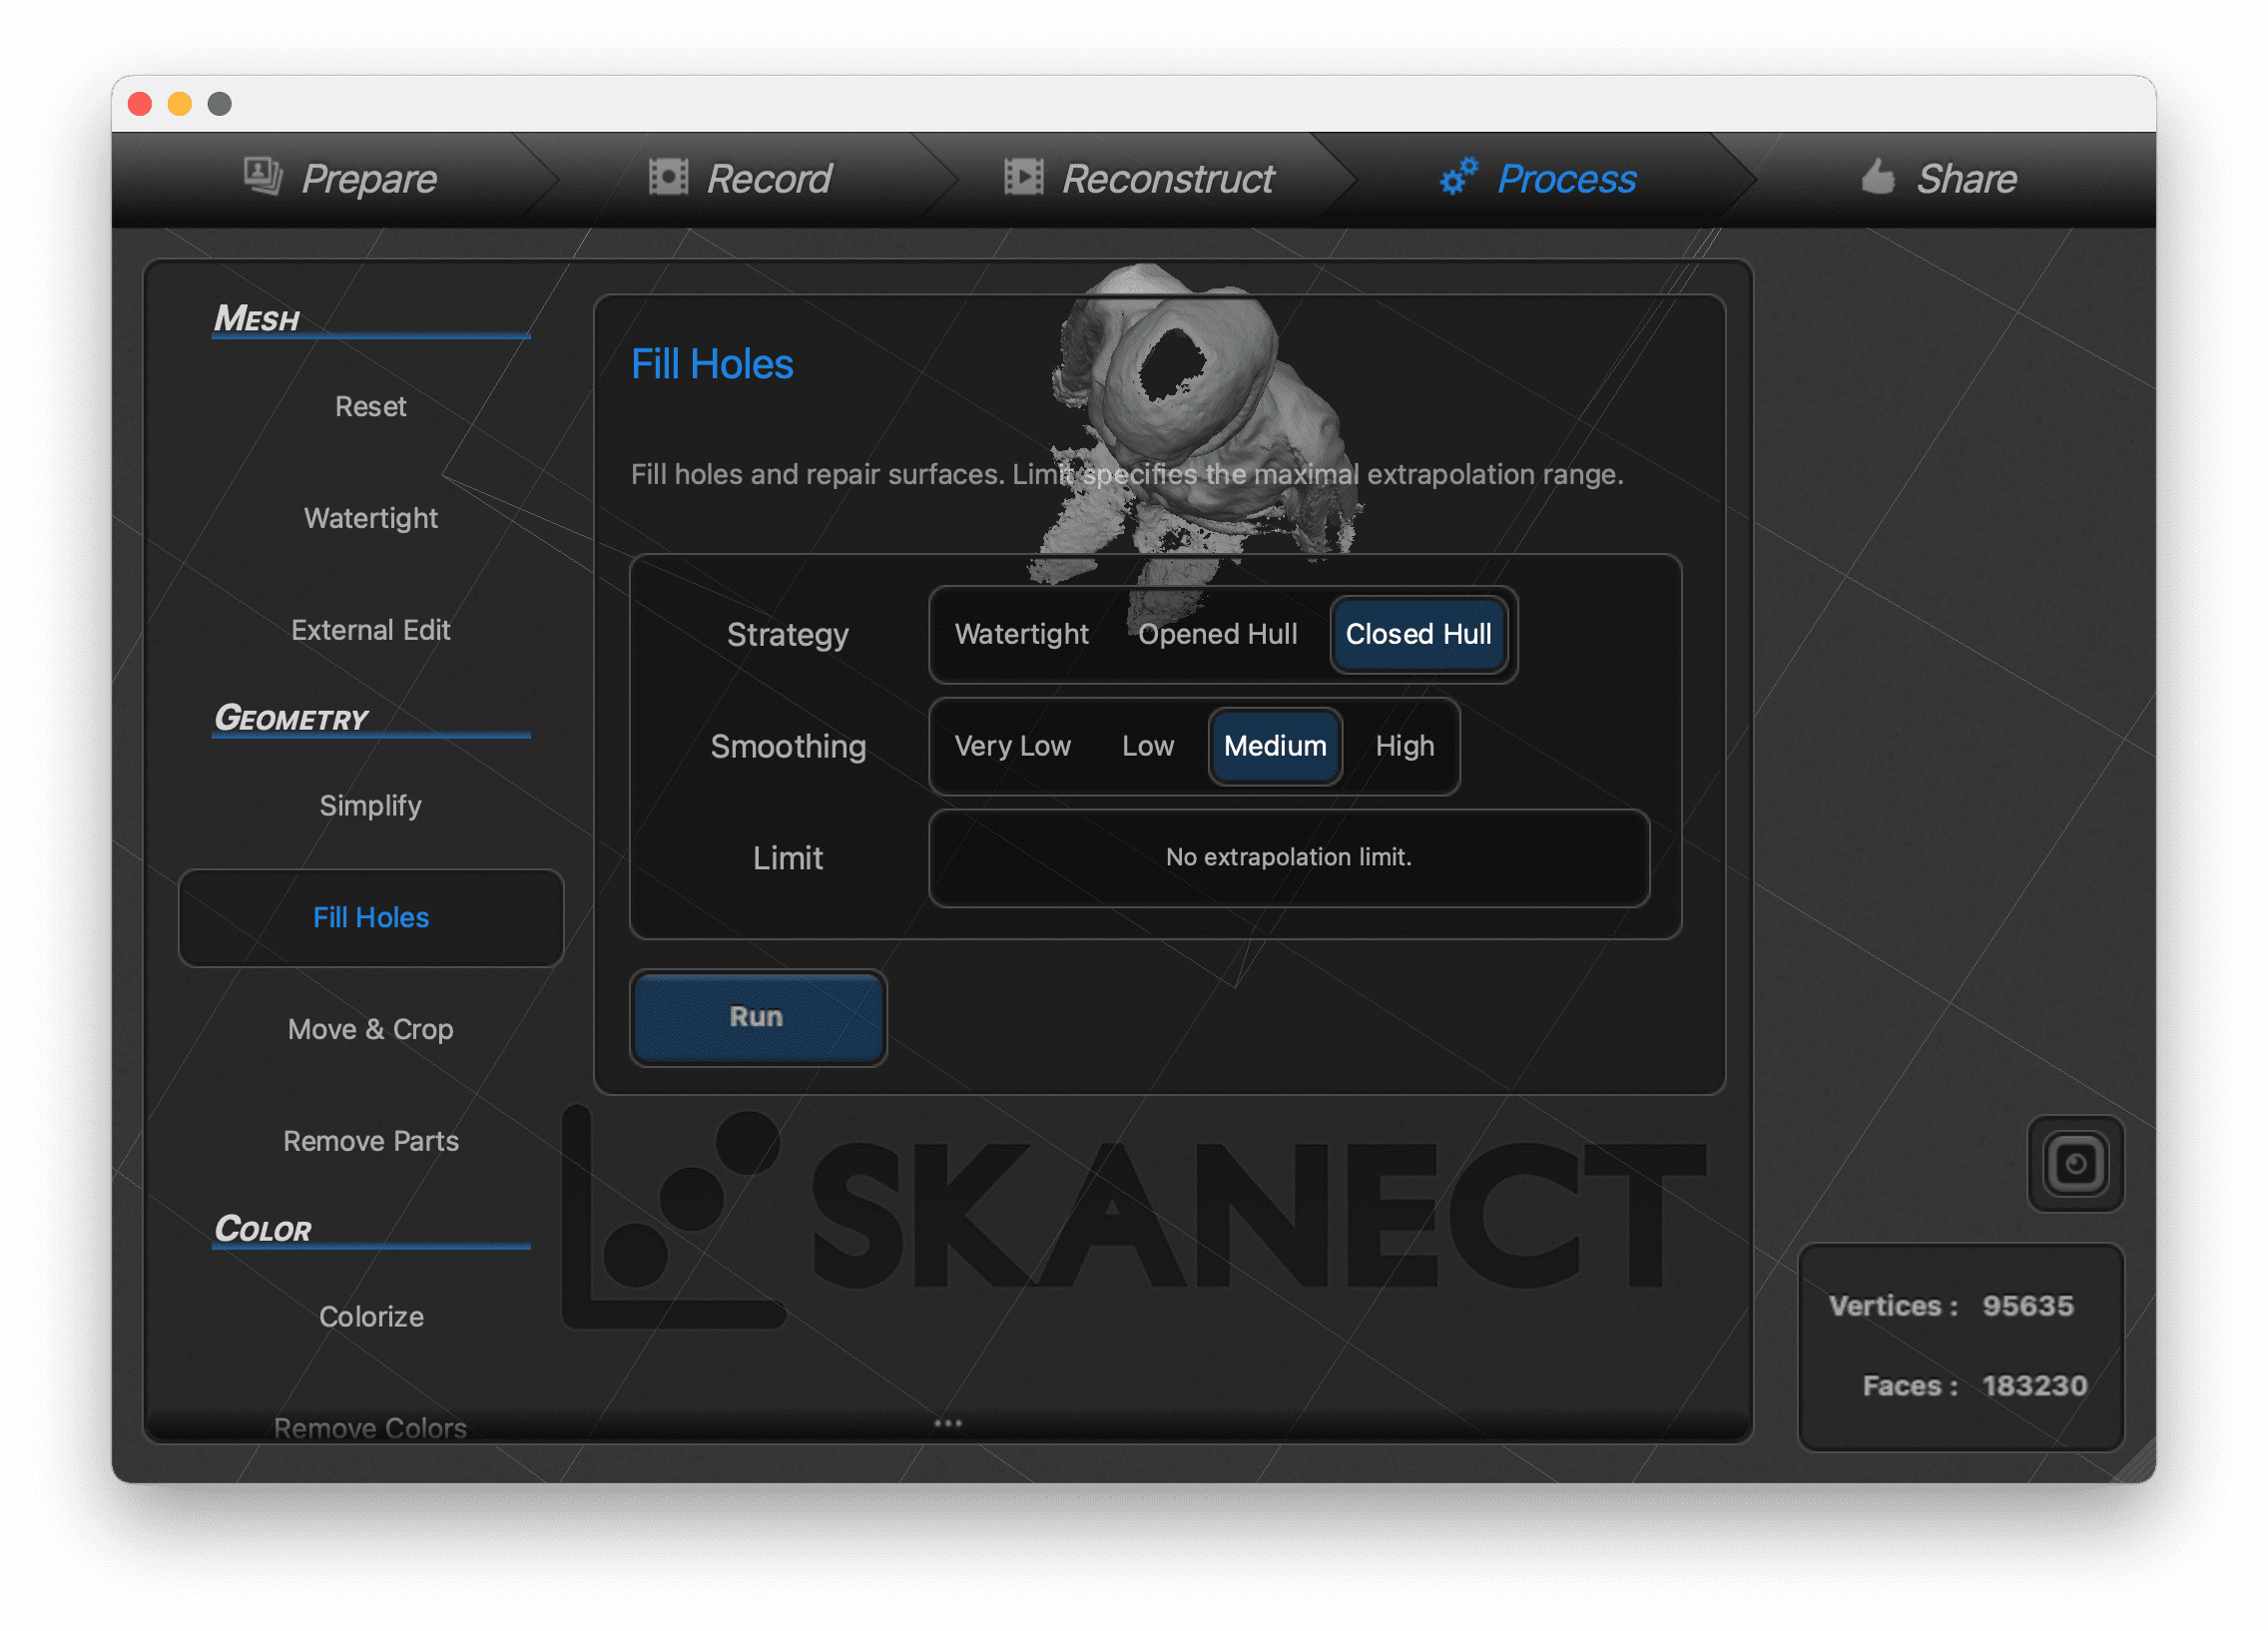
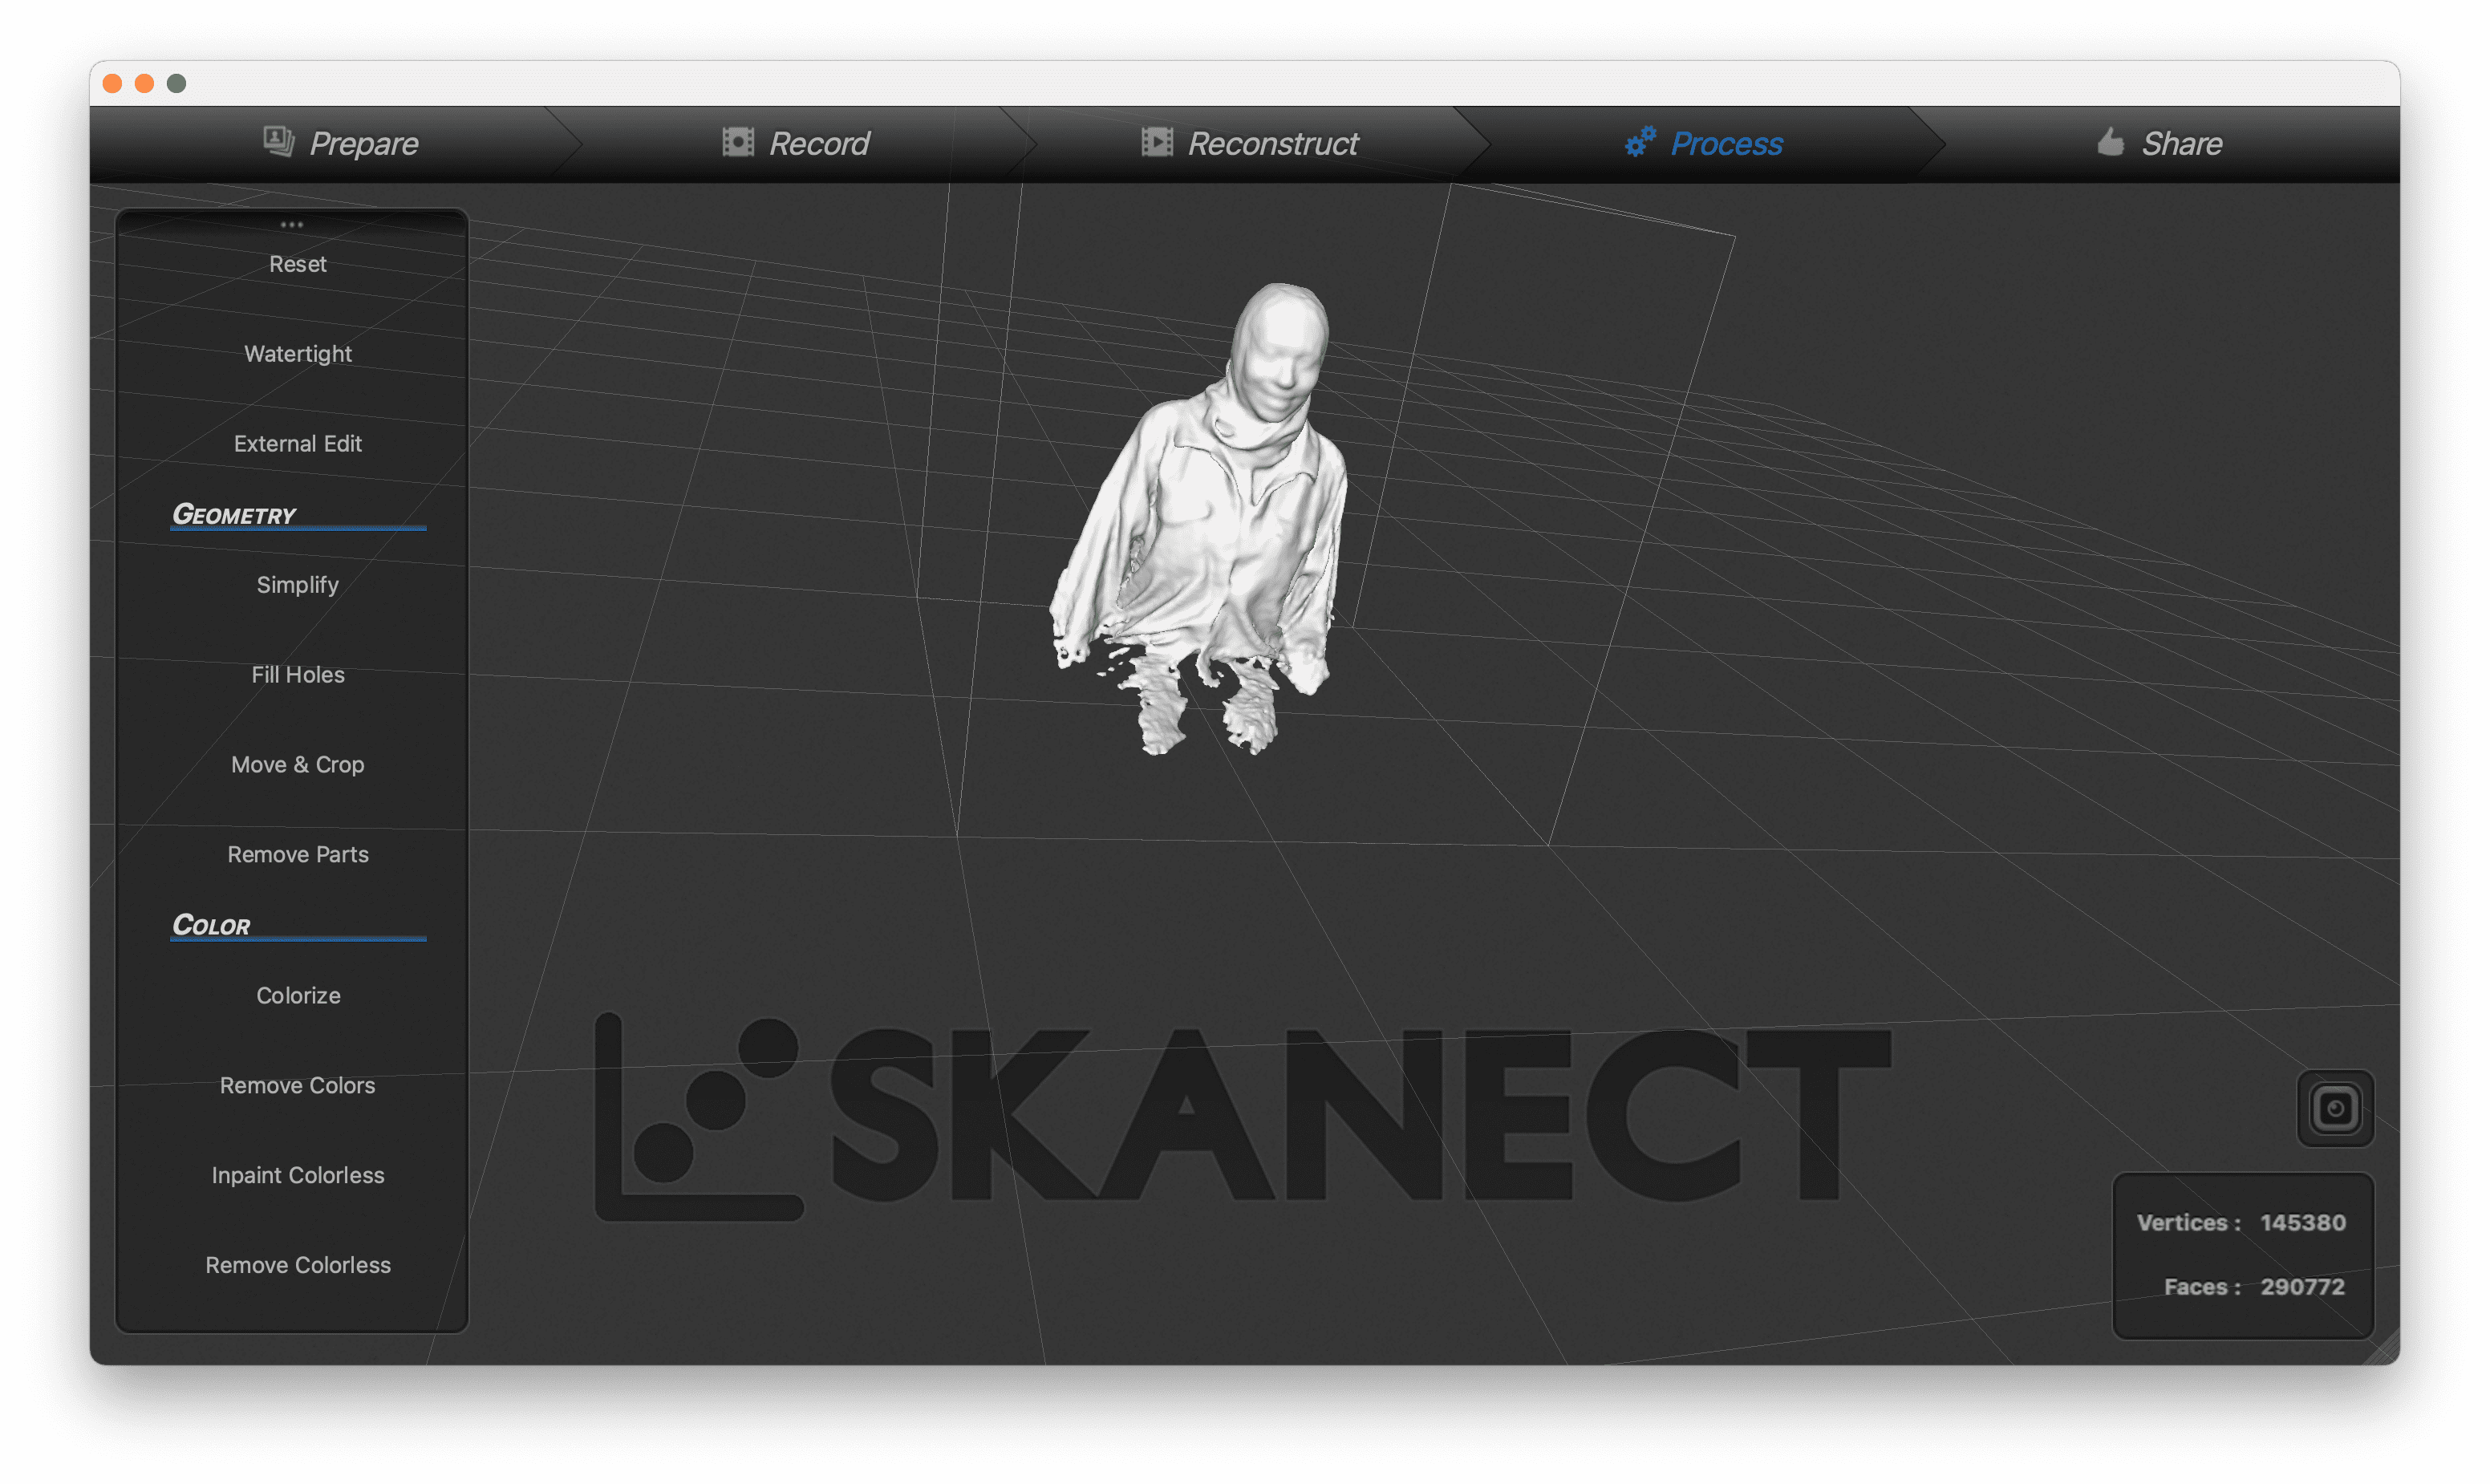
6. Step 6, you can see here that the holes are filled
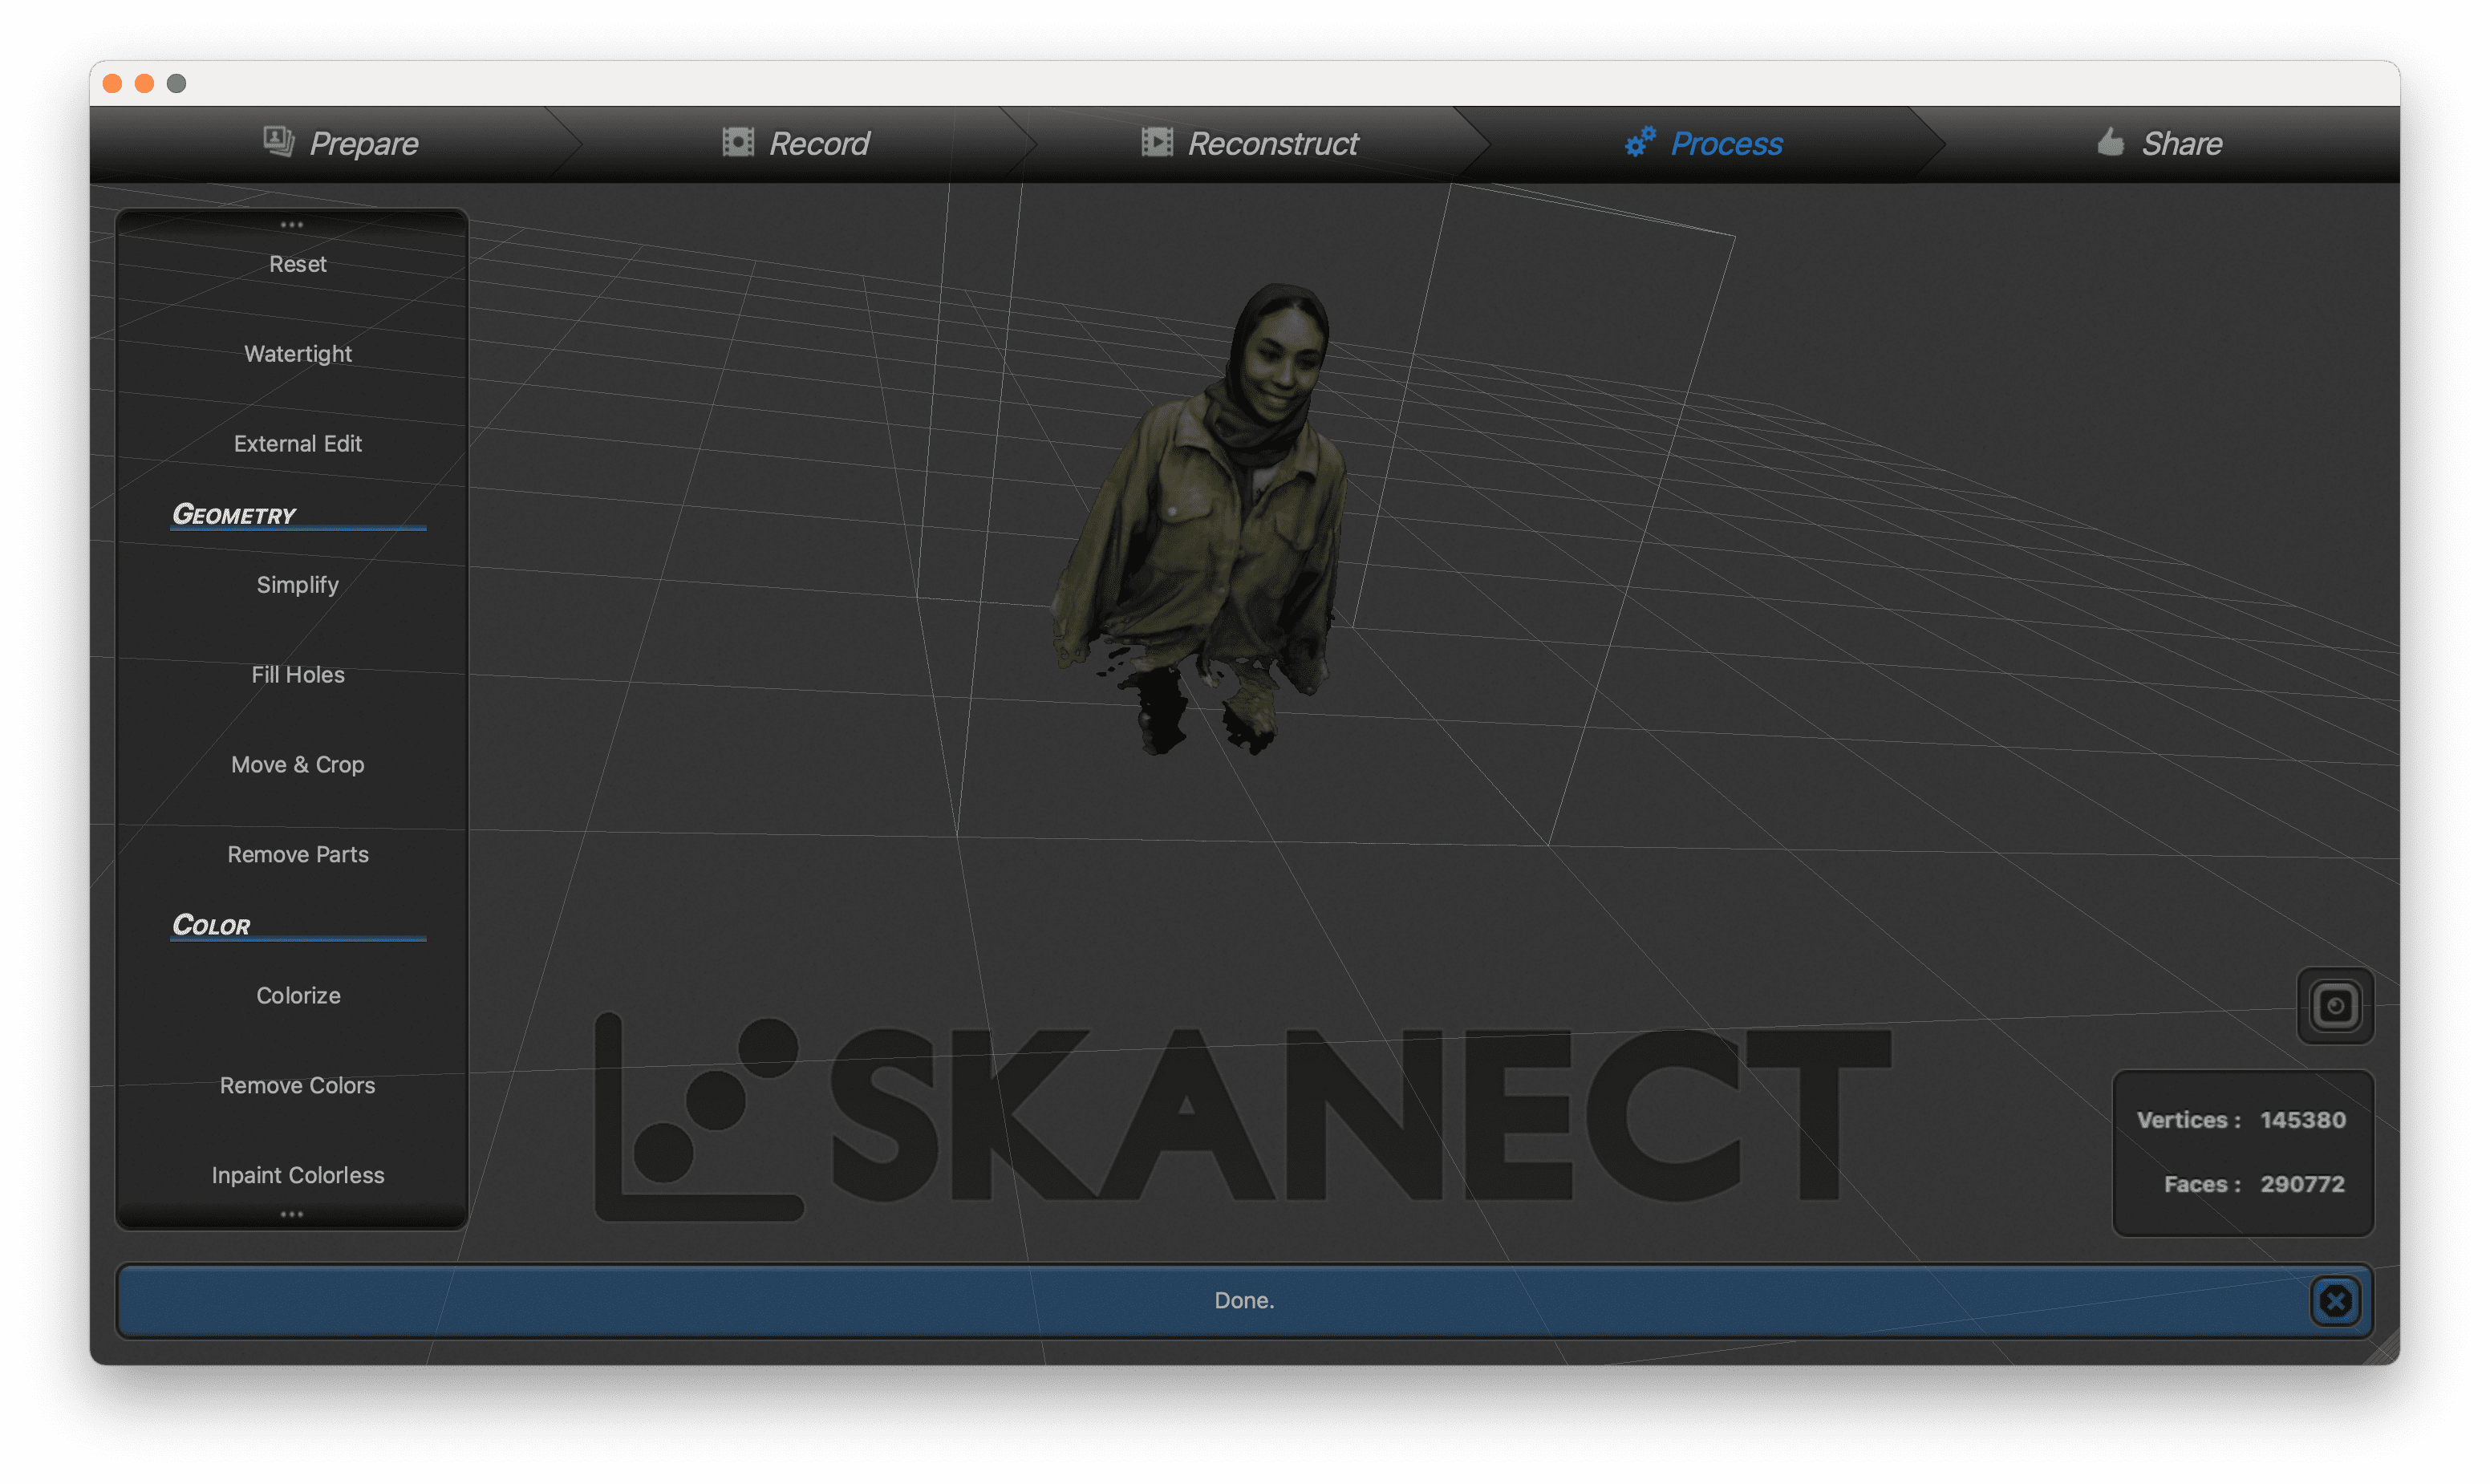
7. Step 7, you can see the scanning with color, by clicking colorize in process, then remove color
8. Step 8, go to share, export file as stl
Click here to download stl file
Work Files
Resources & Useful Links
- 3D Printing
- Types of Filaments
- Problems with 3D Printers
- Additive & Subtractive Manufacturing
- Common Problems with 3D Printers