4. Embedded programming
Using Arduino
What is Arduino?
Arduino is an open-source electronics platform based on easy-to-use hardware and software. Arduino boards are able to read inputs - light on a sensor, a finger on a button, or a Twitter message - and turn it into an output - activating a motor, turning on an LED, publishing something online. You can tell your board what to do by sending a set of instructions to the microcontroller on the board. To do so you use the Arduino programming language (based on Wiring), and the Arduino Software (IDE), based on Processing.
Micro-Controller
A microcontroller is a compact integrated circuit designed to govern a specific operation in an embedded system. A typical microcontroller includes a processor, memory and input/output (I/O) peripherals on a single chip
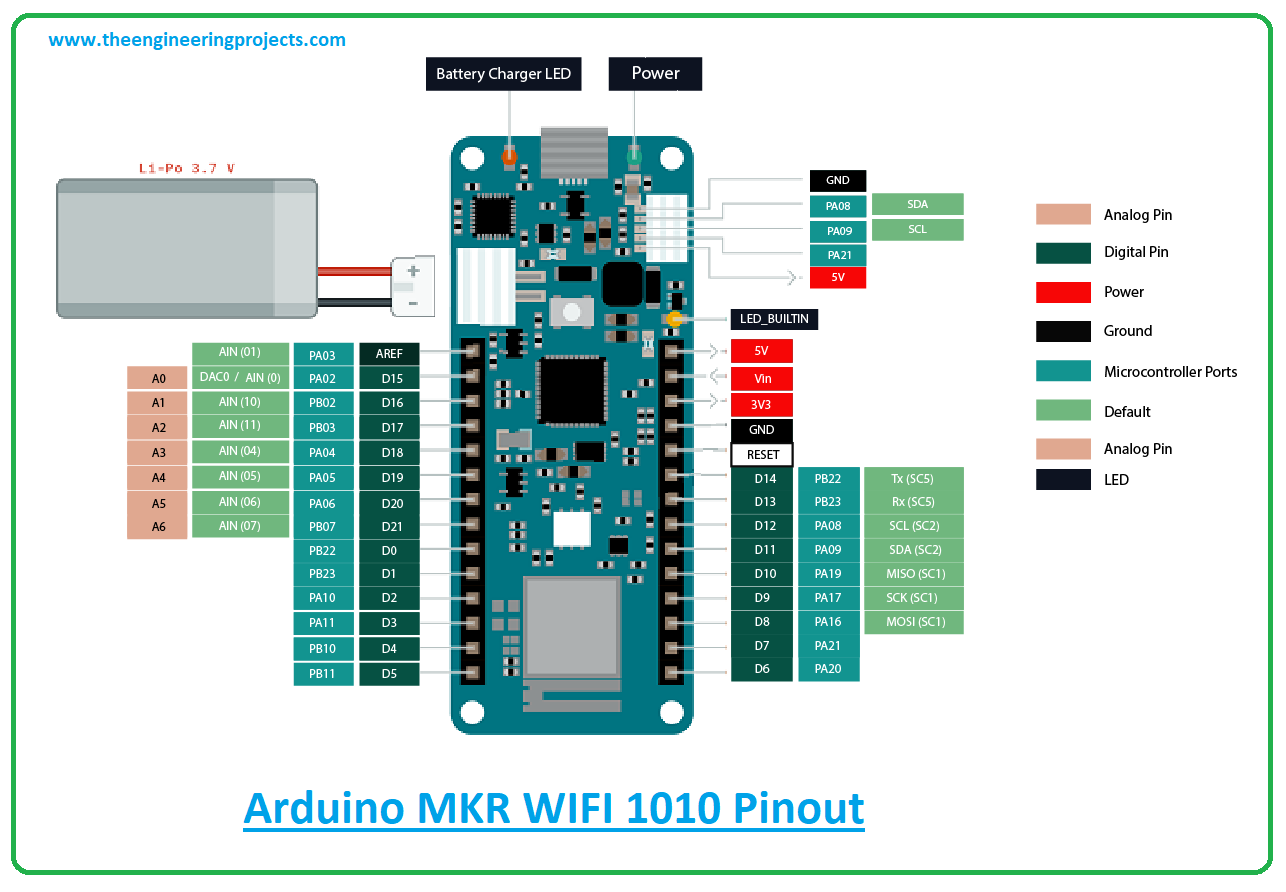
- Micro-Controller we are using: Arduino MKR wifi 1010: The MKR WiFi 1010 is a miniature sized modulecontaining a SAMD21G18A Processor, the NinaW102 Module, a crypto chip (the ATECC508), and a2MByte SPI Flash.
Setting up Arduino
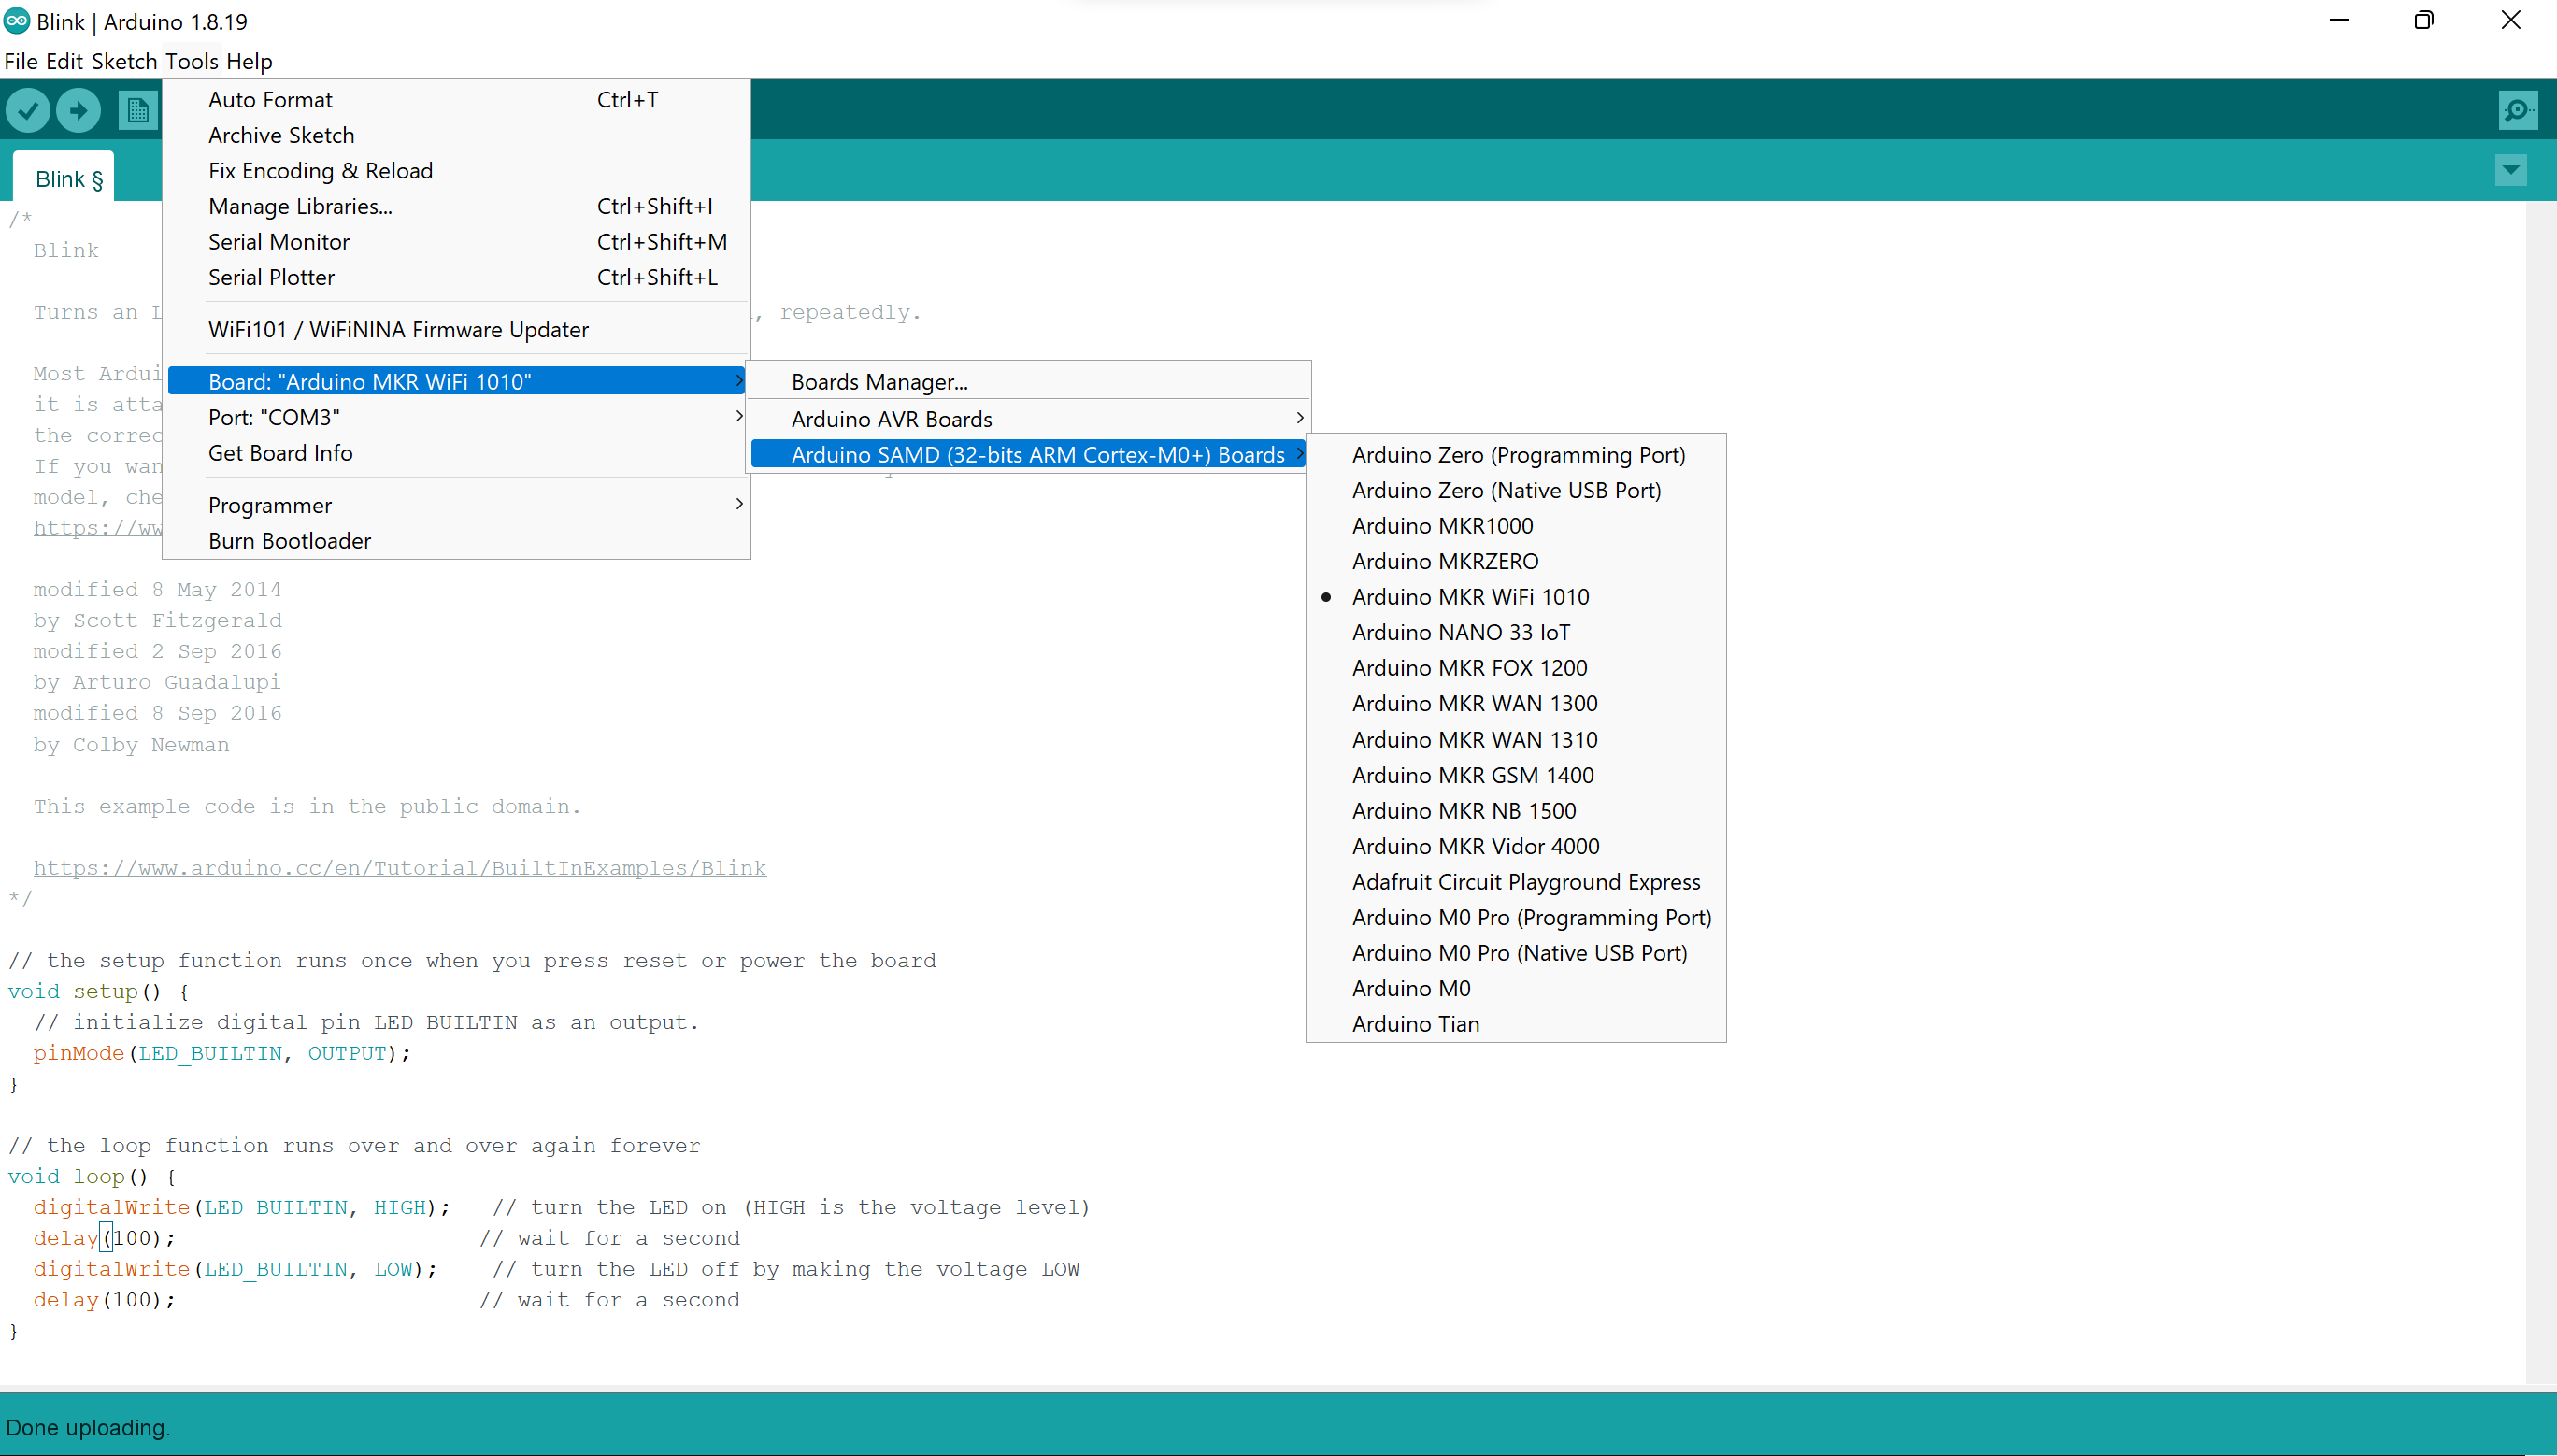
After downloading Arduino IDE, which you can download by clicking here you need to start and set up the program.
- Set up your board by selecting it.
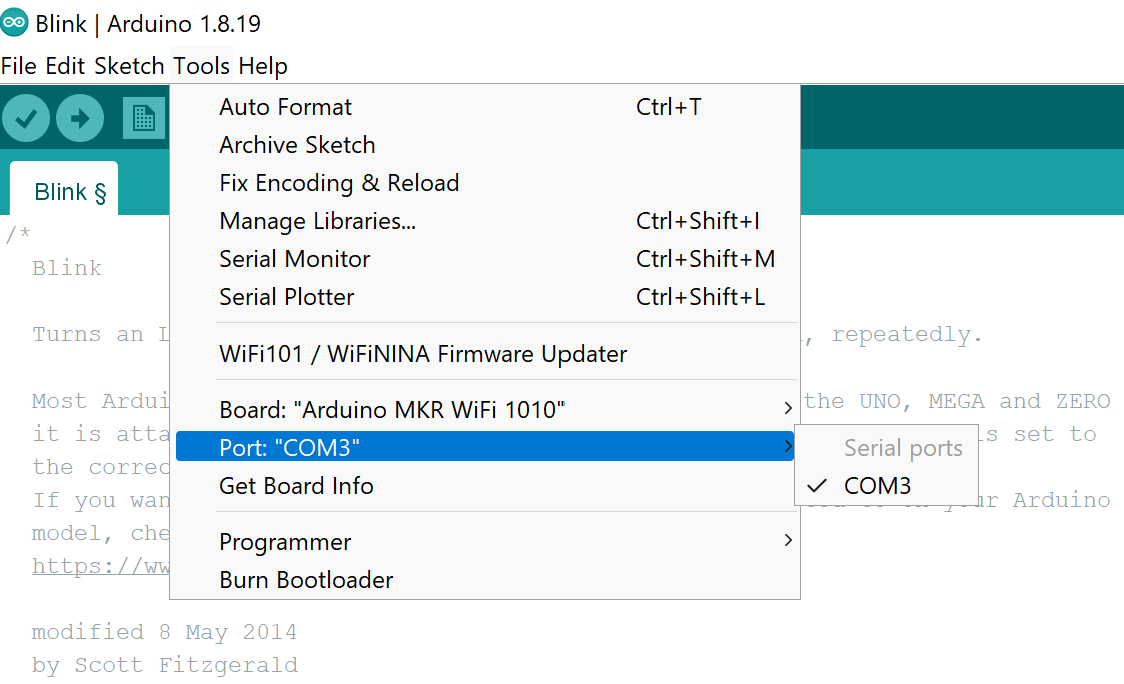
- Select your port
- In our case we had to download the library
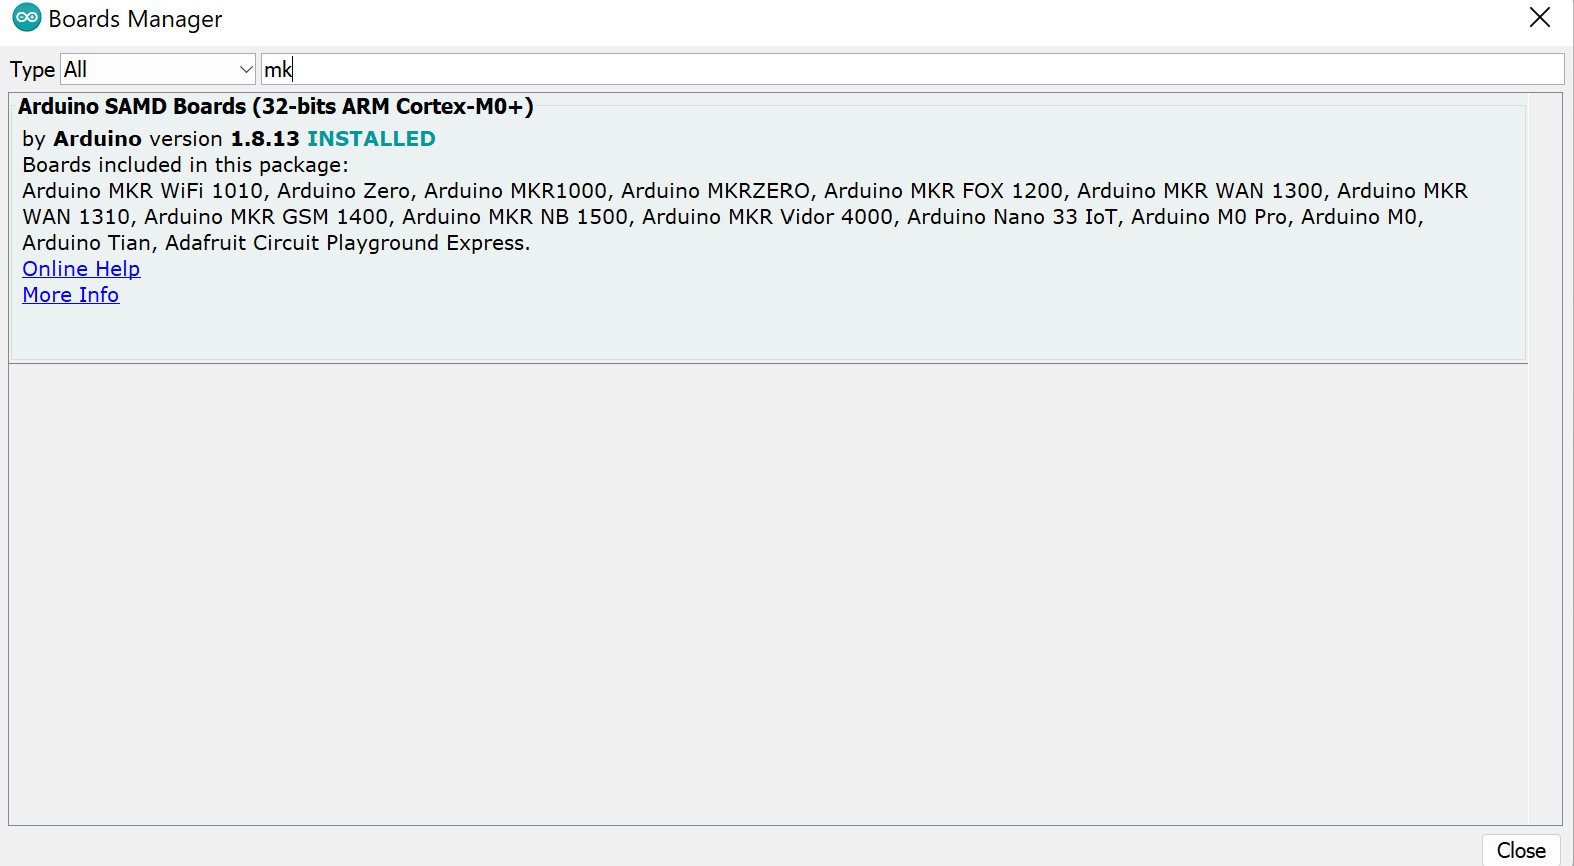
- You are set!
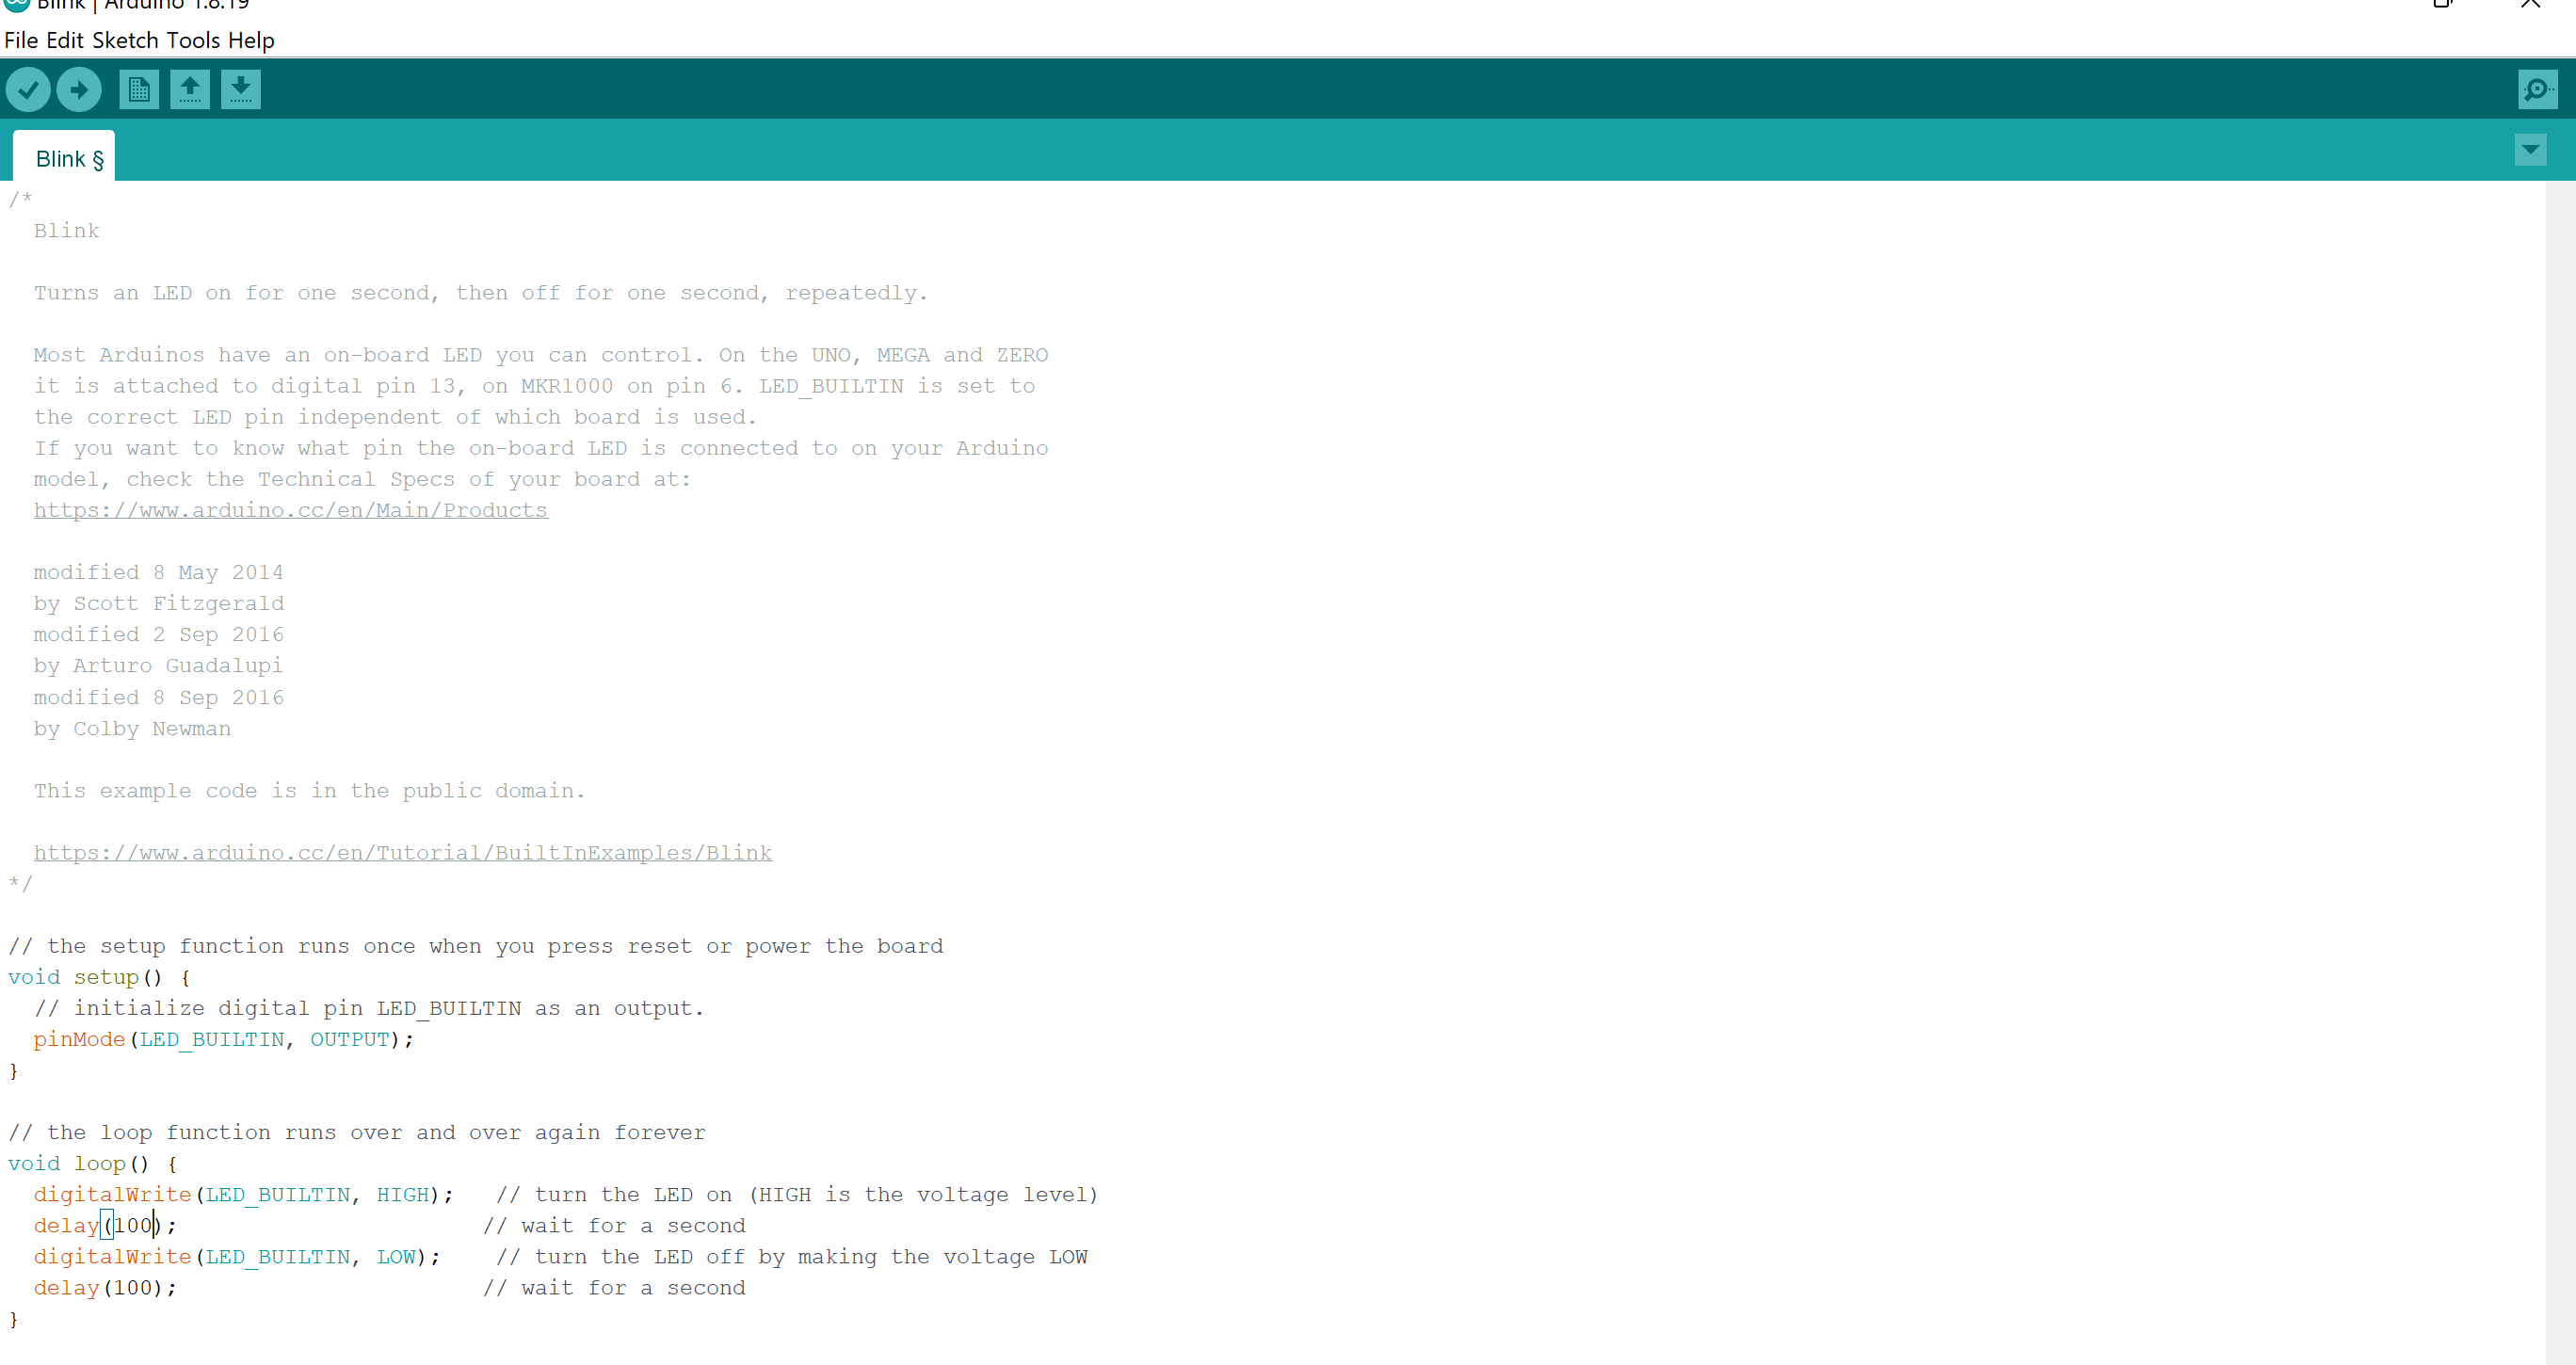
Task 1: Blink.
For the first task we had is something very simple to get ourselves used to using arduino and the micro-controller, we were asked to make the micro-controller blink.

/*
  Blink

  Turns an LED on for one second, then off for one second, repeatedly.

  Most Arduinos have an on-board LED you can control. On the UNO, MEGA and ZERO
  it is attached to digital pin 13, on MKR1000 on pin 6. LED_BUILTIN is set to
  the correct LED pin independent of which board is used.
  If you want to know what pin the on-board LED is connected to on your Arduino
  model, check the Technical Specs of your board at:
  https://www.arduino.cc/en/Main/Products

  modified 8 May 2014
  by Scott Fitzgerald
  modified 2 Sep 2016
  by Arturo Guadalupi
  modified 8 Sep 2016
  by Colby Newman

  This example code is in the public domain.

  https://www.arduino.cc/en/Tutorial/BuiltInExamples/Blink
*/

// the setup function runs once when you press reset or power the board
void setup() {
  // initialize digital pin LED_BUILTIN as an output.
  pinMode(LED_BUILTIN, OUTPUT);
}

// the loop function runs over and over again forever
void loop() {
  digitalWrite(LED_BUILTIN, HIGH);   // turn the LED on (HIGH is the voltage level)
  delay(1000);                       // wait for a second
  digitalWrite(LED_BUILTIN, LOW);    // turn the LED off by making the voltage LOW
  delay(1000);                       // wait for a second
}
Task 2: Random Delay.
It was an addition to the first task where we make the light blink in random intervals.
void setup() {
  // initialize digital pin LED_BUILTIN as an output.
  pinMode(LED_BUILTIN, OUTPUT);
}

// the loop function runs over and over again forever
void loop() {
int A=random(500,5000);
Serial.println(A);
int B=random(500,5000);

for(int j=0; j<10; j++){
  digitalWrite(LED_BUILTIN,HIGH);
  delay(A);
   digitalWrite(LED_BUILTIN,LOW);
  delay(B);
}
}
Task 3: Morse Code.
In this task we were asked to write something with morsecode using the micro-controller.
What I did in this task is to create a function for every possible delay we had, which were the dot, the dash, end of the word, and between letters.
It looked like this:
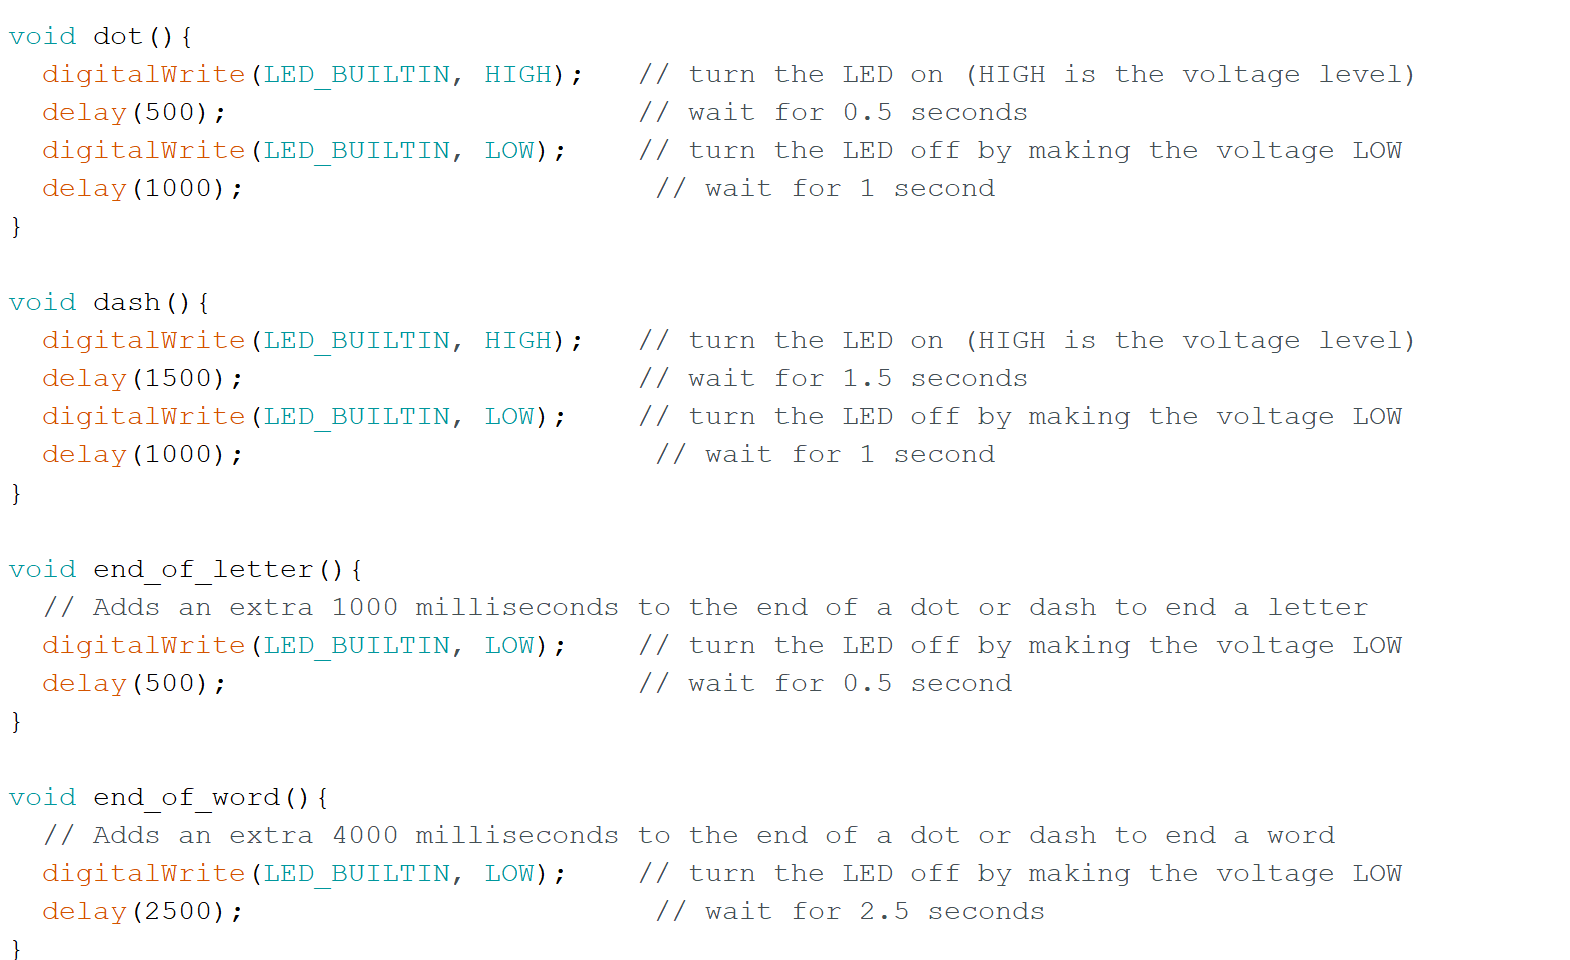
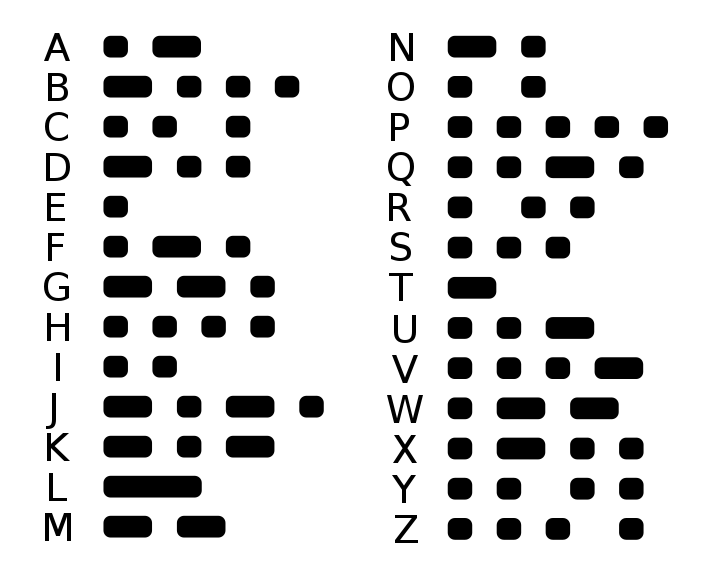
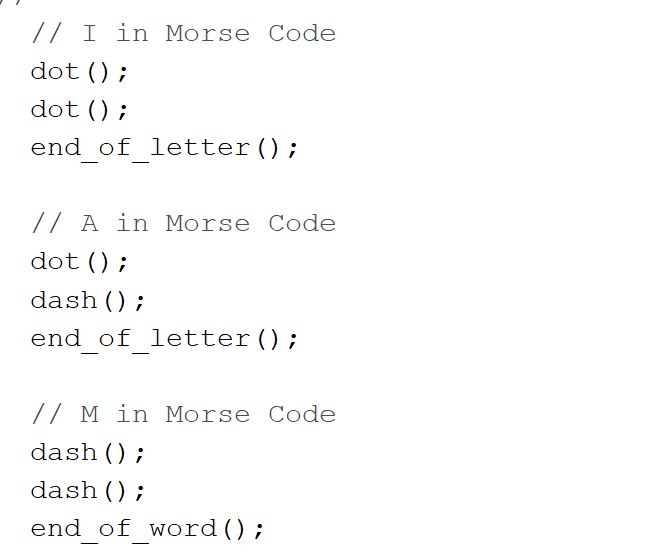
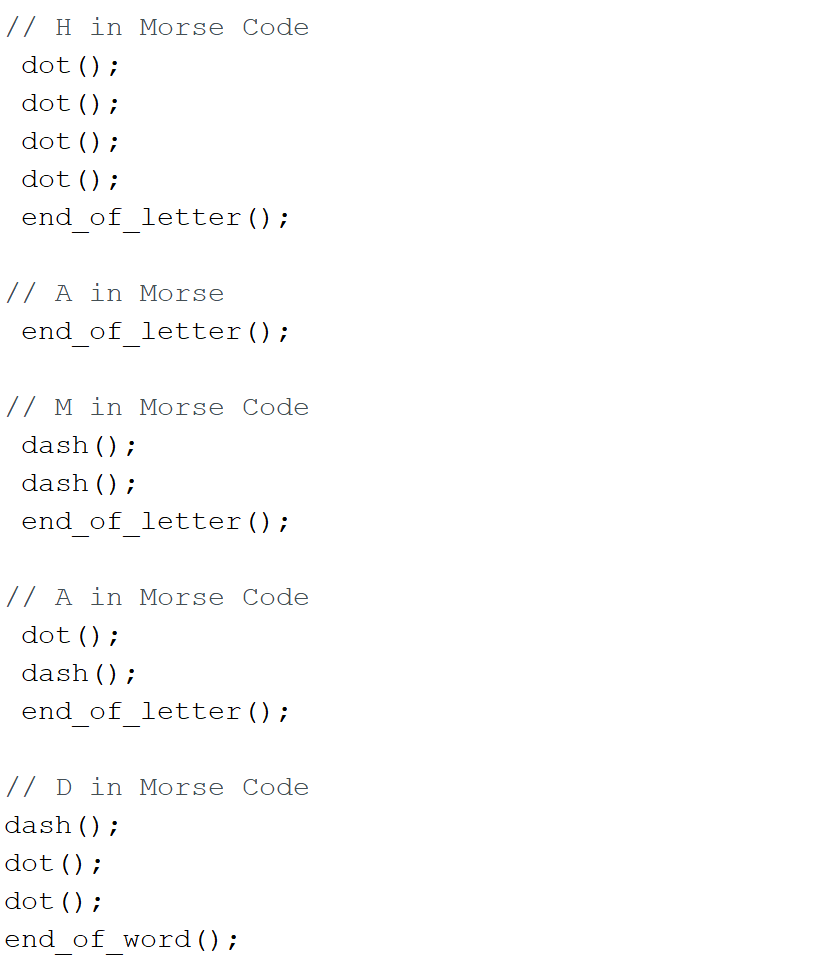
now we have the delays, I wanted to write ‘Hello I am Hamad’, I had to translate that into morsecode, you can easily find it by searching for the letters.
after translater an easy way to write what I want in morse code is just to call any function I created as many times as I wanted.
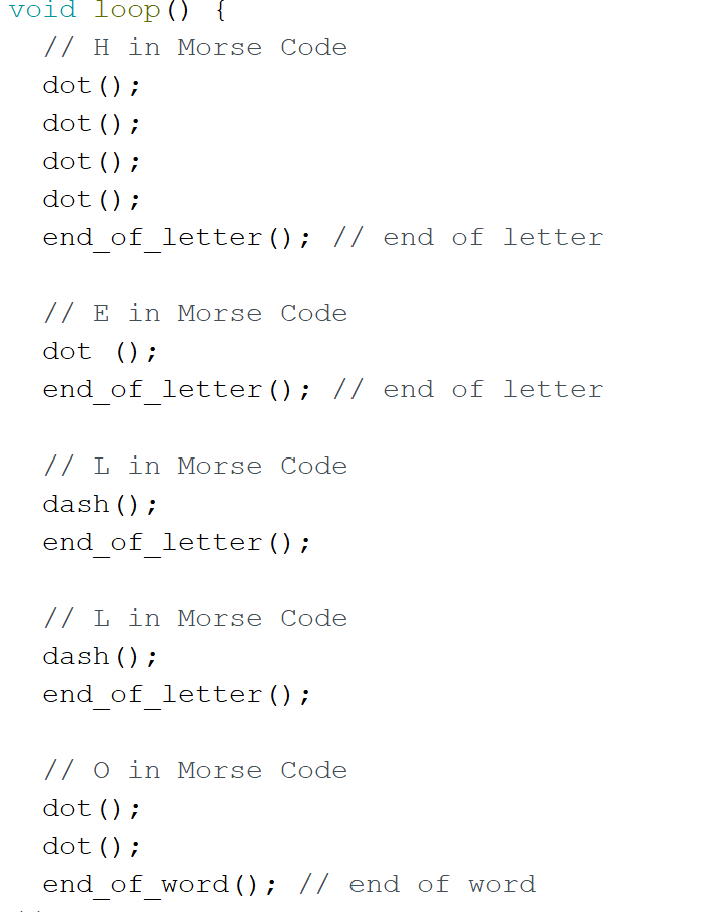
Arduino code.
*/
void setup()
{
  // initialize digital pin LED_BUILTIN as an output.
  pinMode(LED_BUILTIN, OUTPUT);
}
void loop() {
  // H in Morse Code
  dot();
  dot();
  dot();
  dot();
  end_of_letter(); // end of letter

  // E in Morse Code
  dot ();
  end_of_letter(); // end of letter

  // L in Morse Code
  dash();
  end_of_letter();

  // L in Morse Code
  dash();
  end_of_letter();

  // O in Morse Code
  dot();
  dot();
  end_of_word(); // end of word
//-------------------------------
  // I in Morse Code
  dot();
  dot();
  end_of_letter();

  // A in Morse Code
  dot();
  dash();
  end_of_letter();

  // M in Morse Code
  dash();
  dash();
  end_of_word();
//-------------------------------
 // H in Morse Code
  dot();
  dot();
  dot();
  dot();
  end_of_letter();

 // A in Morse
  end_of_letter();

 // M in Morse Code
  dash();
  dash();
  end_of_letter();

 // A in Morse Code
  dot();
  dash();
  end_of_letter();

 // D in Morse Code
 dash();
 dot();
 dot();
 end_of_word();
}

void dot(){
  digitalWrite(LED_BUILTIN, HIGH);   // turn the LED on (HIGH is the voltage level)
  delay(500);                        // wait for 0.5 seconds
  digitalWrite(LED_BUILTIN, LOW);    // turn the LED off by making the voltage LOW
  delay(1000);                        // wait for 1 second
}

void dash(){
  digitalWrite(LED_BUILTIN, HIGH);   // turn the LED on (HIGH is the voltage level)
  delay(1500);                       // wait for 1.5 seconds
  digitalWrite(LED_BUILTIN, LOW);    // turn the LED off by making the voltage LOW
  delay(1000);                        // wait for 1 second
}

void end_of_letter(){
  // Adds an extra 1000 milliseconds to the end of a dot or dash to end a letter
  digitalWrite(LED_BUILTIN, LOW);    // turn the LED off by making the voltage LOW
  delay(500);                        // wait for 0.5 second
}

void end_of_word(){
  // Adds an extra 4000 milliseconds to the end of a dot or dash to end a word
  digitalWrite(LED_BUILTIN, LOW);    // turn the LED off by making the voltage LOW
  delay(2500);                        // wait for 2.5 seconds
}
Tinkercad
Saying Hi in morse code.
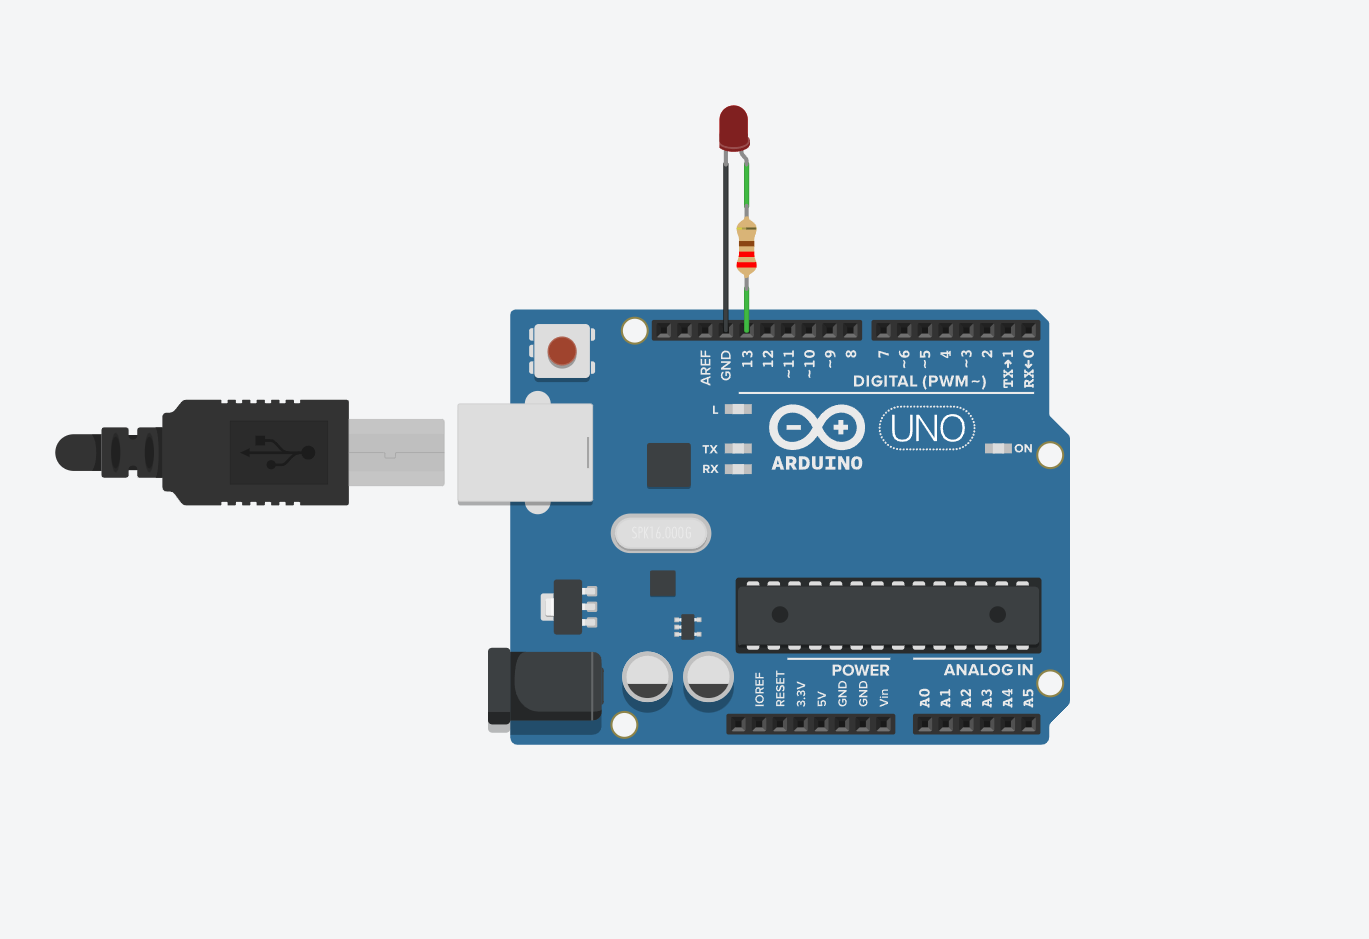
This is how the circuit would look like.
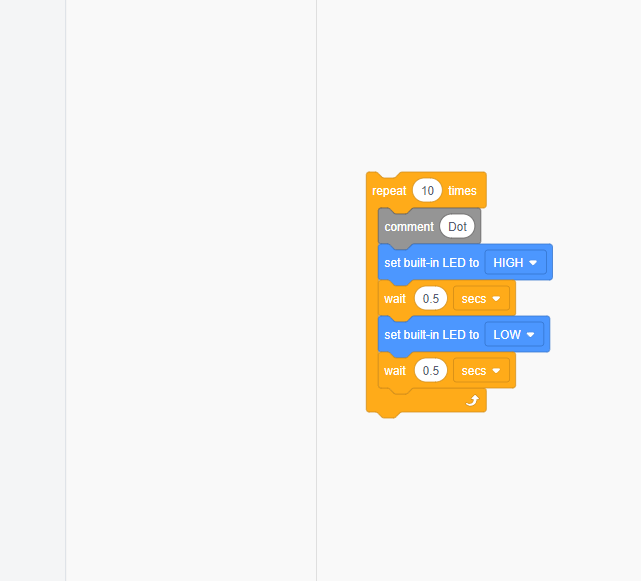
What I did for the blocks is that I made a dot function that would repeat as much as I wanted, reffering back to the morse code picture above, the letter H would be 4 dots and the letter I would be two dots.
Here is the picture of the function
Here is the final result

The simulation worked properly, tinker cad has very user friendly heads up display which made it very easy to learn the basics.
The code used
// C++ code
//
int counter;

int counter2;

void setup()
{
  pinMode(LED_BUILTIN, OUTPUT);

  // letter H
  for (counter = 0; counter < 4; ++counter) {
    // Dot
    digitalWrite(LED_BUILTIN, HIGH);
    delay(500); // Wait for 500 millisecond(s)
    digitalWrite(LED_BUILTIN, LOW);
    delay(500); // Wait for 500 millisecond(s)
  }
  // Between Letters
  delay(1000); // Wait for 1000 millisecond(s)
  for (counter2 = 0; counter2 < 2; ++counter2) {
    // Dot
    digitalWrite(LED_BUILTIN, HIGH);
    delay(500); // Wait for 500 millisecond(s)
    digitalWrite(LED_BUILTIN, LOW);
    delay(500); // Wait for 500 millisecond(s)
  }
}

void loop()
{
  delay(10); // Delay a little bit to improve simulation performance
}