5. 3D printing and scanning
This week we worked on several 3D printers and worked on a group and individual assignments.
Group Project
In this assignmet we will be creating two different object using Prusa 3D printer then compare our objects with the other group that they were using makerbot.
Looking for an object to print.
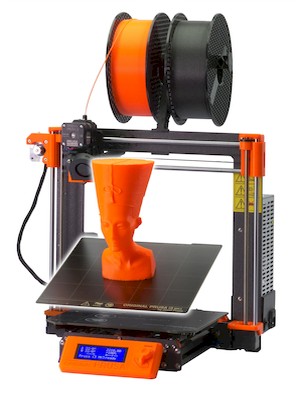
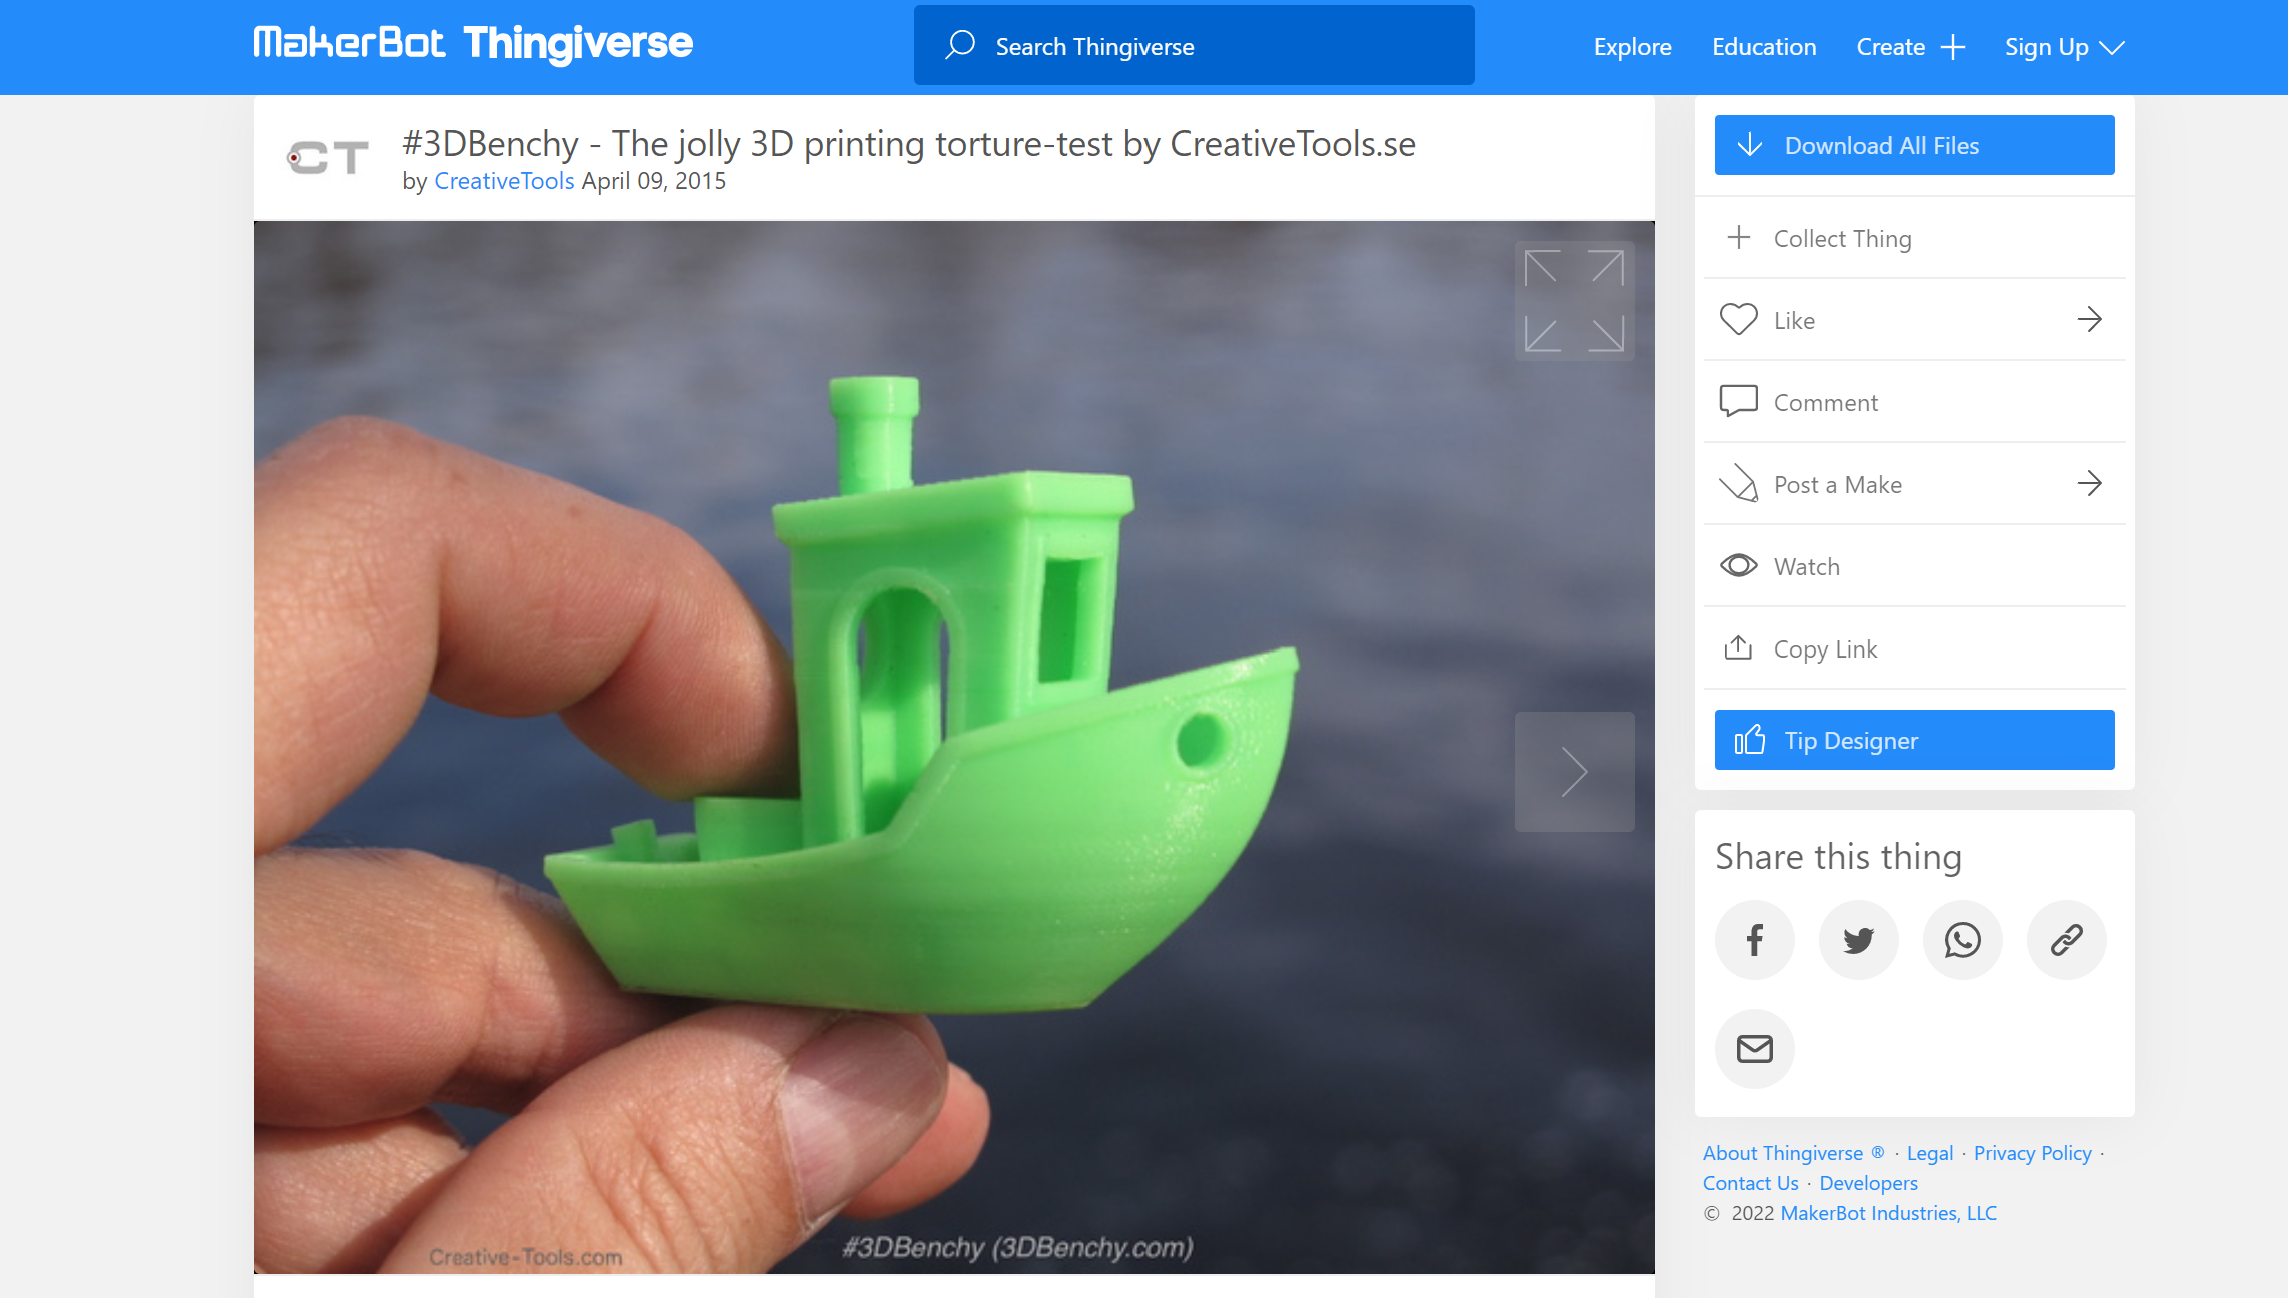
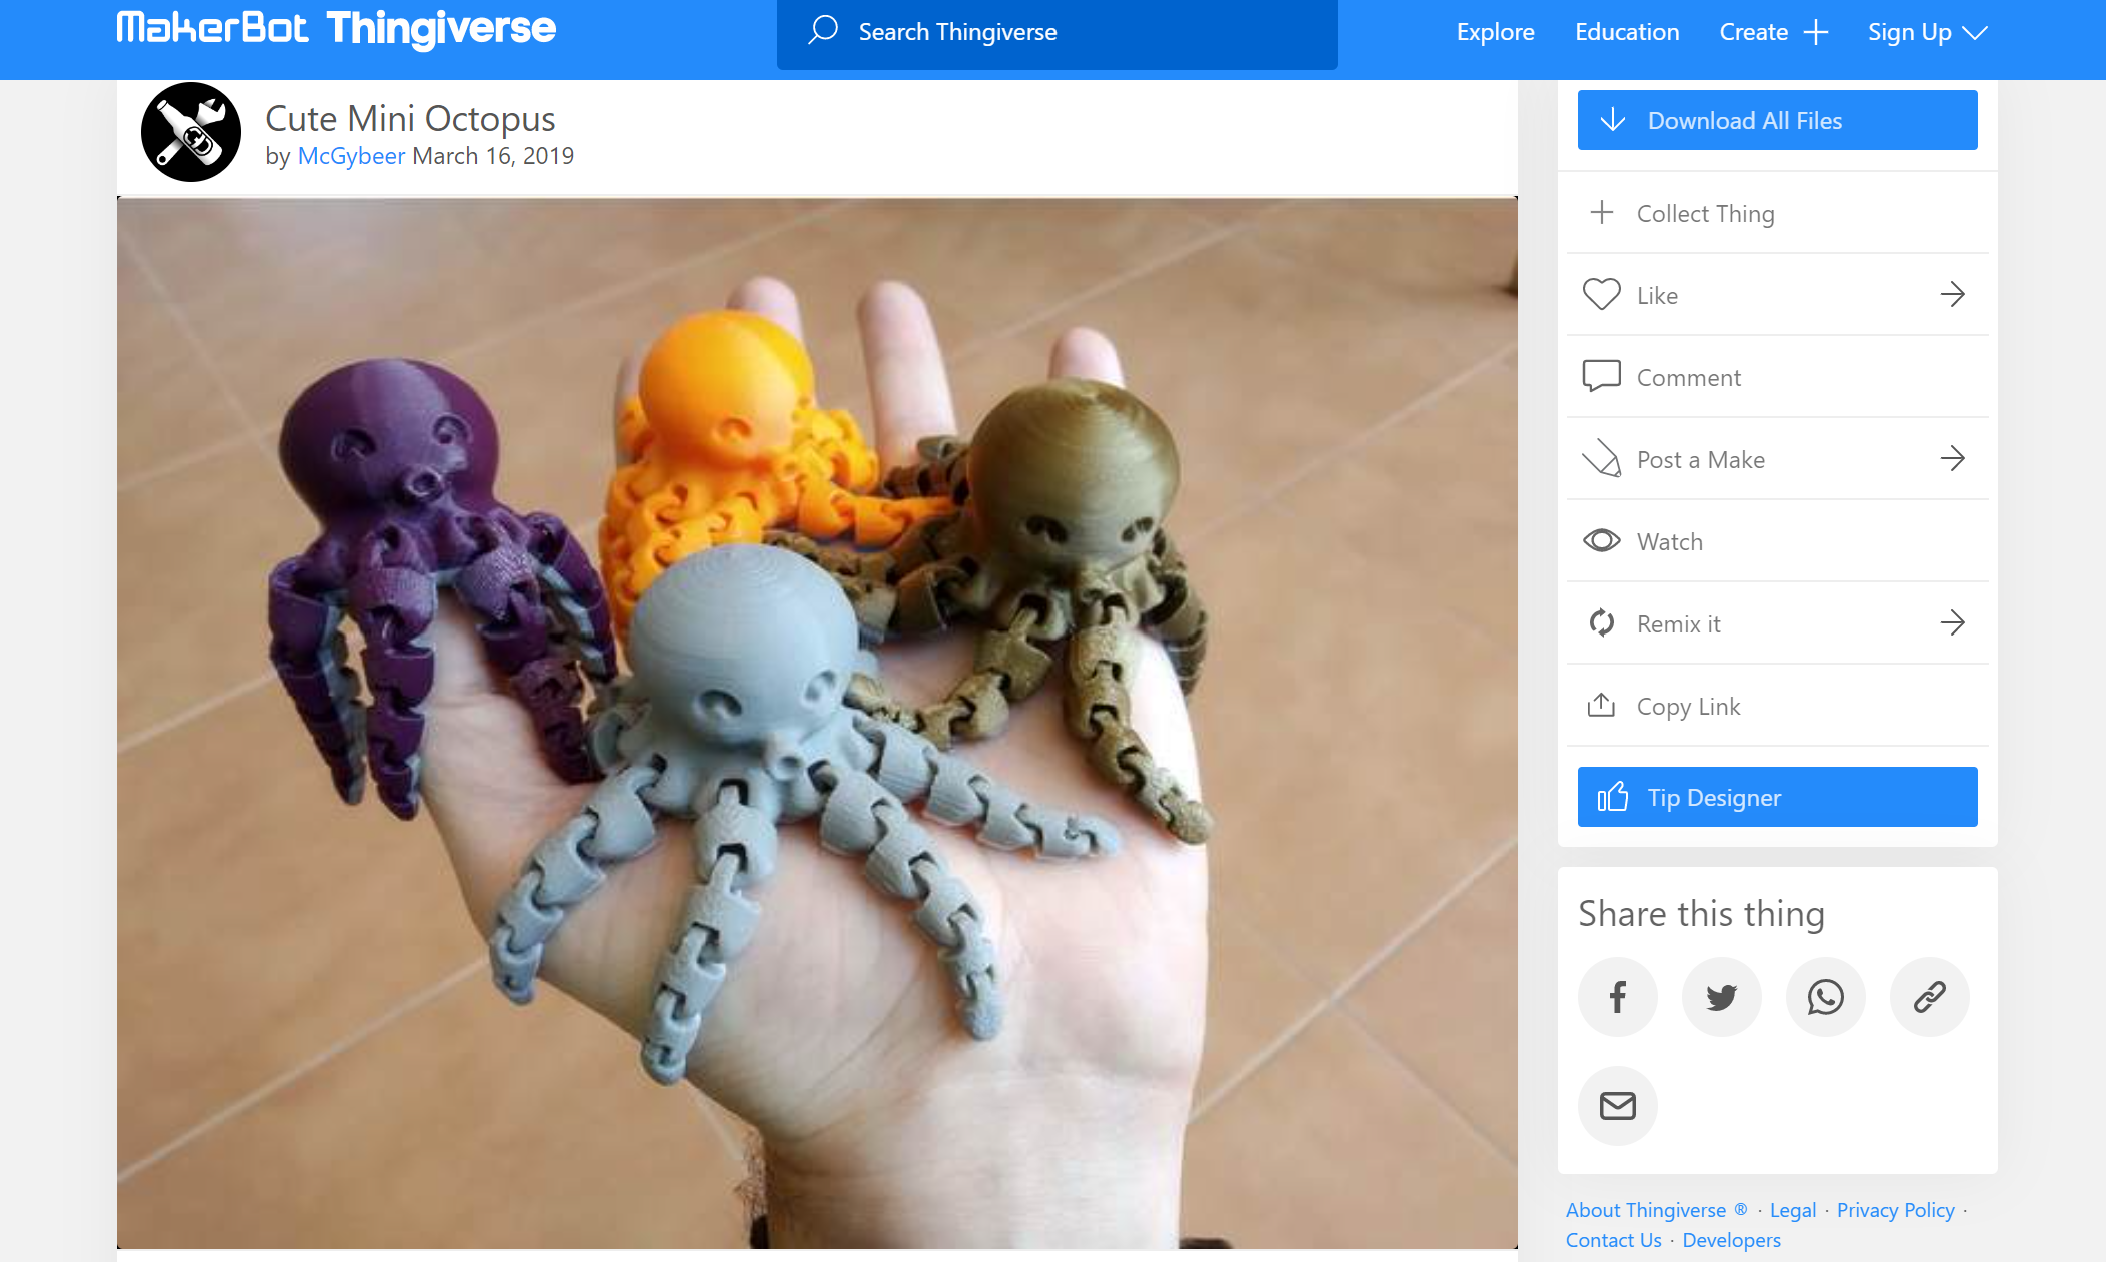
First things first, we couldn’t print anything unless we actually have an object to print, so after browsing Thingiverse we have decided to print these two object, we chose these things as they were not very complex nor so simple, and it would not take more that 10 hours to print.
Software Set up
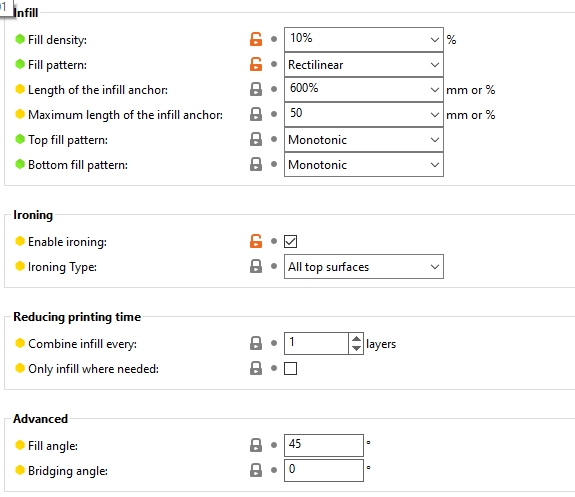
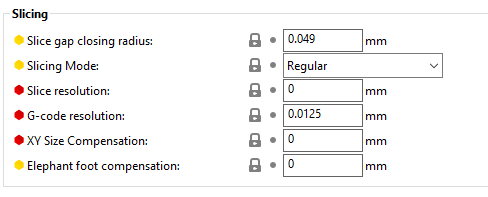
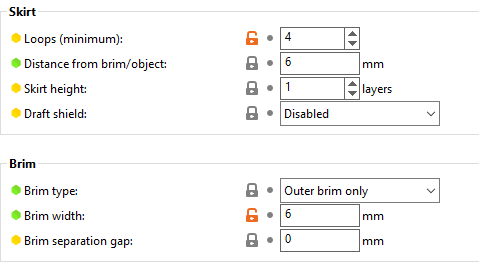
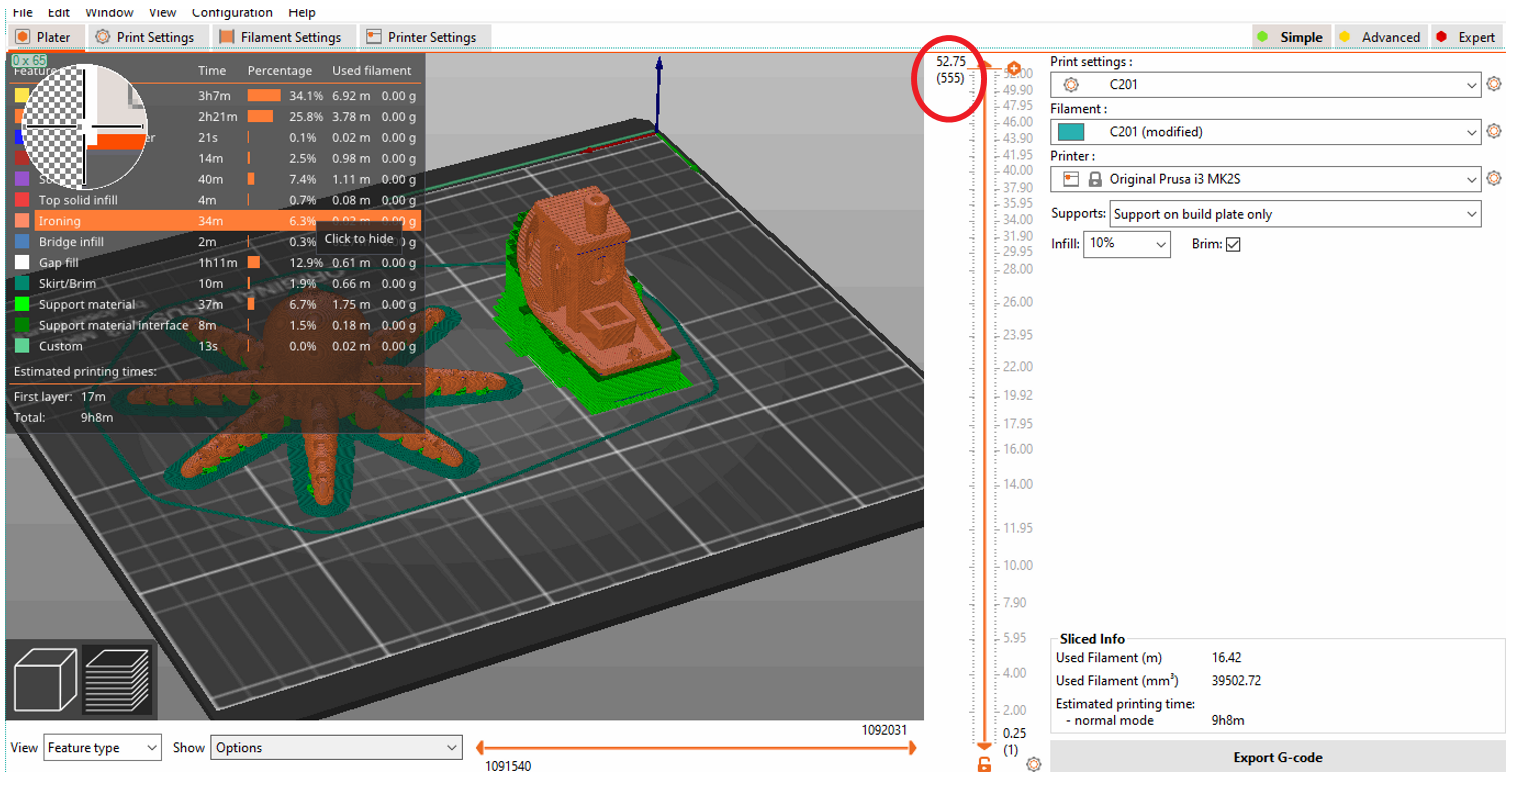
After downloading the objects and opening them with Prusa slicer, we had to change the settings to adjust to what is best for our objects, taking into consideration time to print and the quality of the print.

To set up the software we adjusted a few things such as:
infill Settings
Support Settings
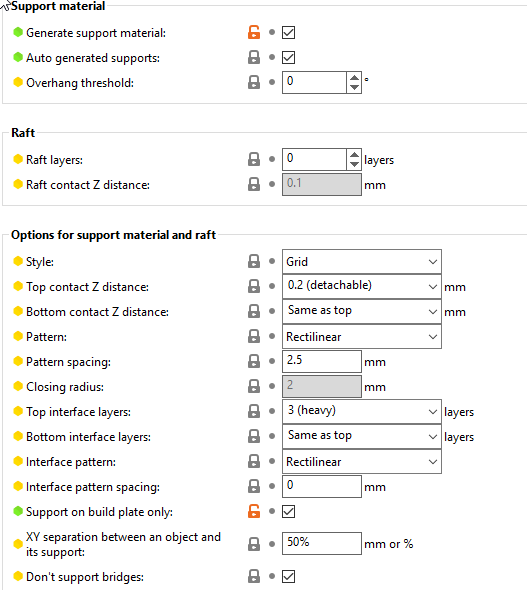
Layer Height
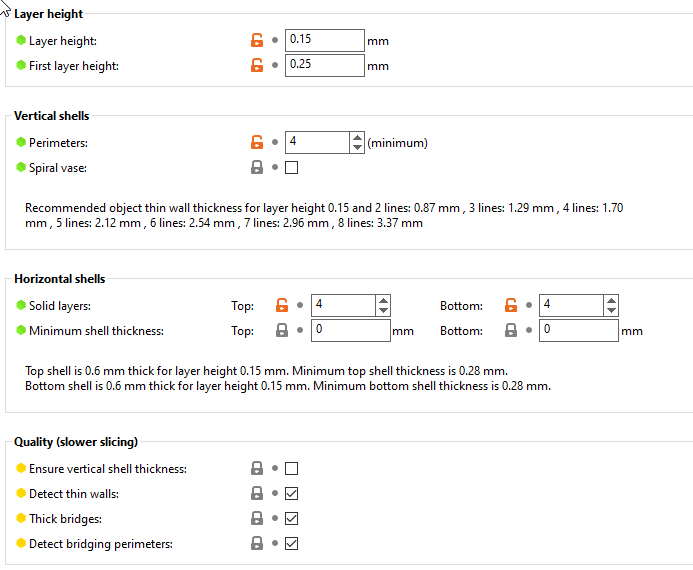
Resolution
Skirt & Brim
Filament Settings
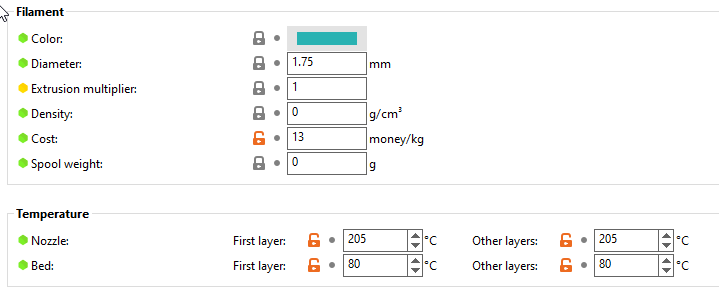
Genereal Settings

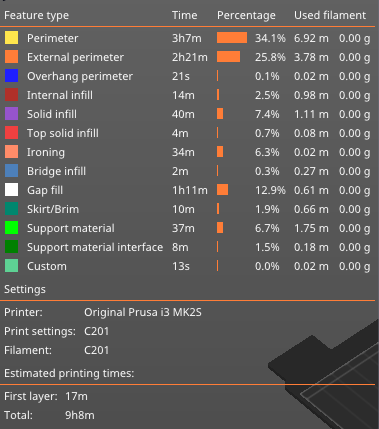
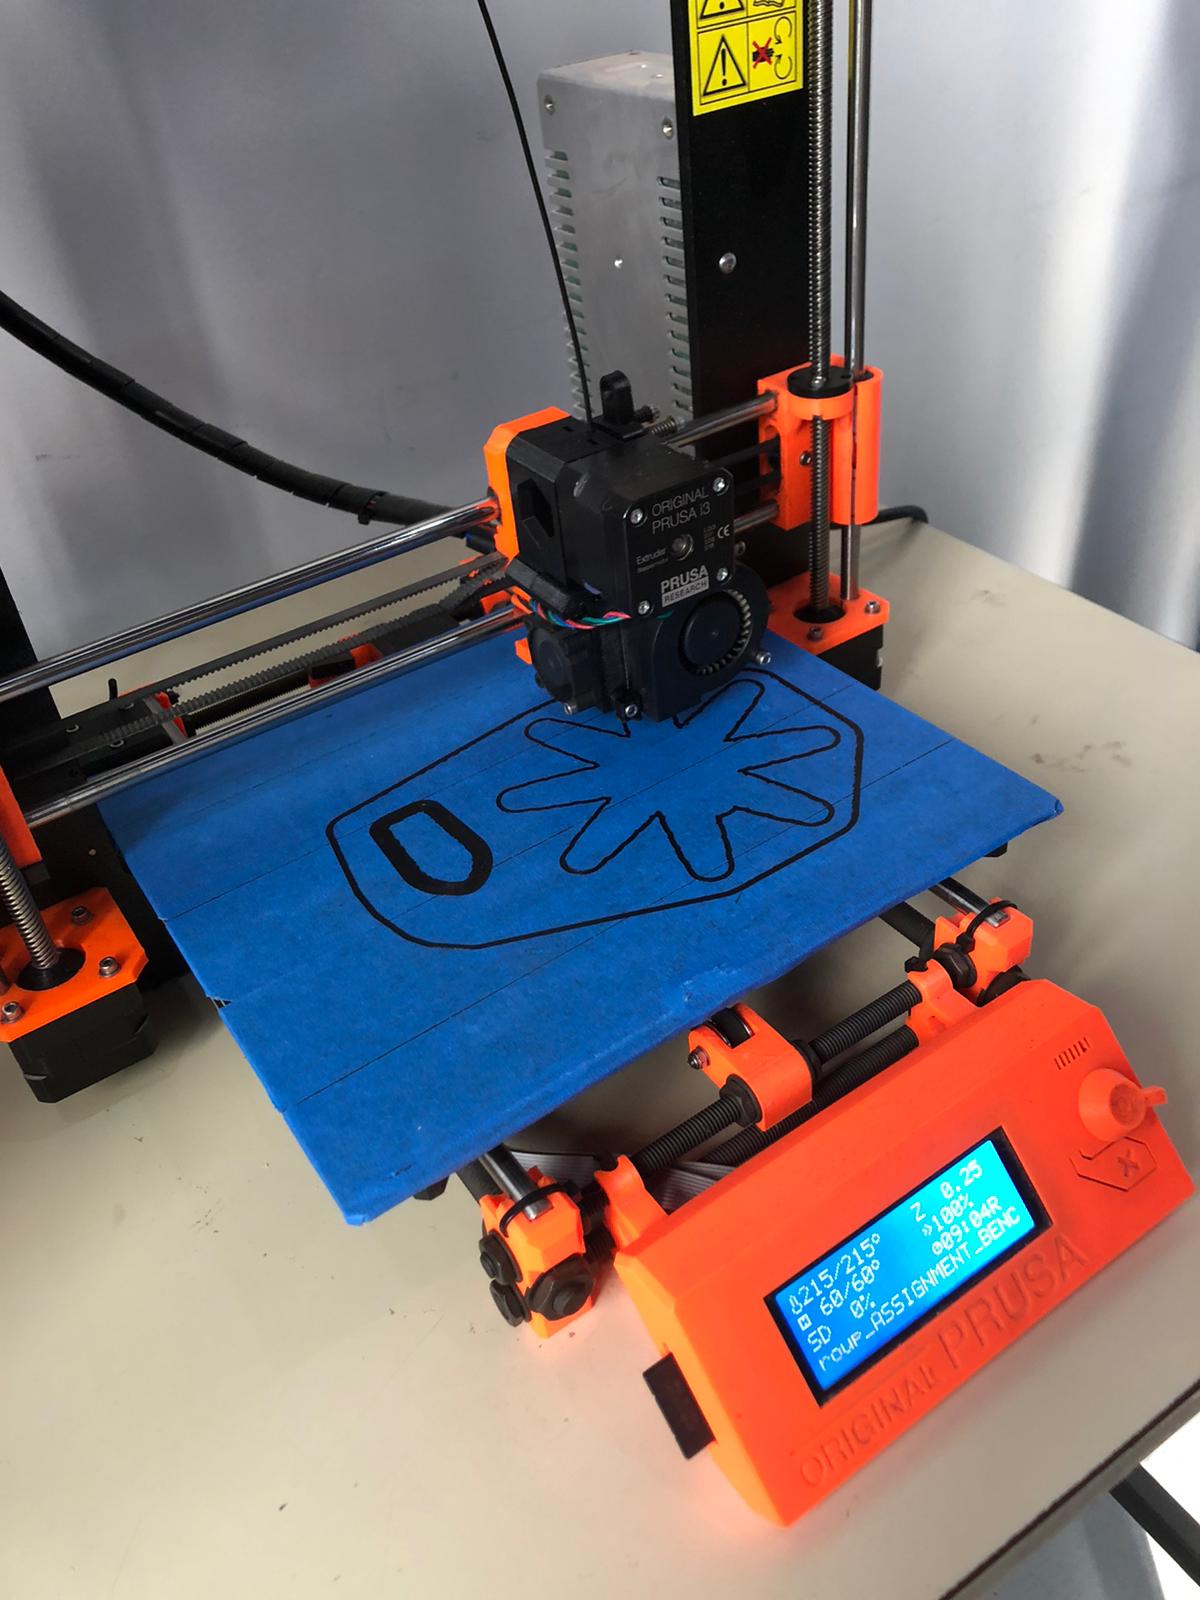
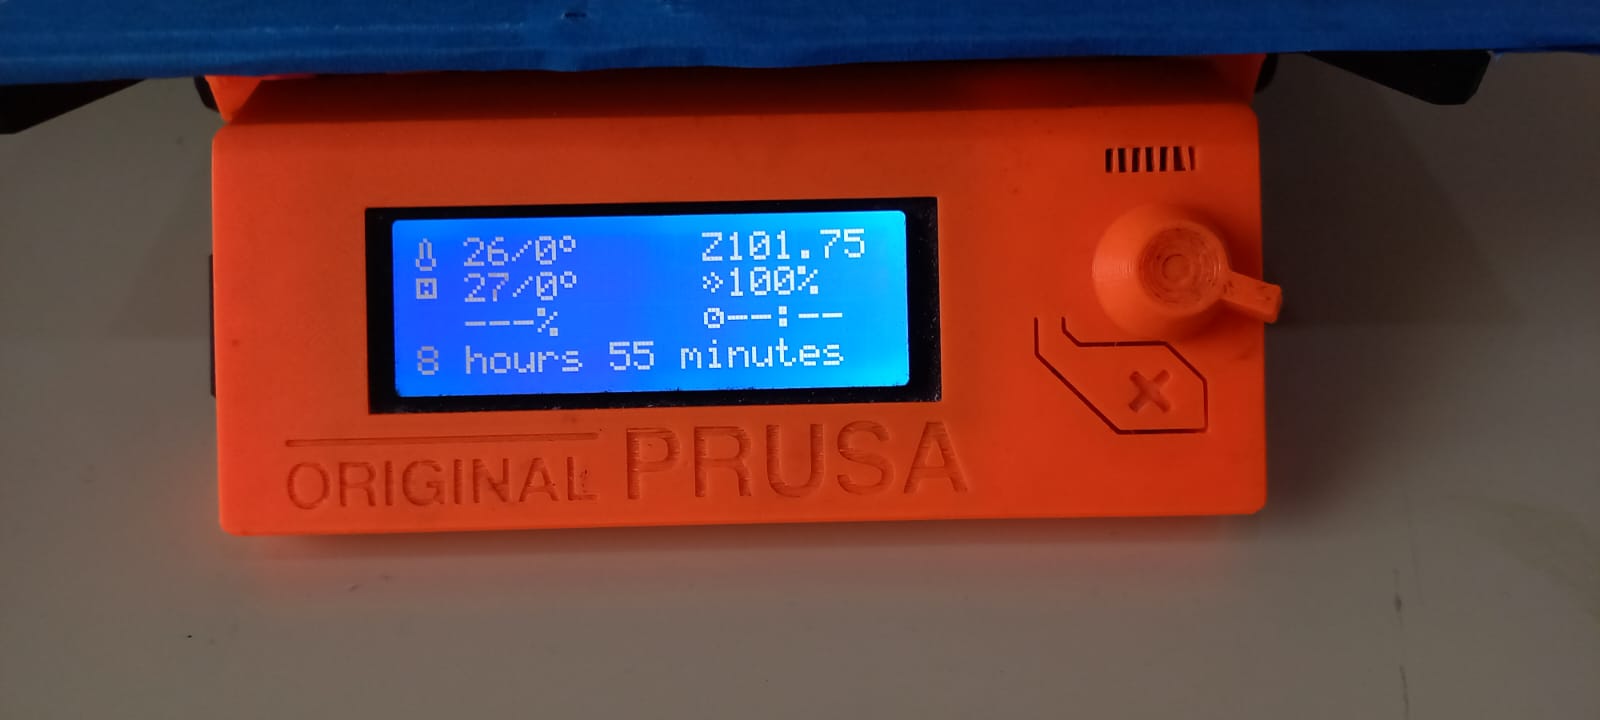
With all of these settings we saw that it would take approximately 9 hours and 555 layers in total.
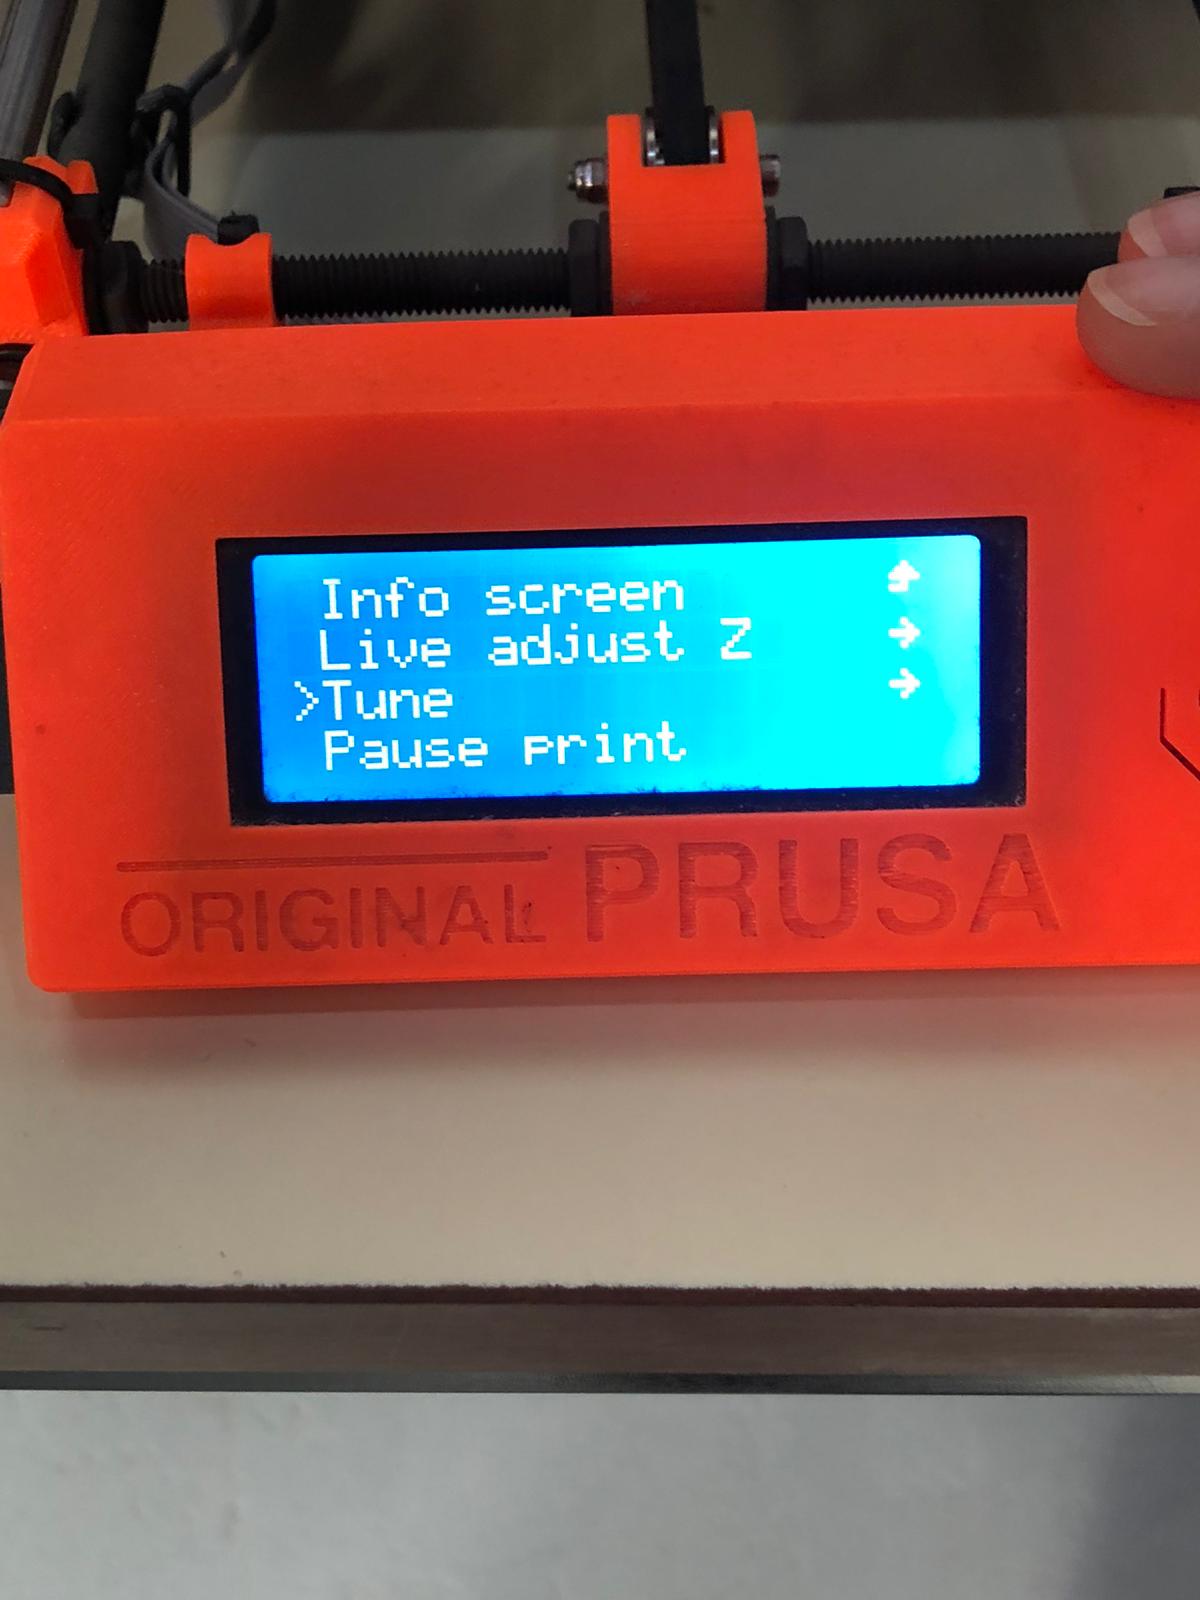
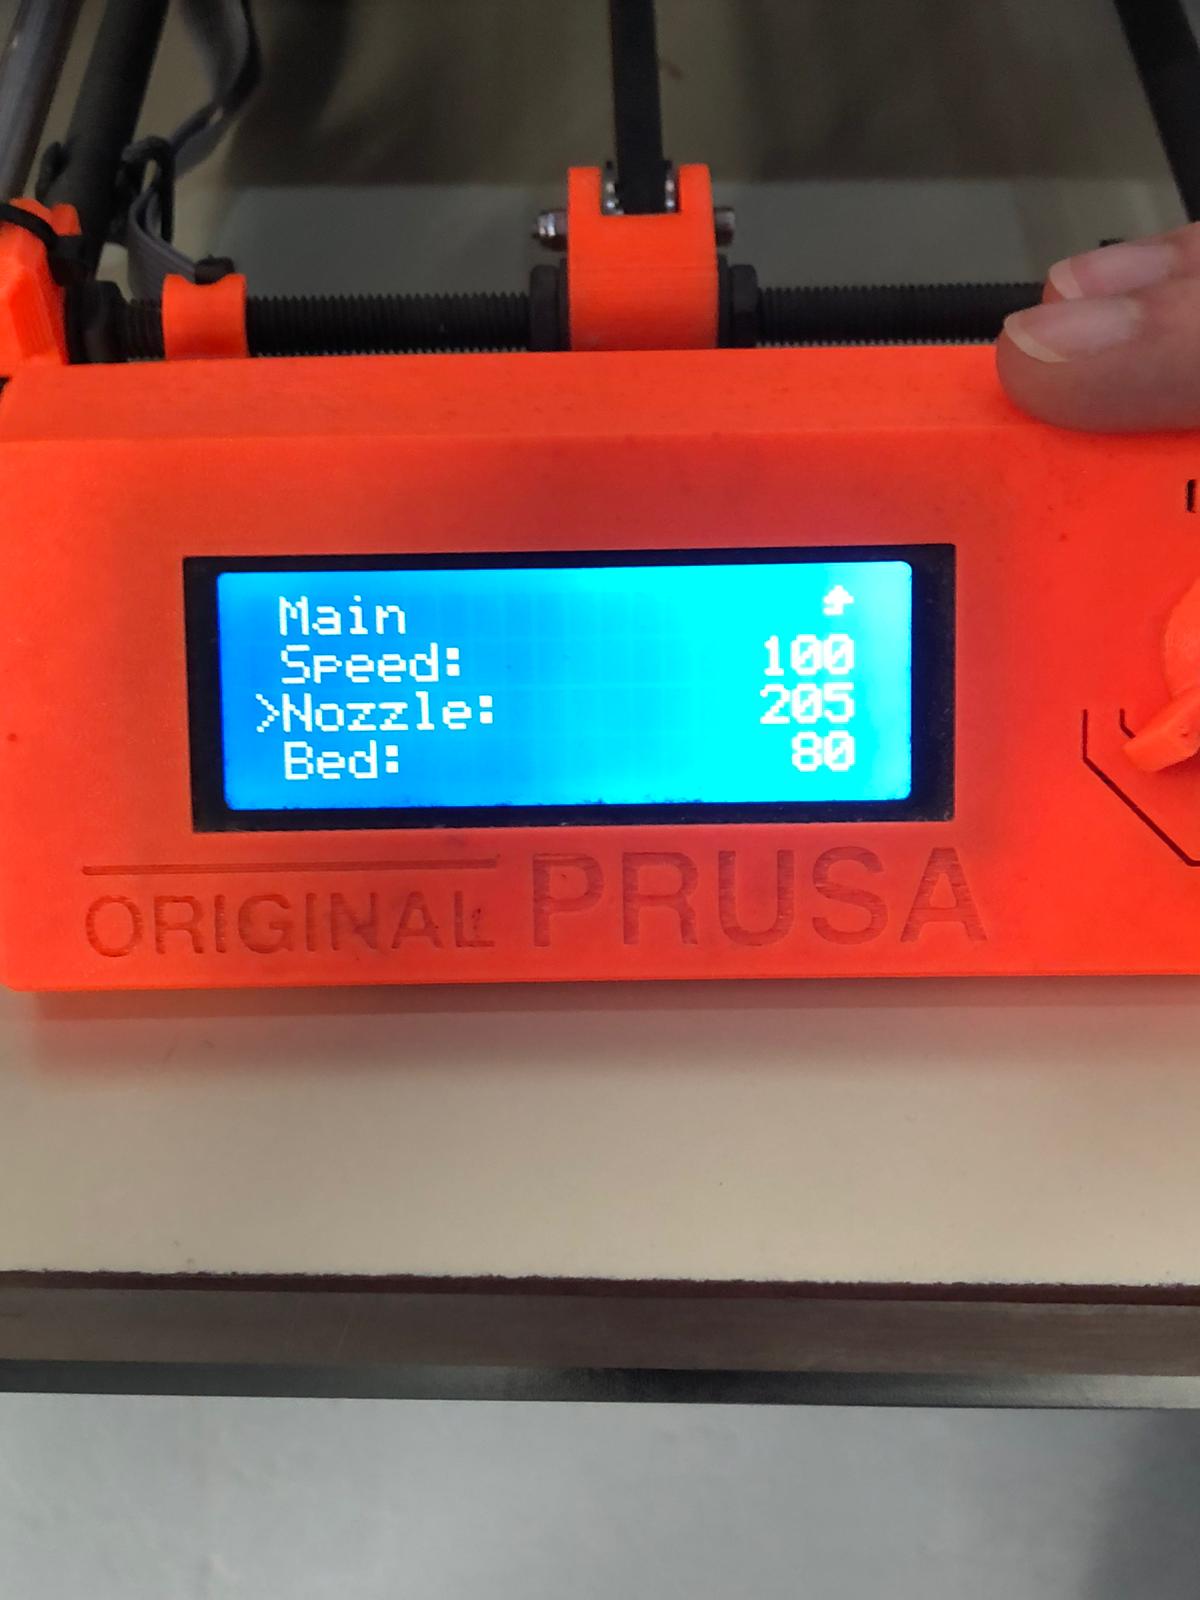
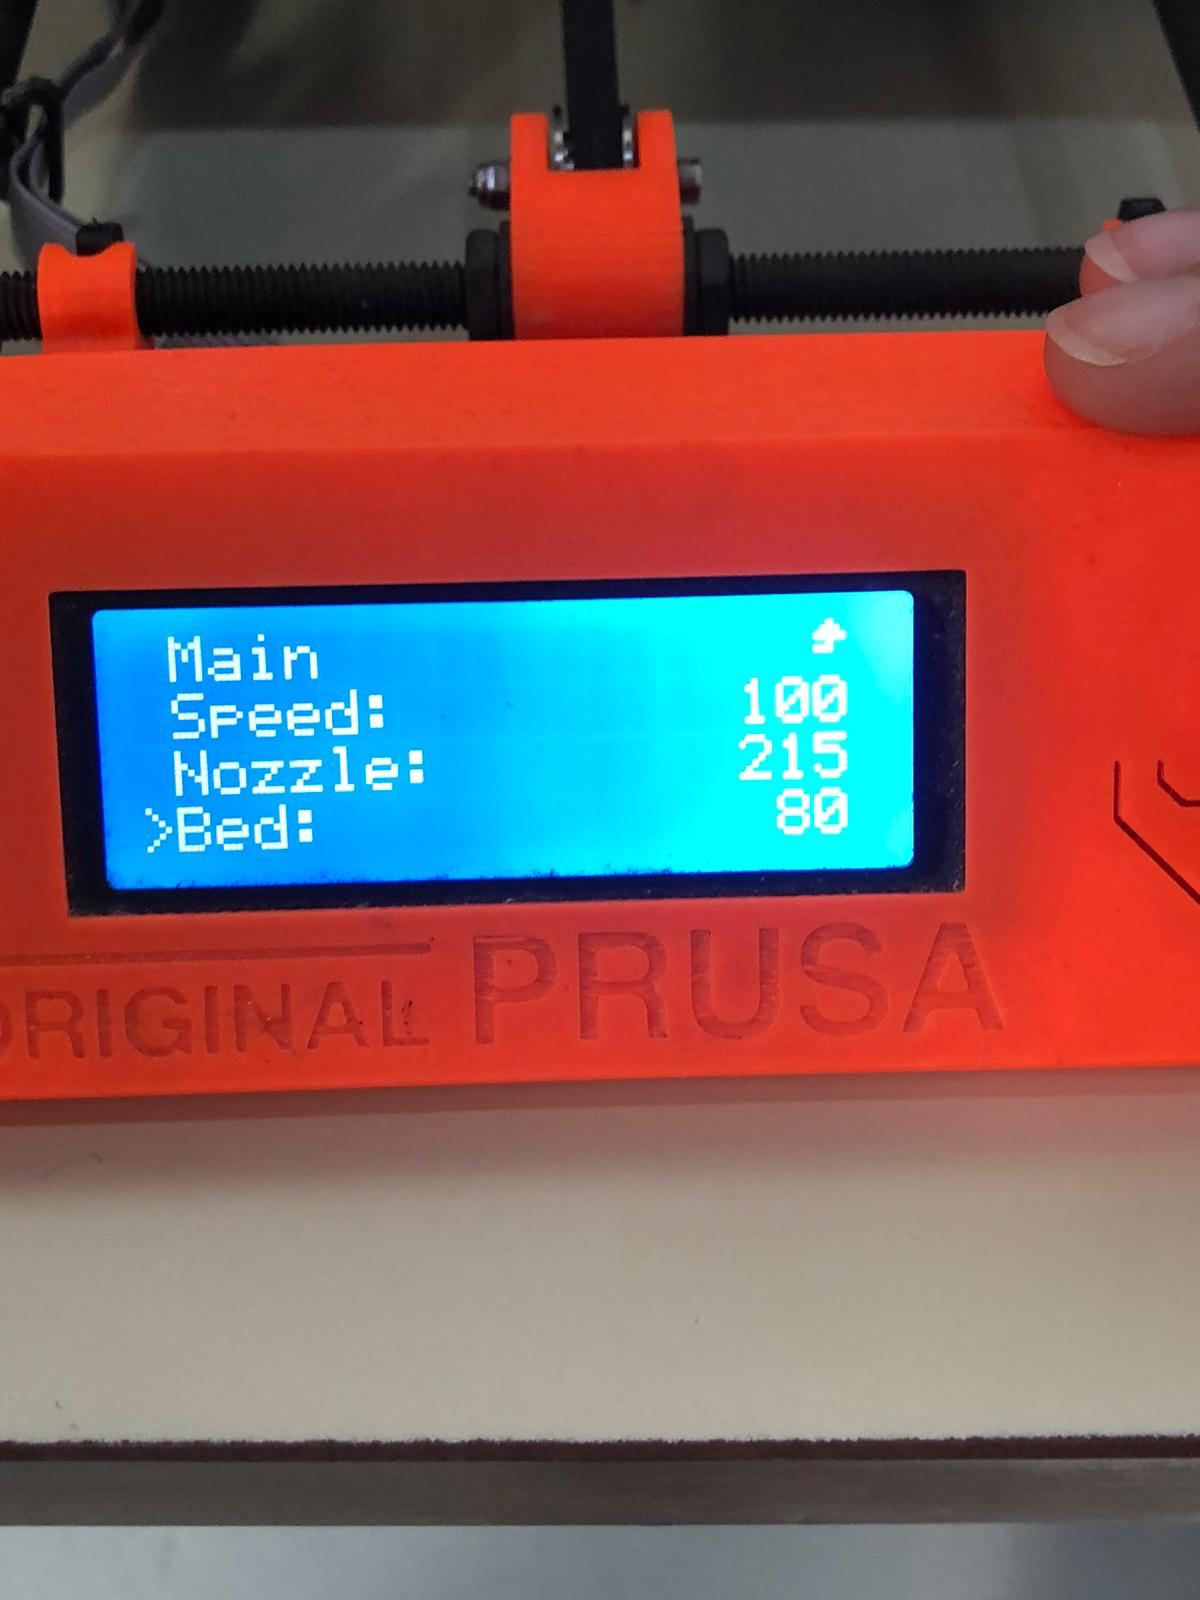
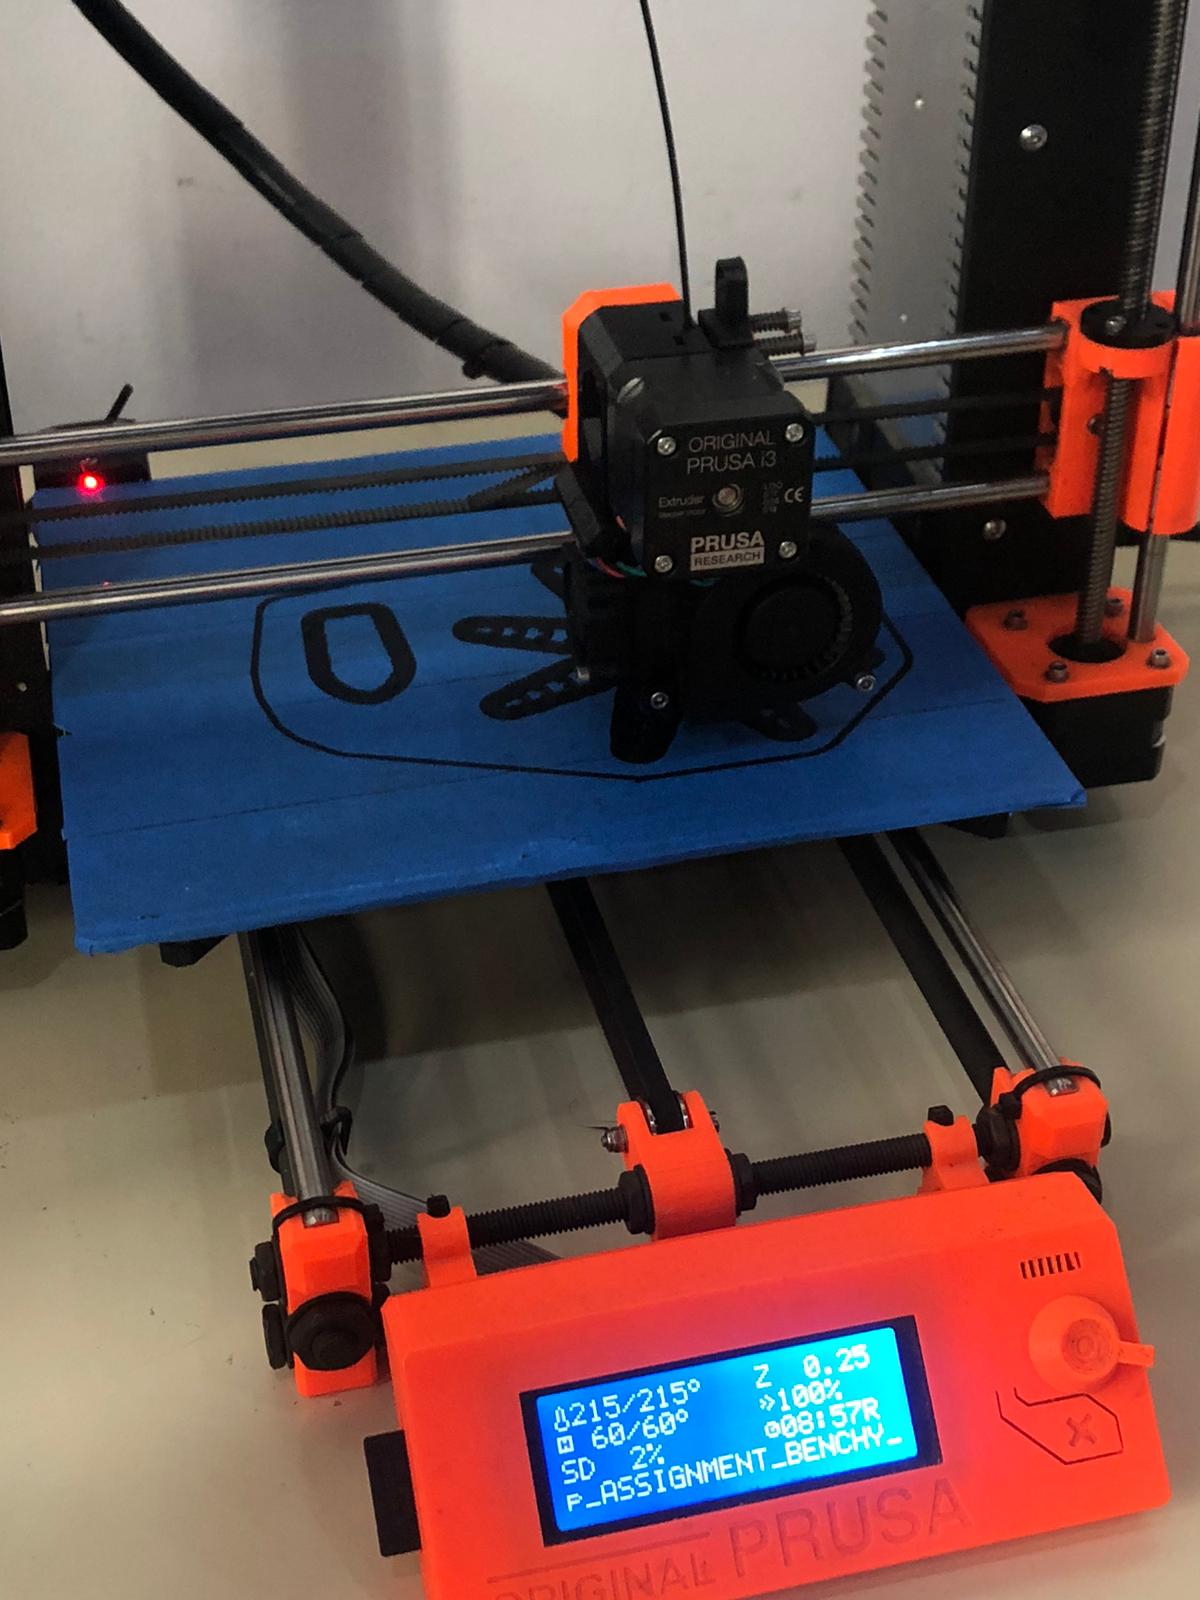
Printer Set Up
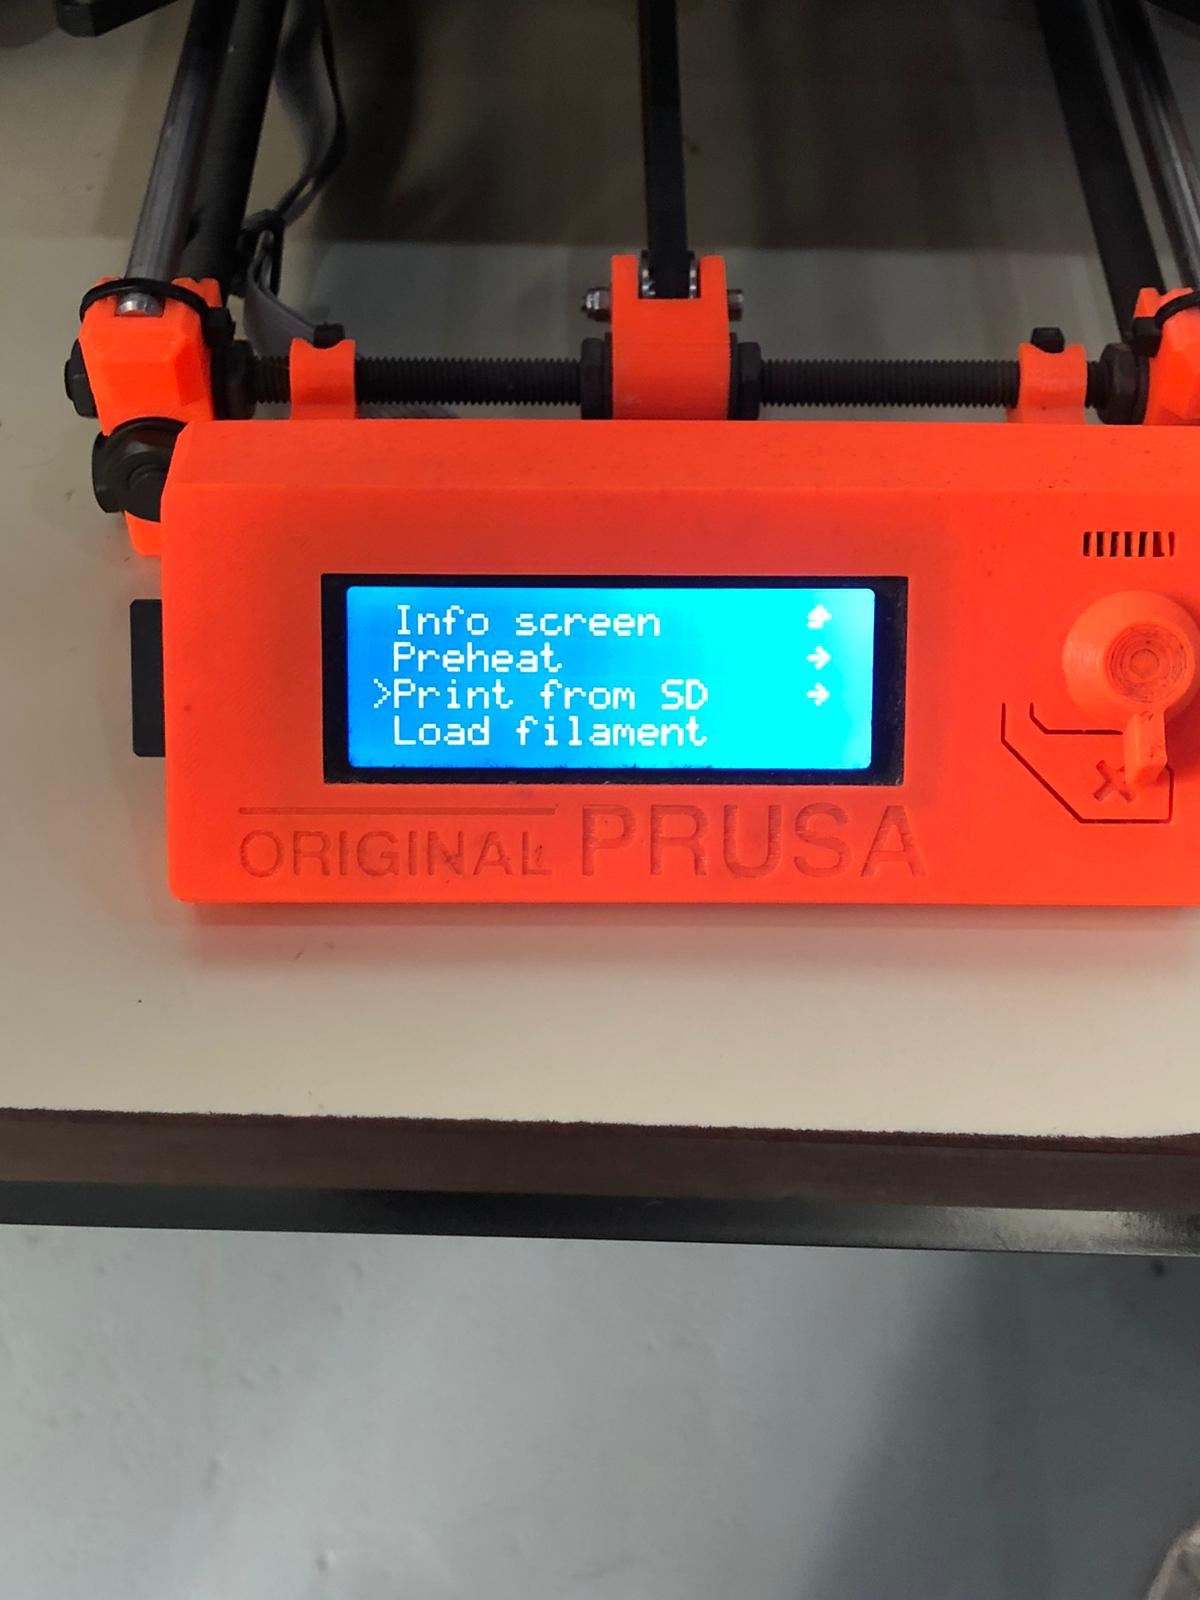
After we are done setting up the software and settings we would export the file into an SD card and would insert it into the printer.

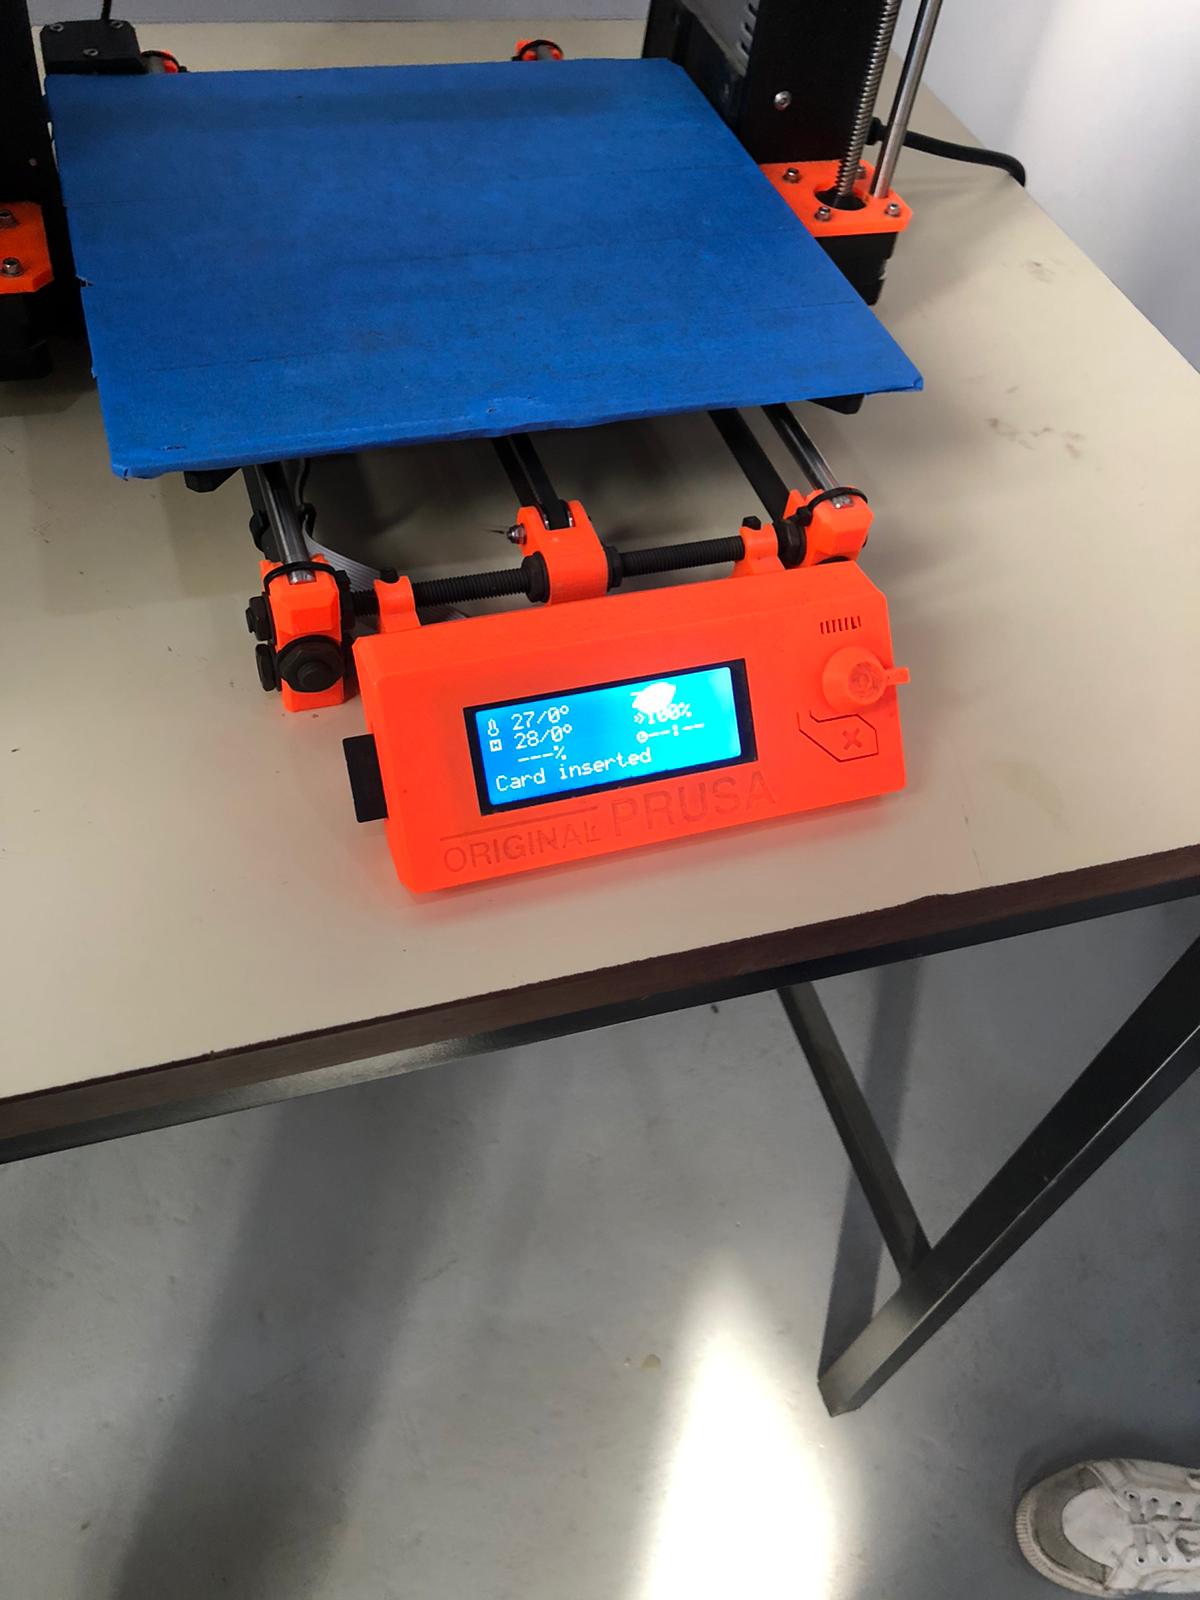
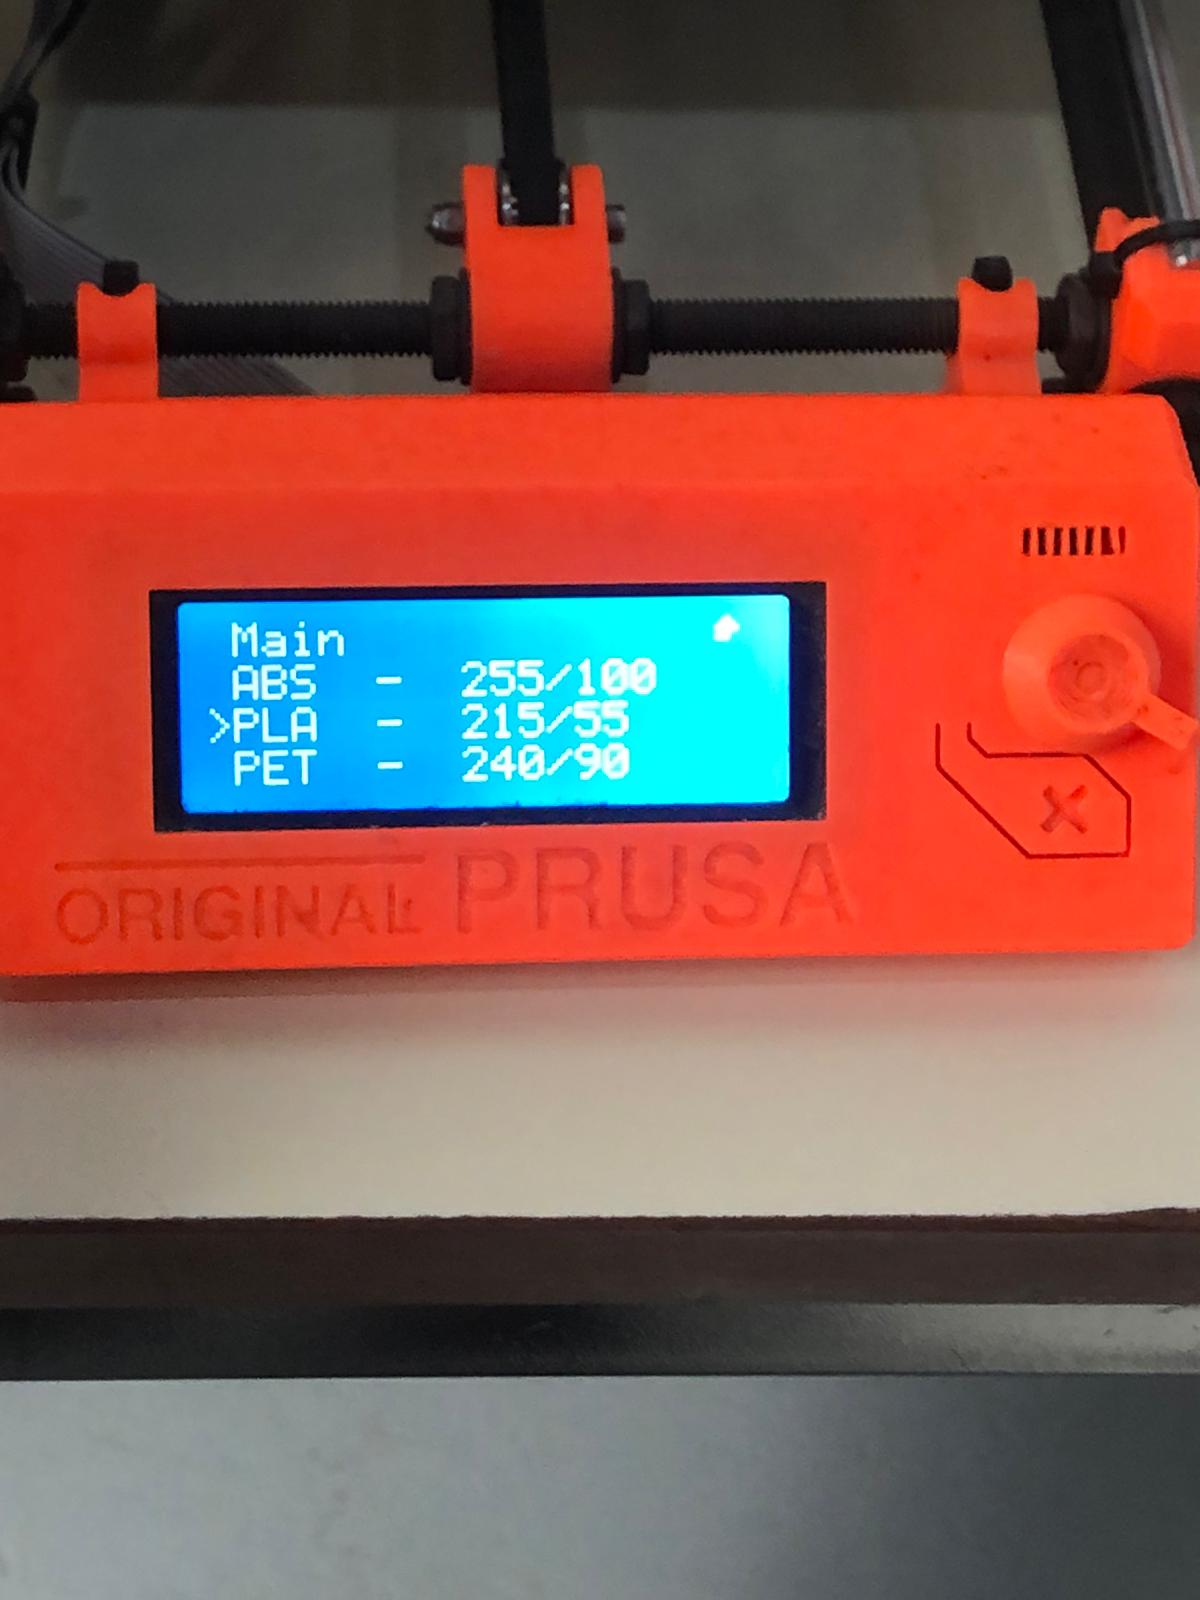
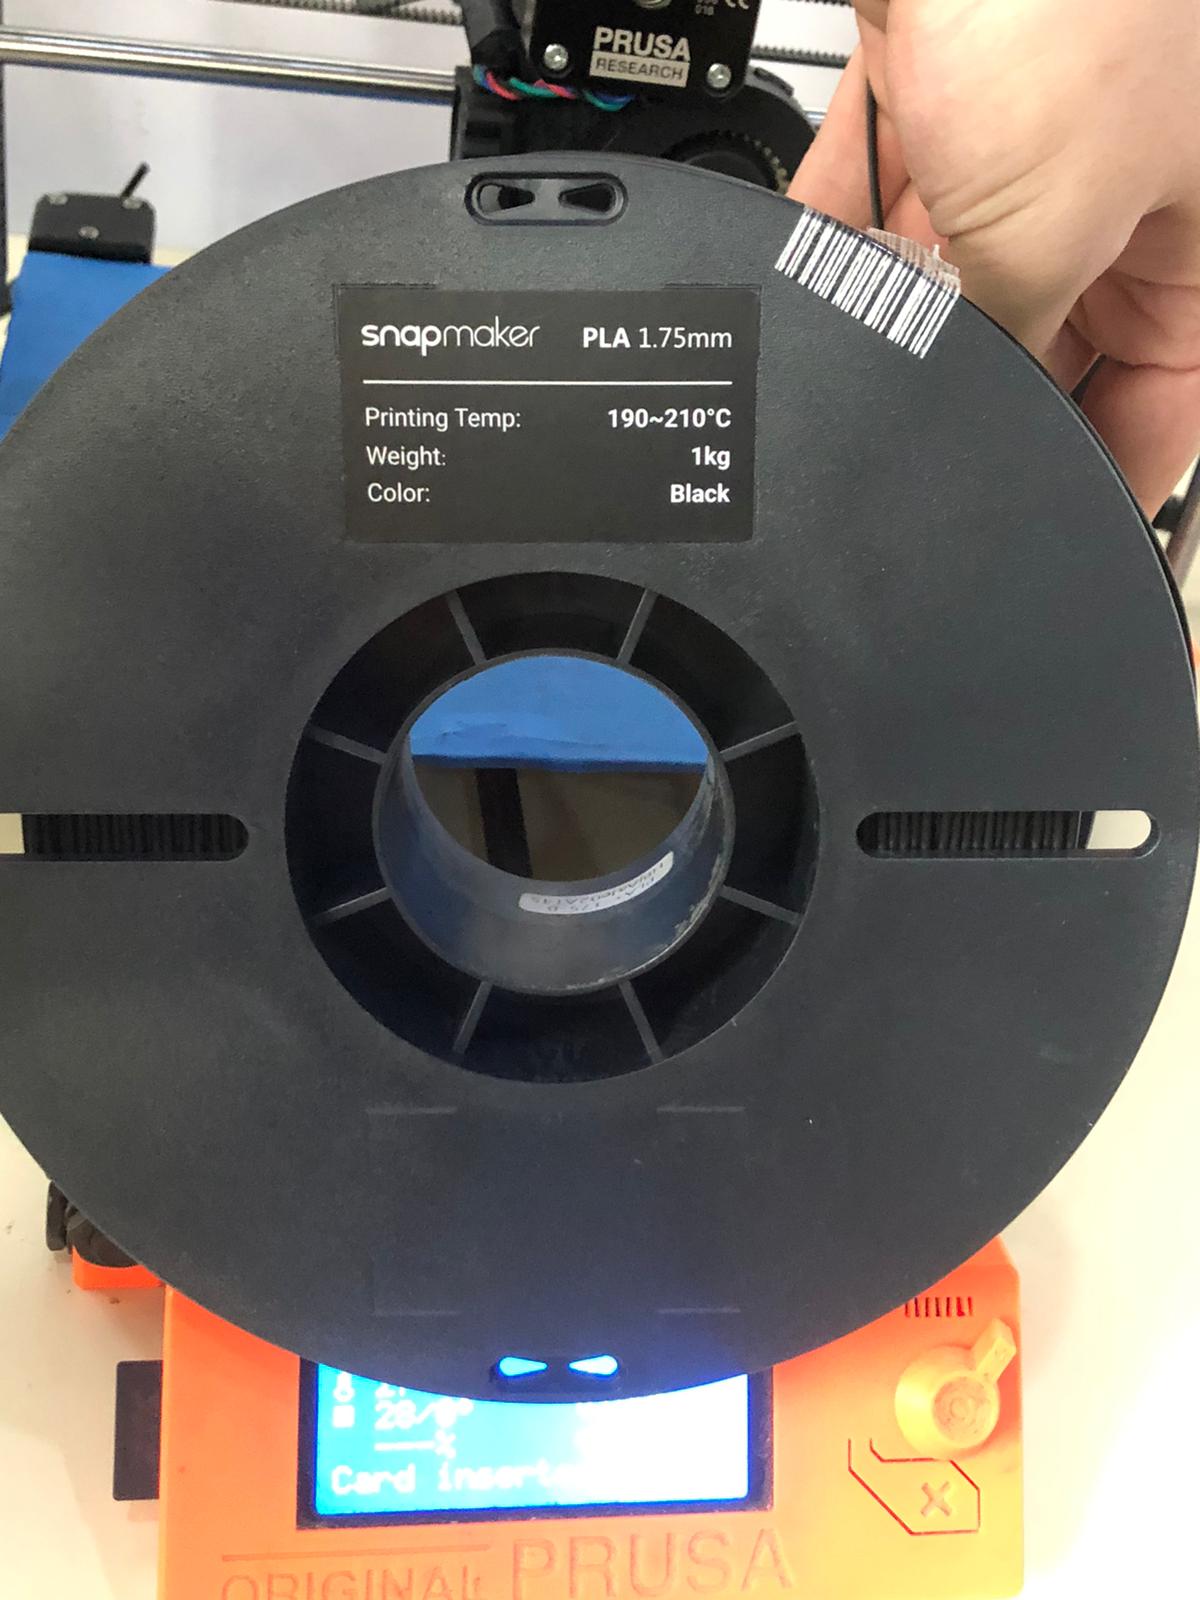
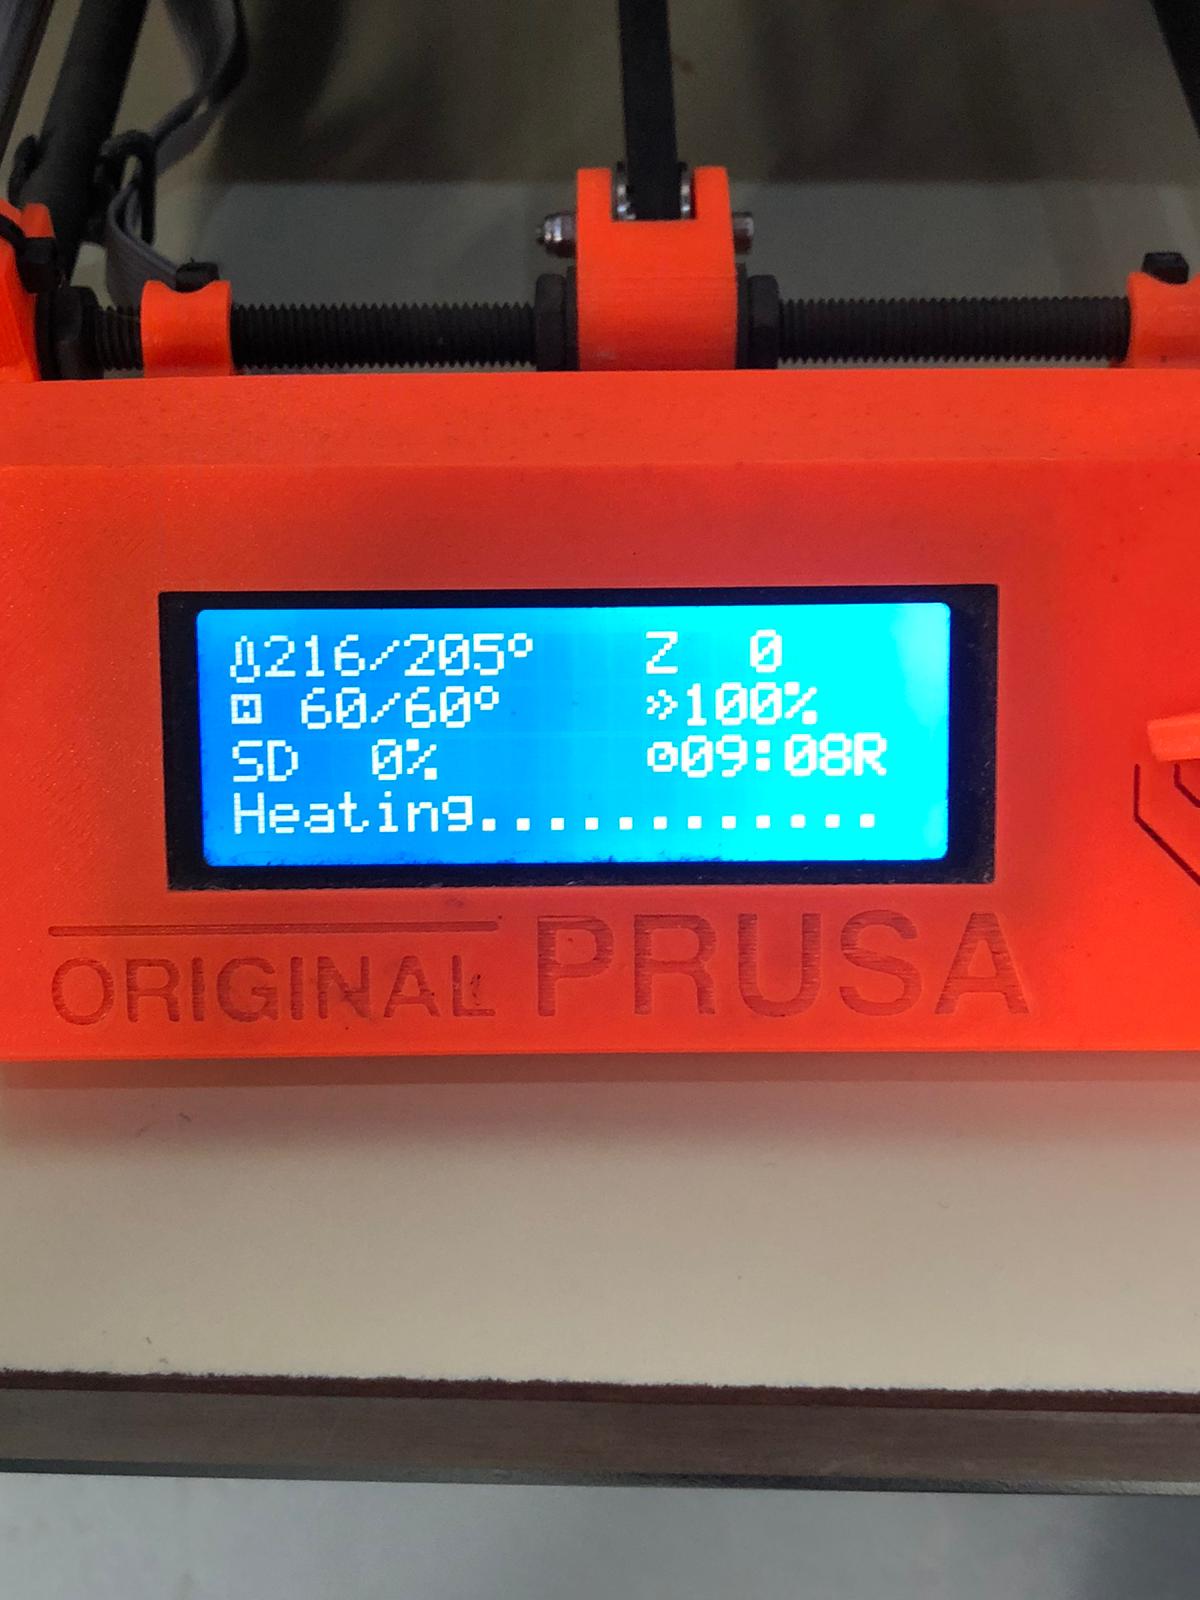
Preheat First thing we need to do is preheat the filament based on what material it is, in our case its PLA 1.75mm
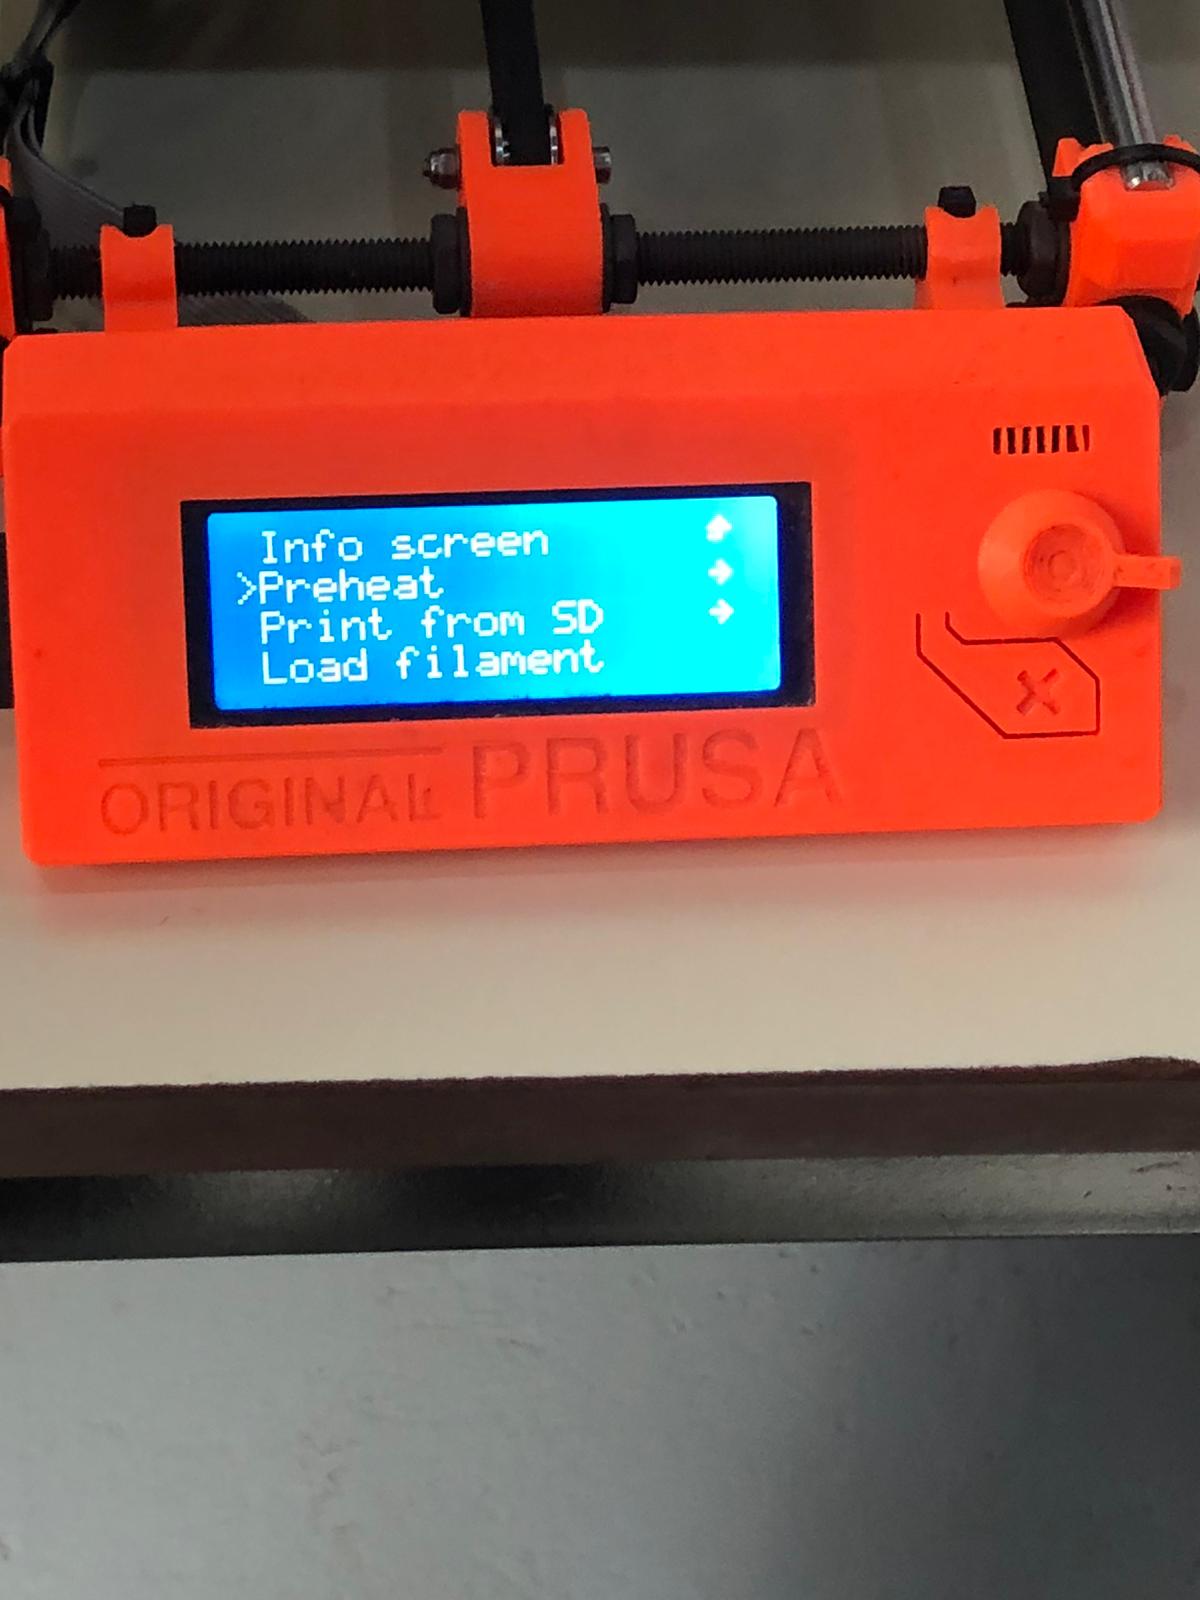
Choosing file Then we chose the file we exported from the software.
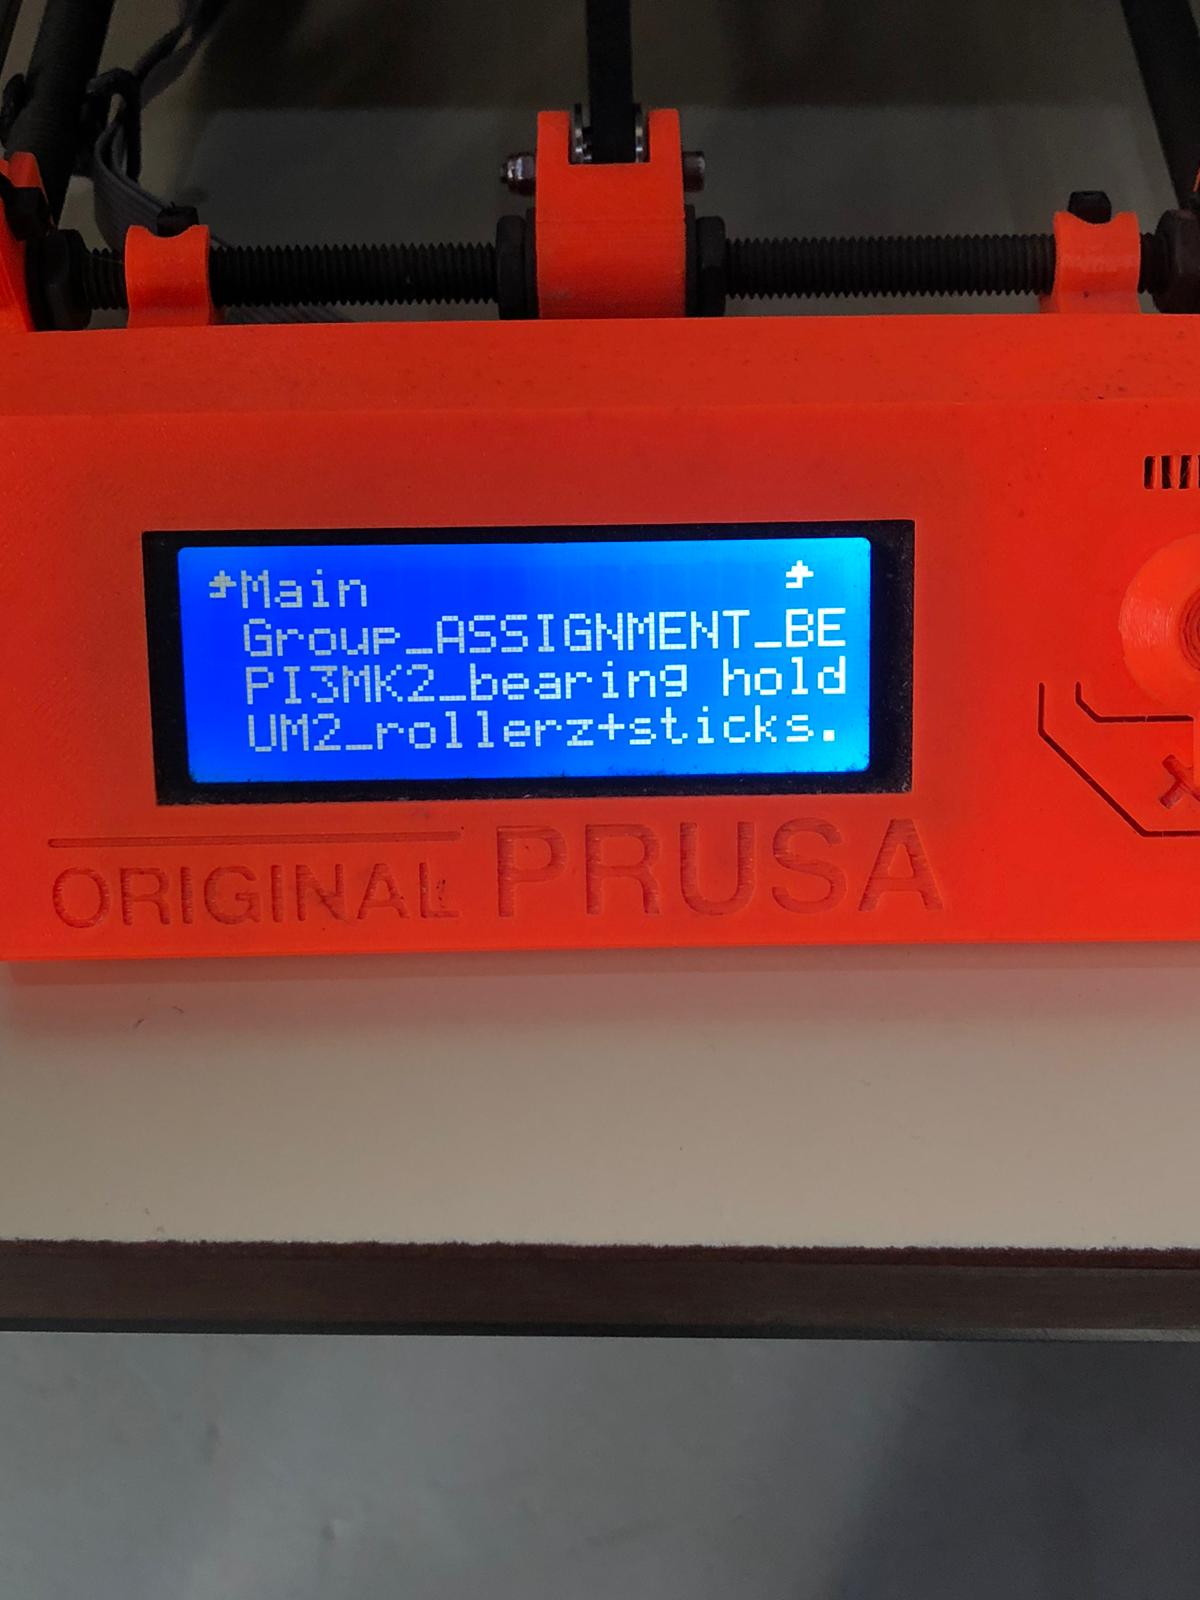
Tuning Tempratures (Bed & Nozzle)

Once everything is done as shown below, we would start the printing process.
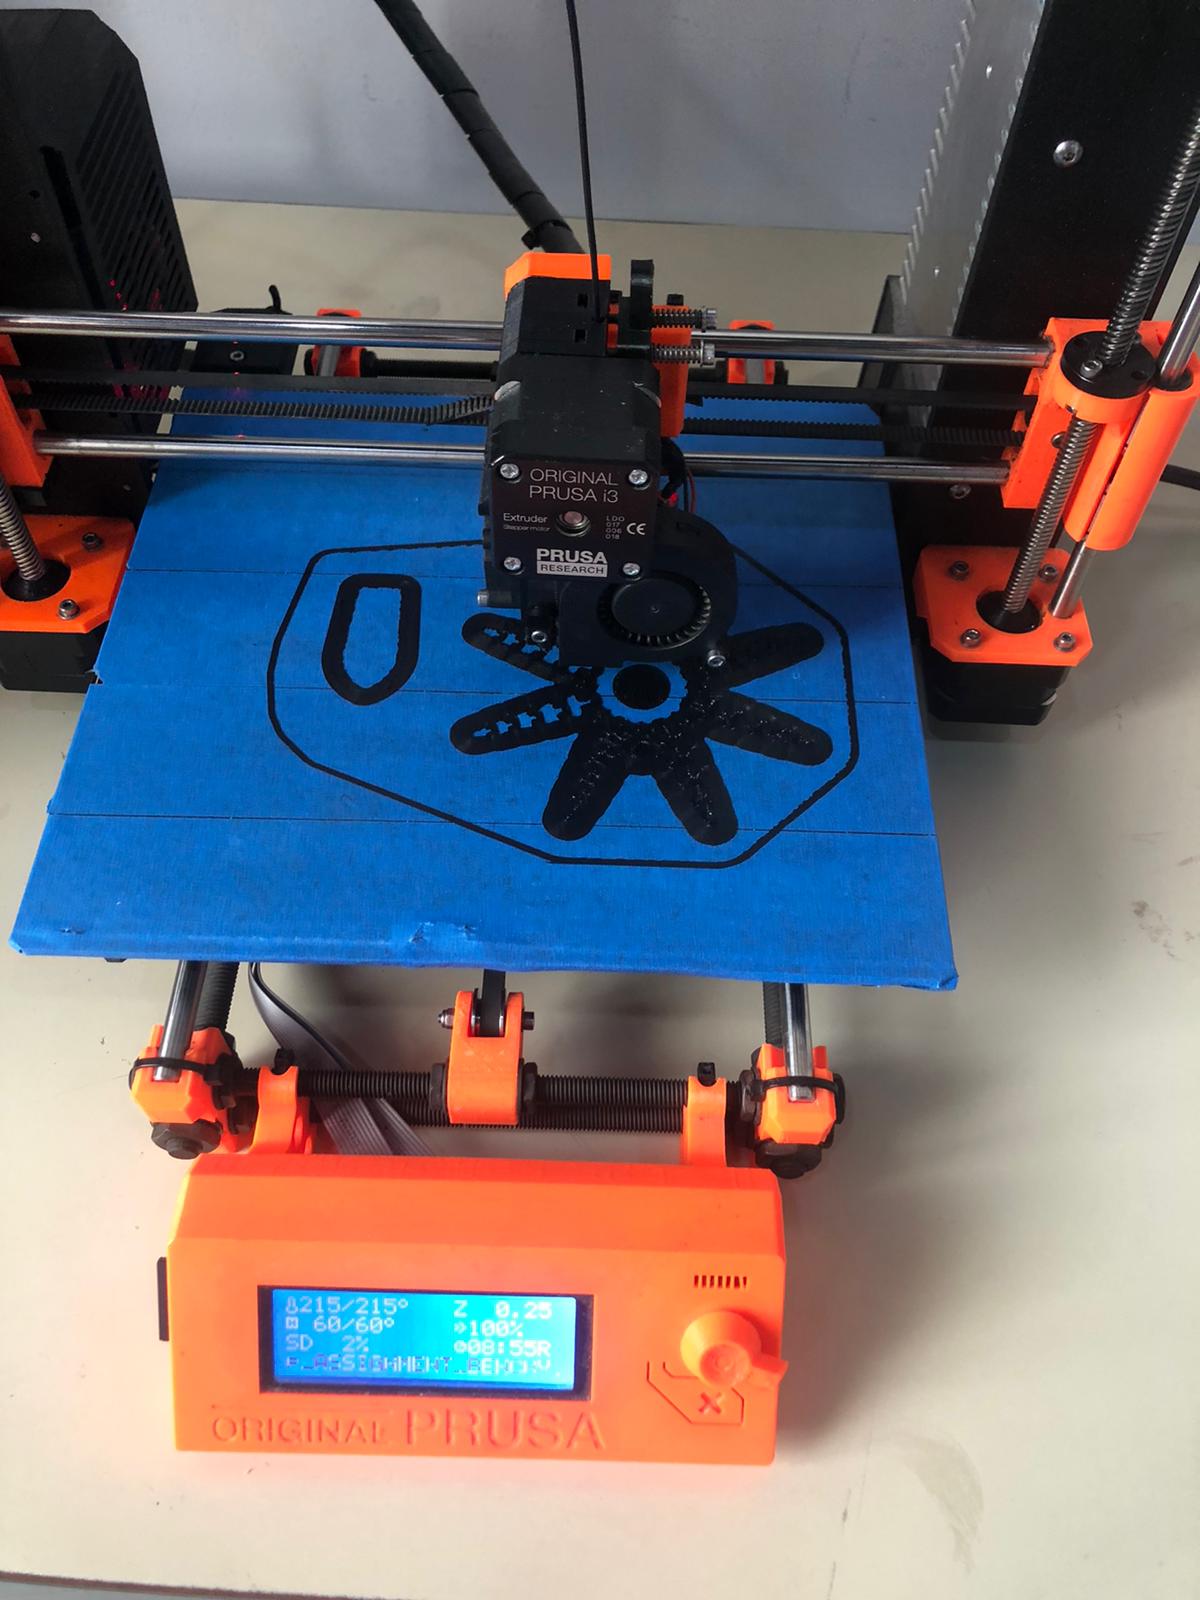
First Layer
First the machine would print out a frame for the build.
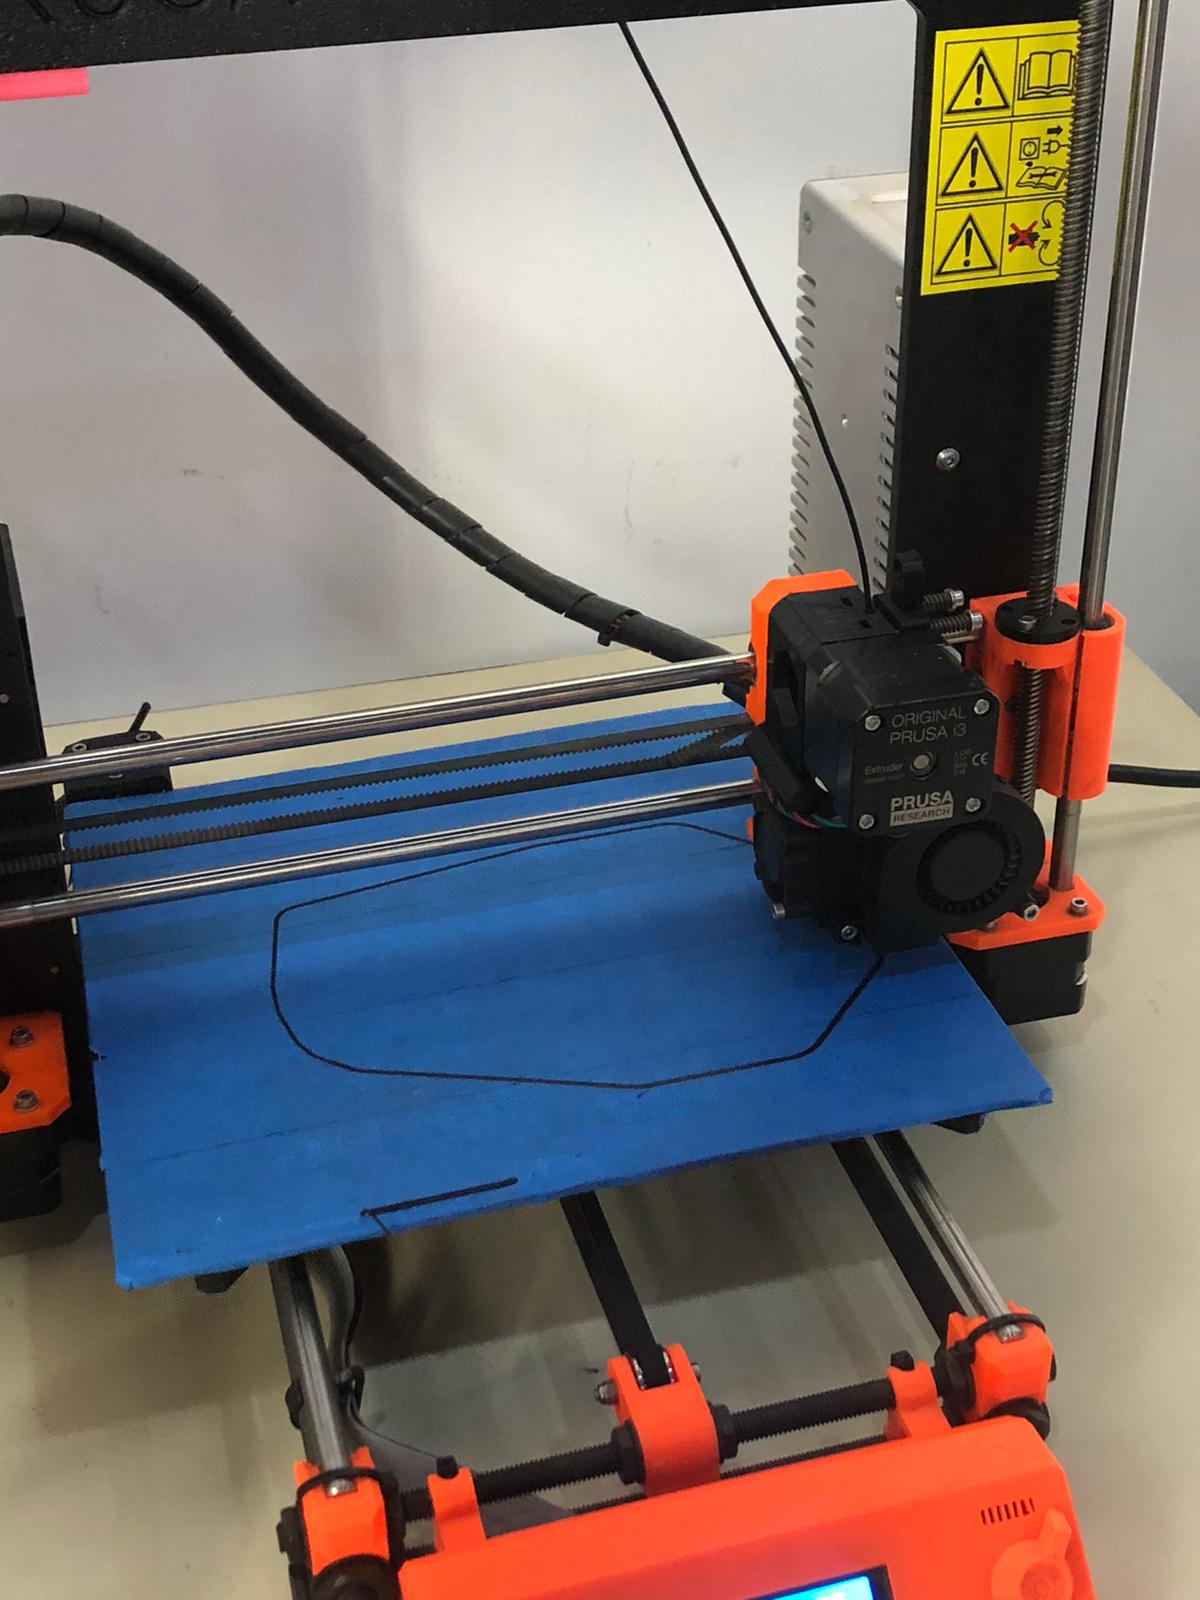
Then it would print the Brim for the objects, a brim is the support for the object as it is getting printed.
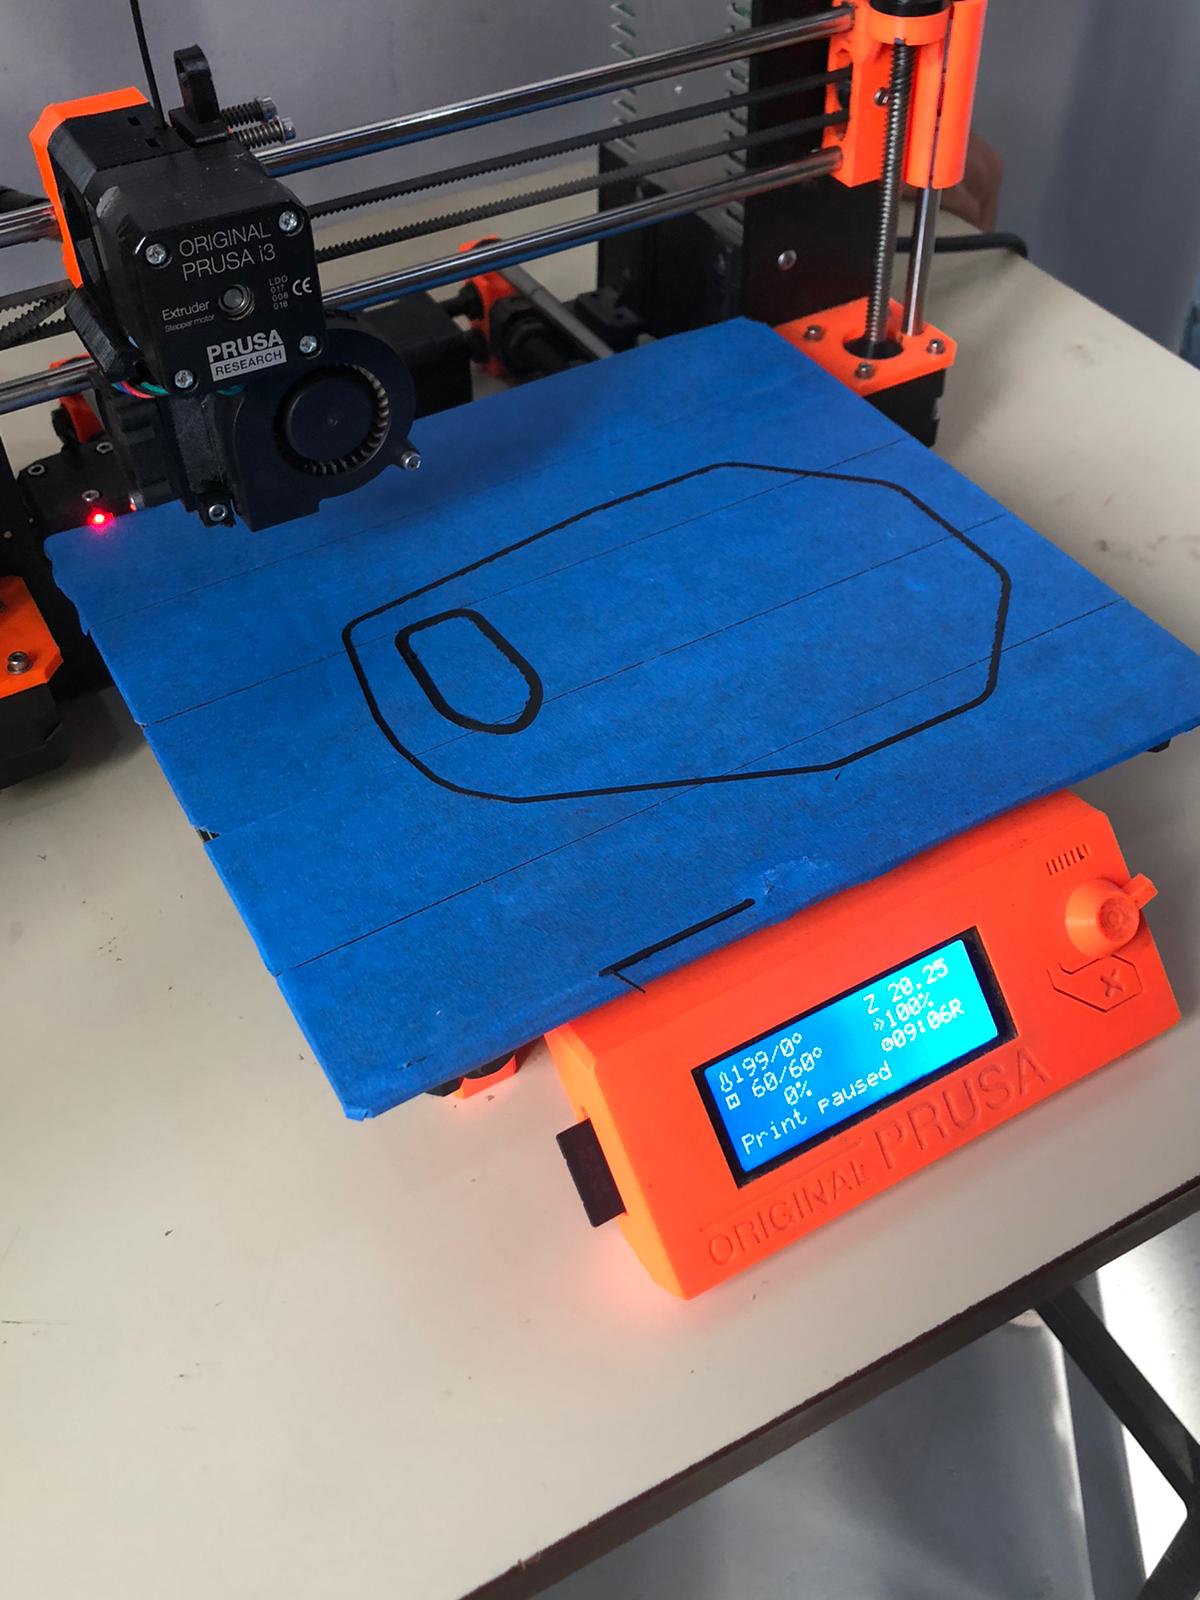
After the brim is done, first layer would start getting printed.
Important note: first layer should be supervised for prevention of any defects or malfunctions or any sort of problems might occur, when the first layer is done feel free to let the printer do its thing :)
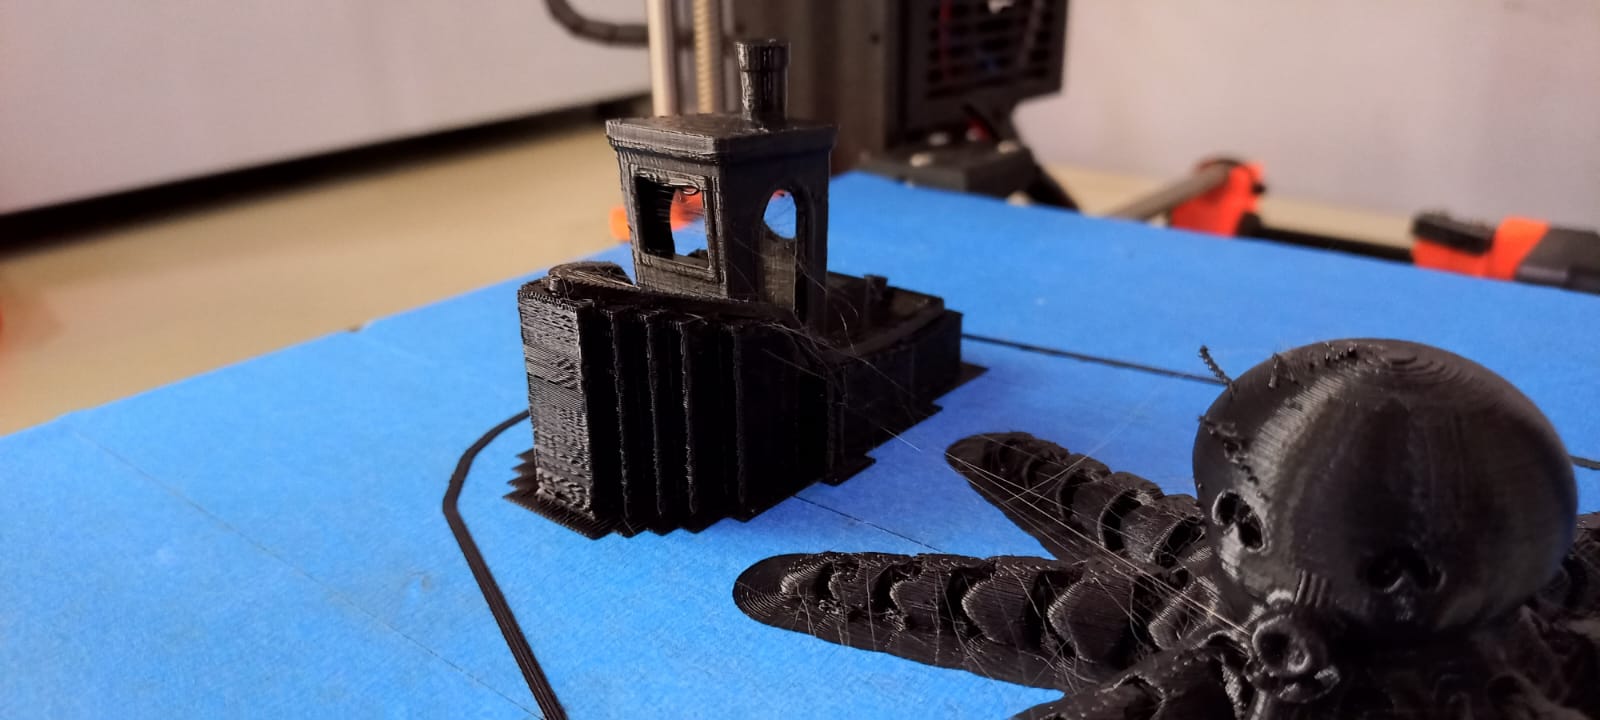
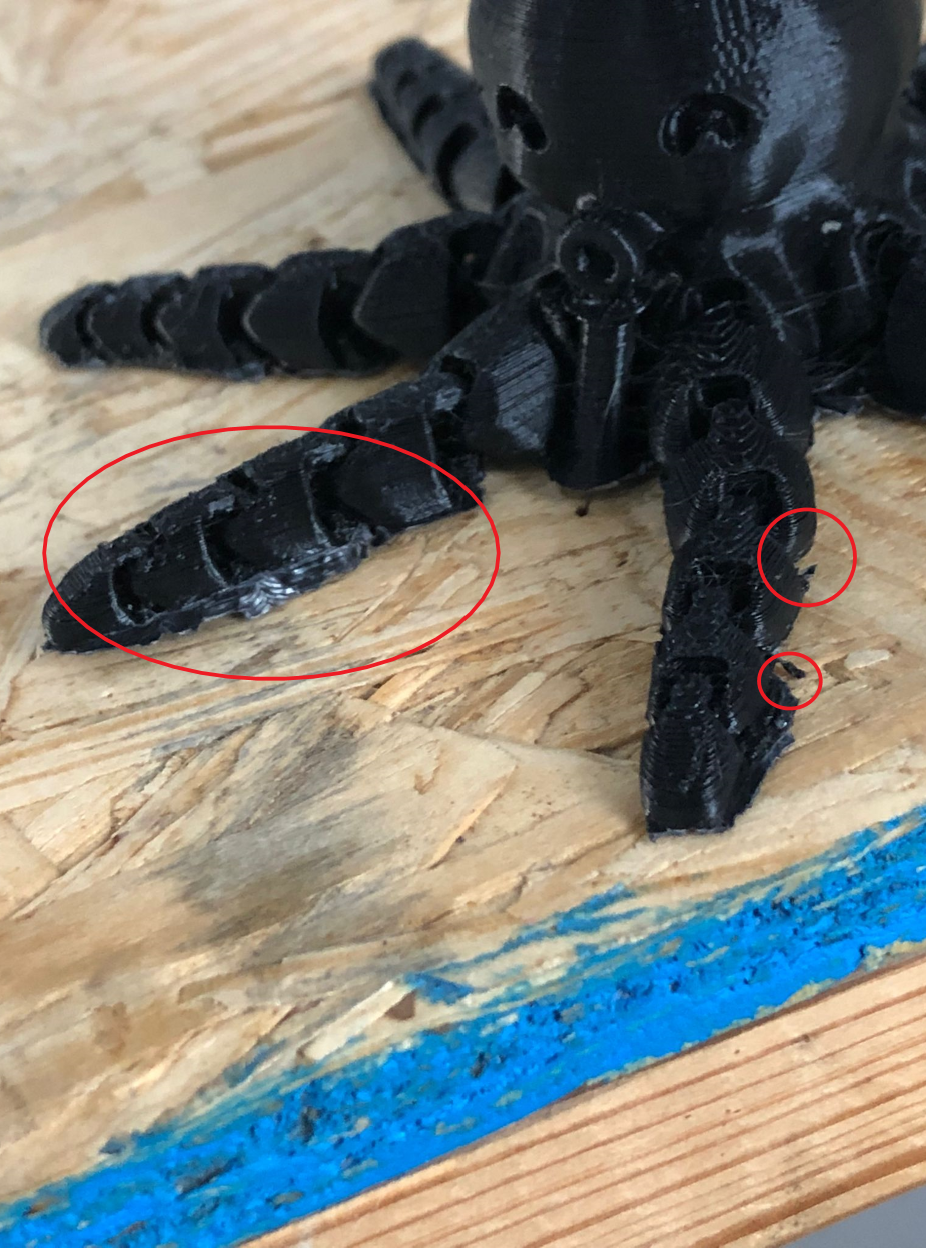
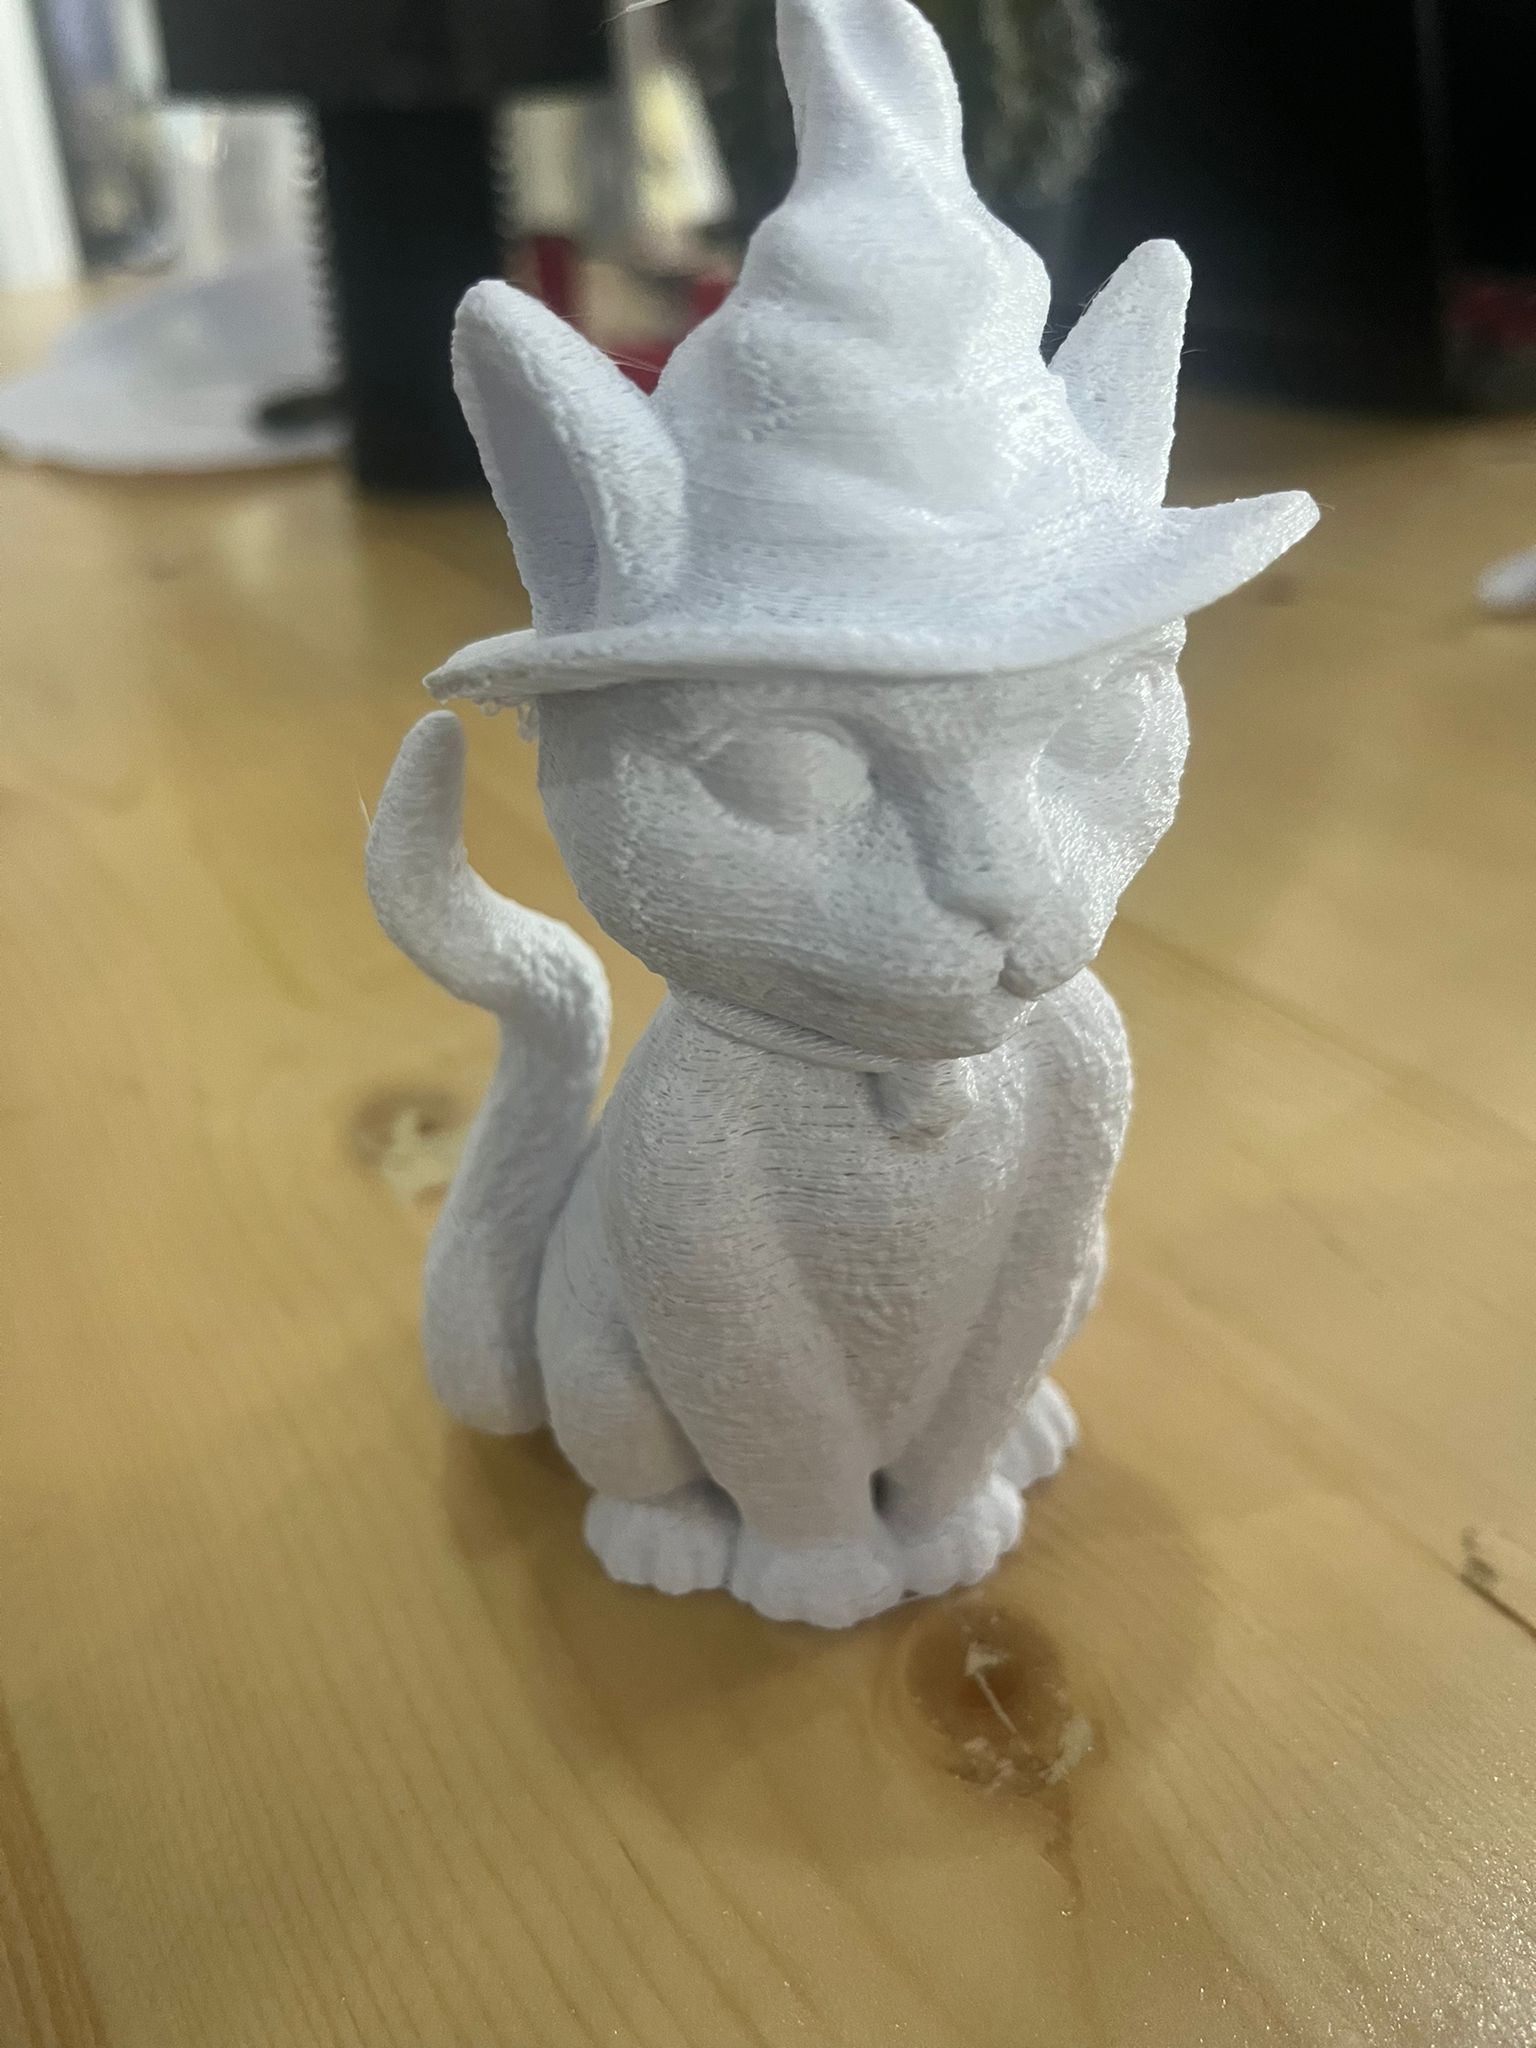
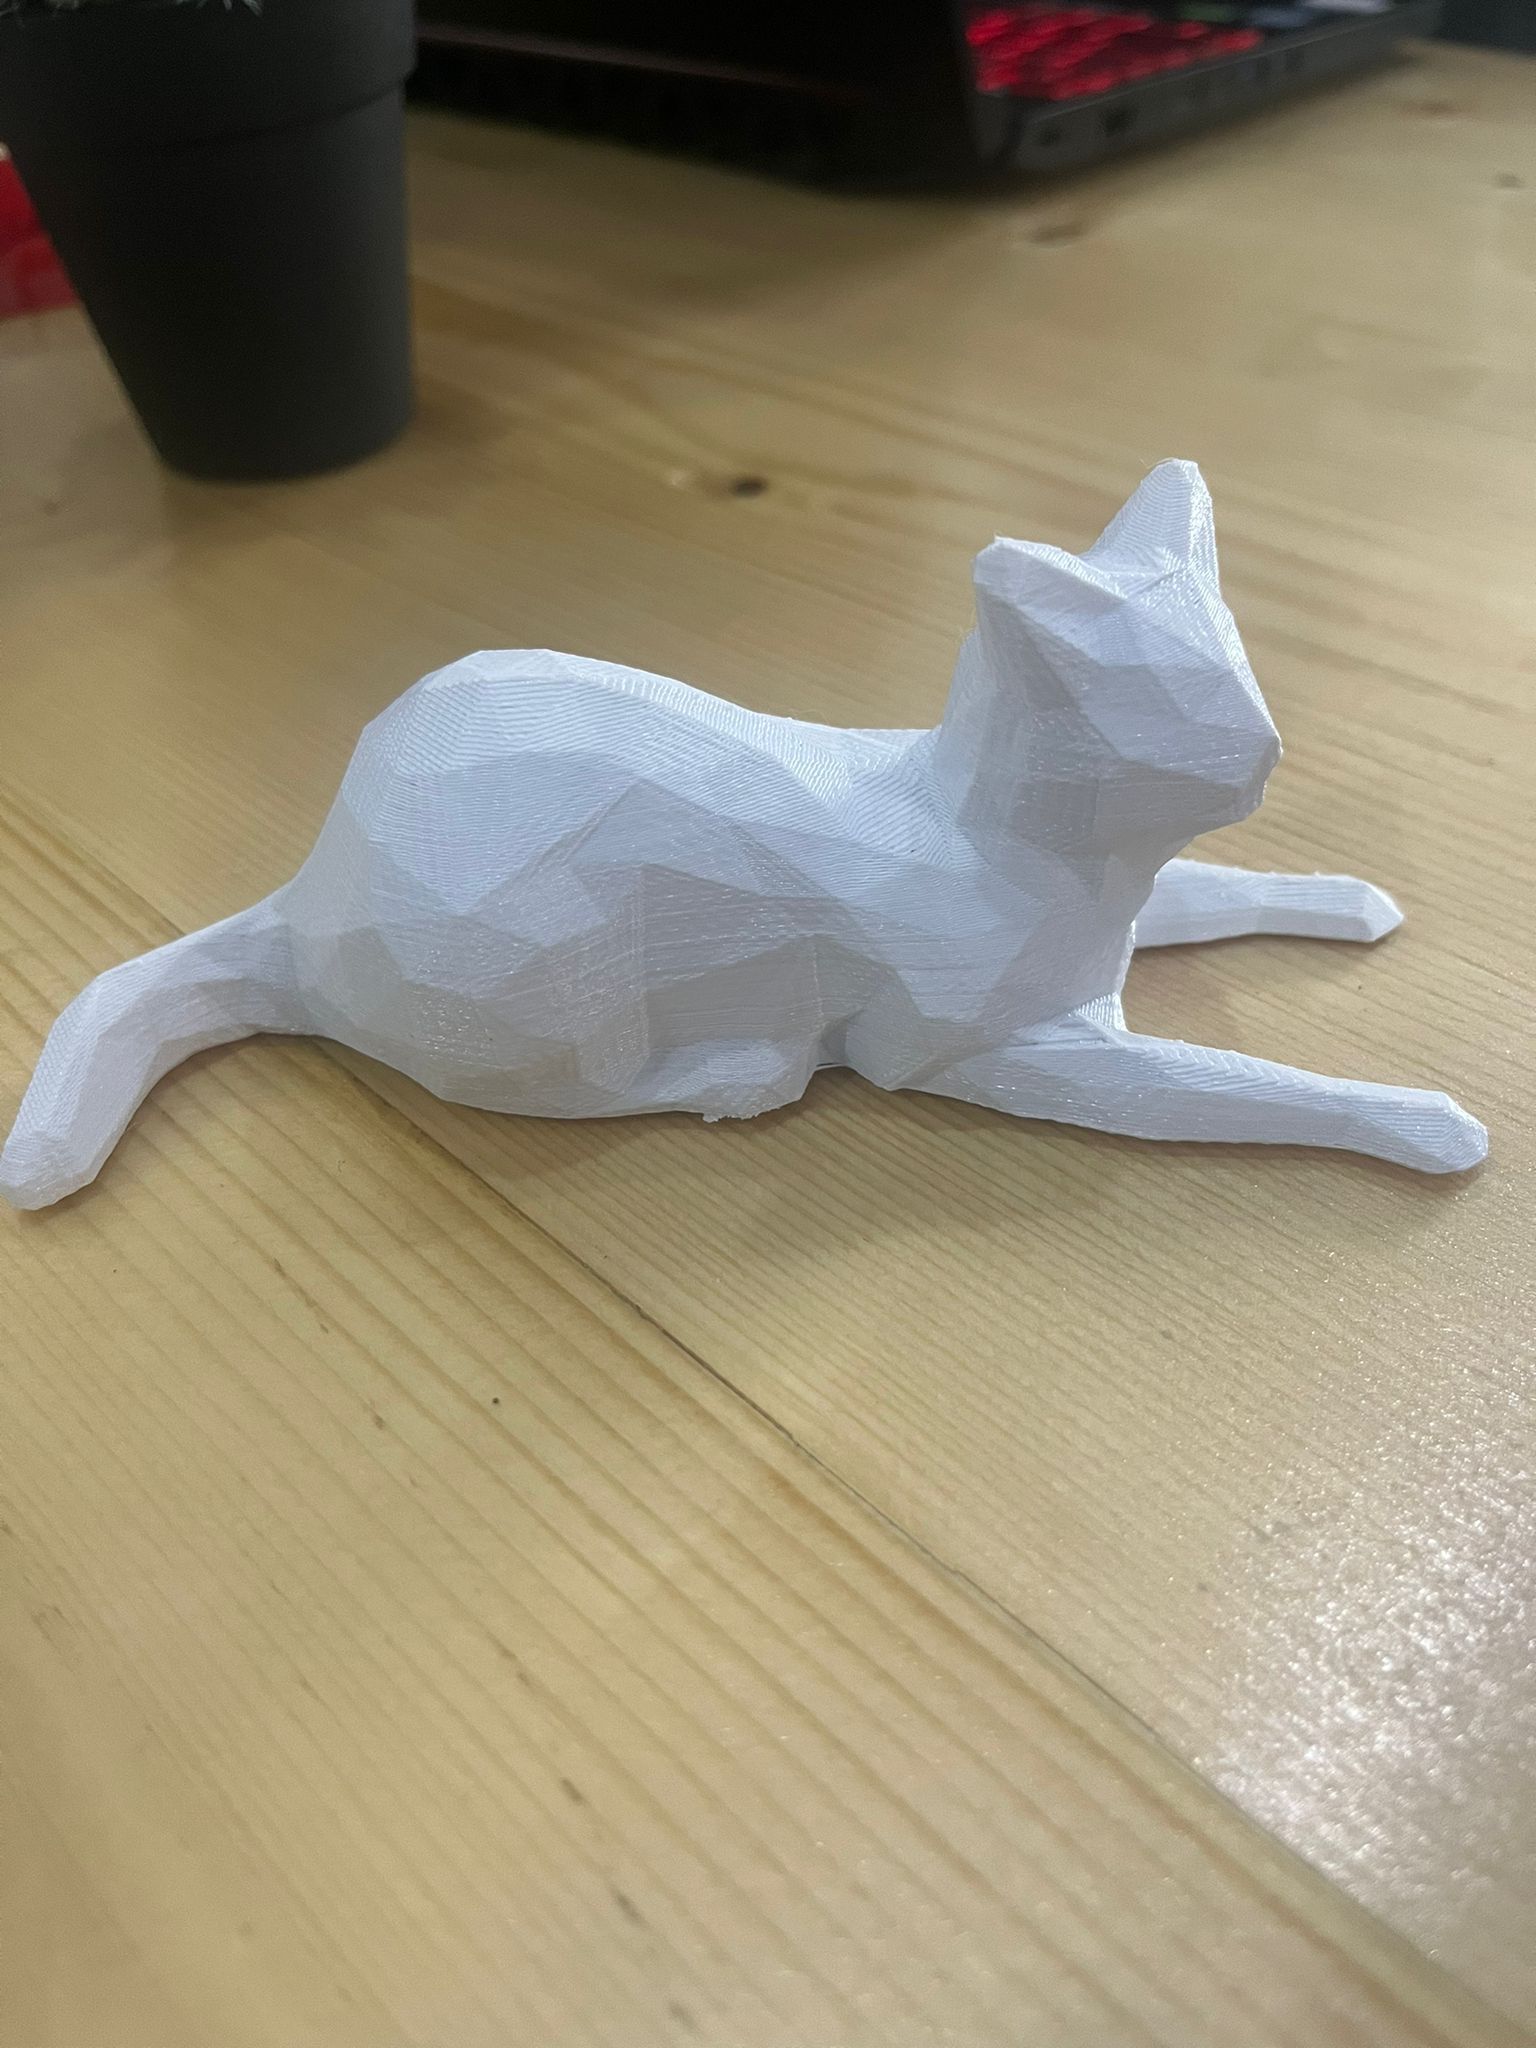
Results
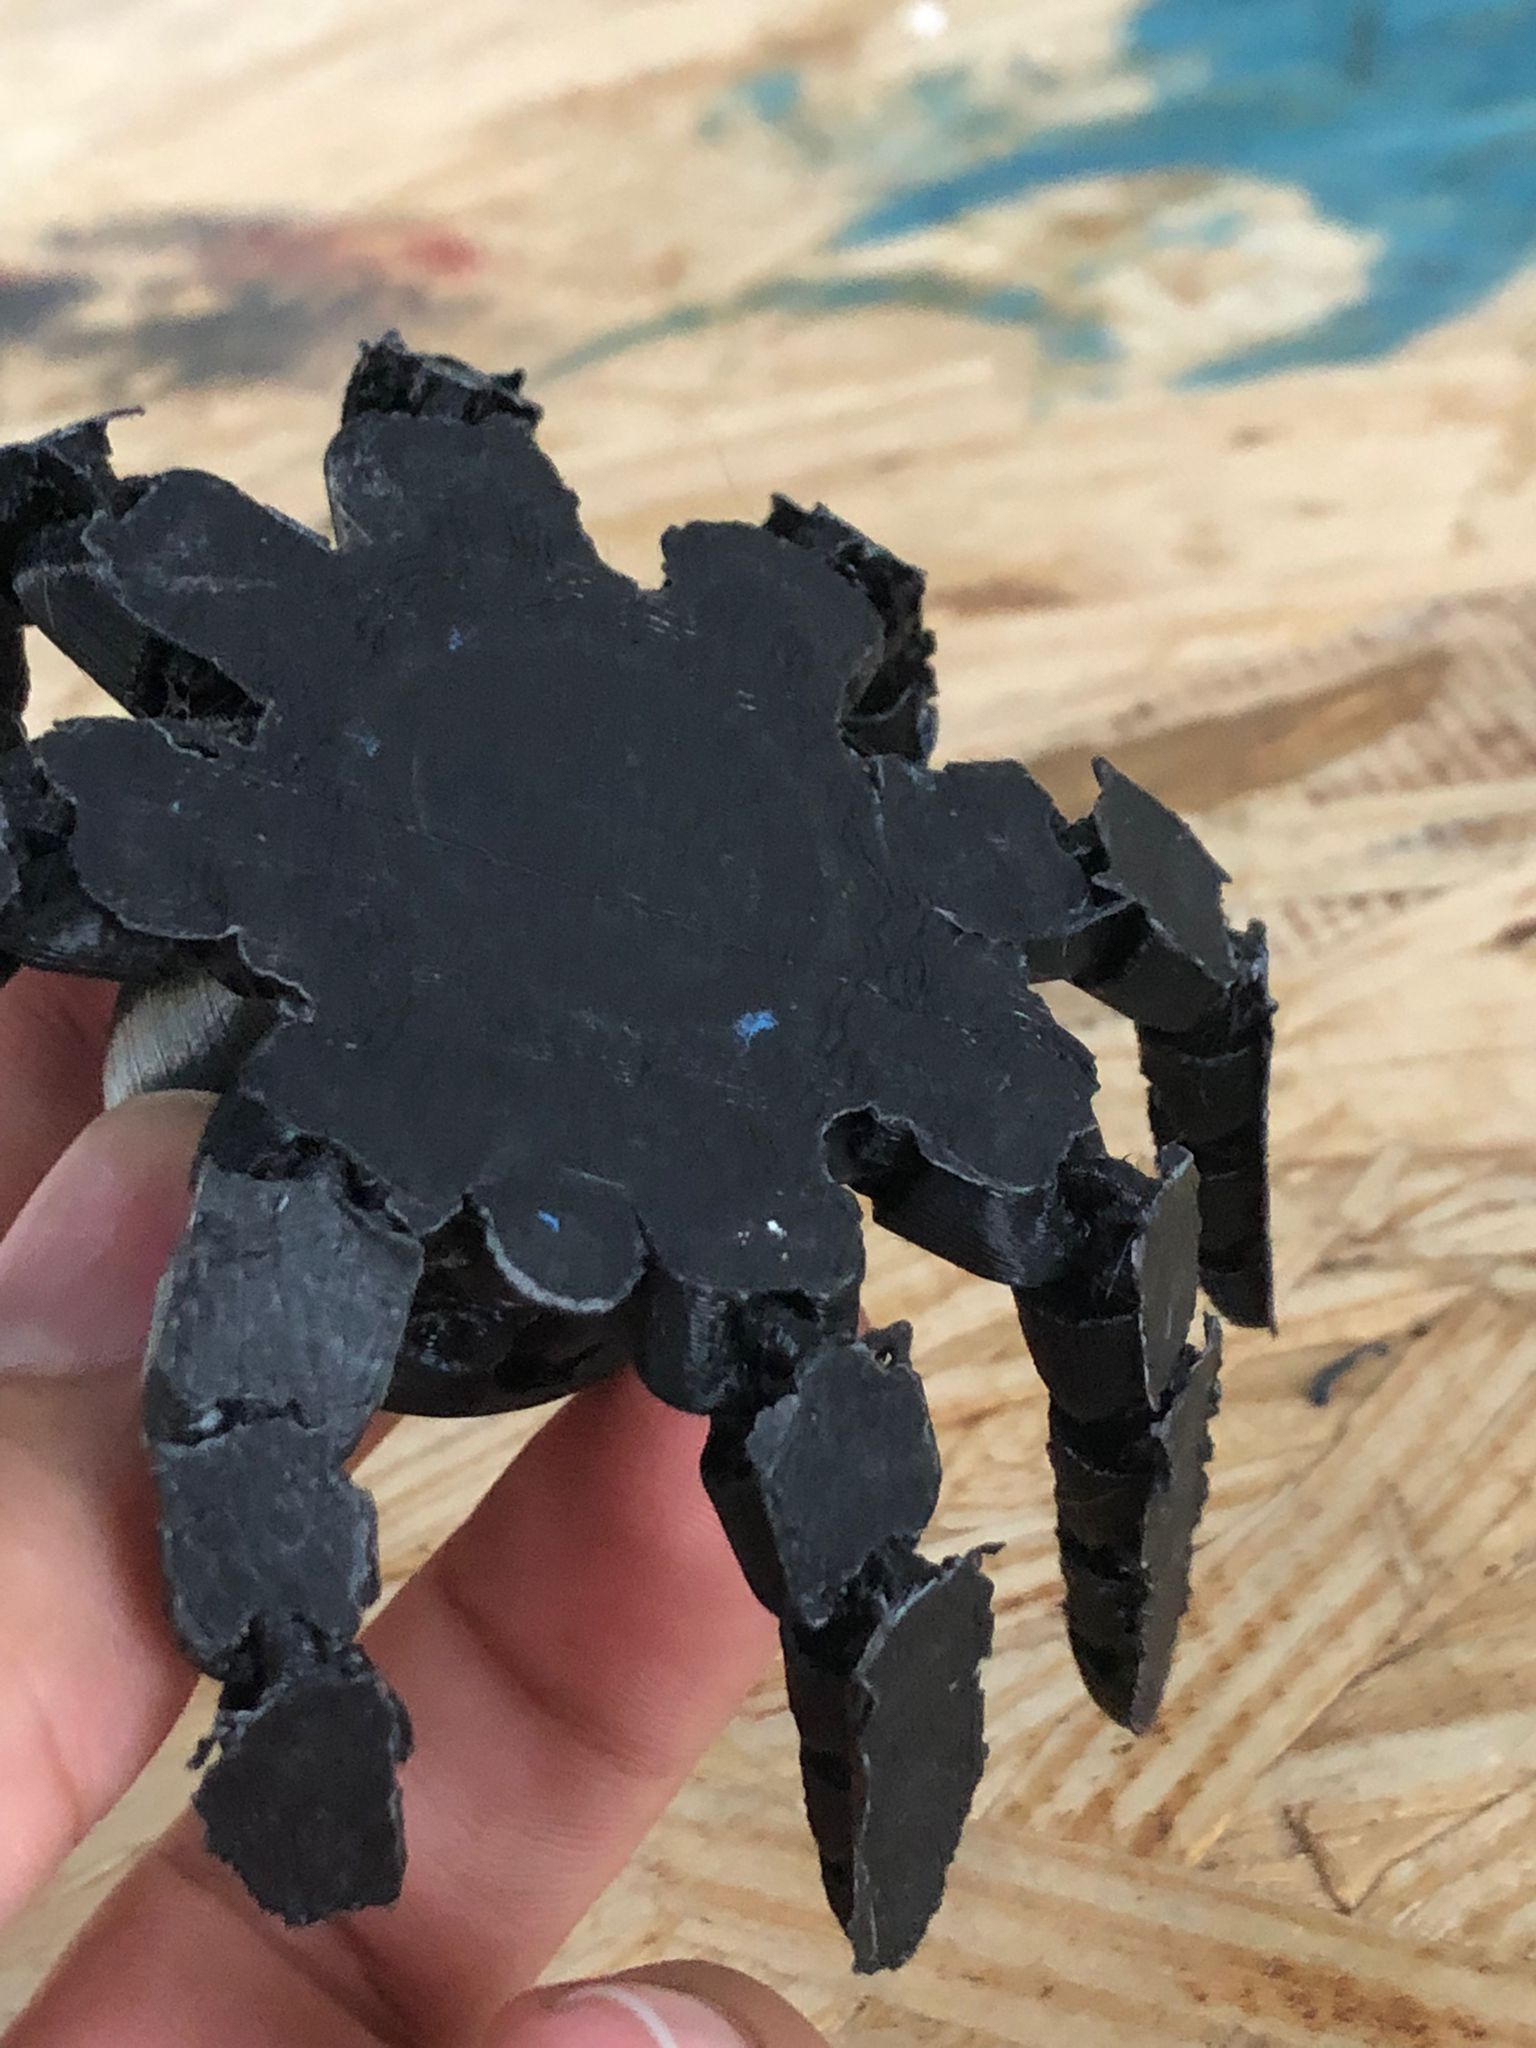
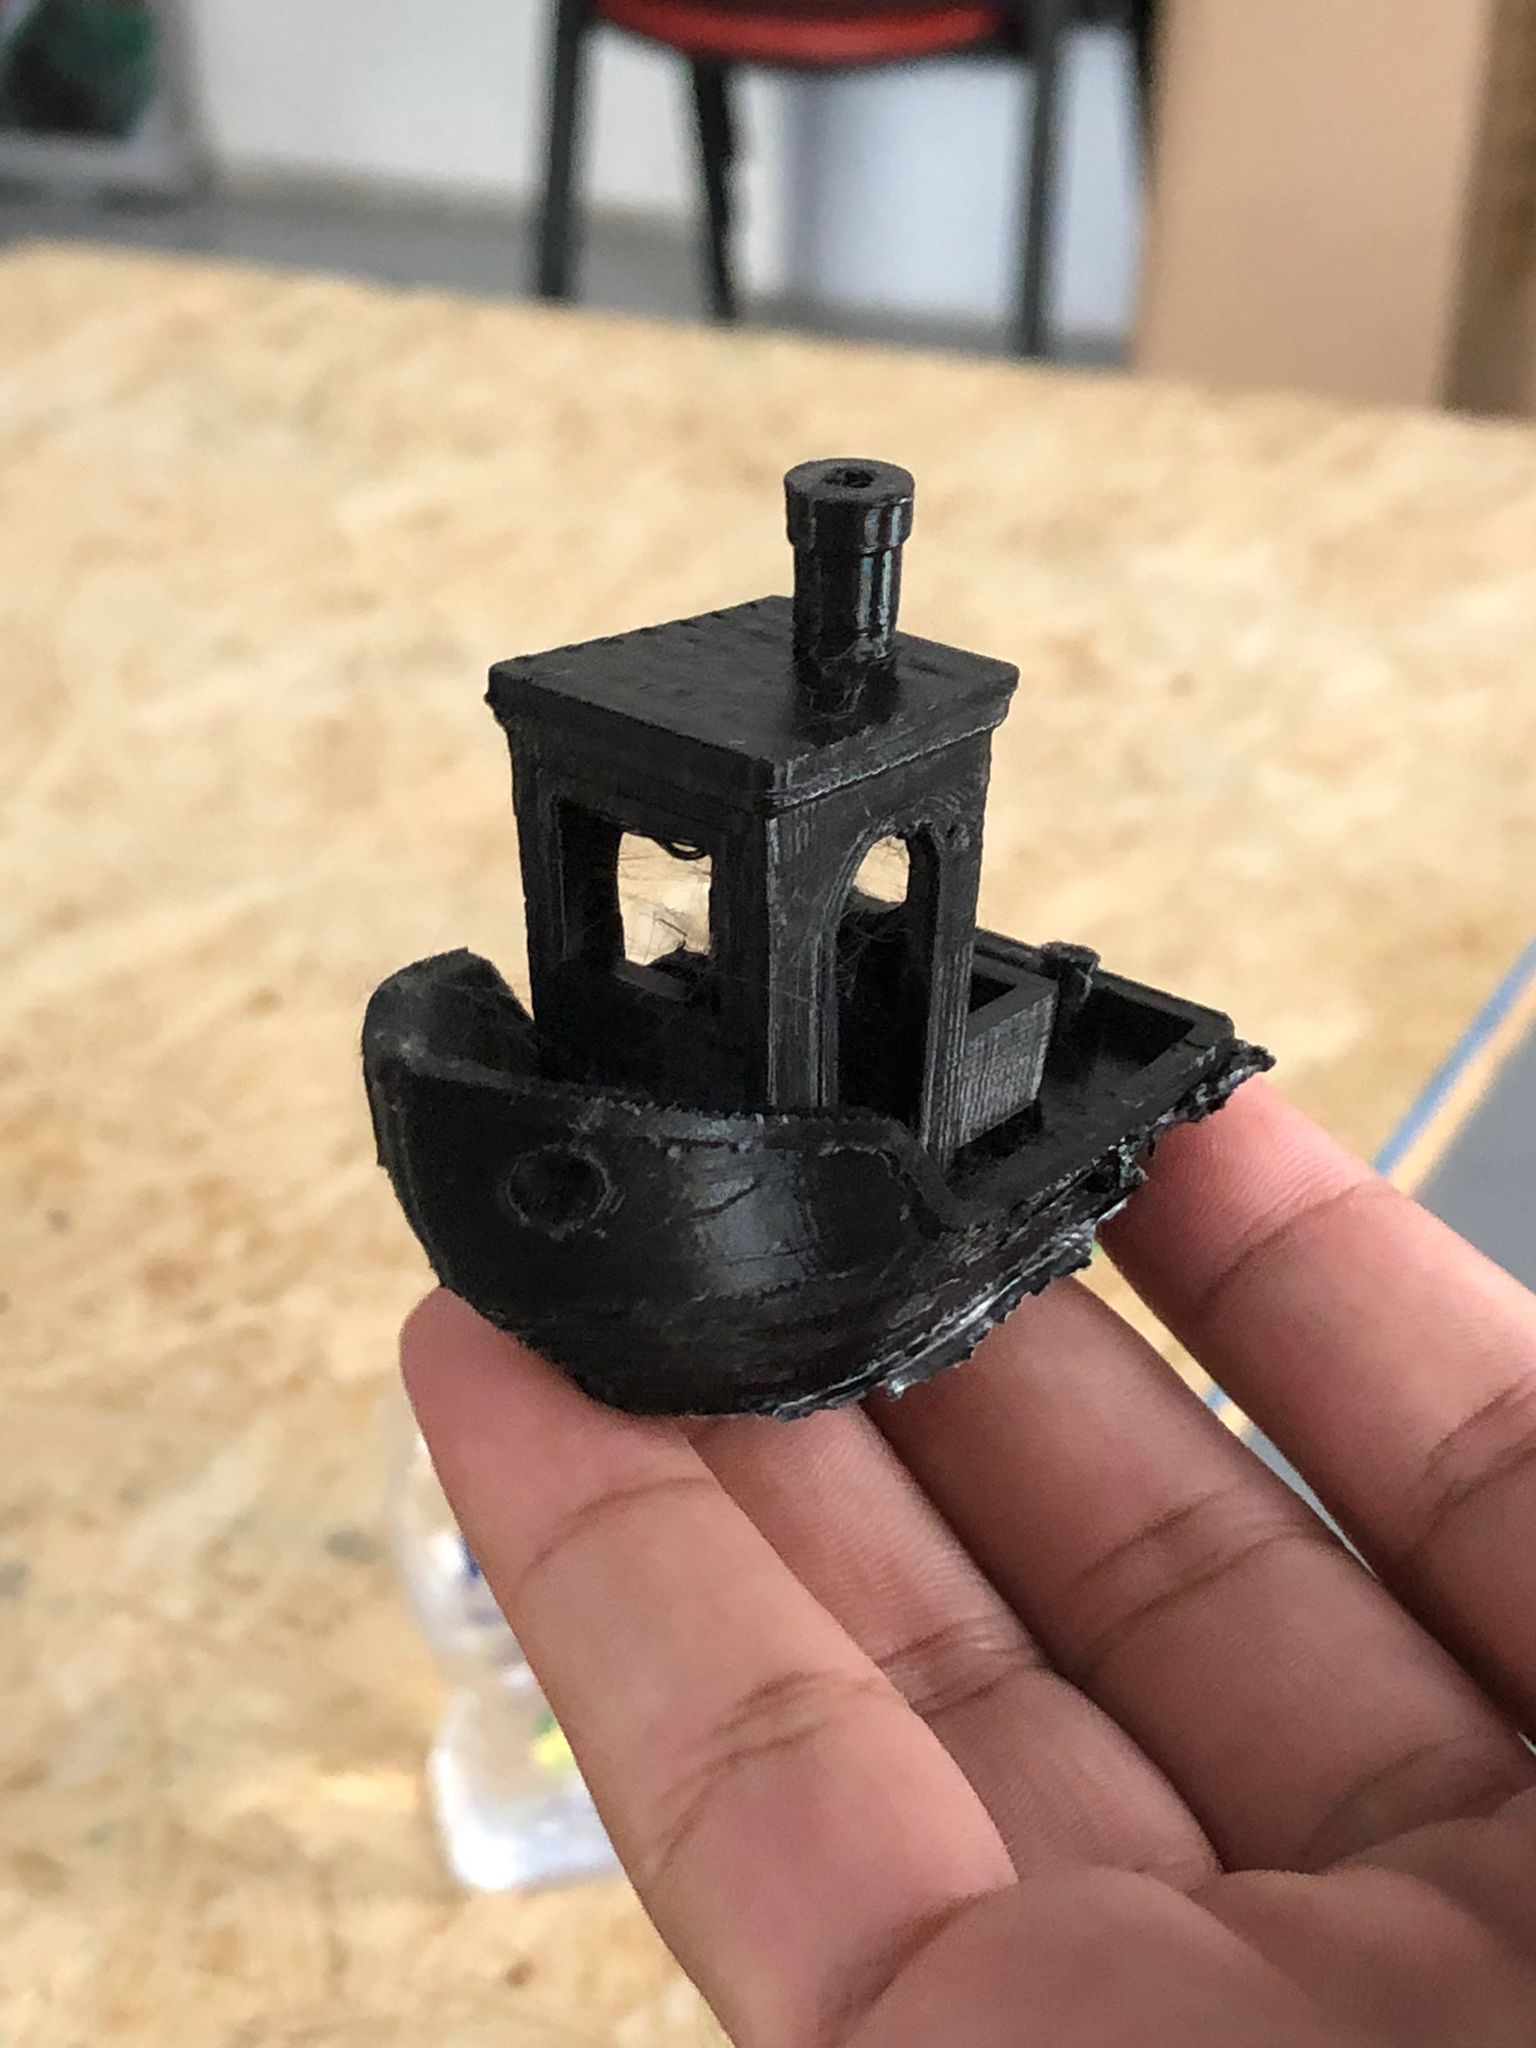
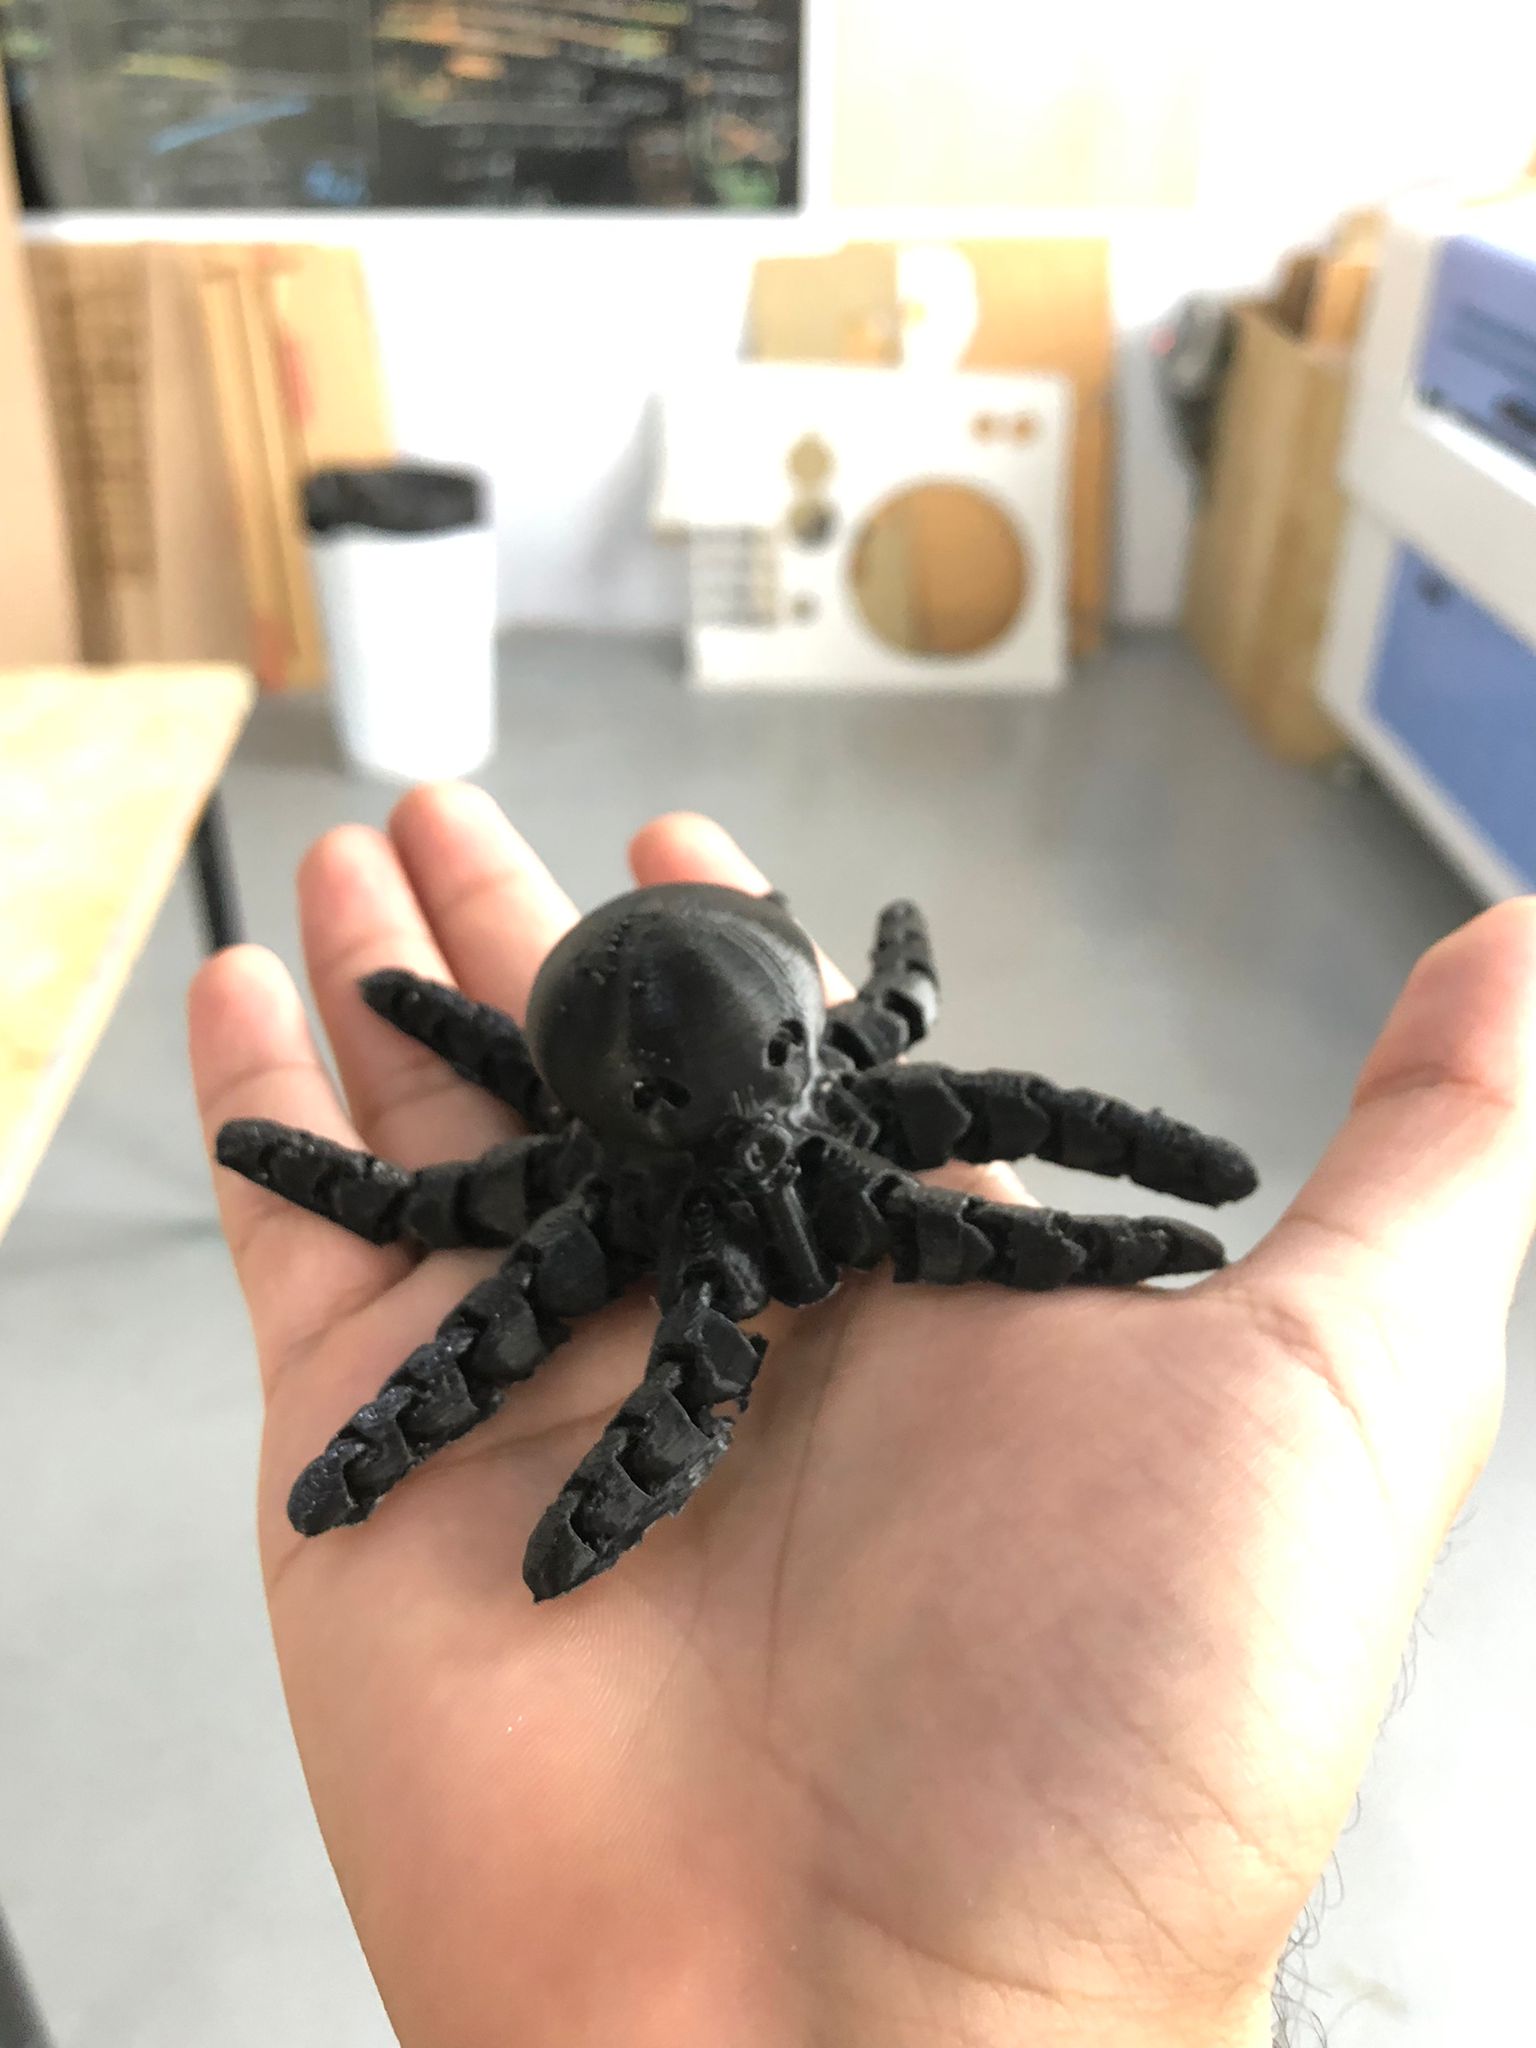
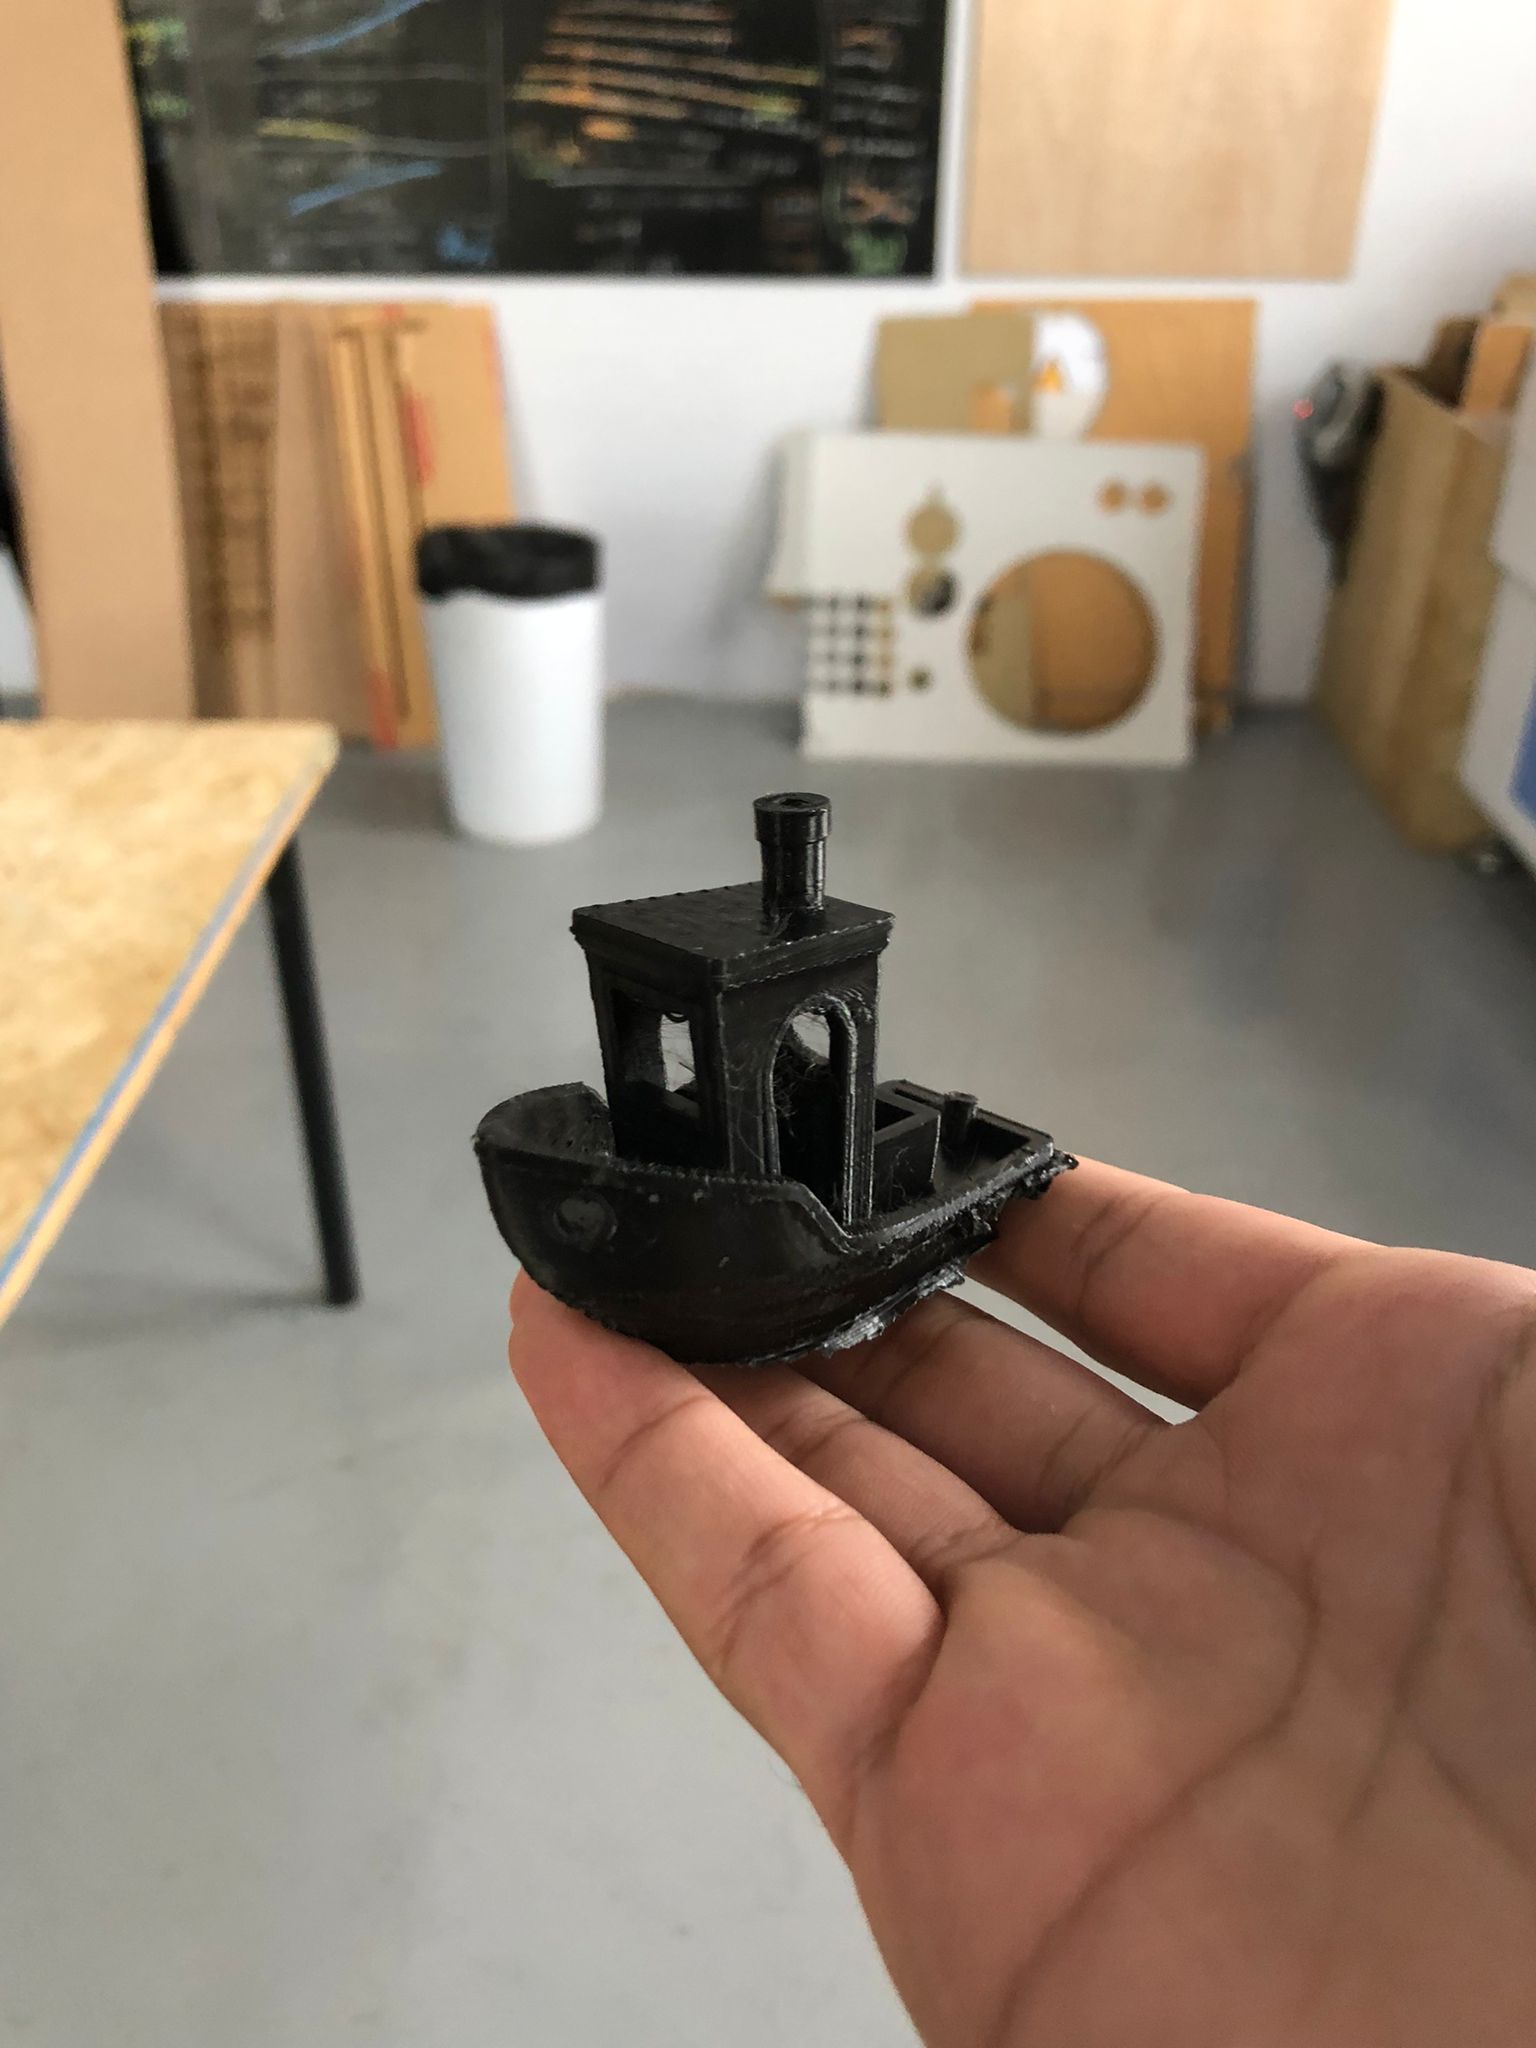
Results
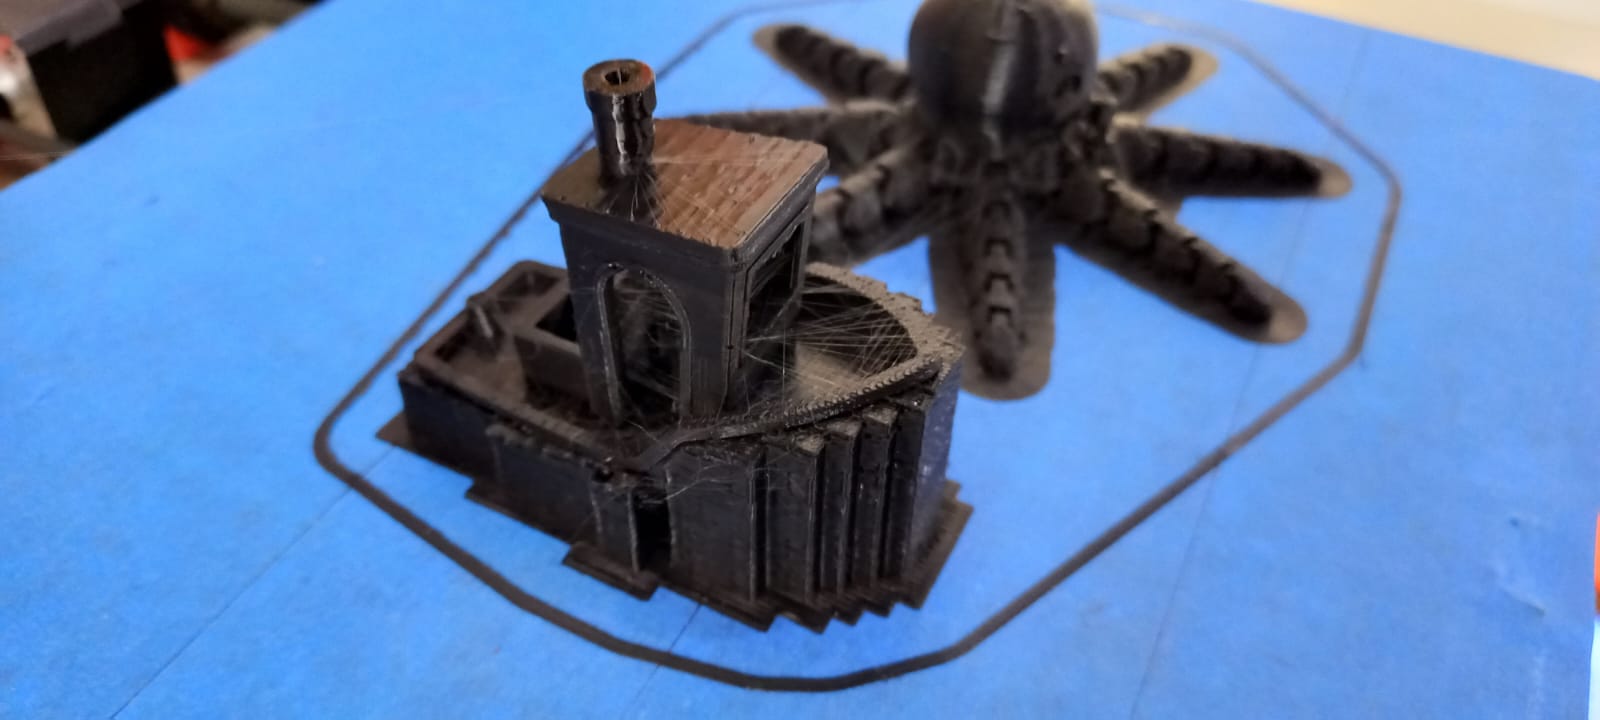
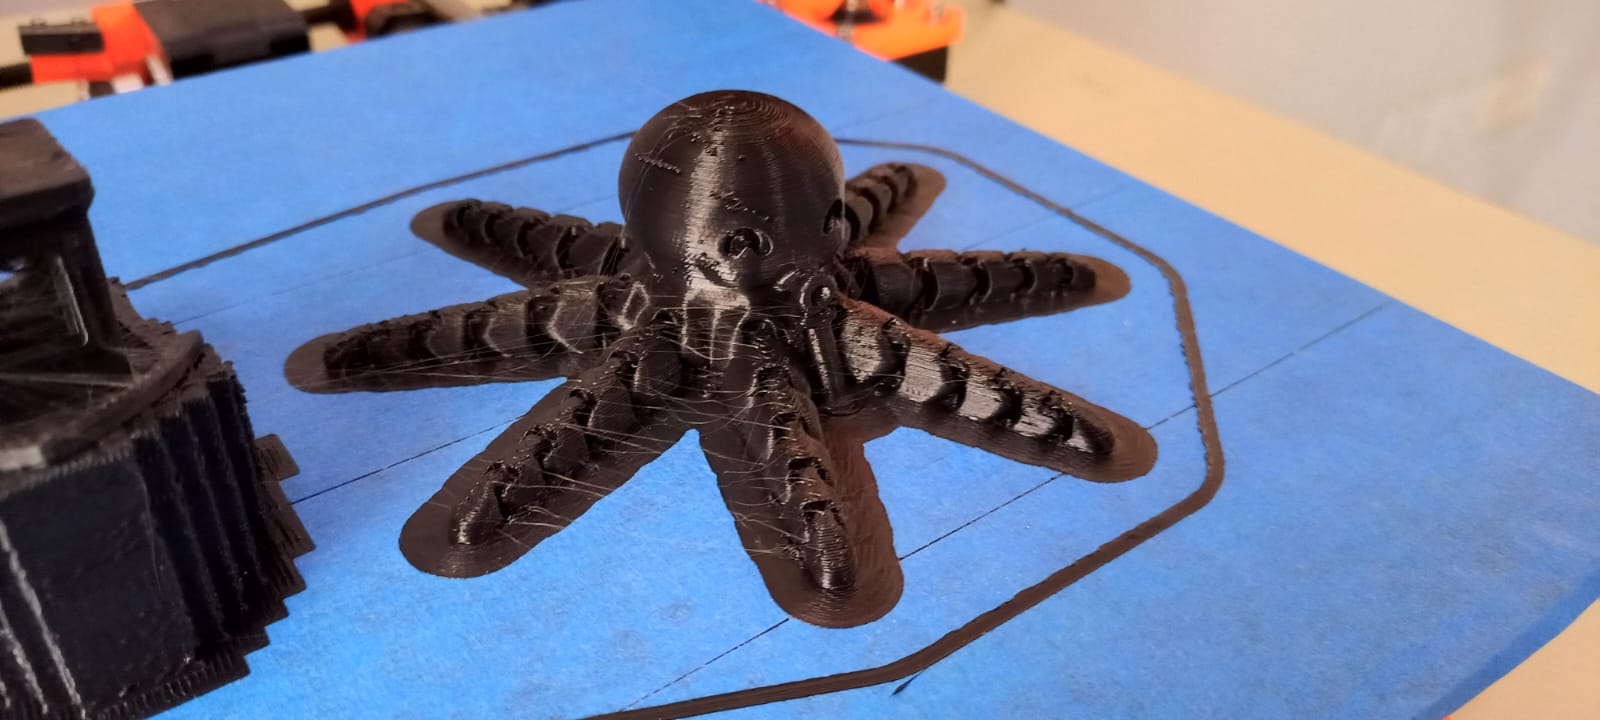
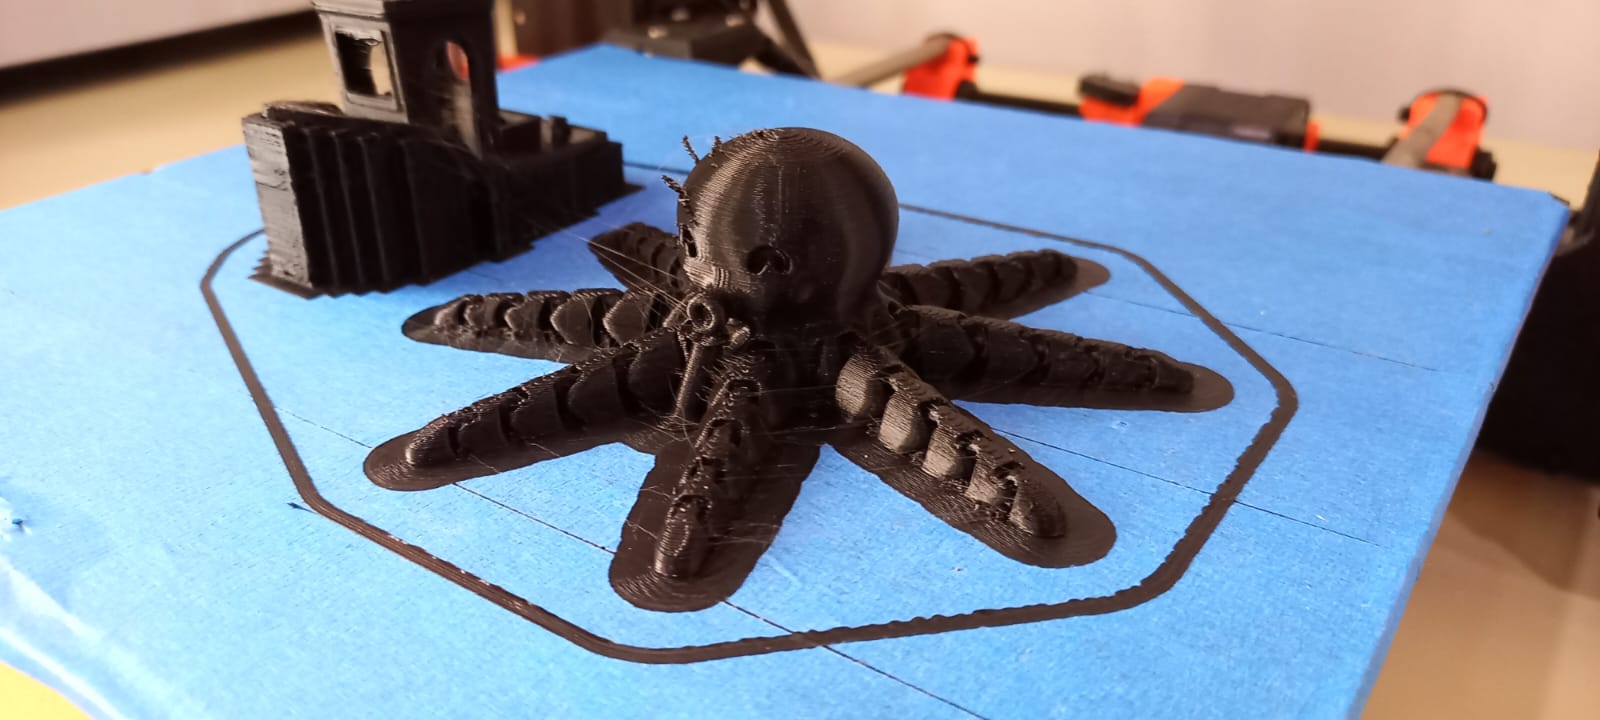
For the octopus, it came out as fine but for its tentacles (moving joints) a brim is not required and it would produce rougher edges and would hinder the moving joints as shown below.
As for the ship, it would be a lot smoother build if we had not chosen the support option as the design was already had that into consideration also there was suppose to be writings at the bottom but due to the z-axis being too low, it did not get printed.

Comparison: MakerBot vs Prusa
The other group made two different objects using Makerbot and here are the hero shots of both groups.

Final Thoughts
While Makerbot is userfriendly, we would prefer using Prusa as it offers a varitey of filament types and it is cheaper in general while the performance is fairly similiar.
Individual Assignment
Apple Watch Charger Stand
In this assignmet I tried doing something practical and a bit complicated that uses a lot of new functions and methods that we I didn’t use before. The main thing was creating in Fusion 360 an object as components, and in the apple watch charger stand it has 4 main components, the charger base, the stand, the charger holder and the stand. I am going to demostrate how I created each of these components step by step.
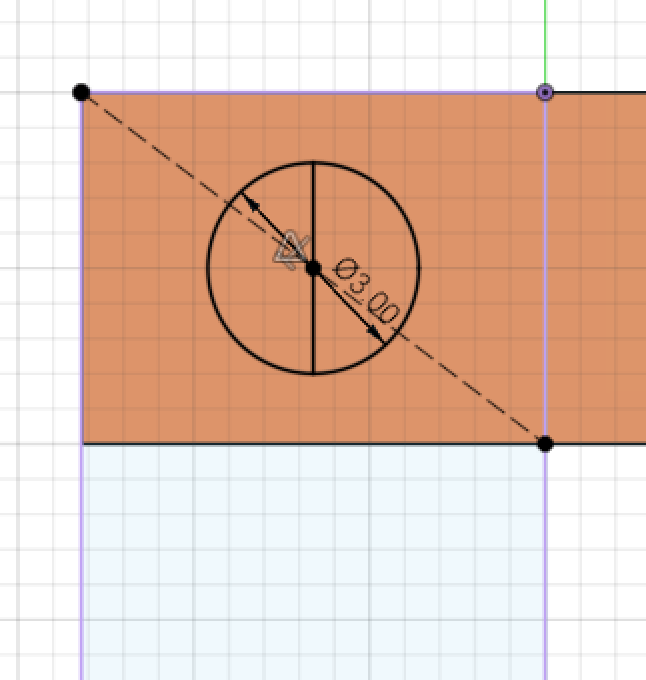
Charger base
This component would not be printed but it is helpful to scale and use it in other components when designing.
Step 1: As every project in fusion 360 it starts with a sketch.
Step 2: Extruding the sketch.
Step 3: Charger base.
Final Step: Extrude.
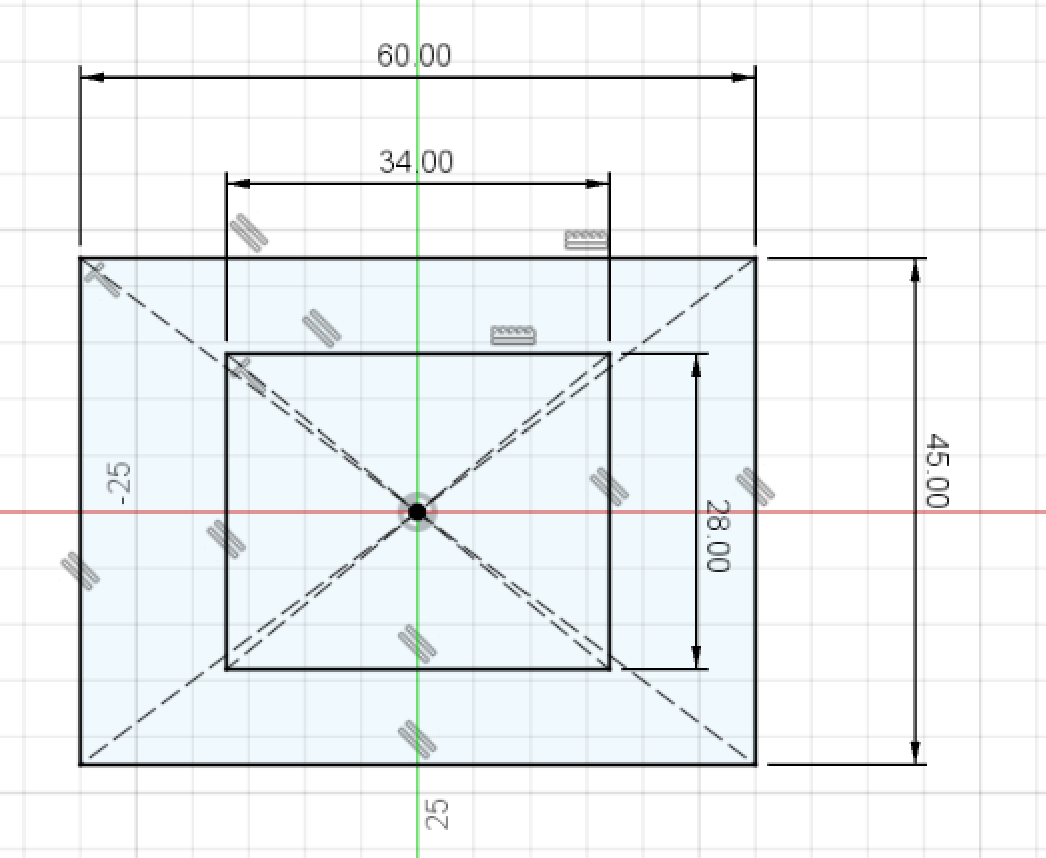
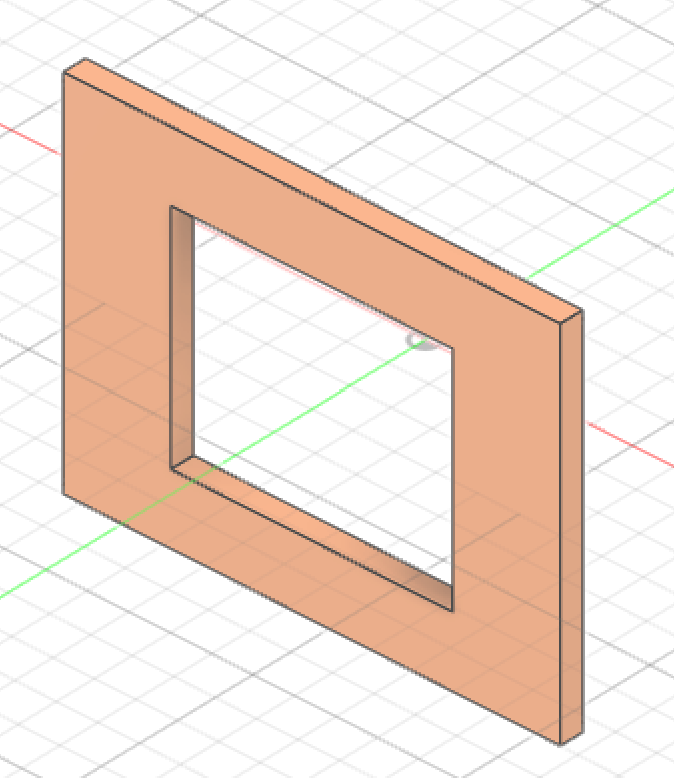
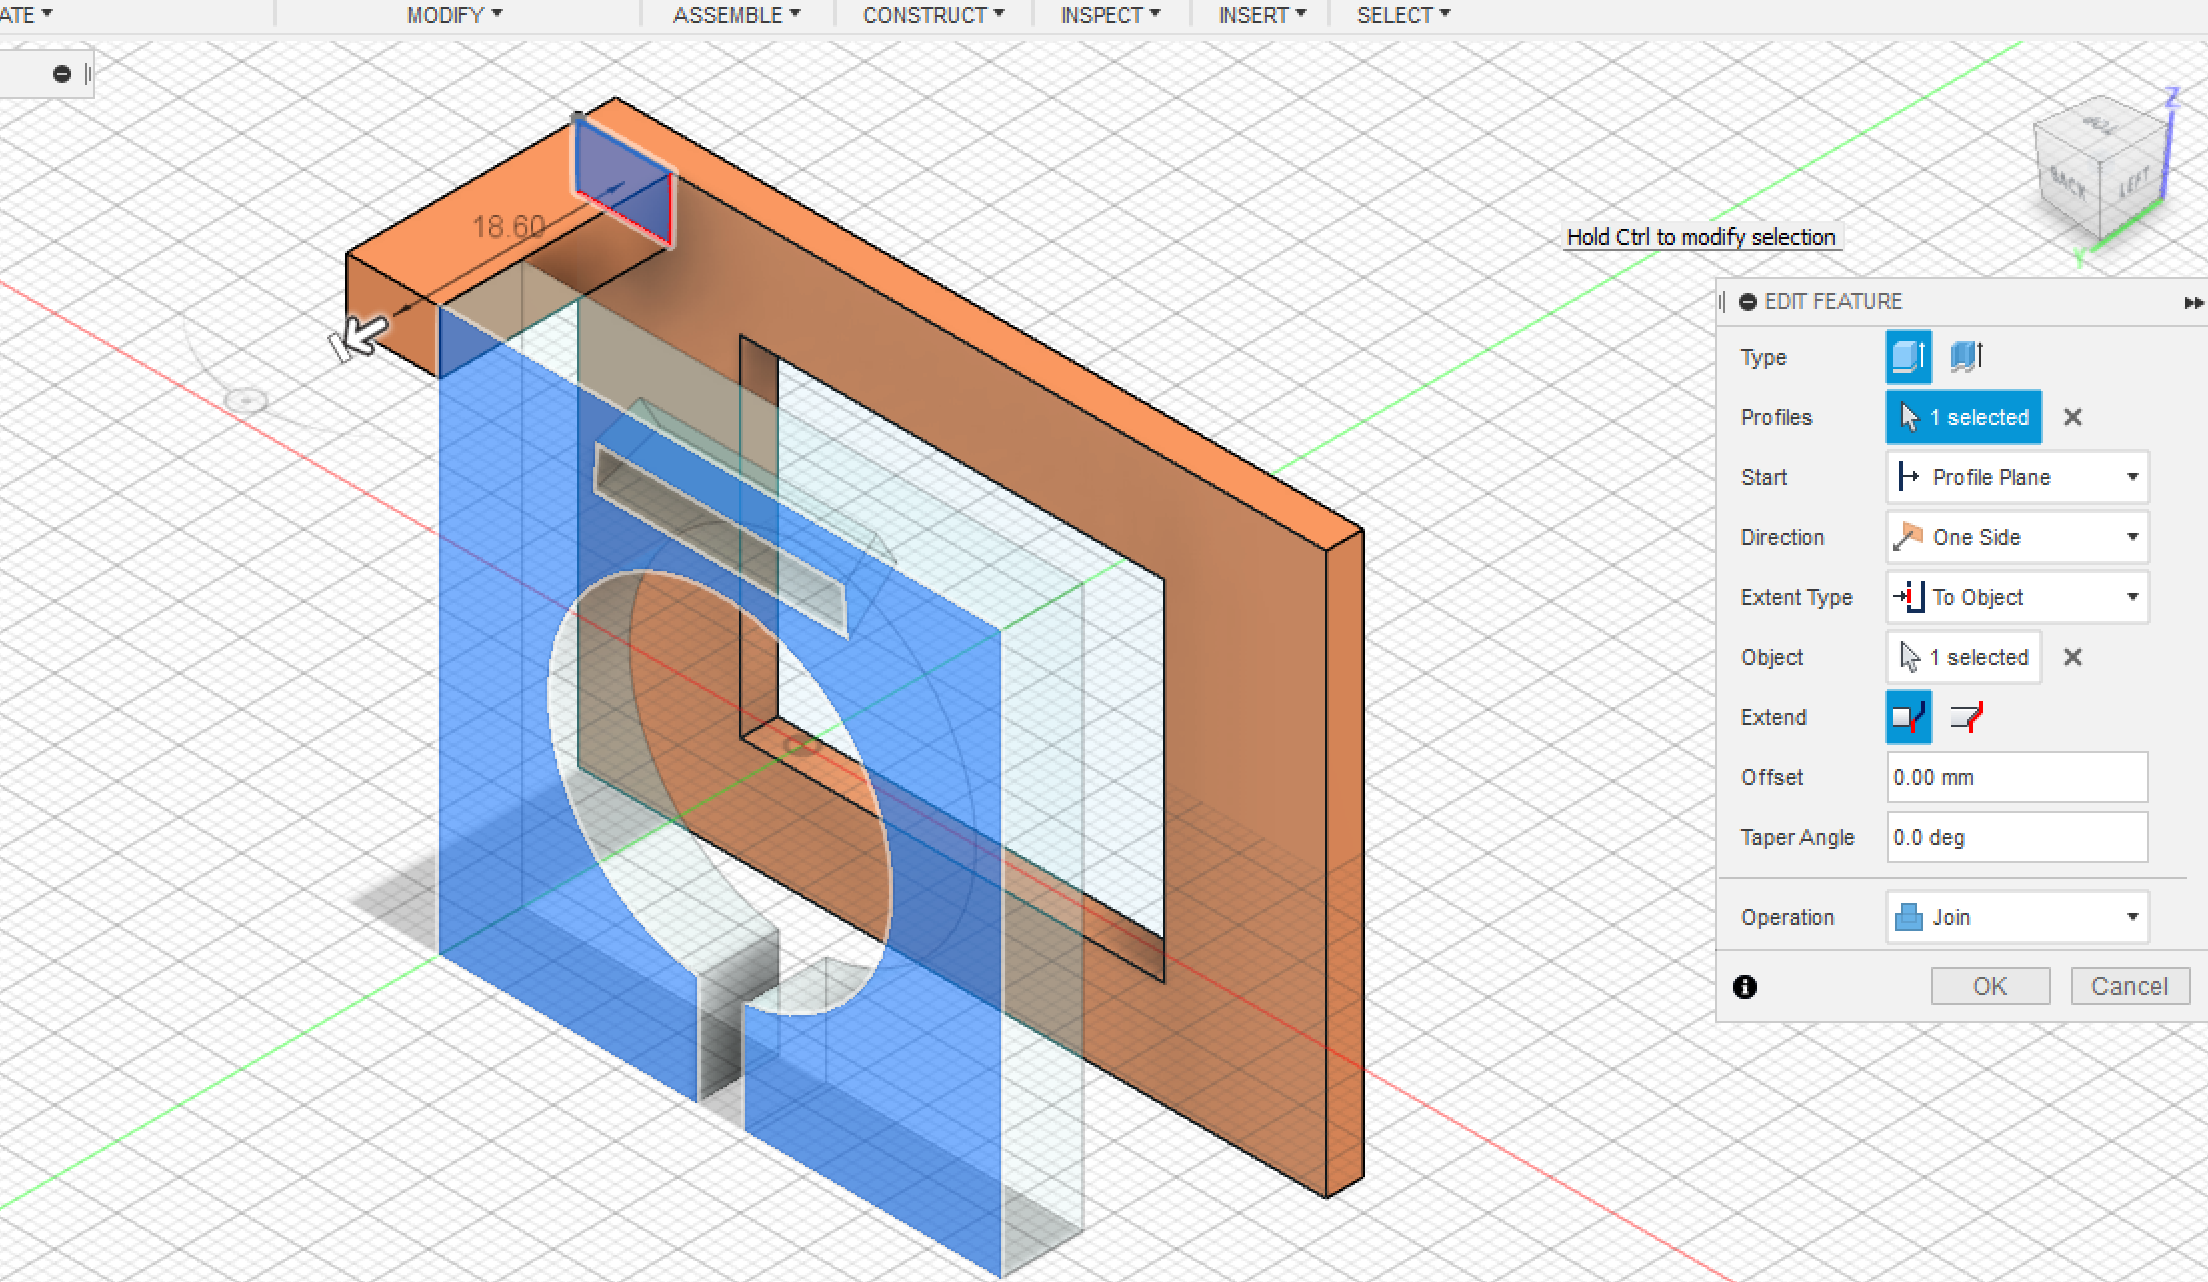
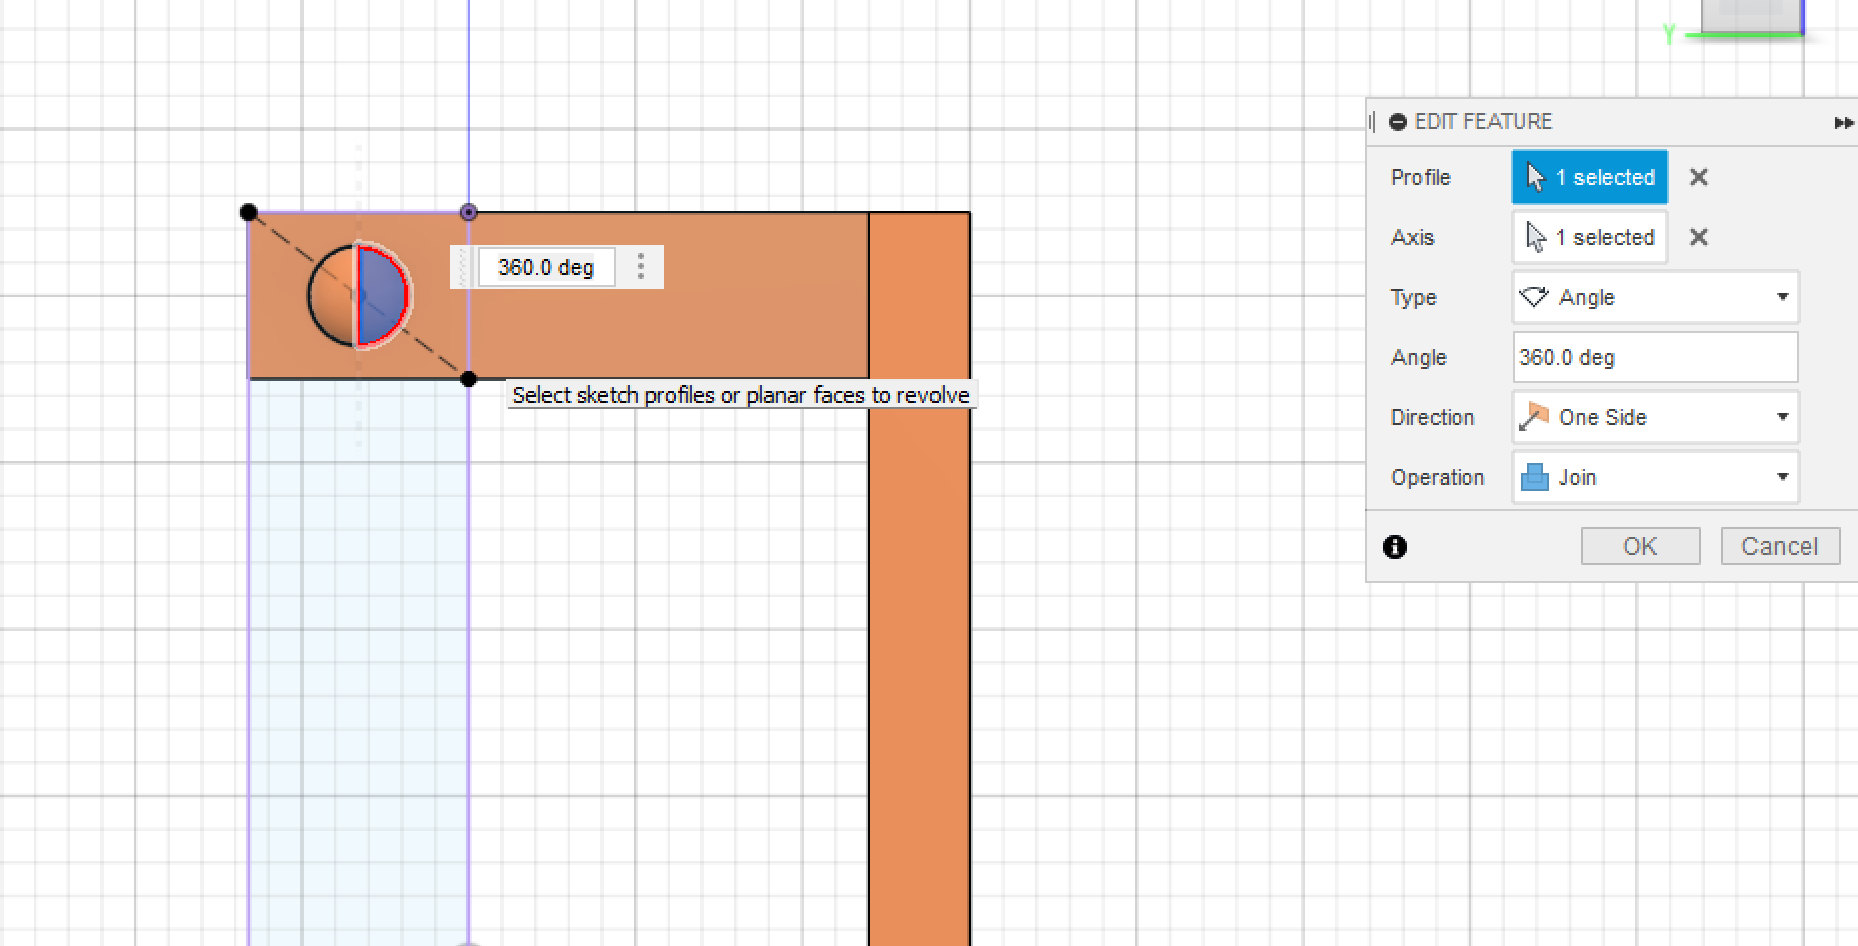
Charger Holder
** Step 1:** Sketching the base, but here we use projection to cut out the extrusion for the charger to be placed.
Step 2: Extruding.
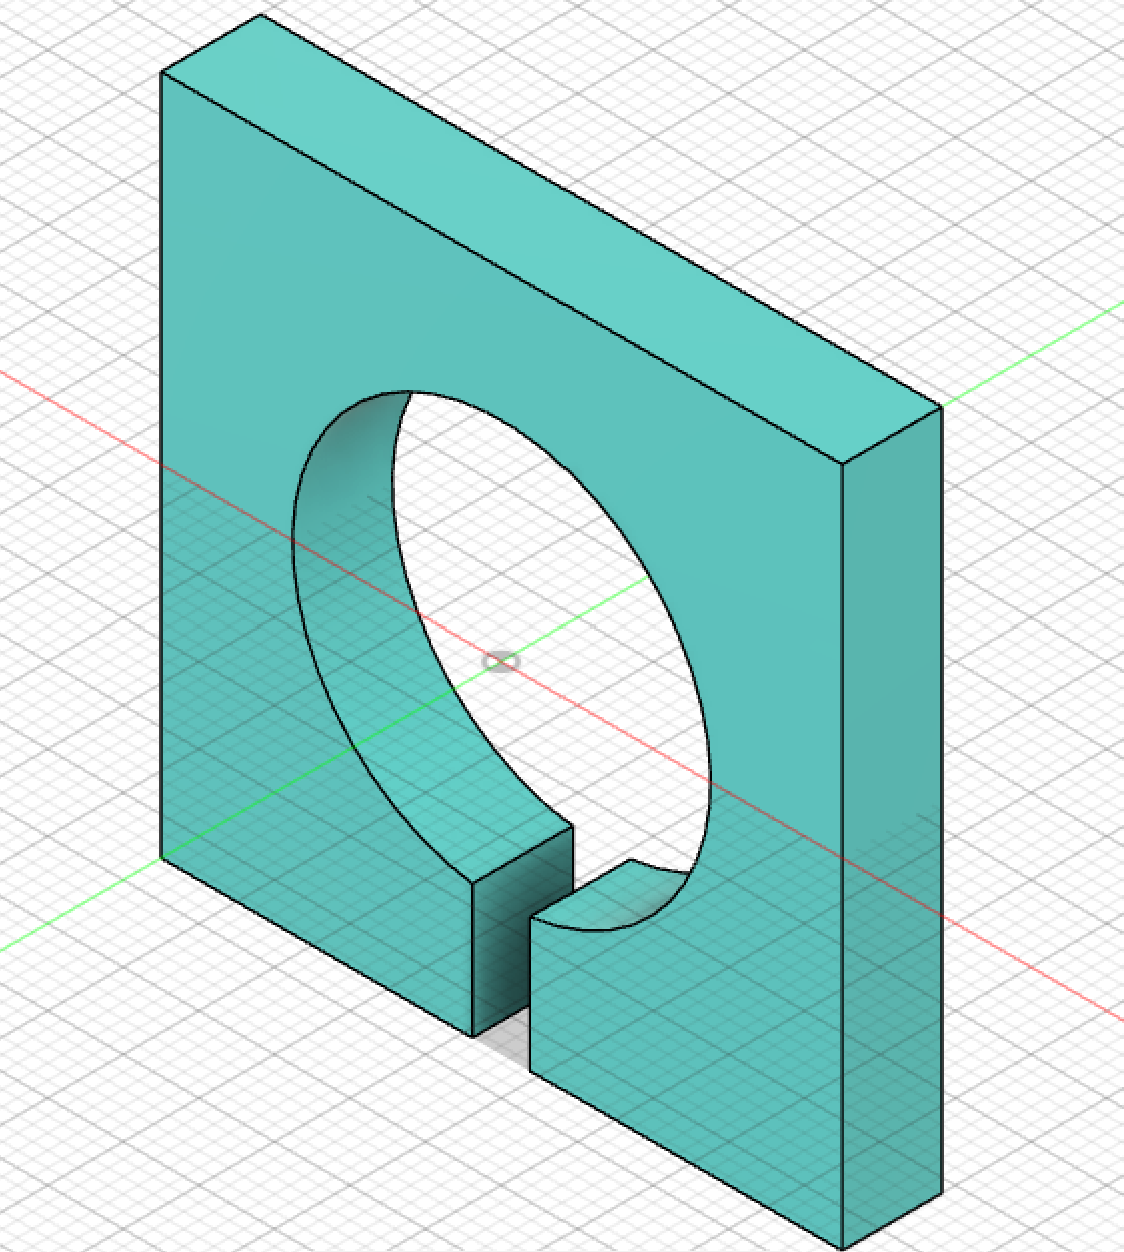
Step 3: Creating tolerance or offsetting to make the charger fit and not to fall off.
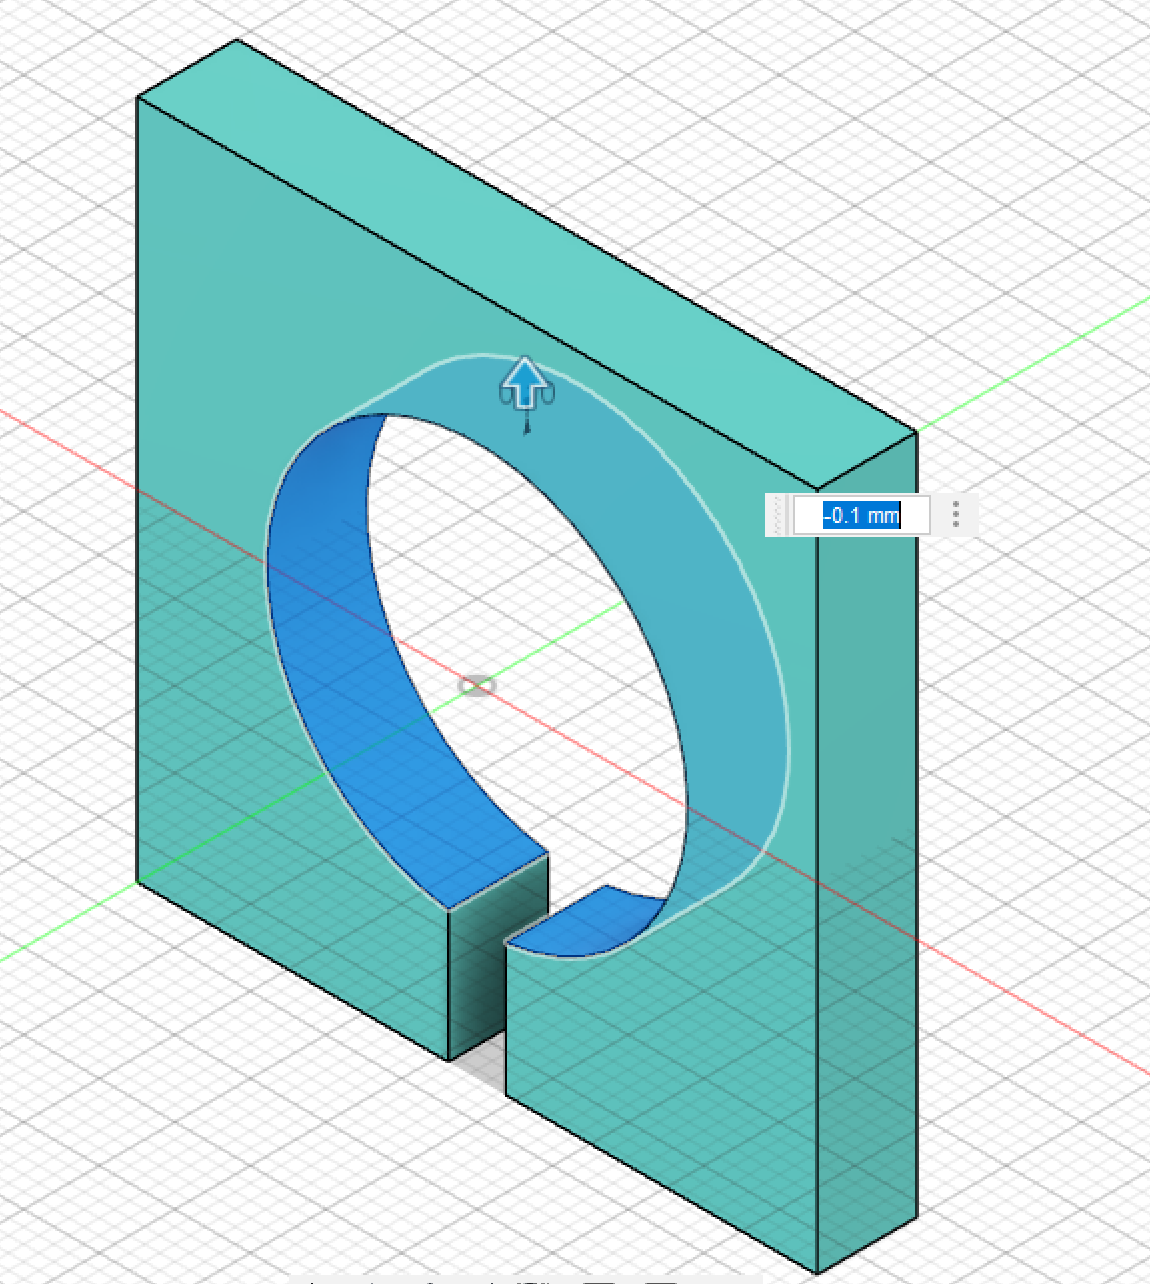
This is not the final look of the holder as we will be creating more features when we combine the other components with it.
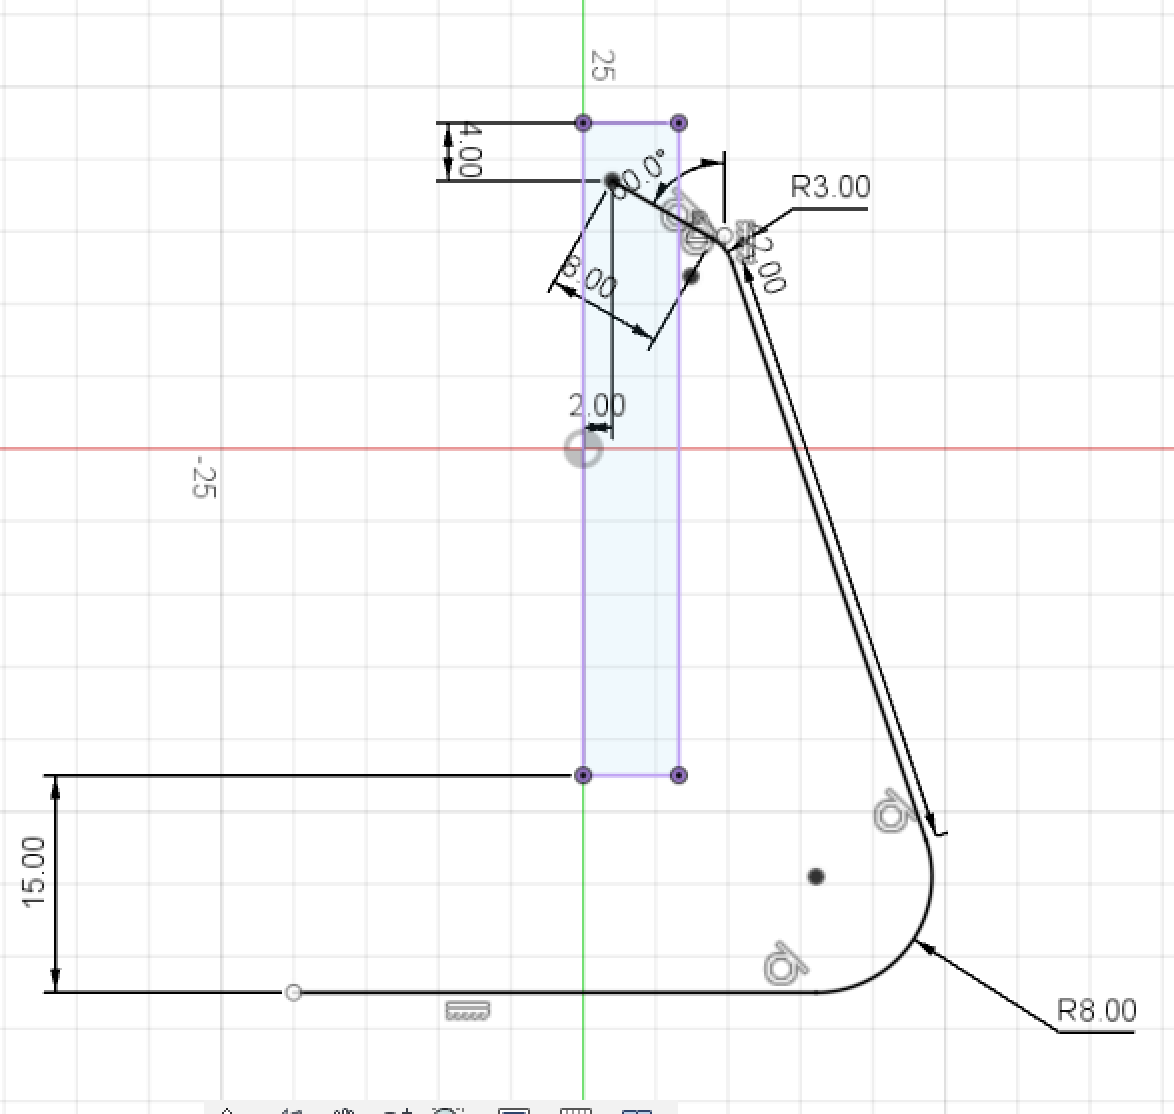
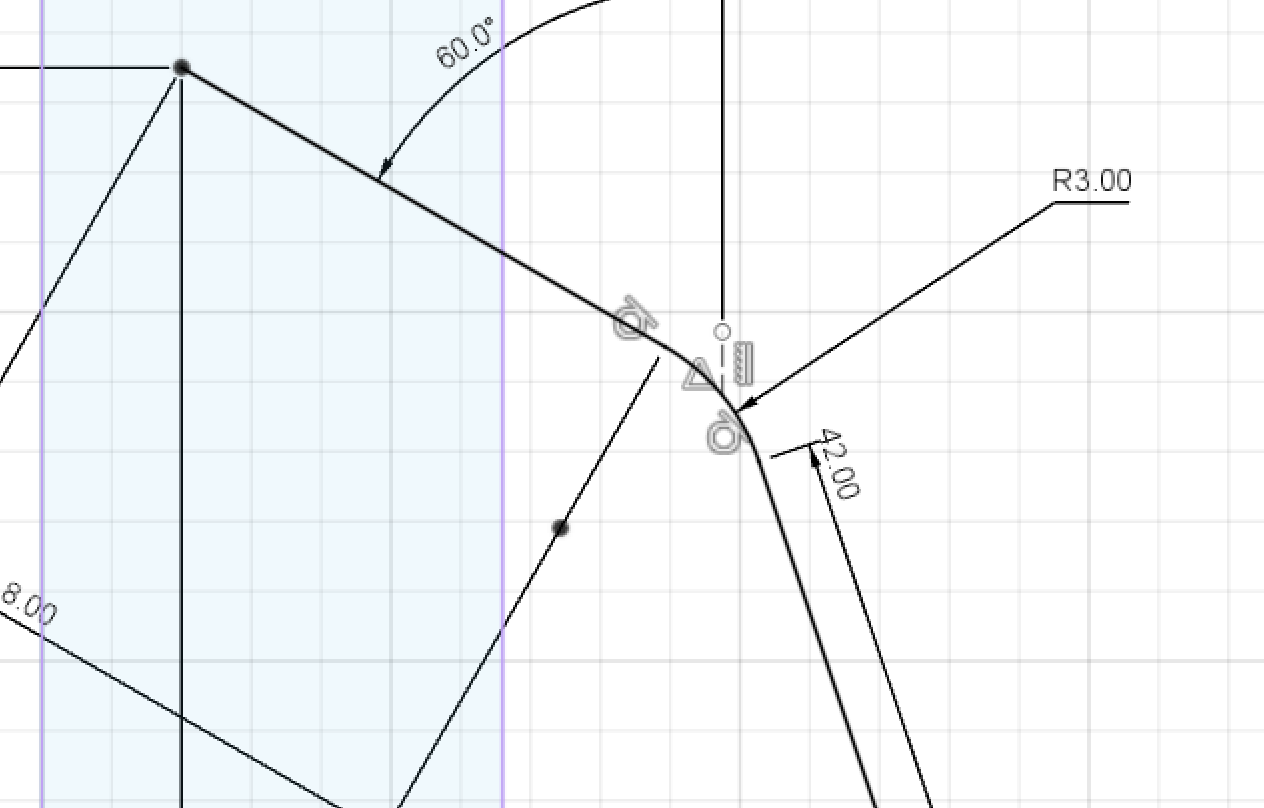
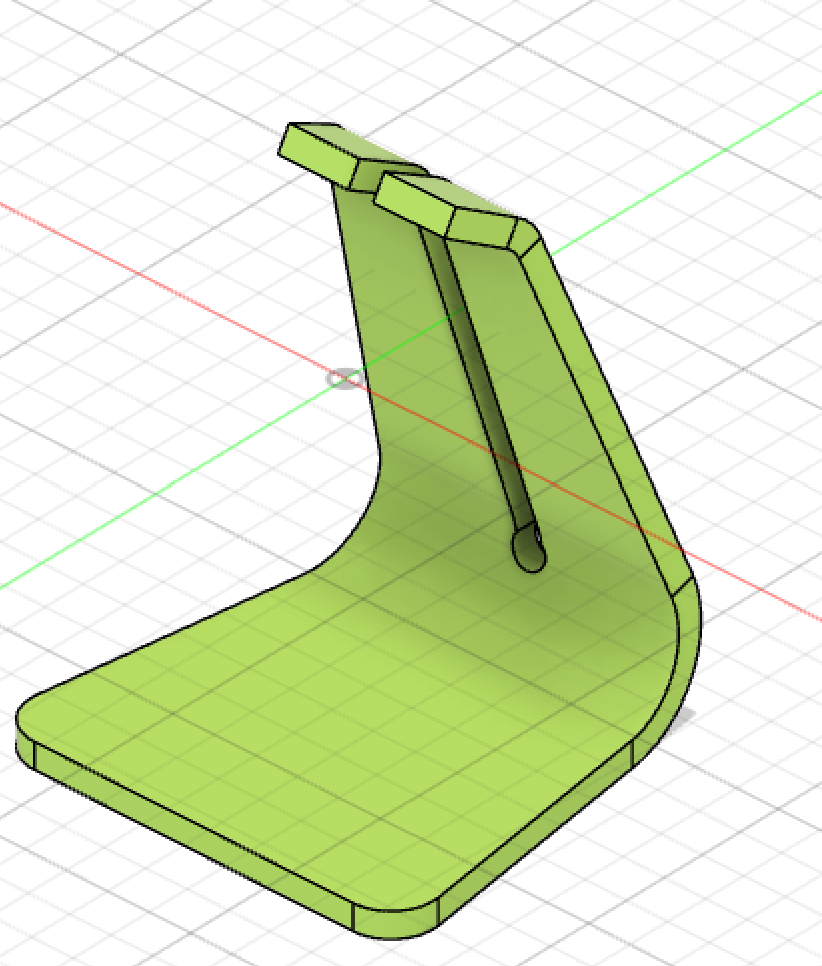
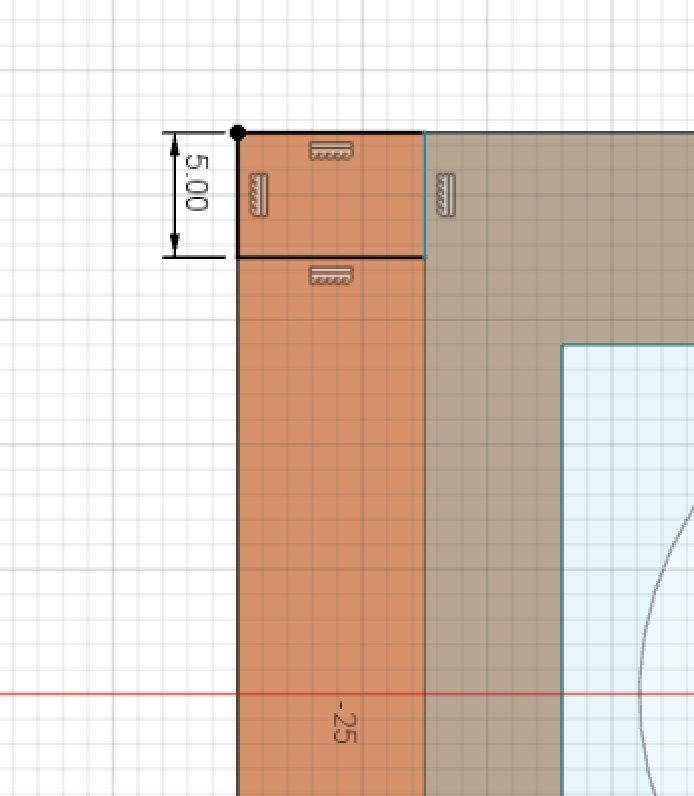
The Stand
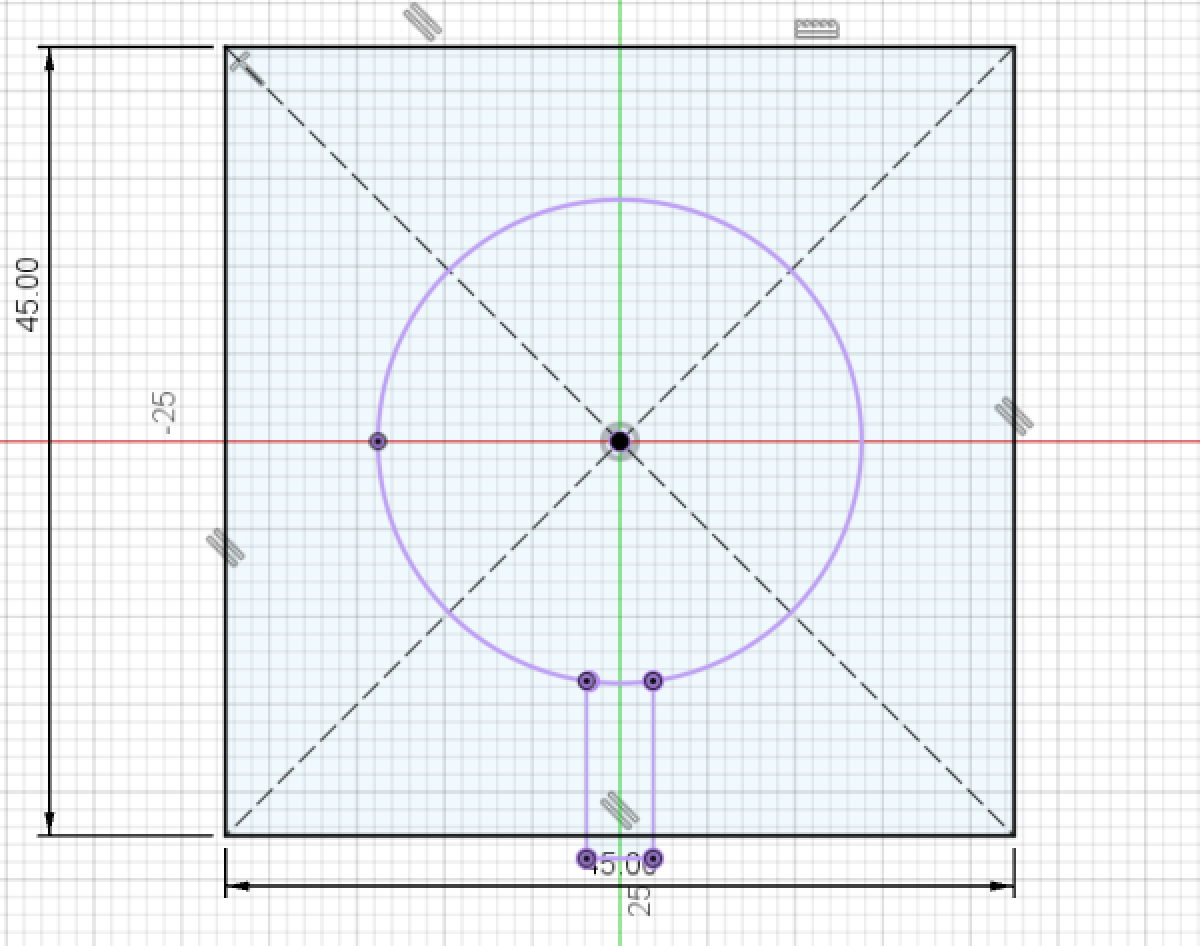
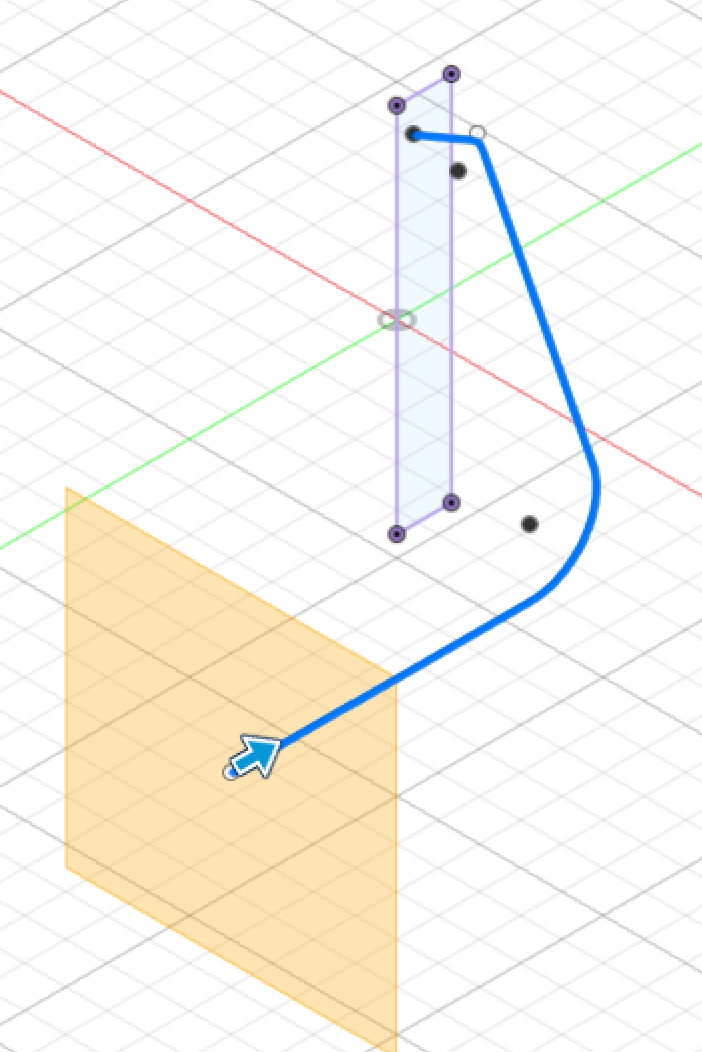
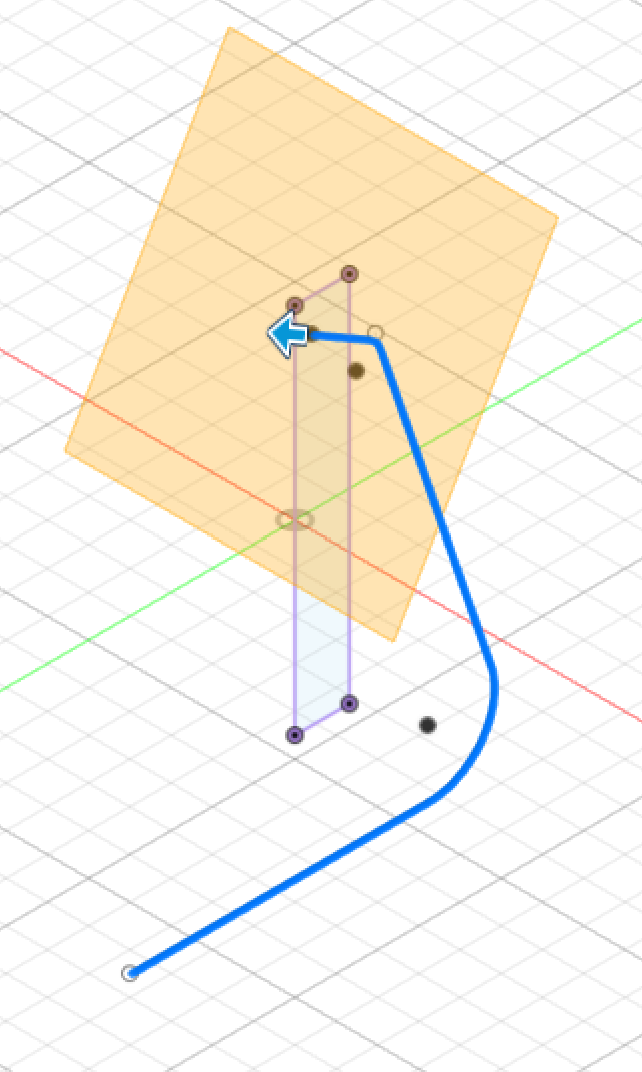
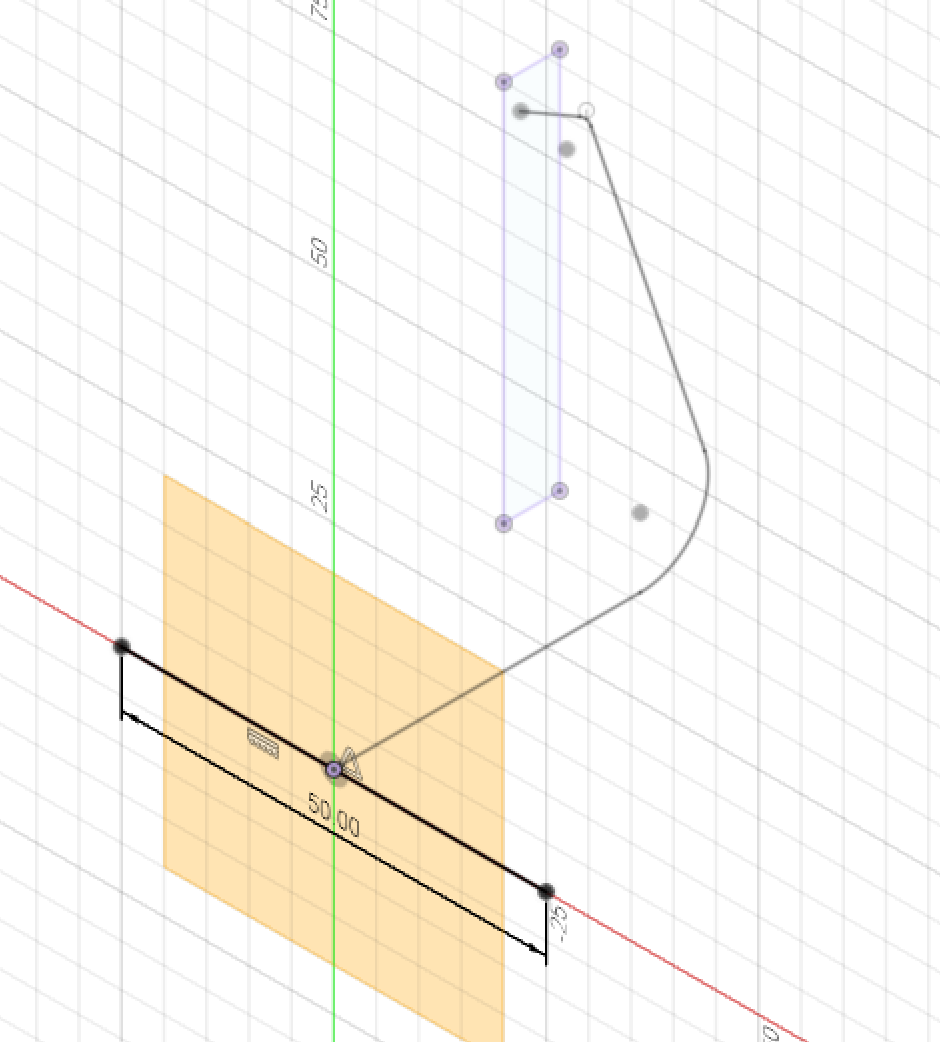
Step 1: Sketcing on the YZ plane.
Step 2: Using “plane along path we would create a plane on each end of our scetch.
Step 3: Sketching on each plane.
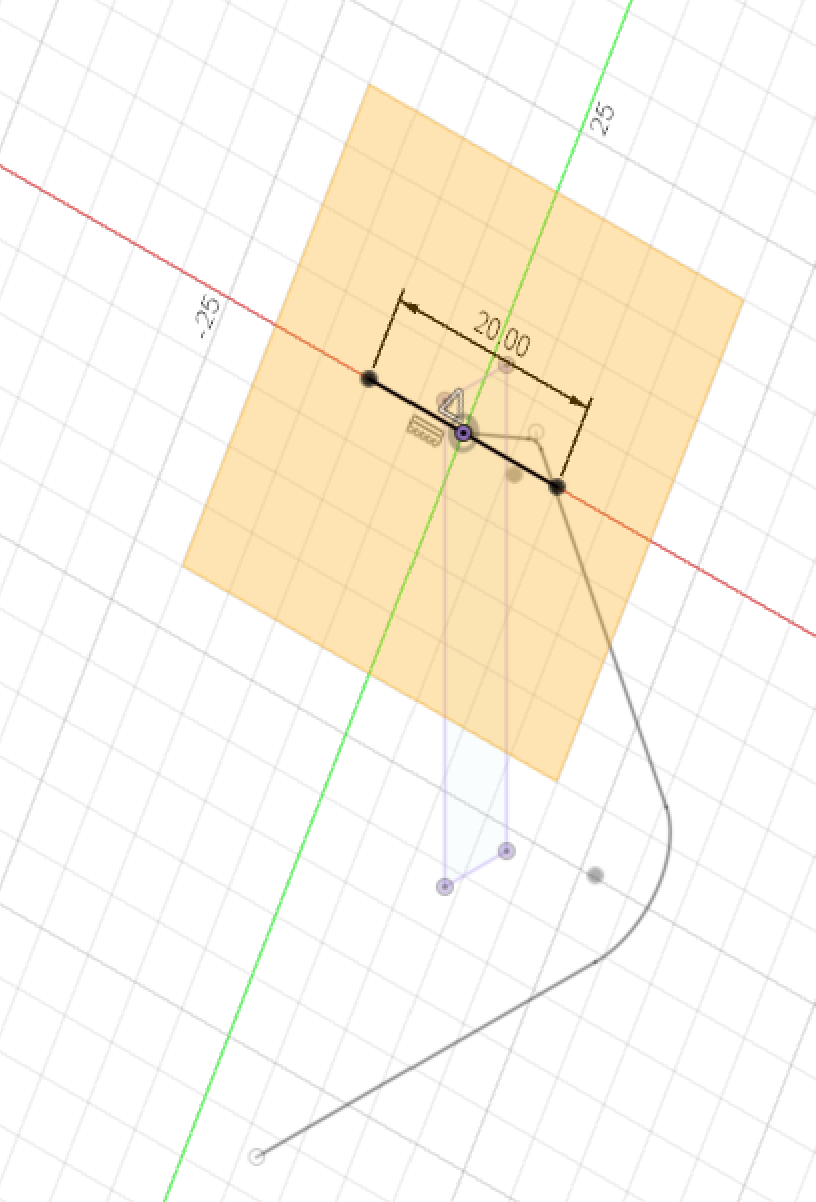
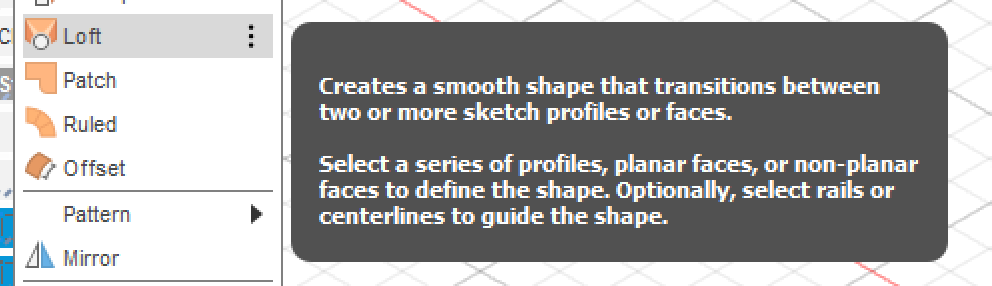
Step 4: Using Loft to create the body.
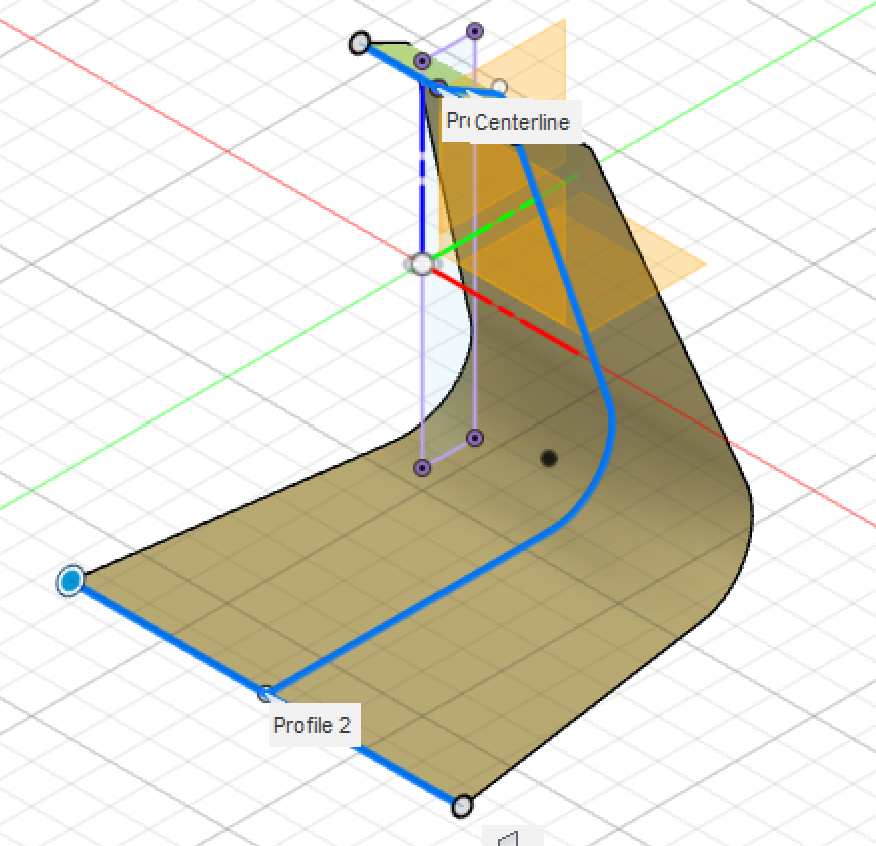
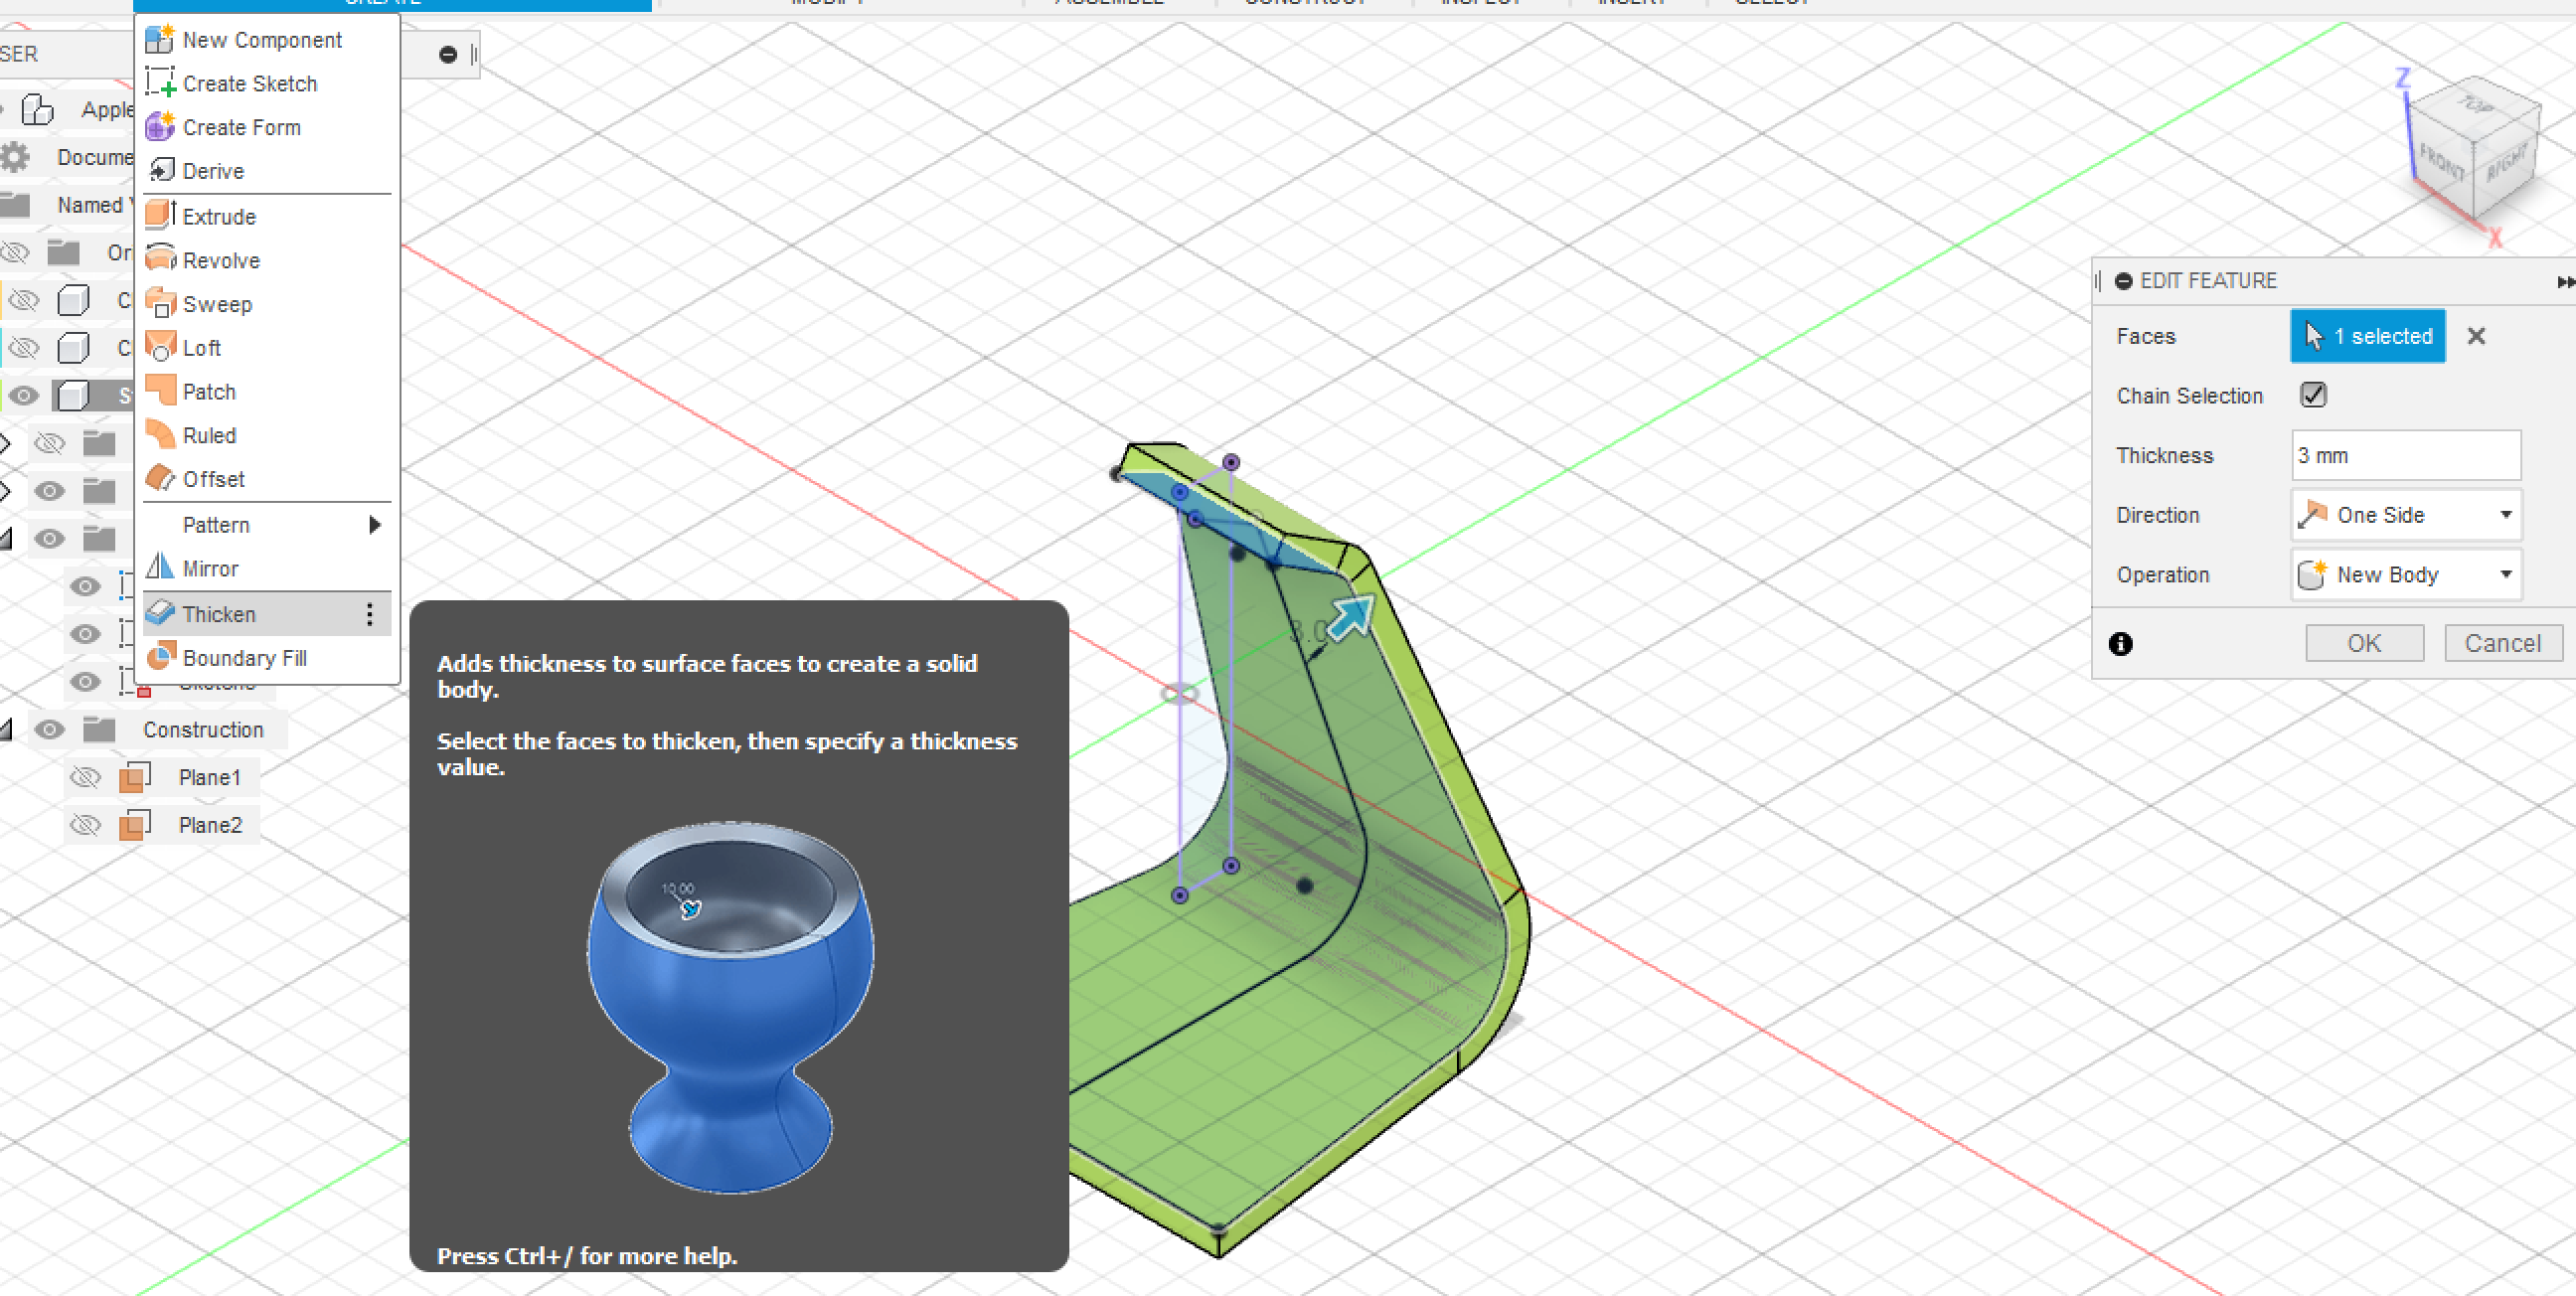
Step 4.5: Using thickens to extrude body.
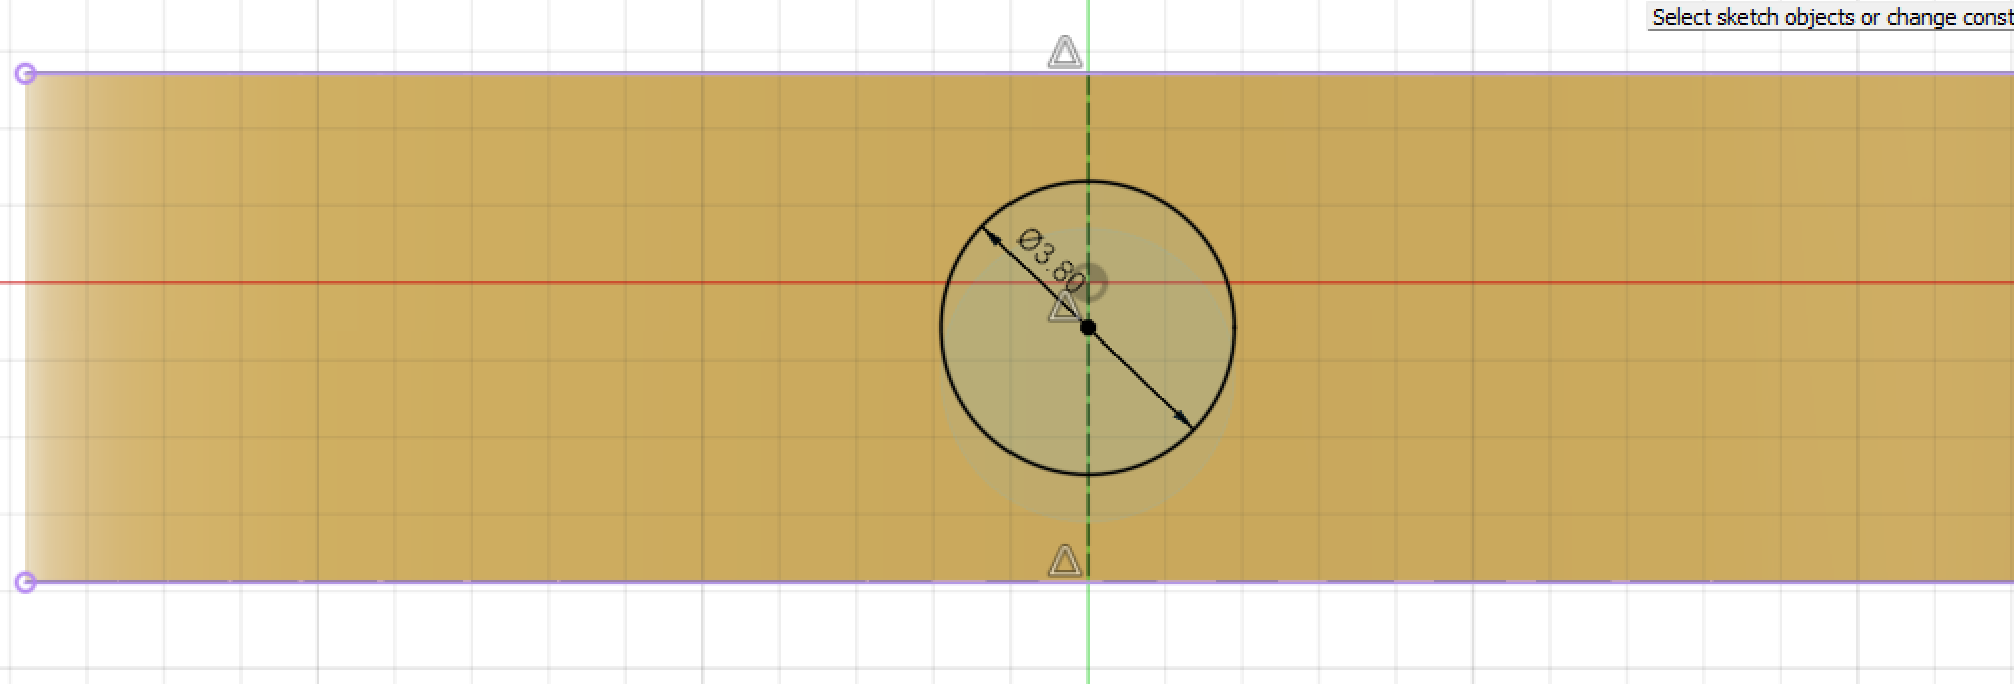
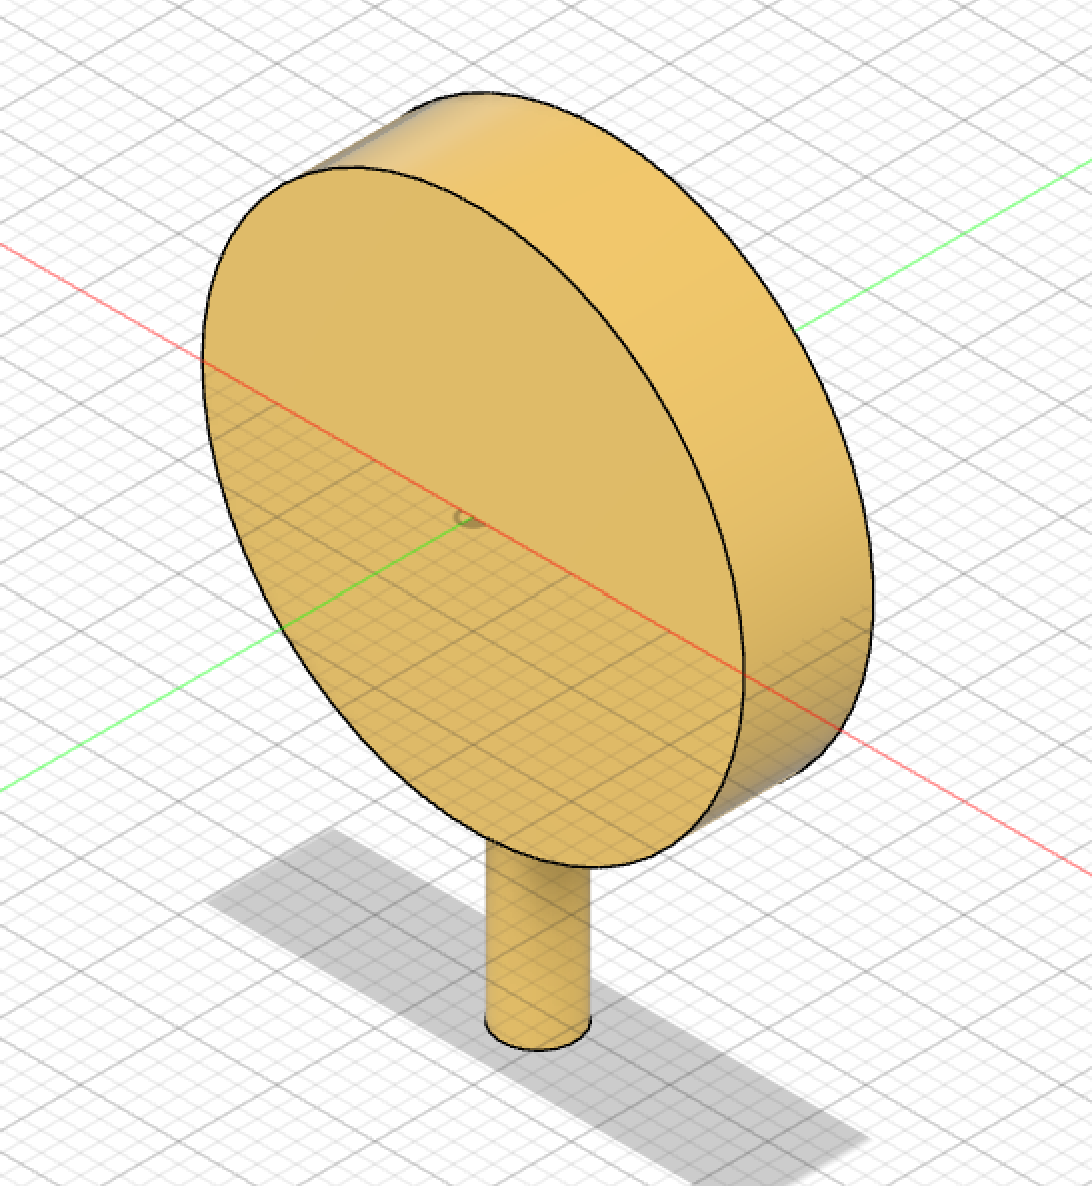
Step 5: Adding charger place.
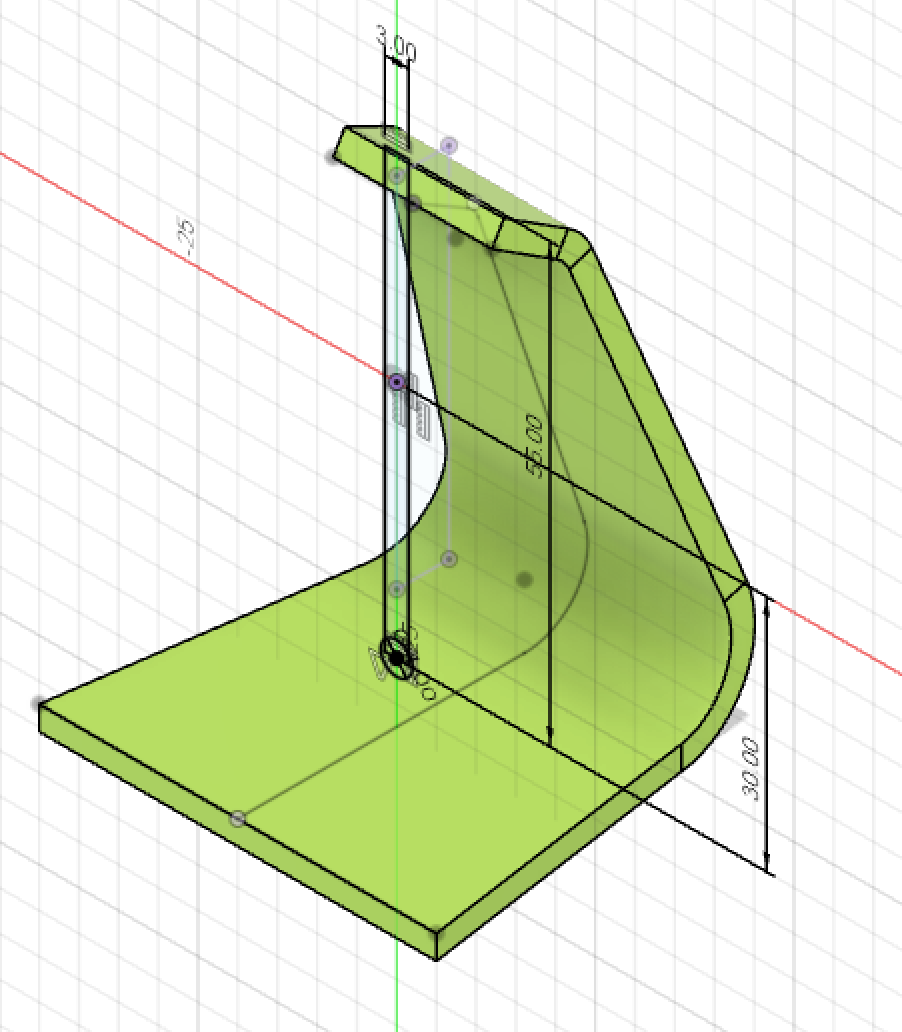
Final look
The Screen
Step 1: Sketch and Extrude.
Step 2: Creating the handles.
Step 2.5: Creating handles joint.

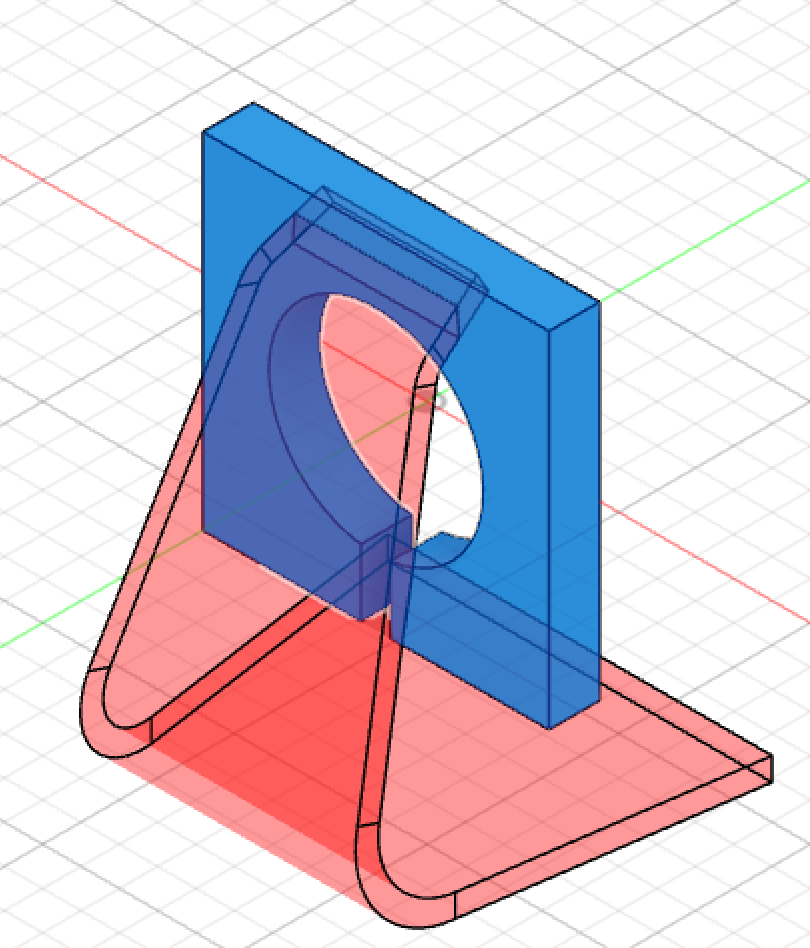
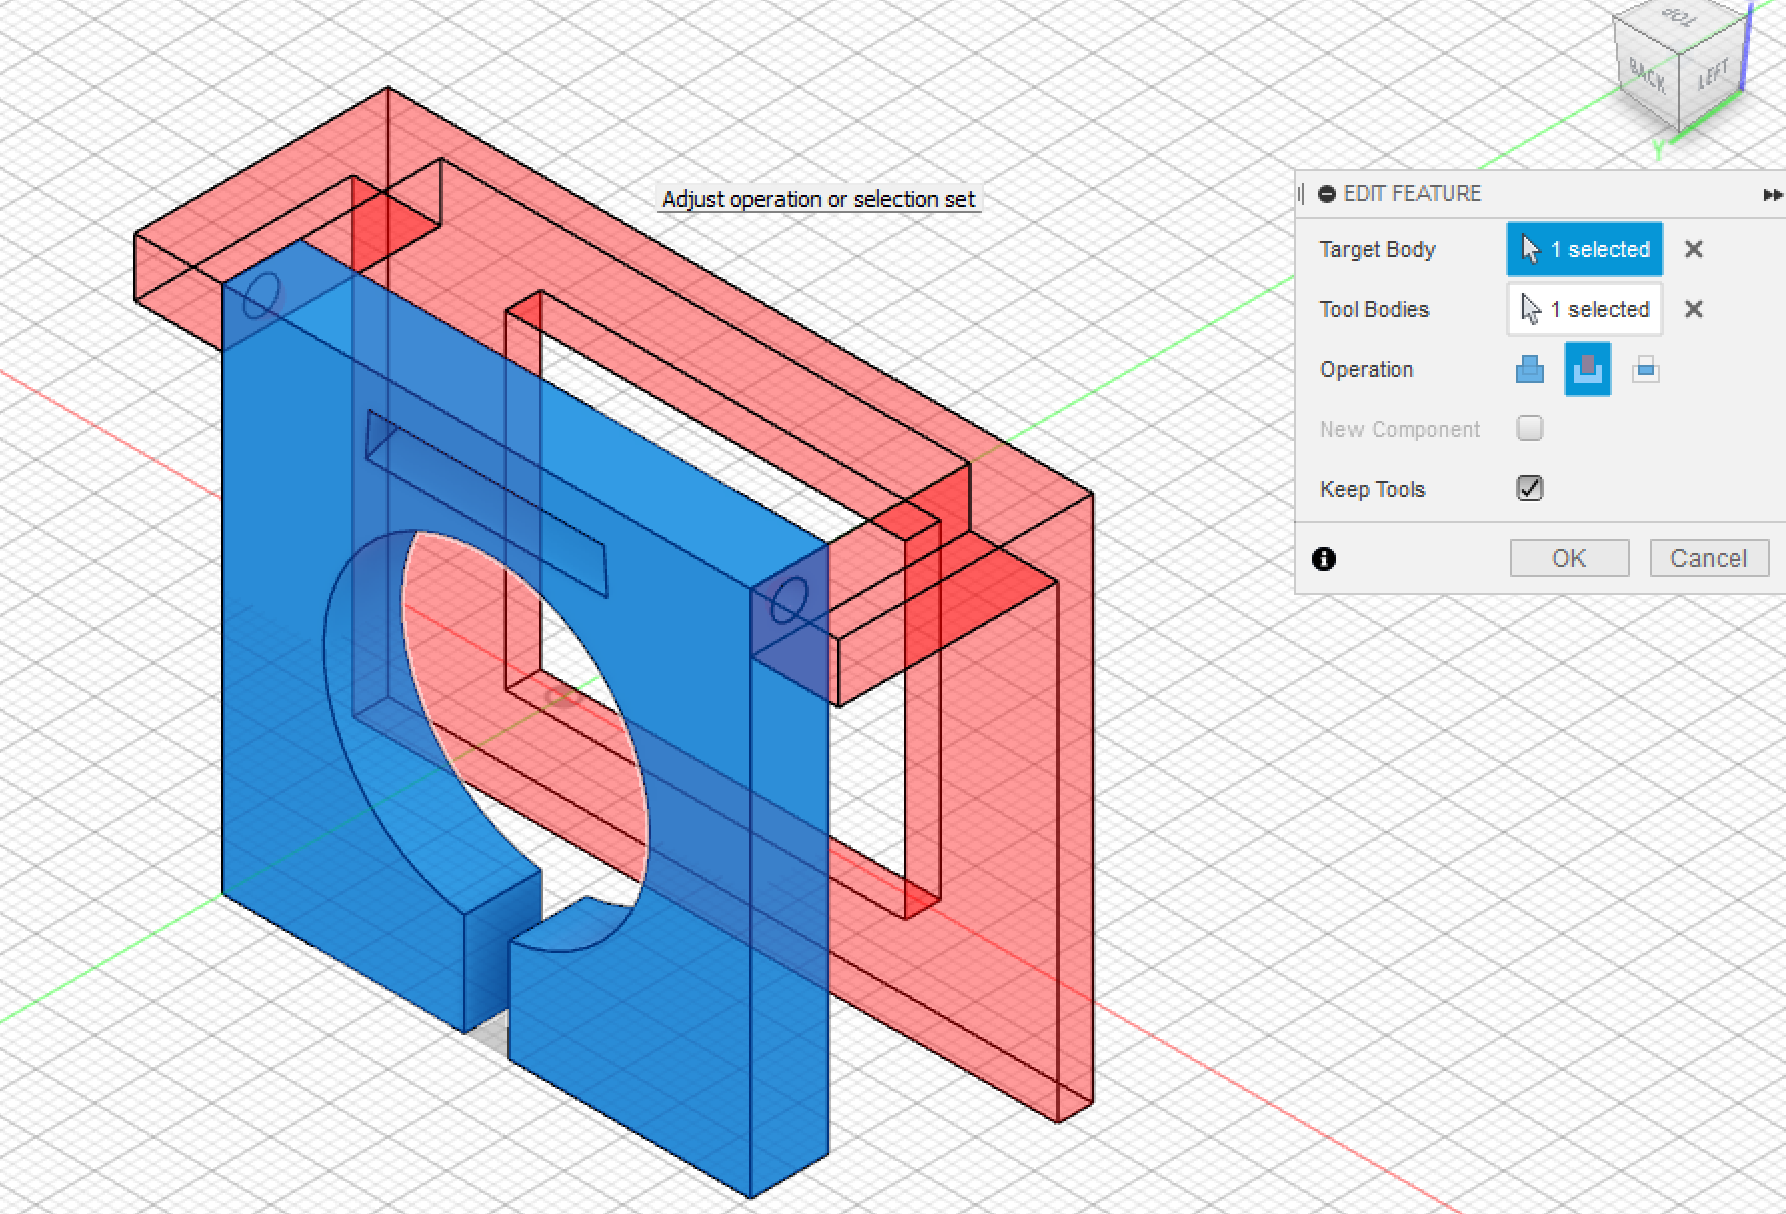
Using “Combine” Function.
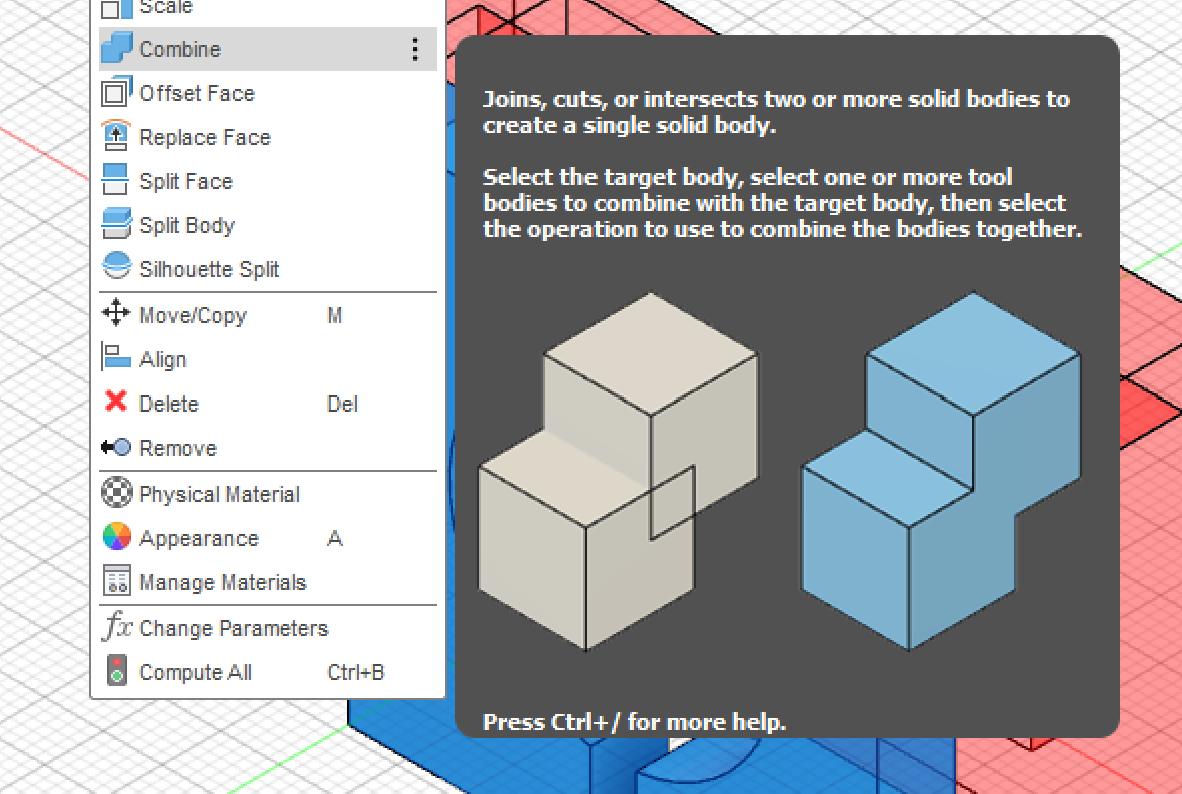
The Target body is the Charger Holder.
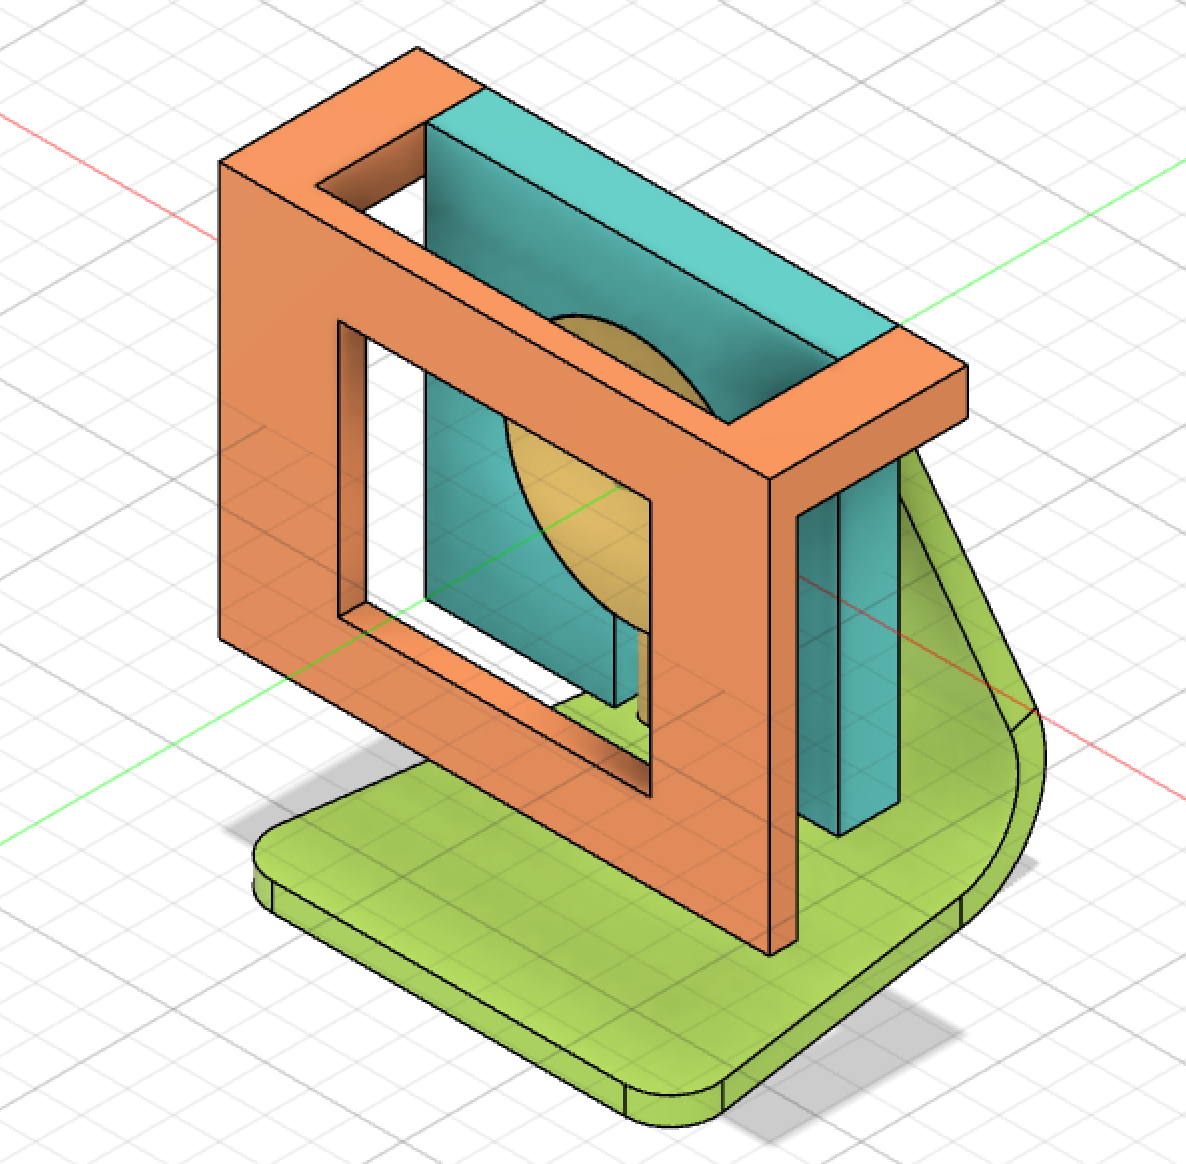
Final Look.
Printing process
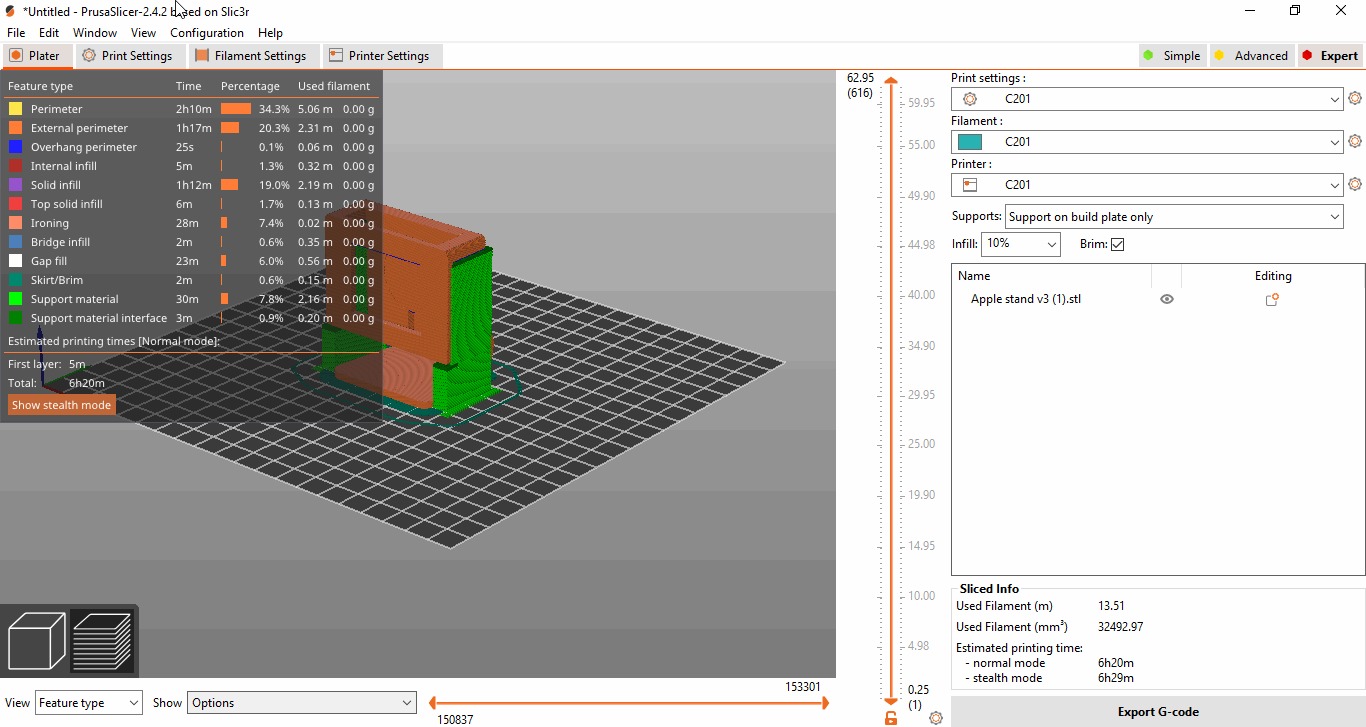
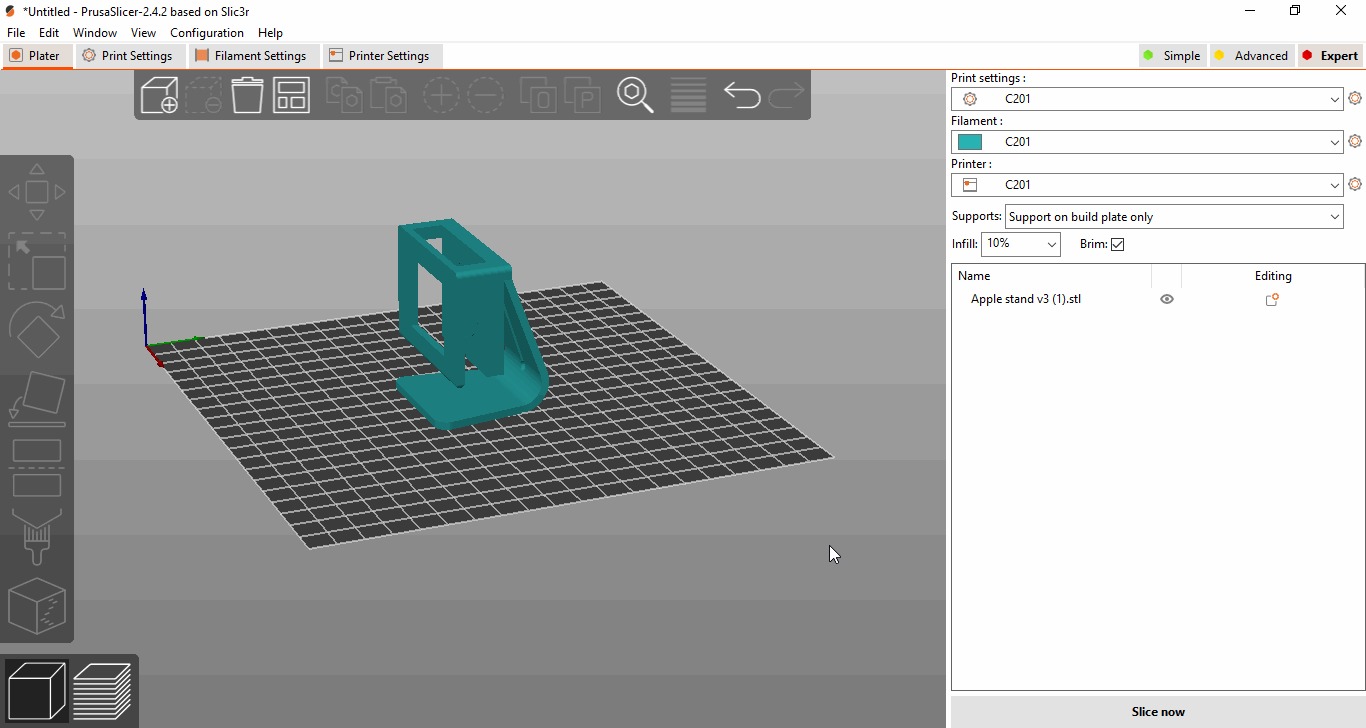
For the printing process I have used a prusa printer with prusa slicer.
Setting up the printer :
material used
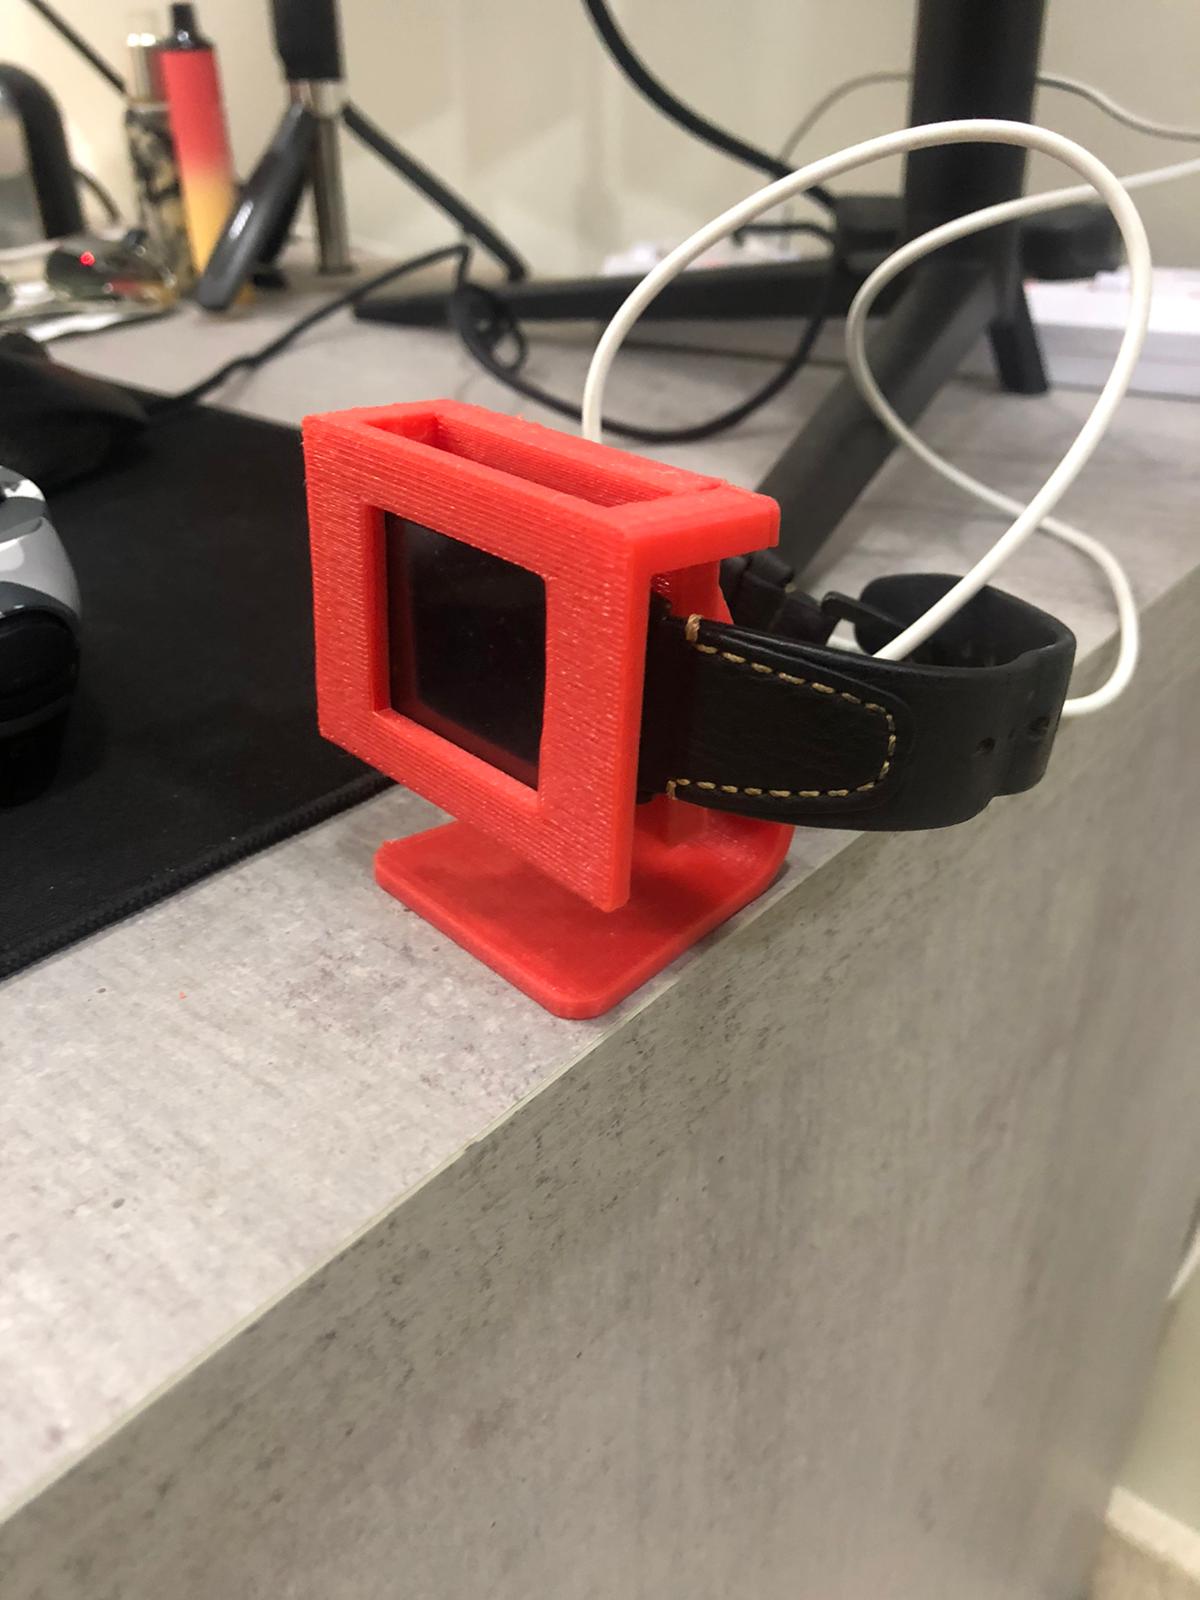
Hero shots


Design files
3D Scanning
What is qlone ?

Qlone is an all-in-one 3D scanner app. We have made it easy and fast to create 3D models from real objects, edit them with built-in editing tools and seamlessly export the result to popular platforms, 3D file formats and 3D printers.
Scanning using 3D scan mat

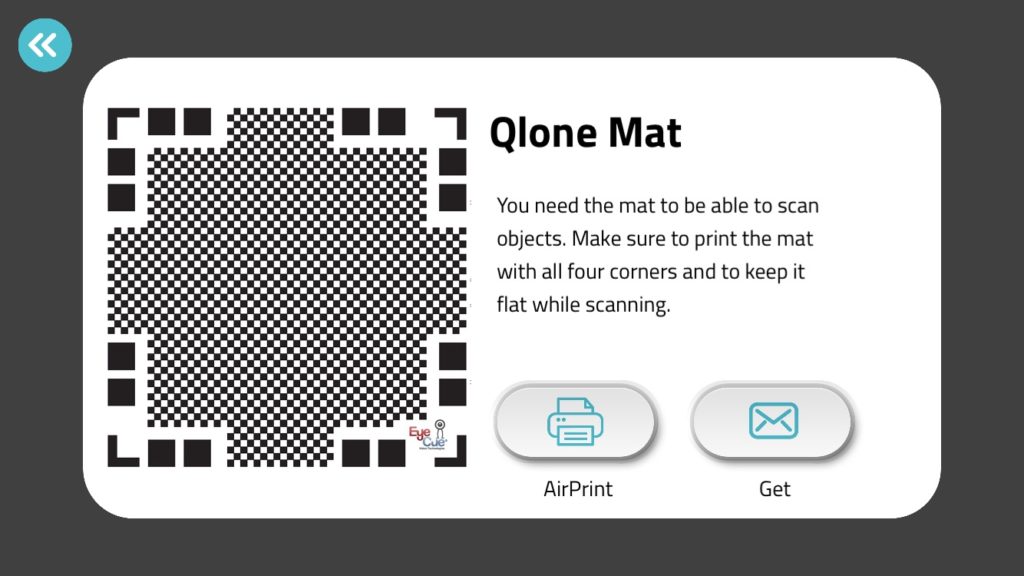
Qlone have the option to use a 3D scanning mat, but…What is a “mat” ?
A mat is a paper printed that has black dots and sqaured which is designed to secure pieces whilst scanning to ensure a stable scanning quality.
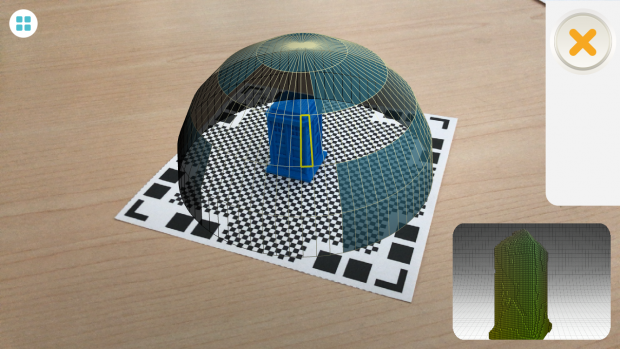
Scanning process
The process of 3D scanning an object using the mat is that you rotate the mat or the camera to get all of the angles of the object, and it looks like this:
Final look
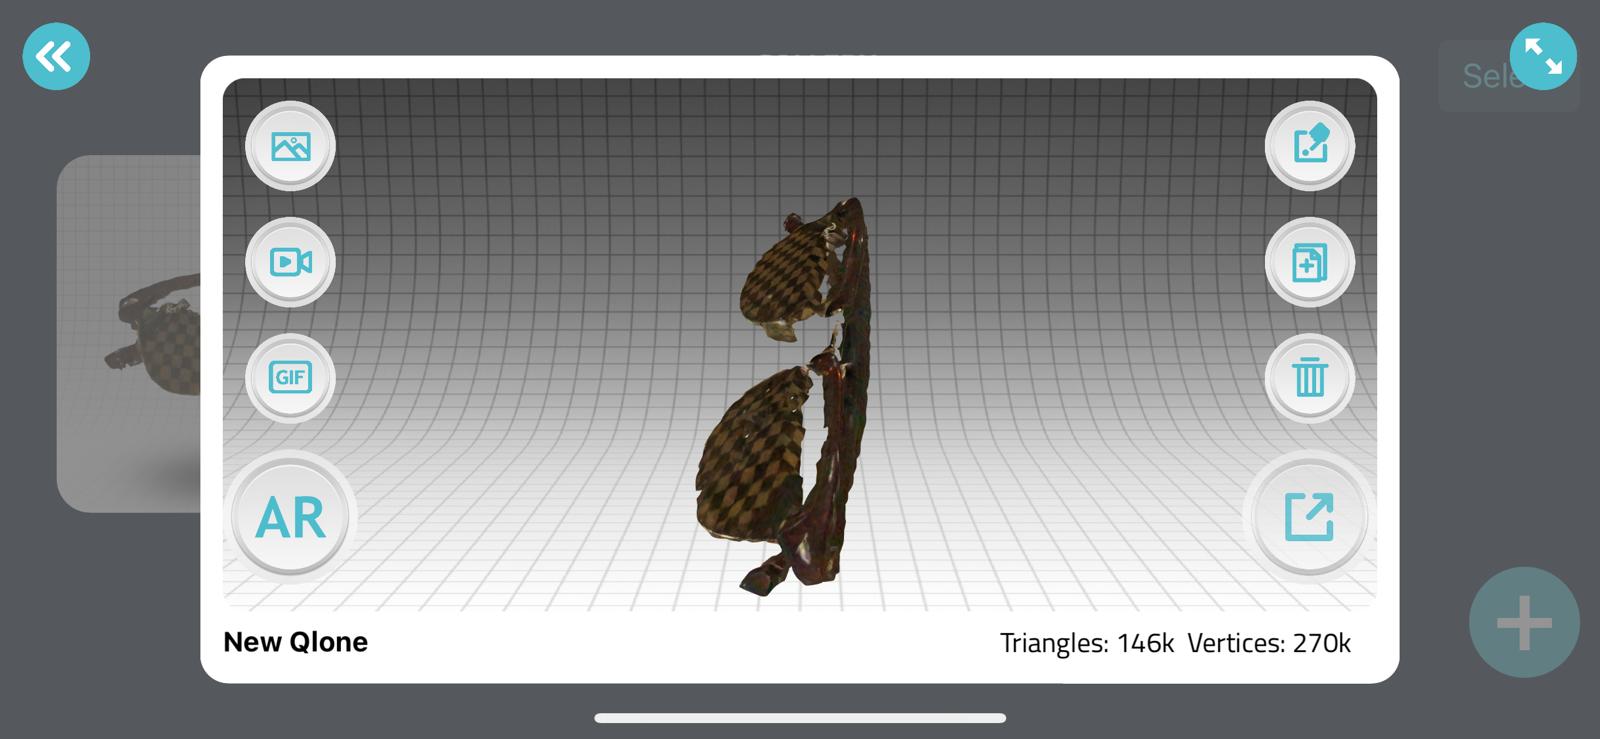
Notes: You can see that the scan wasn’t the best in terms pf quality as most of the sunglasses was missing, maybe it because of the reflection surface but overall it was in good quality. The file wouldn’t be usable to print it using a 3D printer because missing part of the scan.