2. Computer Aided design
The second week of the this program is about getting familiar with software for 2D, 3D designs and rendering. Computer-Aided design create digital designs in 2D and 3D. These designs can be modified, reviewed and rendered before manufacturing them. Software used for this purpose will be discussed in the sections below.
Cuttle
It is a very simple and effective design tool used for digital cutting machines (e.g. Laser Cutters).
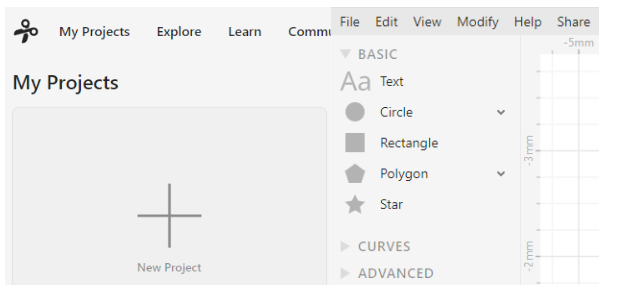
- Go to the cuttle website.
- Create an account and login to the website.
- Open a ‘New Project’
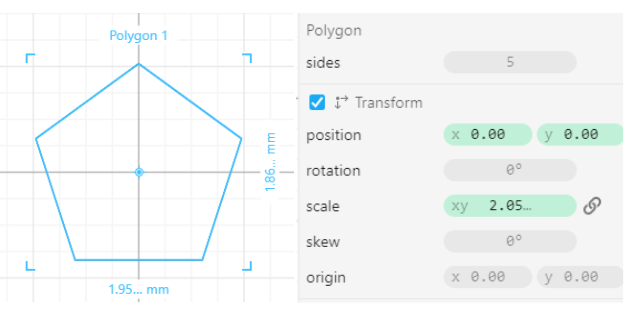
- Select your desired shapes (Basic, Curves or Advanced). I selected Polygon shape. A new tab appears on the left side of the screen, where properties of polygon (such as dimensions, positions, number of sides etc.) can be managed.
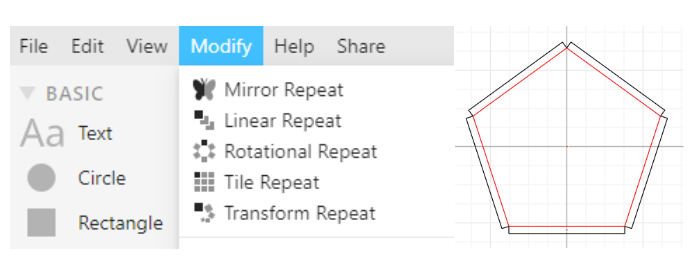
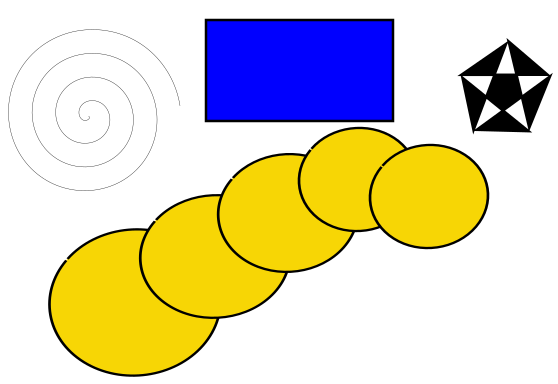
 5. Added a rectangle shape and combined it with polygon. Using the ‘rotational repeat’ from ‘modify’ option, replicates of rectangle were created for each side. You can make any design using these tools.
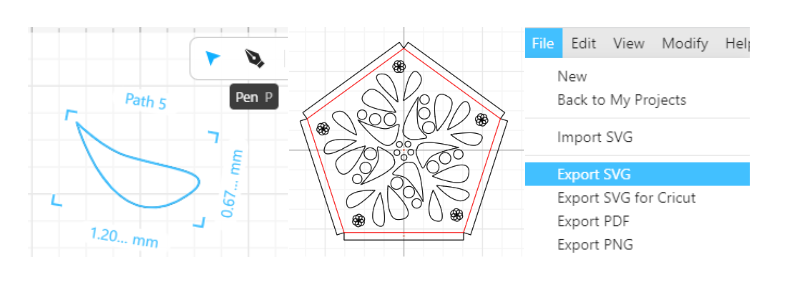
6. Use Pen tool, to create custom paths.
7. At the end, export the this file to be cut into the design made.
5. Added a rectangle shape and combined it with polygon. Using the ‘rotational repeat’ from ‘modify’ option, replicates of rectangle were created for each side. You can make any design using these tools.
6. Use Pen tool, to create custom paths.
7. At the end, export the this file to be cut into the design made.
I made a design with the help of a video tutorial, but the size of the design was too small (by mistake) to be seen in the exported file:
Click to download pdf of design
Fusion 360
Fusion 360 is a very powerful 3D modelling software to design and manufacture a product. I started with creating my account on the website and registered as a student under my university name. It gave me the access to download the software with an educational license.
Bookrest 3D Design
After downloading, open the fusion 360 (.exe) file. At the top there is menu bar where you can create a new sketch of any shape, modify that shape and can add constraints to the design.
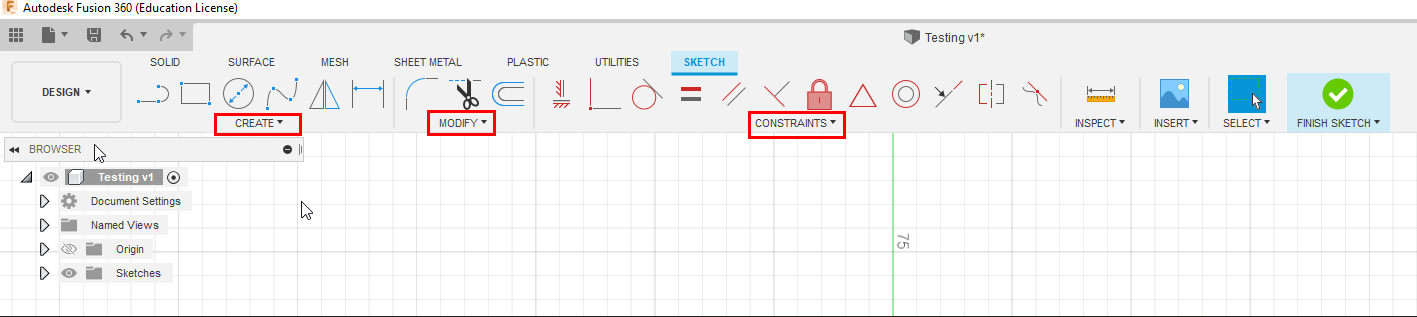
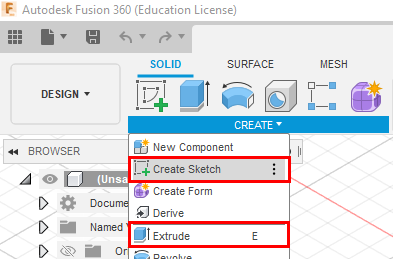
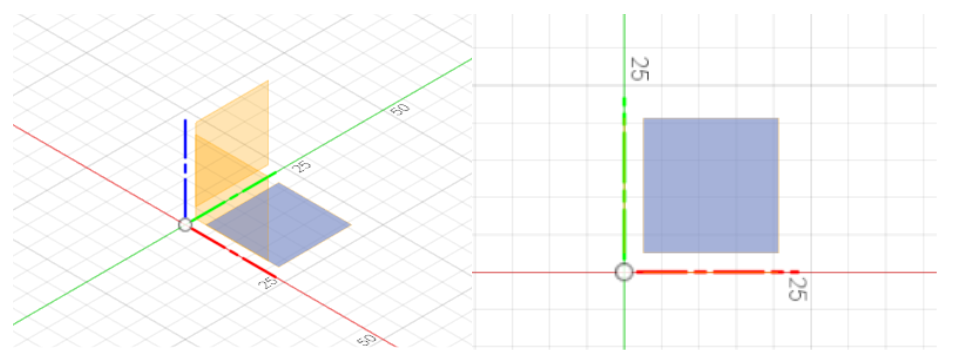
I selected ‘create sketch’ and then chose on of the plane to start working on. You select a plane because your initial sketching will be in 2D. Later, using the ‘Extrude’ option you can convert your 2D model to 3D.
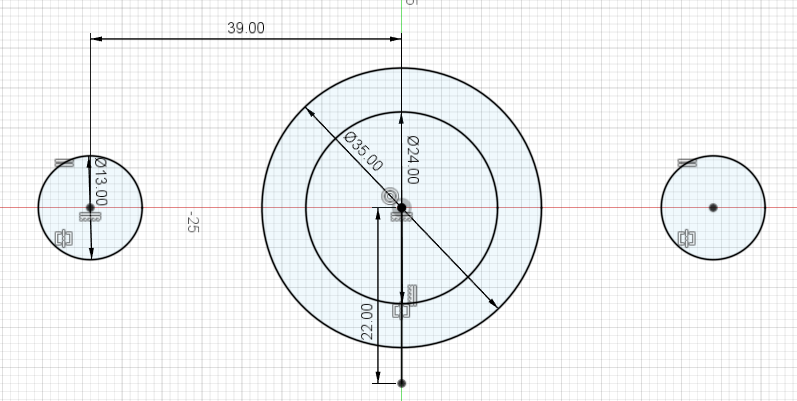
I added 4 circles of different dimensions. Using sketch dimension I fixed the circles at a certain distance from each other.
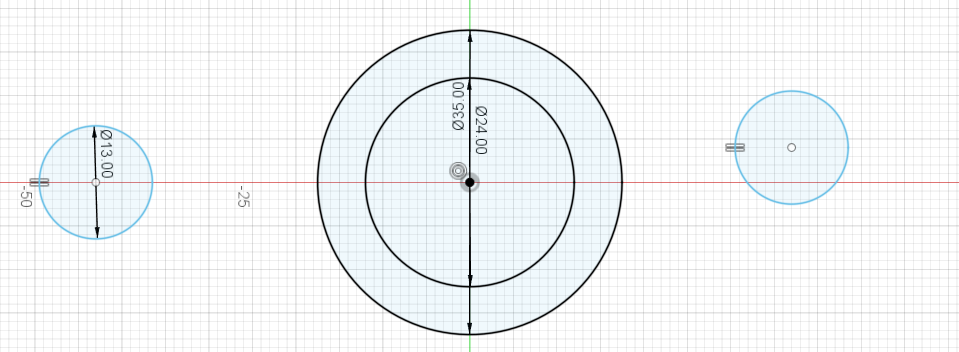
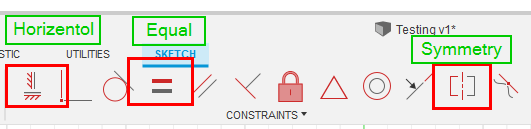
I used ‘Equal’ constraint to keep the same size of two outer circles. Then I used ‘symmetry constraint’ to make outer two circles symmetrical. ‘Horizontal’ constraint was used to fix the circles movement.
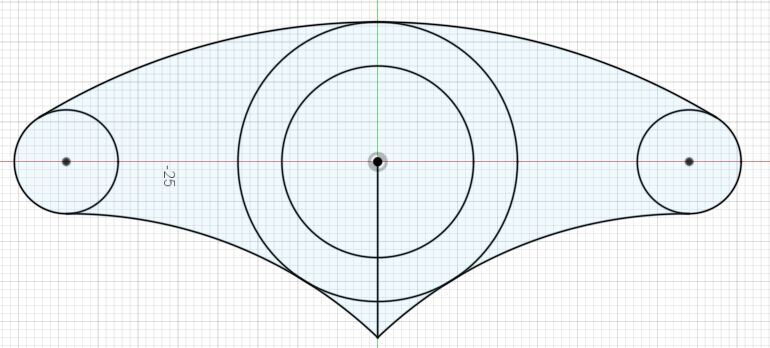
Using 3-point arc from the ‘Sketch’ dropdown menu, all the circles were connected. ‘Tangency’ constraint was used to give a clean tangent on the circles.
Using ‘Extrude’, converted the 2D design to 3D. Then I shaped the edges of the design to be smooth using the ‘fillet’ from the dropdown menu of ‘Modify’.
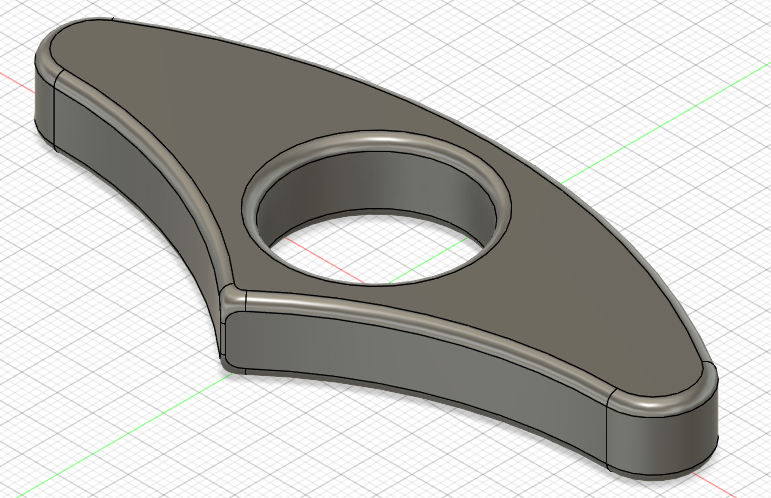
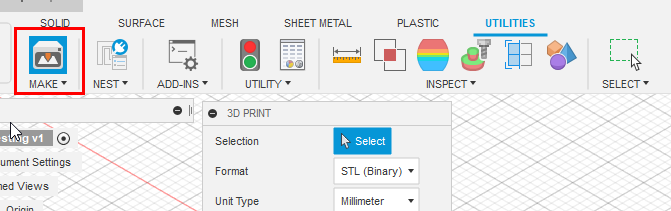
This design is ready to be exported to 3D printer, instead I saved it to my computer. You can download the .stl file.
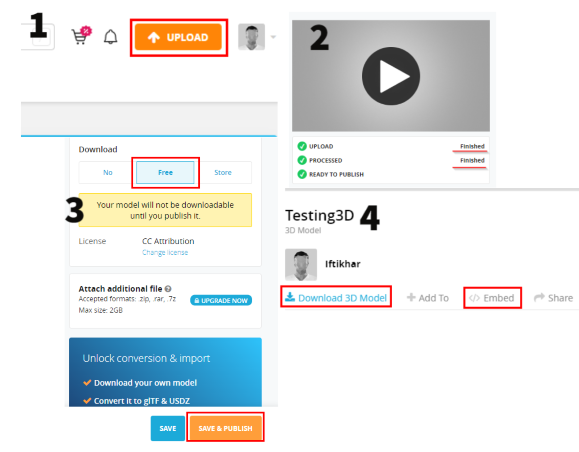
Uploading 3D design
I signed up to the Sketch Fab using my Google Account. Upload the .stl file to your page. Make sure ‘free’ download button is enabled for other user to download your design. Once its uploaded successfully. Press ‘Save & Publish’. The design will appear on your page. Copy the embed code of the video and paste it in your markdown file.
This design of Bookrest was created with the help of a video tutorial.
Inkscape
It is a vector graphics editor, where you can design your drawings. Vector graphics allows unlimited resolutions for printing, presenting or rendering.
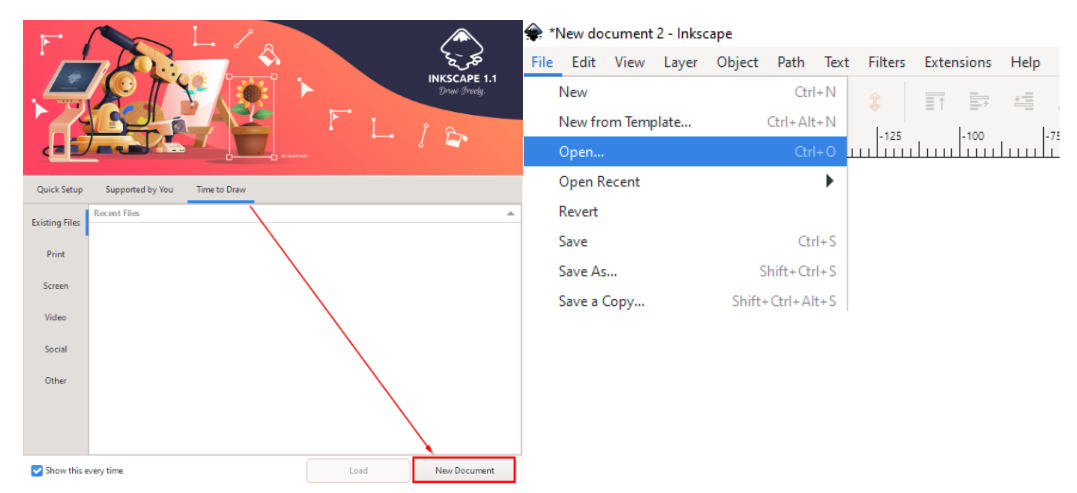
Run the Inkscape.exe file from your computer. Open a new document where you can draw any shape or make any design. Also, you can open any file or image from your computer and change its resolutions and quality and a lot more.
Toolbox on the left shows different shapes. One can simply drag the required shape to the canvas. At the bottom of the canvas, you can select the fill and stroke (outline) colour of the shapes.
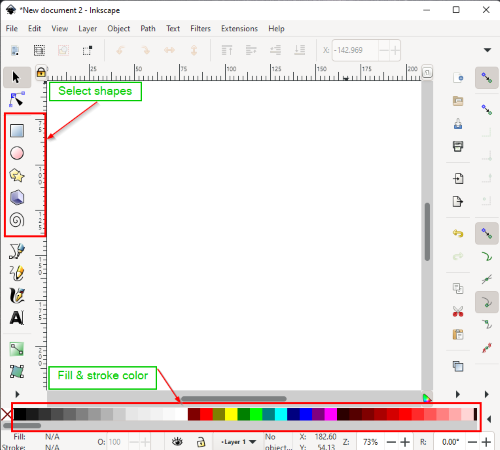
I added some shapes and changed their colours. From ‘Object’ dropdown menu, you can arrange the objects in an order you like.
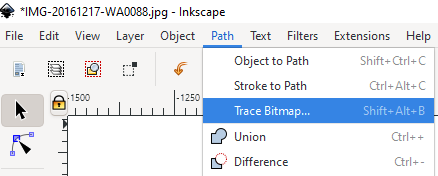
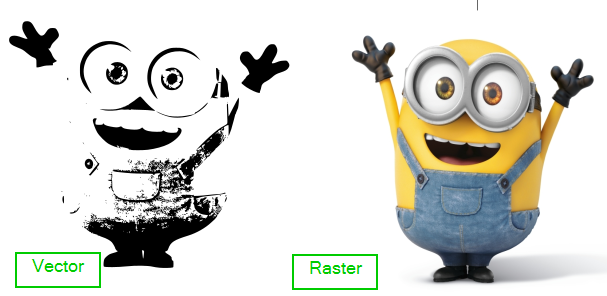
Using ‘Trace Bitmap’ from the ‘Path’, I changed a raster image to vector. Raster image has its limitations in terms of resolutions. While vector is not bound to a fixed number of pixels. The pixels of a raster image start breaking after a certain zoom limit but vector image remains the same.
Design File for Inkscape Click to download svg file of design
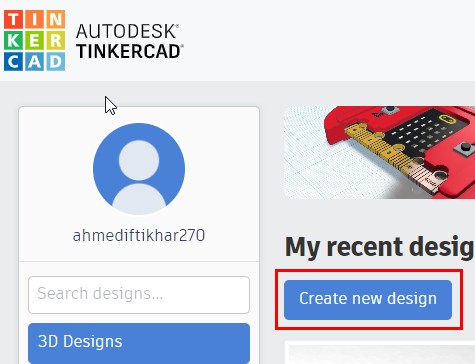
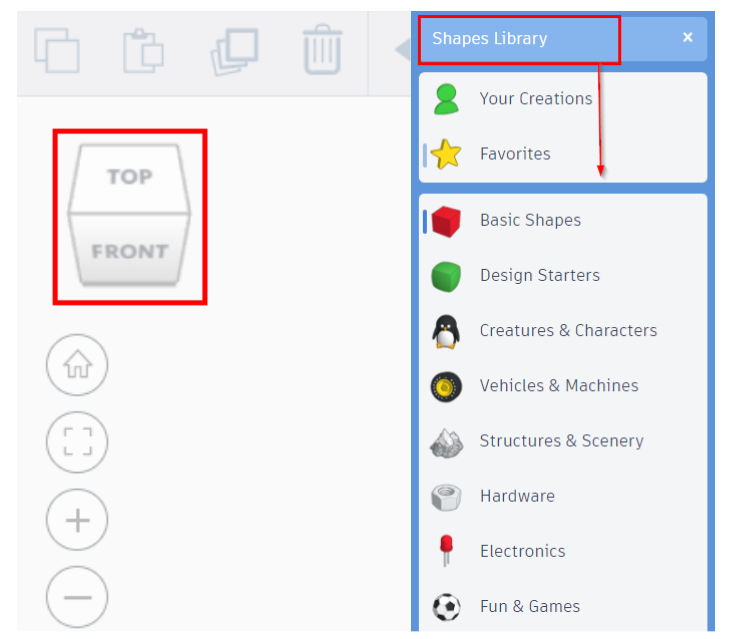
Tinker cad
Tinker cad is a very a simple and easy platform to make 3D digital designs. It is a free online software tools. You can simply sign up using your Google account on the Website. Start by creating a new design. It will take you to the workplane. On the right, there is shapes library where you can select any desired design or even start with basic shapes. On the left, you can manage the view of your workplane.
I started by dragging some basic shapes such as a cylinder, text, paraboloid, diamond shape from the right menu.
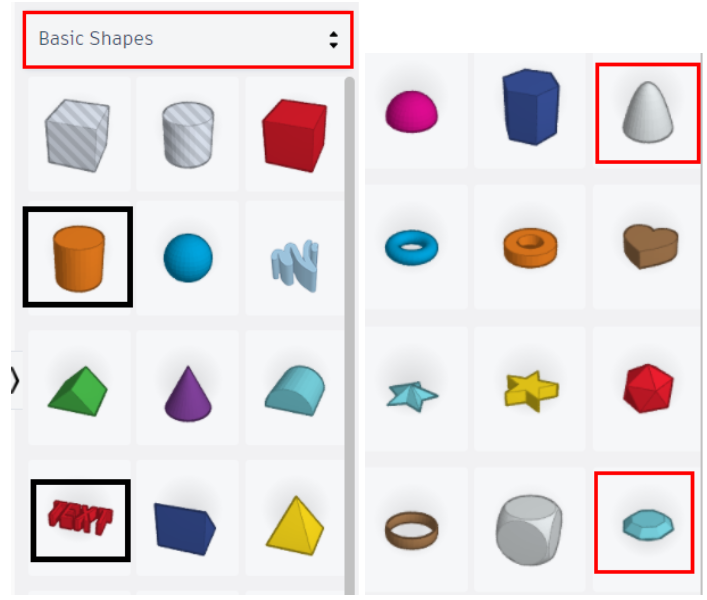
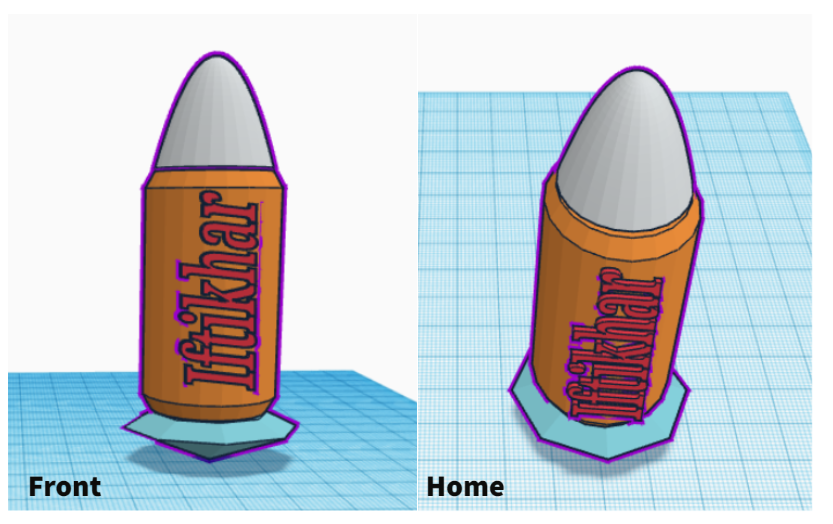
I changed the dimensions of the added shapes. And arranged them on top of each other expecting to have a rocket design. But ended up having a bullet ready to travel in space. I made a bad choice of shapes.
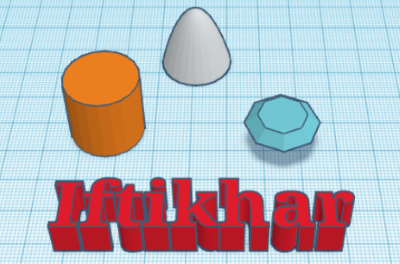
However, I tried to manage them in one design. And I selected all the shapes using CTRL + A then used the Group button on the top left of the workplane to make them a unit. Grouping your shapes will help you in avoiding any accidental mistakes.

Design file for Tinkercad
Click to download STL file of design