3. Computer controlled cutting
Vinyl cutting
Cricut software was downloaded for cutting and printing the design. Created my account and started exploring. Download the Cricut Design Space.
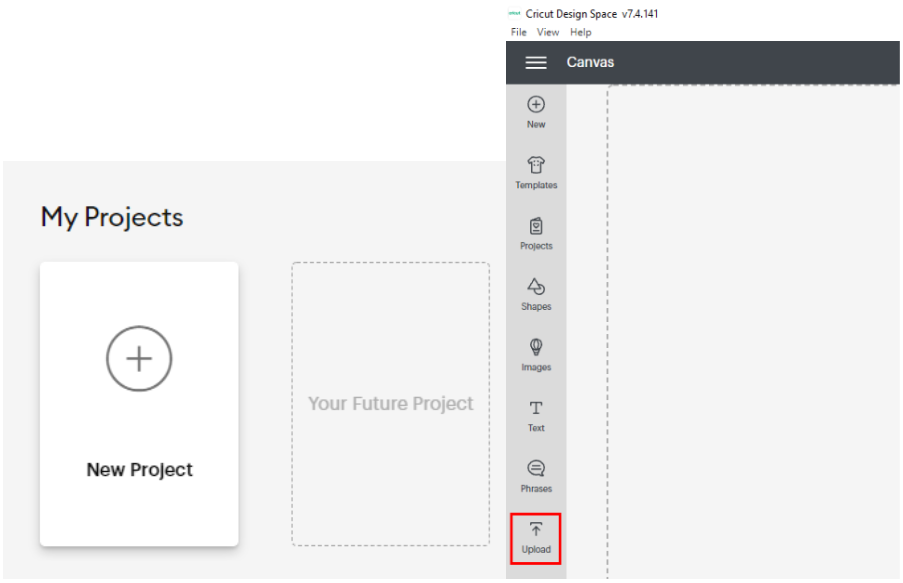
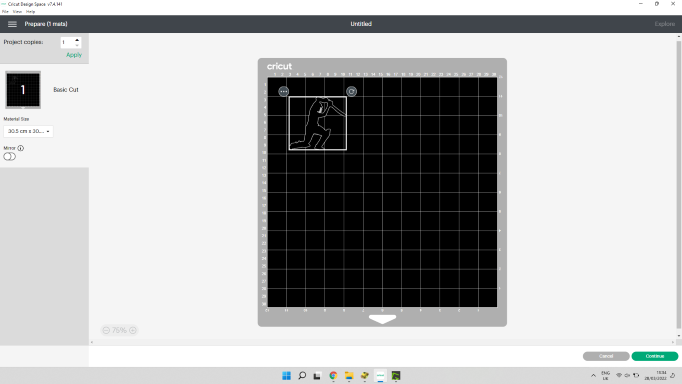
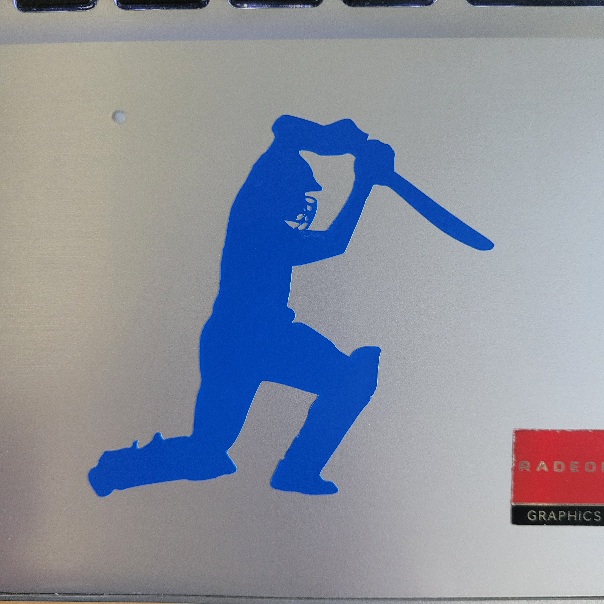
I opened a new project, the canvas appears on the screen. You can either design your objects on the canvas or just upload the file you want to cut. I took a cricket batsman image and uploaded it. Make sure you upload the supported format of the files (.png, .jpg, .gif, .svg .dxf, .heic or .bmp).
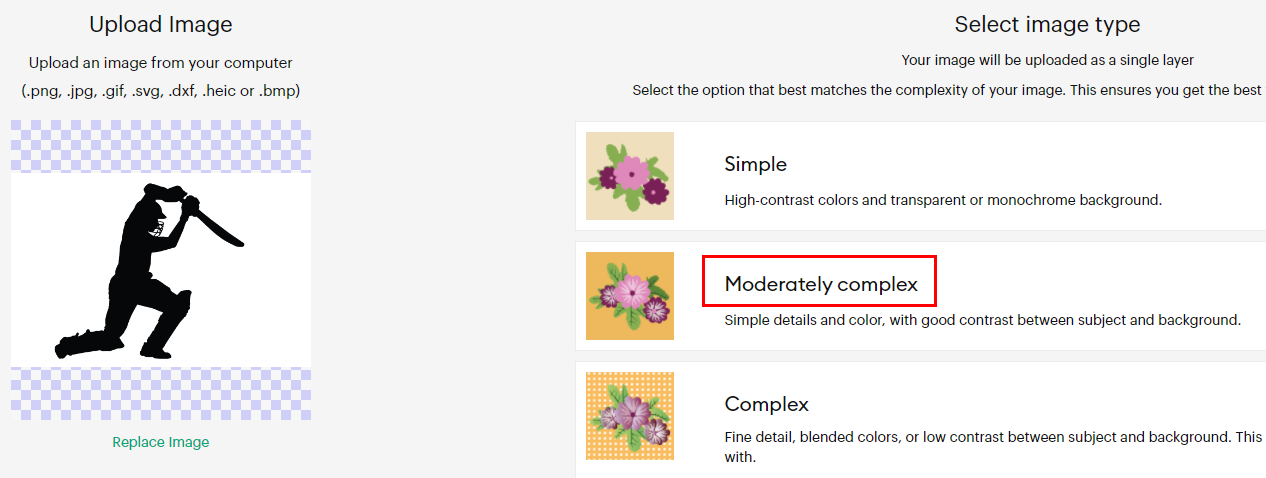
While uploading you must choose an image type based on how much detailed cutting you want. I chose ‘moderately complex’ which is good option for simple detailing and colour.
In the next step, I selected the area which I don’t want to cut. Then if I press the ‘preview cut image’, second image will appear showing the area which will be cut in the cutting machine. If you are satisfied with the preview of the image being cut, just press ‘apply & continue’ to proceed.

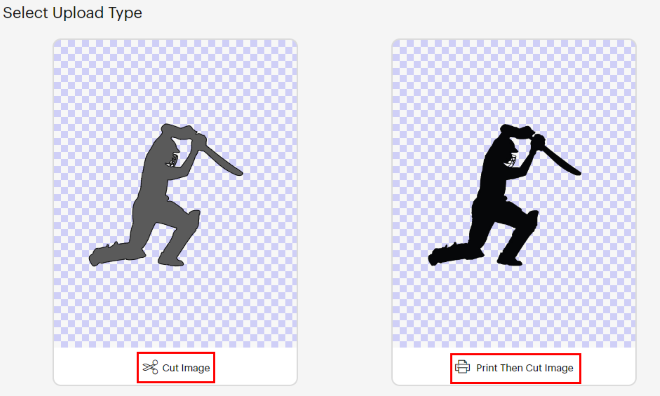
I selected the ‘cut image’ option in the final step of uploading, because I was going to cut the image directly instead of first printing and then cutting it.
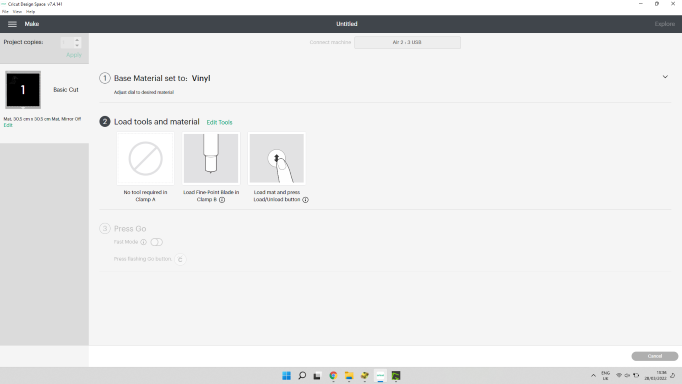
Connected the cricut cutting machine with the laptop.
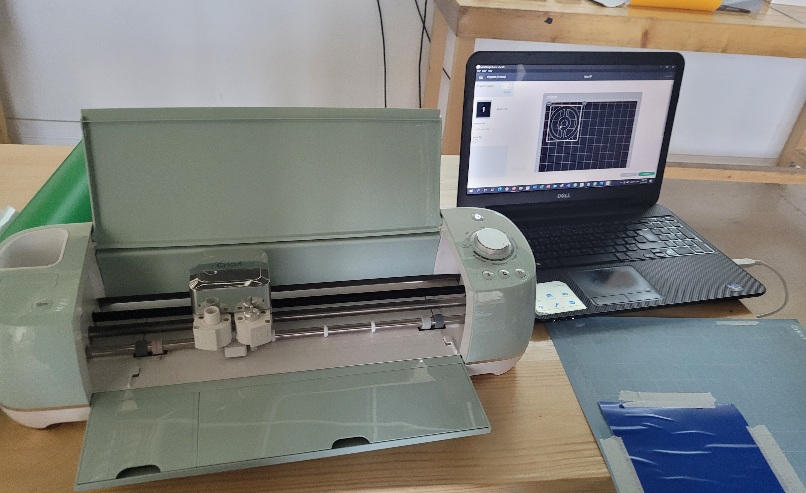
Along with machine setup, I took the vinyl sheet and placed it on the cricut sheet. This sheet was then inserted into the cutting machine.

There are different options on the machine for different materials. Since I am using vinyl sheet, I rotated the switch of the machine to the Vinyl written at the top.
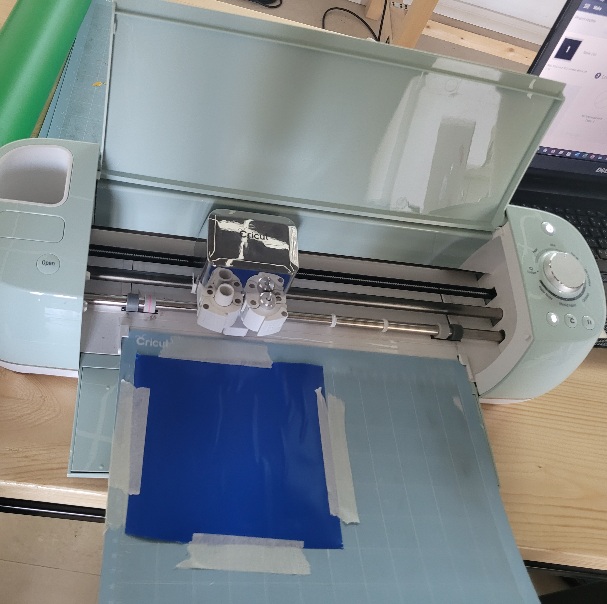
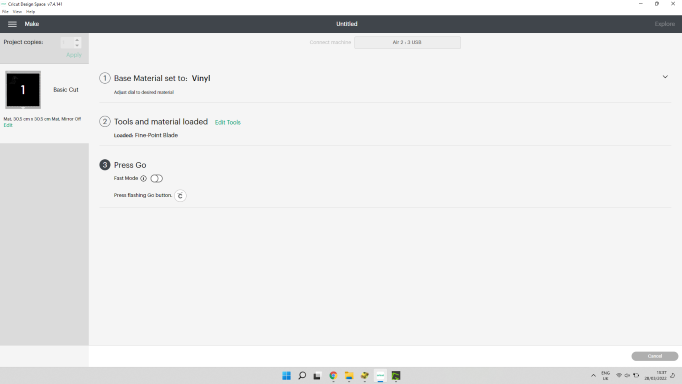
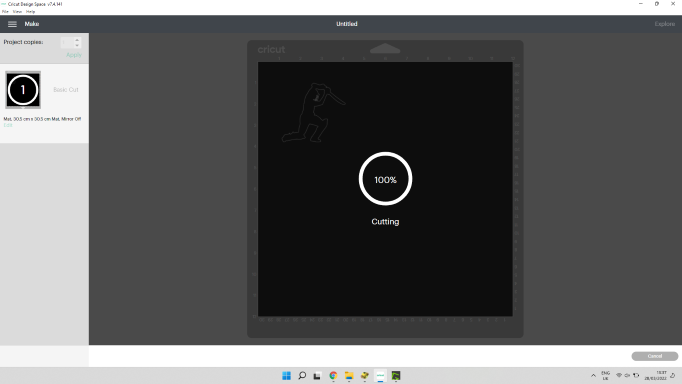
Once you press continue on screen, a two headed arrow button will start blinking on the machine. It fixes the sheet inserted in the cricut machine. After this when you press ‘Go’. Second button (looks like letter c) starts blinking, press it and machine will start cutting the vinyl sheet in the shape uploaded. Screen will show a cutting progress on the screen in percentages.
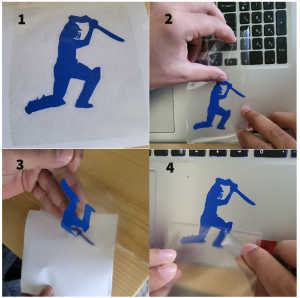
After the cutting, I took out the cut design very carefully. And placed it on my laptop. The cutting was very fine. It cut even the smallest part of the helmet neatly.
Vinyl - Hero Shot
Laser cutting
In the first session of laser cutting, we had a group assignment where we made a comb shaped design in the Fusion 360. Later this design was cut using laser cutting machine connected with a computer software RDWorks. Few tests were made to know the thickness of the material and the joints. Joints thickness was found to be 5.55mm where it fits perfectly with the other shape. Group Assignment Details
Changing Parameters in the Fusion 360.
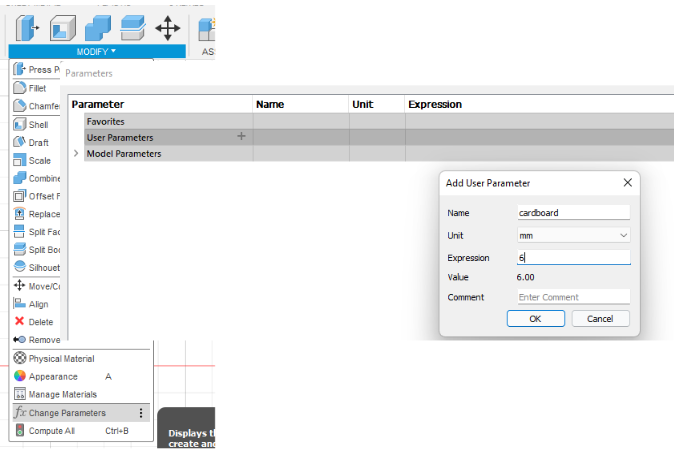
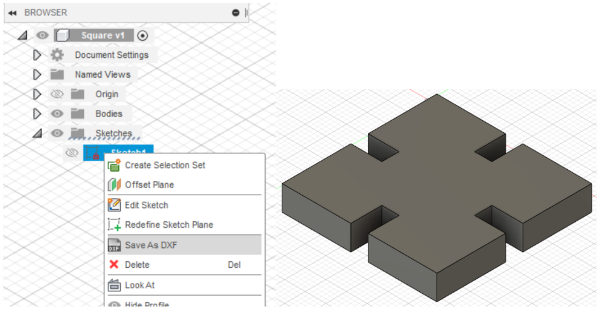
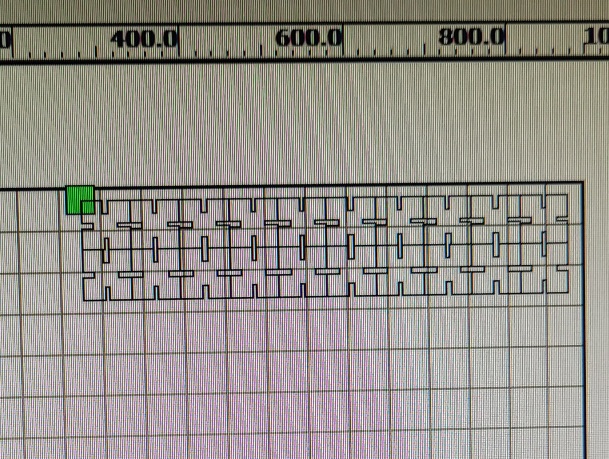
 In the Second session of laser cutting, we were asked to work individually. I designed a square shape (40x40mm) with joints (thickness of 5.55mm) in the Fusion 360. I extruded the design to fix the settings (lengths, thickness etc) of the design. Then saved the file in the DXF format because the laser cutting software supports this format.
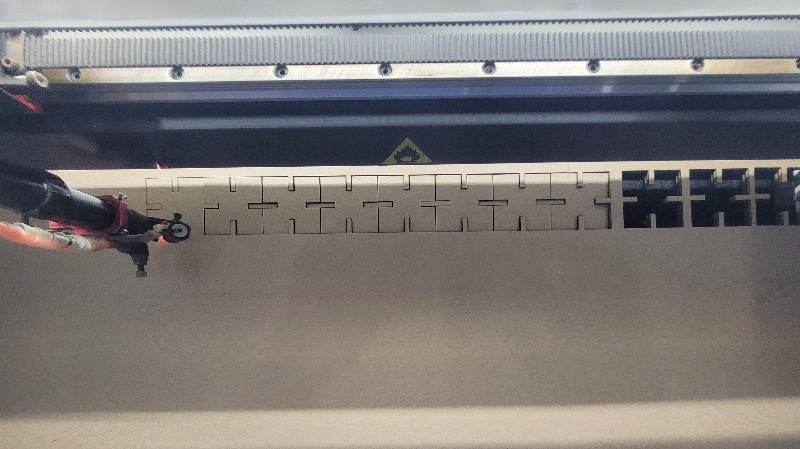
RDWorks software sends commands to the machine then machine cuts the material being used as per mentioned settings. I used carboard material having thickness of 6mm.
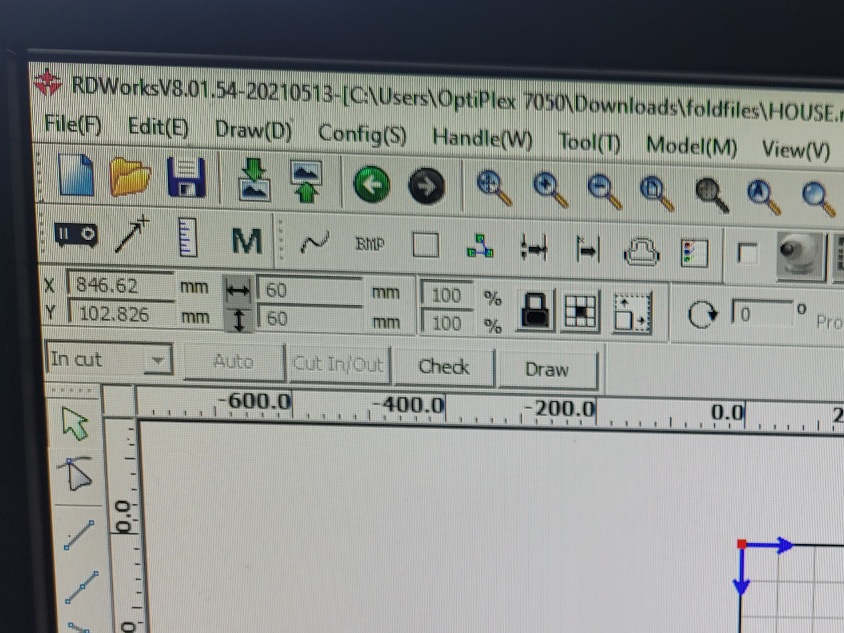
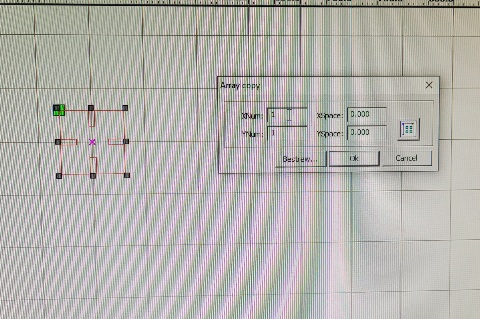
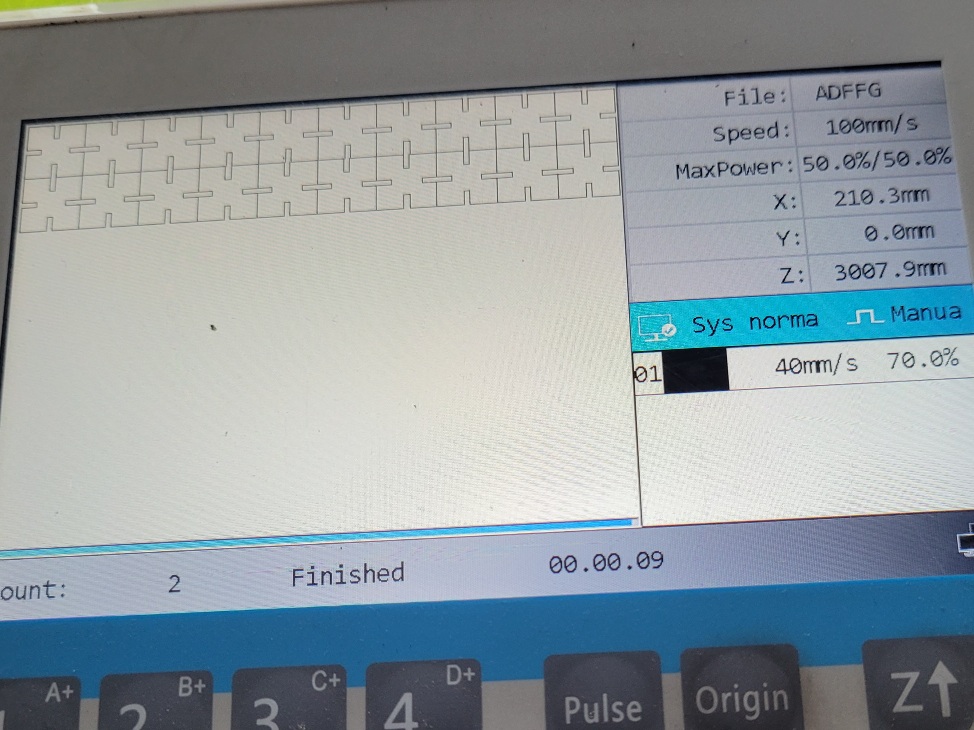
Import the design in dxf format to the software. I specified the number of squares I need to be laser cut. I used an array of 10x2 which means machine will cut 2 lines of 10 squares, a total of 20 shapes.

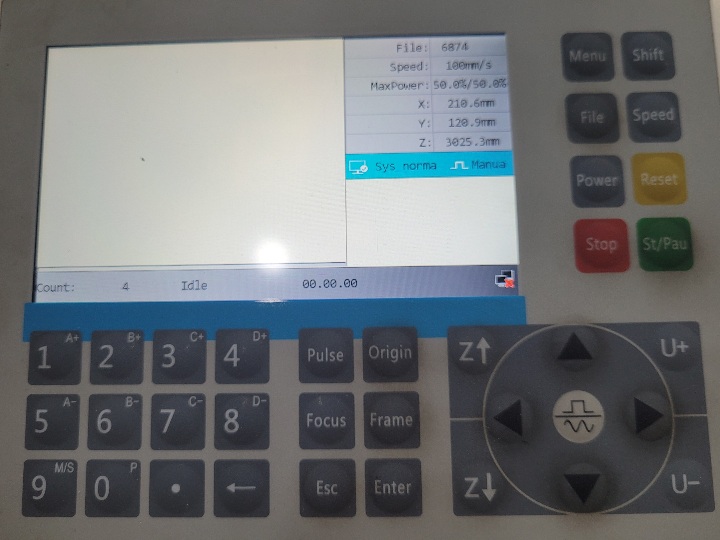
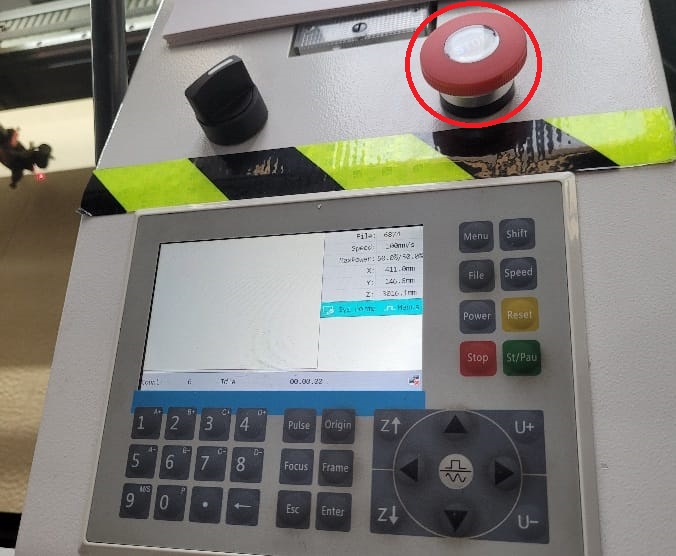
There is control panel on the machine. On this panel green button indicates the starting/pausing the machine. Use the ‘origin’ button to specify the start point. You can move the laser pen using four arrow keys. Before starting to cut, you can use ‘frame’ button (on left side of arrow keys) to know the boundary/frame in which your shapes will be cut.
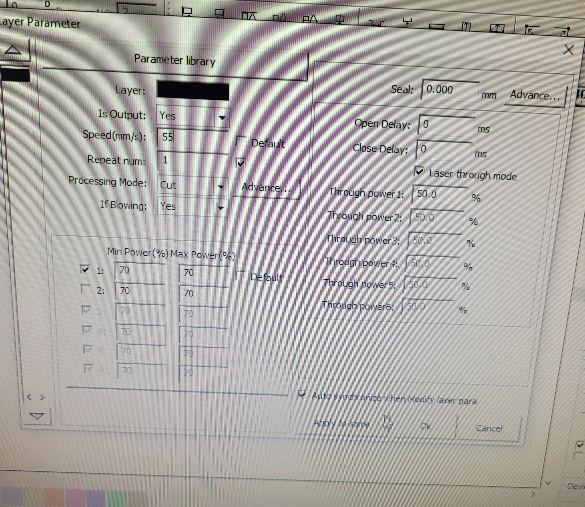
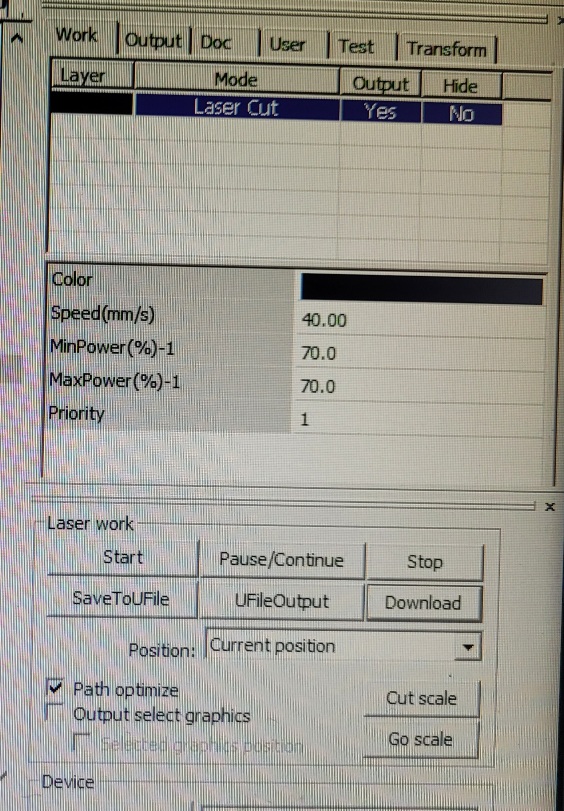
You must specify the speed and power of the laser cutter. I clicked on the ‘Laser Cut’ appearing under ‘Work’ tab and a ‘parameters’ dialog box appears where I specified the speed of 40 mm/s and 70% of the laser power to cut the material.
Speed and power varies from material to material.
Press the ‘Download’ button to transfer the data to the machine control panel where it can be previewed along with its settings.
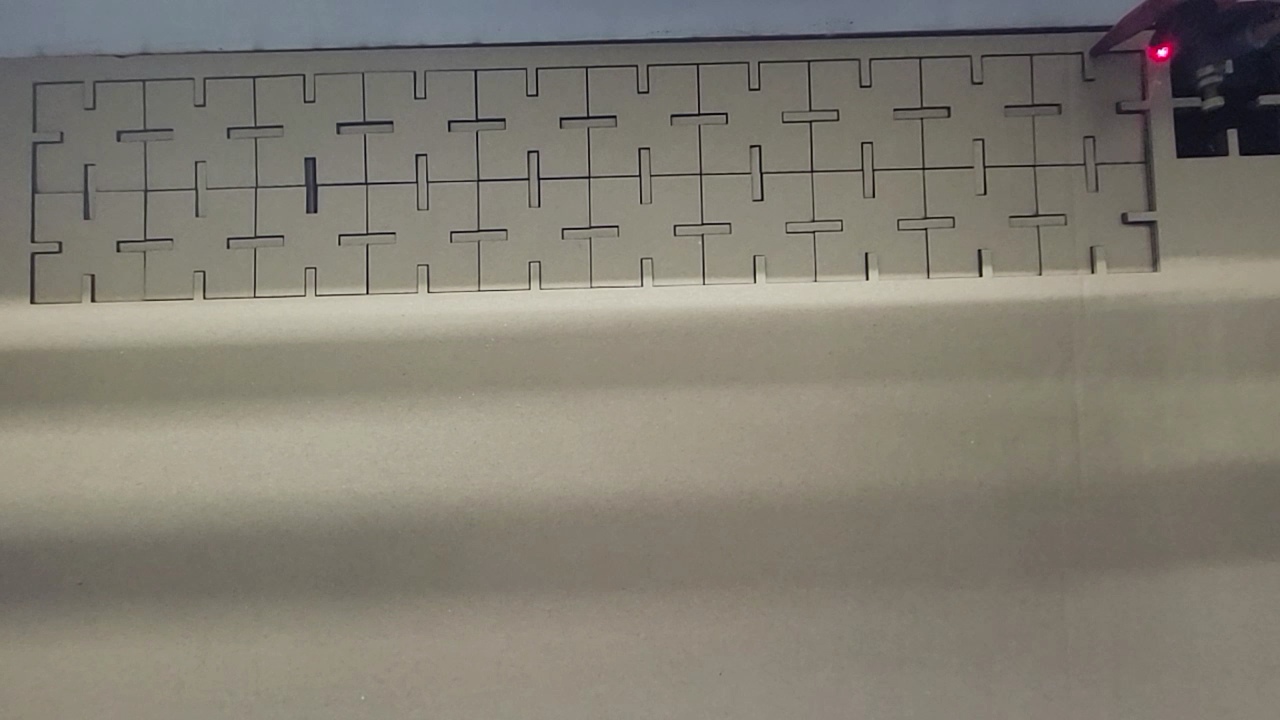
Press ‘Start’ to start the cutting press. A fine cutting of the carboard can be seen.
Note: Power and speed of the laser are very important factors.
Use them carefully as it might cause a fire.
In case of fire, press the 'Stop' knob at the top of the machine,
throw a blanket over the fire for the safety.
Download stl file
Download dxf file
Hero Shot
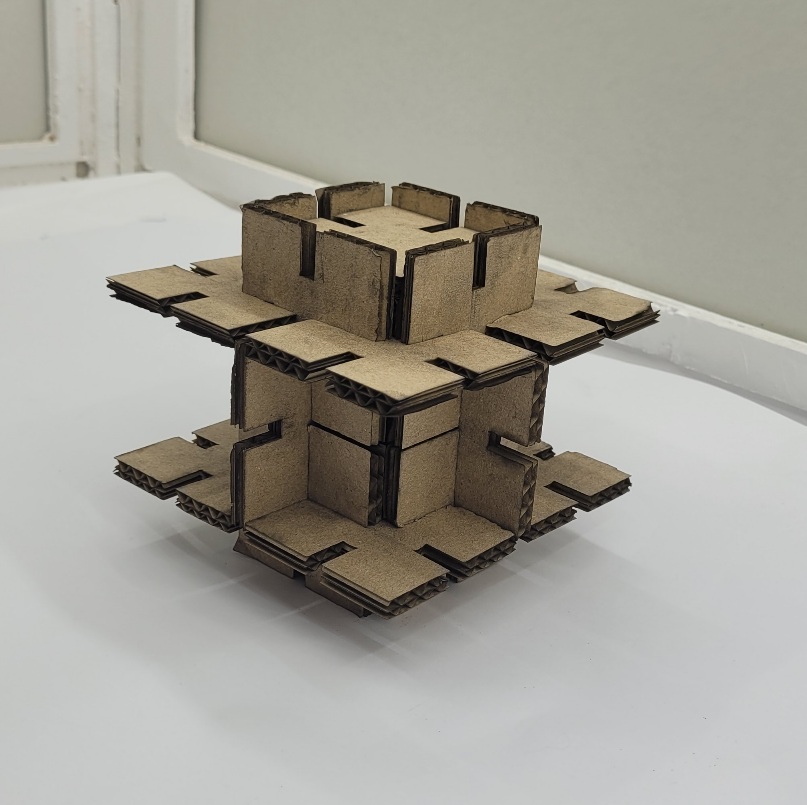
After collecting the laser cut pieces from the machine, I tried to make a tower design with them. It might not look as useful, but I found it appealing due to its symmetrical appearance. The hero shot of the structure is shown below.