4. 3D printing and scanning
3D printing is using a 3D printer to produce designs with three dimensions. The advantage of this machine lies in its components which vary and differ based on each machine. The two main types are :
-
FDM uses plastic and melts it to form a 3D design. The plastic is rapped in film and the extruder in its name extrudes it will the nozzle heats it up as it gets pushed out at a temperate range of 215-290C. The machine requires a bed at the bottom to which the nozzle prints on inorder for the platic to stick to. During the process of extrusion the change in temperature causes the plastic to shrink as it is being melted out.
-
SLA uses a ‘resin’ which is a liquid that melts with UV light to form the design, Mostly used for jewellery design and production.
Special features of a 3D printer:
- Infills are used to fill up the design. For designs that only rely on its external surface/features 30% would be most likely used. A design that is expected to withstand wear and tear/pressure an infill of 100% would be most likely used.
- Layer height thickness could be altered based on the time it takes for the machine to extrude out the design.
- ‘Support’ is unnecessary plastic that is printed that does not add to the design aesthetic but is used to support designated parts of the design. Support is not needed for anything below 45 degrees. It could be removed after printing due to the gap that forms between the design and the support.
Material used for 3D printing:
1. PLA is the most common material used in FDM machines due to its low cost and high melting temperature tolerance.
2. ABS is difficult to print but is extremely sunlight/heat tolerant
3. Nylon is easily flexible
4. PETG is a combination between ABS and BLA. Its greatest advantage is that it is food safe so can be used to print food bowels. It can also tolerant high melting points
5. PEI ubiquitious in the car industry. Its skeleton like features makes in desirable to test gears in car machines.
Group Assignment
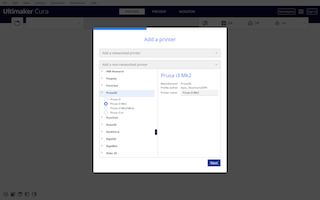
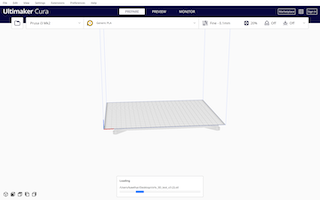
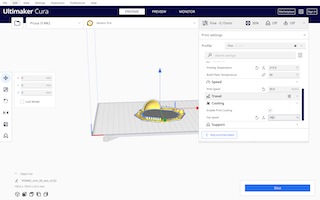
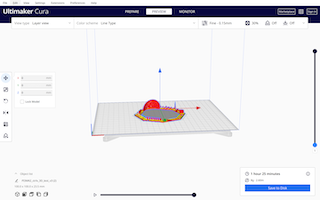
Testing the design rules of a 3D Printer - We were tasked to download Cura - Open thingiverse and download this file - For our designated 3D pinter it was called Prusa i3 MK2 - I opened the file - changed the quality to 0.15, changed infill to 30, Print speed at 50 , Material 215, Cooling speed at 30 - After we checked the preview of the design we went ahead and saved the design onto an SD card to be printed. The approximate printing time was 1 hour and 30 minutes. - Here is the file for our tester design
At first we had to select our designated 3D printer which was Prusa 3D i3 MK2
After we opened the tester file we had the adjusments mentioned above to the cutsom settings
Finally we previewed the design and proceeded to save it on an SD card to be moved over to the 3D printer
All the pictures of the 3D printing process of the group Assignment can be found on this page
Limitations and Advantages of Pursa i3 MK2 compard to other 3D printers - Ultimaker > Pursa > Ender - Ultimaker was the one that produces the clearest tester with the strudiest exterioir - Pursa was able to finely detect the small markings and cuts in the tester piece compared to the other 3D printers - Ender’s tester design was the worst out of the the other 2 3d printer. Ender would be something that I could possibly use if I didnt need accurate measurements and delicate details. Possibly for something big, bulky and with no-minimum details - If I was looking to design something sturdy, Ultimaker was the way to go - Pursa was definitely the middle man. It was able to had a mediocre strudy tester piece with most of the fine details in place.
Things I learned by testing different 3D printers - The material used by a 3d pinter depend largely on what is the intended use of the design - Different speeds and melting points can really elongate your printing time but provide you with the most structurally stable design - Parafilms comes in all shapes, sizes and prices! - The most commonly used material for printing is PLA - When exporting a designing to be 3D printed make sure its in gcode format
Individual Assignment
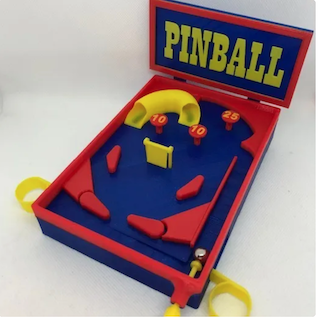
Originally I had wanted to design a game this time around. After making an airplane by laser cutting it, I decided to switch it up and have something that actually moves per say. I was very inspired by a pinabll machine that I had seen online and wanted to recreate something similar to it.
Steps on how I designed the pinball machine:
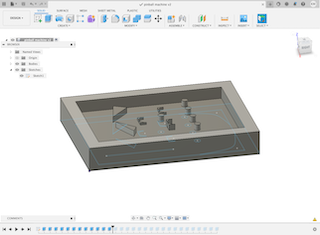
1. I started off by using the app Shaper3d on my ipad but I quickly decided agaisnt it since it wouldnt be able to export my design as an 'stl' which was the main point in using a 3d design software2. My next best software to use was Fusion360 which I had used before and felt very comfortable in using it.
3. I started off with measuring out the size of the rectangle which would serve as the base of my entire machine. It was 15 cm in length and 7 cm in width.
4. Next I sketched out circles in the rectangle just so that I could extrude them later on to act as my obstacles
5. The slope I had decided to add at the end of the design just so that I could have the ball roll off of it
6. Finally for the ball I used the simple sphere tool and had the ball be a diameter of 7 cm just so that it wouldn't be rolled out of the 8cm hole at the bottom of the machine which was intended to only fit the pusher stalk.
7. The pusher stalk was designed by combining a a circle and 2 rectangles and using the option combine
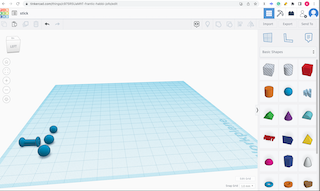
8. Since I wasn't sure about the accuracy of my ball and pusher stalk I also had another set of them created in TInkerCAD just for the sake of it
Here is my original Inspiration that I had found online
This is my pinball machine during its desing stages. I use the sktech tool to first layout all the shapes that I needed then the extrude tool to push them up to my desired height
Since I wasn;t entirely confident in my sphere and pusher stalk that I had made from scratch in Fusion360, I decided to make some in TinkrCAD by using the designs that were readily available
Steps on how I 3D printed the pinball machine:
1. After finalizing my design as saving it as STL, I opened the file in Cura2. In Cura I had to make spacial adjusments to allow not only my only design but the design of my fellow group mater in order for them to be 3D printed together
3. We used the same setting as mentioned above when we tried out 3D printing the tester design for our group Assignment
- the quality to 0.15, changed infill to 30, Print speed at 50 , Material 215, Cooling speed at 30
4. We saved the file as gcode and placed in the SD card
5. We unloaded the clear colored filaments to replace it was a green one
6. We then chose our desired file and starting the printing process which laster for 2 days (Although my piece would be considered large, the long printing time was actually because of my other group mates design which was a 12cm mug)
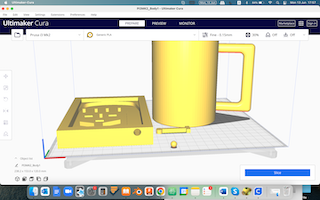
Here is a picture from Cura as I tried to fit both my design as well as my classmate before we saved it as a gcode in the designated SD card
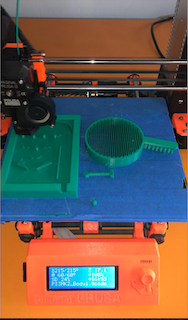
A sneak peak of my design as it was being 3D printed
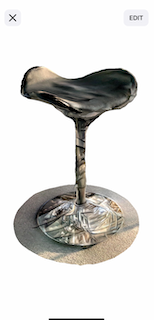
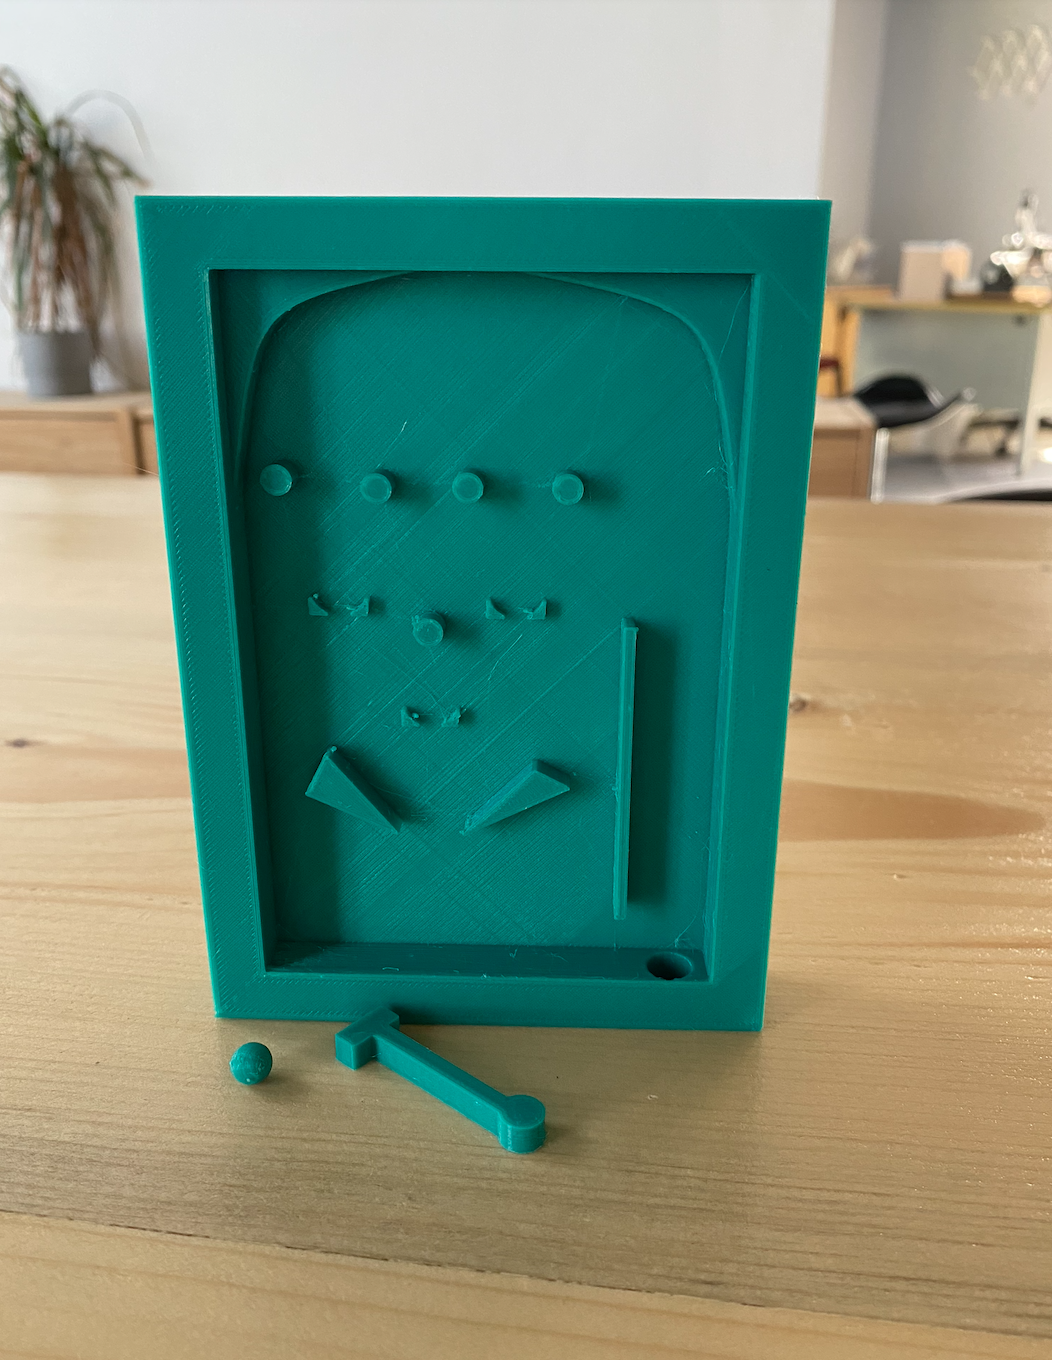
Hero shot:
Link to pusherstalk design file
Why my design cannot be made subtractively
The main reason as to why my design has to be 3D printed and a cannot be made in laser cutter for example is simply due to the fact that I require a sphere. The ball is an integral part of my pinball machine and a pinball machine wihtout a ball would simply be a pin machine and I’m certain that a pin machine is no where as fun a pinball machine :D
3D Scanning
While we waited on our 3D designs to be printed, the instructors introduced us ti 3D scanning which turned out to be way easier and laid back than what it sounds. ALl we had to do ws download two software : Qlone and Trnio Plus and point out phone camers at objects as we spin well for the most part.
Qlone
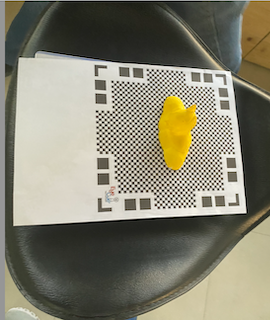
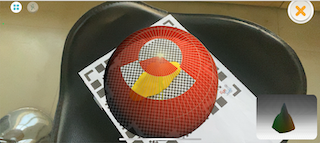
Super easy software to use. We had placed our desired object to be 3D scanned on a mat something very similar to a paper with a qr code on it and spinned the mat ontop of a spinning chair until the software signalled that it was done scanning.
The biggest obstacle in this software is that you had to be very careful when moving your phone as the slightest distance too far or too close could mess up details while scanning and distort your scan.
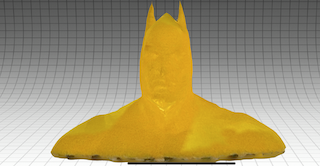
Here is the original batman and the paper mat that I was to start scanning
When the shades surrounding an object turn red it means that the 4 corners of the mat paper arents shosing and I show readjust my distance
Hero shots:
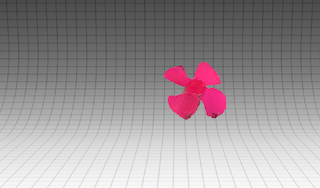
After I had sucessfulyy scanned batman I decided to scan another item which was a fan:
Trnio Plus
A superior 3D scanning software which using dots of light and color to reconstruct the object being scanned. Honestly the details that it was able to produce were worth the long wait as it processed the scan.
For this software I was advised to go ahead and scan something bigger since we no longer required a mat. I decided to scan a chair that was facing the window as the sun was setting the work place. Although I had missed a few spots on the chair it truly magical to see how the ray of the sun at noon could be easily felt in the 3D scan.
Hero shot: