3. Computer controlled cutting
During this week, we worked with laser and vinyl cutting. We were each asked to design a parametric object, which we cut in a two-dimensional manner and then assembled by hand. We also explored the vinyl cutter, and created a T-shirt and stickers.
Group project
For this week’s group project, we had to explore the different characteristics of the CO2 laser cutter machine, such as the power, speed, elevation of nozzle and so on. We also had to experiment with the different joint sizes that makes the pieces fit together securely without being too loose or too tight.
All details of our group work can be found here.
What is laser cutting?
Laser cutting is a manufacturing process that uses a laser beam to cut materials such as metal, plastic, and wood. The process involves directing the beam at the material, which melts, vaporizes, or burns away, leaving a precise, clean edge. Laser cutting is highly precise, with the ability to cut materials with an accuracy of up to 0.001 inches. It is also fast, with the ability to cut through materials at high speeds. One of the main advantages of laser cutting is its ability to cut complex shapes and contours with a high degree of accuracy. It is also a very flexible process, as it can be used on a wide range of materials and thicknesses. Additionally, laser cutting produces very little waste, as the beam can be directed with great precision, resulting in minimal material being burned or melted away.
The machine used in the lab was the CO2 laser engraving and cutting machine, which is a type of laser engraver that uses a CO2 laser to engrave or cut materials. The laser beam is generated by a gas mixture of carbon dioxide, nitrogen, and sometimes a small amount of another gas such as helium or argon. The beam is then directed onto the material to be engraved or cut, which is typically wood, acrylic, plastic, or metal.
CO2 laser engravers are known for their high precision and ability to engrave or cut a wide range of materials. They are often used in industries such as woodworking, metal fabrication, and sign making. Additionally, they are also used for cutting fabrics, rubber, and leather.
A CO2 laser engraver typically includes a laser source, a control system, and a computer-controlled motion system that moves the laser and material. The laser source emits a beam of infrared light at a wavelength of 10.6 micrometers, which is absorbed by most organic materials and can be used to engrave or cut them. The control system regulates the power and focus of the laser beam, while the motion system moves the laser and material to create the desired engraving or cutting pattern.
CO2 laser engravers are versatile and can be used for a wide range of applications, including engraving text and images on wood, acrylic, and other materials, cutting intricate shapes in paper or fabric, and even marking metal parts with serial numbers or other identifying information.
Designing on Fusion360
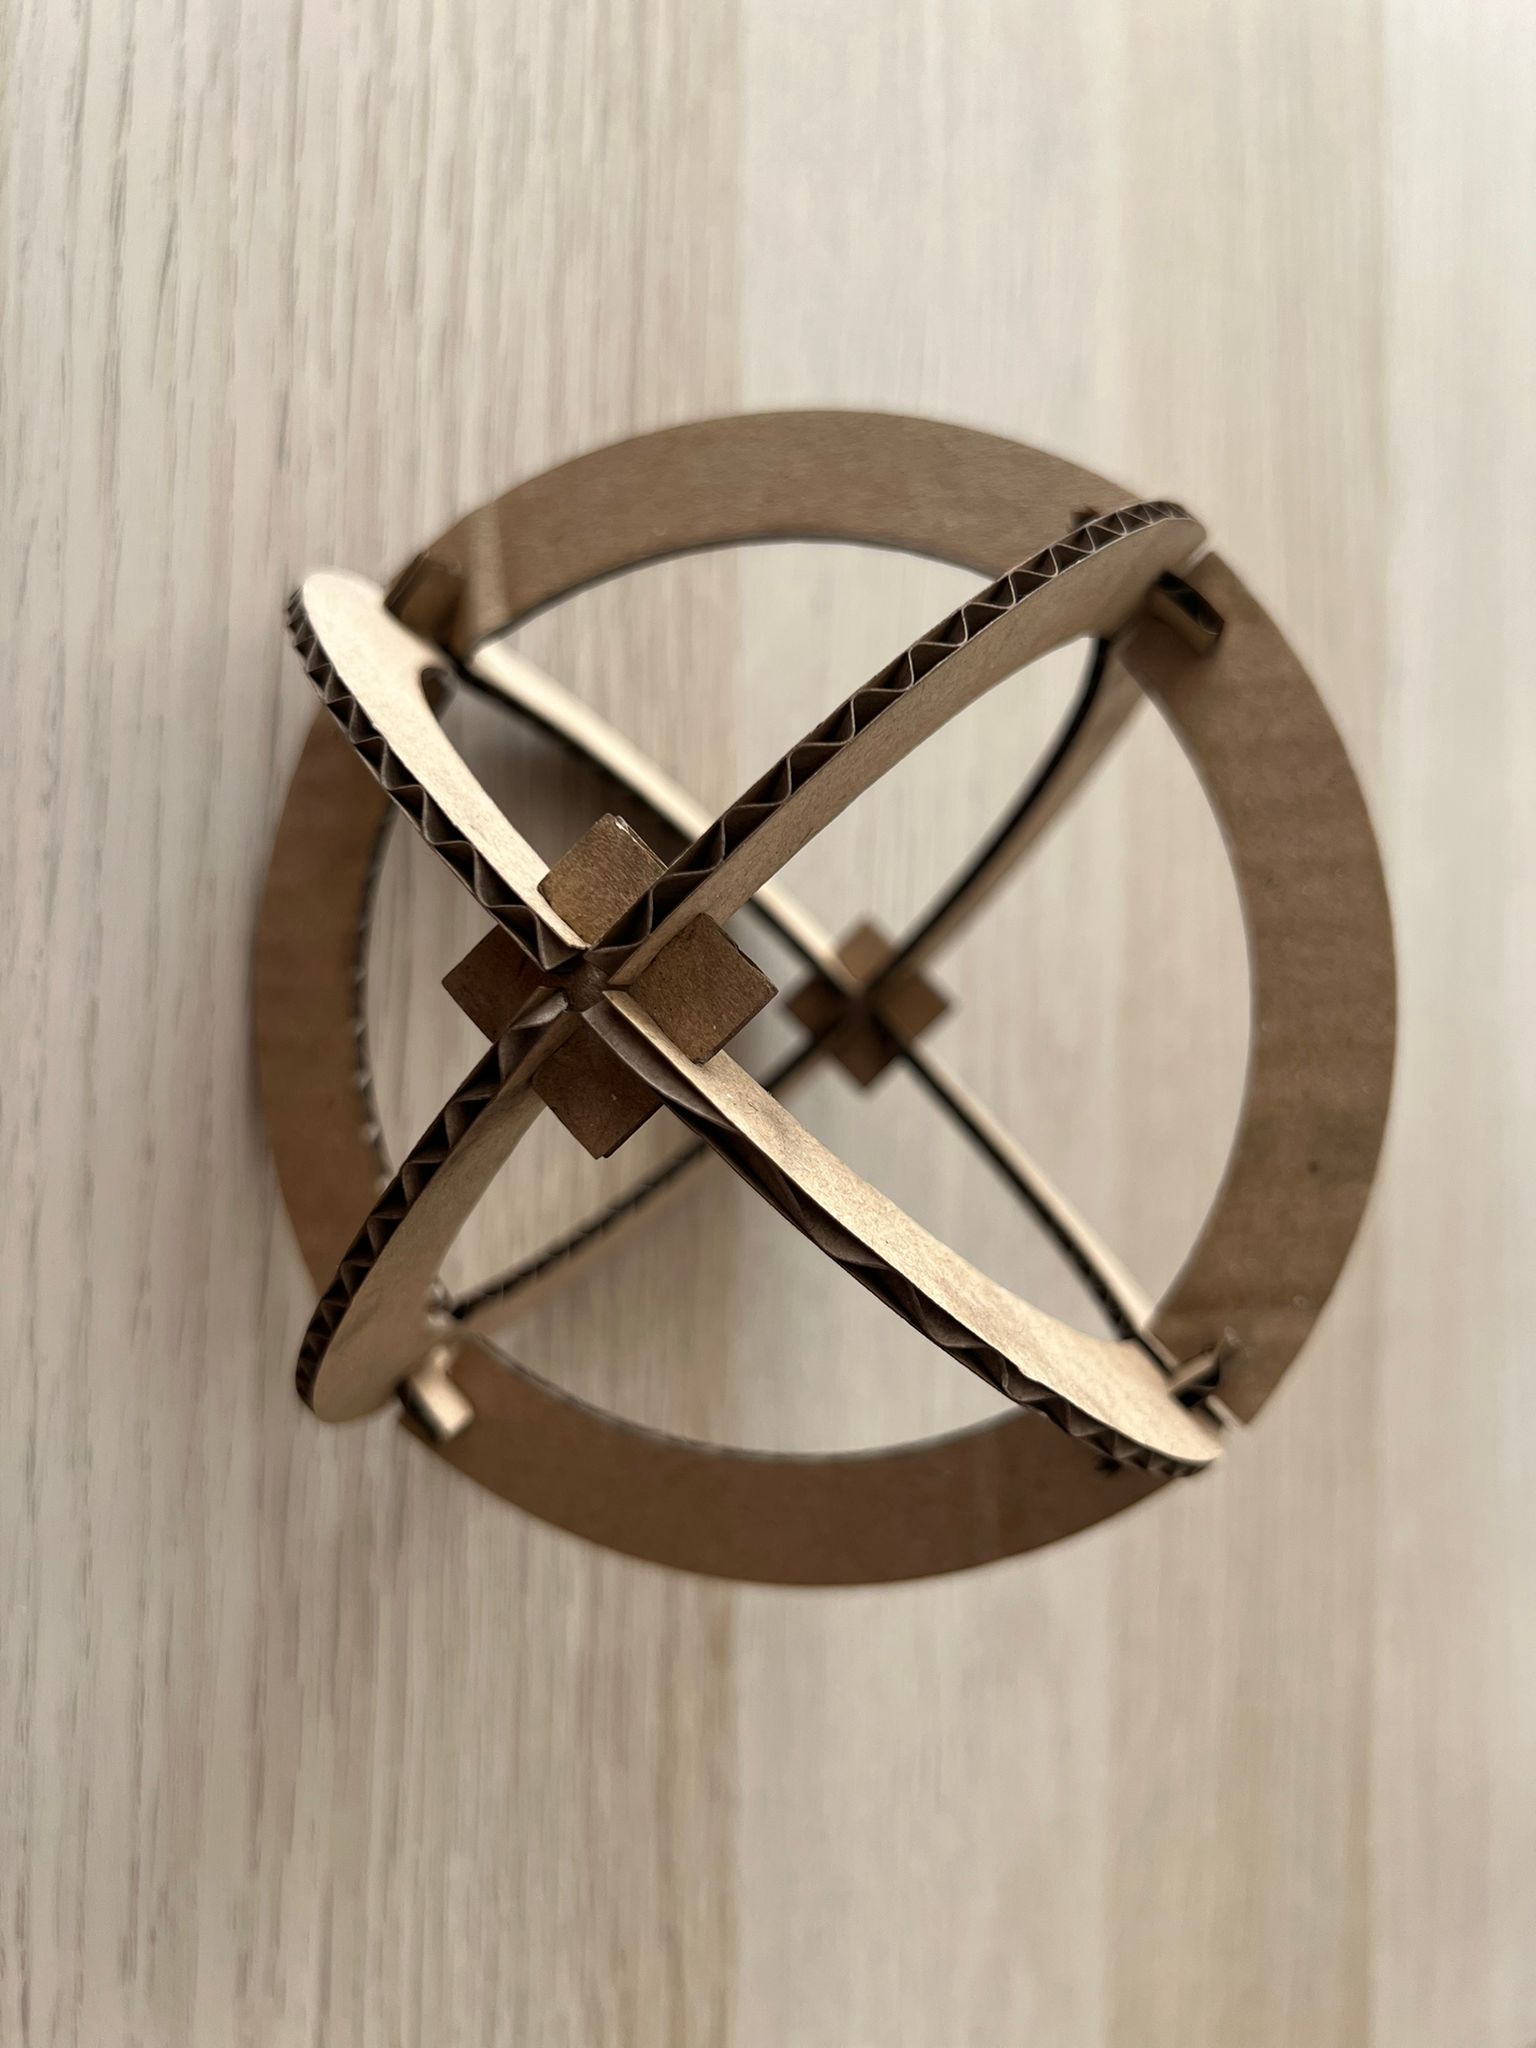
For this week’s assignment, we were tasked with creating a parametric design. Seeing as we had to cut the form in 2D and then intertwine them with each other to create a 3D structure.
Step 1 I had to map out the whole design idea, and measure the dimensions needed for the whole form to look like a sphere when finished.

Step 2 Since the design was made of two repeated shapes, I fixed whatever needed to be fixed in the second sketch, making sure that it fits together.
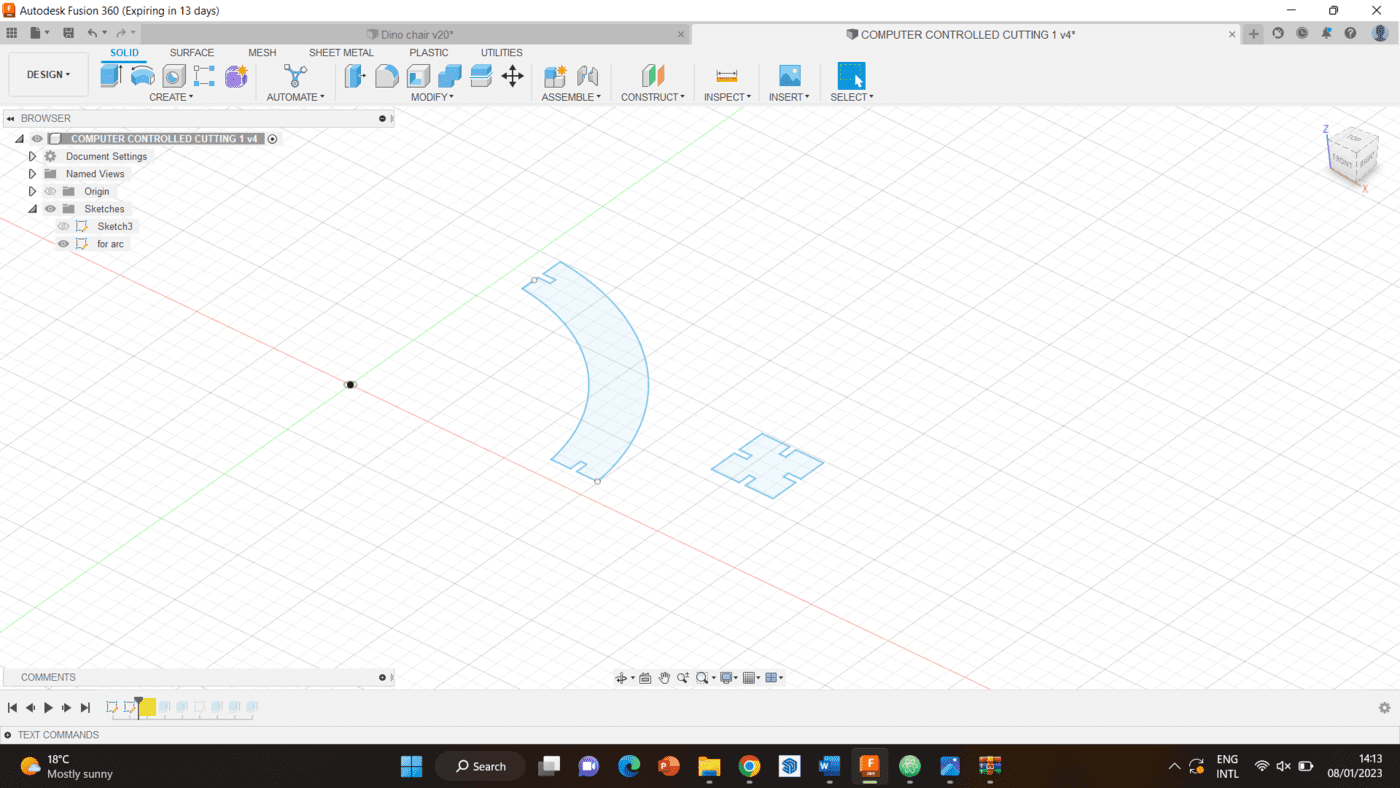
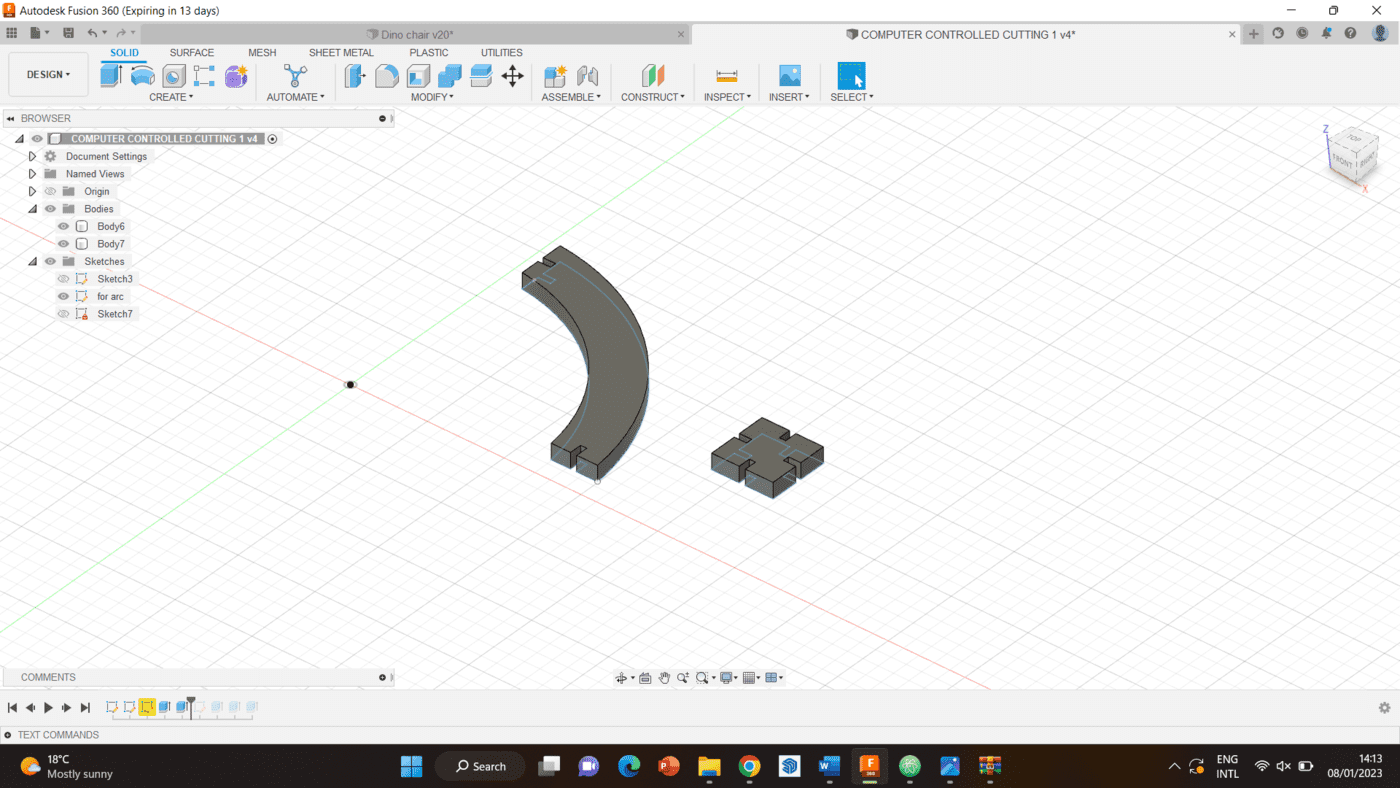
Step 3 The initial sketch had some issues when it comes to line connectivity and simple drawing problems. To fix that, I extruded the shape and projected it into a new sketch, so all the lines are connected in one whole sketch.

Step 4 After ensuring that the drawing is fine, I saved the sketch into a DXF format to import it into the laser cutting machine program. Since one of the sketches had an issue, I had to save each sketch into different DXF files and edit them in the other program.
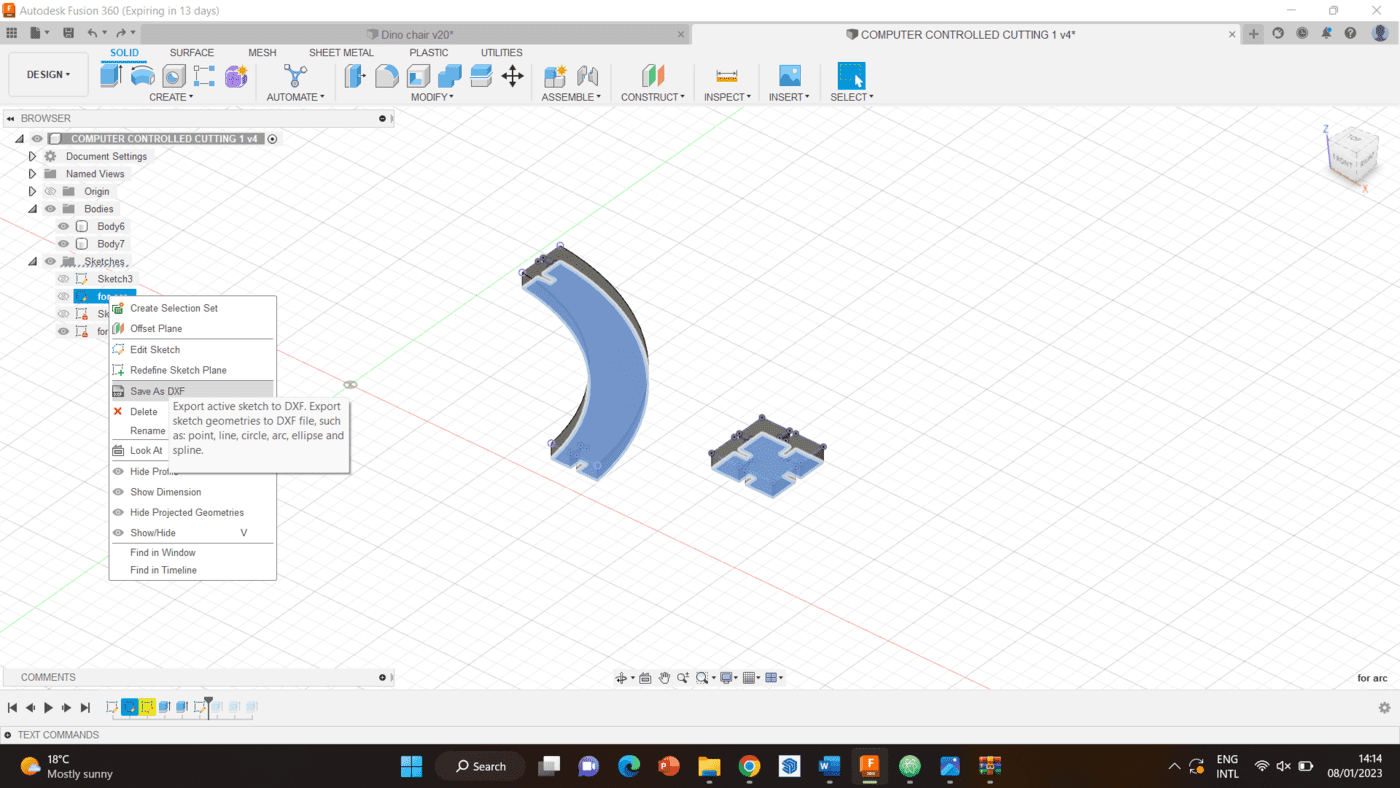
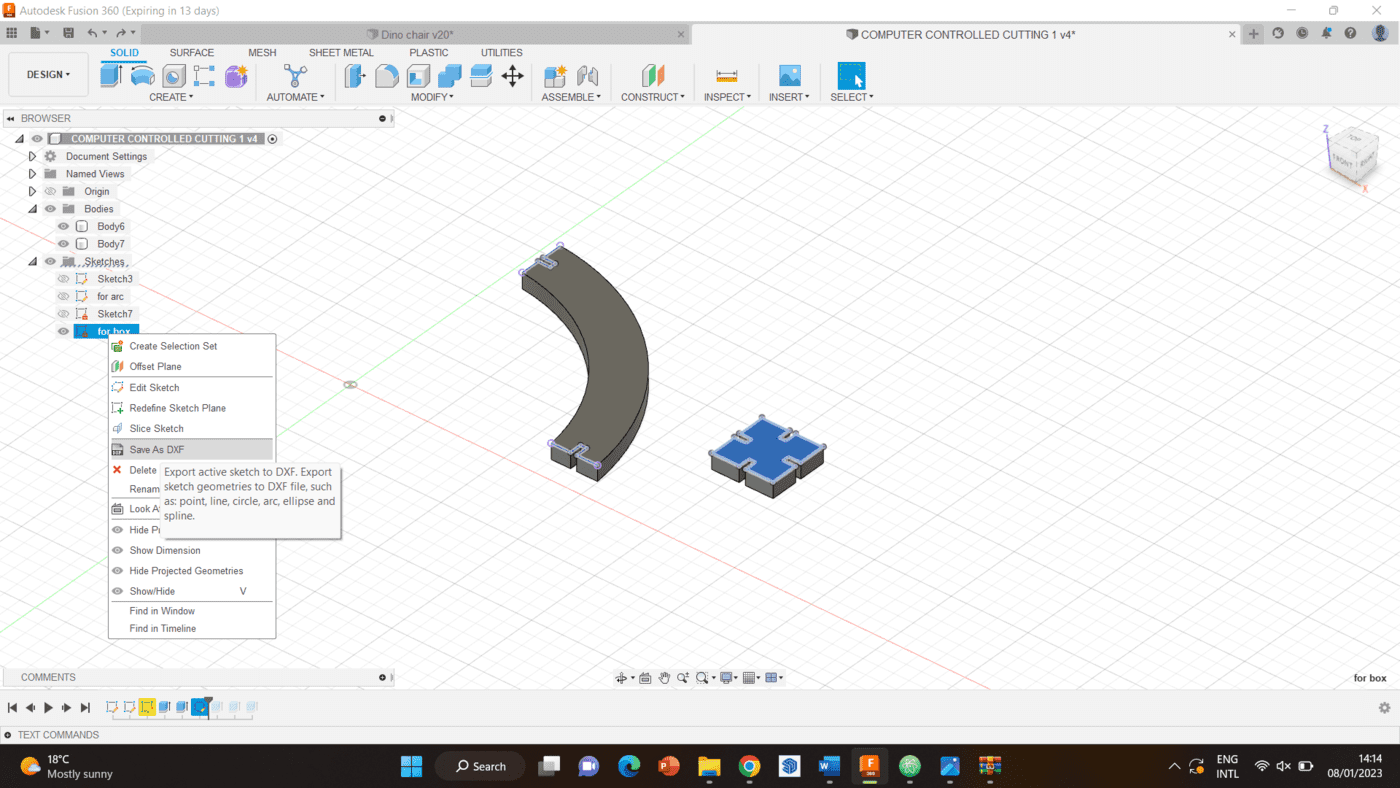
The downloadable file can be acessed below.
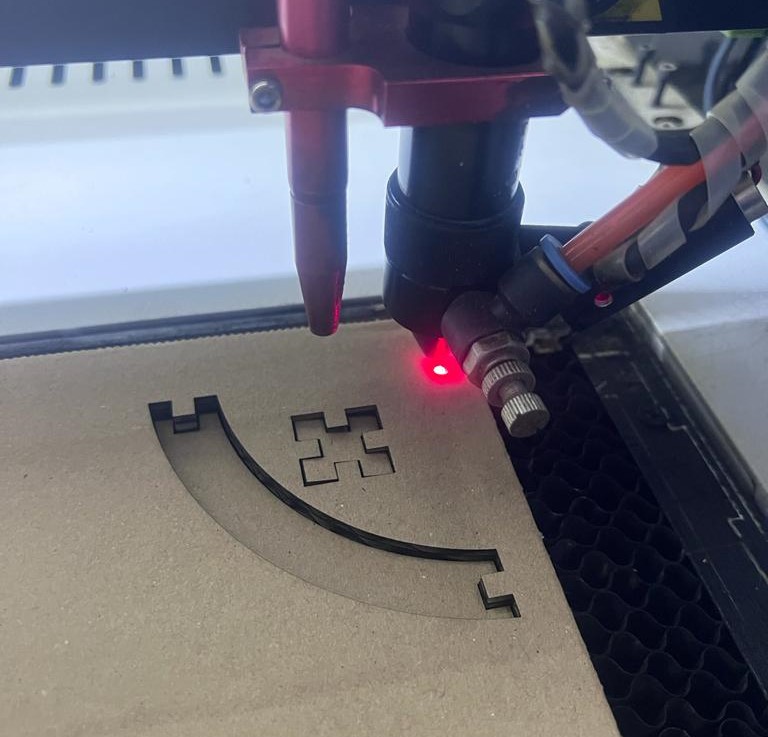
Cutting with the laser machine
After finishing the design, I emailed it to the computer attatched to the laser cutting machine so I can proceed with cutting it.
Step 1 I downloaded the document and imported it into the program linked to the machine, called RDWorks. I then duplicated it to the number of pieces I needed to cut.
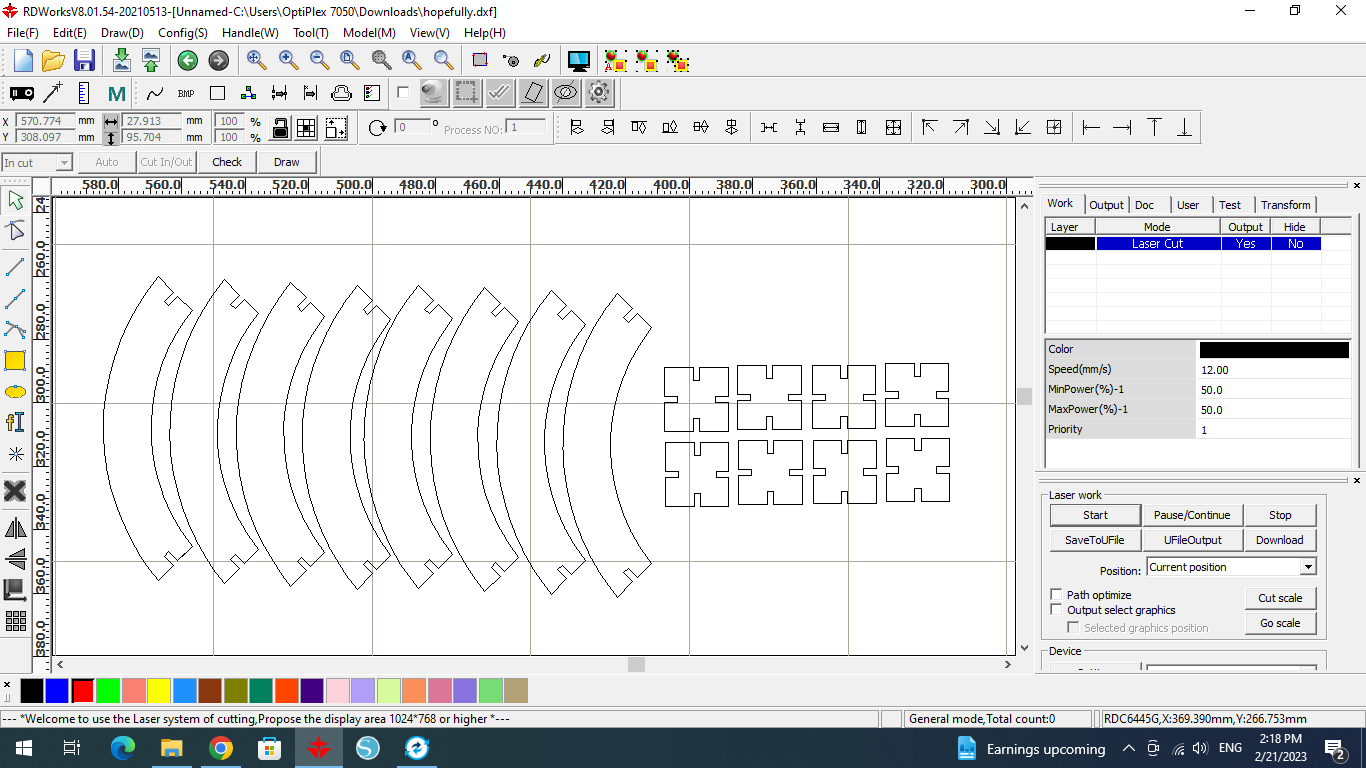
Step 2 Then, I had to double click on the “laser cut” setting on the right side to access the controls.

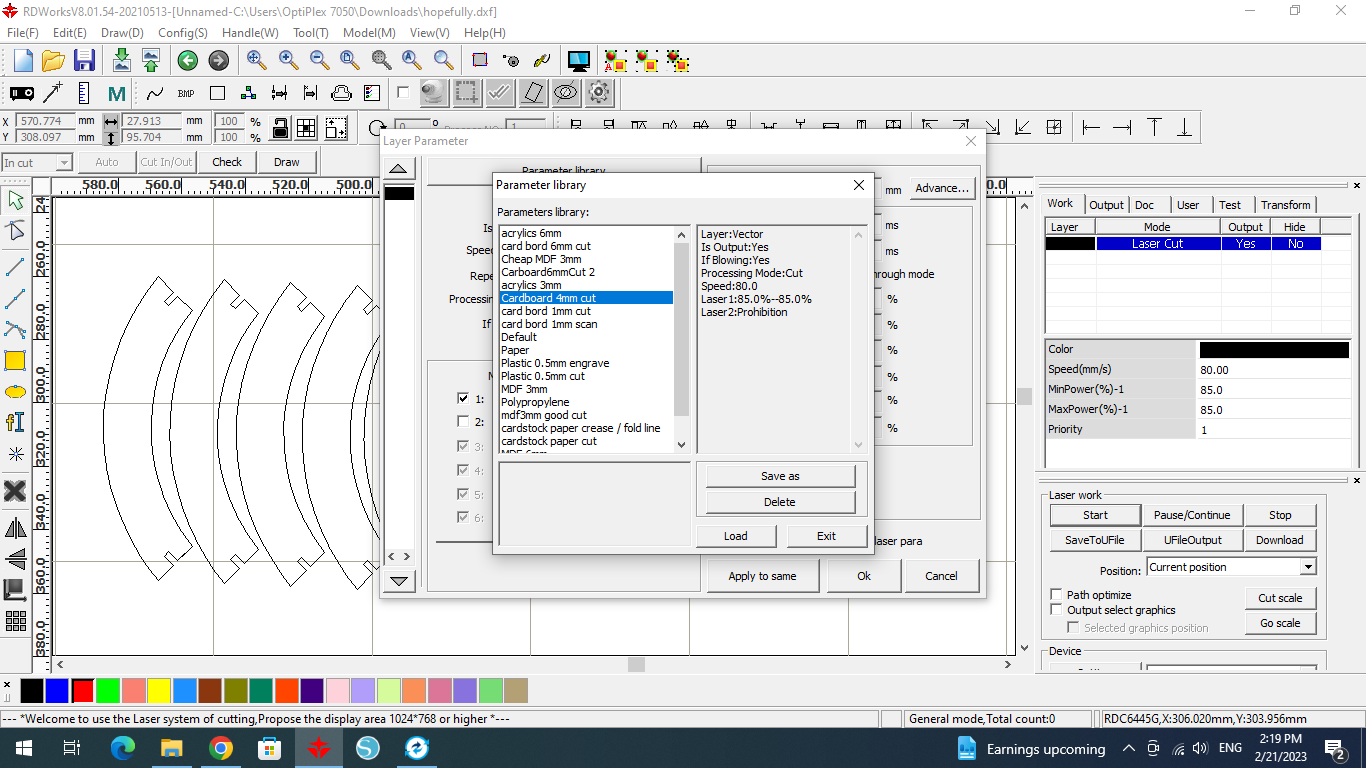
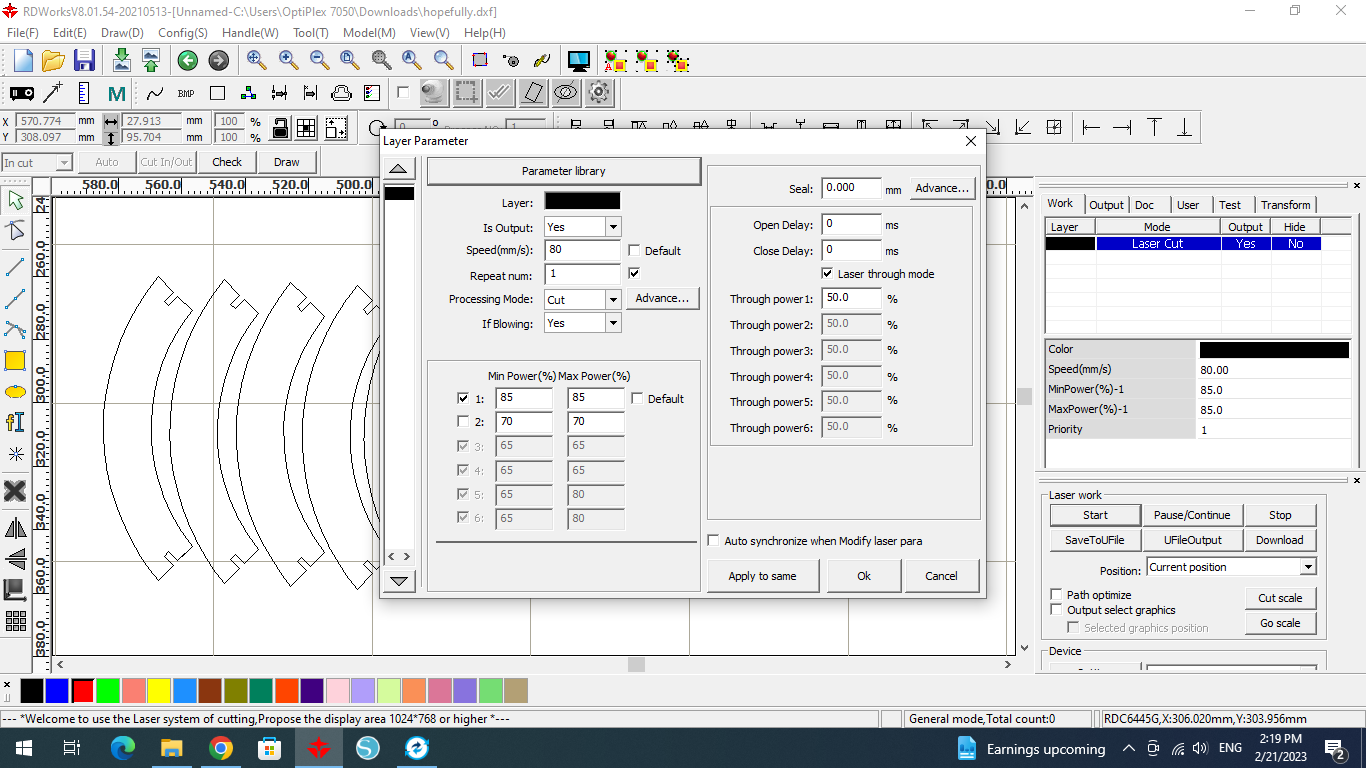
Step 3 After that, I picked the parameter library, and selected the material I was uding, which was 3mm cardboard. The setting were automatically updated, and the speed and power were suitable for the material.
Step 4 Then, I started the machine and got the pieces I wanted.
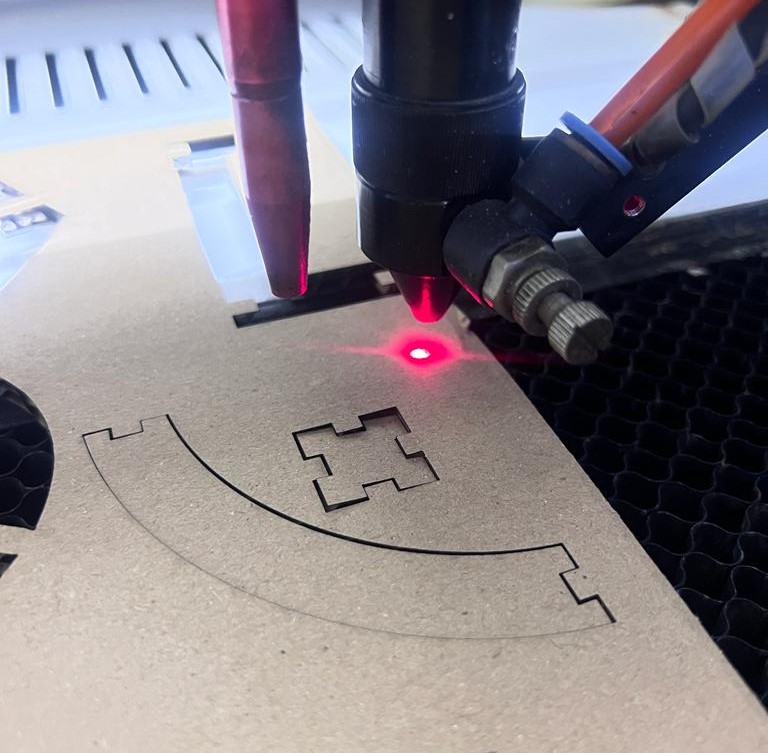
I had to cut twice, since the first time didn’t go as planned. The joints were too shallow for the pieces to fit together tightly. So, I went back to the fusion360 design and fixed the design, then cut it in the exact same process again. The second time around, the joints were much better and fit really well.
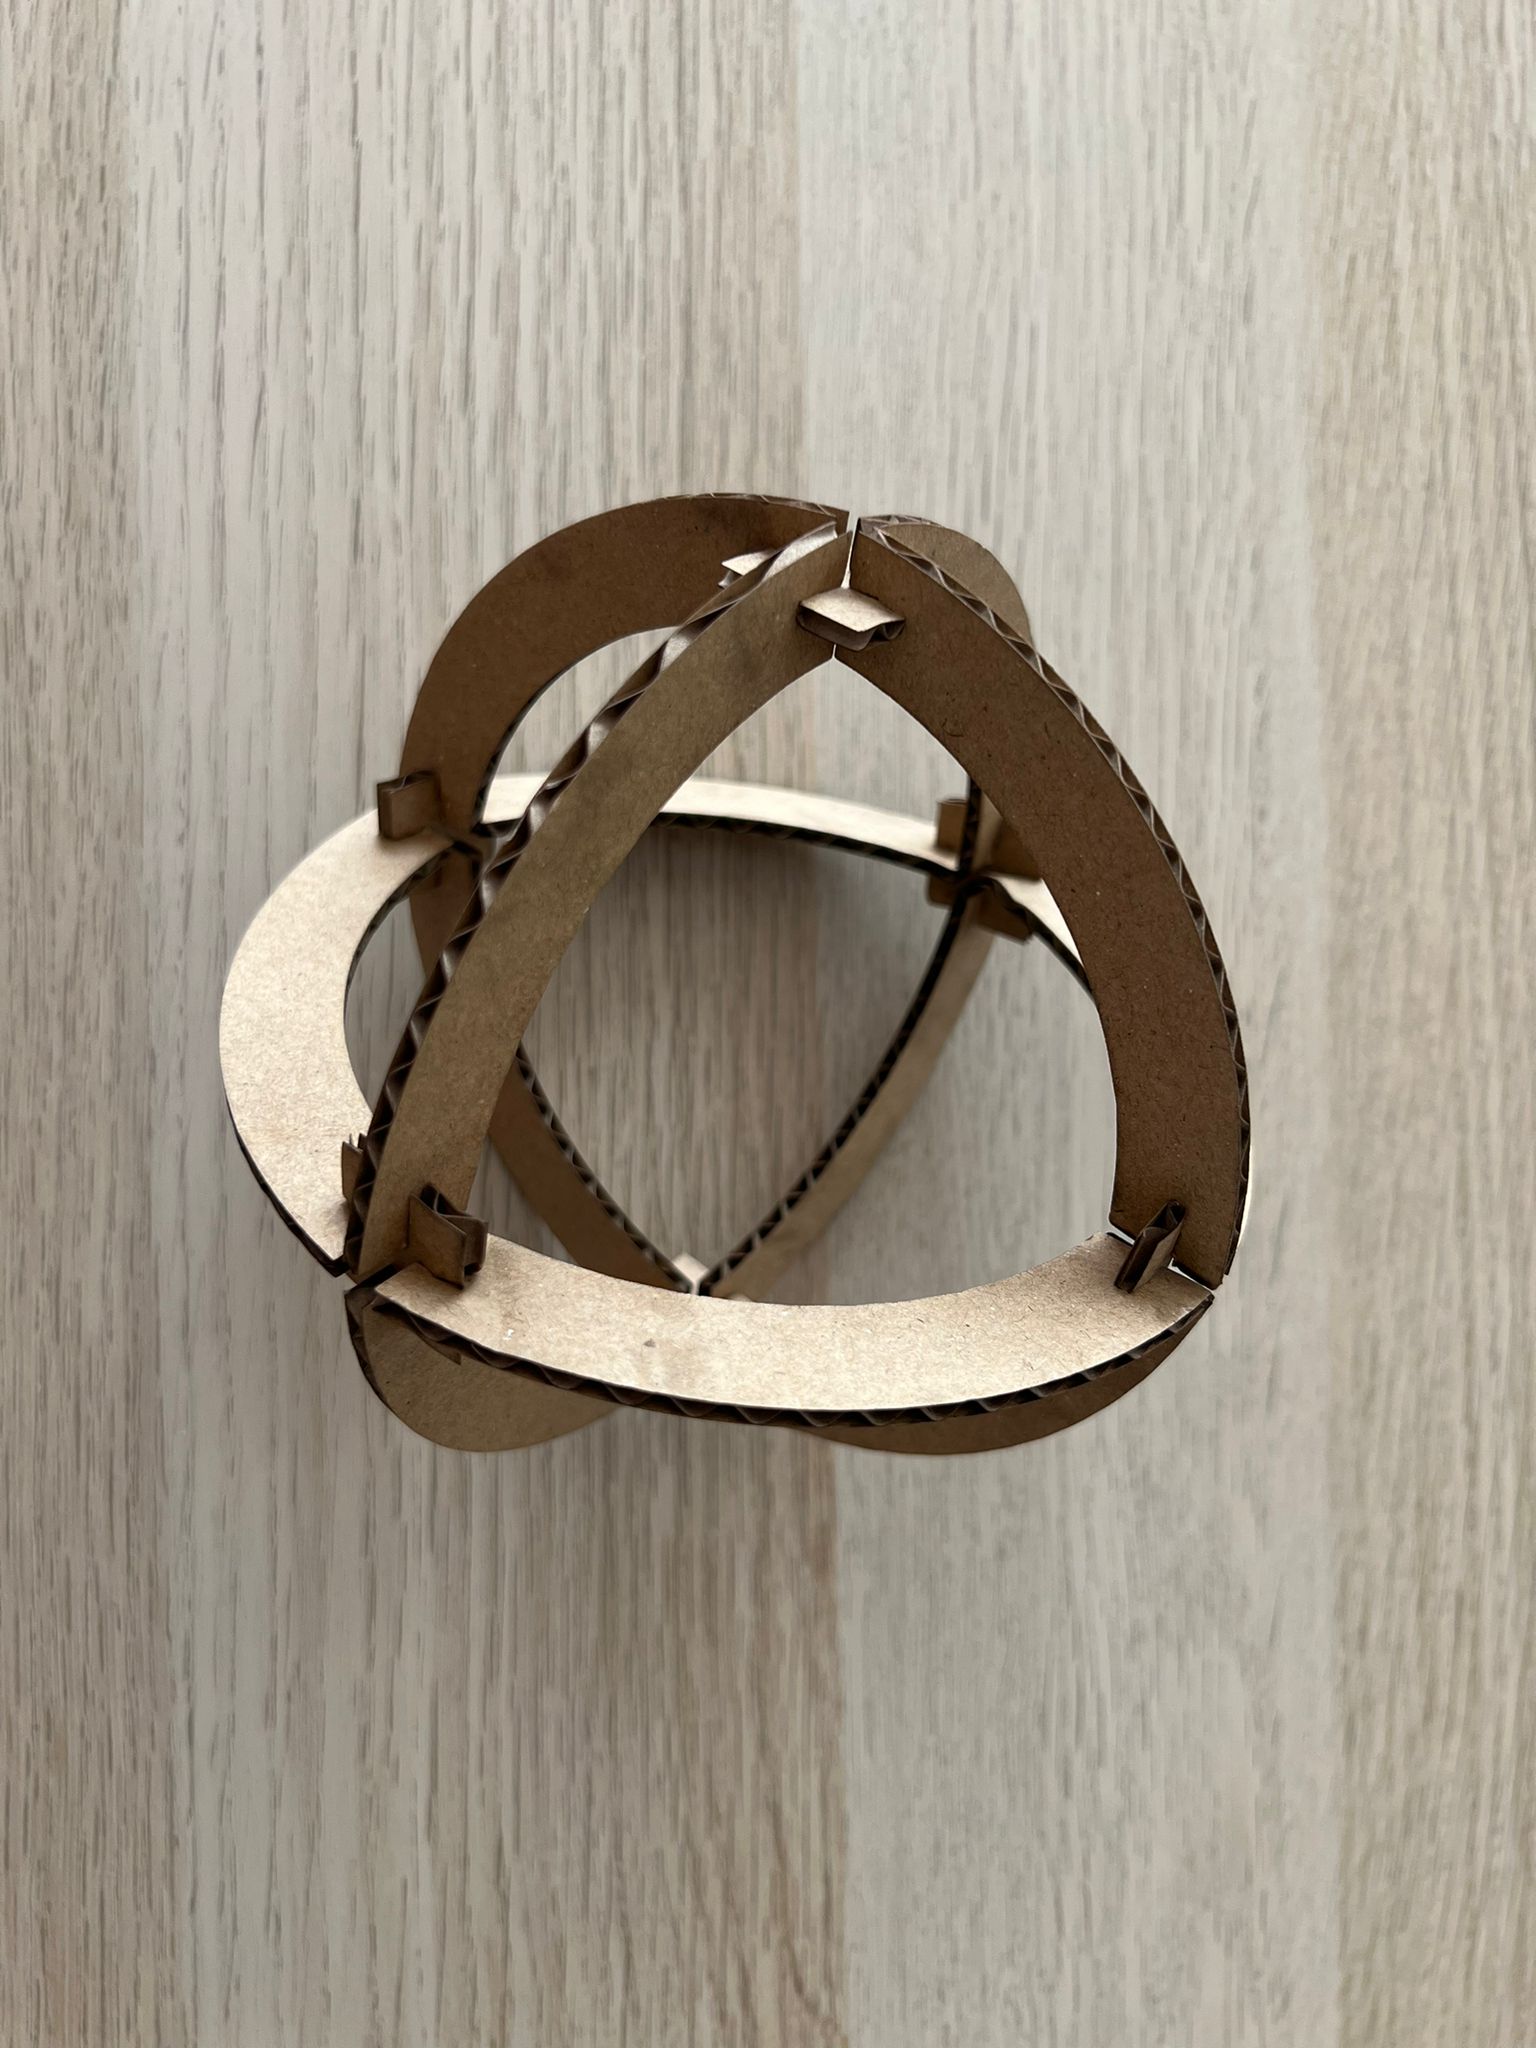
The final result is below.
What is Vinyl cutting?
Vinyl cutting is a process in which a machine is used to cut out shapes and letters from sheets of vinyl material. The cut vinyl can then be used for a variety of purposes such as creating signs, decals, and lettering for vehicles. One of the main properties of vinyl is its durability, as it is resistant to water, fading, and wear. It is also relatively easy to work with, as it can be cut and shaped into a variety of different forms. Additionally, vinyl is a versatile material that can be used on a variety of surfaces, including walls, windows, and vehicles. Overall, vinyl cutting is a useful technique for creating a wide range of customized products.
In the lab, we used a Cricut vinyl cutter, which is a type of computer-controlled cutting machine that is used to cut and create a wide variety of materials, including vinyl, paper, cardstock, and fabric. The machine is connected to a computer via a USB cable, and software is used to design and create cutting patterns, which are then sent to the machine to be cut out. Cricut vinyl cutters are commonly used for creating signs, decals, stickers, and other types of graphics. They are often used by crafters, small business owners, and educators.
We had two tasks we had to complete when it came to vinyl cutting. The first was a batch T-shirt, carrying our batch number and all our names. The second was a customized personal sticker that each person can use however they wanted to.
Using cricut
Step 1 Before working with the vinyl cutter, we first had to download the program linked to it, which was the cricut design space, by following this link.
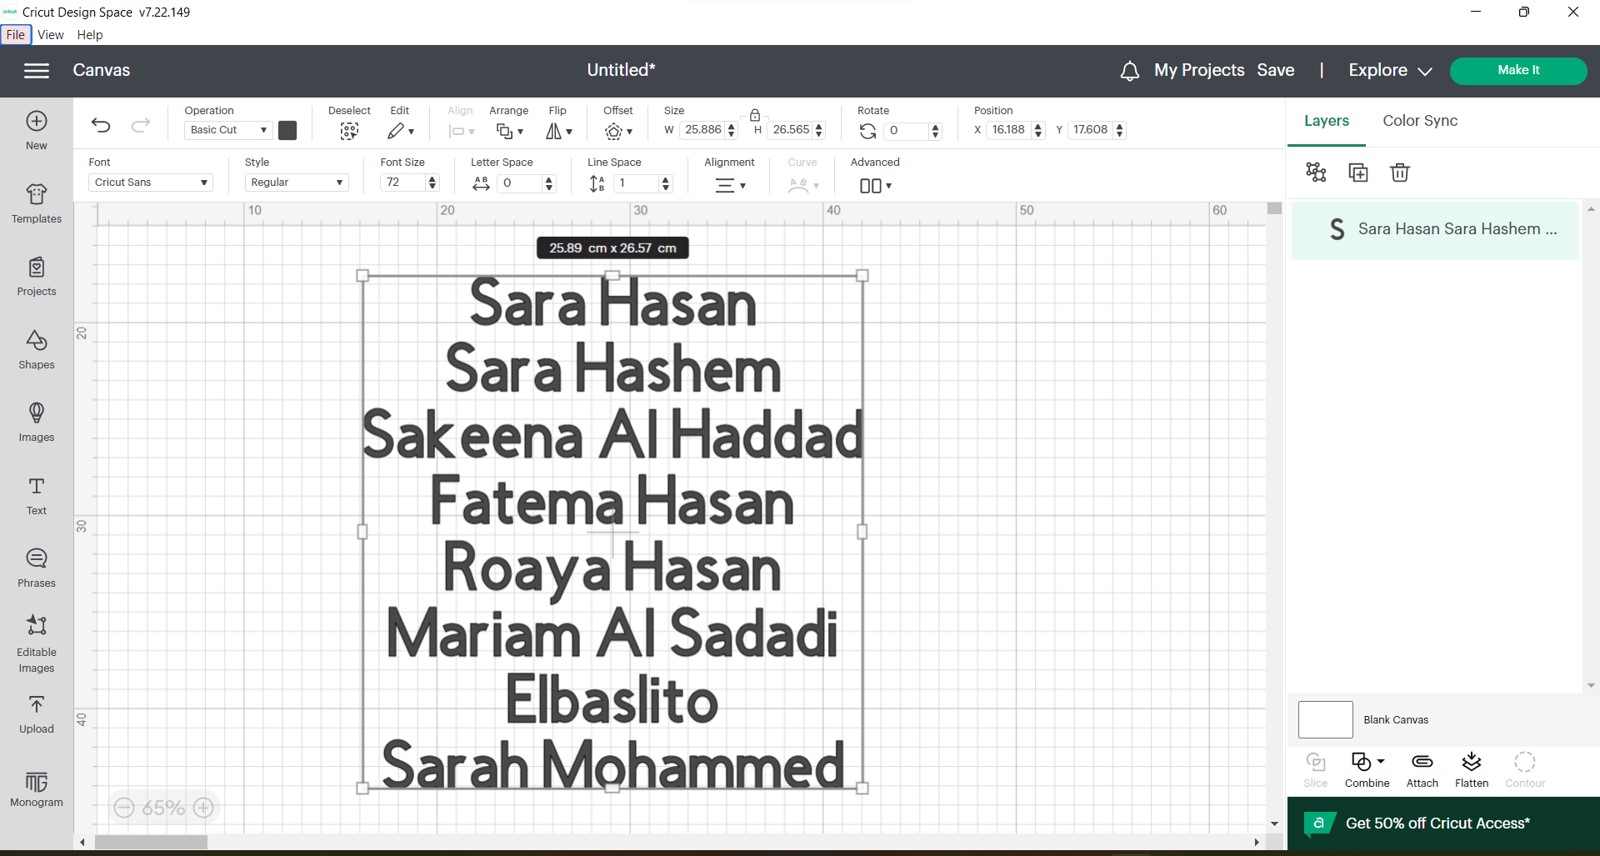
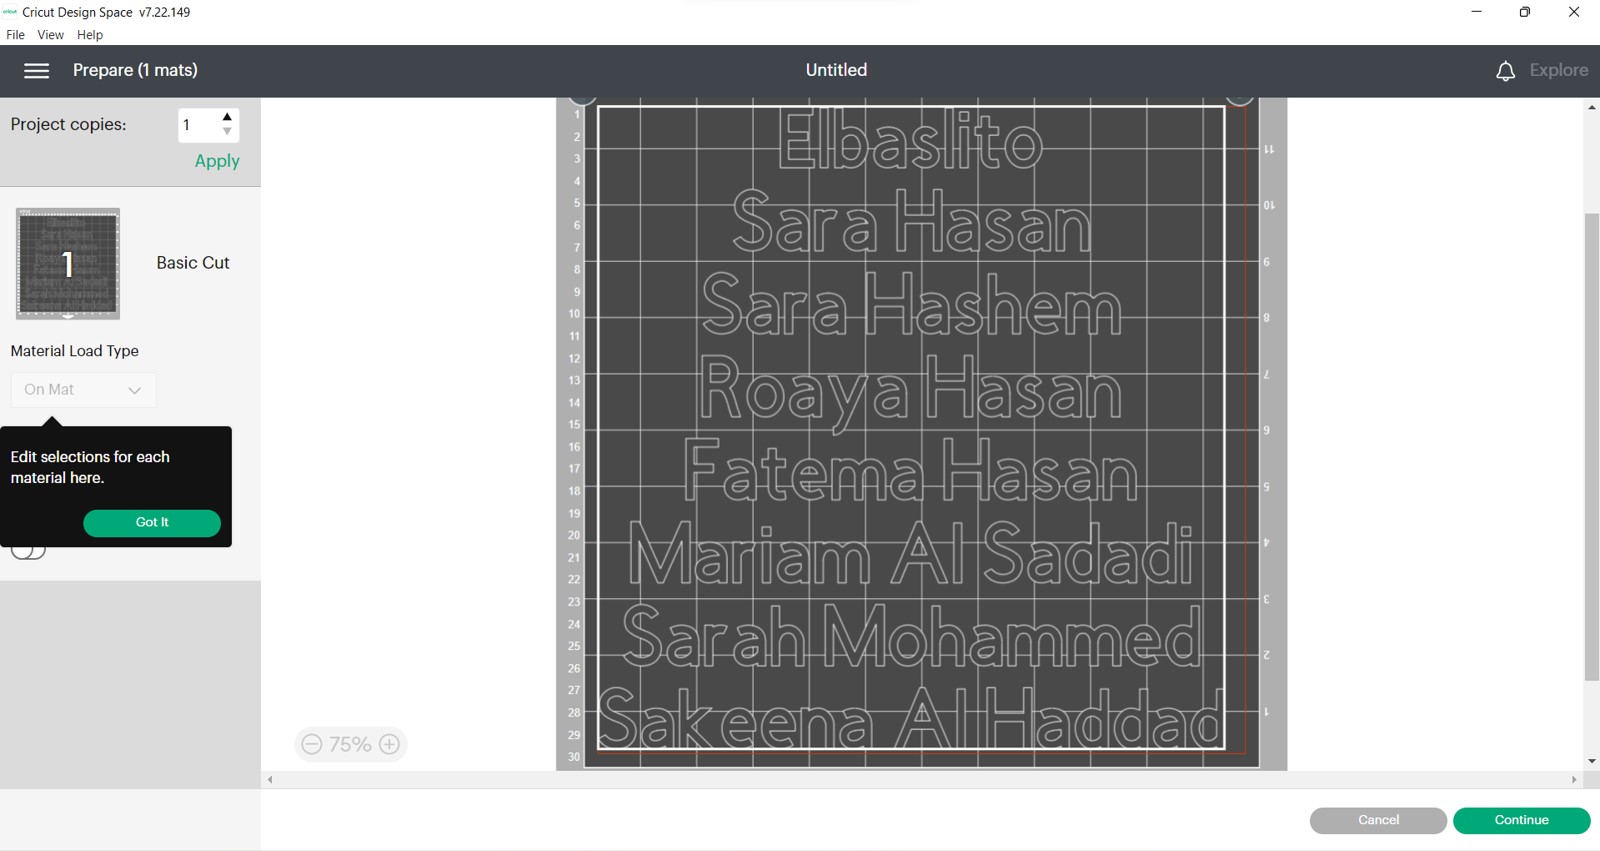
Step 2 The first task we had to do was to create what we wanted to print on the program. Since we wanted to make a batch t-shirt carrying all our names, we created a new space and typed in all of them as shown below.
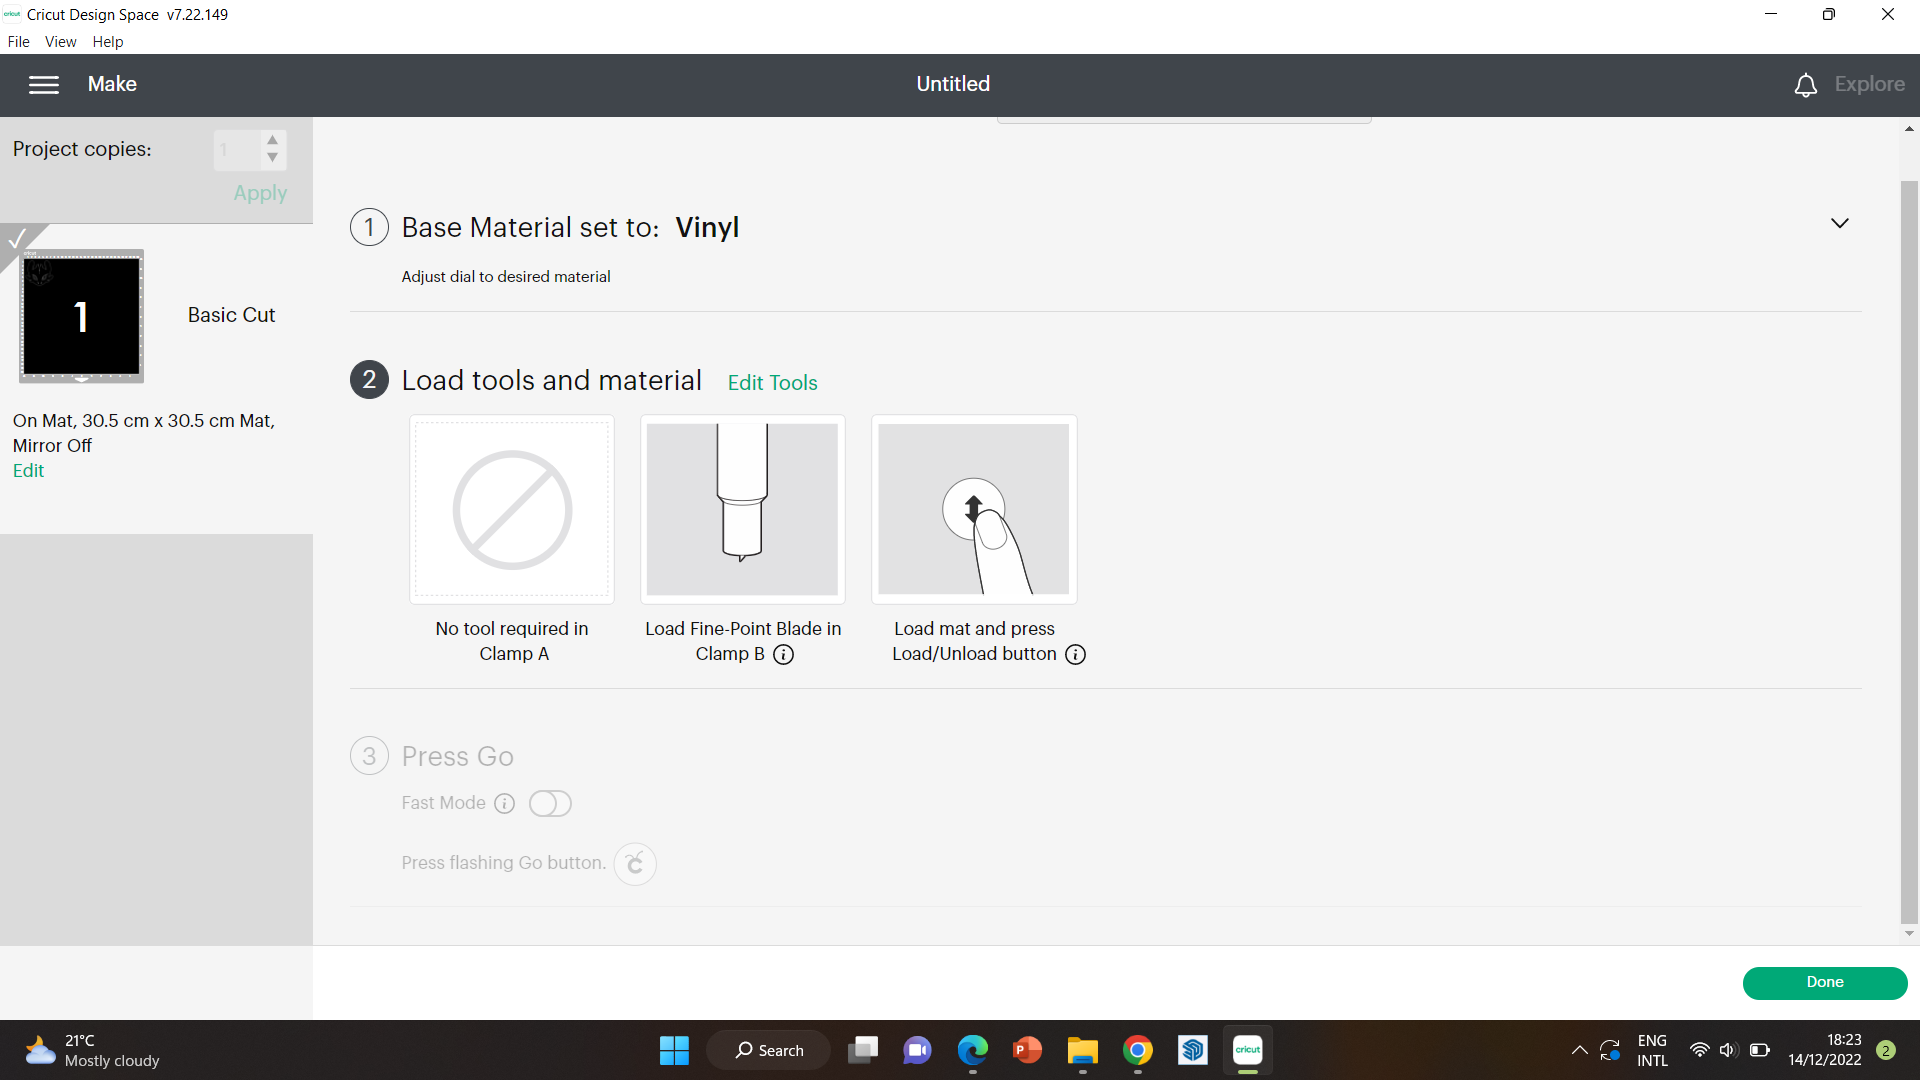
Step 3 Then, we connected the USB cable from the machine to the laptop used, and chose the correct mat size and placement in the program.
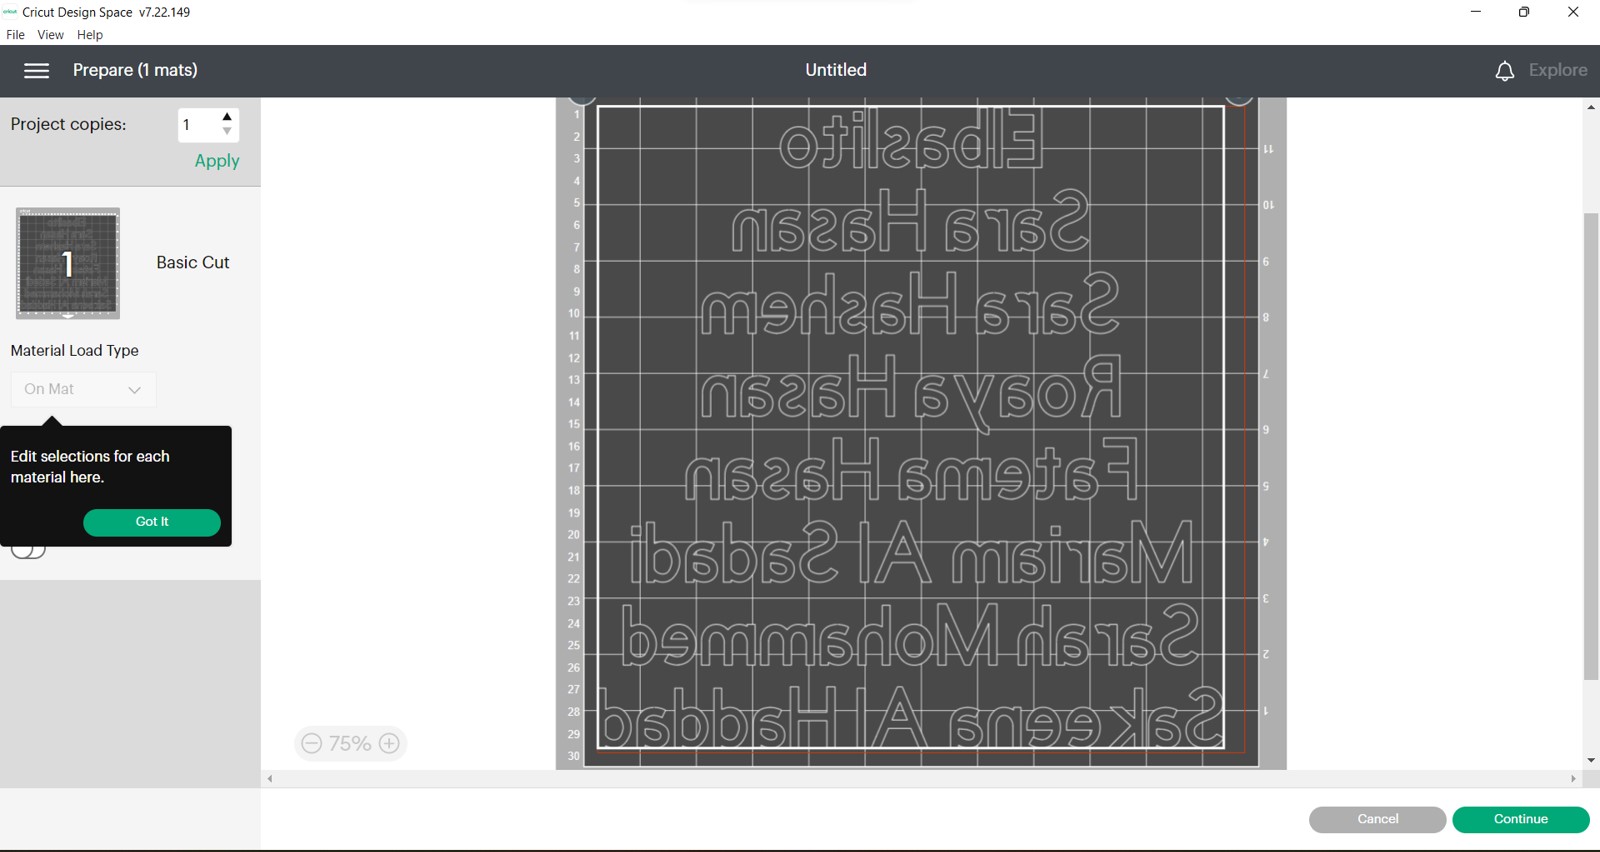
Step 4 After that was done, and since we wanted to iron it onto a t-shirt, we had to mirror what was written in order for it to be put in the correct orientation on the t-shirt.
Cutting with the vinyl cutter
After organizing everything with Cricut, and making it ready to print, we worked closely with the machine to cut and assemble.
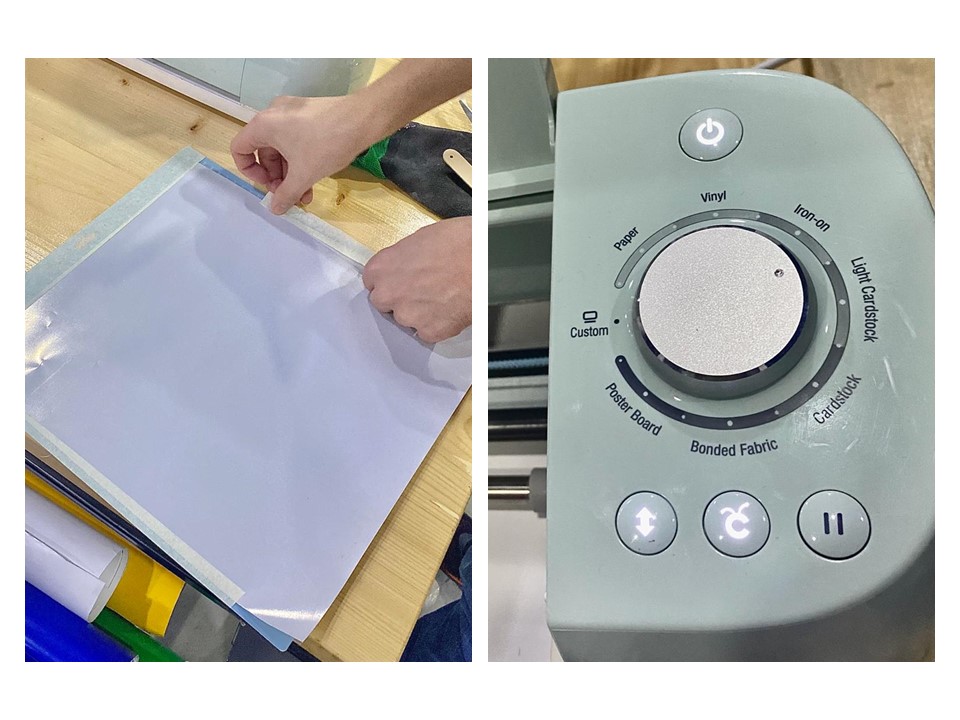
Step 1 We fixed the sheet of vinyl that is suitable to be used for ironing on the mat that we will be inserting into the machine. Then, we chose the correct setting on the machine to insure proper cutting.
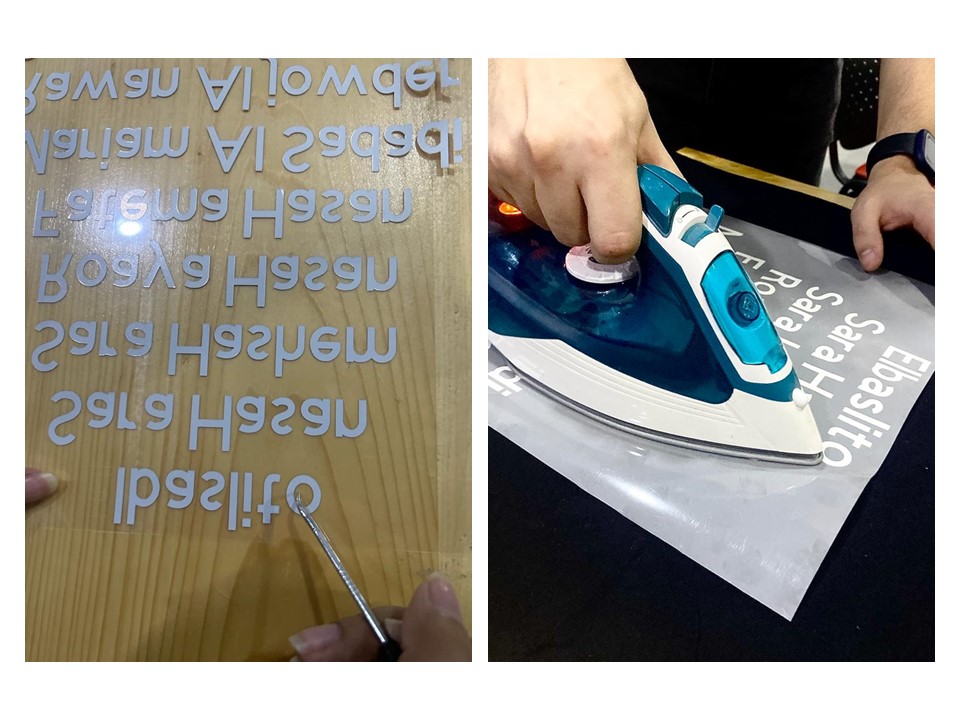
Step 2 After we fixed the machine and the settings, we went ahead and cut whatever we needed to cut. After that, we removed all extra vinyl pieces and were left with only the letters. We placed that on the shirt and started ironing.
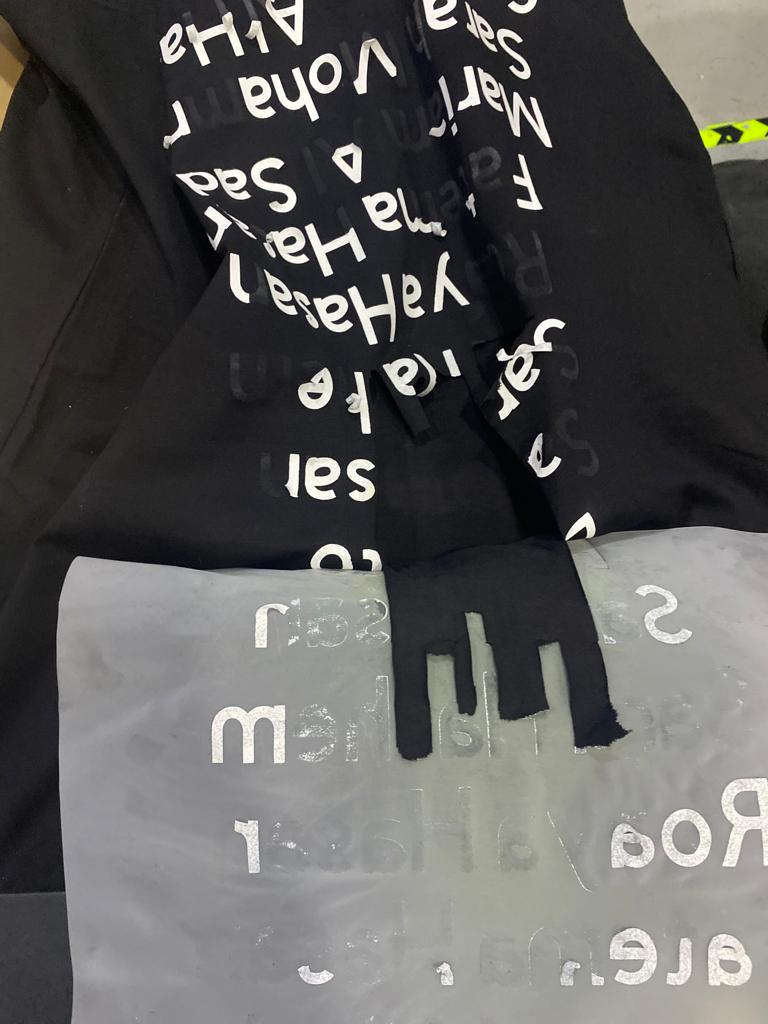
Step 3 However, because of an issue with the material and its adherance to the shirt, it was not sticking. We had to keep on ironing for a long time until the shirt eventually burned and ripped. Therefore, our first attempt was unsucessful.
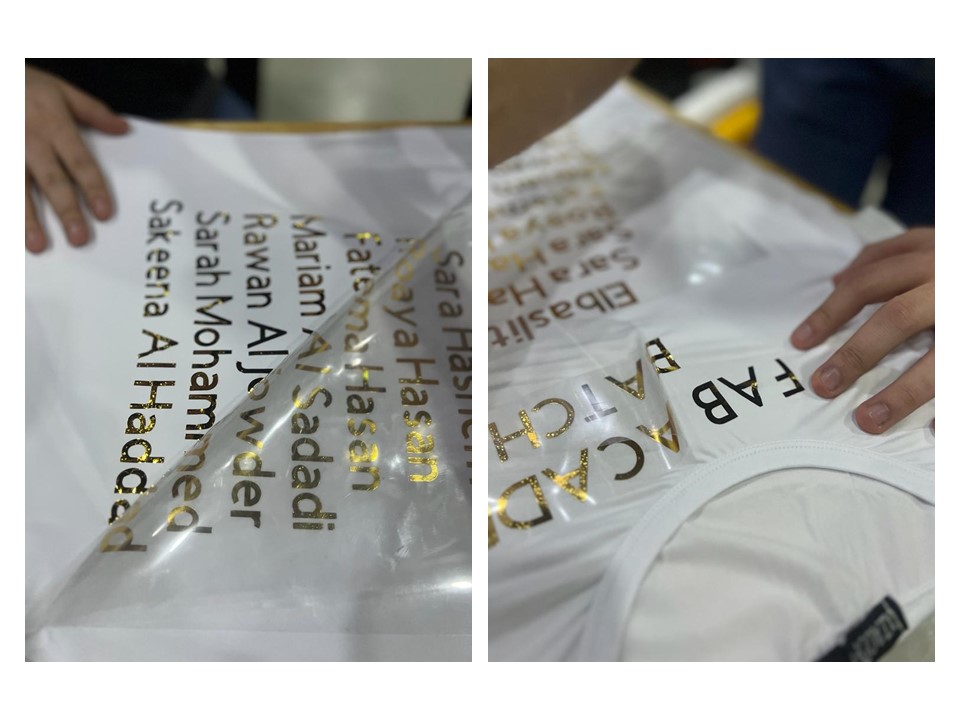
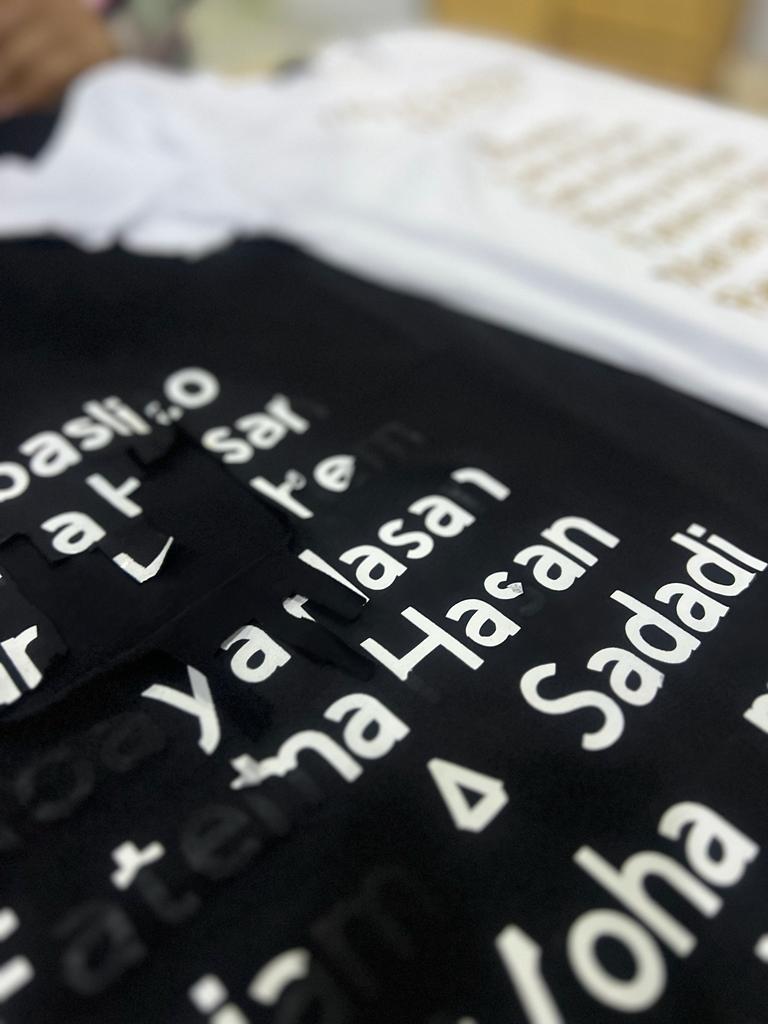
Step 4 Since we really wanted to make this shirt, we decided to try again on a different shirt and a different material. We used gold vinyl instead of white, and wanted to iron it onto a white shirt. After we repeated the first initial steps, our result were as shown below. We then cleaned it and removed all te extra vinyl just like in the first one.

Step 5 When we proceeded to the ironing, we noticed how easier the process was this time. The letters were sticking very fast and very well, and we finished the whole thing in no time.
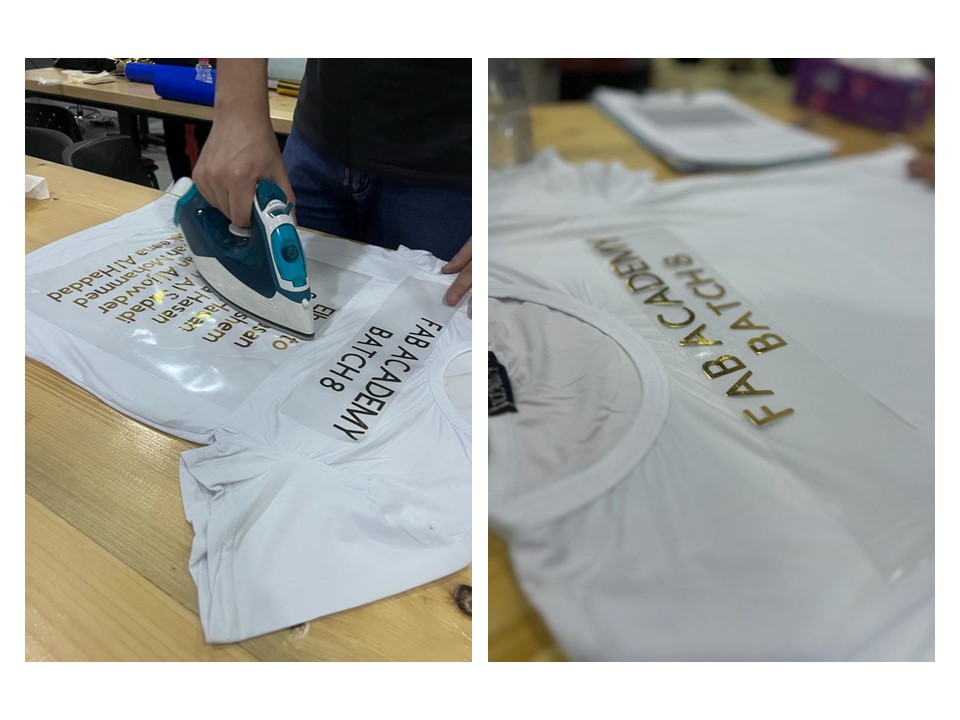
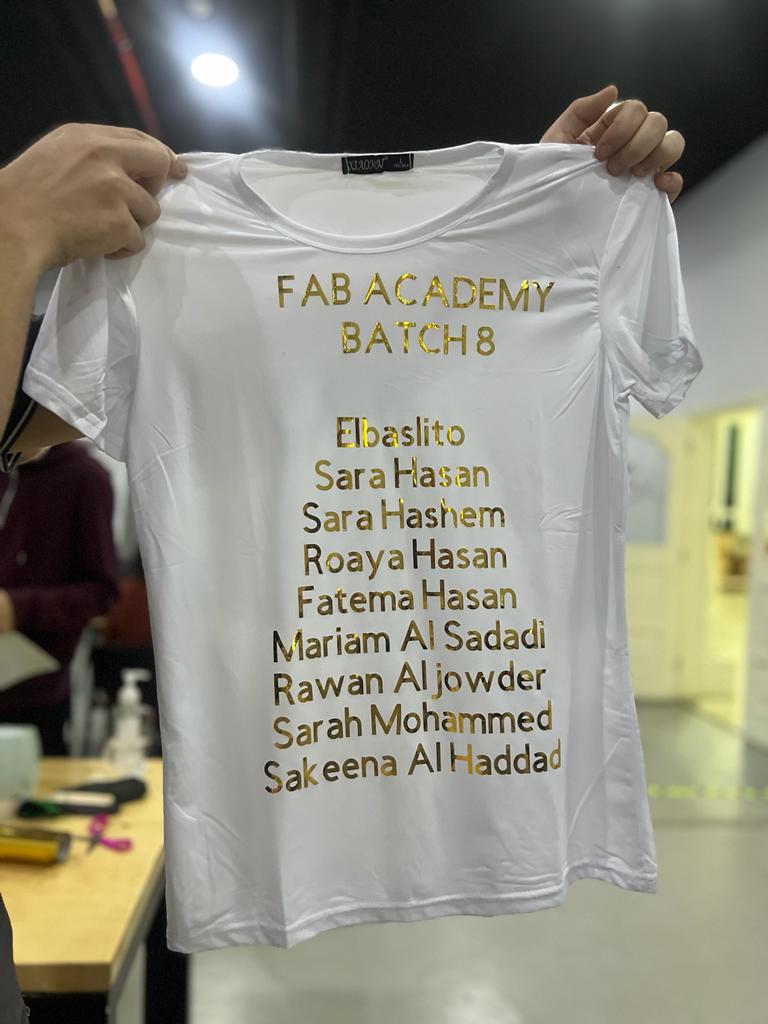
Step 6 After we finished all the ironing, we removed the sheet on top of it and got our final result.
This was our final result.
In the picture below, you can see the difference between our first and second trial.
Sticker
Our second vinyl cutting task was to create a sticker, as I mentioned above.
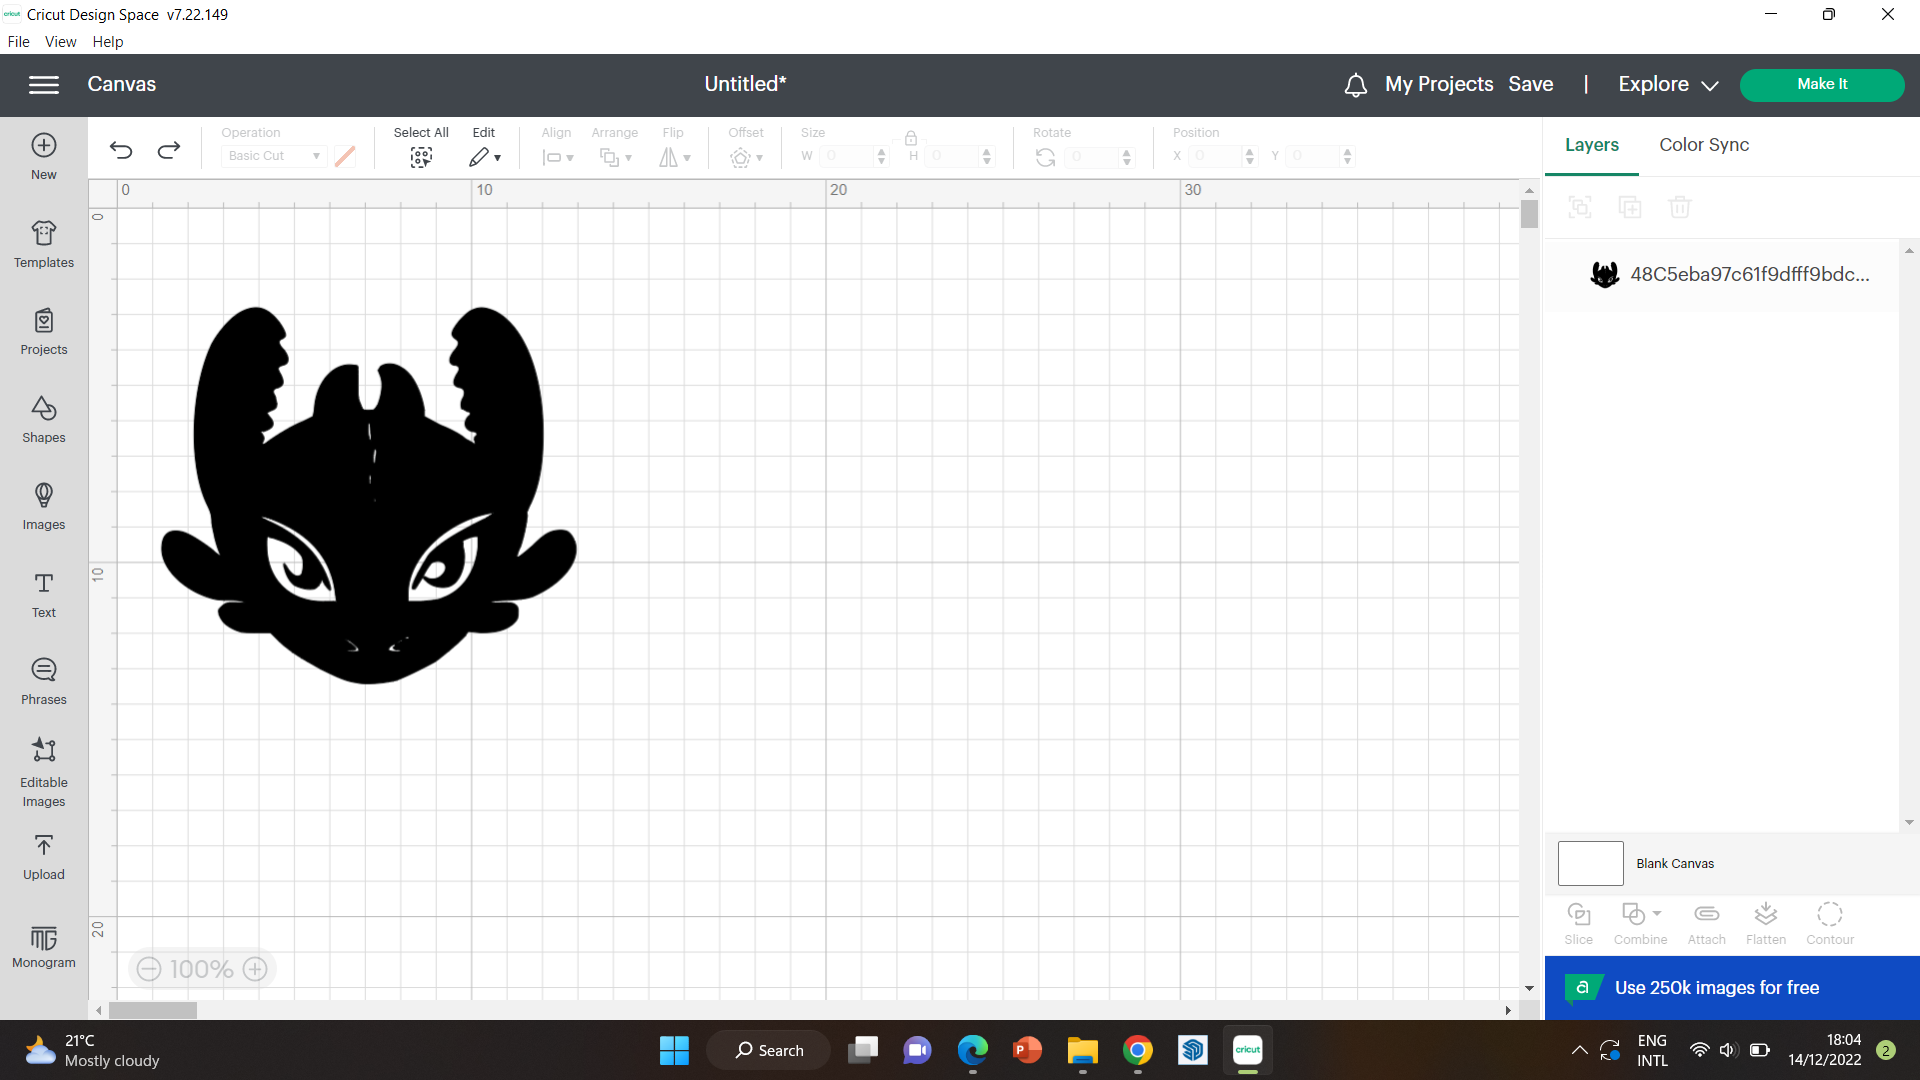
Step 1 I chose the image, which was a sillhouette picture of a cartoon character. I chose a sillhouette because the sticker was going to be printed on one color only, so I had to ensure it won’t look different without all the colors. I also made sure that the size would be suitable to where i wanted to place it.
Step 2 Then, I set up the machine in the exact same way as we did for the batch t-shirt, by setting the sticker on the mat, inserting it into the machine, and then choosing the correct setting.
Step 3 After the piece was cut, I removed it and stuck it on my laptop.
