7. Moulding and Casting
During this week, our work was different compared to the rest. We worked with a small milling machine and learned how to make molds, which can then be used to create multiple replicas of one product.
Explaining the process
Moulding and casting are manufacturing processes that involve creating a mold of a desired object, and then using that mold to create multiple copies of the object by pouring a liquid material (such as metal, plastic, or glass) into the mold and allowing it to harden. The process begins by creating a master model, which is usually made out of clay, wood, wax, or another material that can be shaped easily. This master model is then used to create a mold, which is typically made out of silicone or plaster. Once the mold is created, it can be used to cast multiple copies of the object by pouring a liquid material into the mold and allowing it to harden. The resulting copies are identical to the master model and can be used for a variety of purposes such as art, industry, and prototyping.
Based on what was stated, there are several different materials for this process.
Moulding materials are listed below.
| Material | Pros | Cons | Uses |
|---|---|---|---|
| Silicone | Good for detailed and complex parts, durable, heat resistant, can be used for castings, easy to remove from the original model, reusable. | Expensive, can be difficult to use for beginners, not suitable for casting materials that require high temperature. | Can be used to create molds for a wide variety of materials, including metals, plastics, and resins. |
| Plaster | Inexpensive, easy to use, can be used for intricate parts, good for small runs. | Not very durable, not heat resistant, brittle, not suitable for casting materials that require high temperature. | Commonly used for creating molds for casting ceramics, wax, and other materials. |
| Fiberglass | Durable, heat resistant, good for large parts, can be used for castings. | Expensive, requires specialized equipment and knowledge, not suitable for intricate parts. | Often used to create molds for casting fiberglass and other composite materials. |
| Urethane rubber | Good for detailed and complex parts, durable, heat resistant, can be used for castings, easy to remove from the original model, reusable. | Expensive, can be difficult to use for beginners, not suitable for casting materials that require high temperature. | Often used to create molds for casting a wide variety of materials, including metals, plastics, and resins. |
| Metal | Durable, heat resistant, reusable, can be used for high-volume production. | Expensive, requires specialized equipment and knowledge, not suitable for intricate parts. | Typically made of aluminum or steel, used for casting materials that require high temperature. |
Casting materials can be seen in the table below.
| Material | Pros | Cons | Uses |
|---|---|---|---|
| Metal | High strength and durability, wide range of applications | Expensive, requires specialized equipment and expertise | Automotive parts, mechanical components, sculptures |
| Plaster | Inexpensive, easy to work with | Brittle, not suitable for outdoor use or high-stress applications | Sculptures, figurines, arts and crafts |
| Concrete | Strong and durable | Time-consuming process, requires specialized equipment and expertise | Construction, landscaping |
| Resin | Easy to work with, cures quickly, can be colored and finished | Not as strong as metal or concrete, not suitable for high-stress applications | Jewelry, figurines, prototypes |
| Sand | Easy to work with, inexpensive, can be used to cast large parts | Requires a higher level of skill and experience, surface finish is generally not as smooth | Engine blocks, cylinder heads, large parts |
| Ceramic | High temperature resistance, good insulation properties | Brittle, difficult to work with, high cost | Electrical components, laboratory equipment, art objects |
| Wax | Flexible, easy to work with, inexpensive | Not suitable for high temperature or pressure applications, melts easily | Jewelry making, prototyping, dental impressions |
| Glass | High transparency, versatility in form and color | Fragile, difficult to work with, high cost | Optical components, art objects, lighting fixtures |
| Polyurethane | High flexibility, good resistance to impact and chemicals, easy to work with | Not suitable for high temperature or pressure applications, lower strength compared to metal or concrete | Flexible molds, foam parts, props |
For this week’s group assignment, we were divided into groups, and each group had to research and experiment with one moulding or casting material. All information gathered and steps taken can be found in this link.
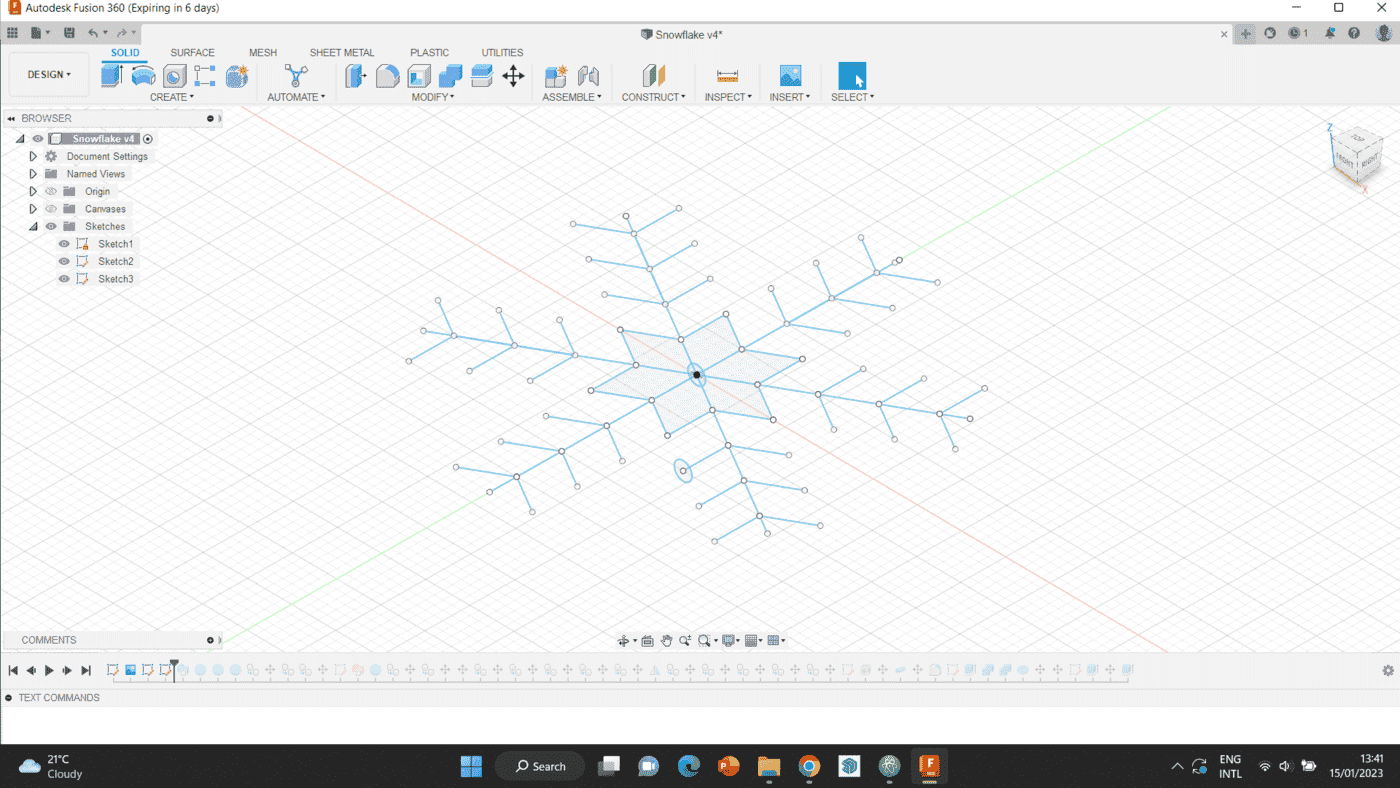
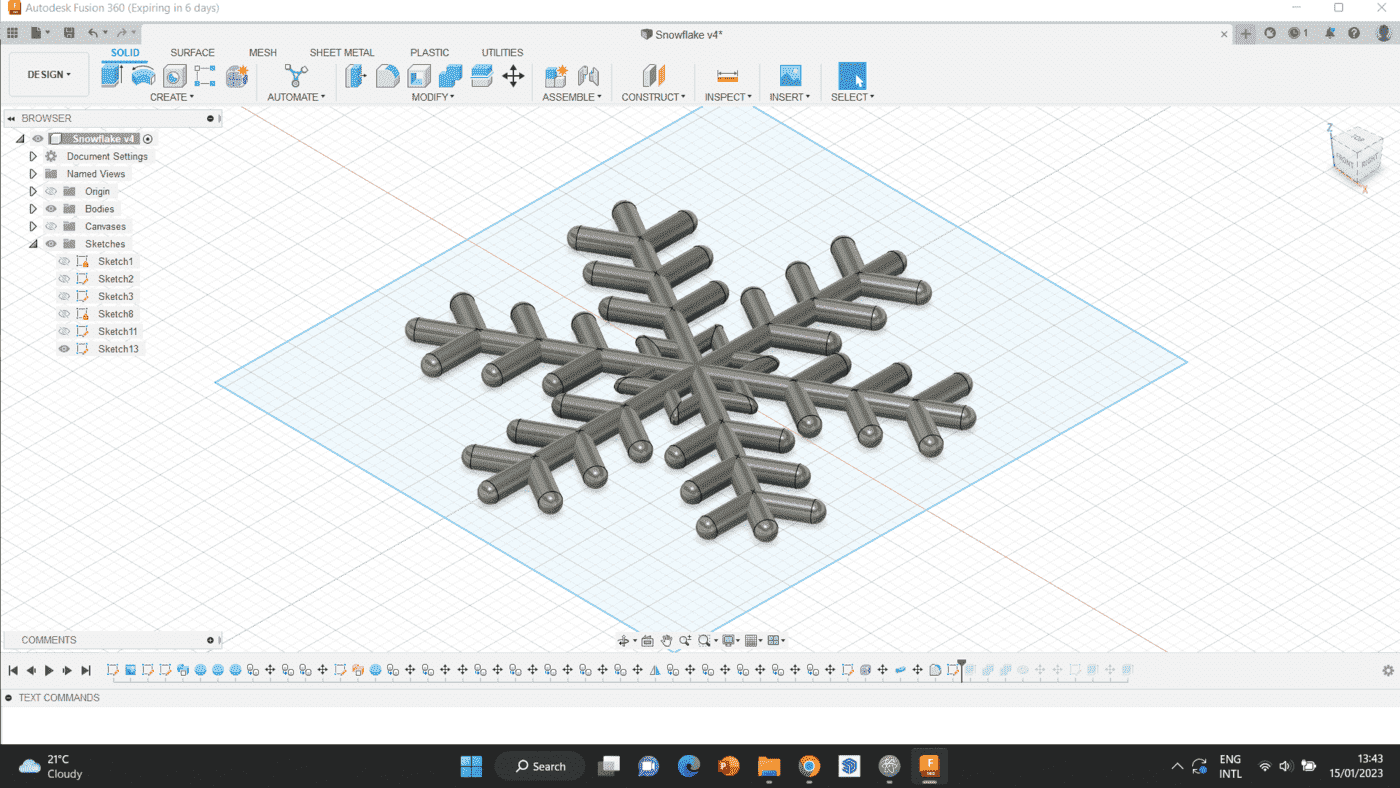
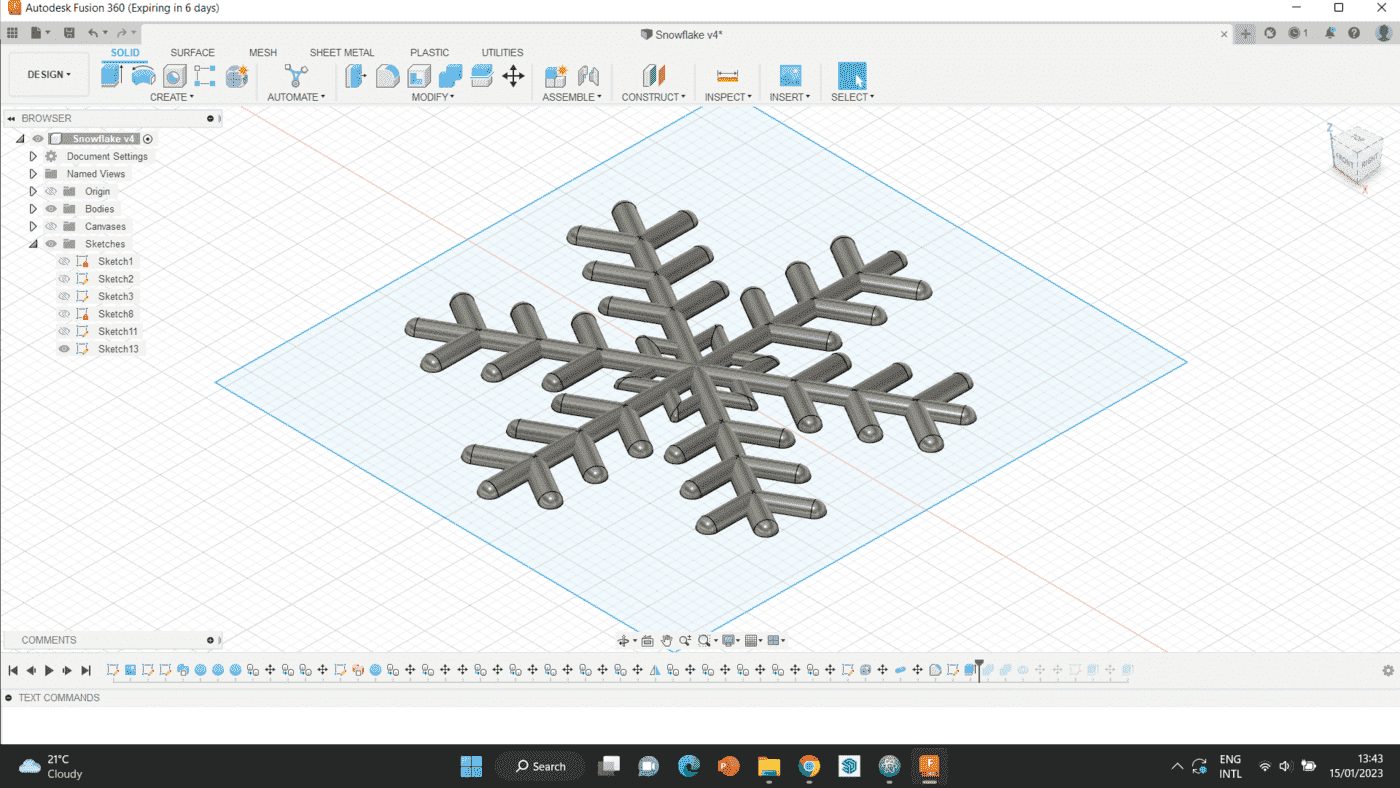
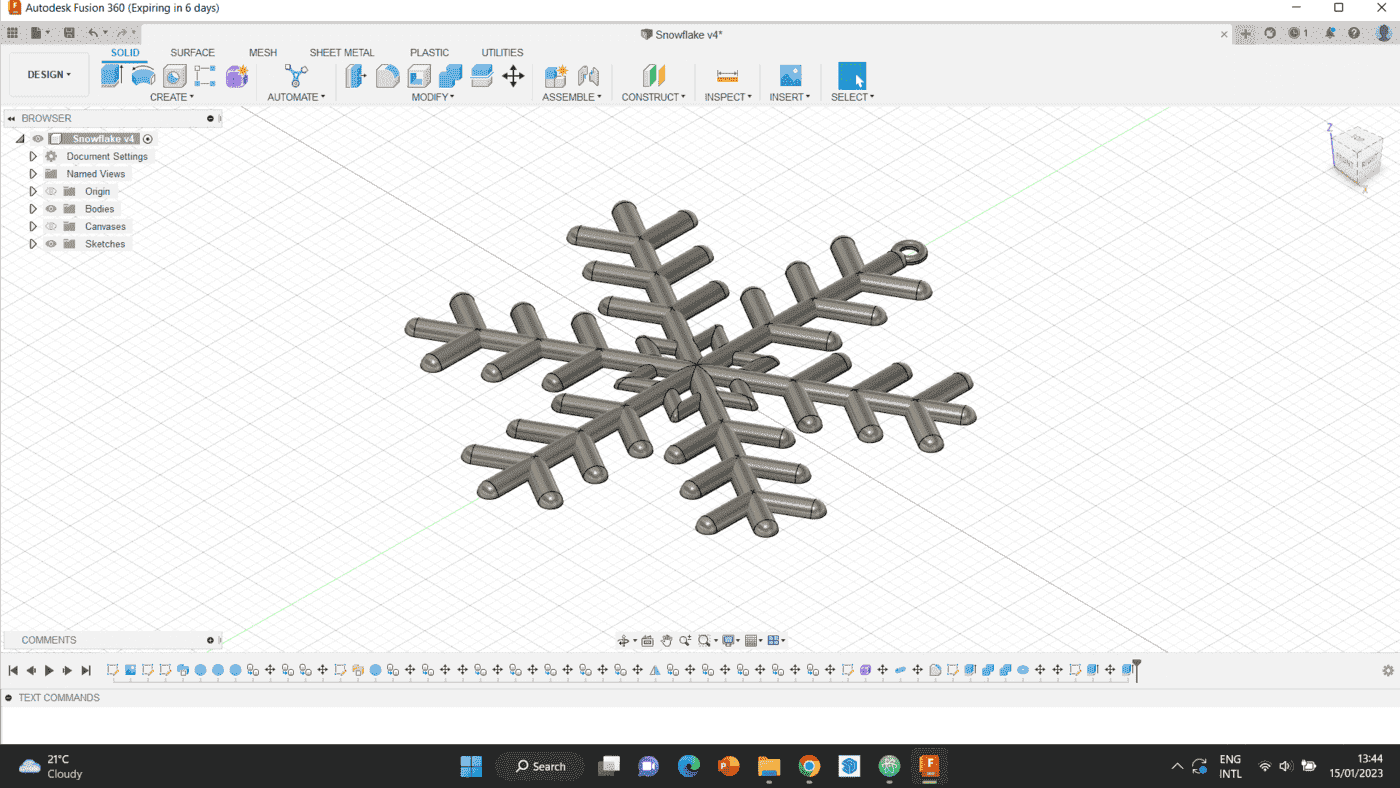
Designing on Fusion360
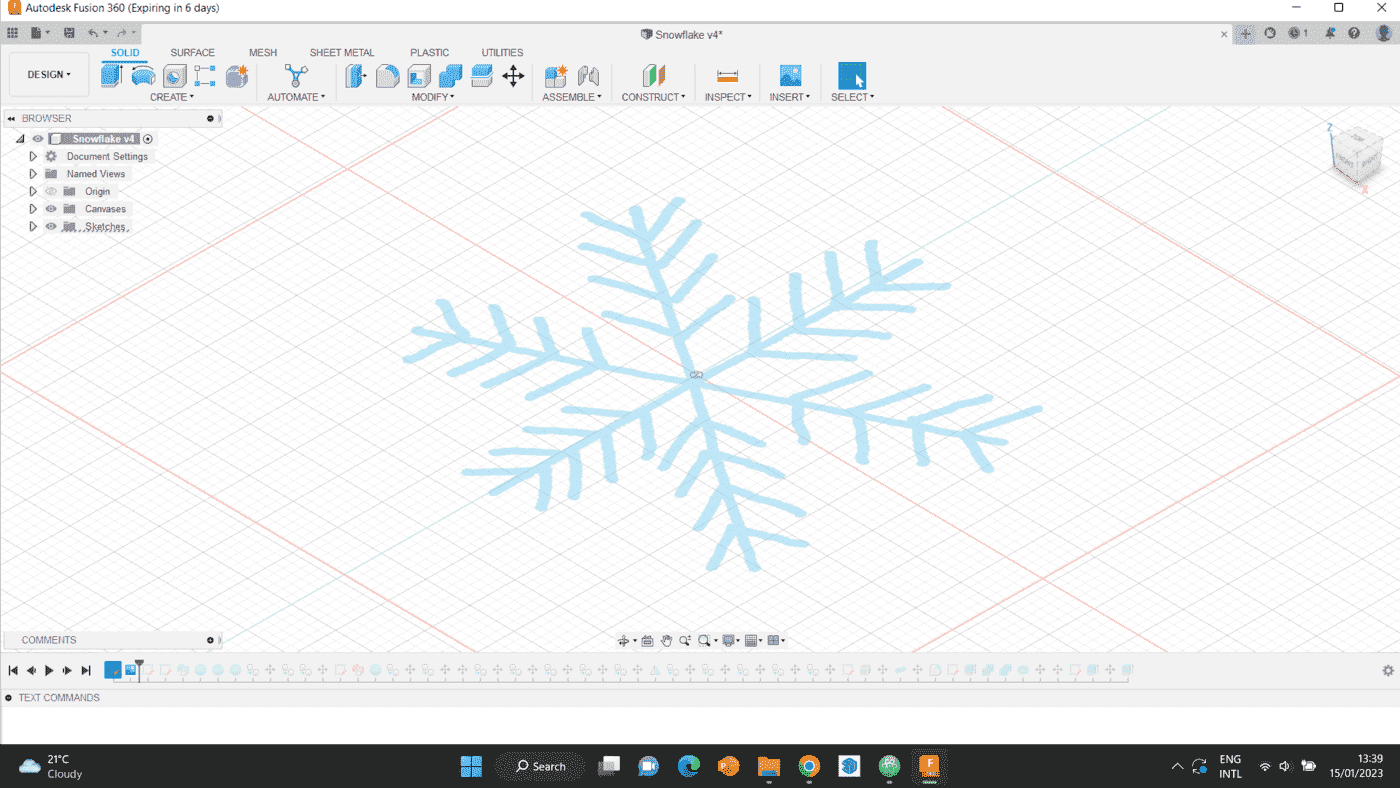
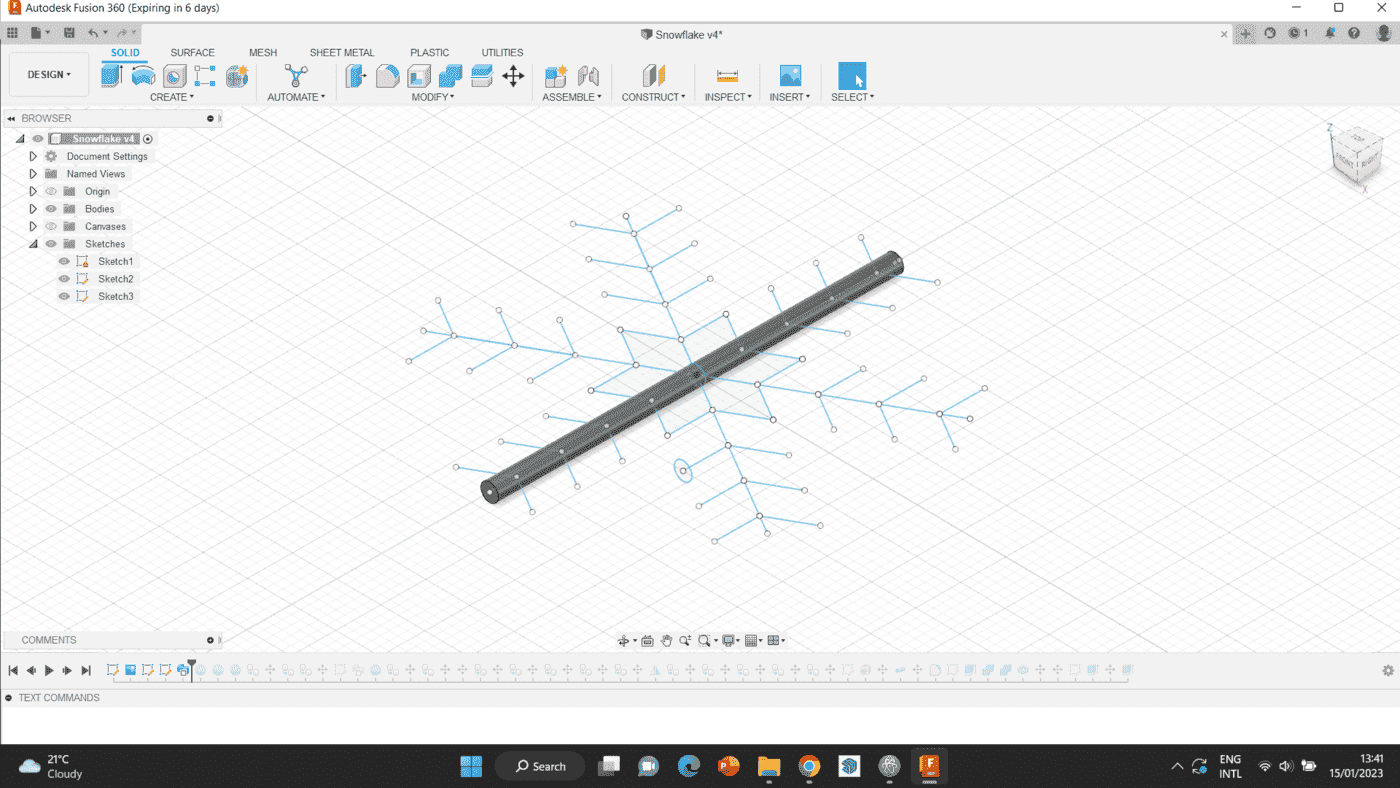
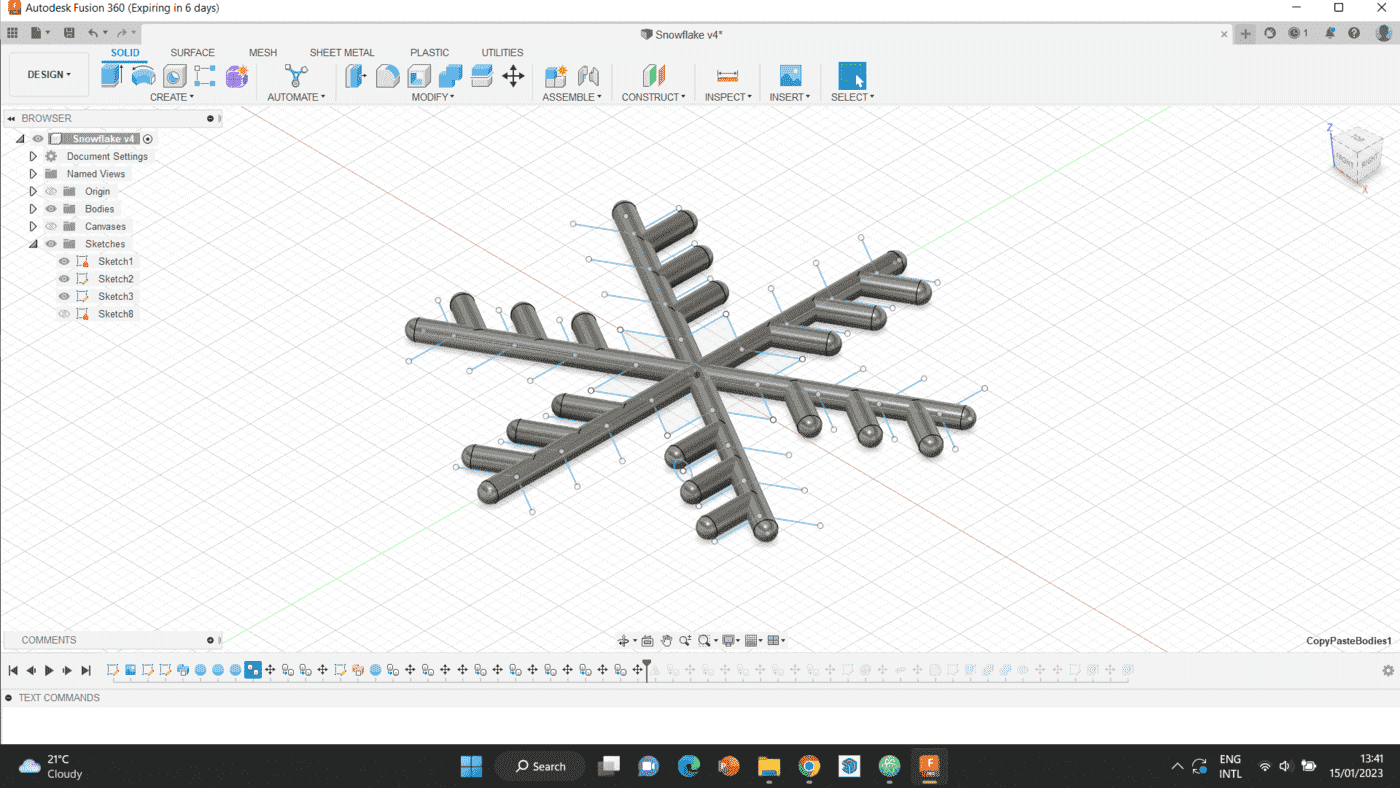
For this week, I used the same snowflake design that I did in week two, since it was perfect to be used. However, I added an extra step at the end to make it flat on one side, as well as added a hook to make it a pendant.
Step 1 Before drawing out the design, I picked a picture from the internet that outlines the same design I was loking for. Then, I added it as a canvas in the Fusion file so I can trace over it. I also added circles to specify the diameter of the object.
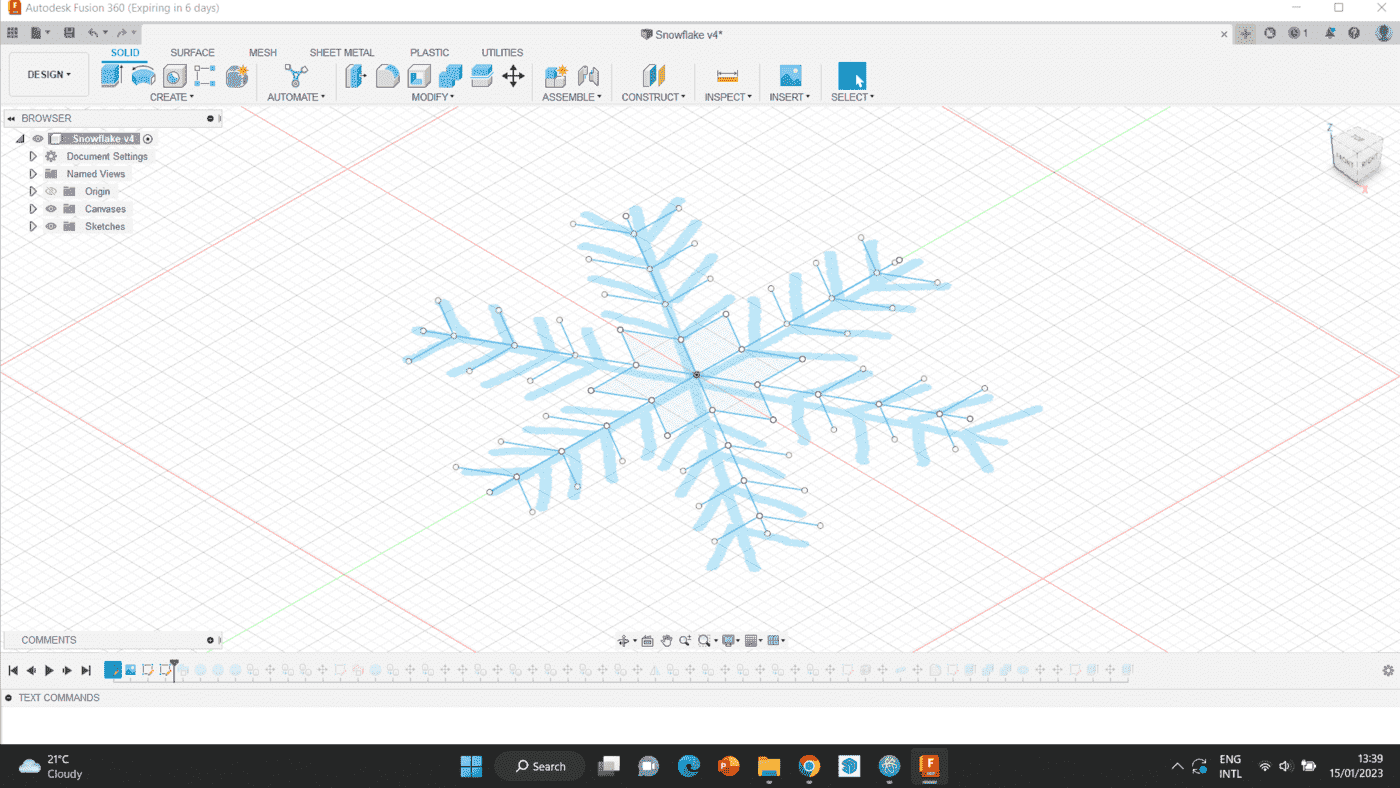
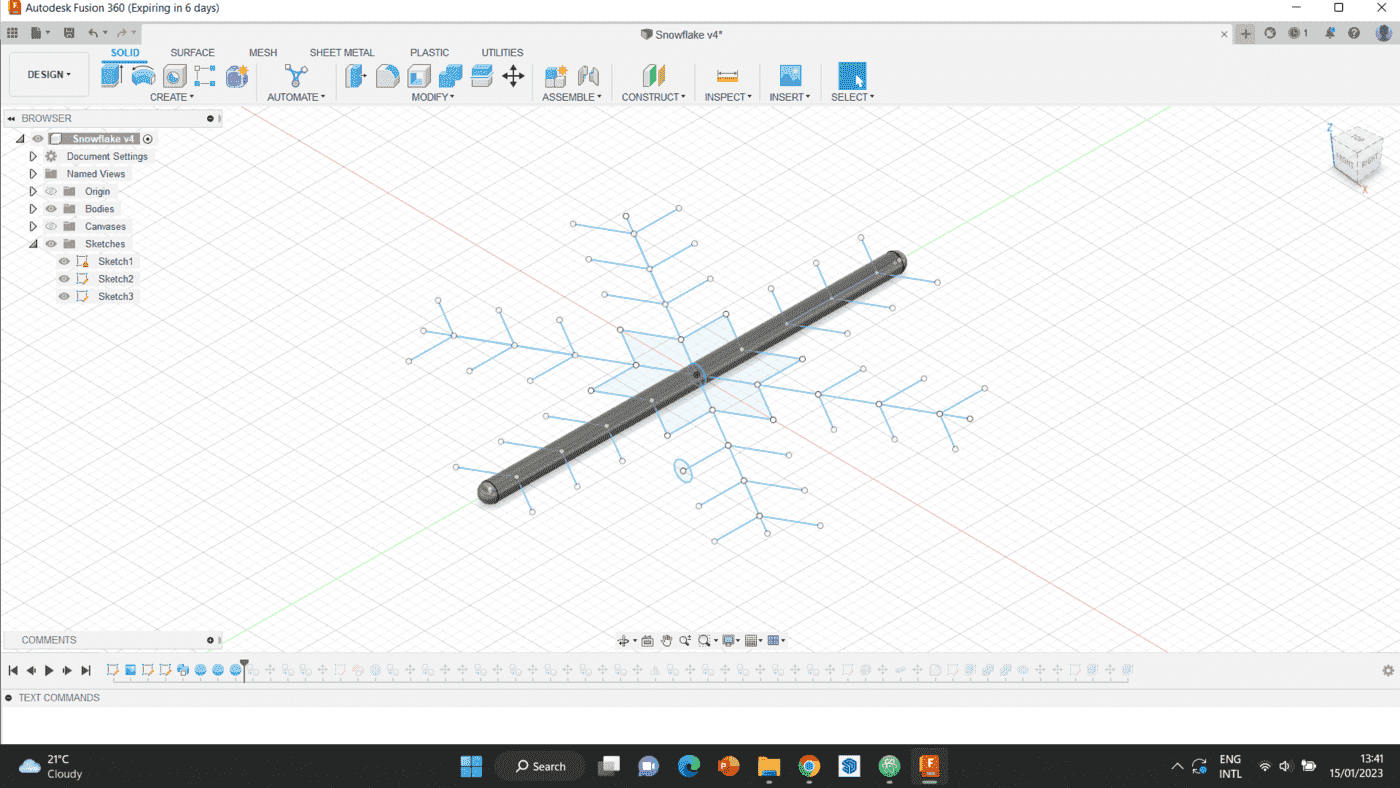
Step 2 After that was done, I sweeped the circle over the line on one of the main lines.
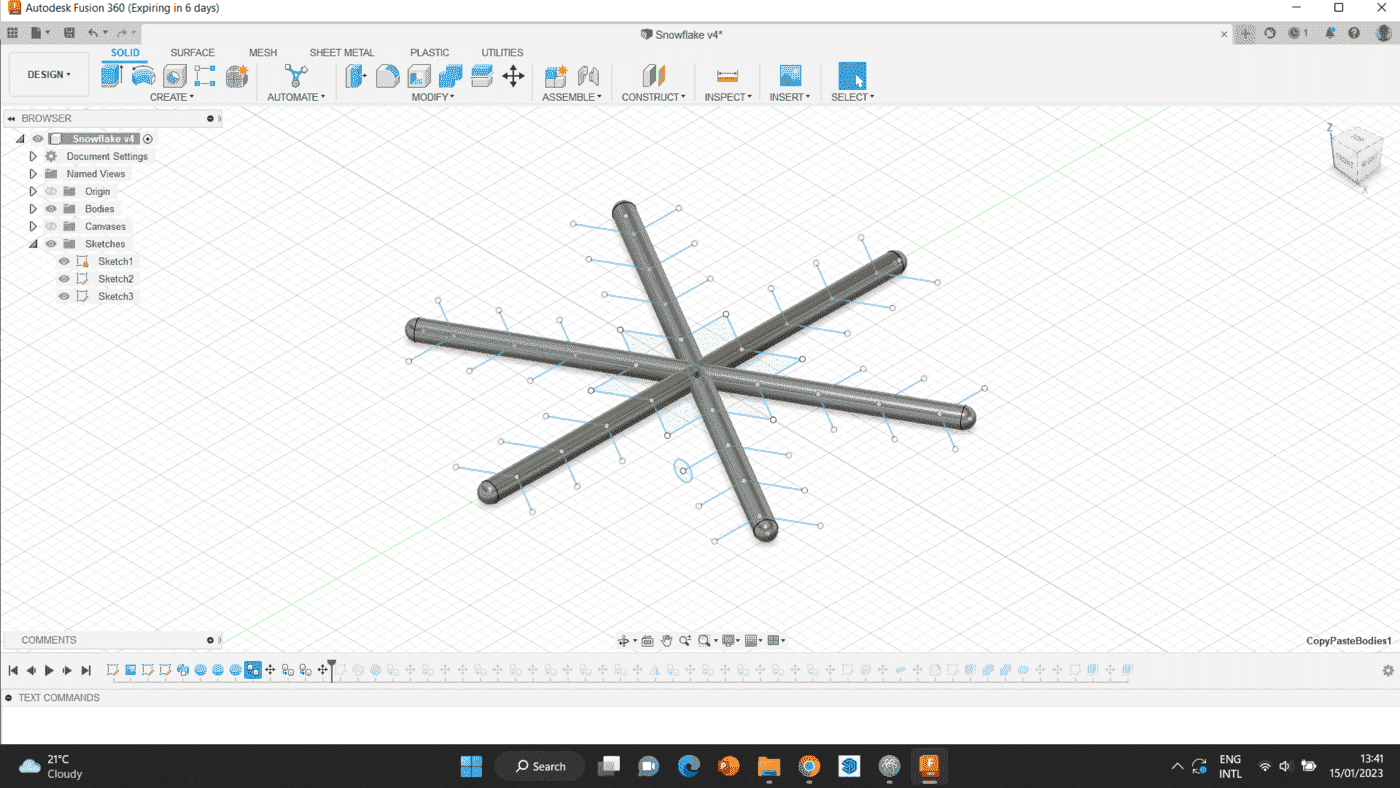
Step 3 To cover the sides of the pipe i created, I added two spheres on both sides of the pipe, and joined all three bodies together.
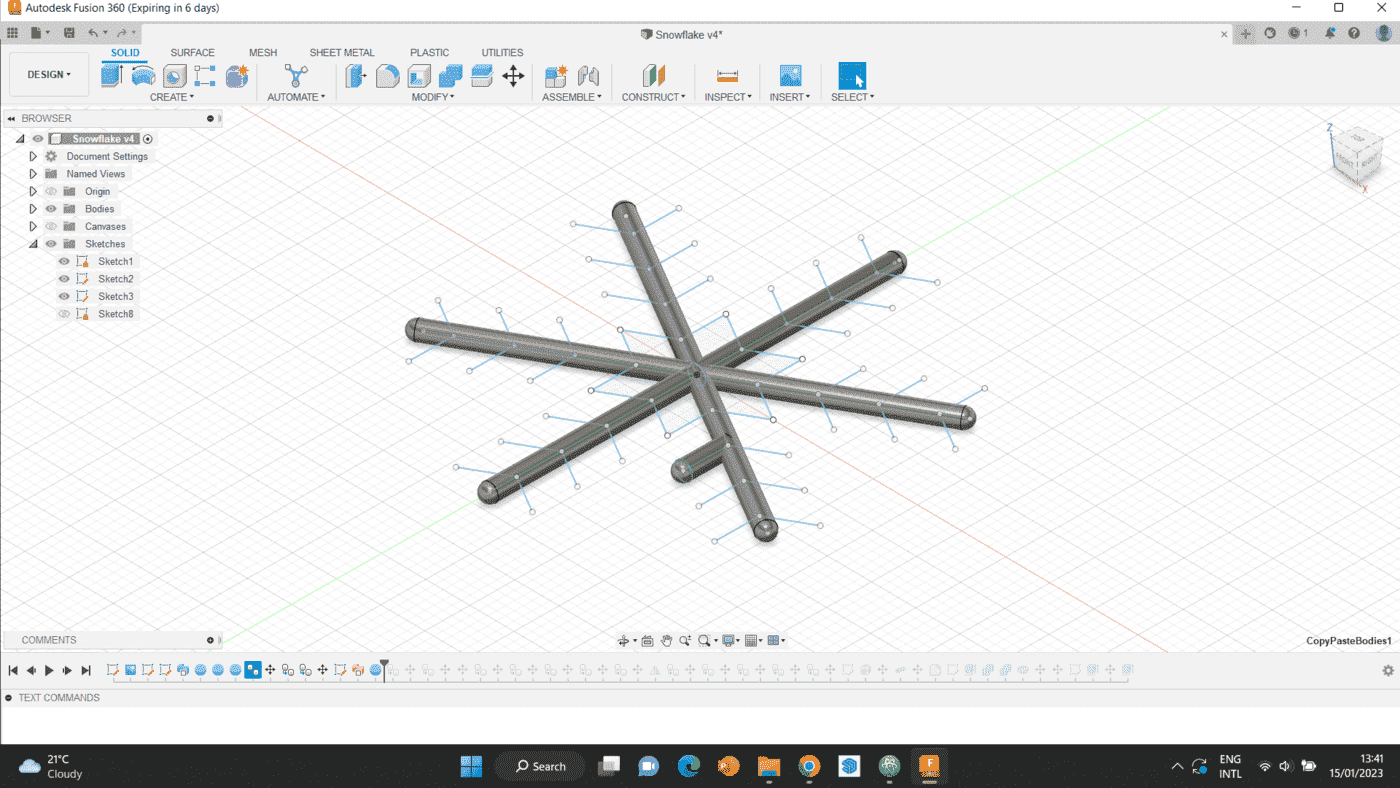
Step 4 To make the rest of the main parts, I duplicated the joined body and rotated them into place.
Step 5 When the main part was done, I repeated the same sweeping process on the smaller limbs, and added a sphere to cover the sides. The body was then copied and mirrored on all the smaller limbs in the form.
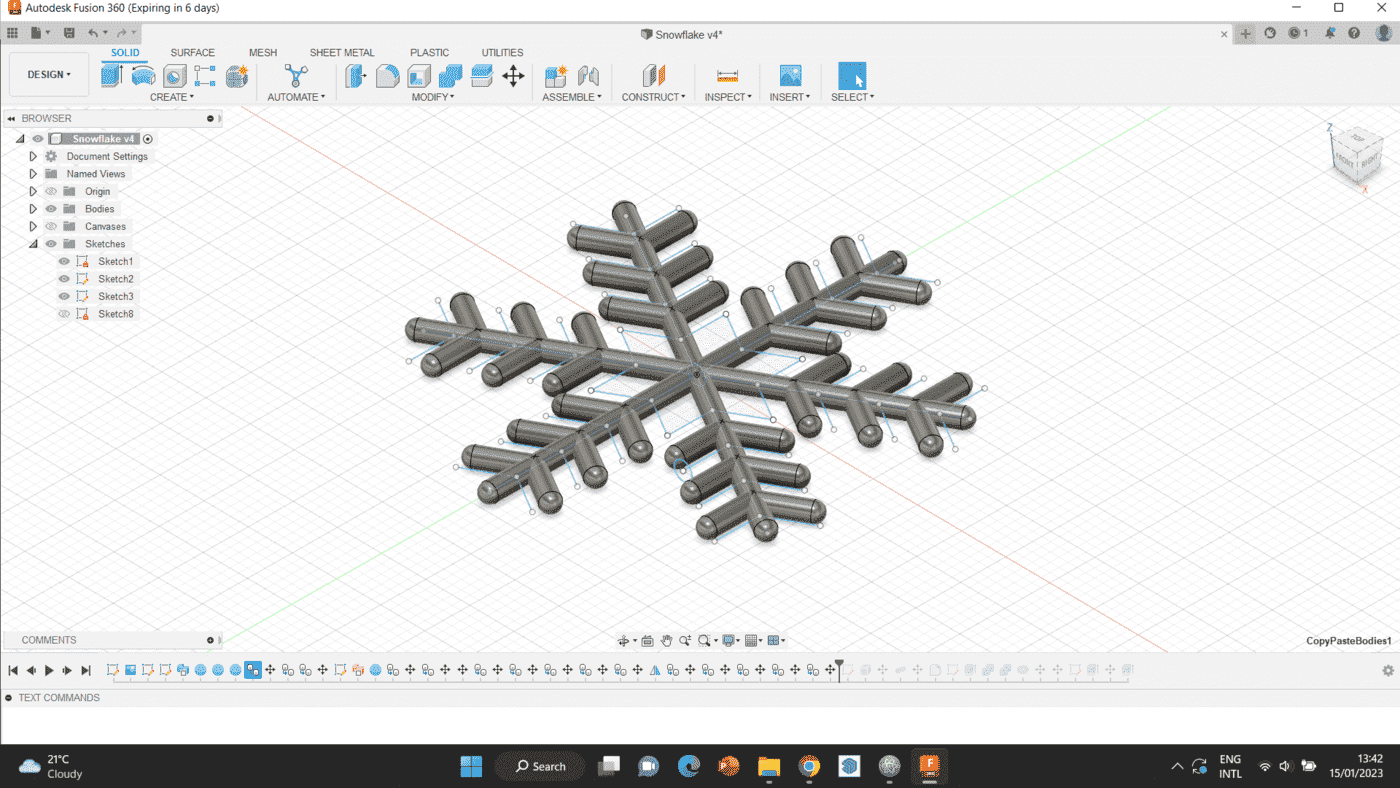
Step 6 To strengthen the design, I designed the star in the middle and filleted its edges to smoothen it out.
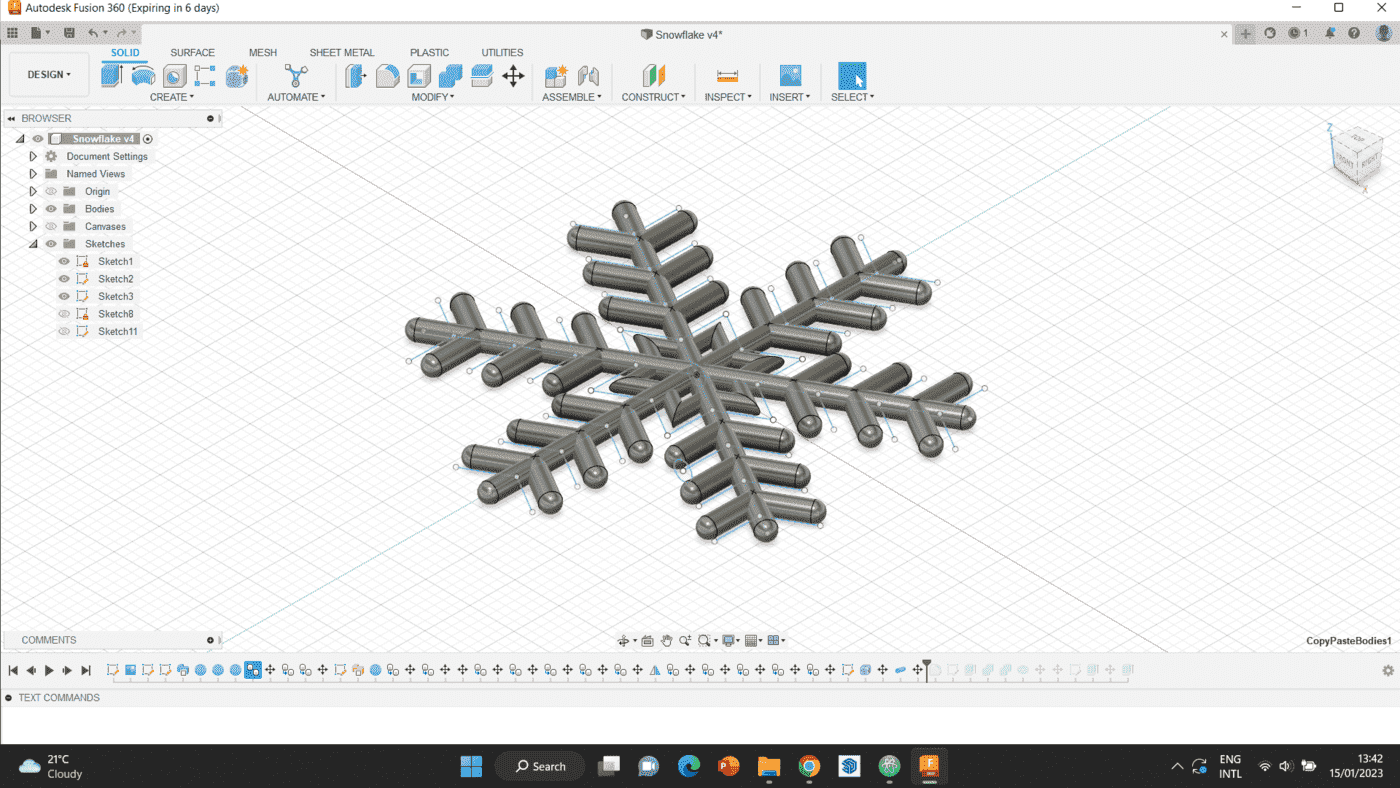
Step 7 After the design was ready, I created a rectangle and extruded it to cut the design and give it a flat surface on one side, since the milling machine needs that.
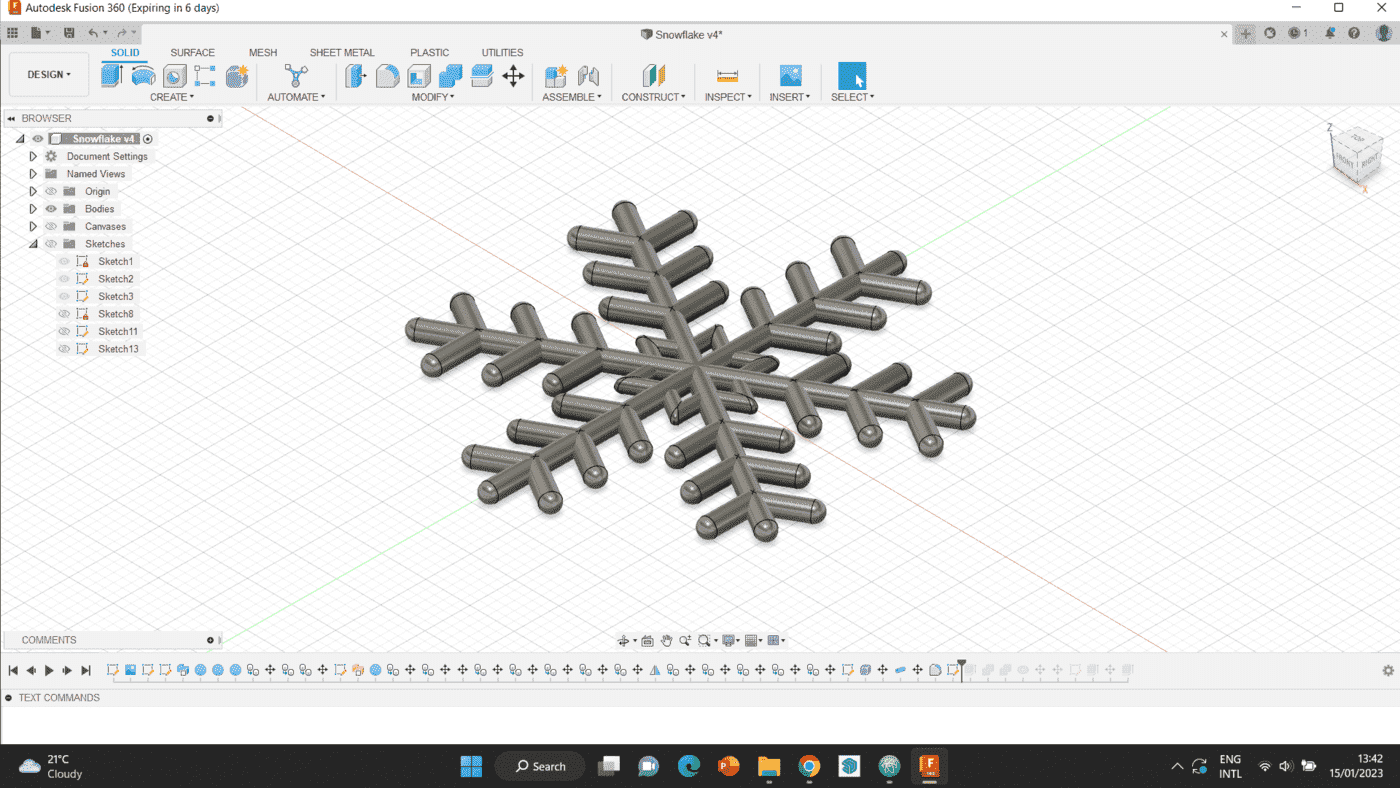
Step 8 When the whole design was ready, I added a small torus shape to make the shape into a medal, and cut it in the same way I cut the rest of the design.
When all the steps were done, the design was done and ready to be milled.
The downloadable file can be accessed below.
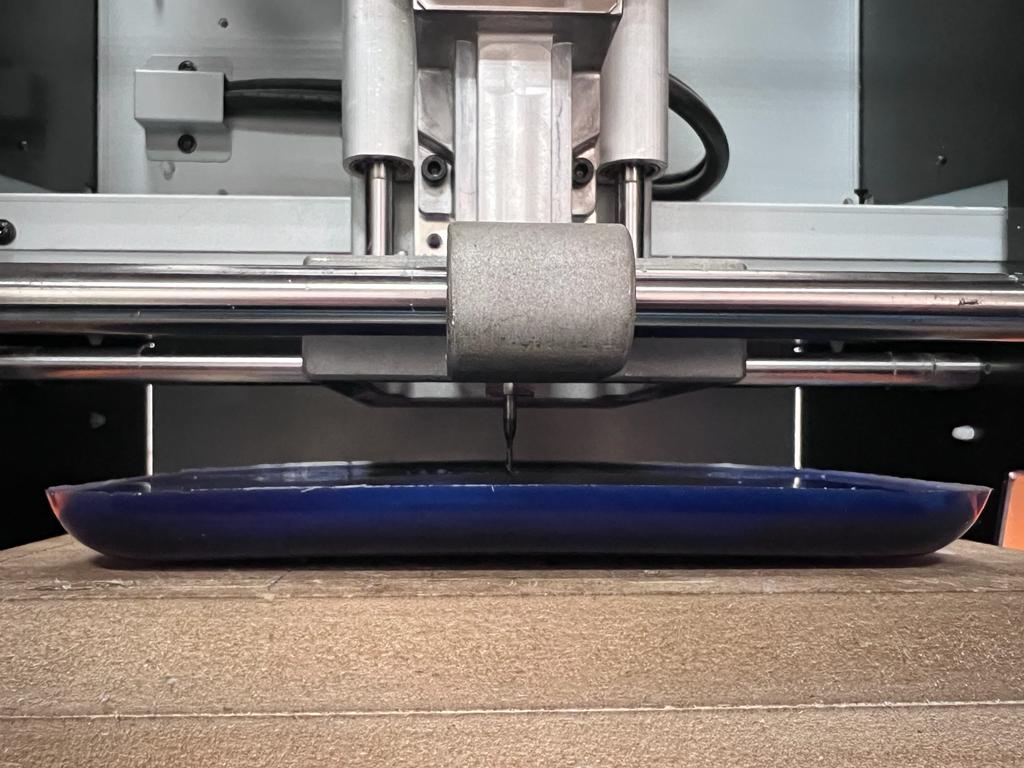
Milling process
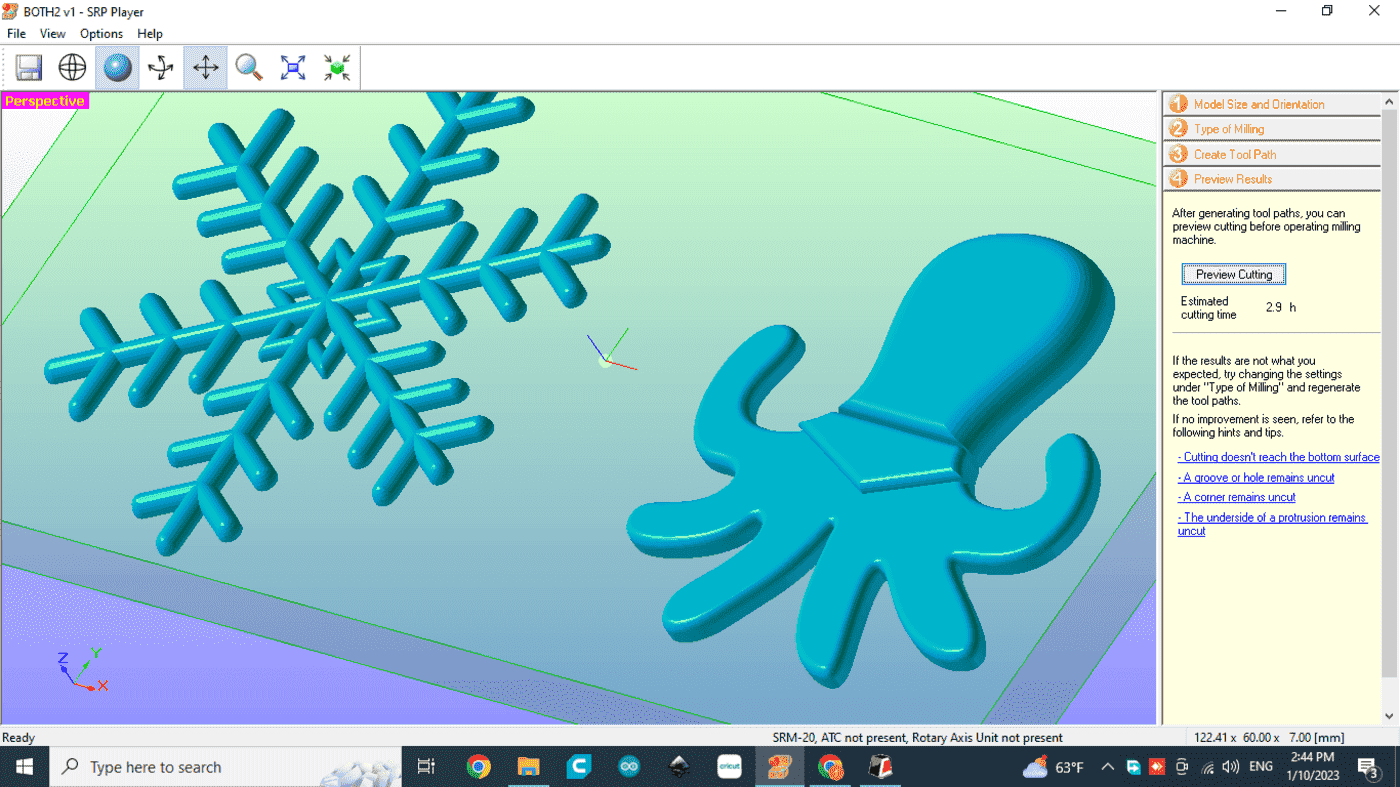
After completing the design, we used the Monofab fine milling machine. Since the machinable wax piece we used was big enought to fit two designs, we combined mine and my classmate’s designs in the program linked to the monofab machine (SRP Player).
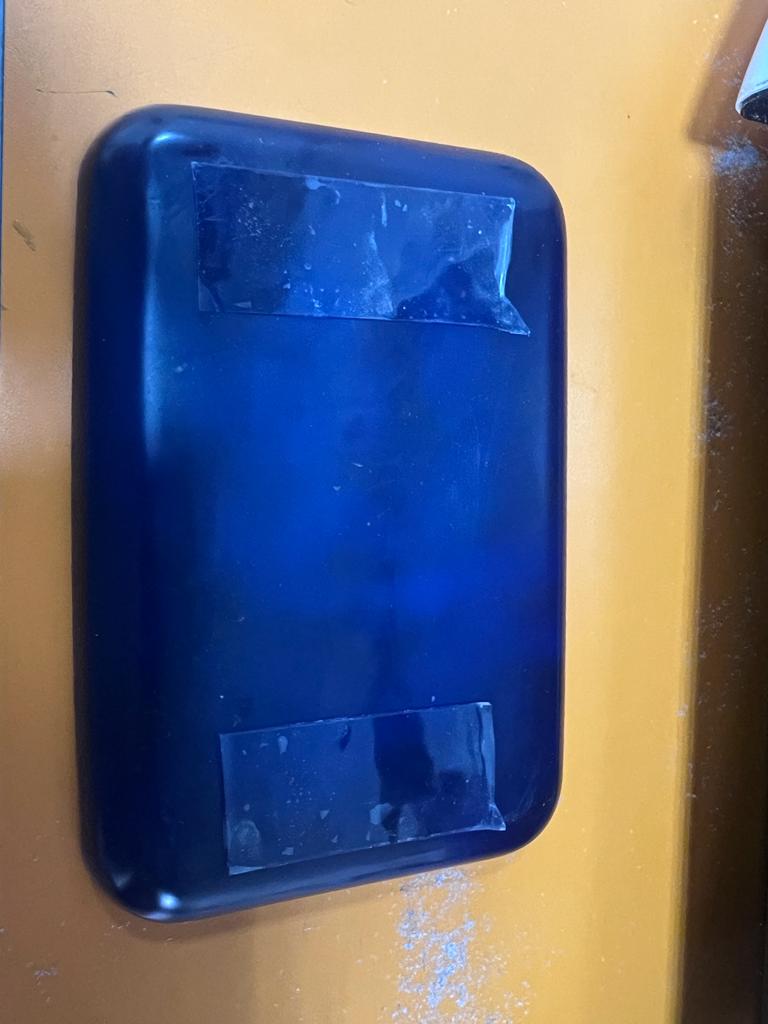
Before working on the machine, we had to mark the center of the wax, and tape it to the platform in the machine.
First, we imported our designs in the program, and fixed the “Z” access to make the design look deeper.
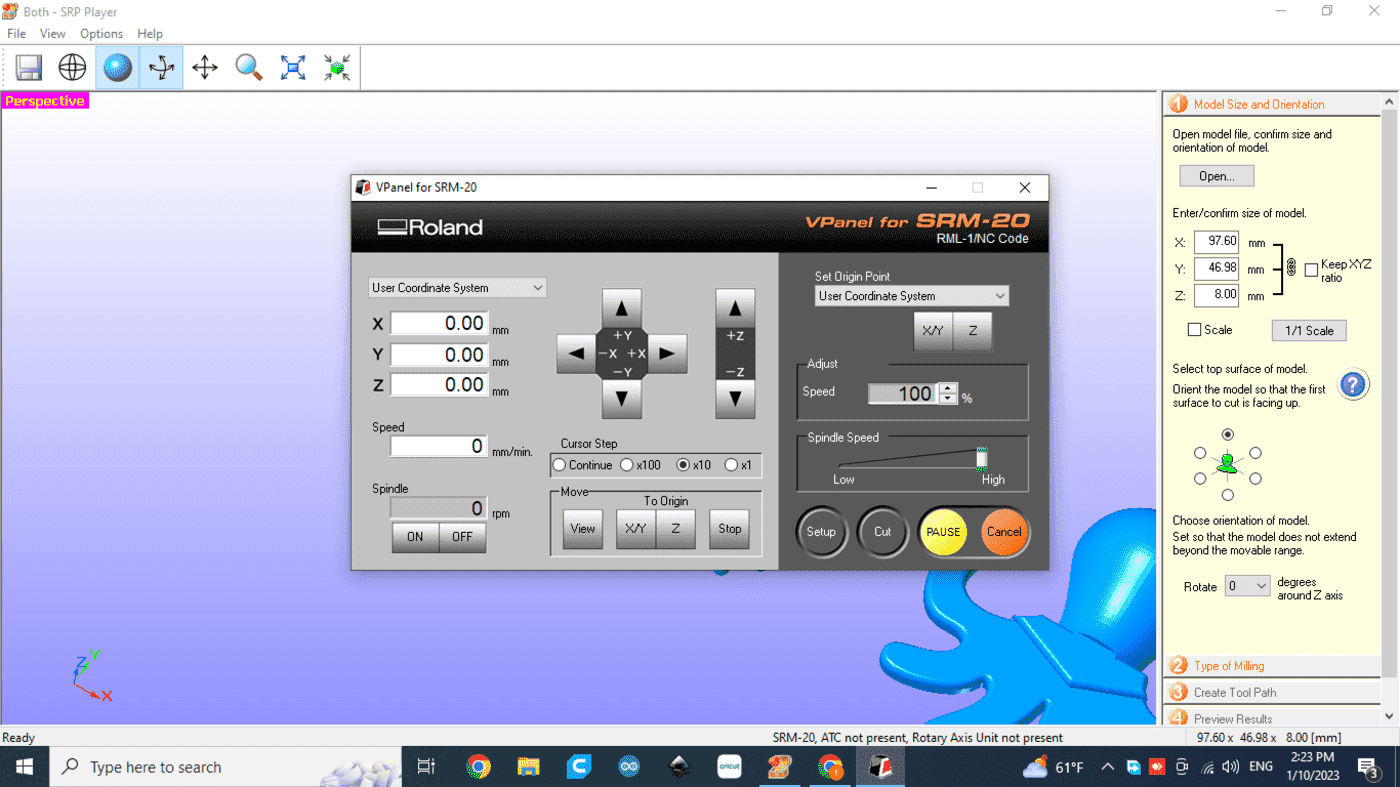
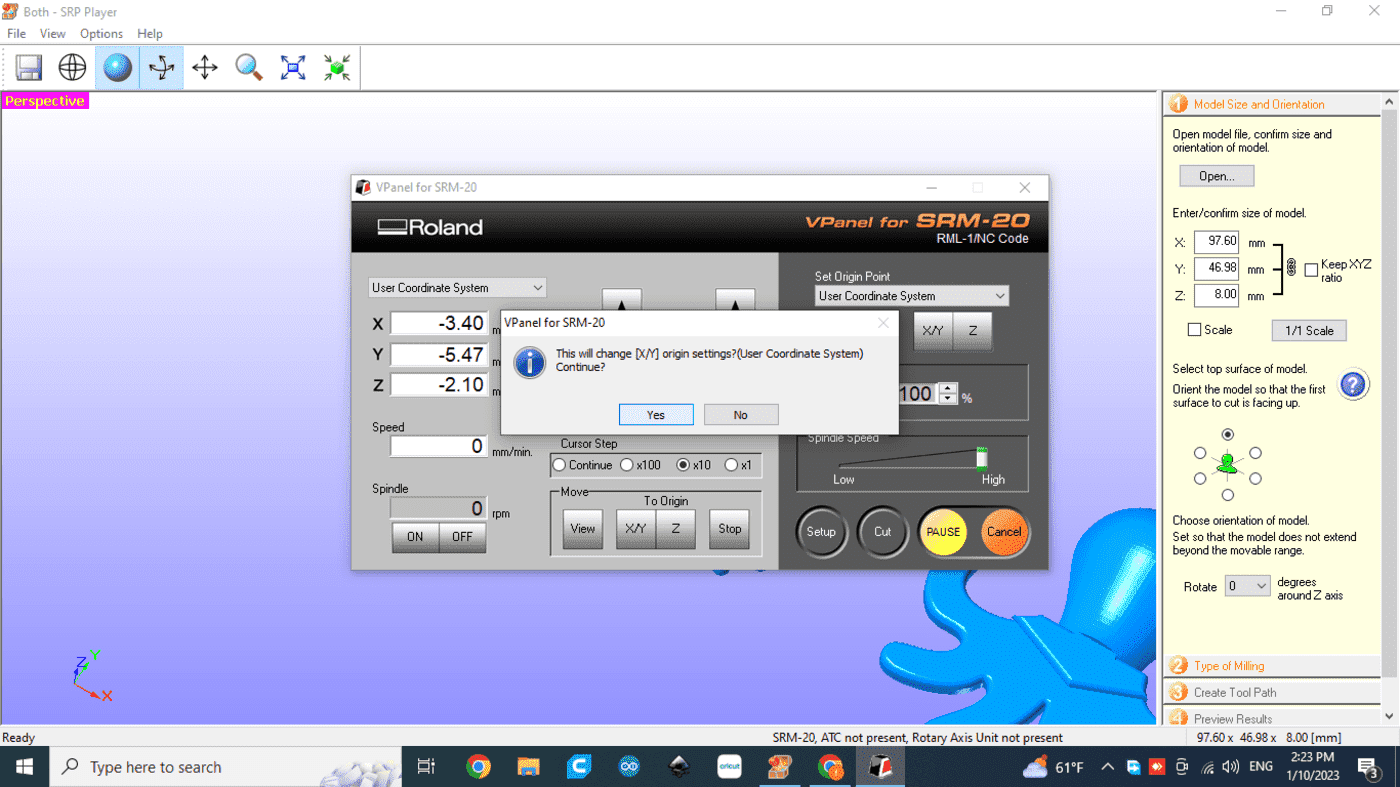
Then, we fixed the settings of the machine, to enable it to do the best job possible. For that, we inserted the model size and its orientation, the type of milling, and created the tool path.
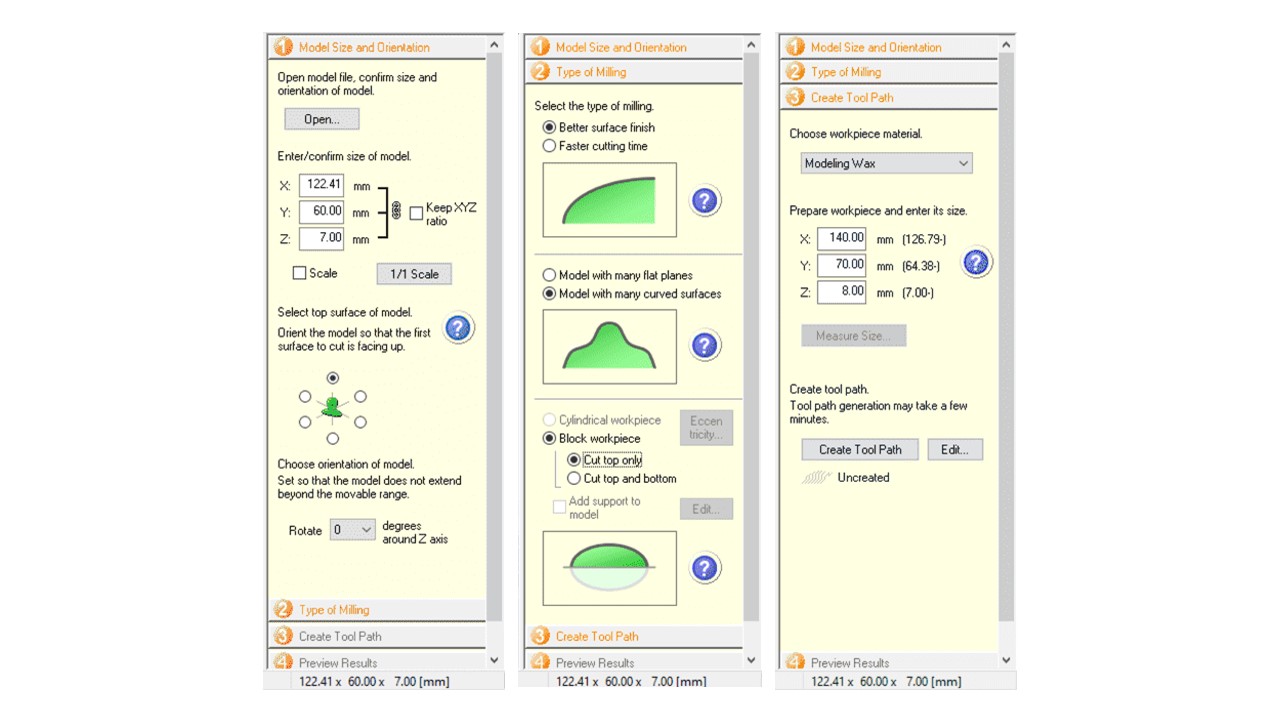
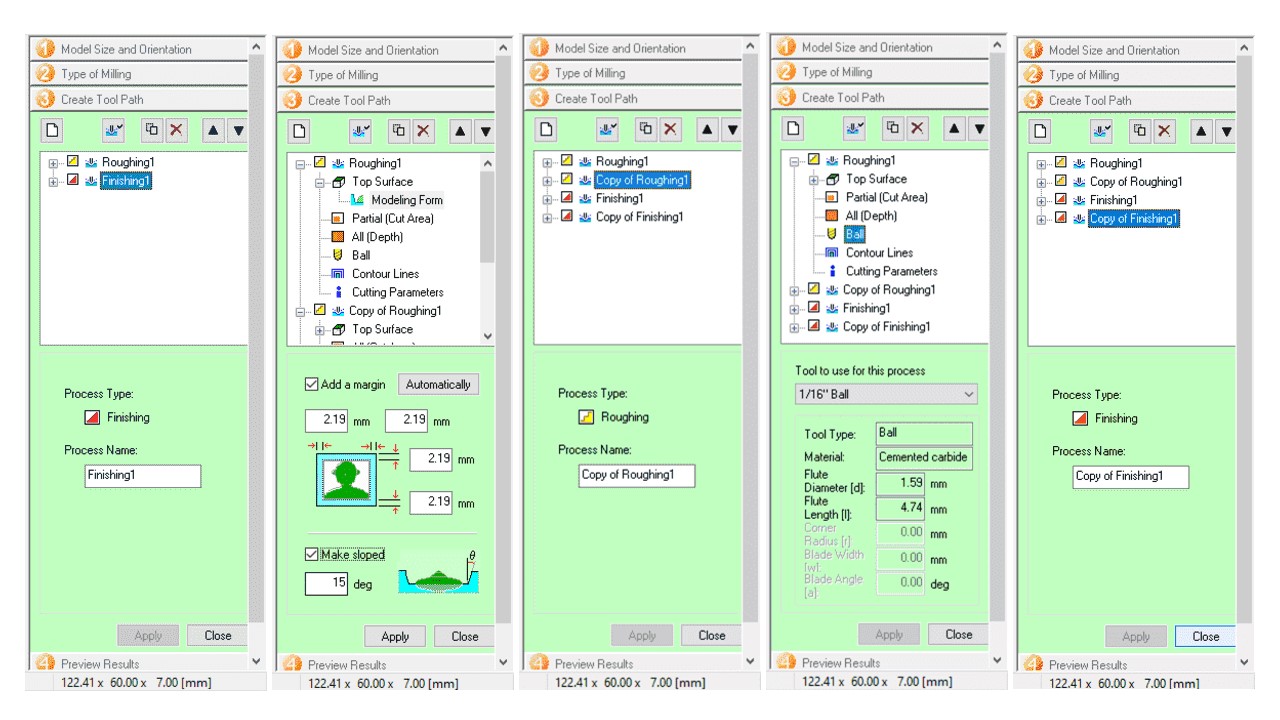
While creating the tool path, we divided it into 4 different files. The pictures below show how we created a rectangle around each shape, to specify the space we wanted the machine to mill.
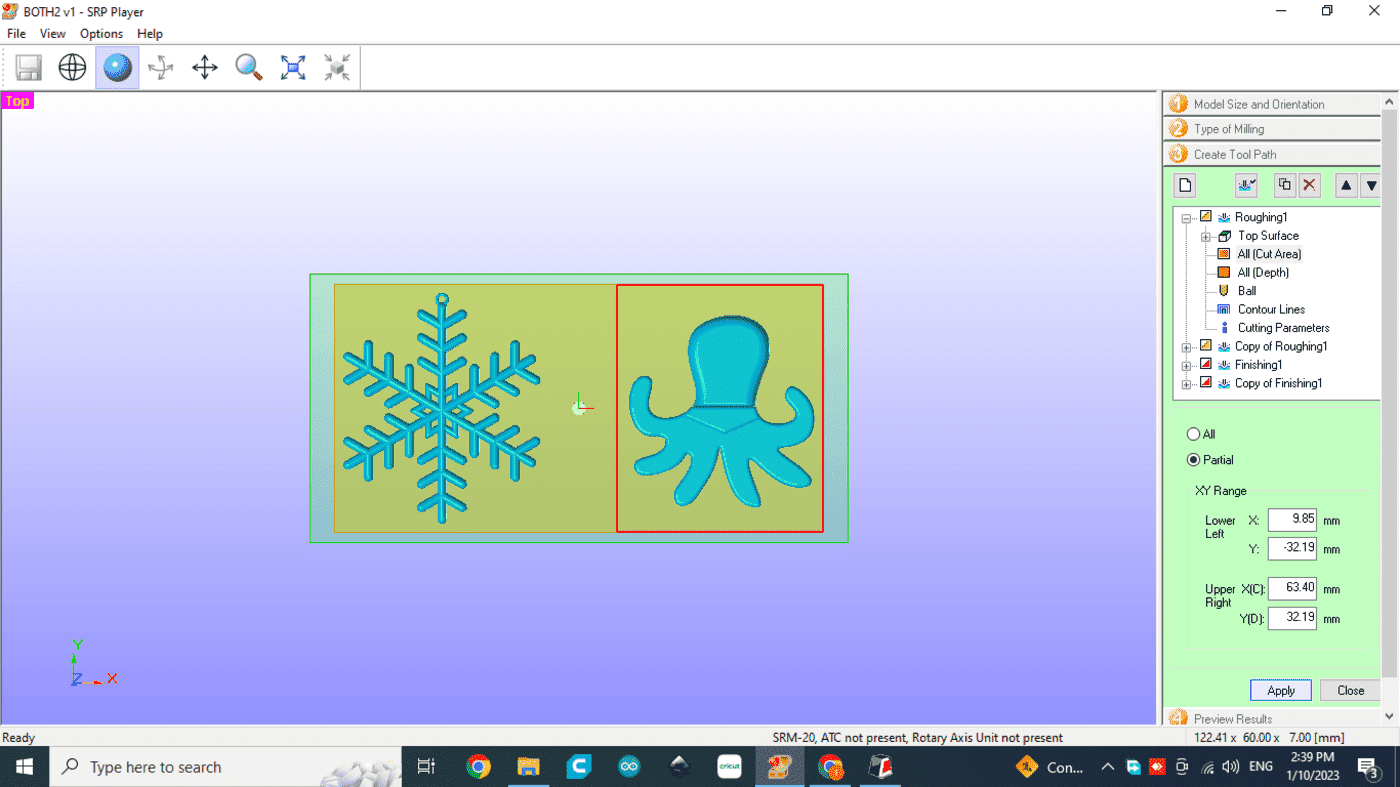
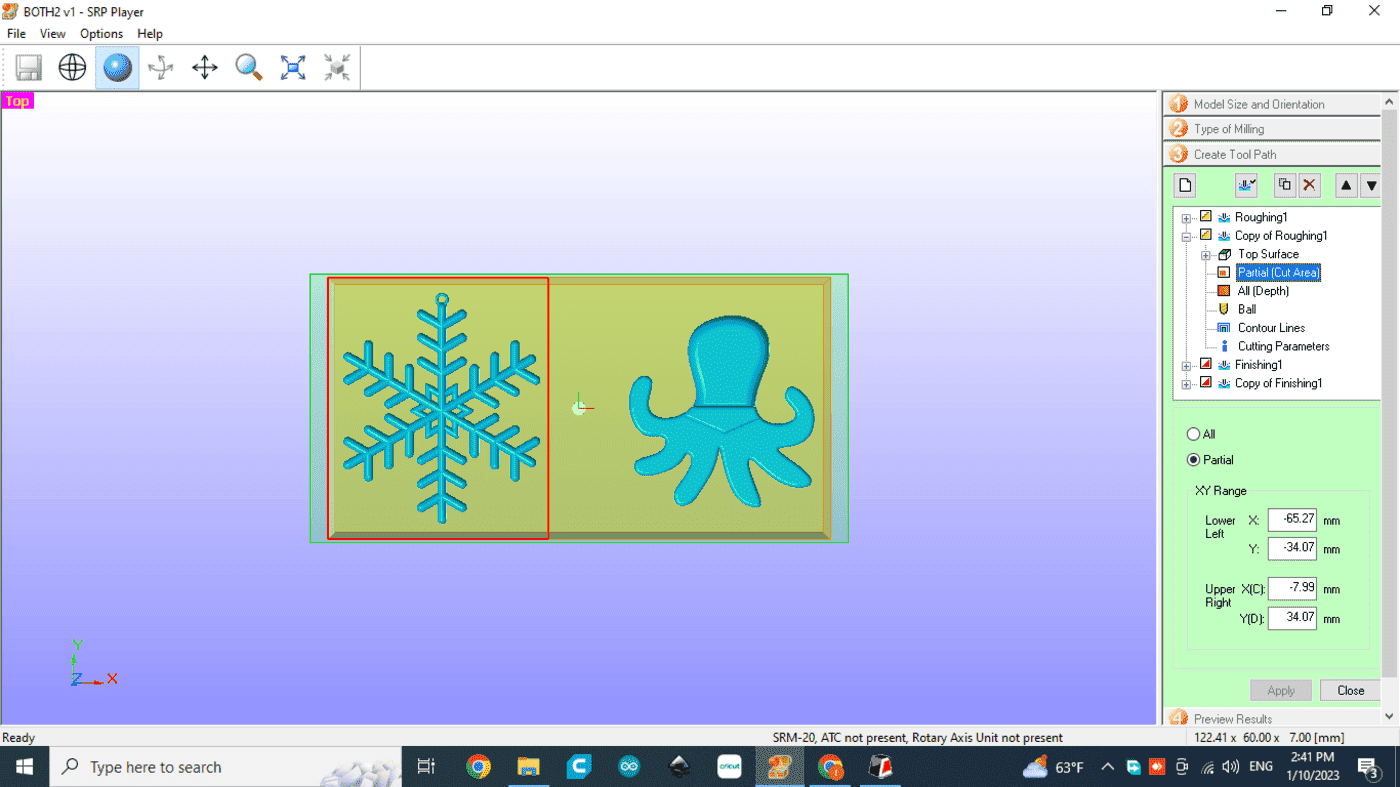
For each form, we created 2 files, roughing and finishing. the roughing parts creates what looks like contour lines on the machinable wax, while finishing goes over it again to give it a smooth final look. The setting for each is shown below.
When that was done, we previewed the results, and saved all 4 files onto the desktop.
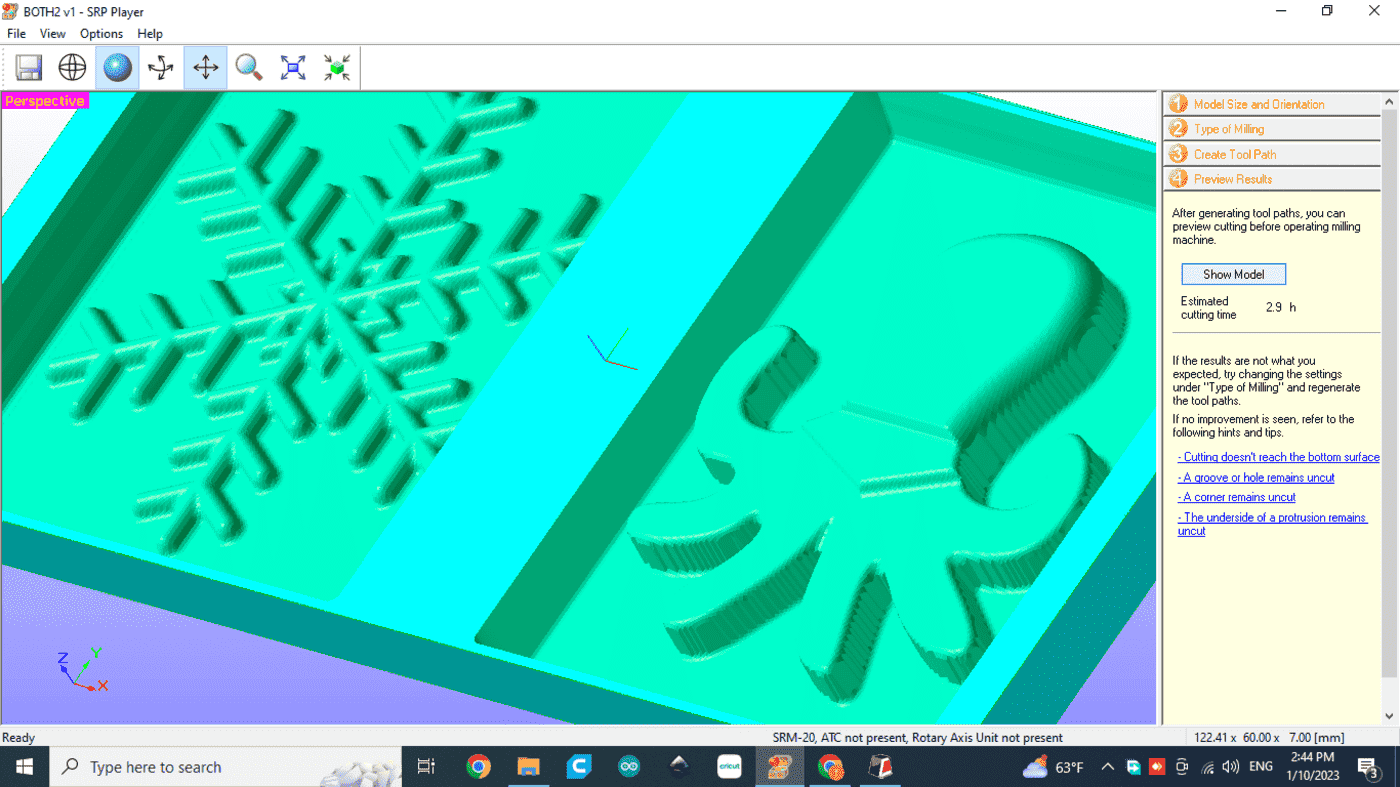
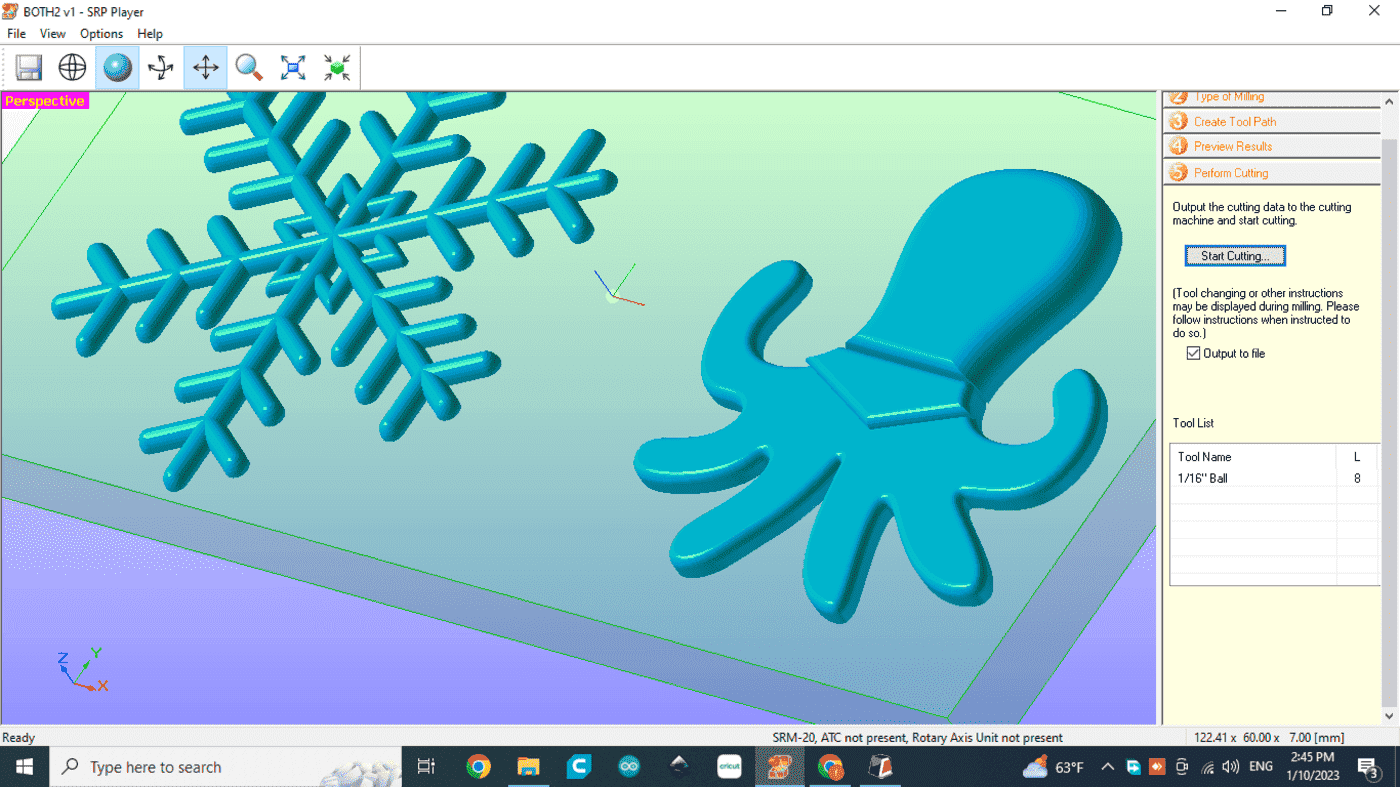

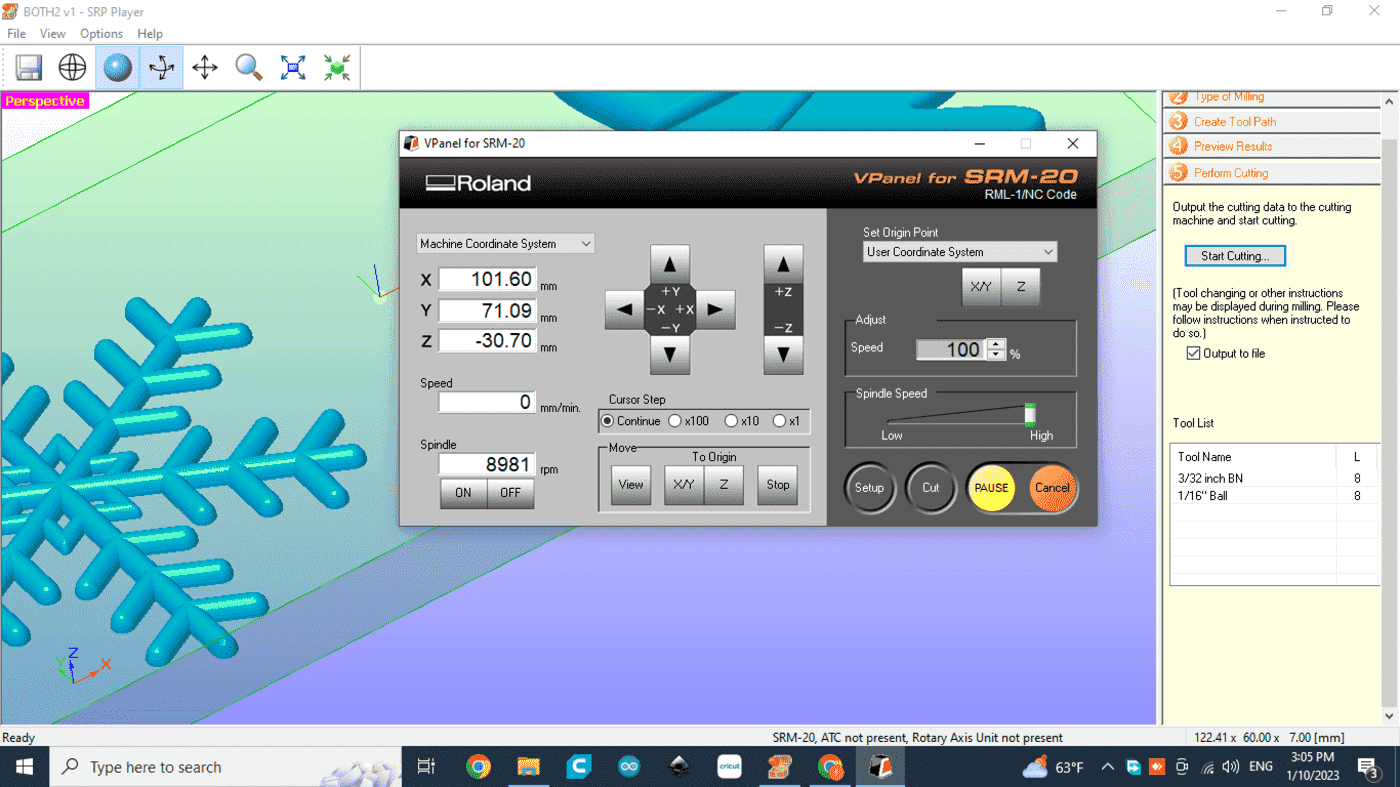
Finally, we calibrated the machine, imported the files into the printing program, and proceeded to cut.
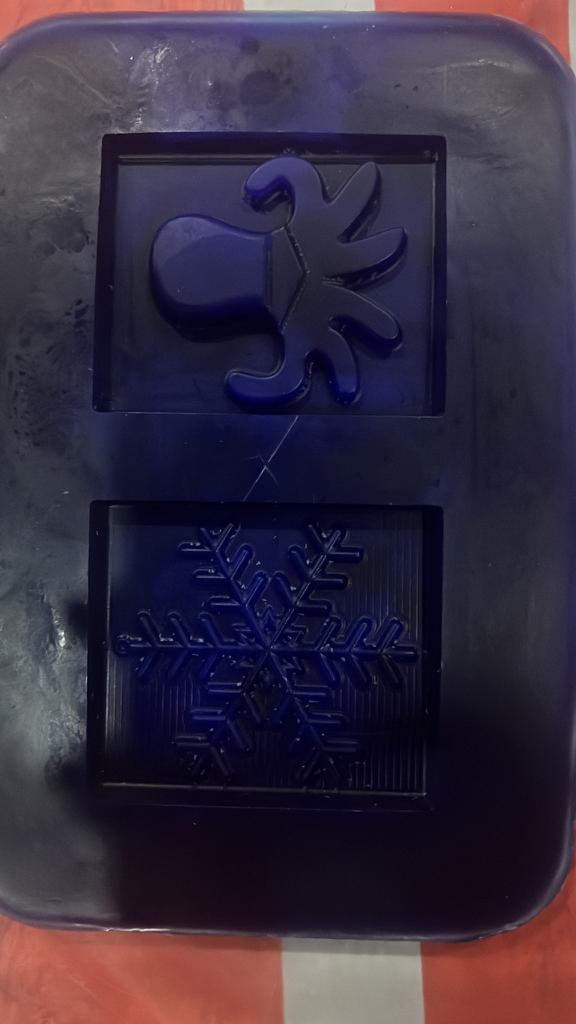
In the end, the results were as follows.

Silicone moulding
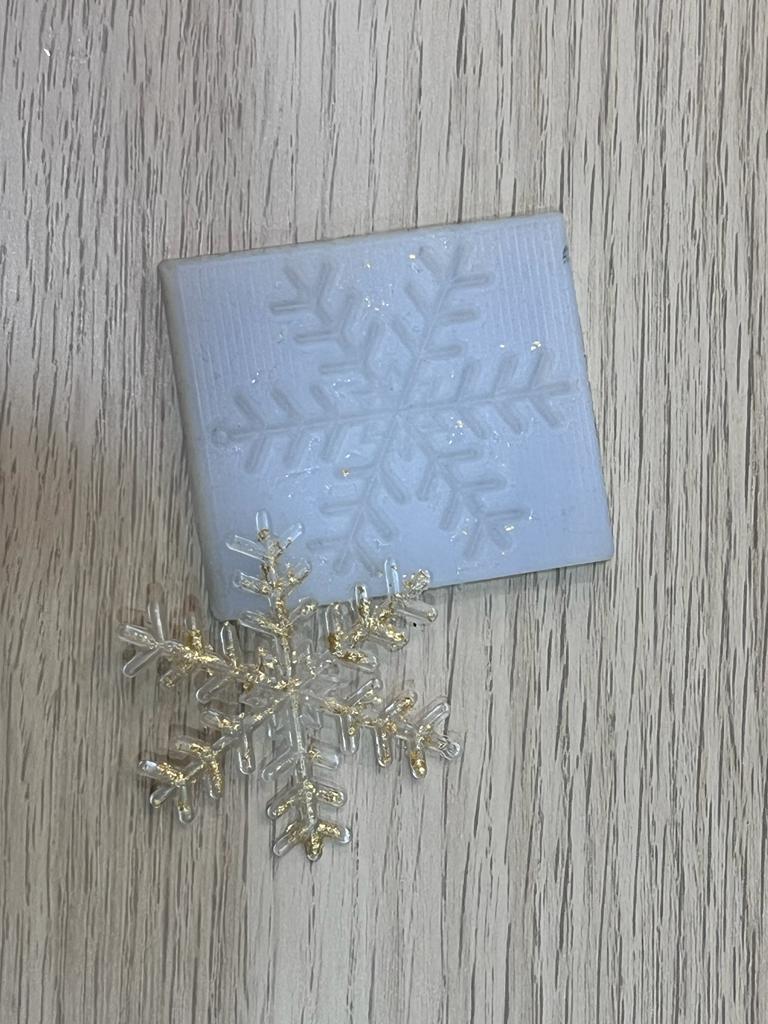
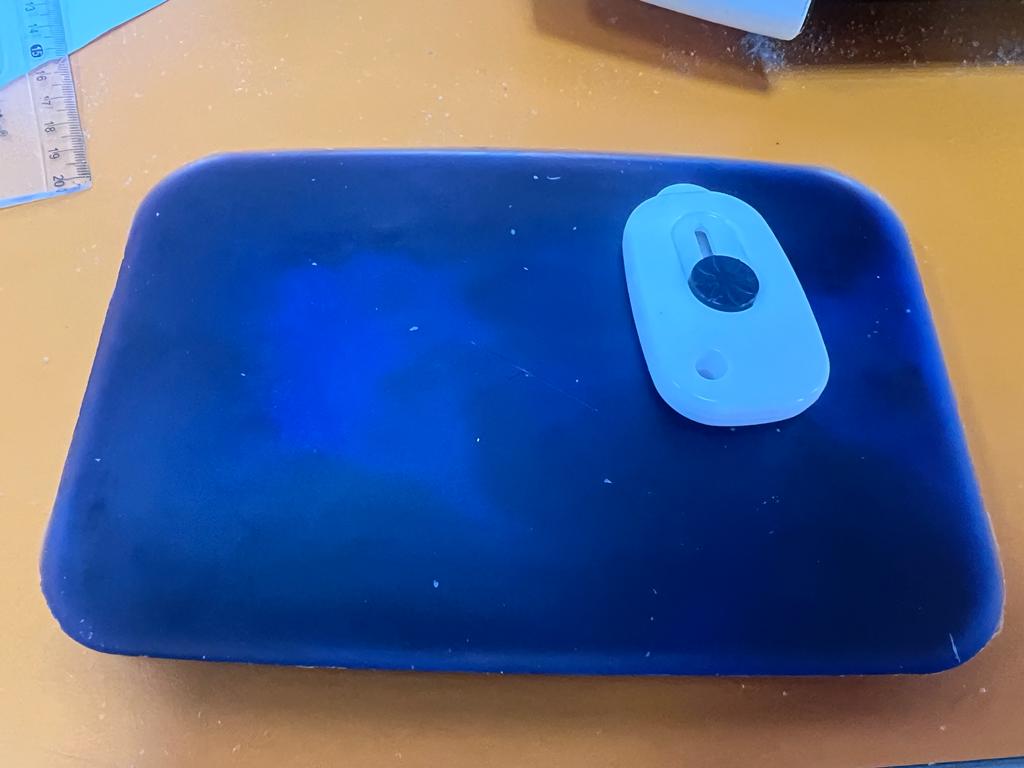
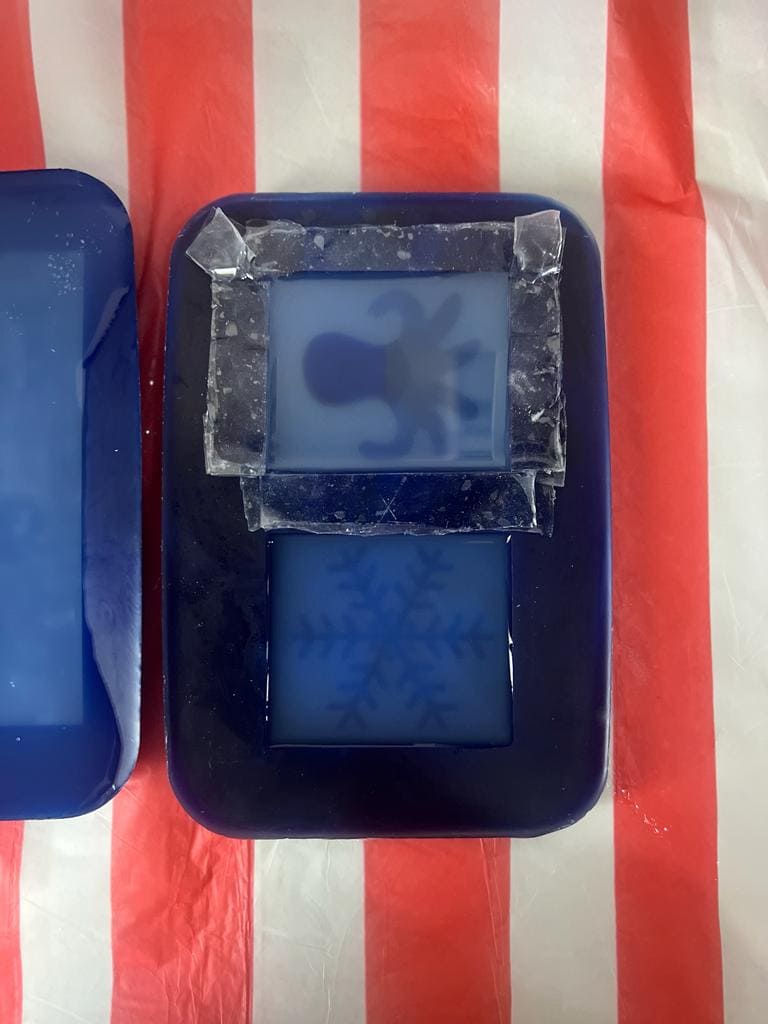
After the wax piece was ready, we proceeded to make the mold, which we can then use to cast as many pieces as possible with several different materials. To do that, and since the wax piece was made of hard material, we had to use soft material for the mold to make it easily removable and usable. Therefore, we used silicone to create the mold, in the steps shown below.
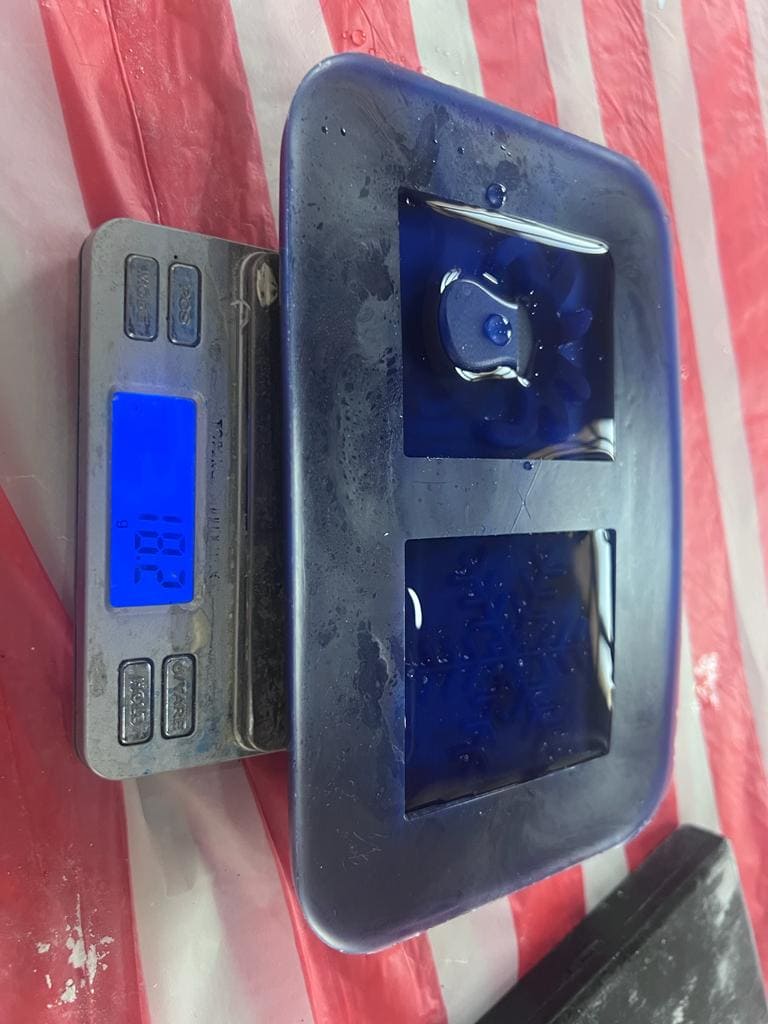
Step 1 We poured water into the wax, to see the amount of silicone we need to make for it to be enough.
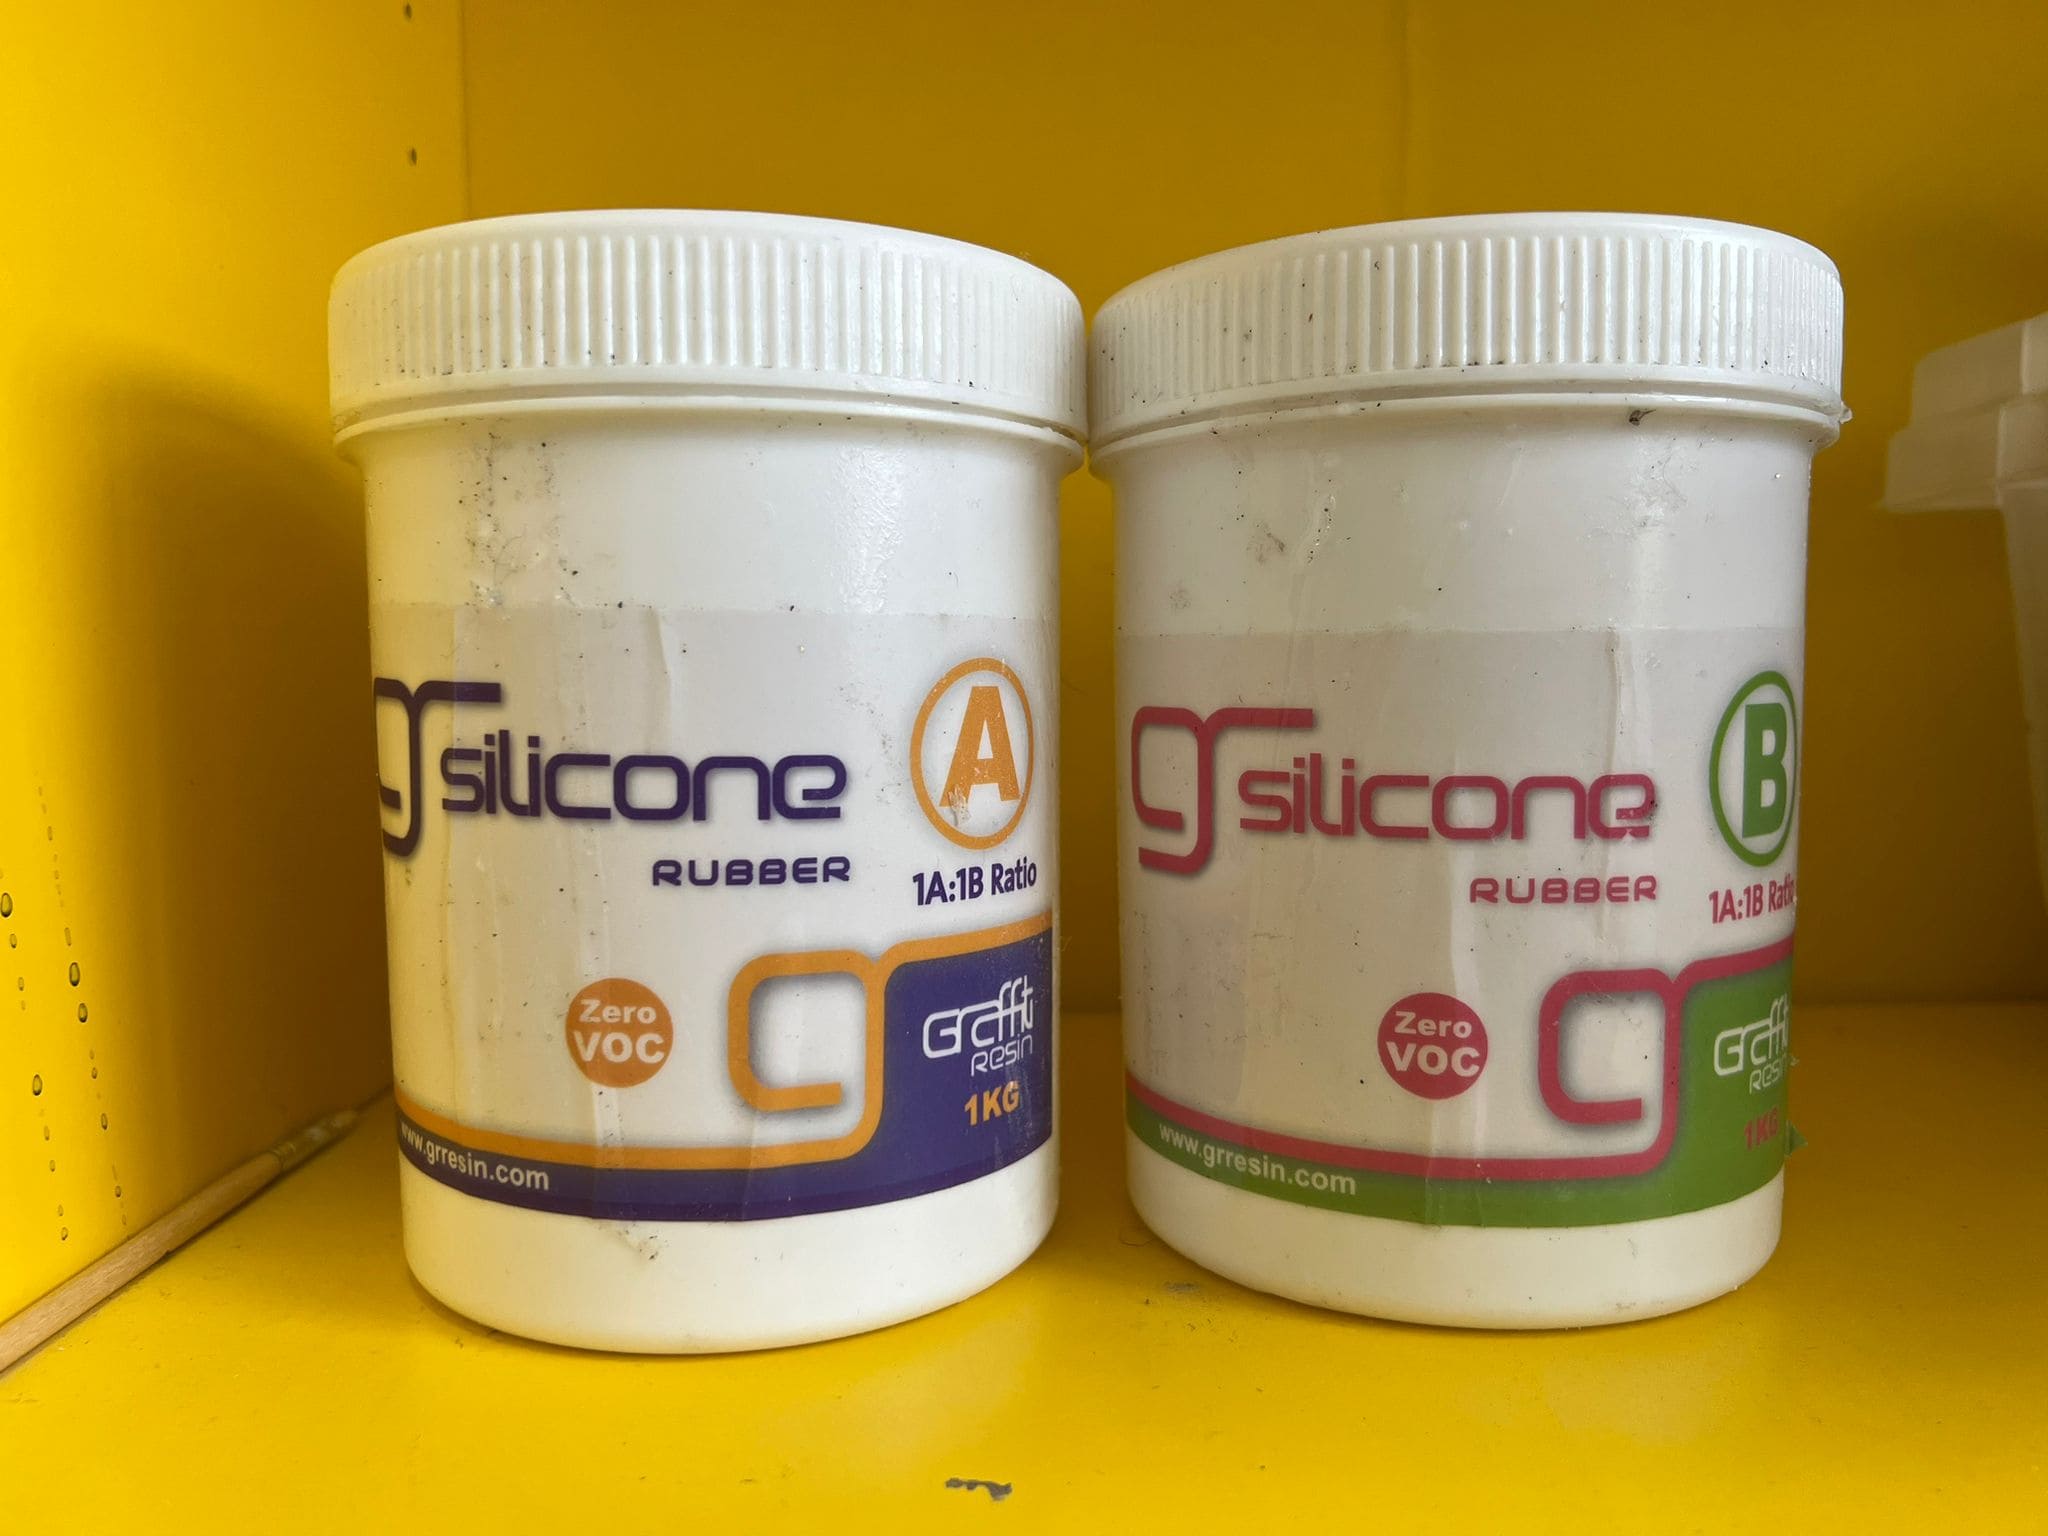
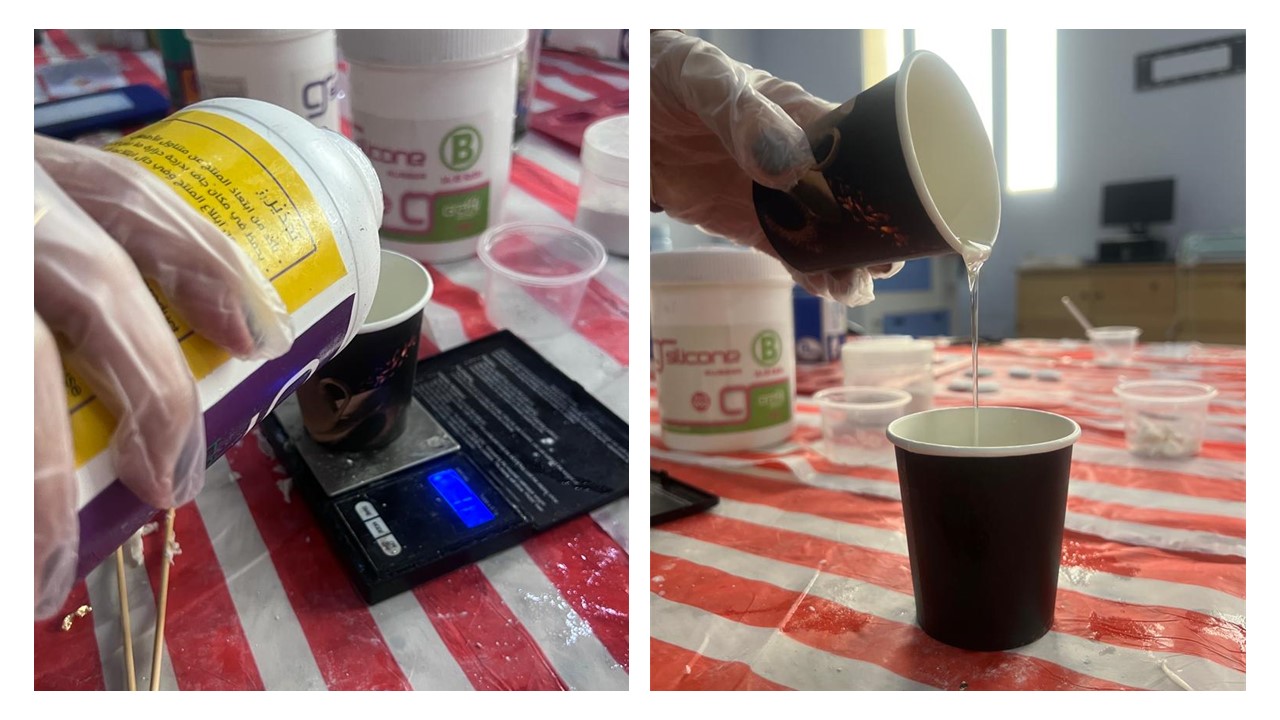
Step 2 After we got the aproximate amount, we divided it into two, and mixed the two types of silicone rubber in 1:1 ratio, as was stated in the instructions on the bottles.
Step 3 Next, we taped around the octopus since the head was the same level as the rest, and therefore the silicone wont cover it. Additionally, we wanted to make sure the silicone in both forms dont overlap, to ensure that each one of us has her own separate mold.
Step 4 Lastly, we poured the well-mixed silicone mixture into the two forms, and left it to cure for one whole day.
Casting with resin
When the silicone mold was done, I had several options i could use to cast my piece, such as resin, dry putty, and soap. However, I decided to go with resin, since I wanted the snowflake to become shiny and more glass-like. I also wanted to add gold to the mixture to give it more shine.
Step 1 Before proceeding with the resin, I added gold leaves to my mold and spread it around to make it distributed.
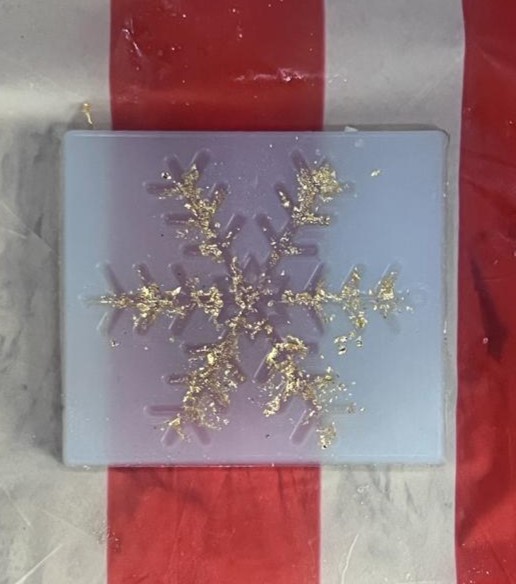
Step 2 Then, I added equal parts of the resin and hardener to a cup, and mixed it with a wooden spoon. I stirred for around 3 minutes to ensure that it was properly mixed.
Step 3 Because the snowflake parts were very small and detailed, I did not pour the resign into the mold. Instead, I used a pointed stick to slowly spread it around on all parts of the mold. This allowed equal distribution as well as clean final look.
Step 4 When that was done, I left the resin to completely cure overnight. Results can be seen below.