4. 3D printing and scanning
This week we learned the different types of 3D printing machines, as well as the different filaments and what each is used for. We were given the opportunity to explore three 3D printing machines and compare between them. In addition to that, we tried to 3D scan our colleagues, using special equipment meant for that.
3D printing
All about 3D printing
3D printing, also known as additive manufacturing, is a process used to create three-dimensional objects by layering materials such as plastic, metal, or ceramic on top of each other based on a digital design. It is used for a variety of purposes including prototyping, product development, and manufacturing. One of the main advantages of 3D printing is that it allows for the creation of complex shapes and designs that may be difficult or impossible to achieve using traditional manufacturing methods. Additionally, it allows for the production of customized products, as the digital design can be easily modified to meet the specific needs of the user. 3D printing is also more efficient and cost-effective than traditional manufacturing for small batch production.
Below is a table that compares between the different filaments that can be used, and what each is used for.
| Filament Type | Pros | Cons | Uses |
|---|---|---|---|
| PLA (Polylactic Acid) | Easy to print with, biodegradable, good for beginners | Not as strong as other filaments, warps at high temperatures | prototypes, figurines, decorations |
| ABS (Acrylonitrile-Butadiene-Styrene) | Strong and durable, resistant to chemicals, can be post-processed | Requires heated bed, difficult to print with, emits strong odors | automotive parts, phone cases, LEGO bricks |
| PETG (Glycol-Modified PET) | Strong and durable, resistant to chemicals, easy to print with | Can be brittle, requires cooled bed, prone to stringing | food containers, water bottles, protective gear |
| PETT (T-Glase) | Strong and transparent, easy to print with | Expensive, prone to warping | phone cases, light covers, transparent prototypes |
| Nylon | Strong and flexible, resistant to chemicals and wear, can be dyed | Prone to warping, absorbs moisture, difficult to print with | gears, snap-fit parts, bearings |
| TPU (Thermoplastic Polyurethane) | Flexible and shock-absorbent, resistant to wear and tear | Difficult to print with, prone to stringing | phone cases, shoe soles, shock-absorbing parts |
Group assignment
For this week’s group assignment, we were divided into three groups, each working with one machine. We had to download and 3D print specific designs from the internet, and then transfer it to Cura program to edit and print.
Details of the group work can be found on my colleague’s page. Please proceed by clicking on this link.
Designing on Fusion360
The individual assignment this week entailed us to design an object that cannot be recreated with a 2D cutting device, such as the laser or CNC cutters. To achieve that, I decided to use Fusion360 to design my product, which were two interlocking donut-shaped rings.
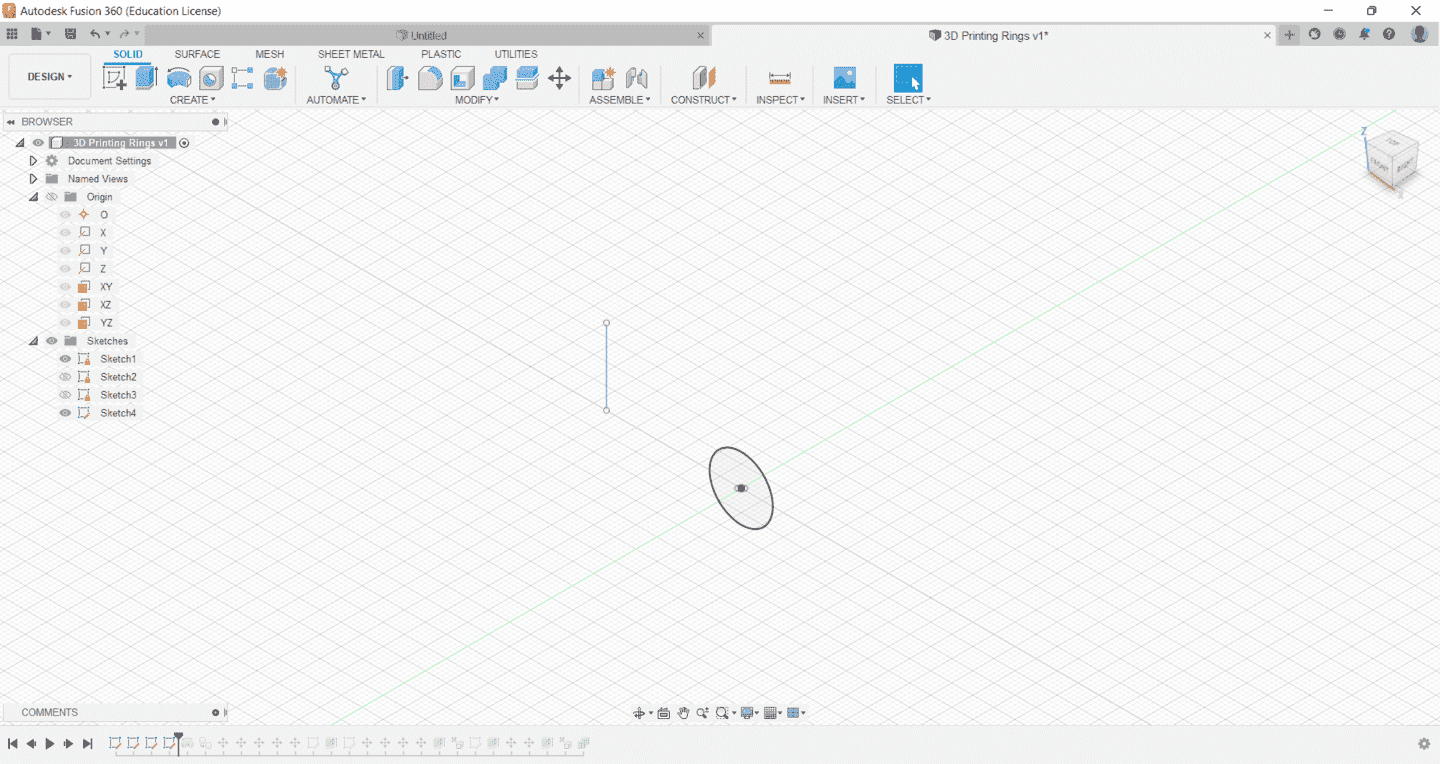
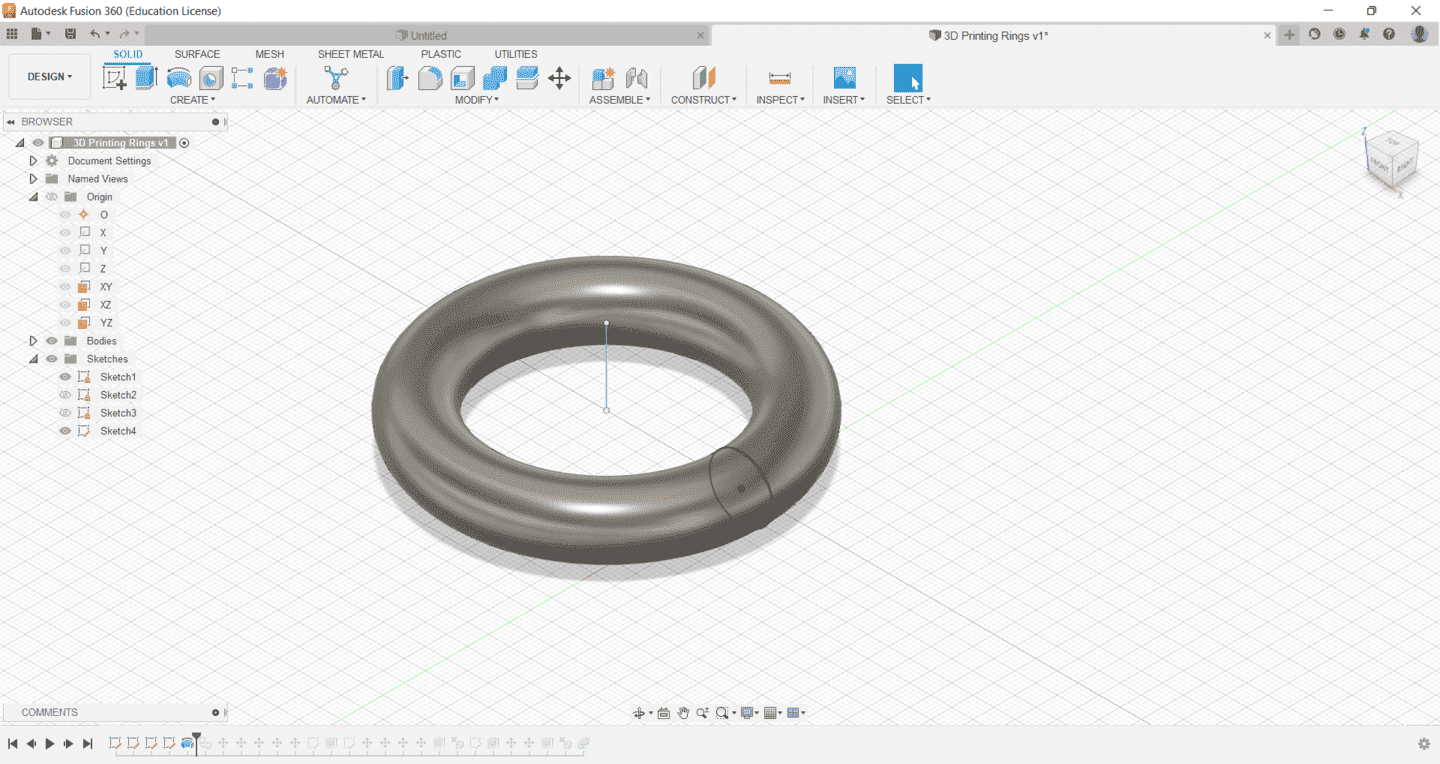
As you can see below, I started by drawing a circle with the diameter I chose, and an axis to revolve the circle around it.
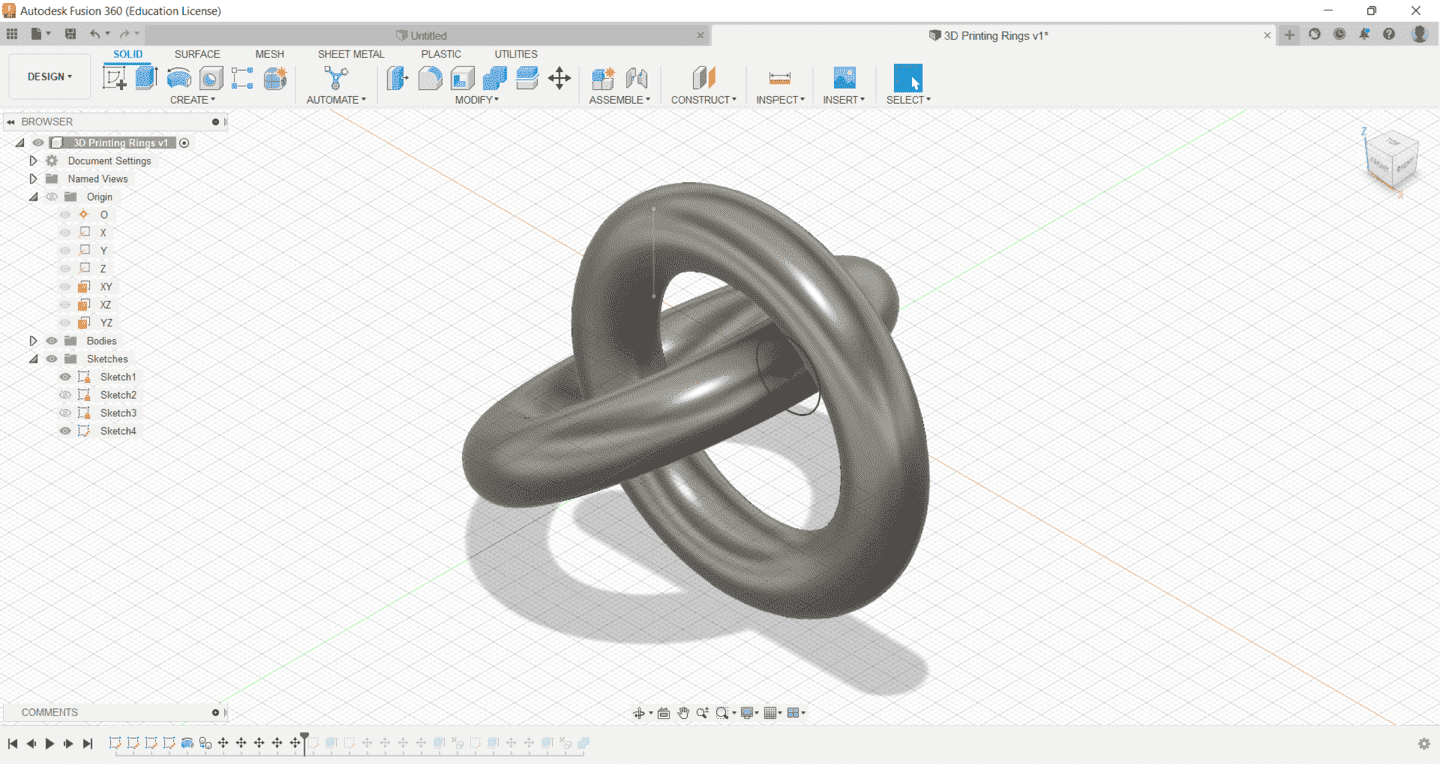
After that, I duplicated the rings and rotated the second one to ensure that the base is on the same line as the original ring, to minimize the supports and allow both rings to be printed on the printer bed and not in the air.
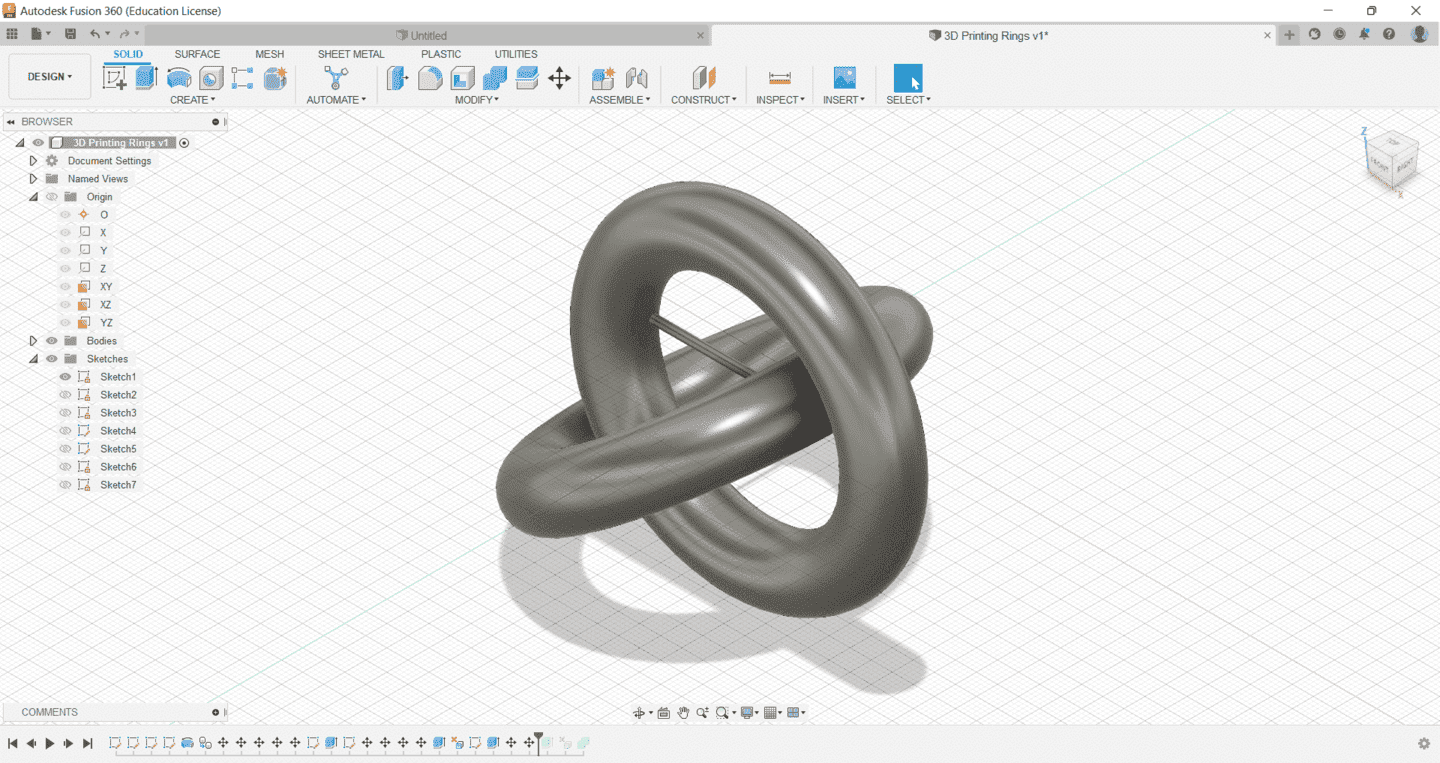
Then, to add extra support and make the printing process easier and smoother, I added an extra piece between the two rings, to connect them together. This piece was only 2mm thick, to make breaking it off after the printing an easier job.
After that, I exported the model as an STL file and imported it into Cura, to complete editing it and preparing it for printing.
The downloadable file is down below.
Using Cura
To print the designs, we put the work of more than one student in Cura and printed all of them together at once.
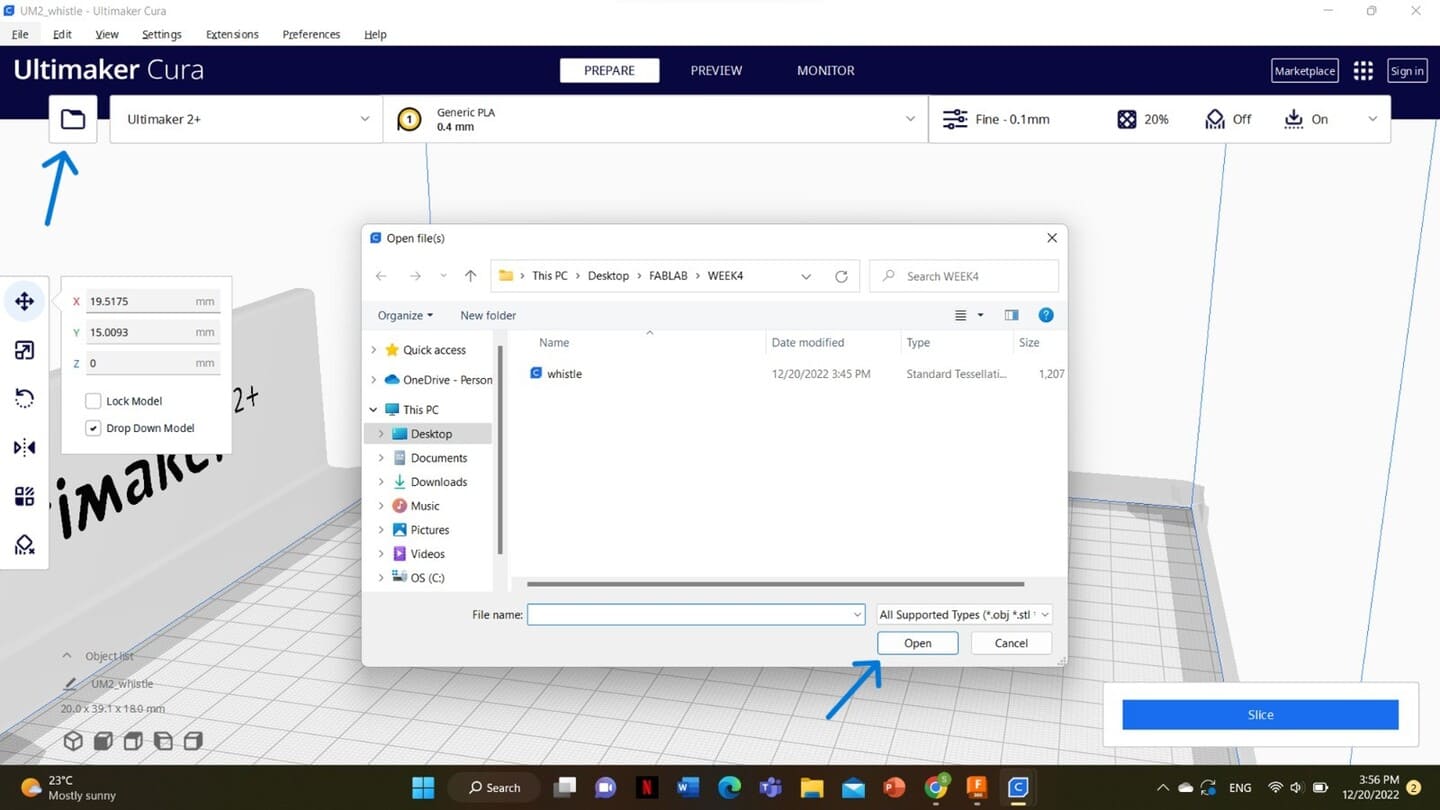
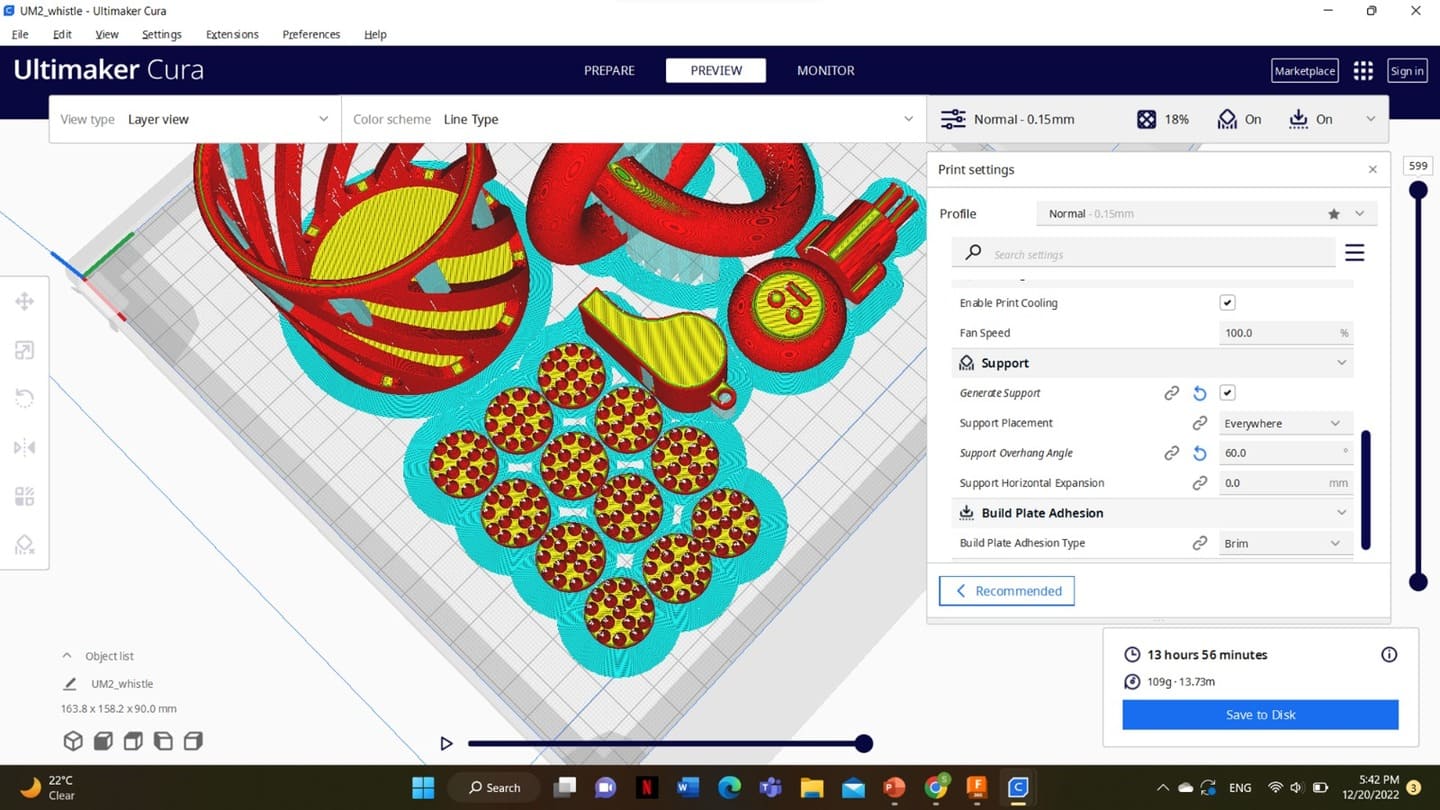
Step 1 First, we import the STL file into cura. It is worth mentioning that the file being imported below is not my own, but rather my classmate’s file which was printed alongside mine.
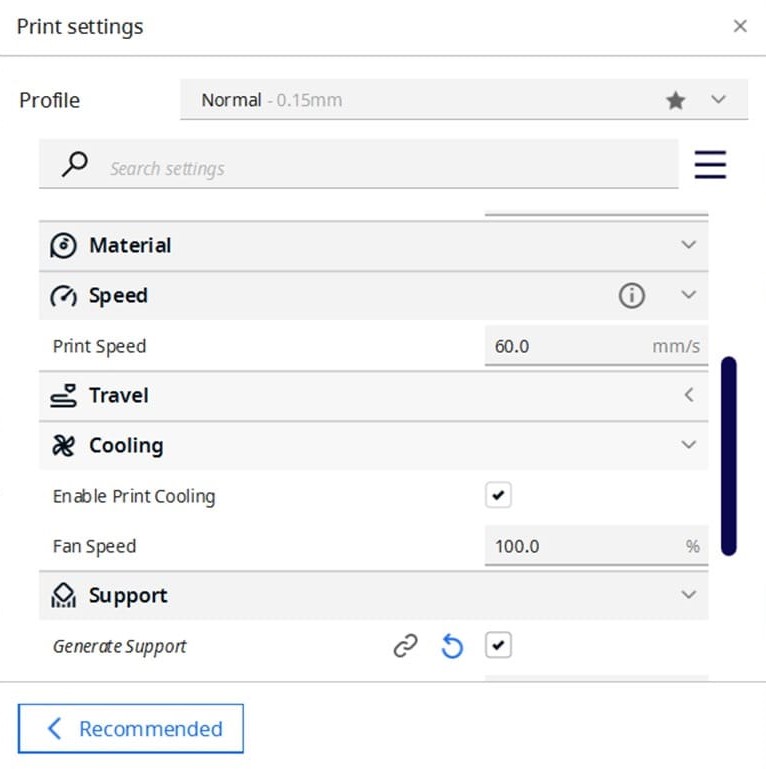
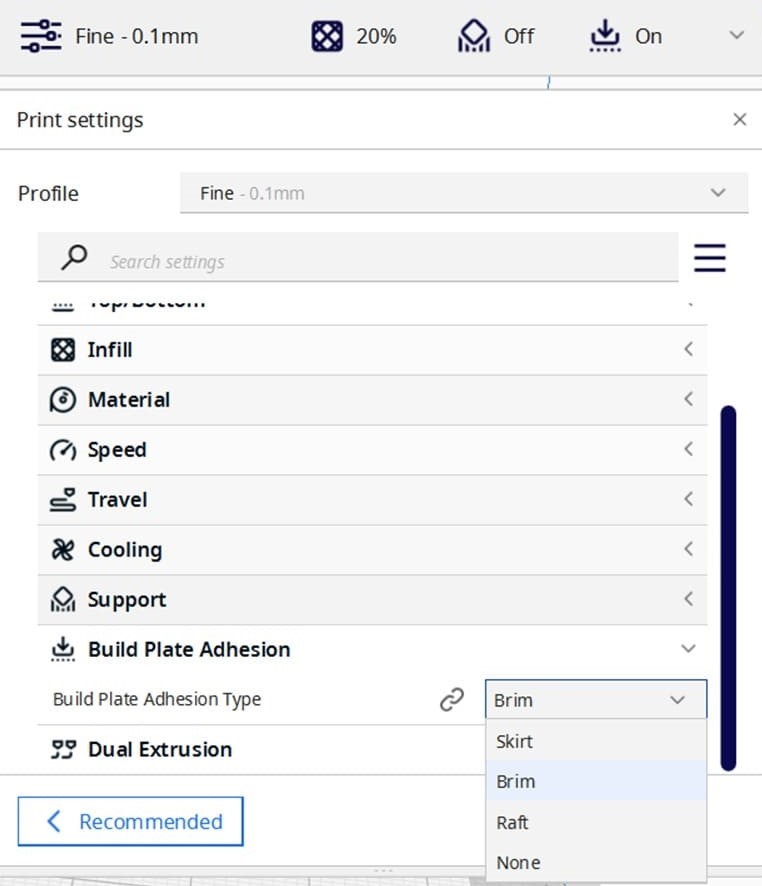
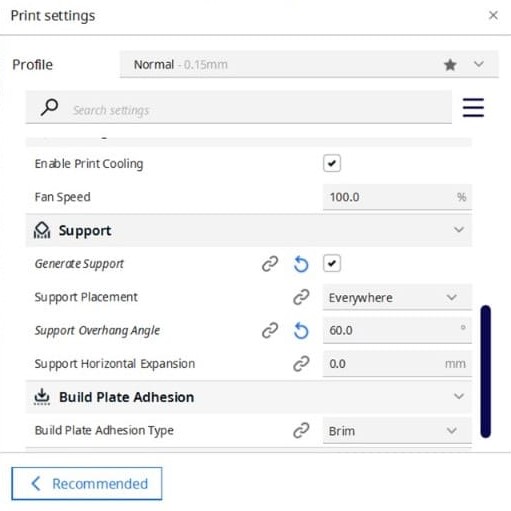
Step 2 After all the files were imported, we fixed the settings and adjusted them to suit the nature of our projects and the material used, which was the PLA filament. We also generated supports to ensure good printing.
Step 3 We sliced the 3D model, and saw how they were going to be printed. Then, we saved it into the memory of the 3D printer itself, to finally print it.

Printing with ultimaker 2
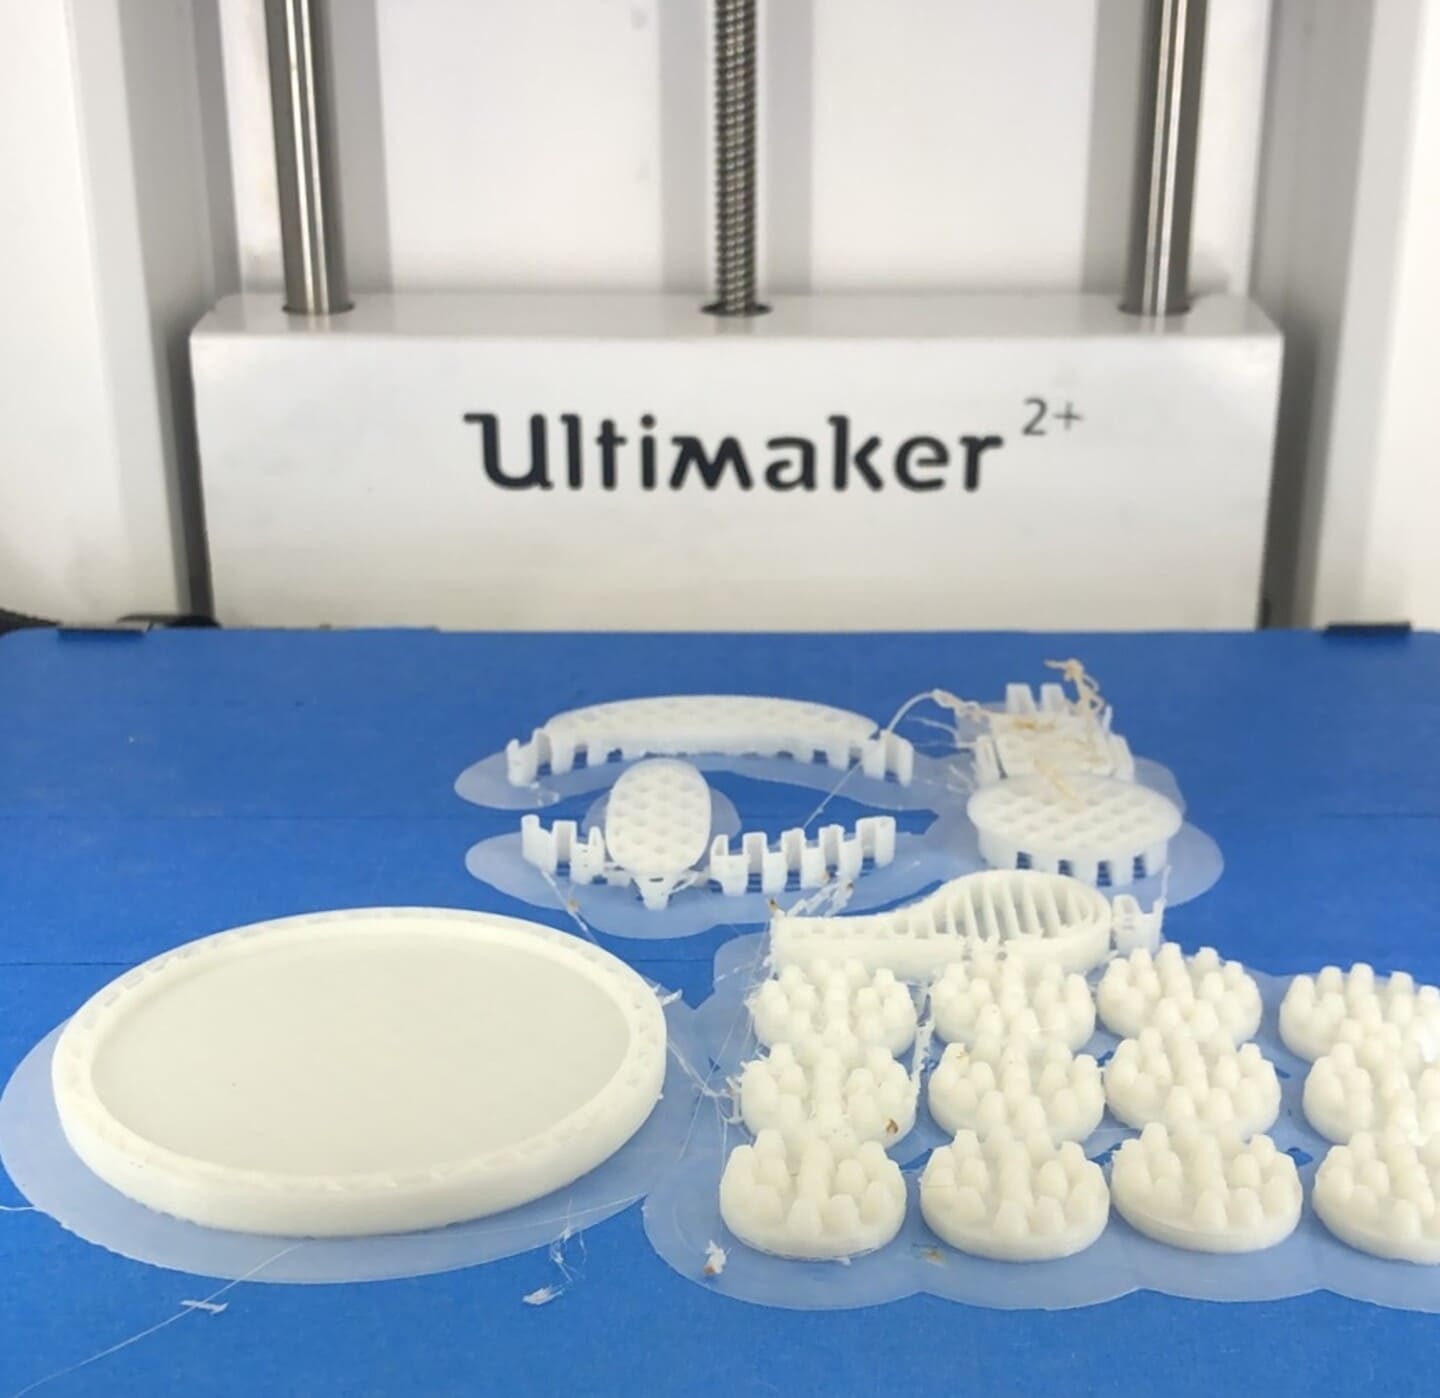
After printing our models, and because they were going to take a long time, we all left expecting to see the results the next day. However, we found out that the printer had an error because of some dust that accumulated on the nozzle. Because of that, the machine could not continue printing well and our work was ruined.
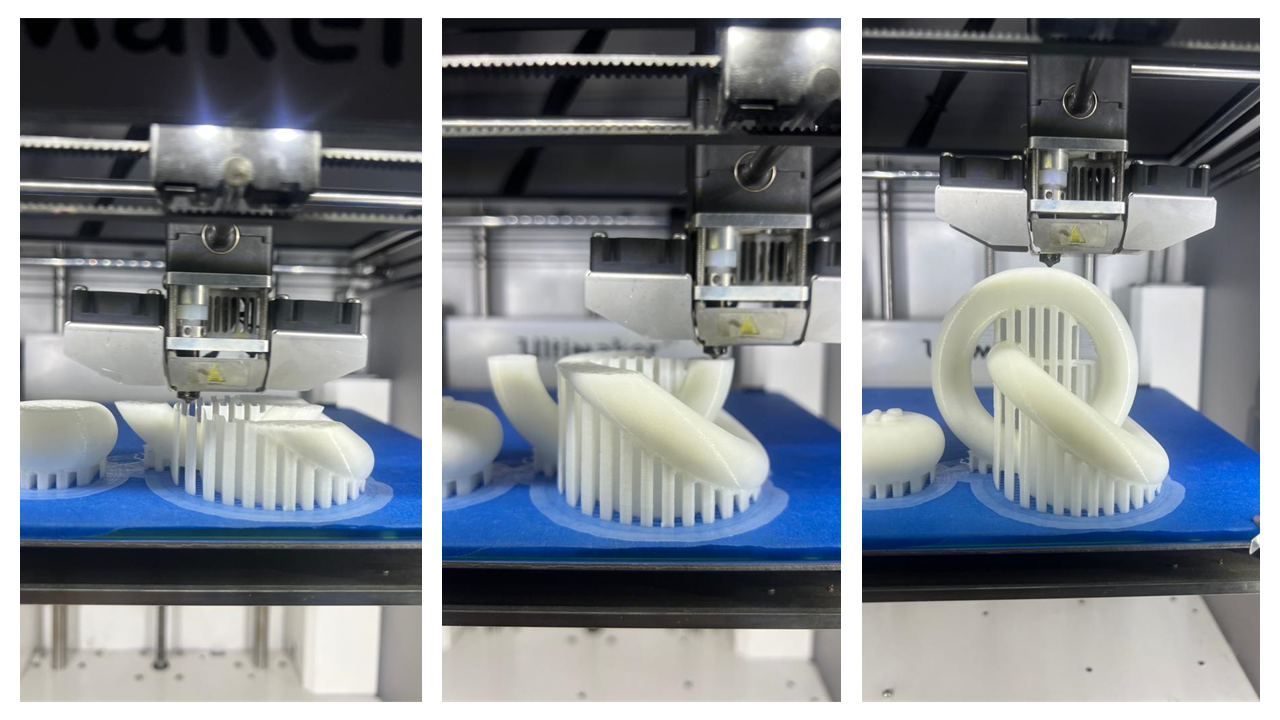
However, our instructor then re-printed all our work on different printers. My model was still printed on Ultimaker 2, and the result of the second printing job was much better than the first. You can see the progress in the pictures below.
Finishing
As soon as I removed the piece from the 3D printer, I broke off the supports that can be seen in the previous process pictures.
This removed the bigger supports, but more work needed to be done to remove the smaller pieces left from the support. I used a nail clipper to clean it.
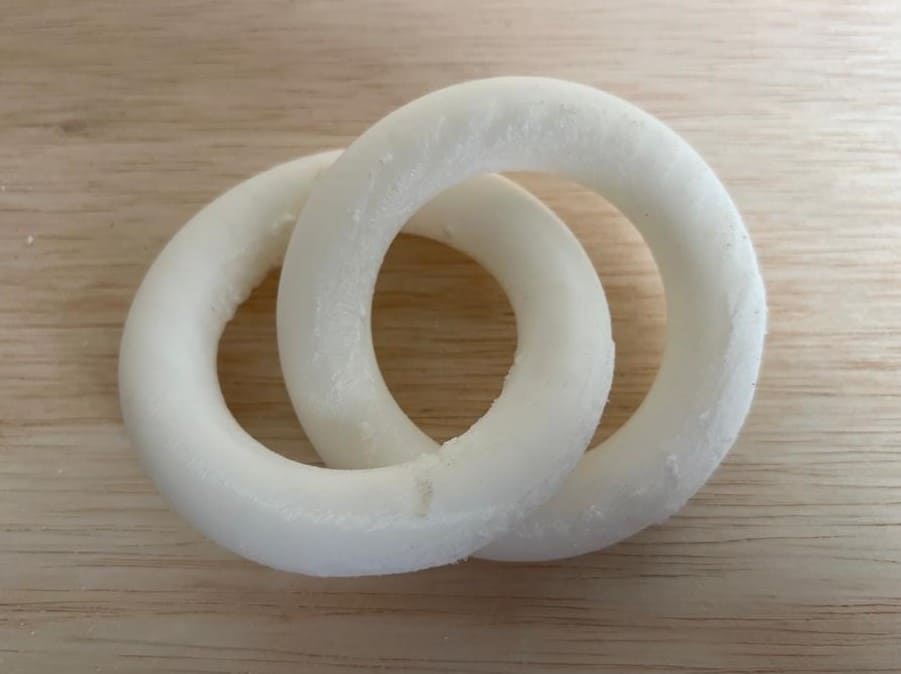
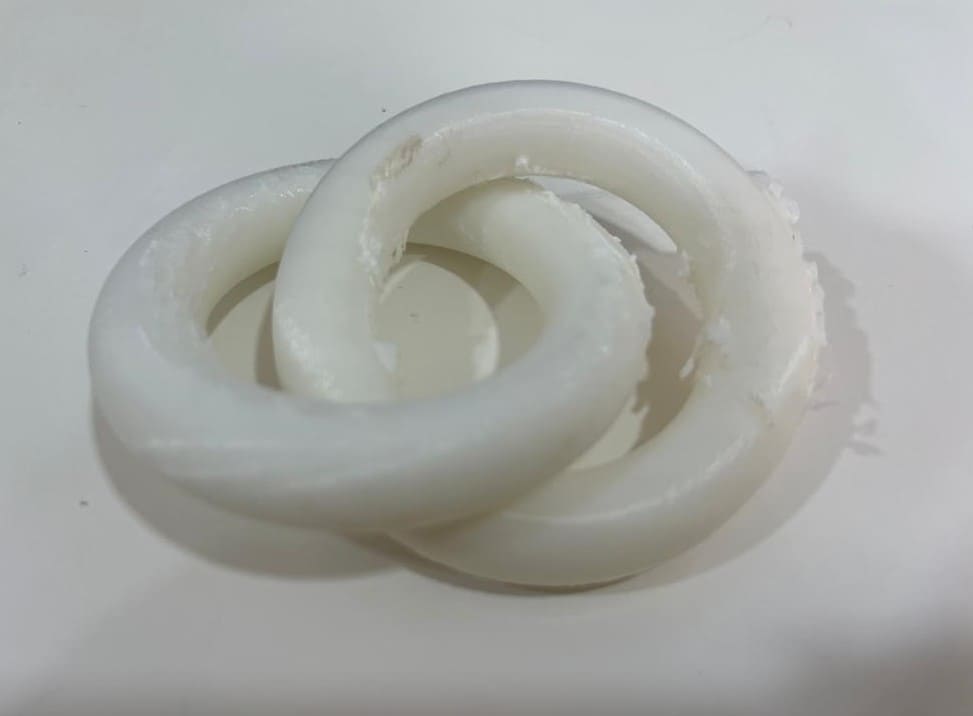
This gave it a generally smoother look, but it still had some bumps and felt a little rough. Since that was the case, I decided to sand it in order to smoothen it out. I used several levels of sandpapers, gradually increasing the level to get the feel I was looking for. I went through 80, 120, 240, 400 and 800 grits. The final result was much nicer and appealing both to look at and to touch.
Will include hero shot
3D scanning
3D scanning is the process of using technology to capture a digital representation of an object or environment in three dimensions. There are various methods for 3D scanning, such as structured light scanning, photogrammetry, and time-of-flight, which use different technologies such as lasers, cameras, and infrared sensors to capture the data. The resulting 3D model can be used for a variety of purposes, including product design, animation, and virtual reality applications.
For our task, we had to 3D scan one of our colleagues.
Before proceeding, we downloaded “Skanect”, which is a 3D scanning software that allows users to create 3D models using a Microsoft Kinect or other compatible 3D sensor. The software can be used to scan objects, people, and scenes in real-time, and the resulting 3D models can be exported in various file formats for use in other applications. Skanect features include real-time 3D scanning, automatic mesh generation, and support for multiple 3D sensors.
Eventhough skanect is available for both Windows and Mac, our instructors preferred for us to use mac, since the windows software proved to not work as efficiently. Therefore, the whole class worked on one laptop, and we took turns scanning one another.
To achieve the goal, we followed several steps.
Step 1 Open a new file.

Step 2 Position camera and start the scanning, while asking my colleague to rotate in 360 degrees slowly, so the camera can capture her from all sides.

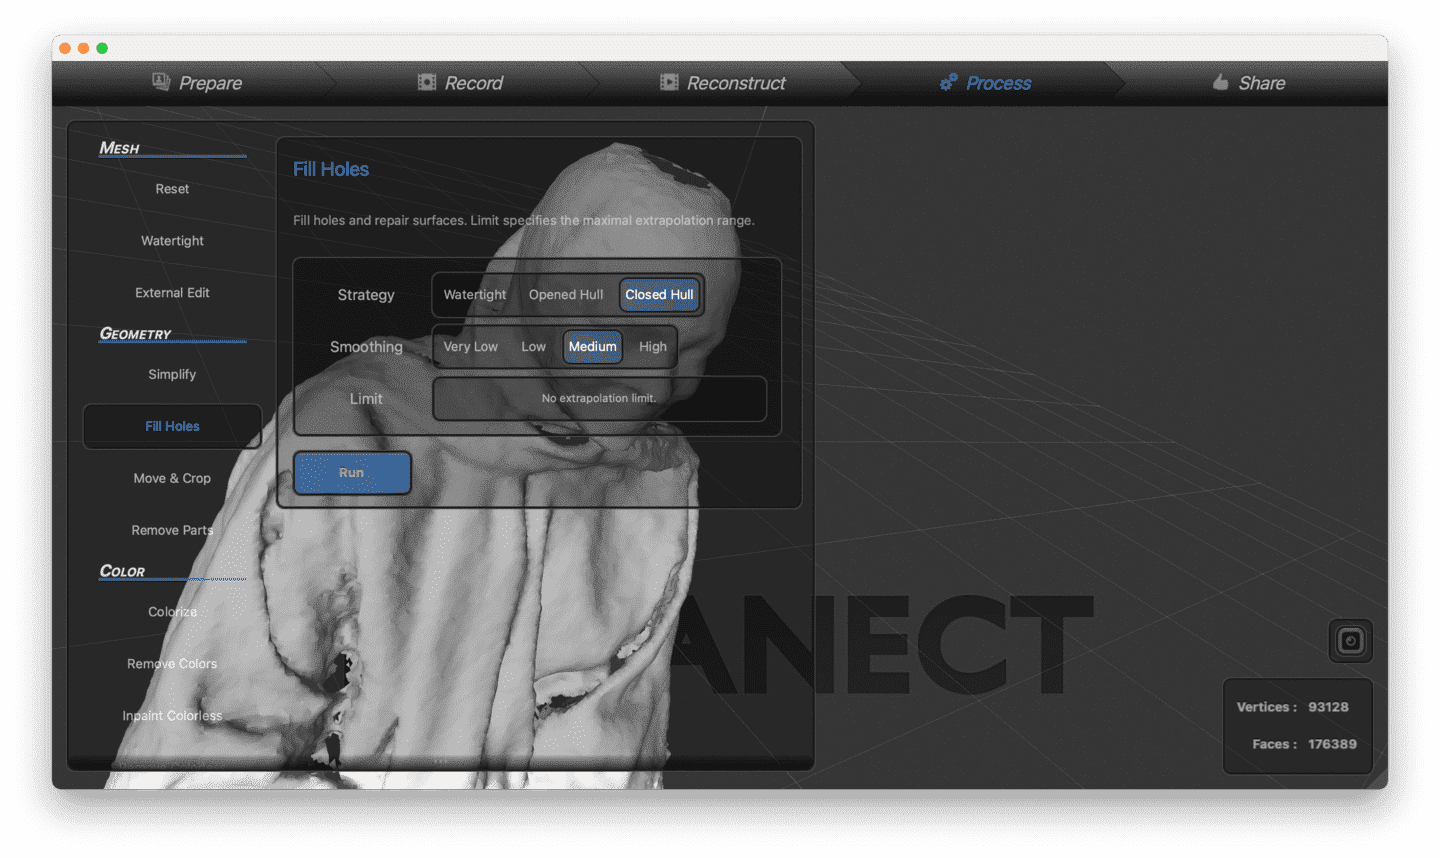
Step 3 After the scanning process is finished, we start by editing the 3D model. First we fill any holes that might be created.
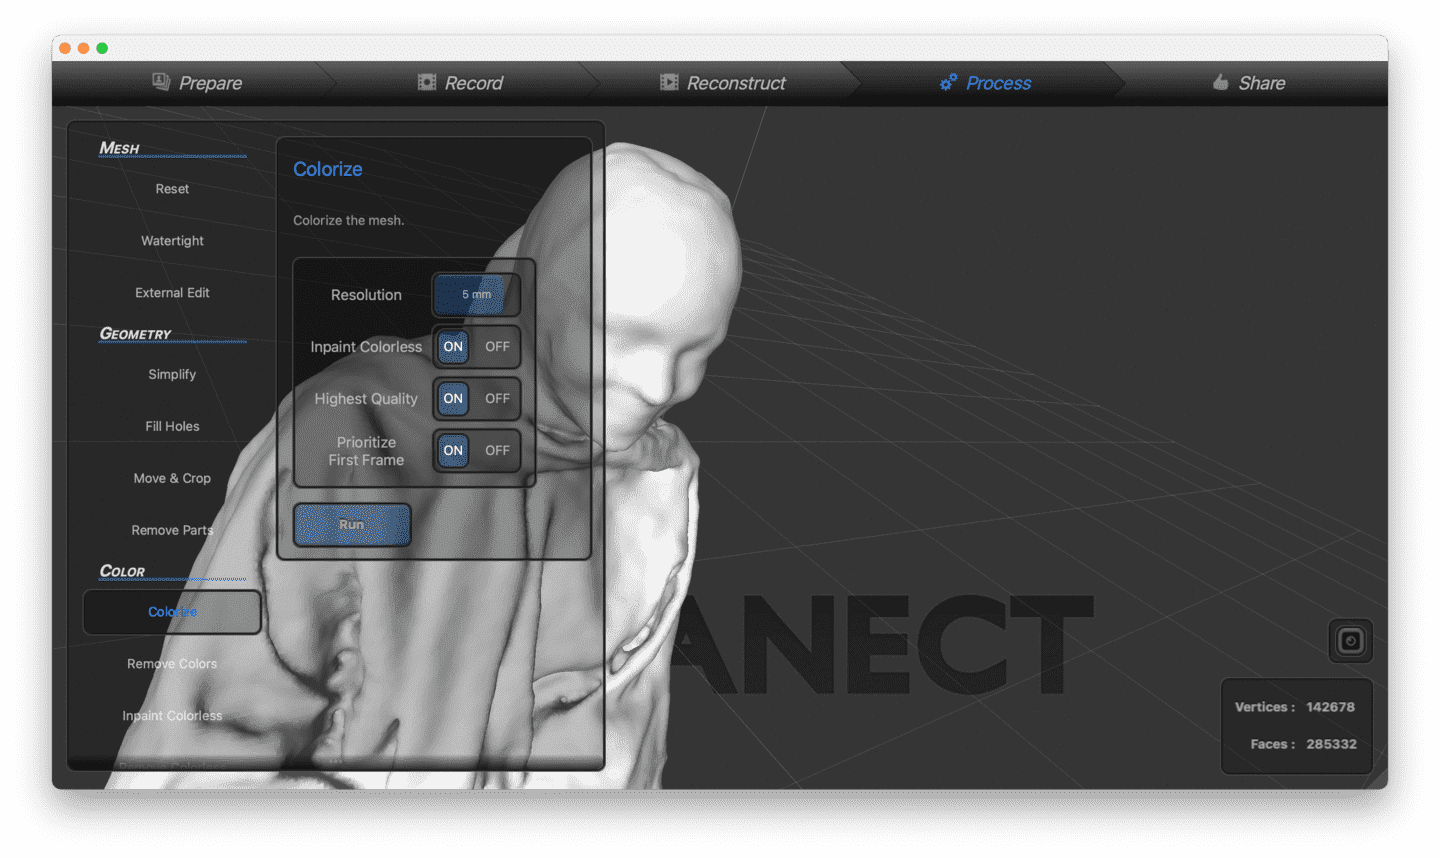
Step 4 Then, in order to see the object more clearly, we can colorize the model.
Step 5 After making sure everything is fine, our model is ready.
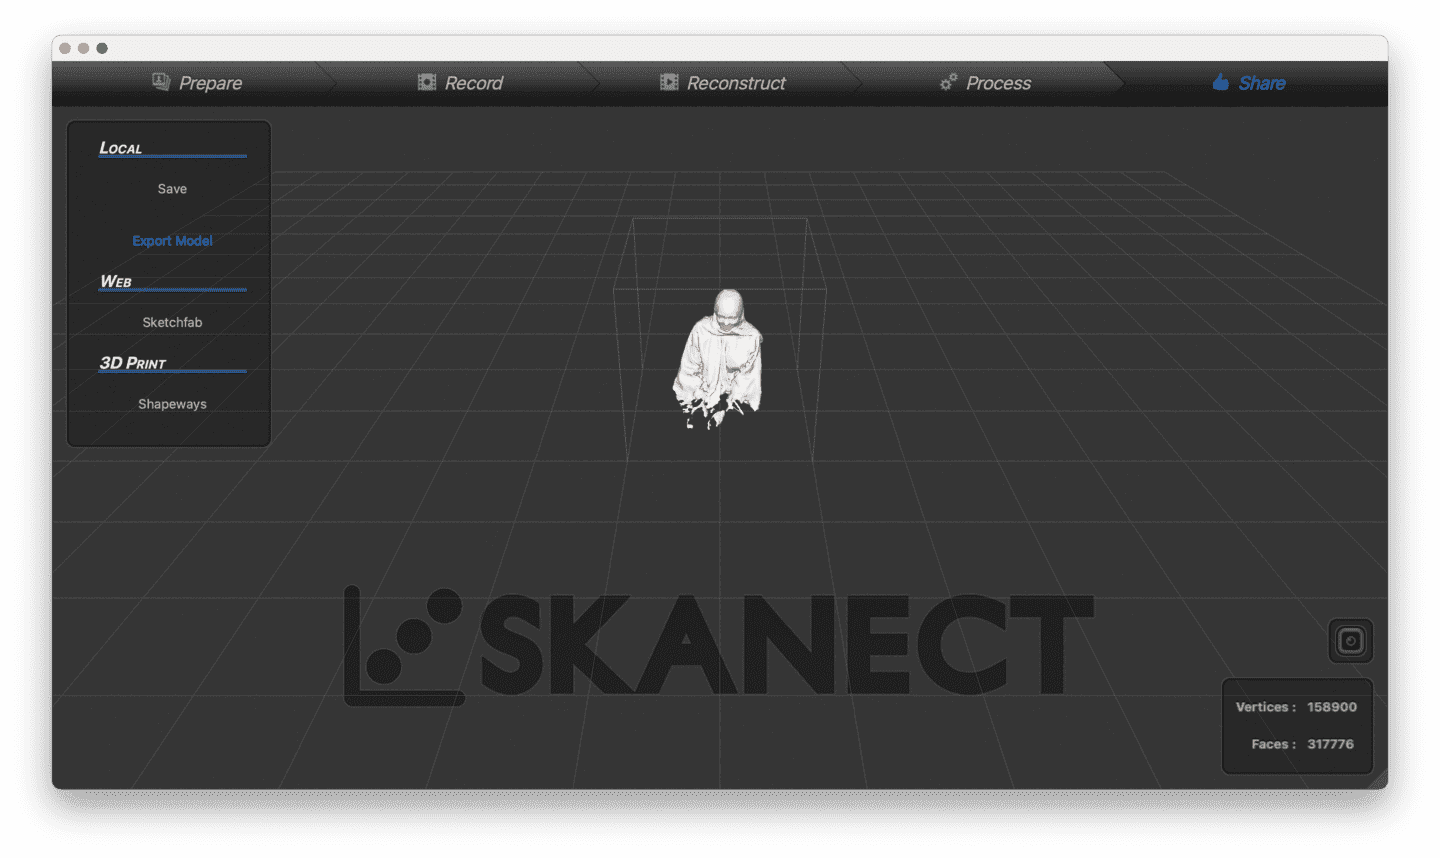
Downloadable file can be accessed below.