8. Moulding and casting
This week I started working on molding and casting.
What is molding?
Making a hollow or shape that bears a reverse or negative impression of an original model is known as molding. Molds can be created using a flexible substance like rubber or a hard material like plaster or plastic resin. When selecting a material, it is important to take into account the model’s material, the material that will be used to create the castings, and whether there are any undercuts.
What is casting?
Pouring liquid substance into a mold’s cavity is the process of casting. This liquid will eventually heal by a chemical reaction or cooling. A casting, which is the term for the solidified component, is ejected or broken out of the mold to complete the procedure. Common casting materials include metals and a variety of cold-setting substances that harden after being mixed with two or more other substances. These substances include epoxy, concrete, plaster, and clay.
Group Assignment.
Reviewing the safety data sheets for each of our molding and casting materials as well as creating and contrasting test castings with each of them were the group’s assigned tasks. Group Assignment link
Individual Assignment.
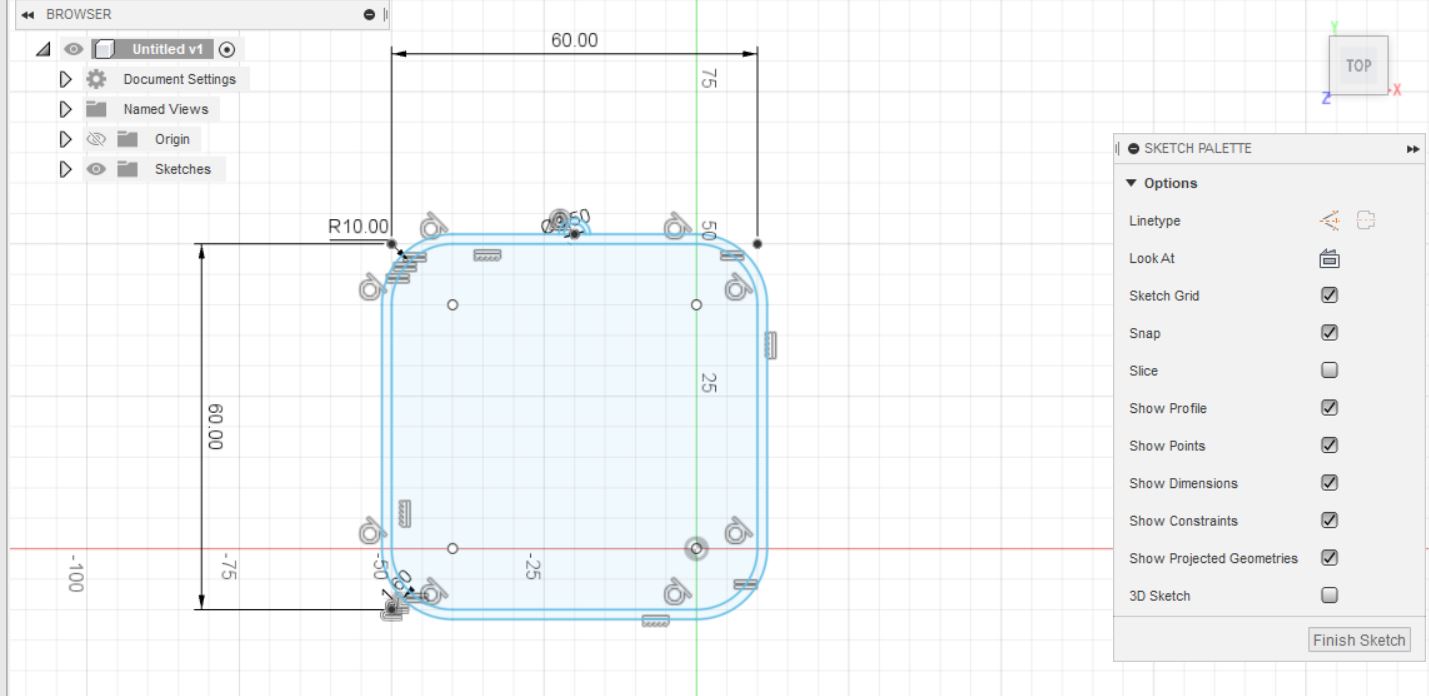
For molding and casting we were asked to creat a design for our final object. i started using fusion 360 software to creat a design.
Requirments
Smallest gap: 1.6mm (that’s the smallest milling bit), design maximum height: 8mm, design maximum width and length: 60mm, were the specifications for the design size.
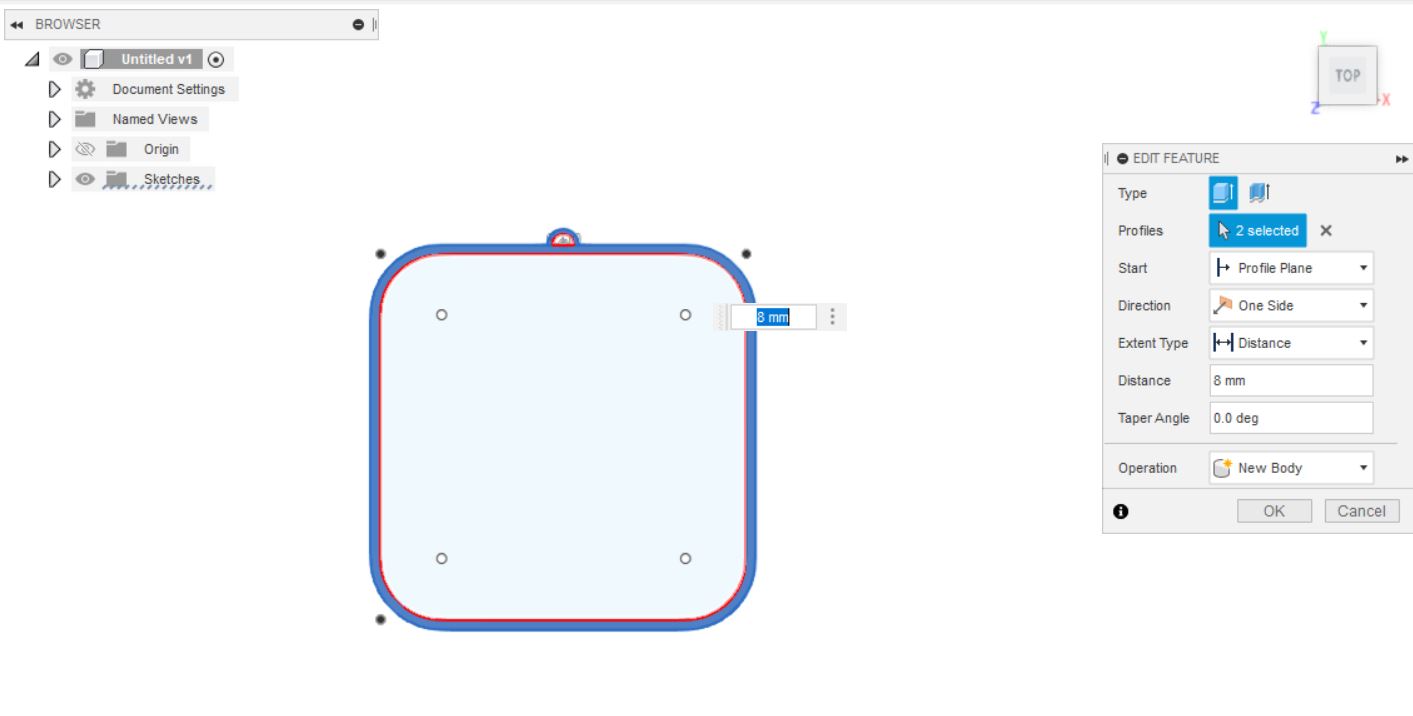
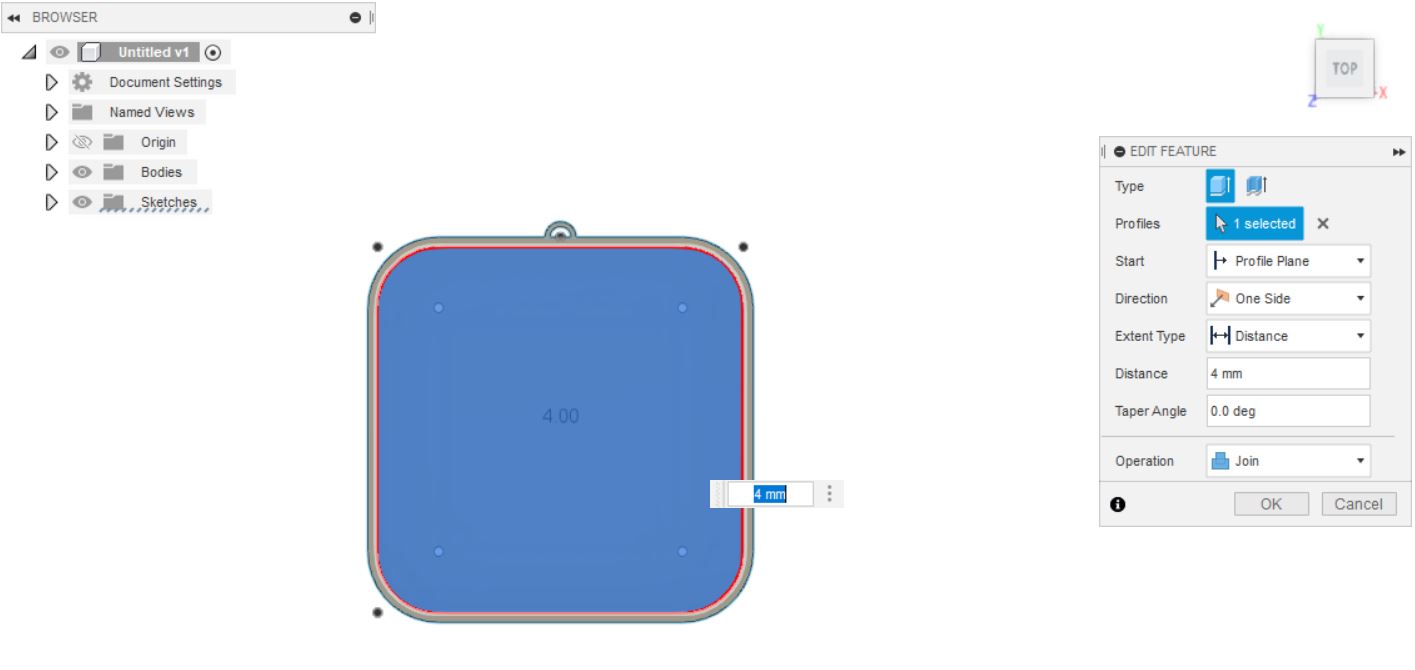
My Design.
I started creating my design according to the requirements mentioned above and i kept my desig as 2d because of requirment.
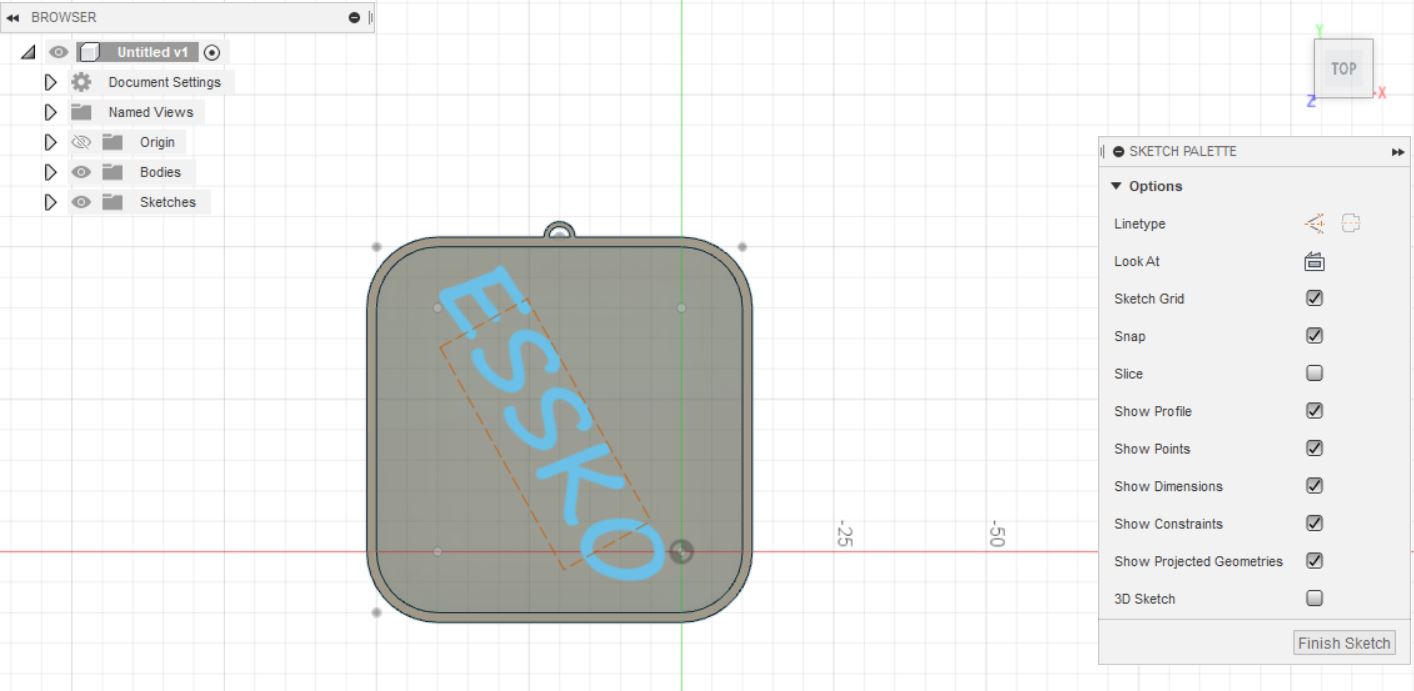
Adding text.
For making my design intersting and unique i start ading text on the main body of my design.we can see the pictures showm below.
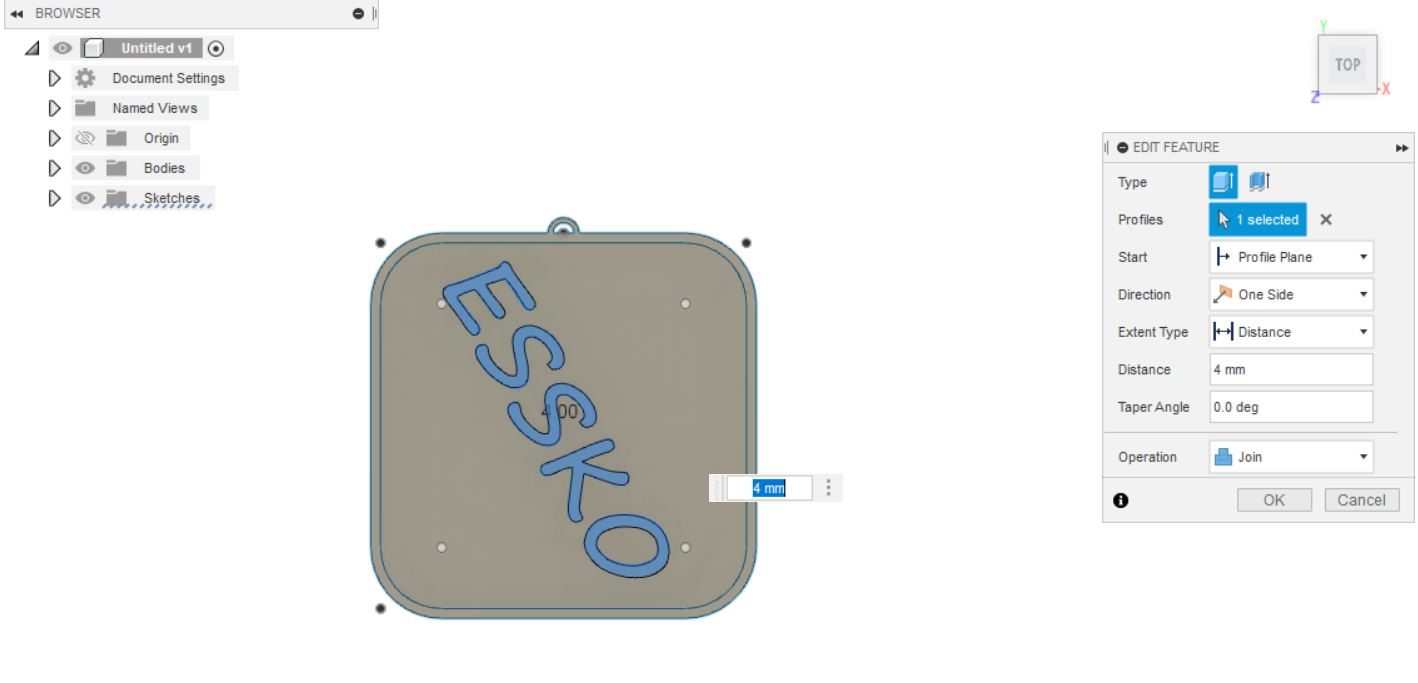
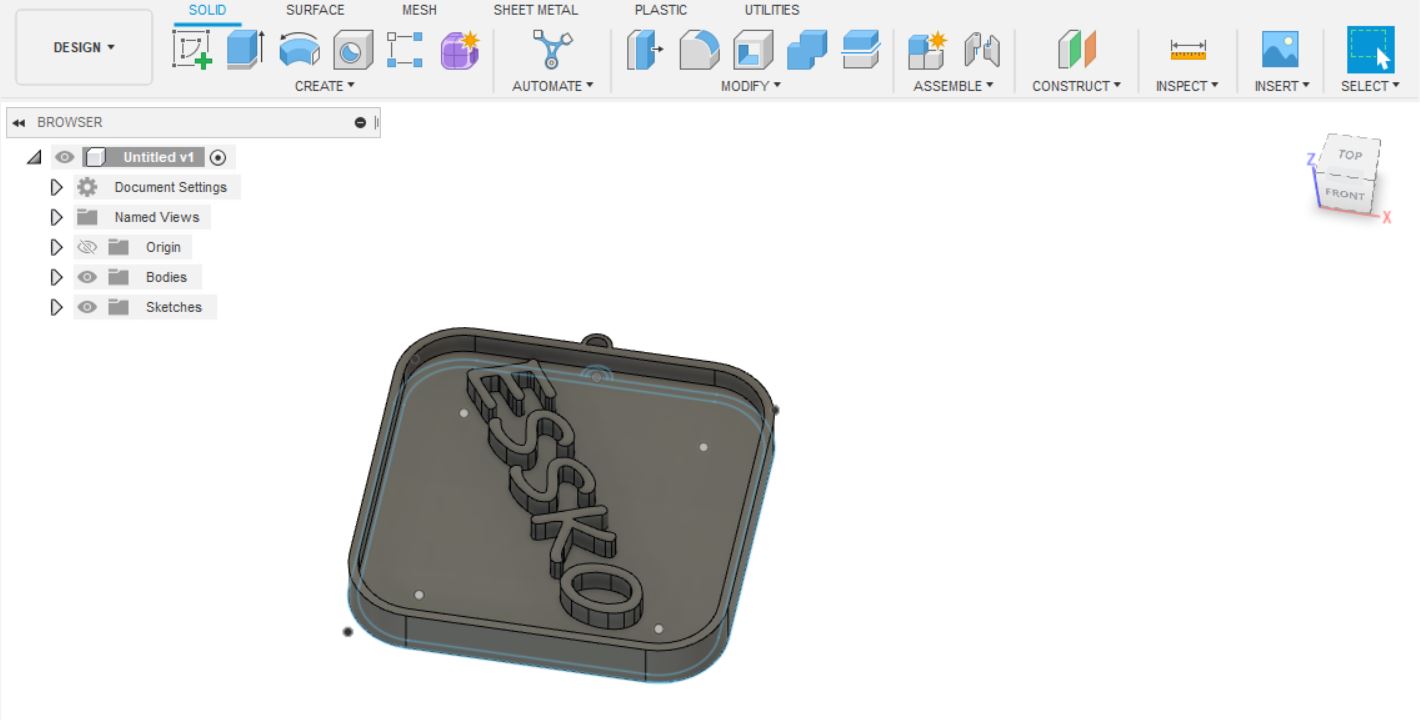
Design.
After adding text on my design here is my design ready.
Sending file.
After completing my design on fusion 360 i sent my file to main system of maoding and casting (desktop).

Milling Phase.
For the milling phase, where the things would be milled and afterwards molded and cast with various materials, we used machinable wax.
Selecting Origin point.
In order to identify the origin point, which was later placed in the software settings, I marked the center of a wax bar. This origin point served as the machine’s beginning point for milling.
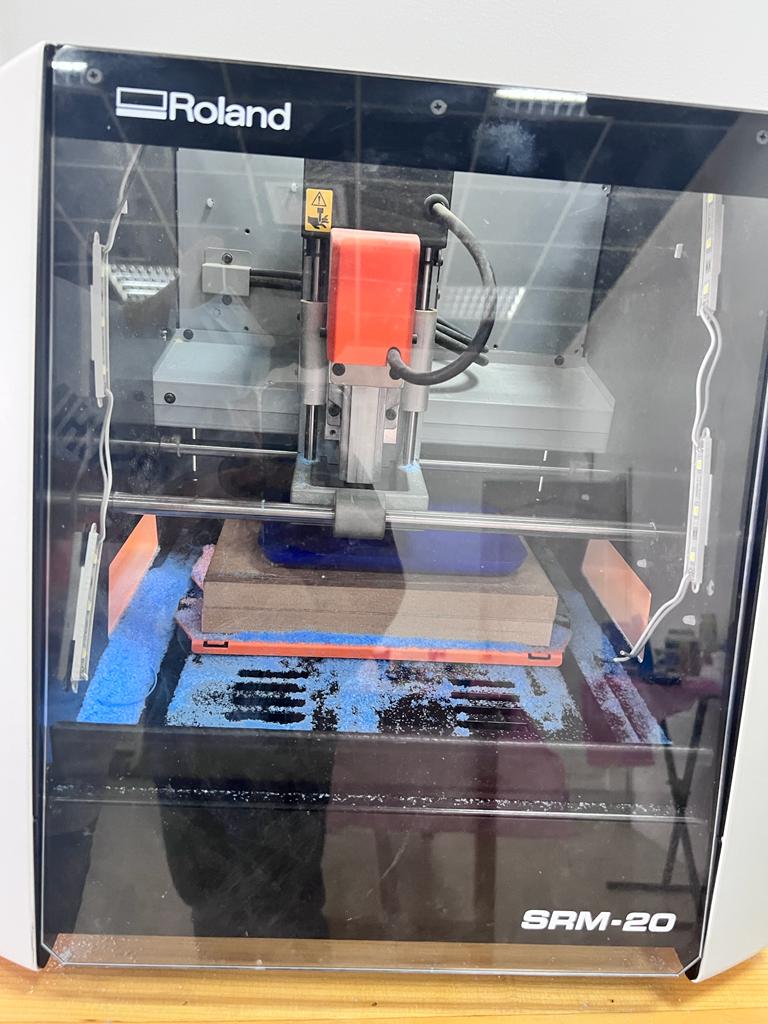
Roland SRM-20 monofeb.
The SRM-20 portable milling machine can mill a broad range of materials, including modeling wax, chemical wood, foam, acrylic, poly acetate, ABS and PC board. The following items are just some of the prototypes and applications made possible: Product inventions. Wax molds for casting. Tools and machinery. Read more
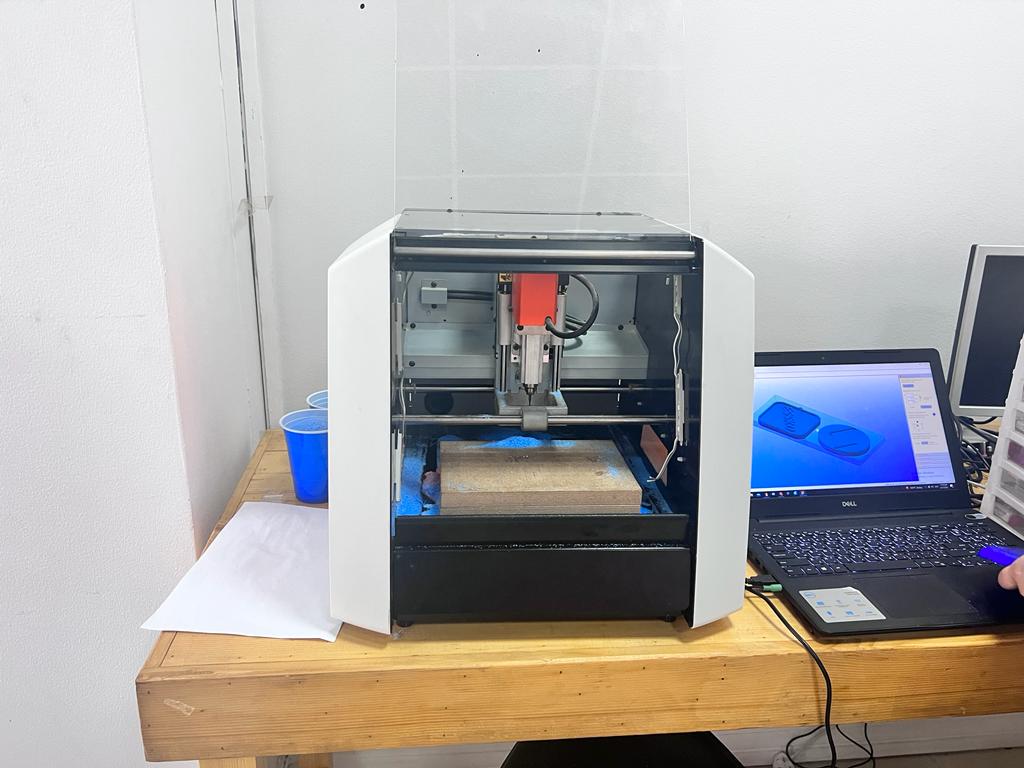
Using Roland SRM-20 monofeb.
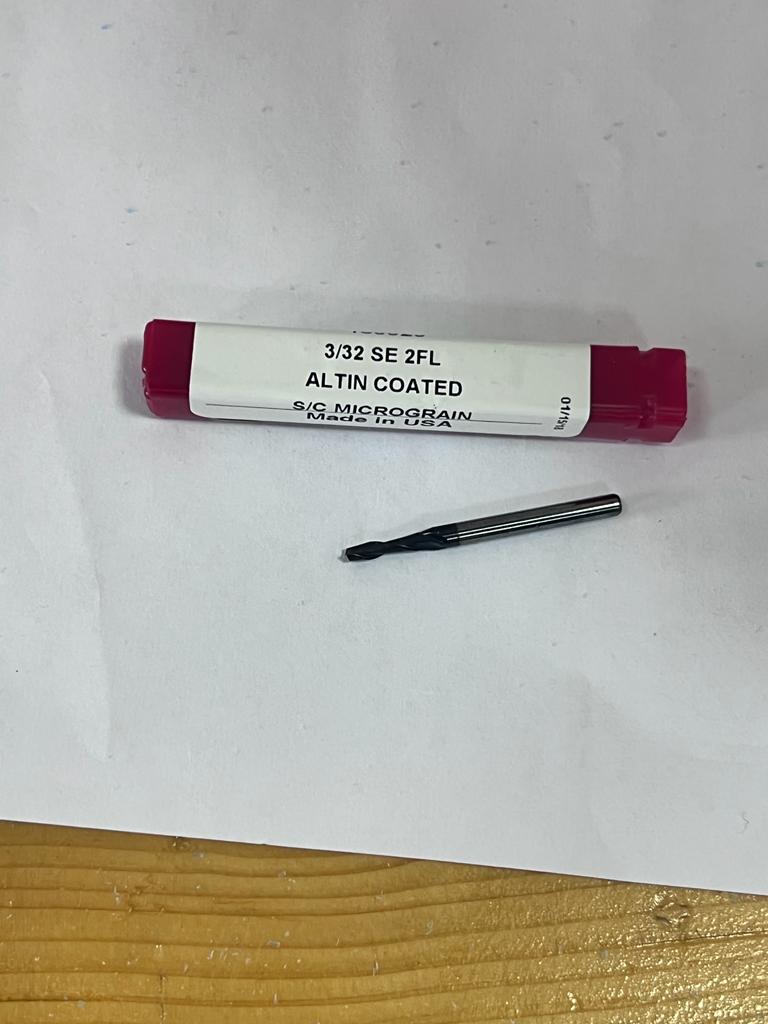
For milling we started to adjust the settings of the Roland SRM-20 monofeb like changing the tool of milling.
 .
.
SPR player.
After completing from machine side i started working on SPR The first step was to set dimensions of modle. - Note to save time we worked in 2 group of people.
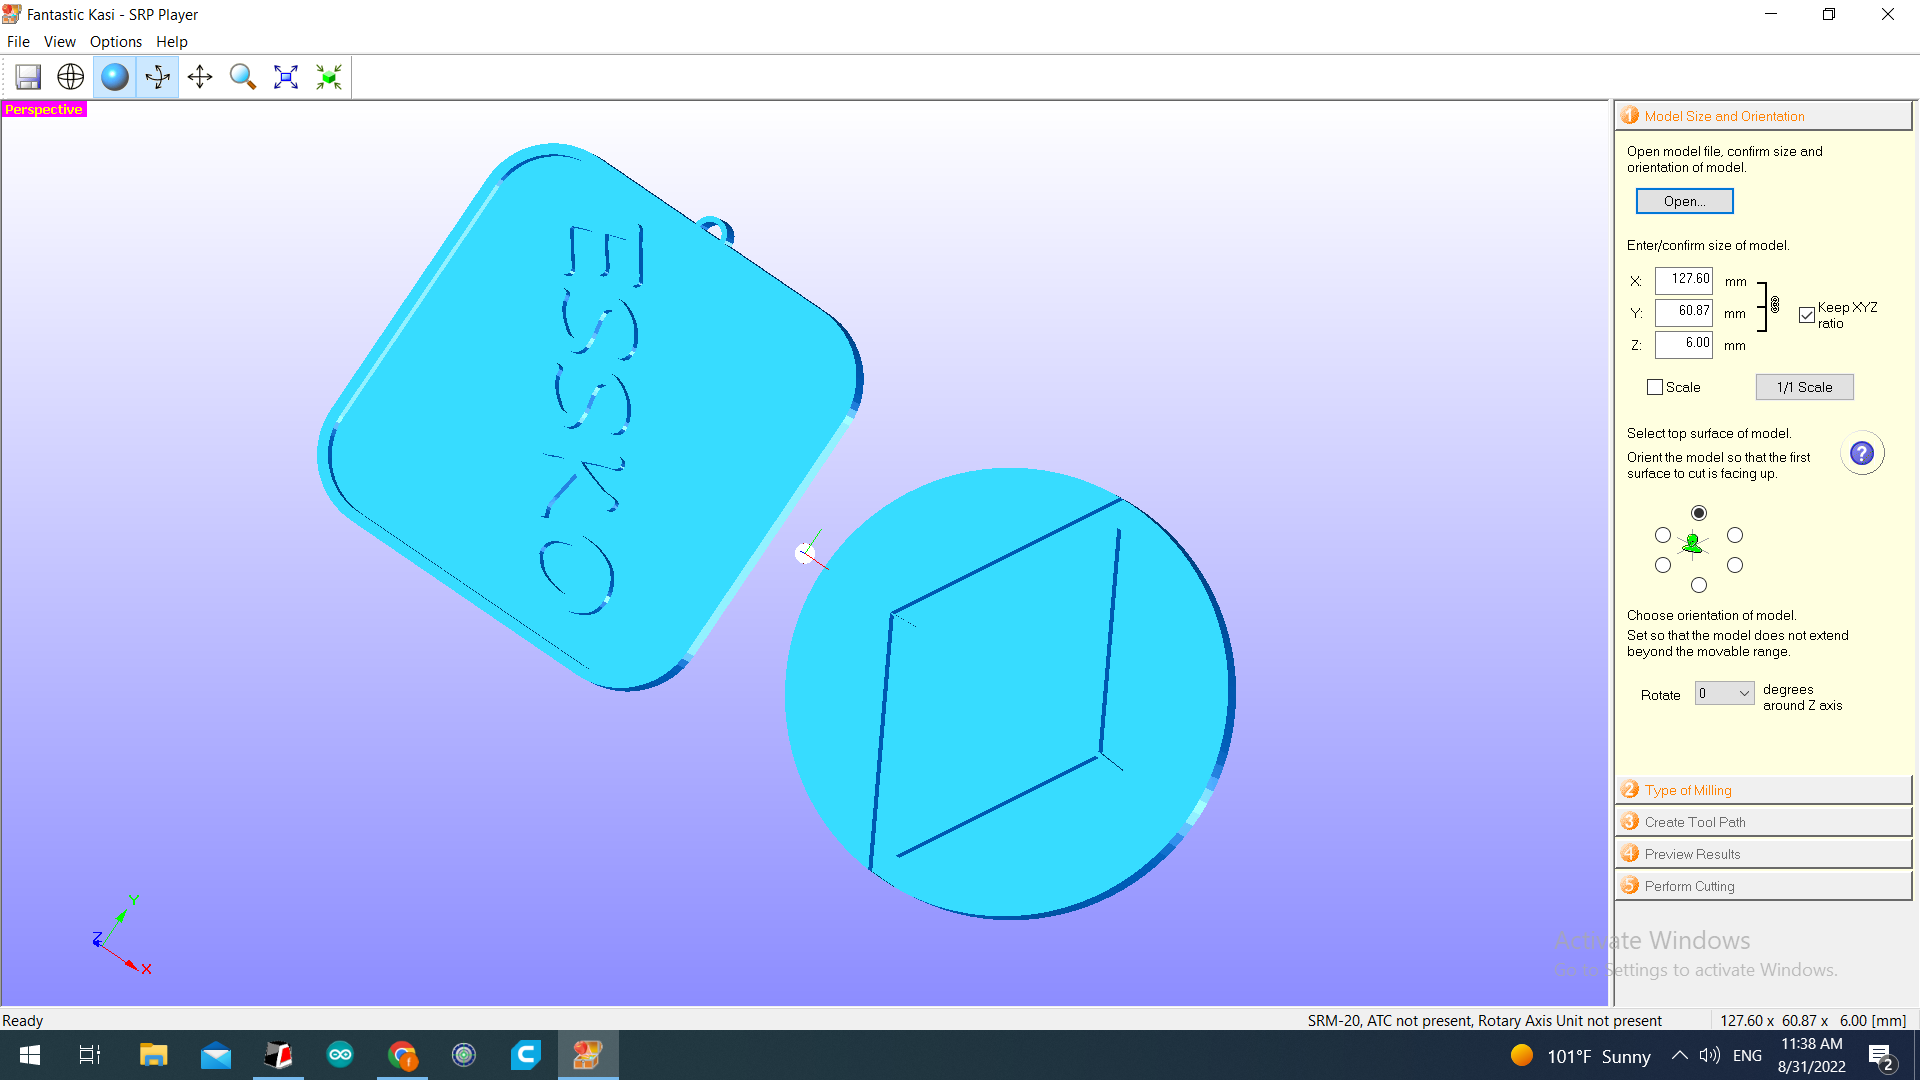
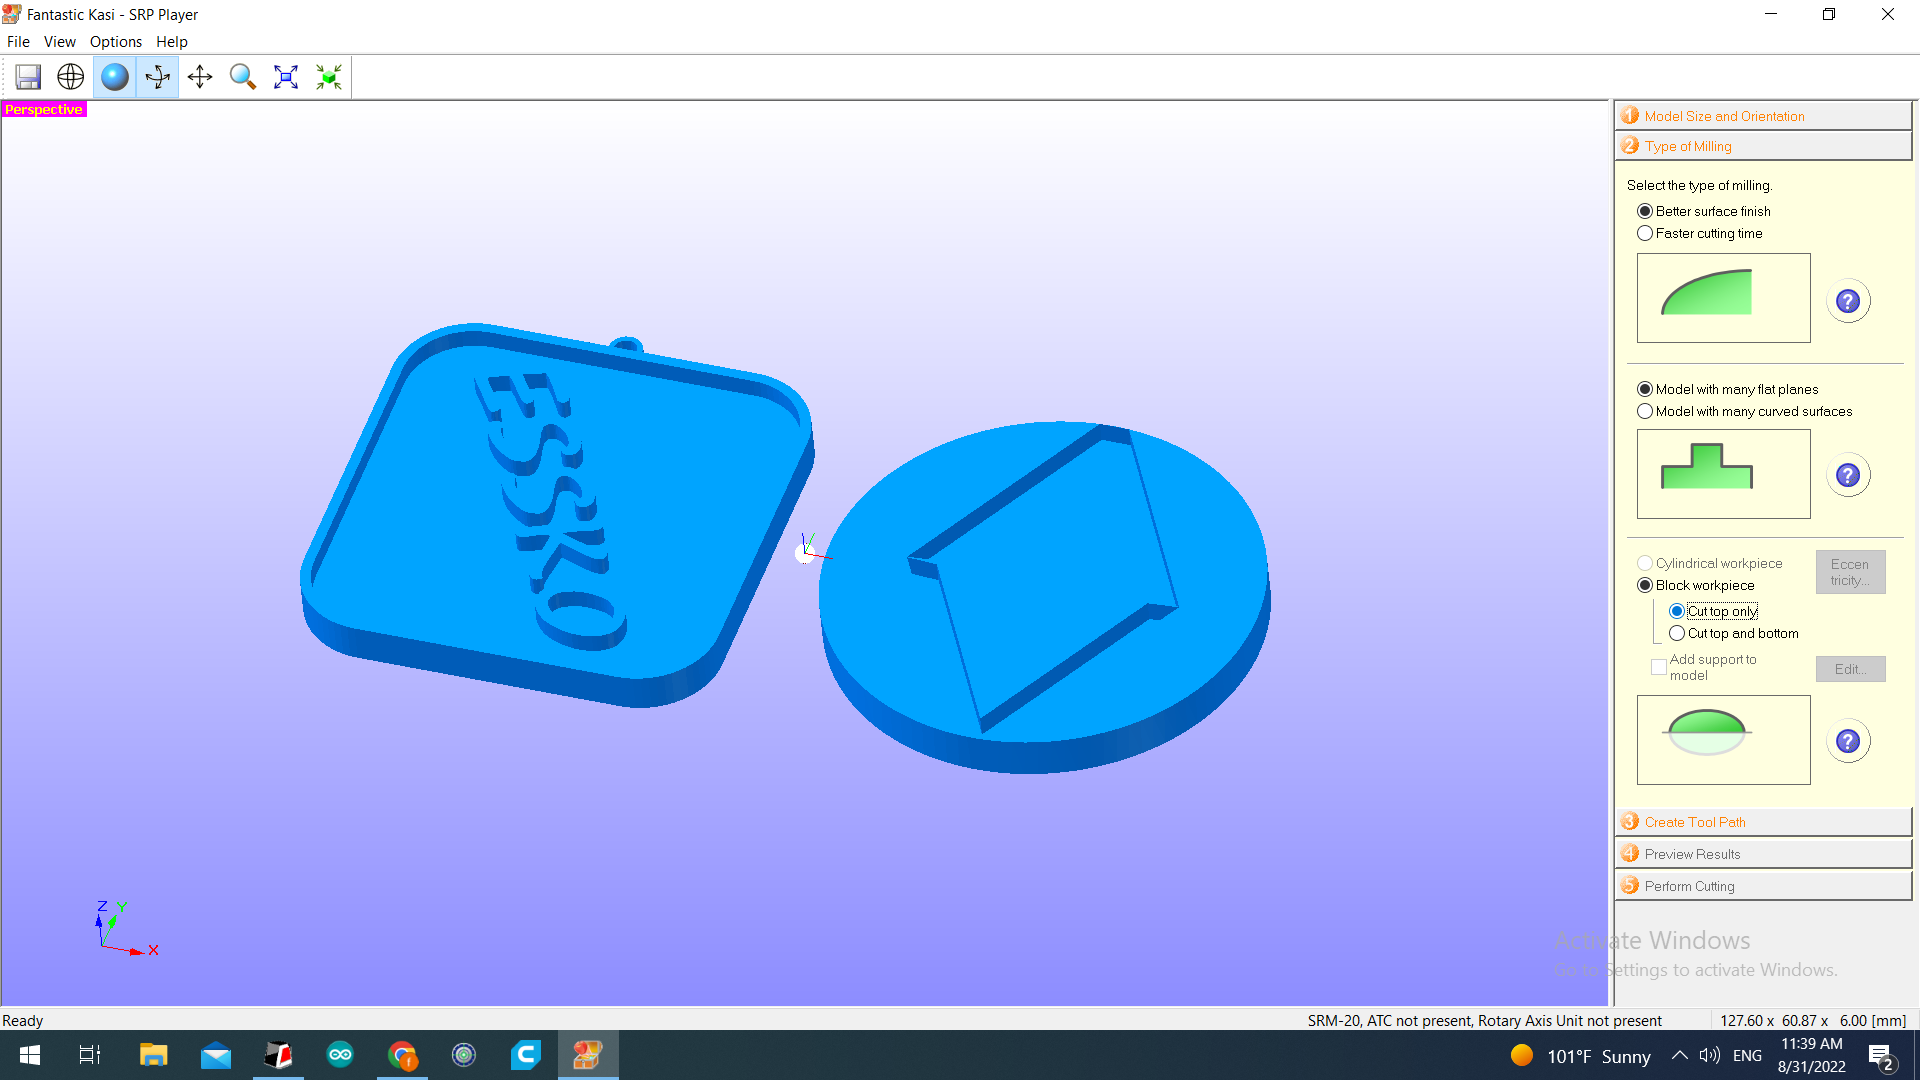
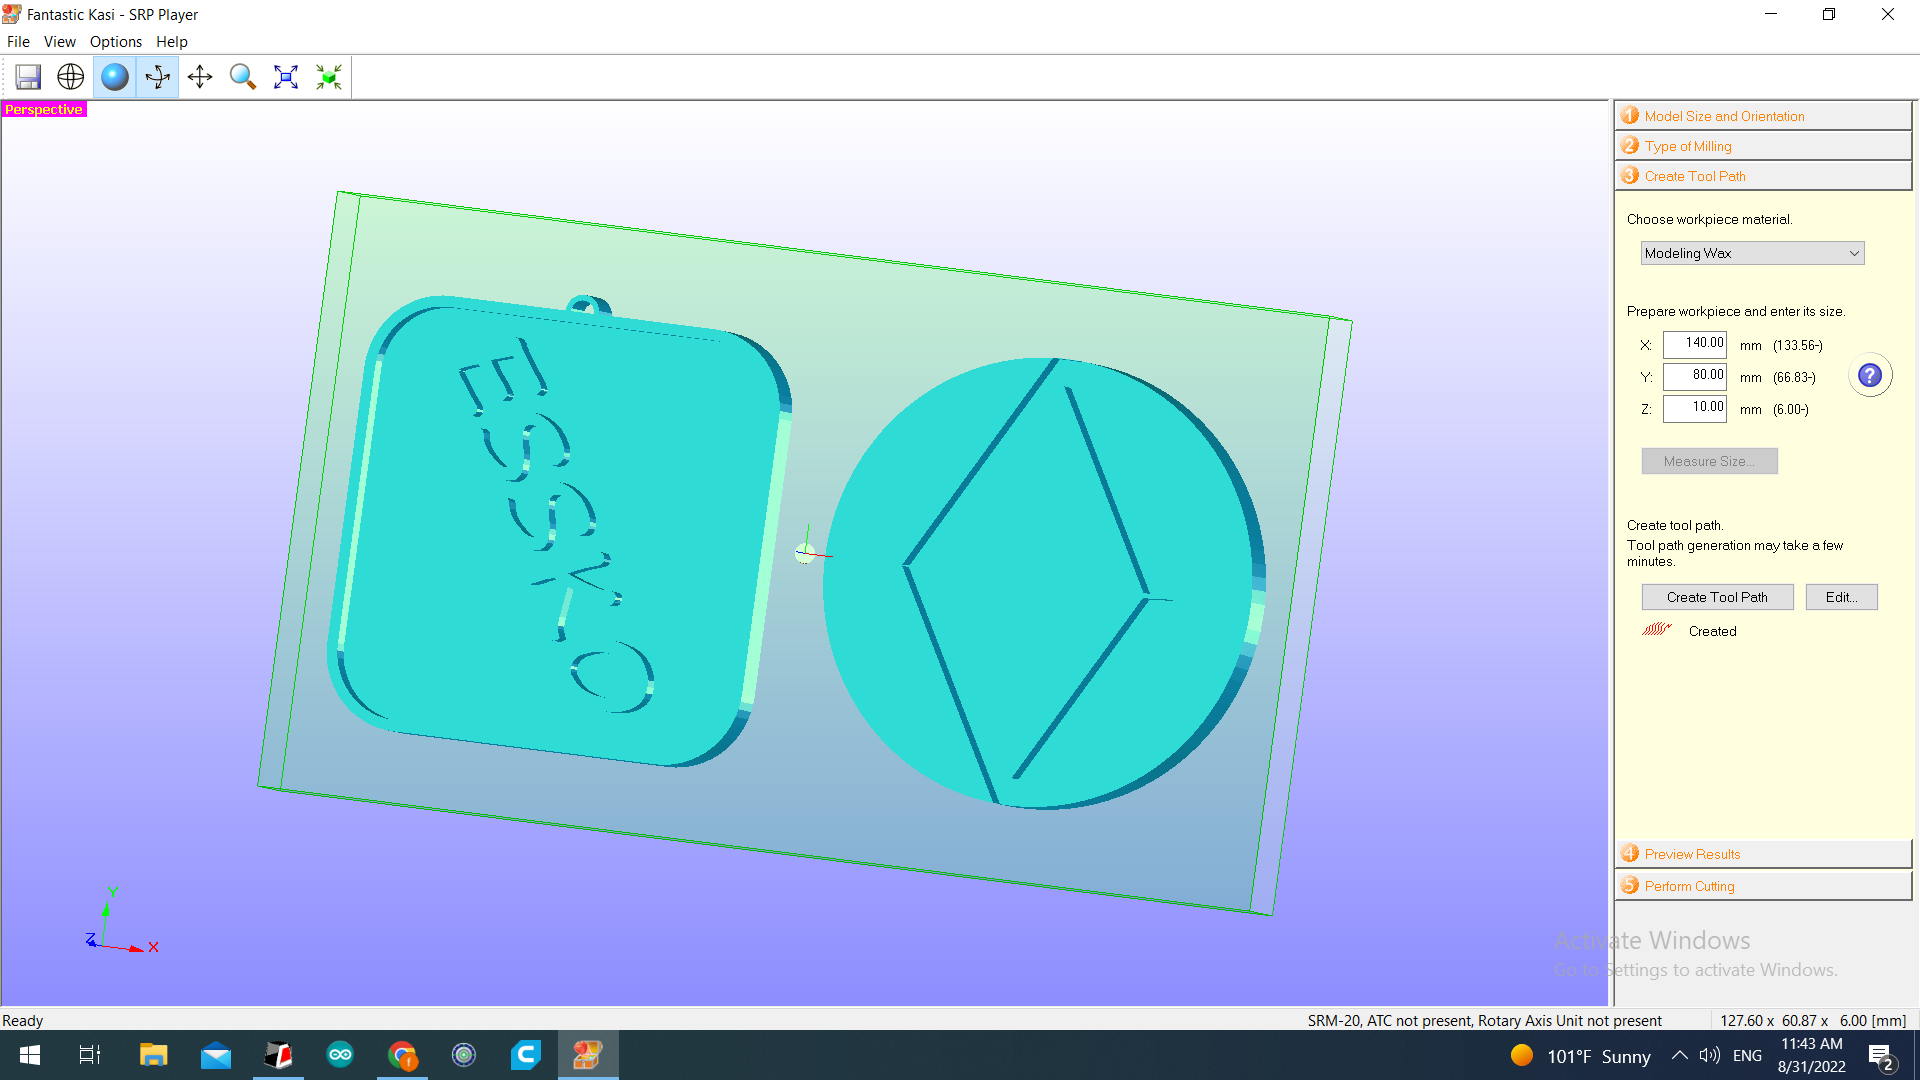
Type of milling.
The type of milling was chosen in the second step. We selected a model with several flat planes, a superior surface polish, and a block work piece. We decided to trim the top of the block work piece only.
creating a tool path
Making a tool route was the third stage. The size of our workspace is something we decided upon.
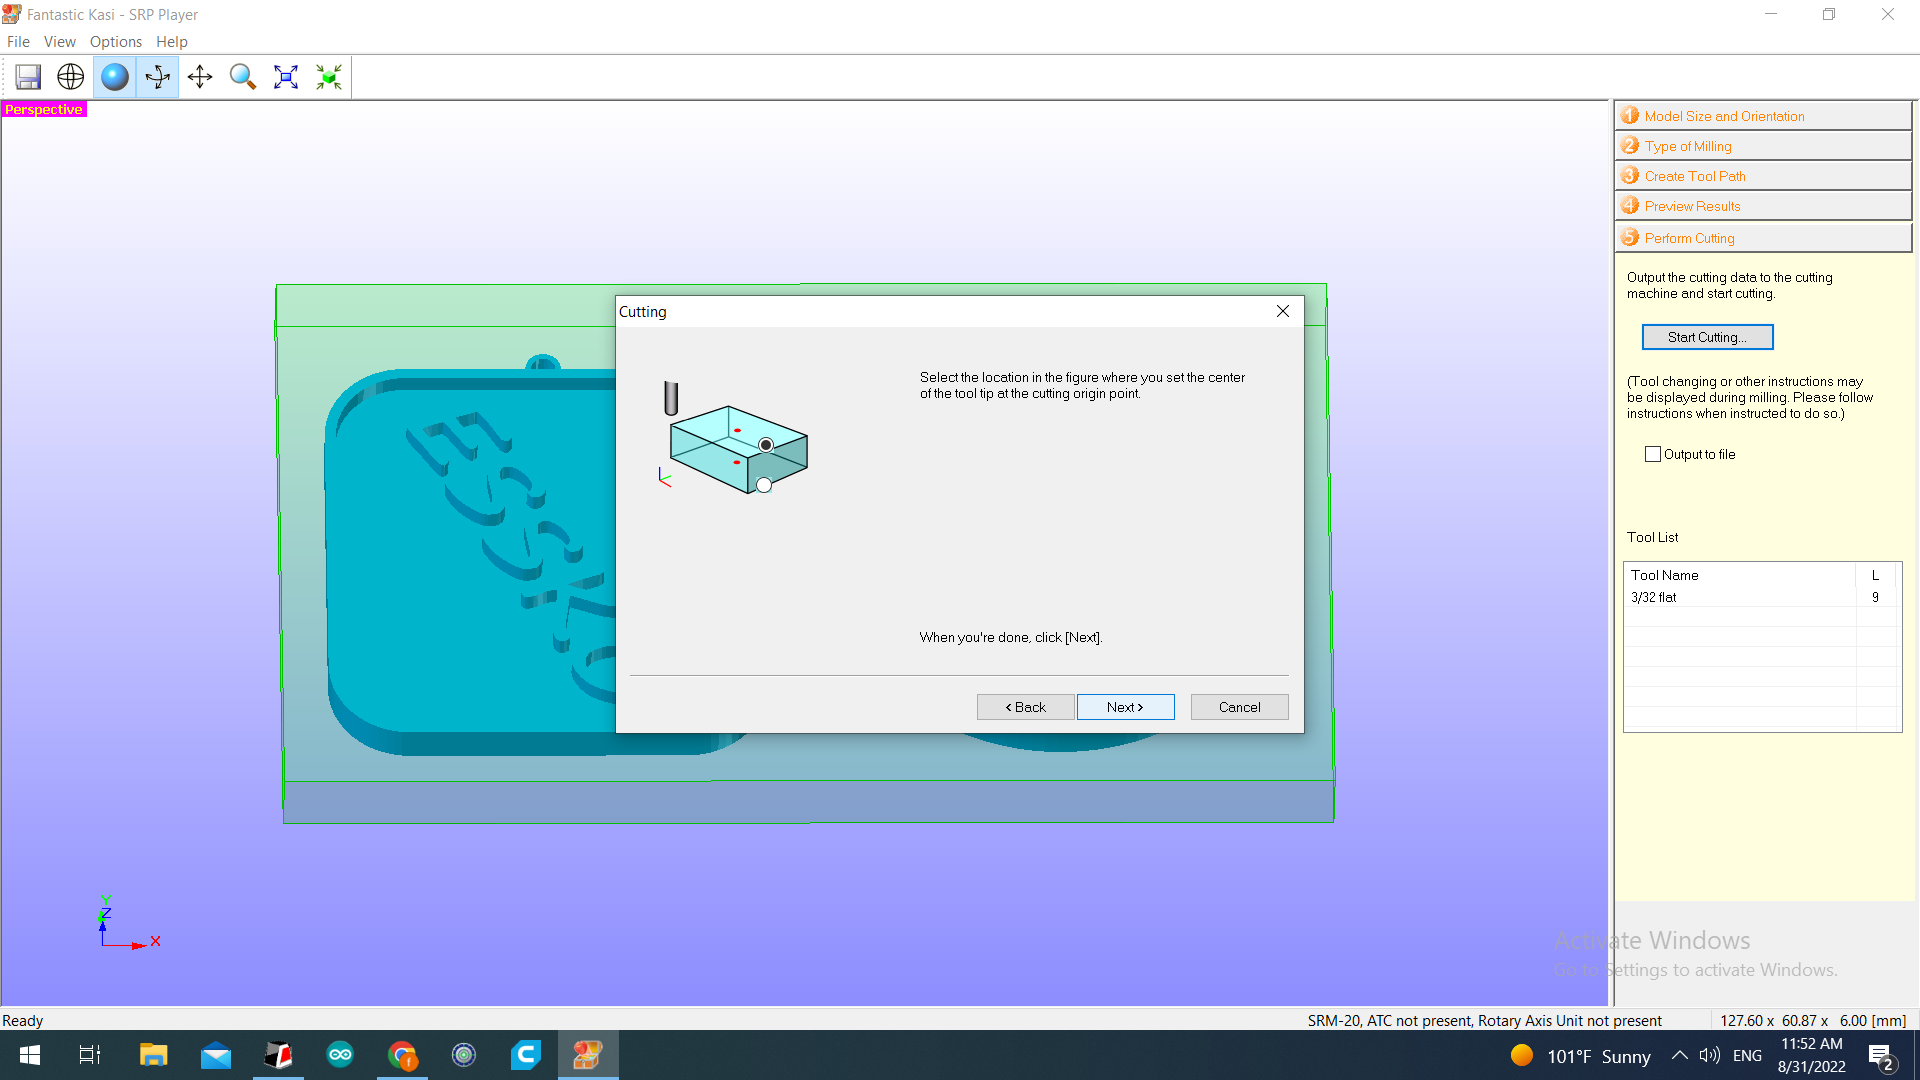
Perform the cutting.
On this step we became ready to perform the cutting.
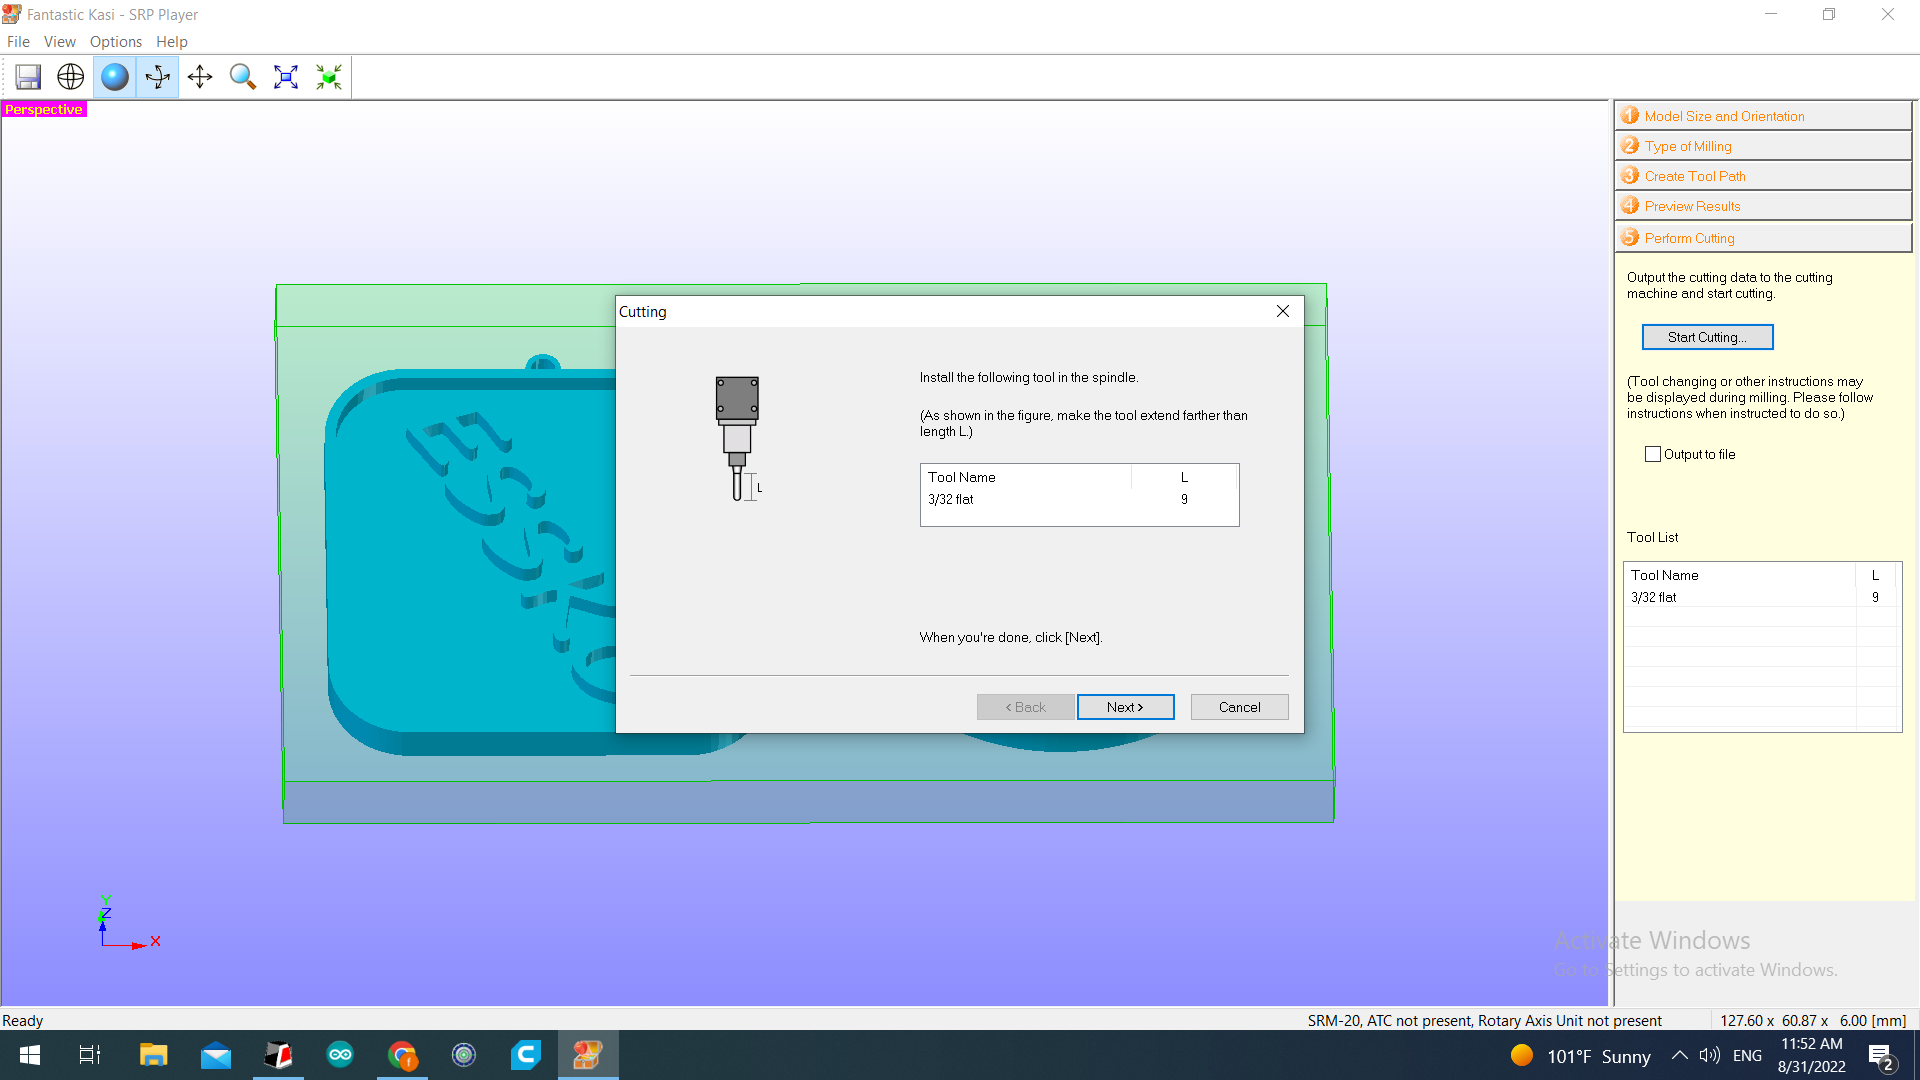
Installing the Wax.
After that we set the wex inside the Roland SRM-20 monofeb and started milling.
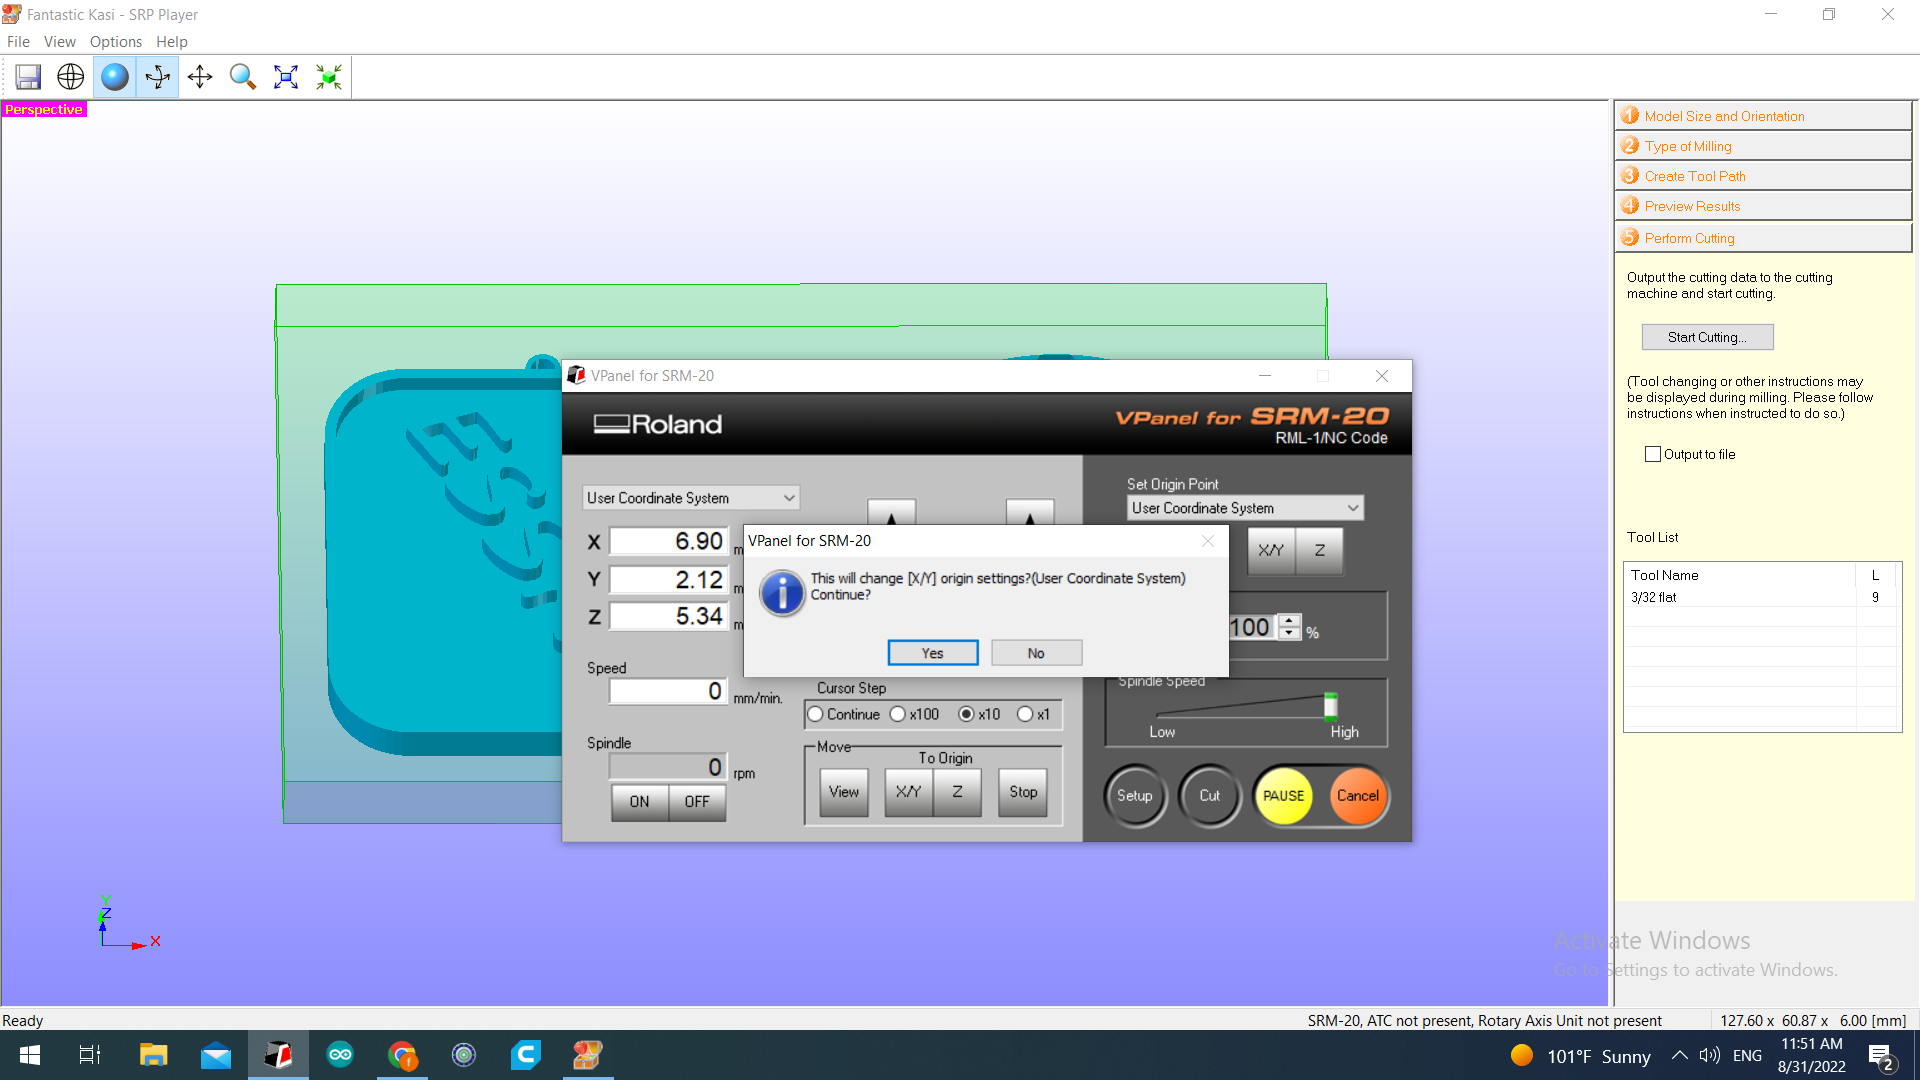
Setting the origin point.
After fixing the wax into the machine, we used VPanel for SRM-20 to set the origin point. We set center of the tool tip at the cutting origin point.

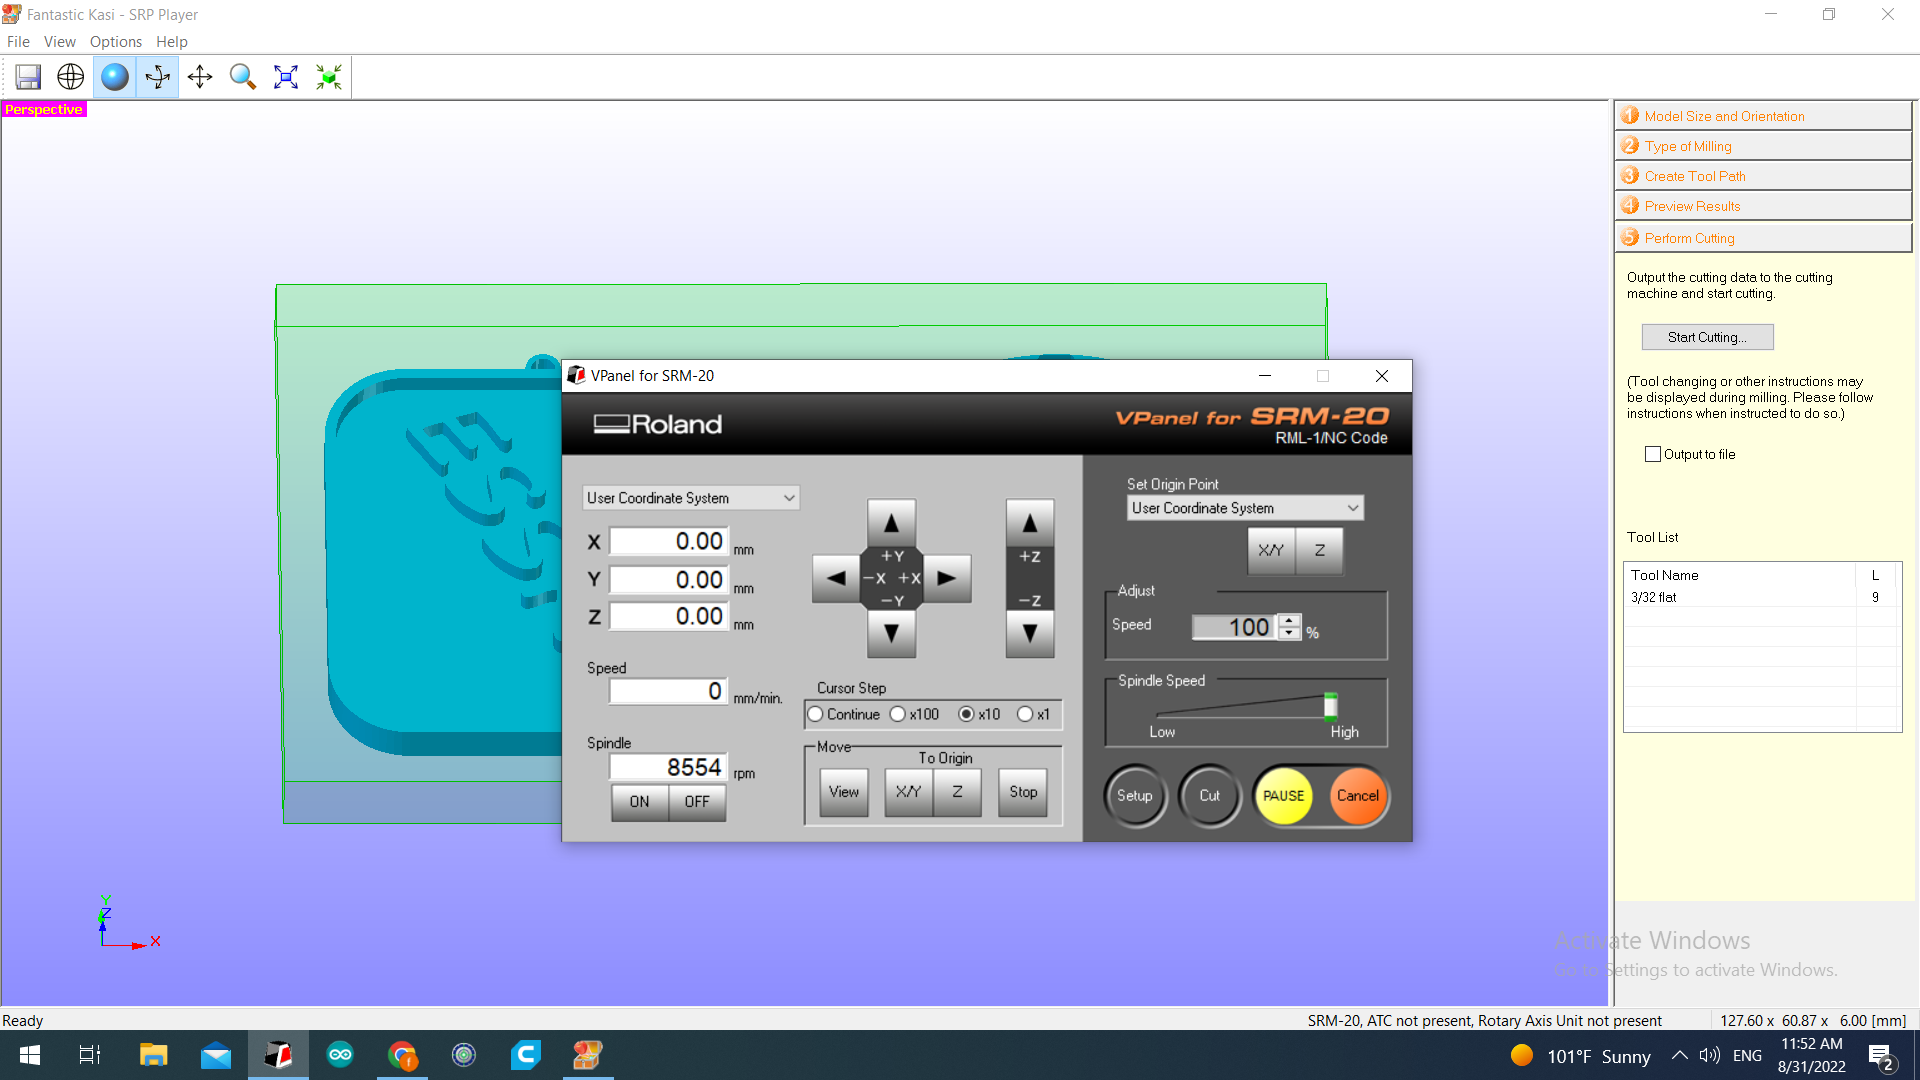
Start Cutting.
Finally we started cutting the wex.
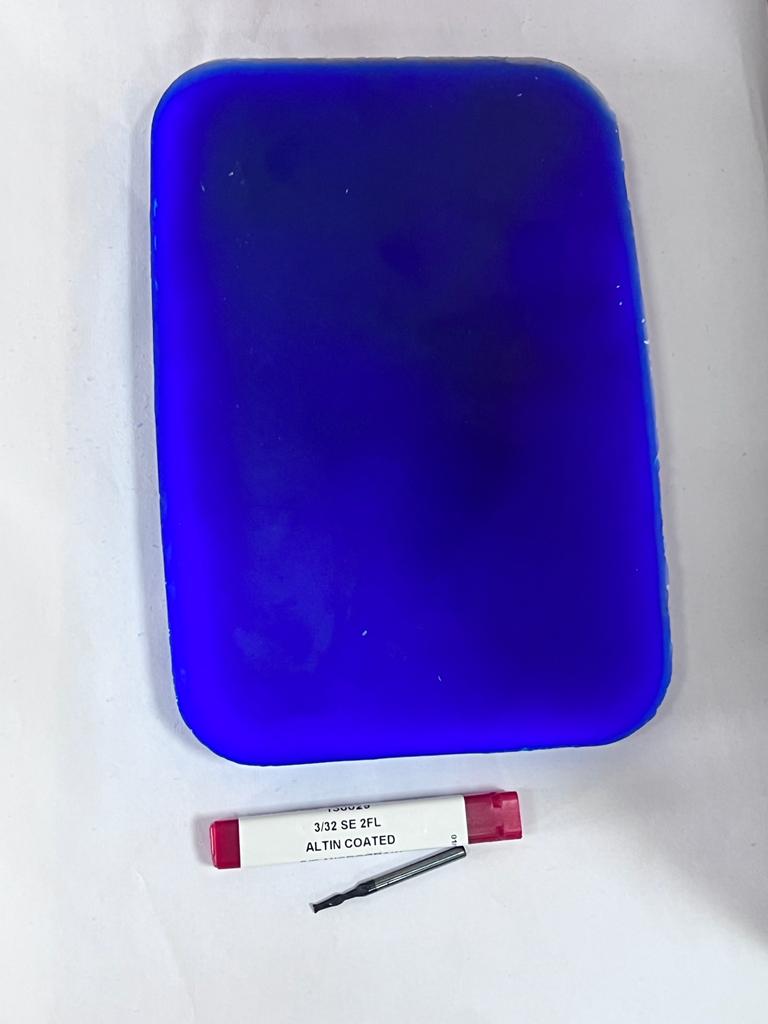
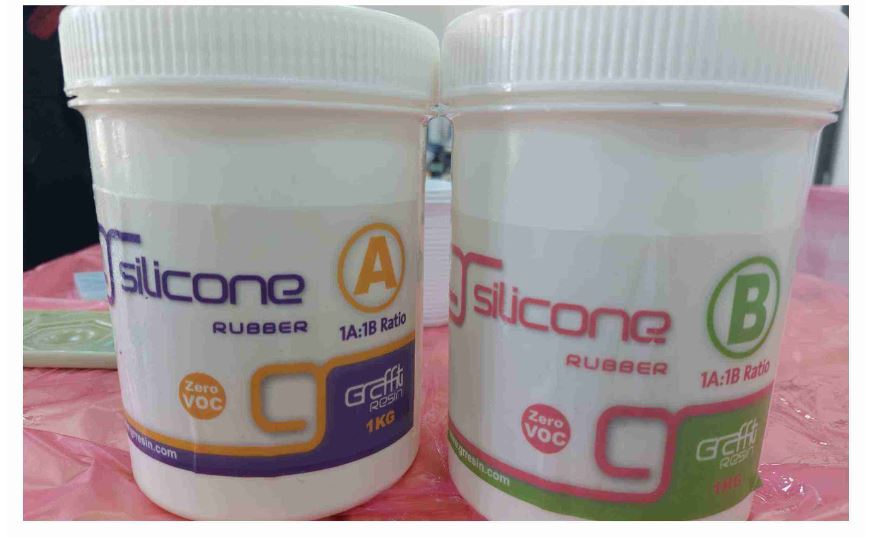
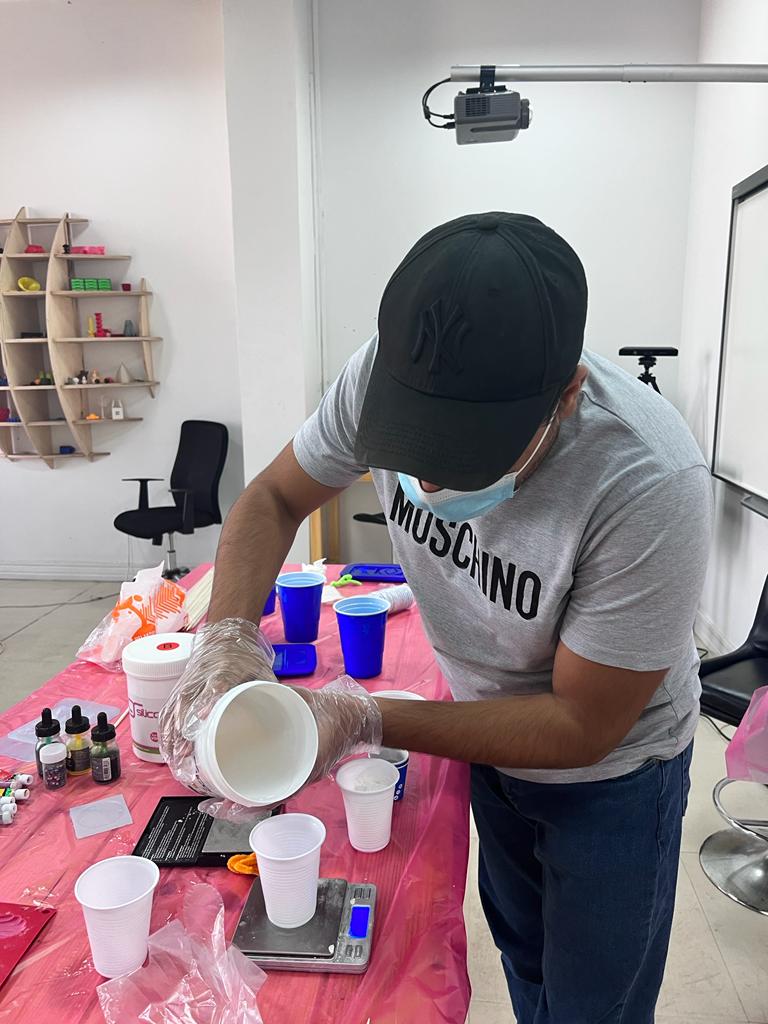
Molding Process.
for molding process we started using 2 different kind of silicion.
 .
.
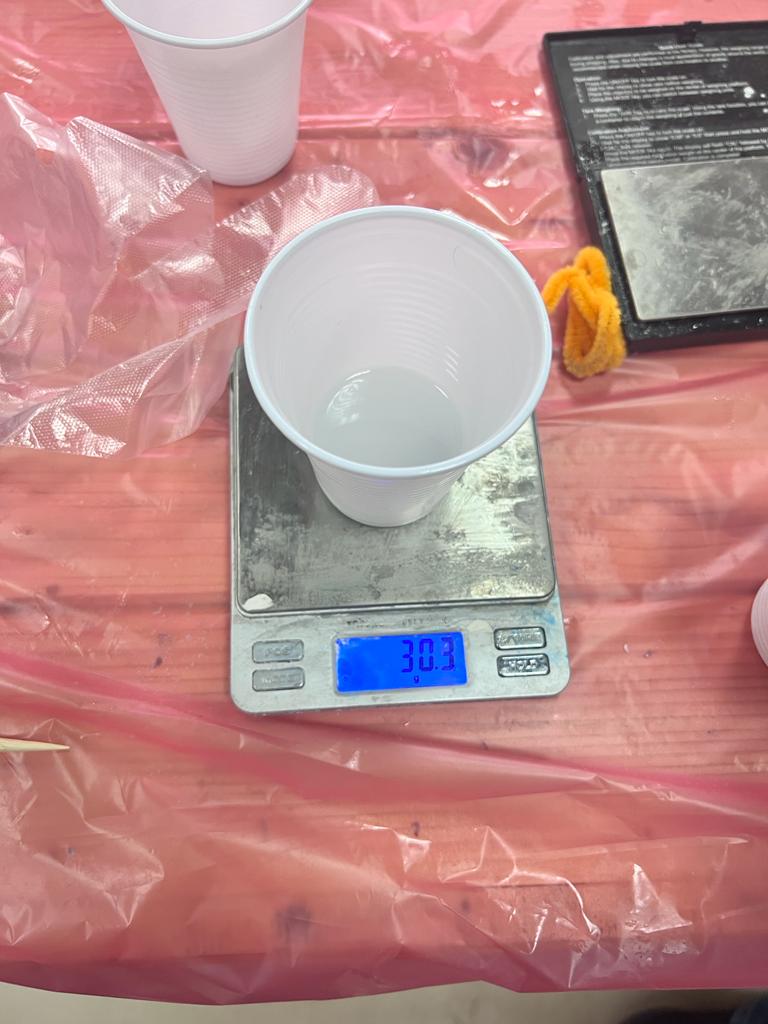
Mixing Silicoin
We started mixing silicion in quantity of 30g of each.
 .
.
 .
.
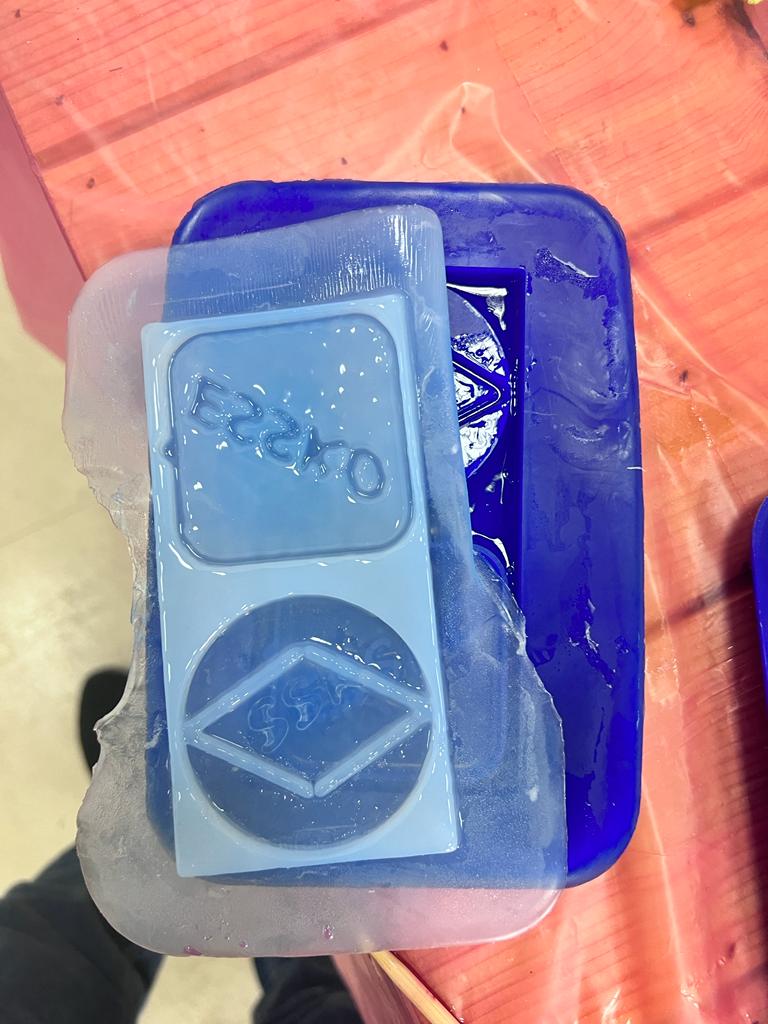
Hero shot.
Here is the heroshot.
 .
.
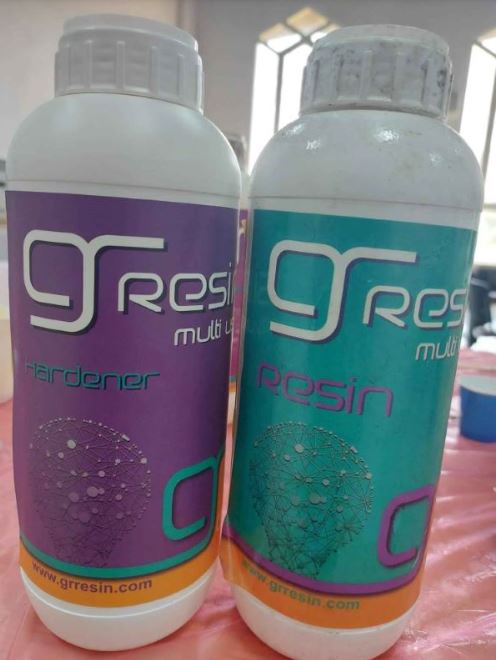
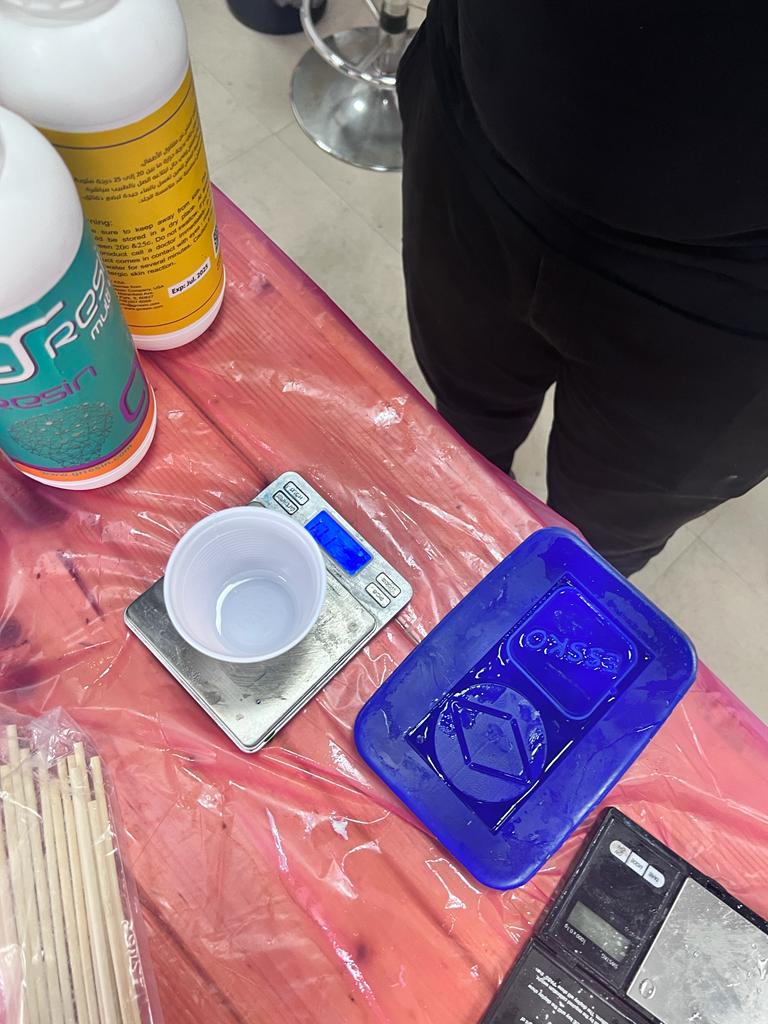
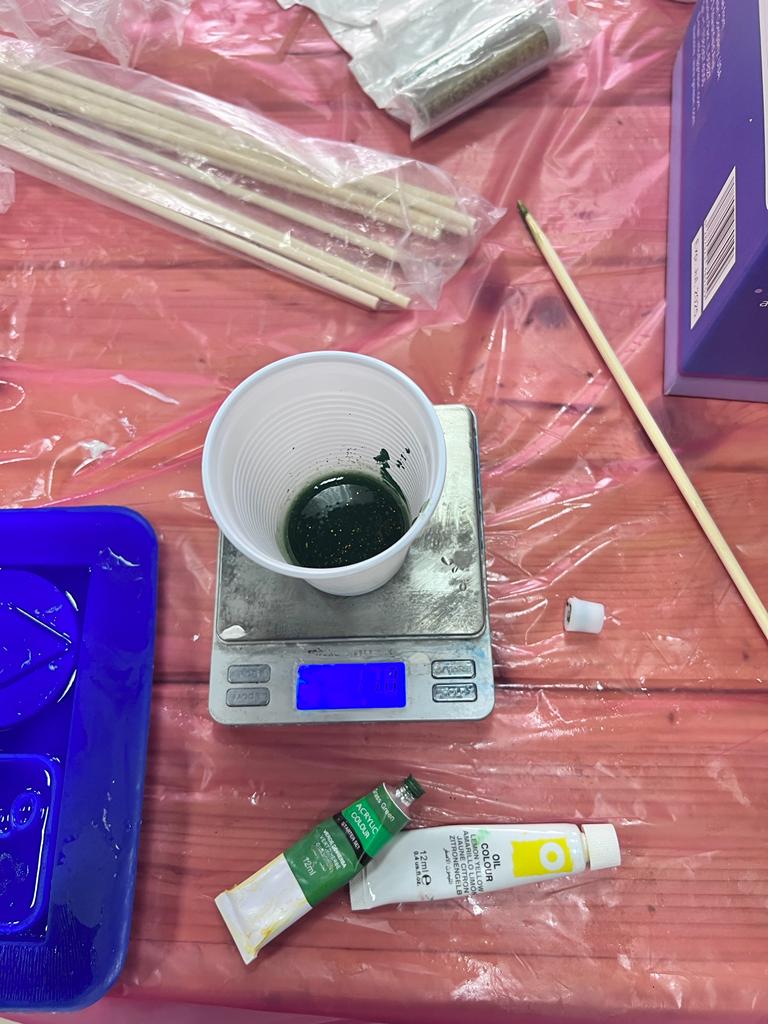
Casting Process.
For casting we start using resin as we can see in picture.
 .
.
Mixing process.
The exact mix ratio for resin is 10:6. So, after discussing with our instructor , we took 15 grams of resin and 6 grams of hardener.We mixed them together and also mixed green color with them and stirred them. The working time of resin is 45 minutes, and the curing time is 24 hours. After mixing them properly, we poured them onto a mould and kept them for 1 day.
 .
.
 .
.
 .
.
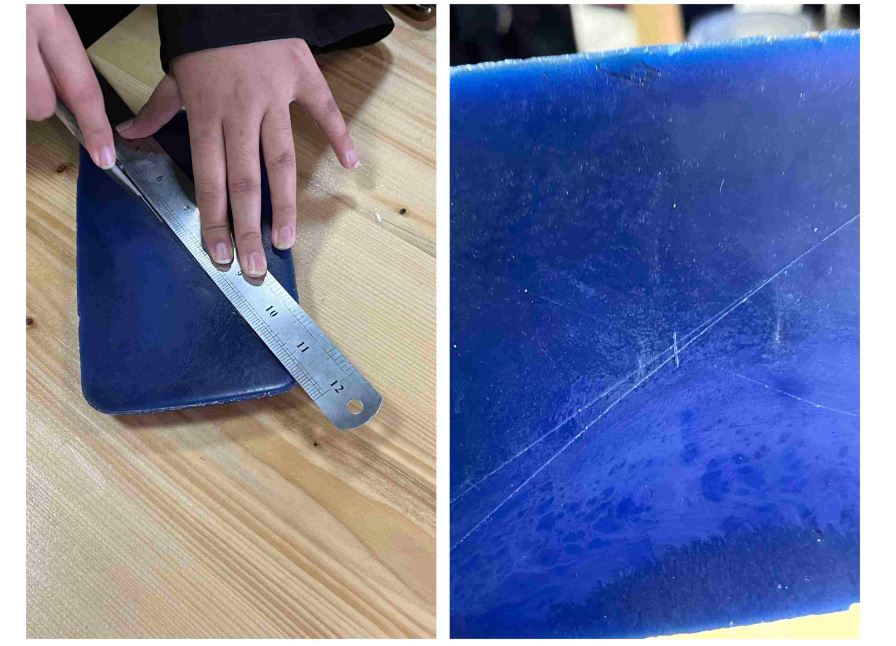
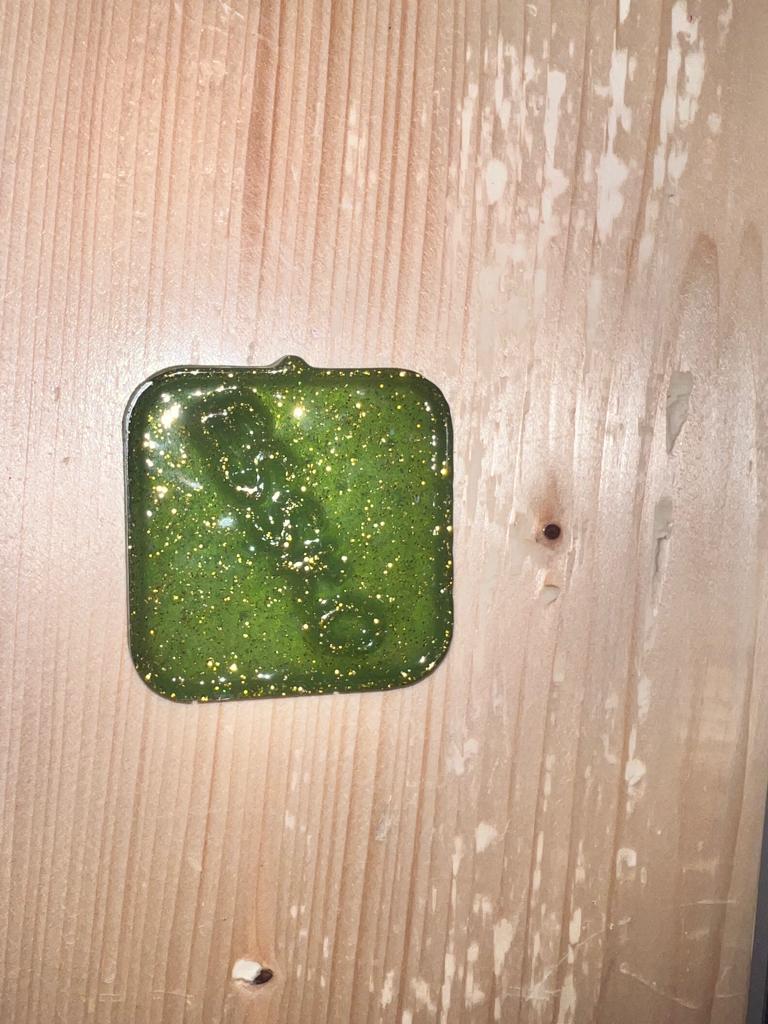
Final Result.
After 24 hours our design became ready as we can see in the picture shown below.
Problems and solutions.
I faced a problem during molding because we mixed silicion in wrong quantity and that took 2 days to become drey so we putted our wax in a hot area just to get our mold ready soon.