4. Embedded programming
This week’s aim was to program the board with as different programming languages and programming environments.
Group assignments
- The group assignment regarding ‘Different Types of Microcontrollers Boards and Comparison between them’ can be found here
- The group assignment regarding ‘Different microcontrollers programming languages and comparison between them’ can be found here
Features of adafruit feather board.
- ARM Cortex M4F (with HW floating point acceleration) running at 64MHz
- 1MB flash and 256KB SRAM
- Native Open Source USB stack - pre-programmed with UF2 bootloader
- Bluetooth Low Energy compatible 2.4GHz radio (Details available in the nRF528 40 (https://adafru.it/Dvy) product specification)
-
FCC / IC / TELEC certified module
-
Up to +8dBm output power
-
21 GPIO, 6 x 12-bit ADC pins, up to 12 PWM outputs (3 PWM modules with 4 outputs each)
- Pin #13 red LED for general purpose blinking, Blue LED for general purpose connection status, NeoPixel for colorful feedback
-
Power/enable pin
-
Measures 2.0” x 0.9” x 0.28” (51mm x 23mm x 7.2mm) without headers soldered in
-
Light as a (large?) feather - 6 grams
-
4 mounting holes
-
Reset button
-
SWD debug pads on bottom of PCB
Different type of adafruit sensors
- PDM Microphone sound sensor: MP34DT01-M
- Temp + Pressure: BMP280
- Humidity: SHT30
- Light + Gesture + Proximity: APDS9960
- Magnetometer: LIS3MDL
- Gyro + Accel: LSM6DS33
To visit the original source of information click here
Download Adruino software
If you need any help click here and follow the instructions.
How to use the basic blink code in adruino software
-
Go to ‘files’ then click on ‘examples’, basics, Blink. (as shown in figure 1)
 figure 1
 -
Now you need to set up and link the board. The below figures demonstrate a clear way to do that.
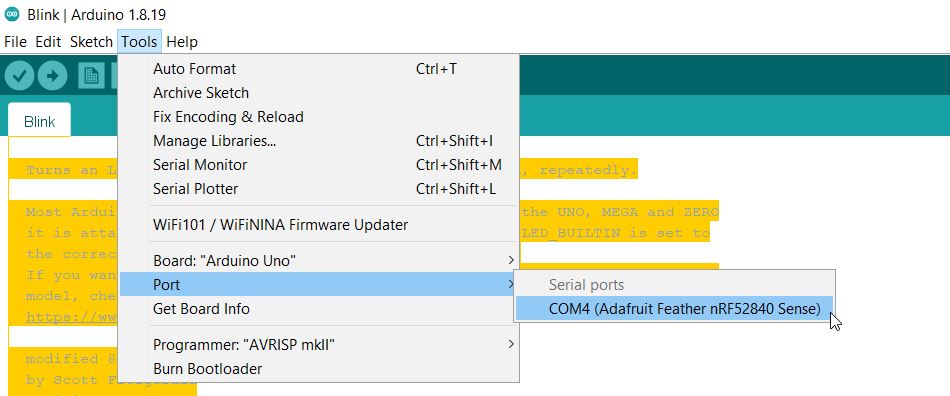 figure 2
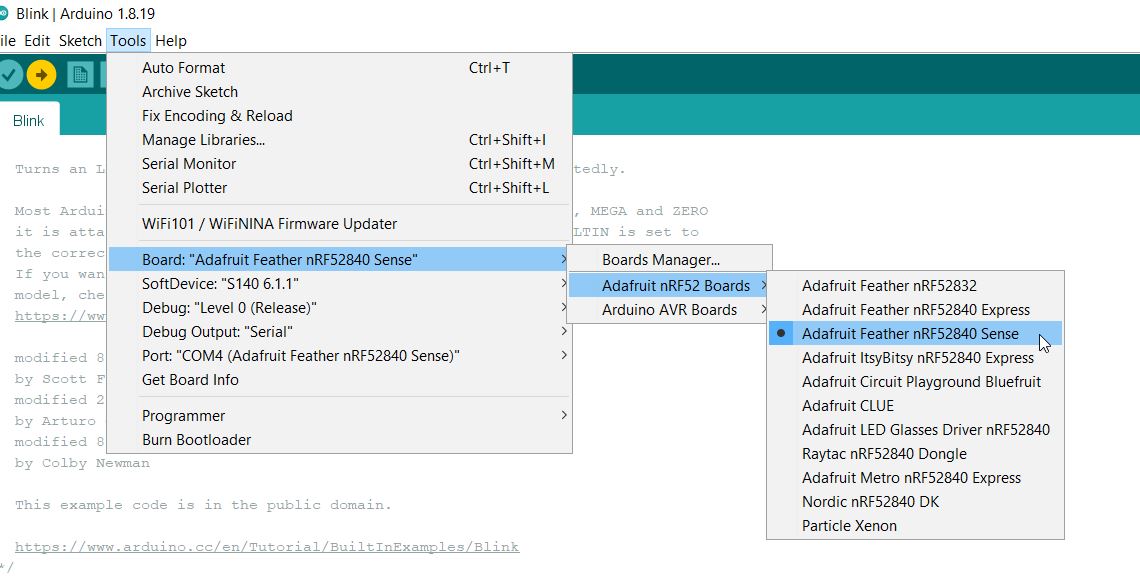 figure 3
 -
Now is your time to add more commands, for instance ‘digitalWrite(LED_BUILTIN, HIGH);delay(1000);’ to have the led light on and ‘digitalWrite(LED_BUILTIN, LOW); delay(1000);’ to have the led light off. The numerical values are the time duration in MS. Finally, click on the upload button and watch your board where the magic happens!
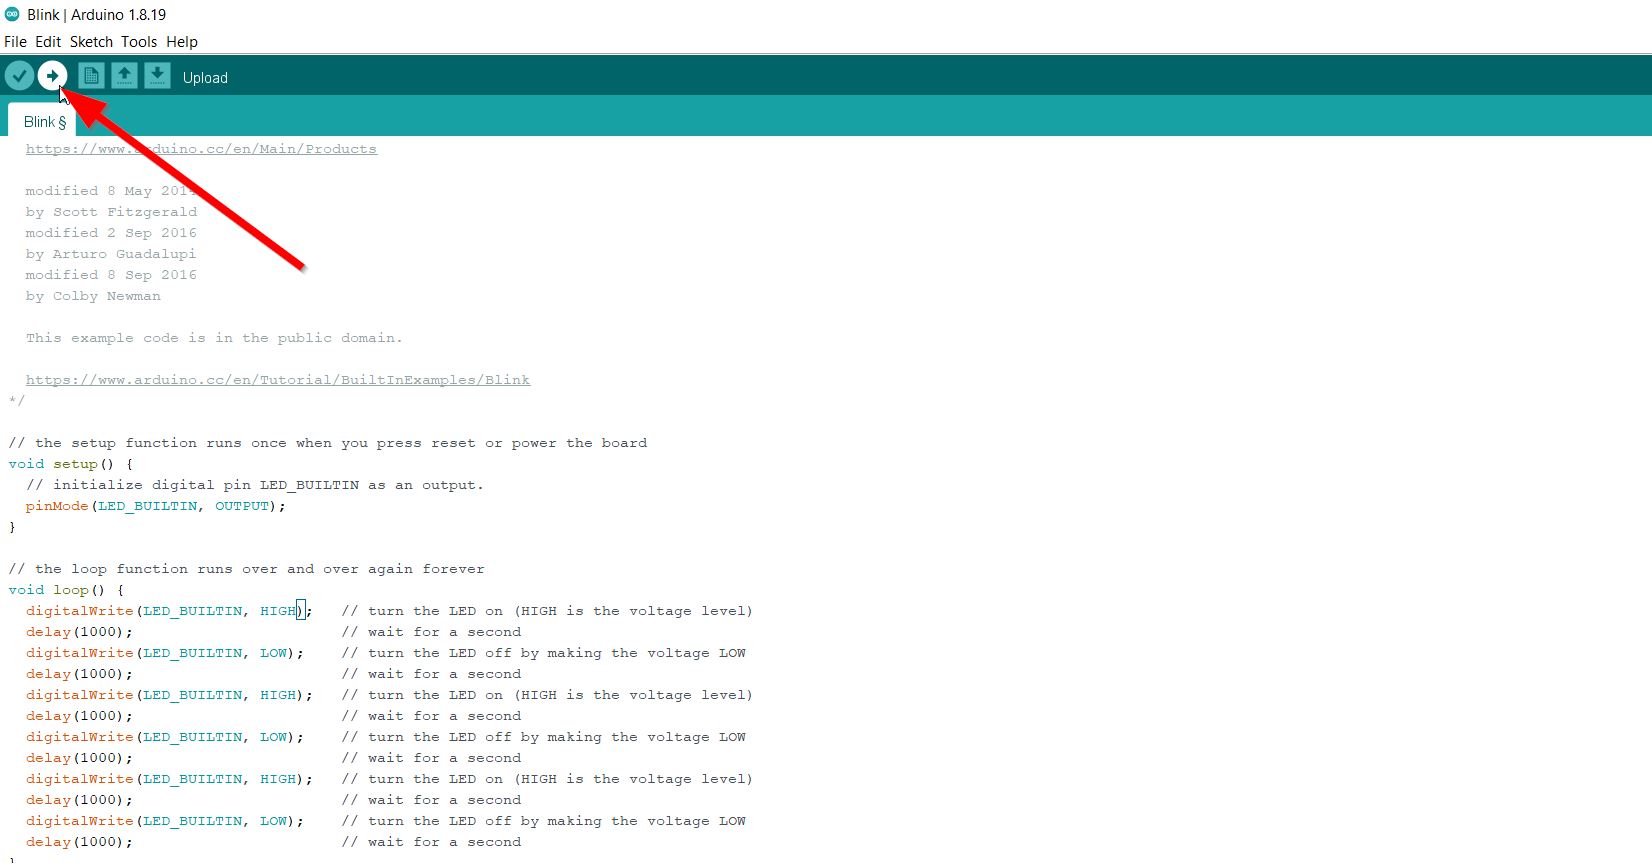 figure 4
 -
Click here for more details.
How to program your board using tinker CAD
-
Visit tinkercad’s website by clicking here
-
create a new circuit by following the steps in figure 1
 figure 1
 -
click and drag the desired board as shown in figure 2.
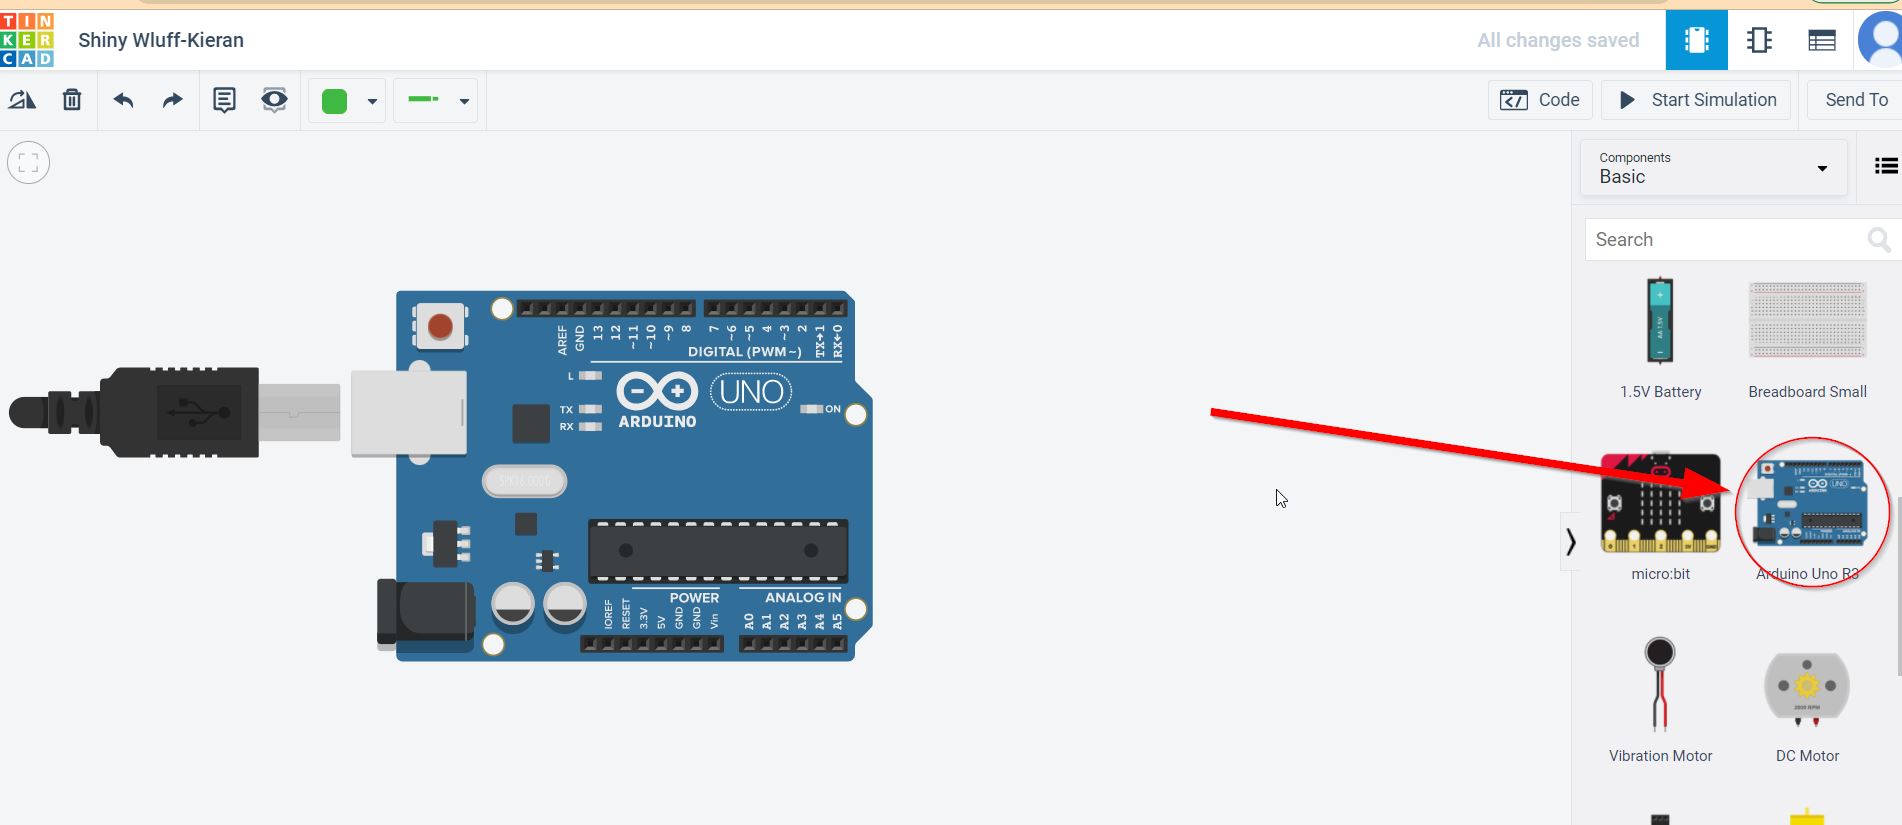 figure 2
 -
Click and drag the desired blocks. As shown in figure 3.
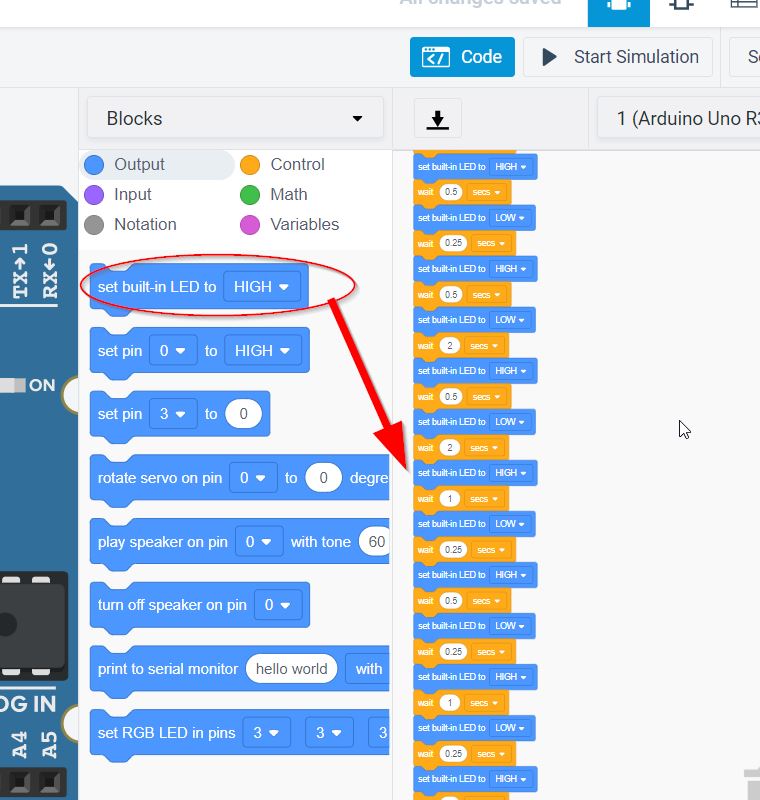 figure 3
 -
Click on ‘start simulation’ to show the result of the code inputed. You could also click on the dropdown arrow as shown in ‘figure 4’ to view the code in text (which could be copied) as well as blocks.
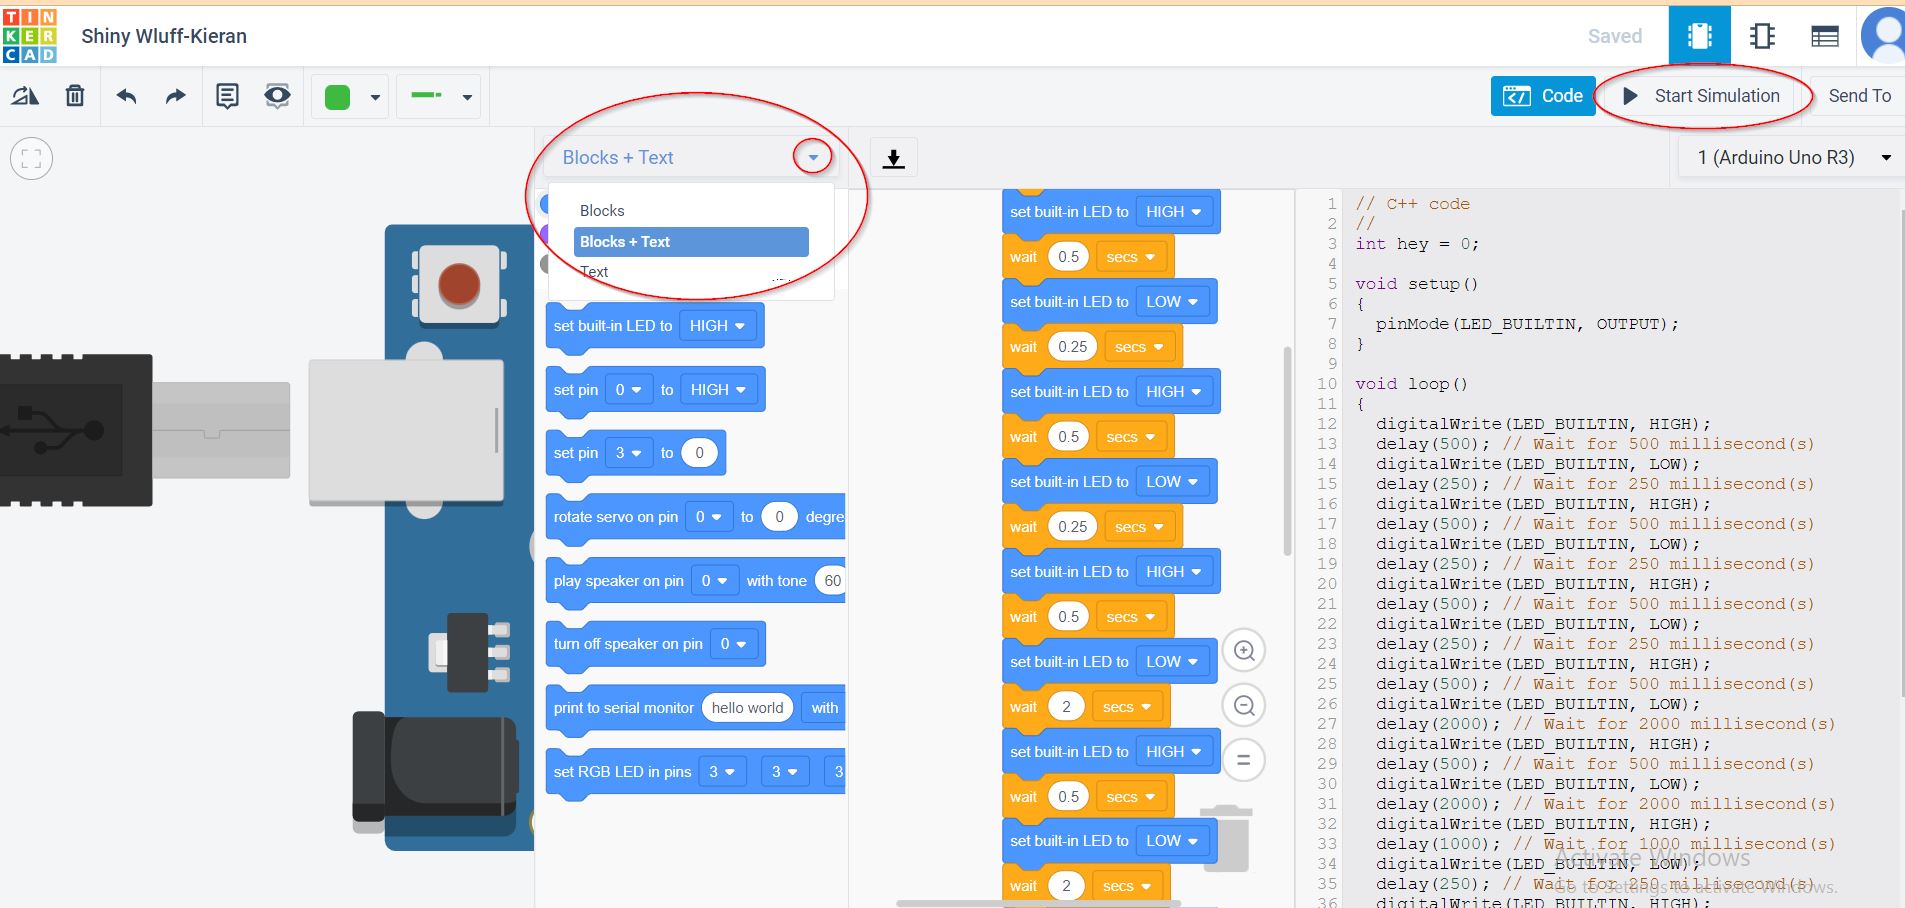 figure 4
How to deliver a morse code using the blink command on the keyboard.
Since you’re familiar with the basic steps which were explained earlier, its time to show you how to deliver a message using morse code via the board.
-
Visit the website morse code translator, or click here
-
As you can see in figure 1, I chose to translate the word ‘hey’. You could translate any word or phrase of your choice.
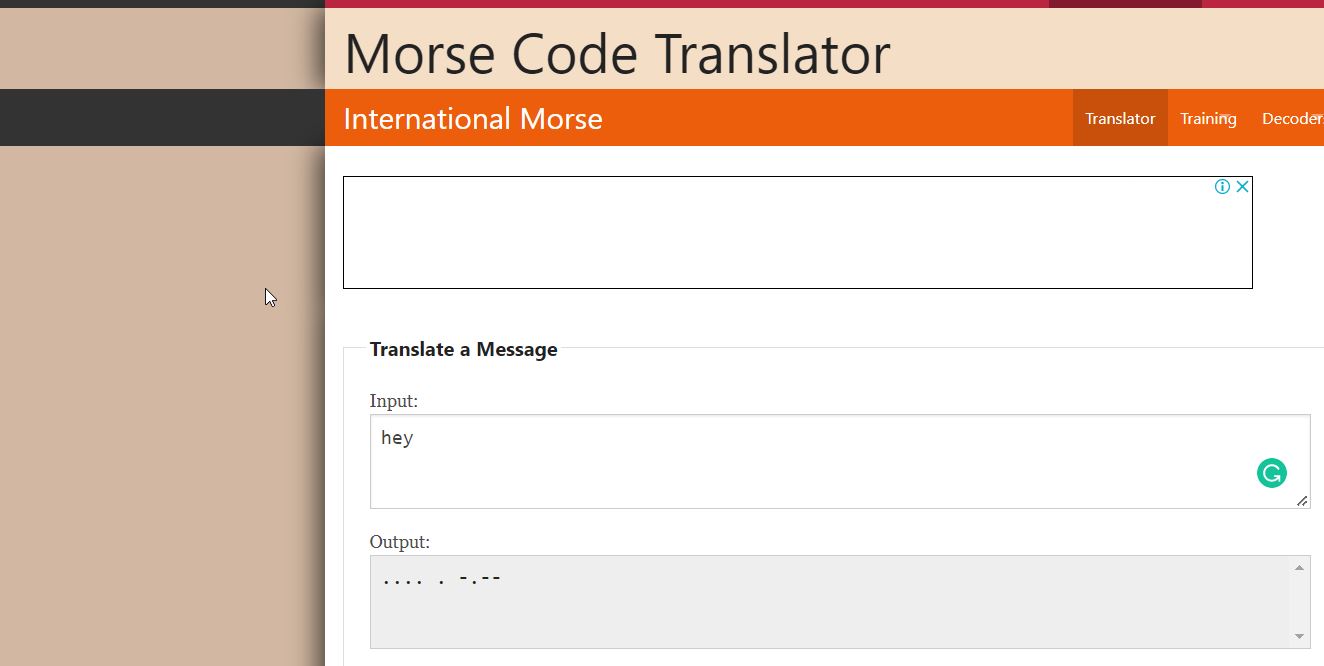 figure 1
 -
remember these tips and rules:- 1.light on for 1second for ‘-’ 2.light on for 0.5second for ‘.’ 3.light off for 0.25second after each ‘.’ or ‘-’ 4.light off for 2seconds after a space between two different letters.
-
By using the tips and rules of morse code, Follow the steps in ‘How to use the basic blink code in adruino software’ or ‘how to program your board using tinker CAD’ and create your own morse code message and challenge your friends to guess it!
-
Below is the code I used for the word ‘hey’.
/*
  Blink

  Turns an LED on for one second, then off for one second, repeatedly.

  Most Arduinos have an on-board LED you can control. On the UNO, MEGA and ZERO
  it is attached to digital pin 13, on MKR1000 on pin 6. LED_BUILTIN is set to
  the correct LED pin independent of which board is used.
  If you want to know what pin the on-board LED is connected to on your Arduino
  model, check the Technical Specs of your board at:
  https://www.arduino.cc/en/Main/Products

  modified 8 May 2014
  by Scott Fitzgerald
  modified 2 Sep 2016
  by Arturo Guadalupi
  modified 8 Sep 2016
  by Colby Newman

  This example code is in the public domain.

  https://www.arduino.cc/en/Tutorial/BuiltInExamples/Blink
*/

// the setup function runs once when you press reset or power the board
void setup() {
  // initialize digital pin LED_BUILTIN as an output.
  pinMode(LED_BUILTIN, OUTPUT);
}

// the loop function runs over and over again forever
void loop() {
  digitalWrite(LED_BUILTIN, HIGH);
  delay(500); // Wait for 500 millisecond(s)
  digitalWrite(LED_BUILTIN, LOW);
  delay(250); // Wait for 250 millisecond(s)
  digitalWrite(LED_BUILTIN, HIGH);
  delay(500); // Wait for 500 millisecond(s)
  digitalWrite(LED_BUILTIN, LOW);
  delay(250); // Wait for 250 millisecond(s)
  digitalWrite(LED_BUILTIN, HIGH);
  delay(500); // Wait for 500 millisecond(s)
  digitalWrite(LED_BUILTIN, LOW);
  delay(250); // Wait for 250 millisecond(s)
  digitalWrite(LED_BUILTIN, HIGH);
  delay(500); // Wait for 500 millisecond(s)
  digitalWrite(LED_BUILTIN, LOW);
  delay(2000); // Wait for 2000 millisecond(s)
  digitalWrite(LED_BUILTIN, HIGH);
  delay(500); // Wait for 500 millisecond(s)
  digitalWrite(LED_BUILTIN, LOW);
  delay(2000); // Wait for 2000 millisecond(s)
  digitalWrite(LED_BUILTIN, HIGH);
  delay(1000); // Wait for 1000 millisecond(s)
  digitalWrite(LED_BUILTIN, LOW);
  delay(250); // Wait for 250 millisecond(s)
  digitalWrite(LED_BUILTIN, HIGH);
  delay(500); // Wait for 500 millisecond(s)
  digitalWrite(LED_BUILTIN, LOW);
  delay(250); // Wait for 250 millisecond(s)
  digitalWrite(LED_BUILTIN, HIGH);
  delay(1000); // Wait for 1000 millisecond(s)
  digitalWrite(LED_BUILTIN, LOW);
  delay(250); // Wait for 250 millisecond(s)
  digitalWrite(LED_BUILTIN, HIGH);
  delay(1000); // Wait for 1000 millisecond(s)
  digitalWrite(LED_BUILTIN, LOW);
  delay(250); // Wait for 250 millisecond(s)
  digitalWrite(LED_BUILTIN, HIGH);
  delay(1000); // Wait for 1000 millisecond(s)
}