3. Computer controlled cutting
This week I worked on defining my final project idea and started to getting used to the documentation process.
Research
Die-cutting is a cutting process done by using die to cut low-strength materials in the form of sheets by shear.
Versatile materials can be cut using die-cutting like cloth, fiber, fiber glass, wood, plastics, sheet metal, foam, rubber, cardboard, and more.
Die-cutting also come in handy in different industries. Applications of Die-cutting may include: • Making gaskets • Packaging • Fabric industry • Cutting paper • Automotive industry
Mechanical cutting, laser cutting, plasma arc cutting, and waterjet cutting are some alternatives of die-cutting process.
Task-1
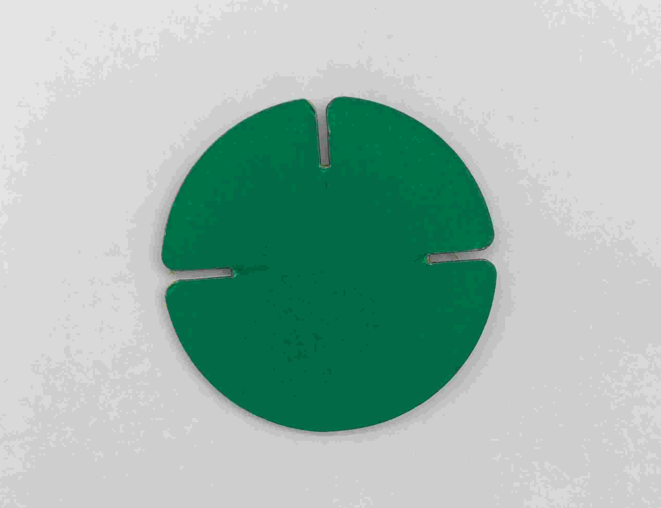
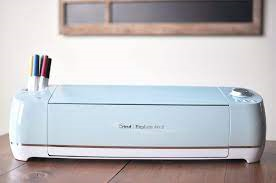
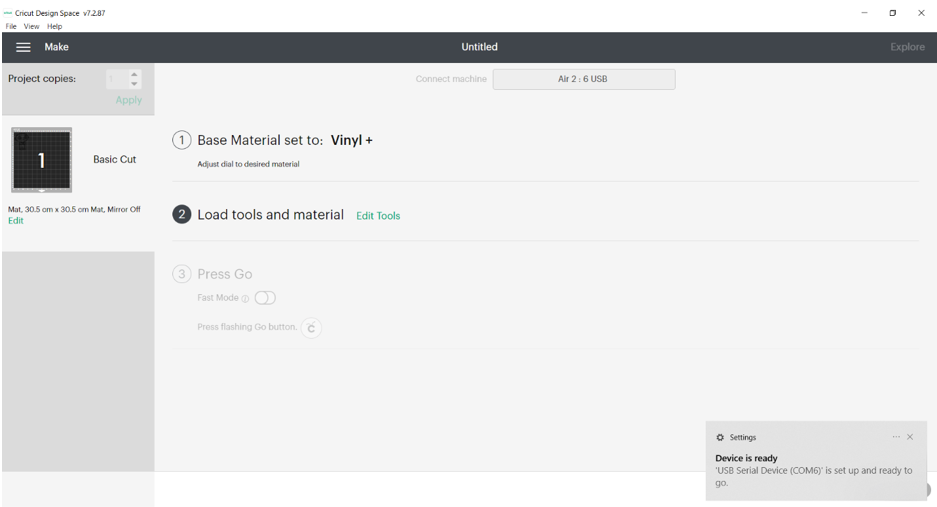
Cricut Explore Air 2 Die-cutting machine was used to perform the task required. It can cut cardstock, fabric, vinyl, and more than 100 different types of materials. It can also be used for writing or drawing instead of cutting.

Please refer to this link to have quick tutorial on how to use the Cricut Explore Air 2. Cricut Design Space is an application that allows you to browse images or projects that are ready to cut or draw by the die-cut machine (the Cricut maker or the Cricut Explore smart cutting machines). You can even design your own project to cut or draw it. Refer to this link to find a full guide on how to use Cricut Design Space for either IOS or Windows.
1- Search for Cricut download.
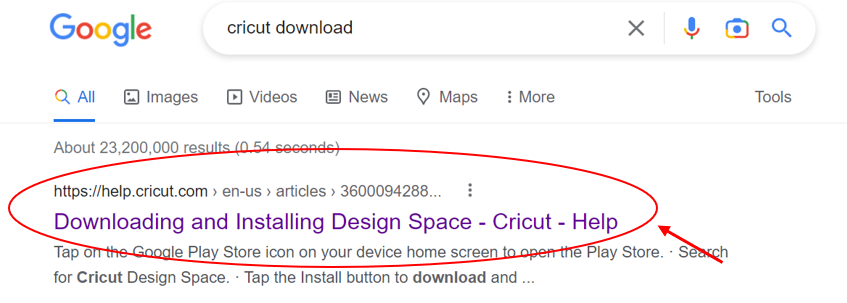
2- Go to this website shown below and follow the steps to download Cricut design space software.

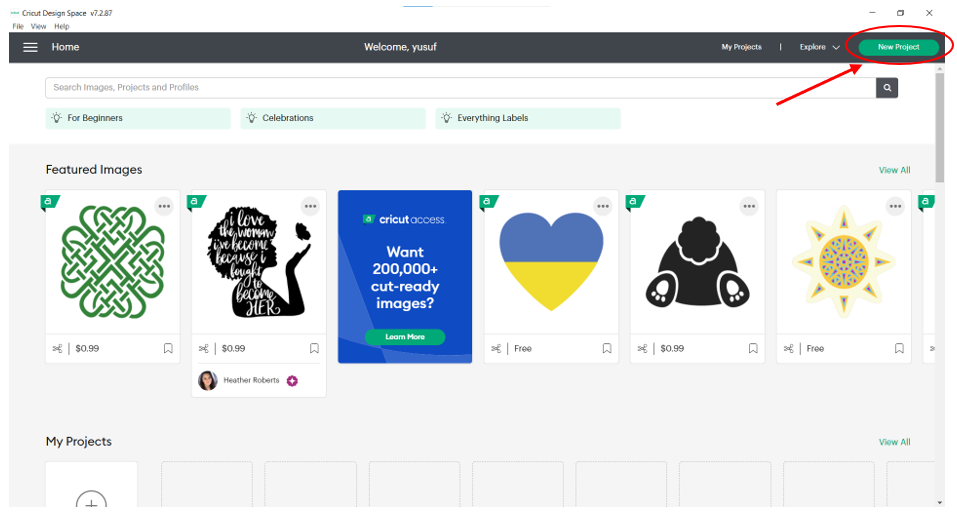
3- Install and run the software. Then click on New Project.
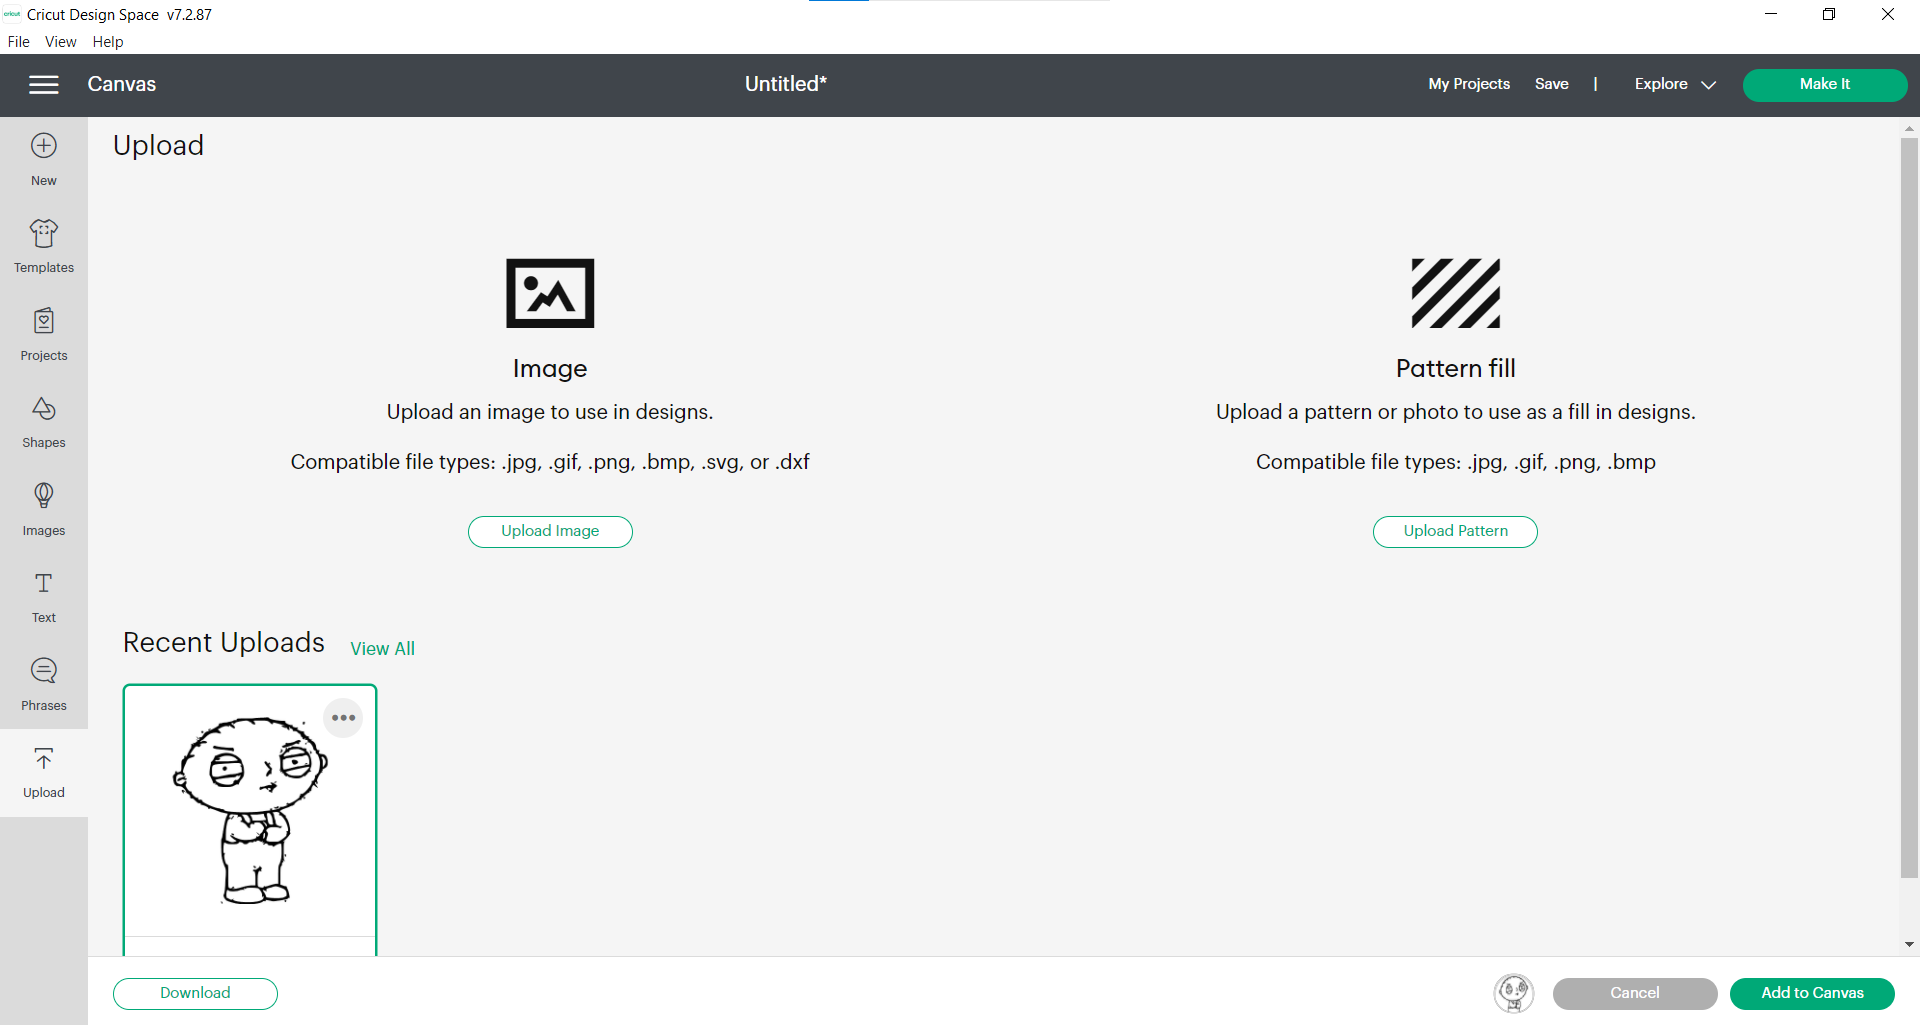
4- A canvas will appear to create your designs. You can also click on upload to upload a design from your device.

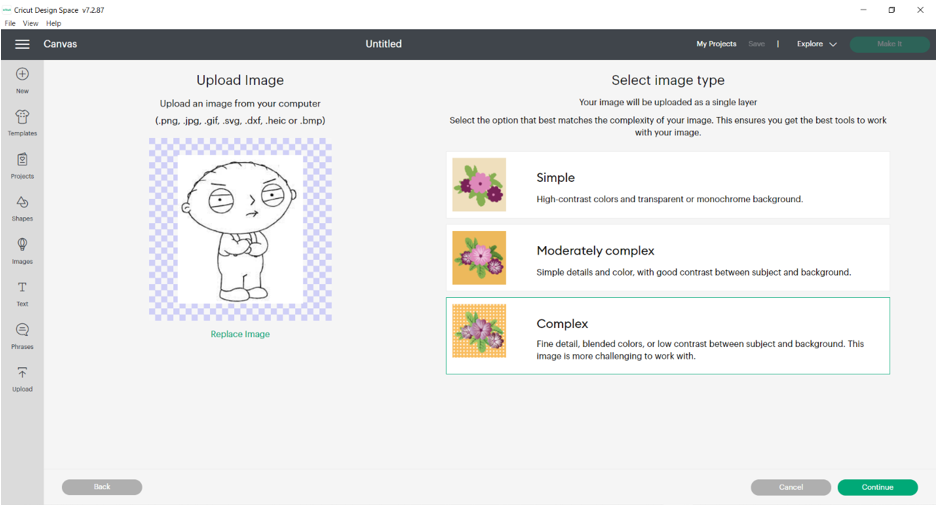
5- After you upload a picture (make sure that the file type of the picture is either: .jpg, .gif, .png, .bmp, .svg, or .dxf), select the option that matches the complexity of your image. But even if your image is simple, you can choose complex mode. This can allow you to make more detailed modifications on the image. When you choose the mode, click on continue. This link is for the imge I used

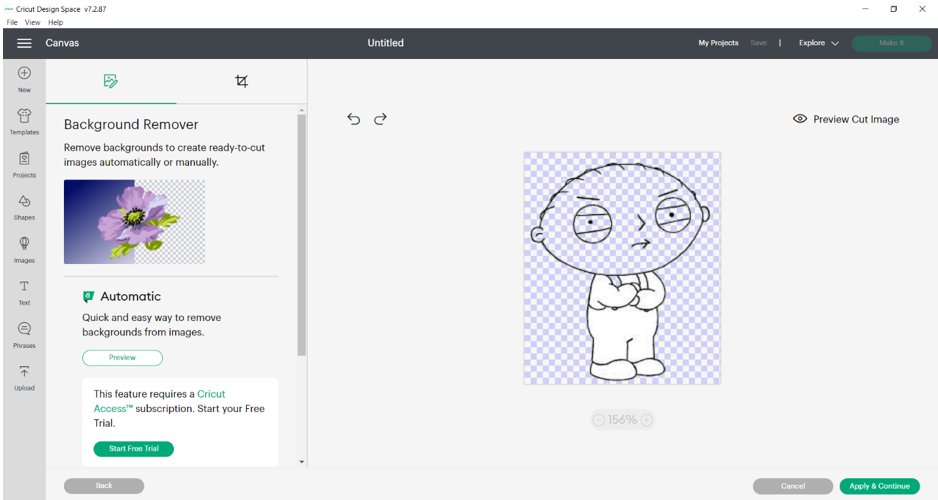
6- Then, use the background remover to create ready-to-cut images. Then click on apply and continue.

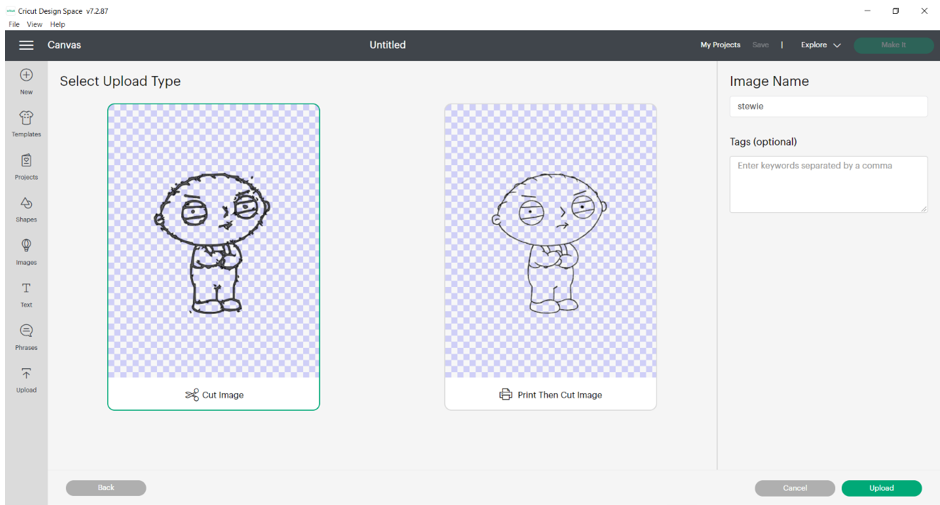
7- After that, you have the choice to either print your image or cut it. In this assignment, you have to cut something so choose cut and click on upload.
8- Now choose the image and add it to canvas.
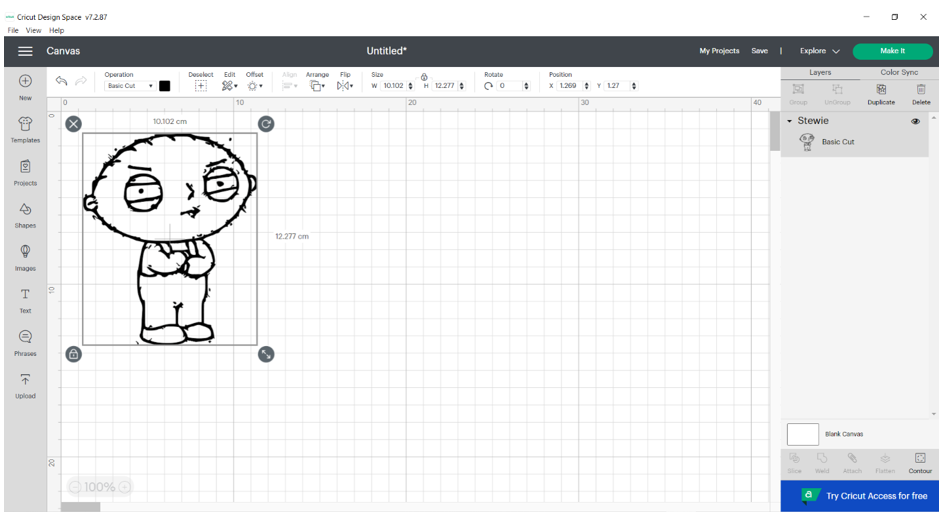
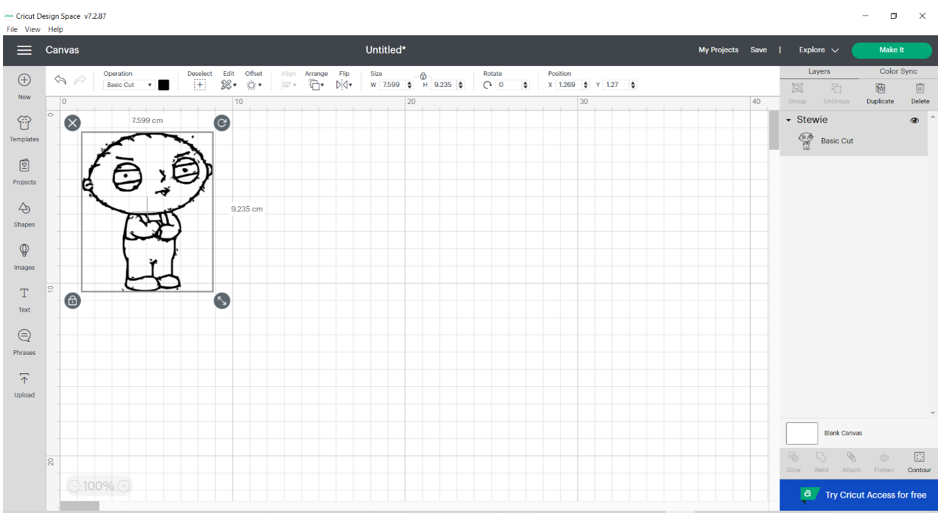
9- In canvas, you can modify the image you uploaded, make it smaller or bigger, etc. When you are done with the changes click on make it.
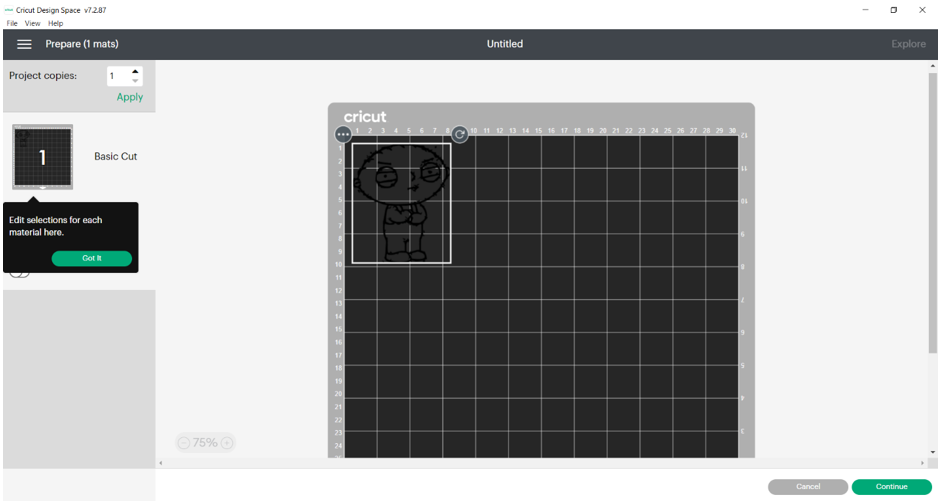
10- In this page, you can place where exactly on the mat (it is a sticky mat where you stick the paper you want to cut on it and then pass it to the cutting machine) do you want to cut your design. When you finish, click on continue.
11- Now you need to connect the machine to your computer via USB wire.
12- When connected successfully, the software (Cricut Design Space) will identify the cutting machine).

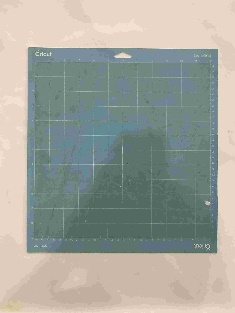
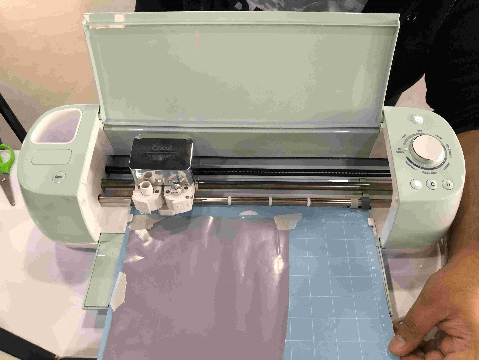
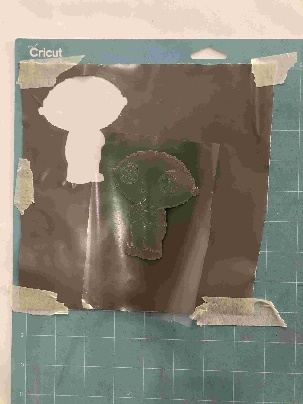
13- Take a mat and stick the piece of paper you want to cut on the mat. You can use adhesive tape also to make sure the paper does is well fixed on the mat. This is done so that the paper does not move while the cutting tool is cutting it.


14- Place the mat into the machine. The machine will identify it and this button will start to flash. Press on it so that the machine fastens the mat.
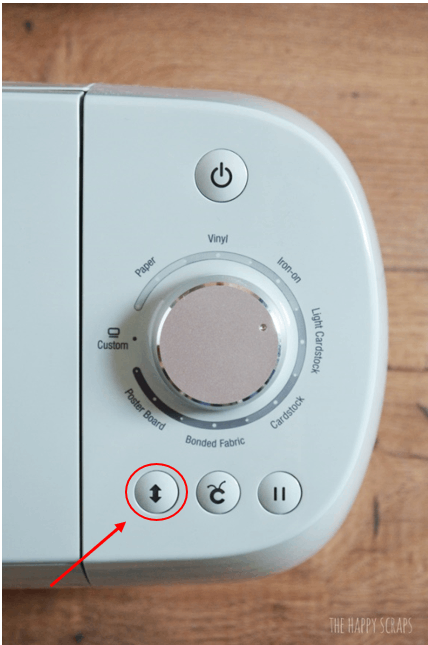
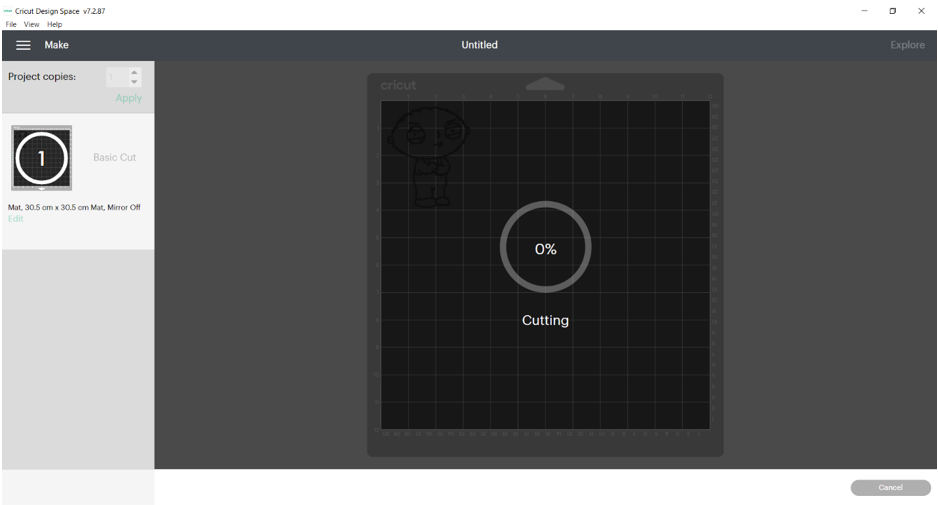
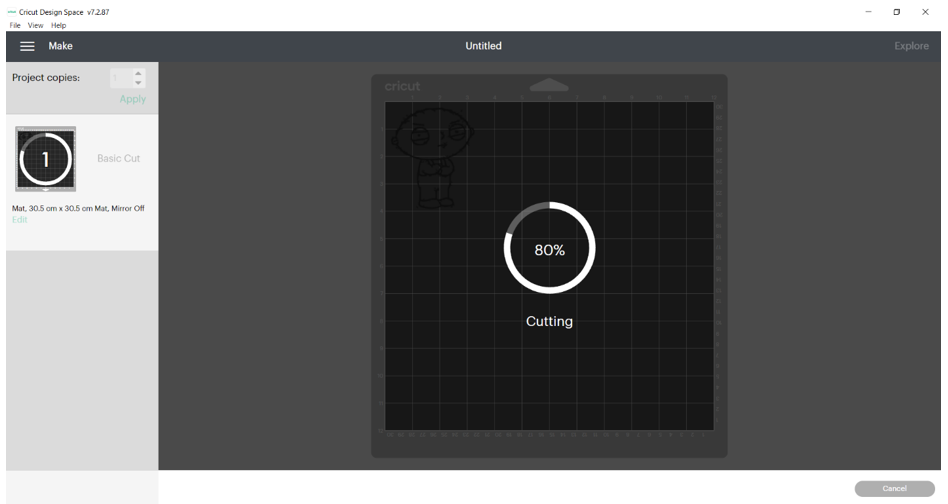
15- Press on this button to start cutting. The cutting amount of progress will appear on your computer device.

16- When the process is done, you can either click on the button shown in step 15 or click done on your device to unfasten the mat with your piece of paper.

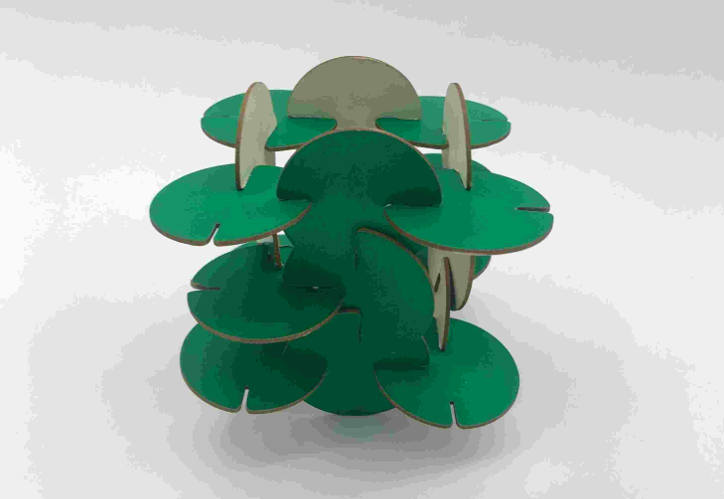
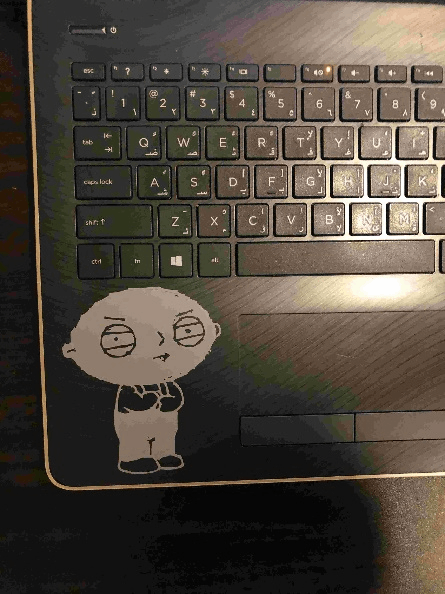
17 Take a piece of binding paper, open it, and stick it on the cut design.

18- Press the binding paper firmly on the cut design and then remove it gently to take out the design off the paper.
19- Now you can finally stick your design where you want.
Research
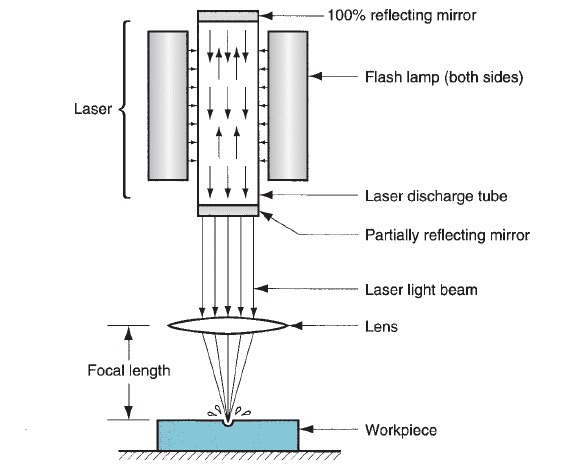
Laser-beam machining:
Laser beam machining (LBM) uses the thermal energy exerted from high energetic photons of a laser to cut a material by heating, melting, and vaporizing it. Two main types of LBM are used which are carbon dioxide gas lasers and solid-state lasers. Solid-state lasers can also be of different types.

LBM can be used to cut, mark, and create holes (drilling) or slots in a workpiece. However, LBM cannot be considered for mass production.
Variety of materials can be machined via LBM. But, the properties of an ideal material for LBM are: thermal conductive, low specific heat, light energy absorptive, low reflectivity, low heat of fusion, and low heat of vaporization. But there is no material that has a combination of all these properties.
Materials that can be used in LBM include: textile, rubber, soft metals, ceramics, glass, glass epoxy, wood, and metals of high strength and hardness. Main parts of LBM are:
• Flash lamps: are used to provide white coherent light for a sort duration of time (pulse)
• Capacitors: pulse grade capacitors or pulsed capacitors are used to buffer the supply voltage thus supplying pulses of current making a resonant charge circuit.
• Power supply: high voltage power supply is needed to produce laser as it requires to excites the electrons.
• Lens: focuses the laser light beam into a small spot of beam with very small diameter making it capable of accurate cutting and engraving. It can also be used to modify the beam radius.
• Mirrors: are used to stimulate more atoms to discharge more photons across the material. This leads to growth of energy and this energy partially leaves through a mirror that is not 100% reflective (partially reflective).
Some advantages of LBM:
• Very small diameters can be achieved. • Accuracy and high precision. • It can cut almost all types of materials if conventional processes fail to do so to any material. However, it is best suited for brittle and low conductivity materials. • There s no contact between the tool and the material. • Low maintenance cost. • It reduces oxidation of the workpiece.
Some disadvantages of LBM:
• Relatively high fixed cost. • Low production rate. • Energy intensive process.
Some applications of LBM:
• It usually used when high precision machining of complex parts is required. • Drilling, welding (seam and spot), and engraving. • Circuiting and wire stripping for connecting two ends. • Hair removal and cosmetic surgery.
Task-2
Group Work (characterize your lasercutter’s focus, power, speed, rate, kerf, and joint clearance)
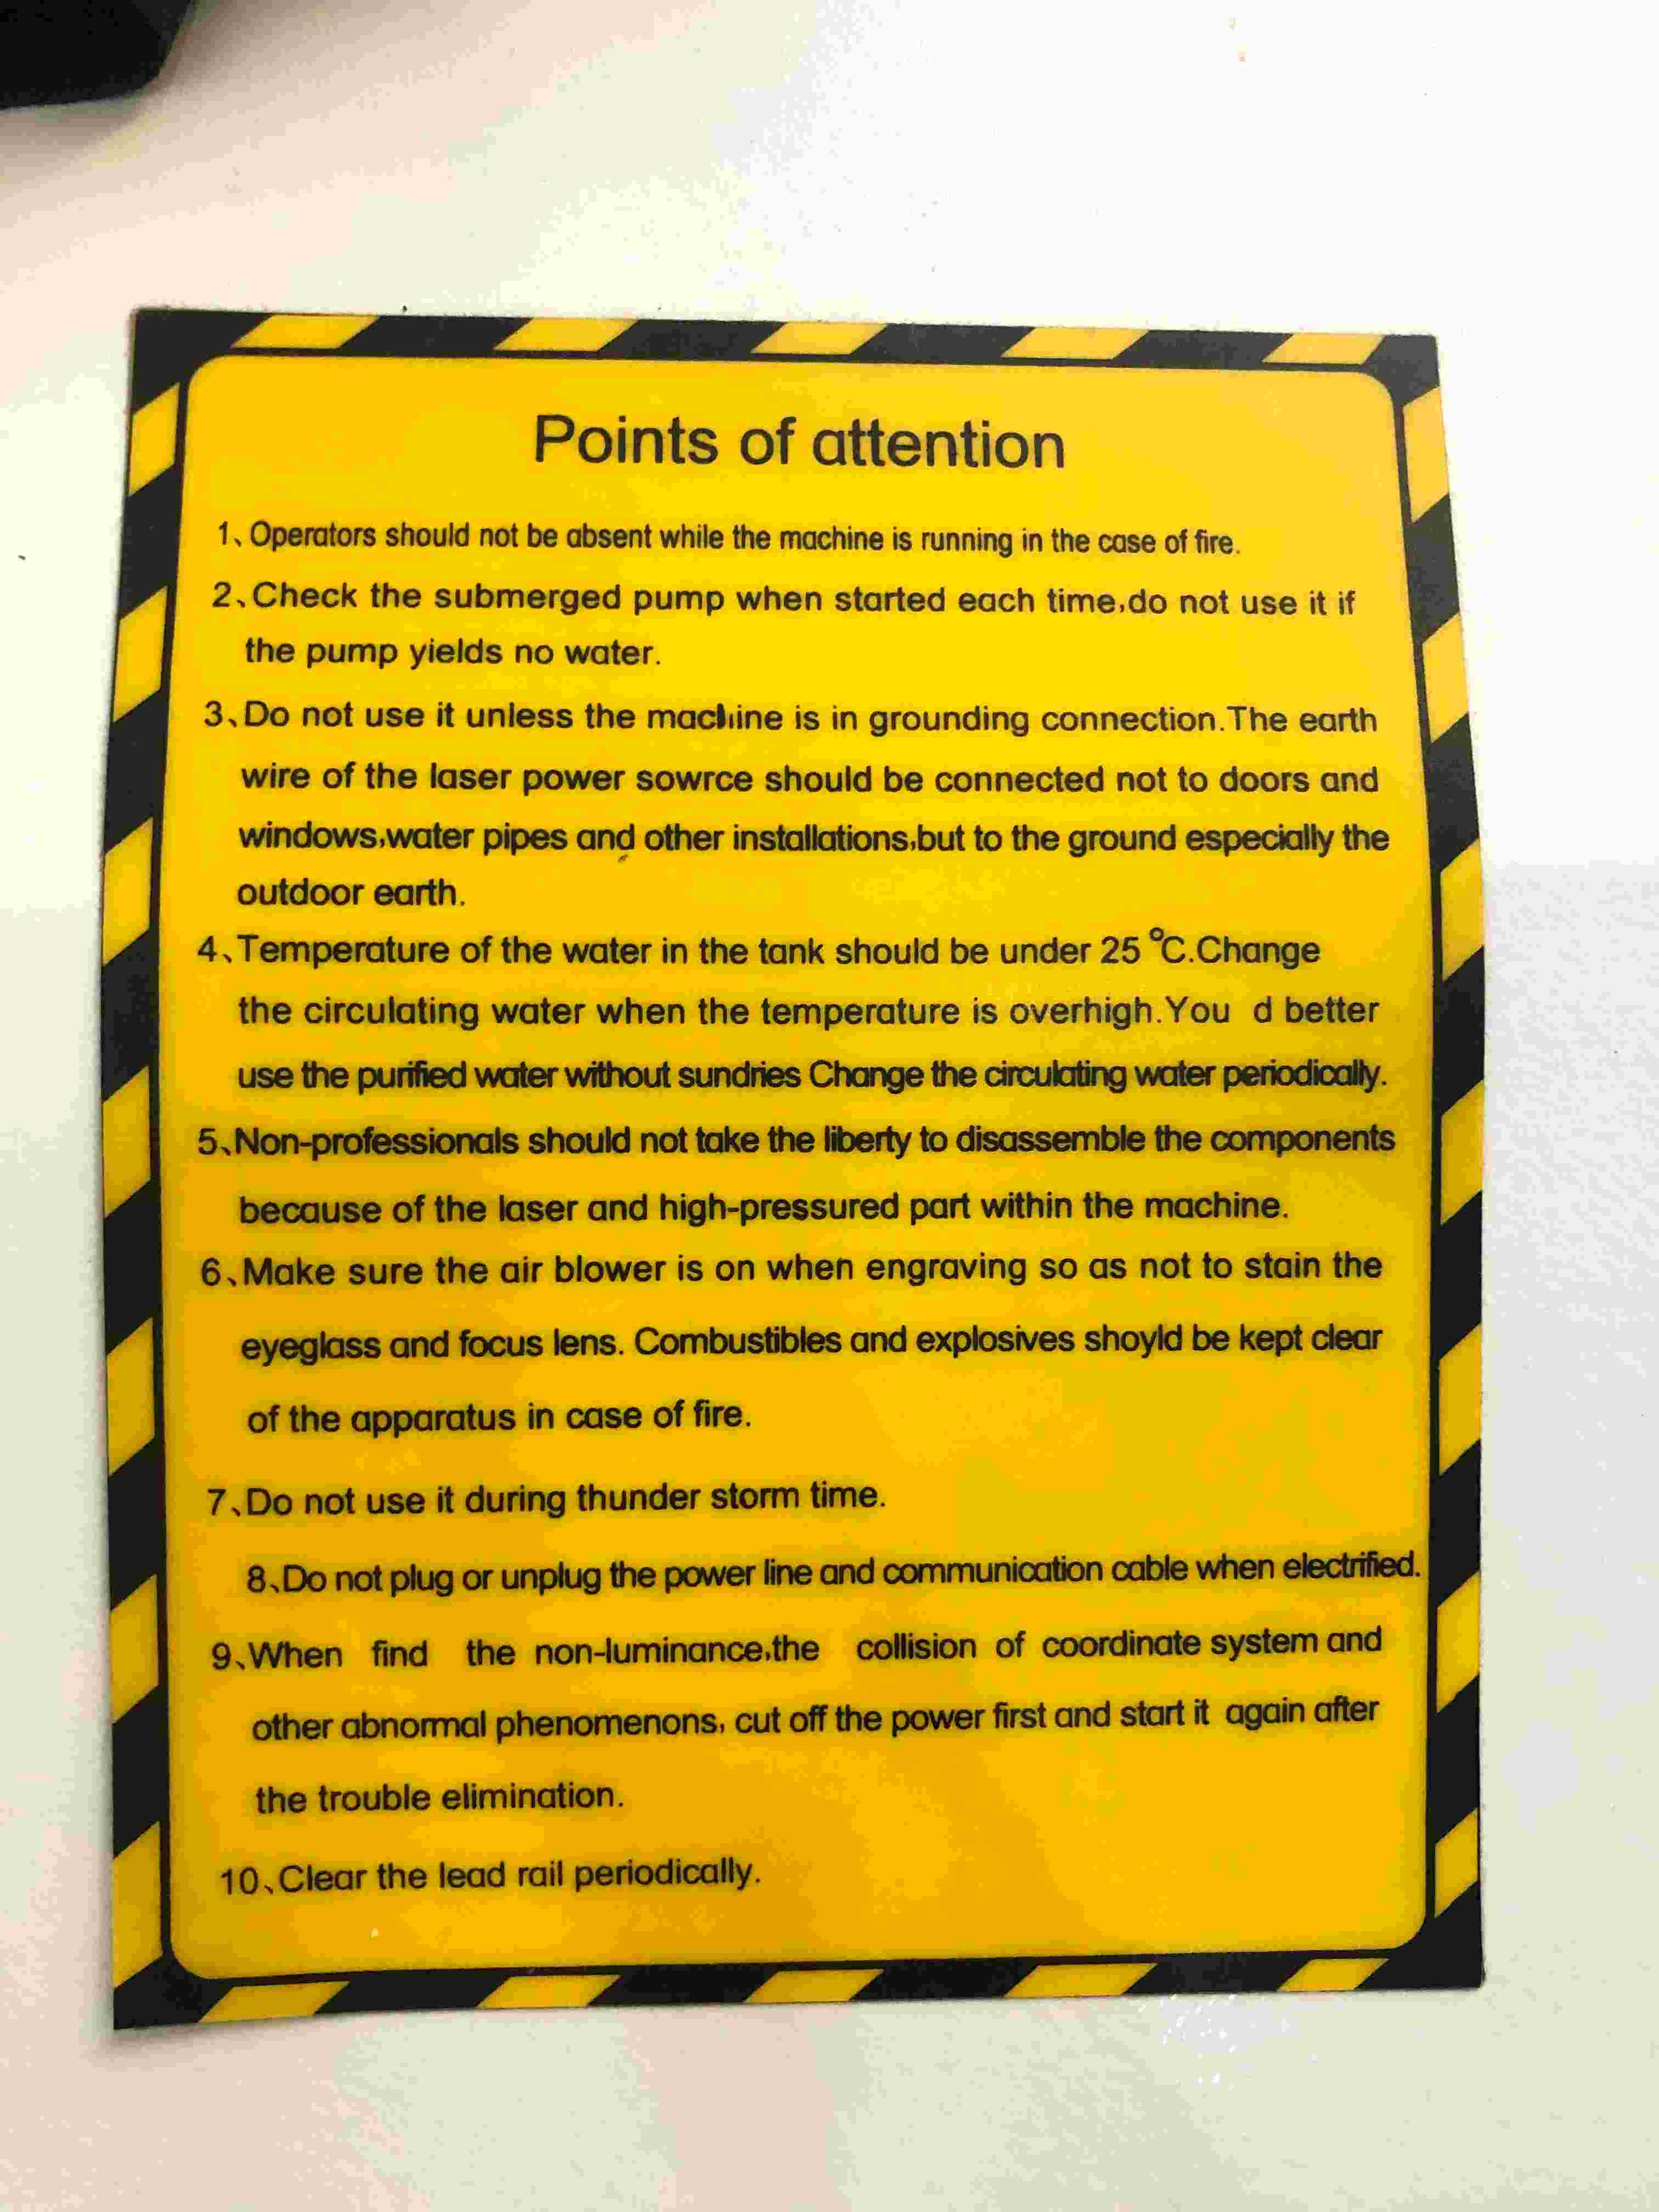
The gorup assignment is a group work and you can refer to it through this link It is worth mentioning to read carefuly the Points of attention of the laser cutter before using it for the first time.
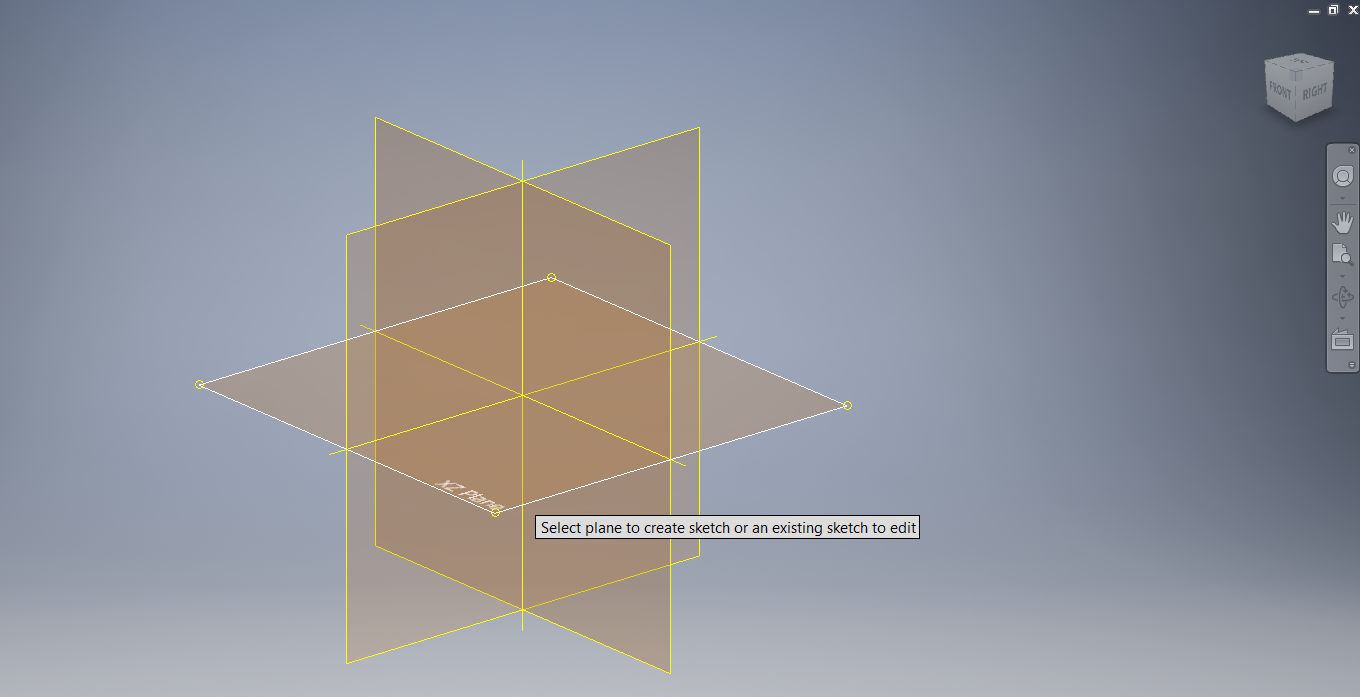
1- Open Autodesk Inventor.

2- You can either choose Part or Drawing to draw your design. Choose Part.

3- Start a 2D sketch.

4- Pick any plane to draw on it.
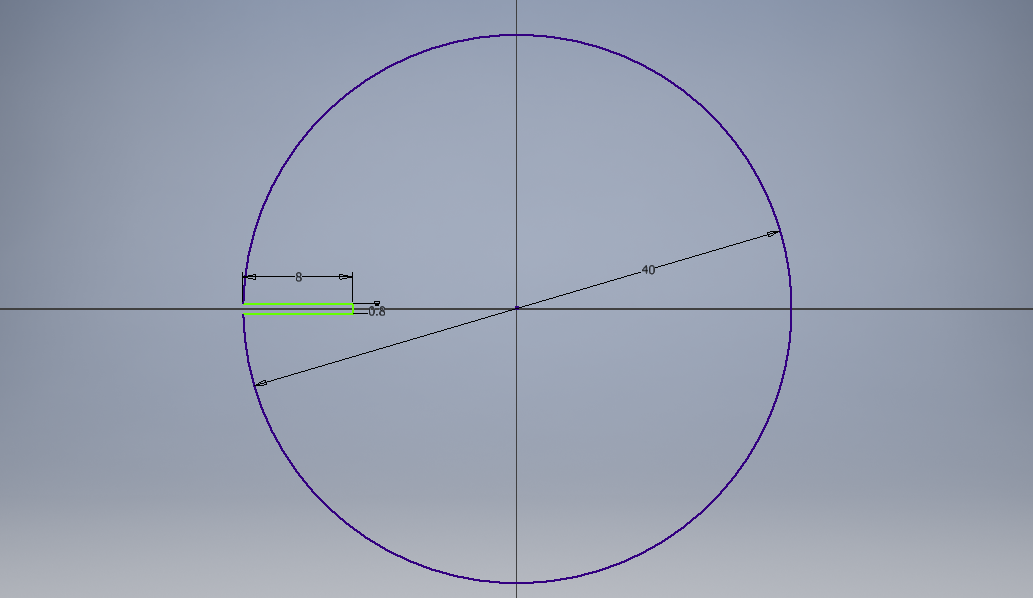
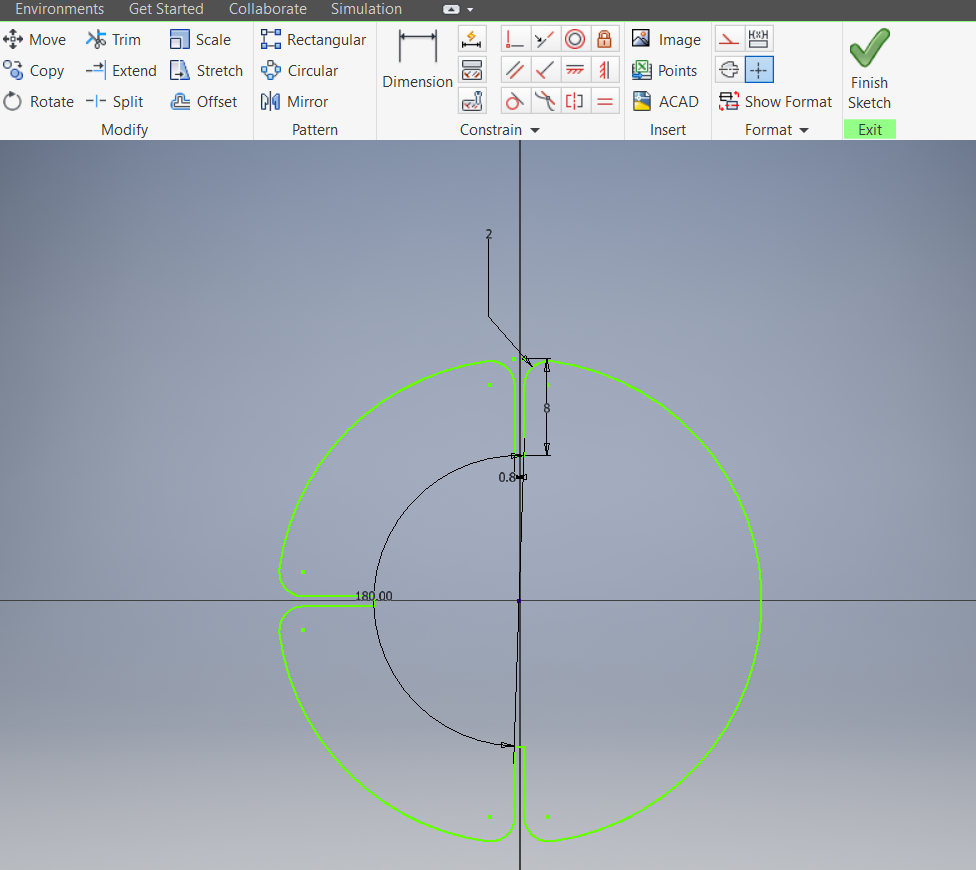
5- Draw a circle with the diameter you want. I chose 40mm diameter.

Fitting test in step-6 (Group work)
6- Draw the slot you want with whatever method you like. I chose the dimensions 8 x 0.8 mm. You can put different dimensions if you want to. But, be careful when changing the width (0.8mm) as it depends on the press fit. Our group saw that 0.8mm as the best fit after several trials. Click on this link to check the fitting test.
7- It I preferable to make a chamfer or a fillet for the design. This helps to guide the insertion of the parts together, squeeze them into each other’s slots if the slots are tight, and prevent the damage of the part’s edges. I chose A fillet in my design.
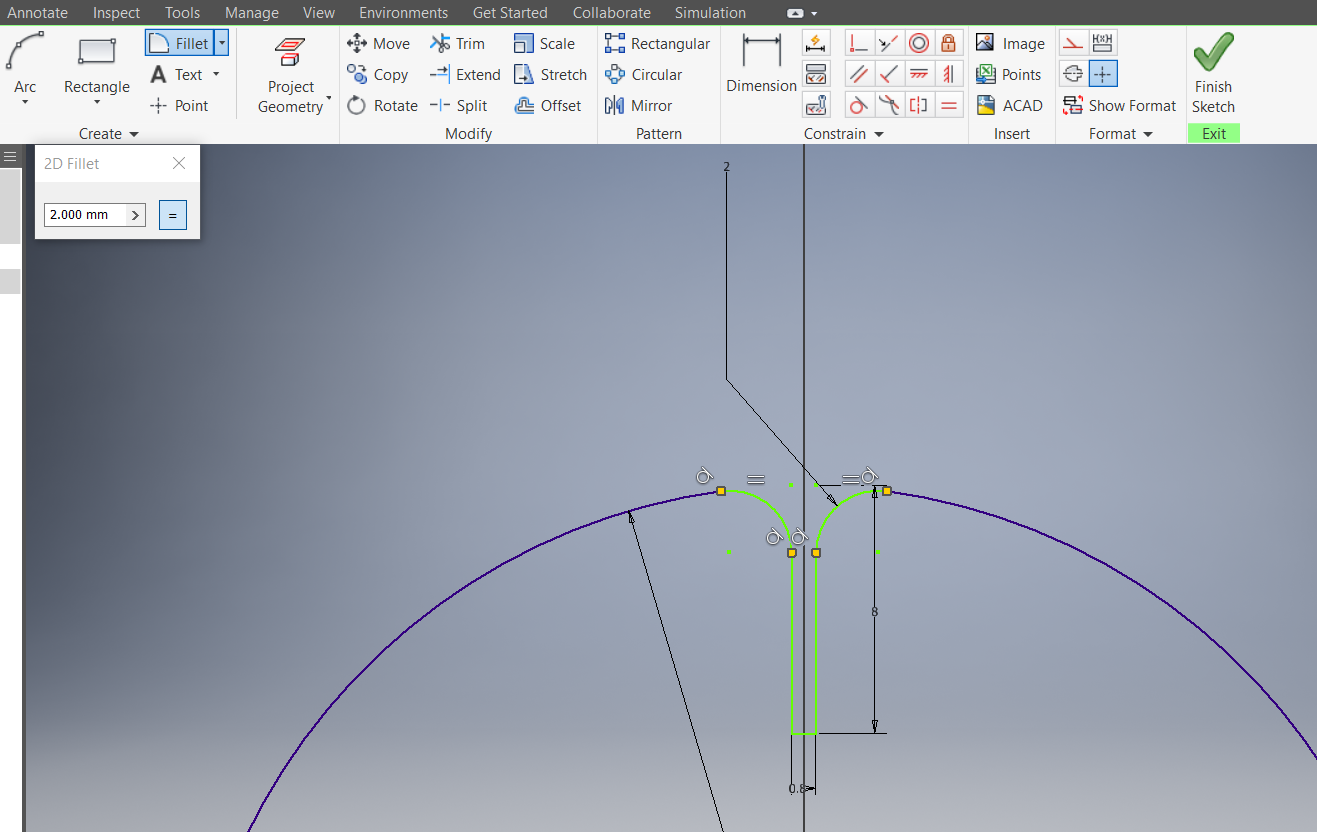
8- Make a circular pattern to repeat the slot, decide how many slots you want, and what is the angle between them. I chose to have 3 slots distributed equally in 180 degrees range. The pattern feature makes have less parameters. When making changes to the main slot you designed, the rest slots will change accordingly.

9- make sure you trim the parts you do not need.

10- Go to manage and click on parameters.
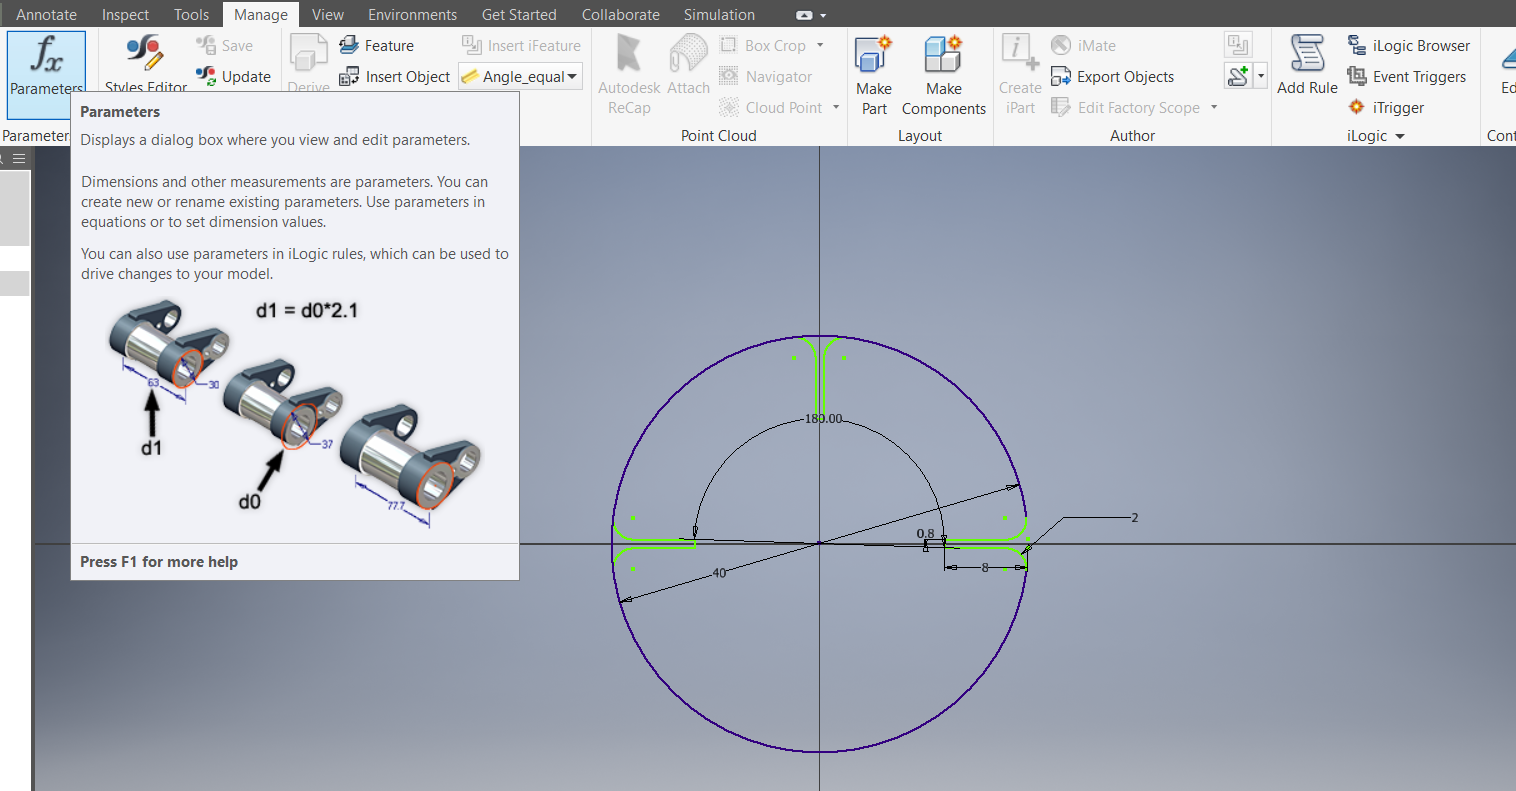
11- Luckily, Autodesk inventor automatically recognizes the parameters in the sketch.
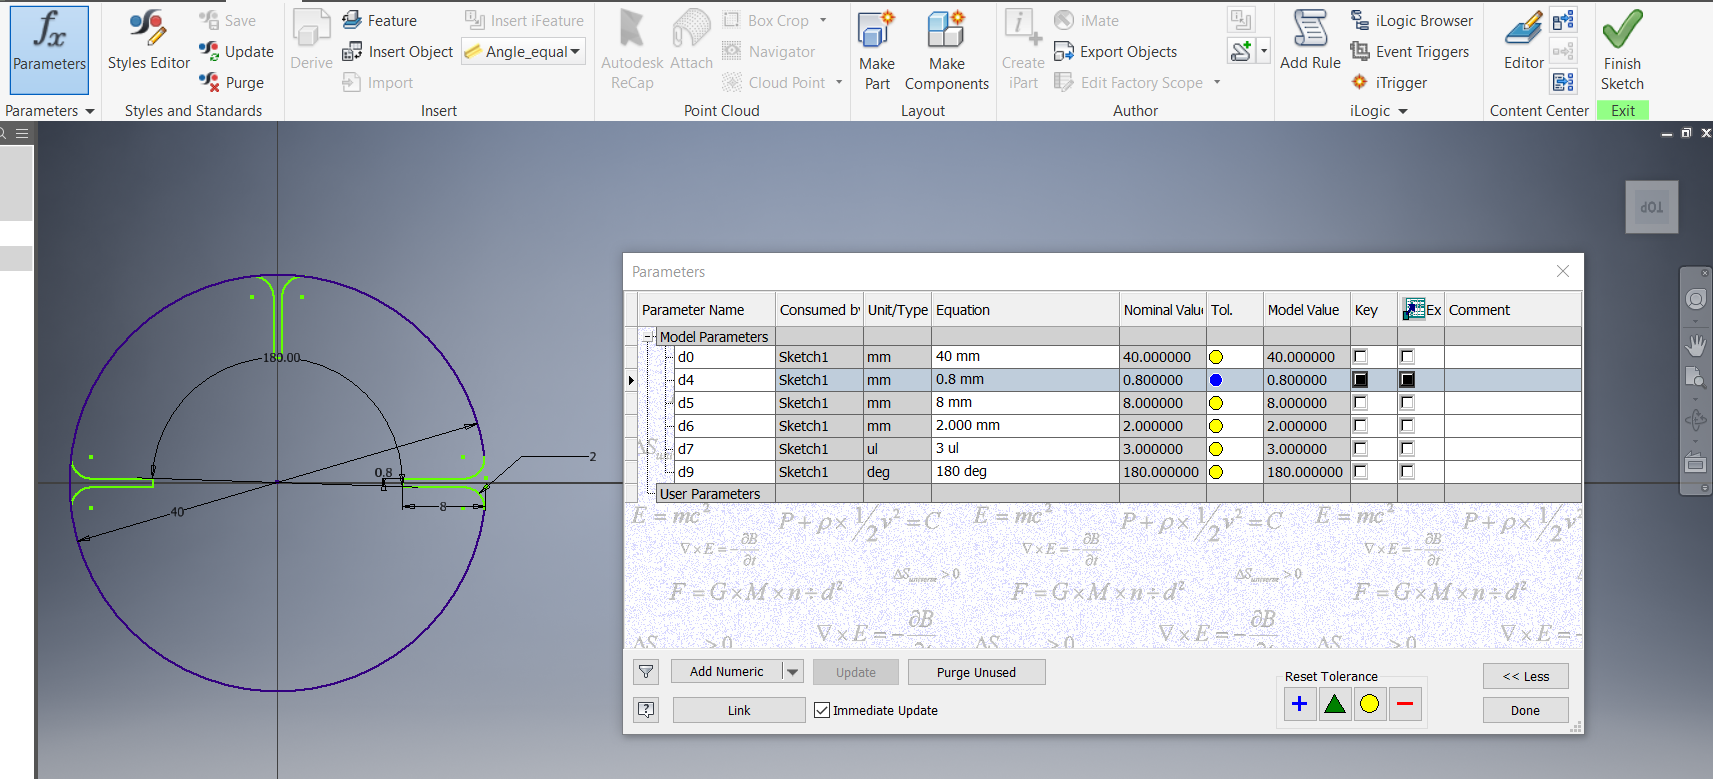
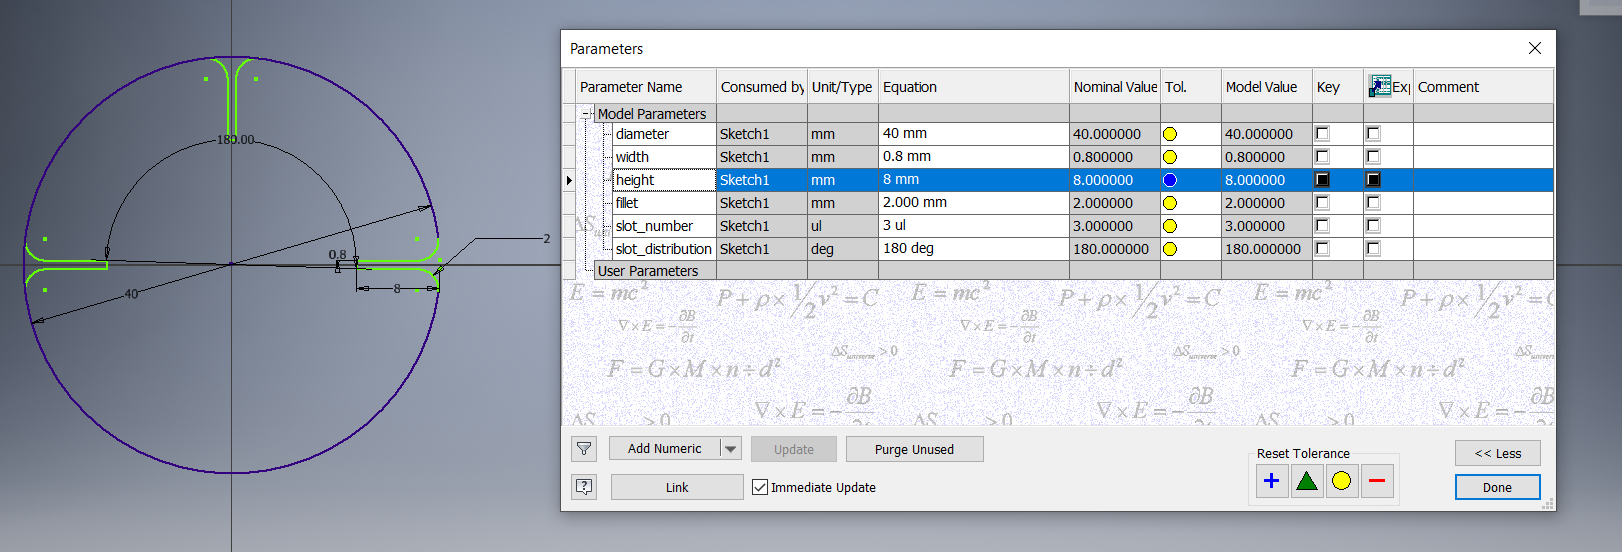
12- You can rename the parameters. Whatever you change from the parameters will apply to drawing. Click on done.
13- Click on finish sketch.
14- Right click on the sketch and click on export sketch as.

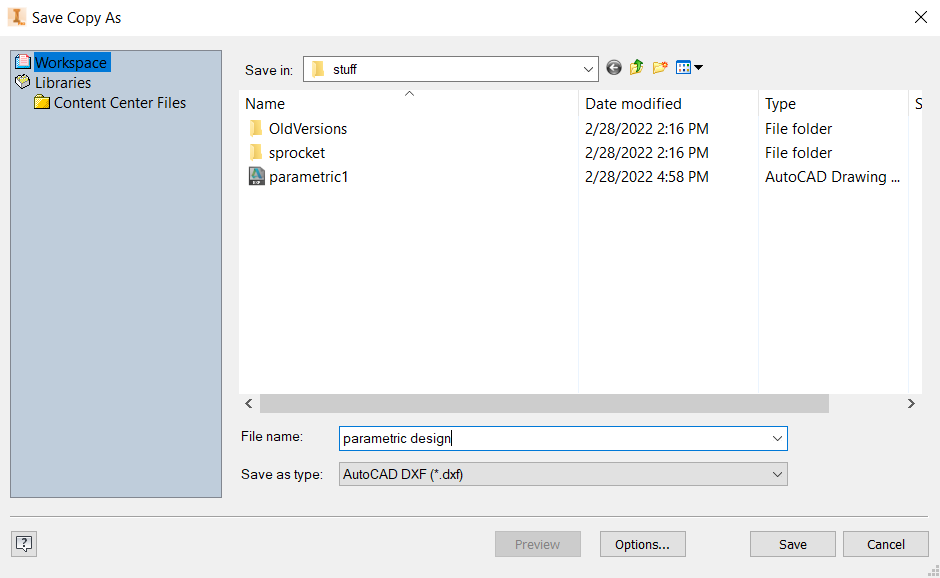
15- Now save it to the directory you want as a (.dxf) file.
16- Open RDWork on the computer that is connected to the laser cutting machine.
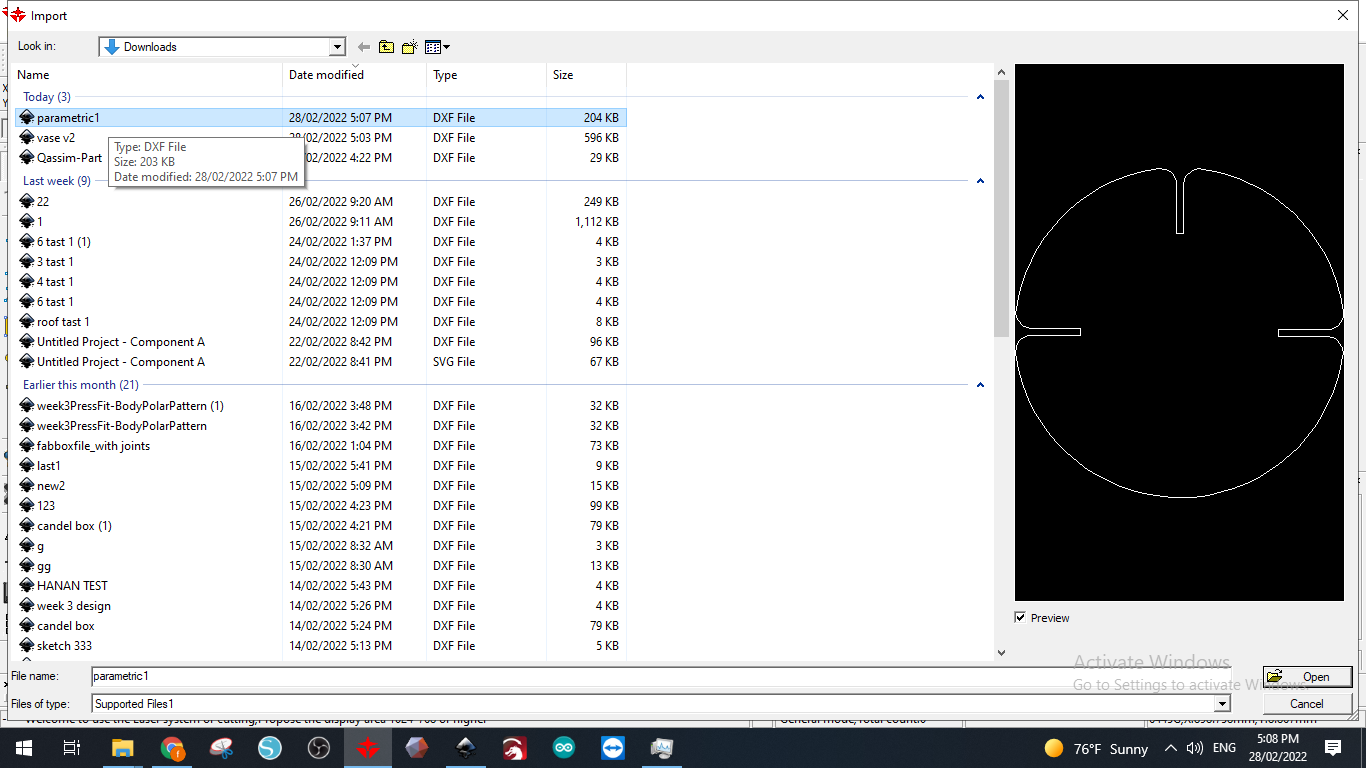
17-Click on file and then import to import your drawing.

18- Click and open your file.
19- Set the speed and power.
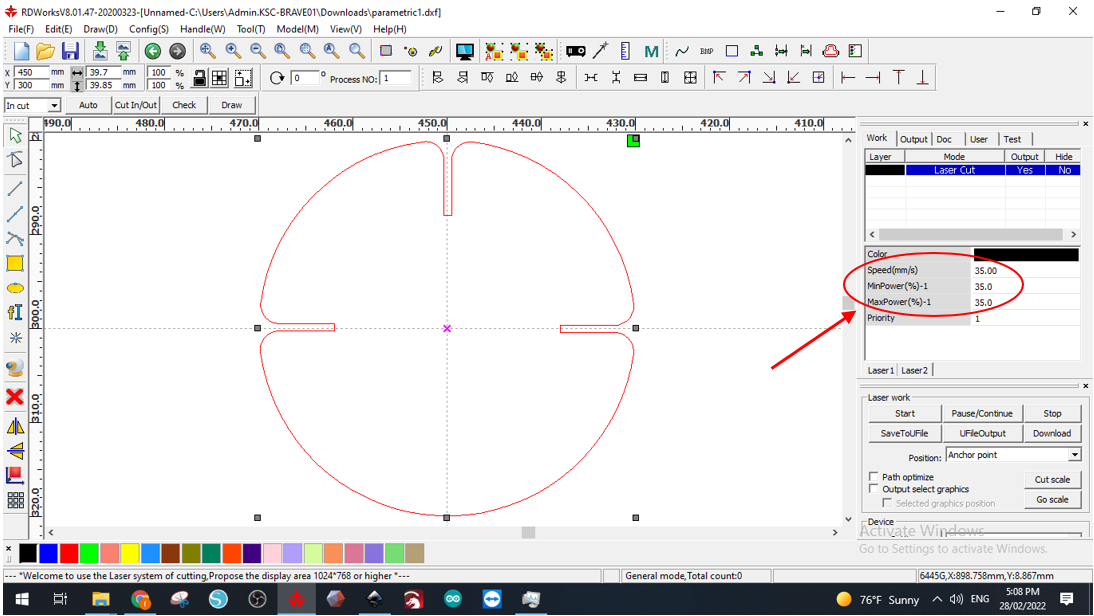
20- Select your drawing/s and make an array to have the number of parts you want for your drawing and to place them close to each other to avoid waste of material.
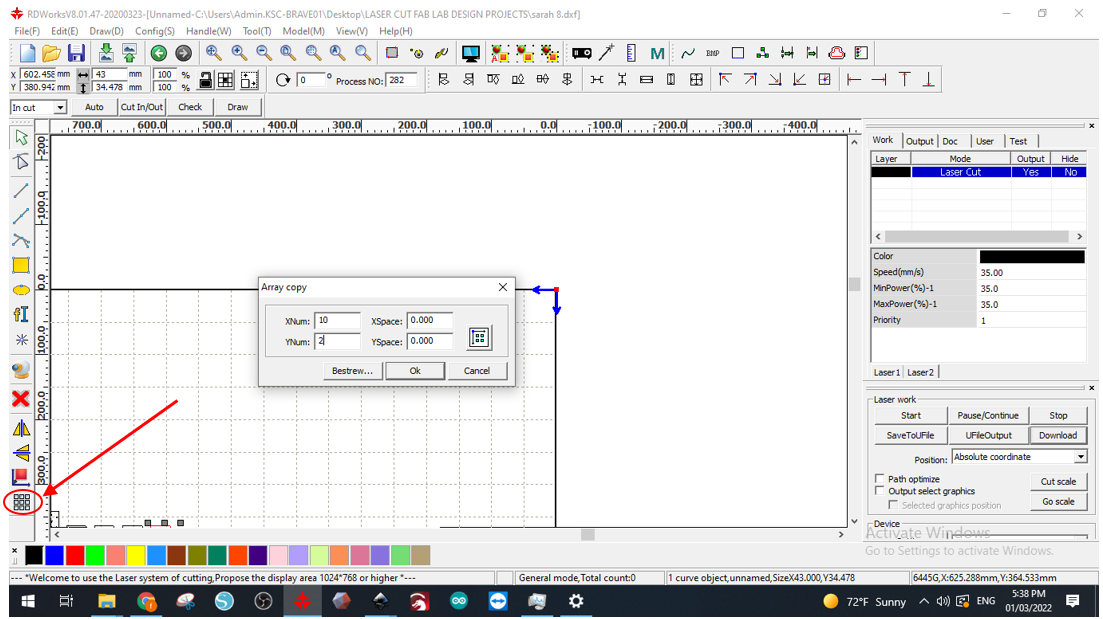
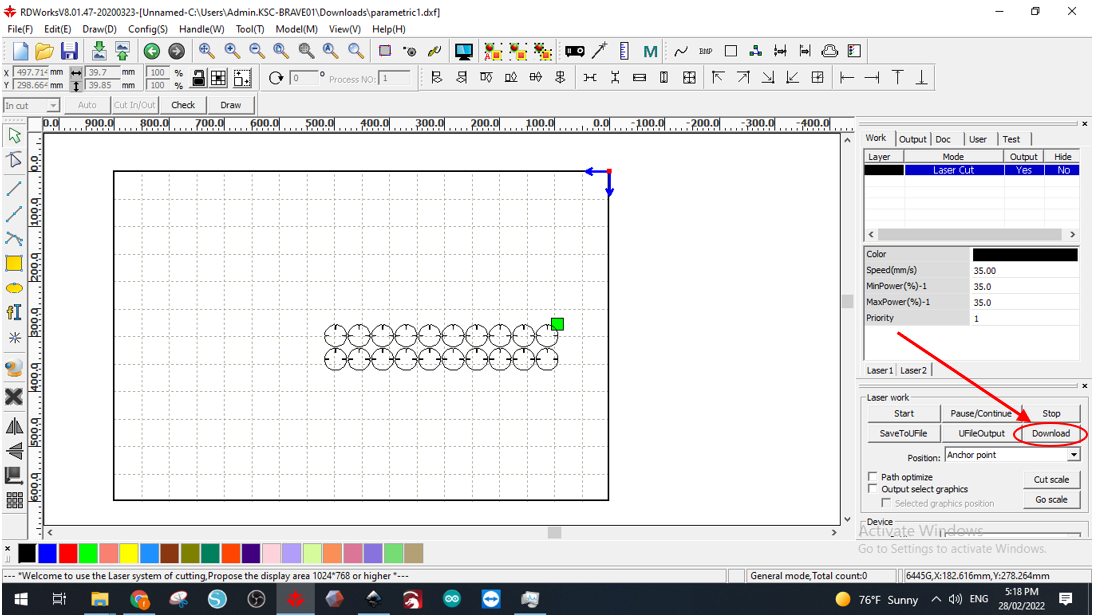
21- You can select and move the parts to the corner too to minimize waste of the whole cardboard. Download the file to the machine.
22- Take a picture of your designed part and the 2 parametric designs you made with it.