8. Moulding and casting
This week I worked on defining my final project idea and started to getting used to the documentation process.
Research
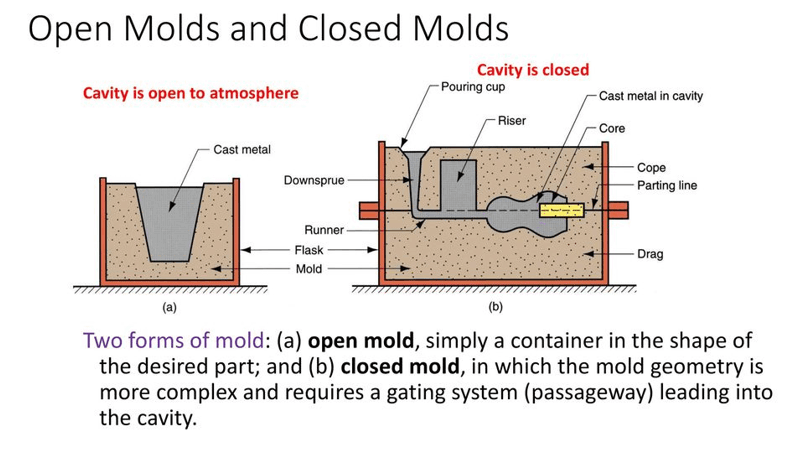
Casting: Casting is the process in which a molten state liquid is poured (by gravity) or forced into a mold and then solidifies to take the shape of the mold. Casting is also referred to the workpiece that is made by casting. A mold is the cavity where the liquid state material is put and solidifies and its geometry defines the shape of the part. Molds are made of different types of materials including plaster, ceramic, sand, and metal. A mold can be closed or open as shown below. A mold can either be expendable mold which needs to be destroyed to remove the cast part or permanent which can be used several times without the need of destroying the mold to remove the casting. 43
Some advantages of casting:
• Complex, internal, and external parts can be created.
• Some casting requires less or even no further processing or finishing.
• Capability of making large products.
• Some casting processes are well suited for mass production.
• Can be performed for any material that can melt and solidify or solidify with the use of agent (can be used for metals, ceramics, and polymers)
Some disadvantages of casting:
• Usually harmful to the environment.
• Porosity in some casting processes.
• Poor surface finish in some casting processes.
• Poor dimensional accuracy in some casting processes.
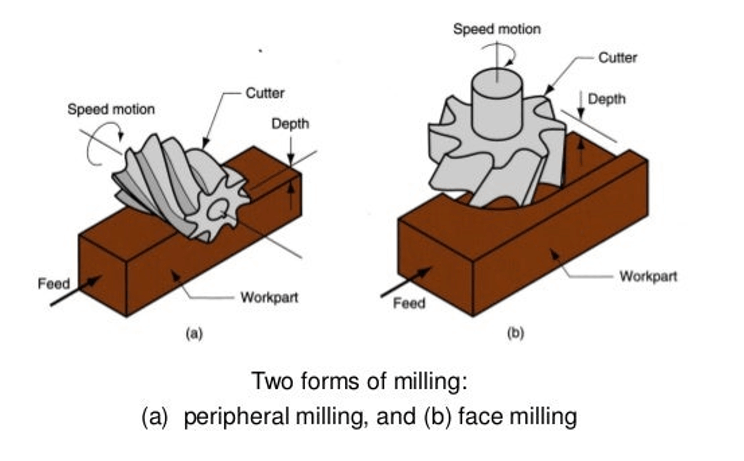
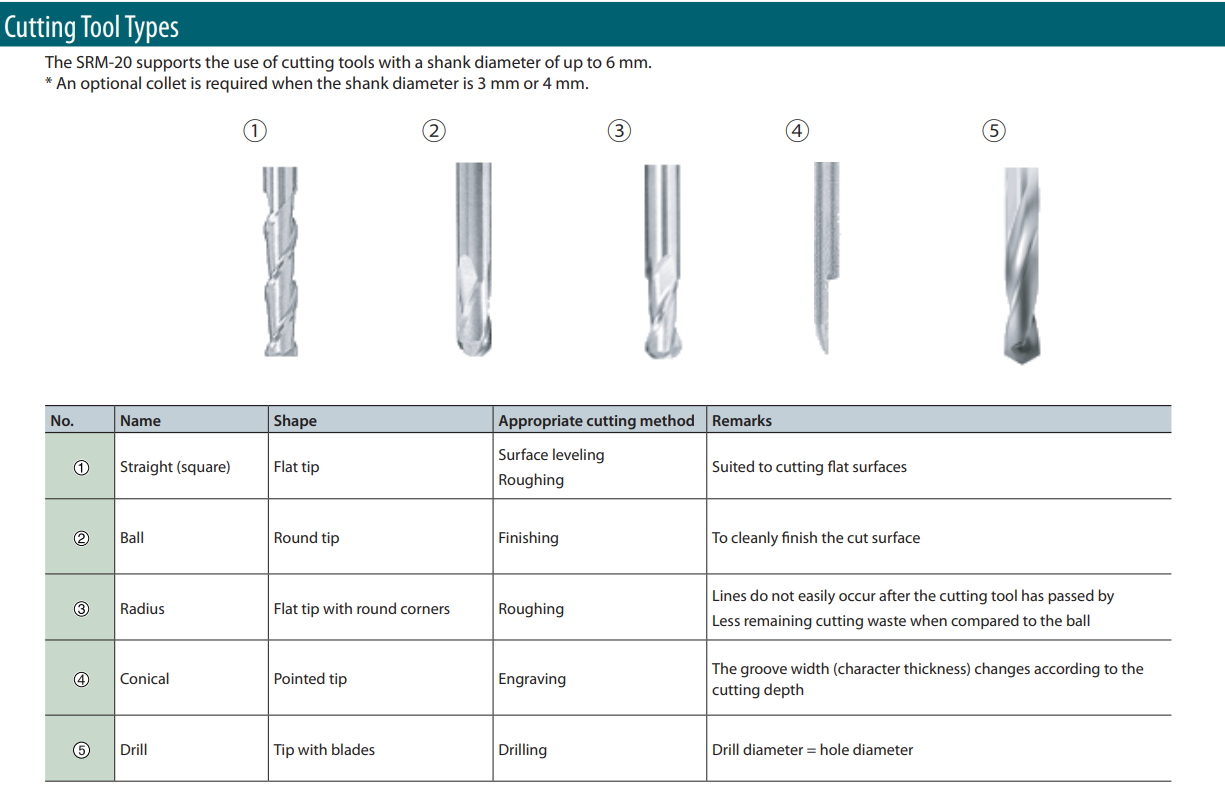
Milling: a machining operation in which a machine (milling machine) with a cylindrical cutting tool (milling cutter) is rotating in a perpendicular axis and work part is fed past. Milling can be divided into two main categories based in the axis of the tool:
• Peripheral milling/plain milling: where the axis of the milling cutter is parallel to the surface of the workpiece and the cutting operation is done by the outside periphery of the cutter.
• Face milling: where the axis of the milling cutter is perpendicular to the surface of the workpiece and the cutting operation is done by the outside and the end periphery of the cutter. 44
Milling is one of the machining operations (among drilling and turning). Machining operations have common advantages and disadvantages.
Some advantages of machining operations:
• Good surface finish.
• Accurate in terms of dimensions.
• Almost any solid material can be machined.
• Complex geometries can be made.
Some disadvantages of machining operations:
• Wasteful in terms of material.
• Generally slow compared to other shaping processes.
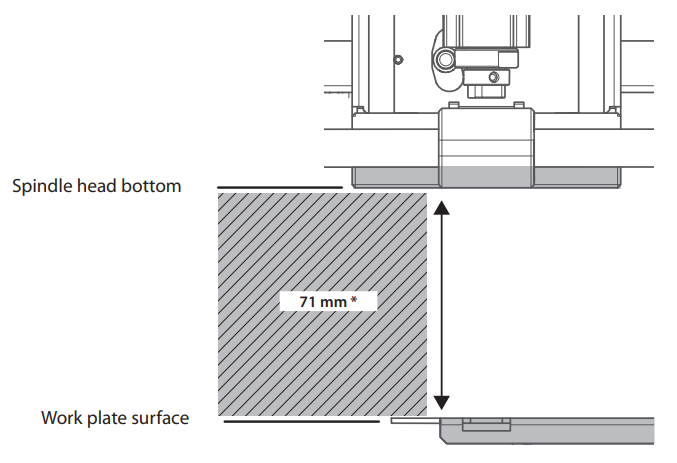
The milling machine which was used in laboratory was a CNC face milling machine. It can mill chemical wood (material made of resin powder and solidifying adhesive), sanmodur (one type of chemical wood suitable for making molds), ABS, and modeling wax. It has a cutting area of 203.2mm in the X-axis, 152.4mm in the Y-axis, and 71 mm in the Z-axis. However, the allowable dimension in the z-axis can vary depending on the length of the attached cutting tool. Also, creating an object with this size is not possible because a certain amount of clearance in the X, Y, and Z-axes are required. Moreover, a board is required to be placed on the worktable so that that the table do not damage. This board is called a scrap board. 45,46

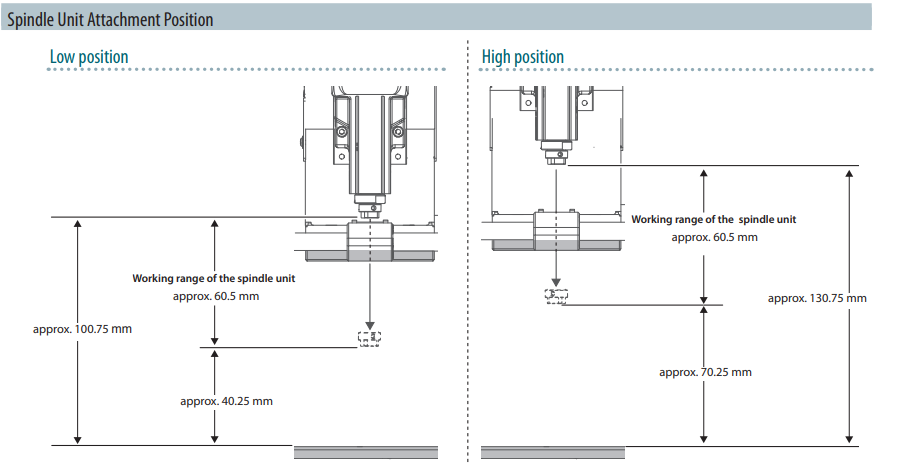
There are two attachment positions of a spindle unit. It can go properly with cutting tool and the workpiece thickness: 47
The figure below shows the cutting tool types that can be used by the SRM-20: 48
Click on this link to access the data sheet of the SRM-20. It contains important basics, maintenance, setting the machine, starting the SRP player, and more.
Task-1
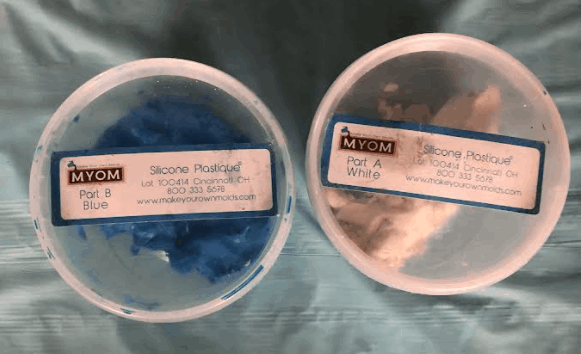
1- Choose a material that is either for molding or casting and write brief information about it. I chose Silicone Plastique which is a type of mold consisting of two parts (materials). 1
Safety data for Silicone Plastique
Information about Silicone Plastique: Silicone Plastique is a food-grade platinum silicone putty for making reusable molds for chocolate, Isomalt, ice, butter and other. It can be also used for non-food applications. It can be put in freezer and handles high temperatures up to 204.44 ֯C. It’s a safe silicone material, odorless, non-toxic, and approved by FDA. However, it has not been tested for baking or cooking applications. Silicone Plastique has the consistency of clay or cookie dough.
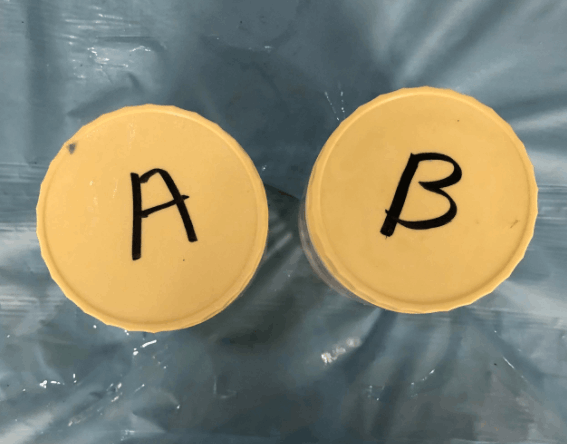
Silicone Plastique contains two parts like-clay materials which are Part-A and Part-B:
• Part-A: is the catalyst which is used to harden the mold. It is a component that can contain vinyl functional silicones and platinum.
• Part-B: is the base It can contain functional polymer, hydrogen-functional crosslinker, and cure inhibitor. Refer to this link to get more information about Silicone Plastique and this link for frequently asked questions.
2- Google the steps required to make the mold.
3- The steps are as follow:
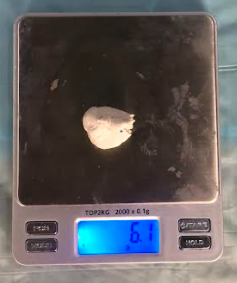
• Take two equal amounts of parts A and B. 2,3

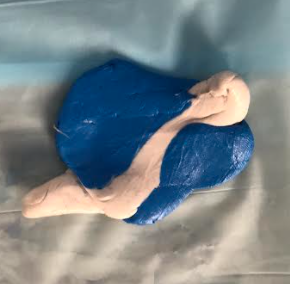
• Knead and mix the two parts together until uniform color is formed. 4,5,6

• Take the mold putty and press it on the shape/medallion you want to make and make sure to fill the holes if any. Or, you can press the shape onto the putty after shaping it. 7,8
• Silicone Plastique has work time of 15-20 minutes and a cure time of 60-75 minutes at room temperature (21.11 ֯C). It should be allowed to fully cure before separating it from the shape. The cured material state should be durable rubber mold.
4- Take hero shots of final product. 9,10


Group assignment (Safety datasheets and comparison)
5- Click on these links below (this is part of the task) to refer to other molds and casting materials information documented by colleagues:
- GR Silicon Rubber by Aliredha
- Resin by Sarah
- Meelad
- Hanan
- Resin-clear cast epoxy by Mohammed
- Soap by Hafsa
- Cement by Fatima
Task-2 Mill
1- Make a 3D design of an object to be casted. It must have different heights or curves as this shows the capability of milling machine to machine in 3 axes (x, y, and z) instead of laser cutting machine that can only machine in two axes (x and y). Note: your design should be bound within the dimensions (7.5 x 9 x 1 cm) maximum.
Problem in step-2
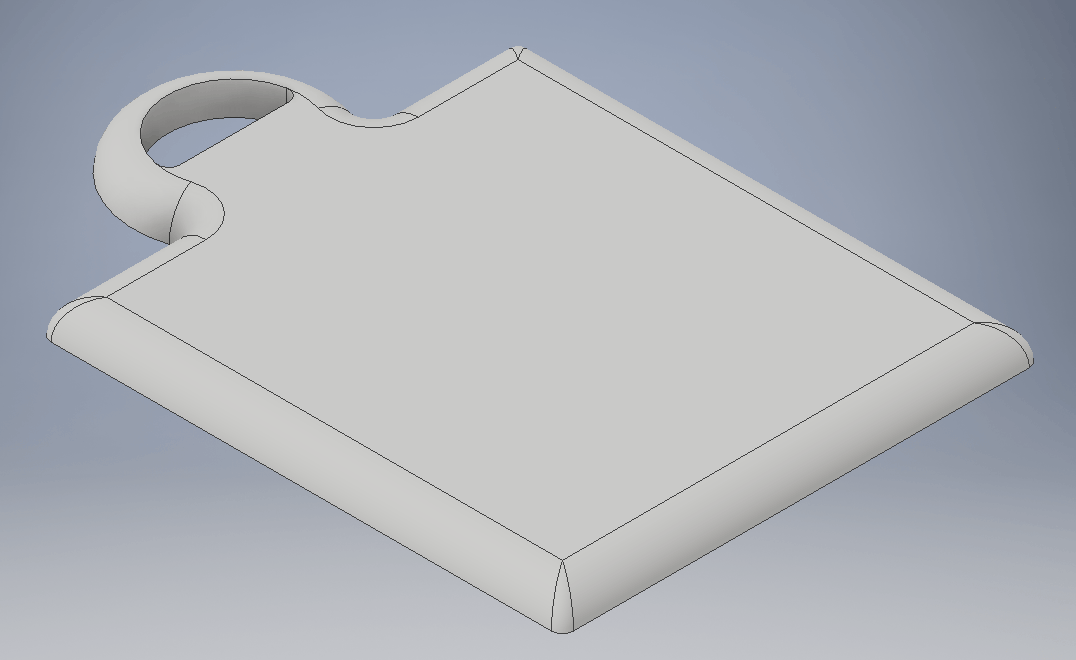
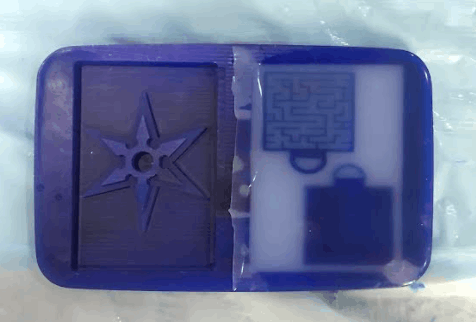
2- The design is a maze-like medal. It has two parts which are the body having the maze and the cover of the medal. You can notice there was fillet at the bottom of the medal however, since an open mold would be used for this part, it cannot have two sides shapes. 11, 12

Problem in step-3
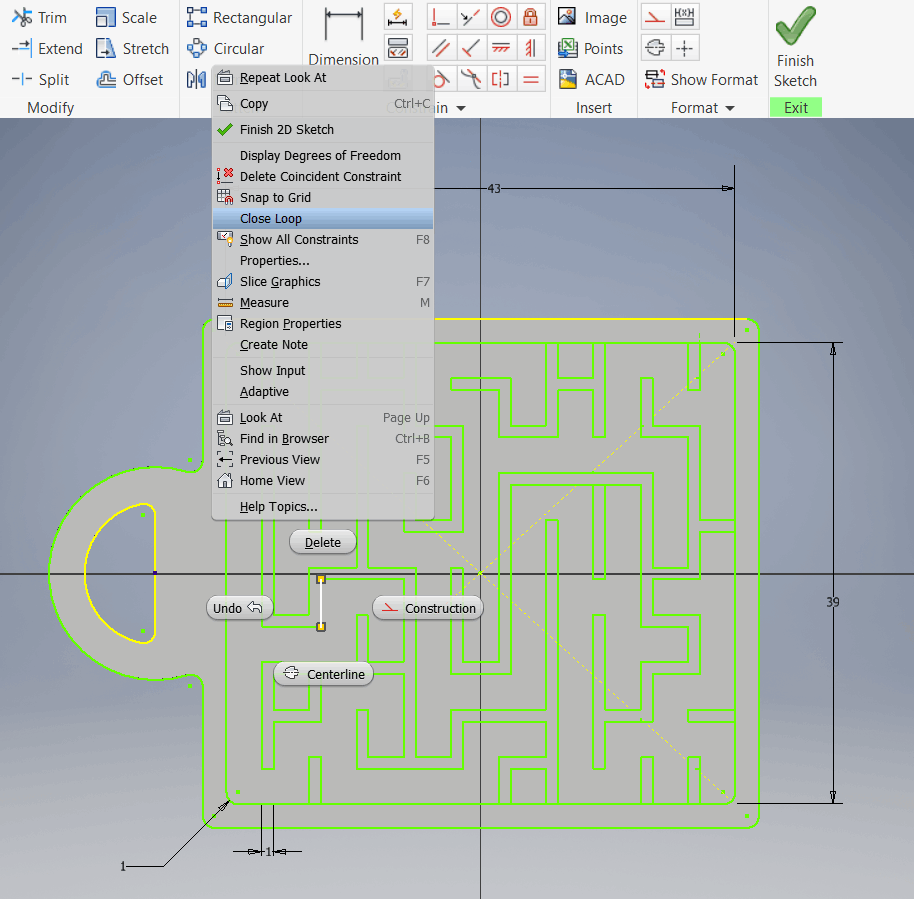
3- There were some problems when sketching the maze because the sketch needs to be constrained and must be a closed loop. You can use Sketch Doctor function to show you the issues. Also, if Sketch Doctor do not work you can use the function close loop and select the parts of the sketch that is extruding. 13
4- Save the two parts as STL files and send to fablabbh.share@gmail.com
5- Tinkercad website was used to fit the objects within the specified dimensions of the machinable wax to be milled. 14

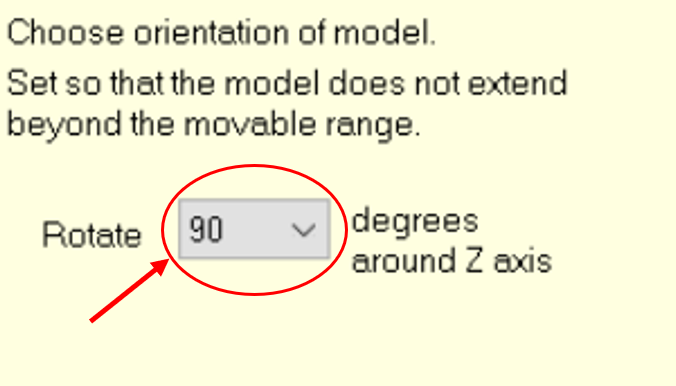
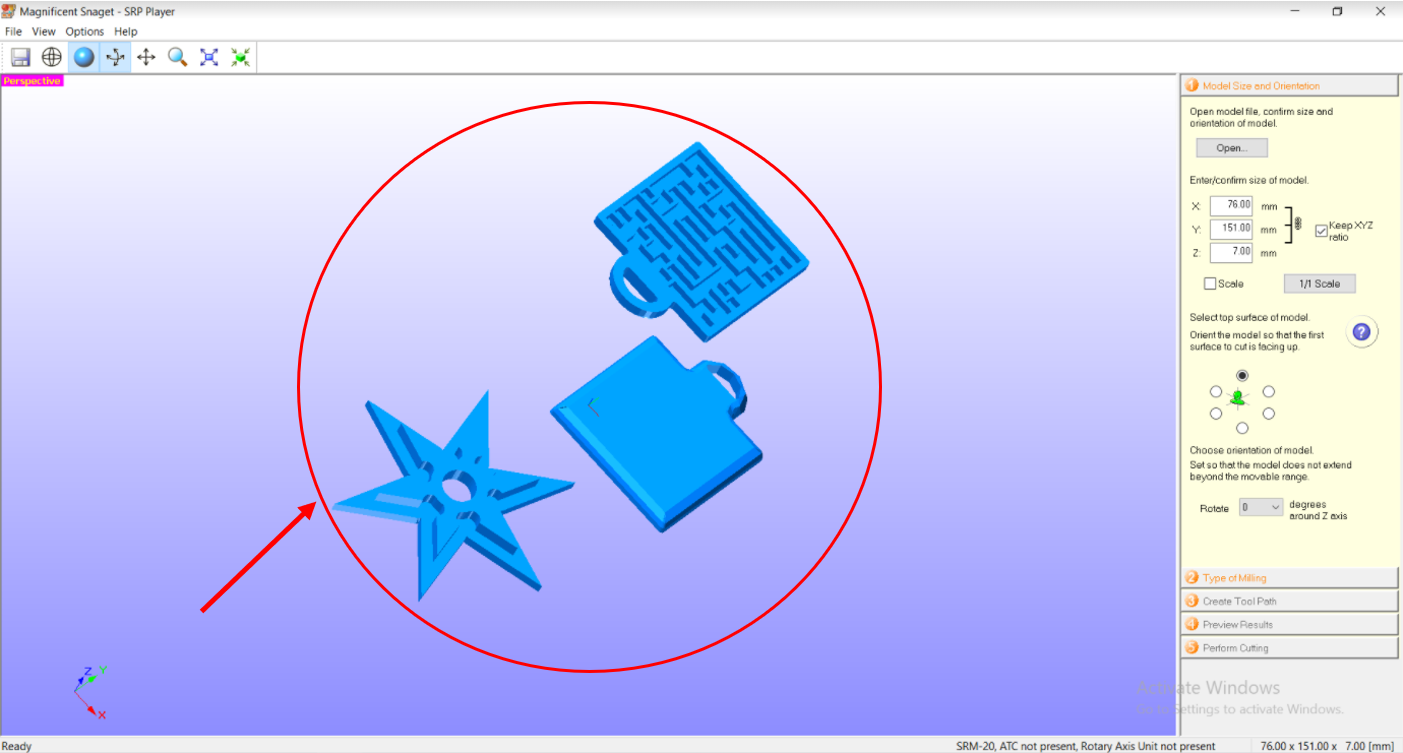
6- Import the STL file SRP (Subtractive Rapid Prototyping) player software which is used to automatically generate the tool path and setting the milling requirements. Sometimes you need to tilt the model to be set on and aligned to the machinable wax. 15,16,17

7- measure the dimensions of the machinable wax (width, height, and length).
8- Enter the size of the area to be milled. Basically, it is a bit less than the size of the machinable wax being used. 18

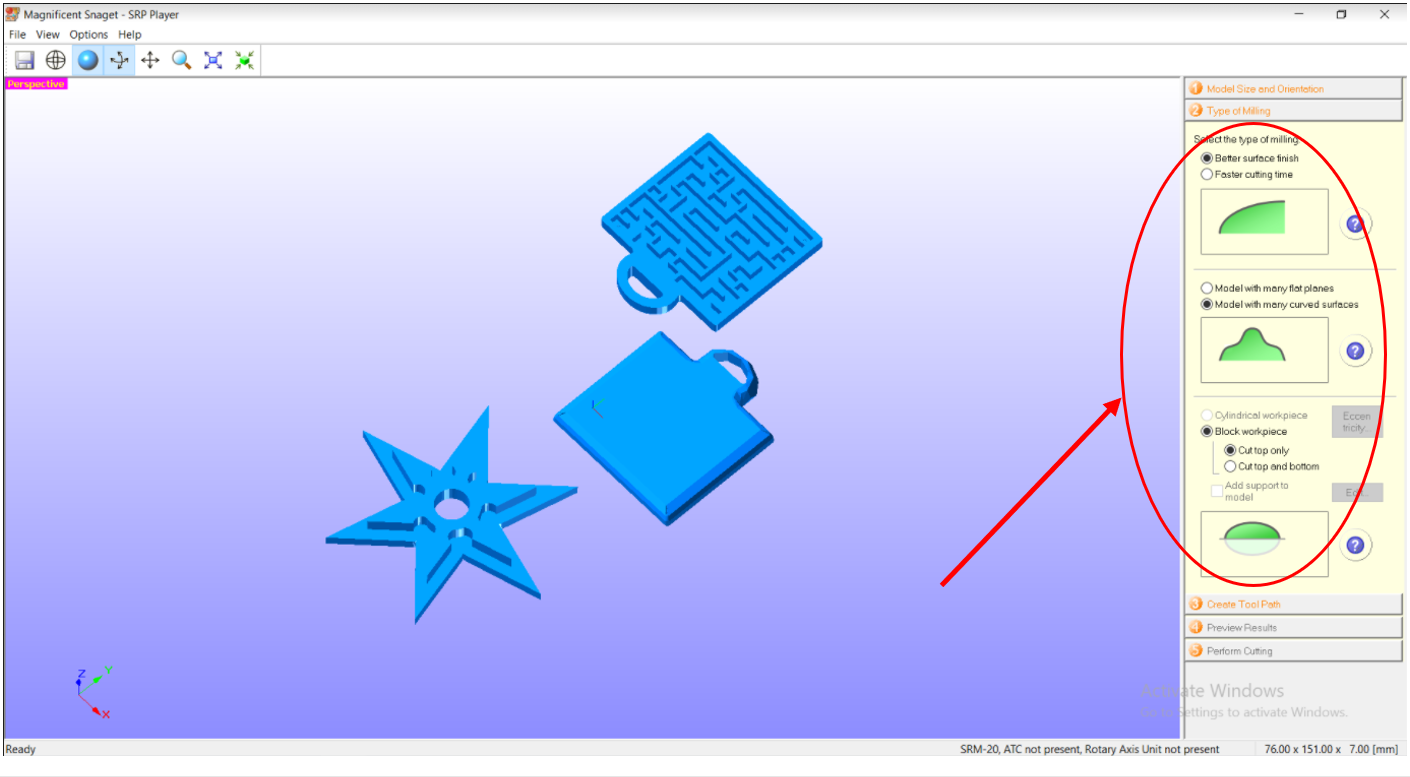
9- Select the type of milling. 19
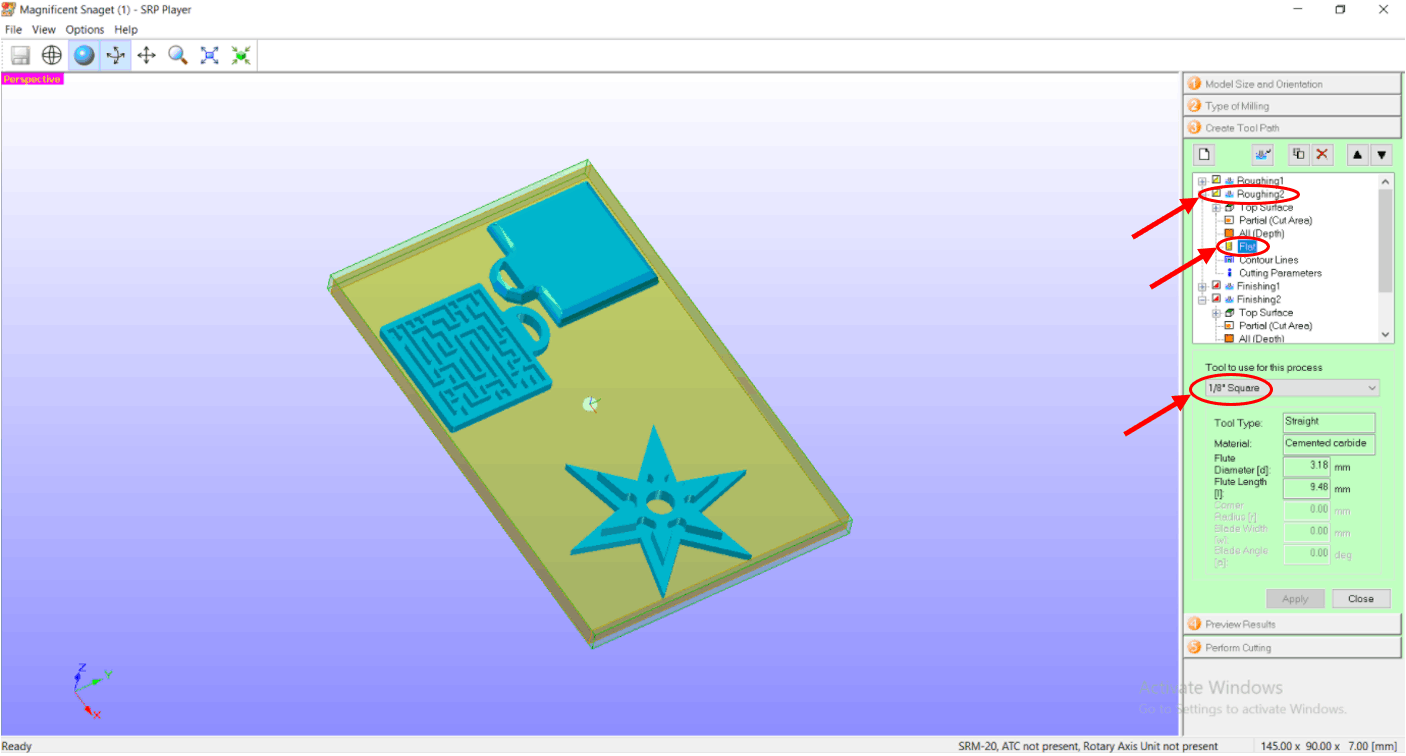
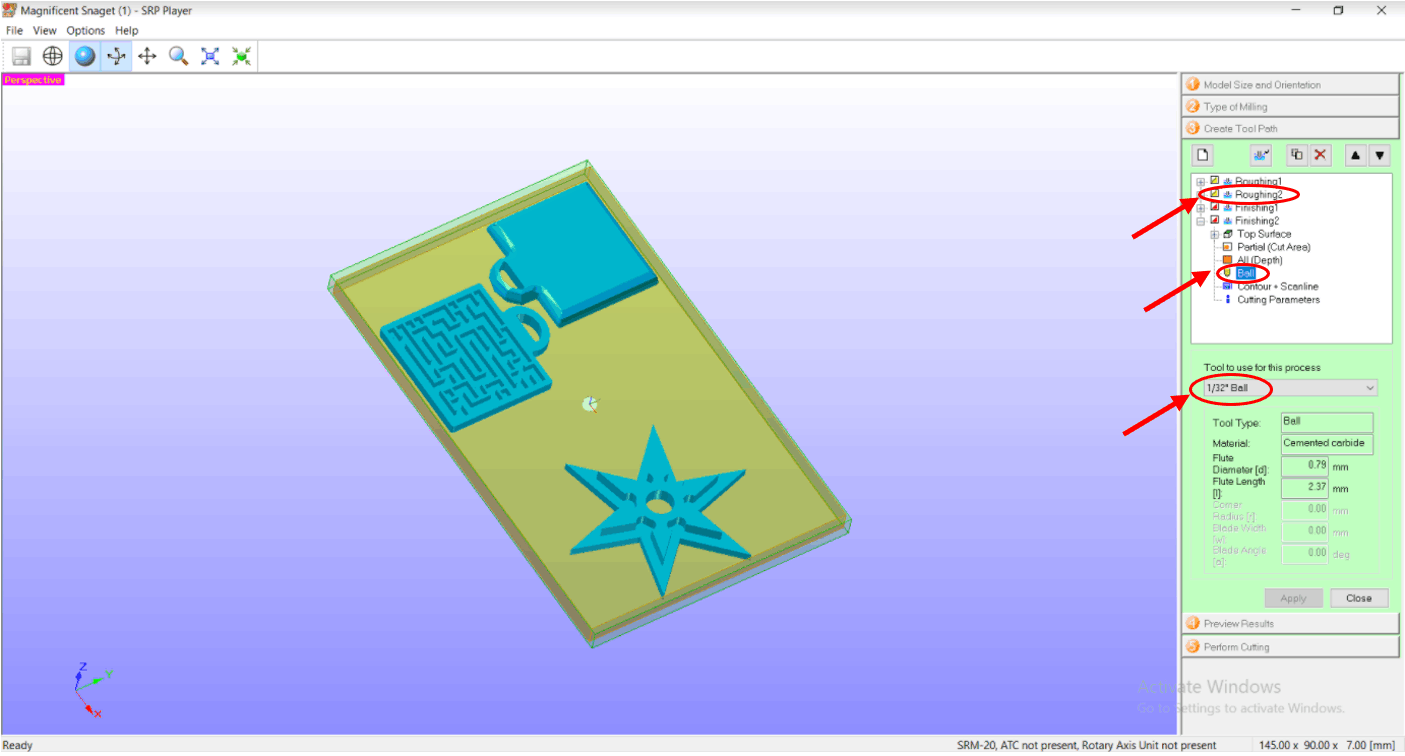
10- The software automatically creates the tool path when setting the workpiece material, the size of the workpiece, and the tool type (tool type is shown in next step). 20

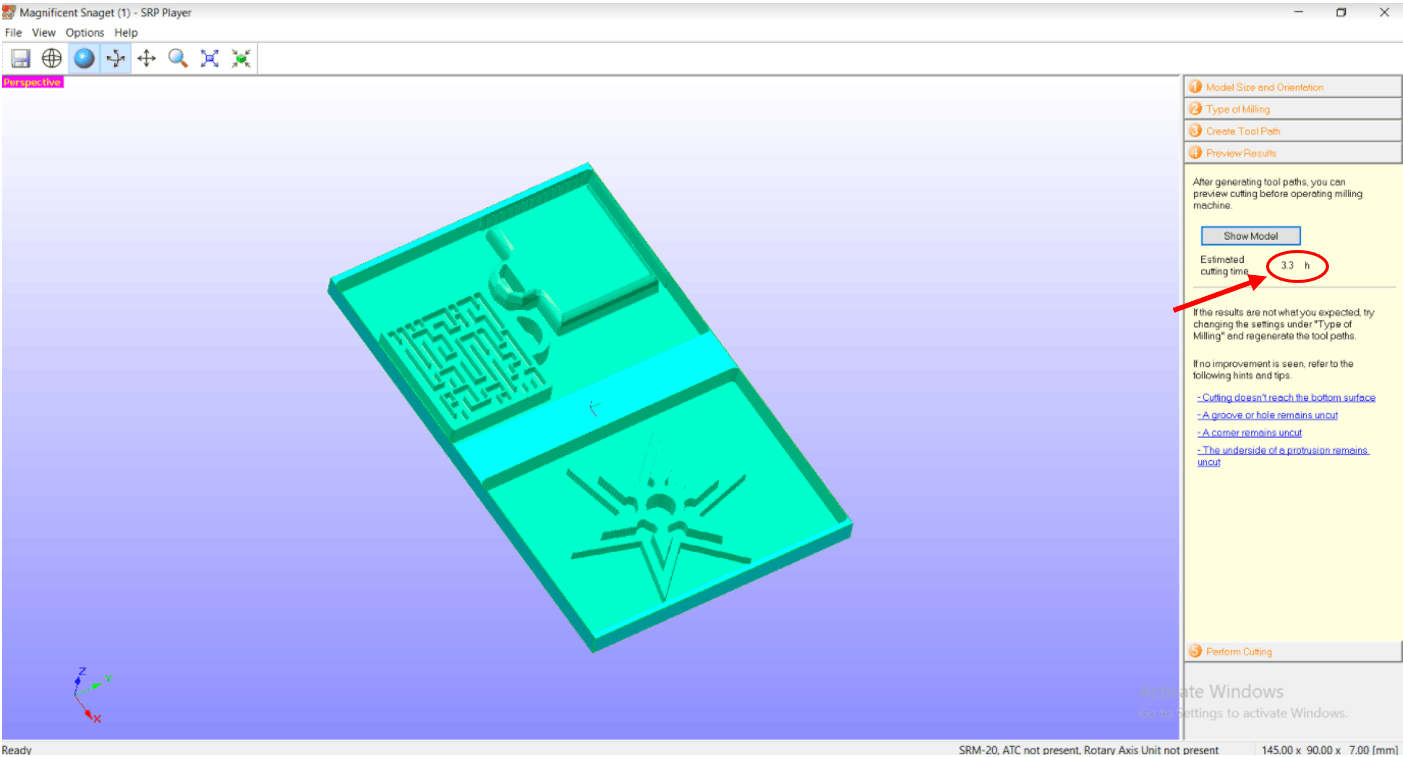
11- You can add more than one tool path. In this case two paths were used in which the first path is a roughing mill with 1/8 inch flat square cutting tool and the second is finishing cut with a 1/32 inch ball shape cutting tool. Estimated time of milling will appear (in this case it is 3.3 hours). 21,22,23
12- Take a piece of machinable wax and draw two diagonal lines to mark its center. This is made because the milling machine used in the lab has a fixed origin in the center and only starts milling from the center of the workpiece.
Problem in step-13
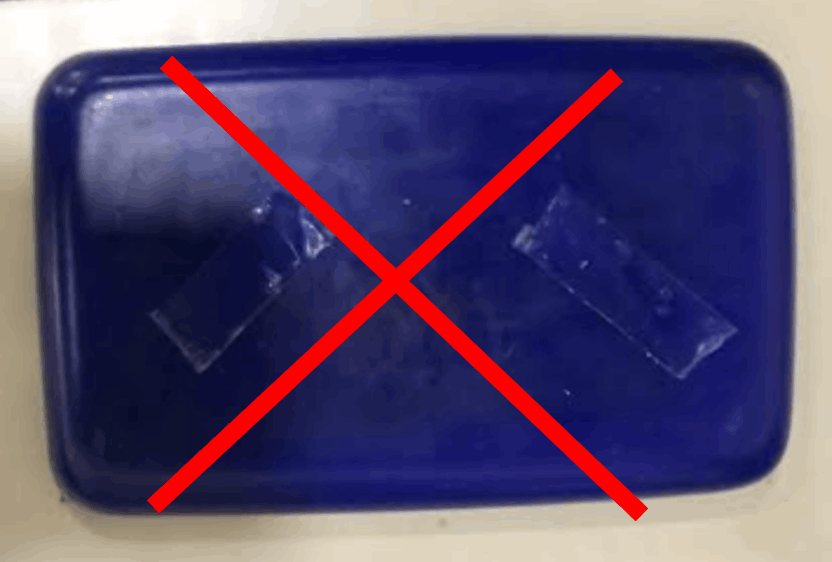
13- Stick a two-side tape on the bottom of the machinable wax to prevent it from moving while milling. Do not put the tape randomly on the machinable wax. It should be sticked within equal distances and in all sides. Also, make sure there are no protruding parts or bends in the tape. These mistakes can make the machinable work have a tilted surface when set on the bed of the milling machine. This can cause more noise when milling, degrade the quality of milling, breaking the cutting tool, and even damage the milling machine. 24,25

14- Place the machinable wax on the center of the bed. 26

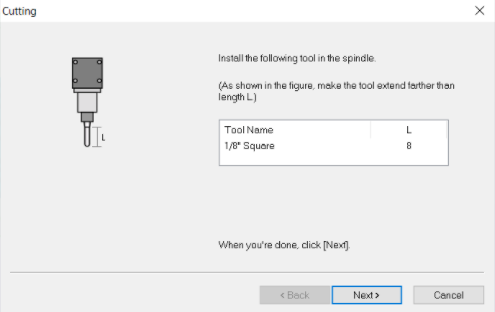
15- Install the first cutting tool in the spindle and tighten it loosely. Then, loosen the spindle so that the cutting tool falls gently on the machinable wax and then tighten it again. You do not have to tighten it strongly as this can damage the spindle. 27
16- Move the tool (forward, backward, left, or right) using the software to set it perfectly atop the center of the machinable wax. 28
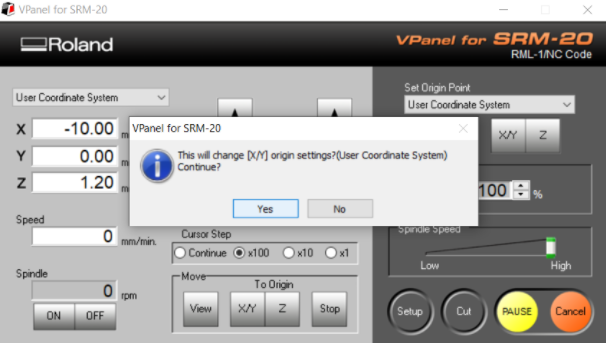
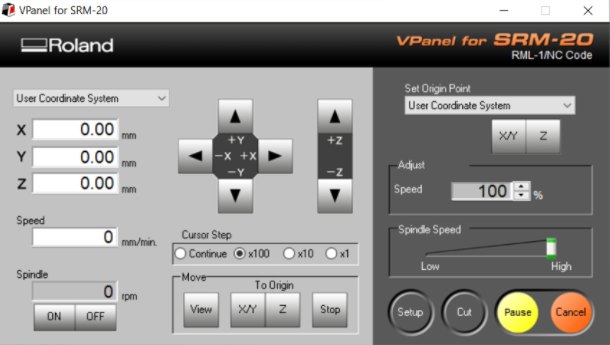
17- Set the current position of the tool as the origin (0,0,0). 29
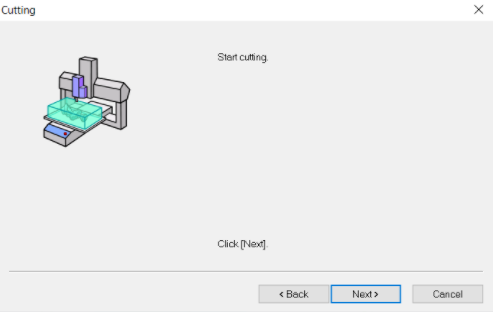
18- Now you can start cutting. 30
19- the cutting process will appear as a percentage and the time estimated for the roughing cut to complete using the specified tool (in this case it is 22 minutes). 31

20- When the finishing cut is complete replace the roughing tool (1/8 inch flat square) with the finishing tool (1/32 inch ball).
21- Before starting the finishing cutting, set the origin again. The X-axes and Y-axis will remain the same but the Z-axis will change because the first cutting tool has a different length from the second.
Task-3 Cast the mold
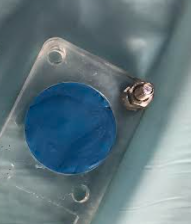
1- Clean the mold and wash, if necessary, from debris. 32, 33(take a pic)


2- Choose the material that would suit the features of the cast. Silicone mold was seen as the best available choice. You can click on this link to see a colleague’s documentation on this type of mold (GR silicone rubber)
3- Take equal amounts of parts A and B and then mix them together. You have a work time of 15-20 minutes. The amounts of parts A and B were 20 grams each and they perfectly filled the mold. 34
4- Pour the mixture slowly into the mold. Make sure you fill the narrow gaps.
Problem in step-5
5- Make sure the mold is fully covered and no bubbles are trapped. If bubbles were noticed, let the mixture set for some time and they should vent. If there are still bubbles that needs to be forced out, gently vibrate the mold.
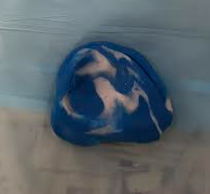
6- The mixture has a cure time of 24 hours that should be allowed before striping it out. 35
7- take a hero shot of the mold. 36

Task-4 Cast the casting
1- The casting was to be made out of resin. You can click on this link to see a colleague’s documentation on this type of casting material (name). Take a pic of the box 37

2- First put the mold on a scale and calibrate it. Then pour water on the mold until it is filled. Note the weight of water used (24.5 grams). Add to this amount around 4-7 grams and this will be approximately the amount of resin needed to fill the mold. Take a pic of the bottles 38

3- Always read the instructions on how to use any of the casting or mold materials.
4- The ratio of using the resin is 10 grams of what to 6 grams of hardener. Since the amount needed for the cast is about 35 grams, take 20 grams of what and 12 grams of hardener (double each).
5- Mix gently for 3 minutes and stir in a way in which bubbles do not form.
6- You can add color to it or some glitter. I made the maze transparent and its cover with black color and blue glitter.
7- Pour the mixture into the mold very gently and make sure all gaps and narrow slots are filled.
Problem in step-8
8- If there are some bubbles you can use a hot air blower which can effectively vent the bubbles and a toothpick can be used too to vent stubborn bubbles. 39

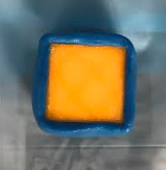
9- The resin has a cure time of 24 hours. Take a pic 40

10-Take hero shots of final product. 41, 42 Take two pics

Design files and Useful links
- Maze Stl File
- Maze cover Stl File
- Groover’s Principles of modern manufacturing
- Make your own molds
- SRM-20 monofab milling datasheet