Project management
How do MkDocs works?
MkDocs is a static site generator that's geared towards building project documentation. Documentation source files are written in Markdown, and configured with a single YAML configuration file. It comes with a built-in dev-server that lets you preview your documentation as you work on it. The dev-server supports auto-reloading, and will rebuild the documentation whenever anything in the configuration file, documentation directory, or theme directory changes. There's a single configuration file named mkdocs.yml, and a folder named docs that will contain your documentation source files (docs is the default value for the docs_dir configuration setting).
Refrence: MkDocs Informations
"My steps to edit on my own website offline"
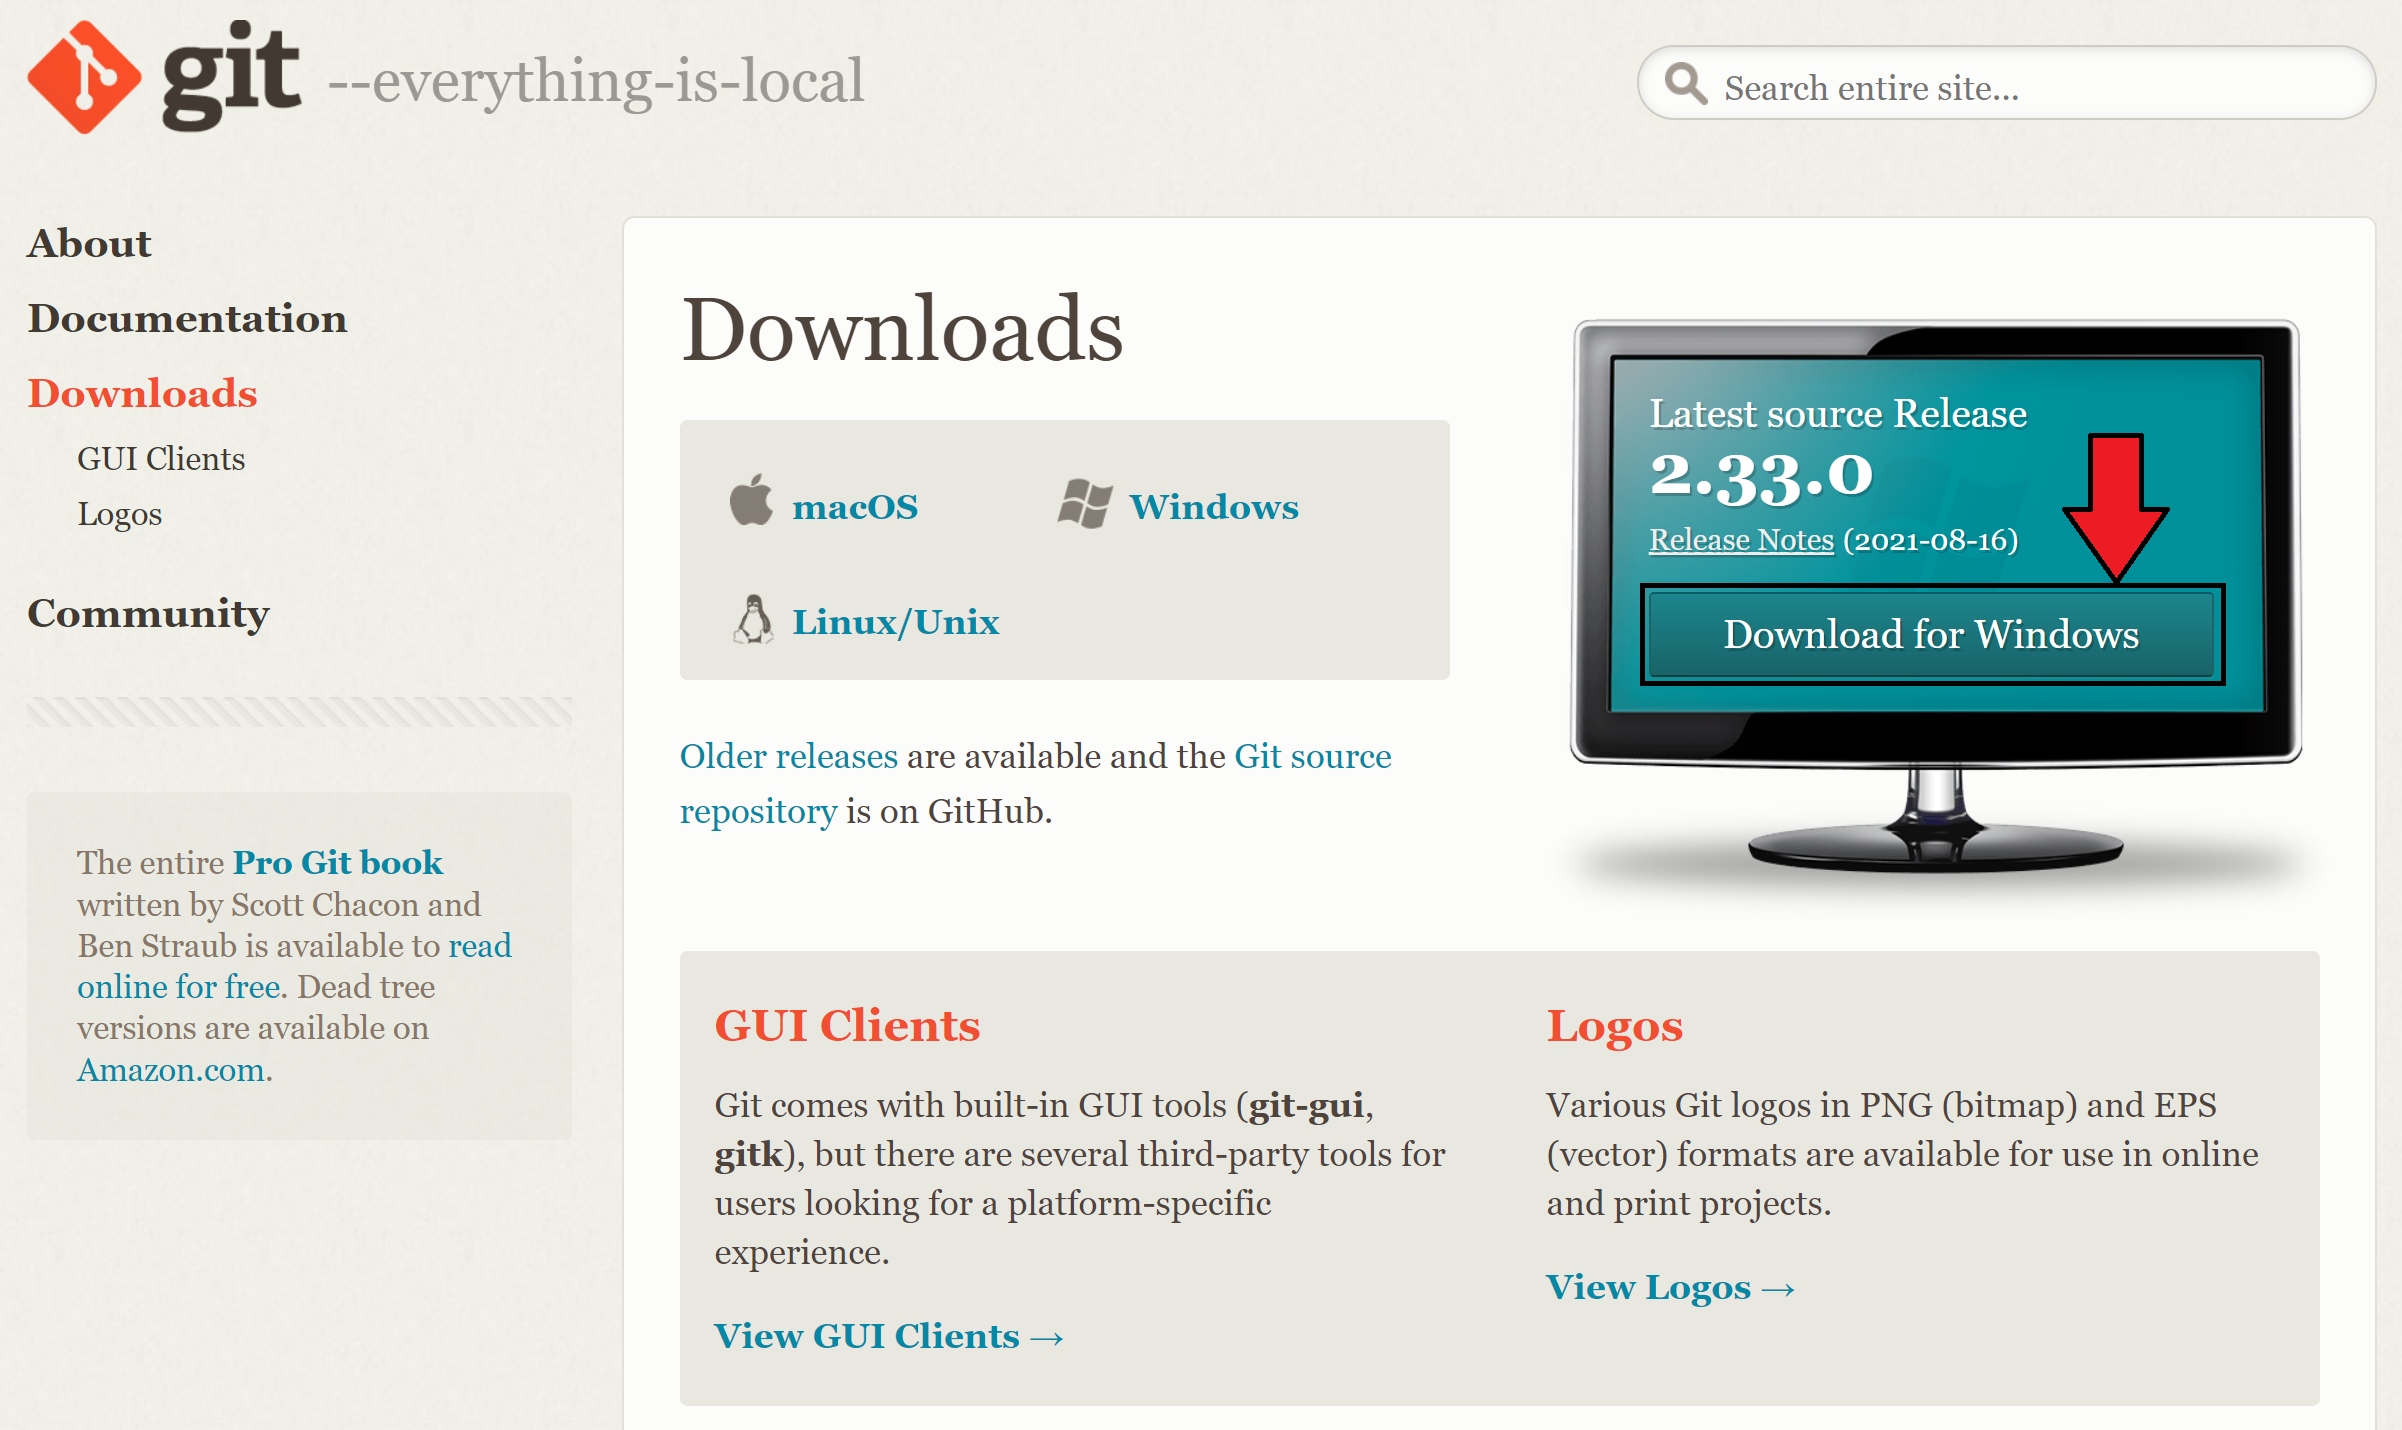
Step A01: Downloading GIT
Git is software for tracking changes in any set of files, usually used for coordinating work among programmers collaboratively developing source code during software development. Its goals include speed, data integrity, and support for distributed, non-linear workflows.
Step A02: Copying the user name
After creating an account in GitLab, you can click on your profile picture in the top right and you will find your user name showing.

Step A03: Pasting the user name and the email
Opening Git Bash and typing:
git config --global user.name "ht.alnasser"
                git config --global user.email "ht.alnasser@gmail.com"

Step A04: Taking the SSH Keys
An SSH key is an access credential in the SSH protocol. Its function is similar to that of user names and passwords, but the keys are primarily used for automated processes and for implementing single sign-on by system administrators and power users.
Typing the follwing code:
cat ~/.ssh/id_rsa.pub | clip
                cat ~/.ssh/id_rsa.pub

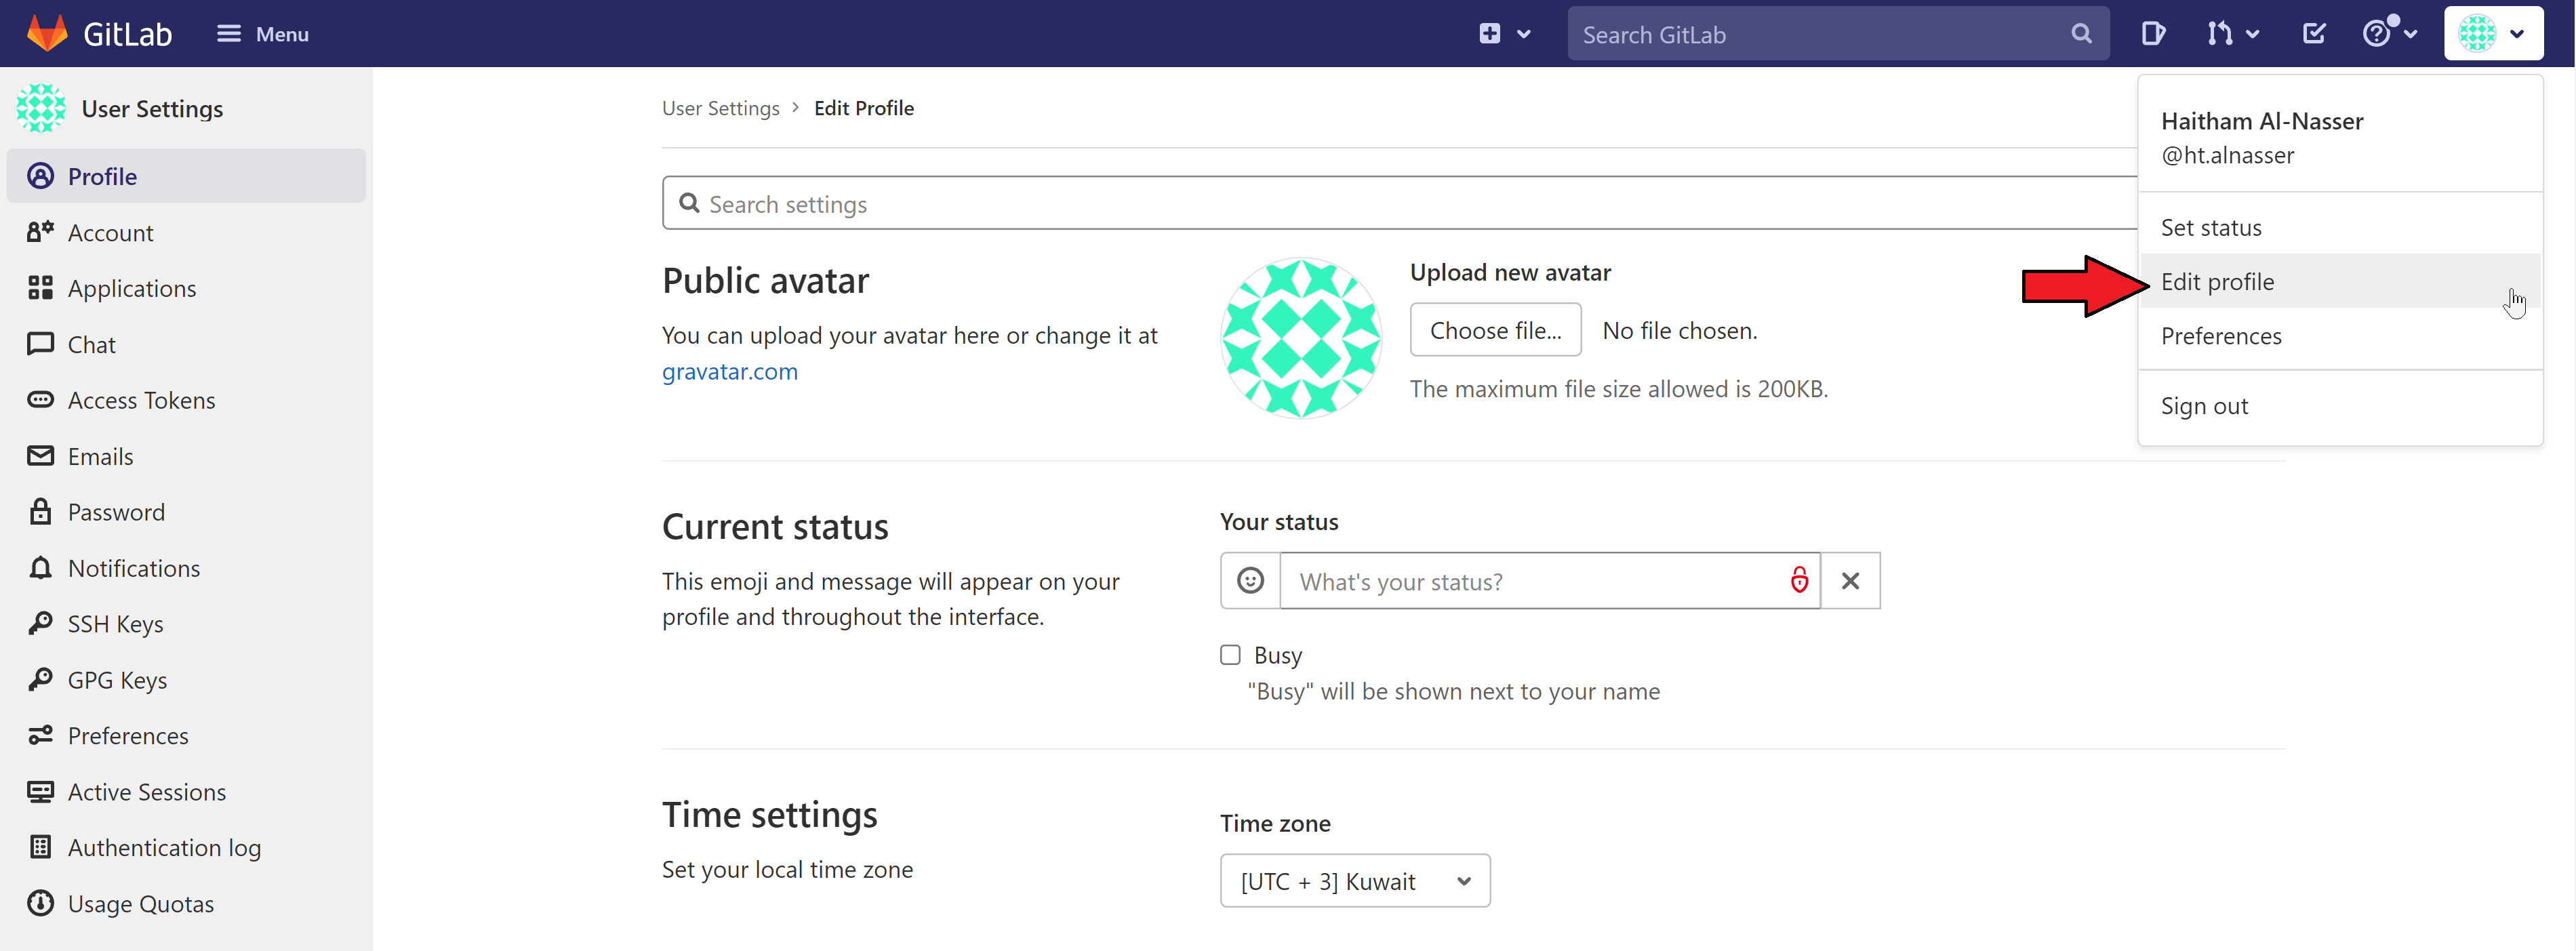
Step A05: Going to the SSH Keys in GitLab
You will need to click on your profile picture on the top right and then click on Edit profile. You will notice the options available in the left side will be change and the SSH Keys will be showing.
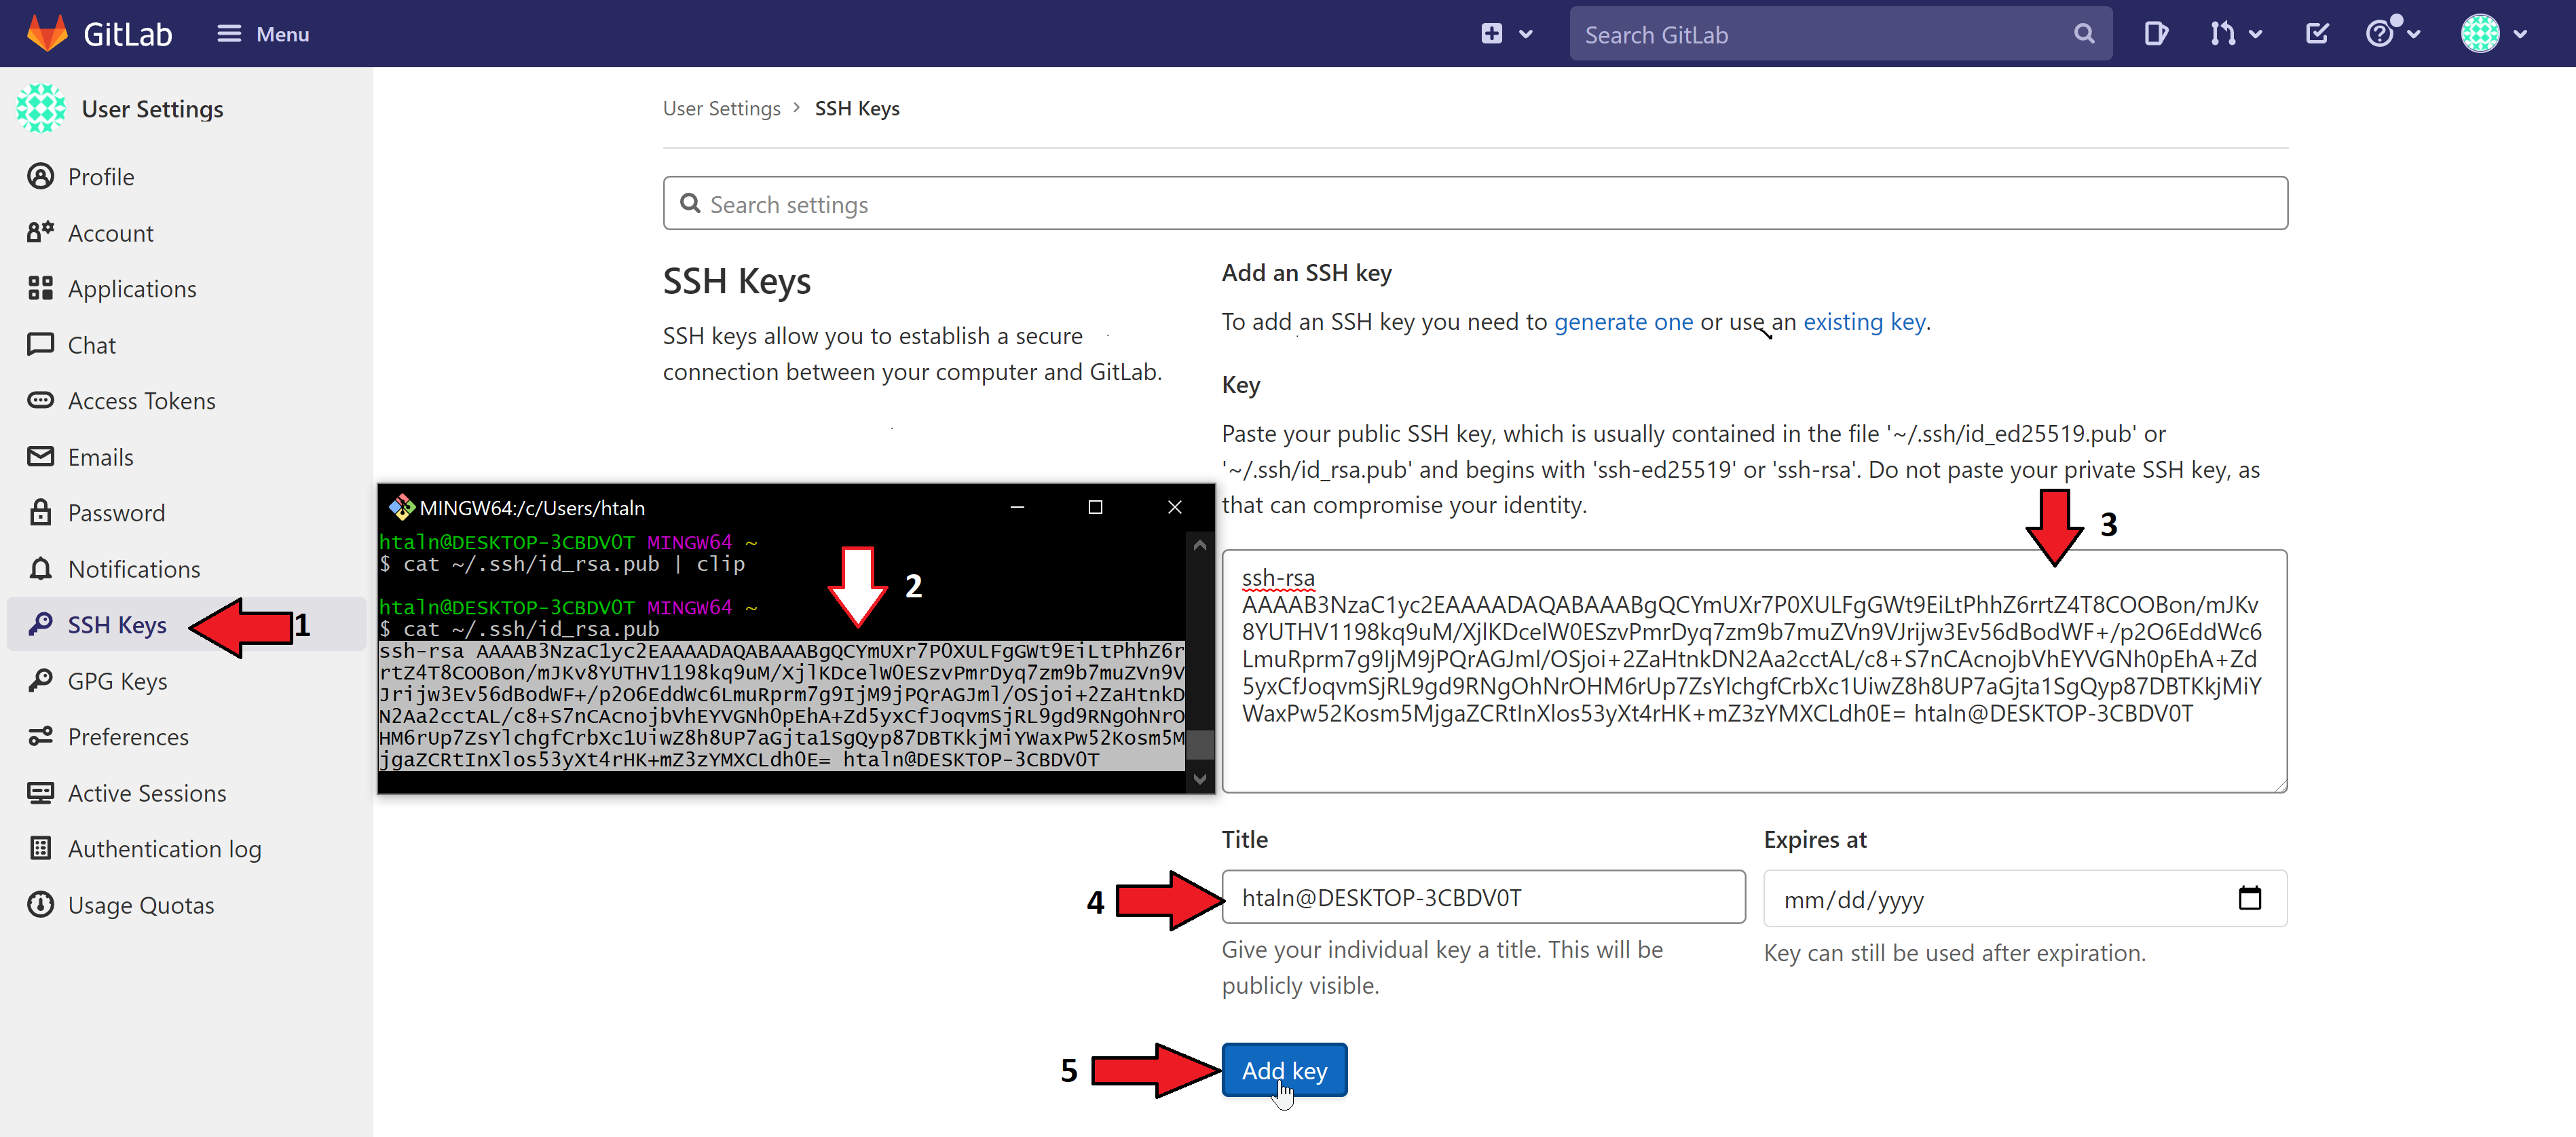
Step A06: Adding the SSH Key in GitLab
After clicking on the SSH Keys in GitLab, you will need to copy the code you get from the Git Bash and past it in GitLab. The Title will be autofill according to the type of PC or Laptop your using. Then you can press on "Add key".
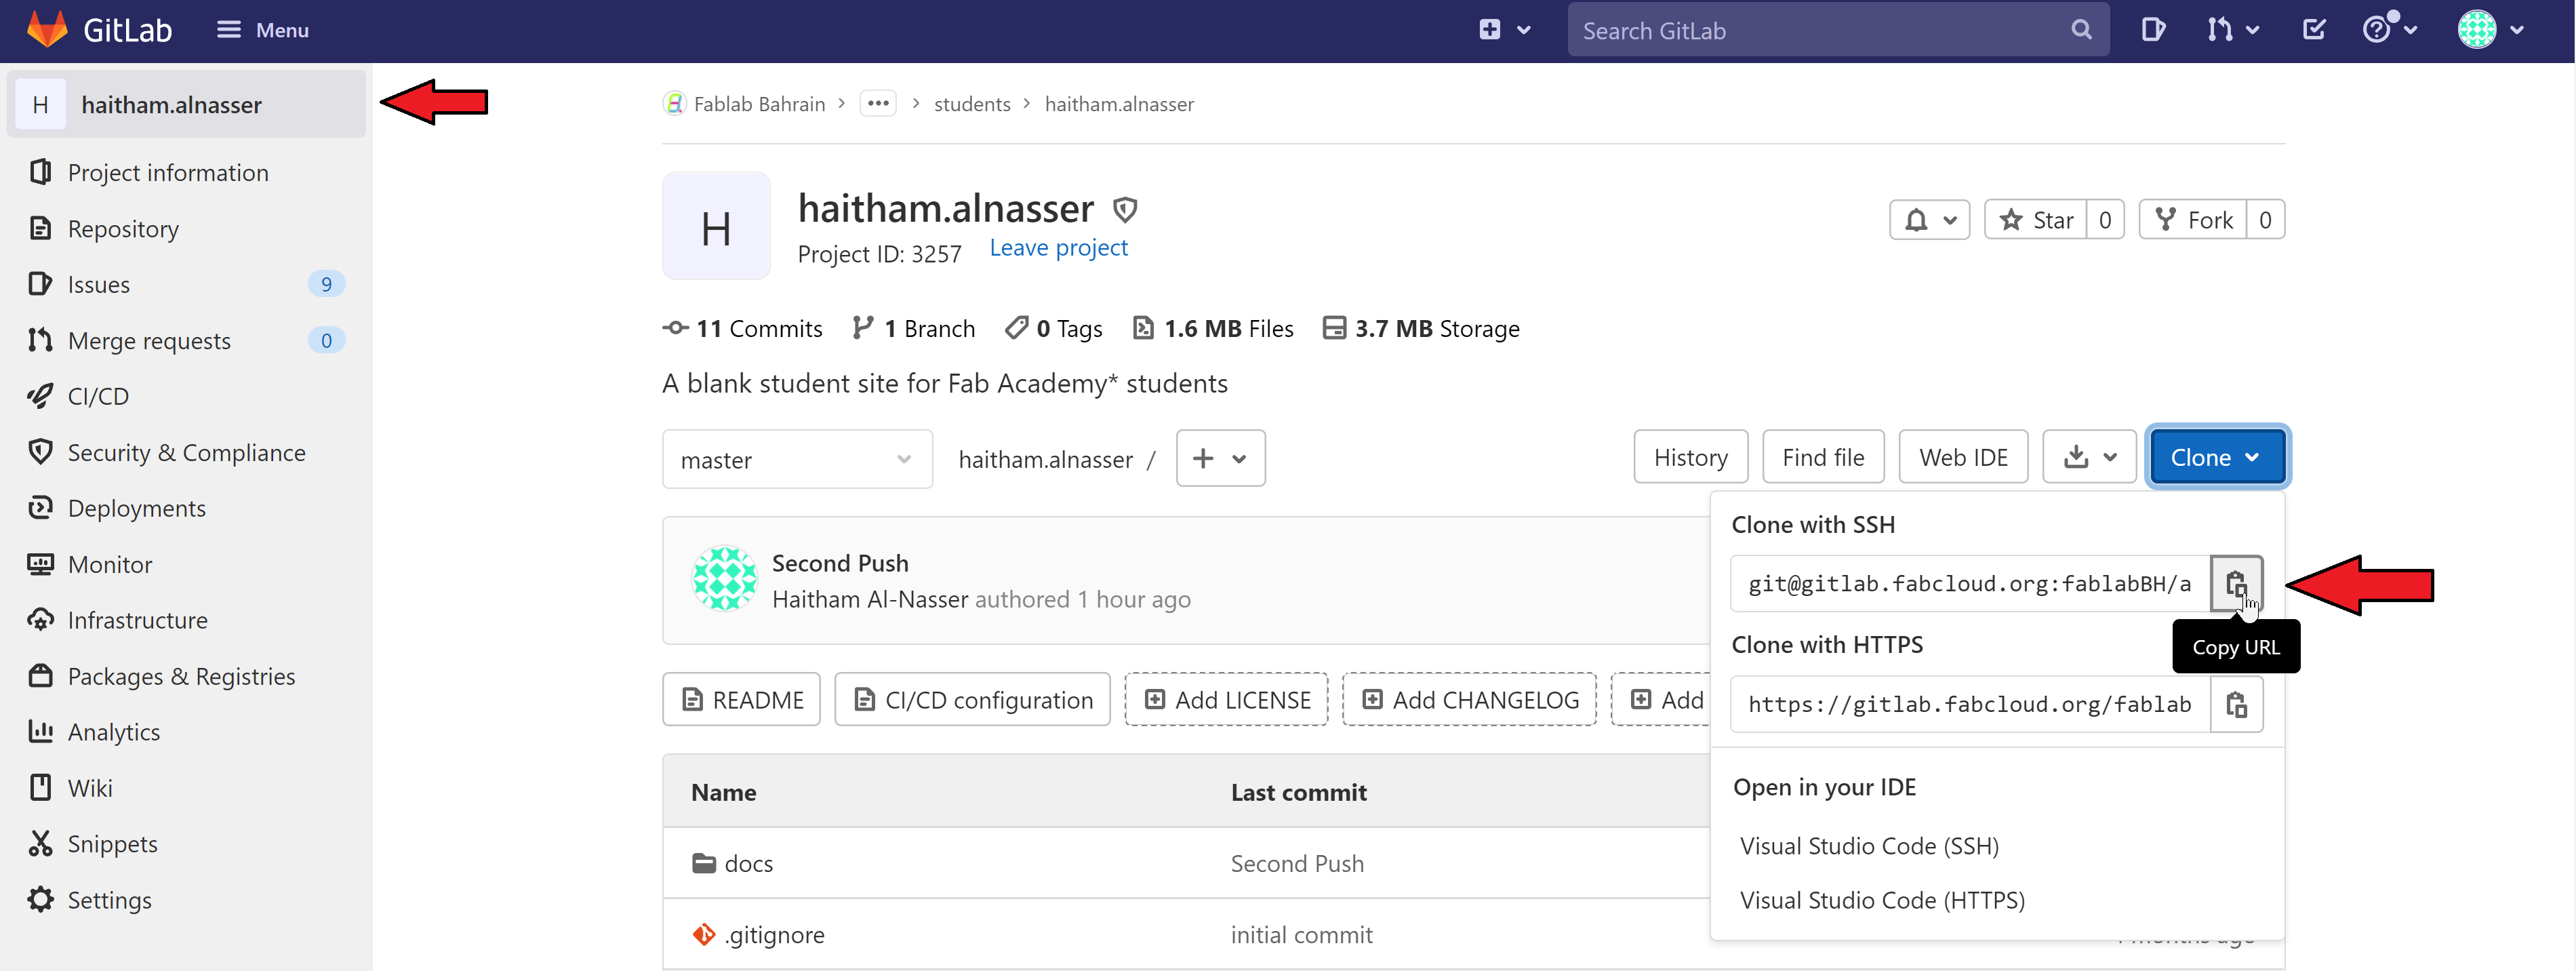
Step A07: Clone with SSH
You can find your page URL link in your GitLab Home Page, by clicking on your name on the top left of your page. You will find a Blue Button named "Clone", click on it and you will find your Clone with SSH URL link to copy.
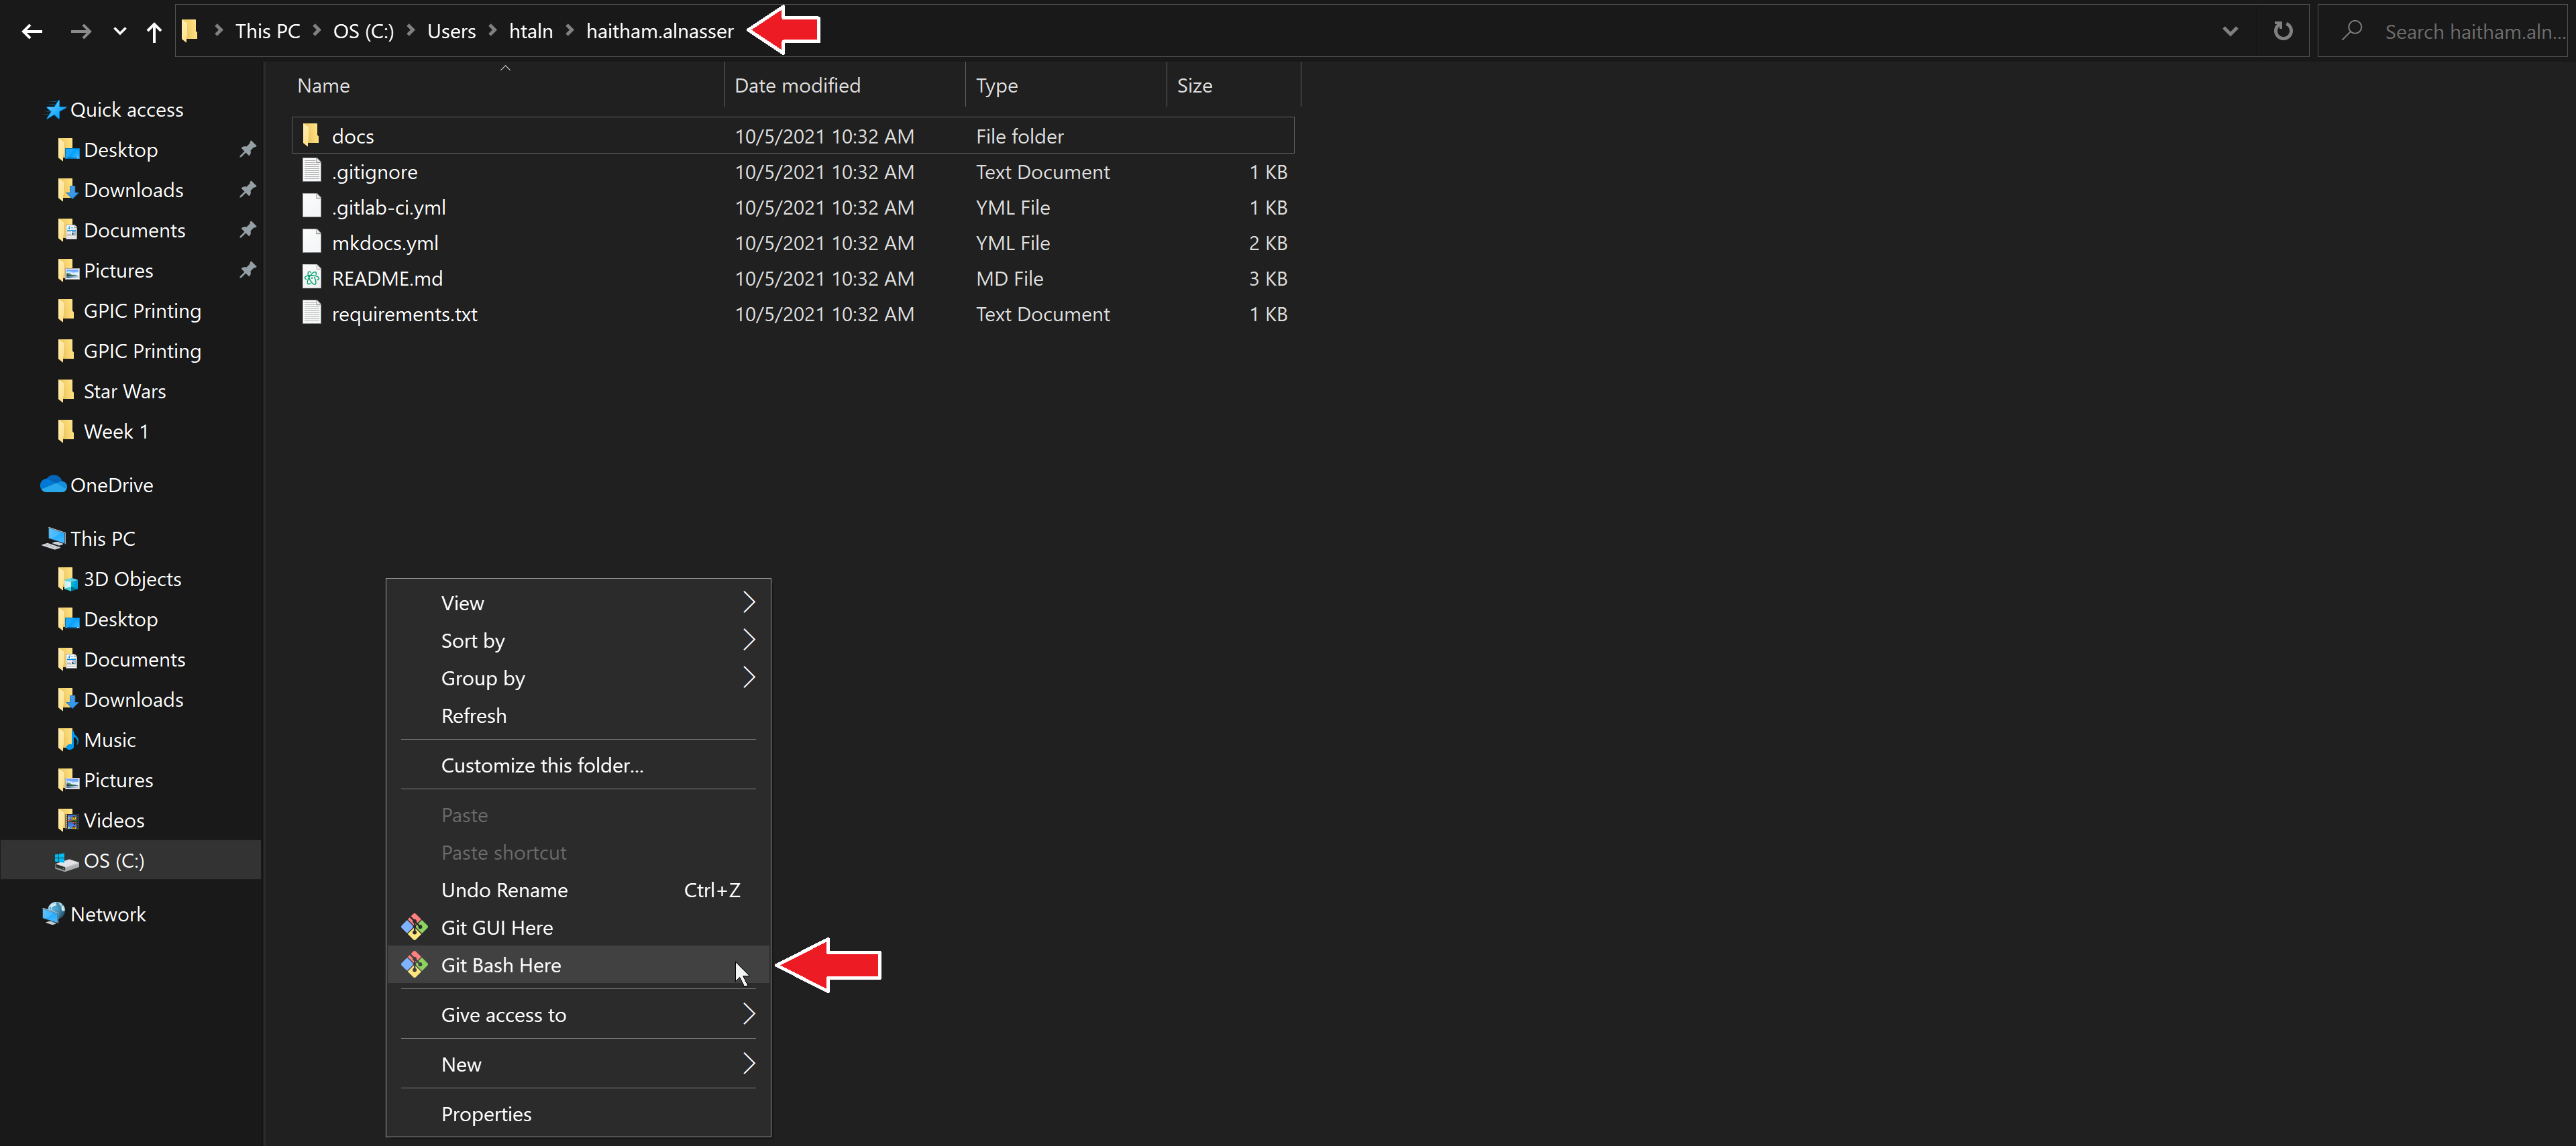
Step A08: Opening Git Bash from your own file
Go to the generated file in your PC, you can find your file usually in the "Users" file in the C Drive. After getting inside your file as it showing in the picture, click right click and open Git Bash Here from your file.
Step A09: Pasting the URL link
You will notice when you open Git Bash from your profile, the name will be showing differently. You can paste your URL link here to complete the path linking.

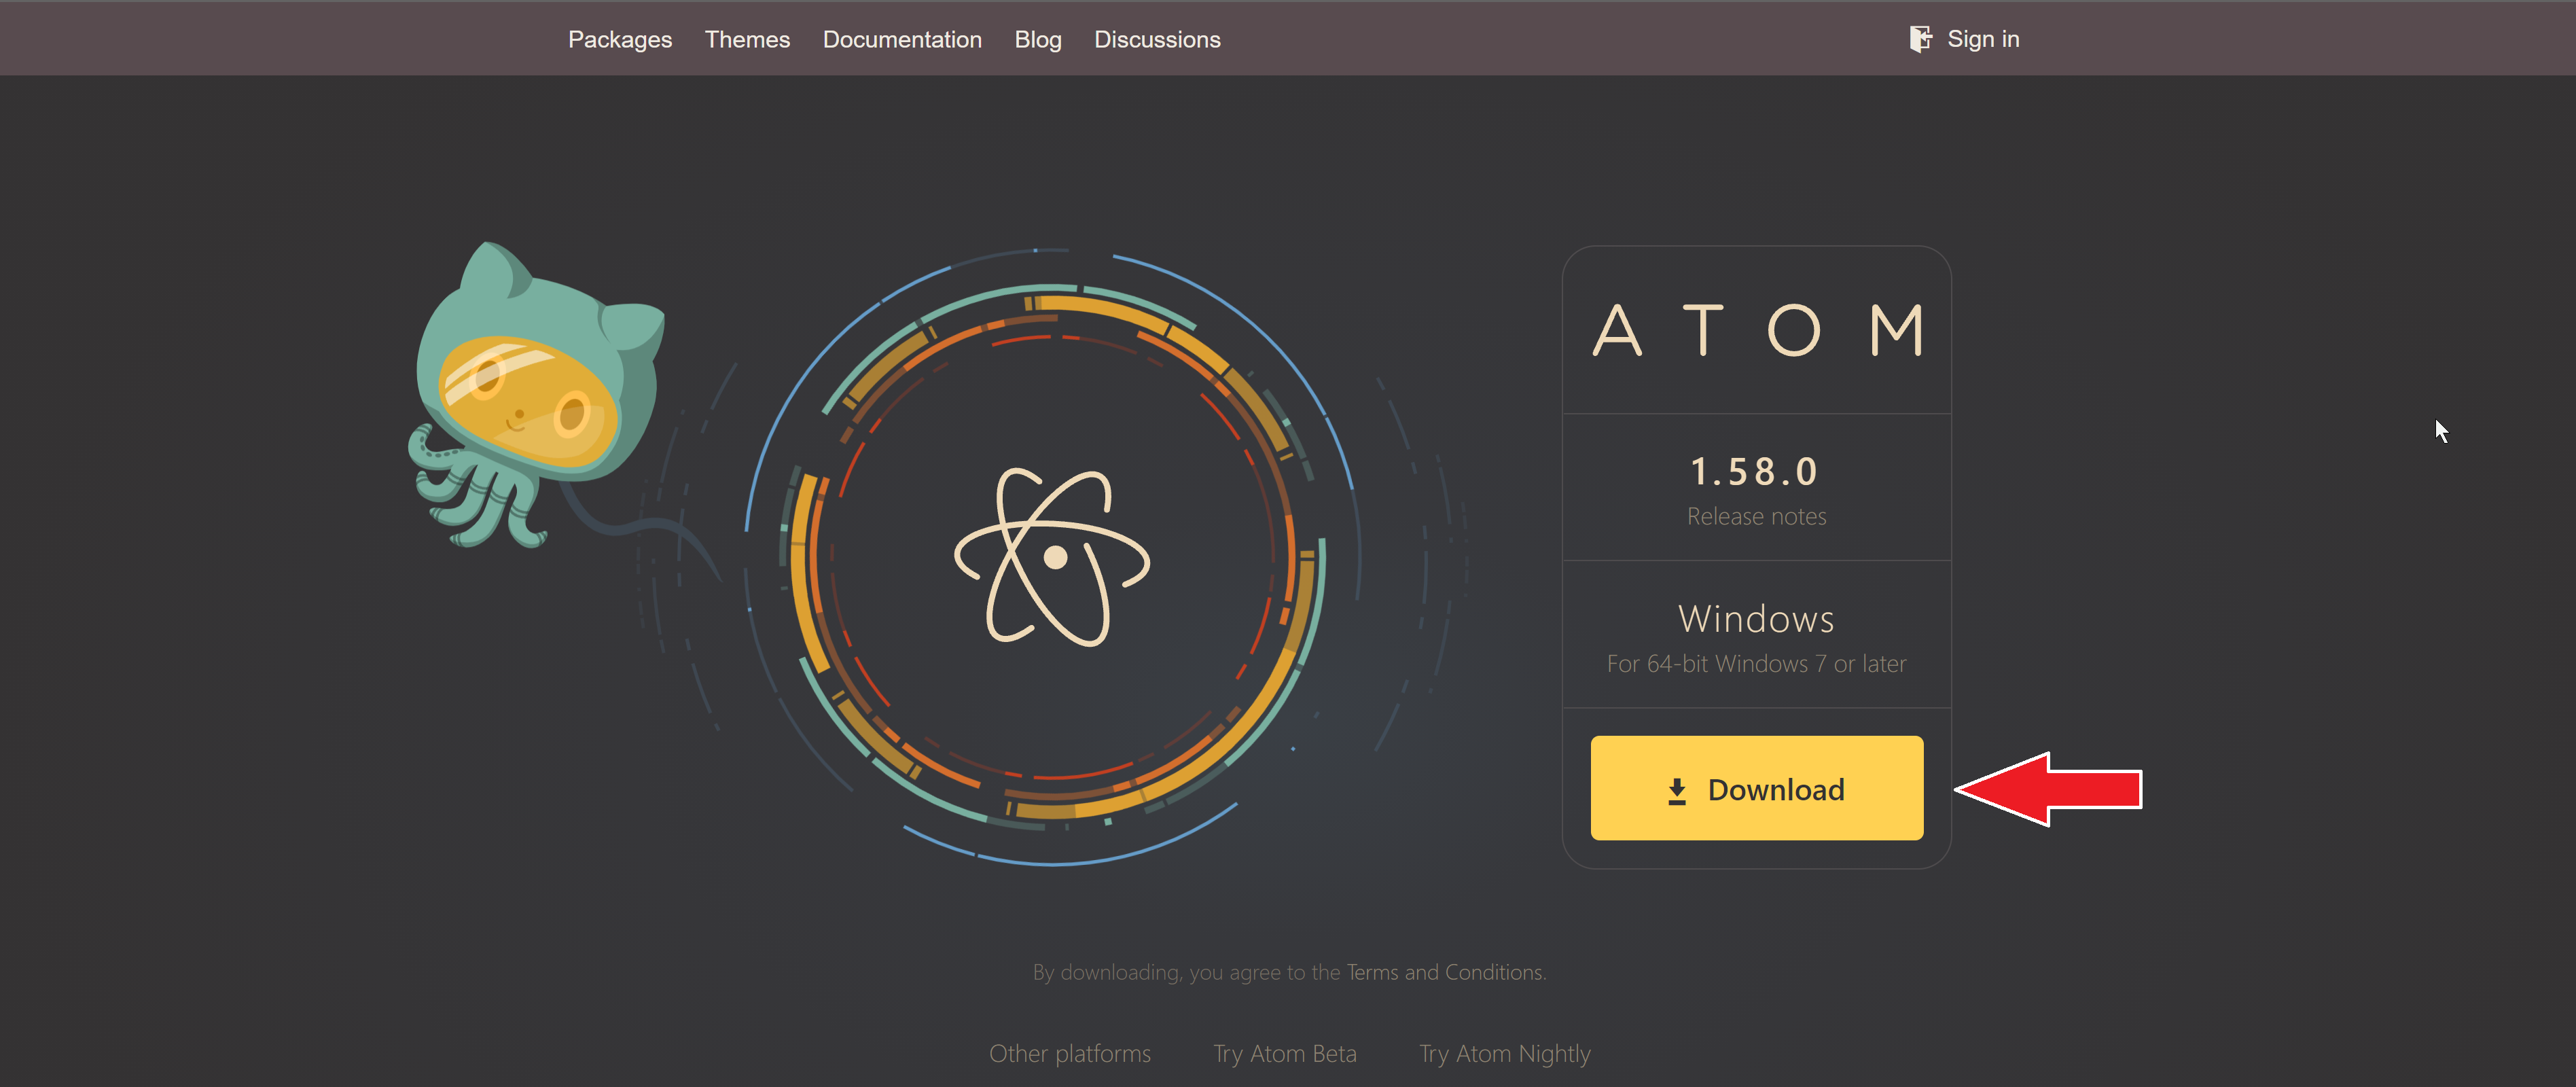
Step A10: Downloading ATOM
Atom is a desktop application built with HTML, JavaScript, CSS, and Node.js integration. It runs on Electron, a framework for building cross platform apps using web technologies. The reason for me to use ATOM because its easy to learn and free to use software. And to edit your own website offline to upload online "Push".
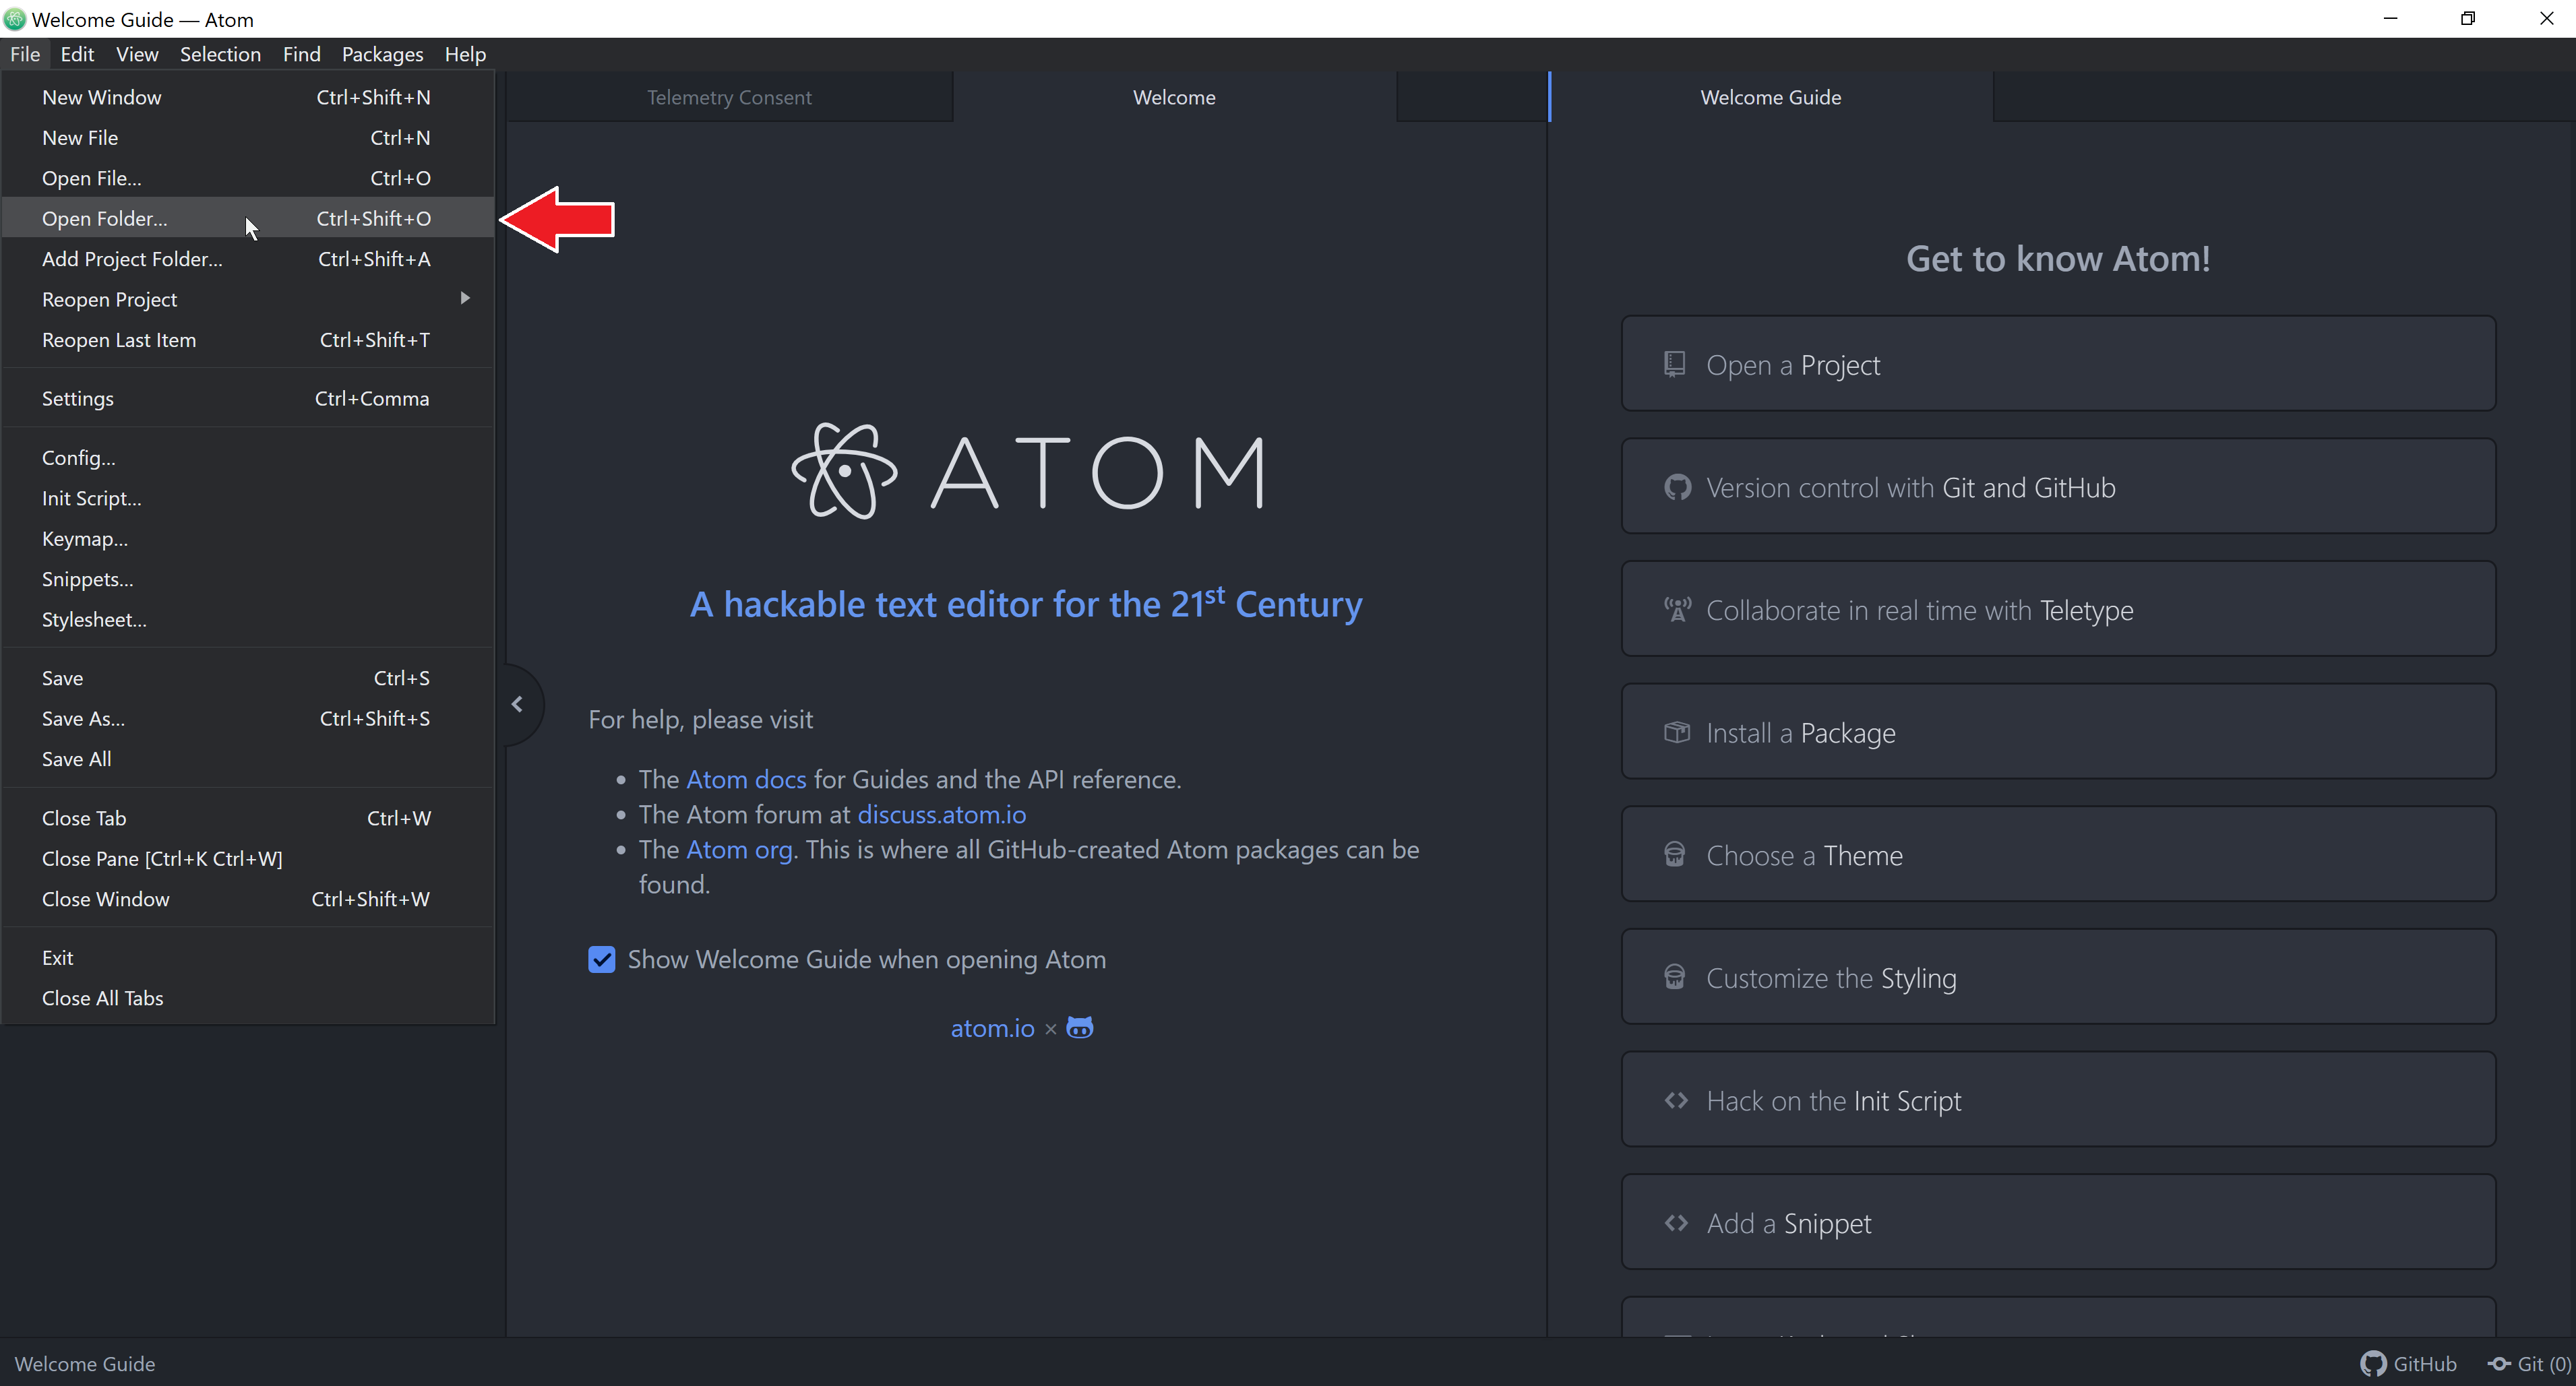
Step A11: Opening the folder in ATOM
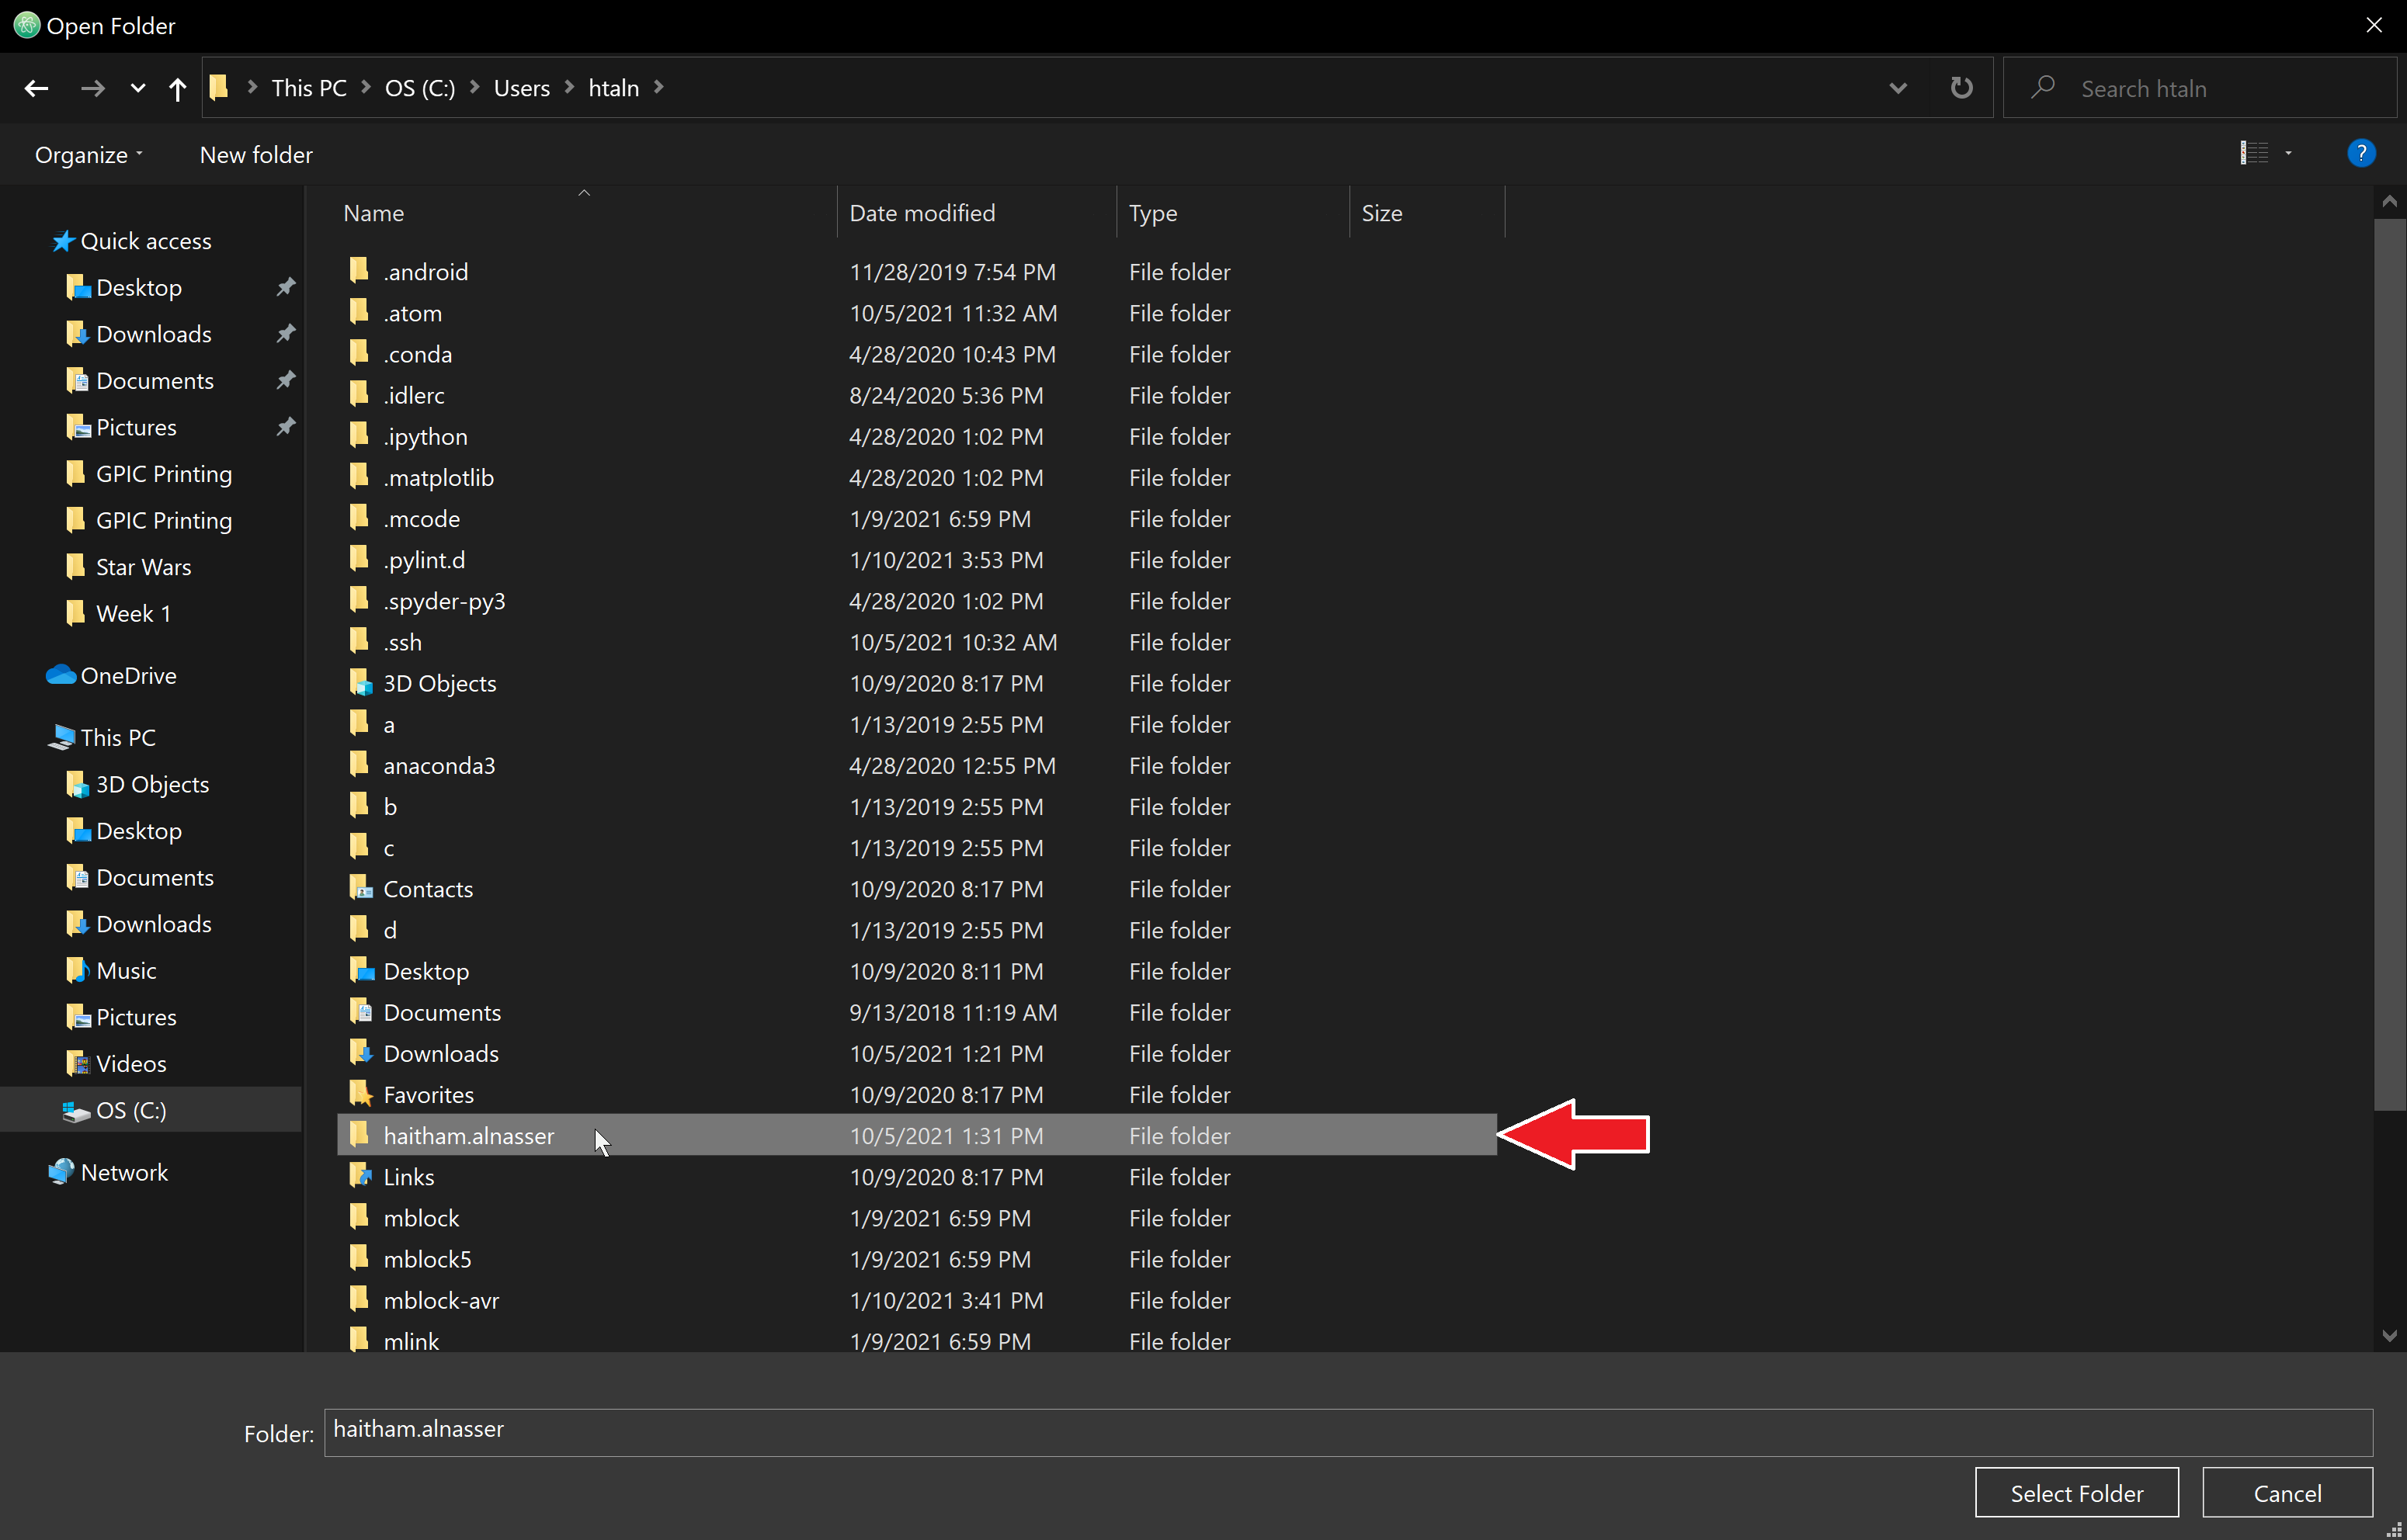
After opening the application go to "File" then "Open Folder" to open your folders in "ATOM"
Step A12: File Selection
Choose your file user name that was made in the generated folder.
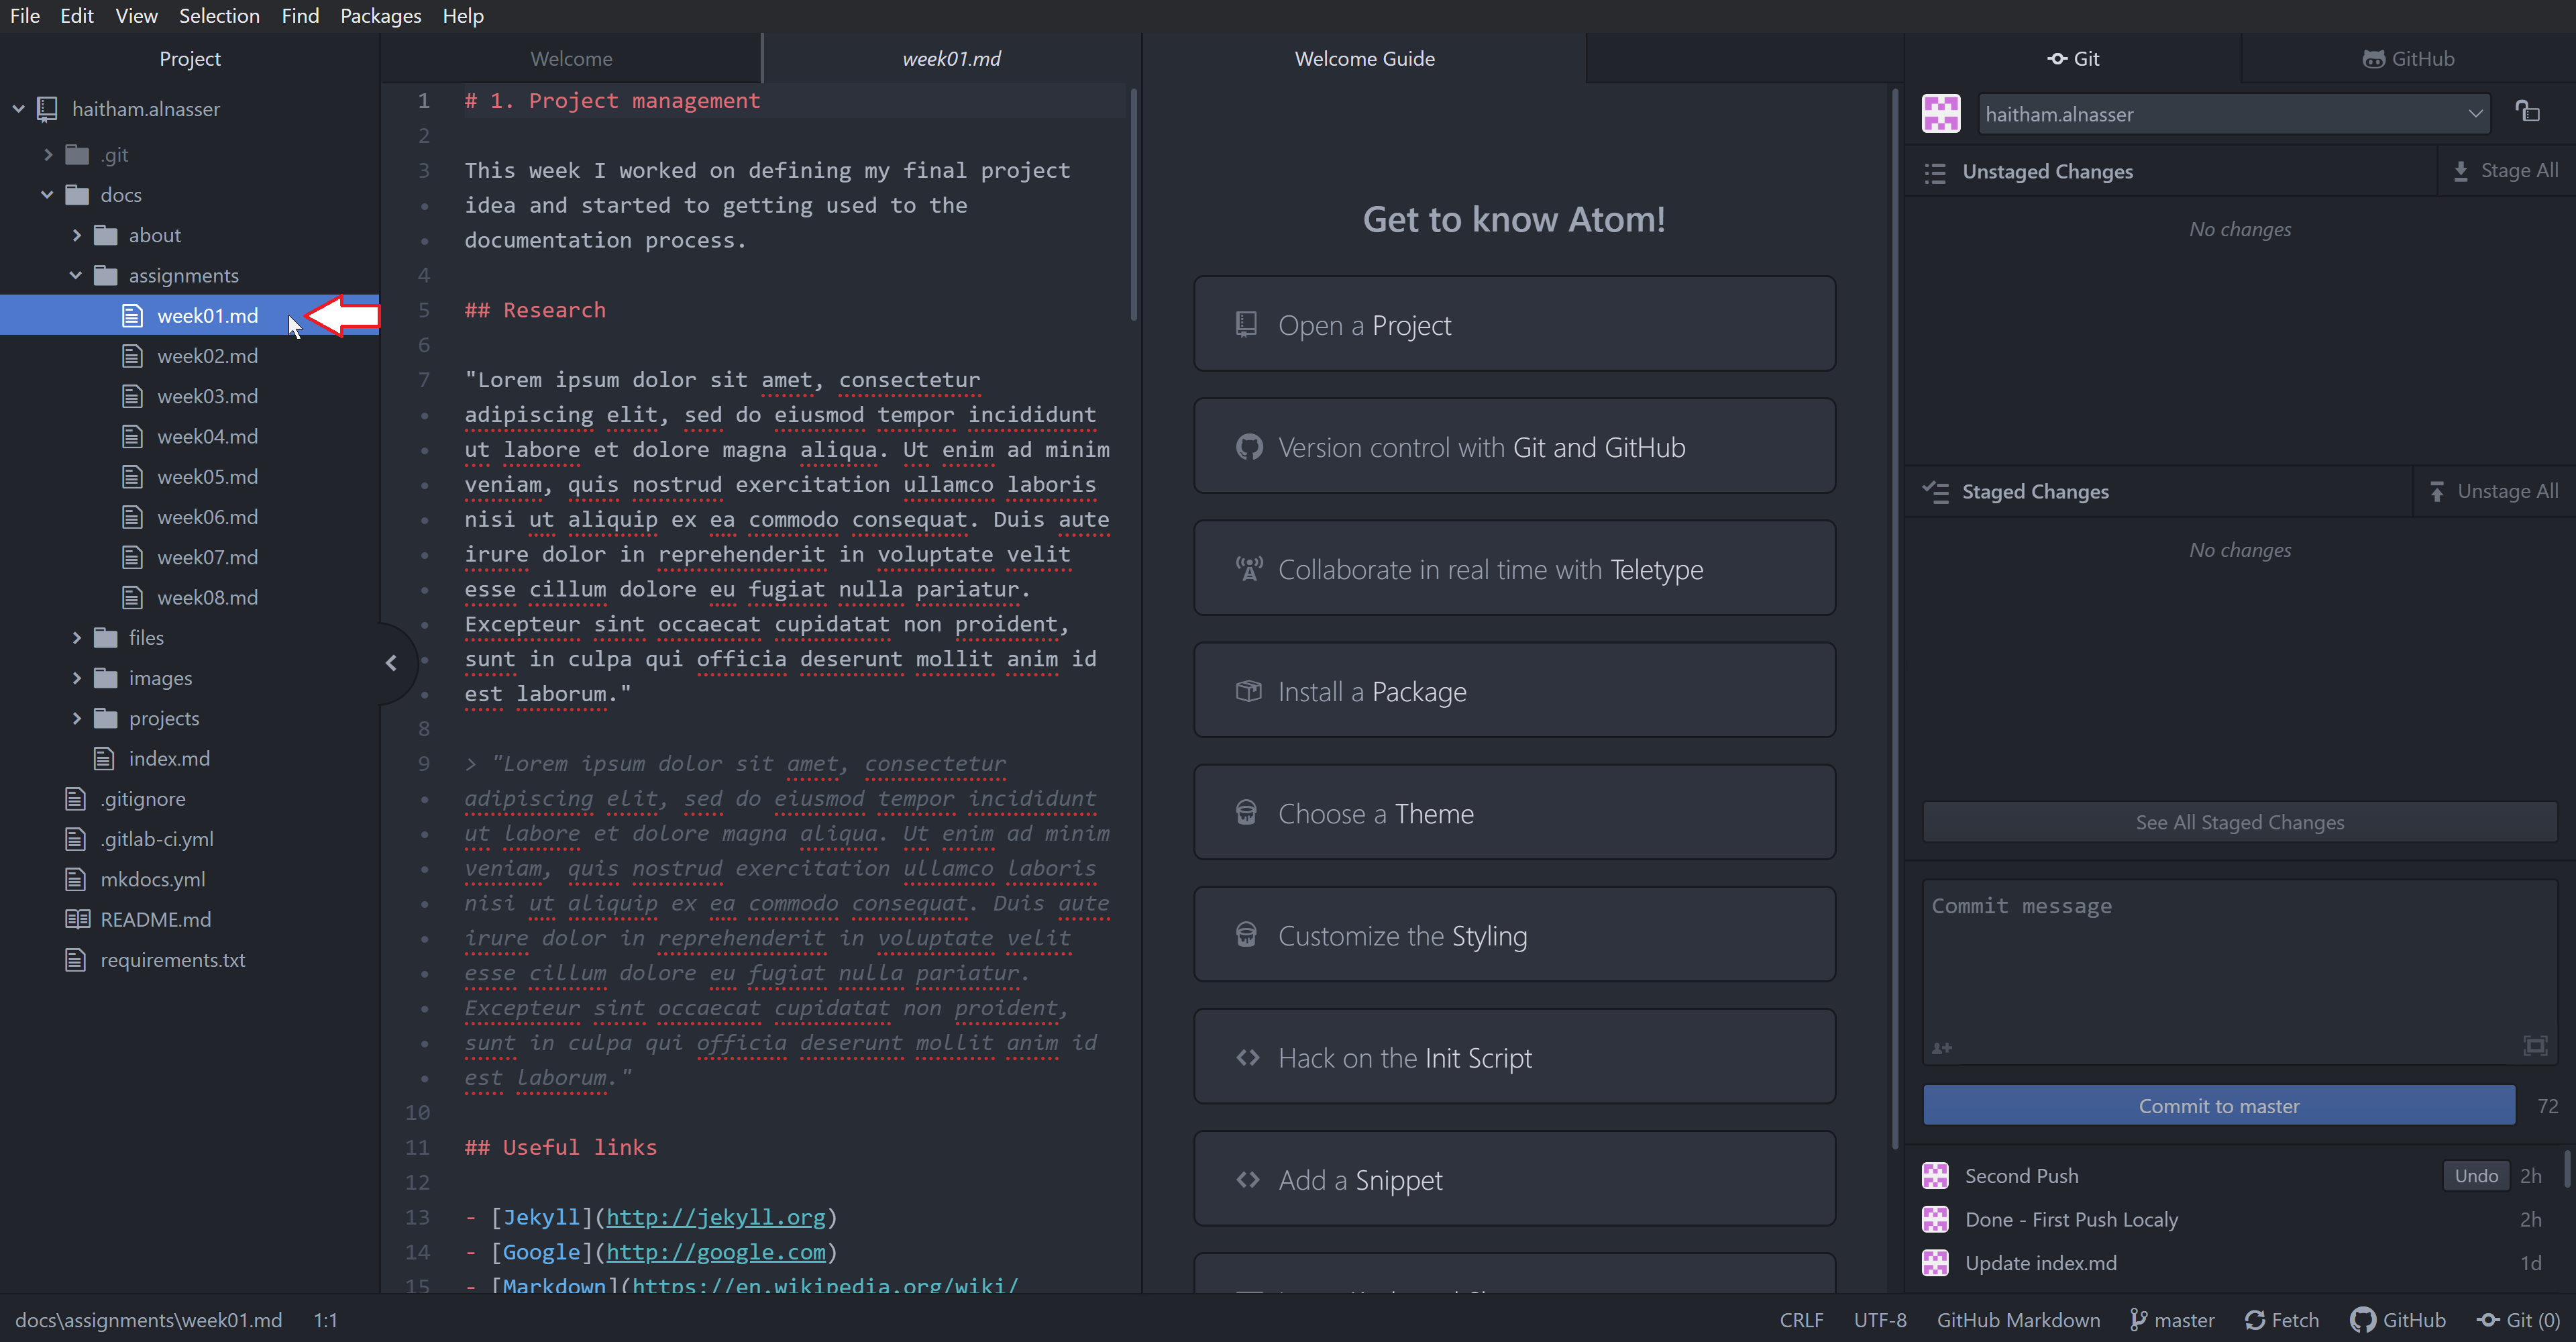
Step A13: Part Selection
After uploading your folder, the files inside your folder will appears. And from there you can select the part you want to edit.
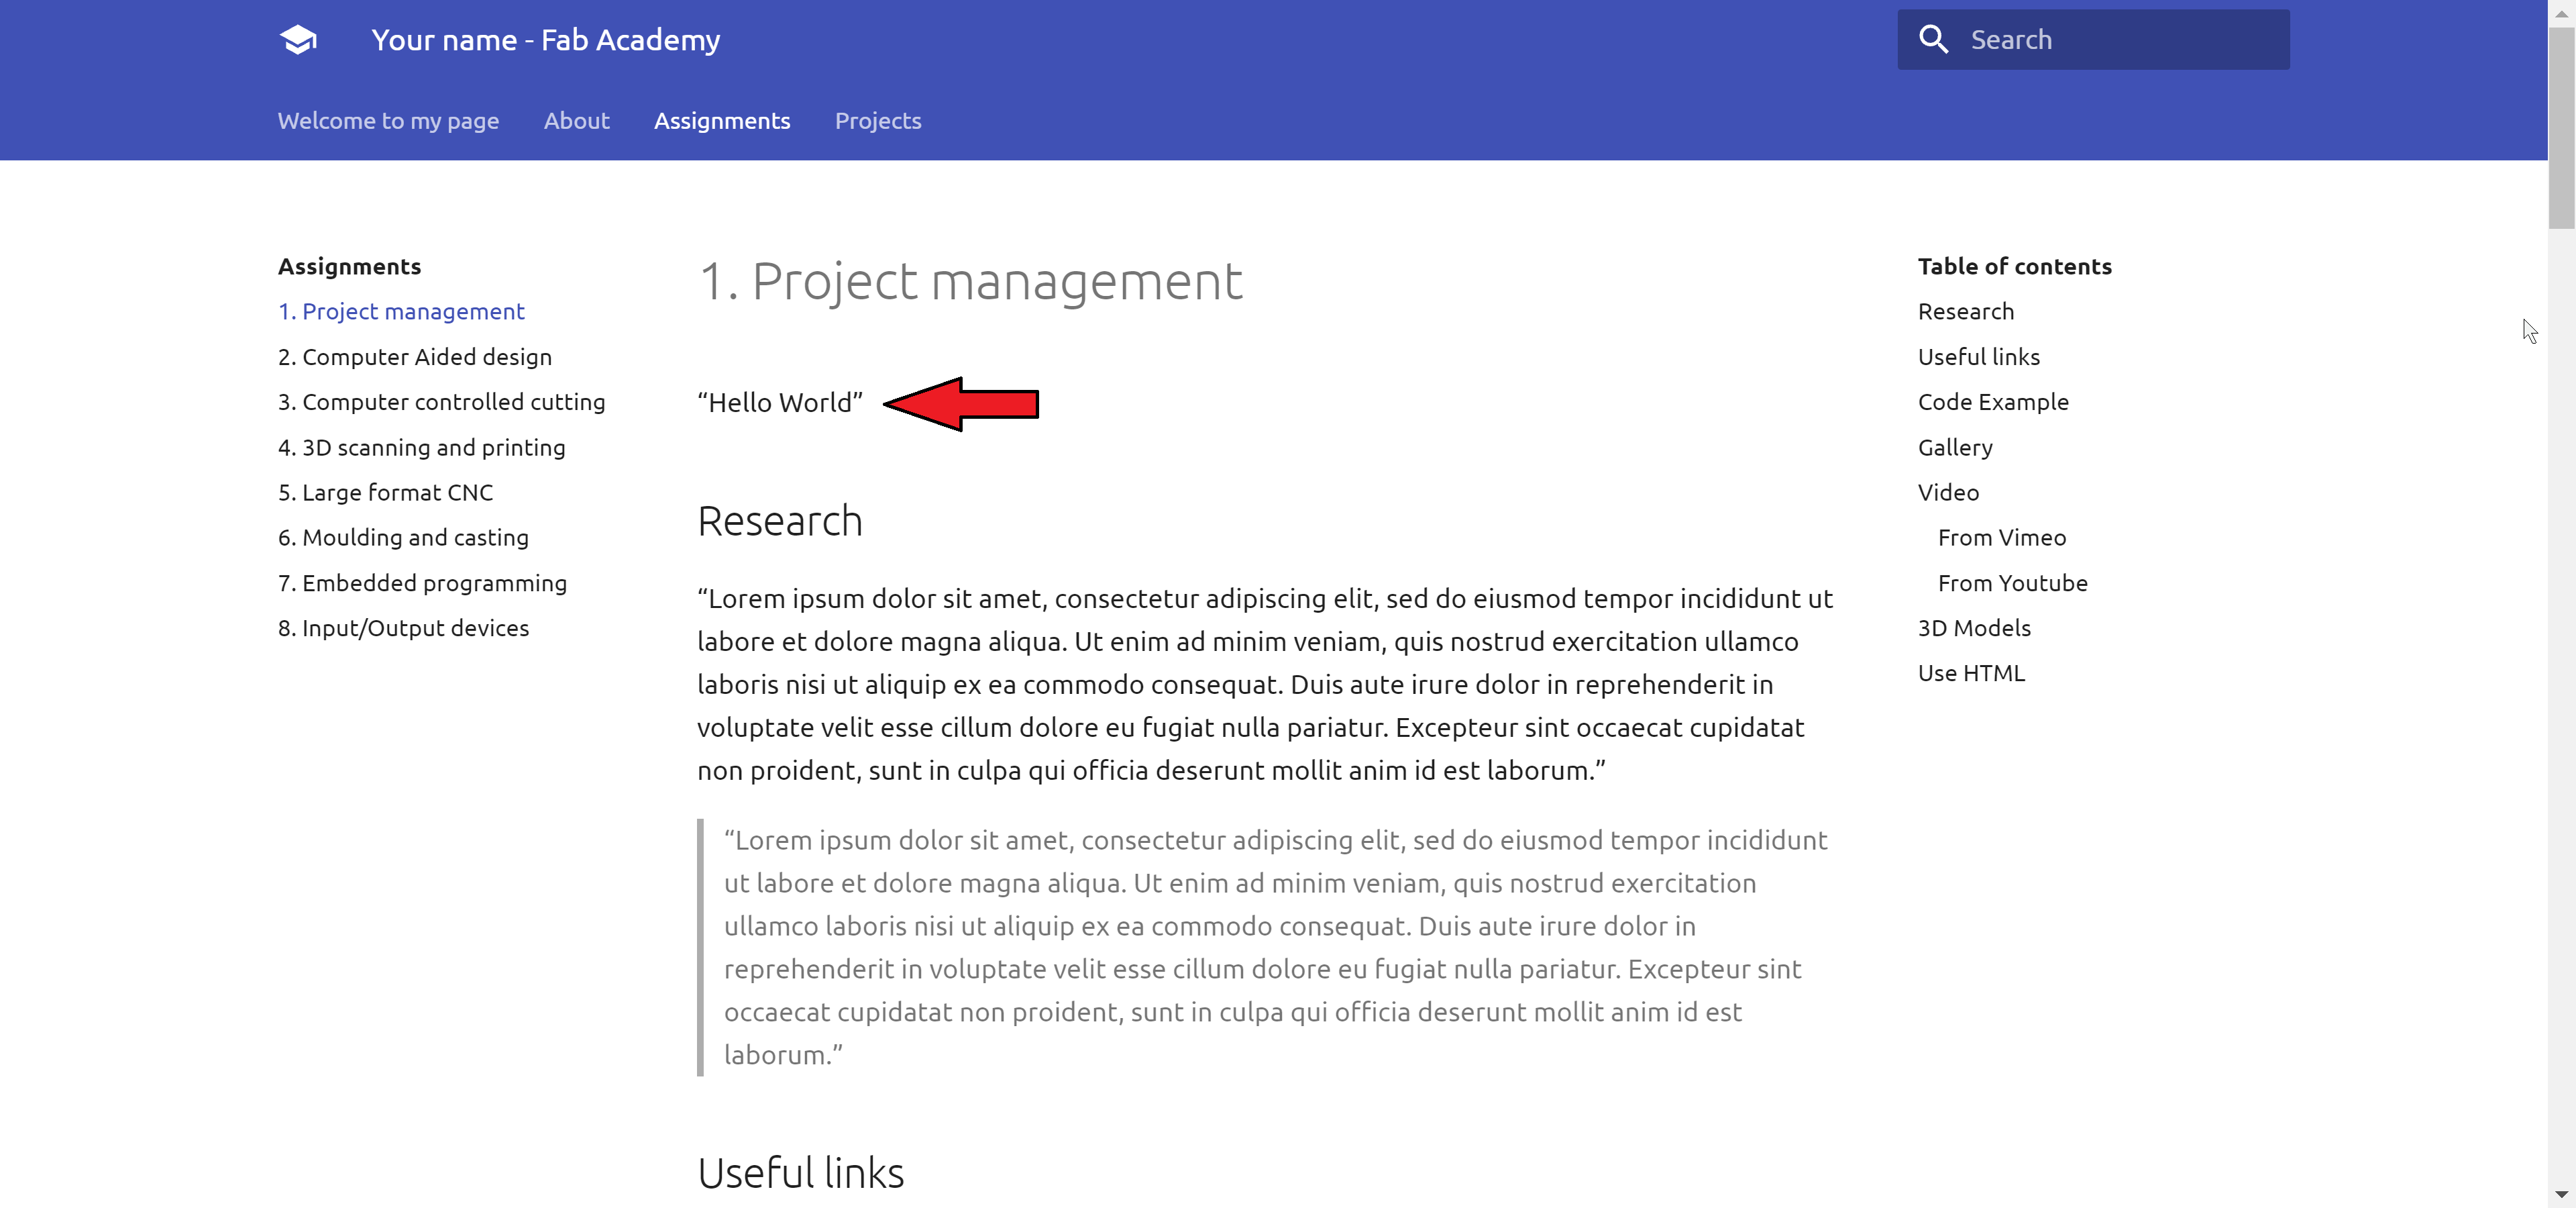
Step A14: Text Editing
As a test we tried to change the in "week01.md" and we wrote "Hello World".
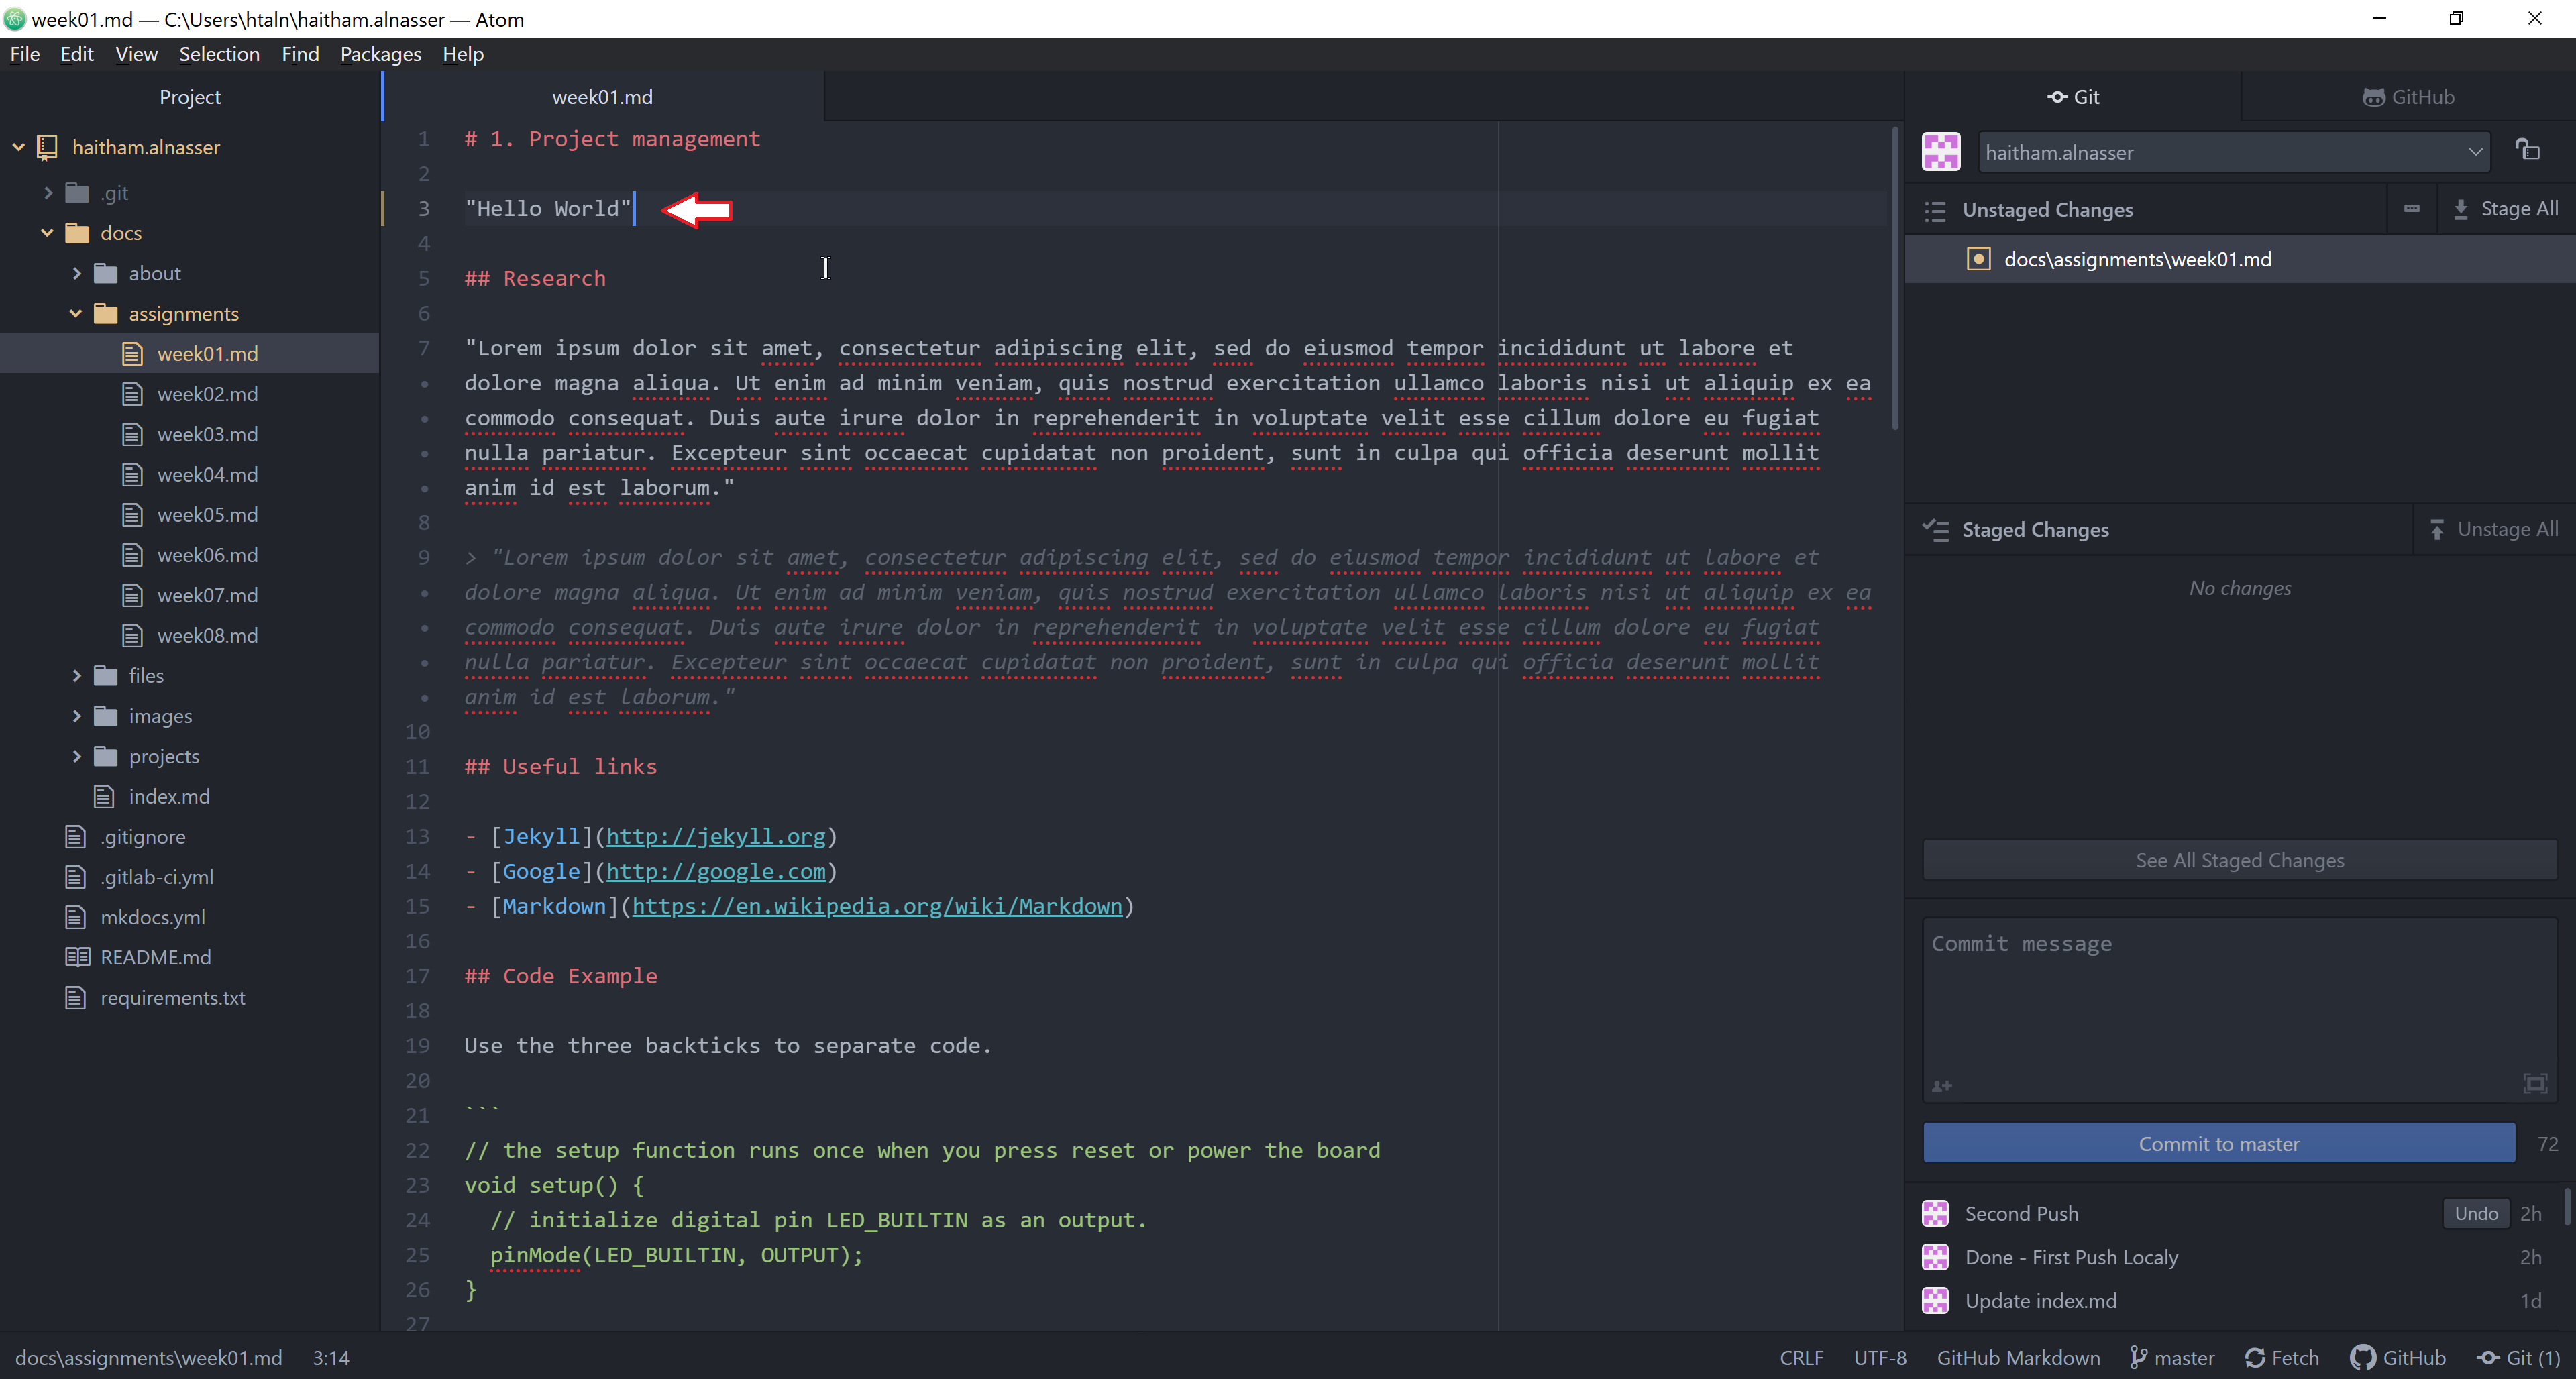
Step A15: Saving
After editing anything your work, a blue dot will show on the top. The blue dot represent you have change in your work and you should probably should save it.

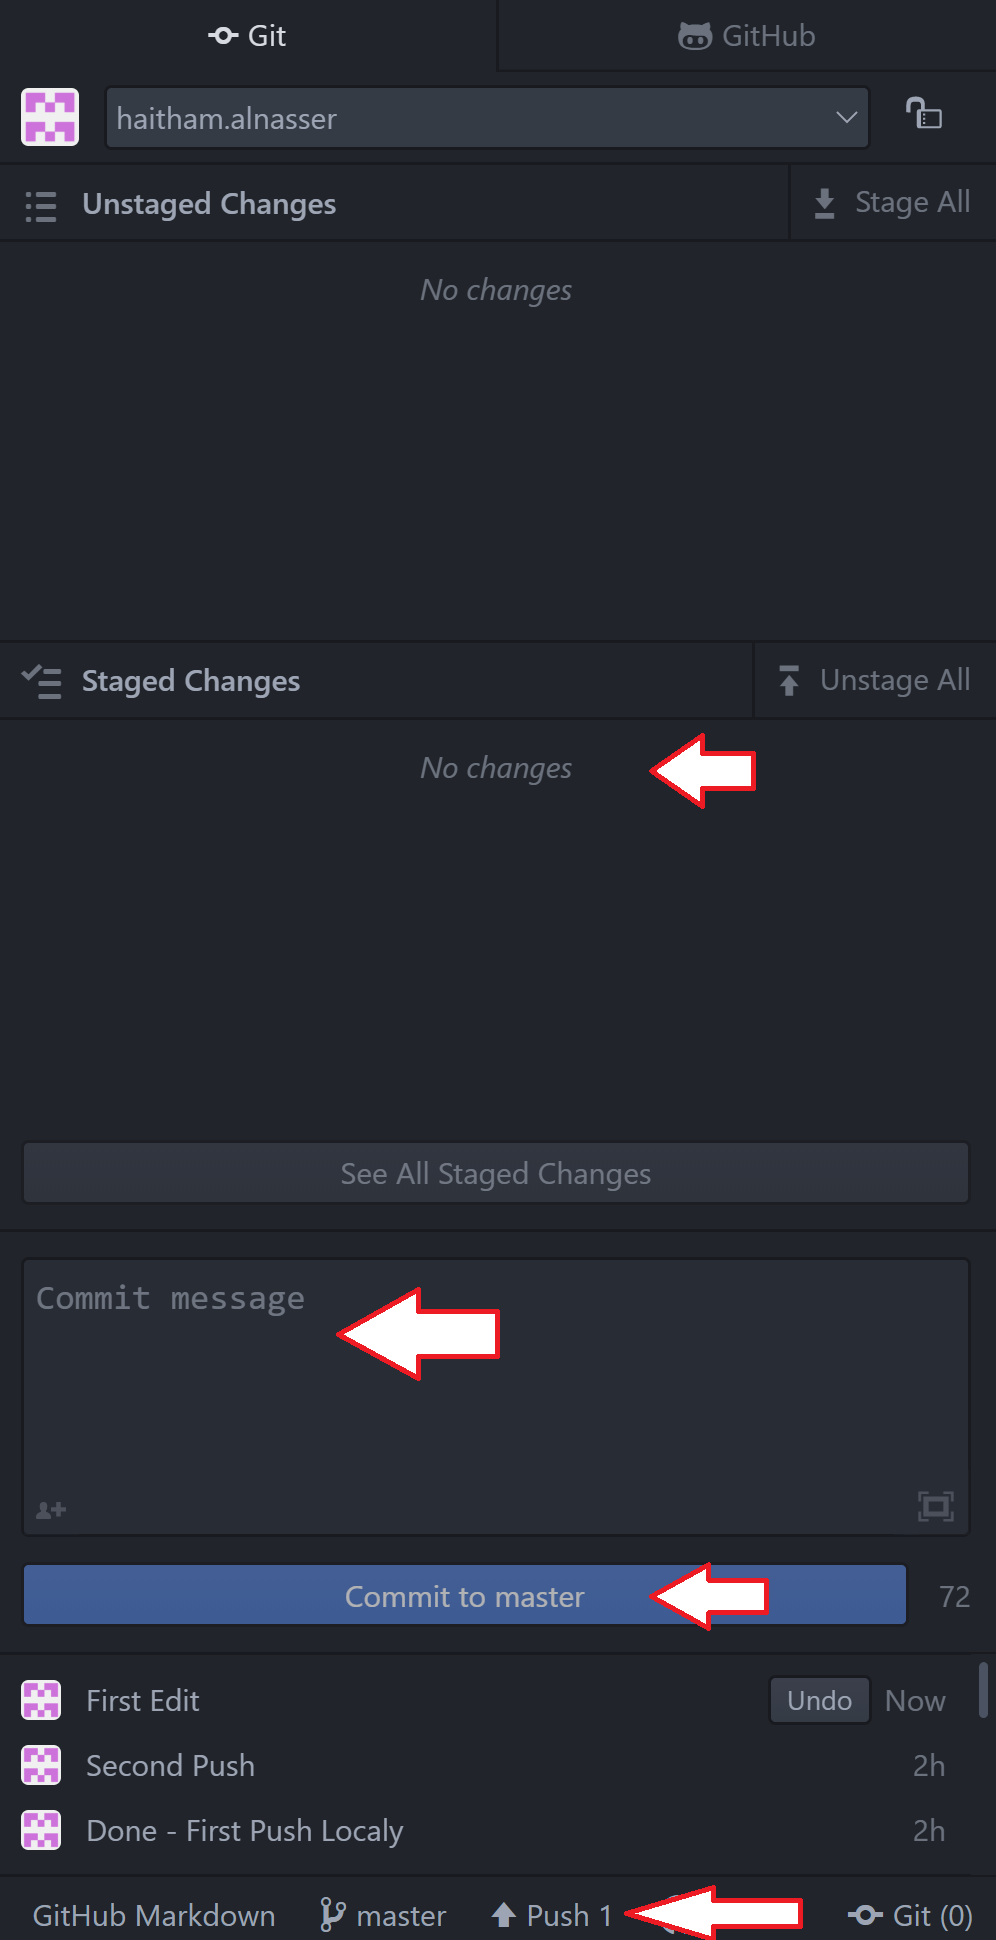
Step A16: Stage All
When you finish from your work and you saved your progresses, in order to upload your work to your online page, you should click on "Stage All".
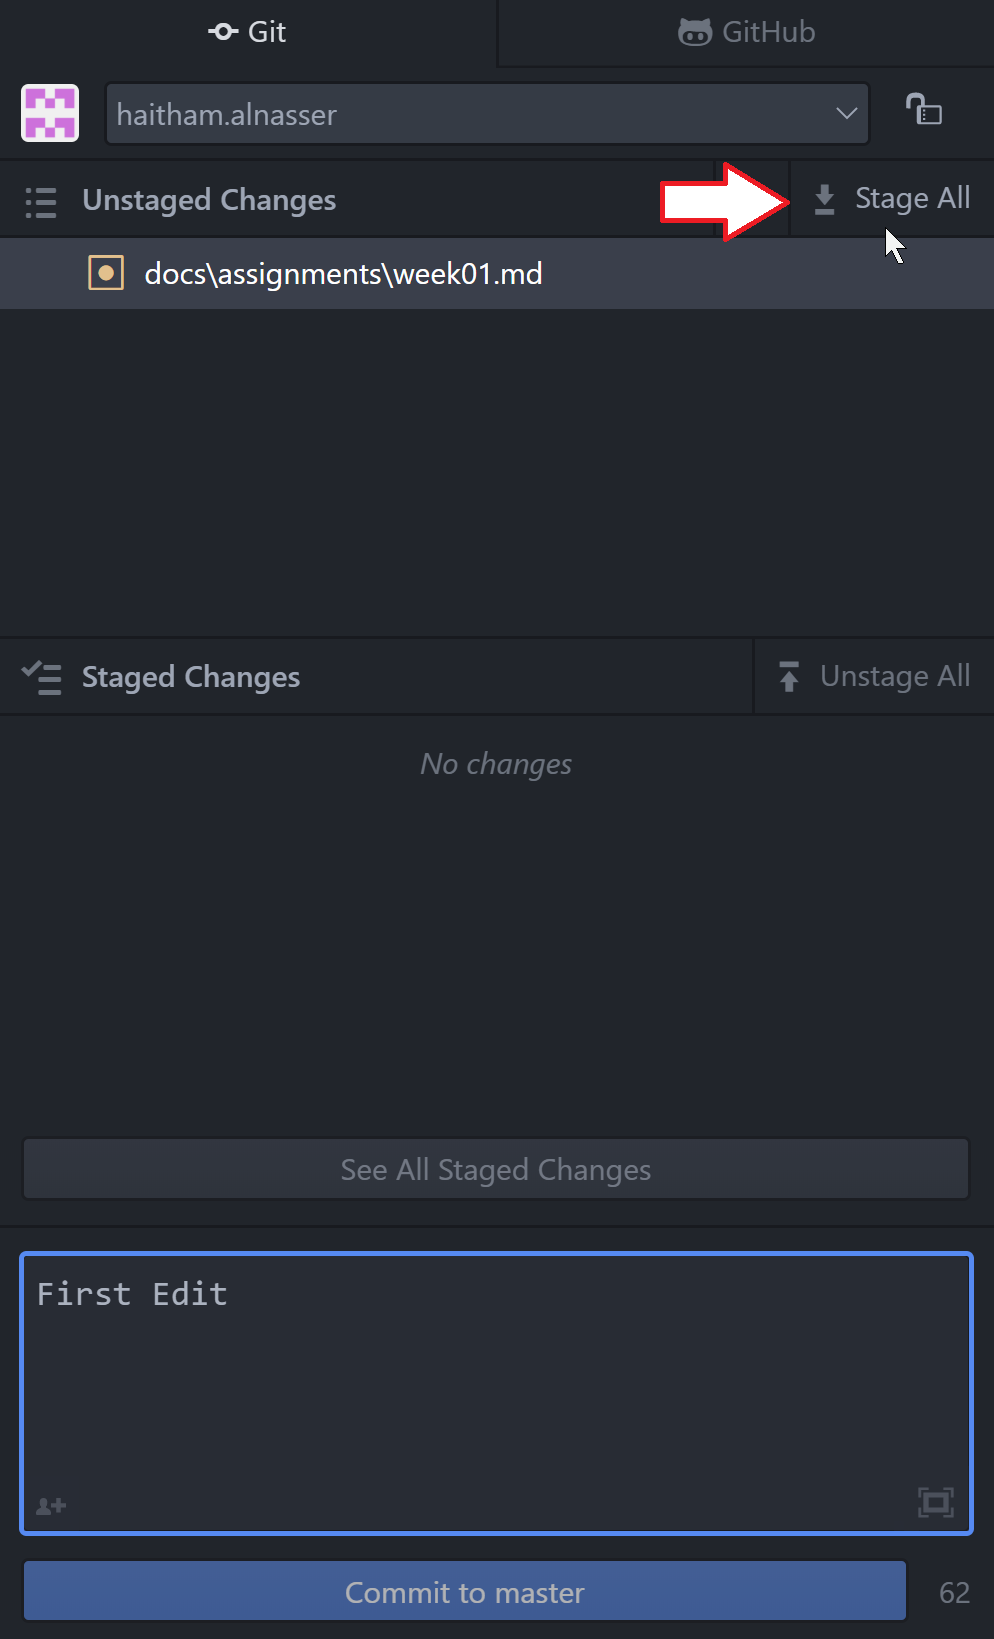
Step A17: Online Uploading
You need to make sure after you click on "Stage All", the file will go "Stages Changes". You must write a comment in the "Commit message" and press on "Commit to master". Lastly click on "Push" to upload the files.
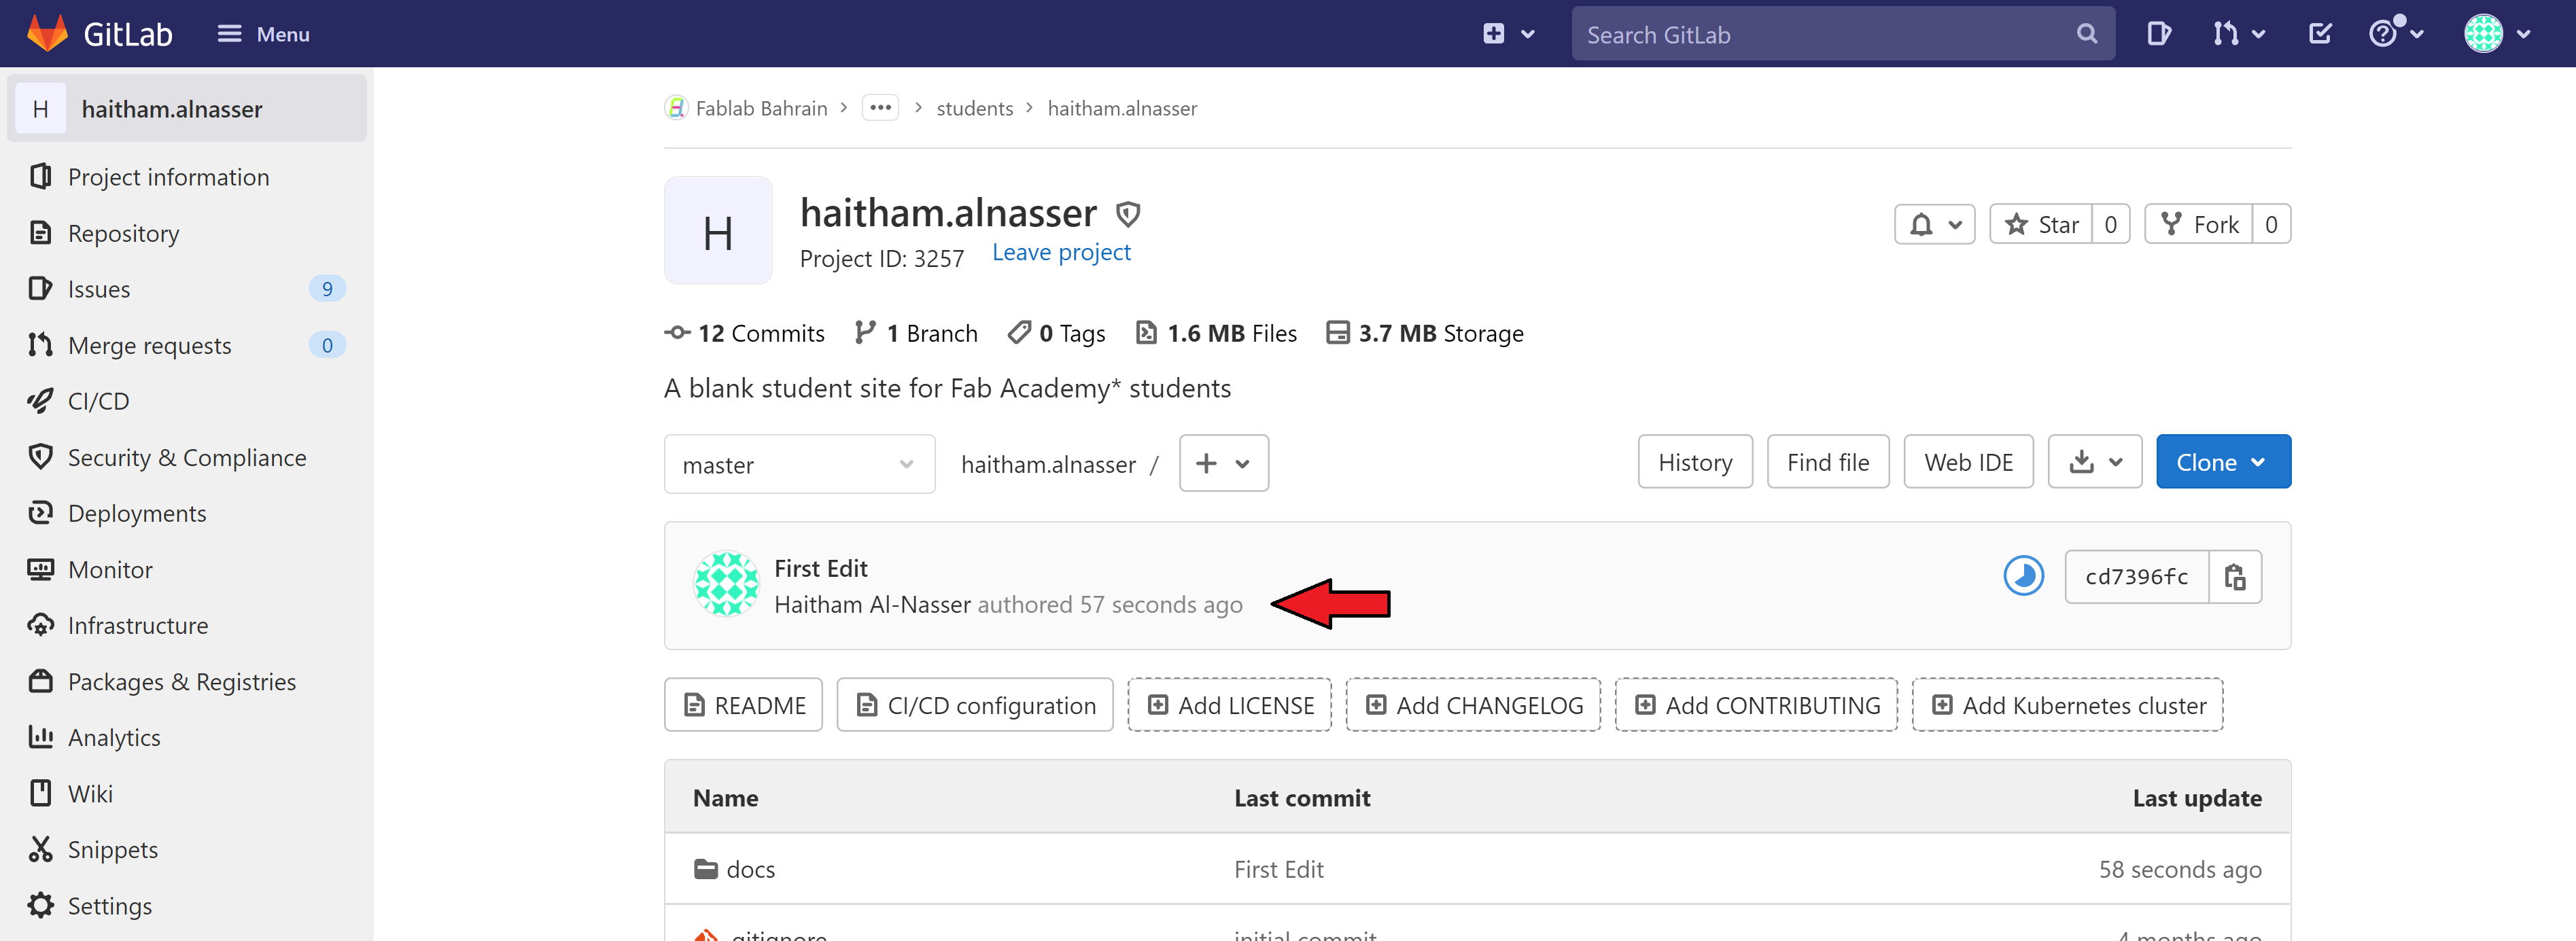
Step A18: Progress Checking
You can double check your work been Uploaded by checking you profile page and check the latest time it been authored.
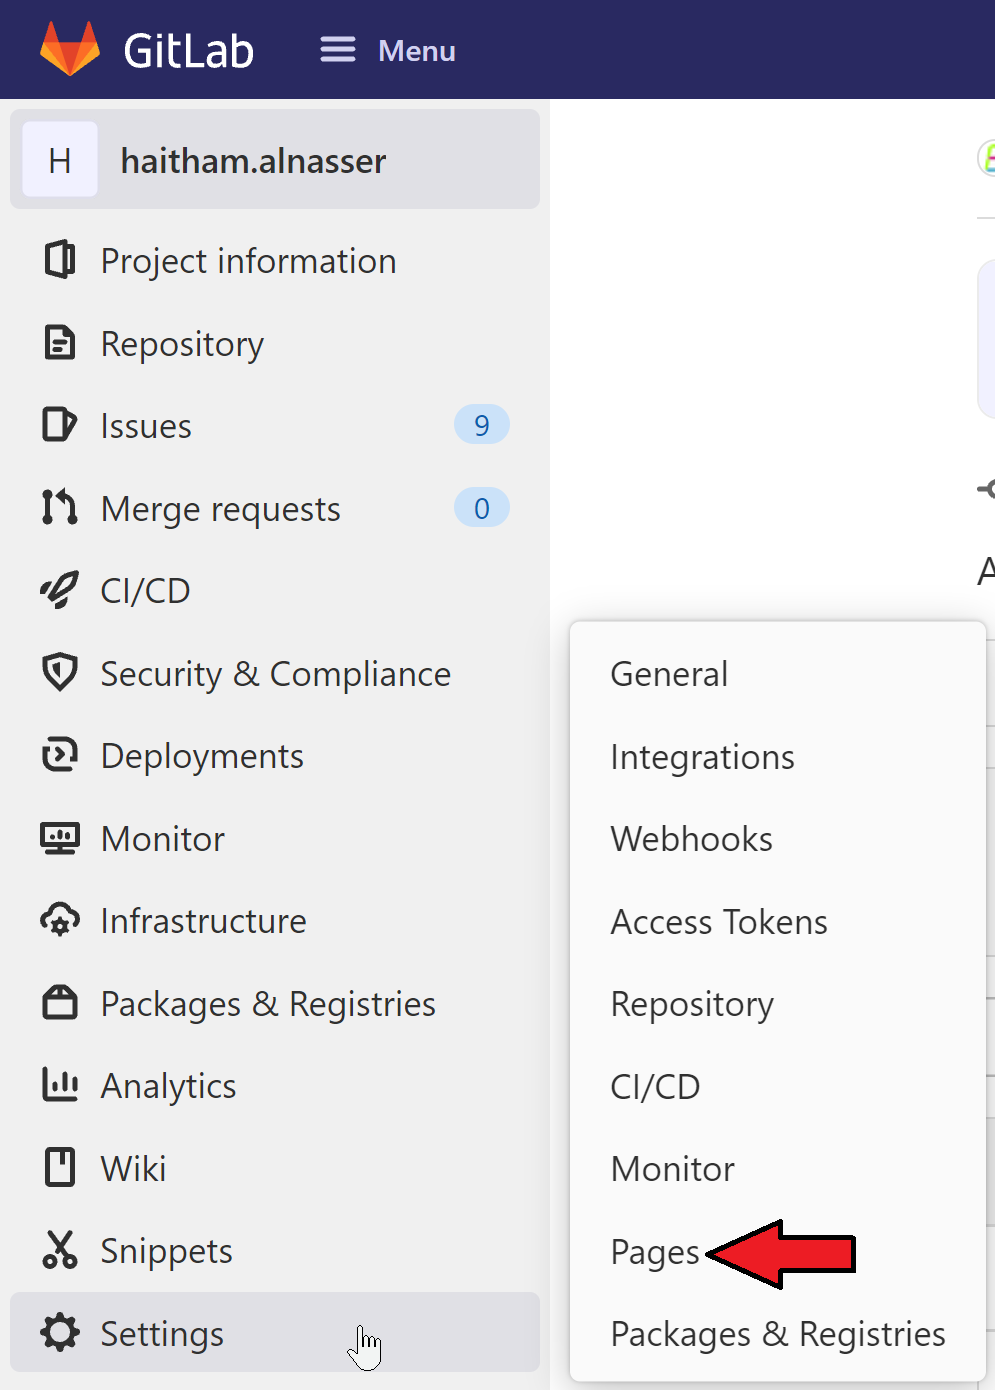
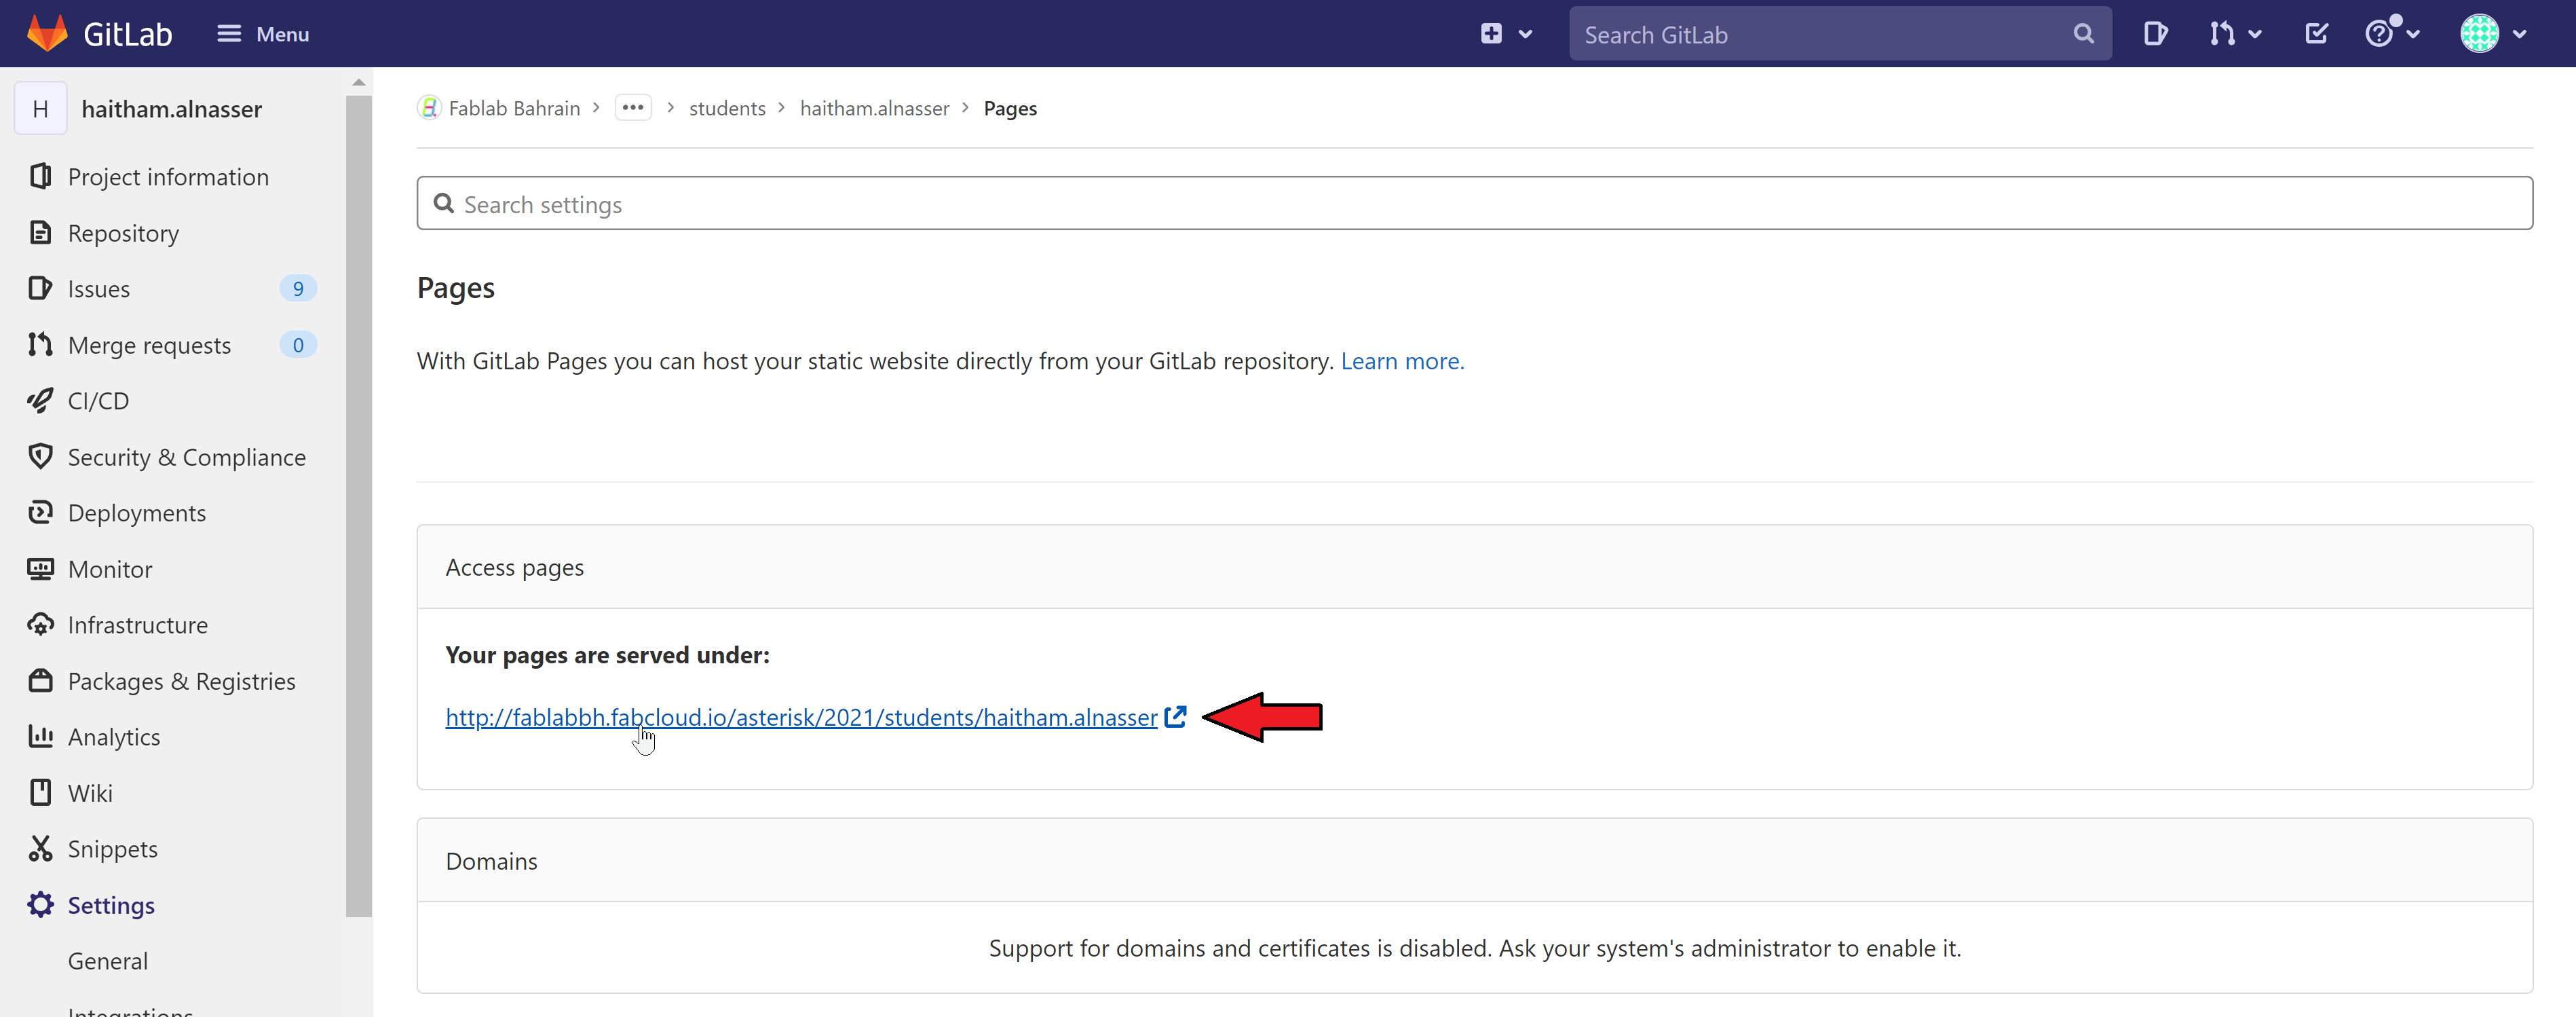
Step A19: Page Accessing
In order to check your web page online, you need to go "Settings" and click on "Pages" and click on your page link.
Step A20: Work Update
You can check what ever you have update or edit or add appears in your page.
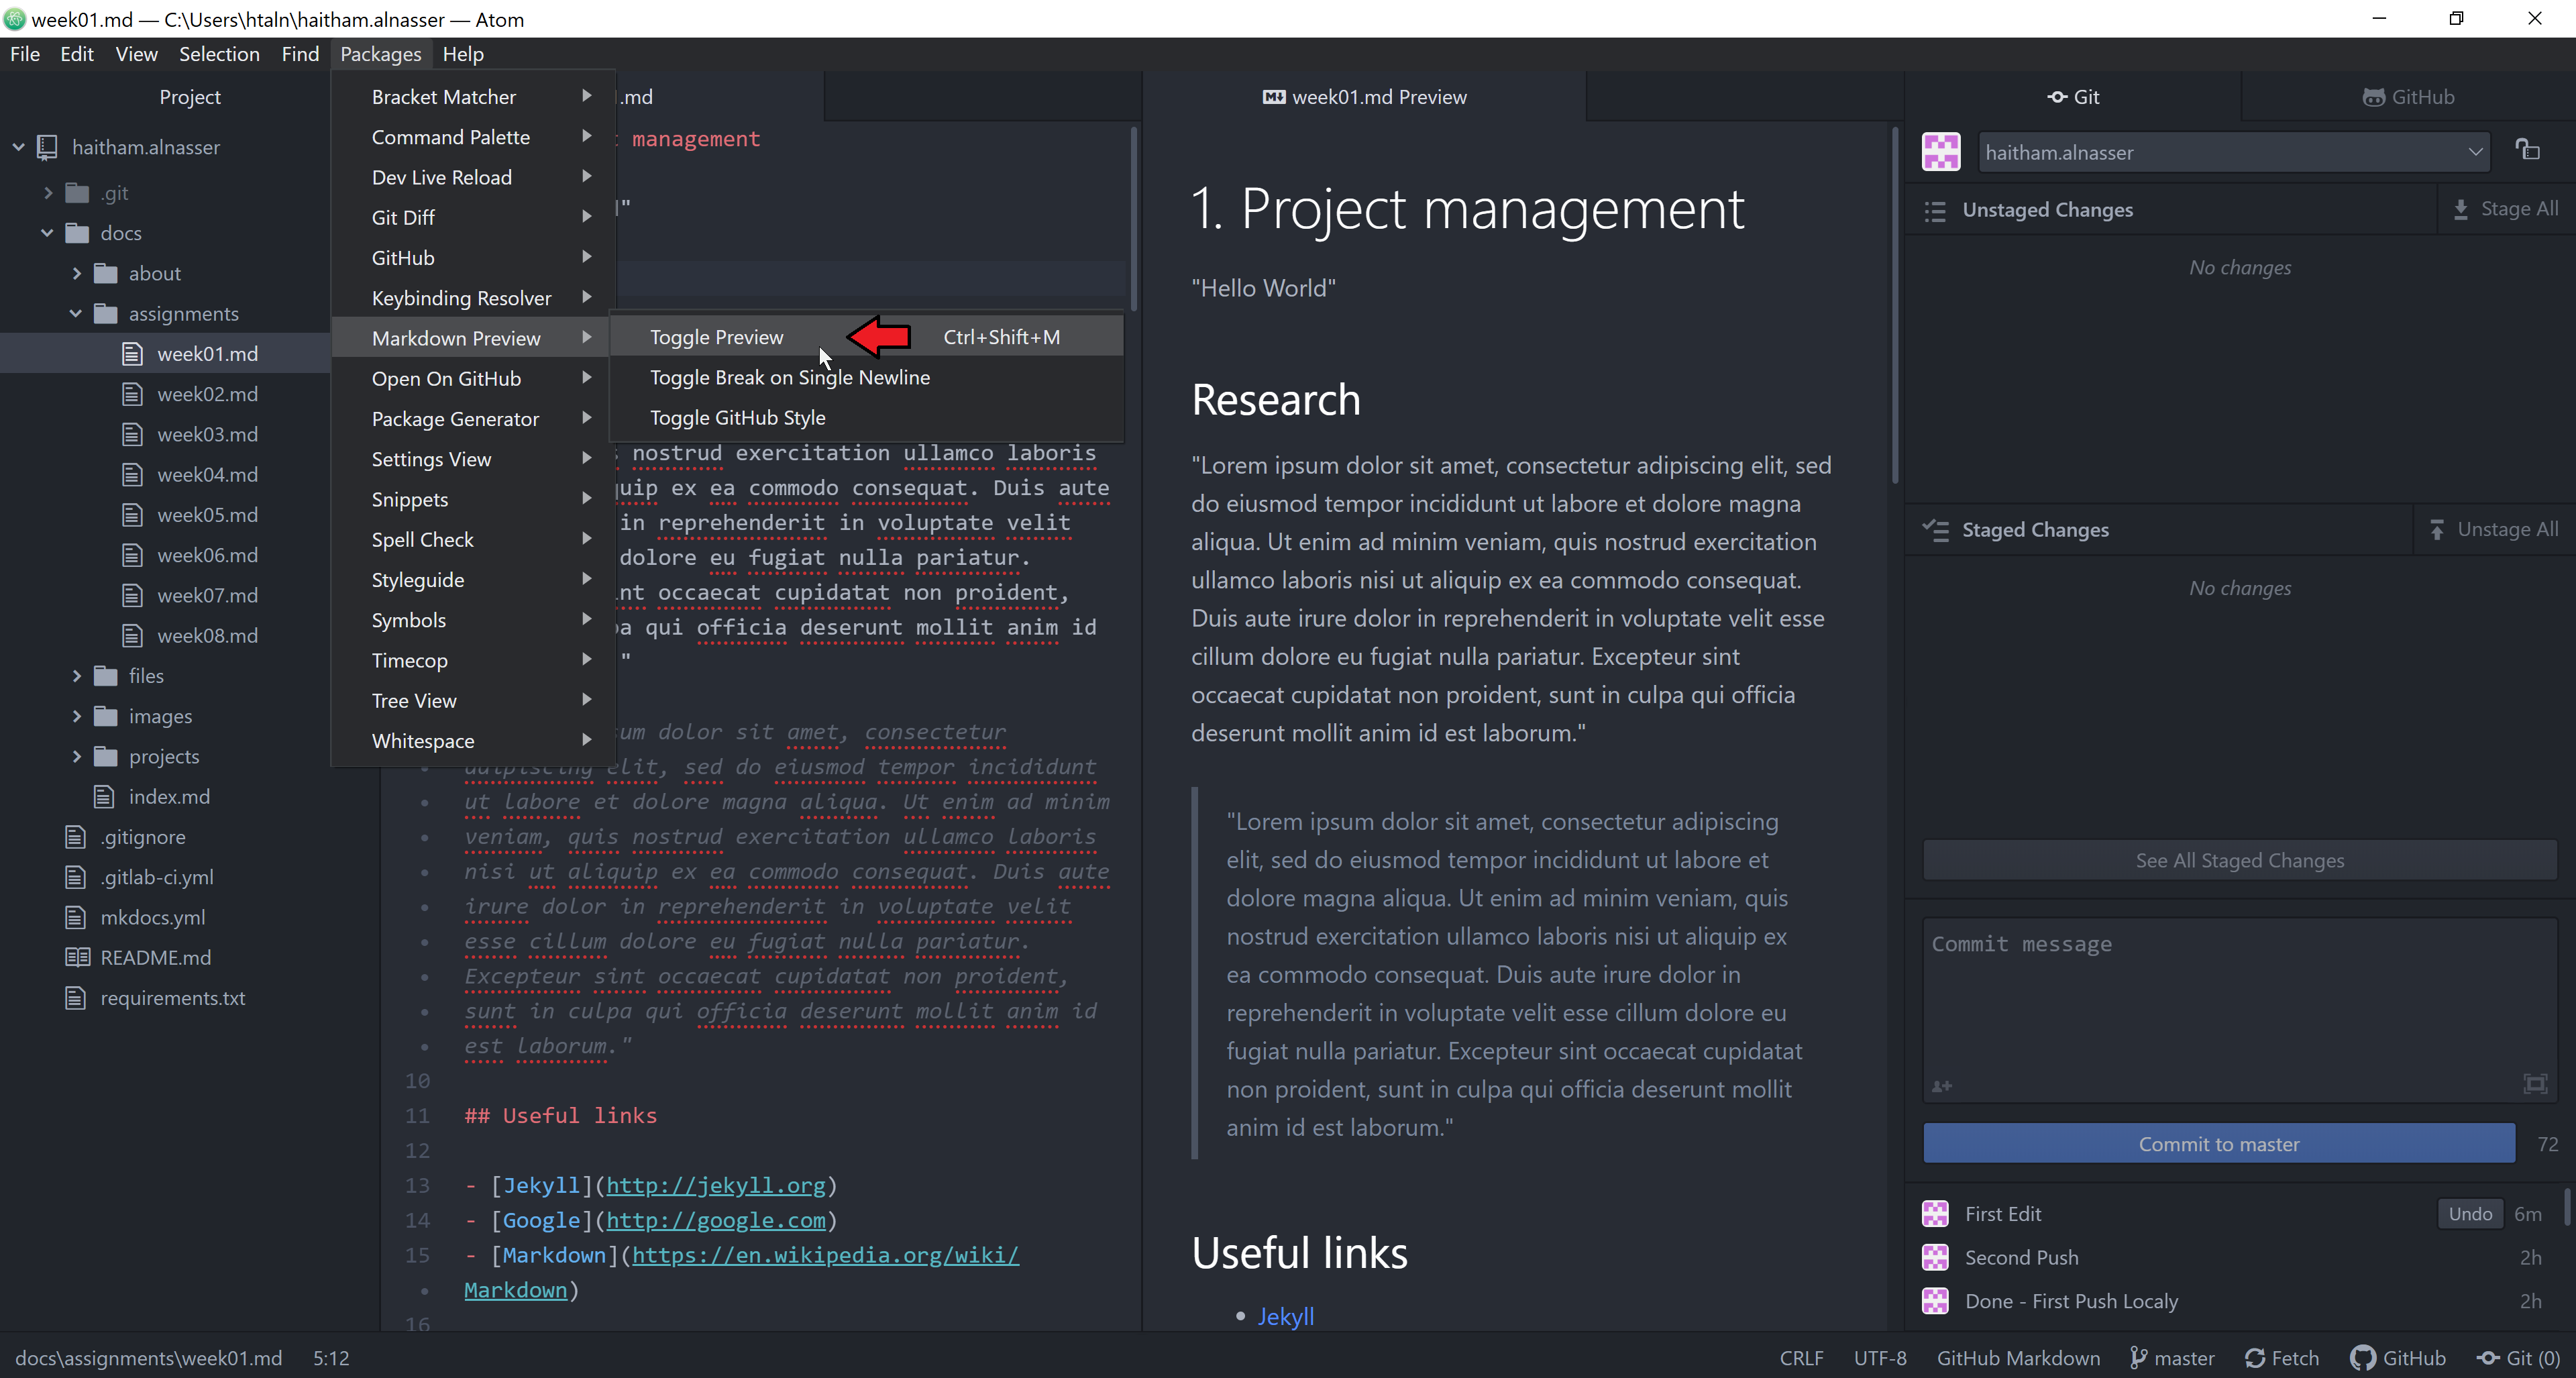
Step A21: Offline Work Update
You can also check your work being update offline without uploading it by going to "Packages" and click on "Markdown Preview" and choose "Toggle Preview"
Converting to HTML
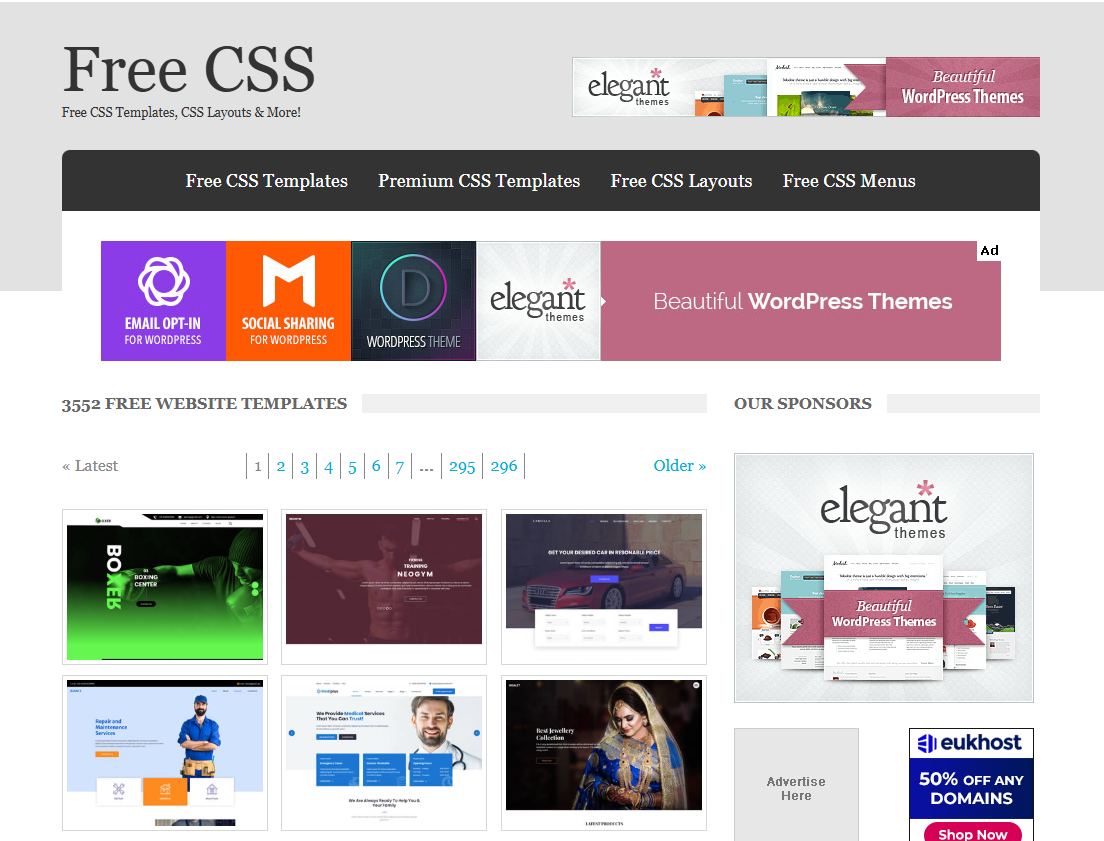
Step B1: Choosing Template
In this section, you can utilize the website Free CSS to download and choose a suitable design for your own website. The site offers a vast collection of 3,552 free website templates, allowing you to explore various styles and layouts. Once you select a template that fits your needs, you can easily download it for use in your project.
The downloaded template typically includes essential files such as:
- bootstrap.js: The main JavaScript file for the Bootstrap framework, enabling responsive and mobile-first web designs.
- jquery-3.4.1.min.js: A lightweight JavaScript library that simplifies HTML document traversal, event handling, and animations.
- bootstrap.css: The main CSS file for Bootstrap, providing styles for grids, typography, buttons, forms, and UI components.
- responsive.css: Additional styles to ensure your website looks great on various devices, often using media queries.
- style.css: A custom stylesheet for your specific styles, which may override Bootstrap defaults.
- style.css.map: A source map that assists in debugging by linking the compiled CSS back to the original source files.
- style.scss: A SCSS file that allows for more advanced CSS features and needs to be compiled into regular CSS.
Additionally, if you have content written in Markdown, you can convert it to HTML to integrate seamlessly with your chosen template. This resource provides a great starting point for anyone looking to enhance their website design without incurring costs.
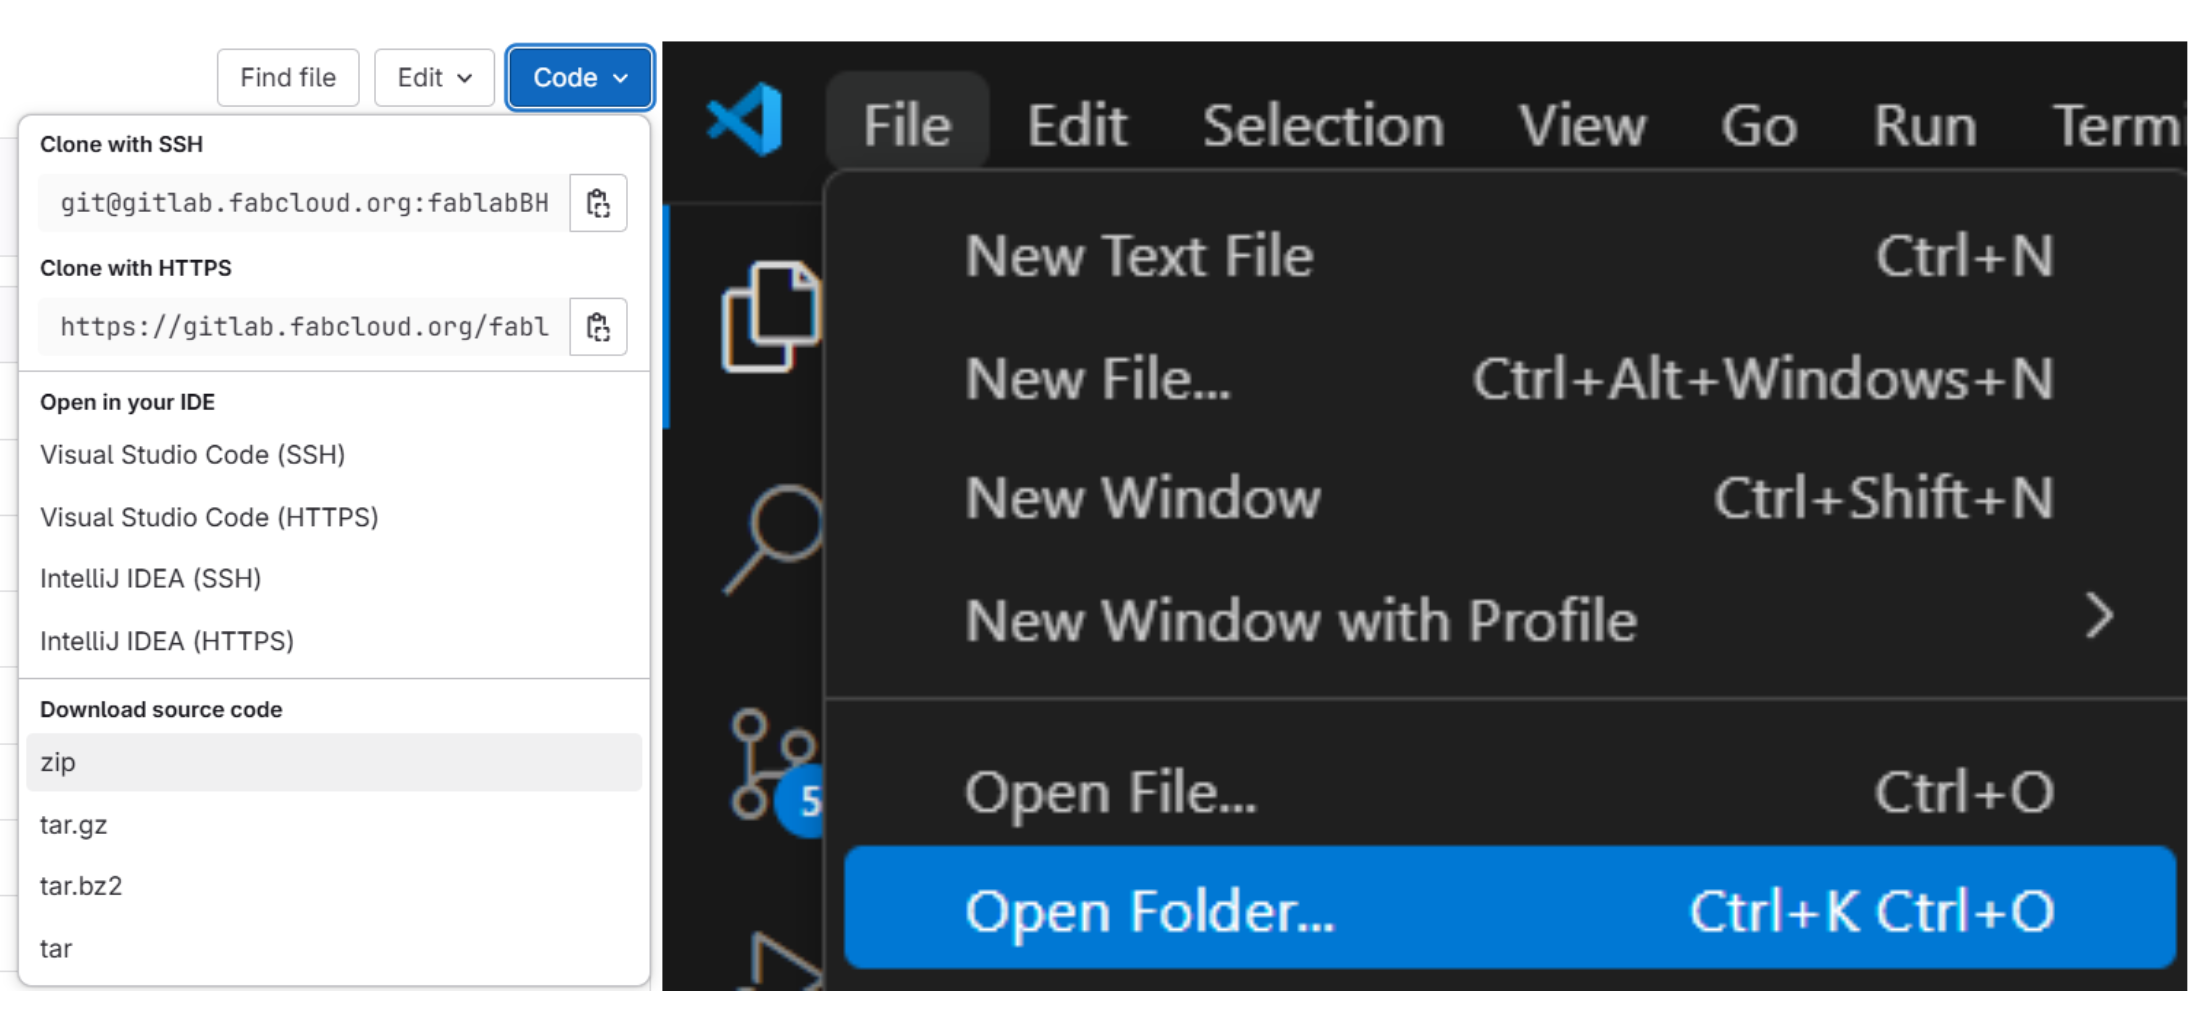
step B2: Downloading Visual Studio
In order to use your HTML template effectively, the best recommended software is Visual Studio Code. This powerful code editor allows you to upload your HTML template design, edit it offline, and easily push your changes to your website when you're ready. You can download Visual Studio Code from the following link: Download Visual Studio Code. This tool provides a user-friendly interface, rich features, and support for various programming languages, making it an ideal choice for web development.

step B3: File Uploading
You can also check your work being update offline without uploading it by going to "Packages" and click on "Markdown Preview" and choose "Toggle Preview"
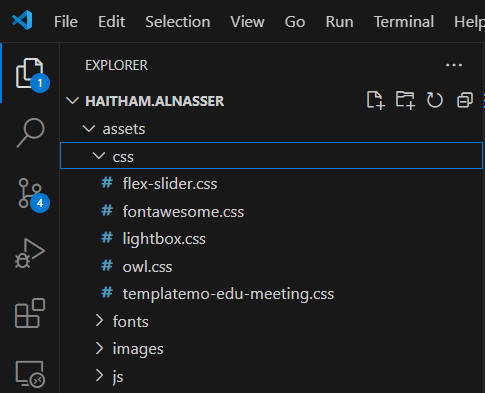
step B4: Assets Editing
To edit the assets of your HTML page, you can find the relevant sections within Visual Studio Code where you can work with CSS, fonts, and images.
- - CSS: In the CSS files, you can adjust styles, layouts, and responsiveness to enhance the appearance of your webpage.
- - Fonts: You can include and customize various fonts by linking to web font services or uploading font files directly to your project.
- - Images: You can manage image assets by uploading them to your project directory and referencing them in your HTML or CSS files.