4. 3D printing and scanning
This week I learnt 3D printing and scanning, got to know about different printers and scanning apps.
3D Printing
3D printing is additive manufacturing technique that uses computer-aided design to create objects layer by layer. It can be done in a variety of processes in which material is deposited, joined or solidified under computer control, with material being added together (such as plastics, liquids or powder grains being fused), typically layer by layer.
3D Printers
The three most established types of 3D printers for plastics parts are fused deposition modeling (FDM), stereolithography (SLA) and selective laser sintering (SLS).
In the Fab Lab Bahrain, we have FDM printers:
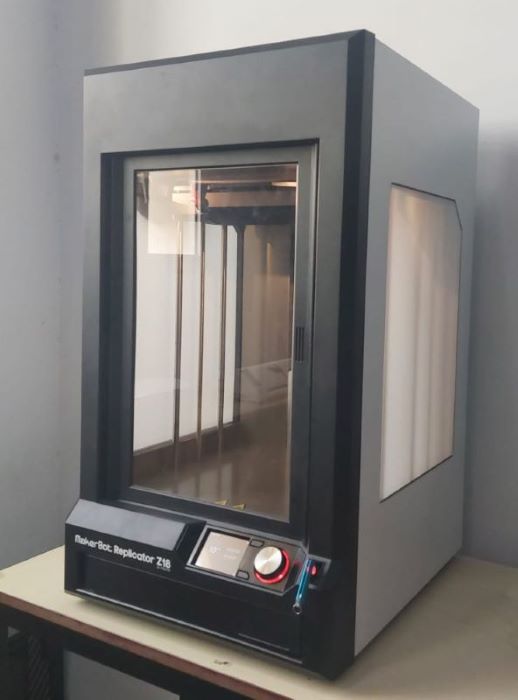
MakerBot Replicator Z18
The Makerbot Replicator Z18 3D printer is a professional FDM 3D printer. The name speaks for itself. “Z18” stands for “18 inches in the vertical plane”. In the horizontal plane, the dimensions are somewhat modest, but they are all equally impressive: 12 inches along the X and Y axes. The Makerbot Replicator Z18 has a 0.4 mm nozzle. It has an extruder and comes with a fan for printing with PLA-type materials. The fan reduces warping and stringing, which allows you to make higher quality prints. Unlike many FDM printers, the Makerbot Replicator Z18 has a heated print bed and a closed print chamber, which means it can safely work with ABS-type materials. MakerBot PLA Filament and other materials such as bronzefill, copperfill, woodfill, and others are used to print with the MakerBot Replicator Z18. The build area of the printer is 11.8 x 12 x 18 inches (300 x 305 x 457 mm). The printer is controlled via a PC or the built-in LCD interface. 3D models can be transferred via USB, Ethernet, or WiFi.
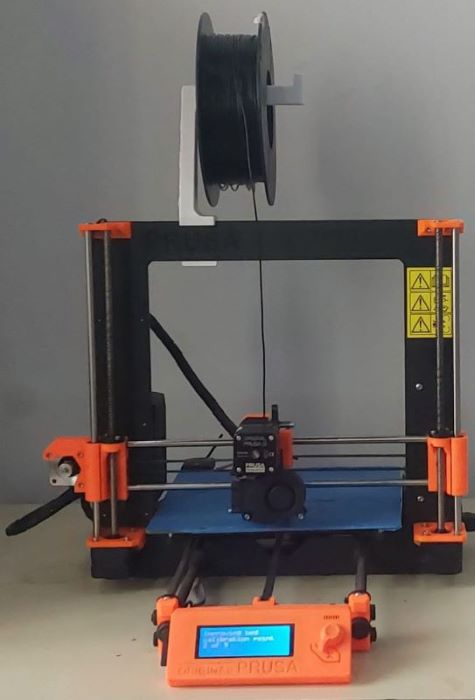
Prusa i3
The Prusa i3 series consists of open-source FDM 3D printers, manufactured by the Czech company Prusa Research under the trademarked name Original Prusa i3. The original Prusa i3 printers are Cartesian printers. The Cartesian printers are characterized by at least three motors moving the parts of the printer along the axes of the Cartesian coordinate system: Y (back and forth), X (left and right), and Z (up and down). The model to be printed needs to be sliced into layers for the print. It is an excellent 3D printer for people who want to start with 3D printing. It is most suited towards beginners as it is very user-friendly but, at the same time, offers some advanced features as well.
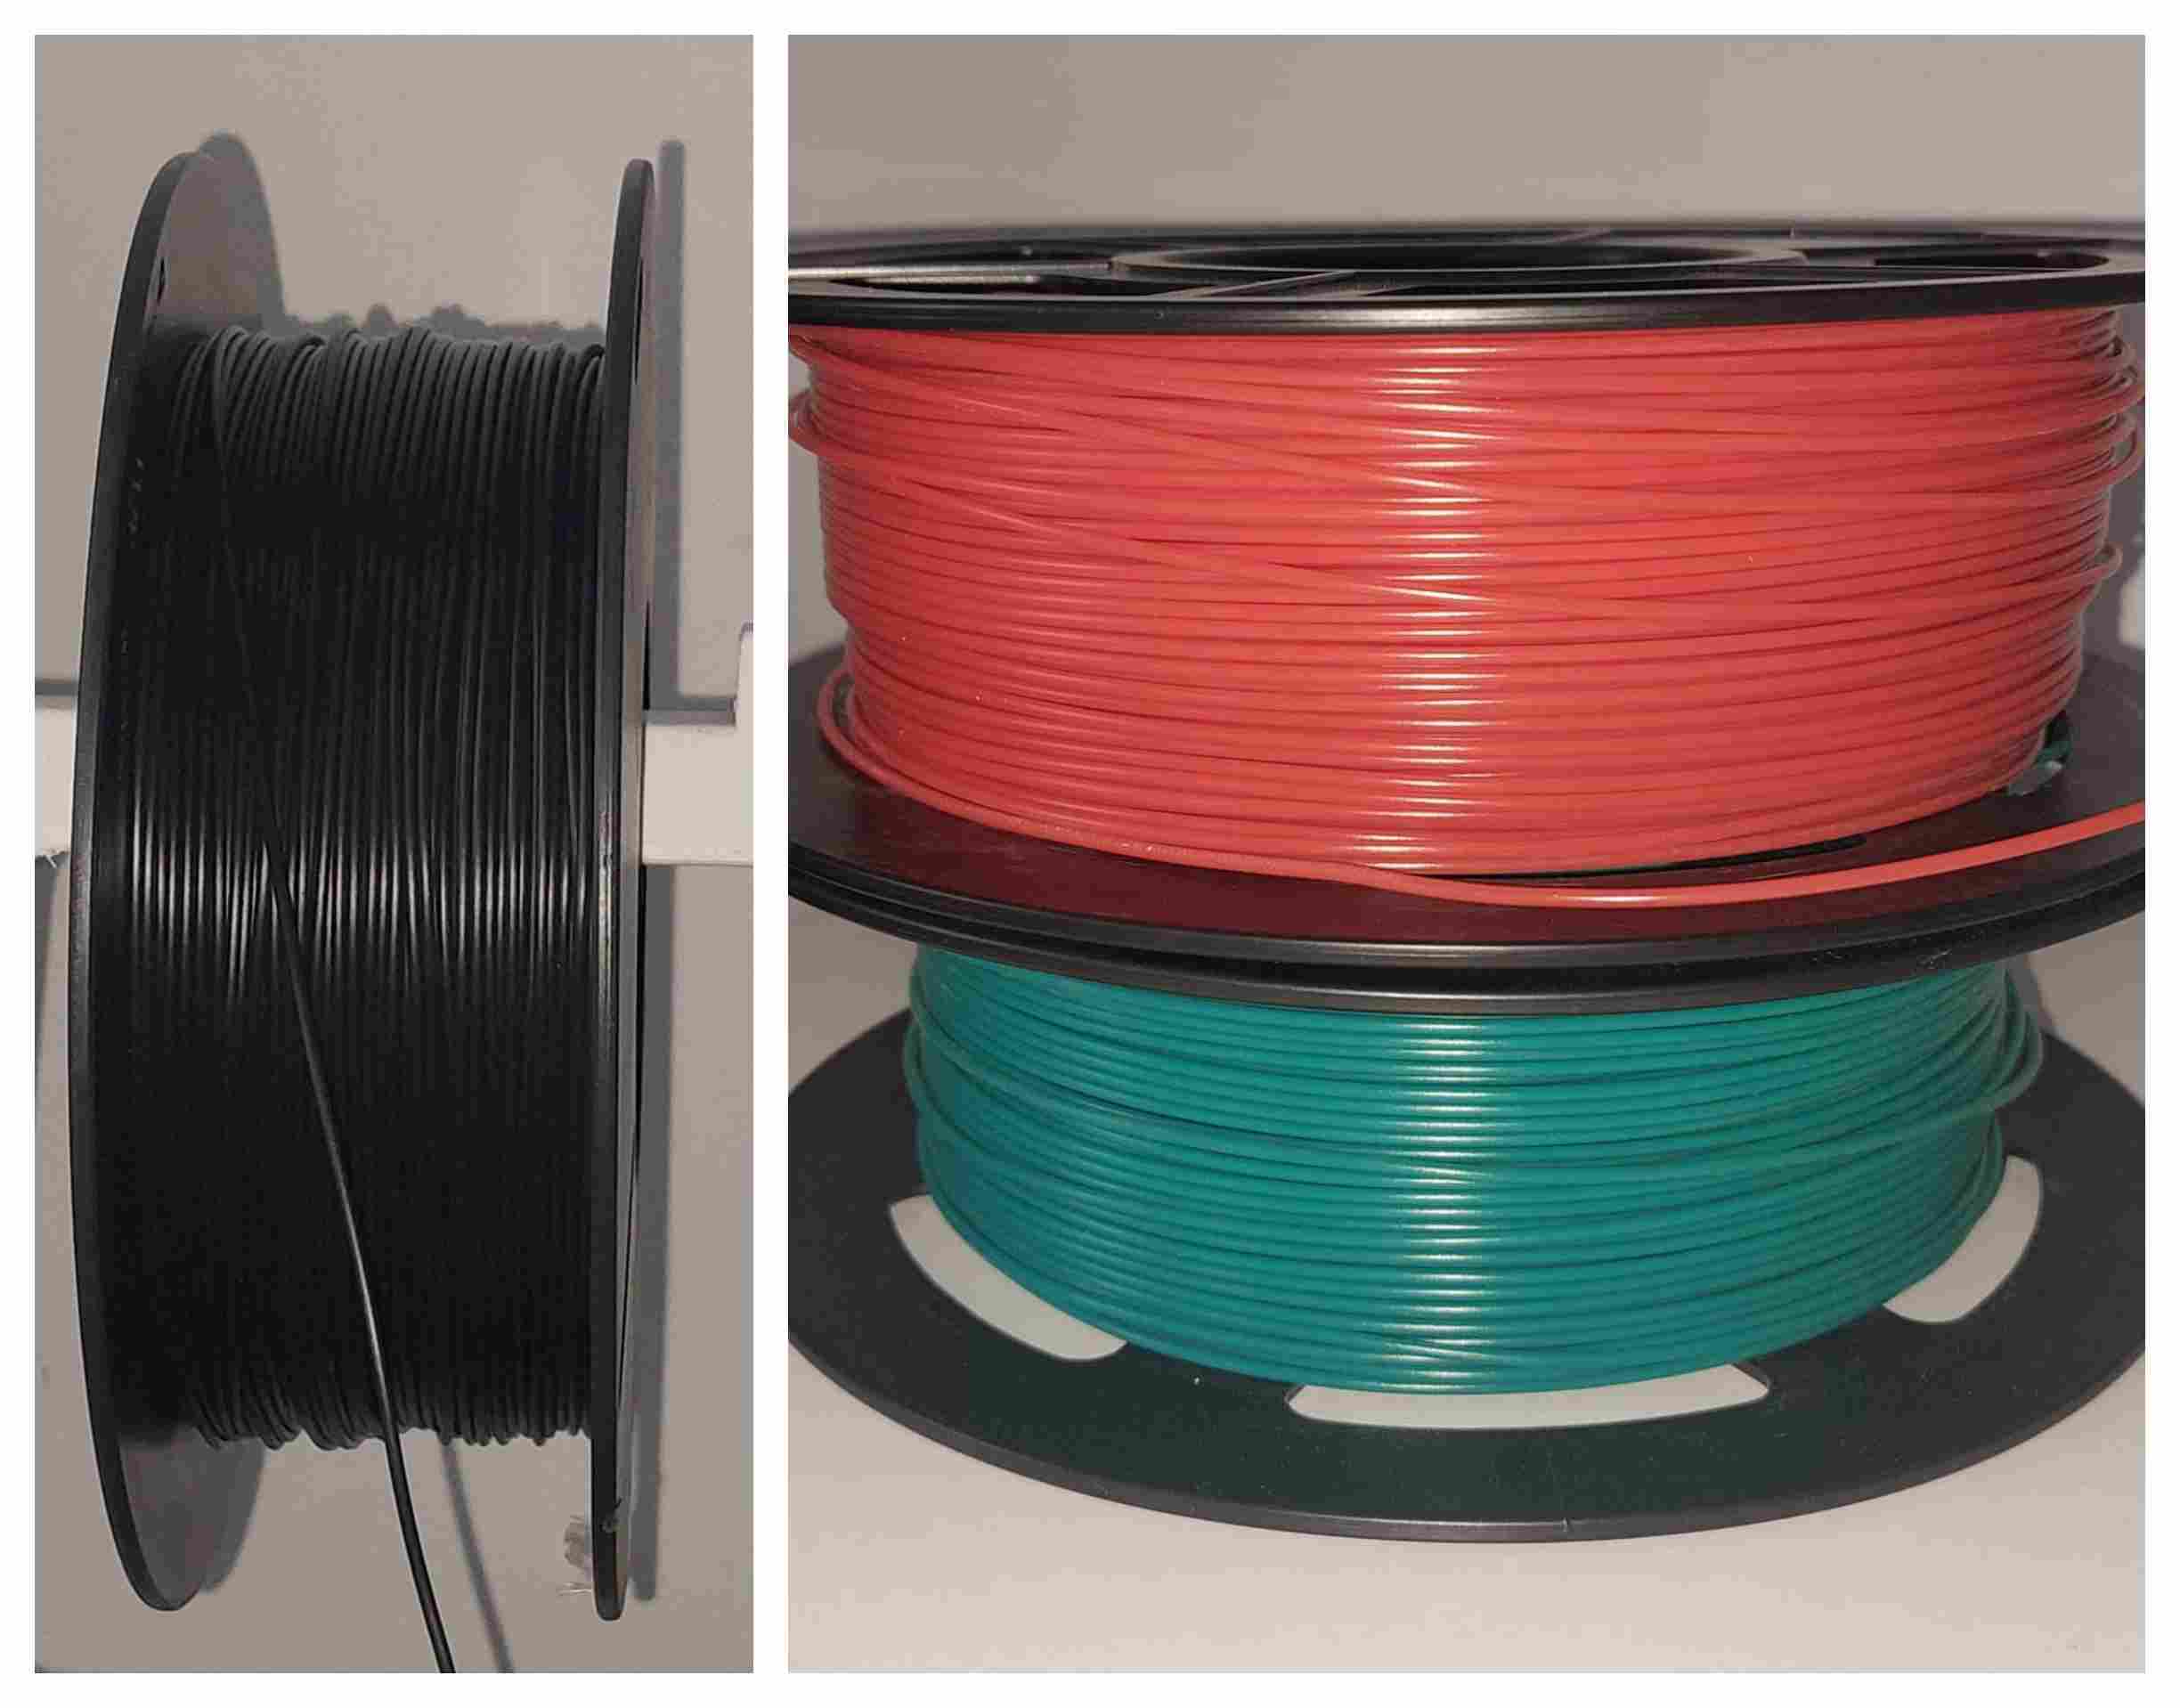
PLA filament
PLA (Polylactic Acid) filament is a recyclable, natural thermoplastic polyester that is derived from renewable resources such as corn starch or sugar cane. The filament is biodegradable under certain conditions with high heat capacity and high mechanical strength. It is the most popular material used in FDM 3D printing. It’s safe, affordable, and has outstanding material properties compared to its ease of use. You can use PLA filament for a wide range of applications and it comes in an equally diverse range of composites and colors.
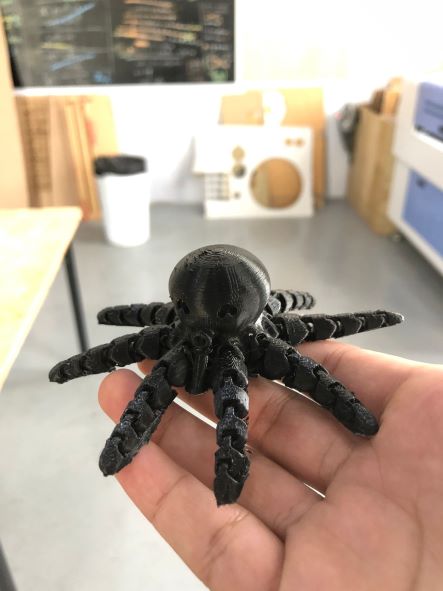
Group Assignment
In this group assignment, we created two different objects using the Prusa i3 3D printer, and then compared our objects with the other group, which used MakerBot. We printed two designs from Thingiverse. Visit HAMAD.ALQAYEM’s website to see more details about group assignment.
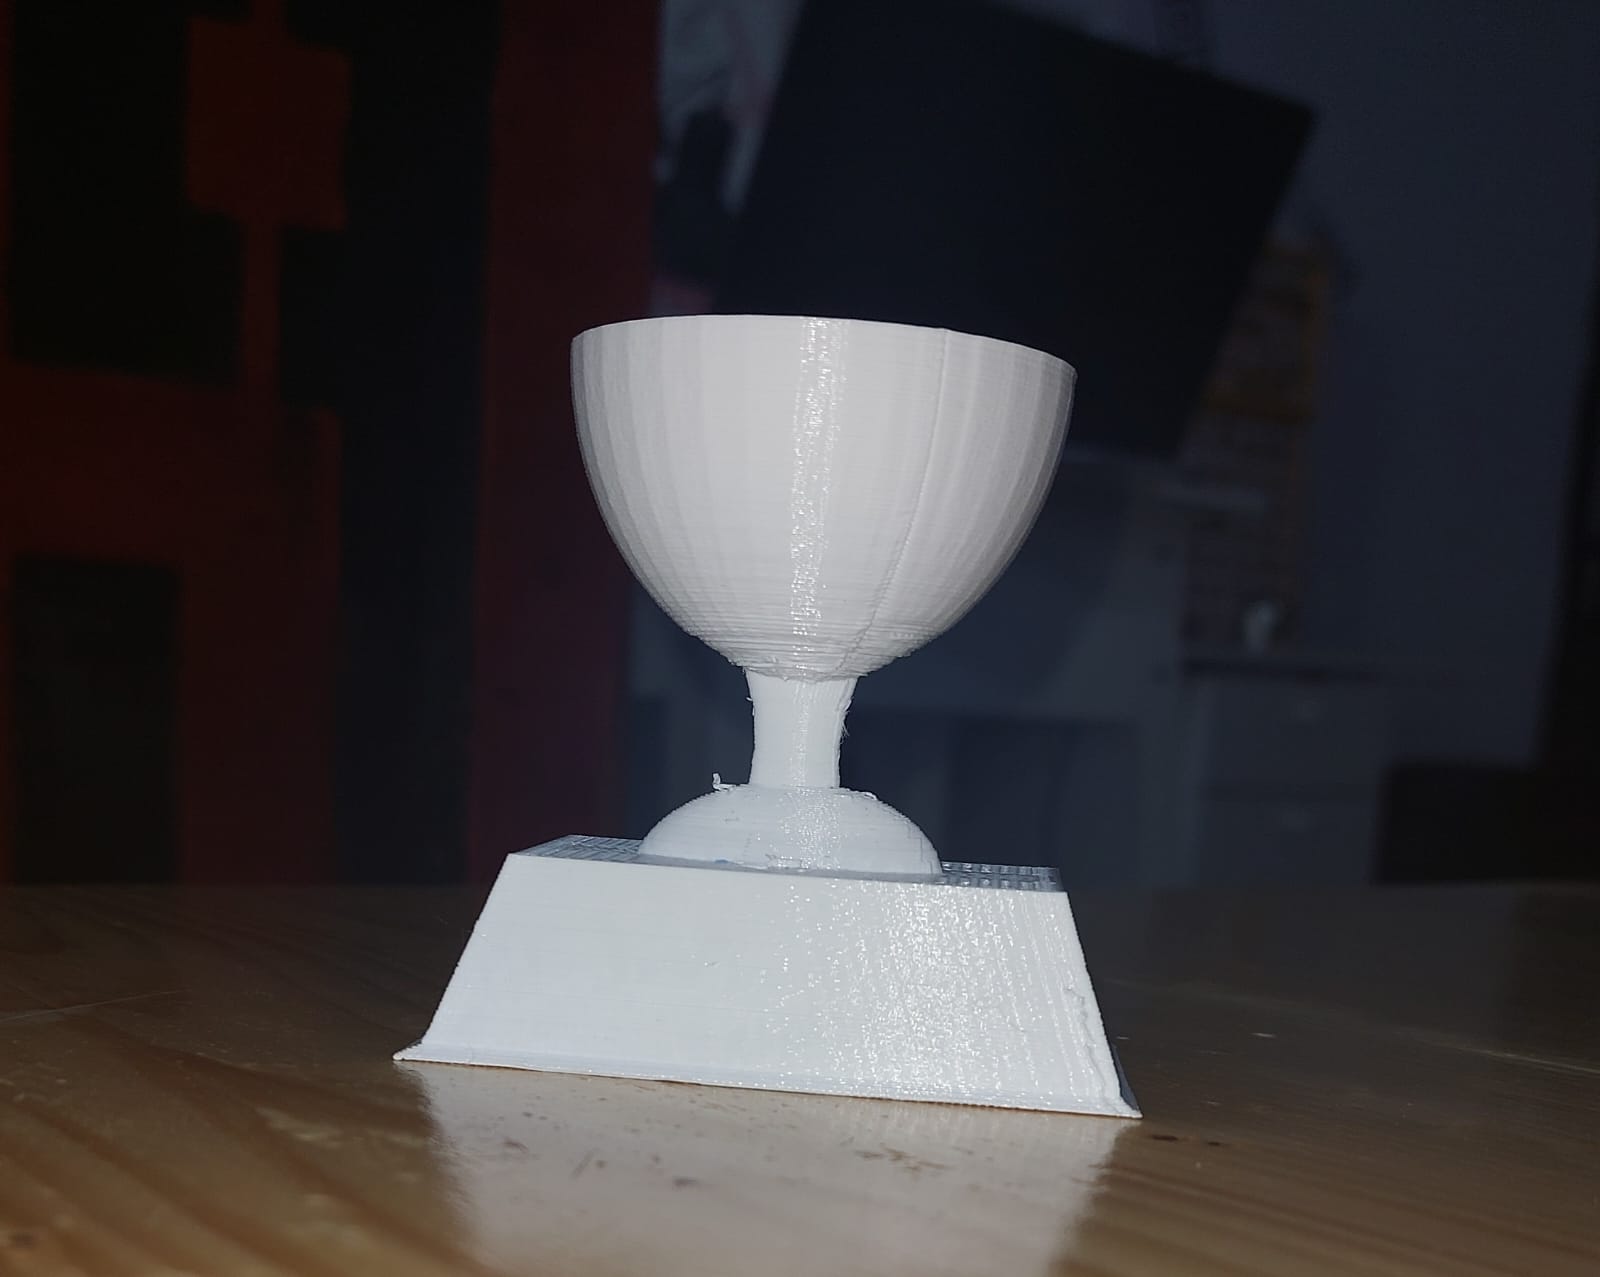
Hero Shot
Individual Assignment
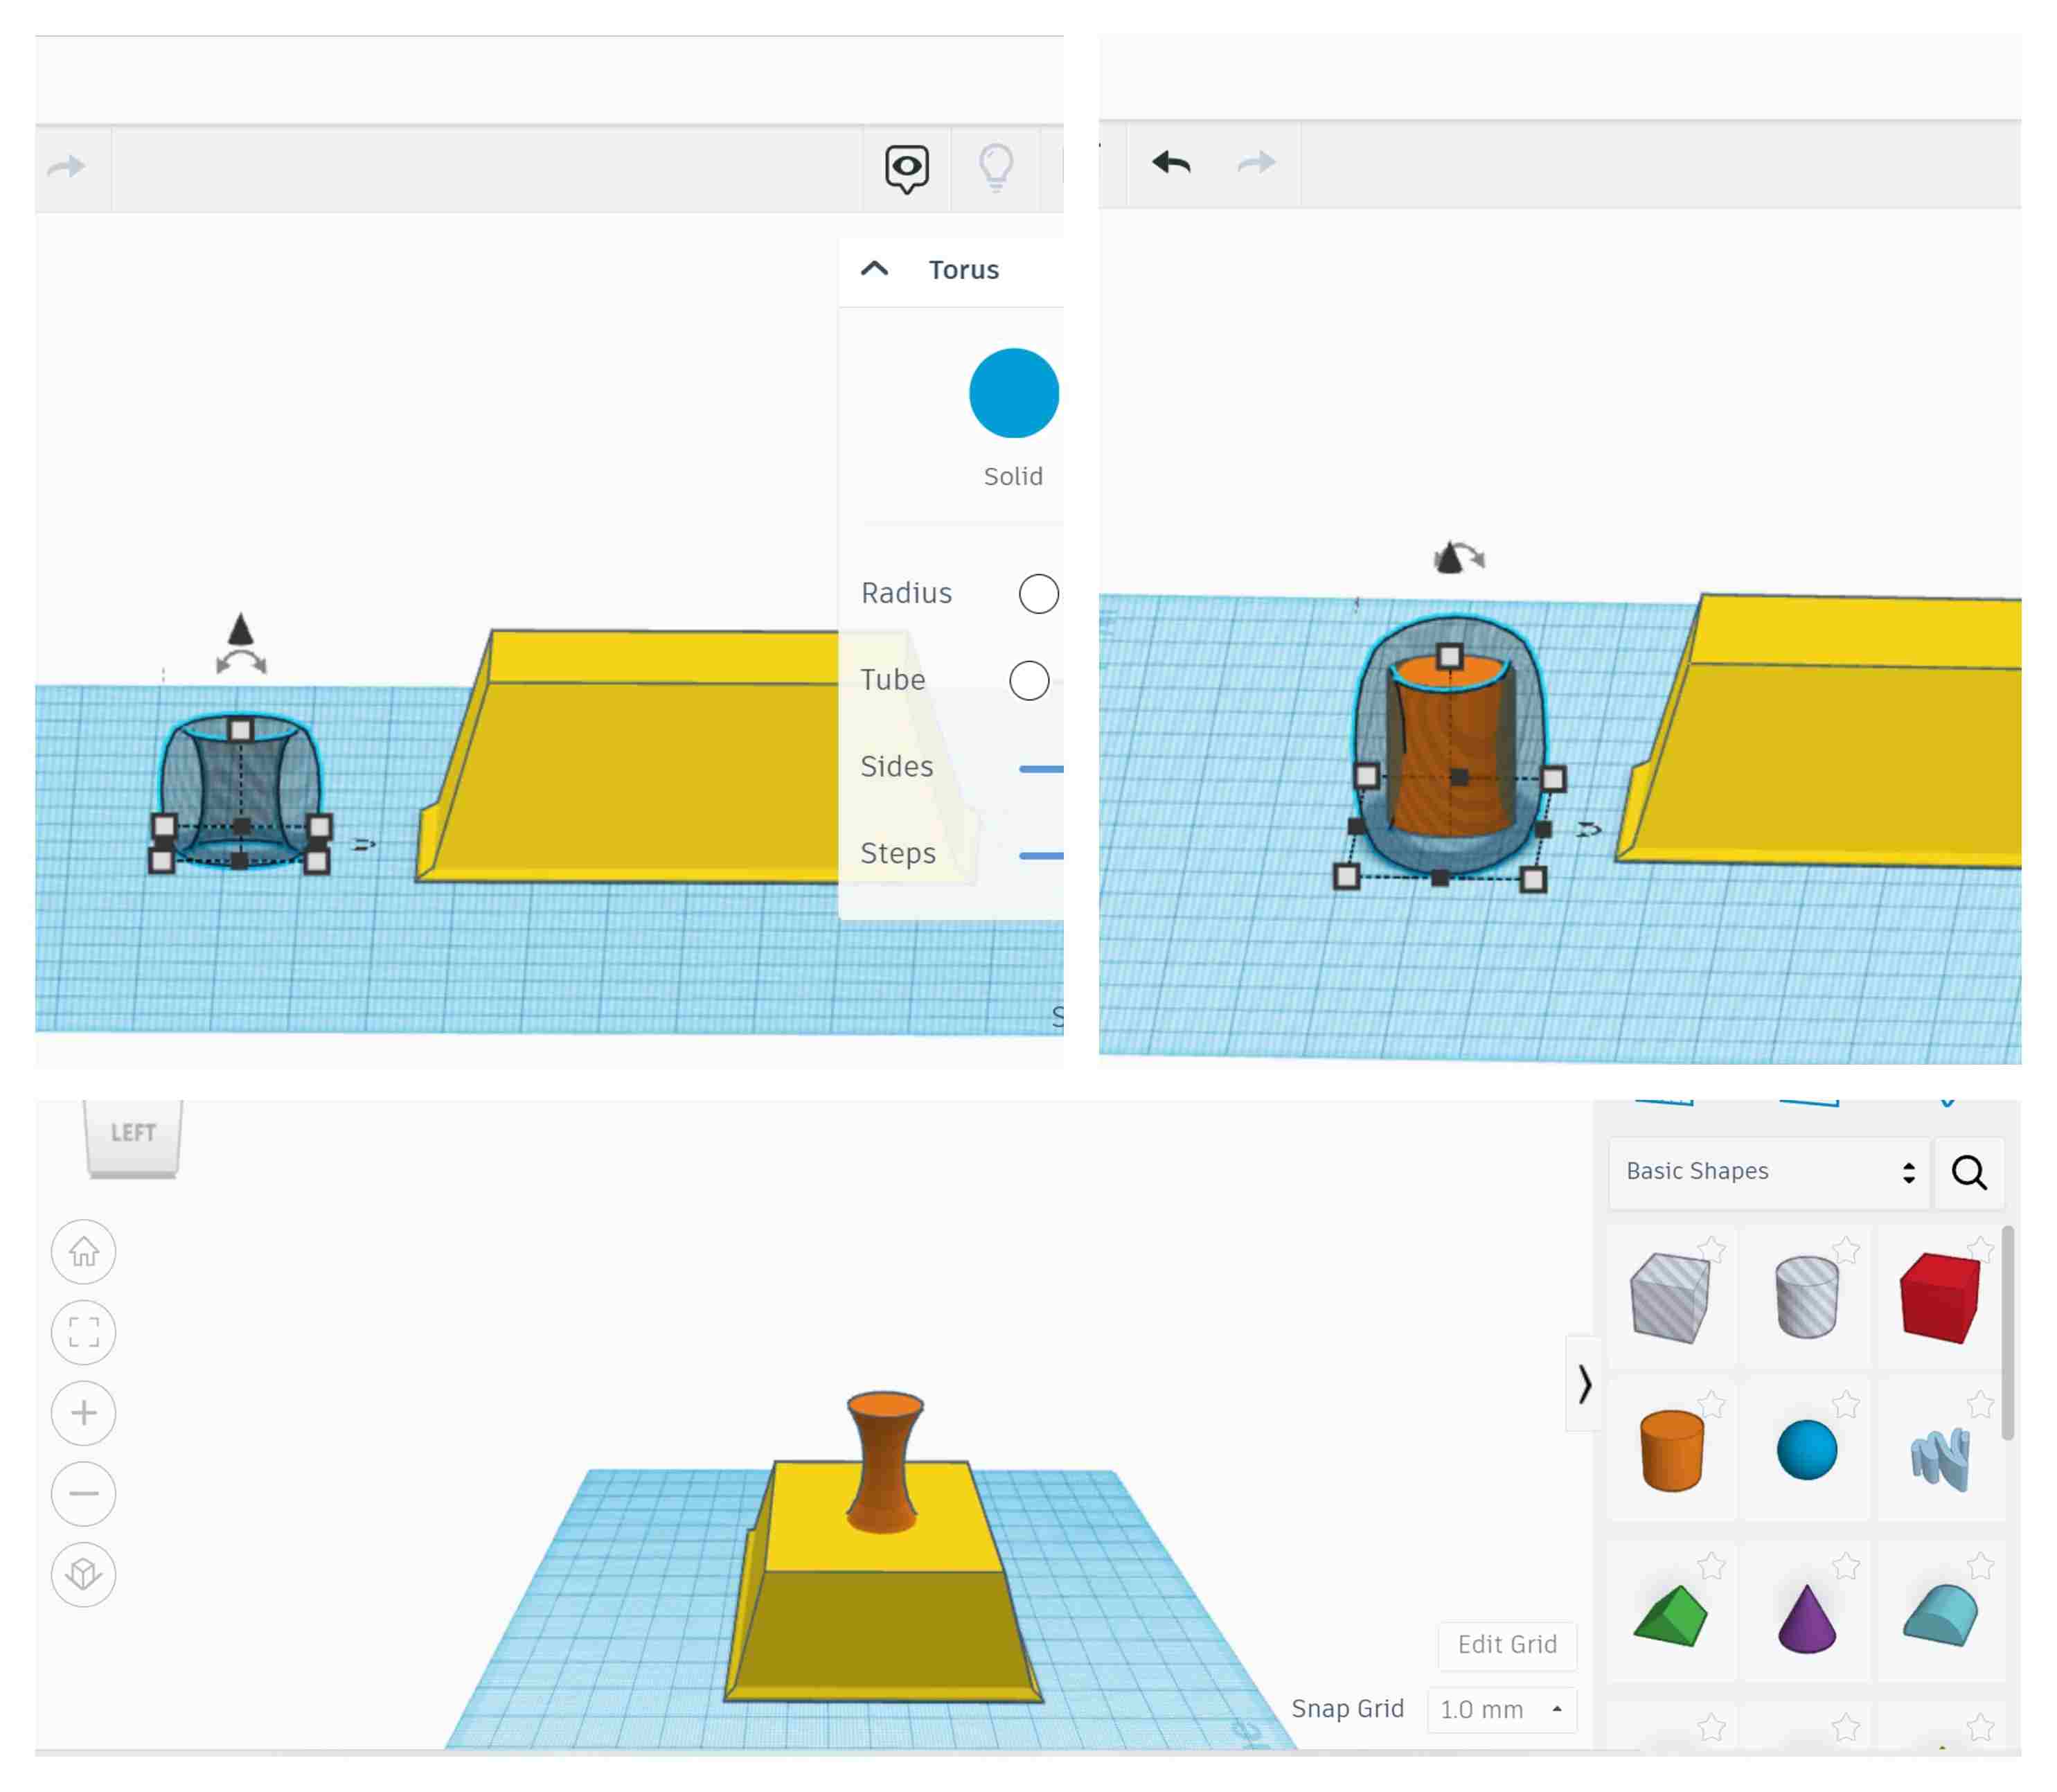
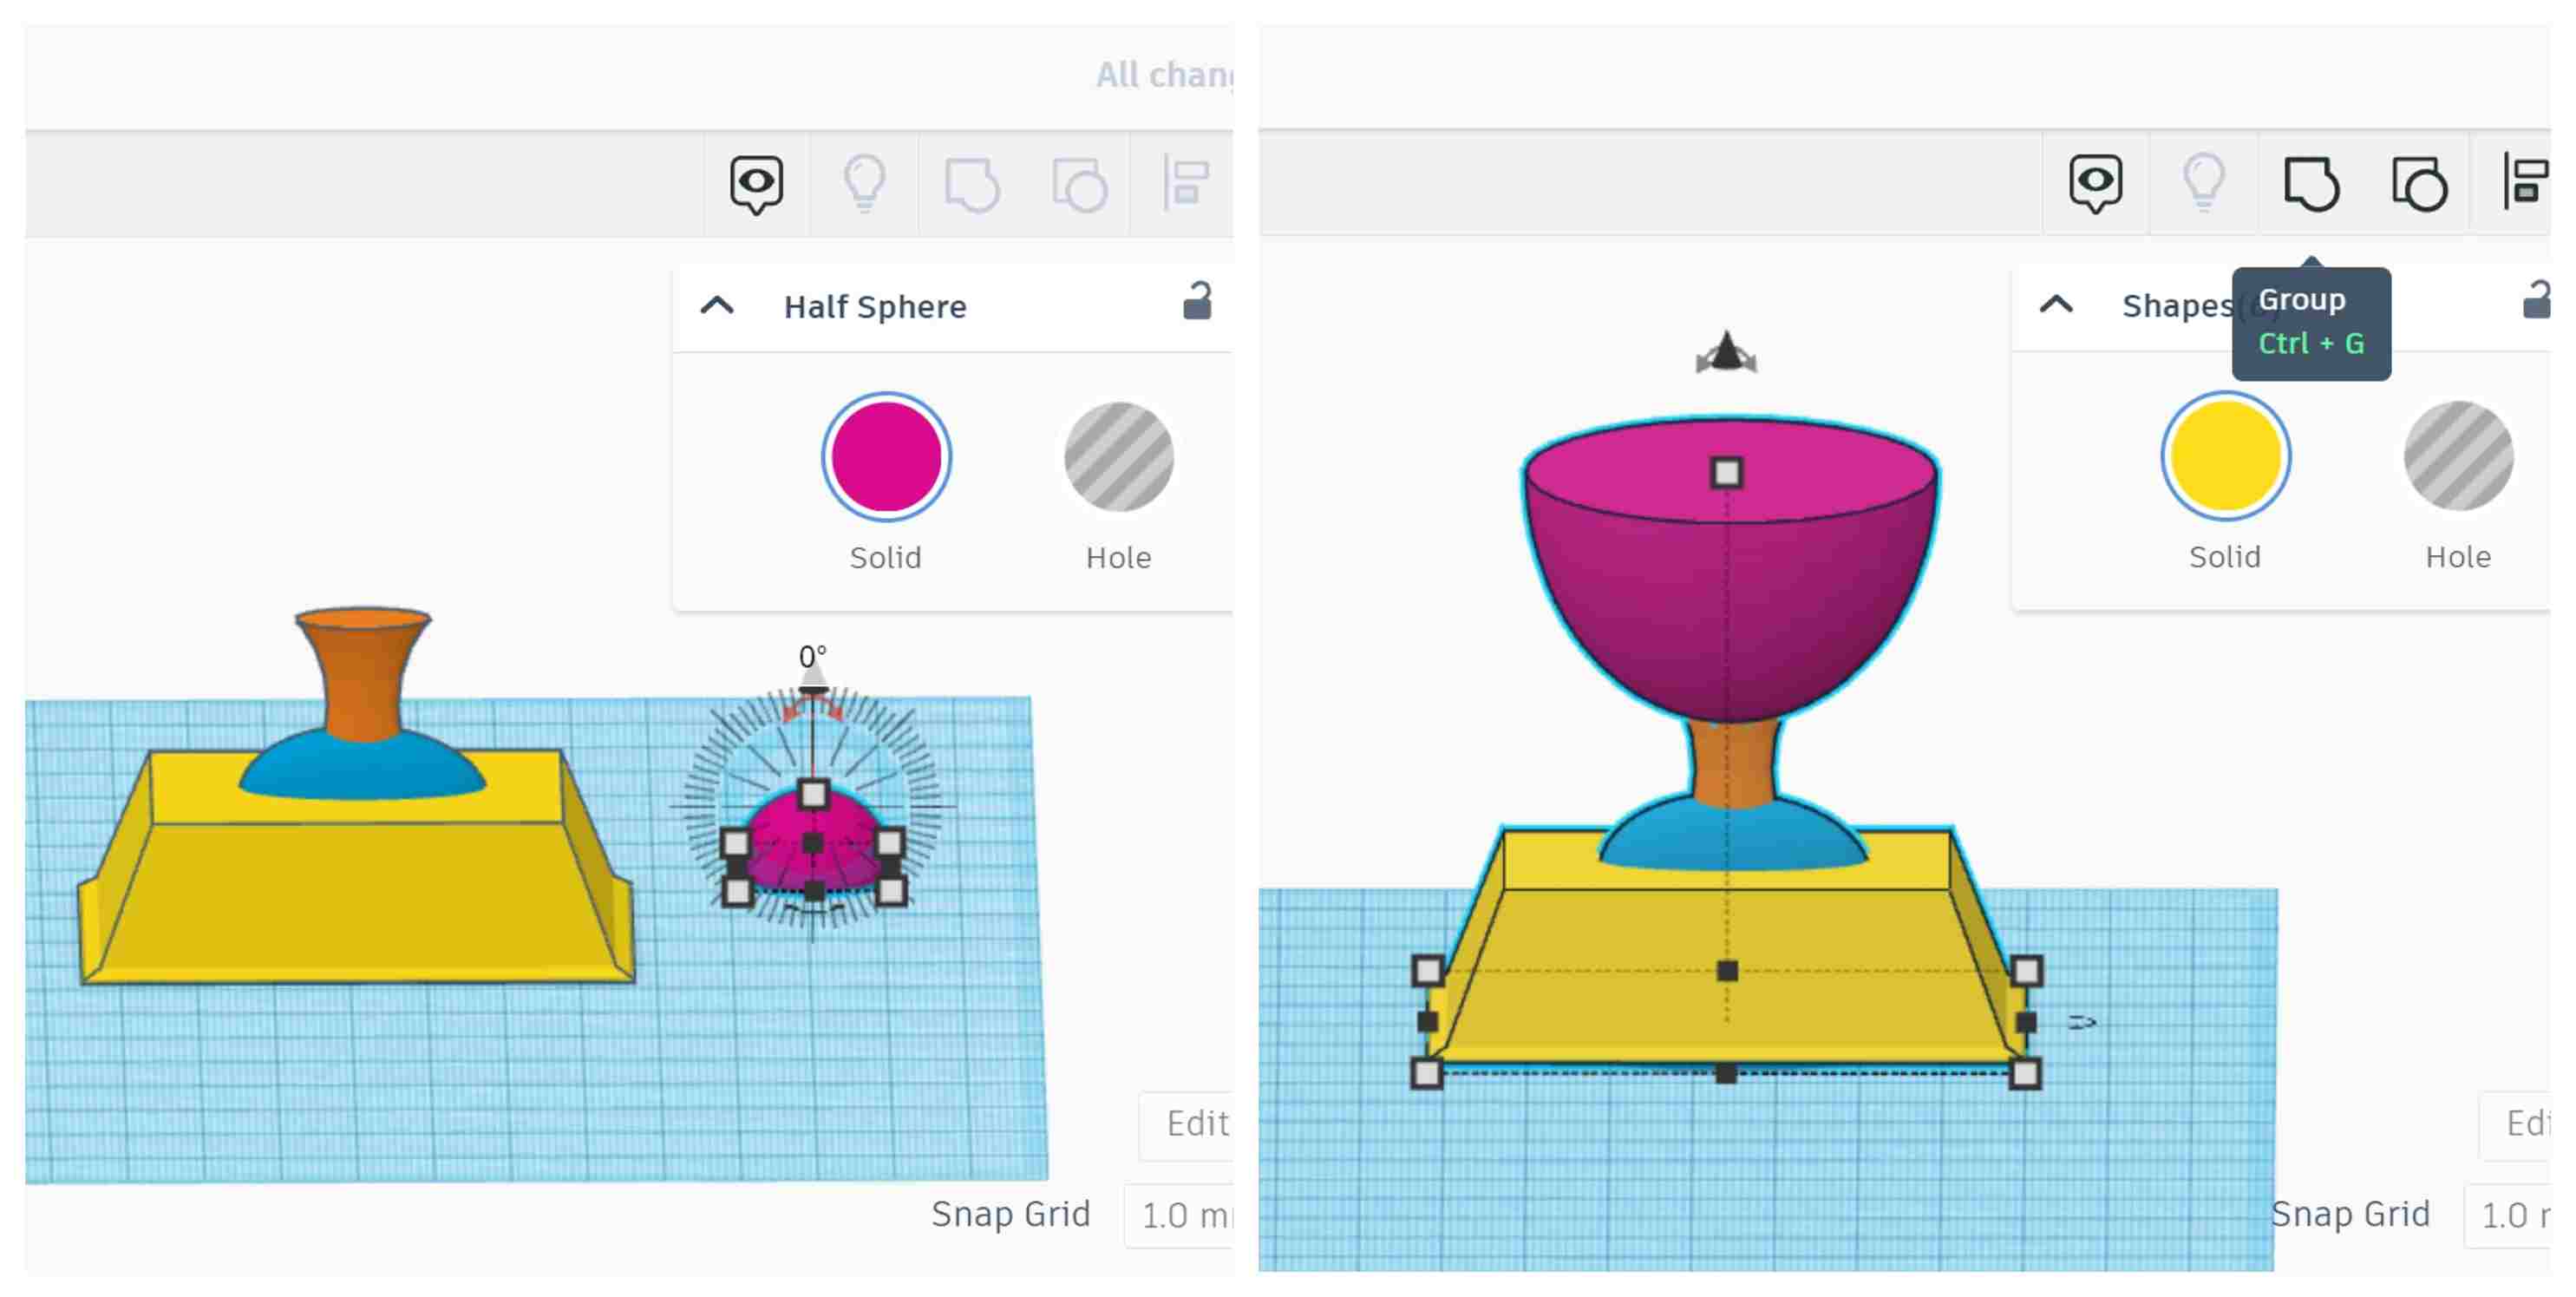
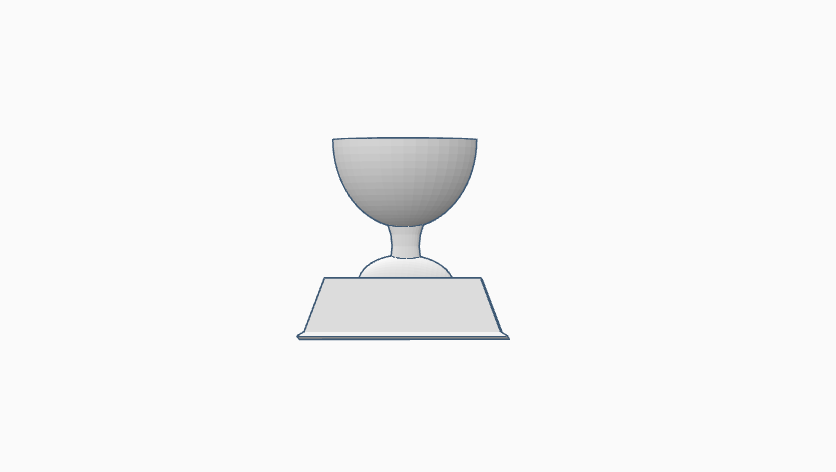
Creating 3D design in Tinkercad
I created a trophy in Tinkercad by following this tutorial. This design can be made addictively easily (layer by layer) on a 3D printer. It cannot be easily made substractively because this design has overhangs and mesh.
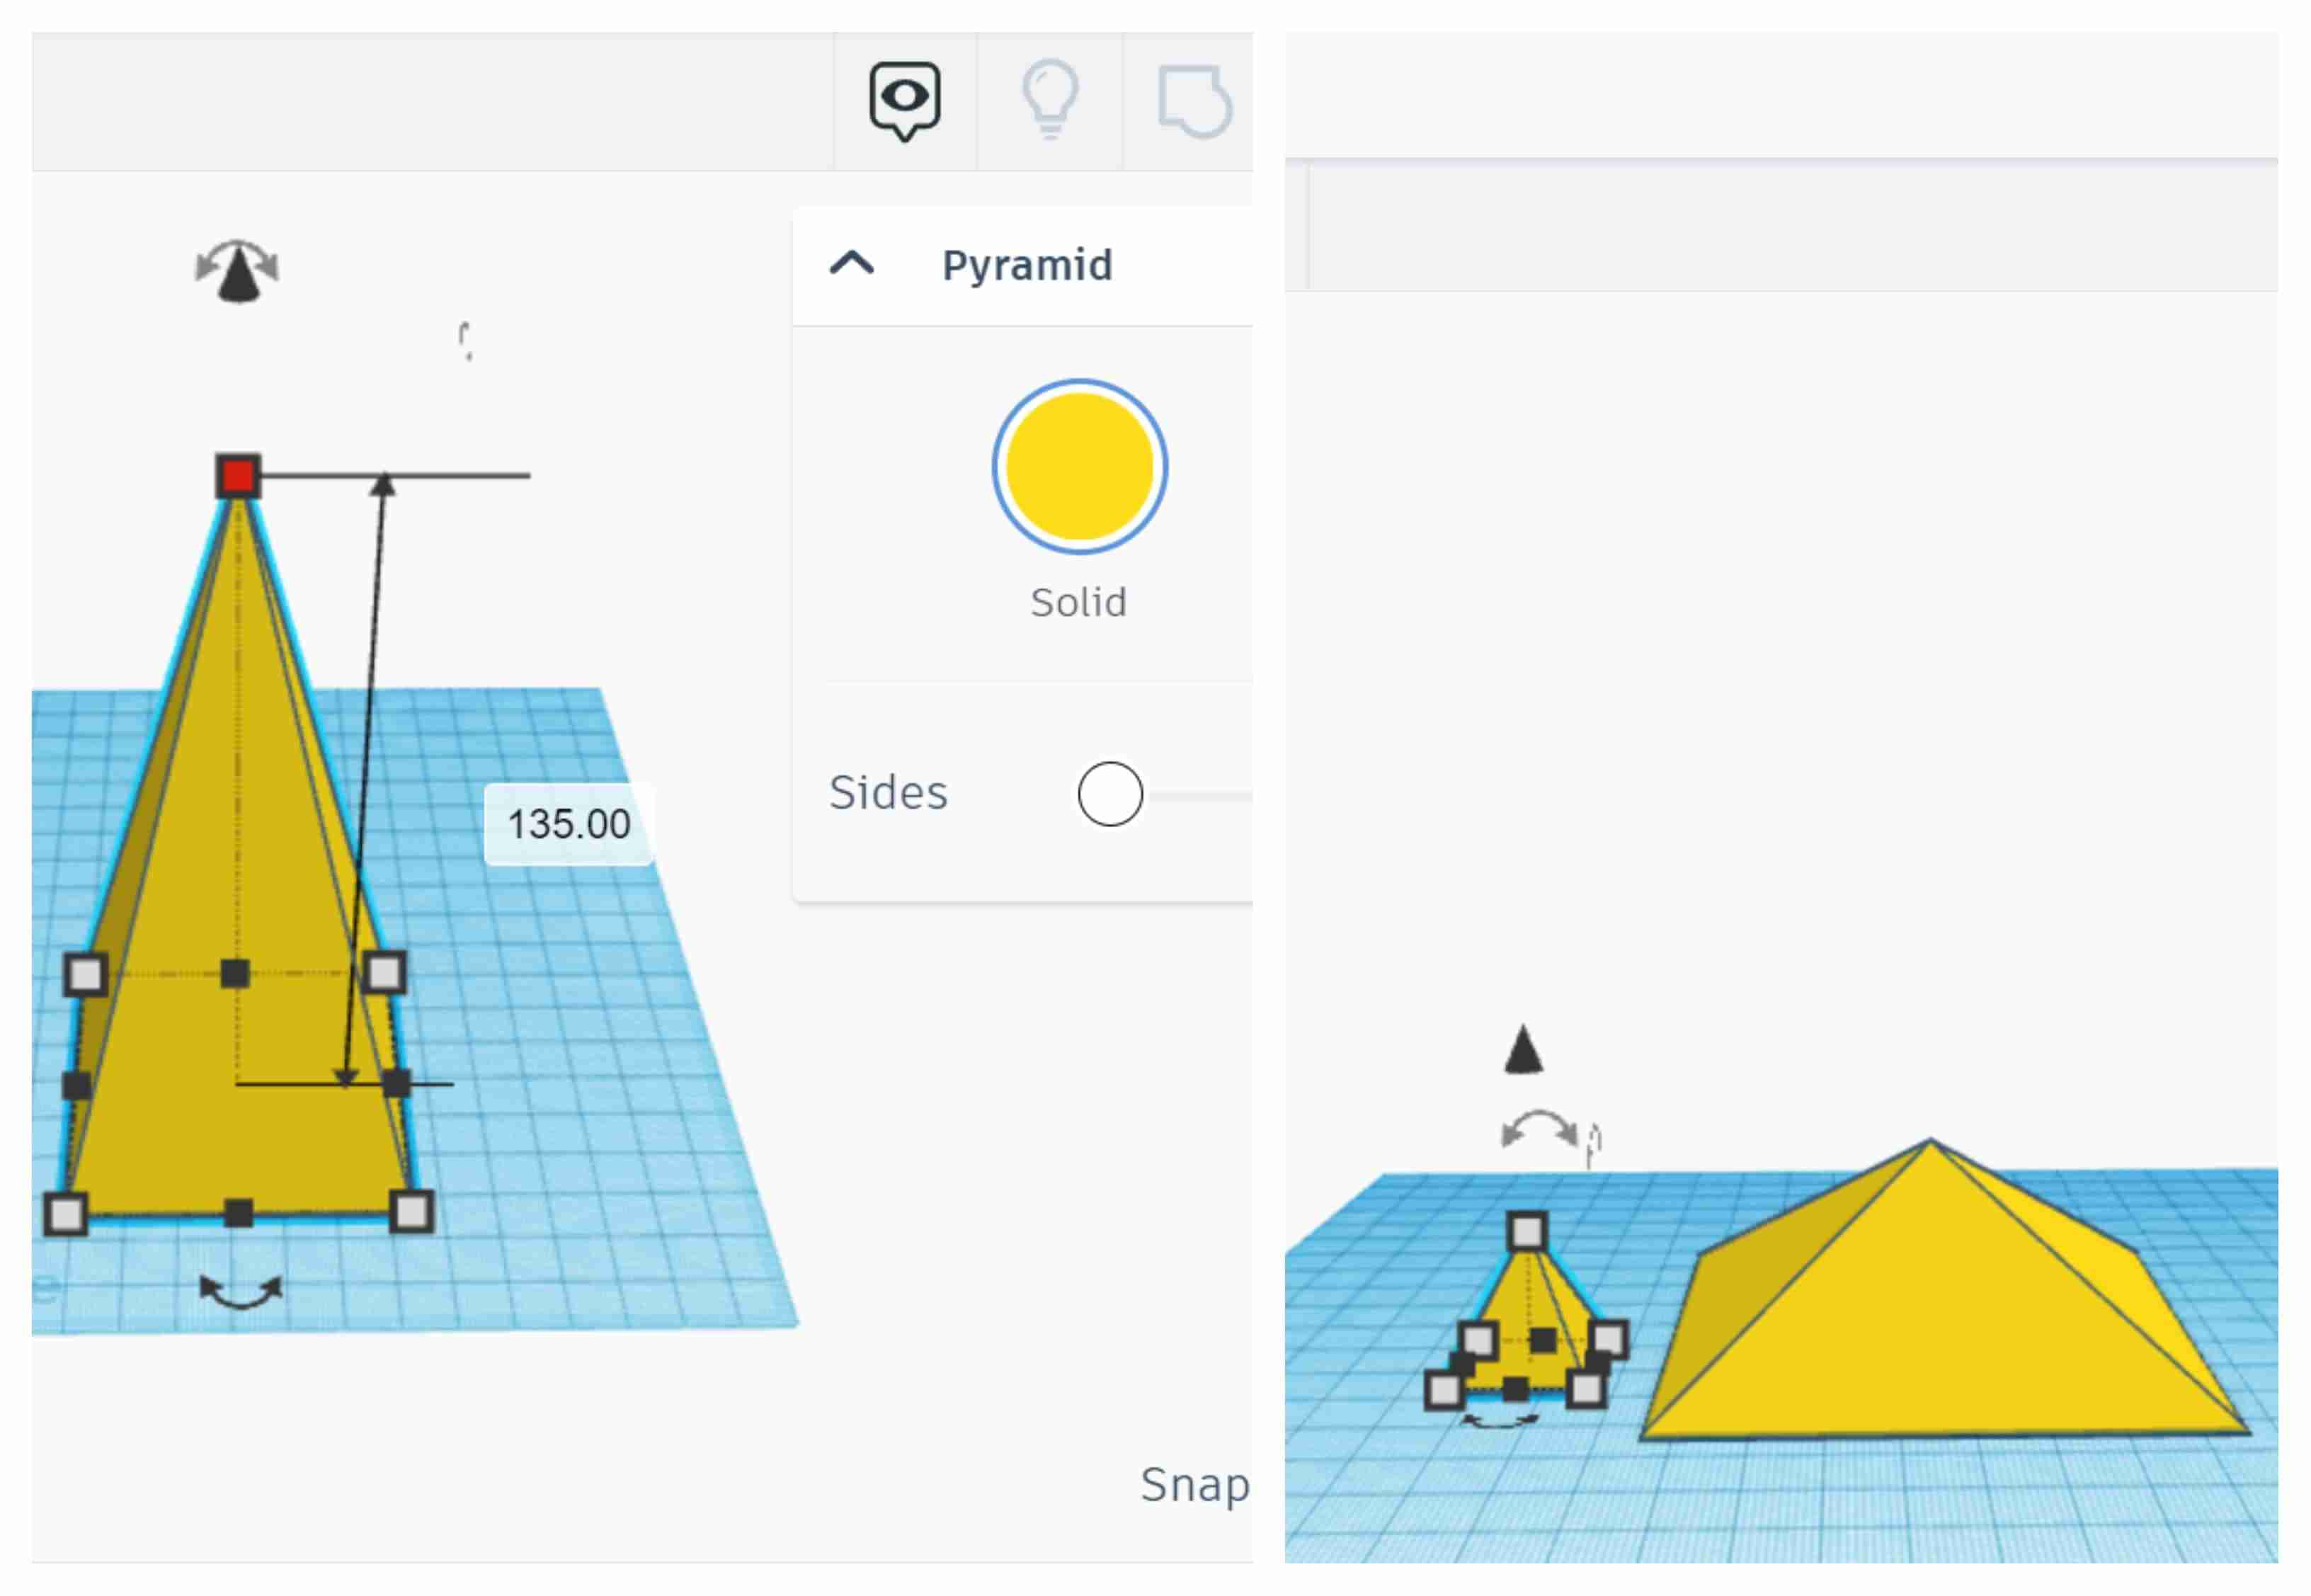
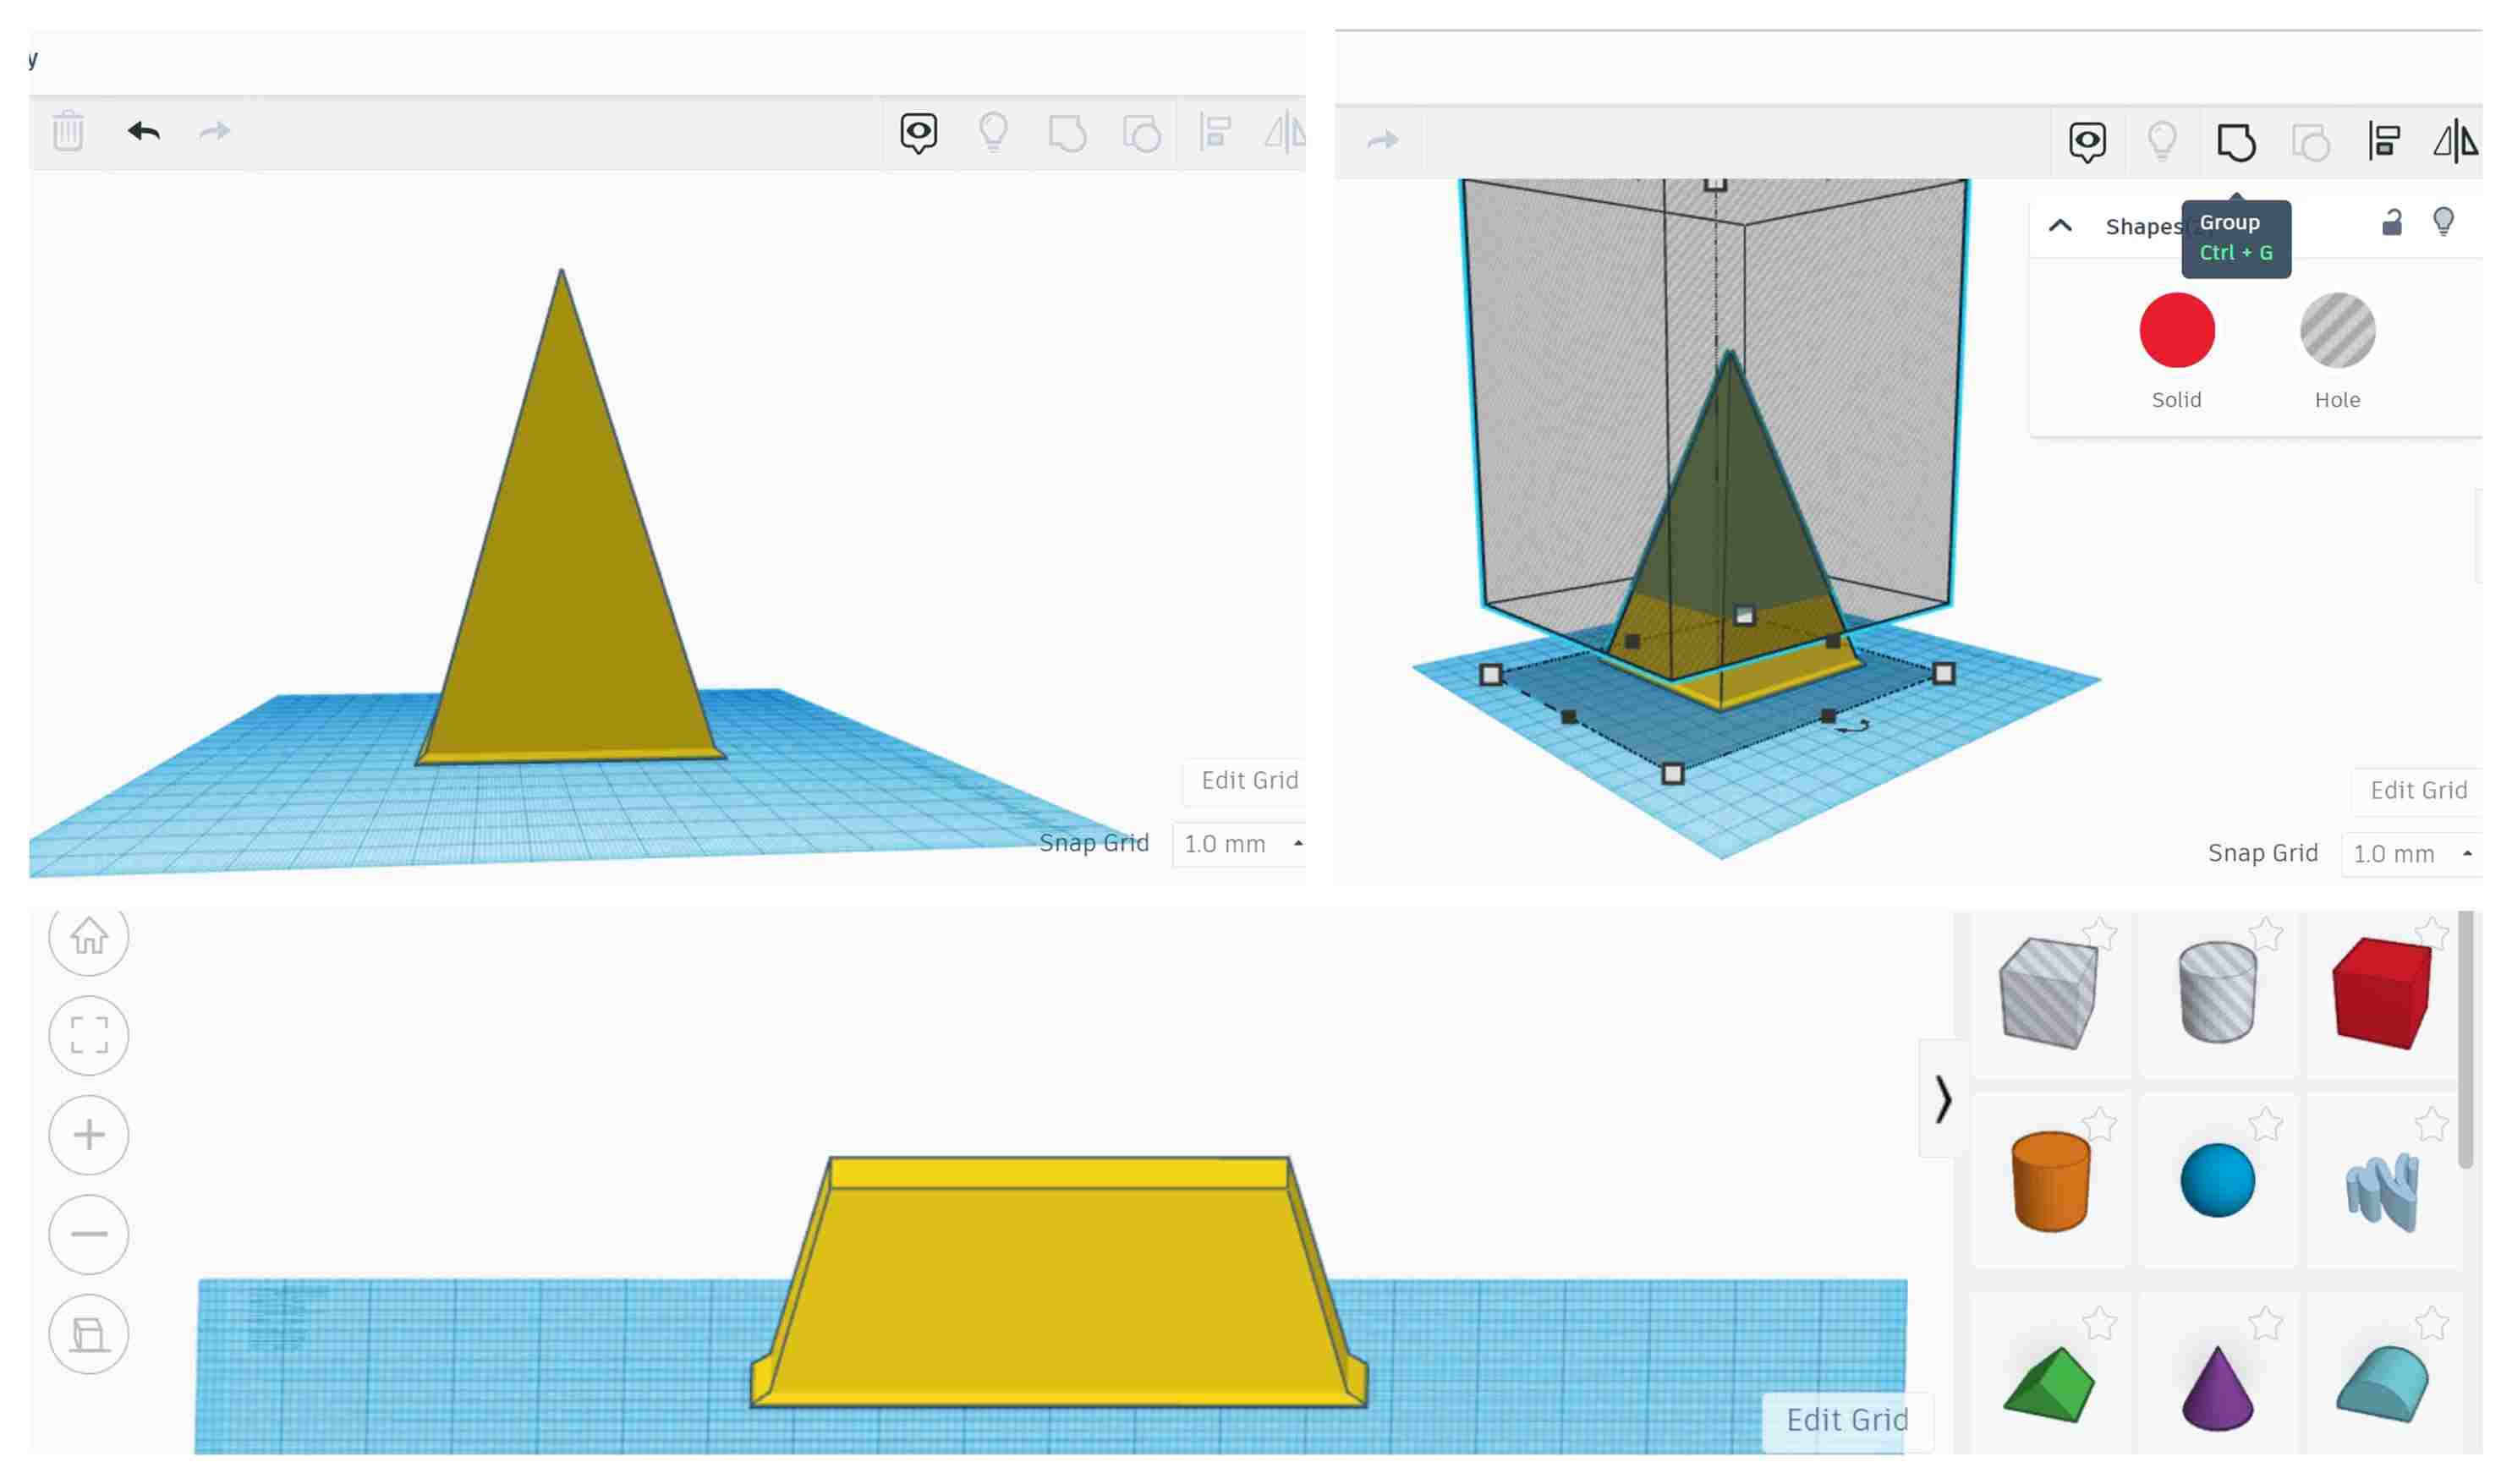
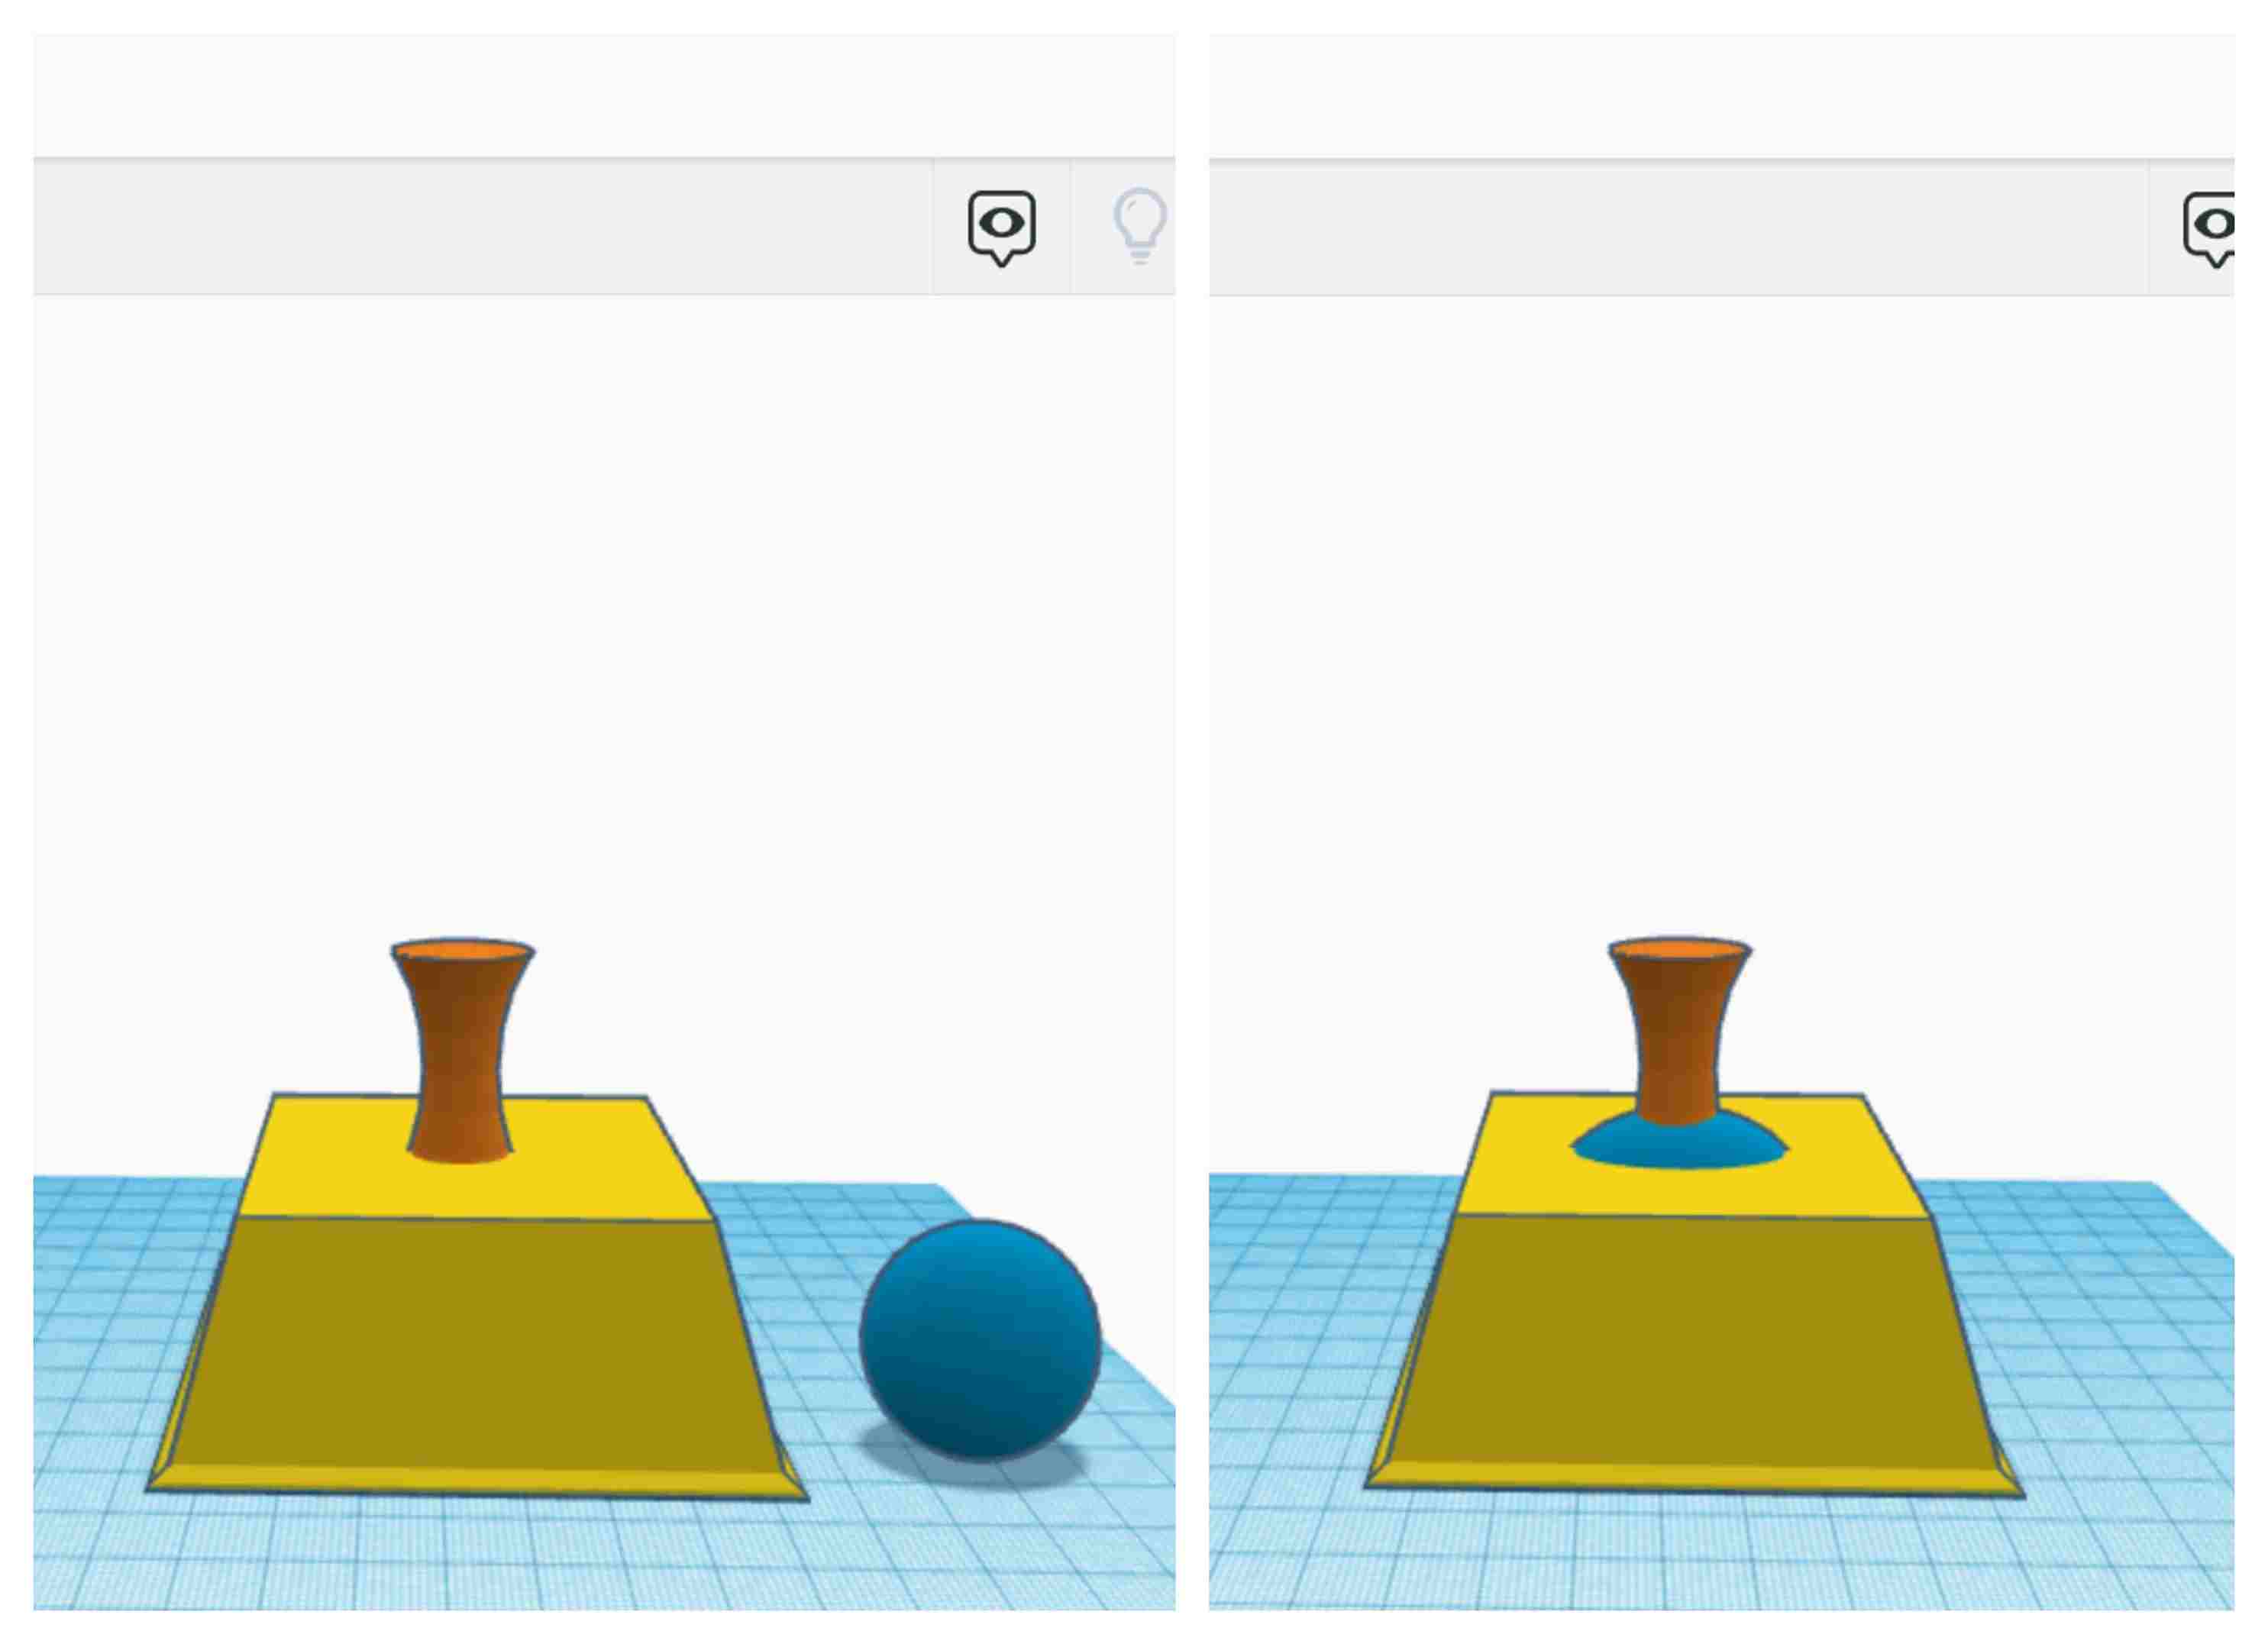
Original stl file download link
Working with 3D Printers
Working with Prusa i3
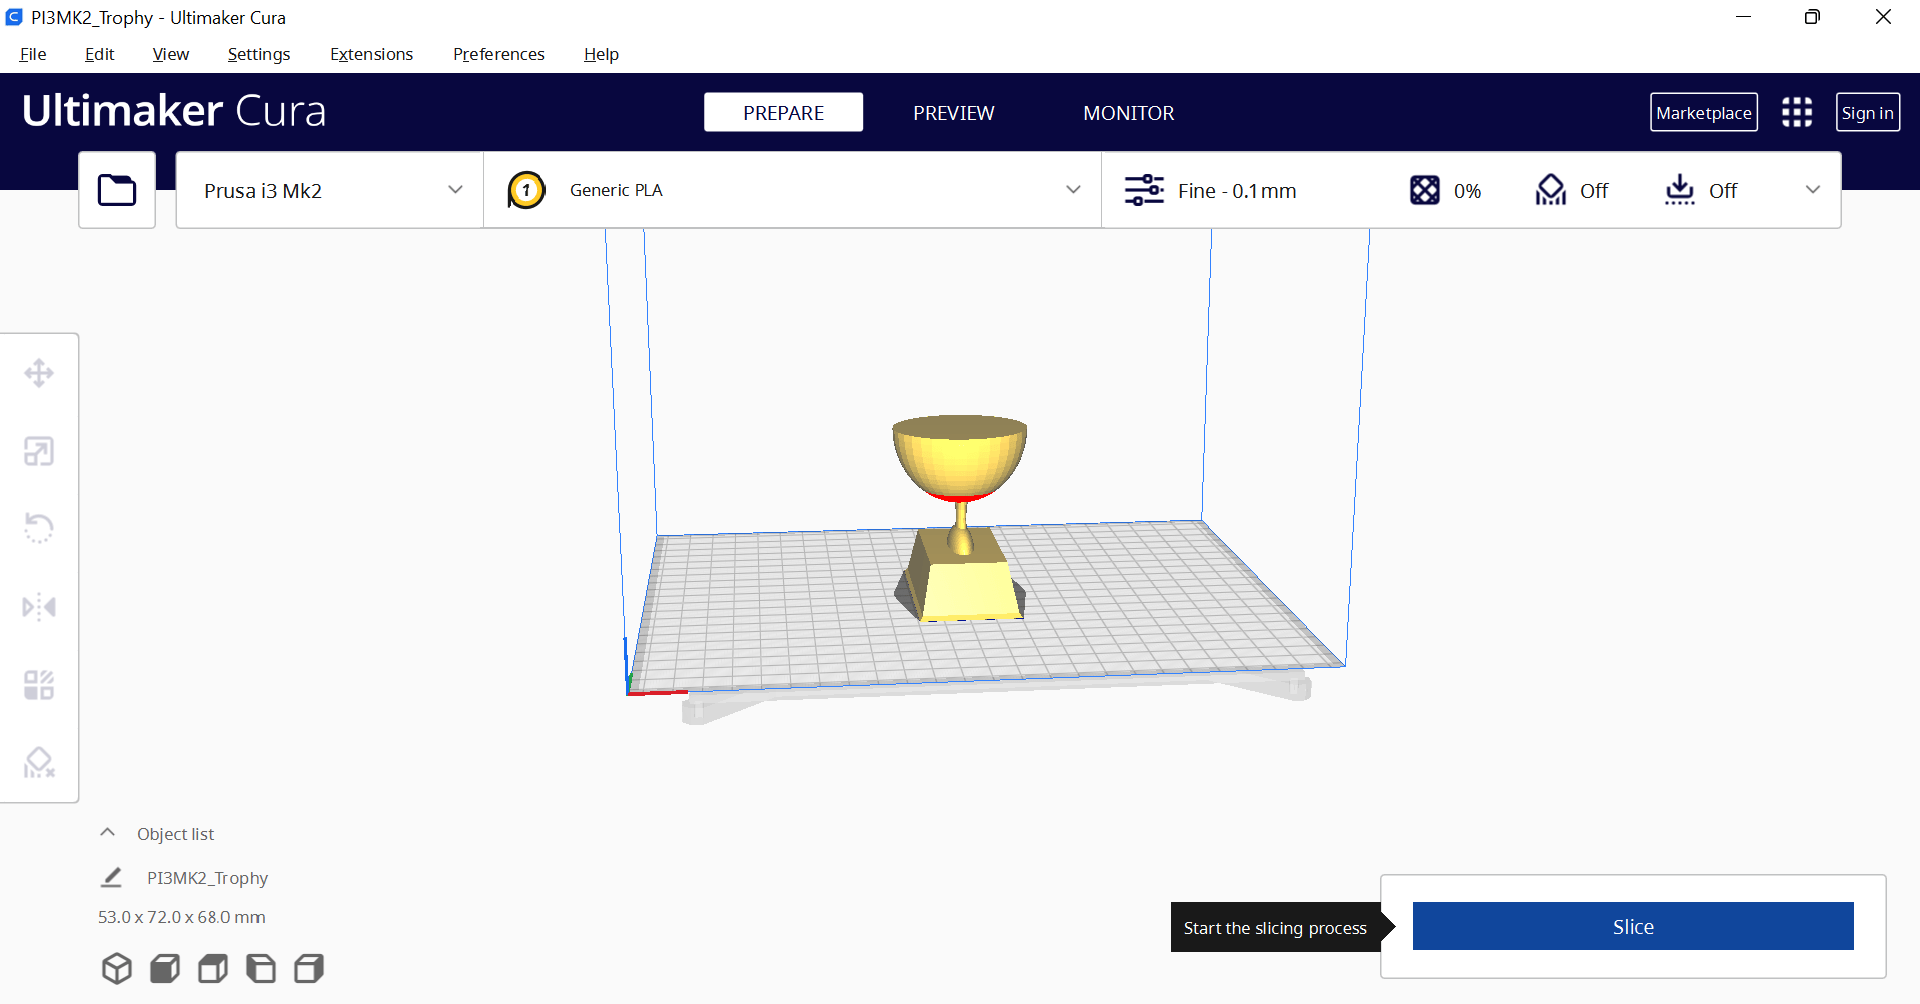
I uploaded the stl design file on Ultimaker cura.
Ultimaker cura is the most advanced 3D printer software. Prepare prints with a few clicks, integrate with CAD software for an easier workflow, or dive into custom settings for in-depth control. At the heart of Ultimaker Cura is its powerful, open-source slicing engine, built through years of expert in-house development and user contributions.
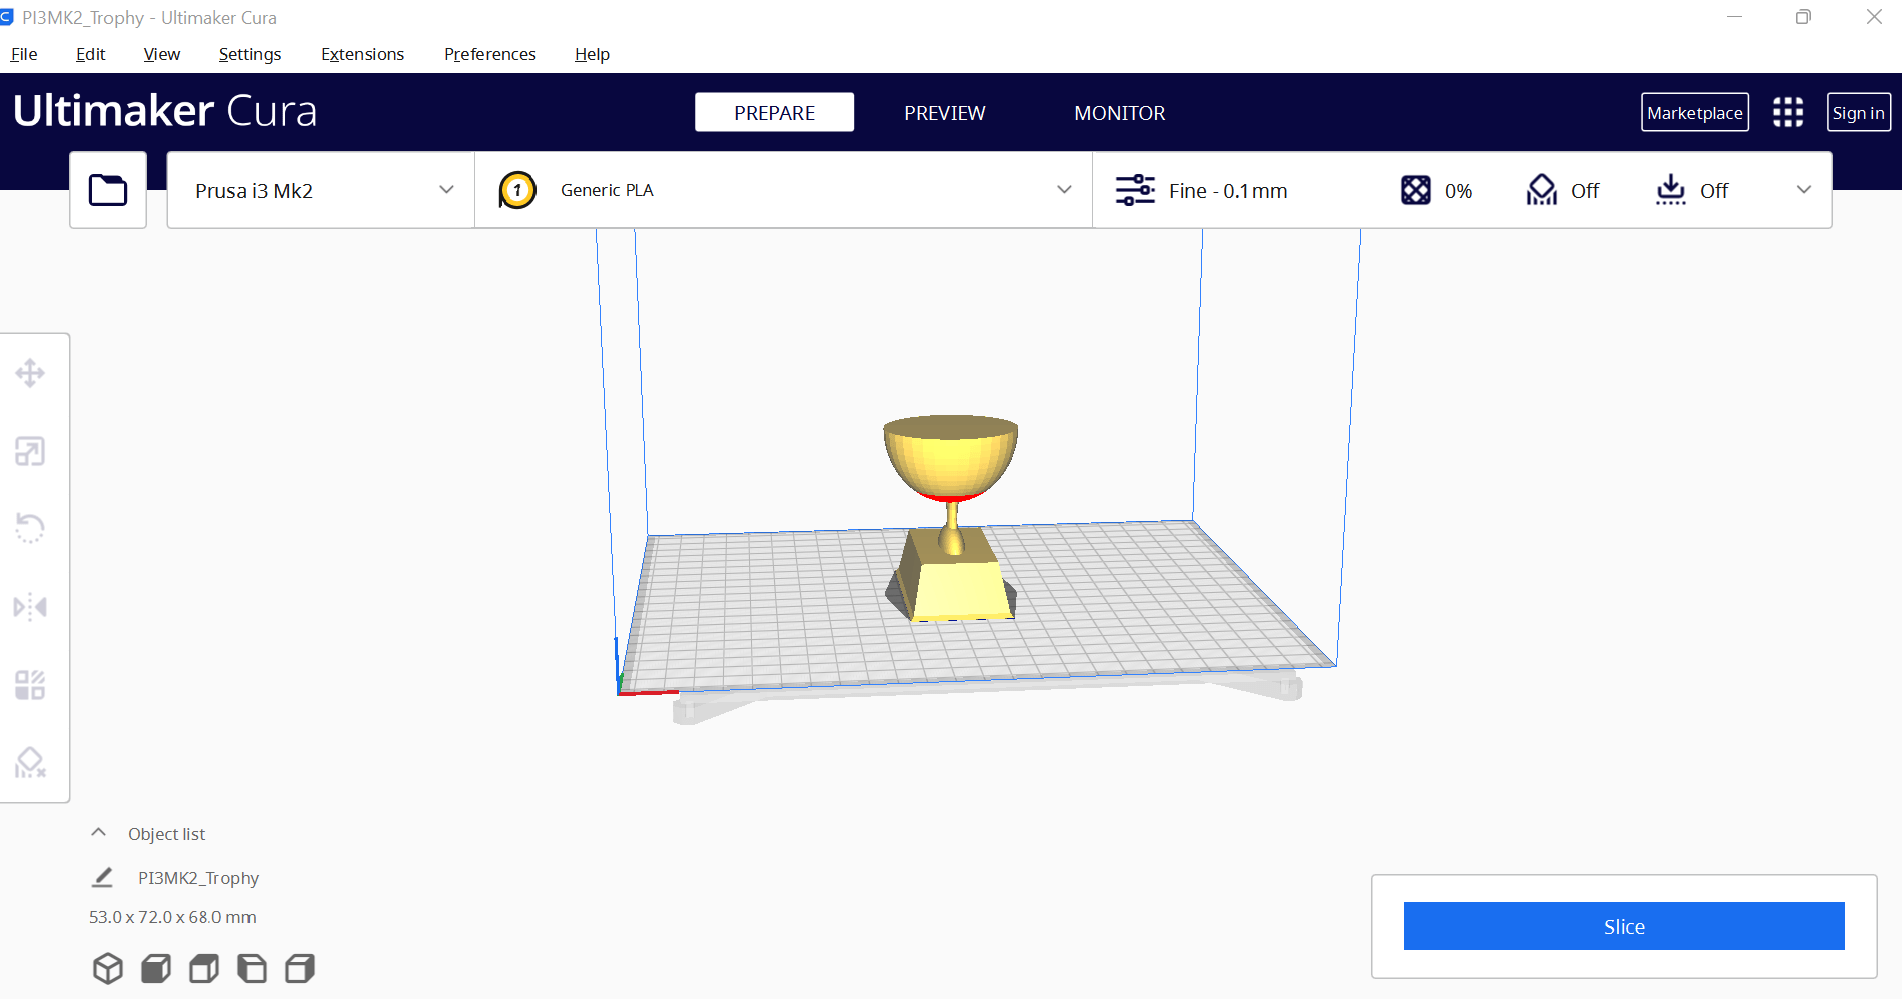
After importing my design, I started the slicing process.
After that, I previewed the results. It shows that it will take 2 hours and 39 minutes to print my results. I converted a design to G-Code and sent it to my colleague.
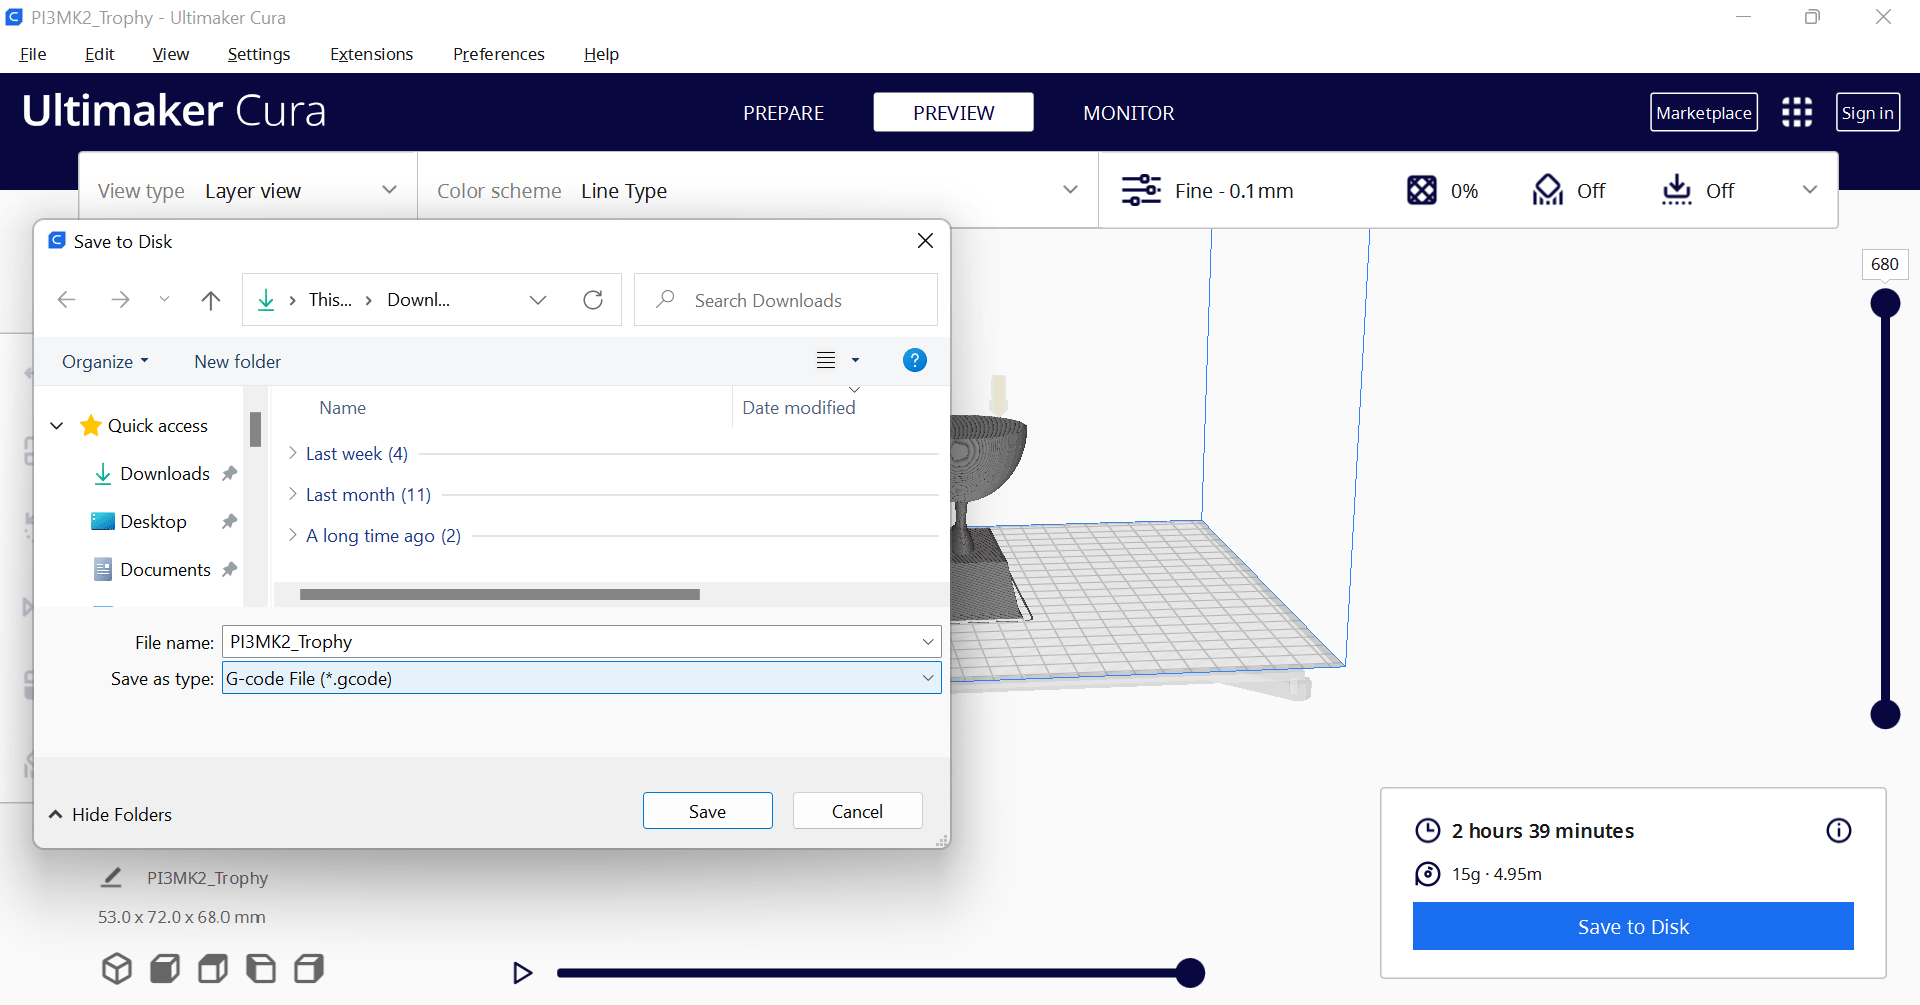
Original G-code file download link
The file is then exported to an SD card and inserted into the printer.
We used a black PLA filament. For PLA filament, the nozzle temperature should be between 190 and 210 Celsius, and the heated bed temperature should be between 60 and 70 Celsius.
Problem Encountered
We put our designs in a group to print. The Pursa i3 printer wasn’t printing correctly due to some problem. We tried for 3 days to print with the Pursa i3 printer. In the end, we used Makerbot to print our objects. Visit Osama Ahmed’s website to see details.
Working with MakerBot Replicator Z18
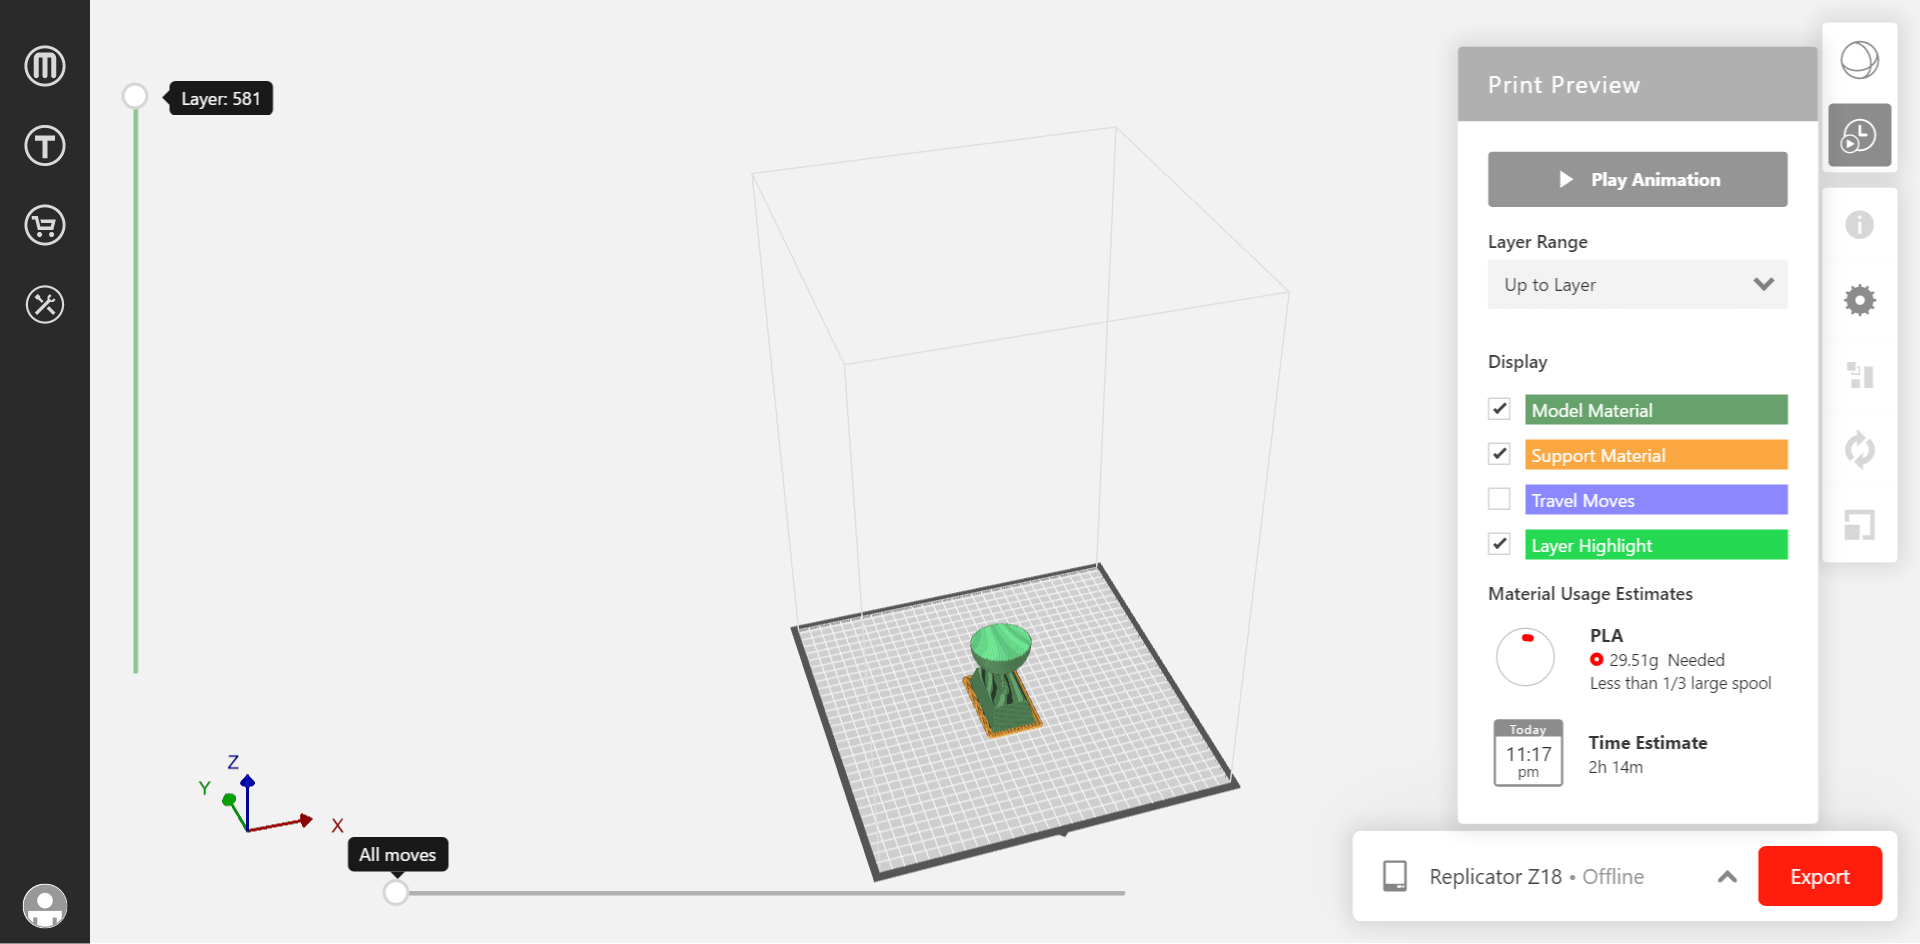
Now we uploaded our designs on MakerPrint.
MakerBot Print that optimizes and streamlines the 3D printing process for any workflow. It allows you to discover, prepare, manage, and share 3D prints. Easily import design files and fine-tune their settings for optimum results. Receive an animated preview and path of your extruder to ensure that your print comes out as intended. The software is available for Windows, Mac OS X. Linux users will need to install a virtual machine.
Original Makerbot Print file download link
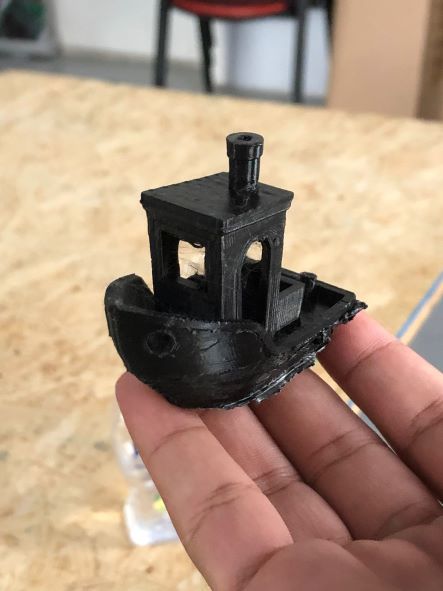
This time the print time estimate for my design was 2 hours and 14 minutes and this time we used white PLA filament.
Hero Shot
Remarks
From testing different types of 3D printers, I got to know the materials used for 3D printing. I learnt that always stick to the temperature mentioned by the manufacturer to avoid print failures or nozzle clogging. Temperature and speed can significantly affect the printing process. If you are facing some problem repeatedly during printing, it can be a slicer fault. PLA filament is the most commonly used plastic material for 3D printing, and we need to convert our design to g-code for printing.
3D Scanning
3D scanning is the process of analyzing a real-world object or environment to collect data on its shape and possibly its appearance (e.g. color). The collected data can then be used to construct digital 3D models.
Qlone
Qlone is the all-in-one tool for 3D scanning and AR. It is the most user-friendly 3D scanning app. It makes it fast to 3D scan real objects, edit them in-app, export the result into many 3D file formats, platforms and 3D printers and even magically bring them to life with animations. A perfect tool for AR/VR (Augmented Reality) content creation, 3D Printing, STEM Education, eCommerce showcase and many other uses.
For iphone users, Qlone is free, but for Android users, it is paid. Because I am an Android user, I tried to download Qlone app by a third party app (which is not safe and not recommended) but I was not able to scan the object because of a bug. My colleague Sikander helped me to do the scanning. I borrowed his phone to use Qlone App.
Steps
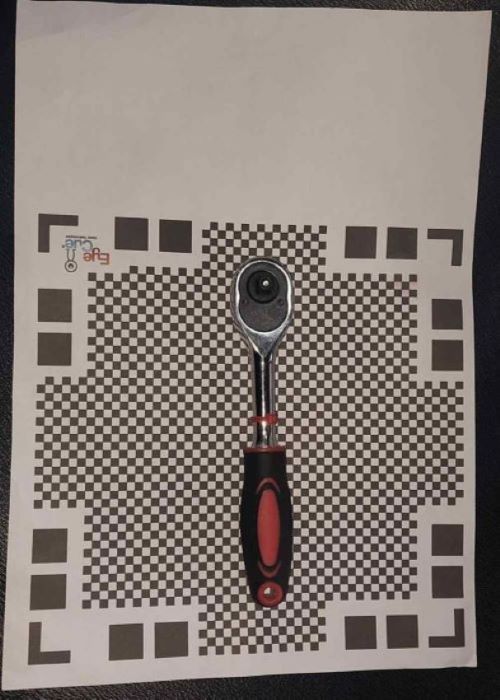
- Place your object in the middle of the qlone mat. Make sure whole mat is in view and its best to use good lighting.
- The AR dome will guide you through the scanning process. Move slowly around the object. Alternatively you can make your mat rotate using simple methods. You can also scan the object from two different angles and it will be automatically merged for a better overall result which includes areas such as the bottom of the object.
- Once the scanning is done, Qlone allows you to make adjustments on the object (art, sculpt, texture, clean and resize) or even merge two different poses of the same object for a better overall result.
Polycam
Polycam is the popular 3D scanning app for iOS, web and Android. They believe that 3D capture is for everyone, so they made it easy. Now we can scan the world around us with our mobile device, DSLR camera, or drone to get beautiful, accurate 3D models.
Steps
- Tap the + symbol in the upper right corner of the app screen to launch the camera.
- When you’re ready to take a picture, tap the round button.
- Then, slowly move the camera while pointing it at the object you want to scan.
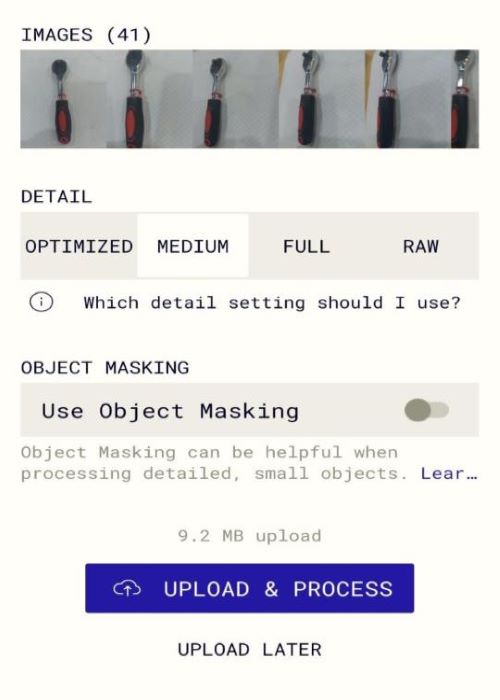
- When you are done, tap the red square button again to finish, and the scanned model will be displayed.
- Tap PROCESS and wait a moment for the process to finish.
- When processing is complete, the model will appear like this, and you can swipe or pinch out to see the completed model from various angles.
Remarks
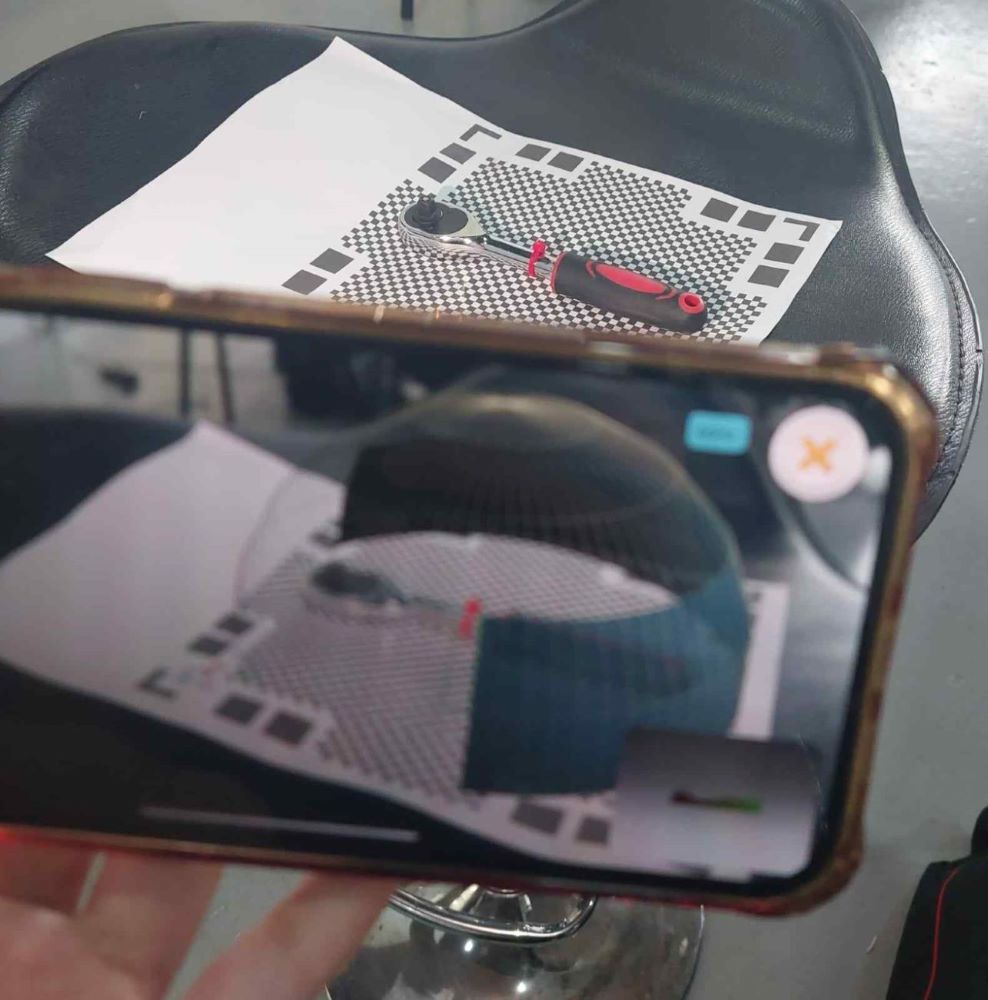
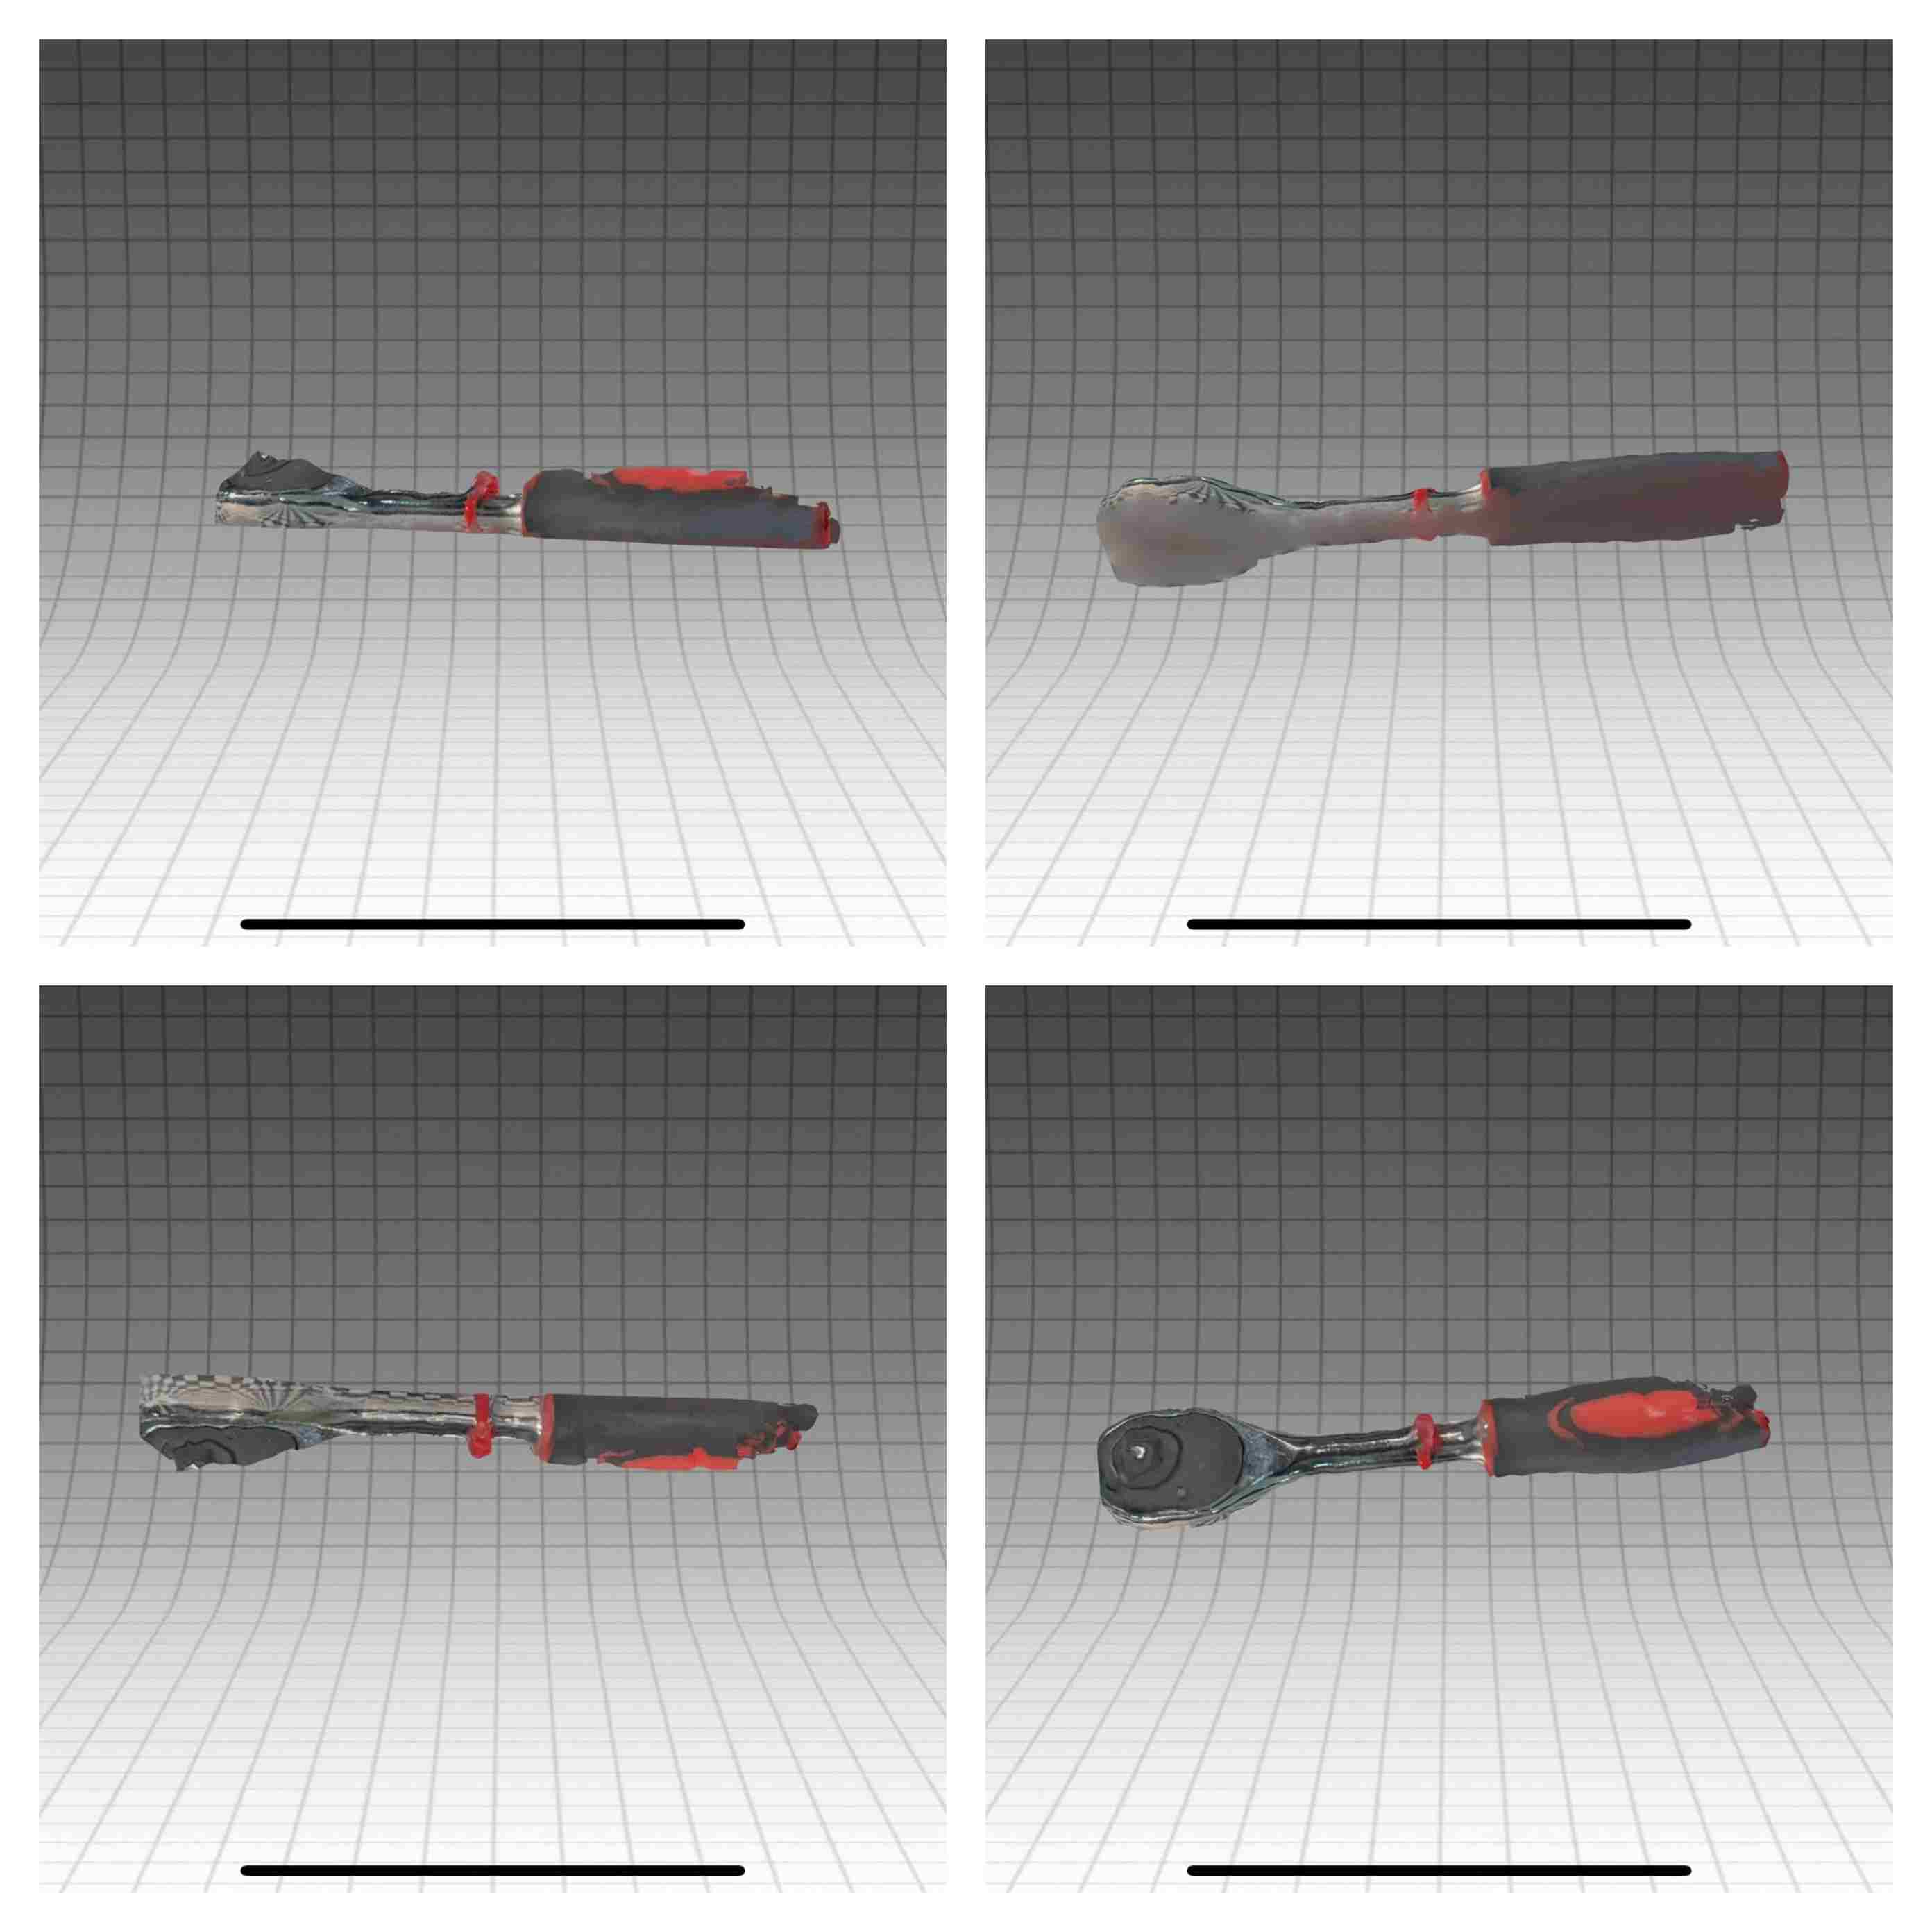
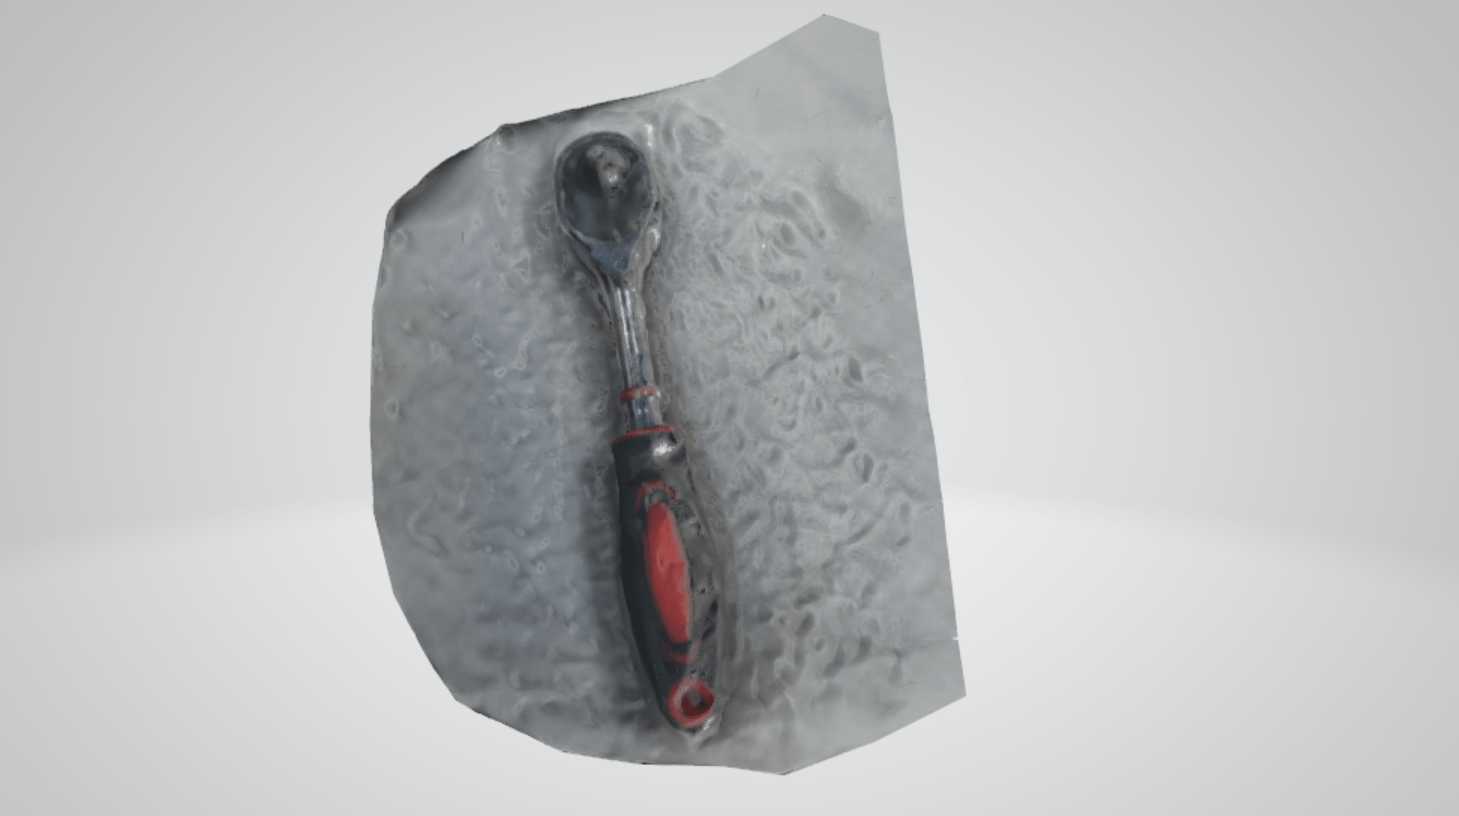
The results I got from both apps were not good and could not be used for 3D printing. The object I randomly took from the lab to scan was not scanned properly because it had so many details and colors. In the qlone app scan result, half of the object was not scanned and the colors were mixed together. And in the polycam scan result, the white color of the paper that I put under the object was mixed up with the silver color of the object.
Useful links
- Makerbot Replicator Z18 3D printer
- Prusa i3 printer
- Type of printers
- What is PLA?
- Ultimaker cura
- Trophy Tutorial
- Thingiverse
- MakerBot Print
- Qlone App
- Qlone mat pdf
- Polycam App