1. Project management
This week I learned to setup my website and work on it locally using Git
Building a website
For this section I was given a website template on Gitlab that is written in markdown.
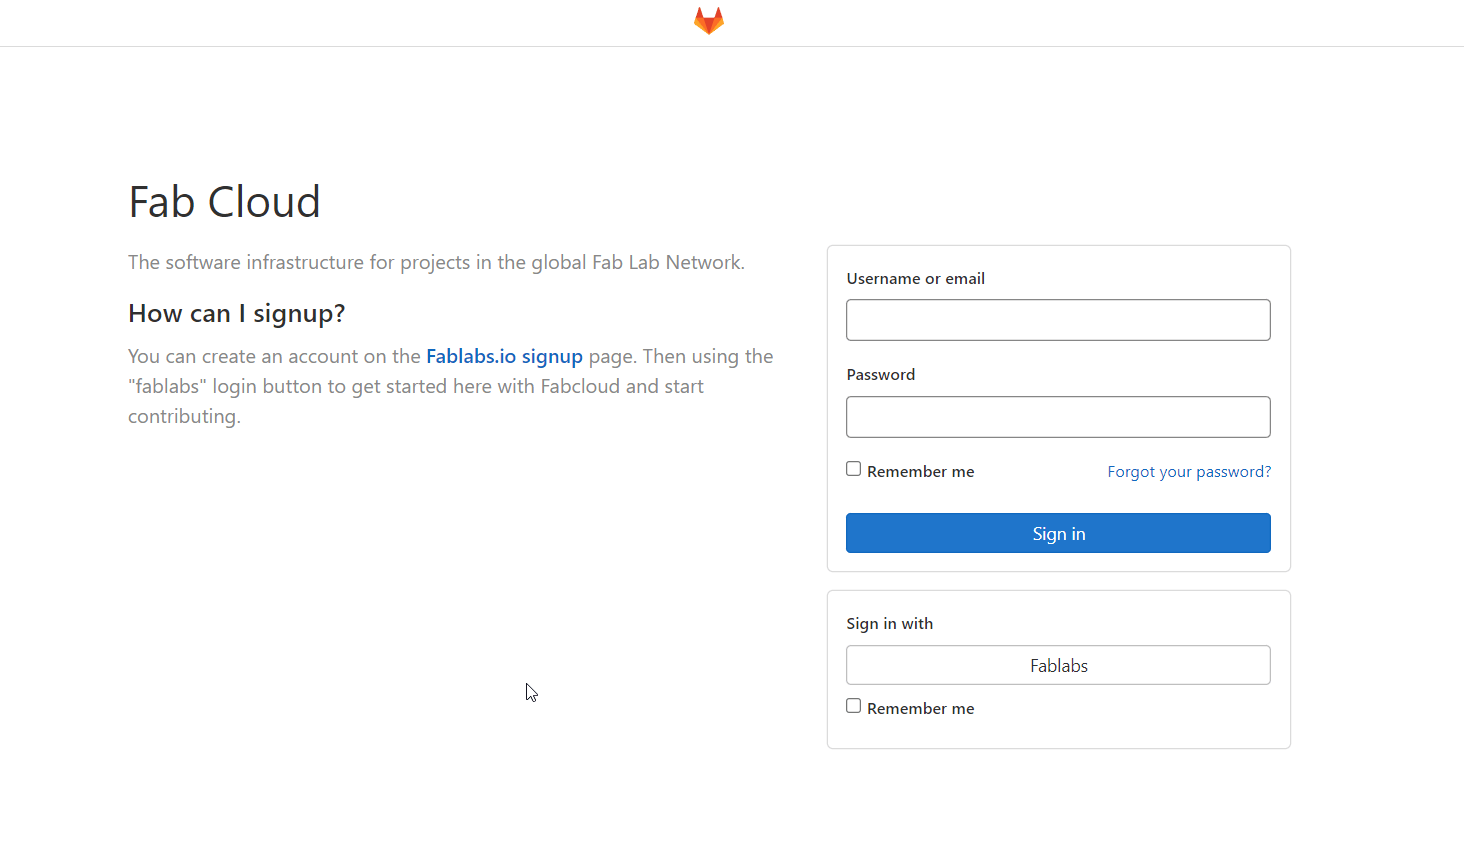
I signined into Gitlab.
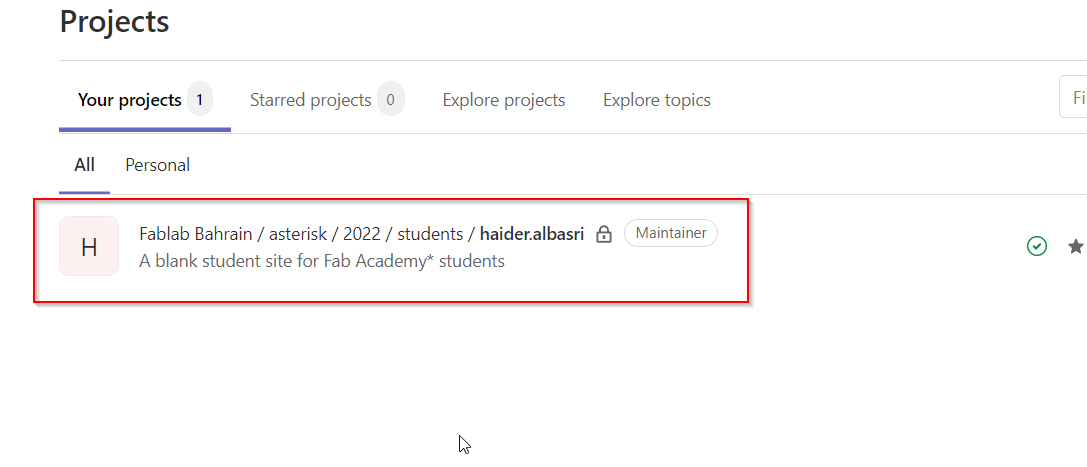
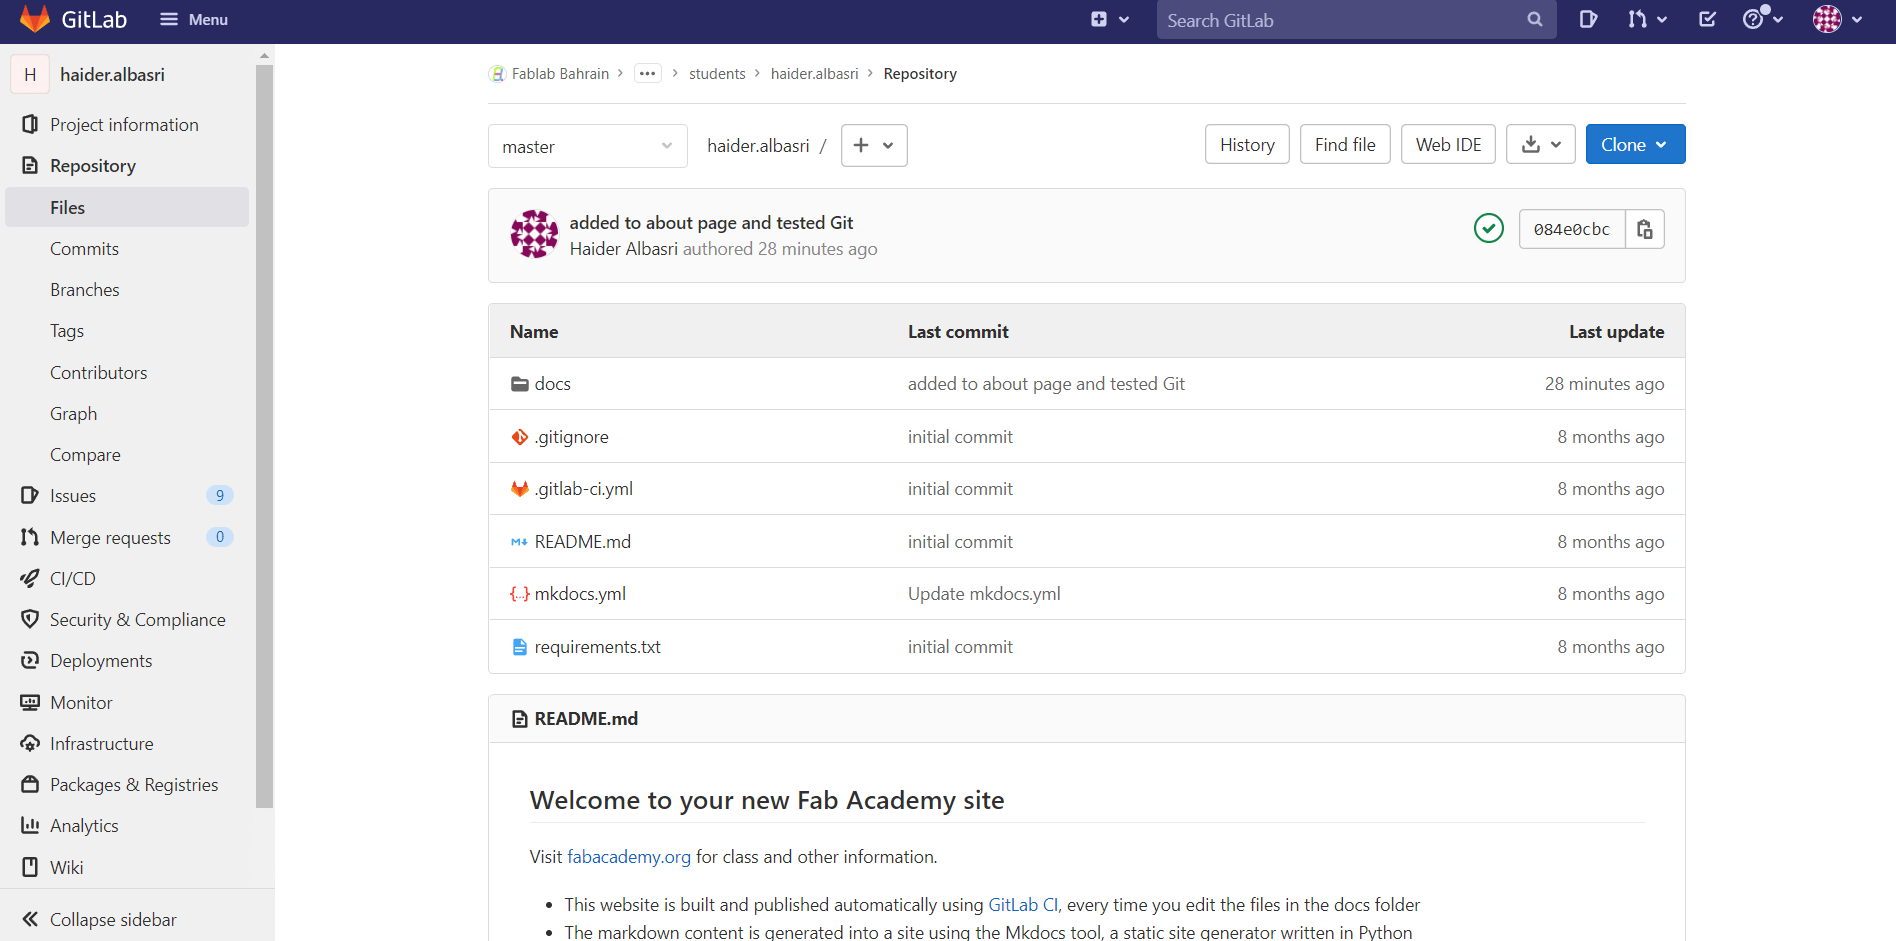
I clicked on the only project i had (which is the website)
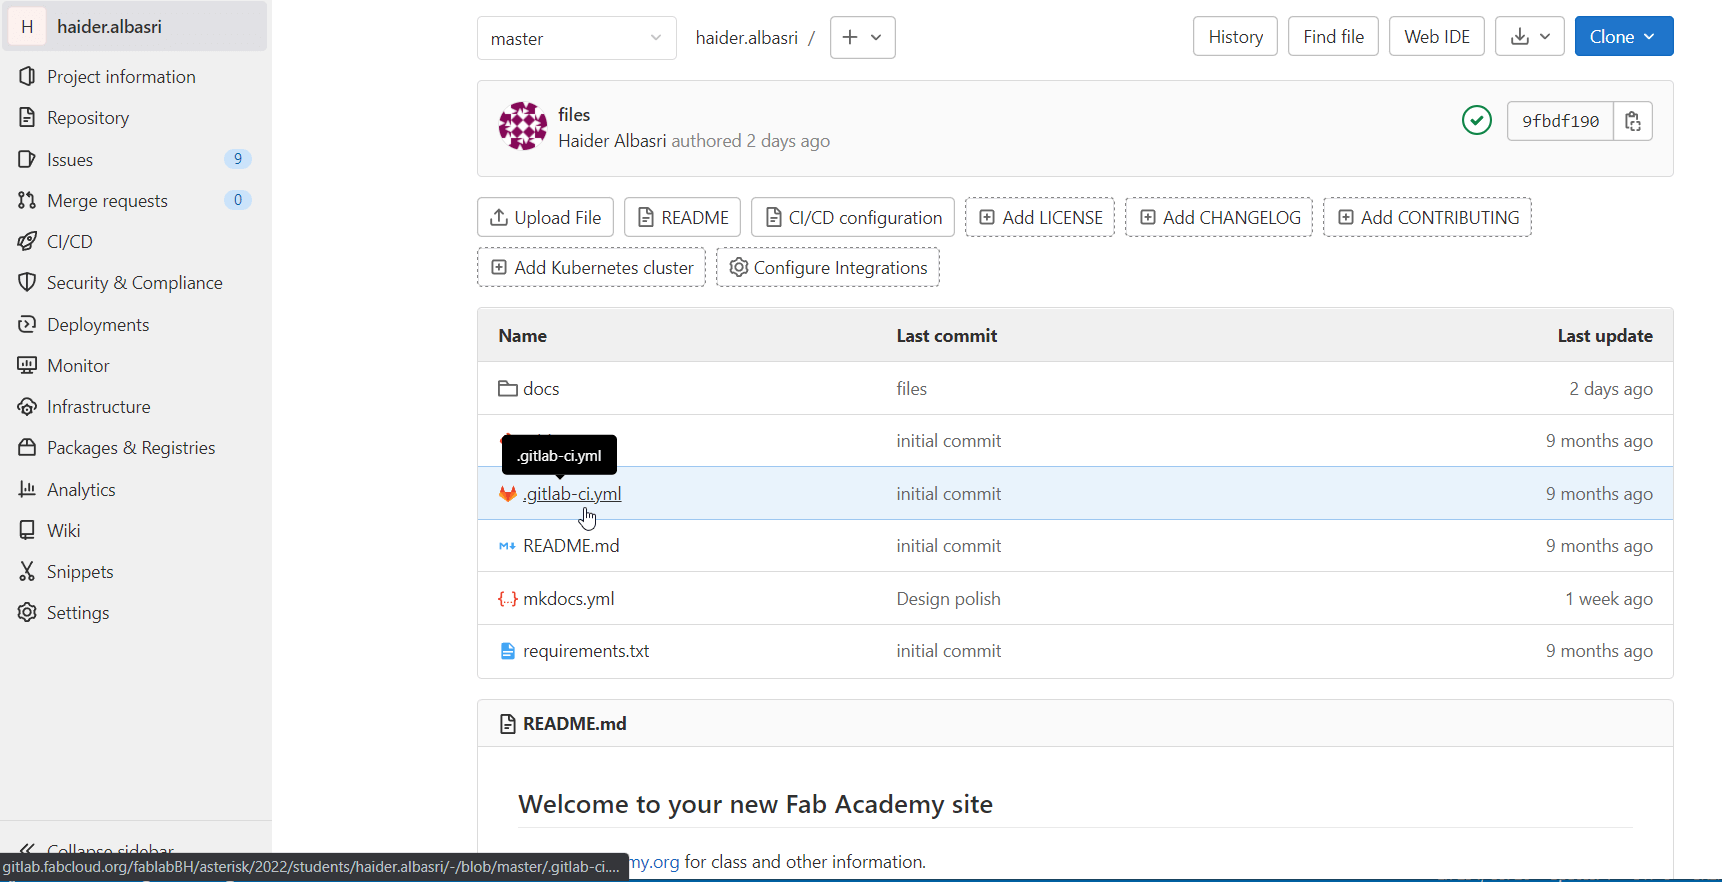
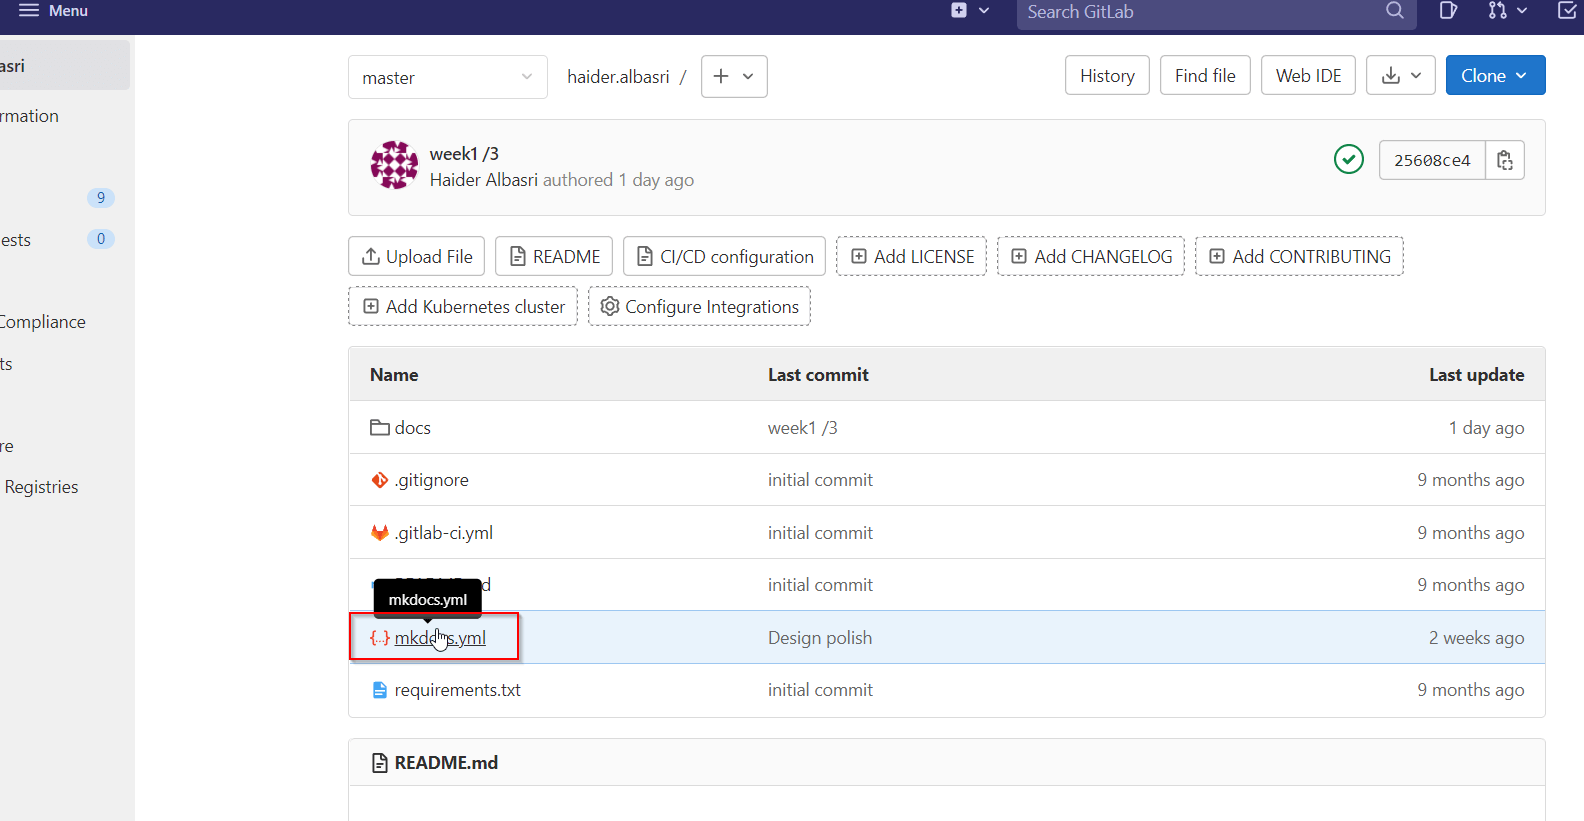
Here are all the files that pertain to the website.
Accessing Website URL
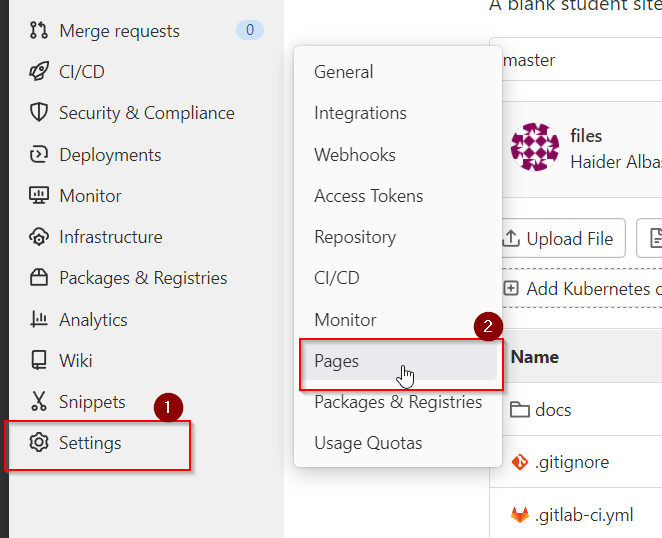
To find my websites url i went to Settings > Pages.
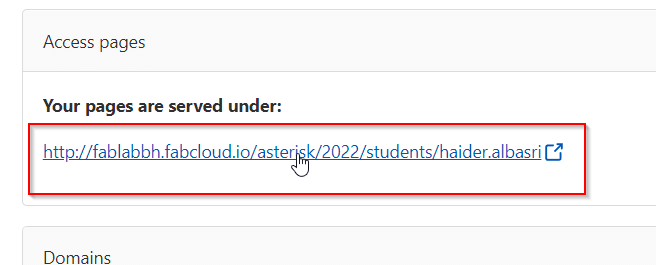
 This link is the url to my website.
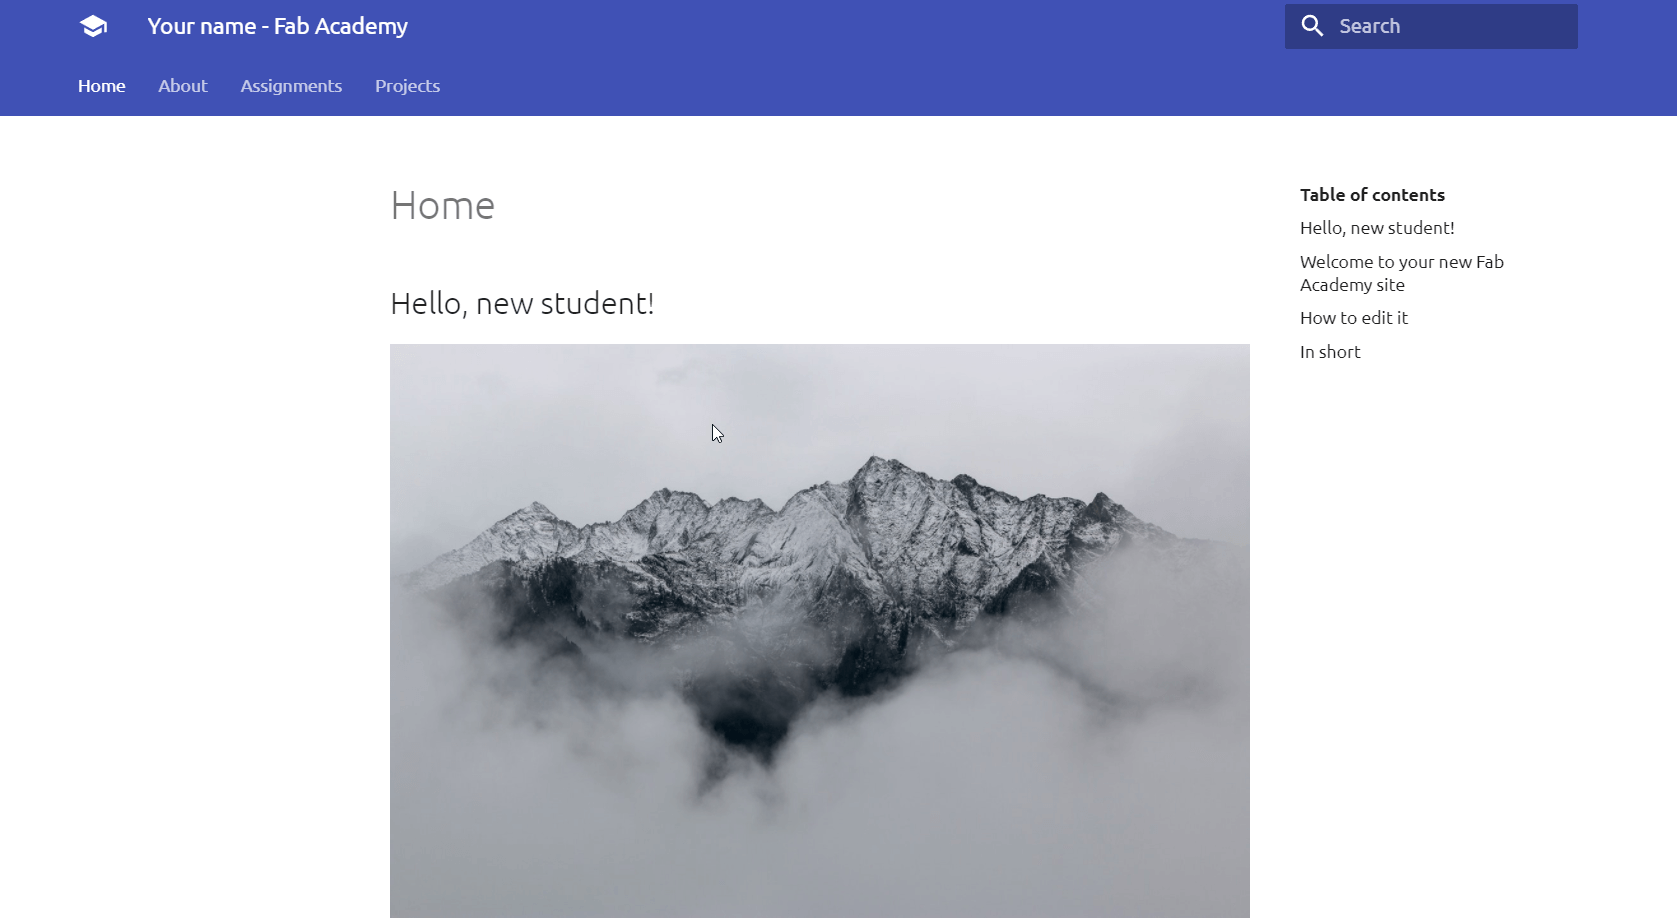
 Heres how my website looks like at the moment.
Website Customization
What is MKDocs?
MkDocs is a site generator that’s creates websites for documentation purposes. The website’s source files are written in Markdown but can be configured with YAML configuration file (mkdocs.yml).
It has several features including: -
- Easy to customize
- Great themes available
- Preview your site as you work
- Host anywhere
More information can be found on their offical website
Accessing Mkdocs.yml
To customize our website we need to edit the mkdocs.yml file. To find it go to your website repository and click mkdocs.yml.
The first section of the mkdocs file contains the site header and footer(top and bottom titles of a website)
and under it are links to social media accounts.
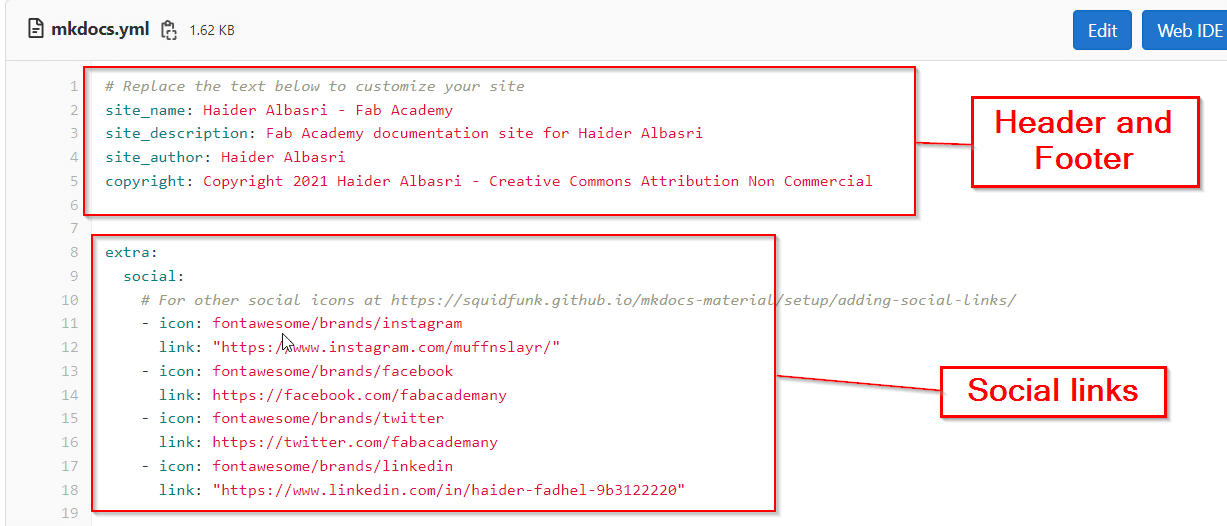
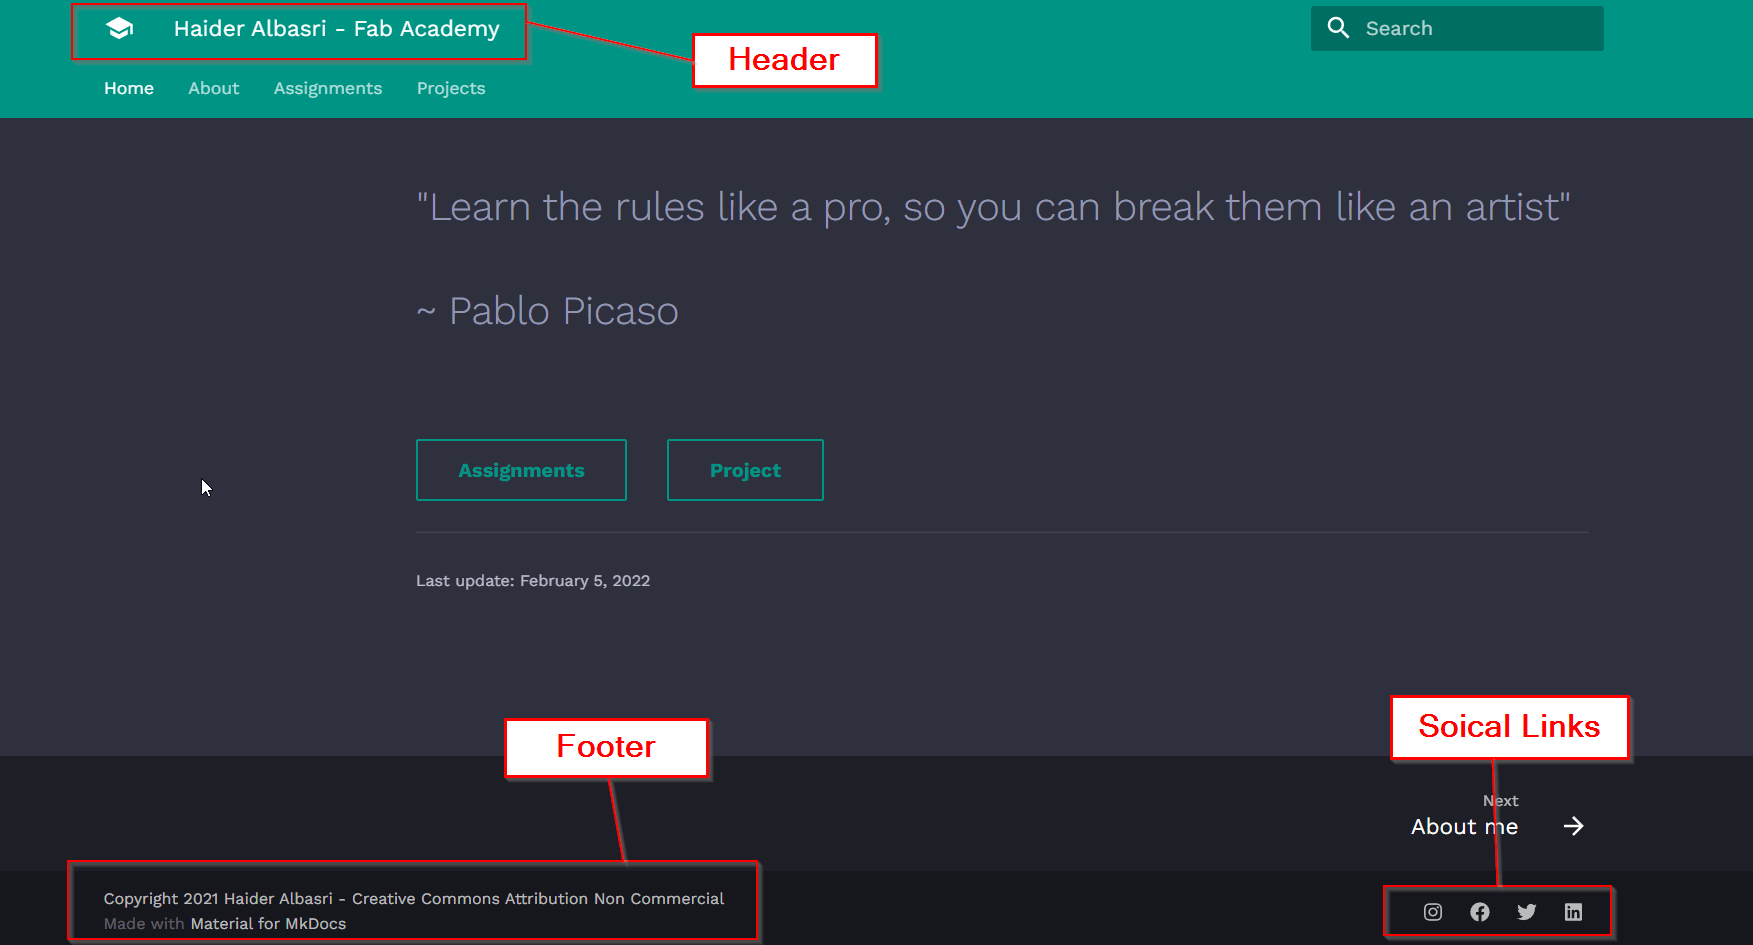
Here’s what changed on the website.
Changing Colors
The Second section controls the colors of the website.
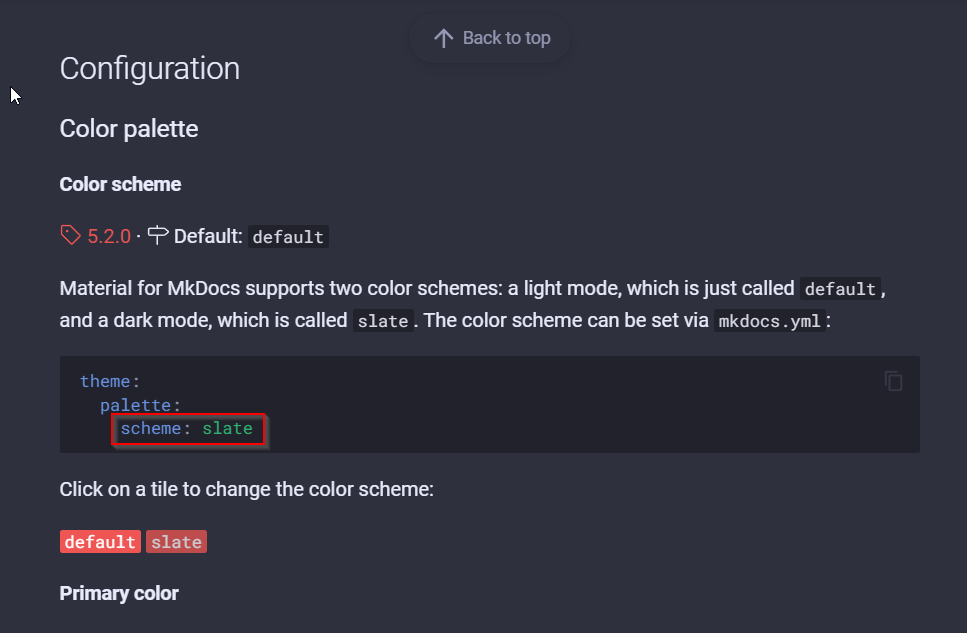
Scheme
Scheme controls the background color of the website.
It can be set to Default for a white background.
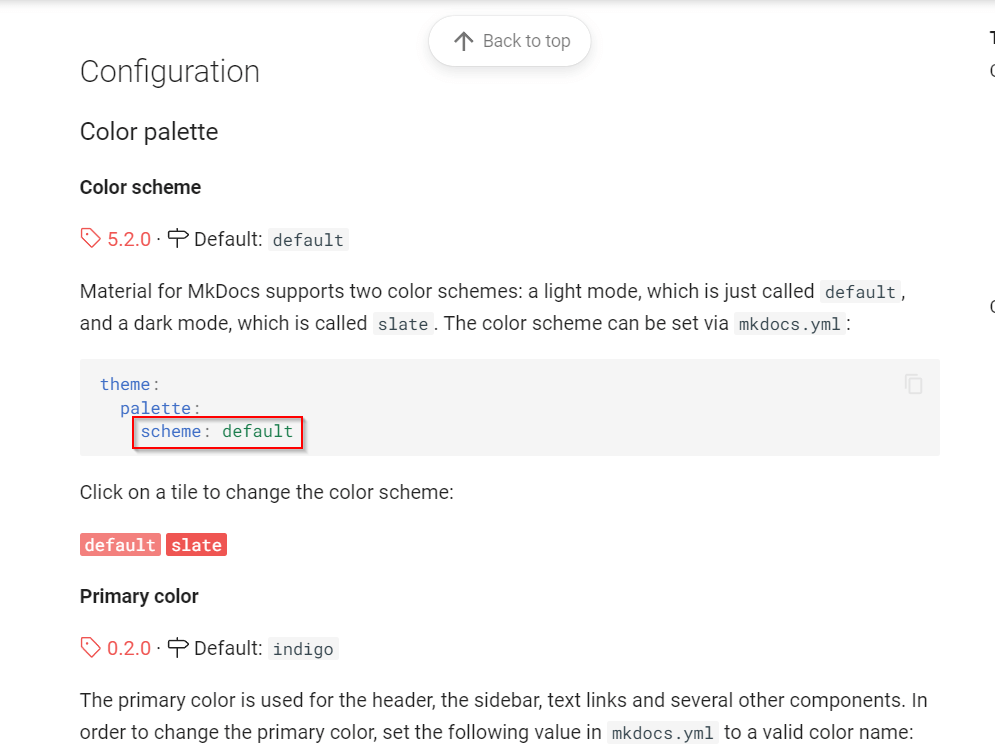
Or to Slate for a black background.
Note
If you dont see “scheme:” in your mkdocs file you can just add it under “palette:” and it will work.
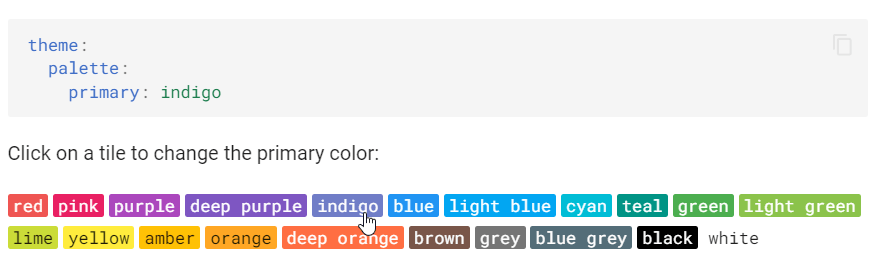
Primary
Primary controls the colors of the top navigation bar.
Here are all the available colors you can choose from.
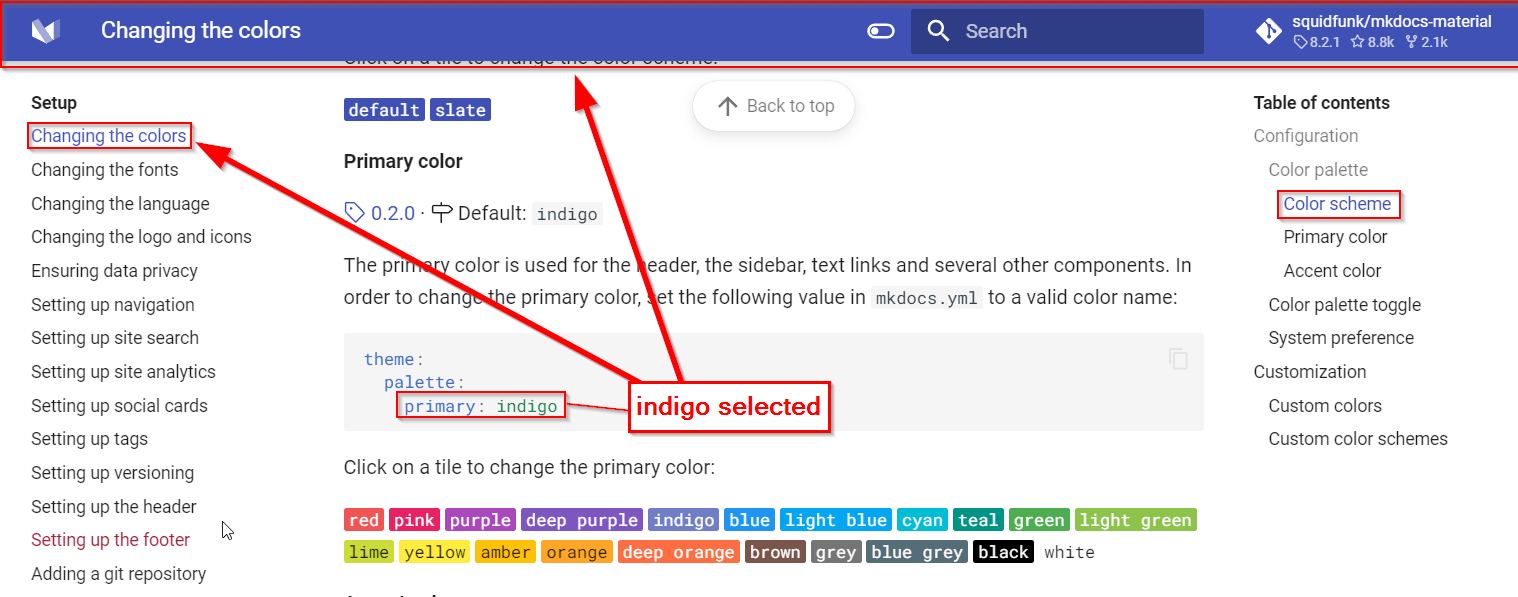
Lets say we had our primary color set to purple in the example below.
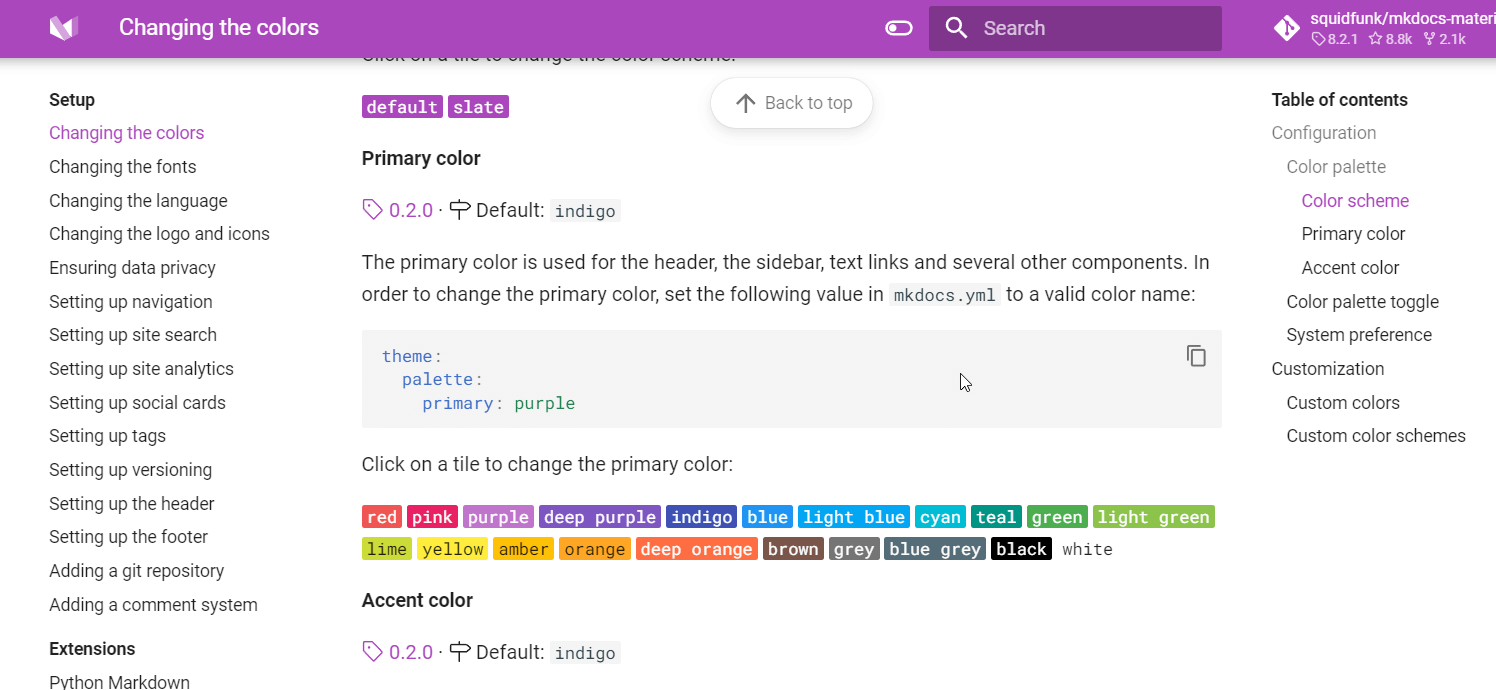
If we change the primary color to indigo the colors of buttons and the header change.
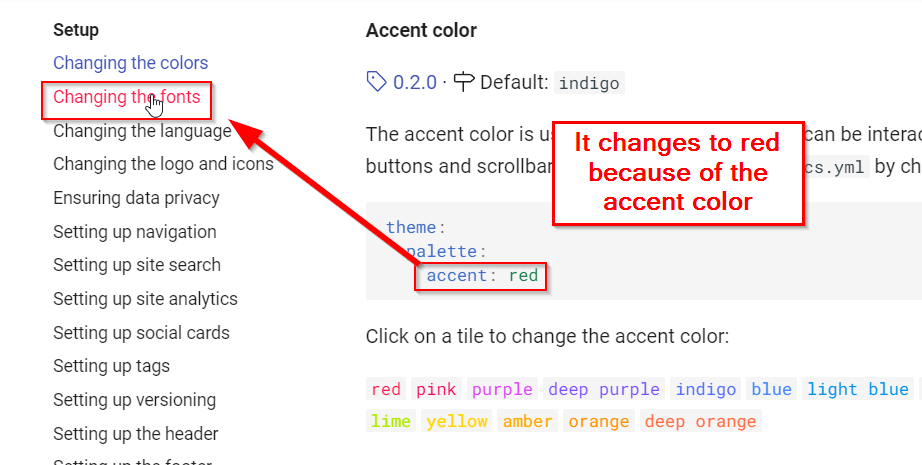
Accent
The Accent color controls the colors of all the interactable elements such as hovered links, buttons and scrollbars. Here are all the available colors you can choose from.

Notice that if we try to click the buttons on the side of the page it turns red. This is because the accent color is set to red.
Example Scenario
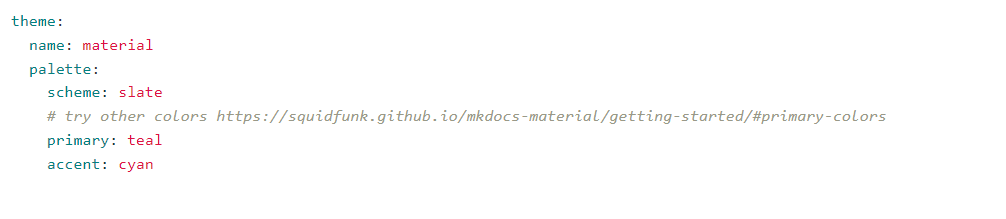
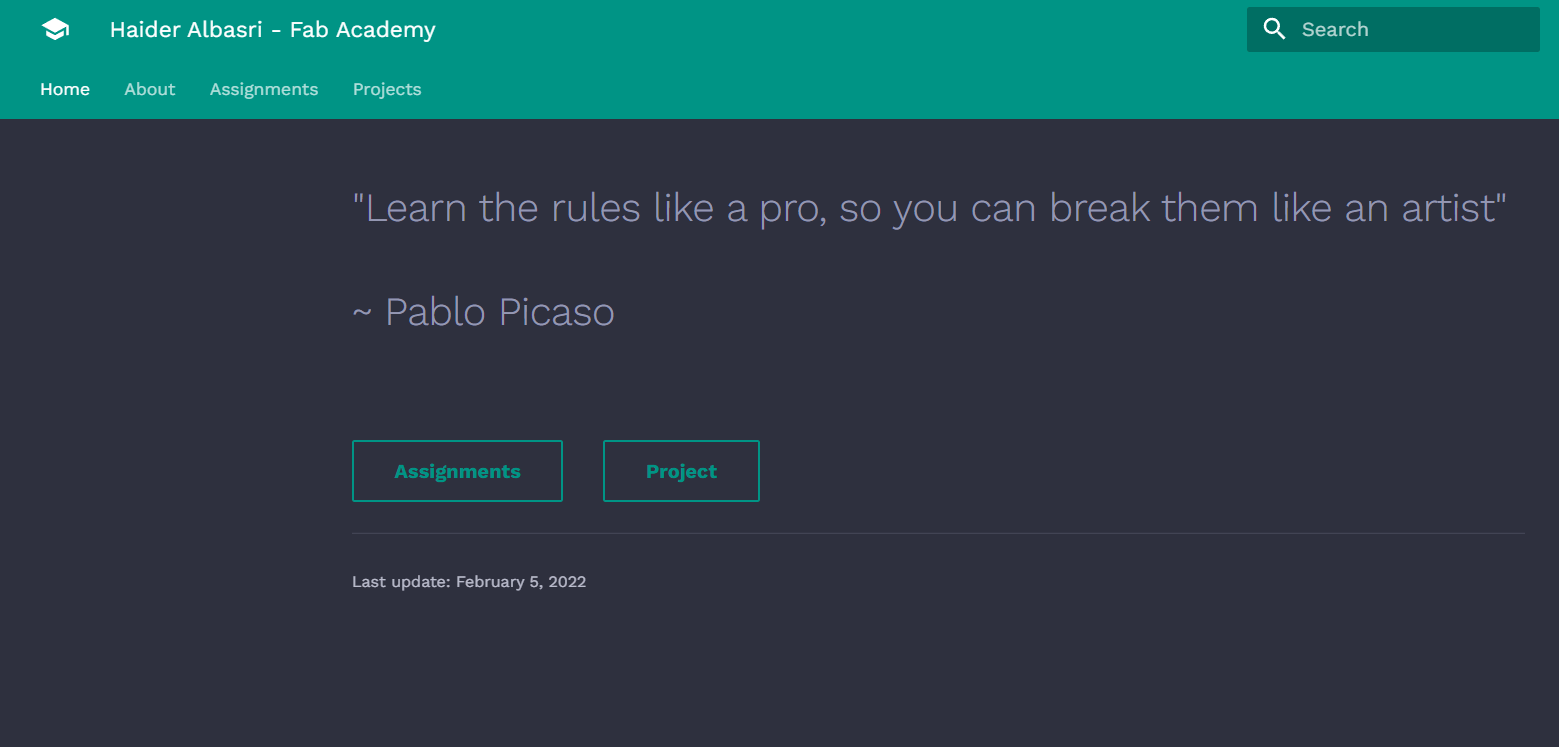
The currently my website looks like this.
Code
theme:
  name: material
  palette:
    scheme: slate
    # try other colors https://squidfunk.github.io/mkdocs-material/getting-started/#primary-colors
    primary: teal
    accent: cyan
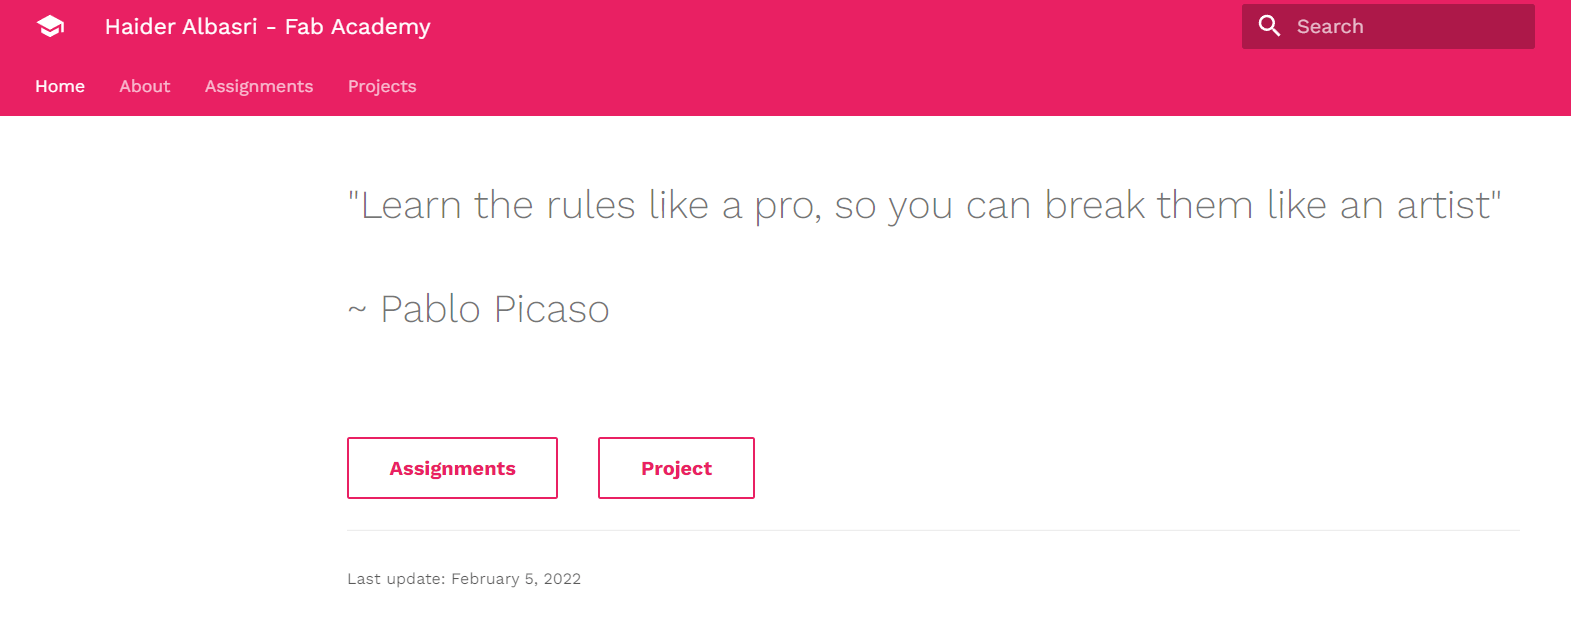
Website View
Lets change the background to white (setting scheme to default), the primary color to pink and the accent color to purple.
Code
theme:
  name: material
  palette:
    scheme: default
    # try other colors https://squidfunk.github.io/mkdocs-material/getting-started/#primary-colors
    primary: pink
    accent: purple
Website View
You can find more examples of all the available options in the Mkdocs Color Documentation.
Changing Font
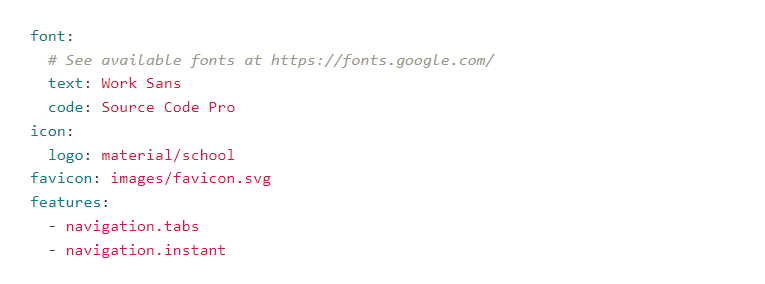
The third section controls the font of the website.
Changing the font is a simple process and can be done in 2 easy steps.
Step 1: Choose a font
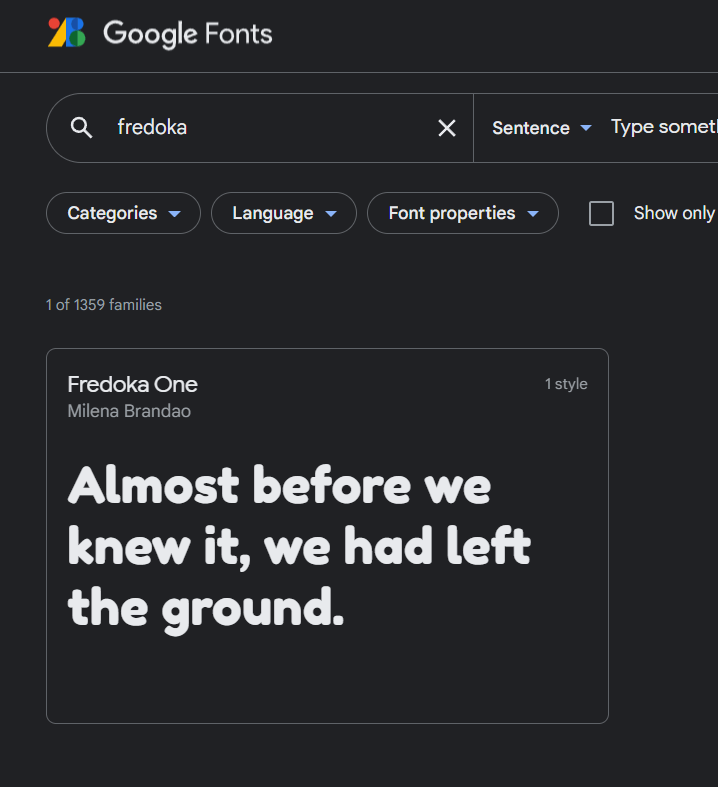
Mkdocs supports all fonts from the Google Fonts website.
You can search for any font you like on the website.
As an example i will choose the Fredoka One font.
Tip
I suggest you research about the best fonts for websites, some fonts will make your documentation unclear.
I my favourite fonts are Lato, Poppins, Montserrat and Work Sans. I recommend that you try them out.
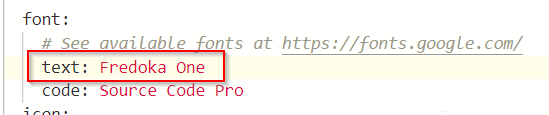
Step 2: Edit mkdocs
Typing the name of the font you chose after the text: value.
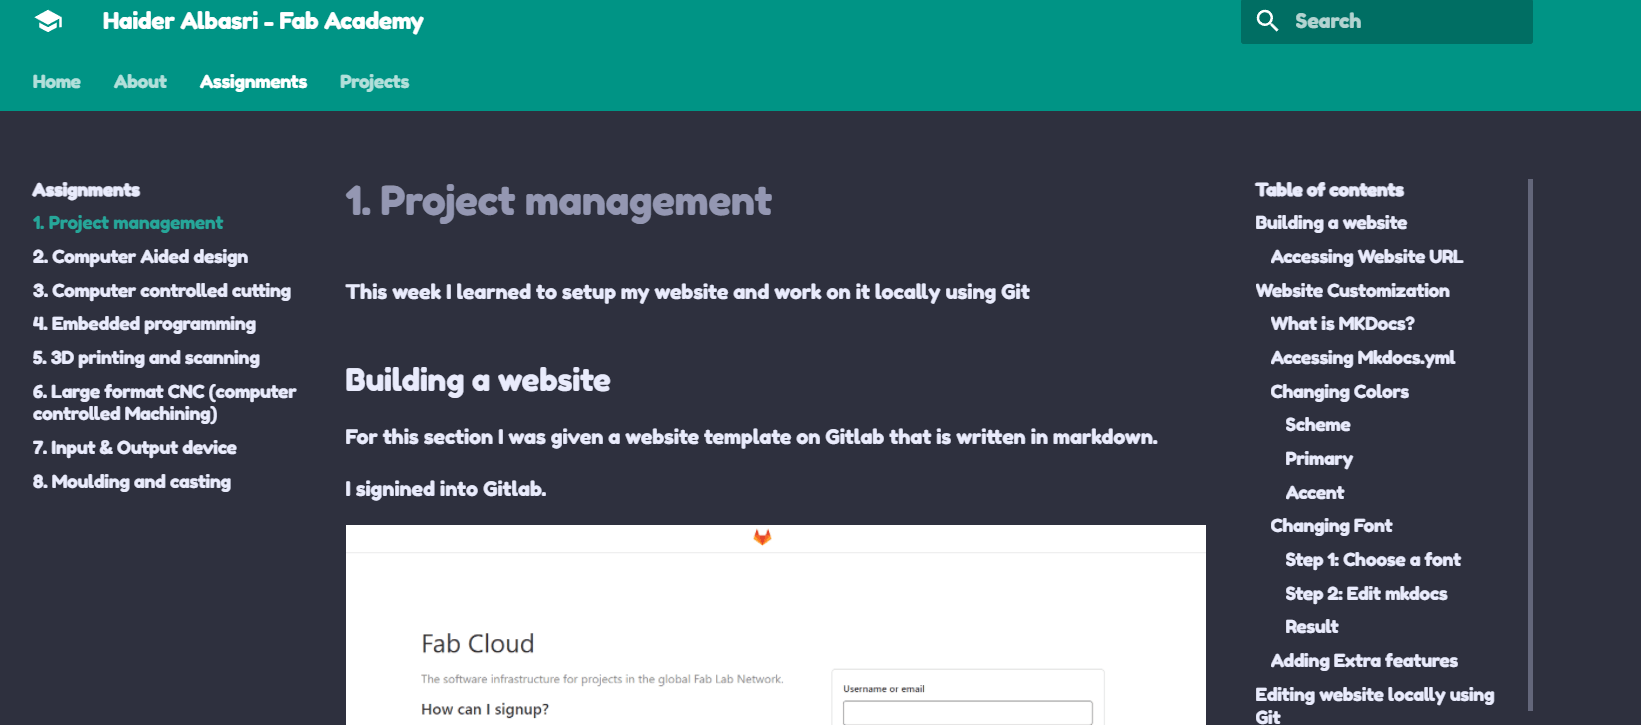
Result
After saving the changes in mkdocs, you should have something like this.
You can find more examples of all the available font options in the MKdocs Font Documentation
Adding Extra features
The last section of the mkdocs controls extra features that can be added to the website.
Buttons
Button Example
This is an example of what the button looks like.
You can add buttons by adding { .md-button } at the end of a link.
Here’s an example of the code.
[Assignments](./assignments/week01.md){ .md-button }
Adding Buttons
You can add buttons to your website by adding the code below to your mkdocs.yml file in the markdown_extensions section.
markdown_extensions:
  - attr_list
Warning
Make sure that the button extention is not already installed in makdocs.
You can find more information in the Mkdocs Buttons Documentation
Admonitions
What are Admonitions
Admonitions are messages that can be put on a web page to give hints, warnings or other utilities.
Here are some examples of Admonitions.
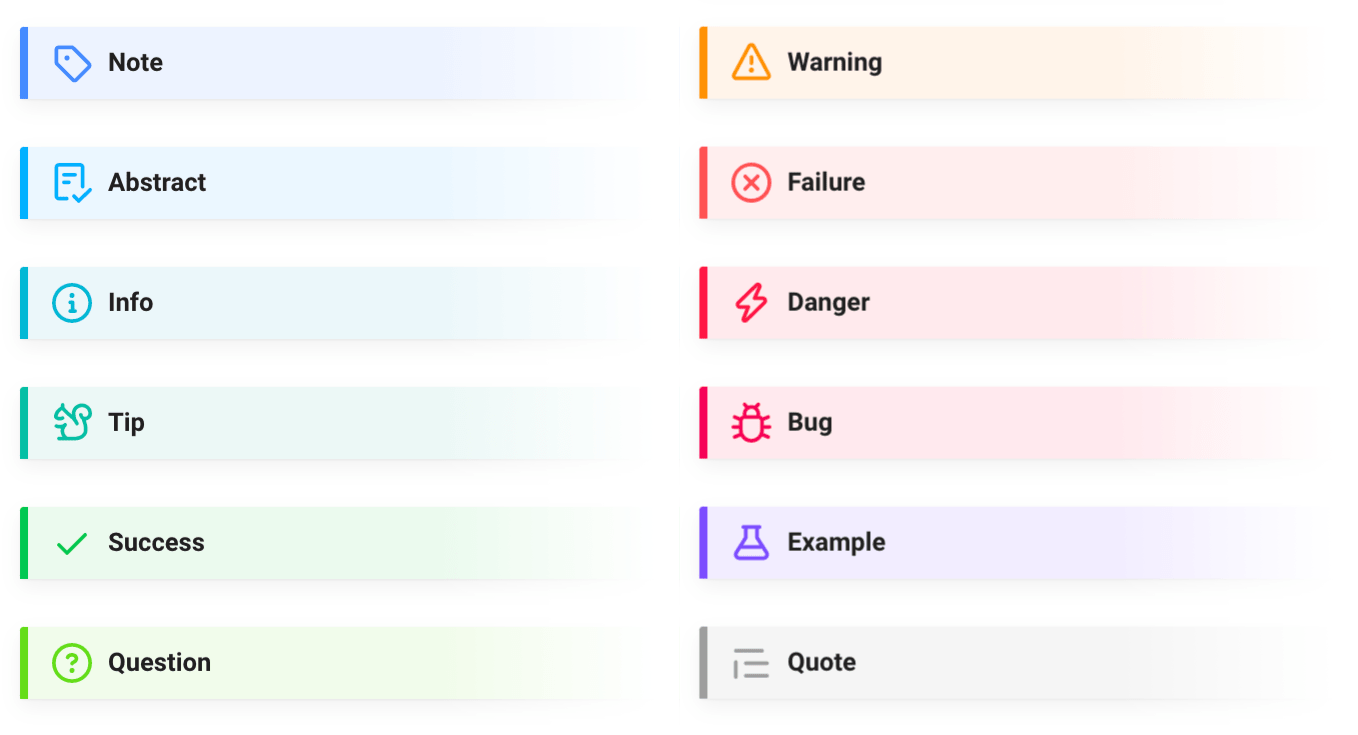
Note
Here is what a Admonition looks like on the page :)
Adding Admonitions
Add the code below to your mkdocs.yml file.
markdown_extensions:
  - admonition
  - pymdownx.details
  - pymdownx.superfences
Using Admonitions
To use Admonitions in your website start with !!! followed by your type of message (Note,Tip,Warning,etc.). Press Enter on your keyboard to skip a line then press Tab to create a space then you can write your message.
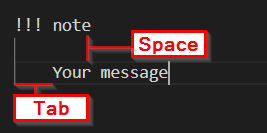
!!! note

    Your message
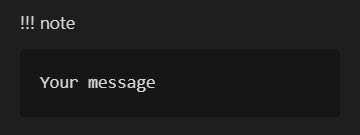
This is what it looks like in the prieview
Extra Info
You can’t see Admonitions locally, they will only appear when when you visit your website.
You can find more information in the Mkdocs Admonitions Documentation
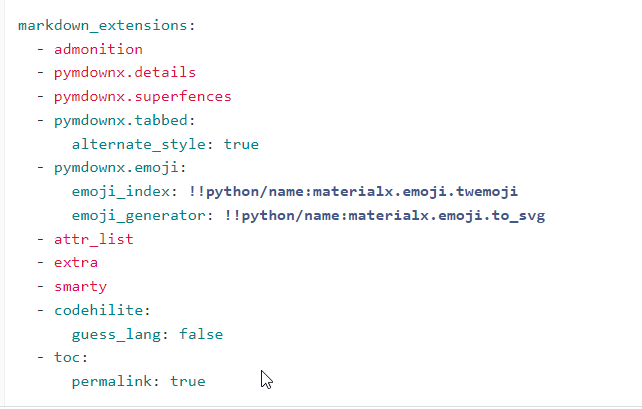
You can use the code below and replace your markdown_extensions section if you want too add all the extentions I have.
markdown_extensions:
  - admonition
  - pymdownx.details
  - pymdownx.superfences
  - pymdownx.tabbed:
      alternate_style: true
  - pymdownx.emoji:
      emoji_index: !!python/name:materialx.emoji.twemoji
      emoji_generator: !!python/name:materialx.emoji.to_svg
  - attr_list
  - extra
  - smarty
  - codehilite:
      guess_lang: false
  - toc:
      permalink: true
Editing website locally using Git
Step 0: Setup & Prerequisites
Step 1: Cloning Website
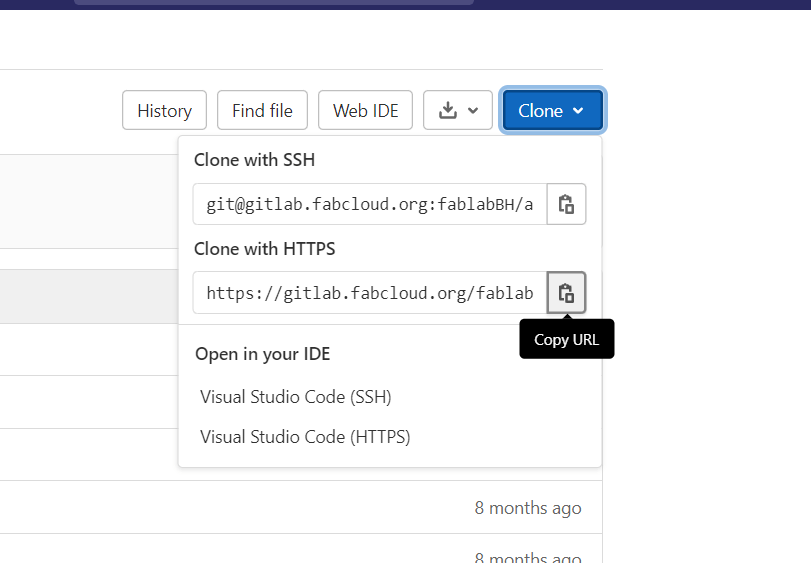
Go to the website repository
Copy the Url under Clone with HTTPS
Step 2: Git Connection
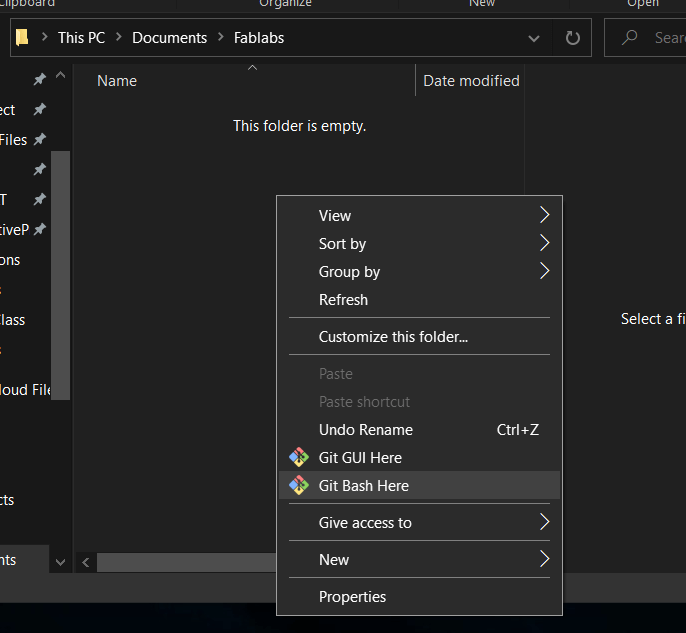
Navigate to where you want to save your local website
Right Click > Git Bash here
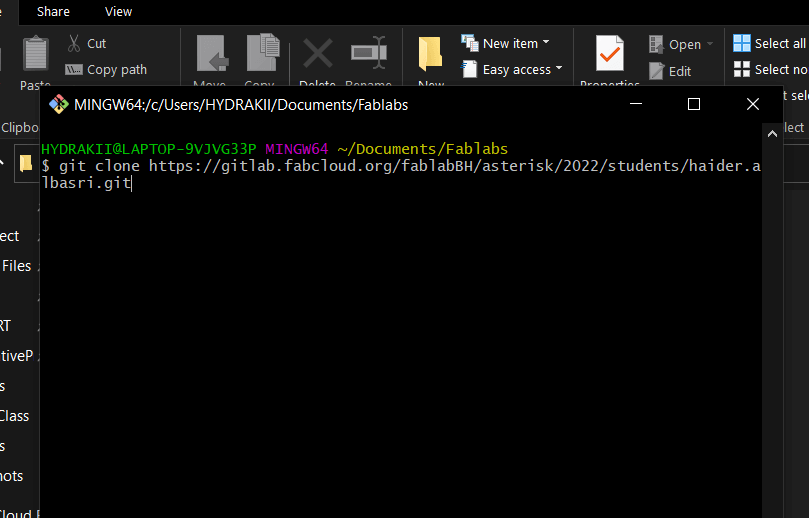
Use the following code in the terminal
Git Clone *The URL you copied in step 1*
Enter your GitLab Username and Password
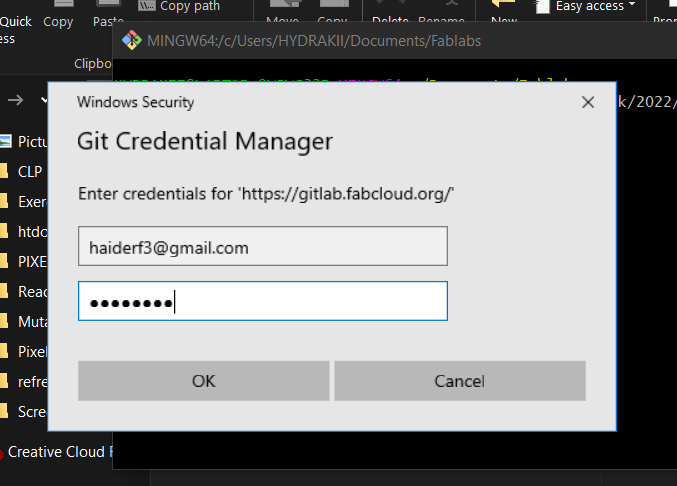
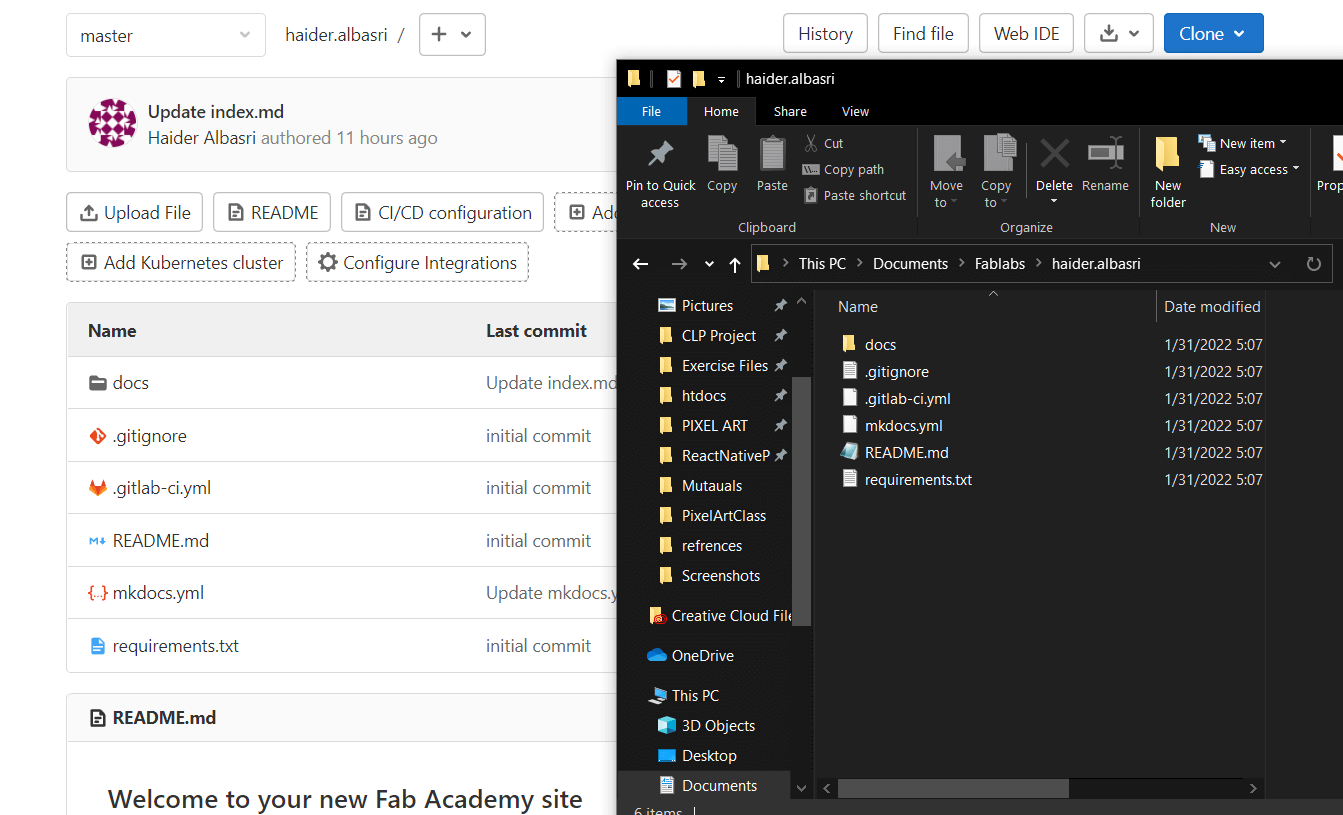
If everything worked fine you should have a folder that contains the same files that are on your repository
Step 3: Setup VS Code Enviroment
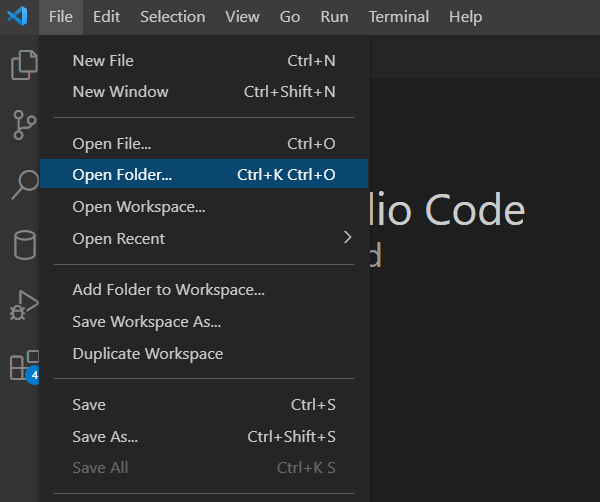
File > Open Folder > Folder you made in step 2
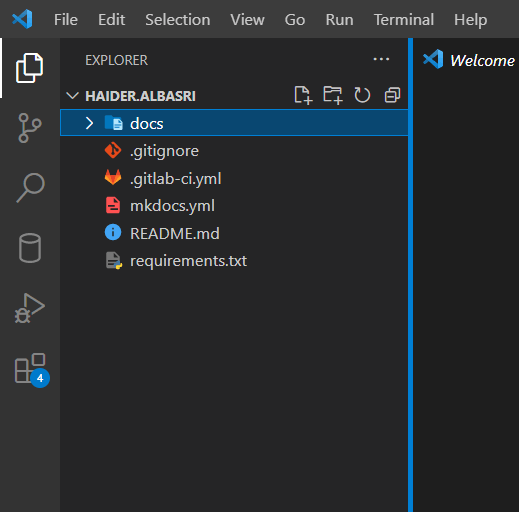
You should see all the files displayed in the to left of the screen
Step 4: Pushing Changes with Git
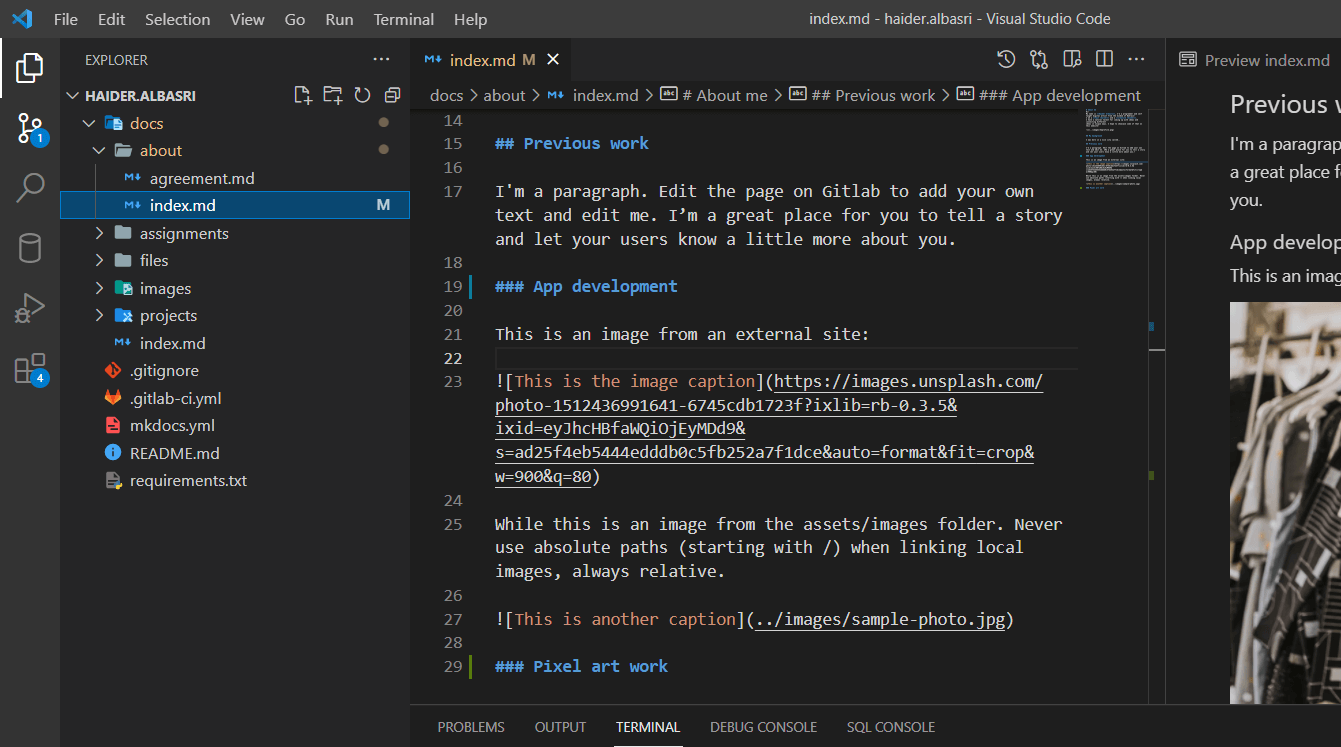
At this point you are free to edit the Website locally however you like
Once you are satisfied, save your work and proceed to the next step
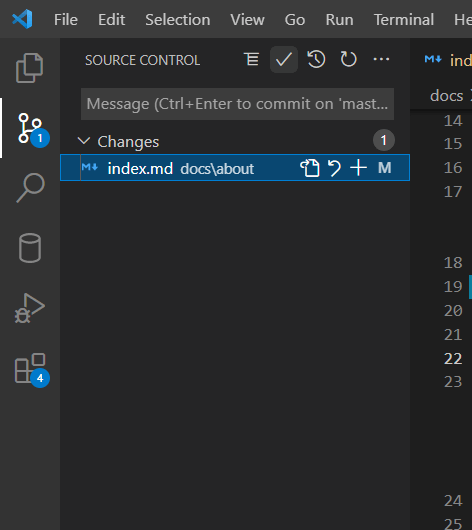
Click the second icon on the toolbar (left side of the screen) to open the Source Control Menu
Click the check icon to commit changes
This prepares your files to be pushed (to be uploaded to GitLab)
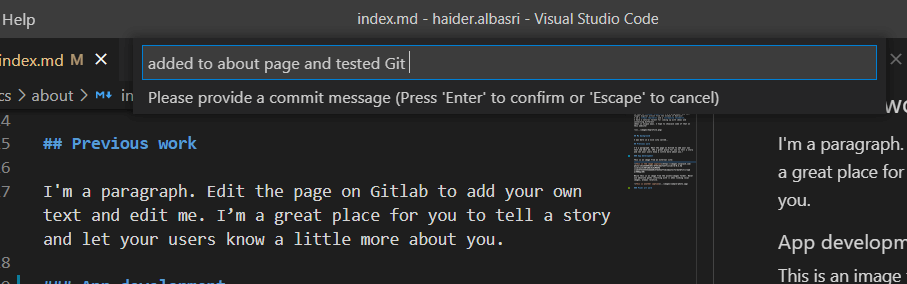
A message box will appear on the top of the screen
Describe the changes you’ve made in the message box and Press Enter
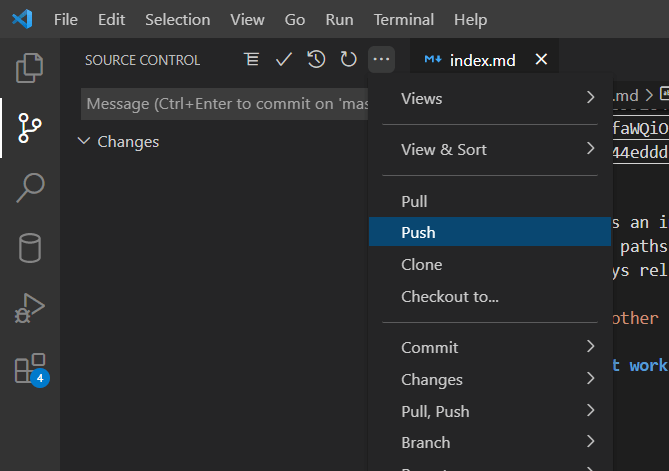
Click … > Push
This will update your changes on GitLab
Step 5: Confirm Changes
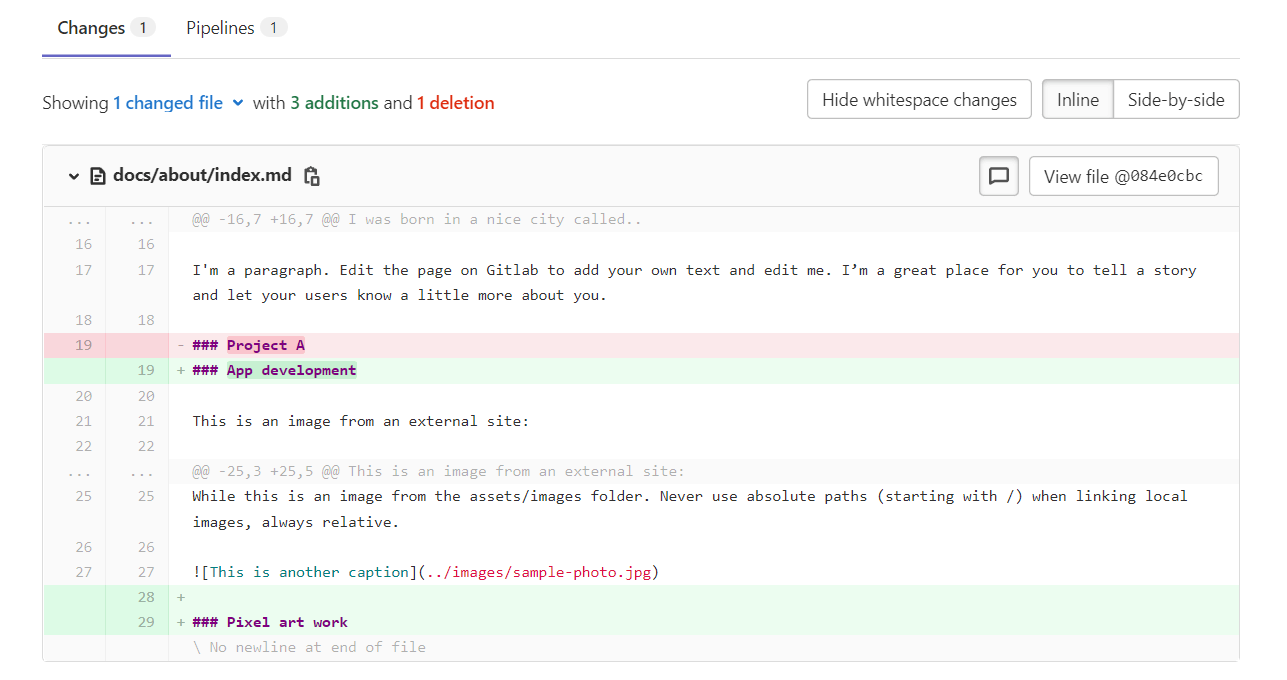
You can makes sure that the changes have been pushed successfully by checking the Commits section in GitLab
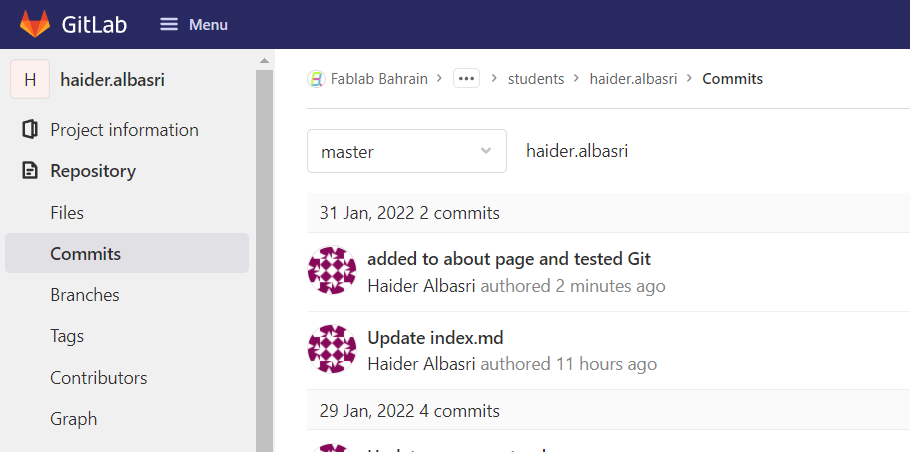
You can also see what exactly has changed by clicking one of the commit messages.