7. Input & Output device
This week I learned about input and output devices.
Background Information
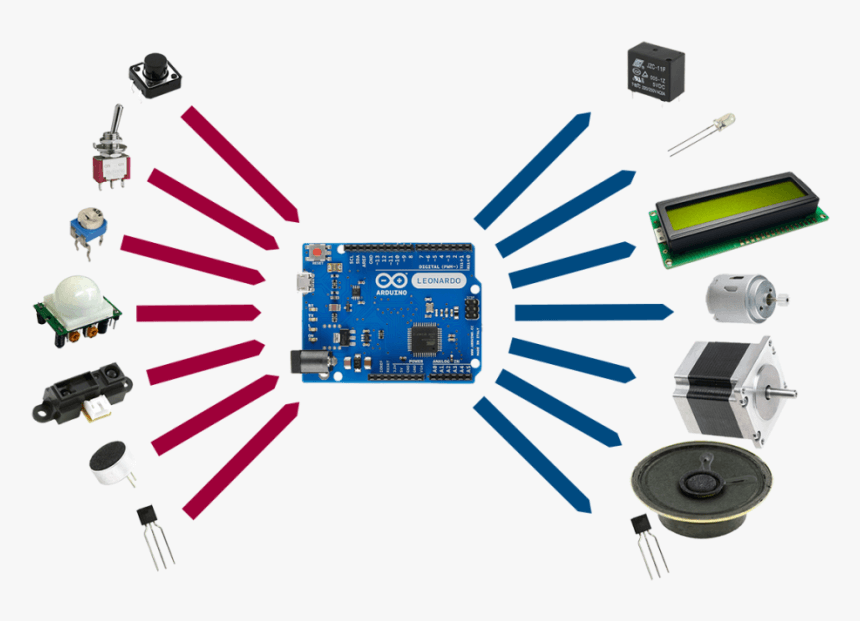
An Input device is any device that can be used to collect data, for example a keyboard that collects keys typed or a switch that turns on a light.
An Output device is any device that can be used to represnt data, for example a lcd screen or a light bulb .
Here are some examples of input and output devices.
| Input Devices | Output Devices |
|---|---|
| Switch | LED Light |
| Sensor | LCD screen |
| Button | Motor |
| Variable Resistor | Buzzer |
Individual Work
Practice
I followed this tutorial to understand the basics of Input and output.
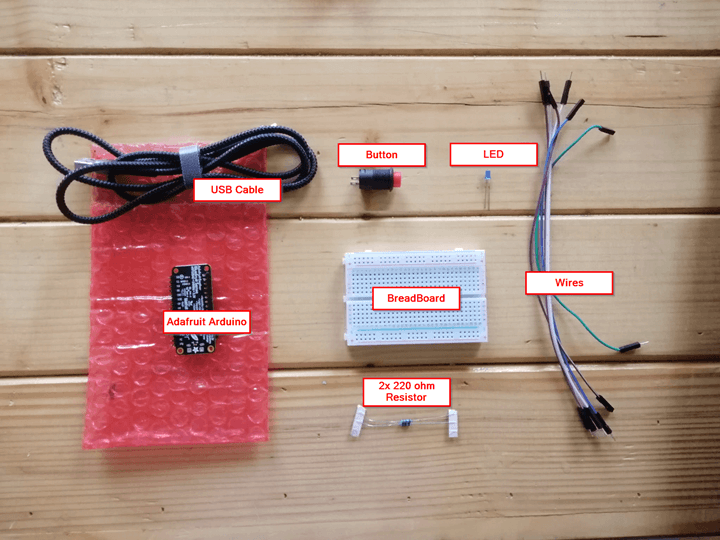
I will make a simple led and button curuit using the adafruit.

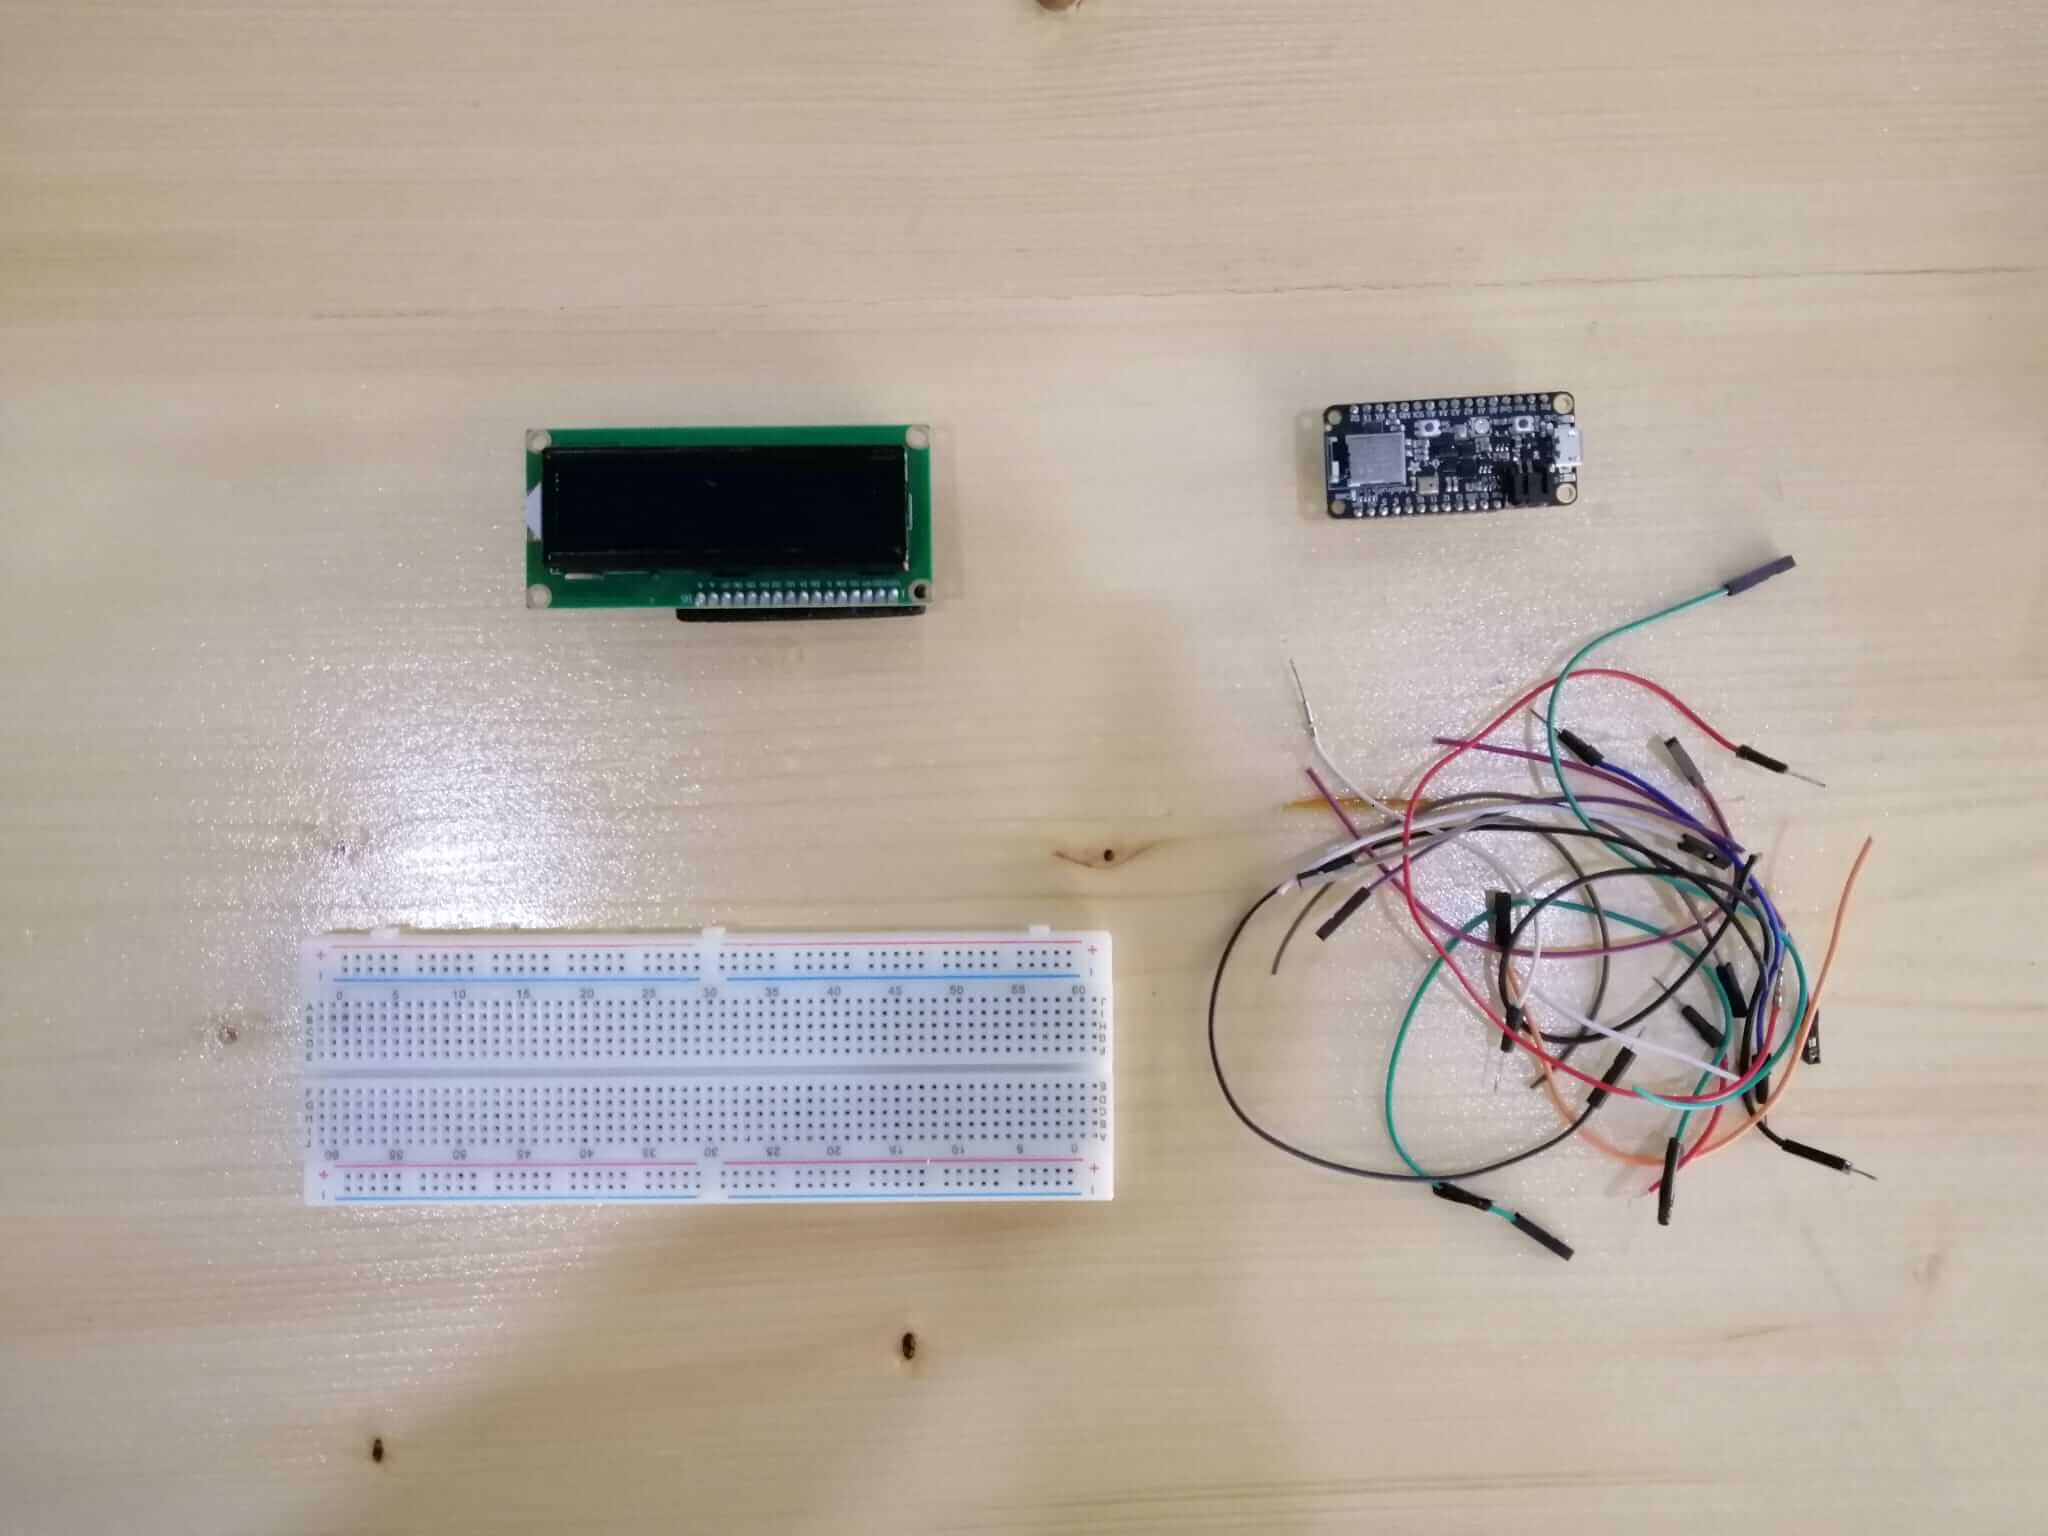
Here are some of the stuff we will need.
Power off the Adafruit and remove the USB
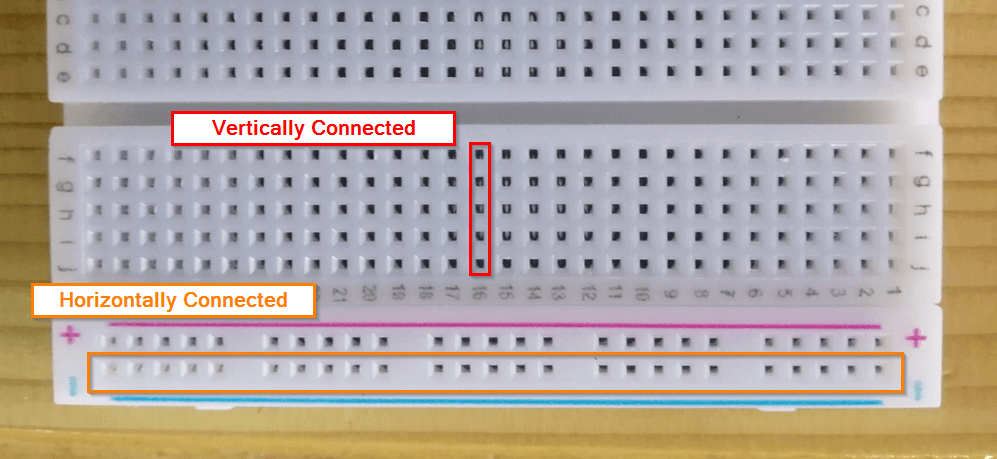
Looking at the breadboard, the middle section of pins are connected vertically. On the other hand, the bottom sections are connected horizontally.
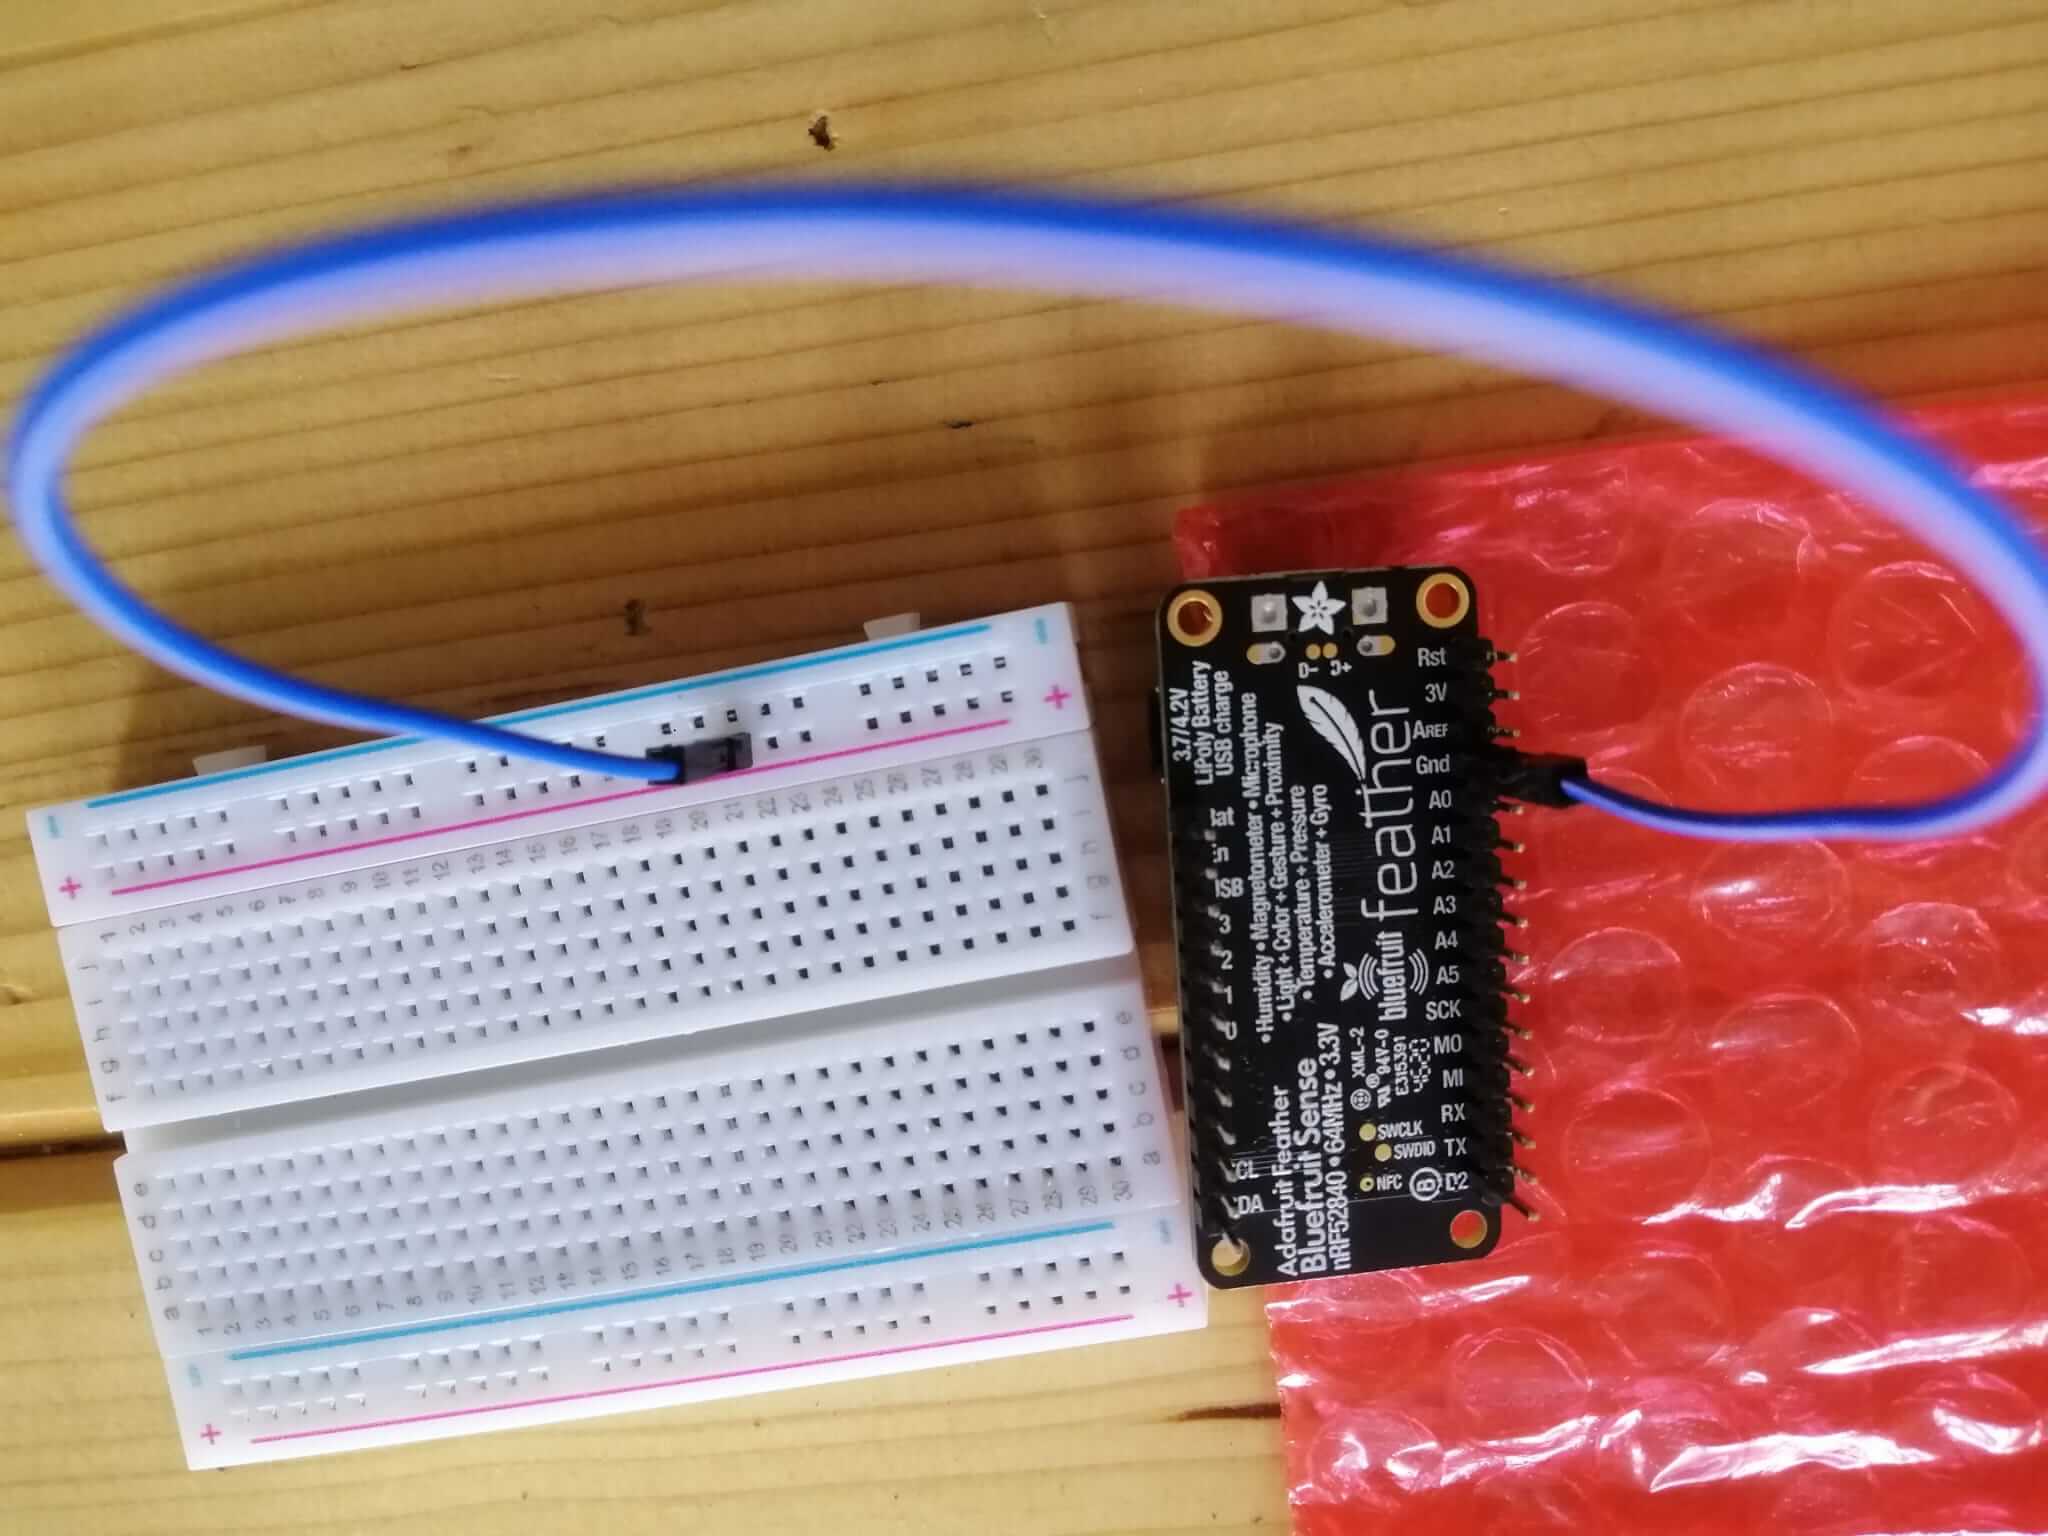
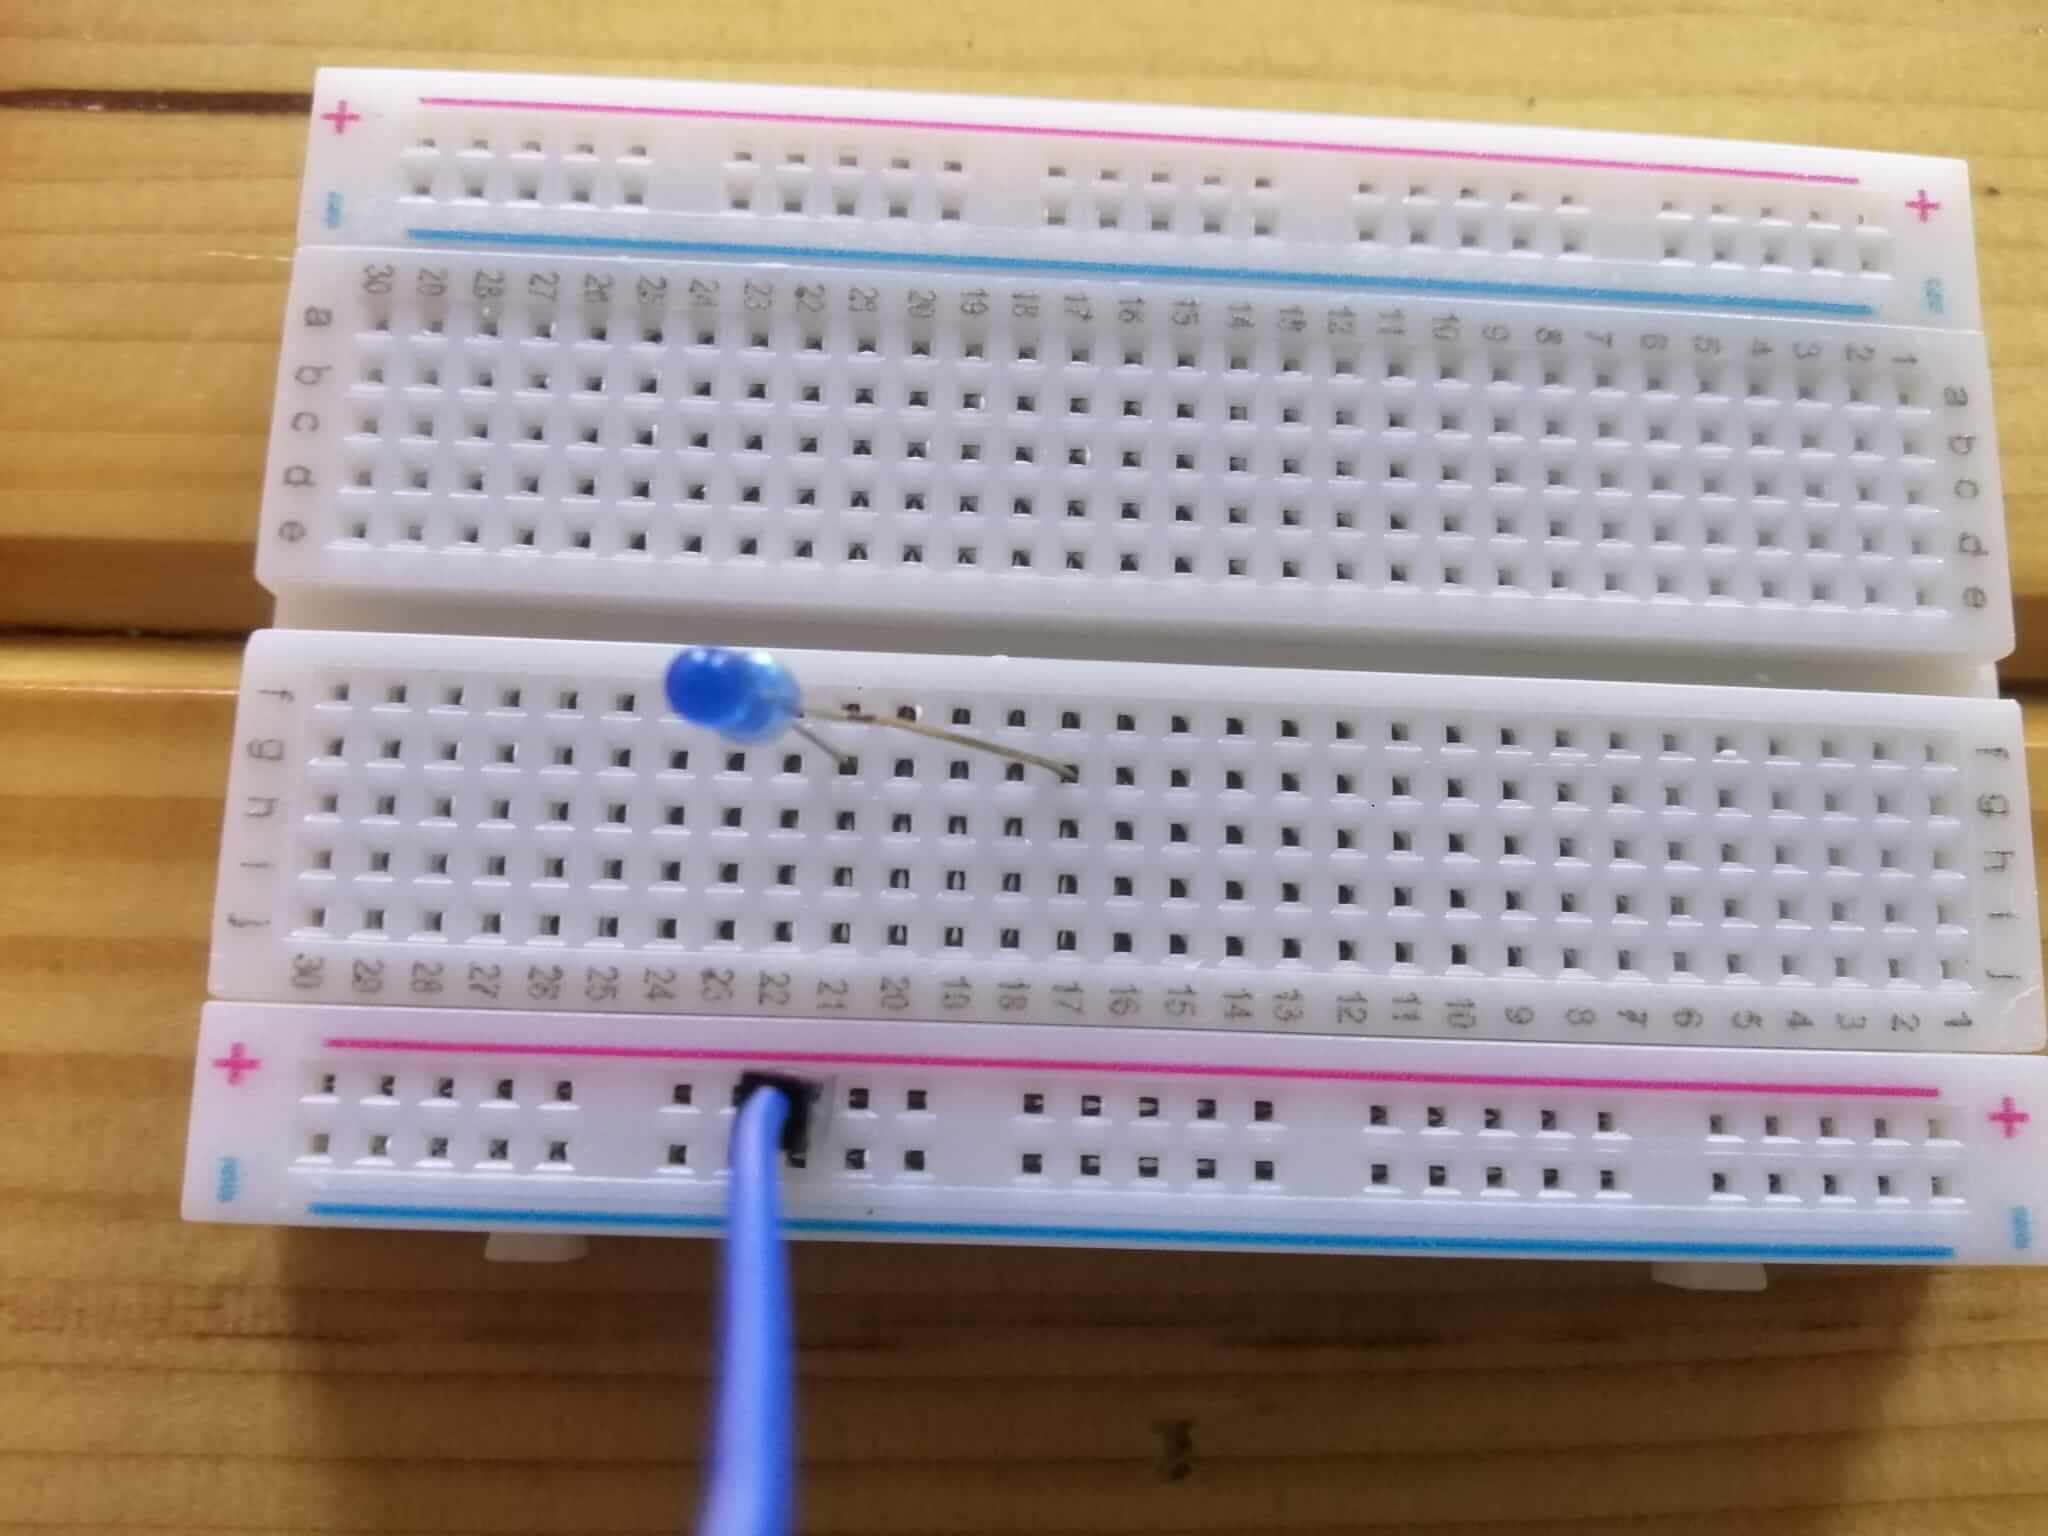
First I plugged a wire in one of the horizontal line pins of the breadboard and a ground (GND) pin on the Adafruit.
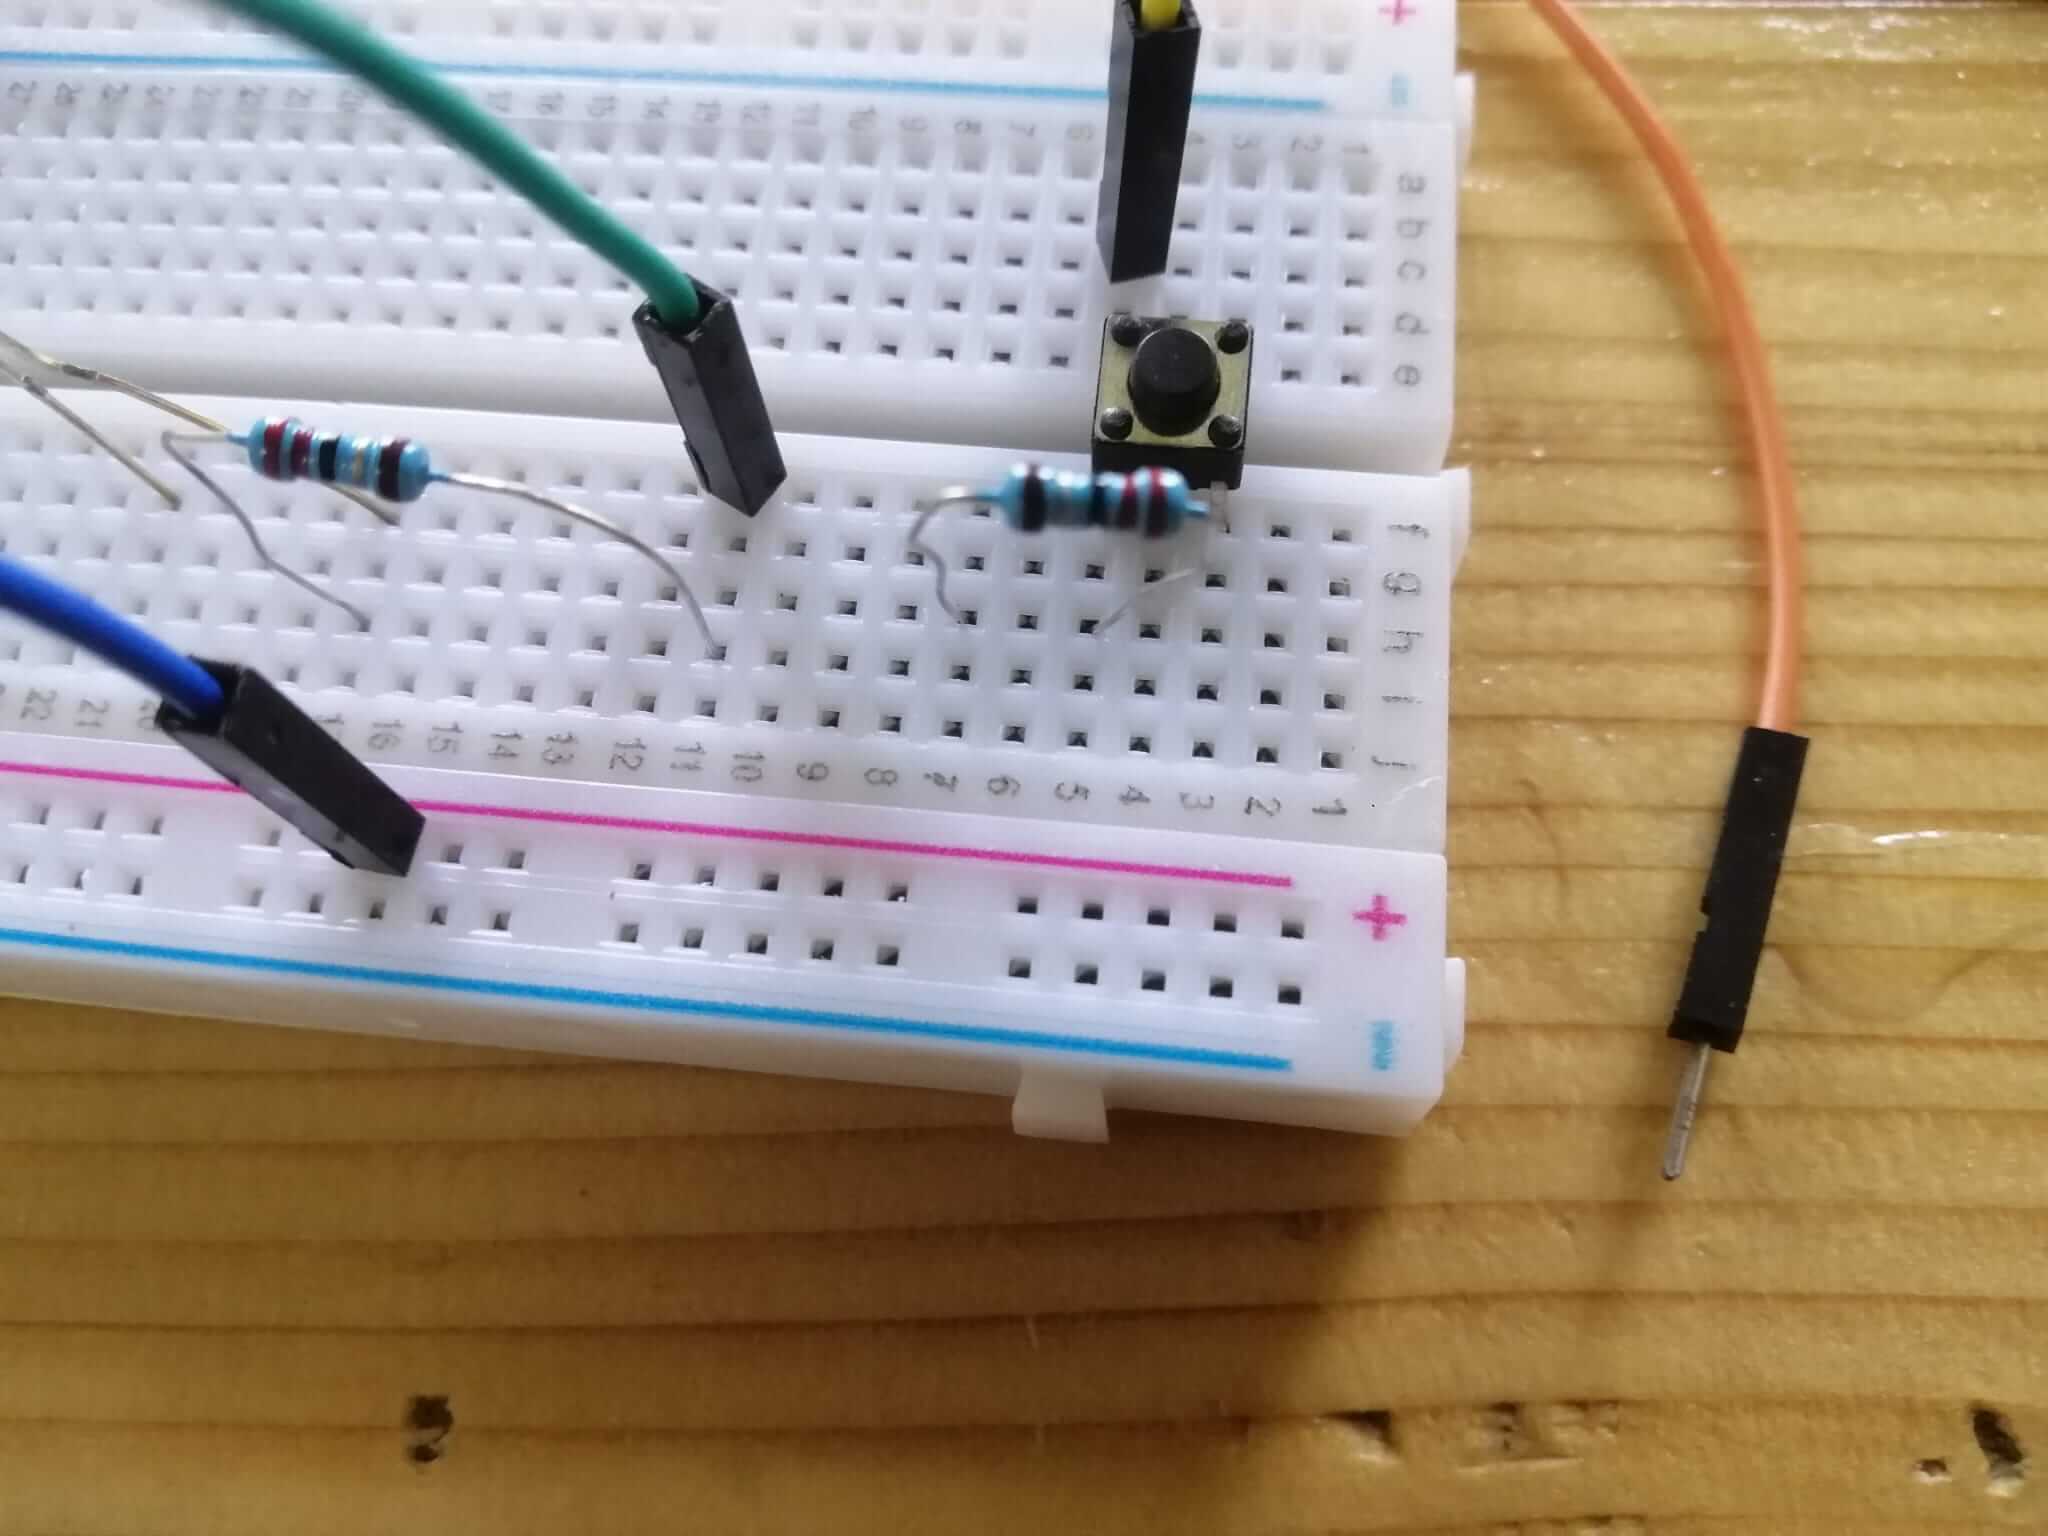
You can notice that the LED has a leg shorter than the other.
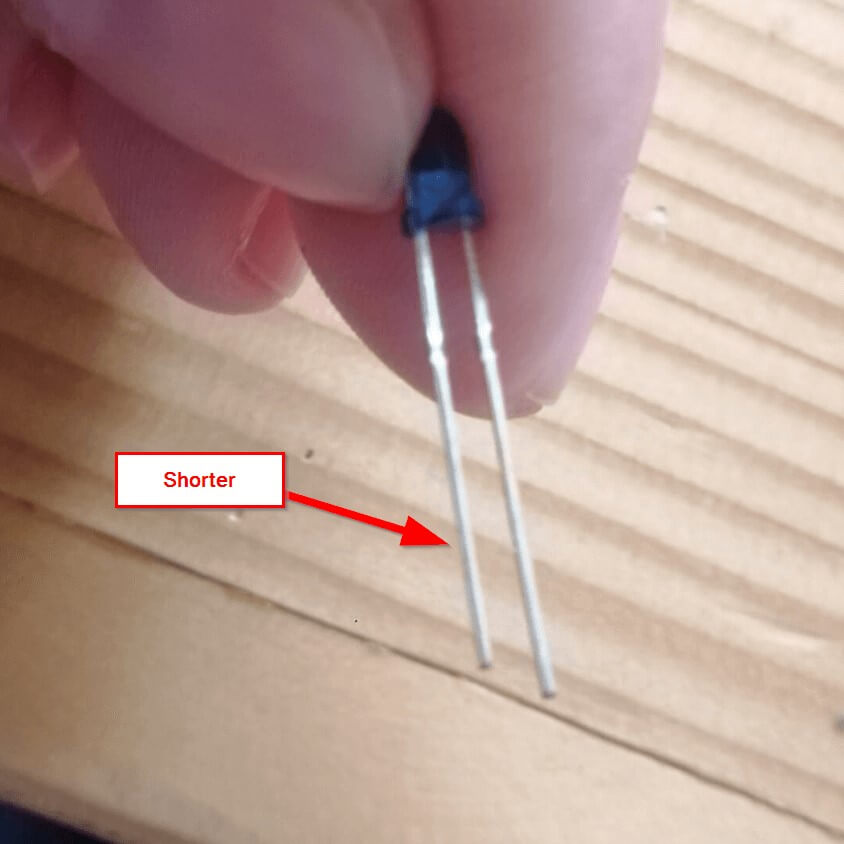
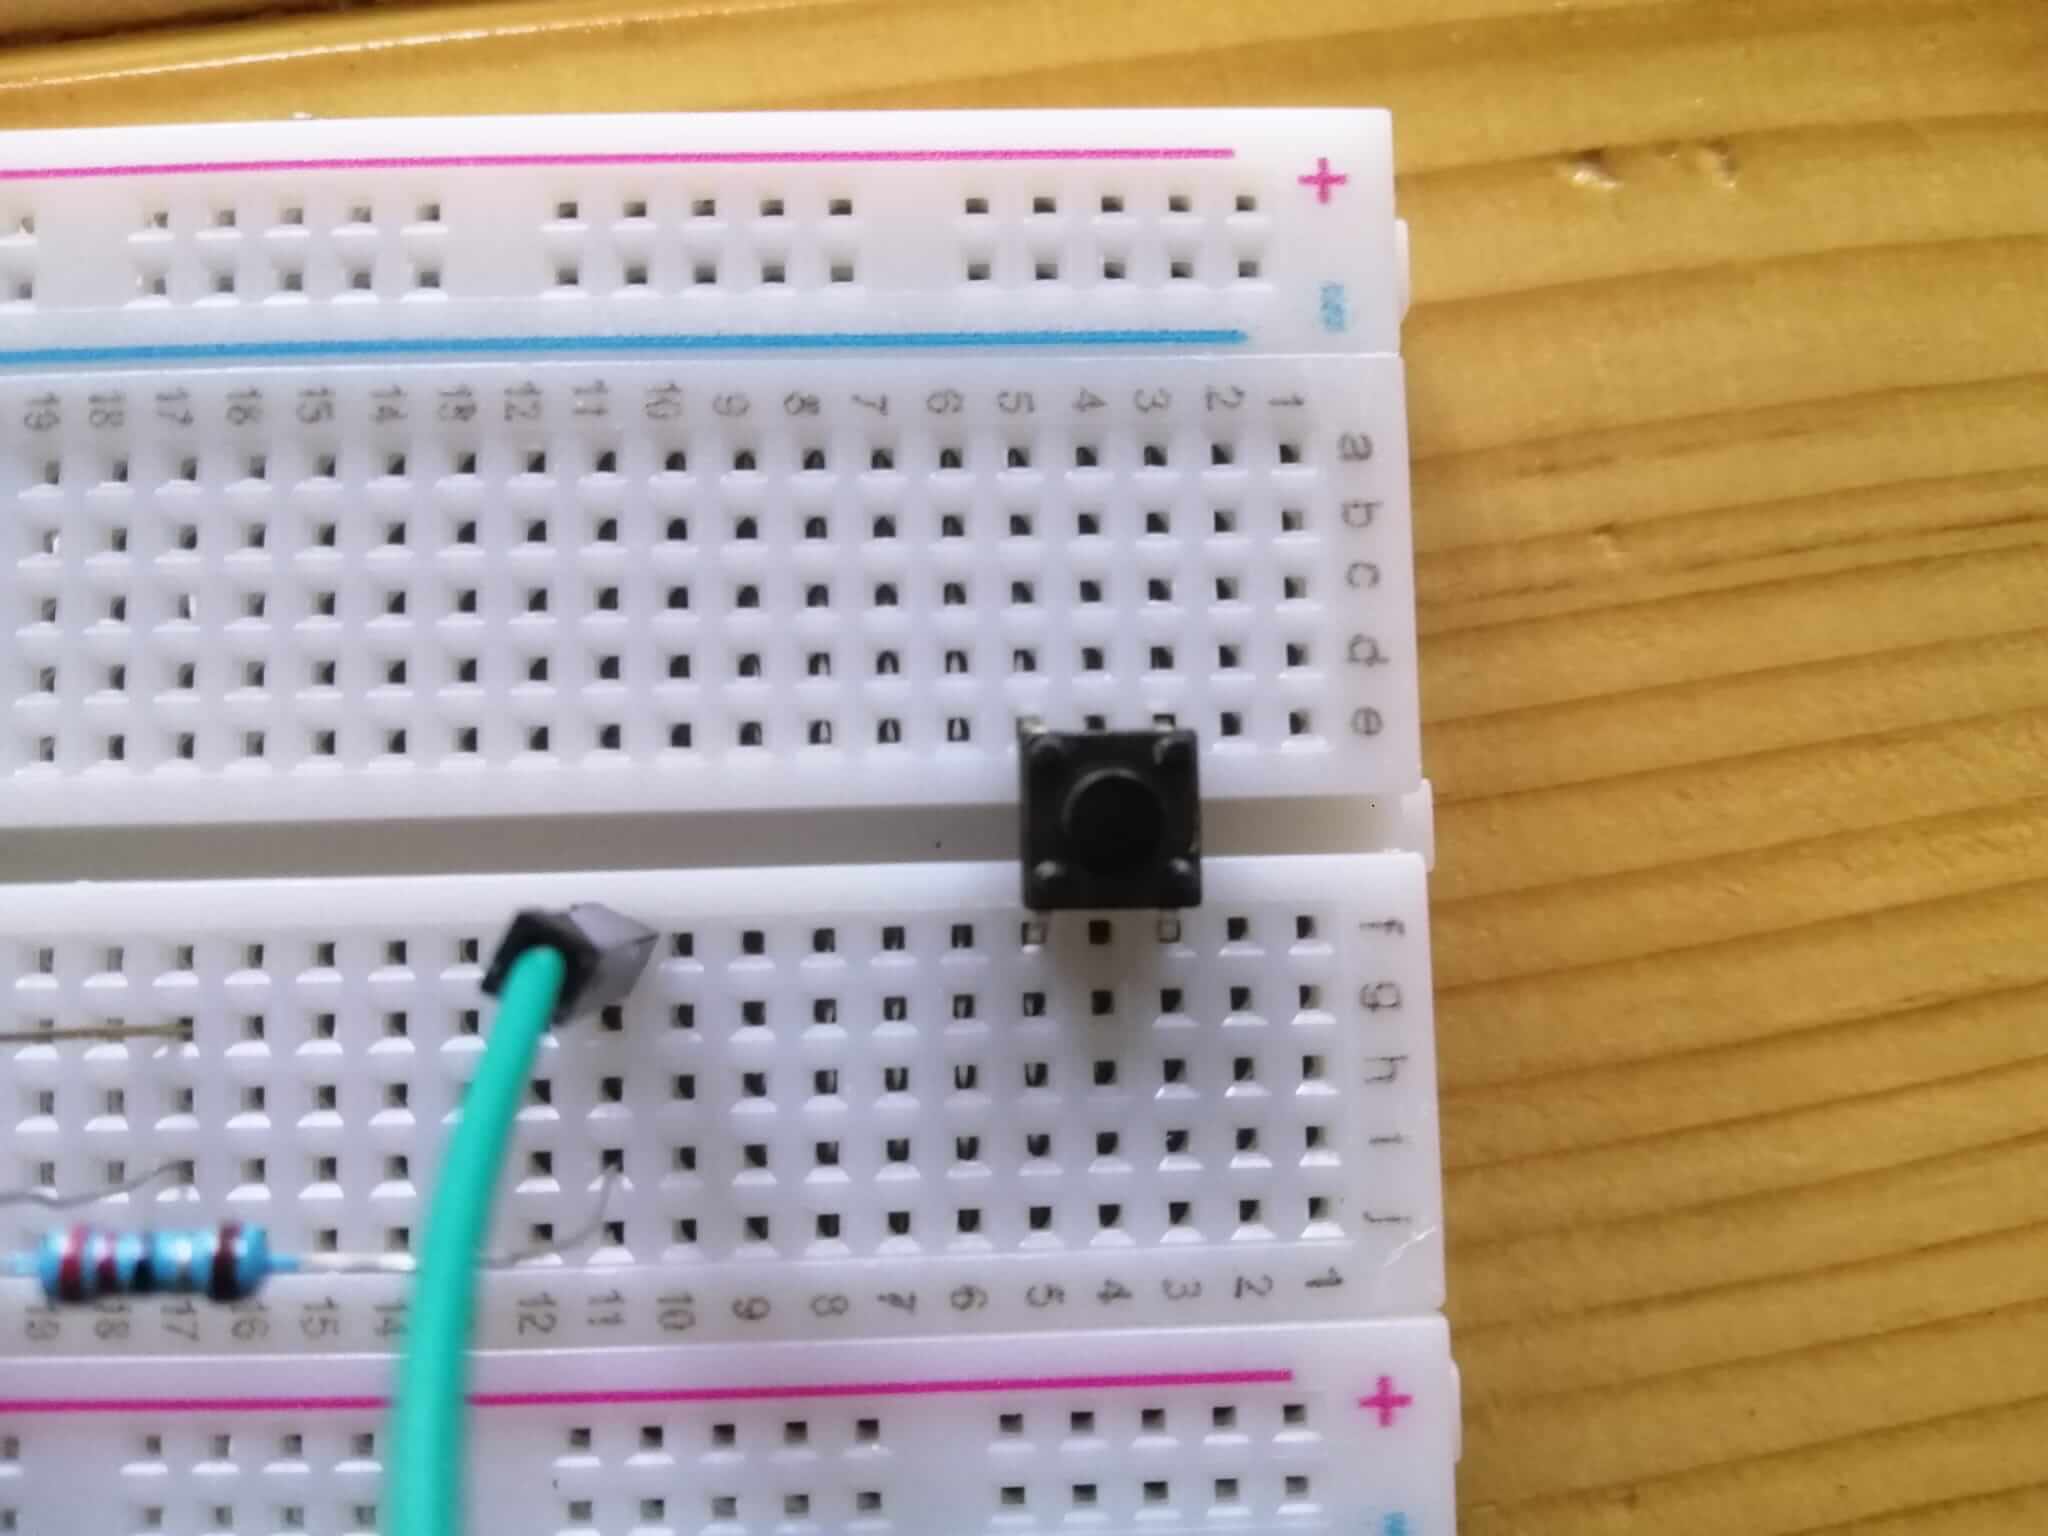
Plug the LED in the breadboard, the shorter leg to the ground( near the blue wire ).
Add a resistor with one leg in the same veritical pins as the the longer leg of the LED.
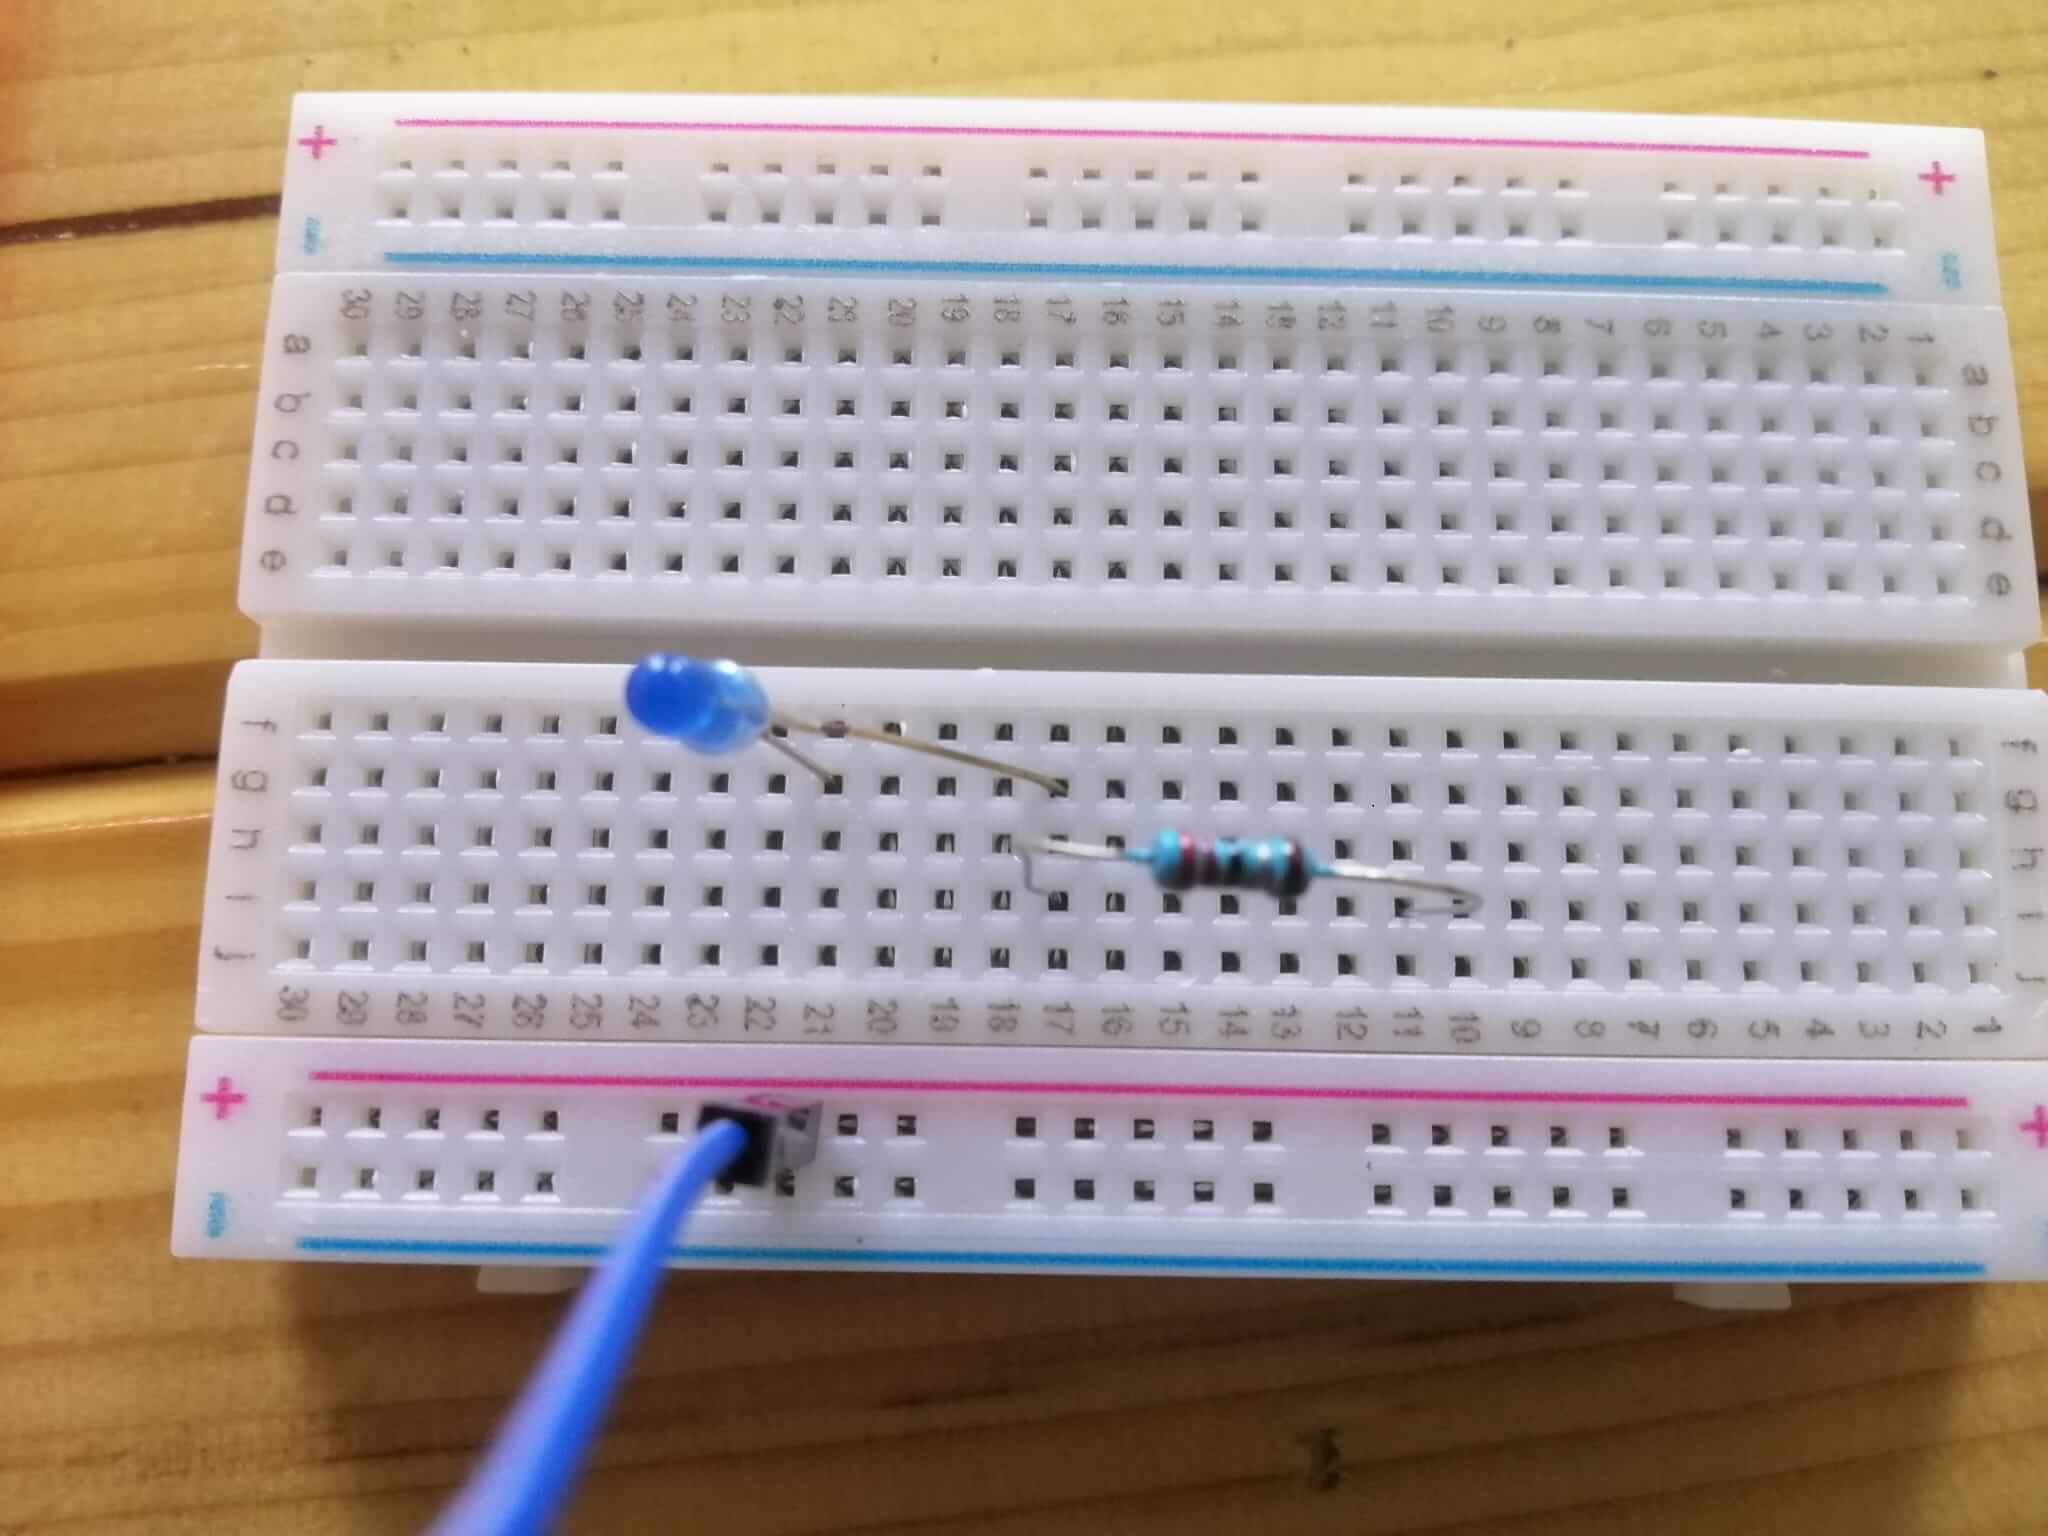
Connect a wire on the same column of the resistor and conncet the other side of the wire to pin 5 of the adafruit. This will link the LED with the pin 5 of the adafruit.
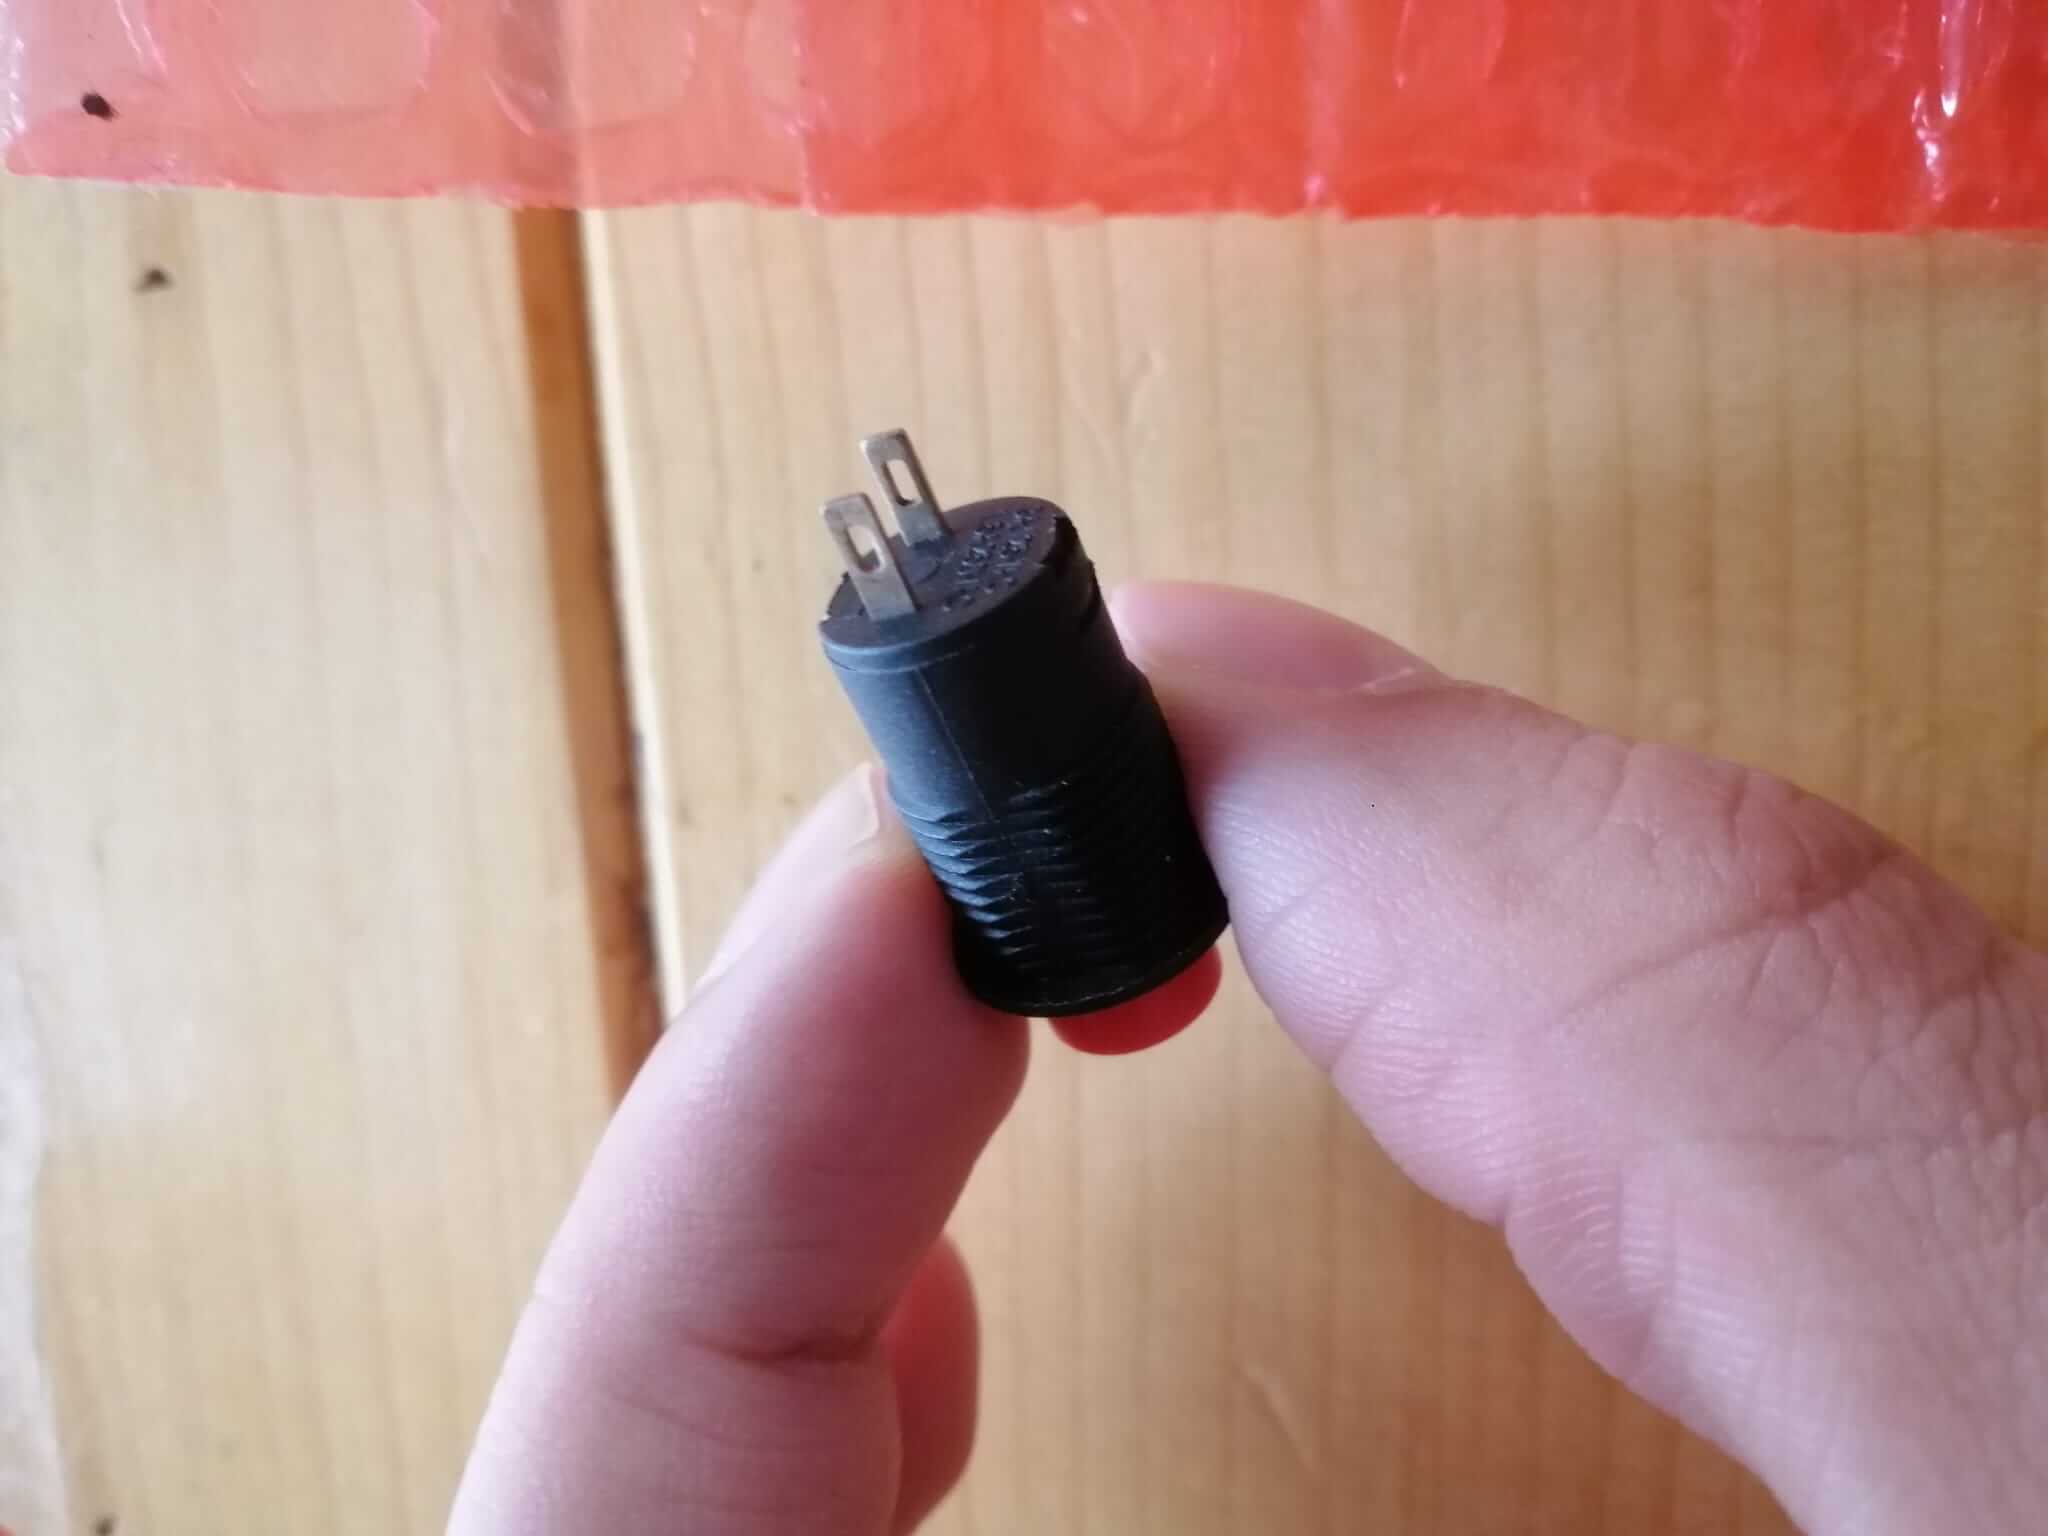
I tried using this button but it did not fit on the breadboard and making it work would add unnessary complexity.
I chose to use this button instead.
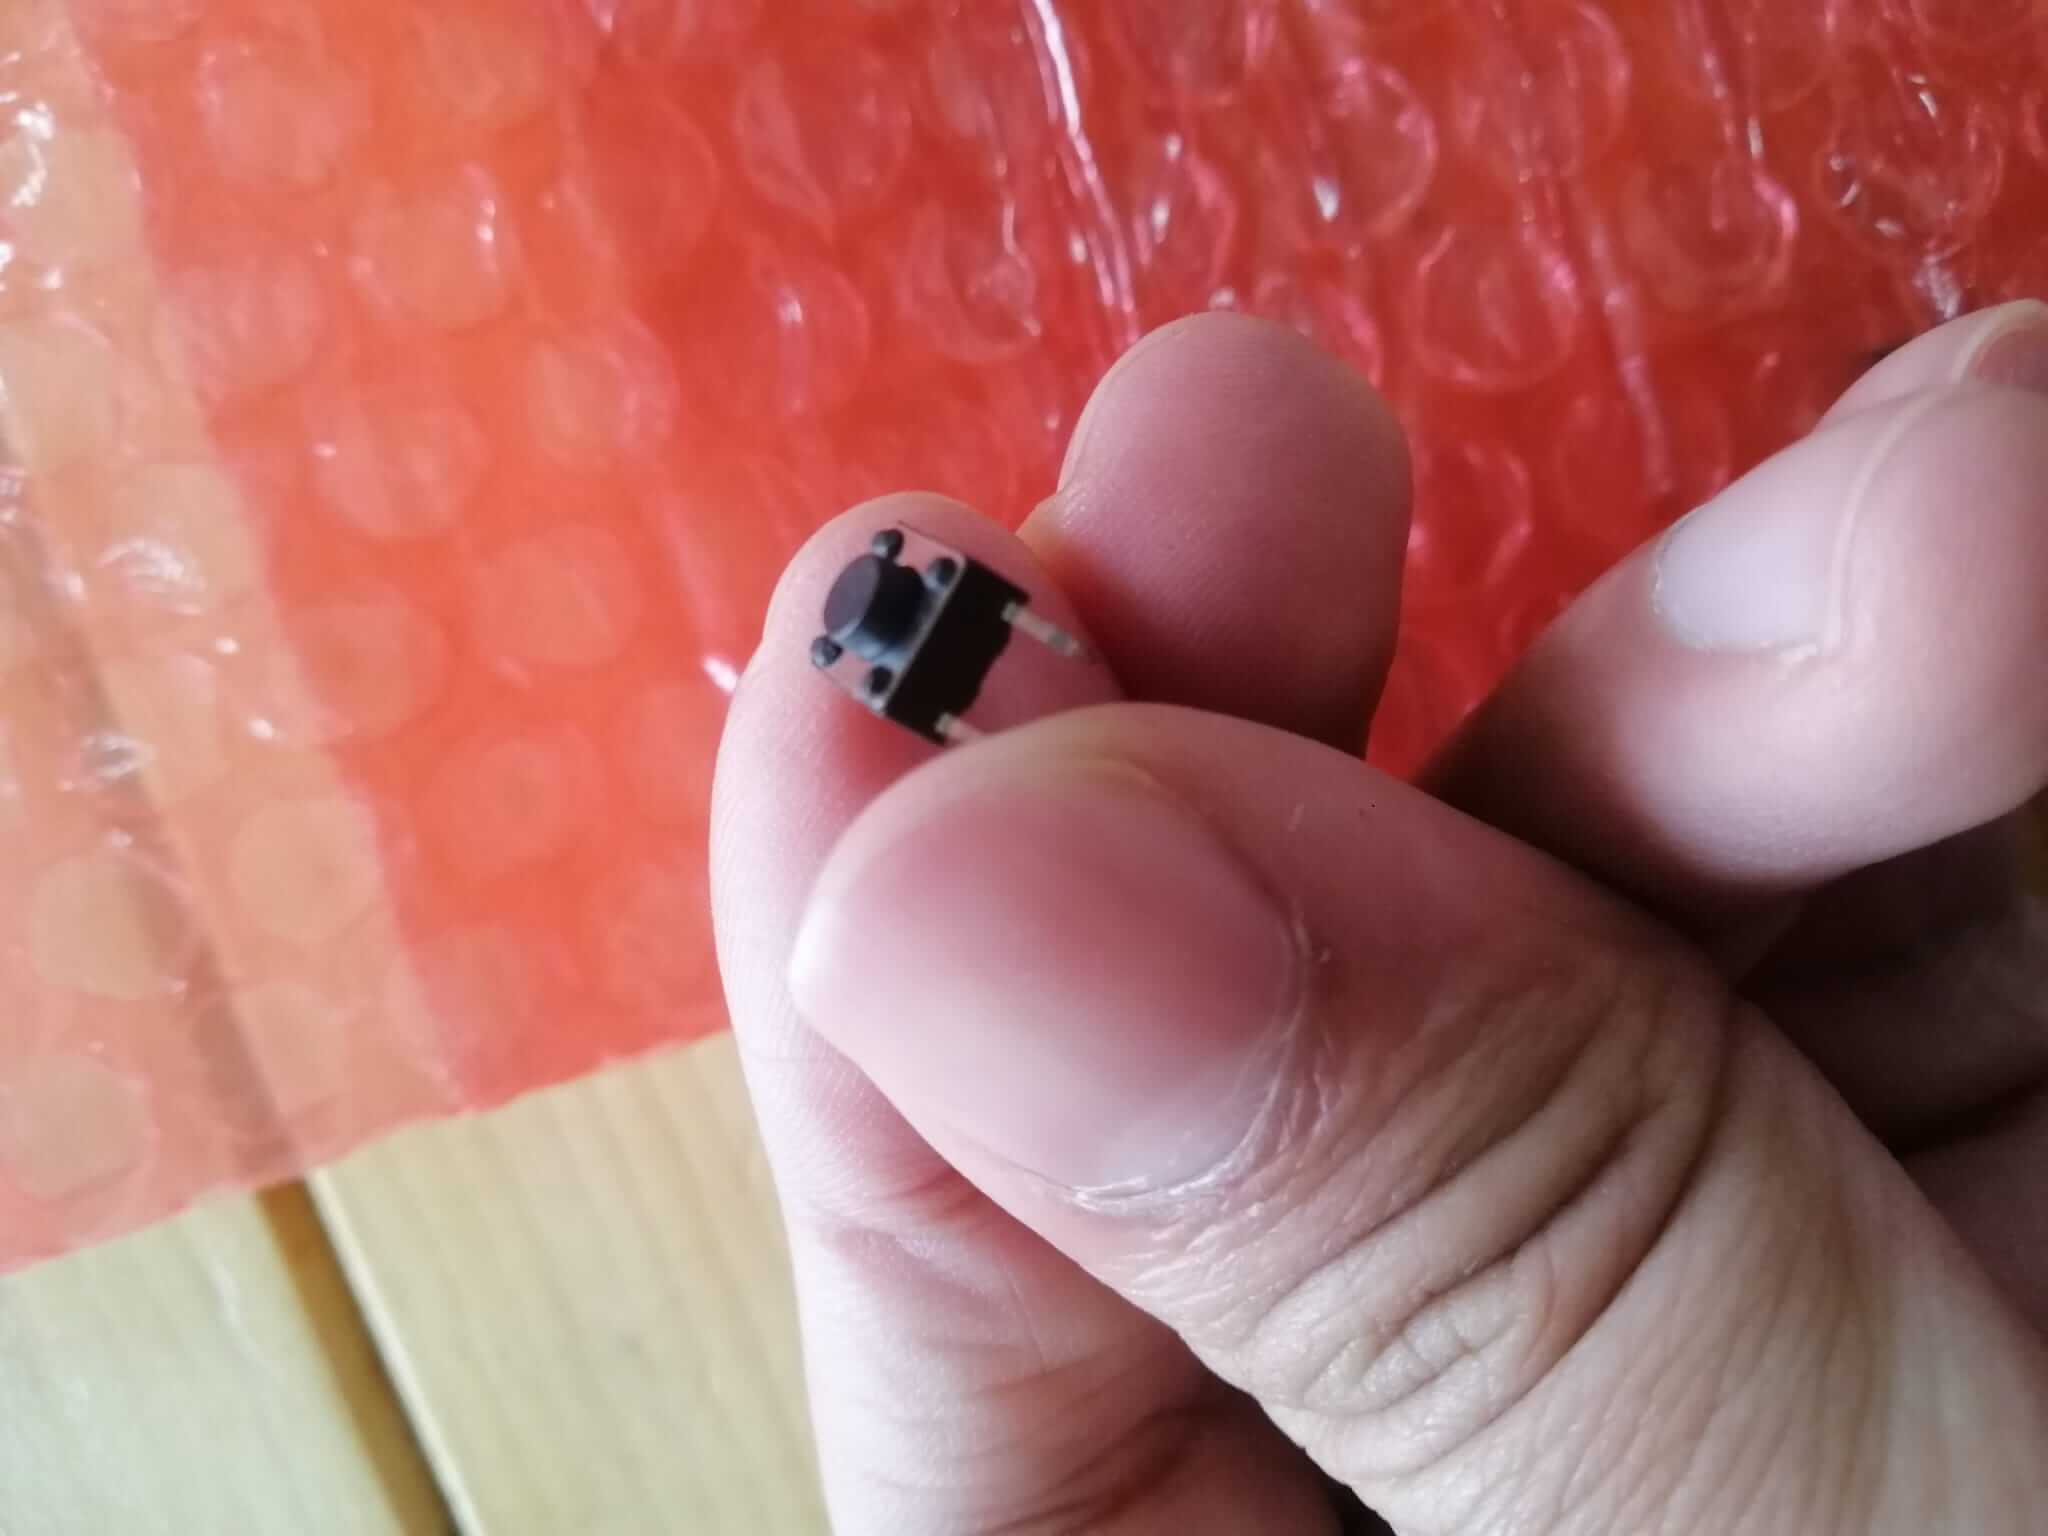
It fits directly on the breadboard without the need of wires.
Connect a wire (yellow) between the button and pin 6.
Add another resistor under the button.
Add a wire between one leg of the resistor and 3v pin of the adafruit.
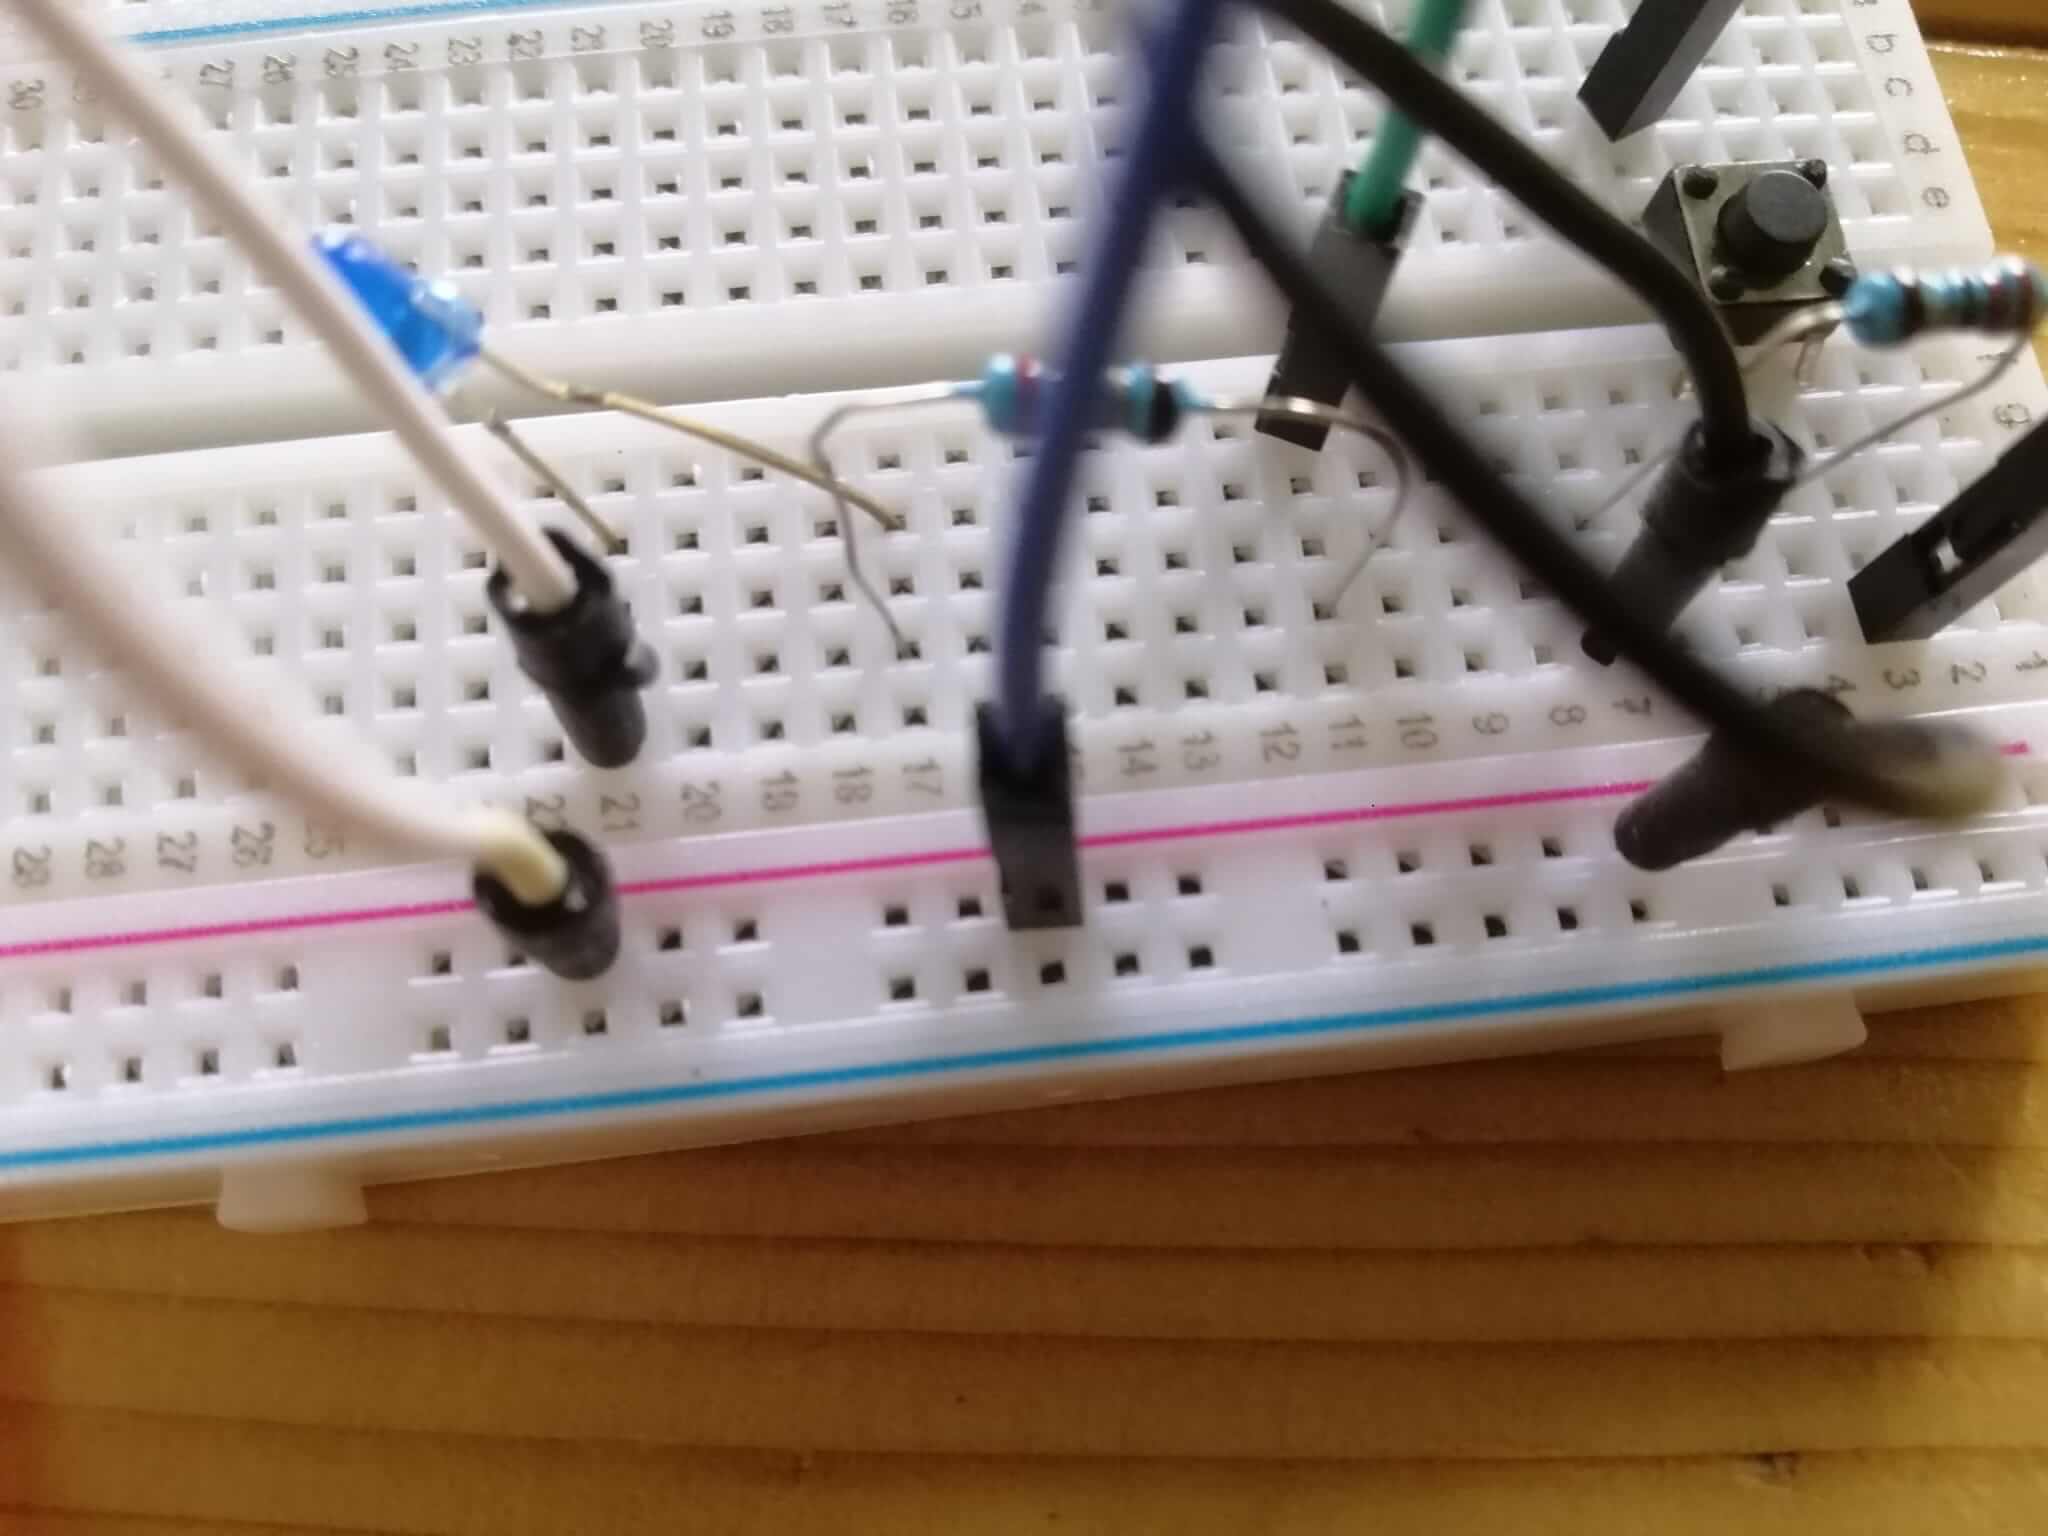
Lastly conncect a the (white) wire to the ground by putting one end in the same column as the LED leg and the other end in vertical section.
Do the same with the black wire by connecting one end to the second resistor and the other to the vertical section.
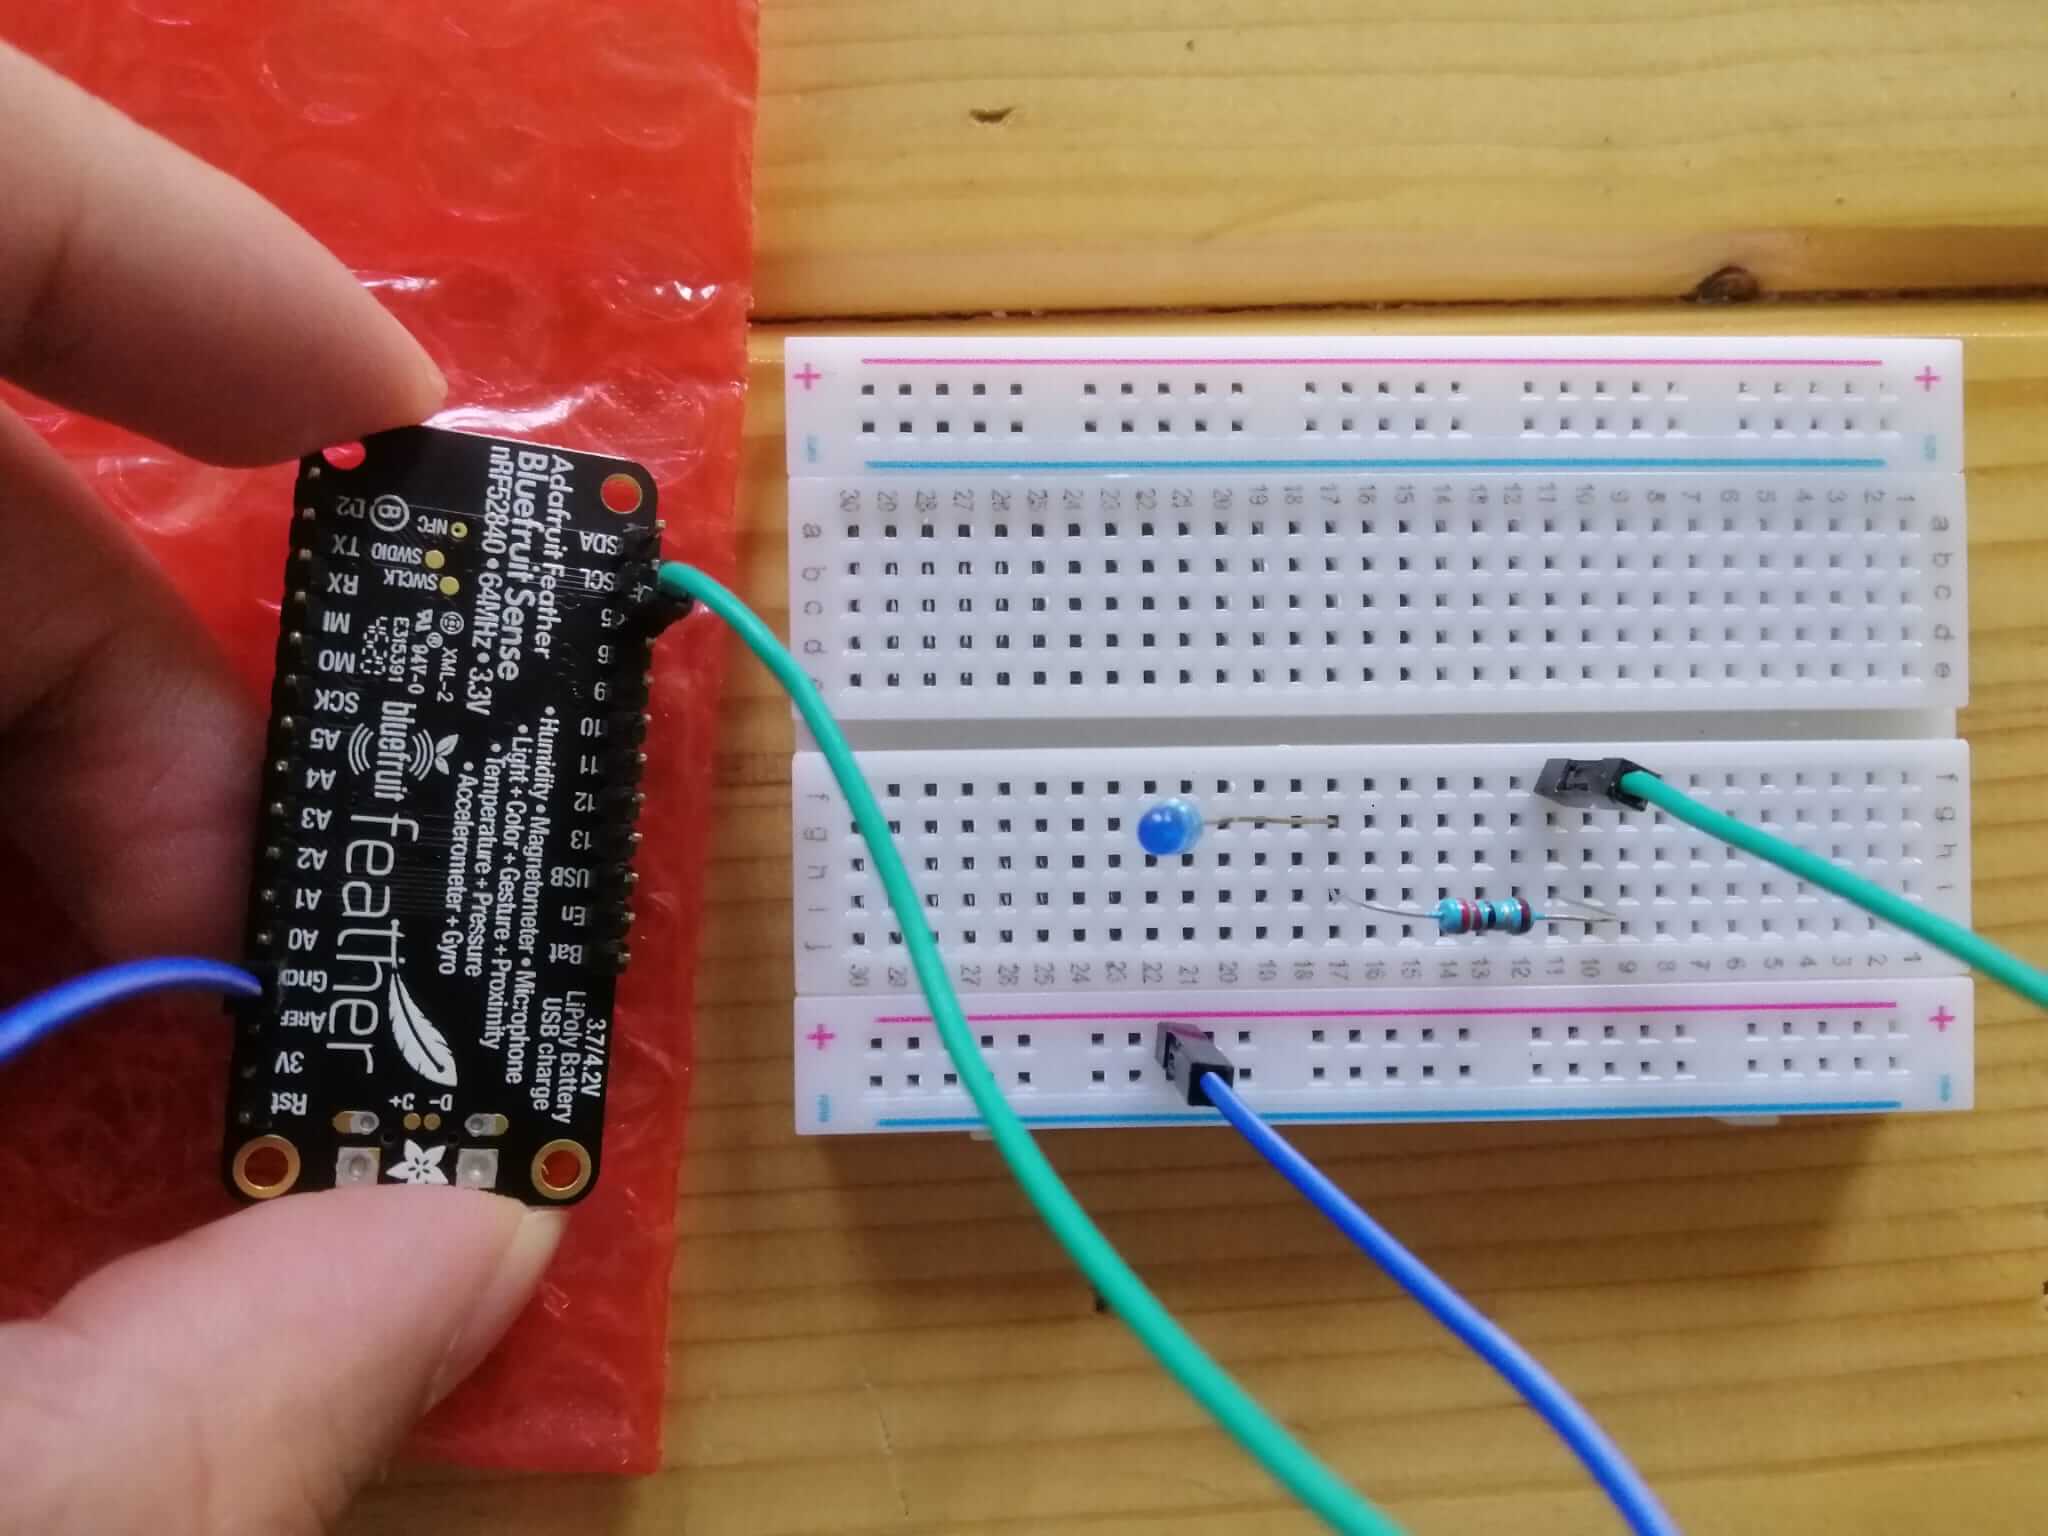
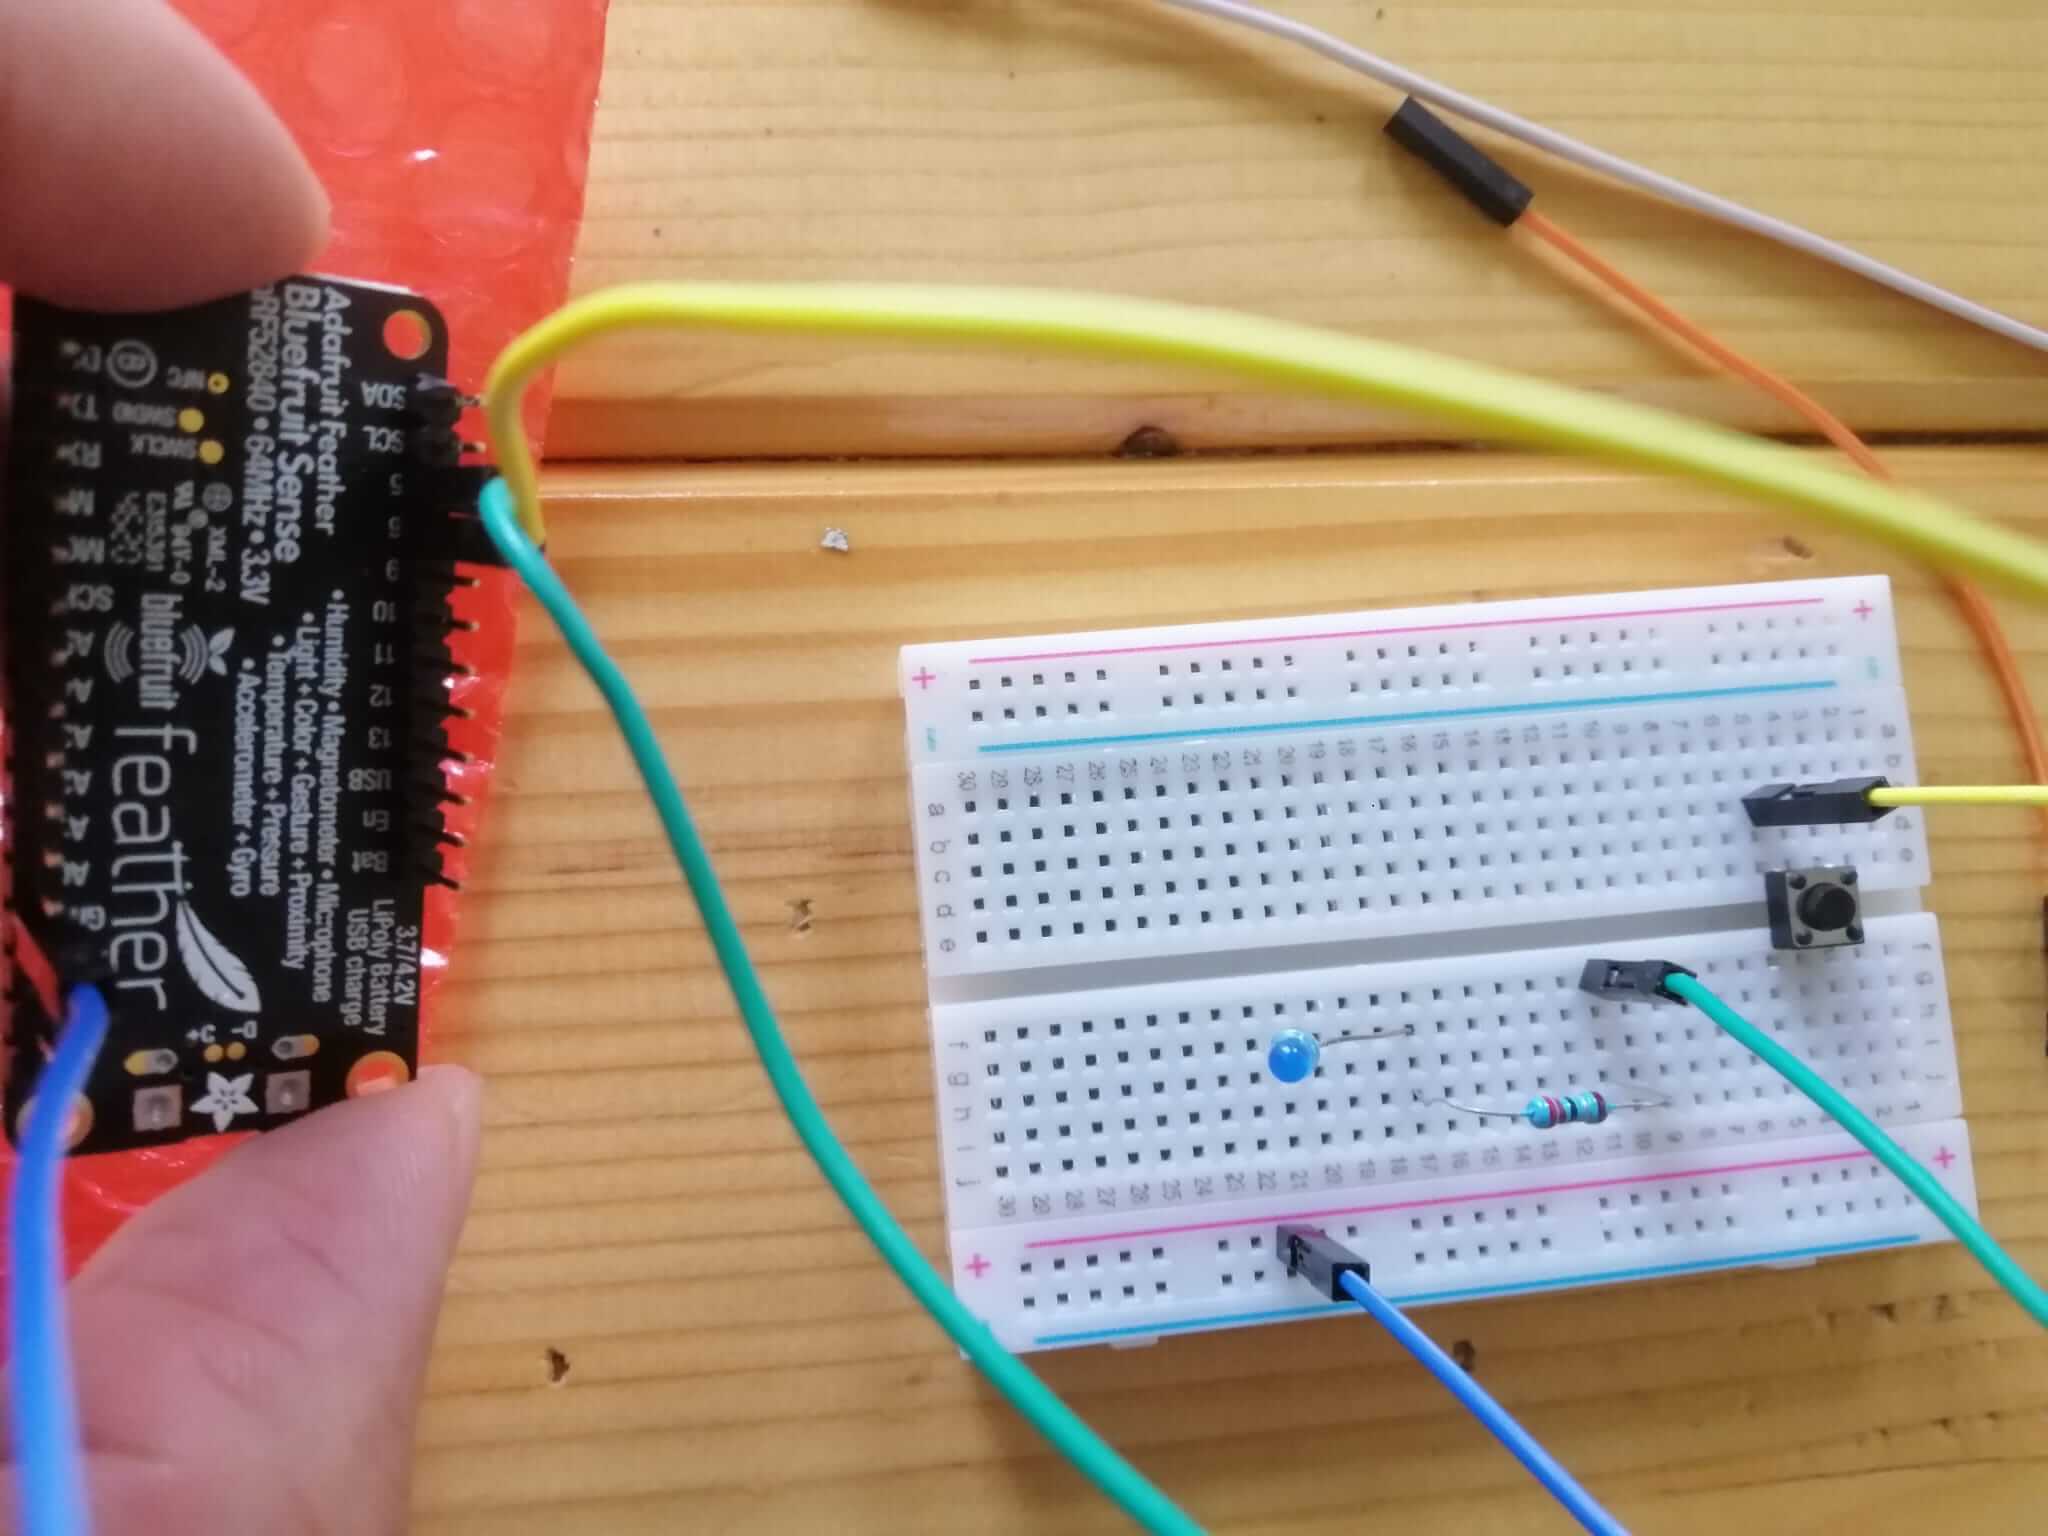
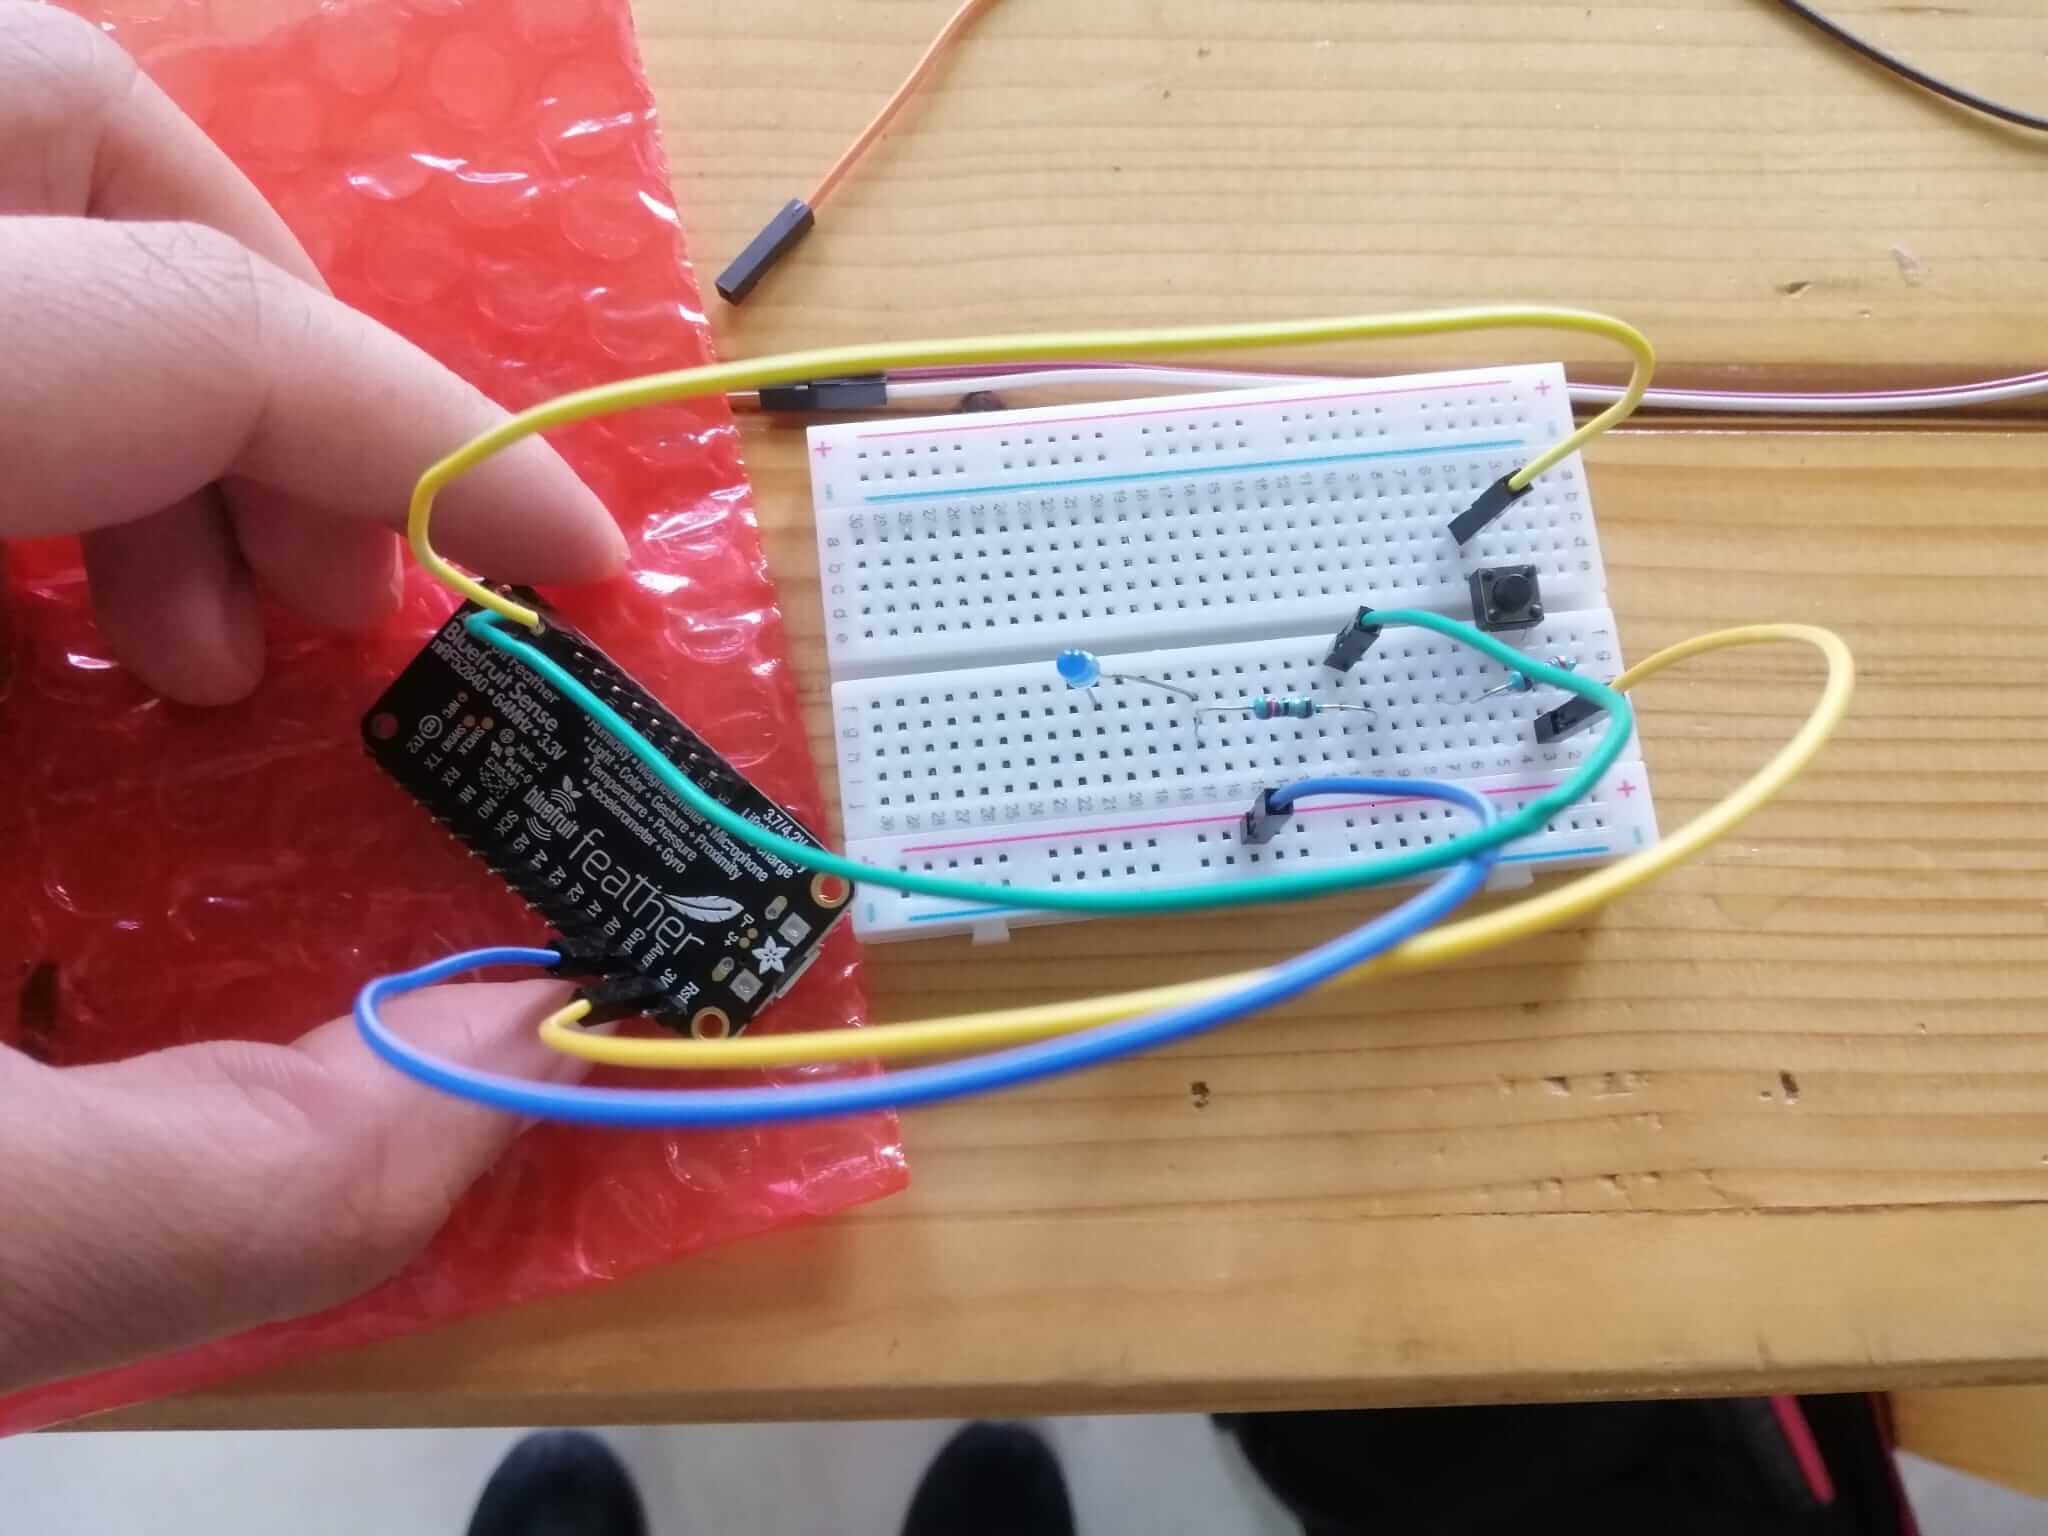
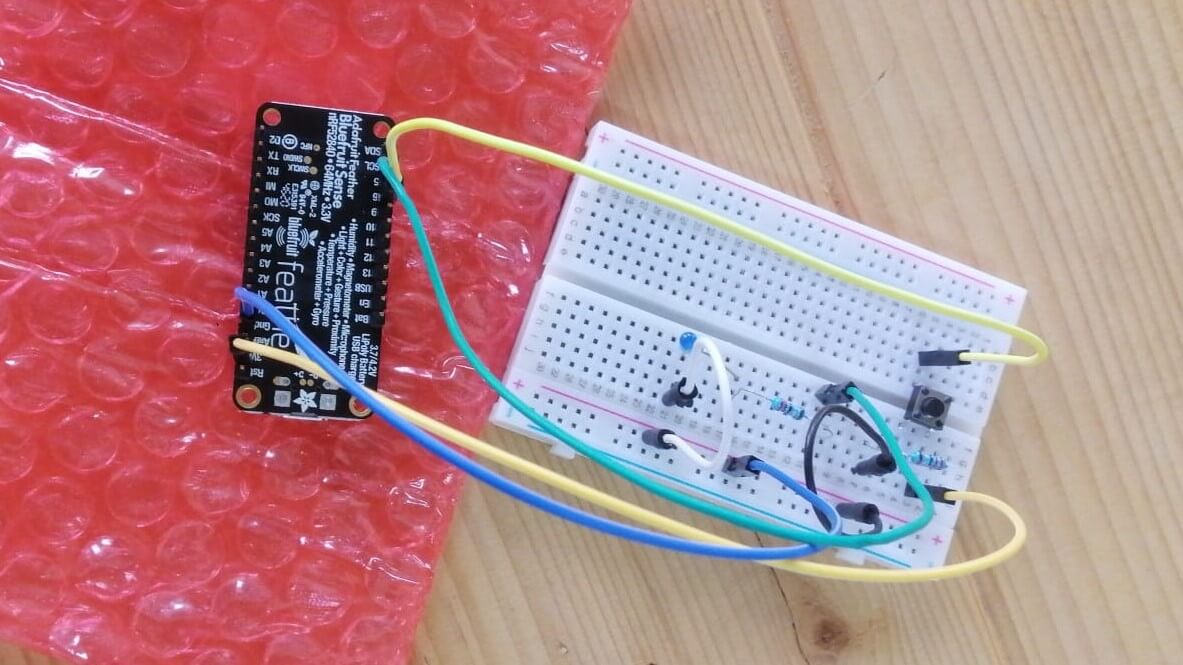
Here is what it should look like in the end.
Here is the my code for the circuit.
#define LED_PIN 5
#define BUTTON_PIN 6

void setup() {
  // put your setup code here, to run once:
pinMode(LED_PIN,OUTPUT);
pinMode(BUTTON_PIN,INPUT);
}

void loop() {
  // put your main code here, to run repeatedly:
if(digitalRead(BUTTON_PIN)== HIGH){
  digitalWrite(LED_PIN,HIGH);
}else{
digitalWrite(LED_PIN,LOW);
}
}
You can download the code file from here as well.
Challenges
Easy Mode:
Use the one of the sensors on the Adafruit & try to program to display its results in the serial monitor + to be represented by an LED &/or Buzzer
In this challenge I will try to use the temprature sensor and display the result on an LCD screen.
First ill need some materials
- Adafruit
- long breadboard
- wires
- resistor / variable resistor (optional)
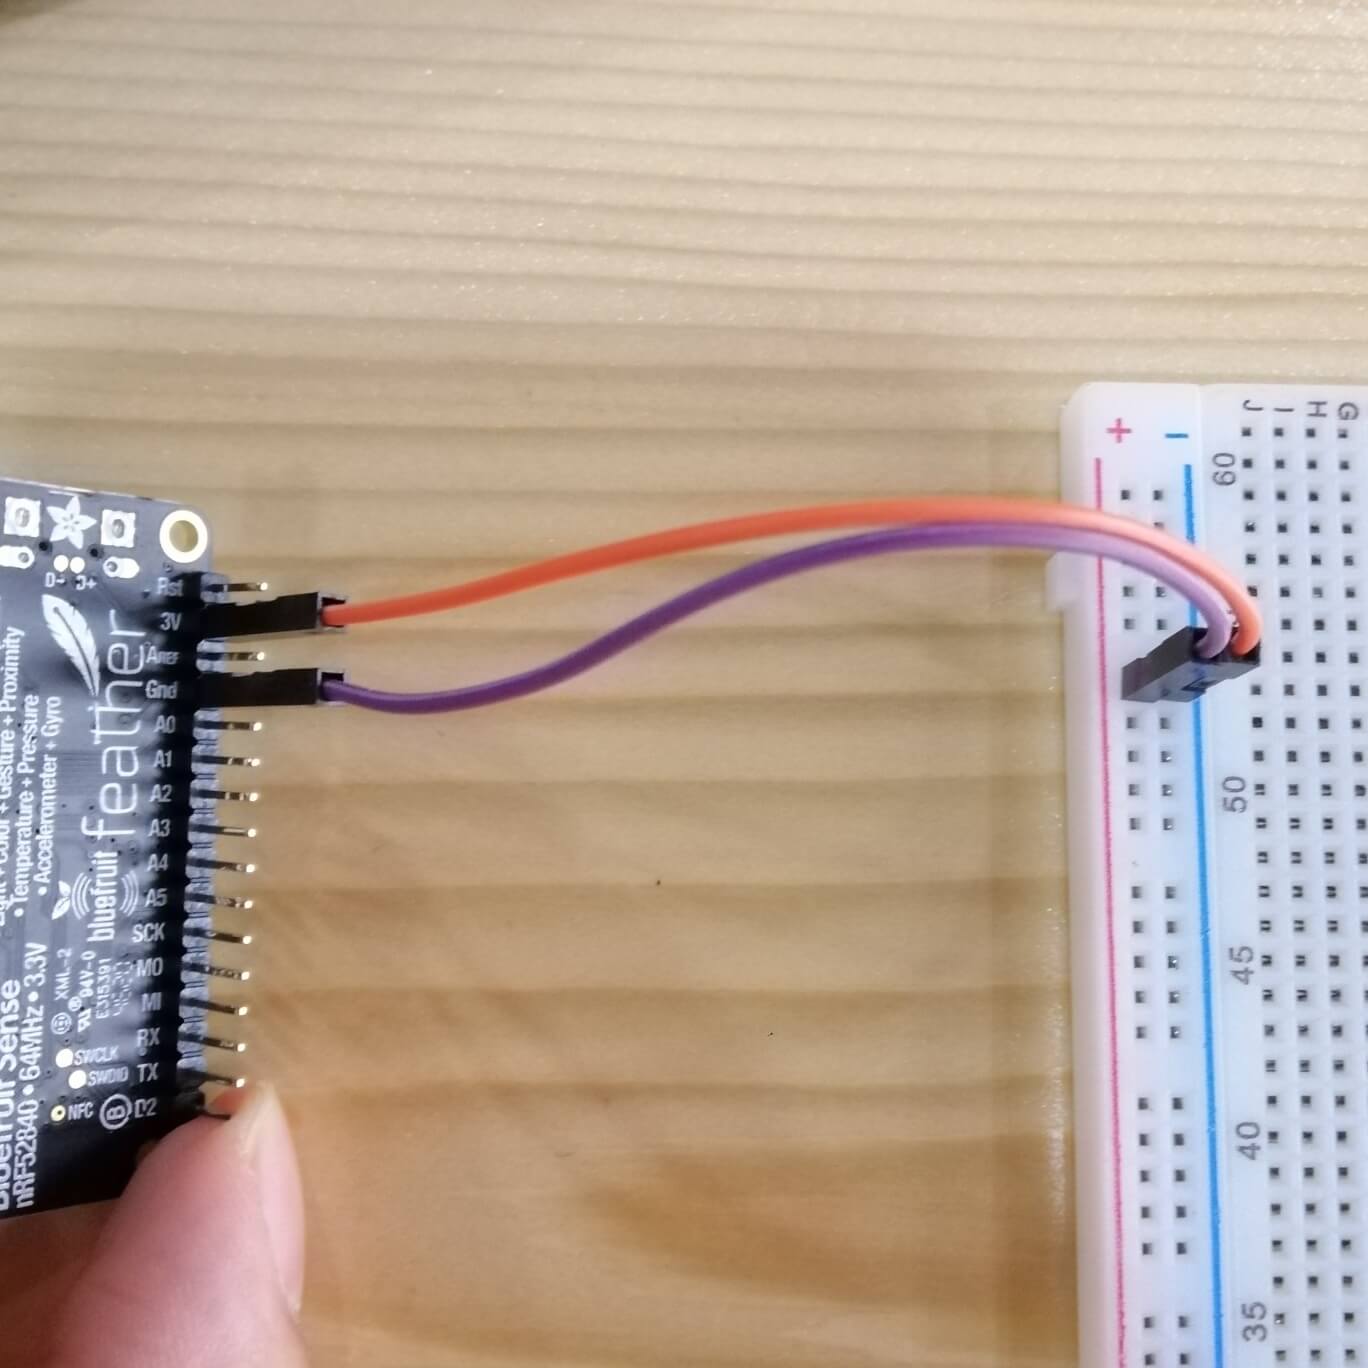
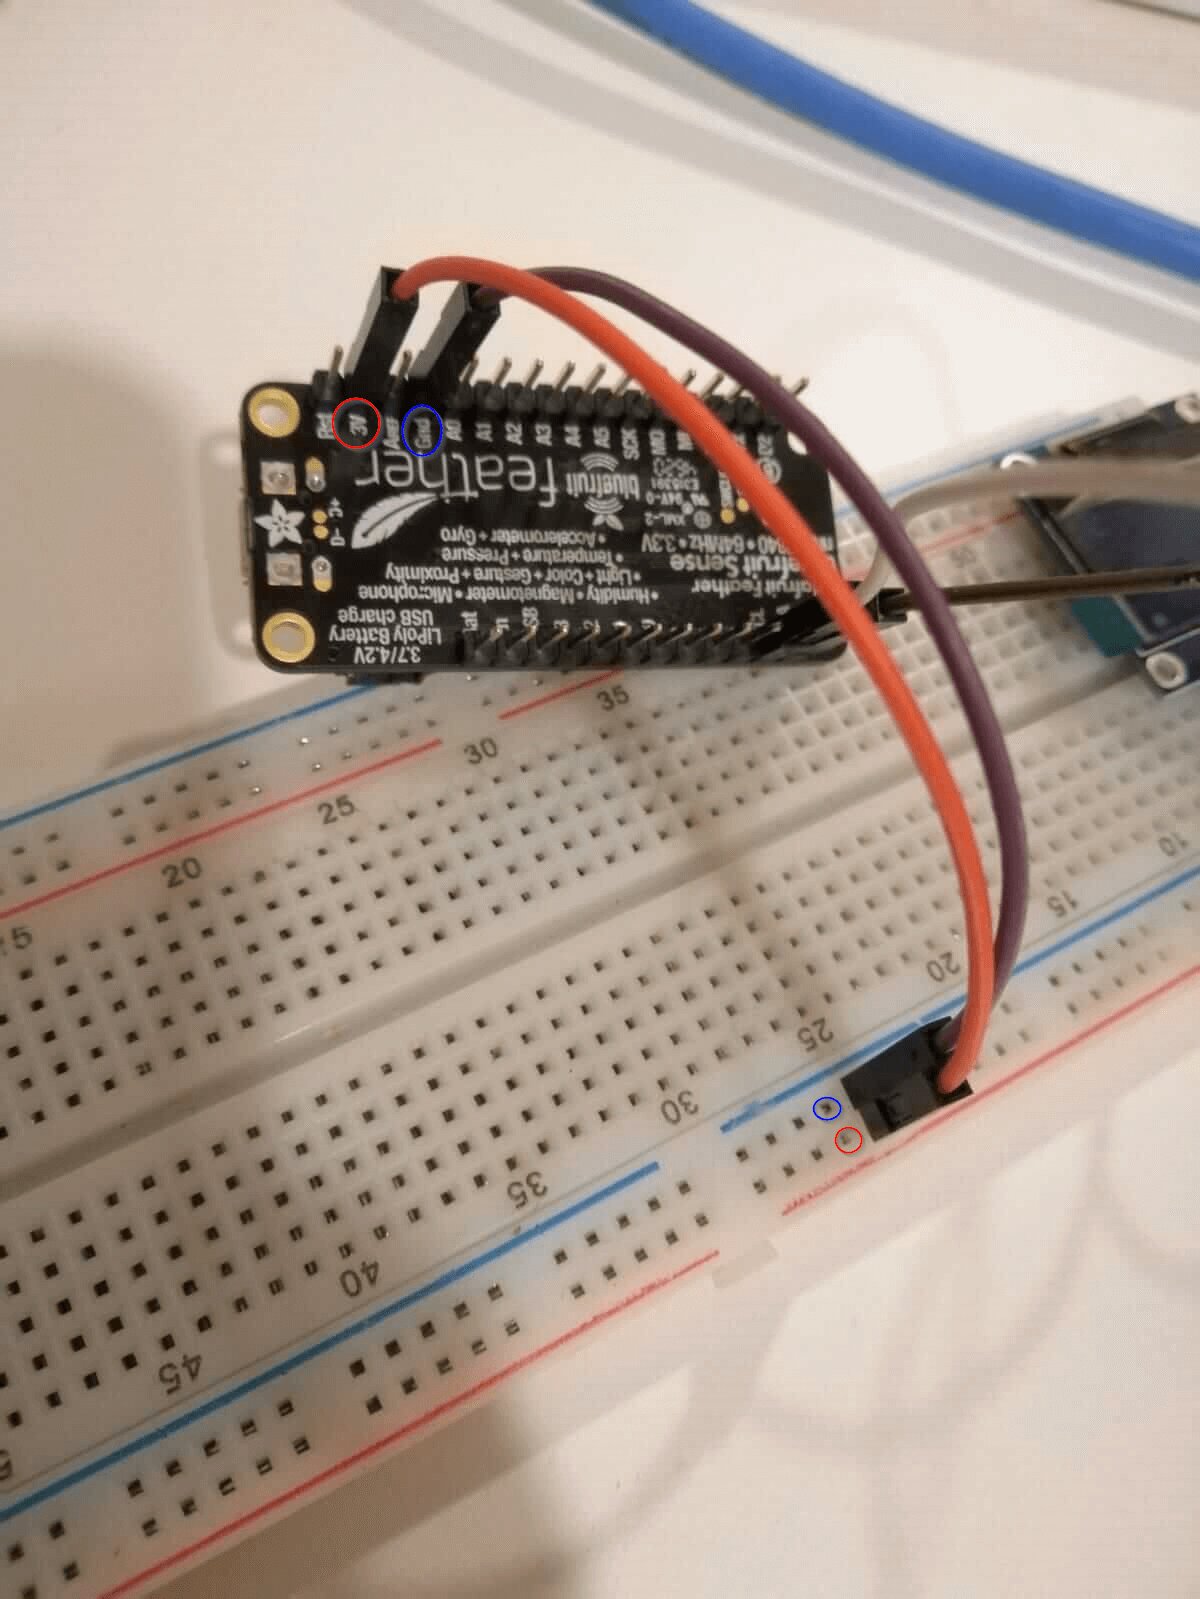
I connected the GND Pin an 3V Pin to the “+” and “-” sections. orginally the GND is for - and 3V is for + but I accidentally swictched them in the picture bellow.
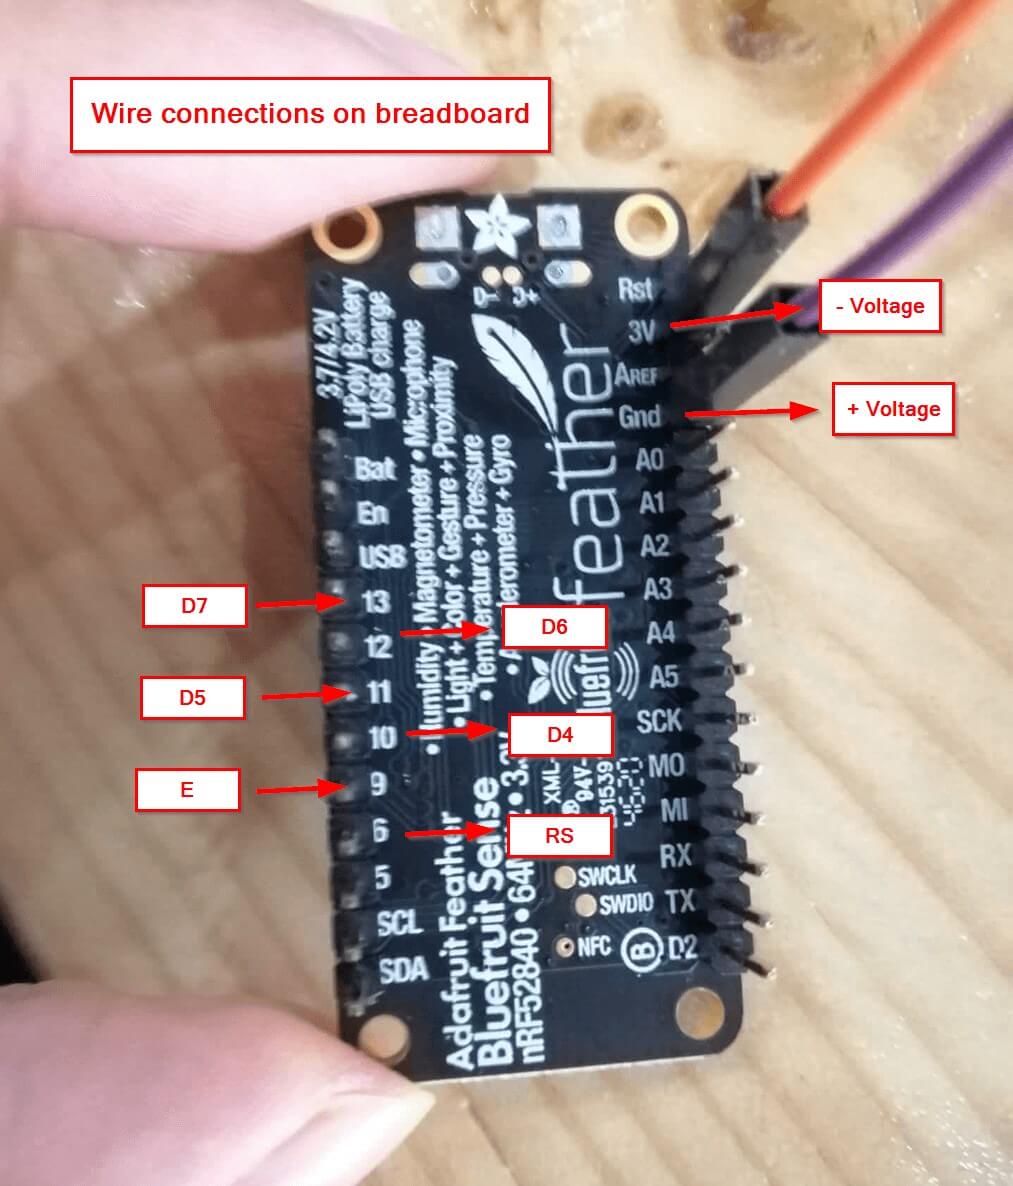
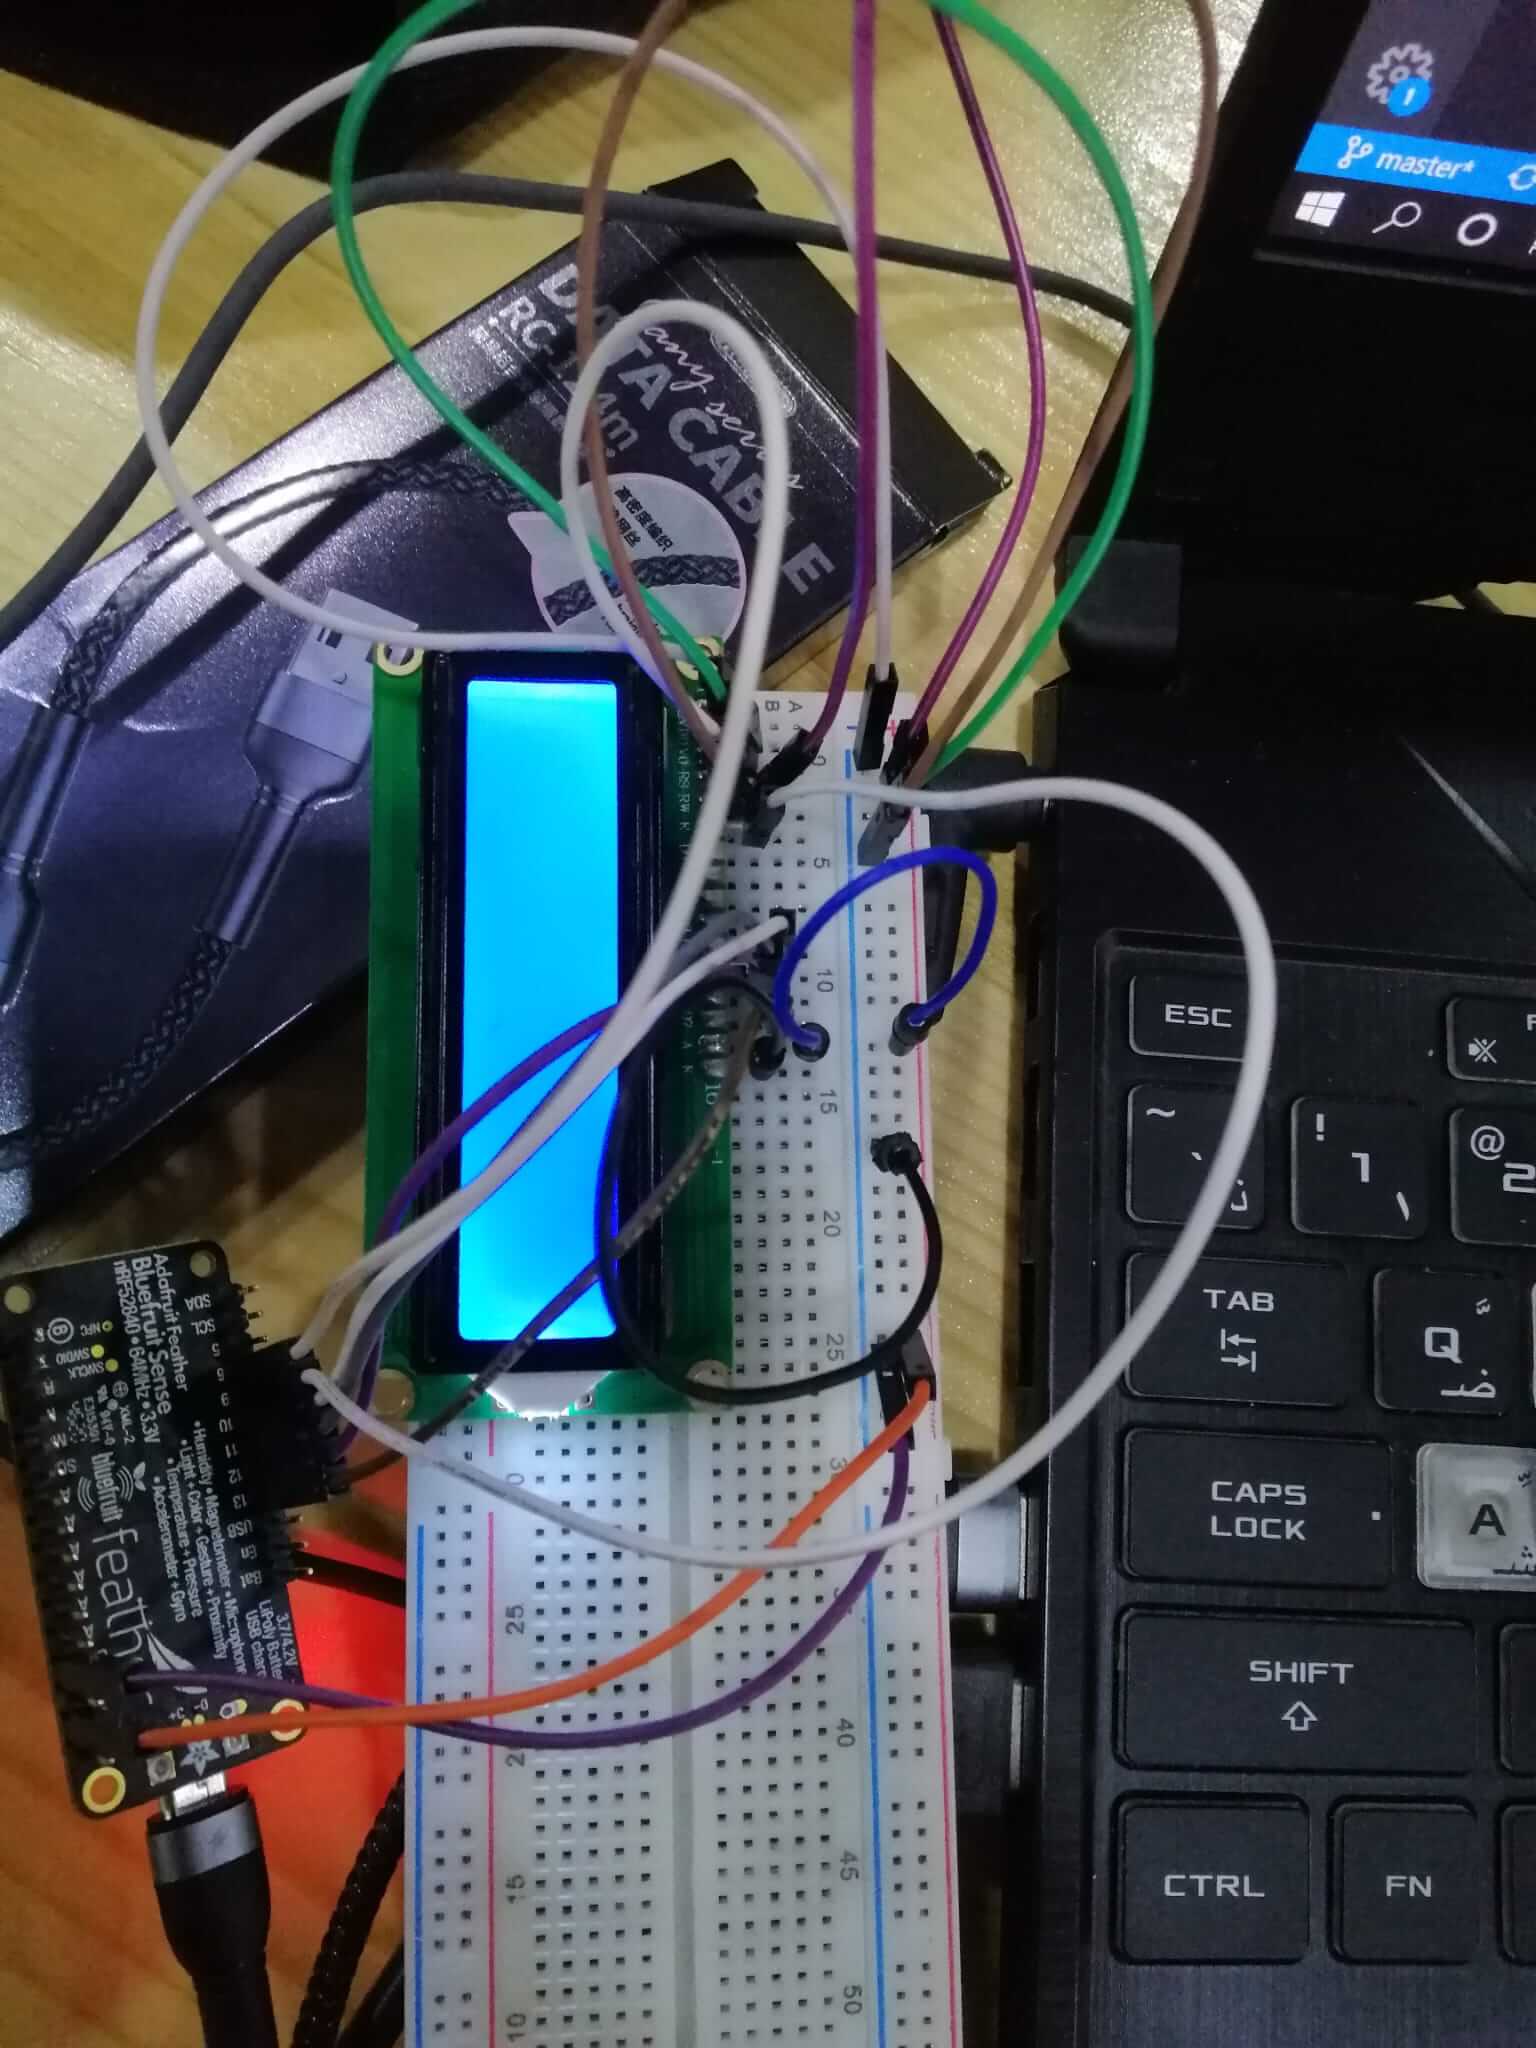
Here are the connections i made with the breadboard, (the D4-D7,E and RS are LCD pins)
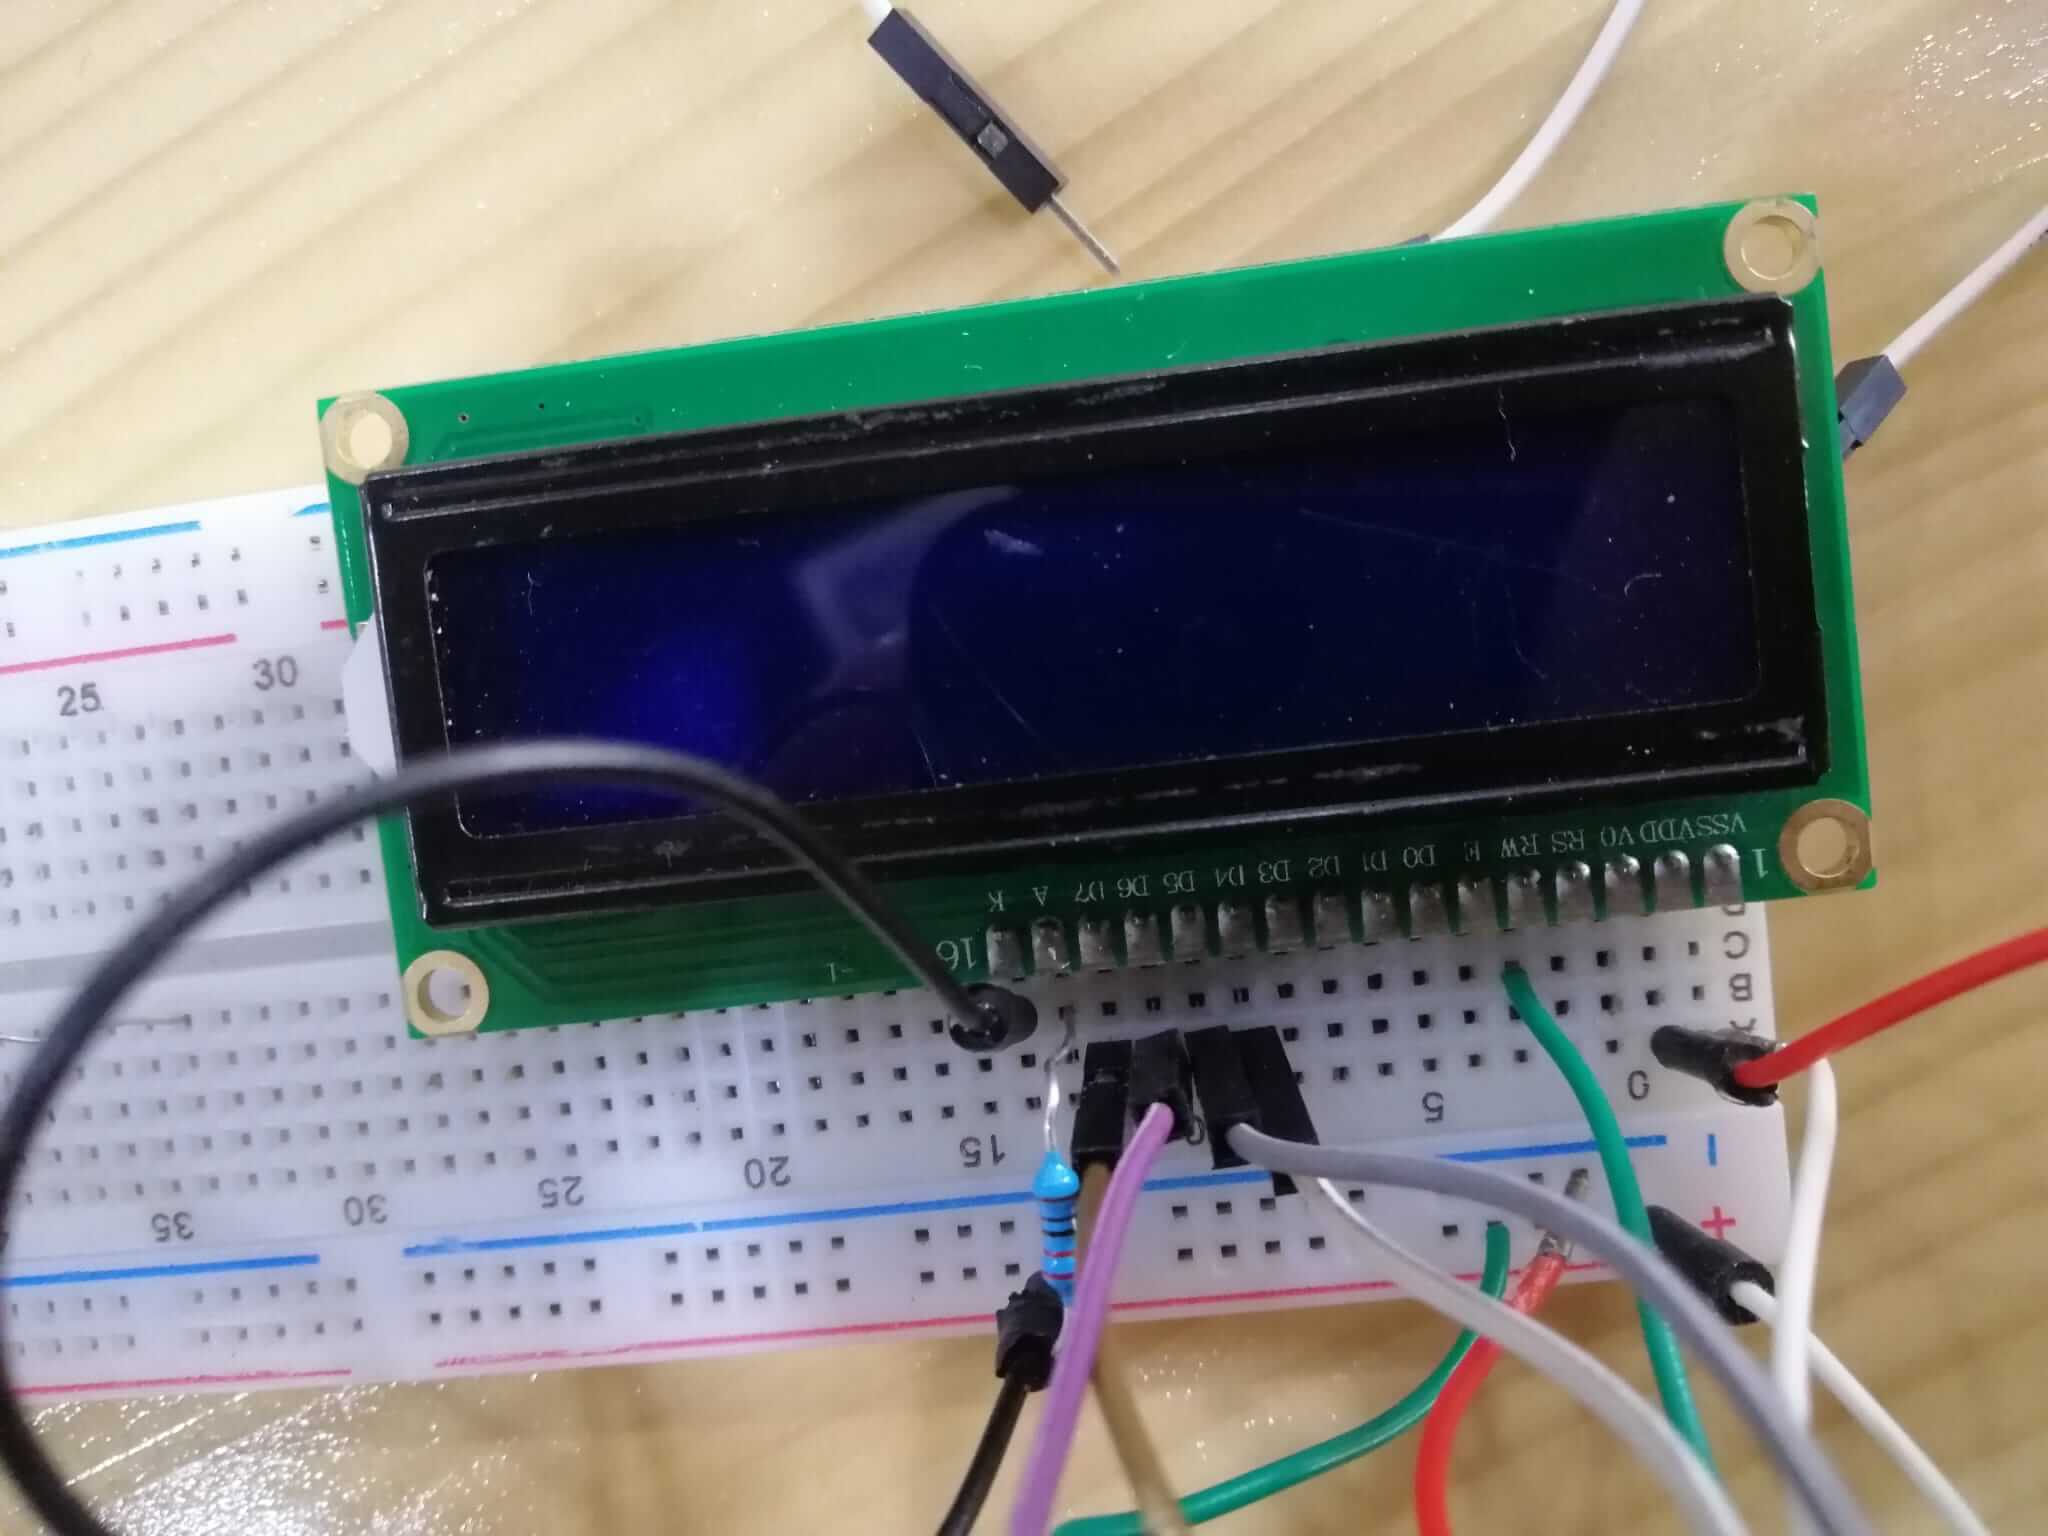
Heres what the connections look like from the the LCDs side .

Heres a picture of how i connected the wires.
Using the Temp Sensor
I used this code to get the temprature from the temp sensor on the adafruit and display the results on the serial moniter.
#include <Wire.h>
#include <SPI.h>
#include <Adafruit_BMP280.h>

Adafruit_BMP280 bmp; // use I2C interface
Adafruit_Sensor *bmp_temp = bmp.getTemperatureSensor();
Adafruit_Sensor *bmp_pressure = bmp.getPressureSensor();

void setup() {
  Serial.begin(9600);
  while ( !Serial ) delay(100);   // wait for native usb
  Serial.println(F("Easy Mode Challenge"));

  unsigned status;
  //status = bmp.begin(BMP280_ADDRESS_ALT, BMP280_CHIPID);
  status = bmp.begin();
  if (!status) {
    Serial.println(F("Could not find a valid BMP280 sensor, check wiring or "
                      "try a different address!"));
    while (1) delay(10);
  }

  /* Default settings from datasheet. */
  bmp.setSampling(Adafruit_BMP280::MODE_NORMAL,     /* Operating Mode. */
                  Adafruit_BMP280::SAMPLING_X2,     /* Temp. oversampling */
                  Adafruit_BMP280::SAMPLING_X16,    /* Pressure oversampling */
                  Adafruit_BMP280::FILTER_X16,      /* Filtering. */
                  Adafruit_BMP280::STANDBY_MS_500); /* Standby time. */

  bmp_temp->printSensorDetails();
}

void loop() {
  sensors_event_t temp_event; //activate sensor
  bmp_temp->getEvent(&temp_event); // start sensor event
  float temperatureC = temp_event.temperature; //get temp in celsius
  float temperatureF = (temperatureC * 9.0 / 5.0) + 32.0; //convert temp to from celsius to fahrenheit

/* Display results on the serial moniter */
  Serial.print(F("Temp in C:"));
  Serial.print(temperatureC);
  Serial.println(" *C");
   Serial.println();

Serial.print(F("Temp in F:"));
  Serial.print(temperatureF);
  Serial.println(" *F");
  Serial.println();

  delay(2000);
}
Heres a test of the temprature sensor code .
Adding the LCD Code
At frist I tried using the lcd screen but it wouldn’t work.
I tried to display “Hello World!” on the LCD screen using this code
#include <LiquidCrystal.h>
#include <Adafruit_BMP280.h>

#define rs 6
#define en 9
#define d4 10
#define d5 11
#define d6 12
#define d7 13

LiquidCrystal lcd(rs, en, d4, d5, d6, d7);

void setup() {
  lcd.begin(16, 2);
  lcd.print("Hello World!");
}
However the LCD screen is always blank and doesnt display “Hello World!”.
The main issue with it was that the adafruit uses 3.3 volts but the LCD screen requires 5 volts to work properly.
To fix this issue I used a iic adress select screen
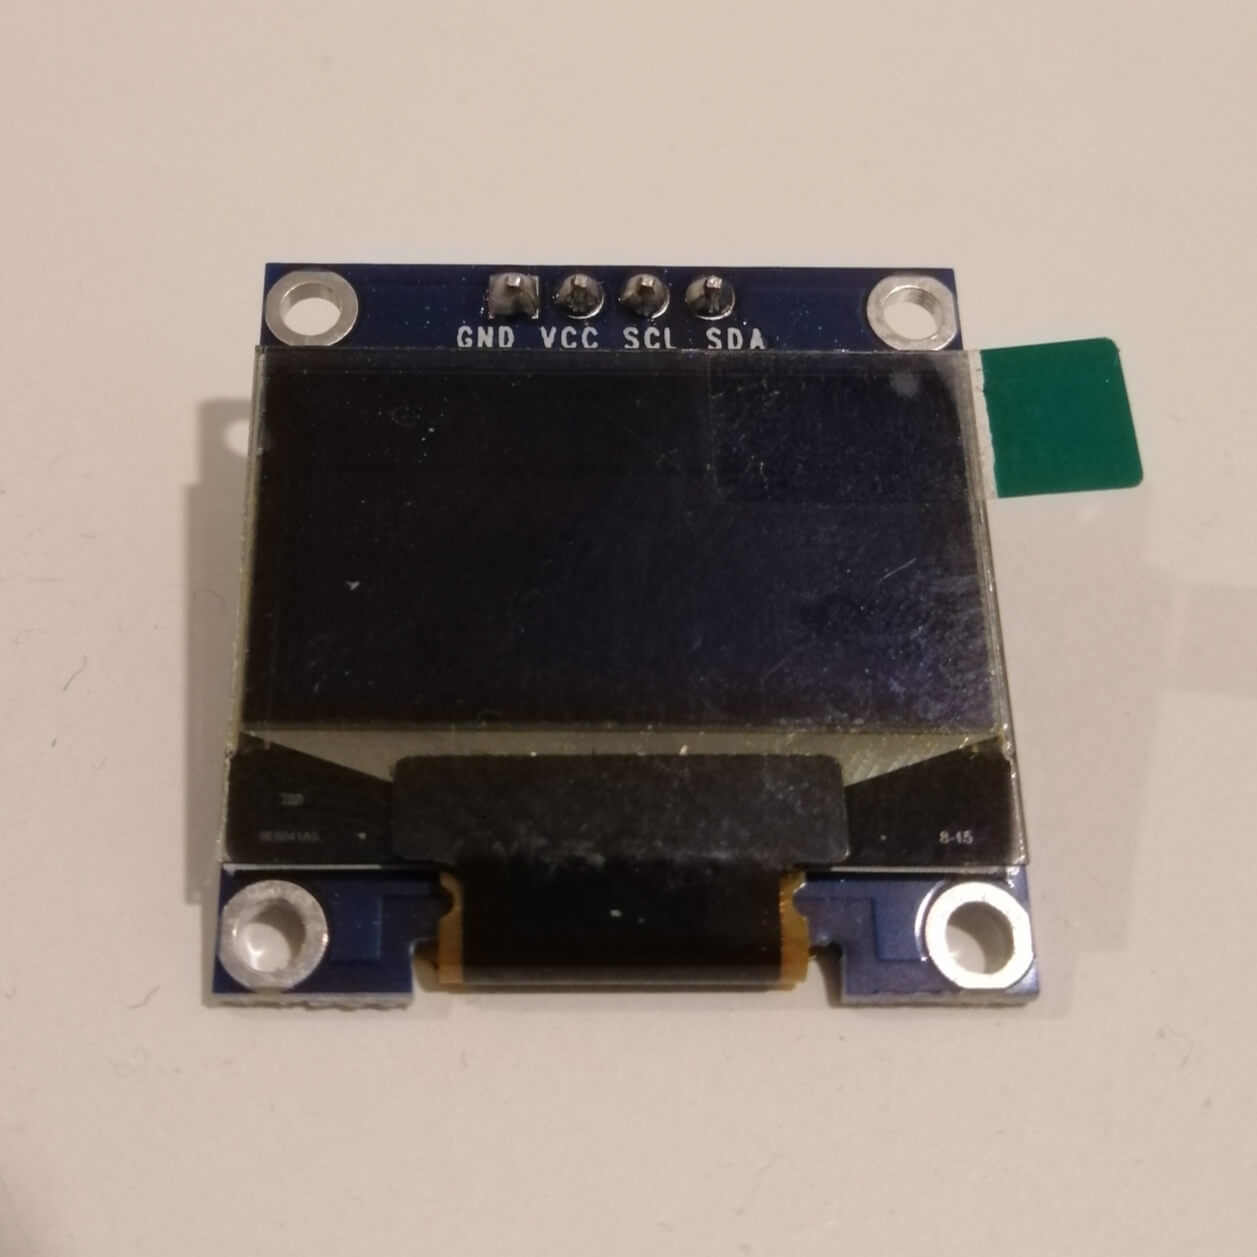
First I connected SDA and SCL to matching pins in the adafruit.

Secondly, I connected the GND pin to the ground (- section of the breadboard) and the VCC to the + section of the breadboard.

Finally I connect the GND pin to the - section and 3V to the + section of the breadboard.
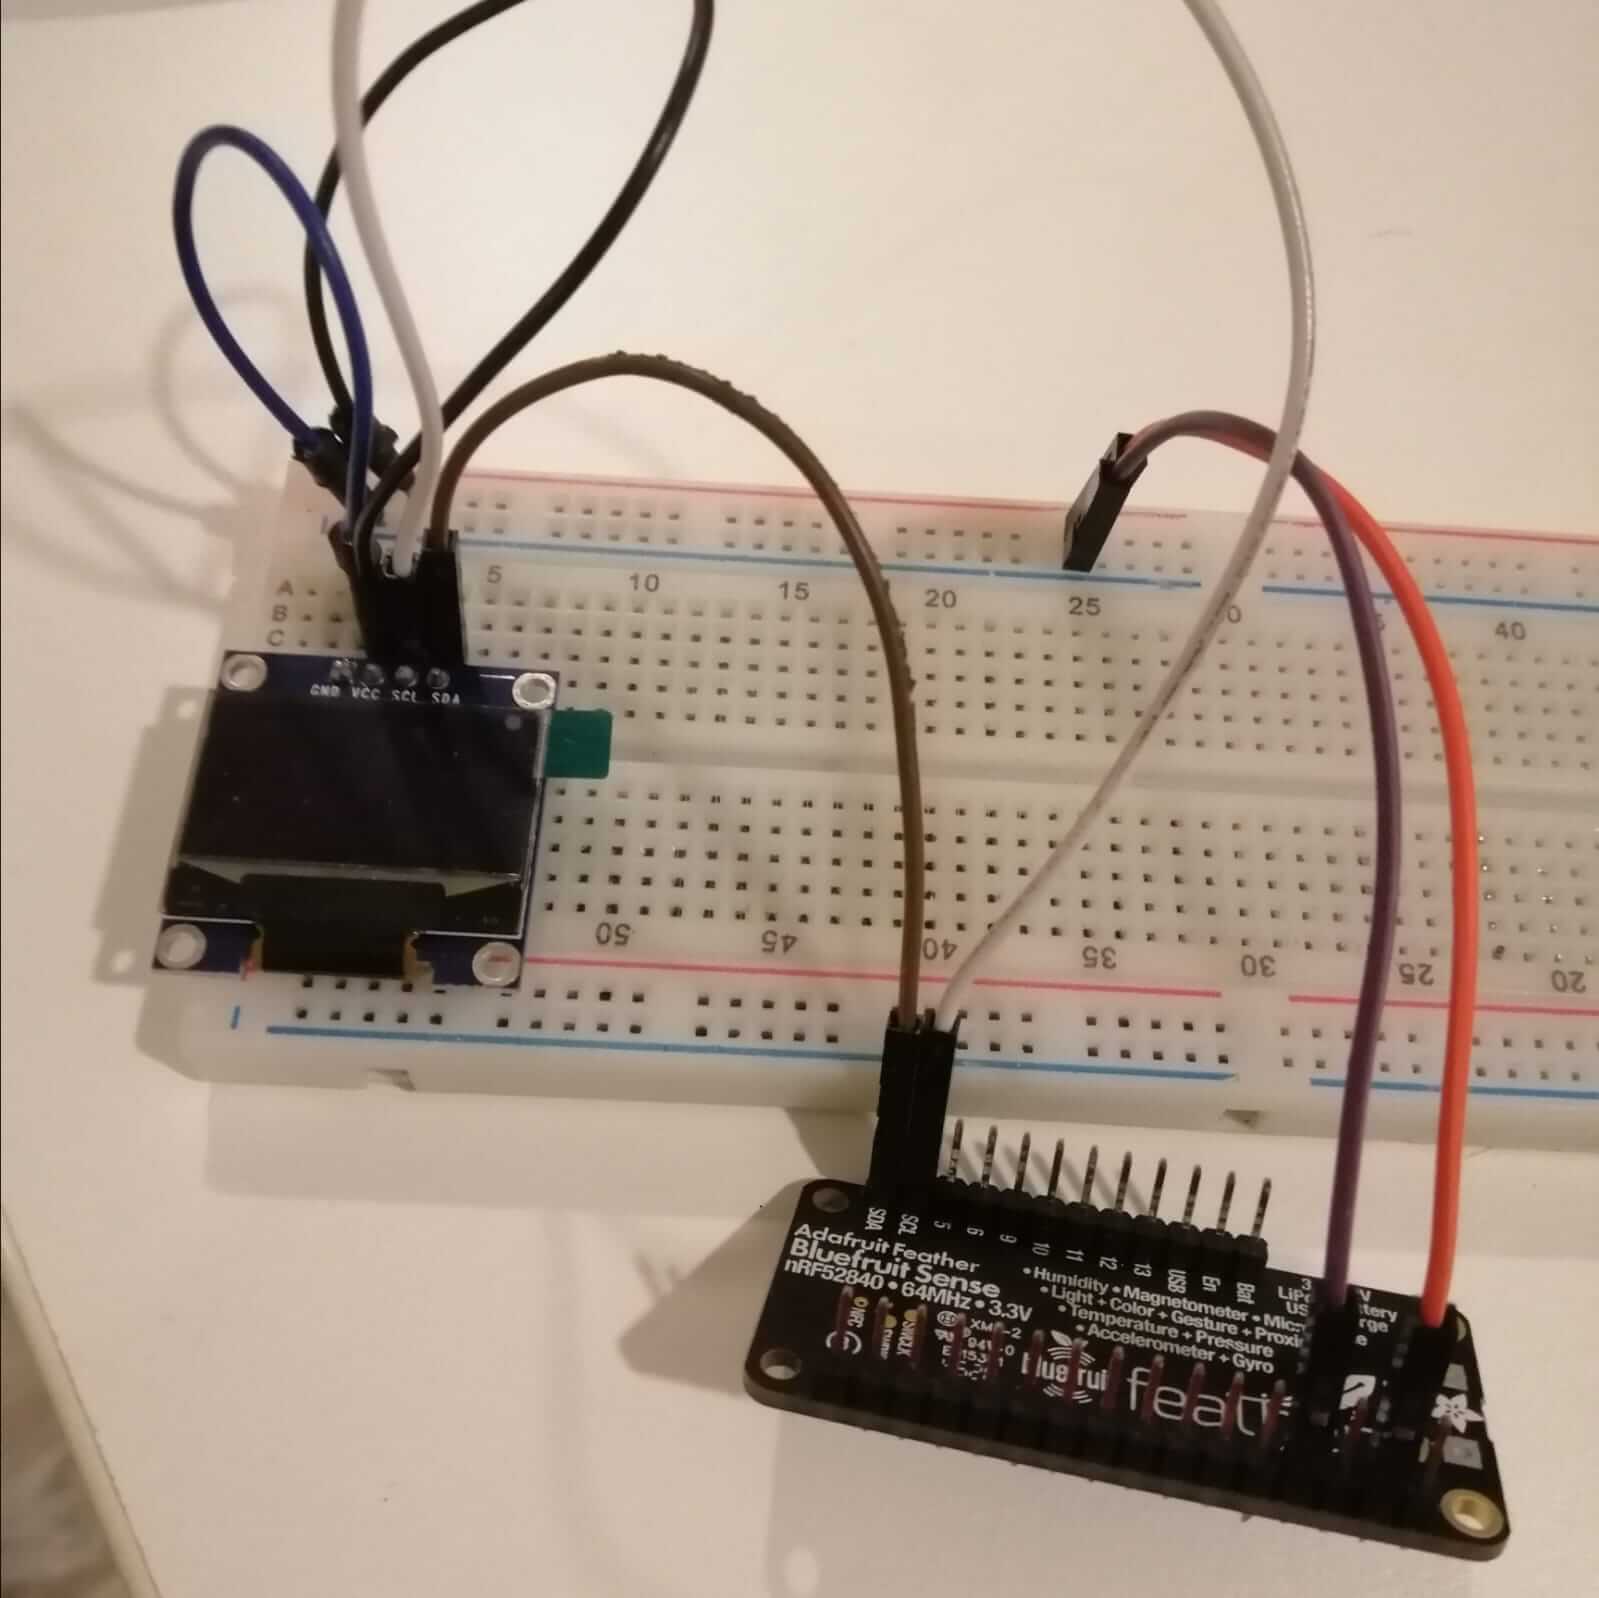
This is how the circuit looks like in the end.
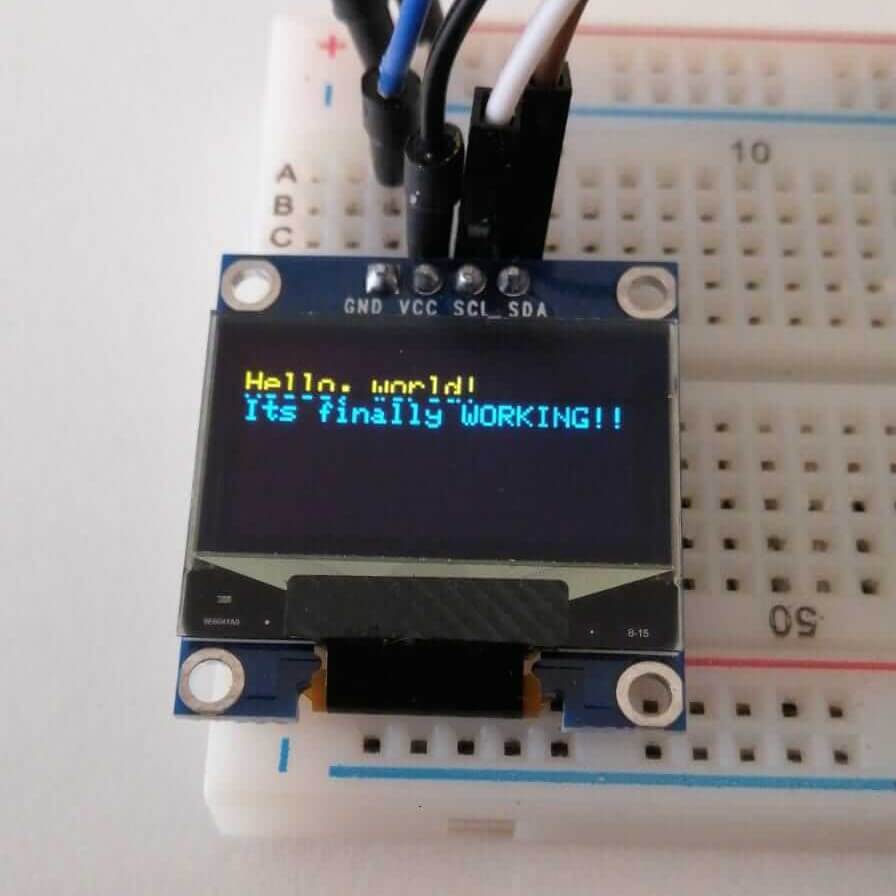
I did a test to see if the new screen would fix the problem. (This guide was very helpful)
/*********
  Rui Santos
  Complete project details at https://randomnerdtutorials.com
*********/

#include <Wire.h>
#include <Adafruit_GFX.h>
#include <Adafruit_SSD1306.h>

#define SCREEN_WIDTH 128 // OLED display width, in pixels
#define SCREEN_HEIGHT 64 // OLED display height, in pixels

// Declaration for an SSD1306 display connected to I2C (SDA, SCL pins)
Adafruit_SSD1306 display(SCREEN_WIDTH, SCREEN_HEIGHT, &Wire, -1);

void setup() {
  Serial.begin(115200);

  if(!display.begin(SSD1306_SWITCHCAPVCC, 0x3C)) { // Address 0x3D for 128x64
    Serial.println(F("SSD1306 allocation failed"));
    for(;;);
  }
  delay(2000);
  display.clearDisplay();

  display.setTextSize(1);
  display.setTextColor(WHITE);
  display.setCursor(0, 10);
  // Display static text
  display.println("Hello, world!");
  display.println("Its finally WORKING!!");
  display.display();
}

void loop() {

}
I modified the Temp Sensor code to addiionally displayed the results on the LCD monitor
/***************************************************************************
  This is a library for the BMP280 humidity, temperature & pressure sensor
  This example shows how to take Sensor Events instead of direct readings

  Designed specifically to work with the Adafruit BMP280 Breakout
  ----> http://www.adafruit.com/products/2651
  These sensors use I2C or SPI to communicate, 2 or 4 pins are required
  to interface.
  Adafruit invests time and resources providing this open source code,
  please support Adafruit and open-source hardware by purchasing products
  from Adafruit!
  Written by Limor Fried & Kevin Townsend for Adafruit Industries.
  BSD license, all text above must be included in any redistribution
 ***************************************************************************/

#include <Wire.h>
#include <SPI.h>
#include <Adafruit_BMP280.h>
#include <Adafruit_GFX.h>
#include <Adafruit_SSD1306.h>

Adafruit_BMP280 bmp; // use I2C interface
Adafruit_Sensor *bmp_temp = bmp.getTemperatureSensor();
Adafruit_Sensor *bmp_pressure = bmp.getPressureSensor();

#define SCREEN_WIDTH 128 // OLED display width, in pixels
#define SCREEN_HEIGHT 64 // OLED display height, in pixels

// Declaration for an SSD1306 display connected to I2C (SDA, SCL pins)
Adafruit_SSD1306 display(SCREEN_WIDTH, SCREEN_HEIGHT, &Wire, -1);

void setup() {
  Serial.begin(9600);
  while ( !Serial ) delay(100);   // wait for native usb
  Serial.println(F("Easy Mode Challenge"));


  unsigned status;
  //status = bmp.begin(BMP280_ADDRESS_ALT, BMP280_CHIPID);
  status = bmp.begin();
  if (!status) {
    Serial.println(F("Could not find a valid BMP280 sensor, check wiring or "
                      "try a different address!"));
    while (1) delay(10);
  }

  /* Default settings from datasheet. */
  bmp.setSampling(Adafruit_BMP280::MODE_NORMAL,     /* Operating Mode. */
                  Adafruit_BMP280::SAMPLING_X2,     /* Temp. oversampling */
                  Adafruit_BMP280::SAMPLING_X16,    /* Pressure oversampling */
                  Adafruit_BMP280::FILTER_X16,      /* Filtering. */
                  Adafruit_BMP280::STANDBY_MS_500); /* Standby time. */

  bmp_temp->printSensorDetails();

 if(!display.begin(SSD1306_SWITCHCAPVCC, 0x3C)) { // Address 0x3D for 128x64
    Serial.println(F("SSD1306 allocation failed"));
    for(;;);
  }
  delay(2000);
  display.clearDisplay();

  display.setTextSize(1);
  display.setTextColor(WHITE);

}

void loop() {
  sensors_event_t temp_event; //activate sensor
  bmp_temp->getEvent(&temp_event); // start sensor event
  float temperatureC = temp_event.temperature; //get temp in celsius
  float temperatureF = (temperatureC * 9.0 / 5.0) + 32.0; //convert temp to from celsius to fahrenheit

/* Display results on the serial moniter */
  Serial.print(F("Temp in C:"));
  Serial.print(temperatureC);
  Serial.println(" *C");
   Serial.println();

Serial.print(F("Temp in F:"));
  Serial.print(temperatureF);
  Serial.println(" *F");
  Serial.println();

/* Display results on the LCD screen */

   //clear display
  display.clearDisplay();

  // display temperature
  display.setTextSize(1);
  display.setCursor(0,0);
  display.print("Temp in C: ");
  display.setTextSize(2);
  display.setCursor(0,10);
  display.print(temperatureC);
  display.print(" ");
  display.setTextSize(1);
  display.cp437(true);
  display.write(167);
  display.setTextSize(2);
  display.print("C");

  // display humidity
  display.setTextSize(1);
  display.setCursor(0, 35);
  display.print("Temp in F: ");
  display.setTextSize(2);
  display.setCursor(0, 45);
  display.print(temperatureF);
 display.print(" ");
  display.setTextSize(1);
  display.cp437(true);
  display.write(167);
  display.setTextSize(2);
  display.print("F");

  display.display();

  delay(2000);}
This is the final result