Final Project
1.0 Introduction
I worked with my partners Iftikhar and Sara to make our final project. It is a contribution machine for the charities. It can count the total contributed money and has LED strips and other sensors to make it more interesting. It is similar to an ATM machine but it only accept money for contribution.
My partners’ pages complete my page, so make sure to visit their pages to see the rest of the work.
My partners' pages
1.1 From a rewarding box to a contribution machine!!
When I began my journey in Fab Lab Bahrain, I did not have an idea of a final project. Then, I thought of making a rewarding box, and I called it the mystery box. It was suppose to contain some gifts and candies. It supposed to contain some buttons, when the person press the button he will win a gift from the box. The box can be used as a reward for example if a student answered a question or if the kids did what their parents told them to do. This idea was missing the mechanism and since I did not find a good one, I decided to ignore it.
After this, I decided to make a team with my partners Iftikhar and Sara to make our final project. We started to think about ideas for our project. We found three ideas:
- Measuring device
- This idea was suggested by Sara.
- It measures the dimension of the object by scanning it when it is placed on the correct position.
- Moneybox
- This idea was suggested by me.
- It is based on my mystery box idea but it will save the money for the kids and it will count the total amount saved in it.
- Dart game
- This idea was suggested by Iftikhar.
- It will use a capacitance sensor and when the missile hit the board it will measure the distance and gives points digitally.
After thinking, I suggested another idea which is a charity box that will show the total contributed amount. Then, we decided to stay on this idea and improve it.
1.2 Answering the final project questions.
Our first step after choosing the project idea was to answer a list of questions that are available in the link below.
Q1) What will it do?
- It will count the contributed money when the user click the buttons. (To handle currency note).
Q2) Who’s done what beforehand?
- Someone in Fab Lab Bahrain made a charity box that send a signal when it is full based on a certain weight, but it does not count the money.
Q3) What will you design?
- A box.
- Buttons.
Q4) What materials and components will be used?
- Wood (CNC machine).
- 3D printed filaments (buttons).
- RGB Strips to encourage people to contribute.
- Ultrasonic sensor.
- Speaker
- Monitor screen
Q5) Where will come from?
- Fab Lab Bahrain.
Q6) How much will they cost?
| Qty | Description | Price | Link | Notes |
|---|---|---|---|---|
| ?? | ?? | ?? | ?? | ?? | s
Q7) What parts and systems will be made?
- Box
- Buttons
Q8) What processes will be used?
- CNC Cutting
- 3D Printing
Q9) What questions need to be answered?
- How we will program the adding algorithm for money counting?
- What will be the decent size of the box, buttons, numbers?
- How to program the ultrasonic sensor such that LED, speaker give output when an object is detected close by?
Q10) How will it be evaluated?
- Based on calculation.
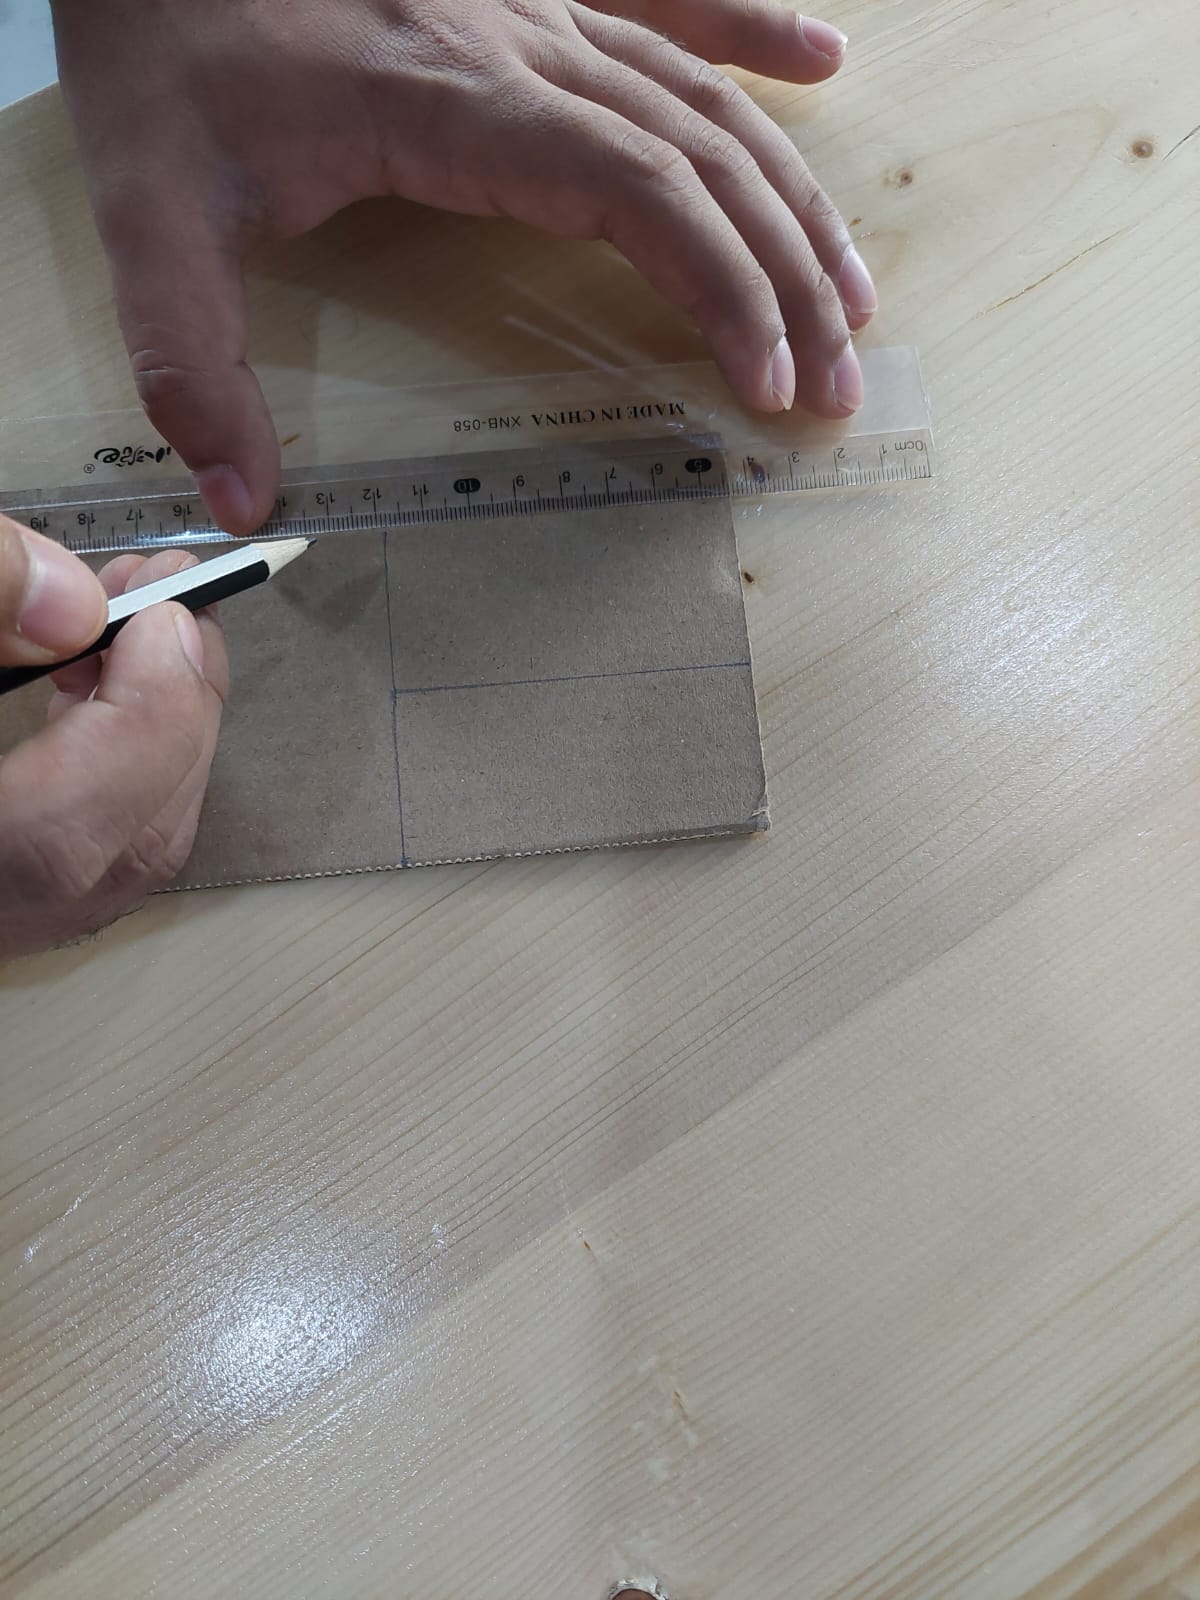
1.3 Cardboard design
Before making the actual design, we used the cardboard and the laser cutter machine to create a prototype.


1.4 Programming and Electronics
I worked with my partner Iftikhar on the electronics and programming part.
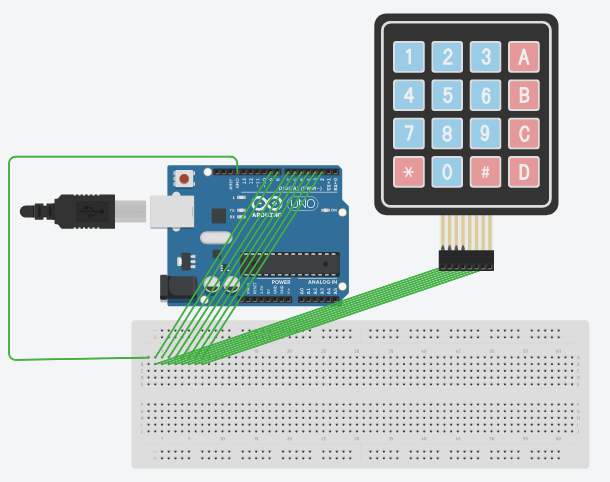
We started working on the buttons first. We tested two buttons in the beginning. I used tinkercad to test a keypad. I found the connection and the code from a YouTube video.
Since the code saves the values of the keypad as characters, I found a code that will convert character (char) to integer (int) and it saves it in a variable. It will also calculate the total and print it.
This is the connection.
This is the code
#include <Keypad.h>

// Constants for row and column sizes
const byte ROWS = 4;
const byte COLS = 4;

// total values
int tot=0;
int ftot=0;

// Array to represent keys on keypad
char hexaKeys[ROWS][COLS] = {
  {'1', '2', '3', 'A'},
  {'4', '5', '6', 'B'},
  {'7', '8', '9', 'C'},
  {'*', '0', '#', 'D'}
};

//To convert char to int and save it into value
char oneChar = hexaKeys[0][0];  // 1
int oneInt = oneChar - '0';
char twoChar = hexaKeys[0][1]; // 2
int twoInt = twoChar - '0';
char threeChar = hexaKeys[0][2];  // 3
int threeInt = threeChar - '0';

// Connections to Arduino
byte rowPins[ROWS] = {9, 8, 7, 6};
byte colPins[COLS] = {5, 4, 3, 2};

// Create keypad object
Keypad customKeypad = Keypad(makeKeymap(hexaKeys), rowPins, colPins, ROWS, COLS);


void setup() {
  // Setup serial monitor
  Serial.begin(9600);
}

void loop() {
  // Get key value if pressed
  char customKey = customKeypad.getKey();


  if (customKey) {
    // Print key value to serial monitor
    Serial.println(customKey);

}

  if(customKey==hexaKeys[0][0])
  {
    for(int i=0; i<1; i++){
    tot = tot+oneInt;
    Serial.print(oneInt);
    Serial.println(" One");
    Serial.print("total= ");
      Serial.println(tot);}
  }
  if(customKey==hexaKeys[0][1])
  {
    tot = tot+twoInt;
    Serial.print(twoInt);
    Serial.println(" Two");
    Serial.print("total= ");
    Serial.println(tot);
  }
  if(customKey==hexaKeys[0][2])
  {
    tot = tot+threeInt;
    Serial.print(threeInt);
    Serial.println(" Three");
    Serial.print("total= ");
    Serial.println(tot);
  }
  if(customKey==hexaKeys[0][3])
  Serial.println(tot);

}
  // put your main code here, to run repeatedly:

}
Then, we started working on the buttons, we connected 2 buttons in the beginning. We also used the buzzer, it will beep when the button is pressed. The code that we used will print the total for button 1 and 2 and the addition of both.
//This is a code for buttons

#include <SPI.h>

int buttonState = 0;
int buttonState2 = 0;
int one = 1;
int five = 5;
double total1 = 0.0;
double total2 = 0.0;
double total = 0.0;

const int buzzer = 5;

void setup()
{
  pinMode(10, INPUT);
  pinMode(12, INPUT);
  pinMode(LED_BUILTIN, OUTPUT);
  pinMode(buzzer, OUTPUT);
  Serial.begin(9600);
}

void loop()
{
  // read the state of the pushbutton value
  buttonState = digitalRead(10);
  buttonState2 = digitalRead(12);
  // check if pushbutton is pressed.  if it is, the
  // buttonState is HIGH
  if (buttonState == HIGH) {
    // turn LED on
    digitalWrite(LED_BUILTIN, HIGH);
    Serial.print("BD ");
    Serial.println(one);
    total1 = total1 + one;
    Serial.print("total1 ");
    Serial.println(total1);
    Serial.print("Total2 = ");
    Serial.println(total2);
    total = total1+total2;
    Serial.print("Total = ");
    Serial.println(total);
    tone(buzzer, 1000);
  delay(500);
  noTone(buzzer);
  delay(500);
  } else {
    // turn LED off
    digitalWrite(LED_BUILTIN, LOW);
    digitalWrite(buzzer,LOW);
  }
  delay(10); // Delay a little bit to improve simulation performance

  if (buttonState2 == HIGH) {
    // turn LED on
    digitalWrite(LED_BUILTIN, HIGH);
    Serial.print("BD ");
    Serial.println(five);
    Serial.print("total1 ");
    Serial.println(total1);
    total2 = total2 + five;
    Serial.print("total2 = ");
    Serial.println(total2);
    total = total1+total2;
    Serial.print("Total = ");
    Serial.println(total);
    tone(buzzer, 1000);
  delay(500);
  noTone(buzzer);
  delay(500);
  } else {
    // turn LED off
    digitalWrite(LED_BUILTIN, LOW);
    digitalWrite(buzzer,LOW);
  }


  delay(10); // Delay a little bit to improve simulation performance
}
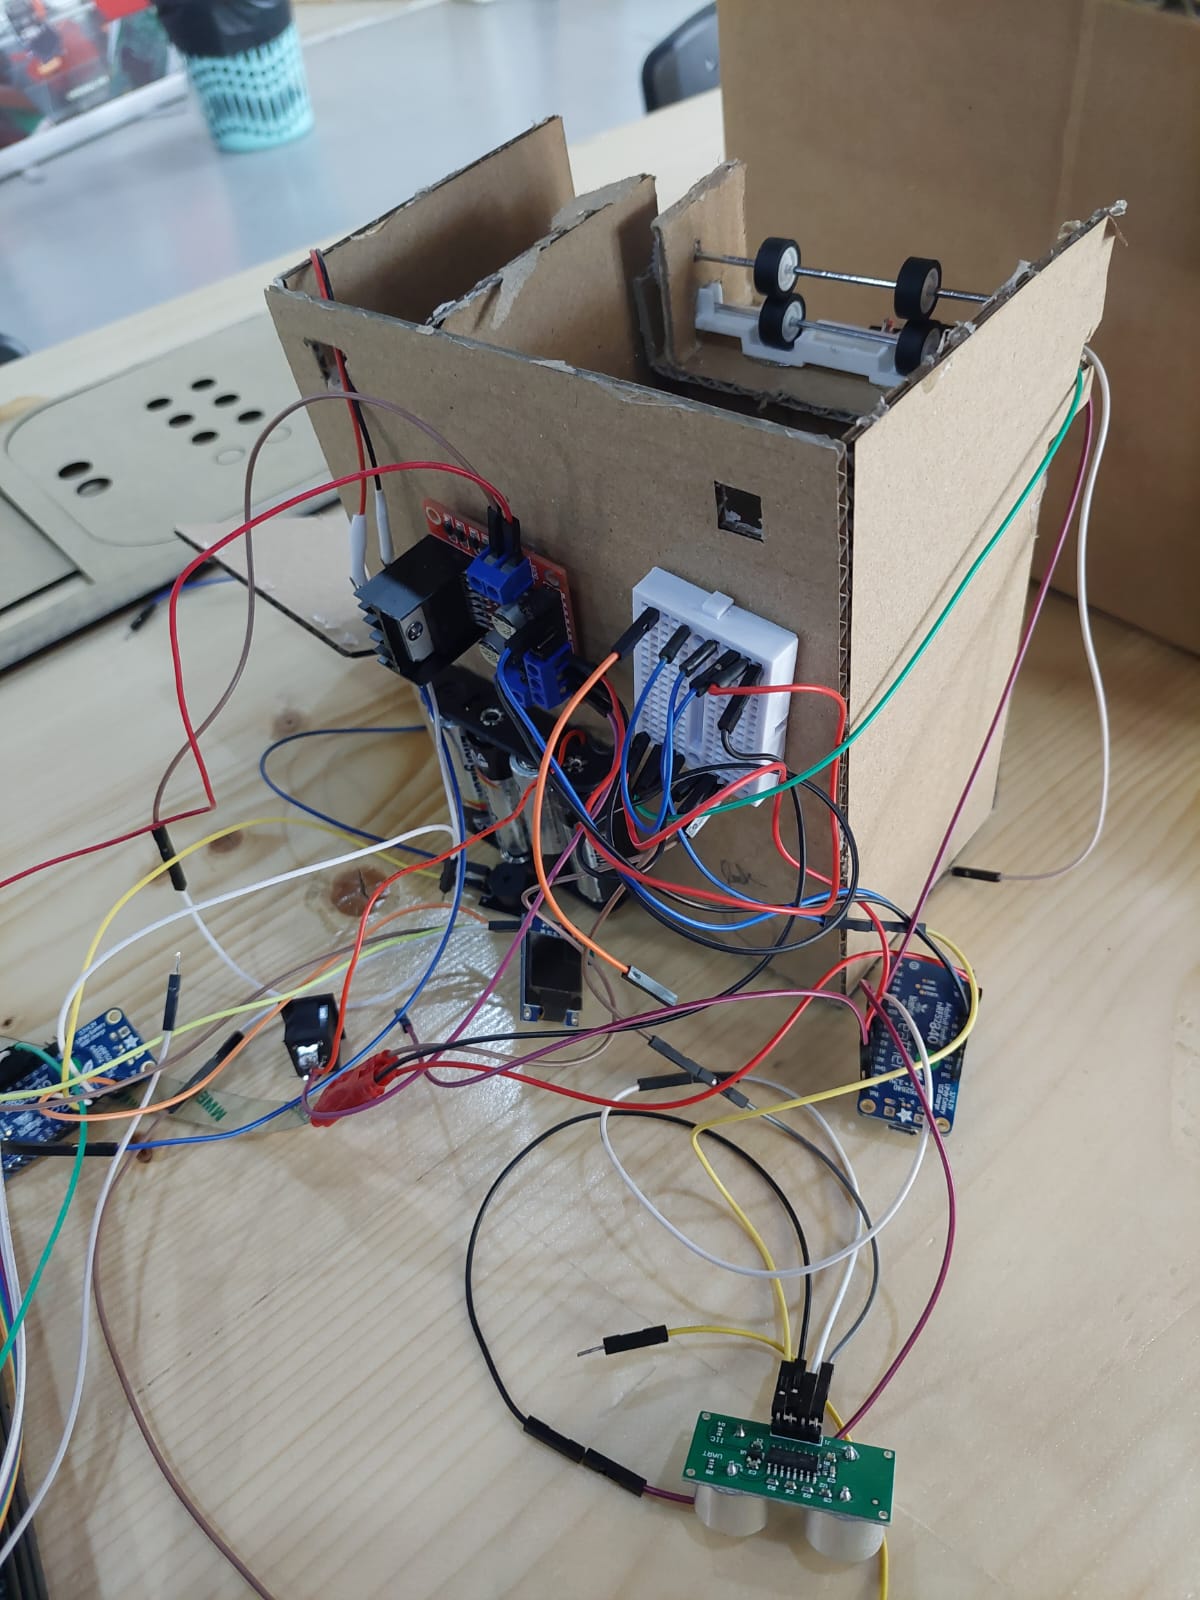
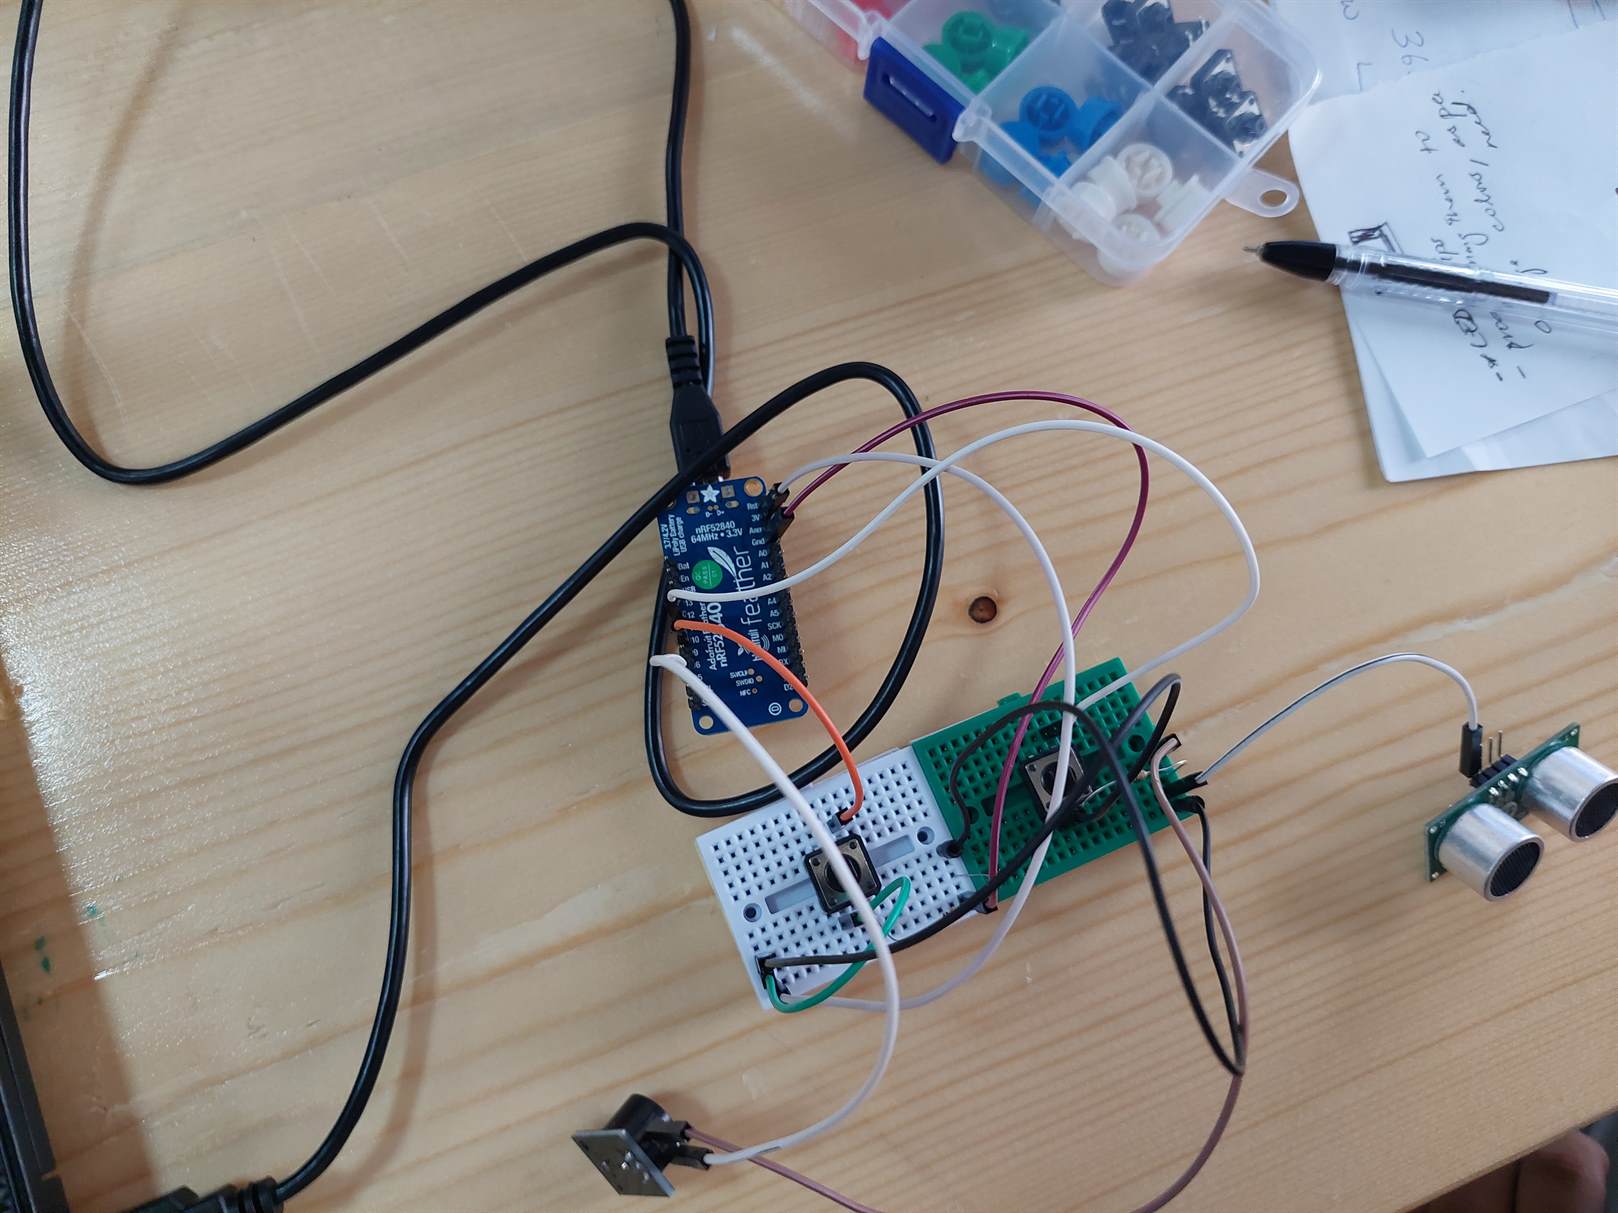
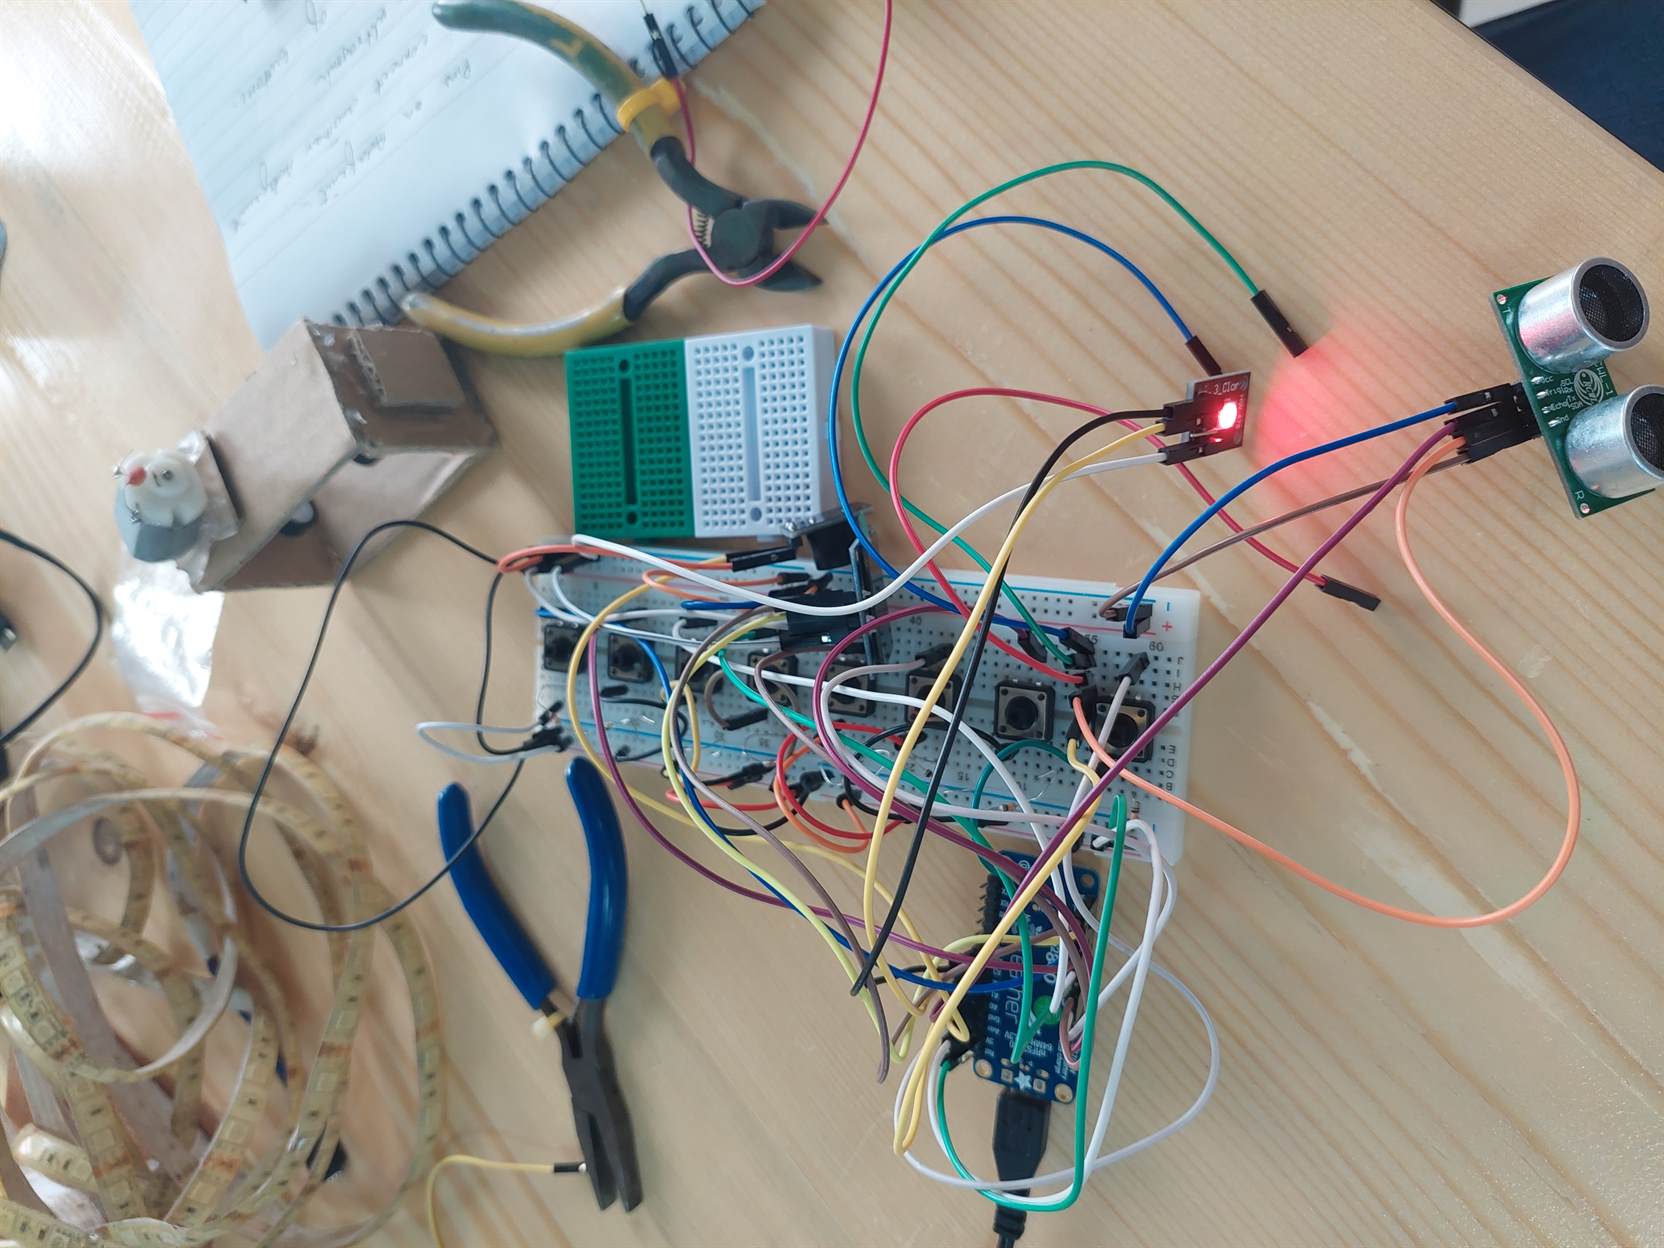
Then, we connected the ultrasonic sensor. Sara provided us with the ultrasonic code and we modified it to make it appropriate with the final project. We used an RGB sensor to test the distance. When the distance is below or equal 50, the RGB color will turn to red. Otherwise, it will stay off. We did not take a video for the test.
This is the connection but we did not connect the RGB sensor in this picture yet.
This is the modified code.
#include <SPI.h>
int trigPin = A3;
int echoPin = A2;
int red = A4;
int blue = A5;

long duration;
int distance;
void setup()
{
pinMode(red, OUTPUT);
  pinMode(blue, OUTPUT);

pinMode(trigPin, OUTPUT);
pinMode(echoPin, INPUT);
Serial.begin(9600);
}

void loop()
{
  digitalWrite(trigPin, HIGH);
  delay(1);
  digitalWrite(trigPin, LOW);
  duration = pulseIn(echoPin, HIGH);
  distance= duration*0.034/2;
  Serial.print("Distance: ");
  Serial.println(distance);

  if(distance <= 50){
  digitalWrite(red, HIGH);
  digitalWrite(blue, LOW);}
  else{
  digitalWrite(red, LOW);
  digitalWrite(blue, LOW);}

}
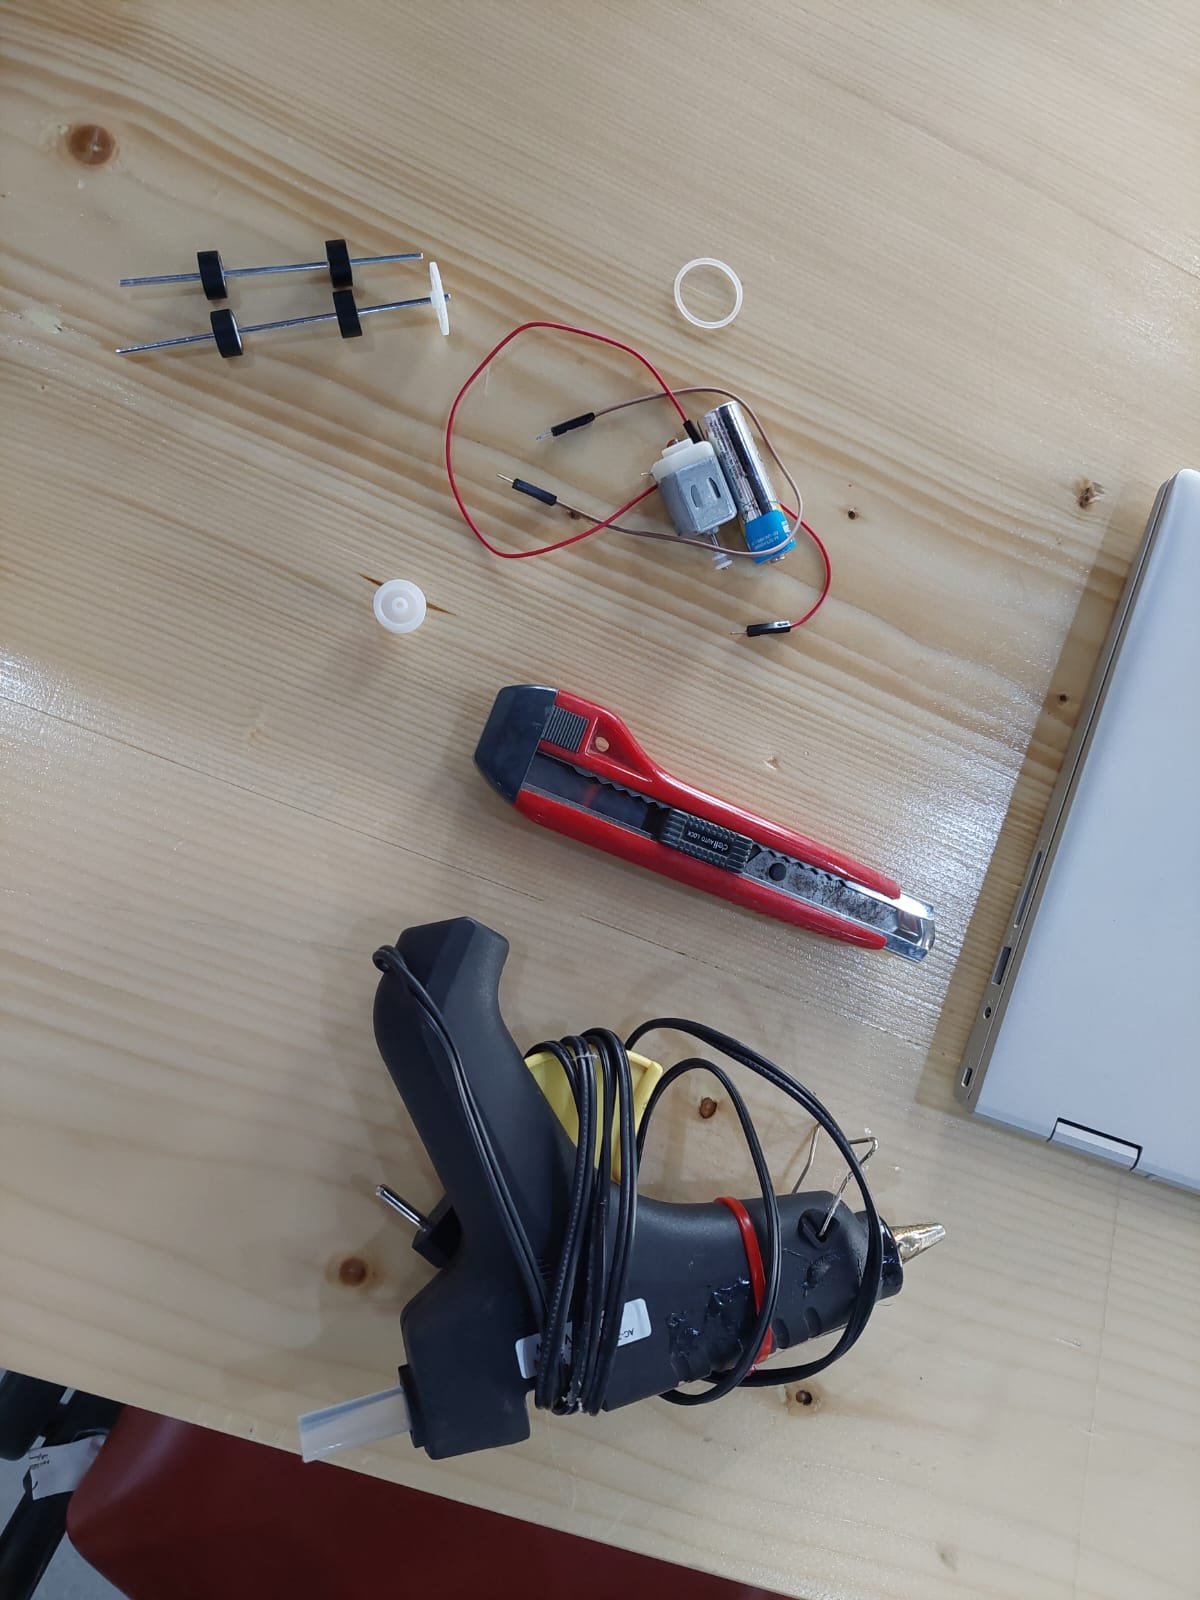
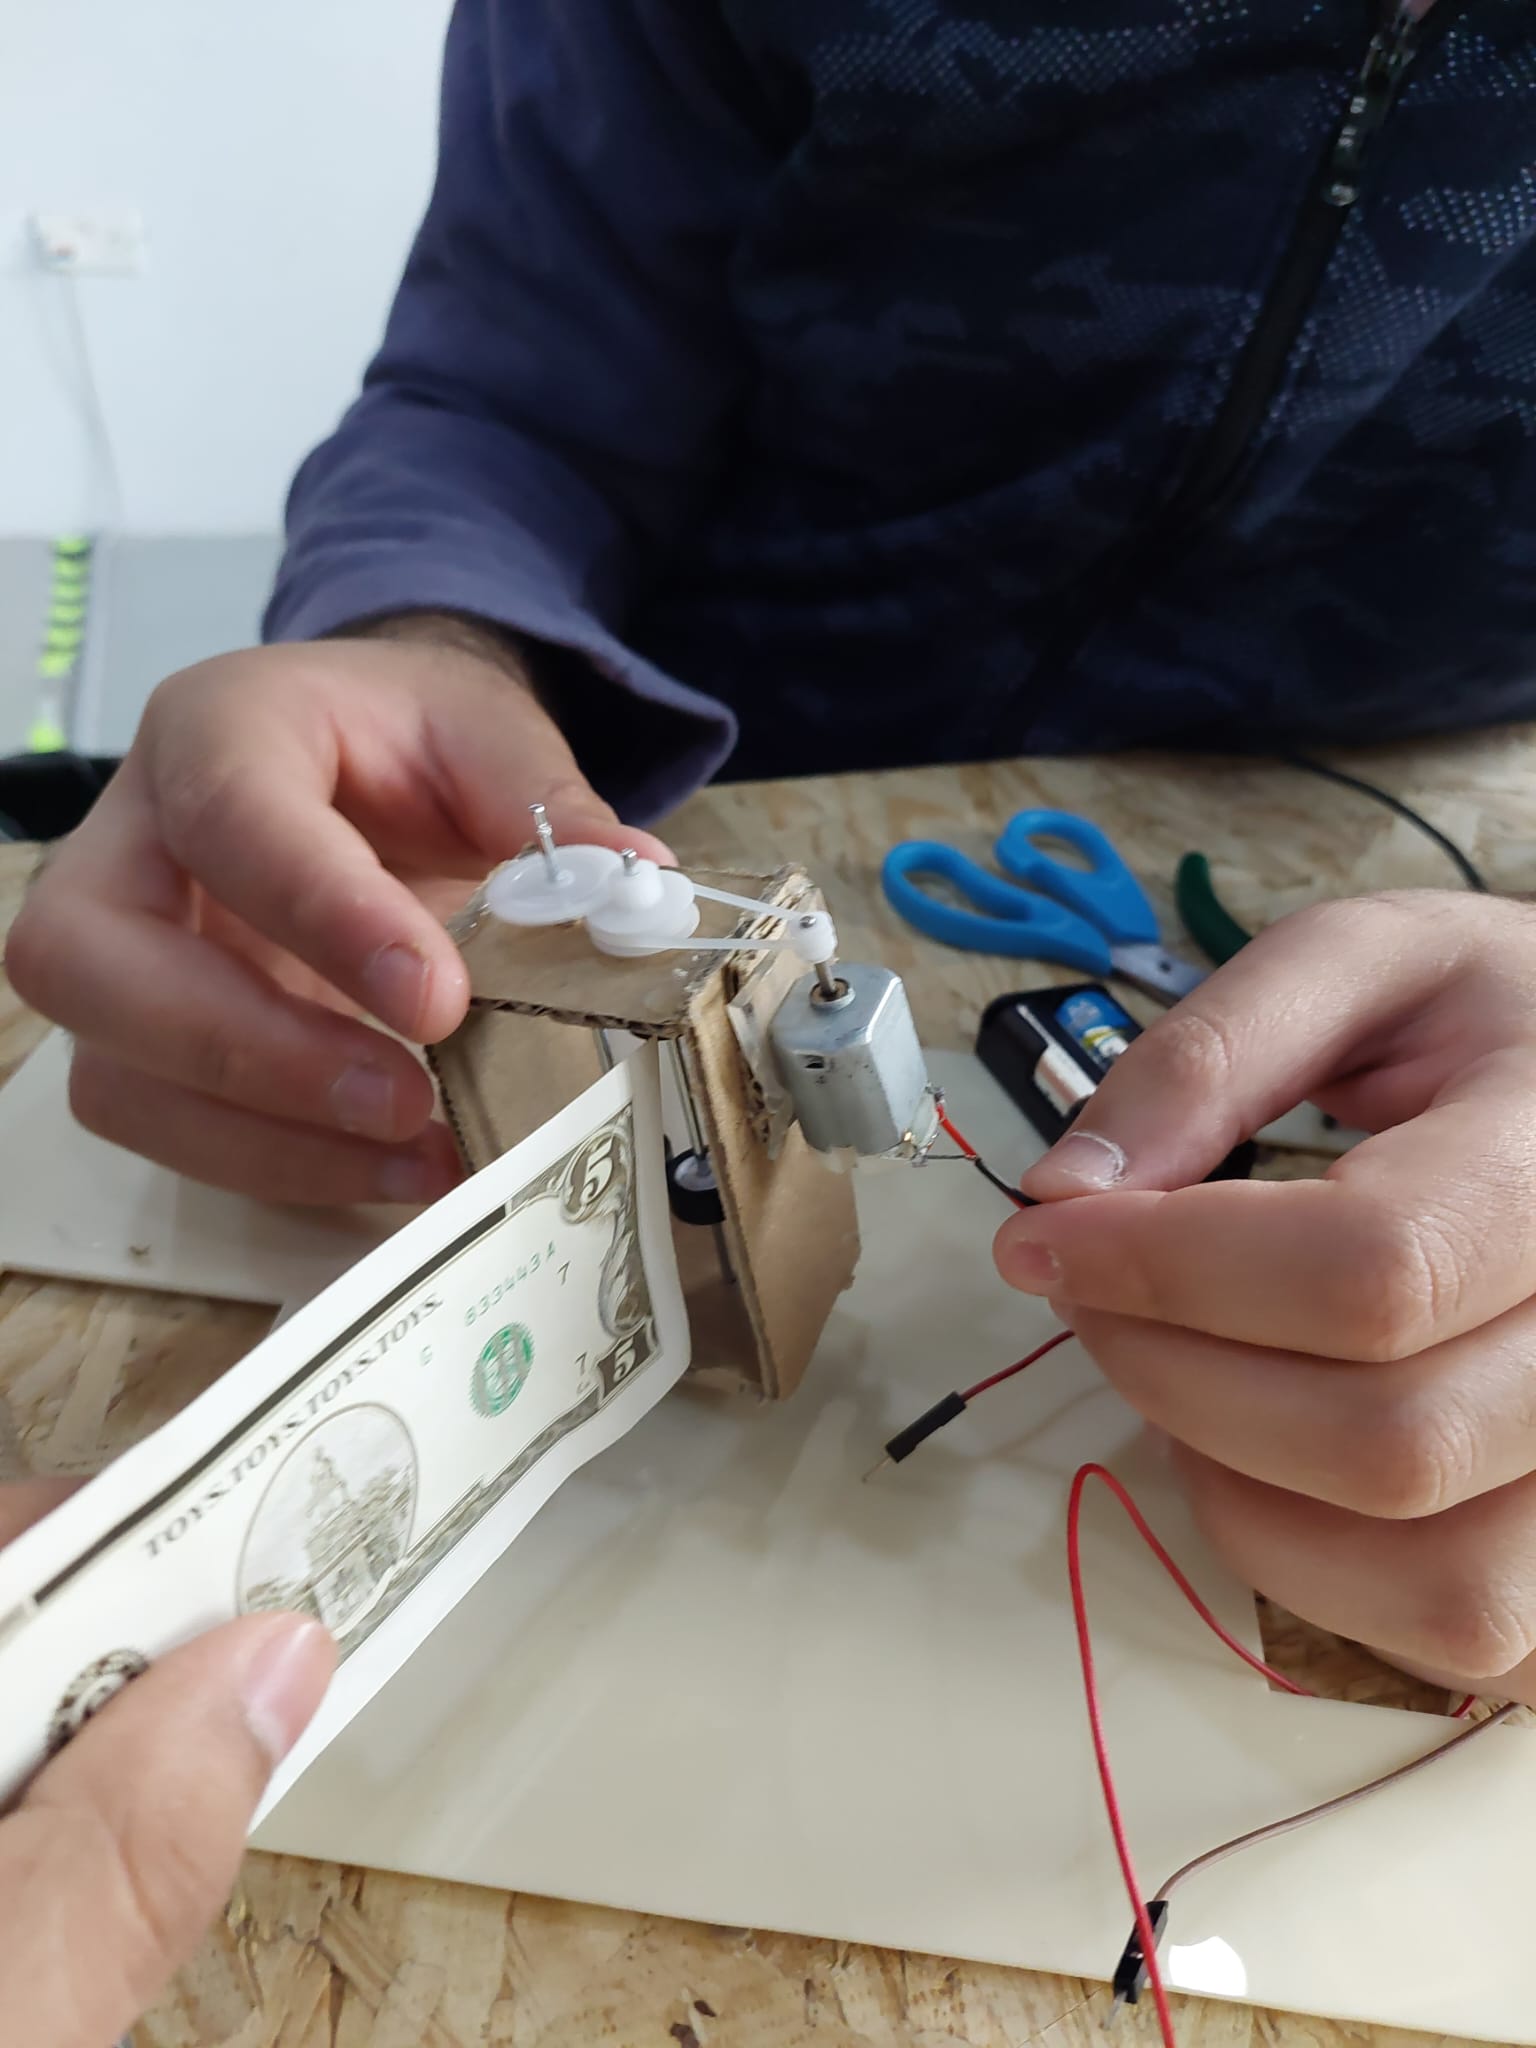
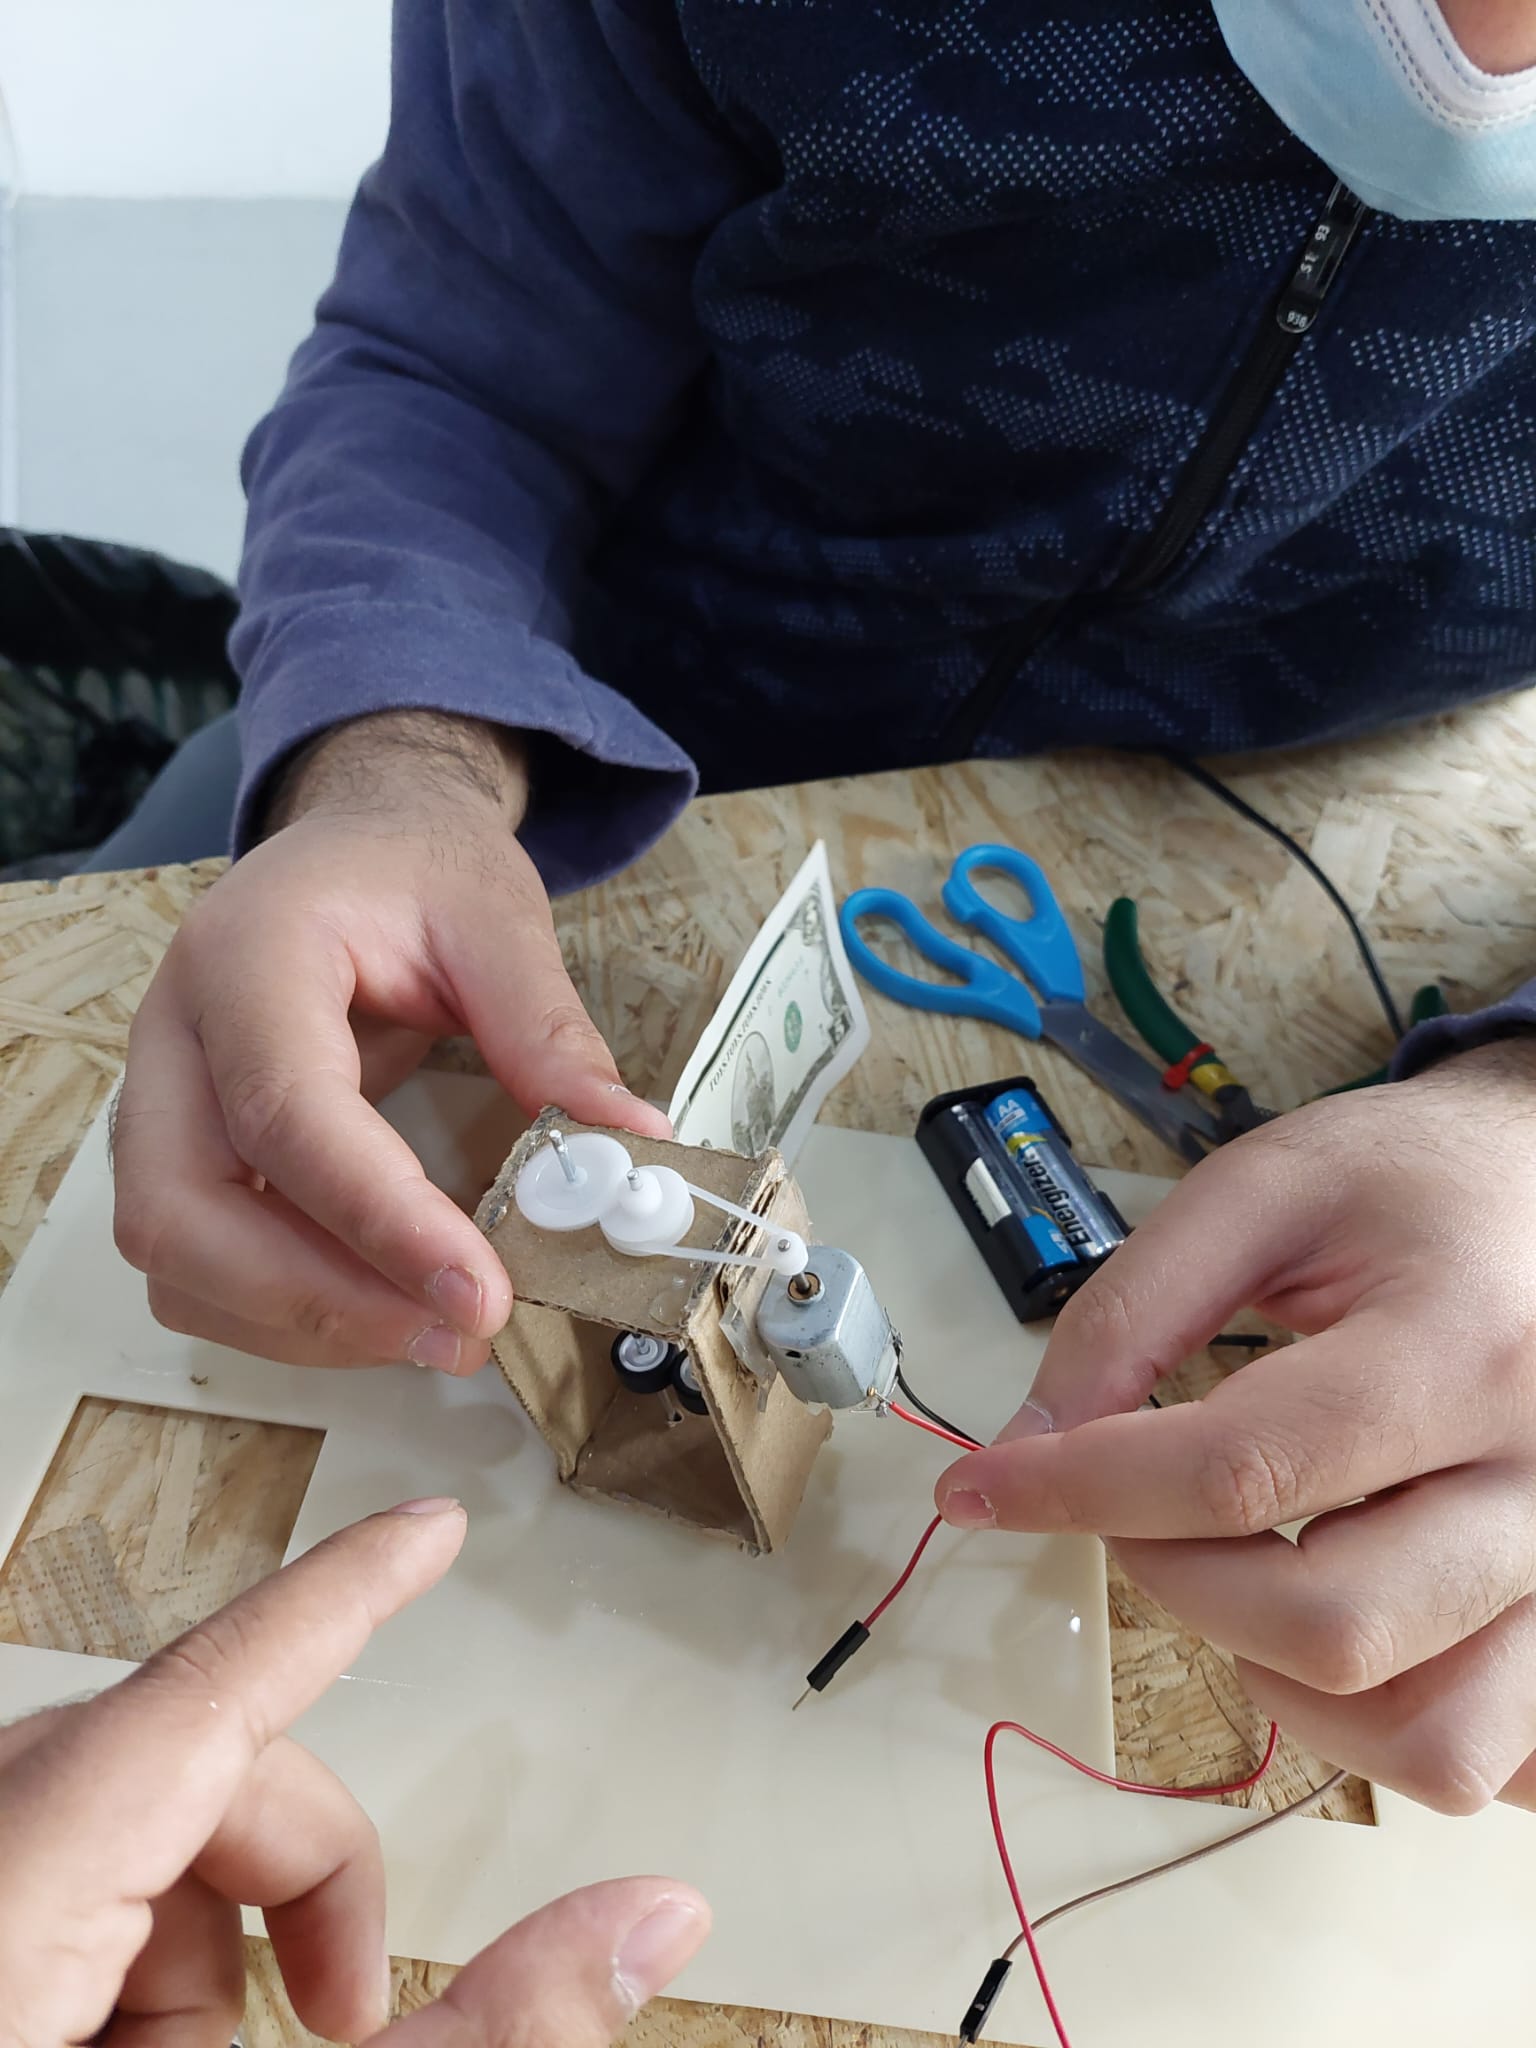
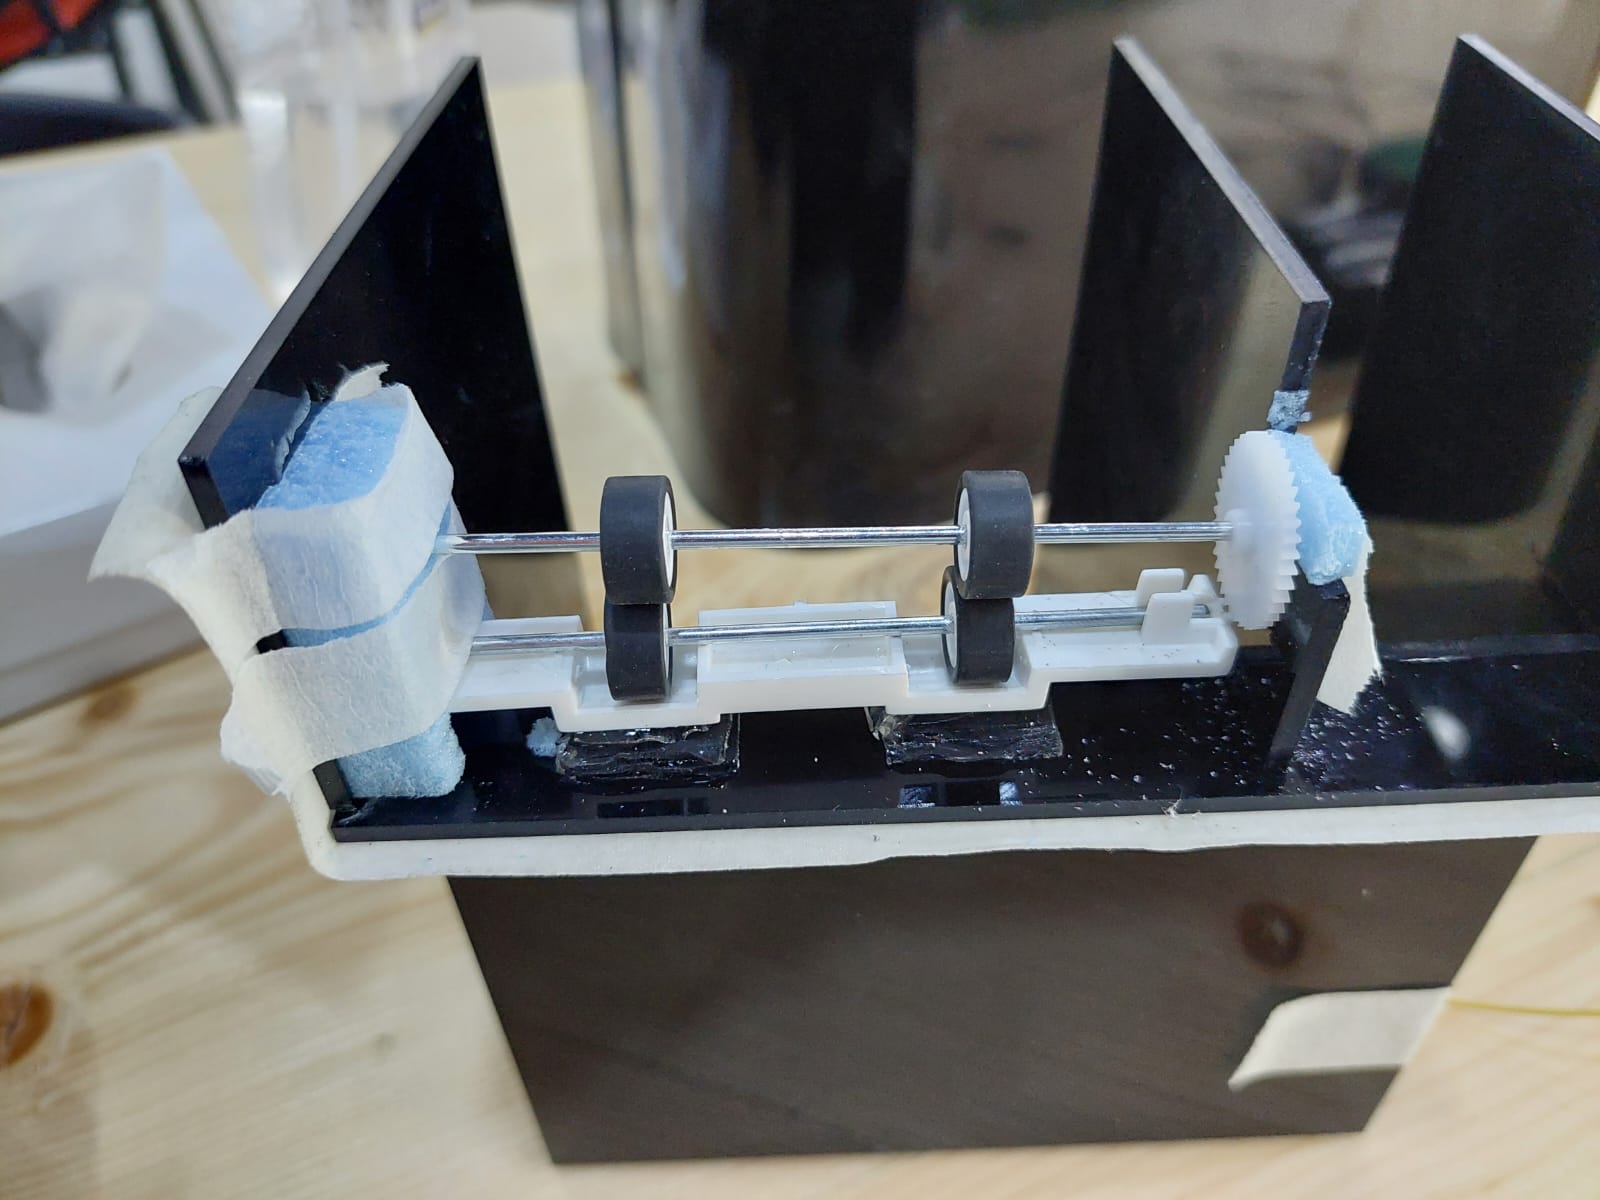
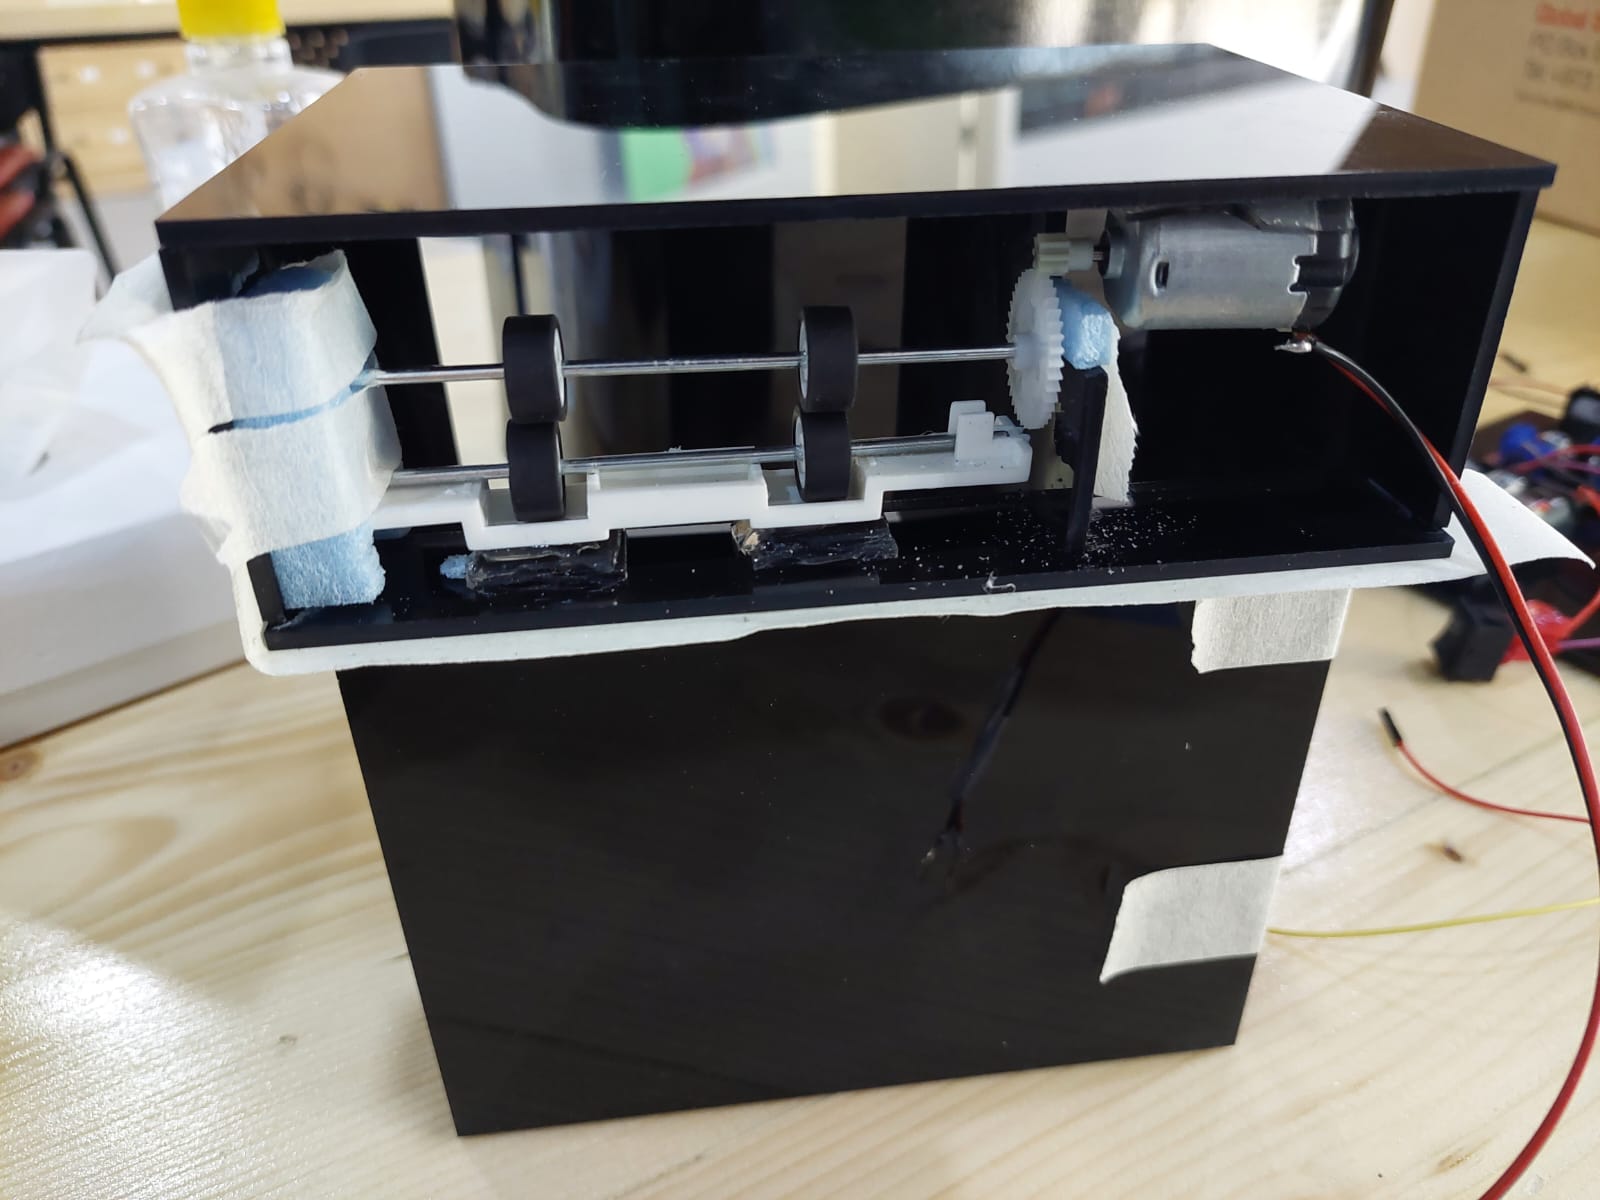
To get an idea of how the motor will take the notes, Sara bought a money safe for kids. It is the same one as shown in the pictures below.


Next, we worked on making a code for the deleting button.
This is the code
// C++ code
//
/*
  Button
  Turns on and off a light emitting diode(LED)
  connected to digital  pin 13, when pressing a
  pushbutton attached to pin 2.

   The circuit:
  * LED attached from pin 13 to ground
  * pushbutton attached to pin 2 from +5V
  * 10K resistor attached to pin 2 from ground
  * Note: on most Arduinos there is already an LED
  on the board  attached to pin 13.

  created 2005  by DojoDave <http://www.0j0.org>

  modified 30 Aug 2011  by Tom Igoe

  This example code is in the public domain.
  http://www.arduino.cc/en/Tutorial/Button
*/
#include <SPI.h>

int buttonState = 0;
int buttonState2 = 0;
int one = 1;
int five = 5;
double total1 = 0.0;
double total2 = 0.0;
double total = 0.0;

const int buzzer = 5;

void setup()
{
  pinMode(10, INPUT);
  pinMode(12, INPUT);
  pinMode(LED_BUILTIN, OUTPUT);
  pinMode(buzzer, OUTPUT);
  Serial.begin(9600);
}

void loop()
{
  // read the state of the pushbutton value
  buttonState = digitalRead(10);
  buttonState2 = digitalRead(12);
  // check if pushbutton is pressed.  if it is, the
  // buttonState is HIGH
  if (buttonState == HIGH) {
    // turn LED on
    digitalWrite(LED_BUILTIN, HIGH);
    Serial.print("Contribute BD ");
    Serial.print(total1+one);
    Serial.println("?");
    total1 = total1 + one;
    Serial.print("total1 ");
    Serial.println(total1);
    //tone(buzzer, 1000);
  delay(500);
  //noTone(buzzer);
  delay(500);
  } else {
    // turn LED off
    digitalWrite(LED_BUILTIN, LOW);
    digitalWrite(buzzer,LOW);
  }
  delay(10); // Delay a little bit to improve simulation performance

  if(buttonState2 == HIGH && total1<=0)
  {
    Serial.println("Please choose how much you want to contribute by pressing the correct buttons.");
    total1 = 0;
    delay(1000);
  }
  else if (buttonState2 == HIGH) {
    // turn LED on
    digitalWrite(LED_BUILTIN, HIGH);
    total1 = total1 - 1;
    Serial.println("Amount deleted.");
    Serial.print("Total = ");
    Serial.println(total1);
    //tone(buzzer, 1000);
  delay(500);
  //noTone(buzzer);
  delay(500);
  } else {
    // turn LED off
    digitalWrite(LED_BUILTIN, LOW);
    digitalWrite(buzzer,LOW);
  }


  delay(10); // Delay a little bit to improve simulation performance
}
Sara provided us with the photoresistor light sensor codes and we modified it to make it appropriate with the final project. This is the code:
int lightPin = A0;

#include <SPI.h>

void setup()
{
  Serial.begin(9600);
  pinMode(lightPin, INPUT);
}

void loop()
{
  int lightStatus = analogRead(lightPin);

  if (lightStatus >= 400)
  {
    digitalWrite(ledPin, LOW);
    Serial.print("It is dark");
    Serial.println(lightStatus);

  }
}
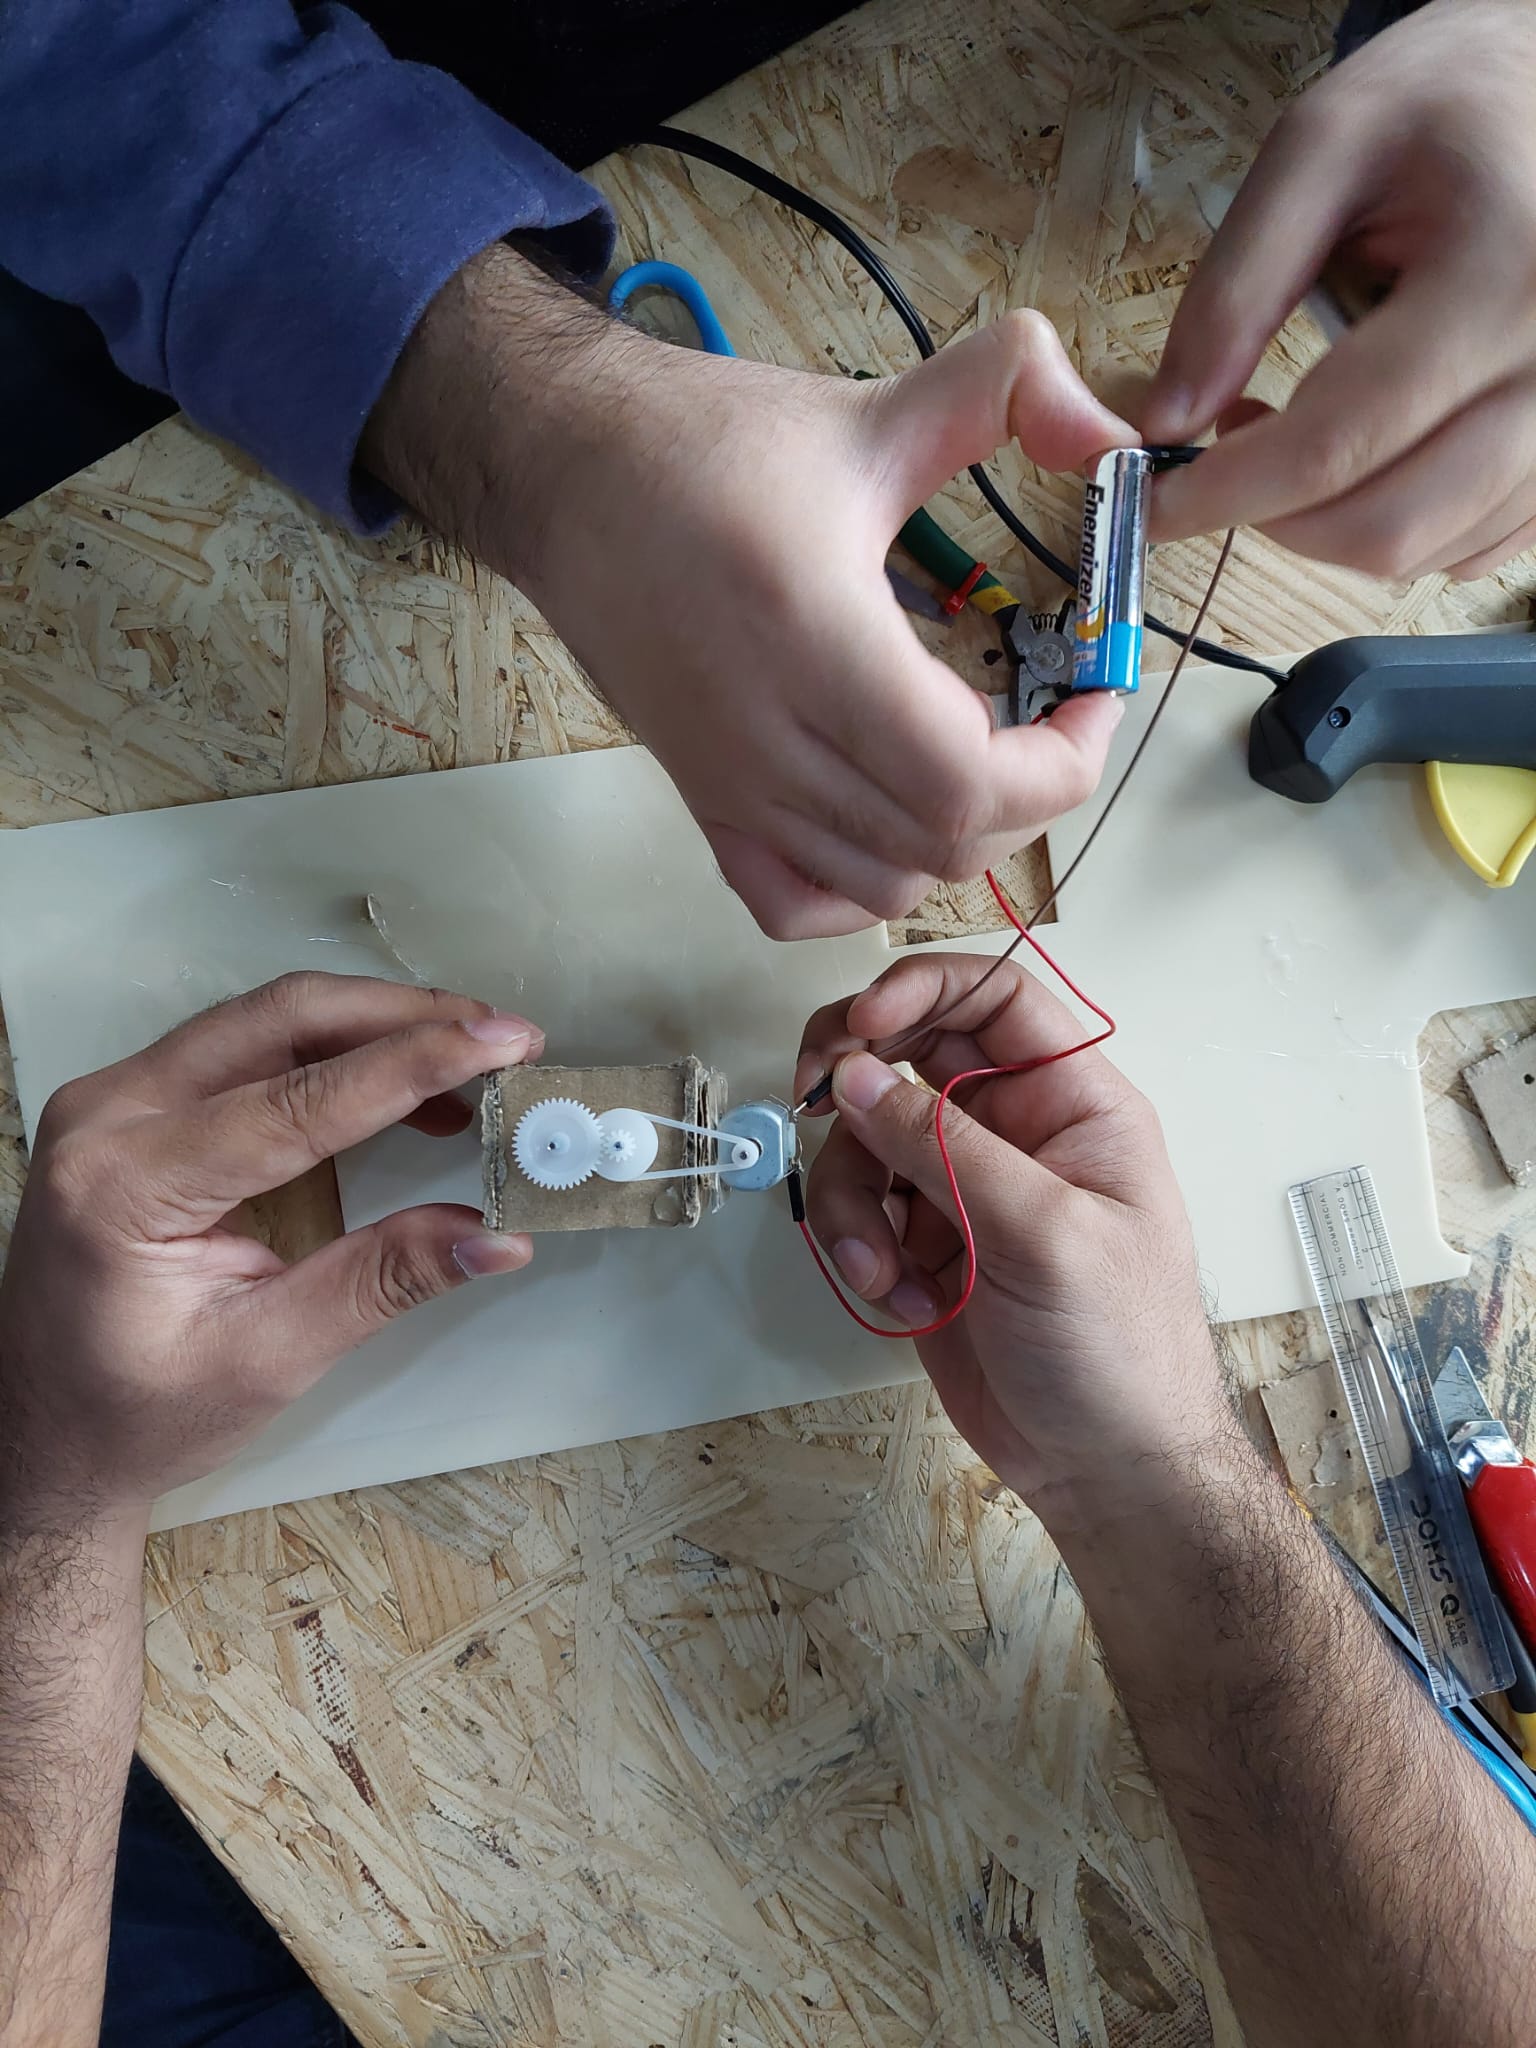
Then, we tried to connect the dc motor to the microcontroller, but it did not work because it requires an H-Bridge which was suggested but our instructors. It can be used to control the direction and speed of the motor.
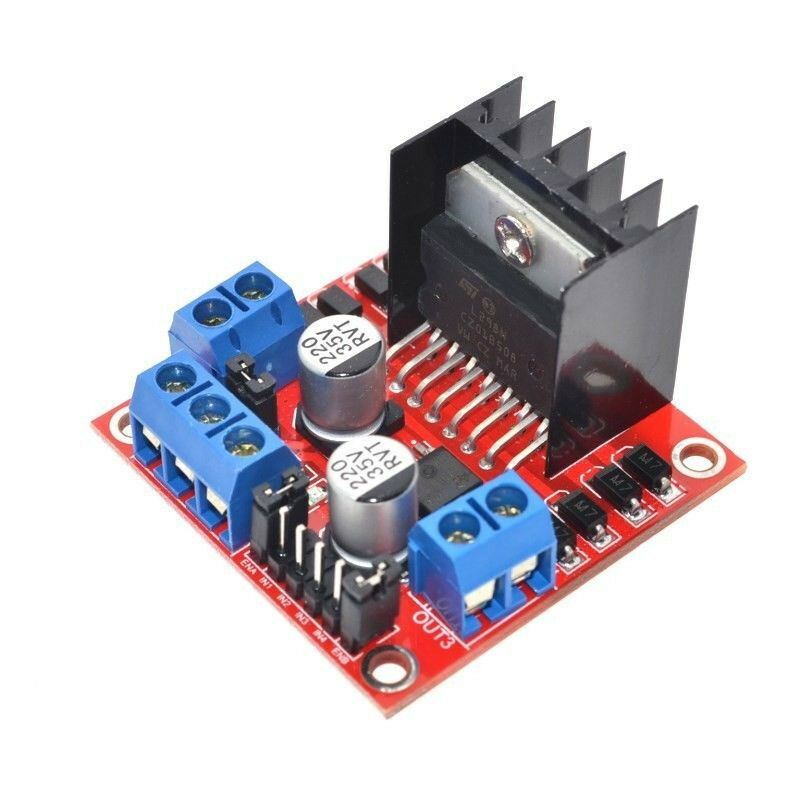
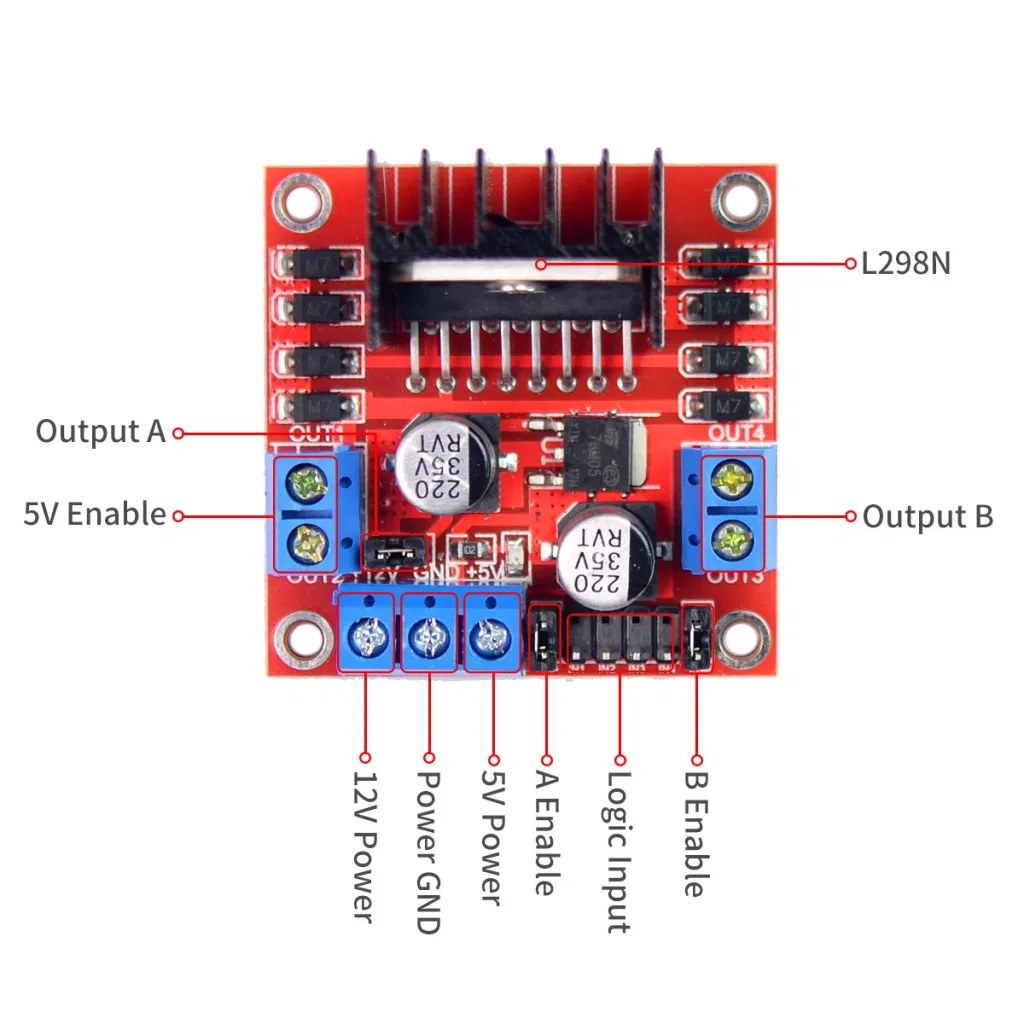
Picture Sources:
This is the connection.
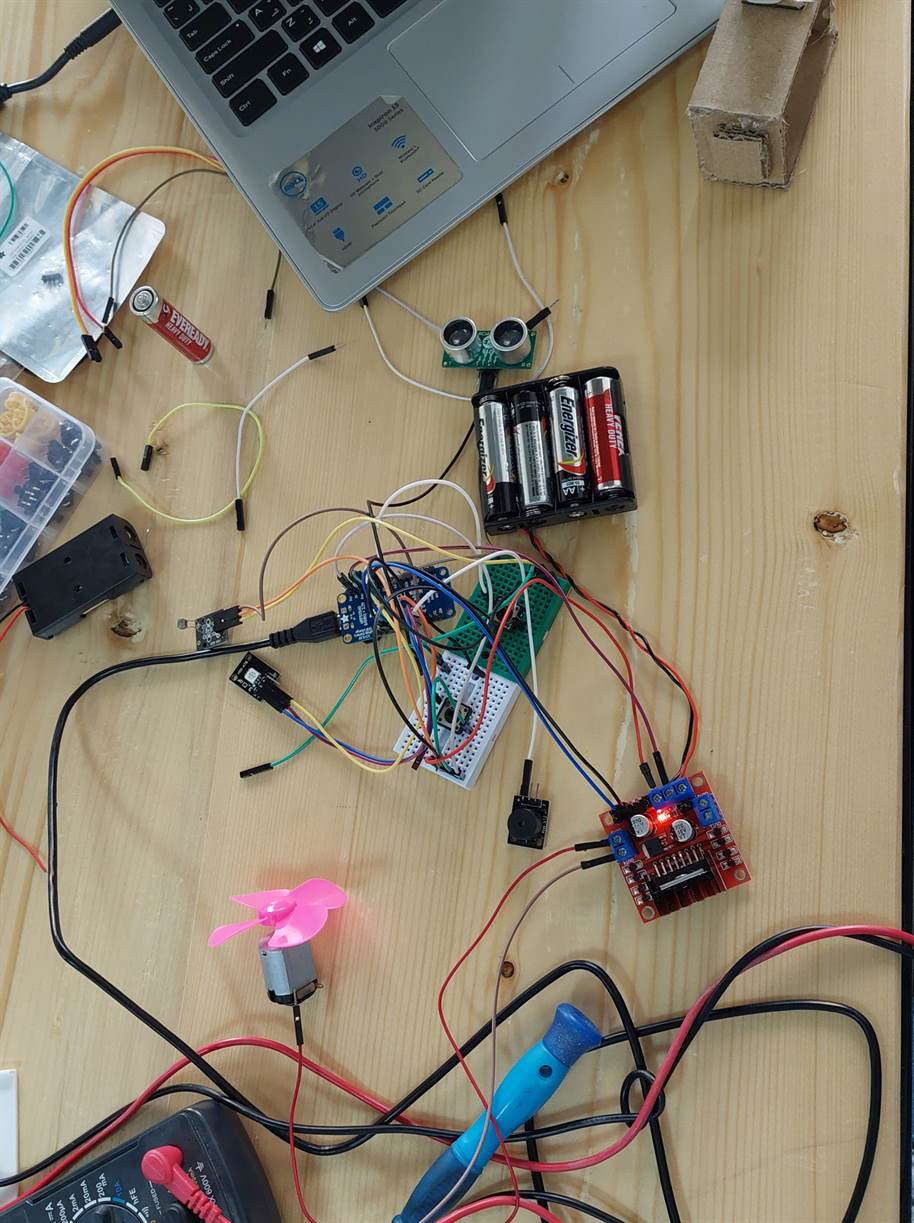
This is the code.
#include <SPI.h>

int lightPin = A0;
// Motor B connections
int enB;
int in3 = 13;
int in4 = 12;
int value = 0;

void setup() {

  Serial.begin(9600);
  pinMode(lightPin, INPUT);
 // Set all the motor control pins to outputs
  pinMode(enB, OUTPUT);
  pinMode(in3, OUTPUT);
  pinMode(in4, OUTPUT);

  // Turn off motors - Initial state
  digitalWrite(in3, LOW);
  digitalWrite(in4, LOW);
}

void loop() {
  value = analogRead(lightPin);
  Serial.println(value, DEC);
  // low value = bright place
  // high value = dark place
  if(value>400)
  {
    digitalWrite(in3, LOW);
  digitalWrite(in4, HIGH);
  delay(100);
  digitalWrite(in3, LOW);
  digitalWrite(in4, HIGH);
  }
  else
  {
    digitalWrite(in3, LOW);
  digitalWrite(in4, LOW);
  }
  delay(100);
}
Then, we searched for a code for the monitor. To use it, we had to install some libraries.
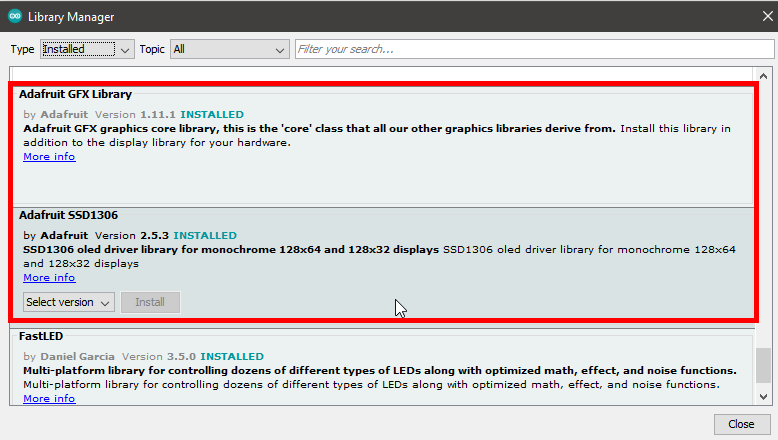
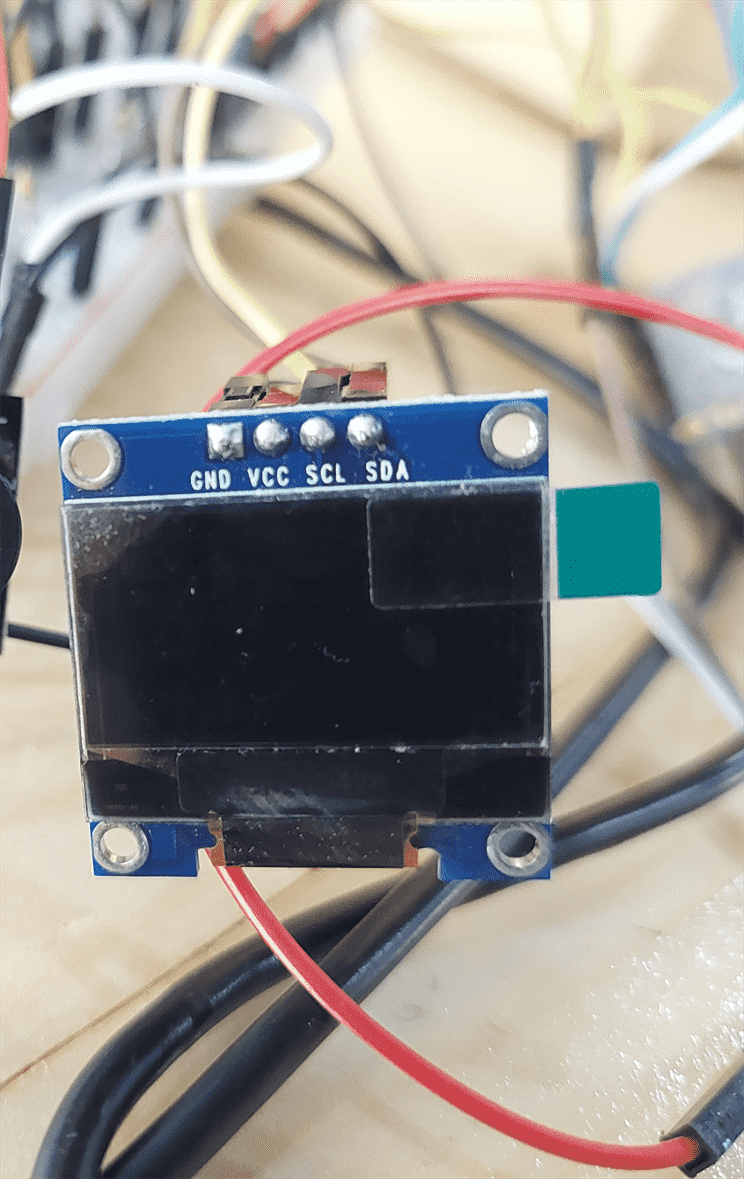
This is the monitor that we used.
This is a code for the test:
/*********
  Rui Santos
  Complete project details at https://randomnerdtutorials.com
*********/
#include <SPI.h>
#include <Wire.h>
#include <Adafruit_GFX.h>
#include <Adafruit_SSD1306.h>
#include <Fonts/FreeSerif9pt7b.h>

#define SCREEN_WIDTH 128 // OLED display width, in pixels
#define SCREEN_HEIGHT 64 // OLED display height, in pixels

// Declaration for an SSD1306 display connected to I2C (SDA, SCL pins)
Adafruit_SSD1306 display(SCREEN_WIDTH, SCREEN_HEIGHT, &Wire, -1);

void setup() {
  Serial.begin(115200);

  if(!display.begin(SSD1306_SWITCHCAPVCC, 0x3C)) {
    Serial.println("SSD1306 allocation failed");
    for(;;);
  }
  delay(2000);

  display.setFont(&FreeSerif9pt7b);
  display.clearDisplay();
  display.setTextSize(1);
  display.setTextColor(WHITE);
  display.setCursor(0,50);
  display.println("Enter Amount in BD");
  display.display();
  delay(2000);
}
void loop() {

}
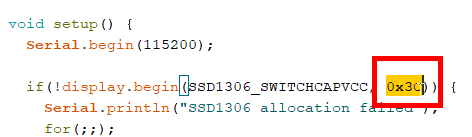
Since there are different OLED monitors, we changed the address to 0x3C in the code.
Then, I started working on the RGB strips. We used an Addressable RGB (ARGB) strips which needs 5V instead of 12V like the regular RGB strips.
First, I needed to install a library for Arduino IDE.
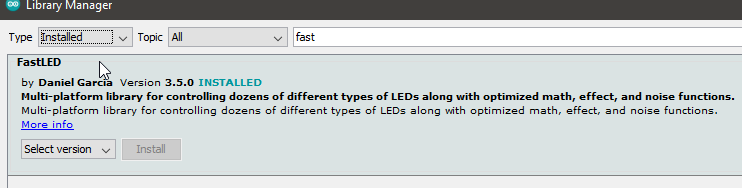
After this, I used a code that is available in the examples in Arduino IDE. Also, since there are different types of ARGB strips, I had to changed the type in the code to WS2812B which is the ARGB strips that we used.
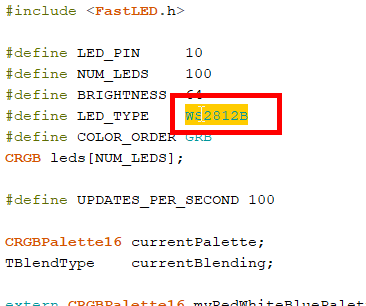
The test code is below.
#include <FastLED.h>

#define LED_PIN     10
#define NUM_LEDS    100
#define BRIGHTNESS  64
#define LED_TYPE    WS2812B
#define COLOR_ORDER GRB
CRGB leds[NUM_LEDS];

#define UPDATES_PER_SECOND 100

CRGBPalette16 currentPalette;
TBlendType    currentBlending;

extern CRGBPalette16 myRedWhiteBluePalette;
extern const TProgmemPalette16 myRedWhiteBluePalette_p PROGMEM;


void setup() {
  delay( 3000 ); // power-up safety delay
    FastLED.addLeds<LED_TYPE, LED_PIN, COLOR_ORDER>(leds, NUM_LEDS).setCorrection( TypicalLEDStrip );
    FastLED.setBrightness(  BRIGHTNESS );

    /*currentPalette = myRedWhiteBluePalette_p;
    currentBlending = LINEARBLEND;*/

}

void loop() {

  currentPalette = myRedWhiteBluePalette_p;
    currentBlending = LINEARBLEND;

  ChangePalettePeriodically();

    static uint8_t startIndex = 0;
    startIndex = startIndex + 1; // motion speed

    FillLEDsFromPaletteColors( startIndex);

    FastLED.show();
    FastLED.delay(1000 / UPDATES_PER_SECOND);

}

void FillLEDsFromPaletteColors( uint8_t colorIndex)
{
    uint8_t brightness = 255;

    for( int i = 0; i < NUM_LEDS; ++i) {
        leds[i] = ColorFromPalette( currentPalette, colorIndex, brightness, currentBlending);
        colorIndex += 3;
    }
}

void ChangePalettePeriodically()
{
    uint8_t secondHand = (millis() / 1000) % 60;
    static uint8_t lastSecond = 99;

    if( lastSecond != secondHand) {
        lastSecond = secondHand;
        /*if( secondHand ==  0)  { currentPalette = RainbowColors_p;         currentBlending = LINEARBLEND; }
        if( secondHand == 10)  { currentPalette = RainbowStripeColors_p;   currentBlending = NOBLEND;  }
        if( secondHand == 15)  { currentPalette = RainbowStripeColors_p;   currentBlending = LINEARBLEND; }
        if( secondHand == 20)  { SetupPurpleAndGreenPalette();             currentBlending = LINEARBLEND; }
        if( secondHand == 25)  { SetupTotallyRandomPalette();              currentBlending = LINEARBLEND; }
        if( secondHand == 30)  { SetupBlackAndWhiteStripedPalette();       currentBlending = NOBLEND; }
        if( secondHand == 35)  { SetupBlackAndWhiteStripedPalette();       currentBlending = LINEARBLEND; }*/
        //if( secondHand == 0)  { currentPalette = CloudColors_p;           currentBlending = LINEARBLEND; }
        /*if( secondHand == 45)  { currentPalette = PartyColors_p;           currentBlending = LINEARBLEND; }
        if( secondHand == 50)  { currentPalette = myRedWhiteBluePalette_p; currentBlending = NOBLEND;  }
        if( secondHand == 55)  { currentPalette = myRedWhiteBluePalette_p; currentBlending = LINEARBLEND; }*/
    }
}

// This function fills the palette with totally random colors.
void SetupTotallyRandomPalette()
{
    for( int i = 0; i < 16; ++i) {
        currentPalette[i] = CHSV( random8(), 255, random8());
    }
}

// This function sets up a palette of black and white stripes,
// using code.  Since the palette is effectively an array of
// sixteen CRGB colors, the various fill_* functions can be used
// to set them up.
void SetupBlackAndWhiteStripedPalette()
{
    // 'black out' all 16 palette entries...
    fill_solid( currentPalette, 16, CRGB::Black);
    // and set every fourth one to white.
    currentPalette[0] = CRGB::White;
    currentPalette[4] = CRGB::White;
    currentPalette[8] = CRGB::White;
    currentPalette[12] = CRGB::White;

}

// This function sets up a palette of purple and green stripes.
void SetupPurpleAndGreenPalette()
{
    CRGB purple = CHSV( HUE_PURPLE, 255, 255);
    CRGB green  = CHSV( HUE_GREEN, 255, 255);
    CRGB black  = CRGB::Black;

    currentPalette = CRGBPalette16(
                                   green,  green,  black,  black,
                                   purple, purple, black,  black,
                                   green,  green,  black,  black,
                                   purple, purple, black,  black );
}


// This example shows how to set up a static color palette
// which is stored in PROGMEM (flash), which is almost always more
// plentiful than RAM.  A static PROGMEM palette like this
// takes up 64 bytes of flash.
const TProgmemPalette16 myRedWhiteBluePalette_p PROGMEM =
{
    //CRGB::Red,
    CRGB::Gray, // 'white' is too bright compared to red and blue
    //CRGB::Blue,
    CRGB::Black,

    //CRGB::Red,
    CRGB::Gray,
    //CRGB::Blue,
    CRGB::Black,

    //CRGB::Red,
    //CRGB::Red,
    CRGB::Gray,
    CRGB::Gray,
    //CRGB::Blue,
    //CRGB::Blue,
    CRGB::Black,
    CRGB::Black
};
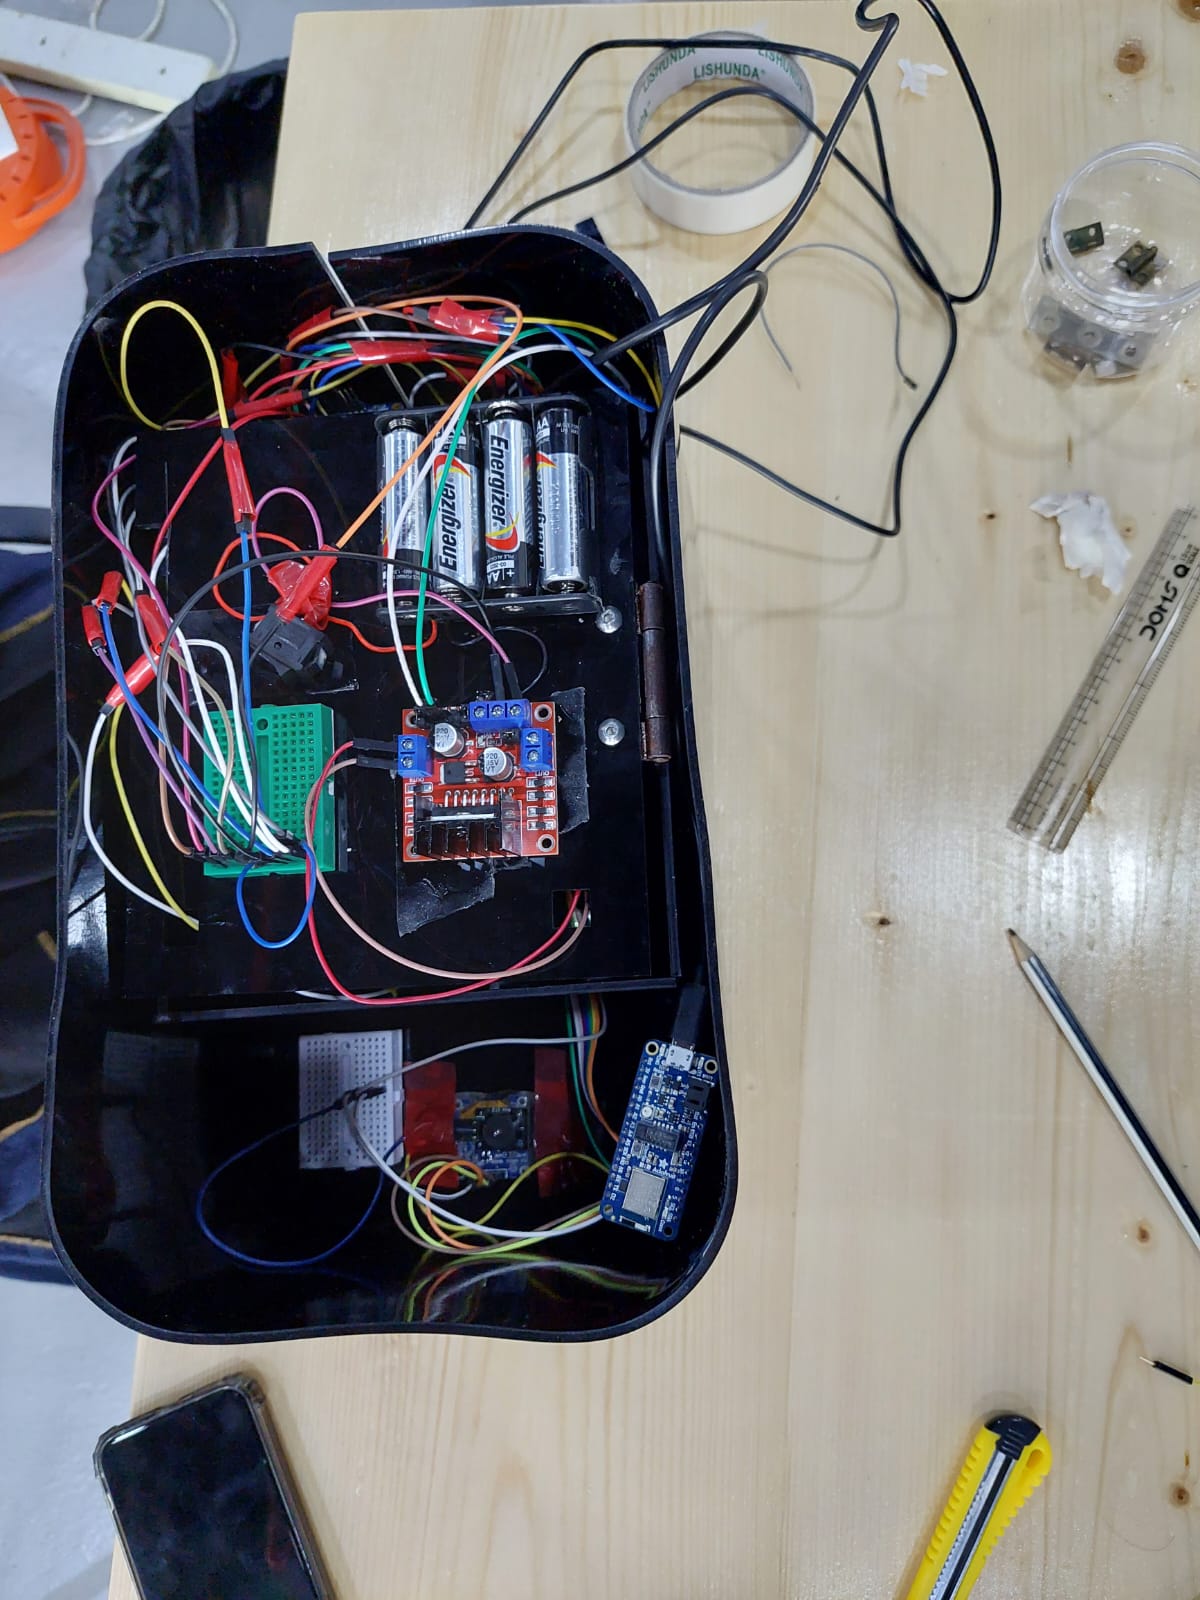
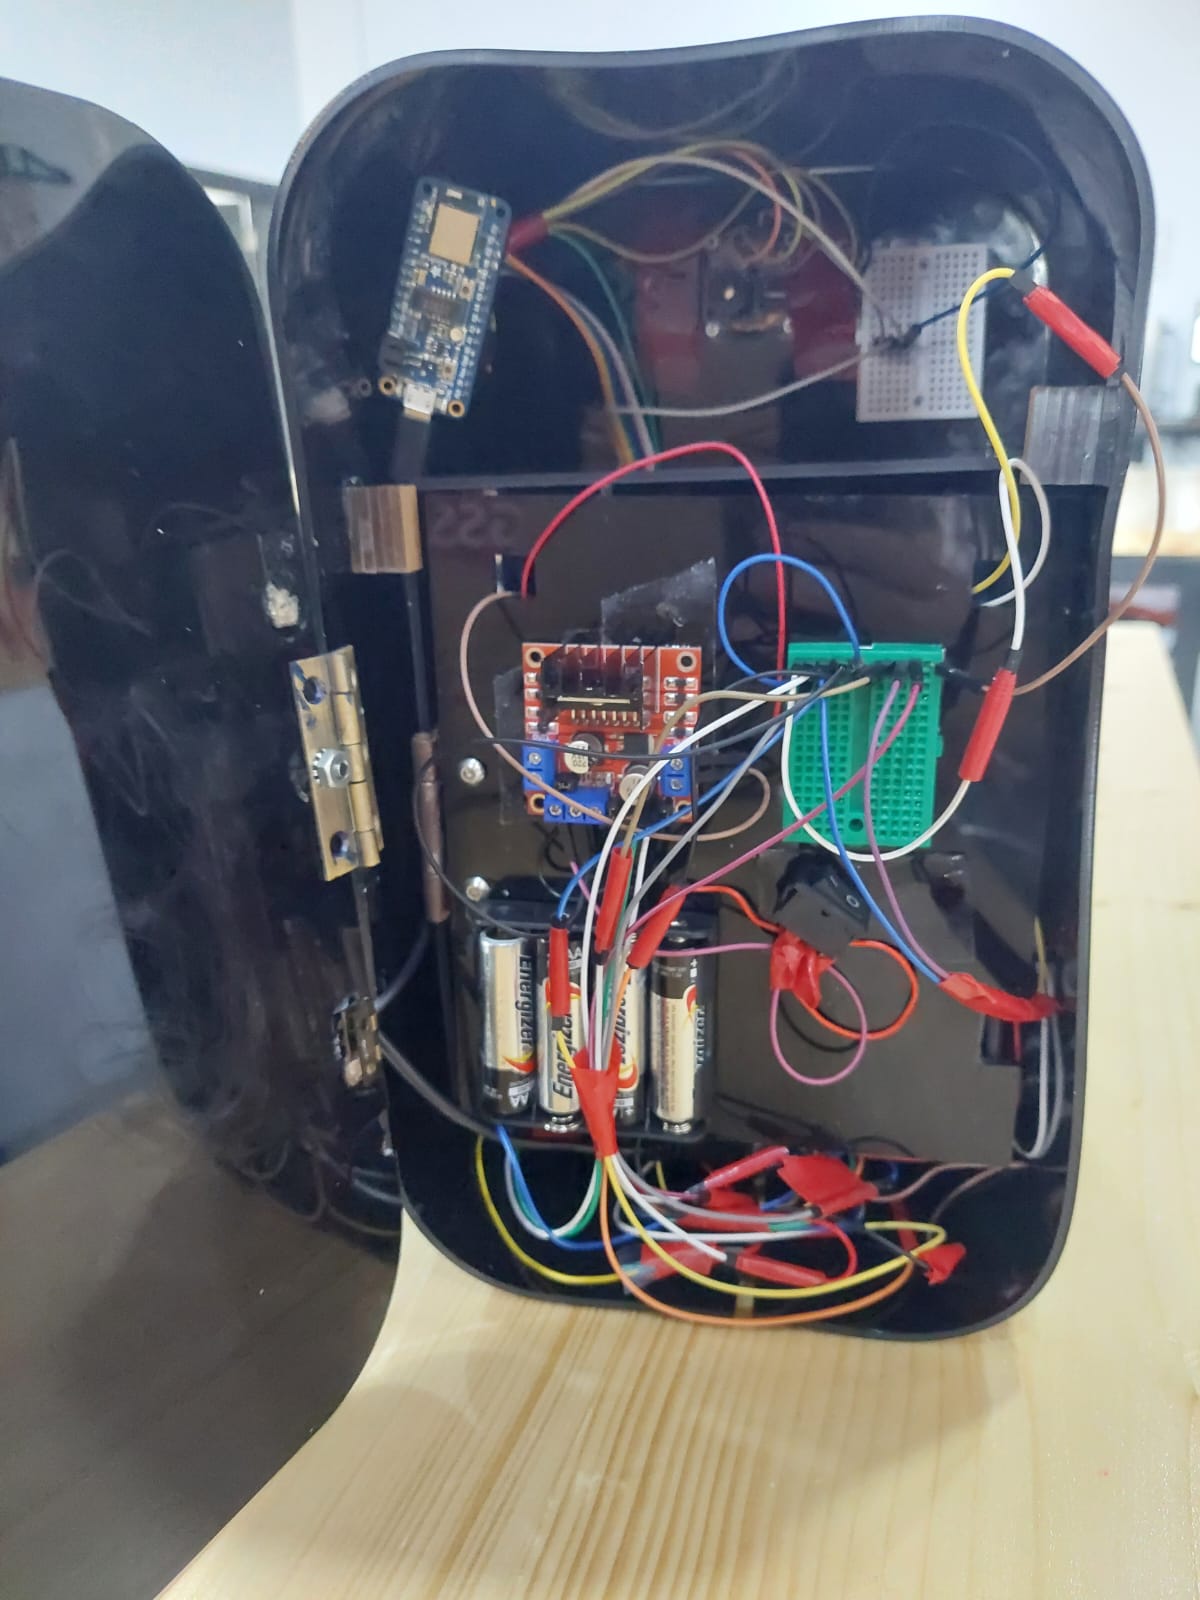
Finally, we tried to assemble the electronics together, but we faced a problem that we did not consider which we don’t have enough pins in the microcontroller. After thinking, we decided to use two microcontrollers, one that will turn on the buttons, the monitor, and the buzzer. The other one will turn on the ARGB strips, the motor, the ultrasonic sensor and the photoresistor sensor.
To provide light for the photoresistor sensor, we used an RGB sensor and we connected only the red and ground pins to the common ground.
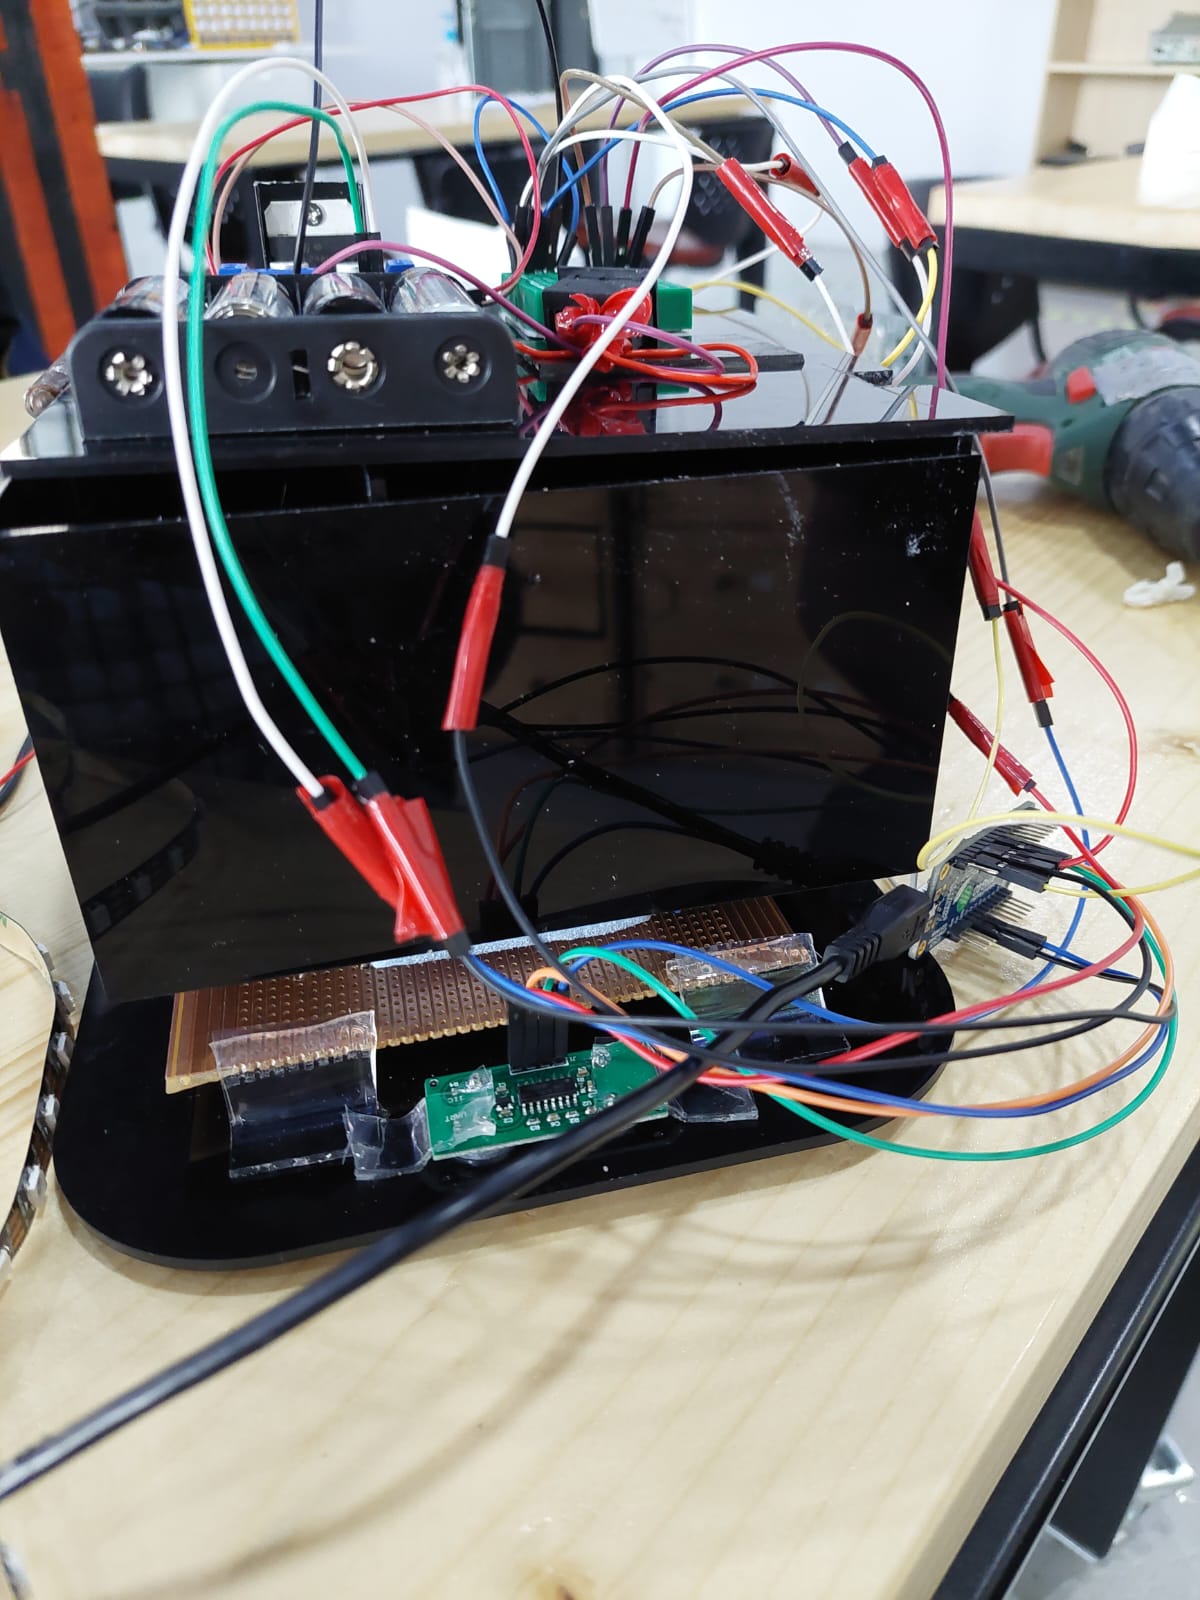
Also, we had to find a way to minimize the used wires as much as possible because it was a disaster when we were testing.
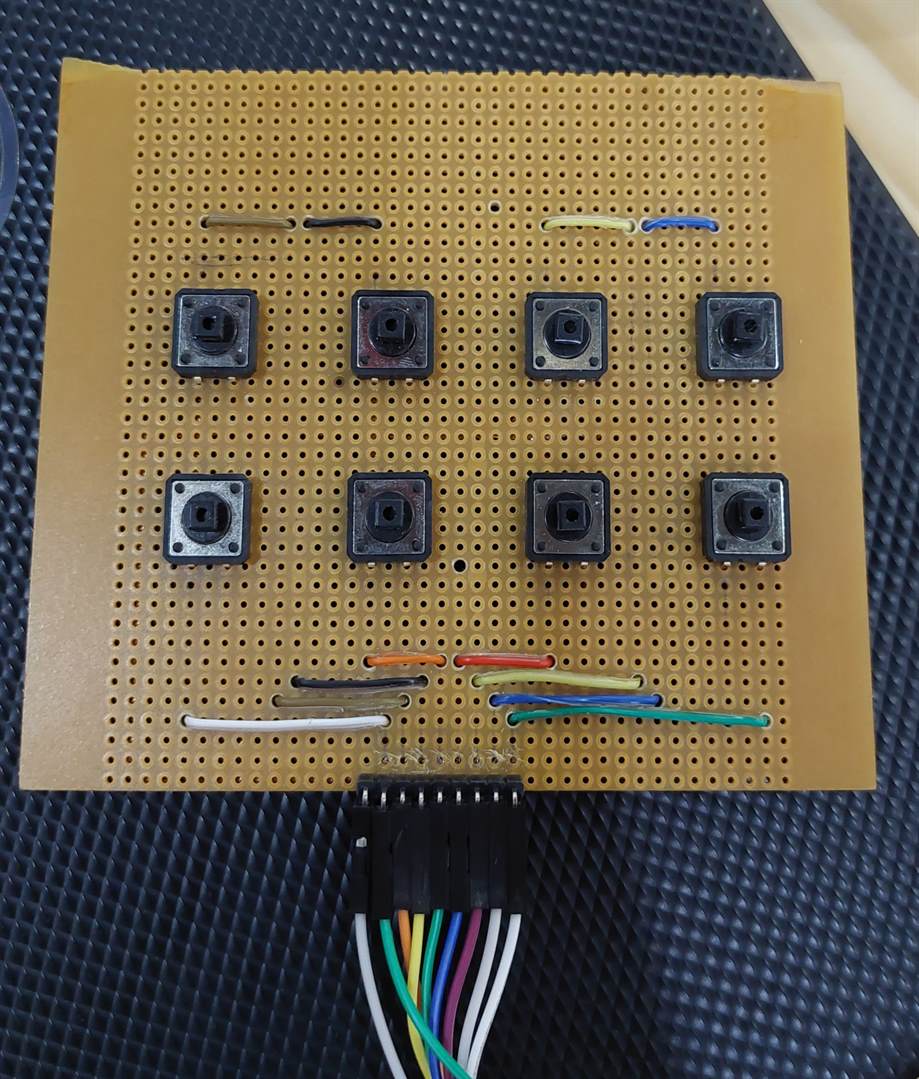
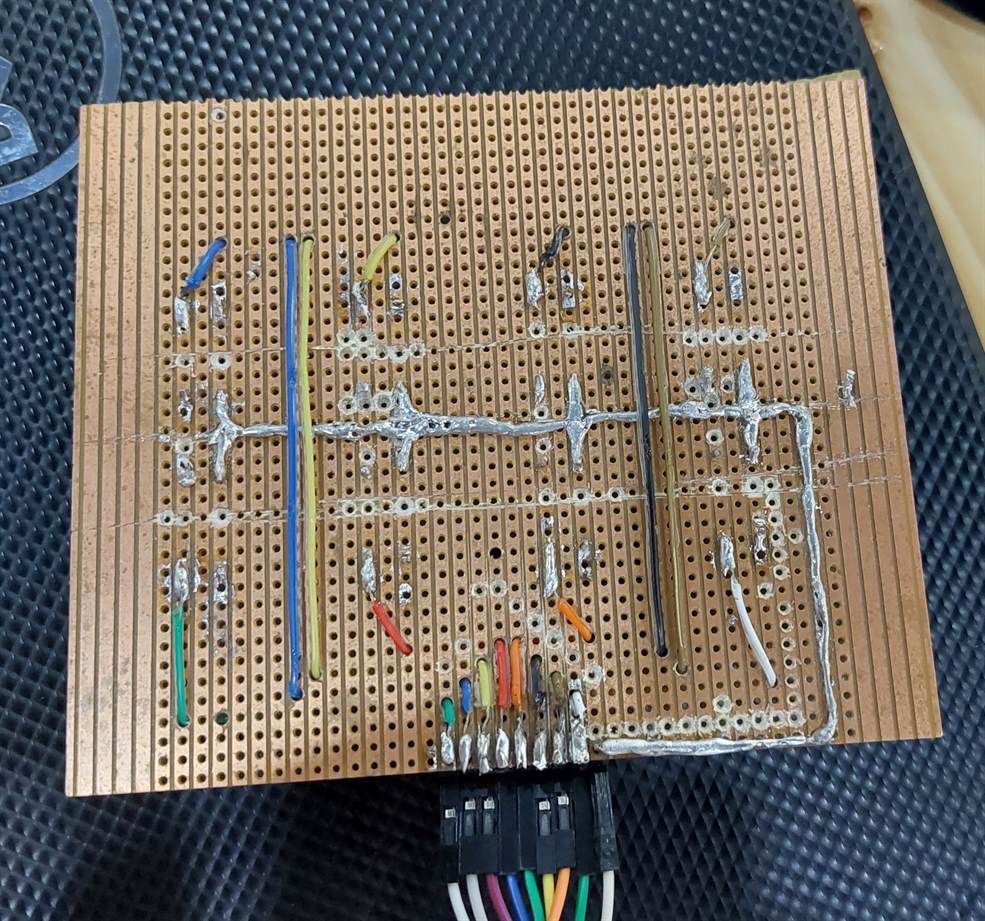
So, Haitham suggested that instead of using the voltage, we can use the buttons by connecting the ground and the pins only. He also showed us a previous work done by him that has a very nice cable management by passing the wires from the bottom of the Veroboard to the top. To do this, we had to do a lot of soldering and we needed to make sure that there are not connections between the buttons that will cause a problem. So we made holes to disconnect the buttons and we made a ground line using the soldering. Iftikhar did the soldering and it turned out to be much better than expected.
This took from us a lot of time but we found a very good result.
Now, since we did not use the voltage, we changed the input of the buttons in the code to INPUT_PULLUP and we reversed the HIGH and LOW in the if else conditions.
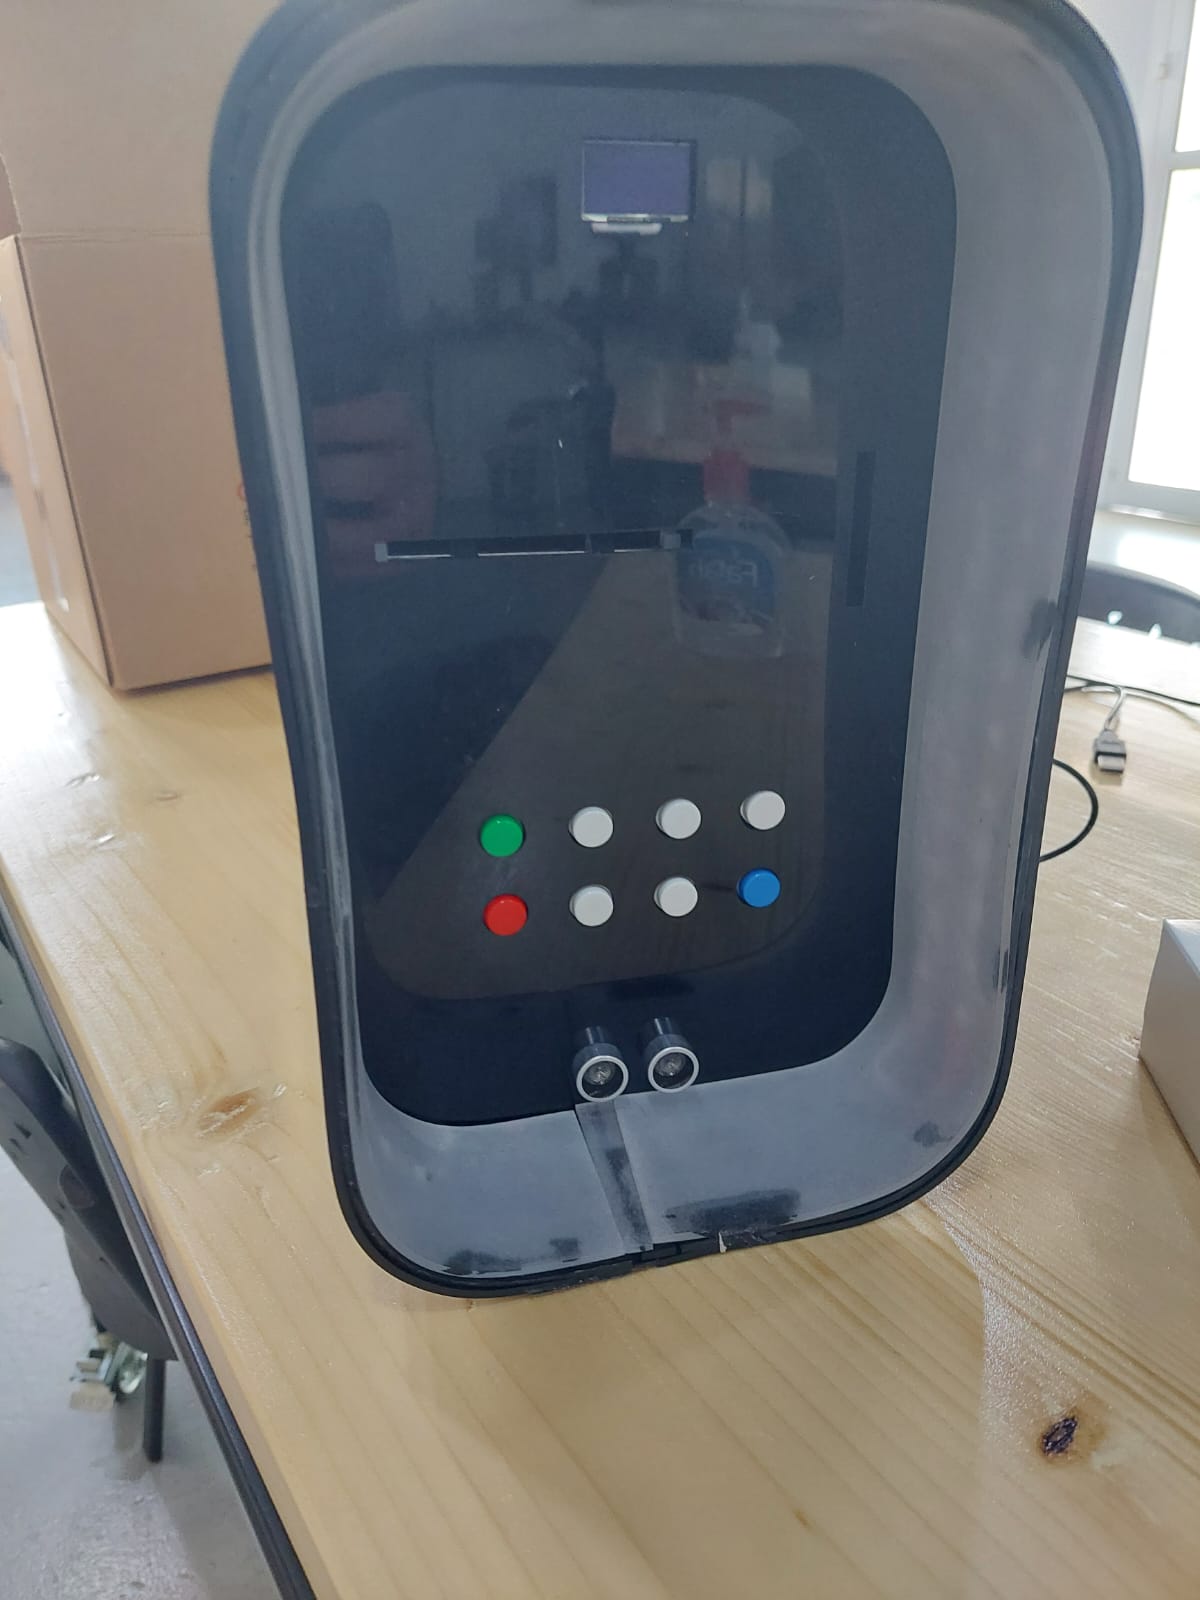
We made 8 buttons with the below functions:
These buttons to choose the amount:
- BD 0.1 button.
- BD 0.5 button.
- BD 1 button.
- BD 5 button.
- BD 10 button.
- BD 20 button.
These buttons to confirm or clear.
- Clear button:
- It will clear every amount chosen without affecting the total amount saved in the machine.
- Confirm button:
- It will confirm the contributed amount and will clear the chosen amount so the next user can contribute again with. Also, It will print the total contributed money available in the machine in the serial monitor using Arduino IDE but it won't print it on the screen. If everything is correct and the contribution went successfully, the buzzer will give a different sound for confirmation. Then, the monitor will display "Enter Amount" so the next user can contribute.
At first, I wanted the clear button to delete the last amount chosen but I couldn’t find a way to do it, so I just kept as a clear button.
I also wanted to write a condition in which if no one is close by, the monitor will turn off. To do this I will have to find a way to connect the microcontrollers together which will takes more time.
1.5 The design
Refer to my partner’s page for the files.
We used the acrylic for the enclosure (case). We cut it using the laser cutter machine.
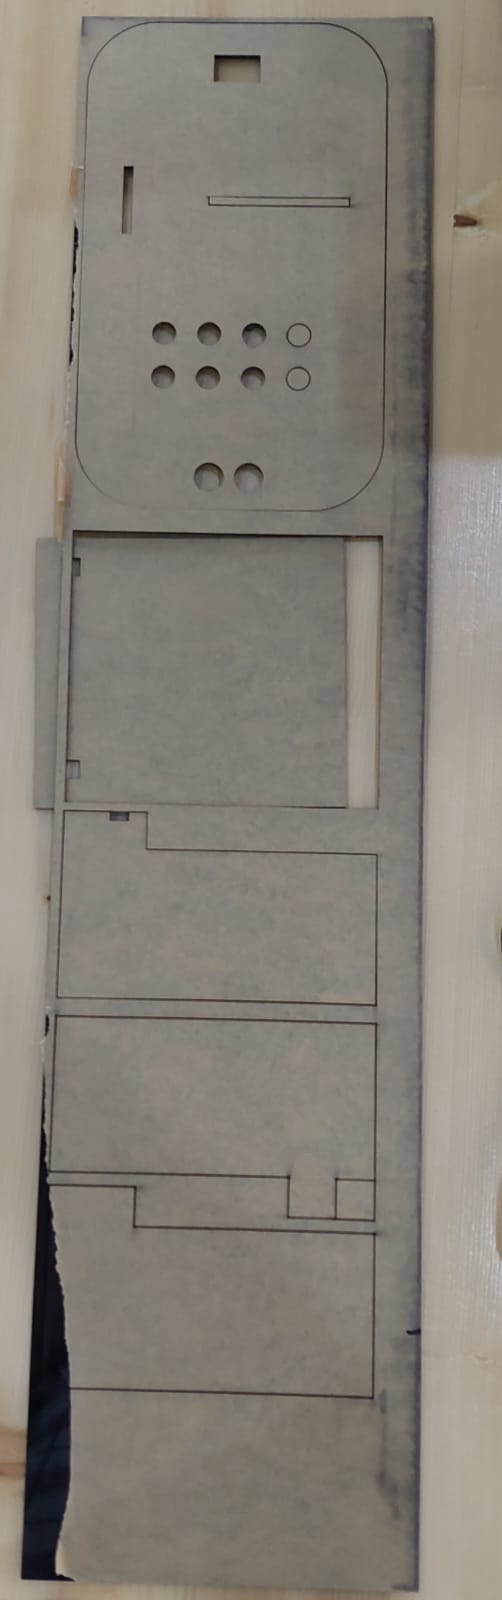
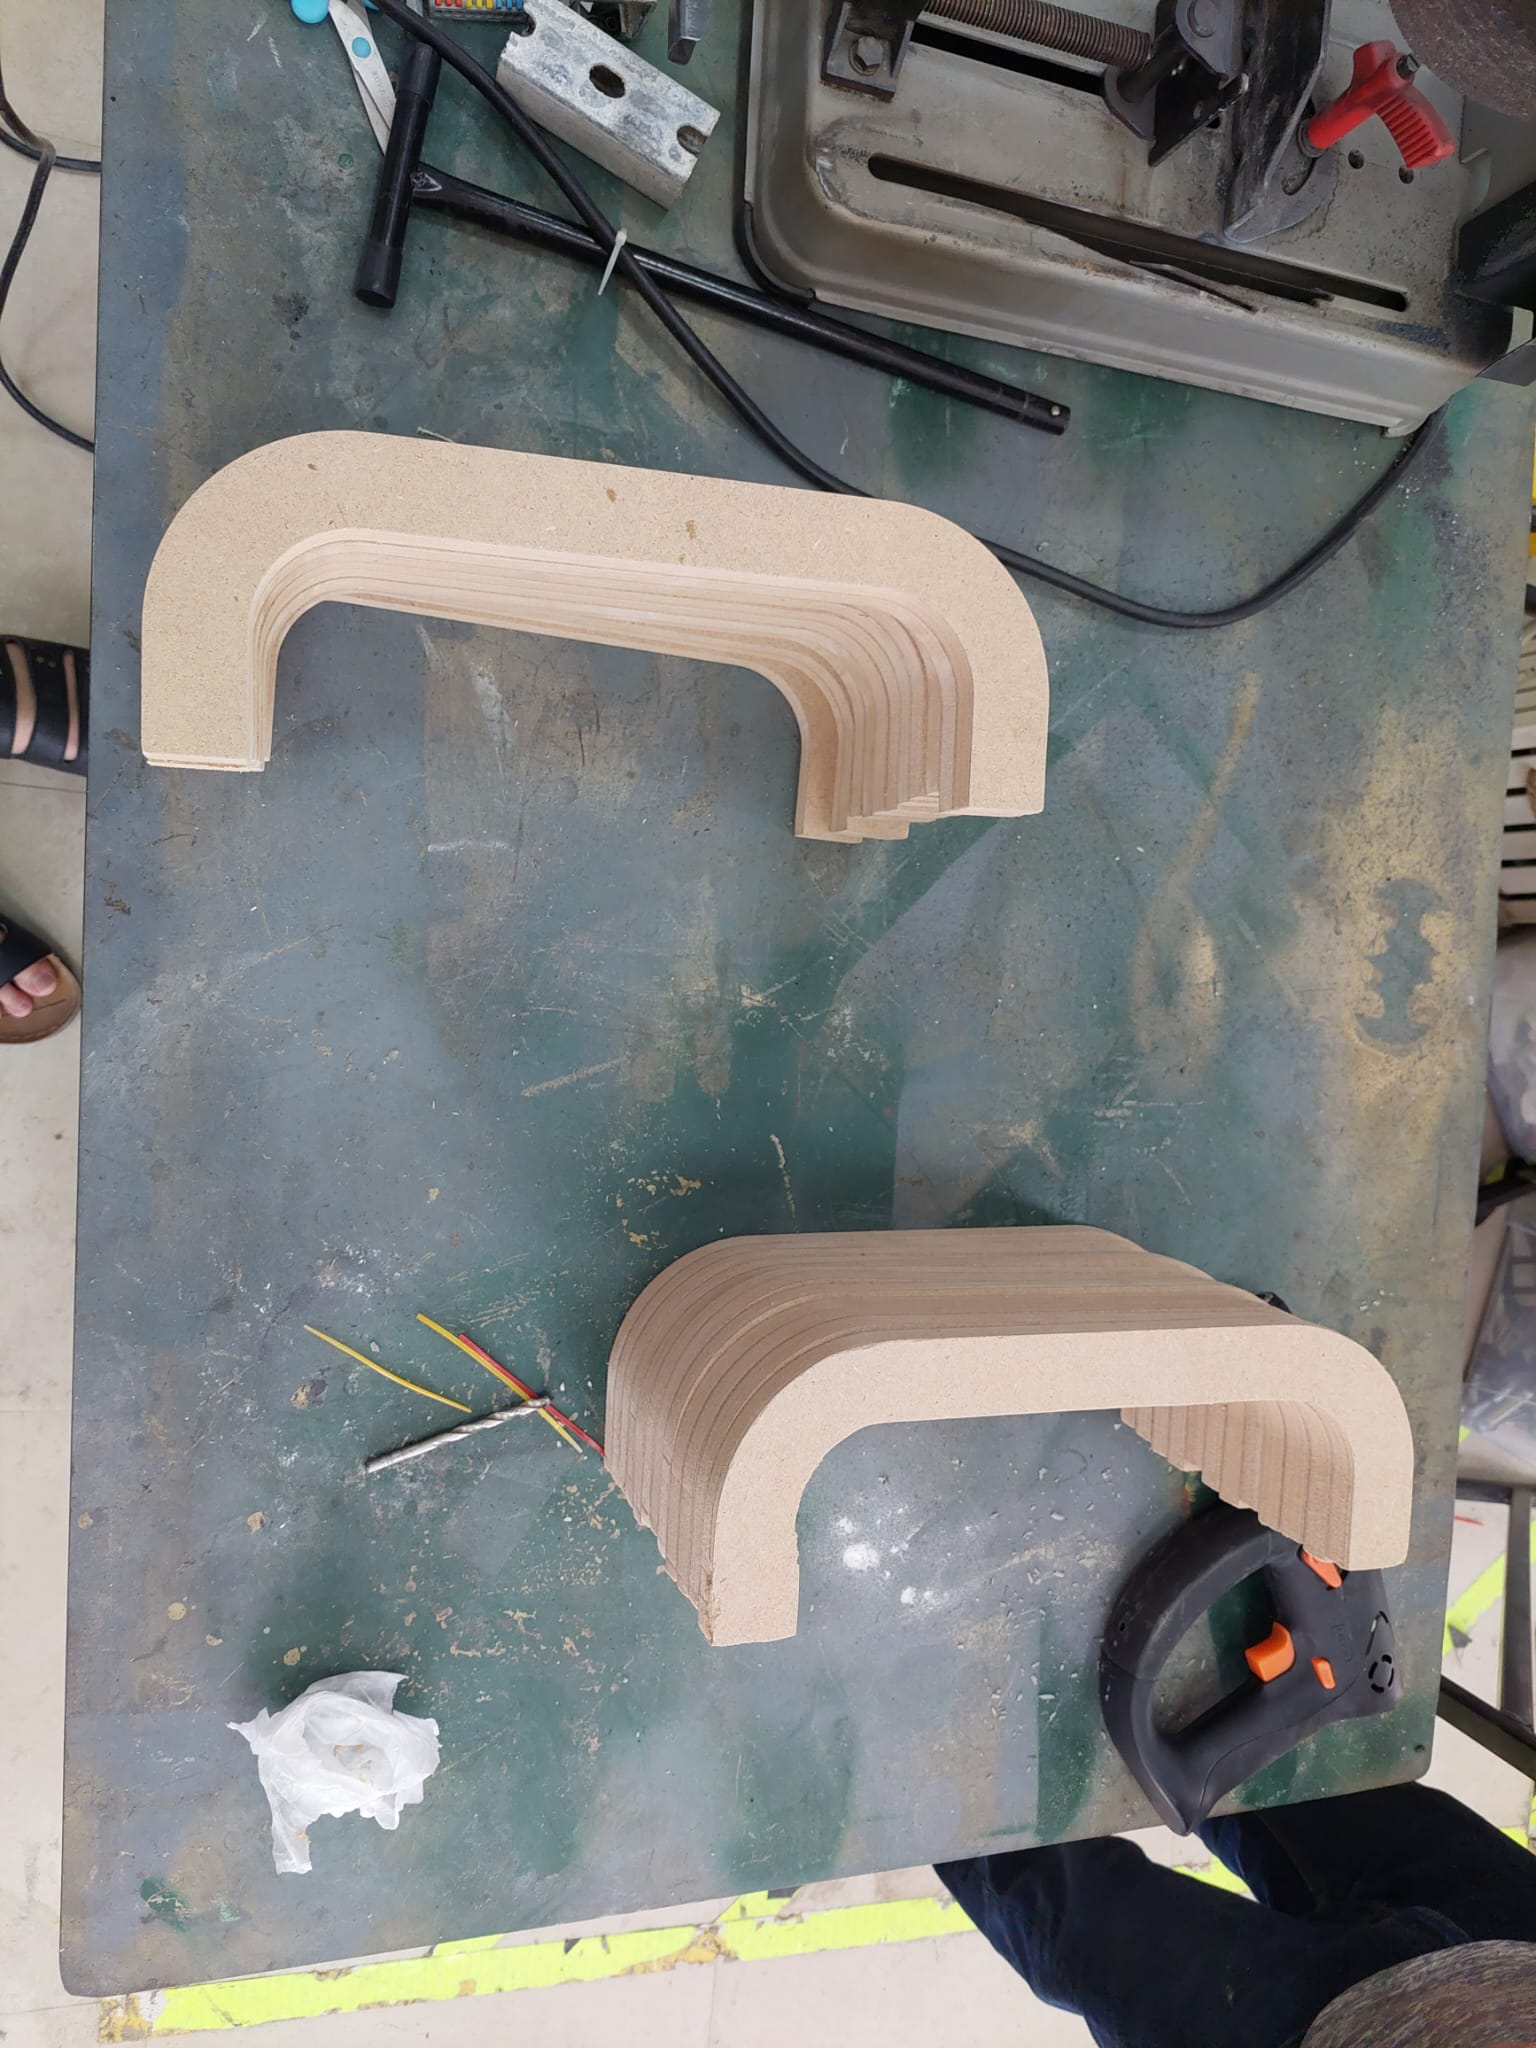
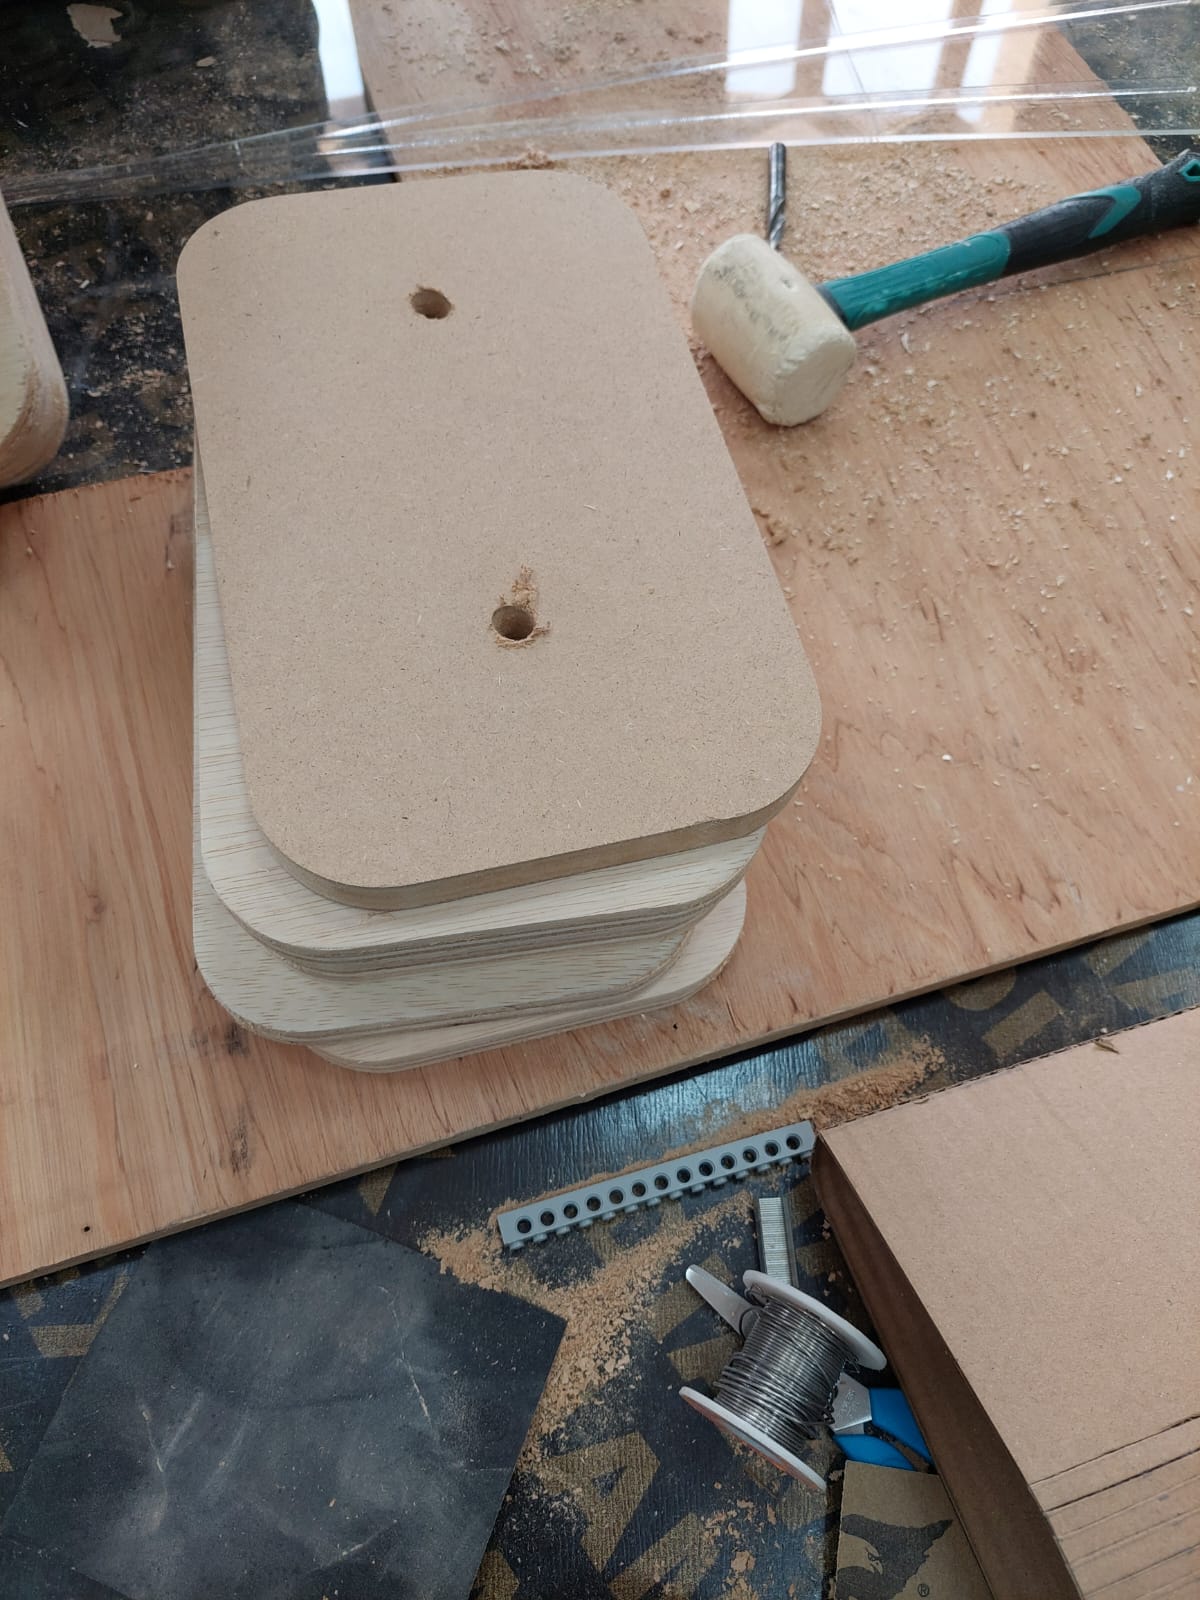
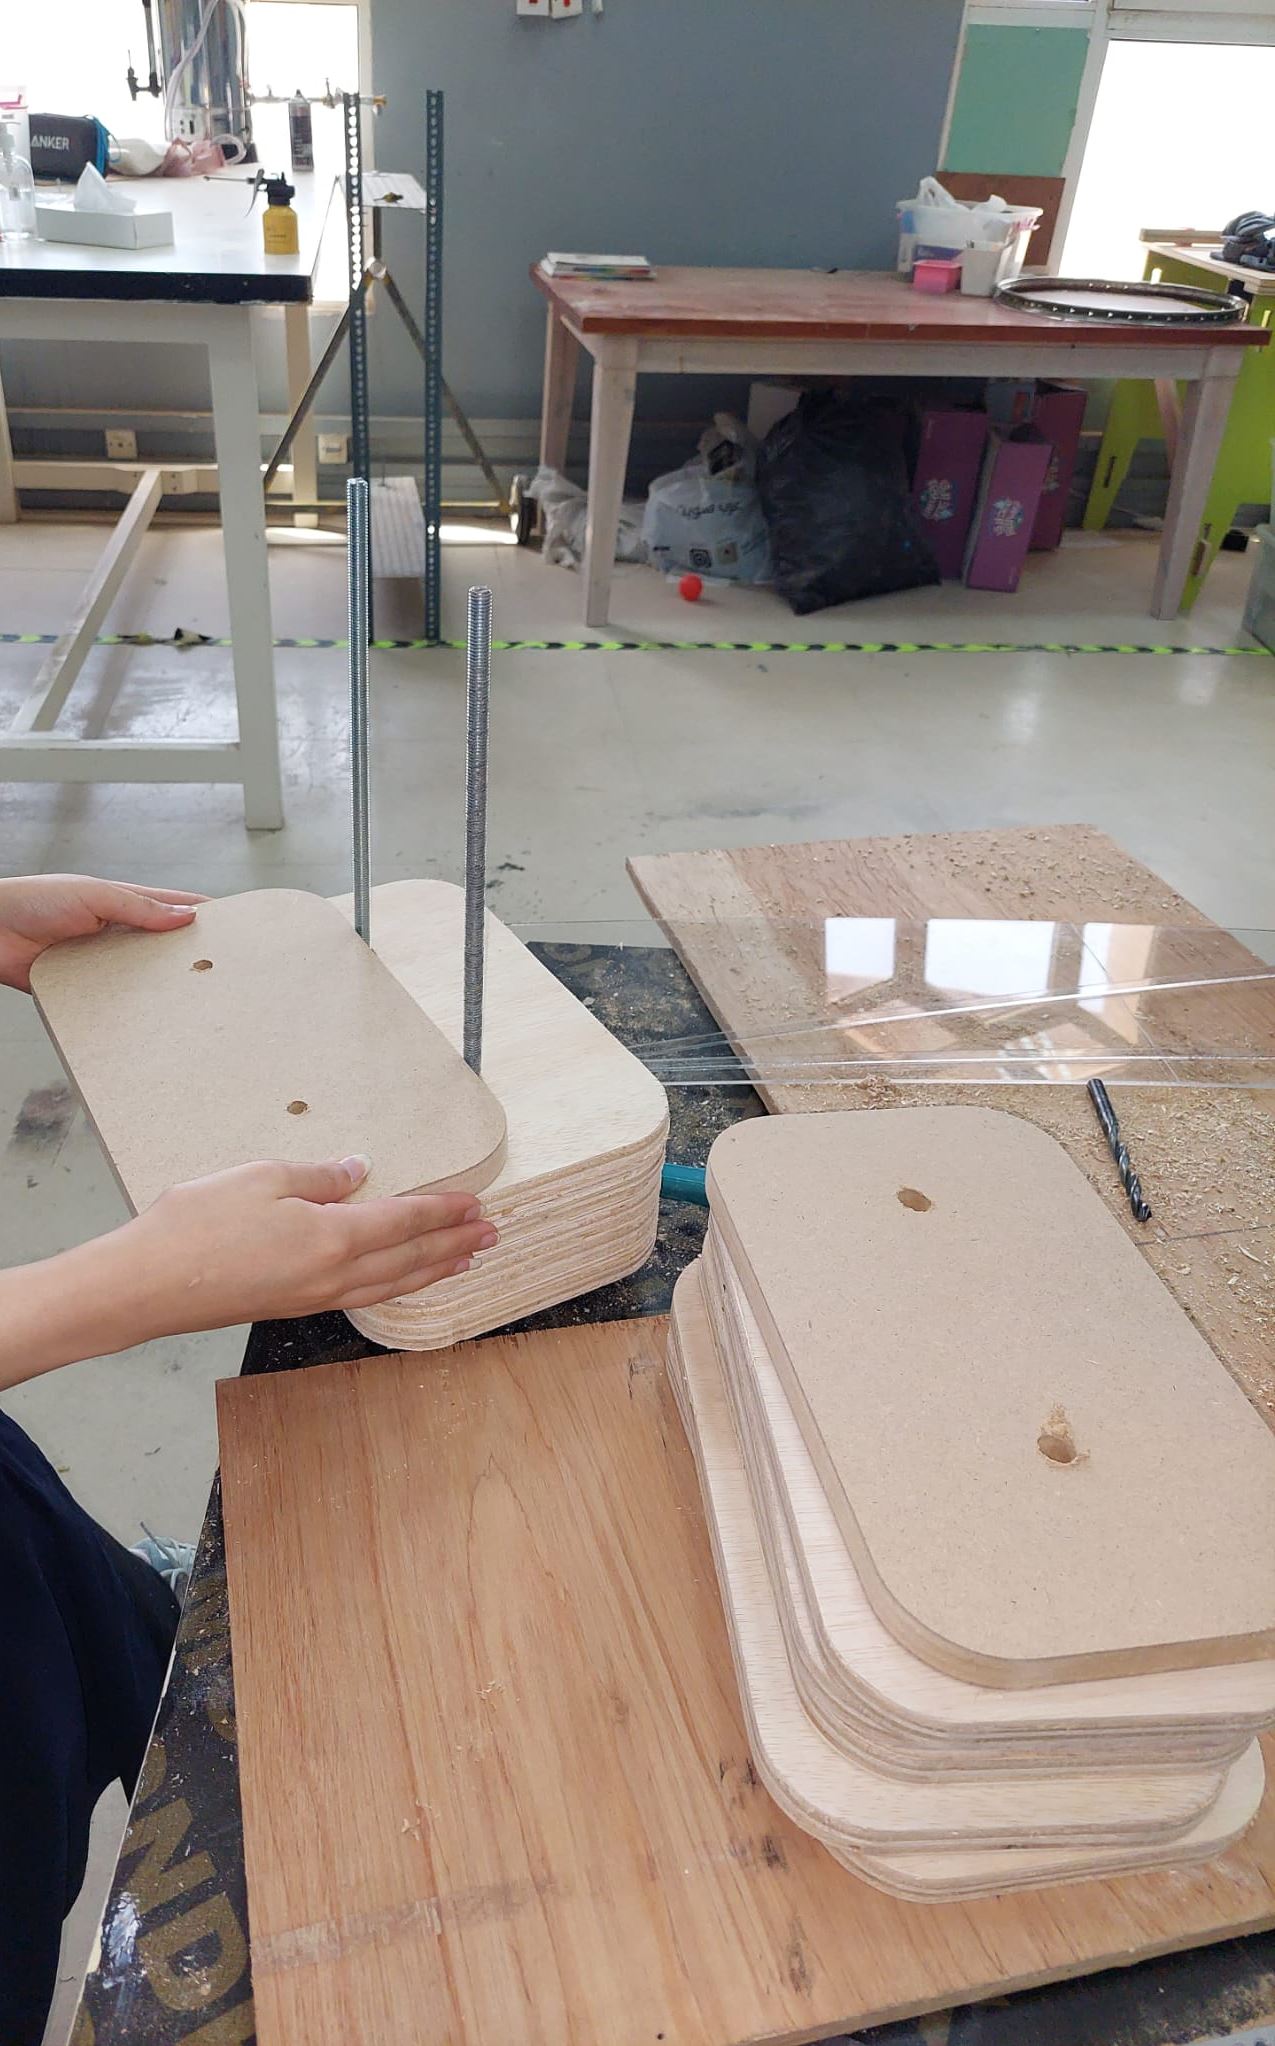
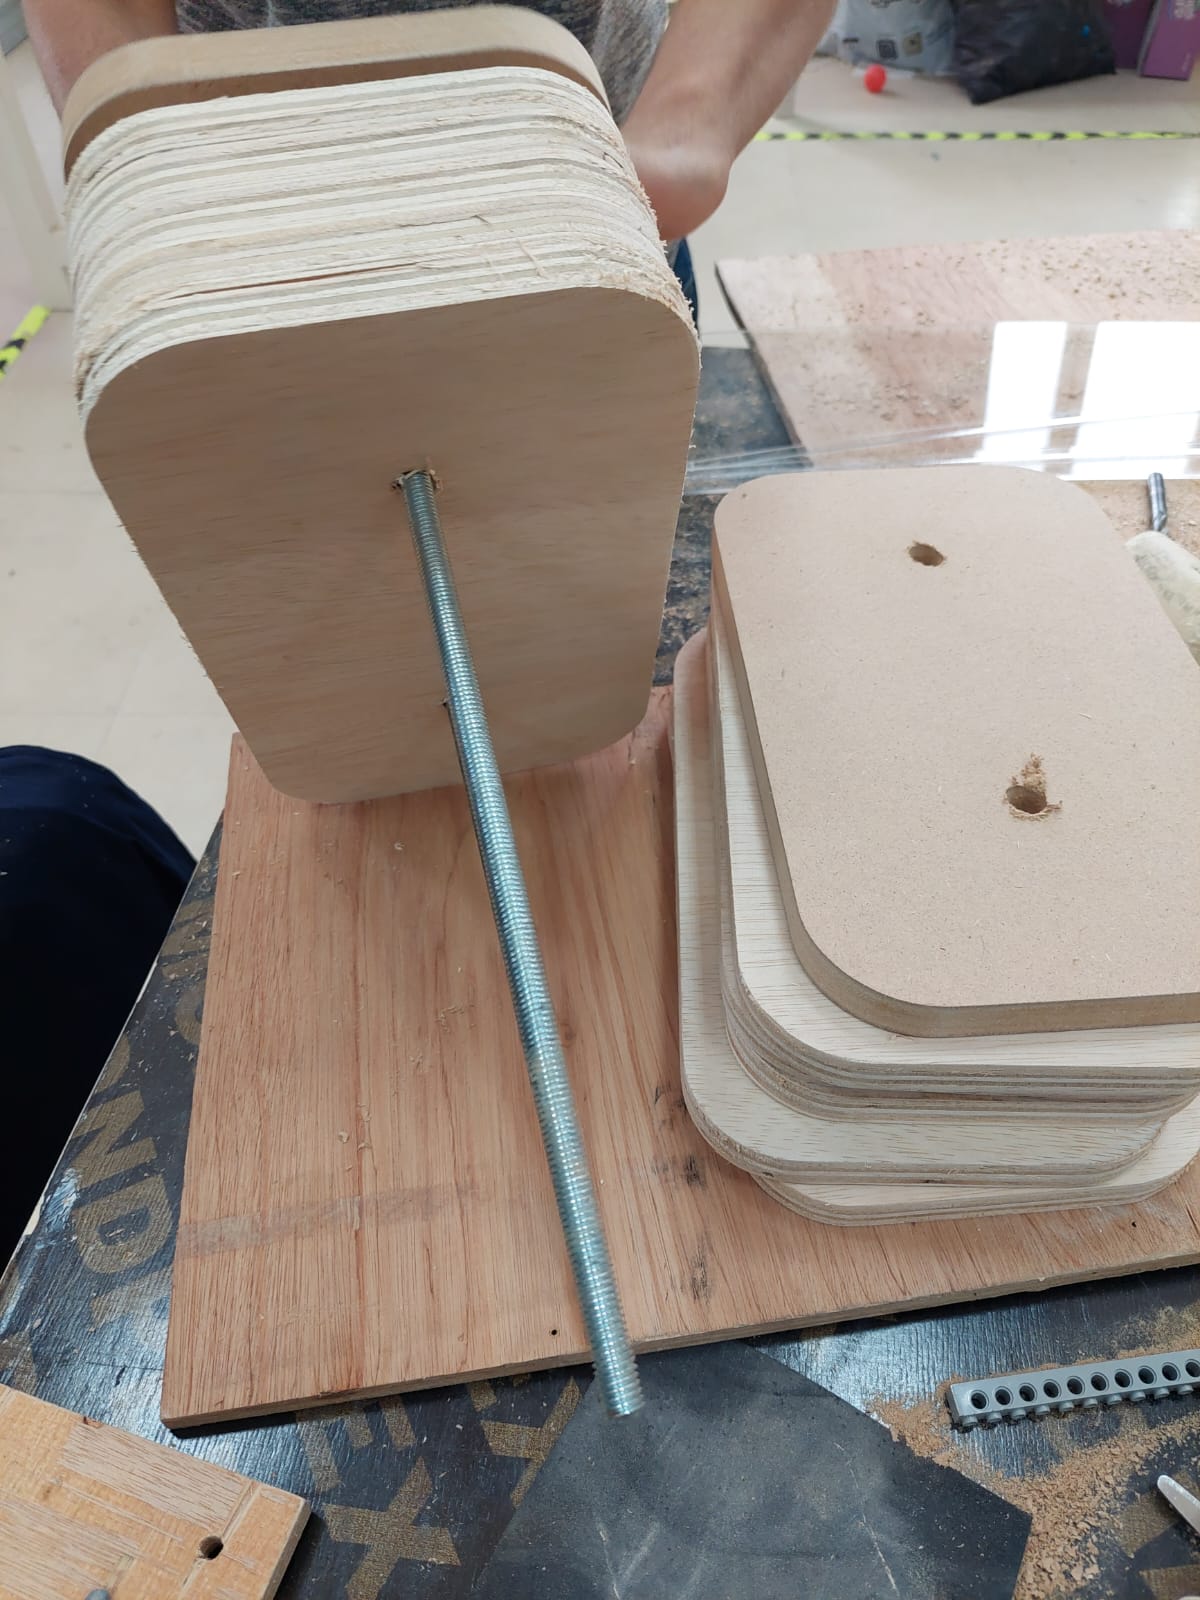
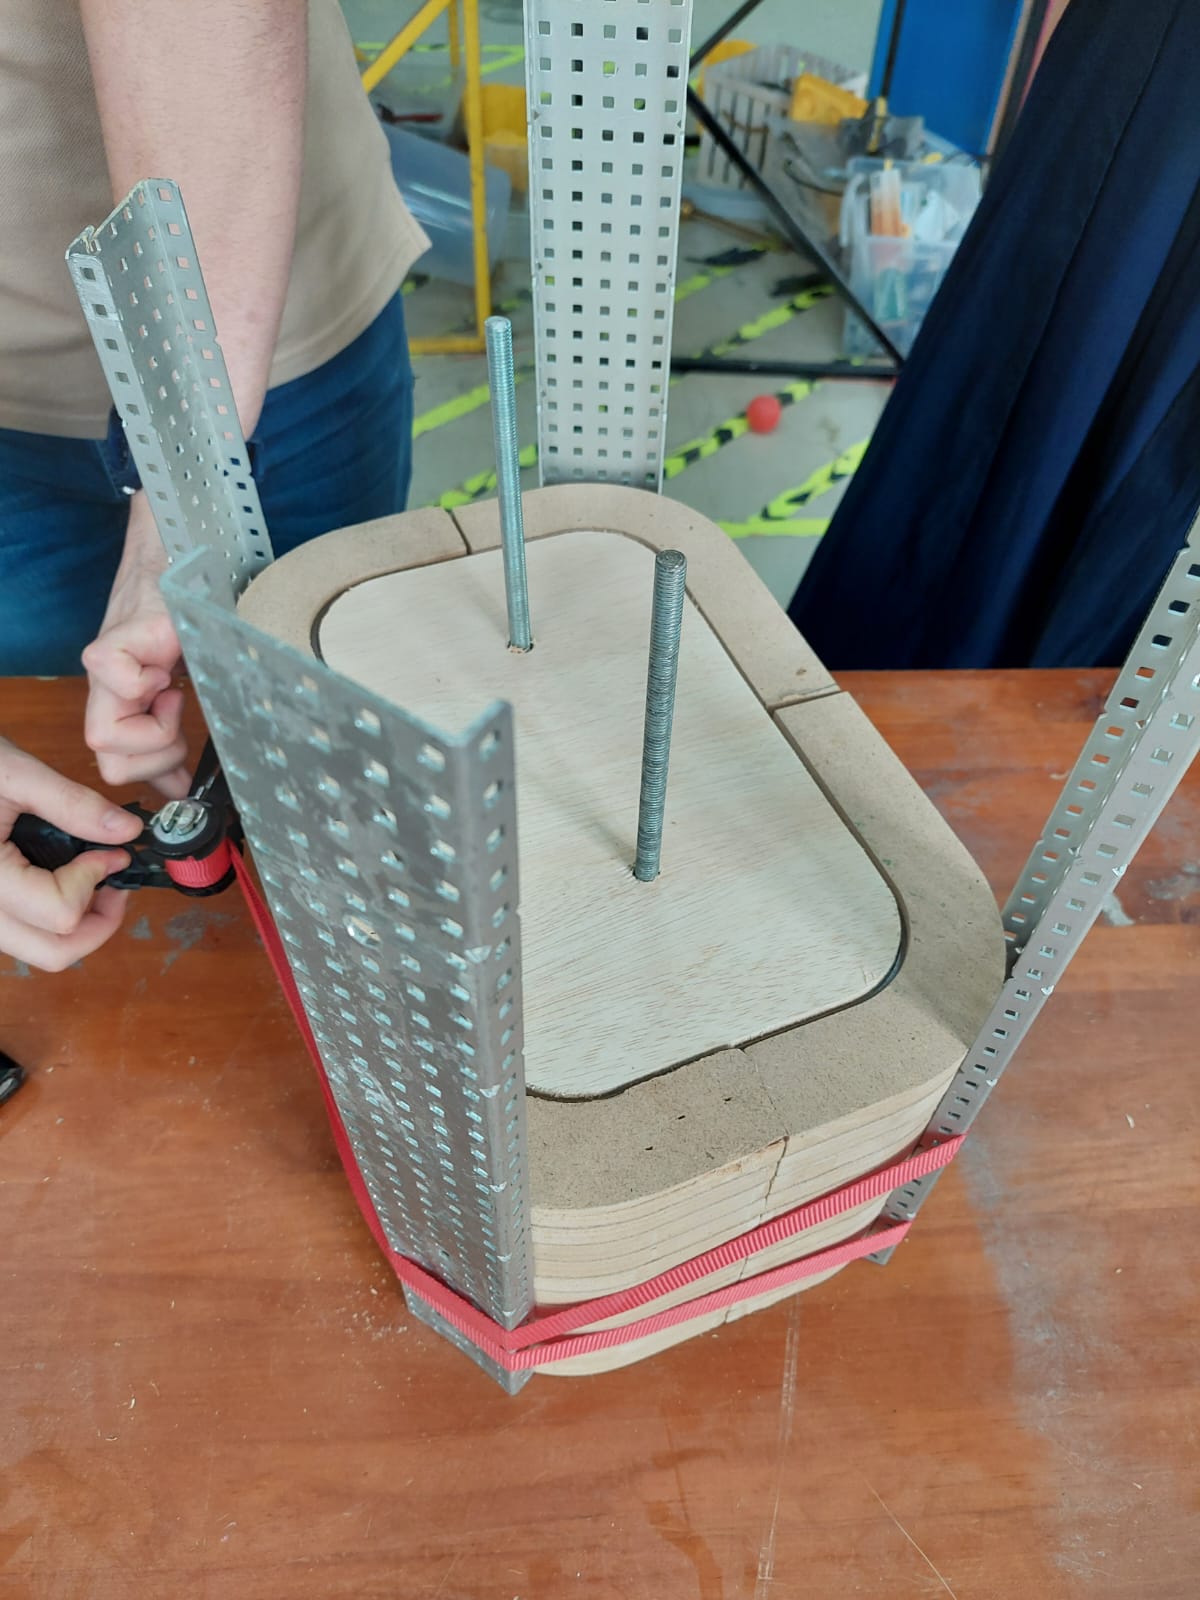
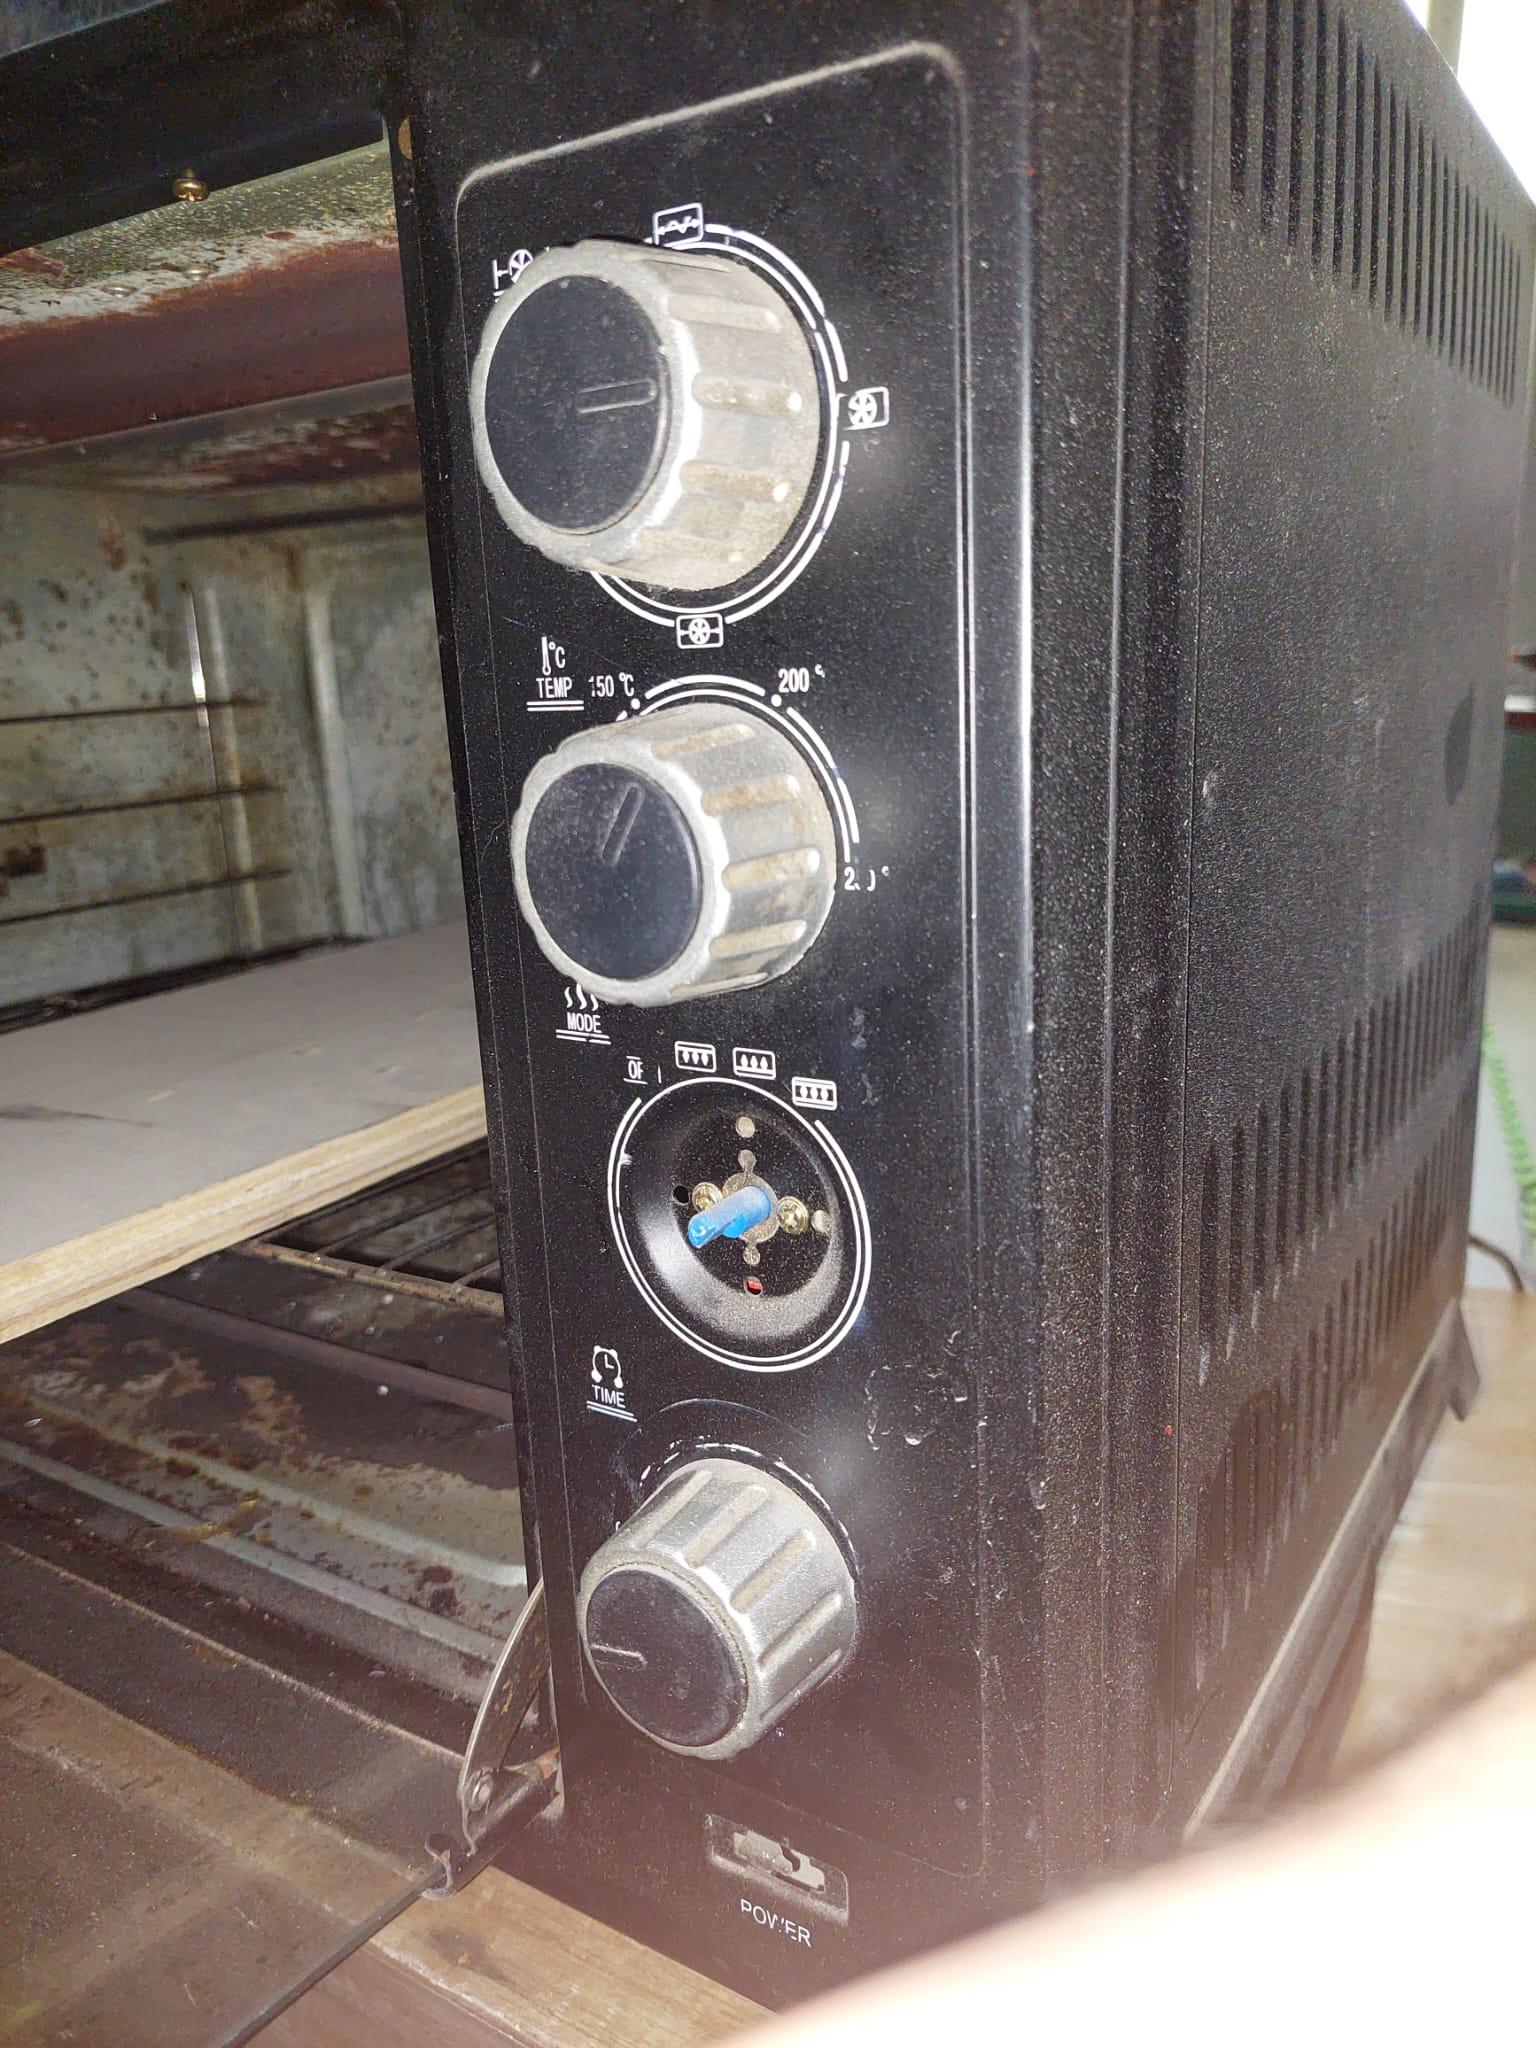
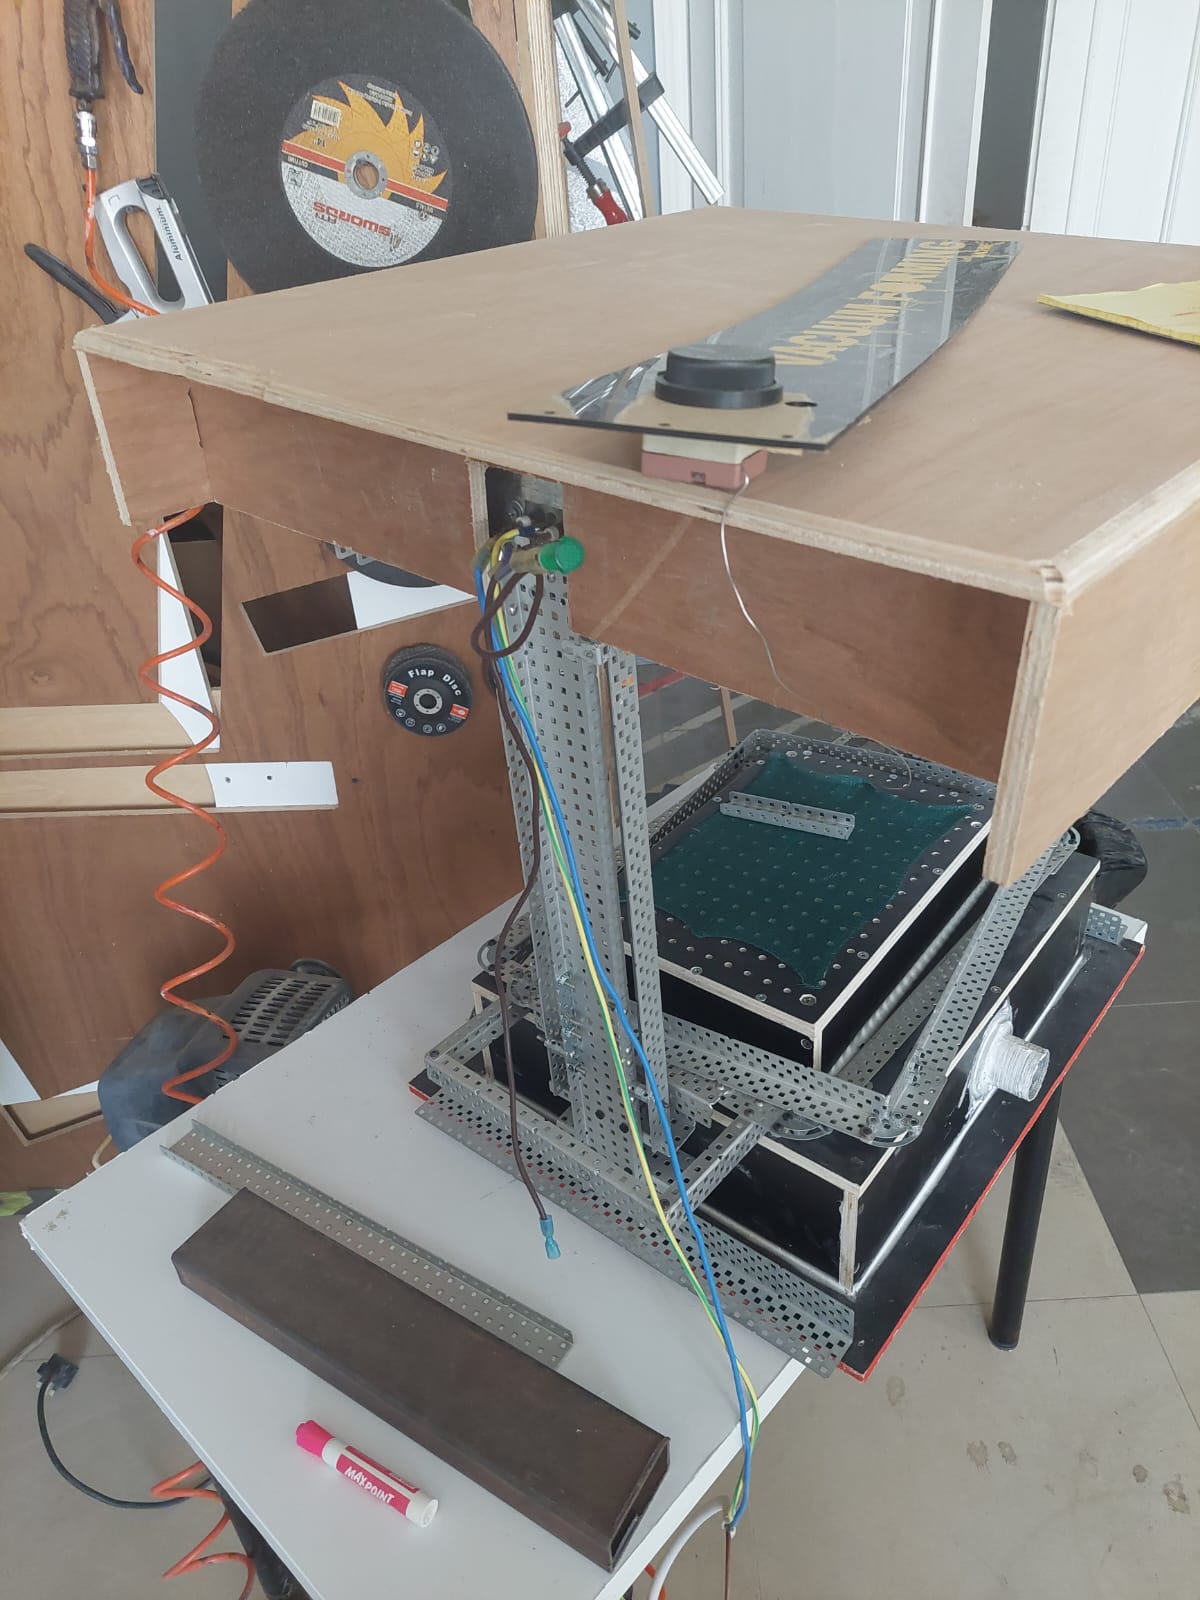
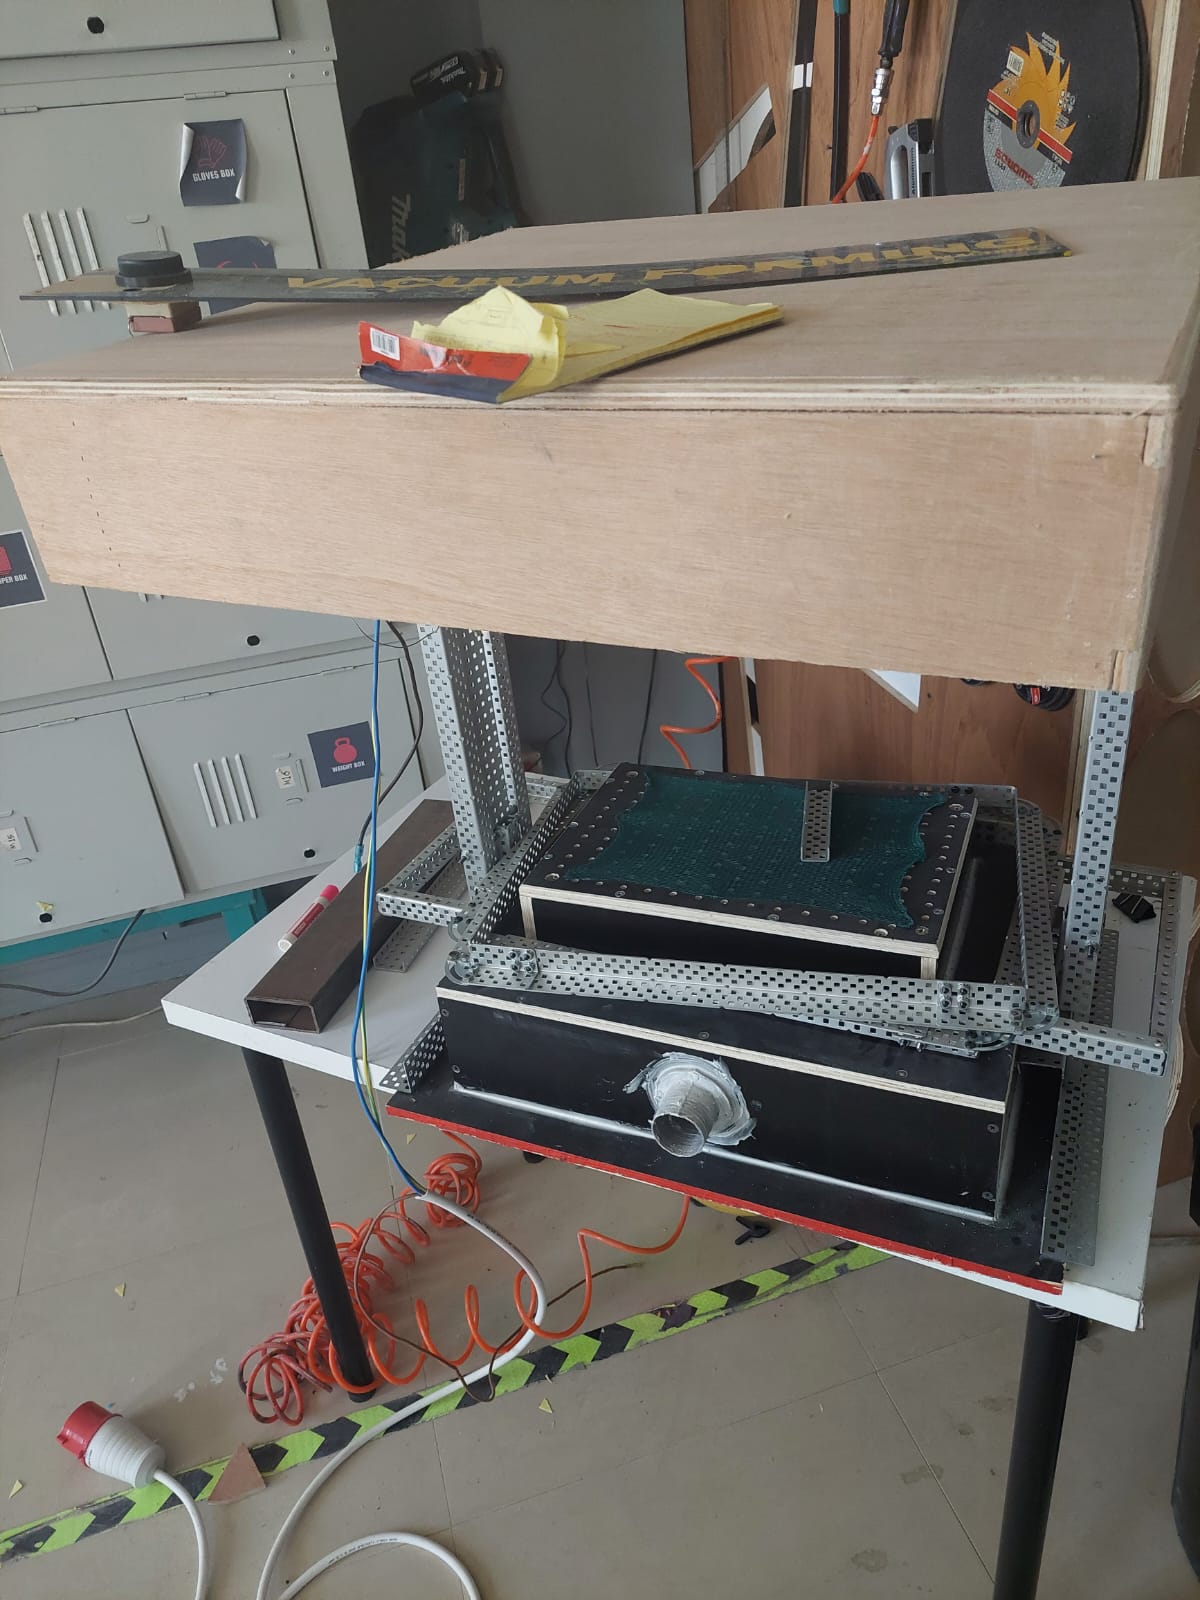
To bend the acrylic we had to create a mold using the wood and cut it using the CNC machine. Then, we used two ovens to heat it and put it on the mold. Abdullah and Abd Al-Ghafour helped us it these steps.


Then, we assembled it together. In the final product, we created some stickers for the buttons using the vinyl cutter machine.

1.6 Final code
Finally, I had to combine the codes together for each microcontroller.
I also made the last changes to the code. The ARGB strips will be off if no one is close, and it will turn white if the distance more than 50cm and less than or equal to 100cm, and it will turn green if the distance is less than or equal to 50cm.
Also, I changed the values for the photoresistor sensor.
I made conditions in which if the user clicked the clear or confirm buttons without clicking at least one of the amount buttons first, the buzzer will give a different sound and it will ask the user to choose the correct button.
This is the final code for the first microcontroller which controls the buttons, the buzzer, and the monitor.
//This is a code for buttons

#include <SPI.h>
#include <Wire.h>
#include <Adafruit_GFX.h>
#include <Adafruit_SSD1306.h>
#include <Fonts/FreeSerif9pt7b.h>

#define SCREEN_WIDTH 128 // OLED display width, in pixels
#define SCREEN_HEIGHT 64 // OLED display height, in pixels

// Declaration for an SSD1306 display connected to I2C (SDA, SCL pins)
Adafruit_SSD1306 display(SCREEN_WIDTH, SCREEN_HEIGHT, &Wire, -1);

int b1 = 11;//1 BD
int b2 = 13;//5 BD
int b3 = 9;//10 BD
int b4 = 10;//20 BD
int b5 = 5;//0.1 BD
int b6 = 6;//0.5 BD
int b7 = 12;//Clear
int b8 = A0;//Confirm

int button1State = 0;
int button2State = 0;
int button3State = 0;
int button4State = 0;
int button5State = 0;
int button6State = 0;
int button7State = 0;
int button8State = 0;

double coin = 0.1;
double half = 0.5;
int one = 1;
int five = 5;
int ten = 10;
int twenty = 20;
int confirm = 0;
int del = 0;

double total1 = 0.0;
double total2 = 0.0;
double total3 = 0.0;
double total4 = 0.0;
double total5 = 0.0;
double total6 = 0.0;
double total = 0.0;
double ftot = 0.0;
double ftot2 = 0.0;

const int buzzer = A1;

void myTone()
{
  tone(buzzer, 1000);
  delay(200);
  noTone(buzzer);
  delay(200);
}

void setup()
{
  pinMode(b1, INPUT_PULLUP);
  pinMode(b2, INPUT_PULLUP);
  pinMode(b3, INPUT_PULLUP);
  pinMode(b4, INPUT_PULLUP);
  pinMode(b5, INPUT_PULLUP);
  pinMode(b6, INPUT_PULLUP);
  pinMode(b7, INPUT_PULLUP);
  pinMode(b8, INPUT_PULLUP);
  pinMode(buzzer, OUTPUT);

  Serial.begin(115200);
  //Serial.begin(9600);

  if(!display.begin(SSD1306_SWITCHCAPVCC, 0x3C))
  {
    Serial.println("SSD1306 allocation failed");
    for(;;);
  }
  delay(1000);
  display.setFont(&FreeSerif9pt7b);
  display.clearDisplay();
  display.setTextSize(1);
  display.setTextColor(WHITE);
  display.setCursor(0,30);
  display.println("Enter Amount");
  display.display();
  delay(1000);
}

void loop()
{
  // read the state of the pushbutton value
  button1State = digitalRead(b1);
  button2State = digitalRead(b2);
  button3State = digitalRead(b3);
  button4State = digitalRead(b4);
  button5State = digitalRead(b5);
  button6State = digitalRead(b6);
  button7State = digitalRead(b7);
  button8State = digitalRead(b8);

  if(button8State == LOW && total<=0)
  {
    display.setFont(&FreeSerif9pt7b);
    display.clearDisplay();
    display.setTextSize(1);
    display.setTextColor(WHITE);
    display.setCursor(0,30);
    display.println("Press the correct button.");
    display.display();
    tone(buzzer, 200);
    delay(500);
    noTone(buzzer);
    delay(500);
    tone(buzzer, 100);
    delay(500);
    noTone(buzzer);
    delay(500);
    delay(2000);
    display.setFont(&FreeSerif9pt7b);
    display.clearDisplay();
    display.setTextSize(1);
    display.setTextColor(WHITE);
    display.setCursor(0,30);
    display.println("Enter Amount");
    display.display();

    Serial.println("Press the correct button.");
    Serial.print("Total in the machine = ");
    Serial.println(ftot2);
    total = 0;


  /*else if (button8State == HIGH && button7State == HIGH)
  {
    display.setFont(&FreeSerif9pt7b);
    display.clearDisplay();
    display.setTextSize(1);
    display.setTextColor(WHITE);
    display.setCursor(0,30);
    display.println("Total is BD ");
    display.println(ftot);
    display.display();

    Serial.println("Total is BD ");
    Serial.println(ftot);

    myTone();
  }*/
  }
  else
  {
  // check if pushbutton is pressed.  if it is, the
  // button1State is HIGH
  if (button1State == LOW)
  {
    total1 = total1 + one;
    Serial.println("Pay BD 1");
    total = total1+total2+total3+total4+total5+total6;
    Serial.print("Total = ");
    Serial.println(total);
    ftot = ftot + 1;


    display.setFont(&FreeSerif9pt7b);
    display.clearDisplay();
    display.setTextSize(1);
    display.setTextColor(WHITE);
    display.setCursor(0,30);
    display.println("Pay BD 1");
    display.print("Total = ");
    display.println(total);
    display.display();

    myTone();
  }
  /*else if(button7State == HIGH && total1>0)
  {
      total1 = total1 - one;
      total = total1;
      Serial.println(total);
      myTone();
  }*/
  else
  {
    digitalWrite(buzzer,LOW);
  }
  delay(10); // Delay a little bit to improve simulation performance

  if (button2State == LOW)
  {
    total2 = total2 + five;
    Serial.println("Pay BD 5");
    total = total1+total2+total3+total4+total5+total6;
    Serial.print("Total = ");
    Serial.println(total);
    ftot = ftot + 5;

    display.setFont(&FreeSerif9pt7b);
    display.clearDisplay();
    display.setTextSize(1);
    display.setTextColor(WHITE);
    display.setCursor(0,30);
    display.println("Pay BD 5");
    display.print("Total = ");
    display.println(total);
    display.display();

    myTone();
  }
  else
  {
    digitalWrite(buzzer,LOW);
  }
  delay(10); // Delay a little bit to improve simulation performance

  if (button3State == LOW)
  {
    total3 = total3 + ten;
    Serial.println("Pay BD 10");
    total = total1+total2+total3+total4+total5+total6;
    Serial.print("Total = ");
    Serial.println(total);
    ftot = ftot + 10;

    display.setFont(&FreeSerif9pt7b);
    display.clearDisplay();
    display.setTextSize(1);
    display.setTextColor(WHITE);
    display.setCursor(0,30);
    display.println("Pay BD 10");
    display.print("Total = ");
    display.println(total);
    display.display();

    myTone();
  }
  else
  {
    digitalWrite(buzzer,LOW);
  }
  delay(10); // Delay a little bit to improve simulation performance

  if (button4State == LOW)
  {
    total4 = total4 + twenty;
    Serial.println("Pay BD 20");
    total = total1+total2+total3+total4+total5+total6;
    Serial.print("Total = ");
    Serial.println(total);
    ftot = ftot + 20;

    display.setFont(&FreeSerif9pt7b);
    display.clearDisplay();
    display.setTextSize(1);
    display.setTextColor(WHITE);
    display.setCursor(0,30);
    display.println("Pay BD 20");
    display.print("Total = ");
    display.println(total);
    display.display();

    myTone();
  }
  else
  {
    digitalWrite(buzzer,LOW);
  }
  delay(10); // Delay a little bit to improve simulation performance

  if (button5State == LOW)
  {
    total5 = total5 + coin;
    Serial.println("Pay BD 0.1");
    total = total1+total2+total3+total4+total5+total6;
    Serial.print("Total = ");
    Serial.println(total);
    ftot = ftot + 0.1;

    display.setFont(&FreeSerif9pt7b);
    display.clearDisplay();
    display.setTextSize(1);
    display.setTextColor(WHITE);
    display.setCursor(0,30);
    display.println("Pay BD 0.1");
    display.print("Total = ");
    display.println(total);
    display.display();

    myTone();
  }
  else
  {
    digitalWrite(buzzer,LOW);
  }
  delay(10); // Delay a little bit to improve simulation performance

  if (button6State == LOW)
  {
    total6 = total6 + half;
    Serial.println("Pay BD 0.5");
    total = total1+total2+total3+total4+total5+total6;
    Serial.print("Total = ");
    Serial.println(total);
    ftot = ftot + 0.5;

    display.setFont(&FreeSerif9pt7b);
    display.clearDisplay();
    display.setTextSize(1);
    display.setTextColor(WHITE);
    display.setCursor(0,30);
    display.println("Pay BD 0.5");
    display.print("Total = ");
    display.println(total);
    display.display();

    myTone();
  }
  else
  {
    digitalWrite(buzzer,LOW);
  }
  delay(10); // Delay a little bit to improve simulation performance


    if (button7State == LOW && total>0)
    {
      total = 0; total1 = 0; total2 = 0; total3 = 0; total4 = 0; total5 = 0; total6 = 0;
      display.setFont(&FreeSerif9pt7b);
      display.clearDisplay();
      display.setTextSize(1);
      display.setTextColor(WHITE);
      display.setCursor(0,30);
      display.println("Amount deleted.");
      display.print("Total = BD ");
      display.println(total);
      display.display();
      tone(buzzer, 500);
      delay(500);
      noTone(buzzer);
      delay(500);
      delay(2000);
      display.setFont(&FreeSerif9pt7b);
      display.clearDisplay();
      display.setTextSize(1);
      display.setTextColor(WHITE);
      display.setCursor(0,30);
      display.println("Enter Amount");
      display.print("Total = BD ");
      display.println(total);
      display.display();
    }
    else if (button7State == LOW && total==0)
    {
      display.setFont(&FreeSerif9pt7b);
    display.clearDisplay();
    display.setTextSize(1);
    display.setTextColor(WHITE);
    display.setCursor(0,30);
    display.println("Press the correct button.");
    display.display();
    tone(buzzer, 200);
    delay(500);
    noTone(buzzer);
    delay(500);
    tone(buzzer, 100);
    delay(500);
    noTone(buzzer);
    delay(500);
    delay(2000);
    display.setFont(&FreeSerif9pt7b);
    display.clearDisplay();
    display.setTextSize(1);
    display.setTextColor(WHITE);
    display.setCursor(0,30);
    display.println("Enter Amount");
    display.display();
    }
    /*if(button7State == HIGH && total1>0)
    {
      ftot = ftot - 1;
    }
    if(button7State == HIGH && total2>0)
    {
      ftot = ftot - 5;
    }
    if(button7State == HIGH && total3>0)
    {
      ftot = ftot - 10;
    }
    if(button7State == HIGH && total4>0)
    {
      ftot = ftot - 20;
    }
    if(button7State == HIGH && total5>0)
    {
      ftot = ftot - 0.1;
    }
    if(button7State == HIGH && total6>0)
    {
      ftot = ftot - 0.5;
    }*/
delay(10); // Delay a little bit to improve simulation performance

  /*if (button7State == HIGH && total1>0)
  {
    total1 = total1 - one;
    total = total1 + total2 + total3 + total4+ total5+total6;
    Serial.println("Amount deleted.");
    Serial.println(total);

    display.setFont(&FreeSerif9pt7b);
    display.clearDisplay();
    display.setTextSize(1);
    display.setTextColor(WHITE);
    display.setCursor(0,30);
    display.println("Amount deleted.");
    display.print("Total = BD ");
    display.println(total);
    display.display();

    myTone();
  }

  else if (button7State == HIGH && total2>0)
  {
    total2 = total2 - five;
    total = total1 + total2 + total3 + total4+ total5+total6;
    Serial.println("Amount deleted.");
    Serial.println(total);

    display.setFont(&FreeSerif9pt7b);
    display.clearDisplay();
    display.setTextSize(1);
    display.setTextColor(WHITE);
    display.setCursor(0,30);
    display.println("Amount deleted.");
    display.print("Total = BD ");
    display.println(total);
    display.display();

    myTone();
  }

  else if(button7State == HIGH && total3>0)
  {
    total3= total3 - ten;
    total = total1 + total2 + total3 + total4+ total5+total6;
    Serial.println("Amount deleted.");
    Serial.println(total);

    display.setFont(&FreeSerif9pt7b);
    display.clearDisplay();
    display.setTextSize(1);
    display.setTextColor(WHITE);
    display.setCursor(0,30);
    display.println("Amount deleted.");
    display.print("Total = BD ");
    display.println(total);
    display.display();

    myTone();
  }

  else if(button7State == HIGH && total4>0)
  {
    total4 = total4 - twenty;
    total = total1 + total2 + total3 + total4+ total5+total6;
    Serial.println("Amount deleted.");
    Serial.println(total);

    display.setFont(&FreeSerif9pt7b);
    display.clearDisplay();
    display.setTextSize(1);
    display.setTextColor(WHITE);
    display.setCursor(0,30);
    display.println("Amount deleted.");
    display.print("Total = BD ");
    display.println(total);
    display.display();

    myTone();
  }

  else if(button7State == HIGH && total5>0)
  {
    total5 = total5 - coin;
    total = total1 + total2 + total3 + total4+ total5+total6;
    Serial.println("Amount deleted.");
    Serial.println(total);

    display.setFont(&FreeSerif9pt7b);
    display.clearDisplay();
    display.setTextSize(1);
    display.setTextColor(WHITE);
    display.setCursor(0,30);
    display.println("Amount deleted.");
    display.print("Total = BD ");
    display.println(total);
    display.display();

    myTone();
  }

  else if(button7State == HIGH && total6>0)
  {
    total6 = total6 - half;
    total = total1 + total2 + total3 + total4+ total5+total6;
    Serial.println("Amount deleted.");
    Serial.println(total);

    display.setFont(&FreeSerif9pt7b);
    display.clearDisplay();
    display.setTextSize(1);
    display.setTextColor(WHITE);
    display.setCursor(0,30);
    display.println("Amount deleted.");
    display.print("Total = BD ");
    display.println(total);
    display.display();

    myTone();
  }
  delay(10); // Delay a little bit to improve simulation performance*/

  if (button8State == LOW && total>0)
  {
    ftot = total;
    ftot2 = ftot2+ftot;
    display.setFont(&FreeSerif9pt7b);
    display.clearDisplay();
    display.setTextSize(1);
    display.setTextColor(WHITE);
    display.setCursor(0,30);
    display.println("Thank You!");
    display.display();
    myTone();
    tone(buzzer, 1000);
    delay(100);
    noTone(buzzer);
    delay(500);
    tone(buzzer, 1000);
    delay(100);
    noTone(buzzer);
    delay(500);
    delay(2000);
    display.setFont(&FreeSerif9pt7b);
    display.clearDisplay();
    display.setTextSize(1);
    display.setTextColor(WHITE);
    display.setCursor(0,30);
    display.println("Enter Amount");
    display.display();

    total = 0; total1 = 0; total2 = 0; total3 = 0; total4 = 0; total5 = 0; total6 = 0;

  }
  if (button8State == LOW)
  {
    Serial.print("Total in the machine = ");
    Serial.println(ftot2);
  }
  delay(10); // Delay a little bit to improve simulation performance

  /*if (button8State == LOW && button7State == LOW)
  {
    display.setFont(&FreeSerif9pt7b);
    display.clearDisplay();
    display.setTextSize(1);
    display.setTextColor(WHITE);
    display.setCursor(0,30);
    display.println("Total in the machine = ");
    display.println(ftot2);
    display.display();
    myTone();
  }
  delay(10);*/ // Delay a little bit to improve simulation performance
  }
}
This is the final code for the second microcontroller which controls the motor, the ARGB strips, the photoresistor sensor, and the ultrasonic sensor.
#include <SPI.h>
#include <FastLED.h>

#define LED_PIN     10
#define NUM_LEDS    82
#define BRIGHTNESS  64
#define LED_TYPE    WS2812B
#define COLOR_ORDER GRB
CRGB leds[NUM_LEDS];

#define UPDATES_PER_SECOND 100

CRGBPalette16 currentPalette;
TBlendType    currentBlending;

extern CRGBPalette16 myWhitePalette;
extern const TProgmemPalette16 myWhitePalette_p PROGMEM;

extern CRGBPalette16 myGreenPalette;
extern const TProgmemPalette16 myGreenPalette_p PROGMEM;

extern CRGBPalette16 myBlackPalette;
extern const TProgmemPalette16 myBlackPalette_p PROGMEM;

int trigPin = A3;
int echoPin = A2;
long duration;
int distance;

int lightPin = A0;
// Motor B connections
int enB;
int in3 = 13;
int in4 = 12;
int value = 0;

void setup() {

  delay( 3000 ); // power-up safety delay
  FastLED.addLeds<LED_TYPE, LED_PIN, COLOR_ORDER>(leds, NUM_LEDS).setCorrection( TypicalLEDStrip );
  FastLED.setBrightness(  BRIGHTNESS );

  pinMode(trigPin, OUTPUT);
  pinMode(echoPin, INPUT);
  Serial.begin(9600);
  pinMode(lightPin, INPUT);
 // Set all the motor control pins to outputs
  pinMode(enB, OUTPUT);
  pinMode(in3, OUTPUT);
  pinMode(in4, OUTPUT);

  // Turn off motors - Initial state
  digitalWrite(in3, LOW);
  digitalWrite(in4, LOW);
}

void loop() {


  digitalWrite(trigPin, HIGH);
  delay(1);
  digitalWrite(trigPin, LOW);
  duration = pulseIn(echoPin, HIGH);
  distance= duration*0.034/2;
  Serial.print("Distance: ");
  Serial.println(distance);

  if(distance > 50 && distance<=100)
  {
  currentPalette = myWhitePalette_p;
    currentBlending = LINEARBLEND;
    static uint8_t startIndex = 0;
    startIndex = startIndex + 1; // motion speed

    FillLEDsFromPaletteColors( startIndex);

    FastLED.show();
    FastLED.delay(1000 / UPDATES_PER_SECOND);
  }
  else if(distance<=50)
  {
    currentPalette = myGreenPalette_p;
    currentBlending = LINEARBLEND;
    static uint8_t startIndex = 0;
    startIndex = startIndex + 1; // motion speed

    FillLEDsFromPaletteColors( startIndex);

    FastLED.show();
    FastLED.delay(1000 / UPDATES_PER_SECOND);
  }
  else if(distance>100)
  {
    currentPalette = myBlackPalette_p;
    currentBlending = LINEARBLEND;
    static uint8_t startIndex = 0;
    startIndex = startIndex + 1; // motion speed

    FillLEDsFromPaletteColors( startIndex);

    FastLED.show();
    FastLED.delay(1000 / UPDATES_PER_SECOND);
  }

  value = analogRead(lightPin);
  Serial.println(value, DEC);
  // low value = bright place
  // high value = dark place
  if(value>400)
  {
    digitalWrite(in3, LOW);
  digitalWrite(in4, HIGH);
  delay(100);
  digitalWrite(in3, LOW);
  digitalWrite(in4, HIGH);
  }
  else
  {
    digitalWrite(in3, LOW);
  digitalWrite(in4, LOW);
  }
  delay(100);
}
void FillLEDsFromPaletteColors( uint8_t colorIndex)
{
    uint8_t brightness = 255;

    for( int i = 0; i < NUM_LEDS; ++i) {
        leds[i] = ColorFromPalette( currentPalette, colorIndex, brightness, currentBlending);
        colorIndex += 3;
    }
}

const TProgmemPalette16 myWhitePalette_p PROGMEM =
{
    CRGB::Gray, // 'white' is too bright compared to red and blue
    CRGB::Black,

    CRGB::Gray,
    CRGB::Black,

    CRGB::Gray,
    CRGB::Gray,
    CRGB::Black,
    CRGB::Black
};
const TProgmemPalette16 myGreenPalette_p PROGMEM =
{
    CRGB::Green, // 'white' is too bright compared to red and blue
    CRGB::Black,

    CRGB::Green,
    CRGB::Black,

    CRGB::Green,
    CRGB::Green,
    CRGB::Black,
    CRGB::Black
};
const TProgmemPalette16 myBlackPalette_p PROGMEM =
{
     // 'white' is too bright compared to red and blue
    CRGB::Black,

    CRGB::Black,

    CRGB::Black,
    CRGB::Black
};
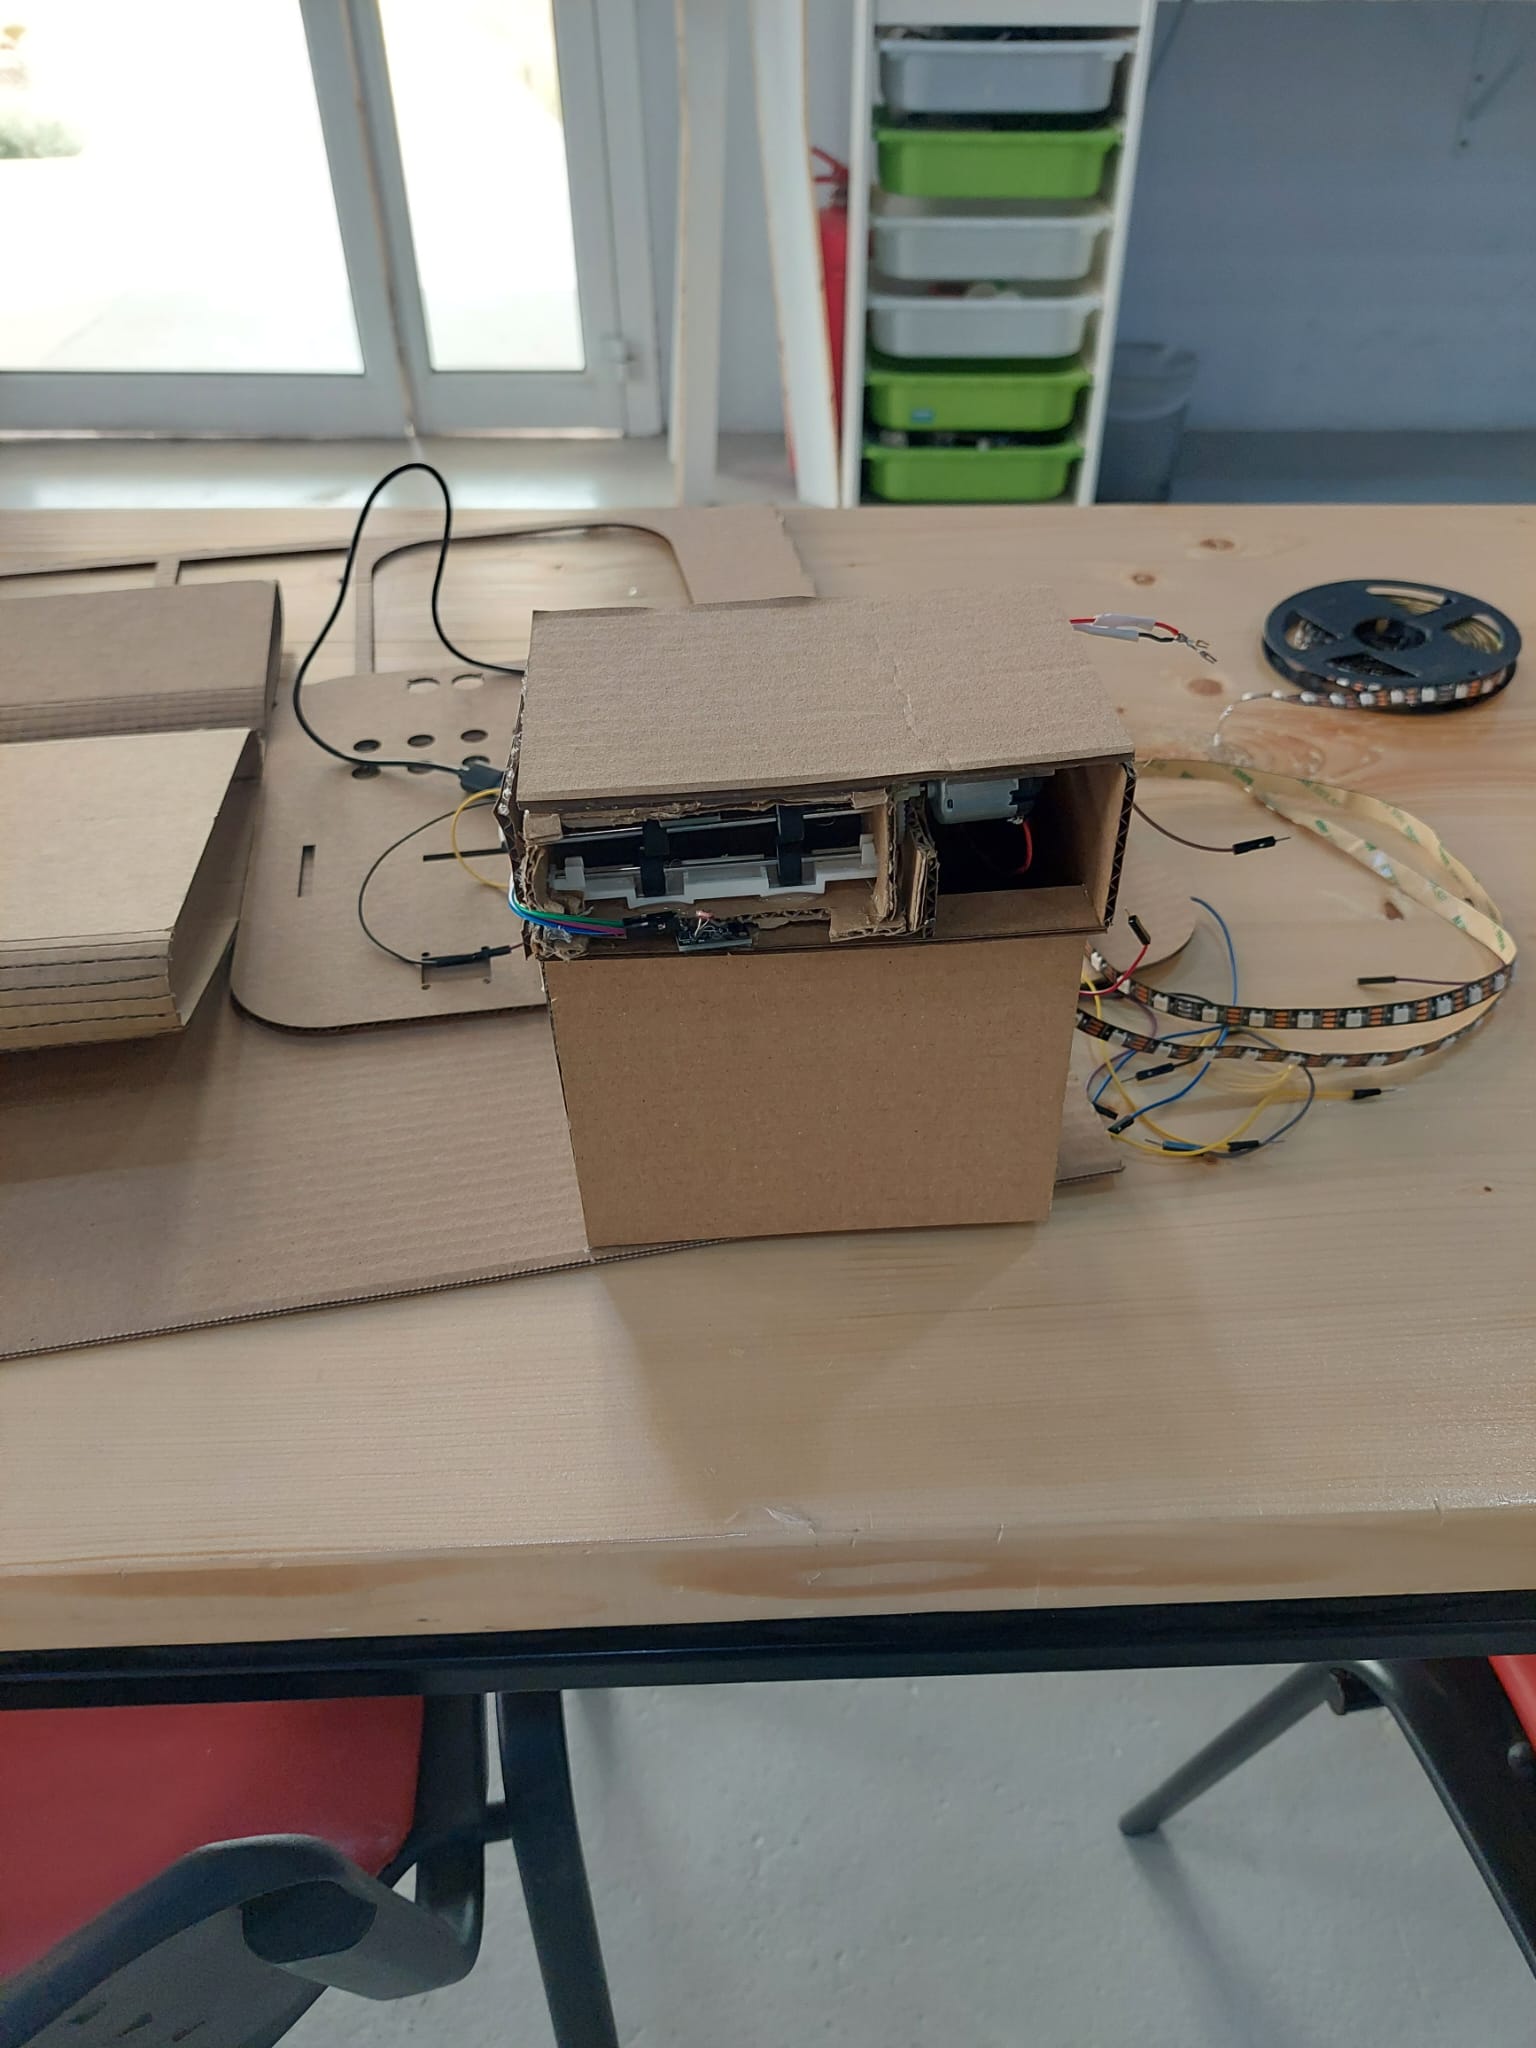
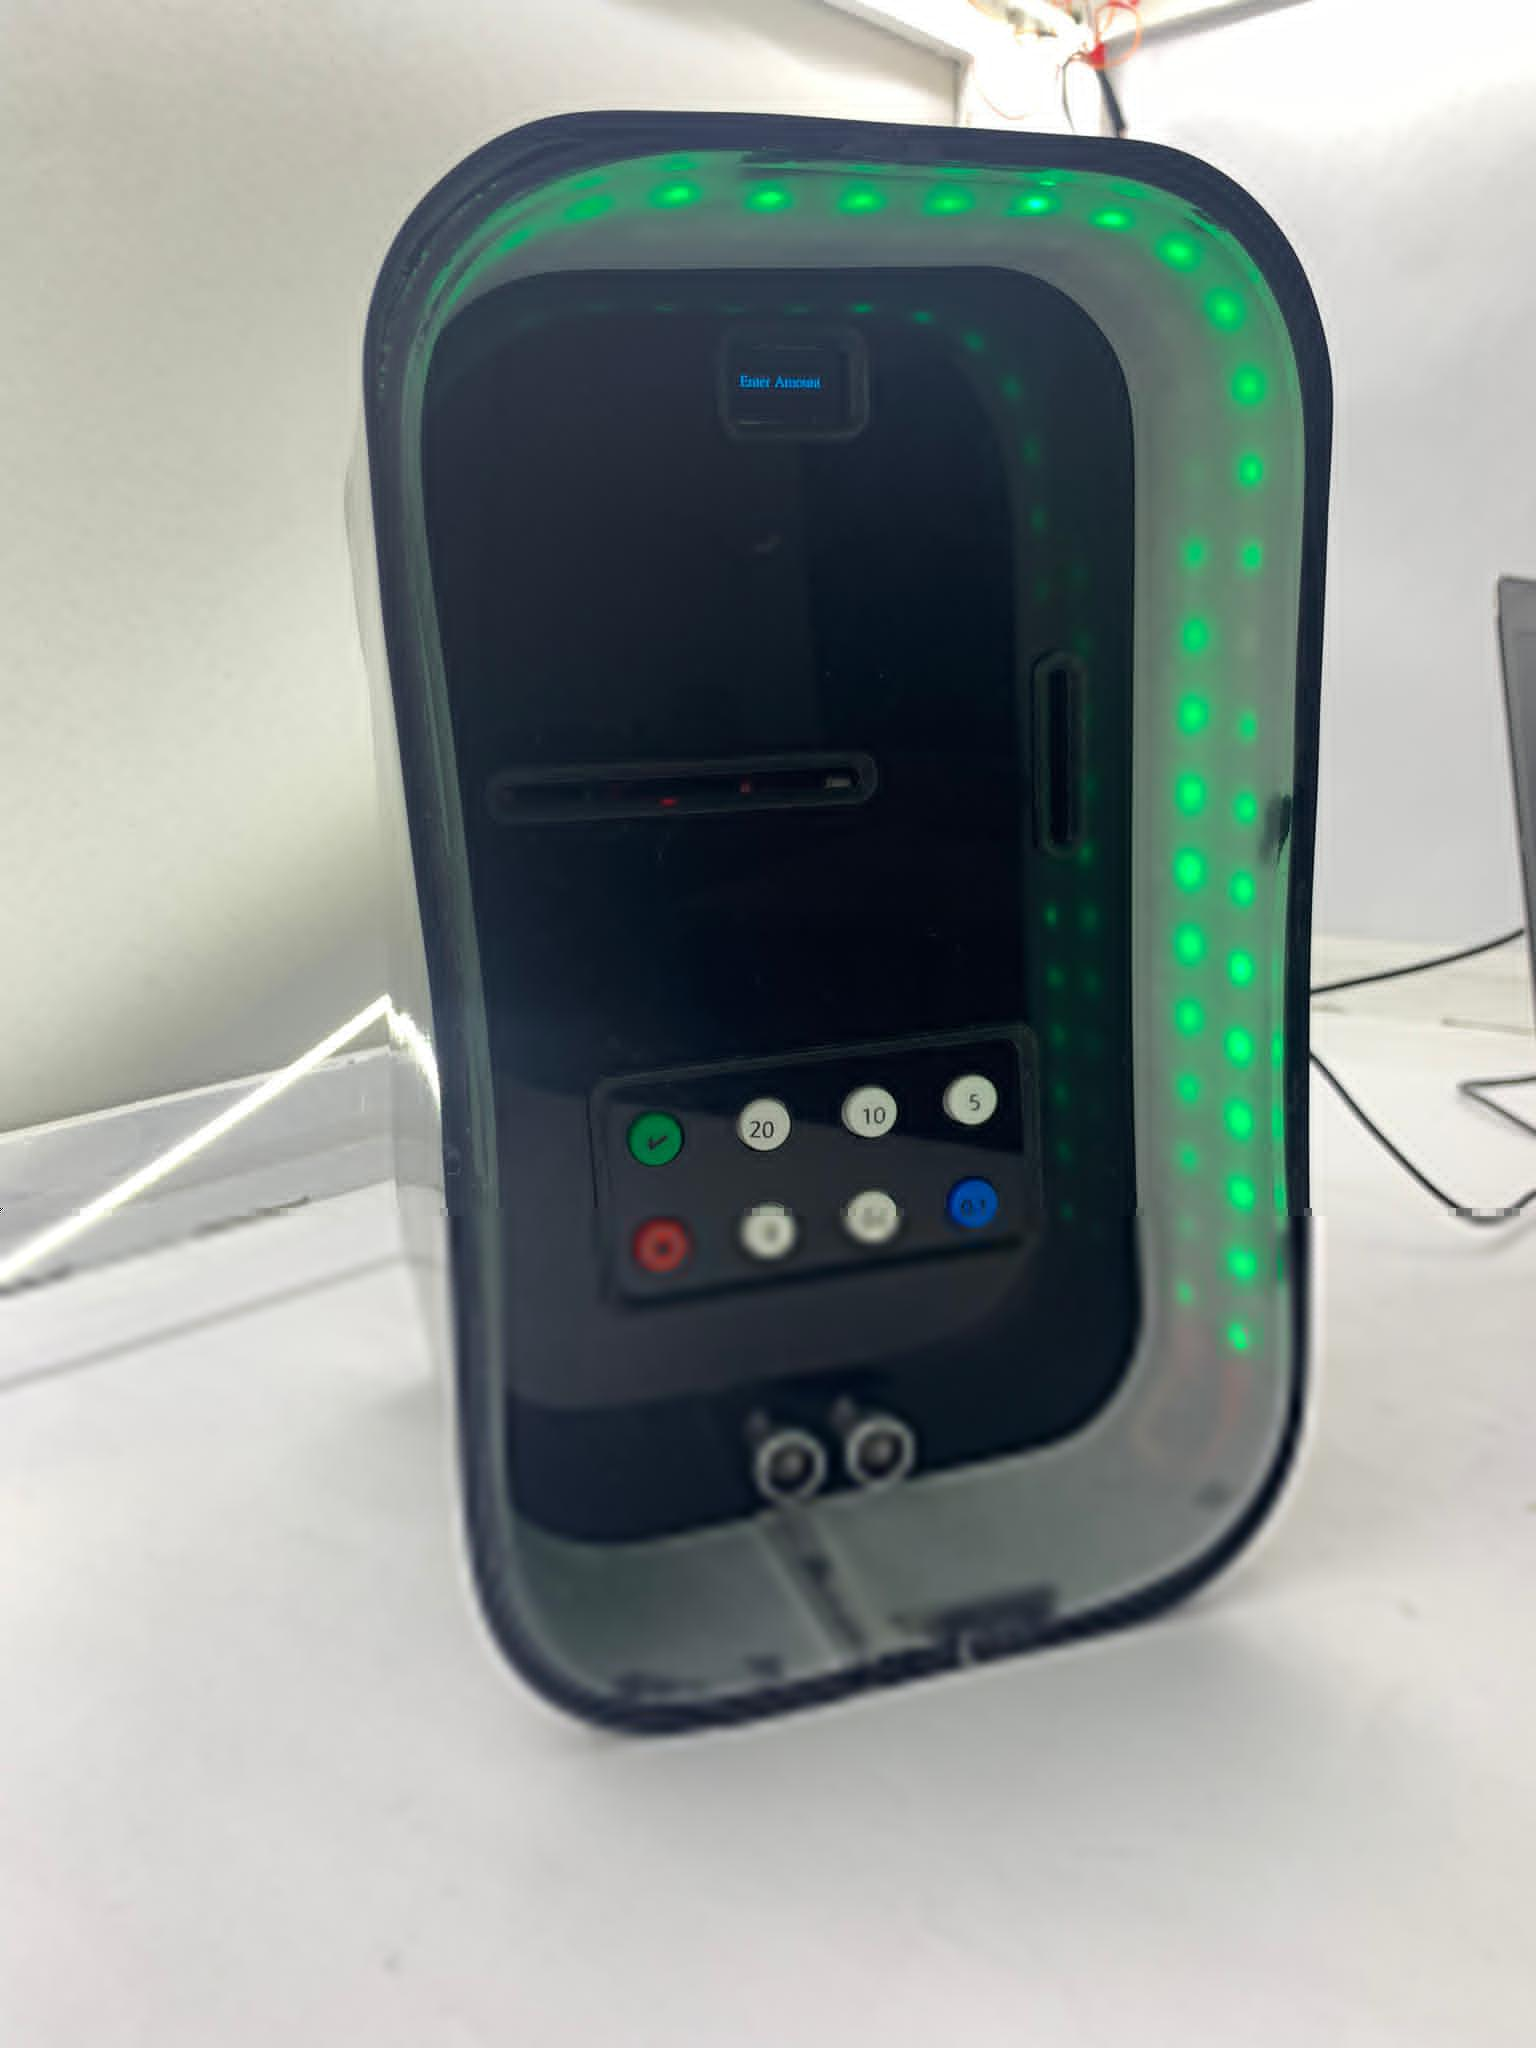
1.7 Final product
This is the final product.
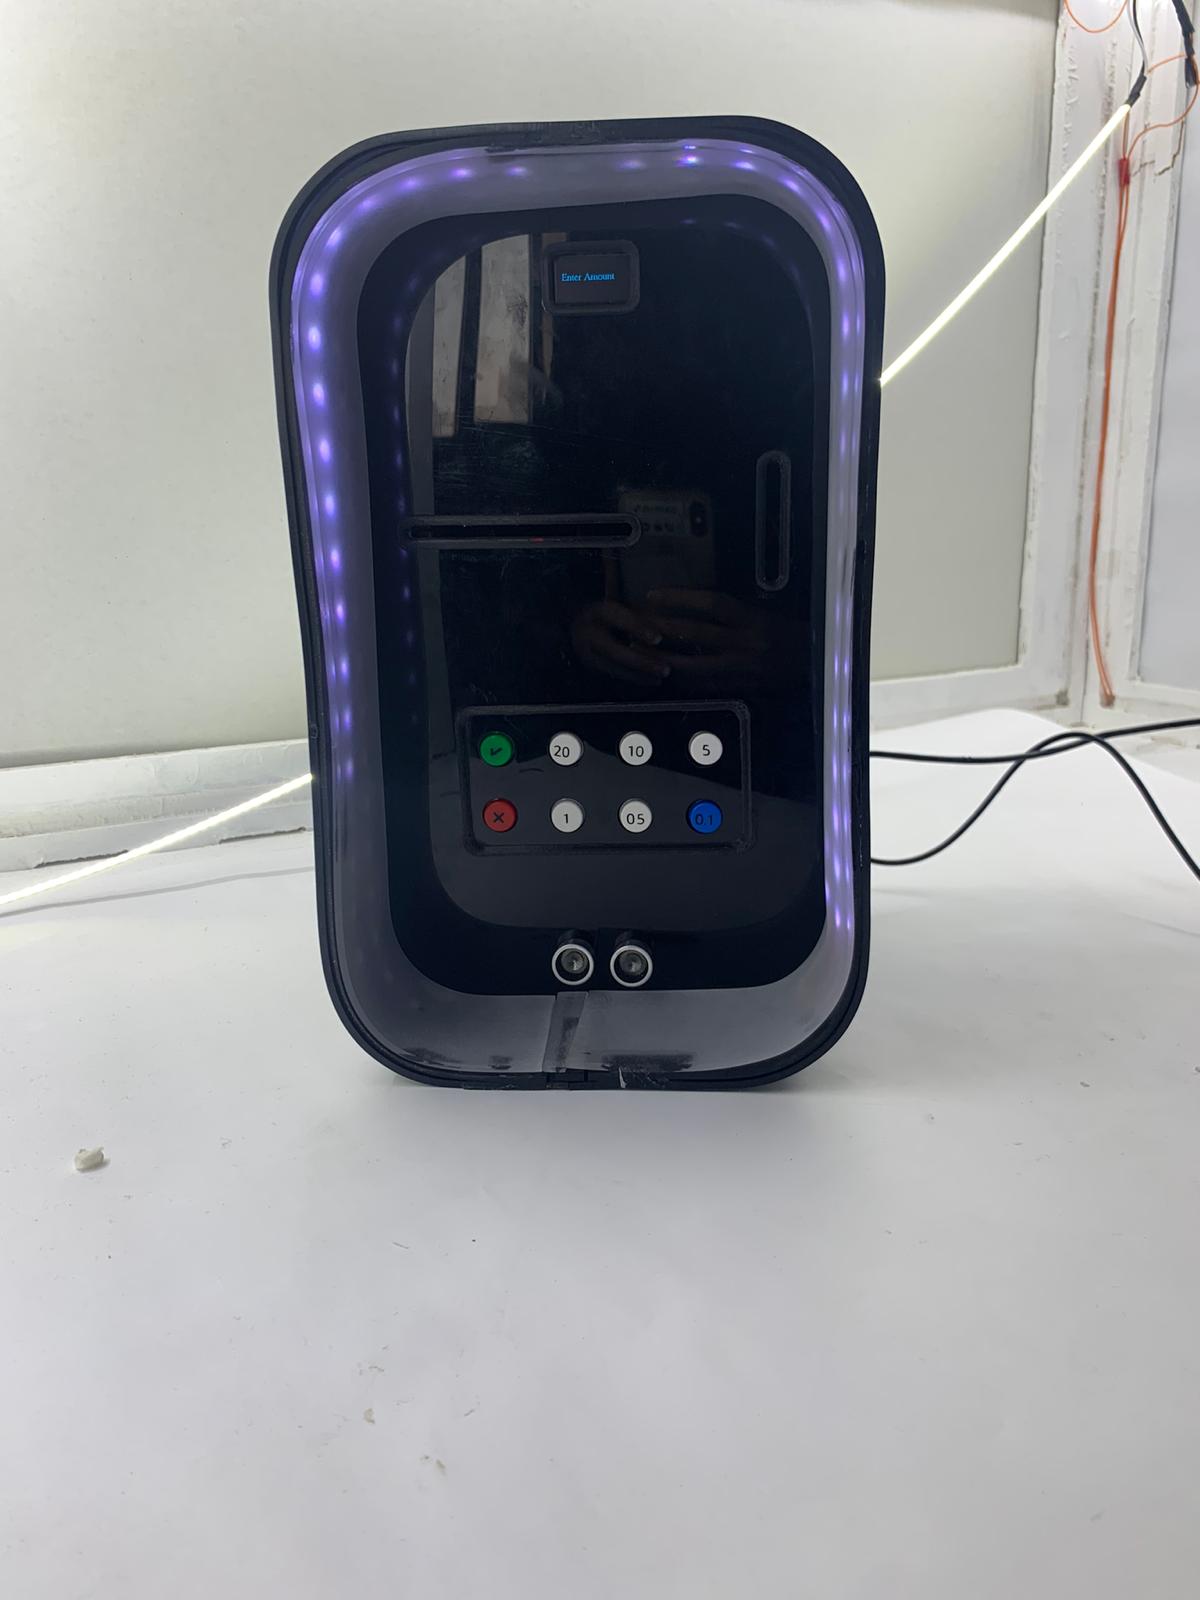
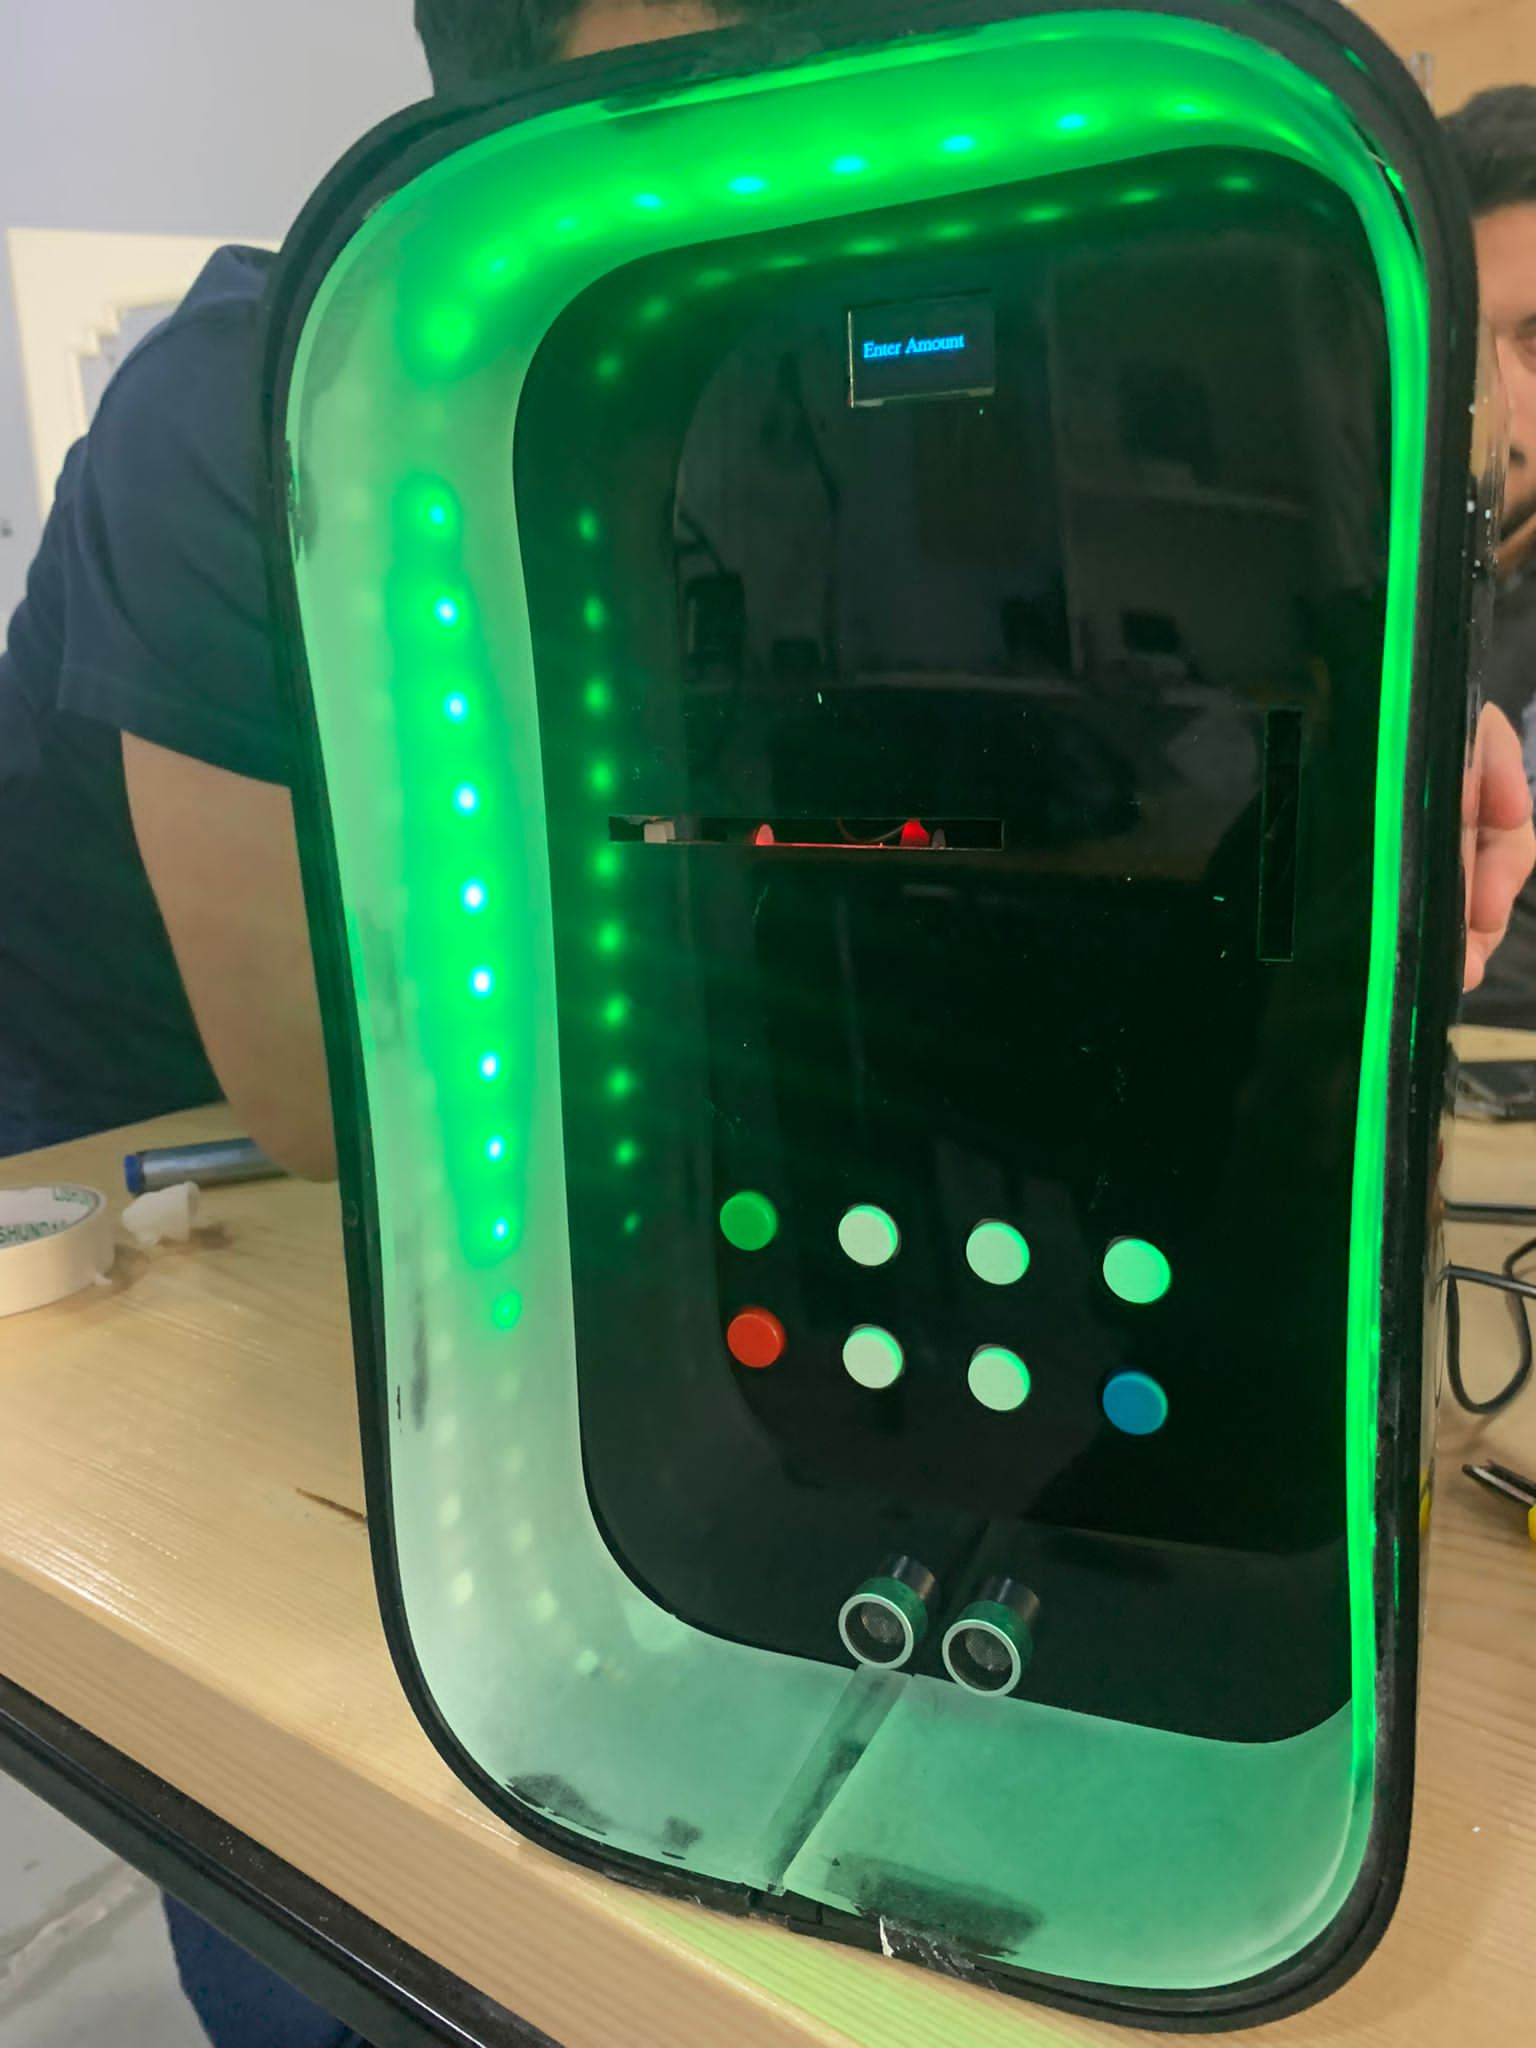
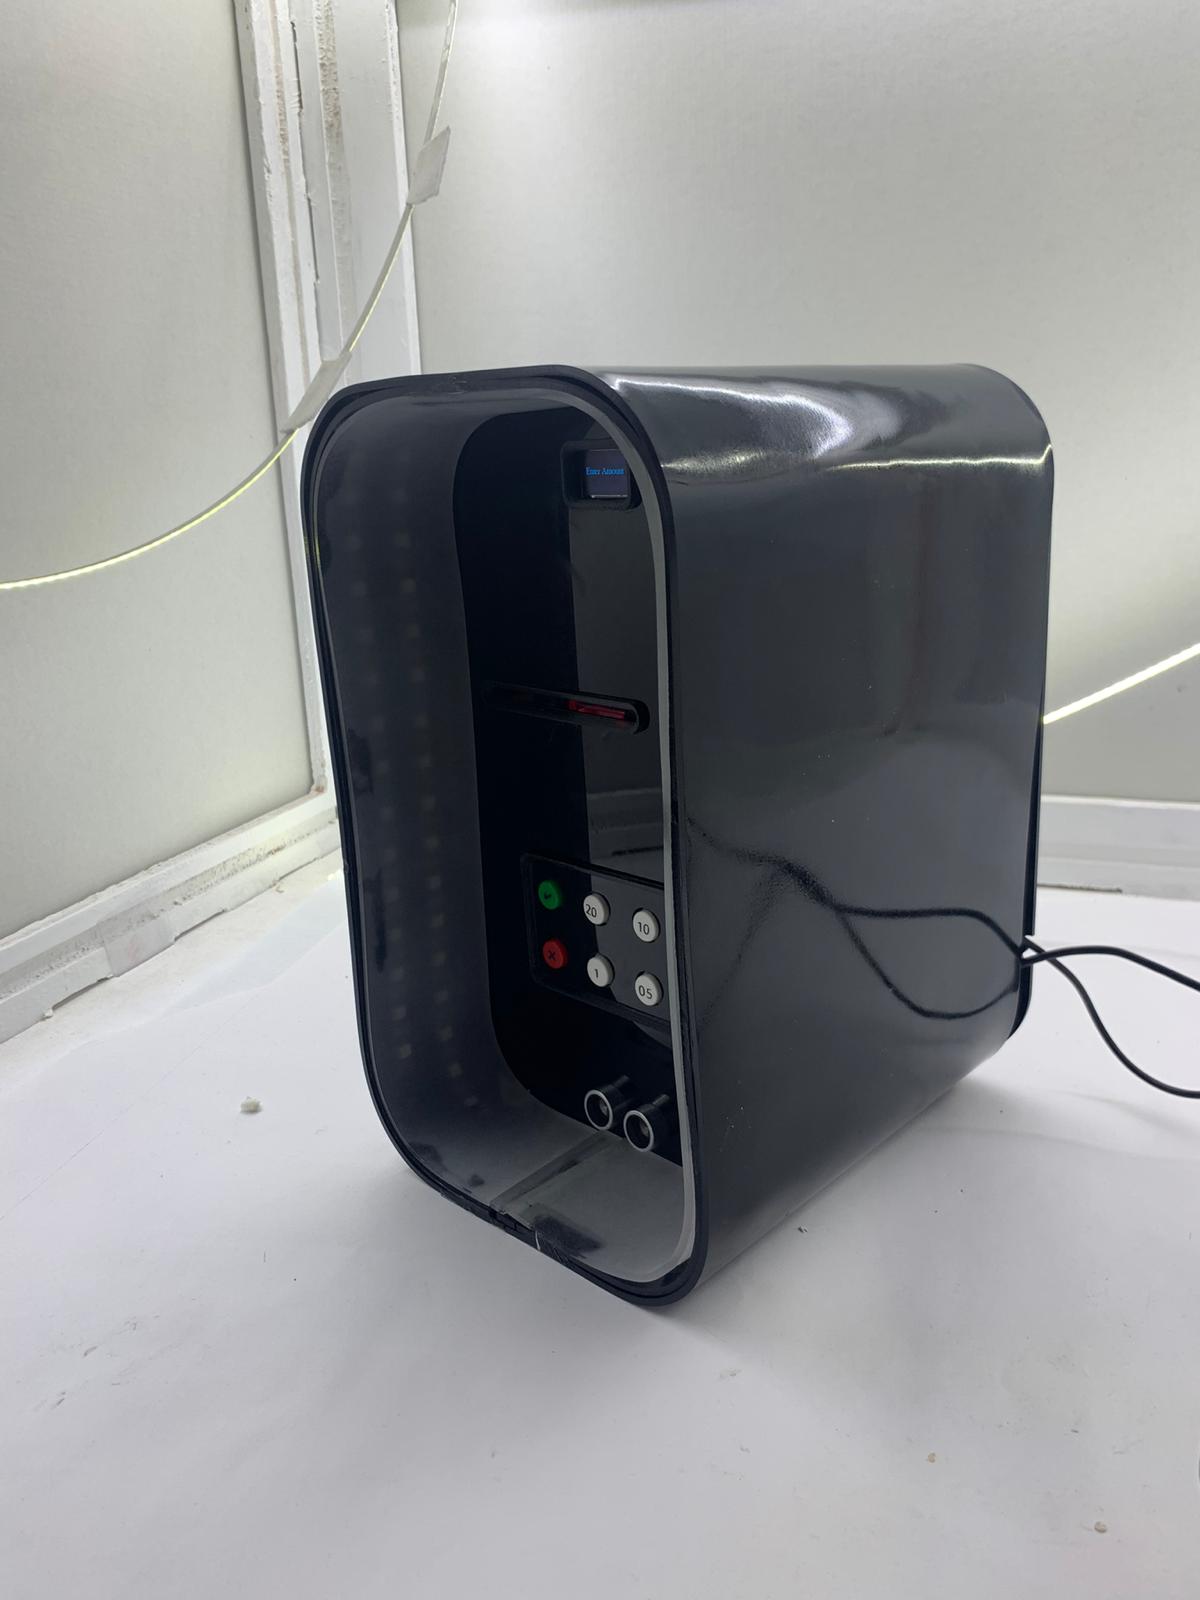
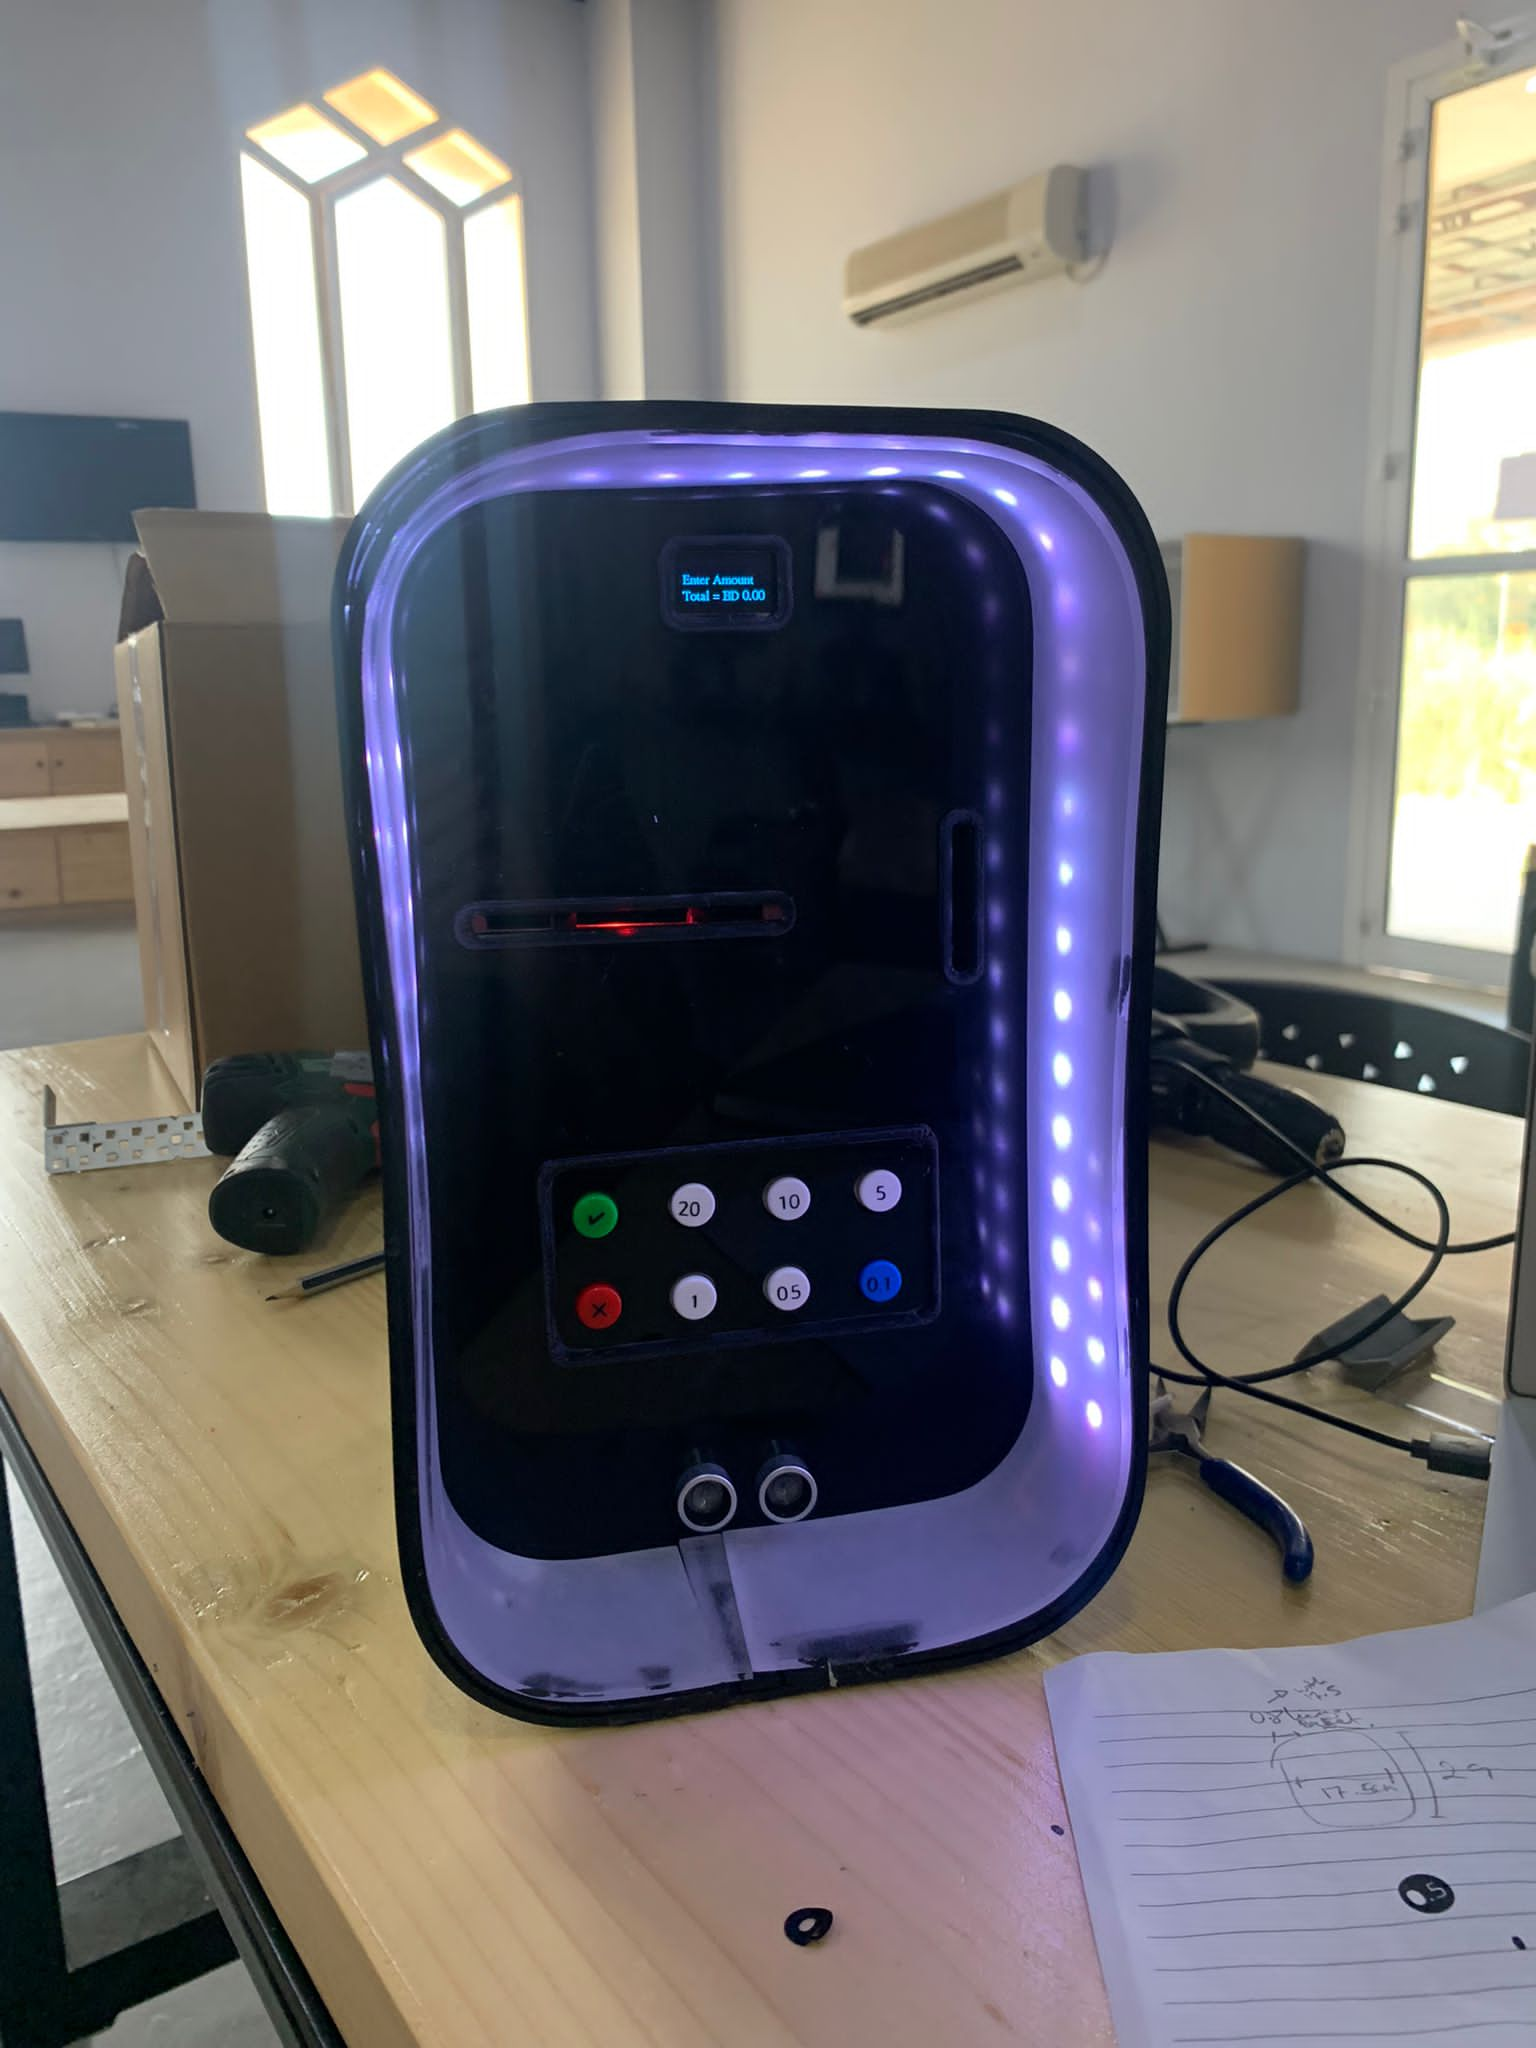
These are some videos for it.