8. Moulding and casting
This week, I have learned about molding and casting by comparing and testing different type of materials. After that, I have designed a wrench, milled it and cast it using the most strong and suitable material.
Aim of this week:
-
Design appropriate objects within the limitations of 3 axis machining.
-
Demonstrate workflows used in mold design, construction and casting.
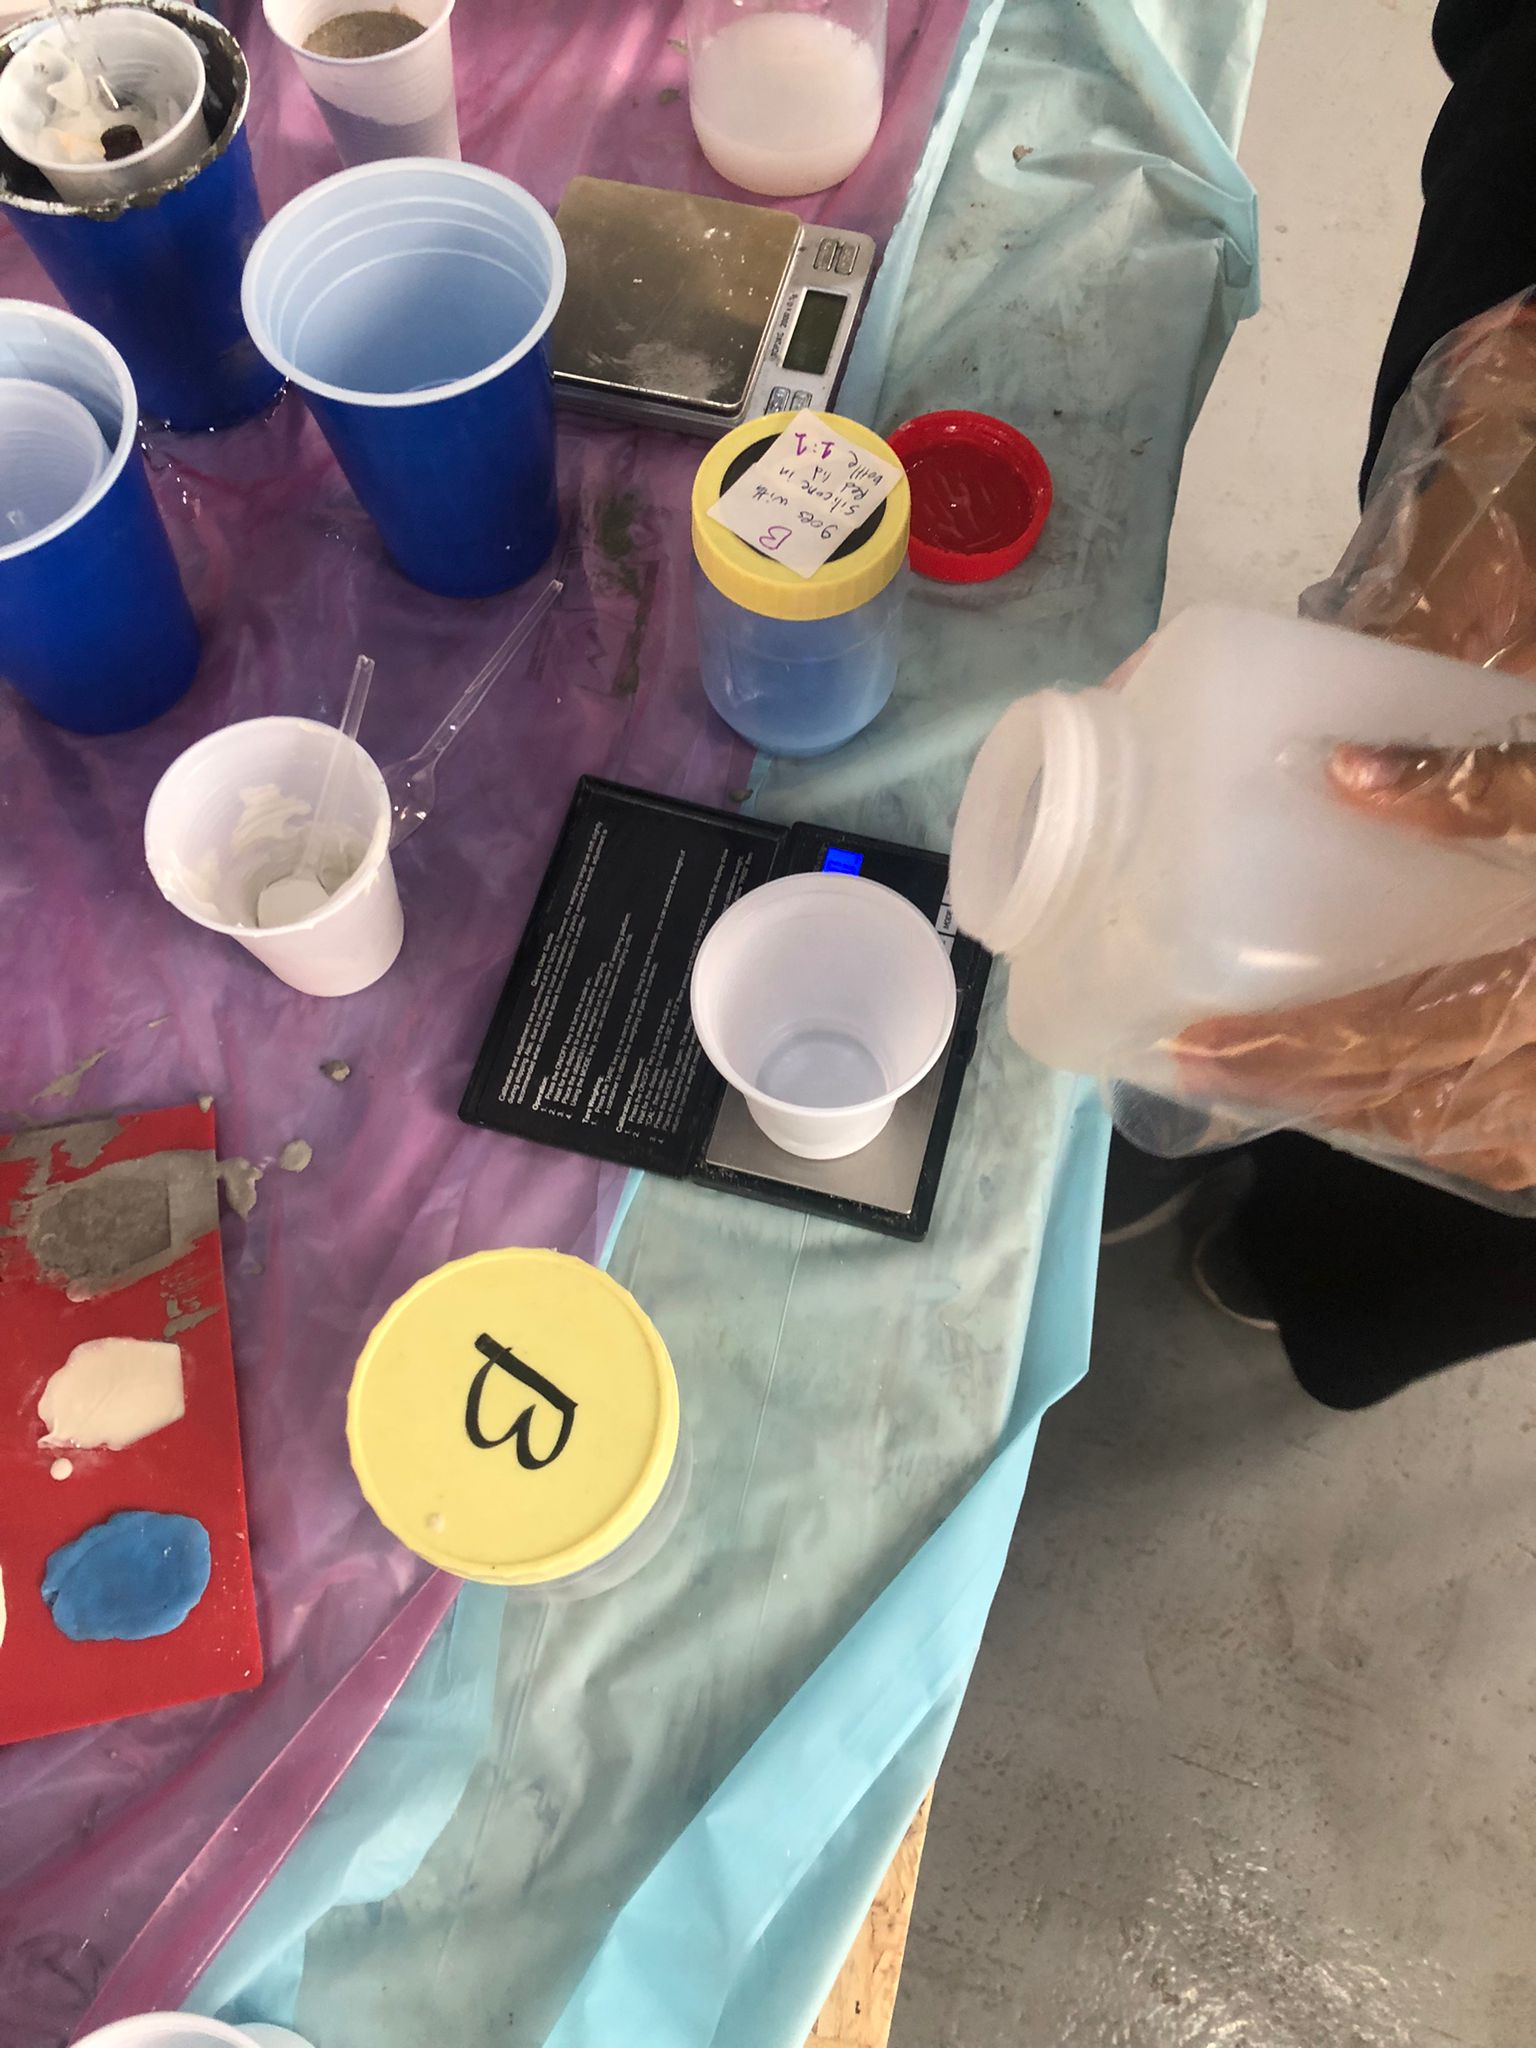
Group Assignment
Material: Gypsum
Safety: Do not breathe dust or mists. Do not eat, drink or smoke while manually handling this product. Wash skin thoroughly after manually handling.
Process: Mix 1 part water to 1 part Gypsum. The end result should be a white liquid.
Work time: While it is completely liquid
Cure time: 6 - 12 hours
Material: Soap base
Safety: Do not touch the hot melted soap. Do not ingest. Melted soap can hurt if dripped or splashed on skin. DO NOT EAT IT! (Though it looks like cheese) Make sure the soap does not come into contact with your eyes. Be sure to wear protective clothing when dealing with the melted soap
Process: - Melt in the microwave using a microwave safe container. Microwave in 10 second bursts stirring in between until fully melted. - Add Fragrance or Essential Oil - Add Color - Stir the Melted Soap - Pour the Melted, Colored, Fragranced Soap Into the Mold - Unmold the Soap
Cure time: 15 minutes
Material: Epoxy
Safety: Put on goggles, safety glasses, gloves, a respirator, and proper protective clothes for the job. Gloves, eye protection, and protective clothes are required when working with epoxy. Use a respirator with an organic vapor cartridge to protect yourself against epoxy vapors
Process: Measure, with gloves on, pour 100A:33B MIX, stir really well for at least 3 minutes. Scrape the sides and the bottom to make sure you’re being thorough (unmixed material will leave you with sticky spots that just won’t cure). Once you put the resin and hardener together, you’ll have about 45 minutes of working time before the resin thickens and cures. POUR, after making sure your piece is level, go ahead and pour it over your work. Don’t be scared! It’ll start to level on its own, and you can spread it around into place. Let the resin run over the edges and then just use a brush to tidy it up. You’ll notice bubbles will begin to rise to the surface. Many of these will pop on their own, but you can also pop them yourself WAIT, it needs to sit for several hours in a dust-free space while it cures. In about 8 hours it will be tacky but you will be able to pour a second coat if necessary. In about 12 hours it will be dry to the touch, and within 24 hours it will be 95% cured. It will be fully cured within 48 hours.
Work Time: 3 minutes
Mixed ratio: 100A:33B
Cure Time: 48 hours
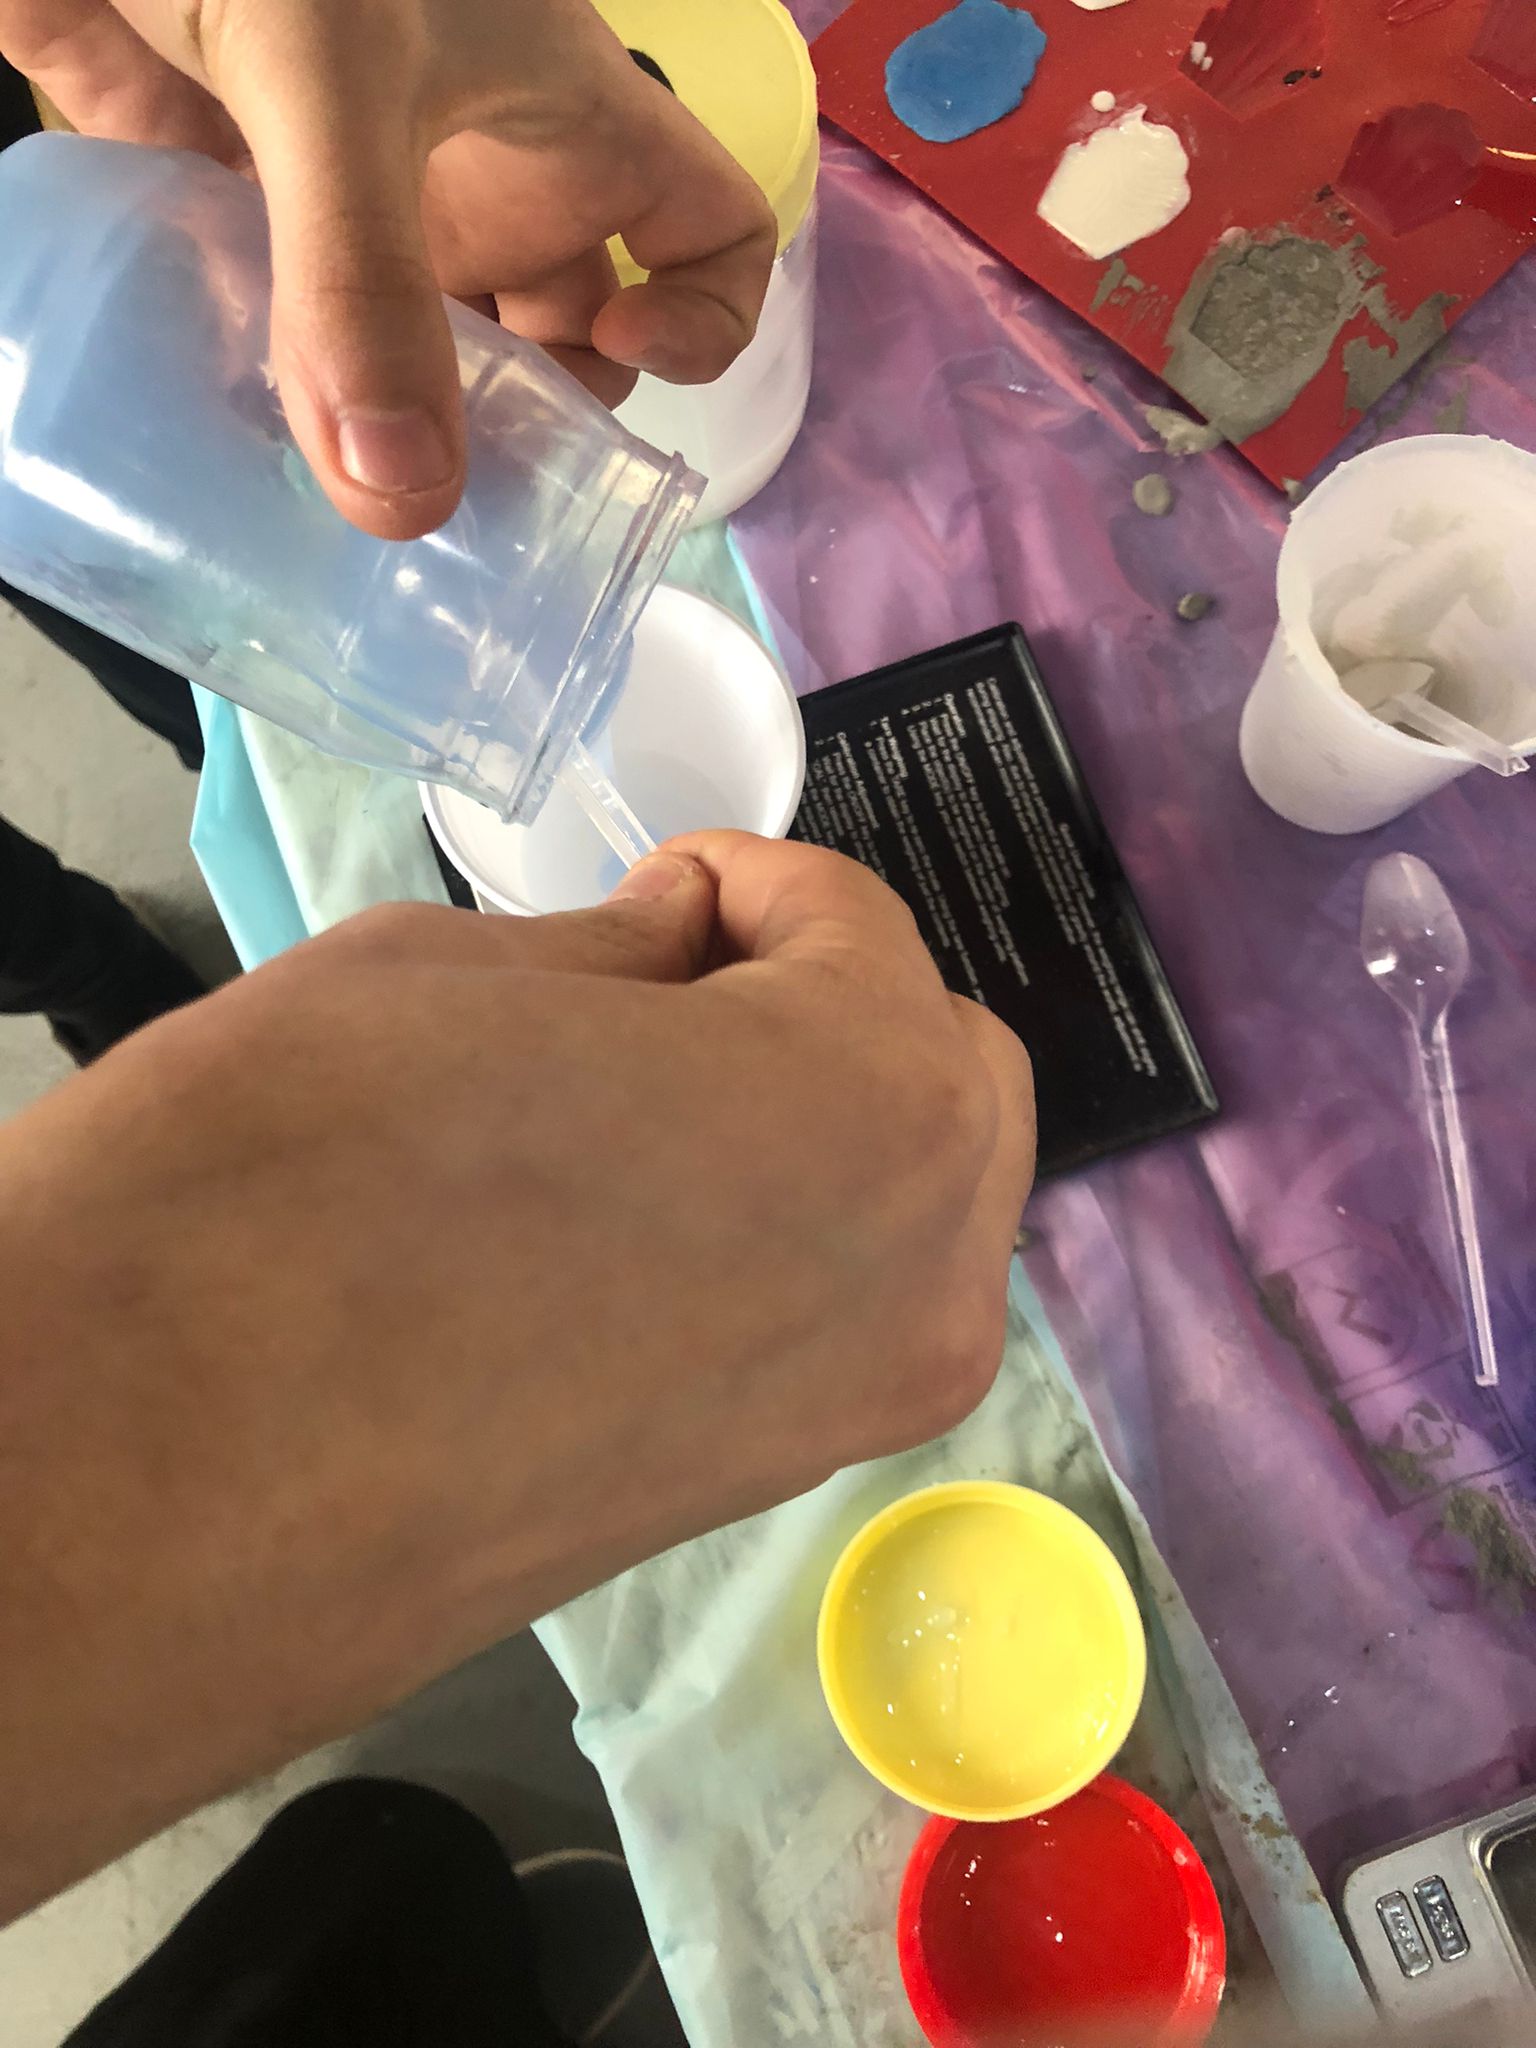
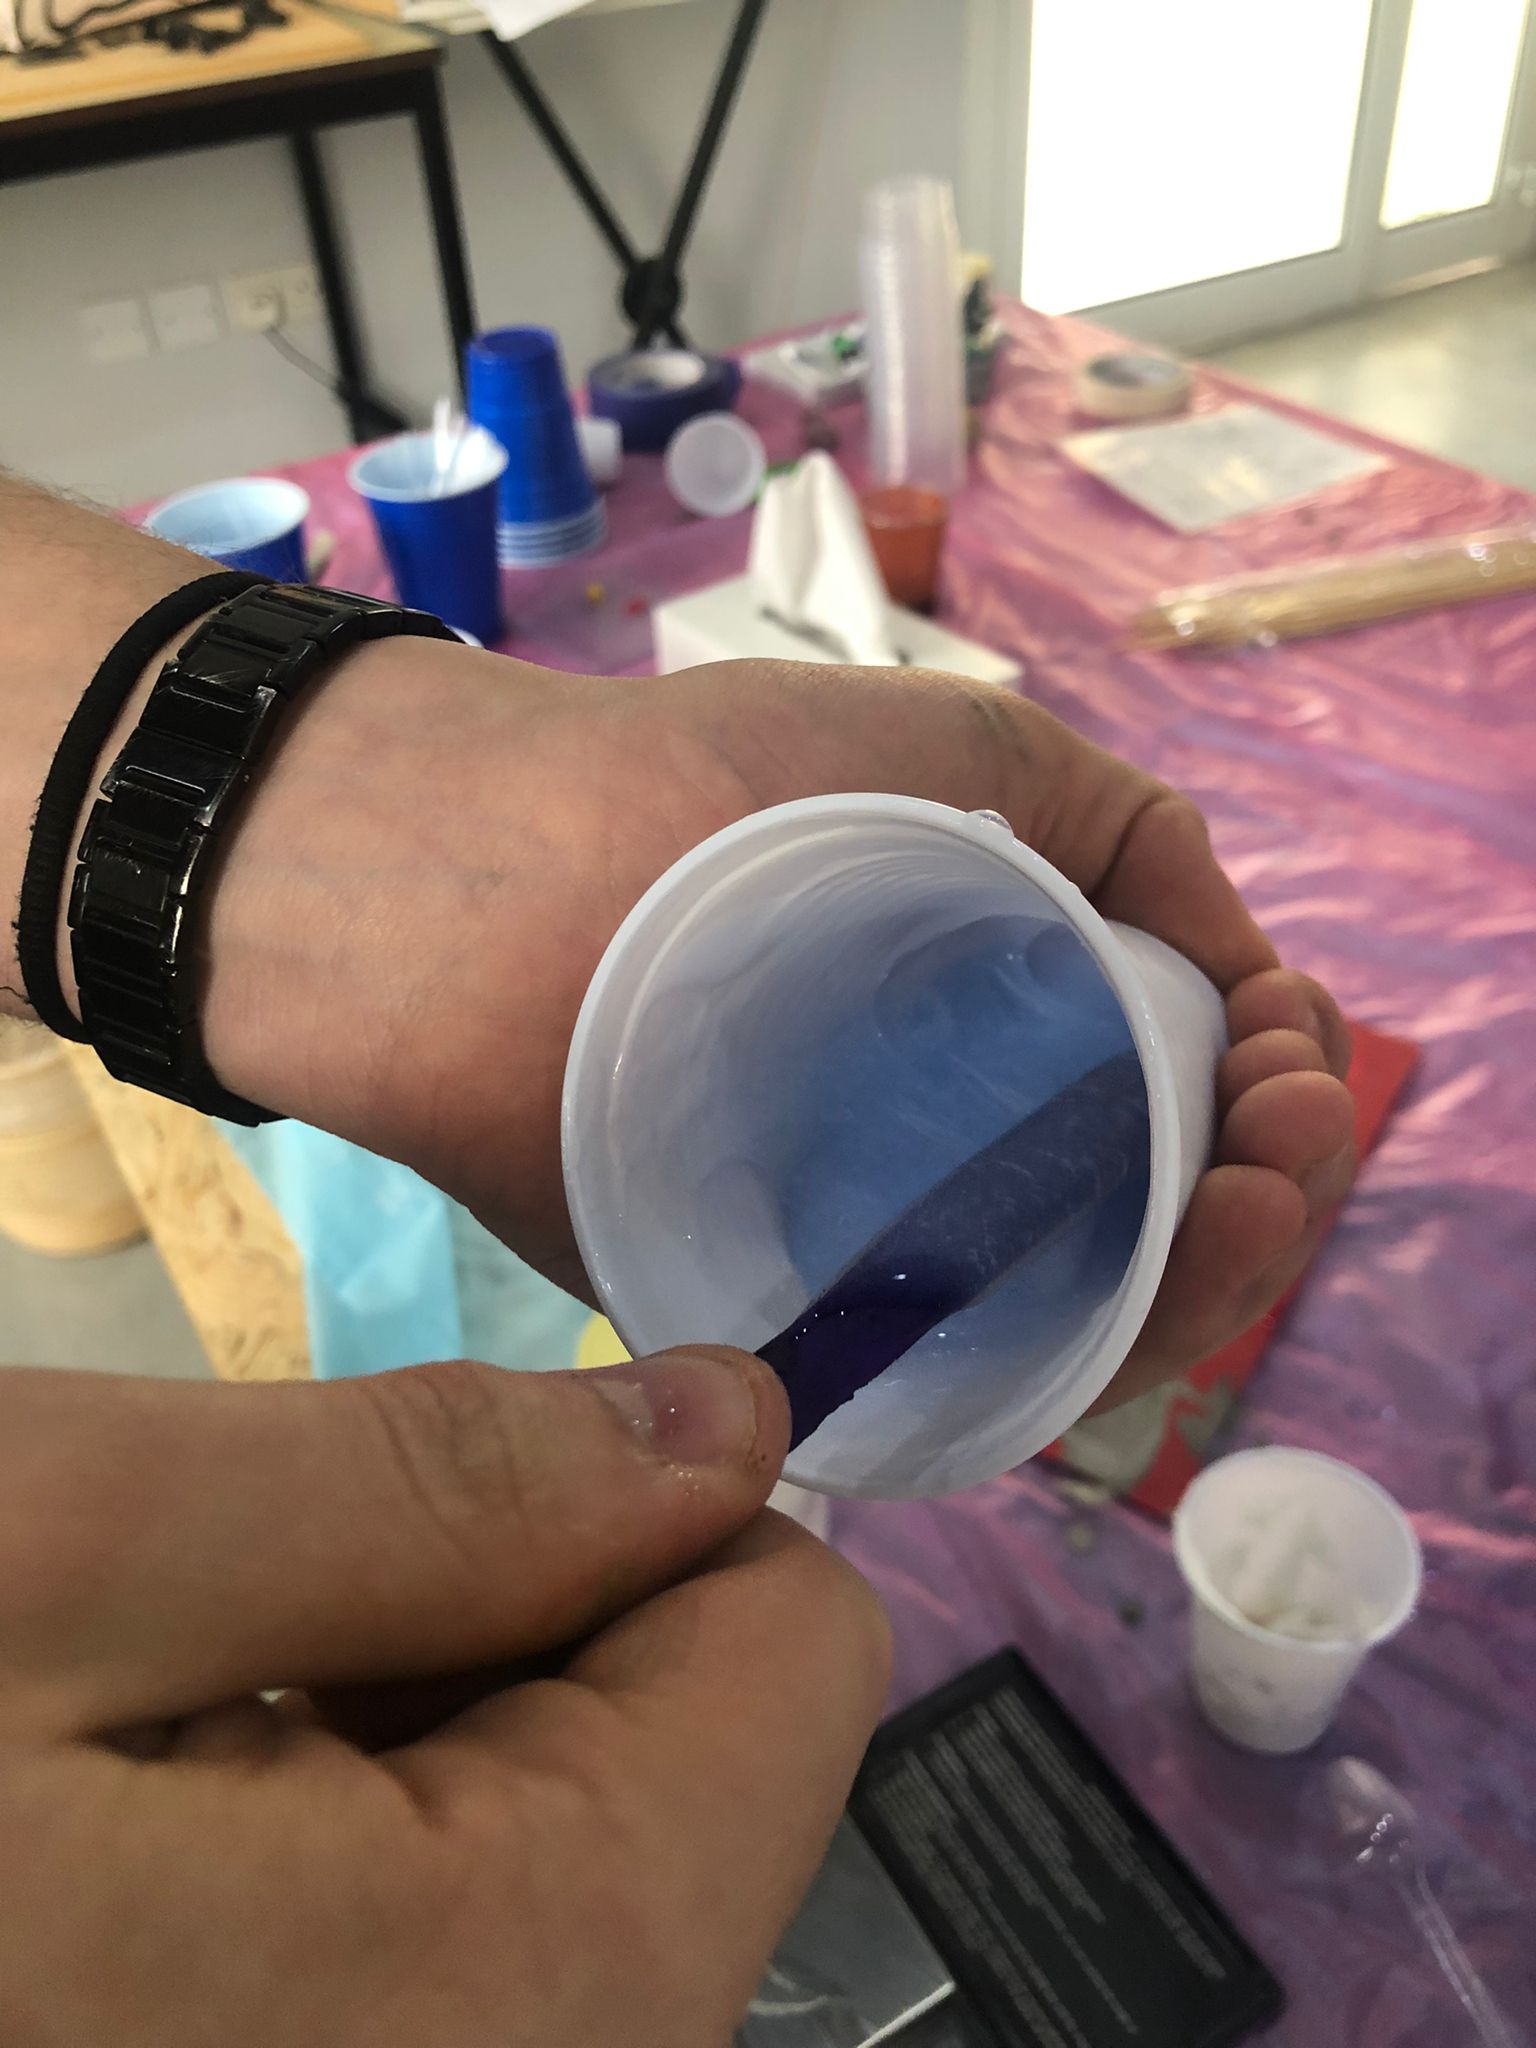
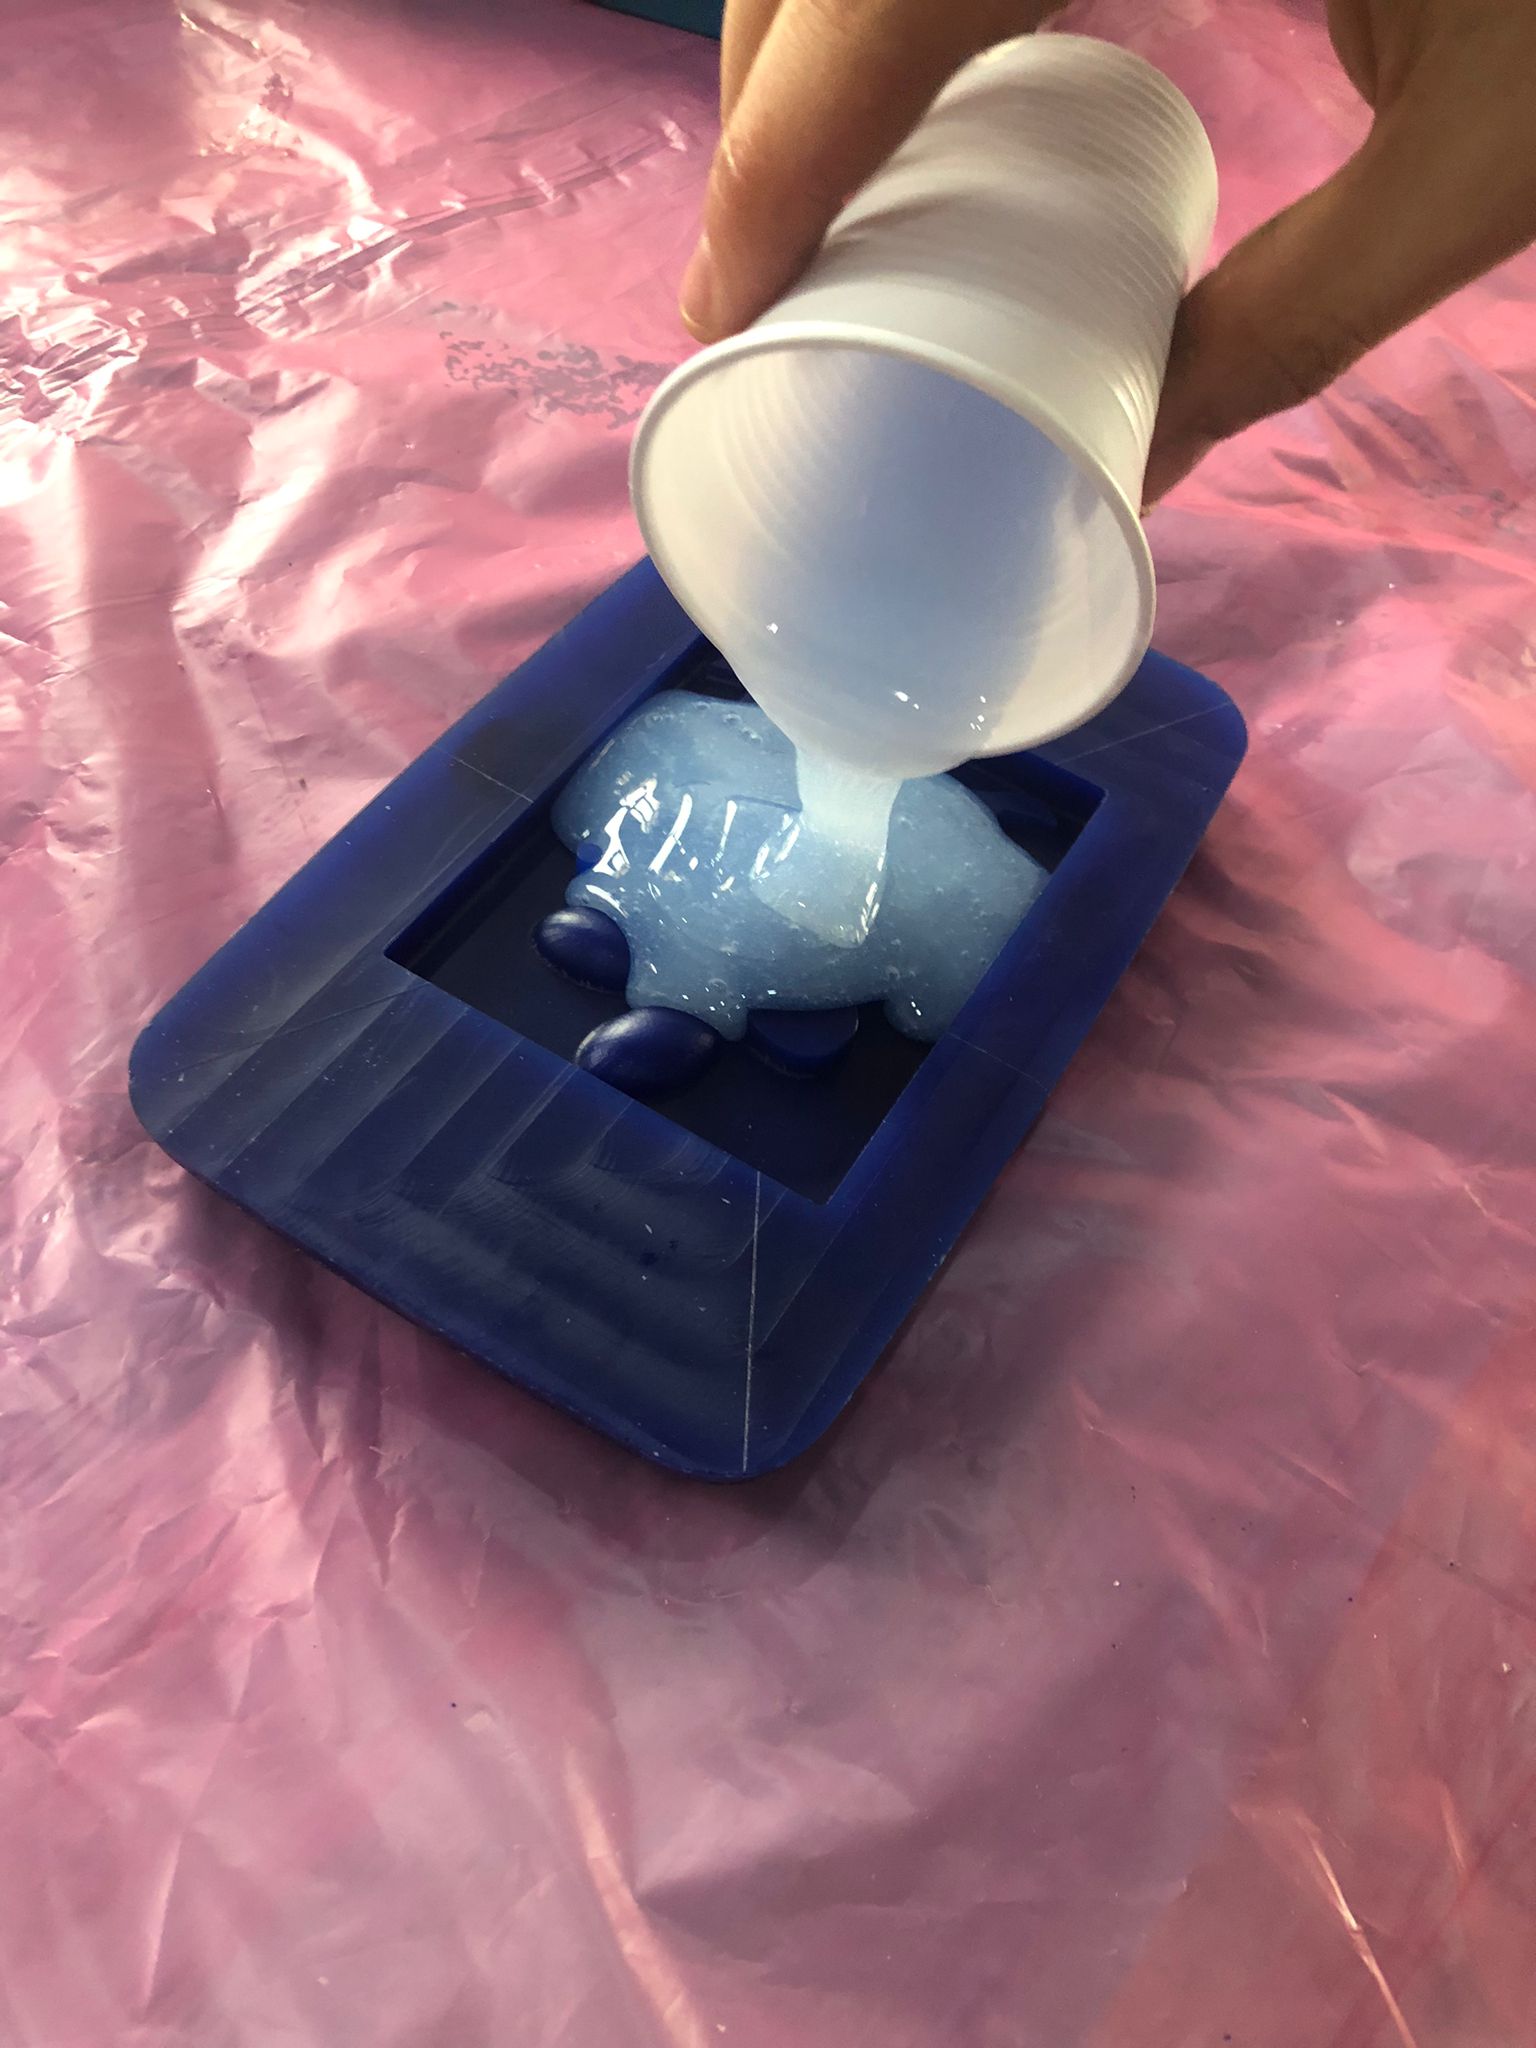
Material : Silicon A & B
Generally, Part A component contains vinyl functional silicones and the platinum catalyst, whereas Part B contains vinyl functional polymer, hydrogen-functional crosslinker, and cure inhibitor.
Safety:
-
Eye Contact: Rinse thoroughly with plenty of water, also under the eyelids. Call a physician immediately.
-
Skin Contact: Wash with soap and water
-
Ingestion: Clean mouth with water and drink plenty of water.
-
Keep away from heat/sparks/open flames/hot surfaces. — No smoking.
-
Keep containers tightly closed in a dry, cool and well-ventilated place. Do not expose to temperatures exceeding 50 °C/122°F. Protect from direct sunlight.
Process
- Mix both material A and B together thoroughly for 5 minutes.
- Then, pour the mixture into the mold.
Cure time: 24 hours
Work time: 30 minutes
Mix ratio : 1:1
Cured material state: Solid
Material: Cement
Safety: Wear water-proof gloves, a long sleeved shirt, full length pants, and proper eye protection Do not eat, drink or smoke while manually handling this product. Wash skin thoroughly after manually handling.
Process: Mix sand, cement, water to get the result.
Mix Ratio: Cement: sand - 1:3 to 1:6
Work time: While it is completely liquid (5 minutes)
Cure time: 24 hours
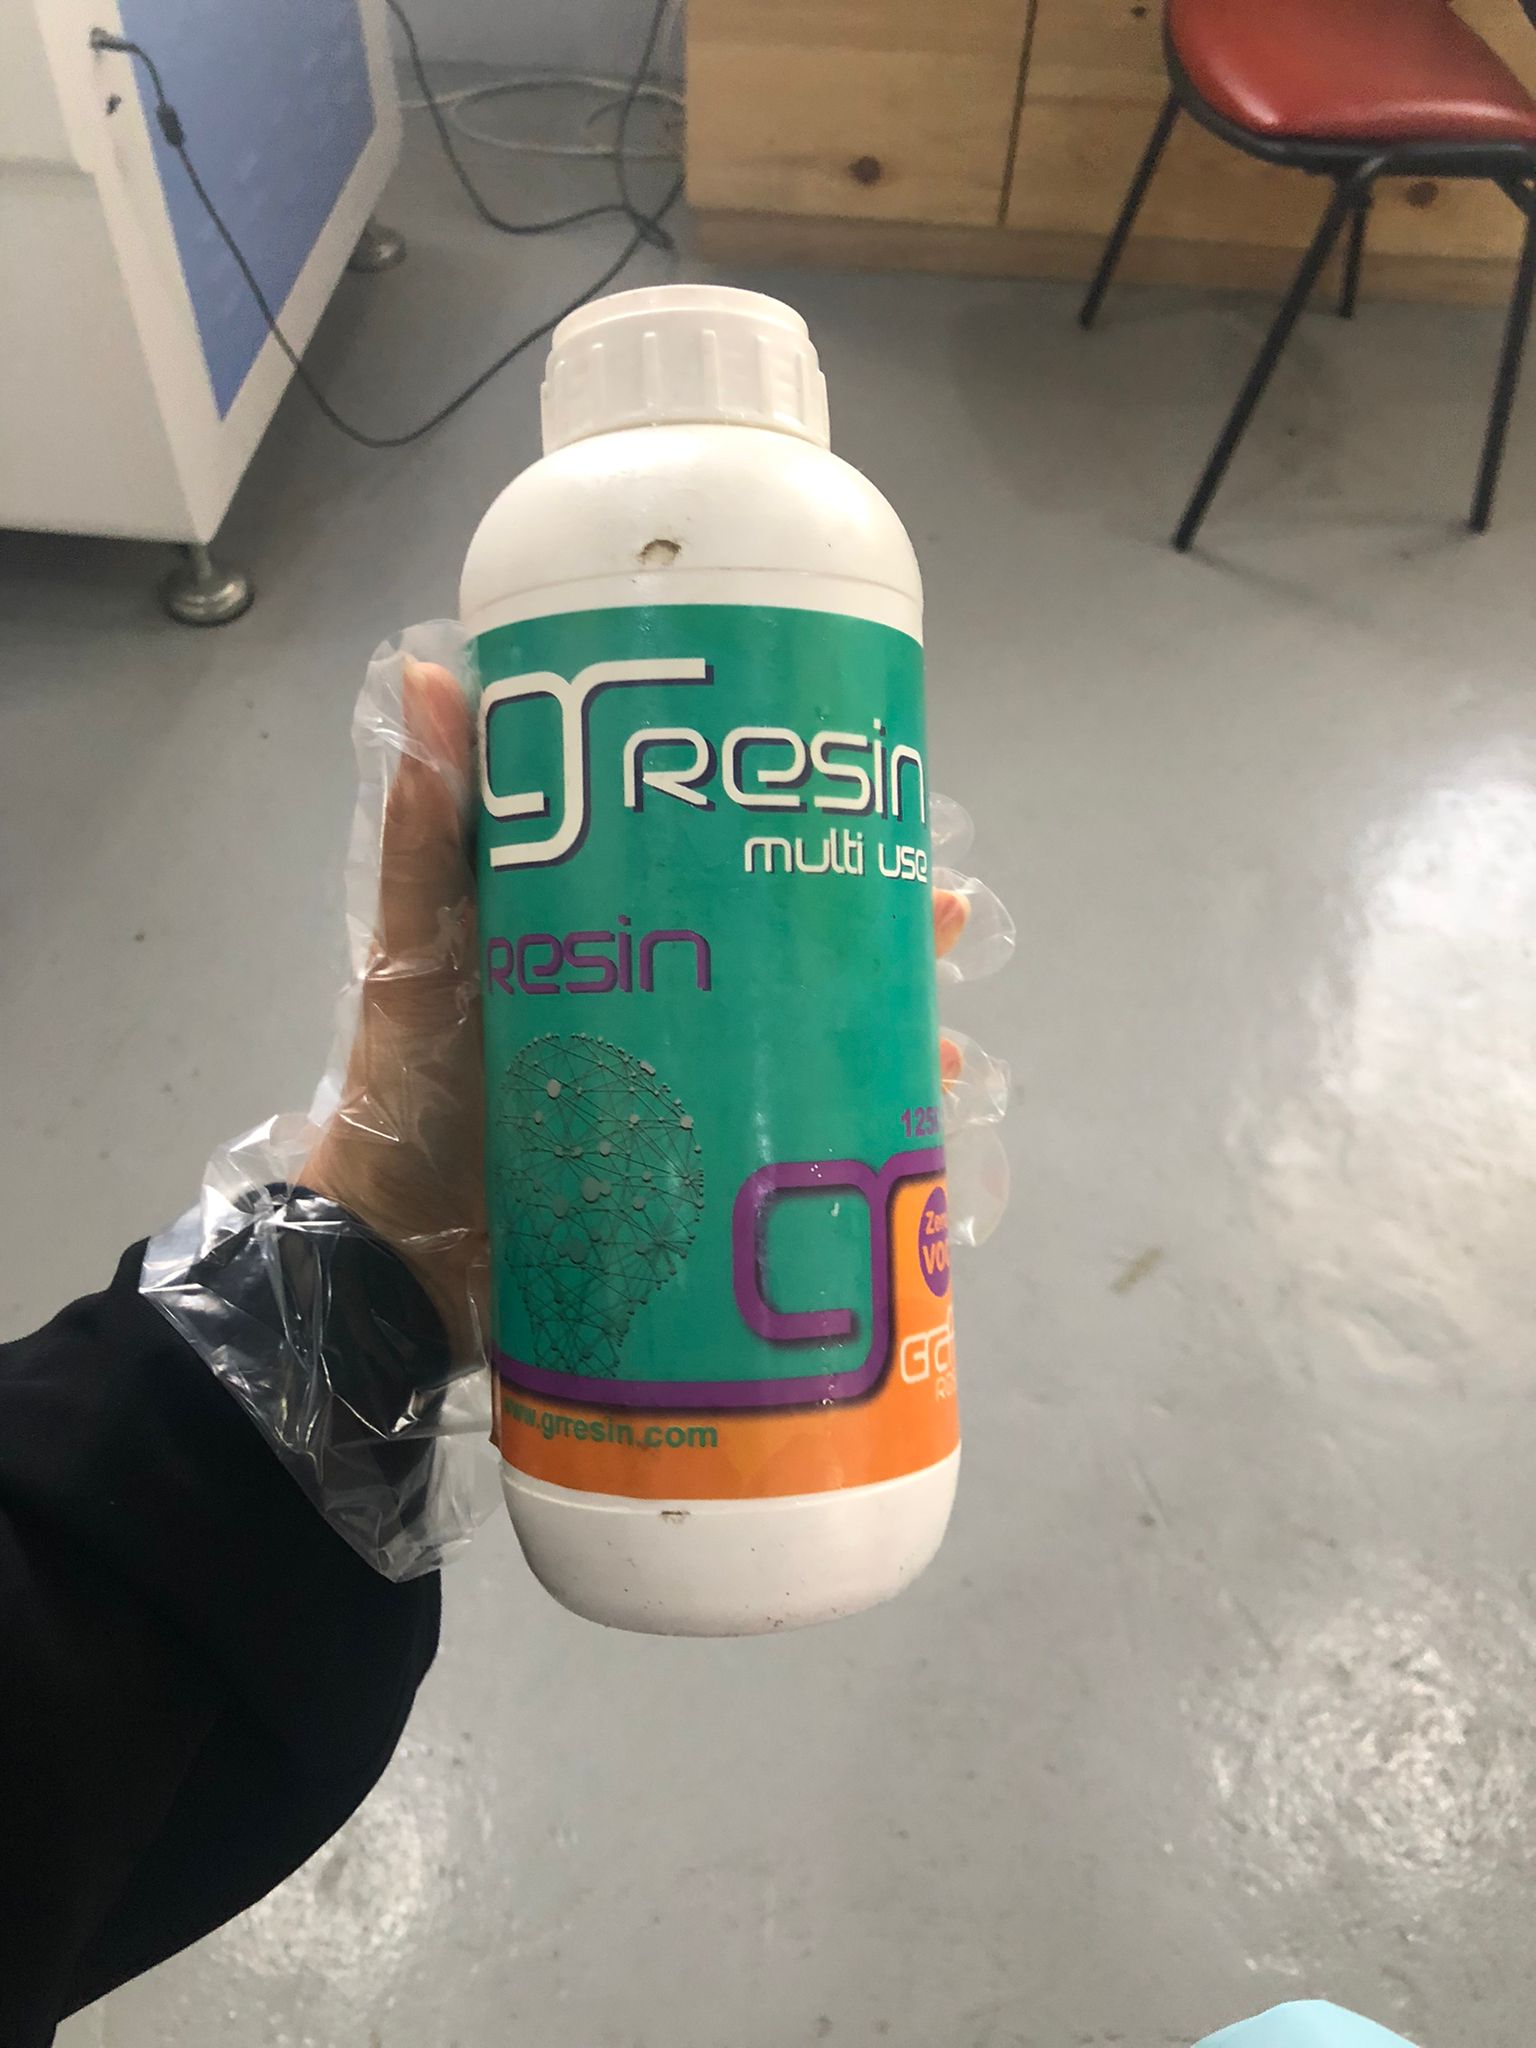
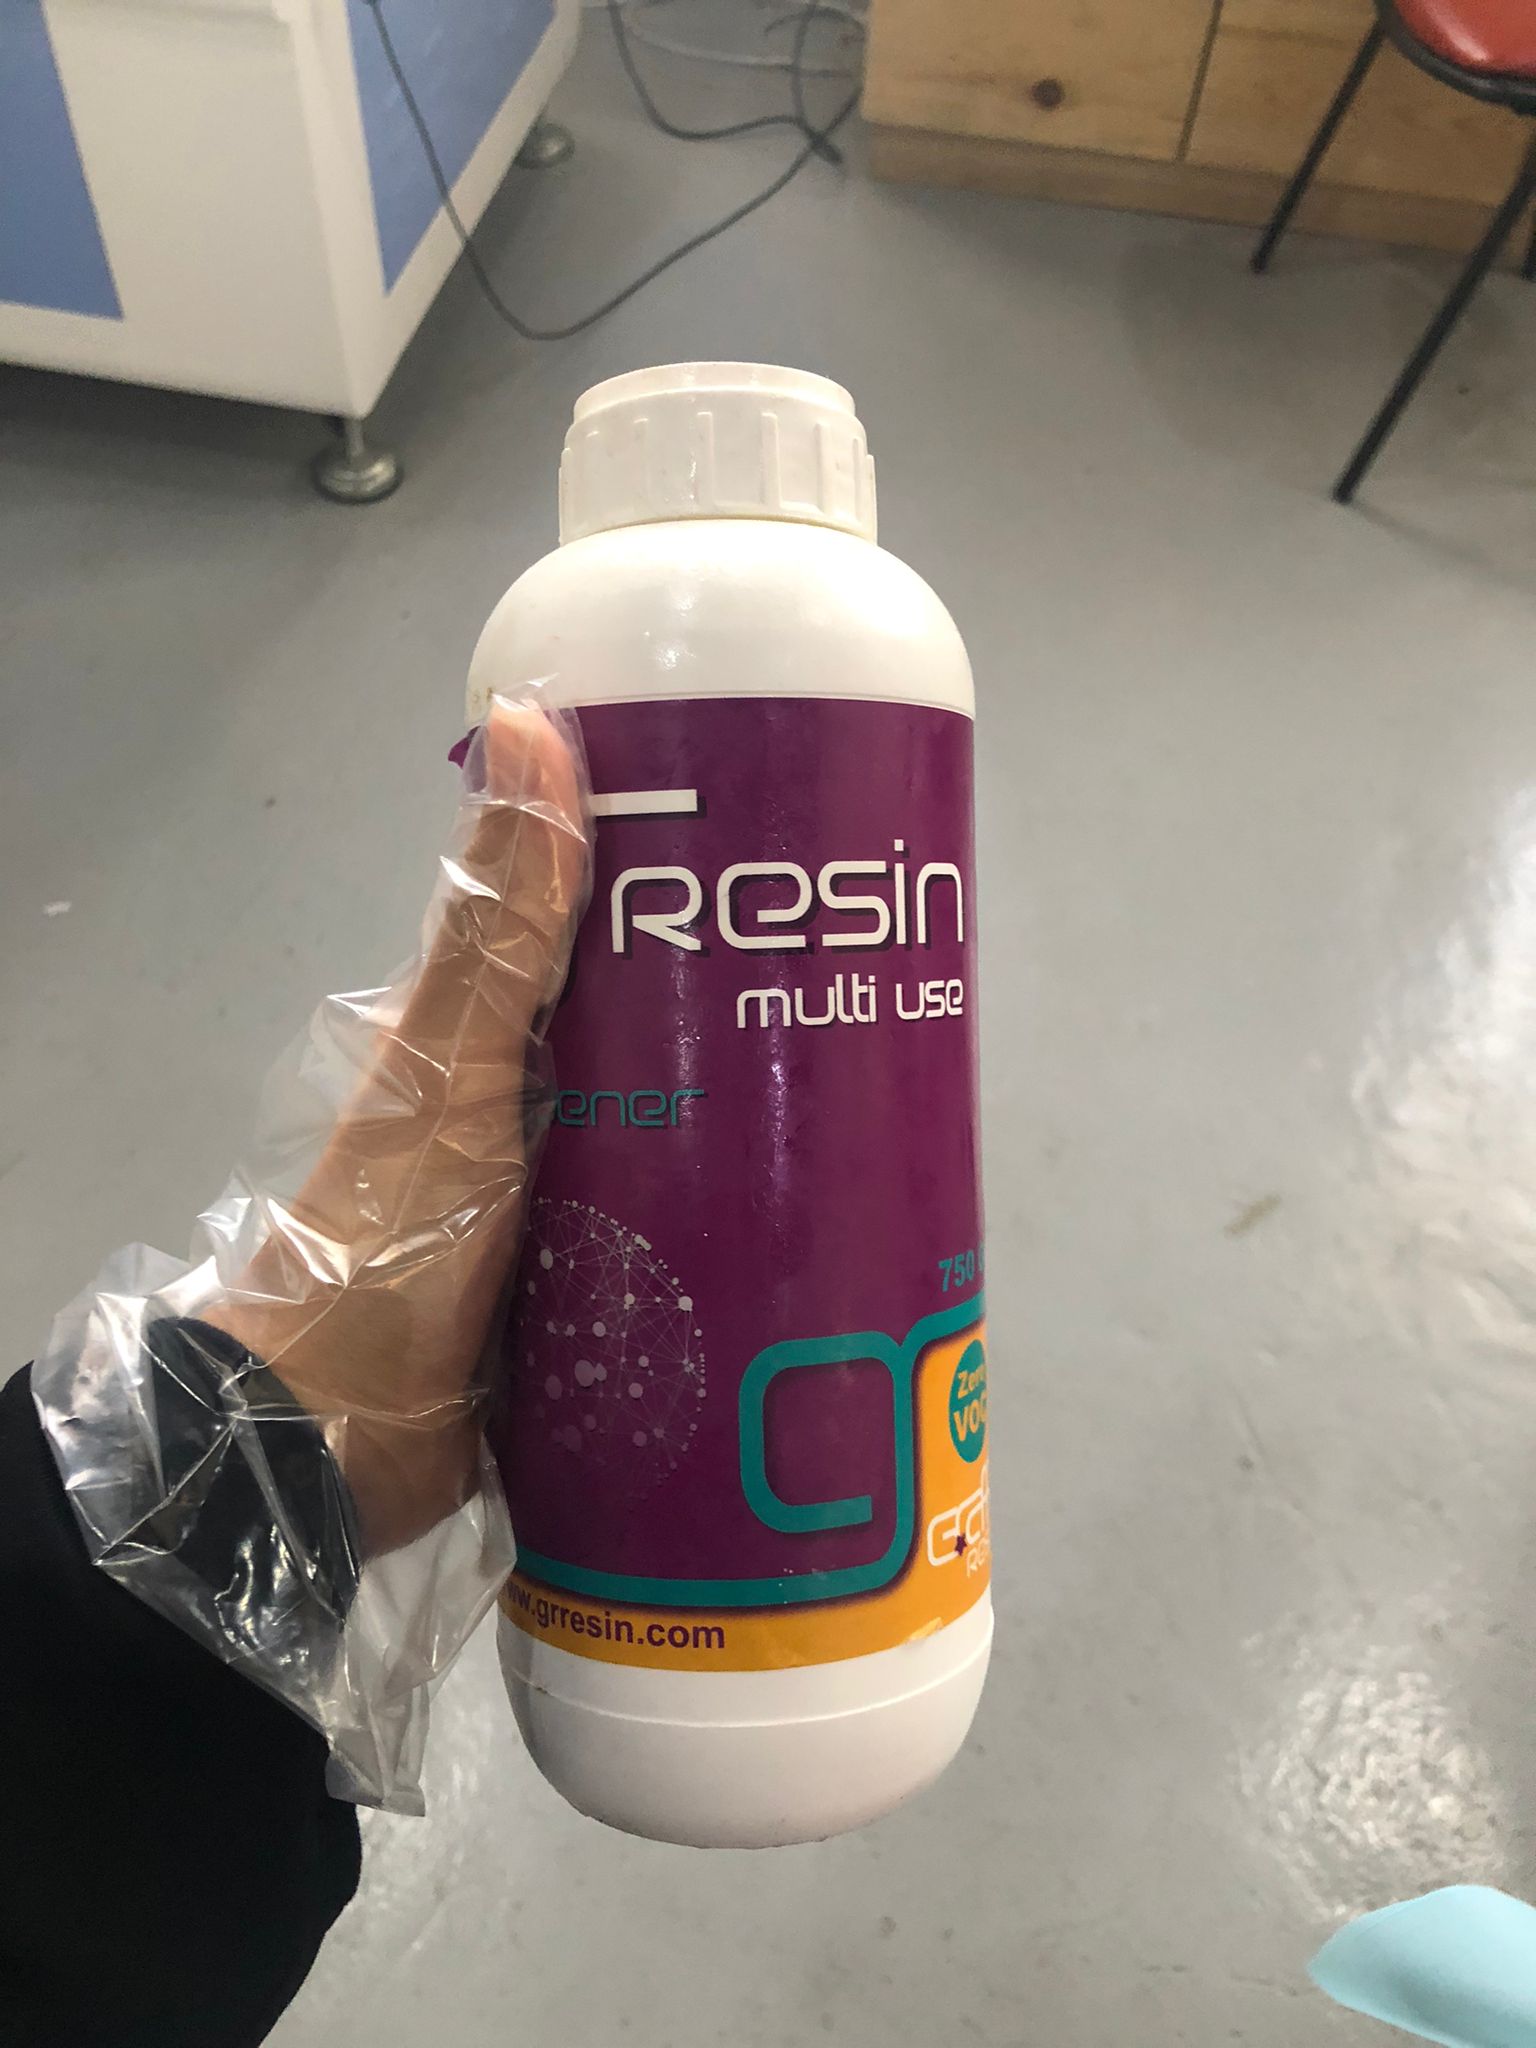
Material: GrResin
Safety - Stored in a dry place. - Preferably in the sealed original container, at temp 20-25c. - Do not swallow. - If you swallowed the resin call a doctor immediately - Wear face masks for pregnant when using the product. - Wear protective gloves - In case the product comes in contact with eyes : rinse cautiously with water for several minutes.
- Caution it may cause an allergic skin reaction.
Process:
-
Mix exact ratio of 10 grams of Resin to 6 grams of Hardener,
-
Using the digital scale to messure the quantity,
-
Stir the mixture for 3 minutes.
-
Pour the mixture and spread it over the project.
Work time: 45 minutes , after pouring the mixture. Advised not to leave the mixture more than 10 minutes in mixing cups.
Cure time: Dries completely after 24hrs and hardens after 48hrs
Material: Dry Putty/ Stucco
Value Dry Stucco/Putty is a specially designed product based on cement and emulsion, that fills and levels surface imperfections on cement and plaster. It also improves the water resistance of the surface and prepares it for the adhesion of subsequent coatings. It can also be directly applied over plaster and overcoated directly with interior or exterior emulsions, even without a primer.
Safety:
- Clean the surface thoroughly.
- Make sure it is dry and free of all dust, contaminants, and fungal growth.
- Remove laitance (accumulation of particles on fresh concrete) with a wire brush or sweep blast.
Tools:
- Trowel
- Putty knife
Process
- Wet the surface with water.
- Mix dry stucco with water in the ratio of 40% to 50% by weight.
- Allow this paste to mature for five minutes, then mix thoroughly and apply with a putty knife or trowel.
- After it is dry, in two or three hours, wet the surface again with water, and apply the second coat.
- Make sure the entire mixed stucco paste is used up within 2-3 hours of mixing. Sand the surface, wet it and then apply the desired top coat.
Cure time: 5 minutes
Work time: 5 minutes
Mix Ratio: 10 parts stucco to 4-5 parts Water
Sources
Final Results of the group assignment
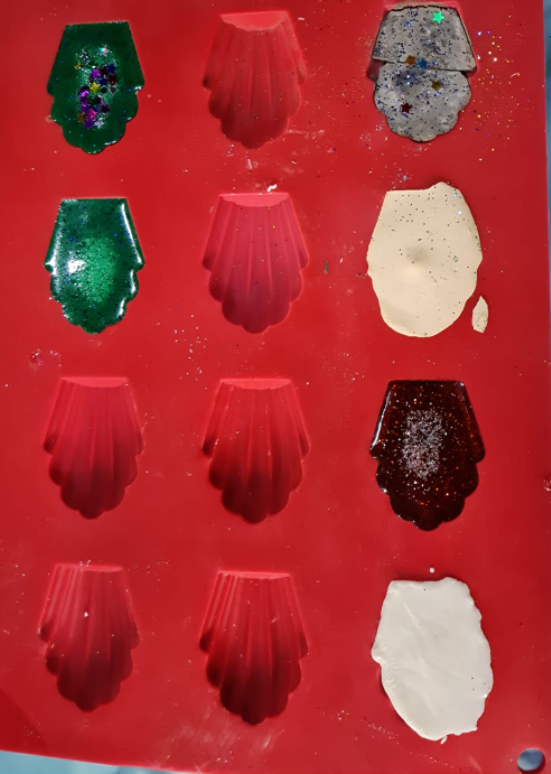
- The green color shape is made of silicon rubber.
- The gray color, the broken one is made of cement.
- The yellowish white color is made of gypsum.
- The white color is made of soap.
- The red color is made of resin.
As it is clearly shown most of the materials were well done except for the cement. This is because the cement ratio to water is not given in the internet. So we have assumed it, and the result failed, it was easily broken.
The best material was Resin, it was strong and looked nice after testing it.
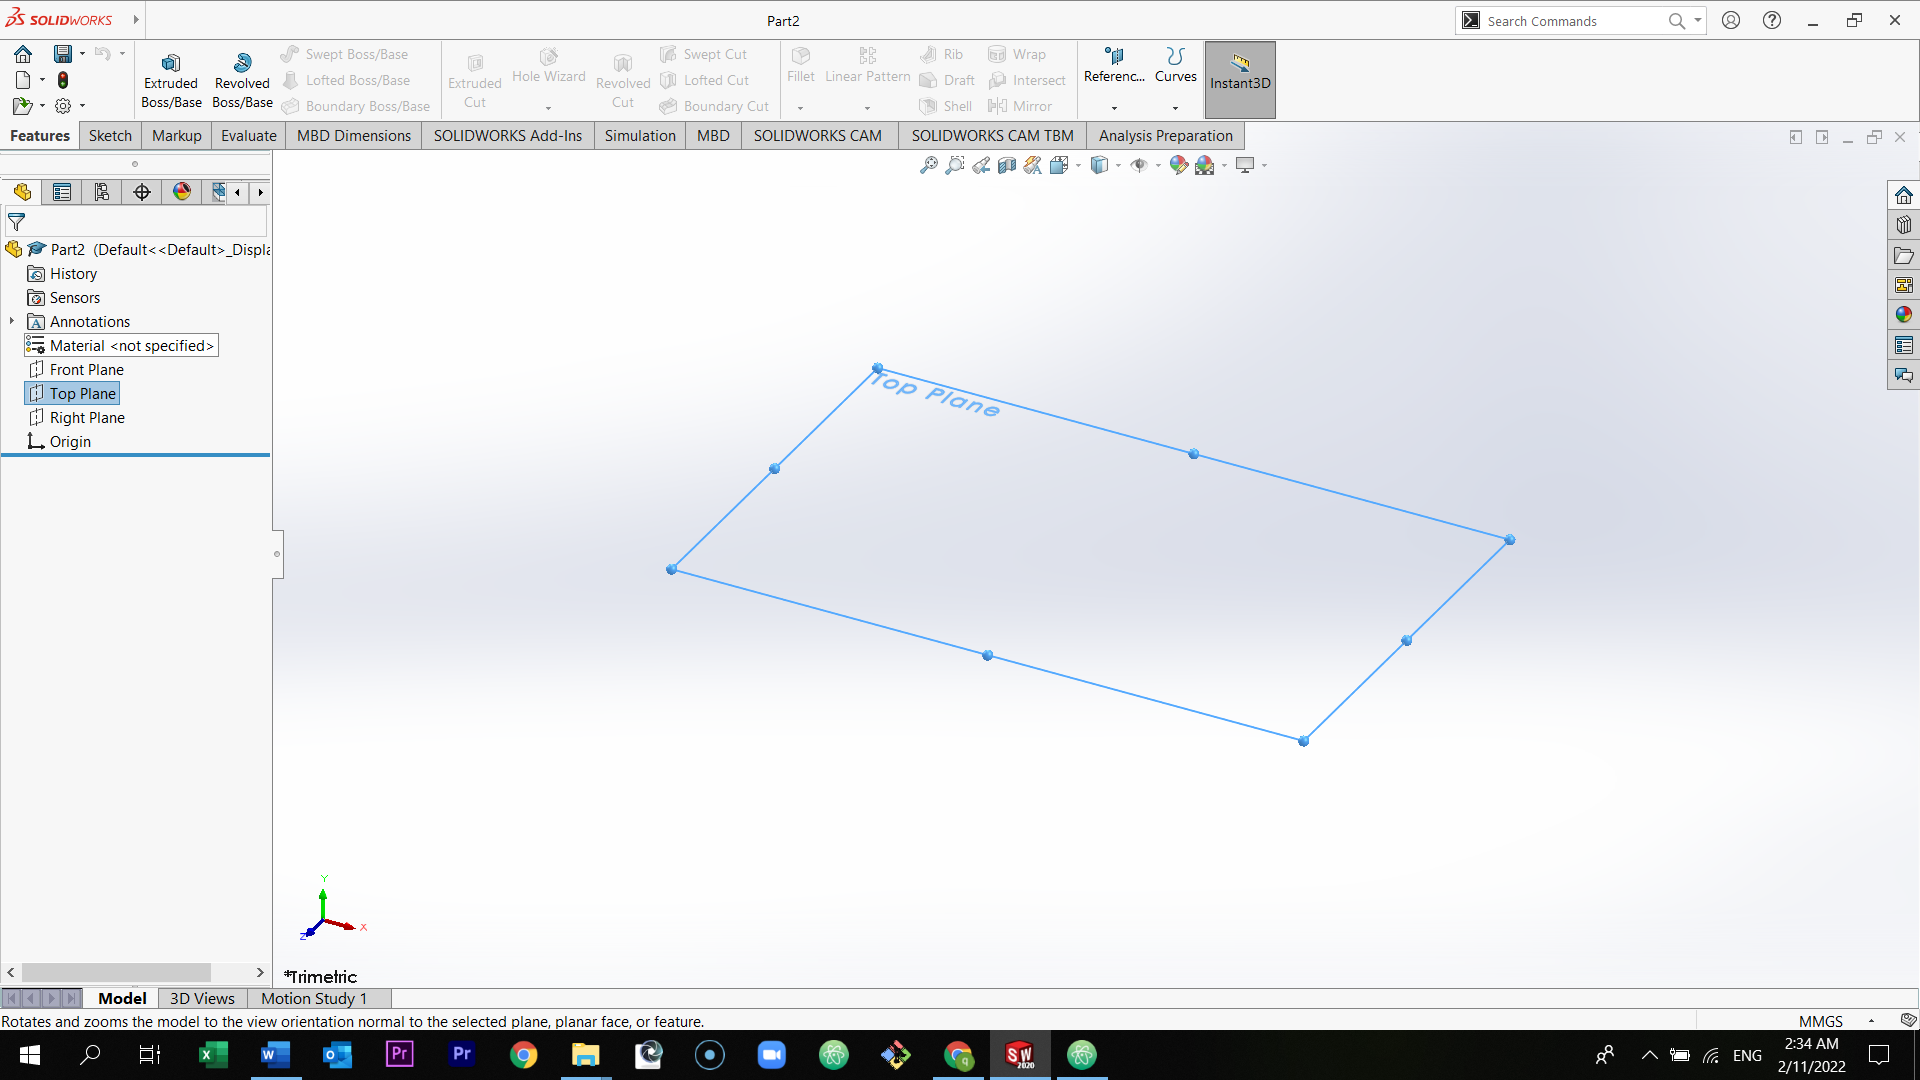
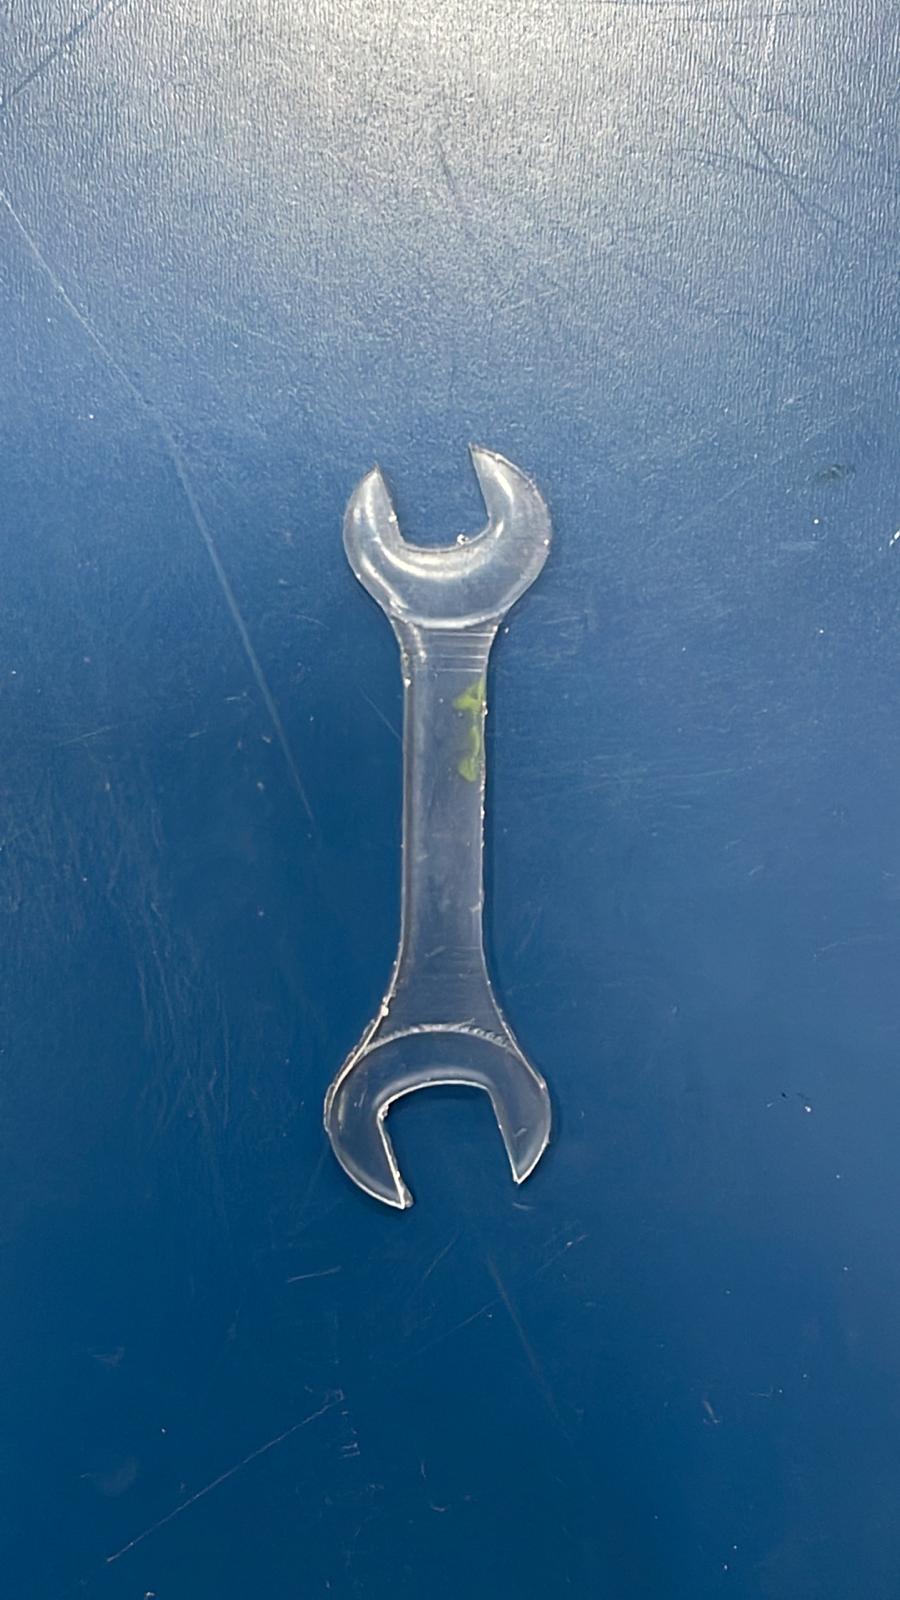
Designing the 3D mold
Open solid works and select the home icon which is located at the top left of the page. Then select part.
Select the top plane.
Select the center rectangle and draw it in the center of the page.

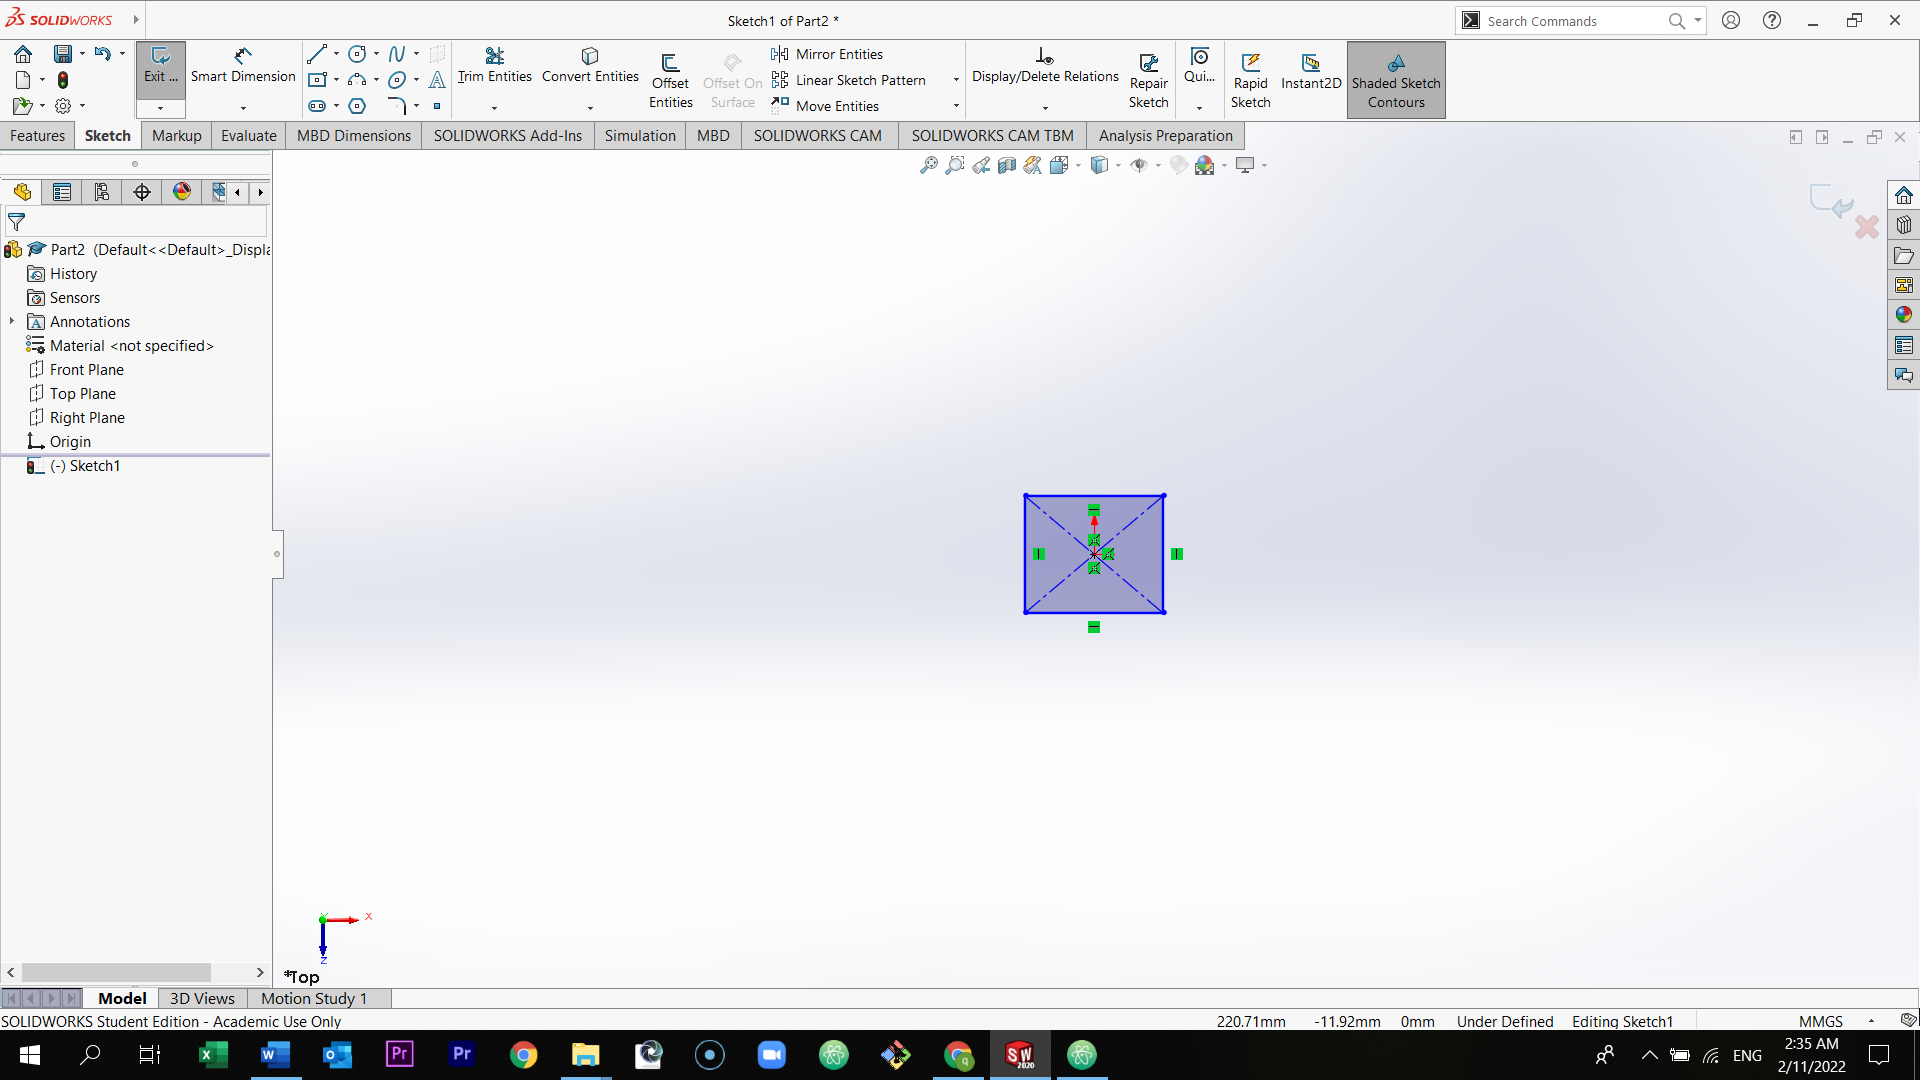
Select the line and draw it from the center of the rectangle to anywhere in the page. Select the line and in the left of the page select for construction.
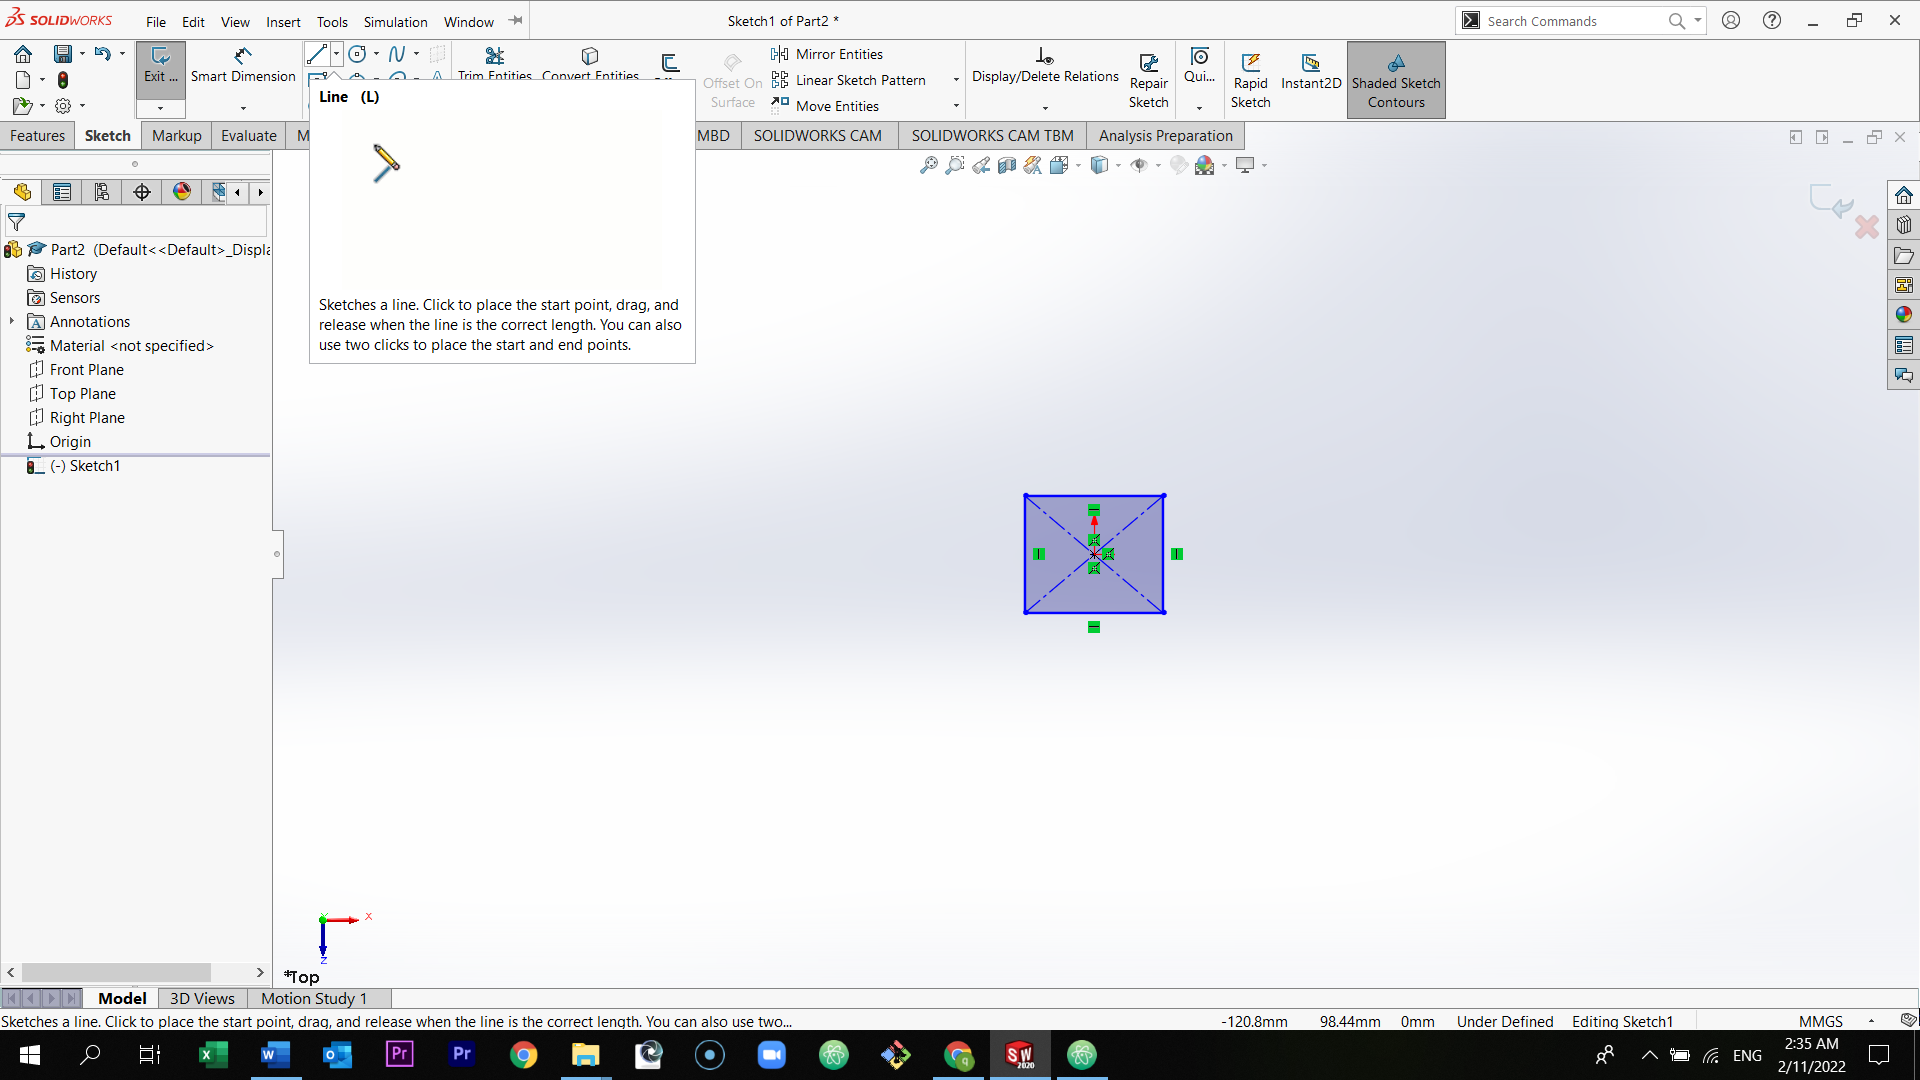
Draw a second center rectangle.
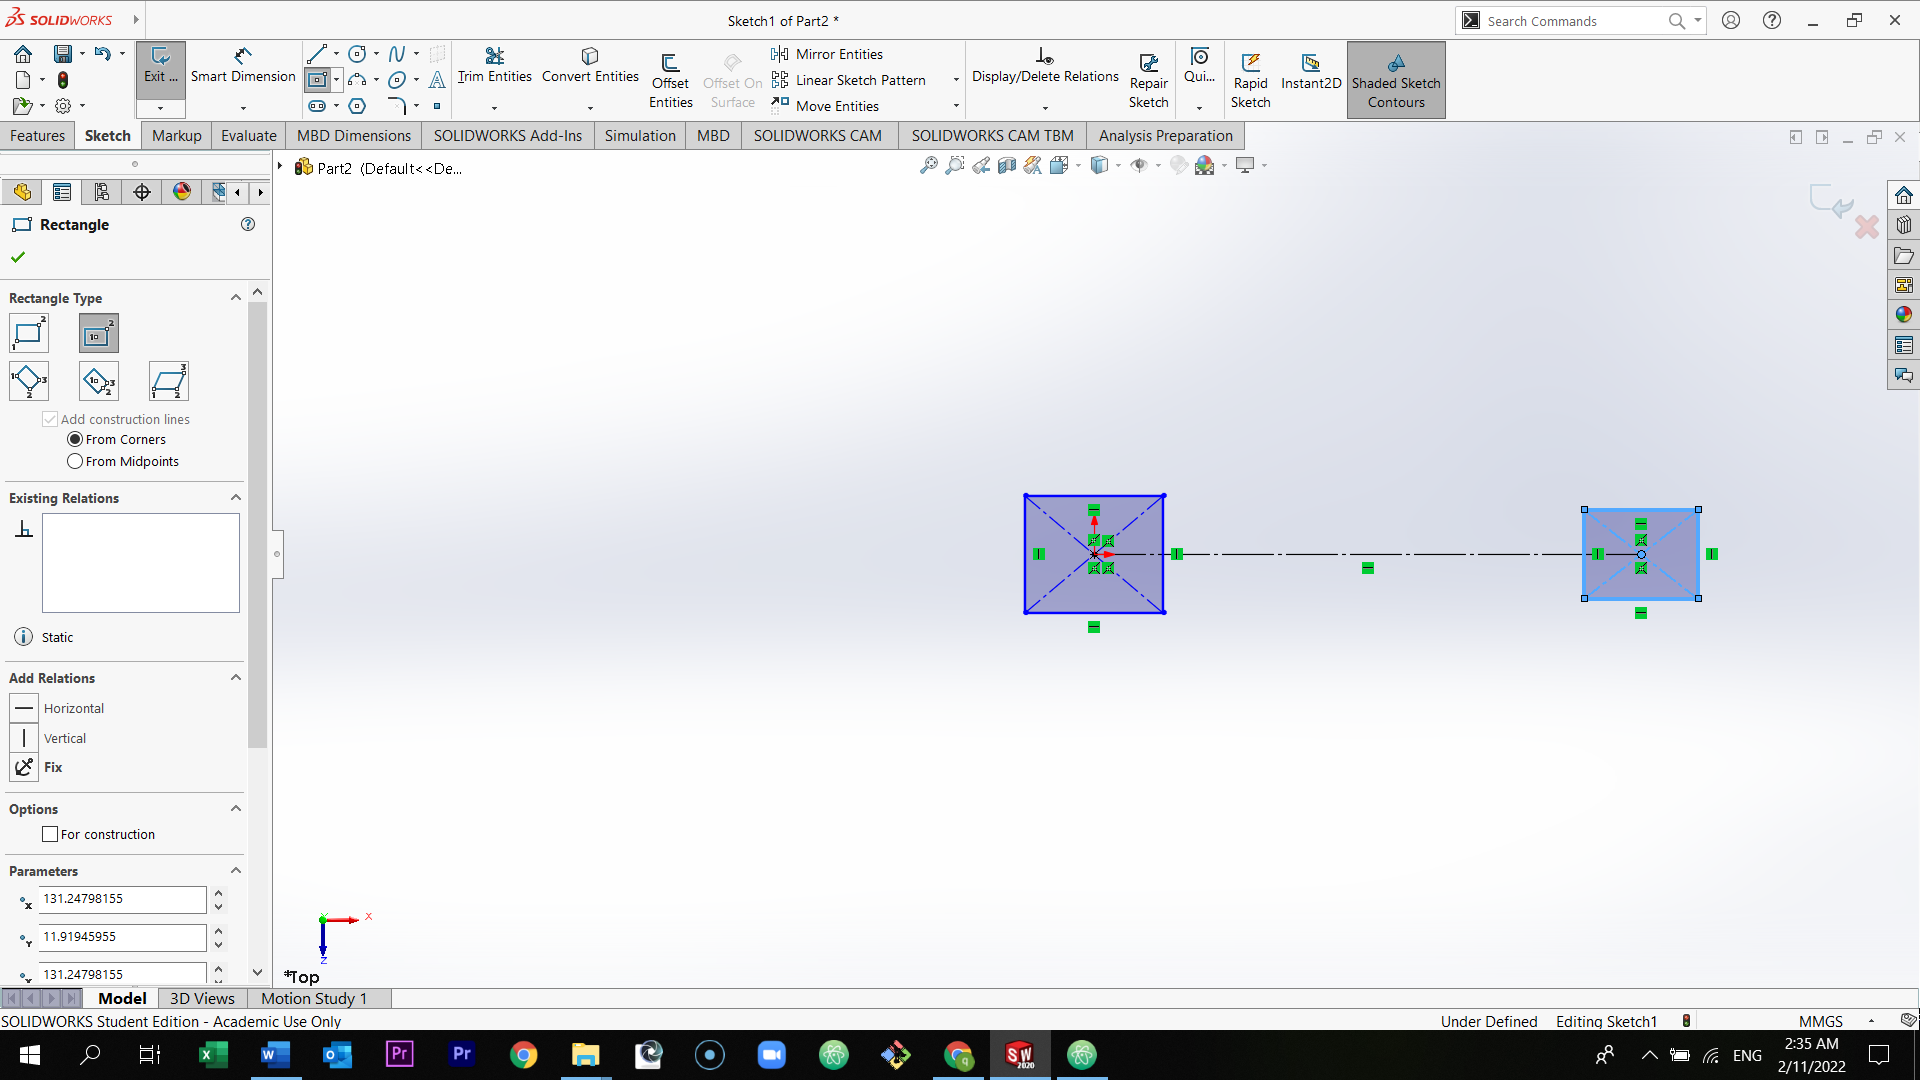
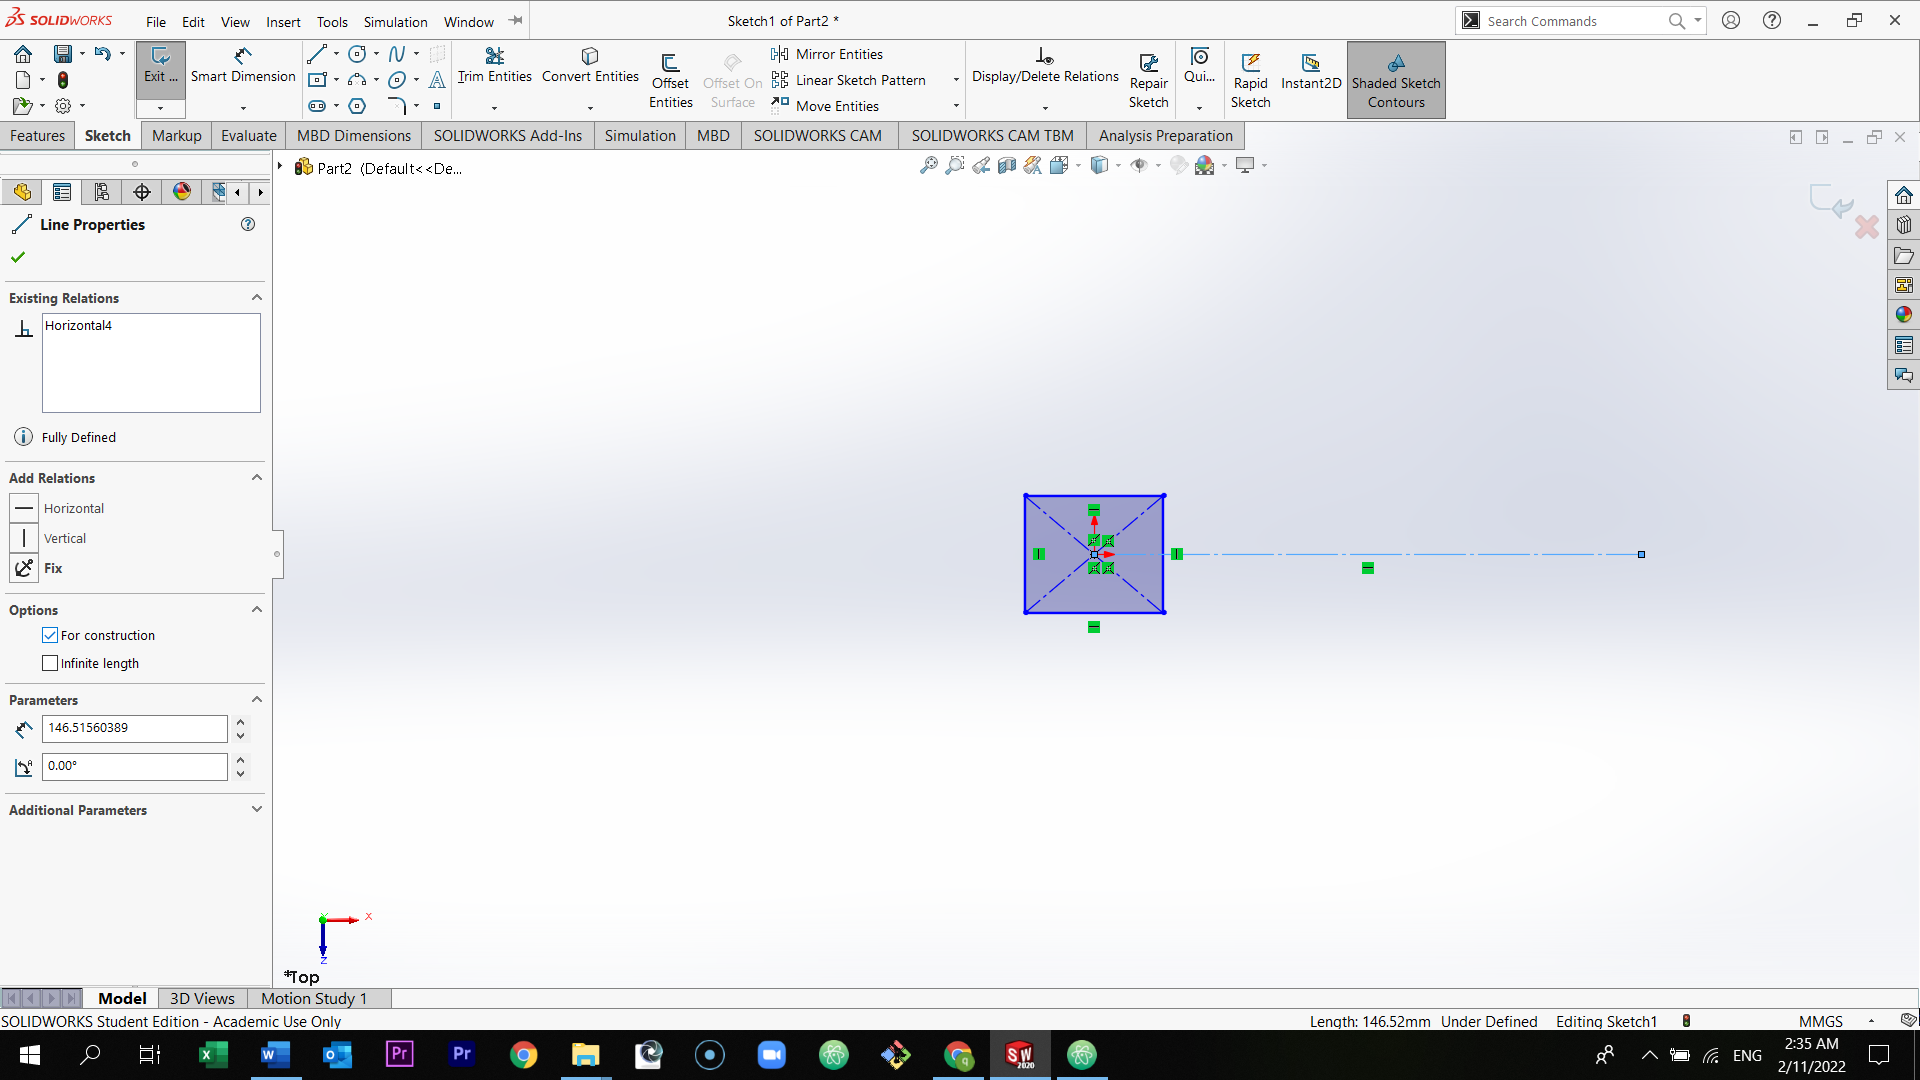
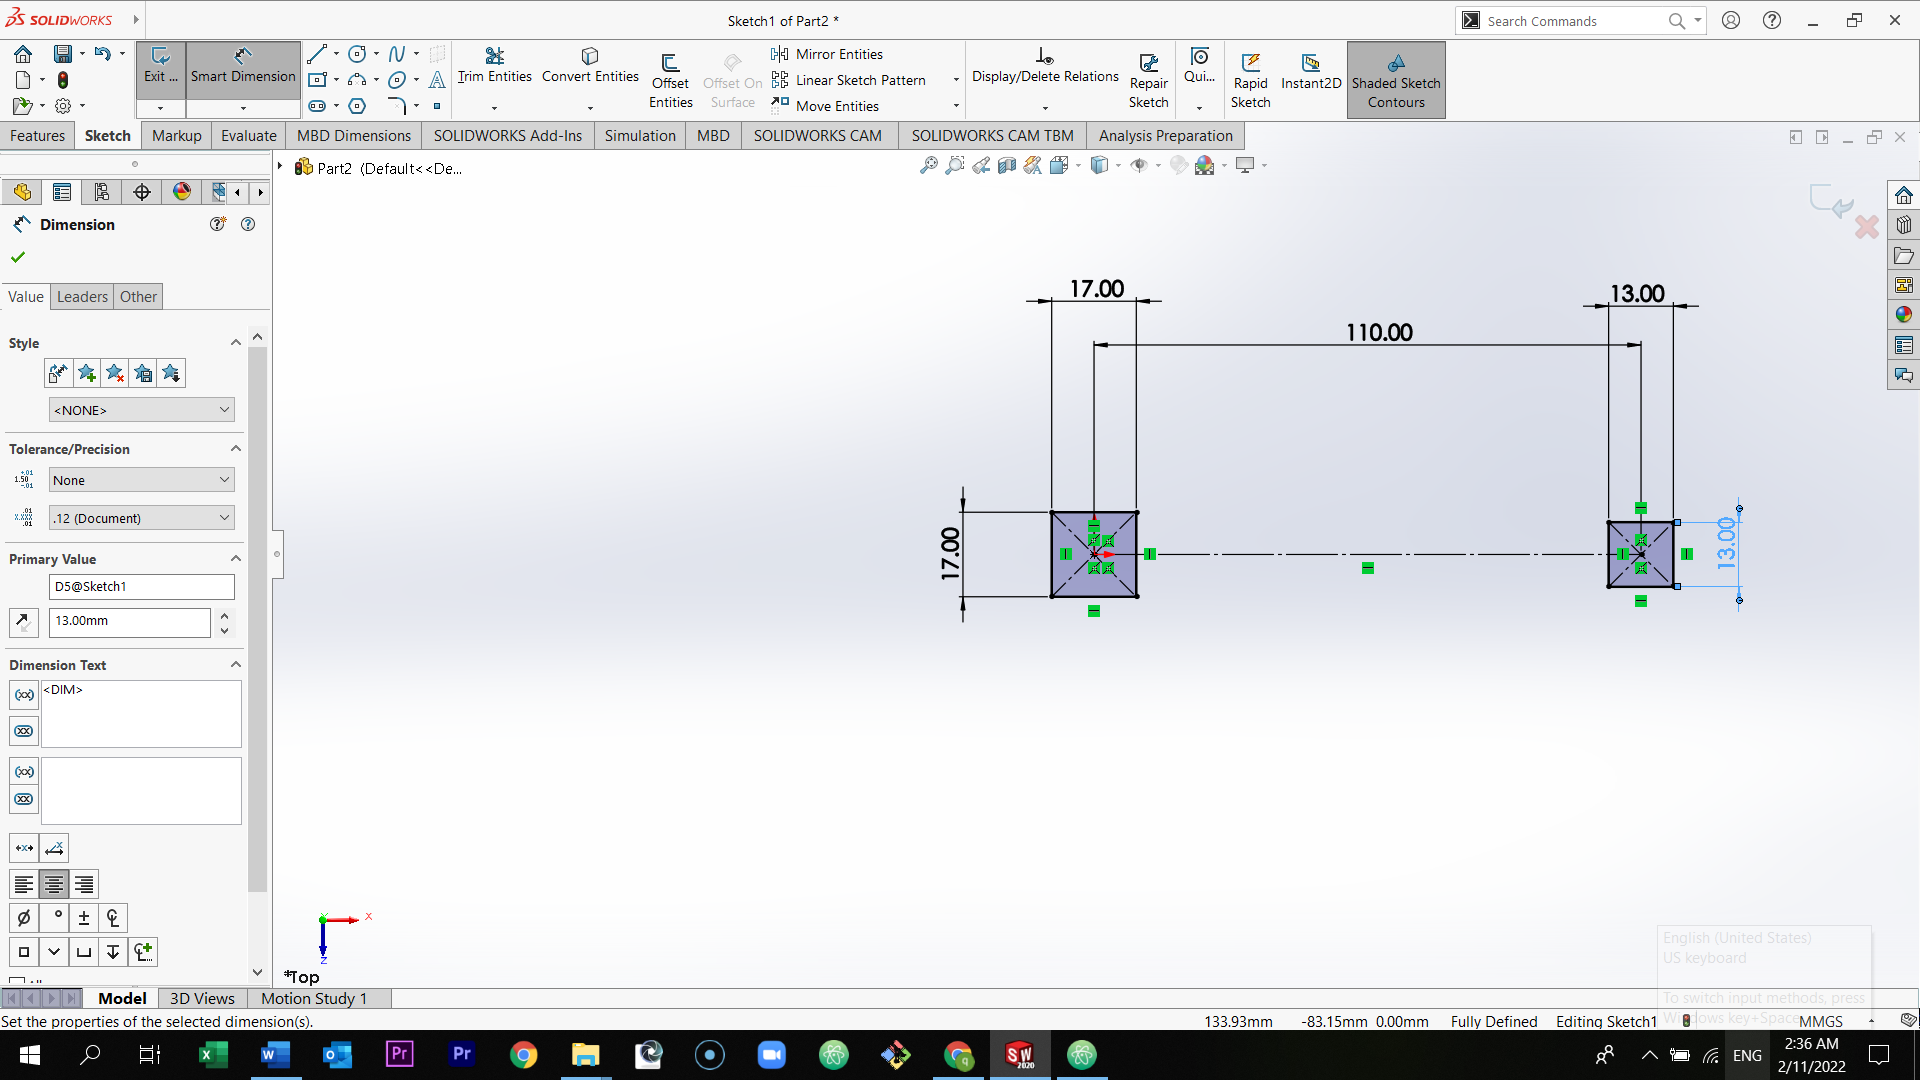
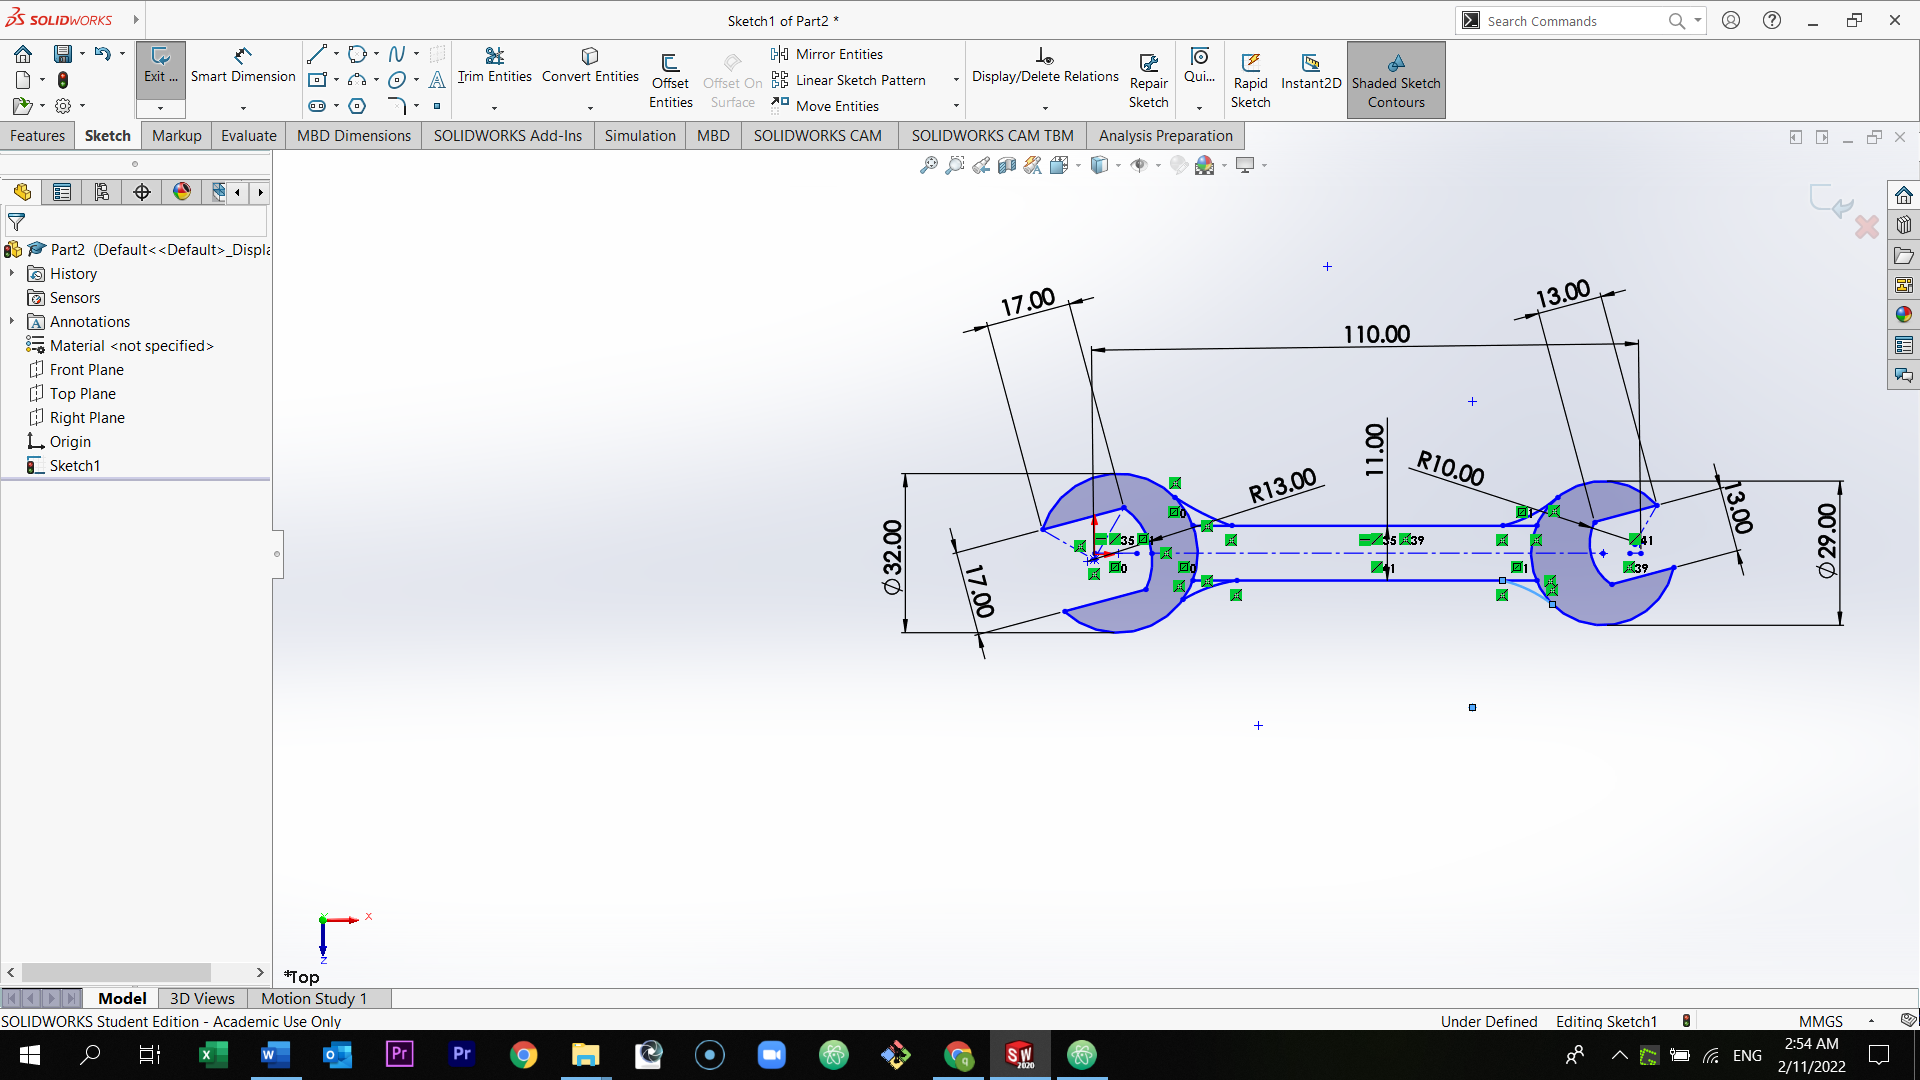
Select smart dimension and select the two points shown in the picture below. (The smart dimension measures the distances between any 2 point, adjust angles and etc.)

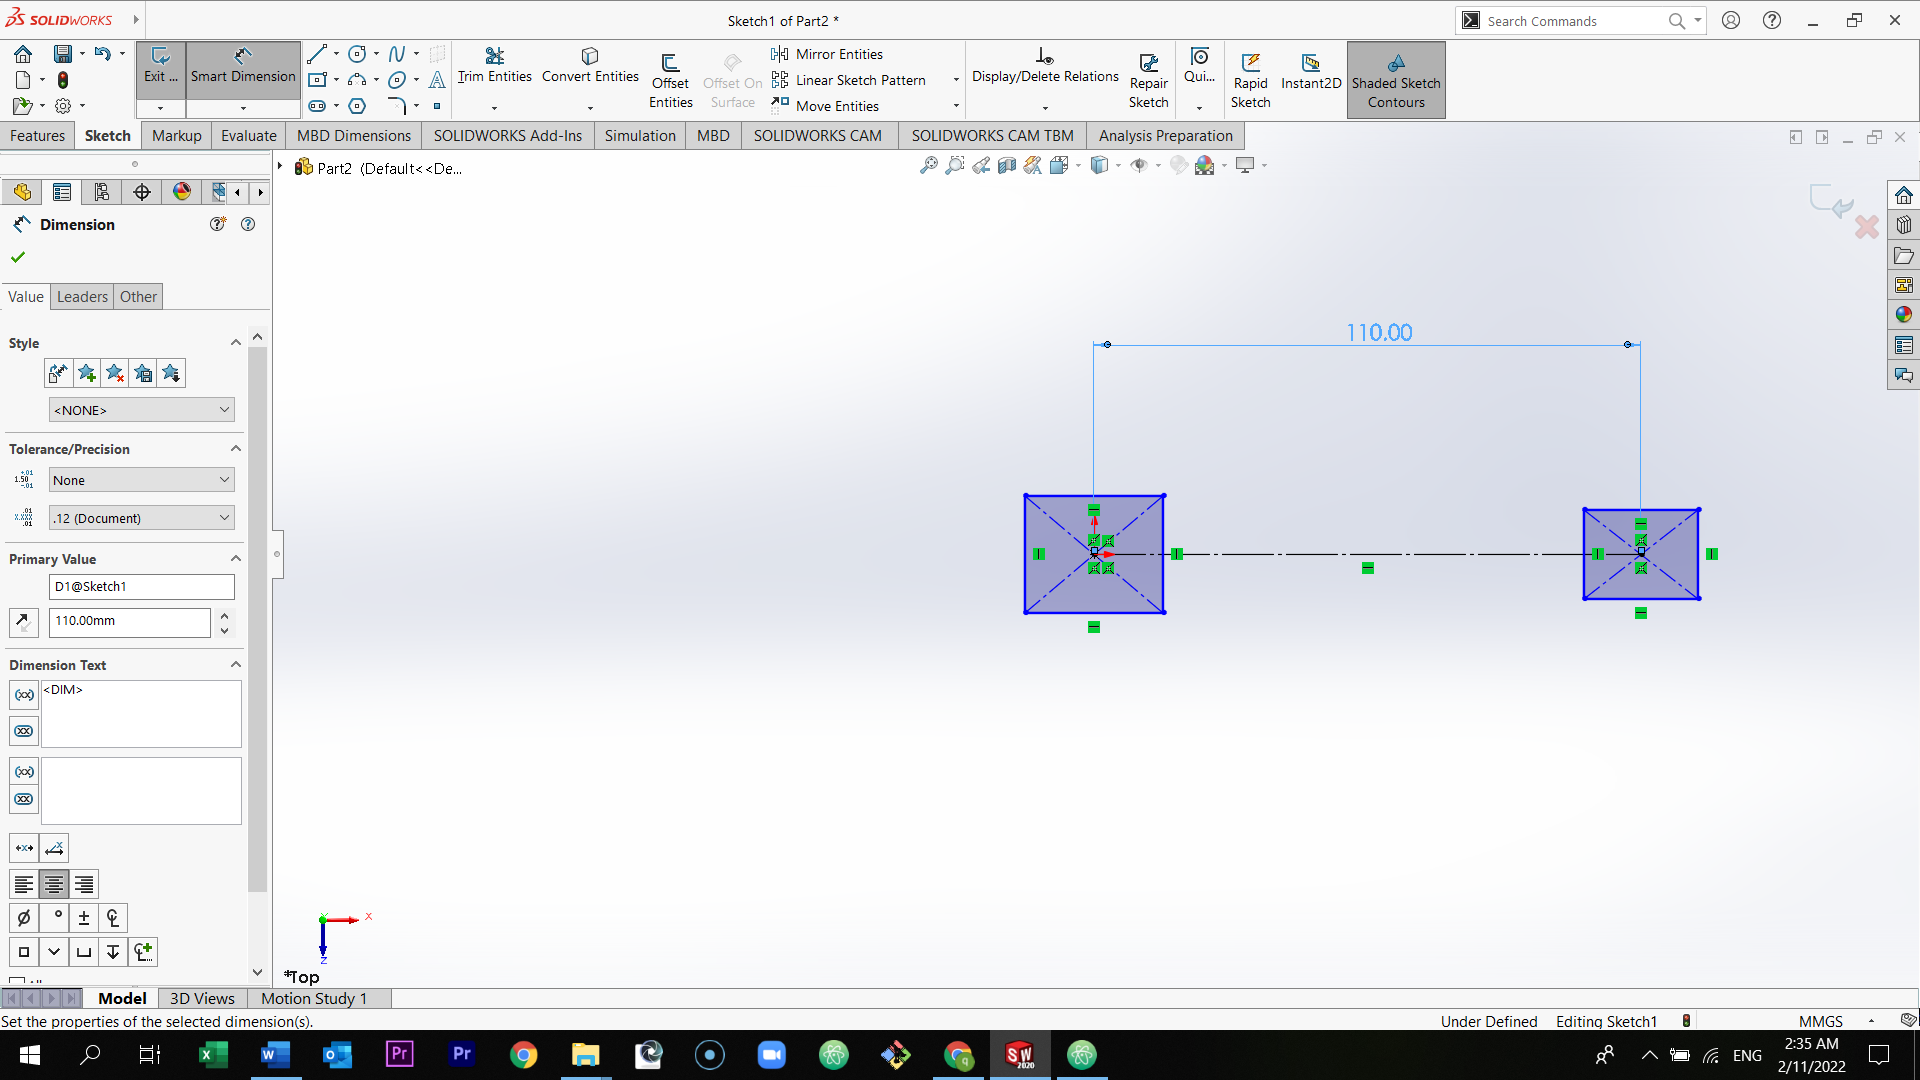
Continue with the smart dimension, and follow the measurements that are shown in the picture below.
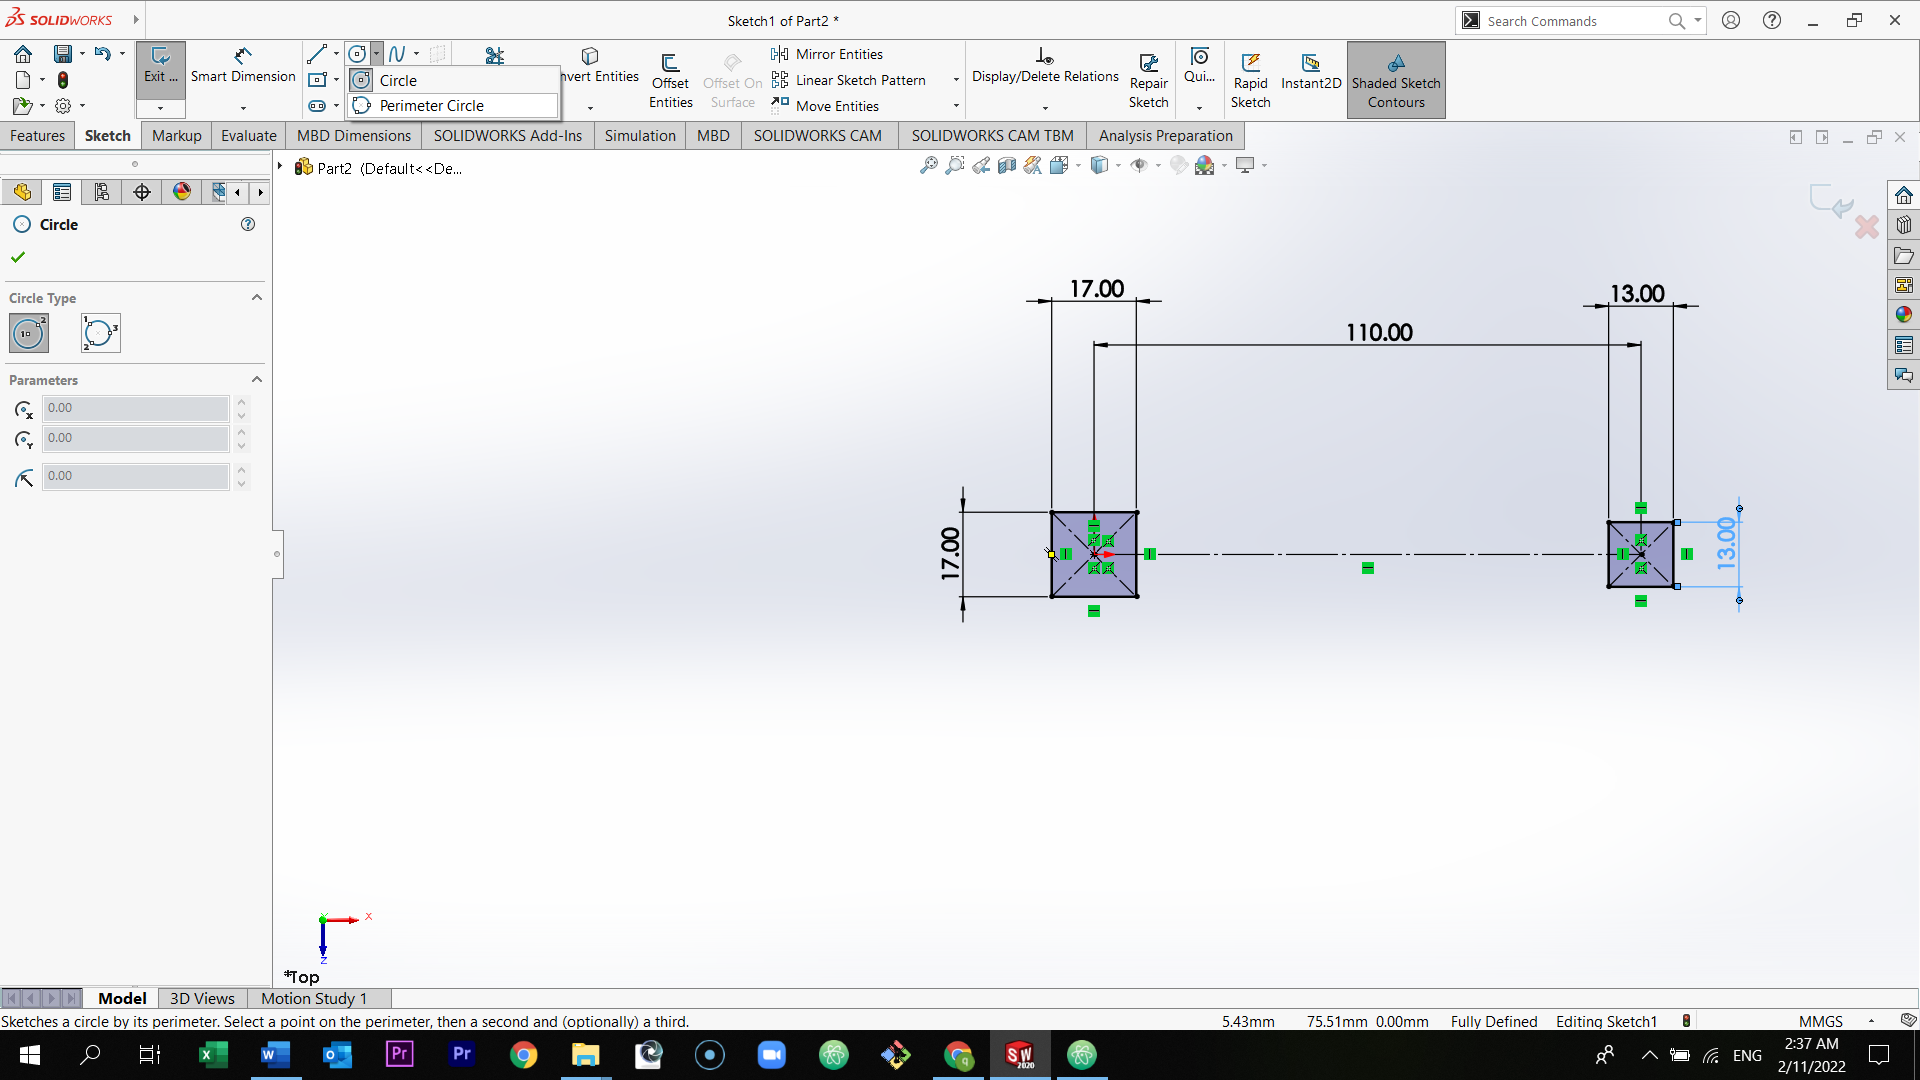
Select the perimeter circle icon, and draw the circle. Repeat the same step for the second side.
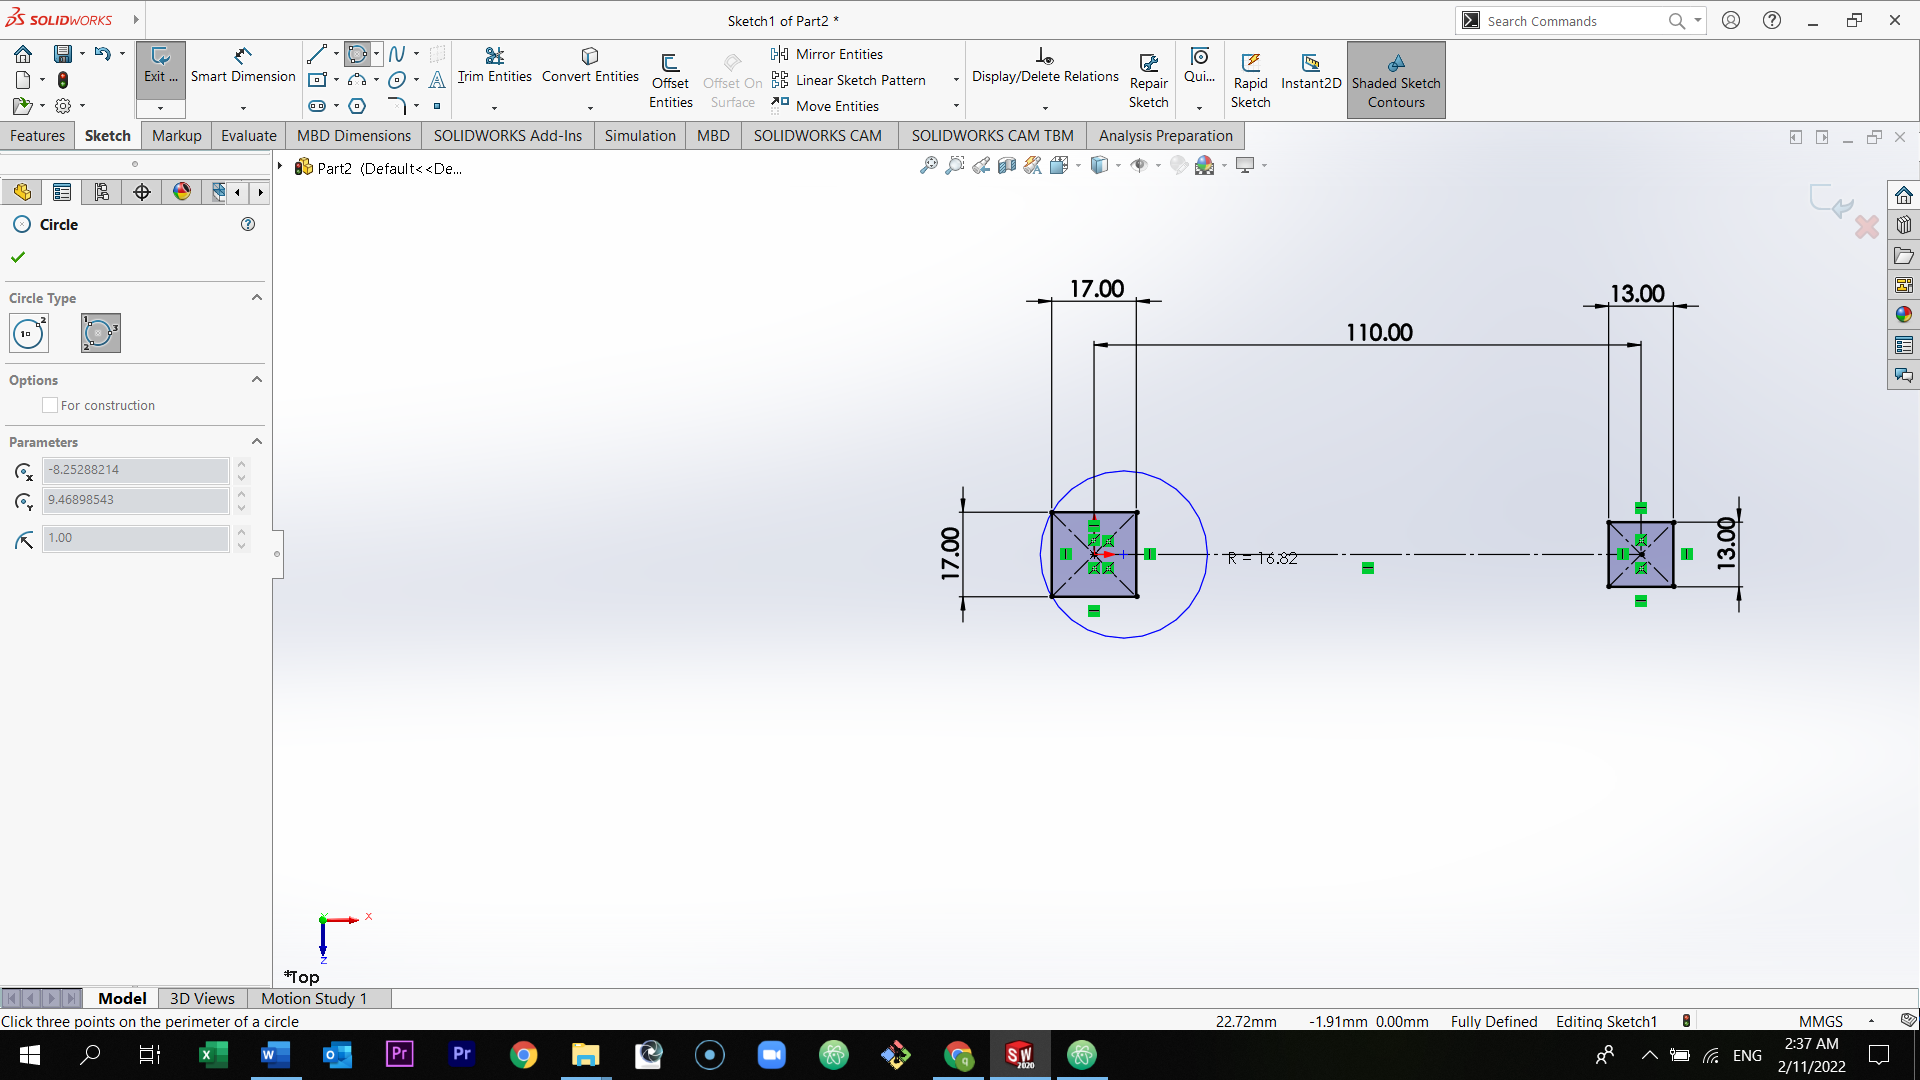
Follow the dimension of the circle as shown in the picture. Then, select the 3 point arc, and then select the two corners of the rectangle, and draw the arc.

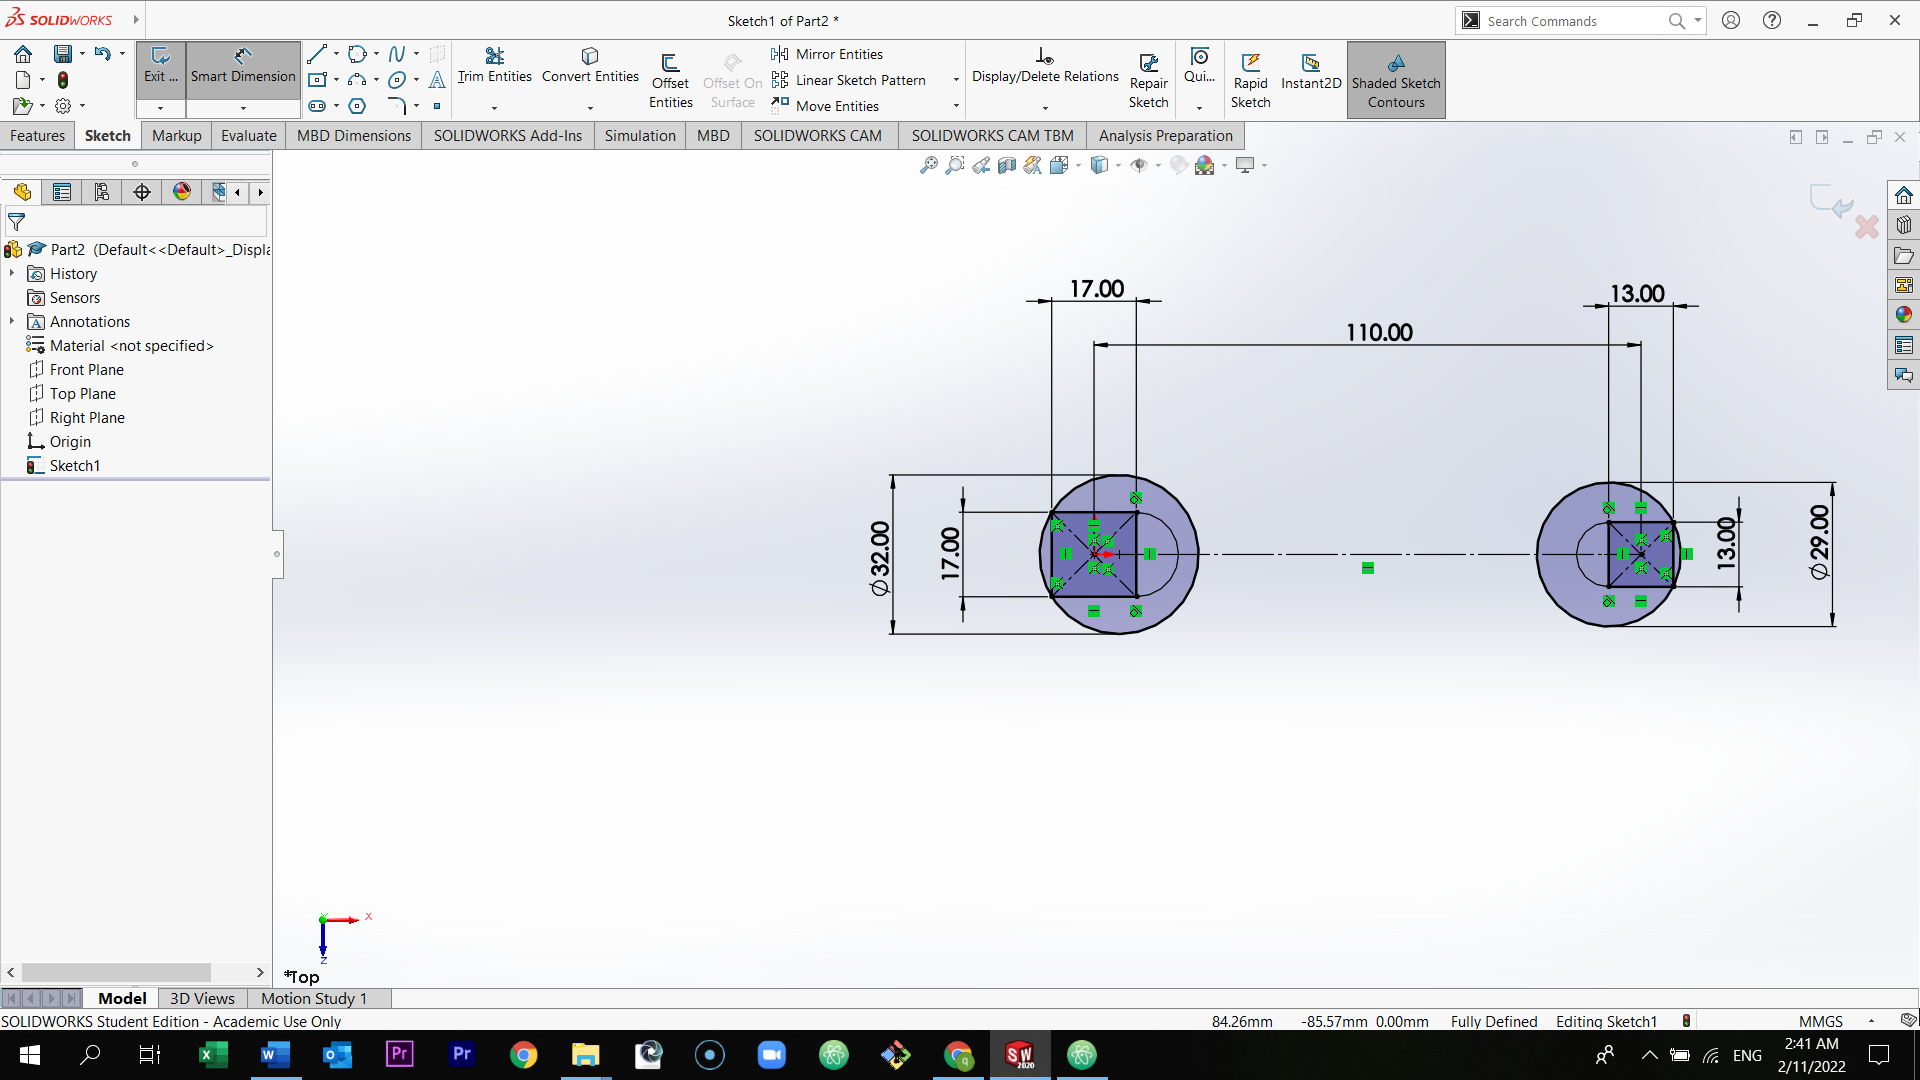
Put the dimensions of the arcs.

Select the line icon.

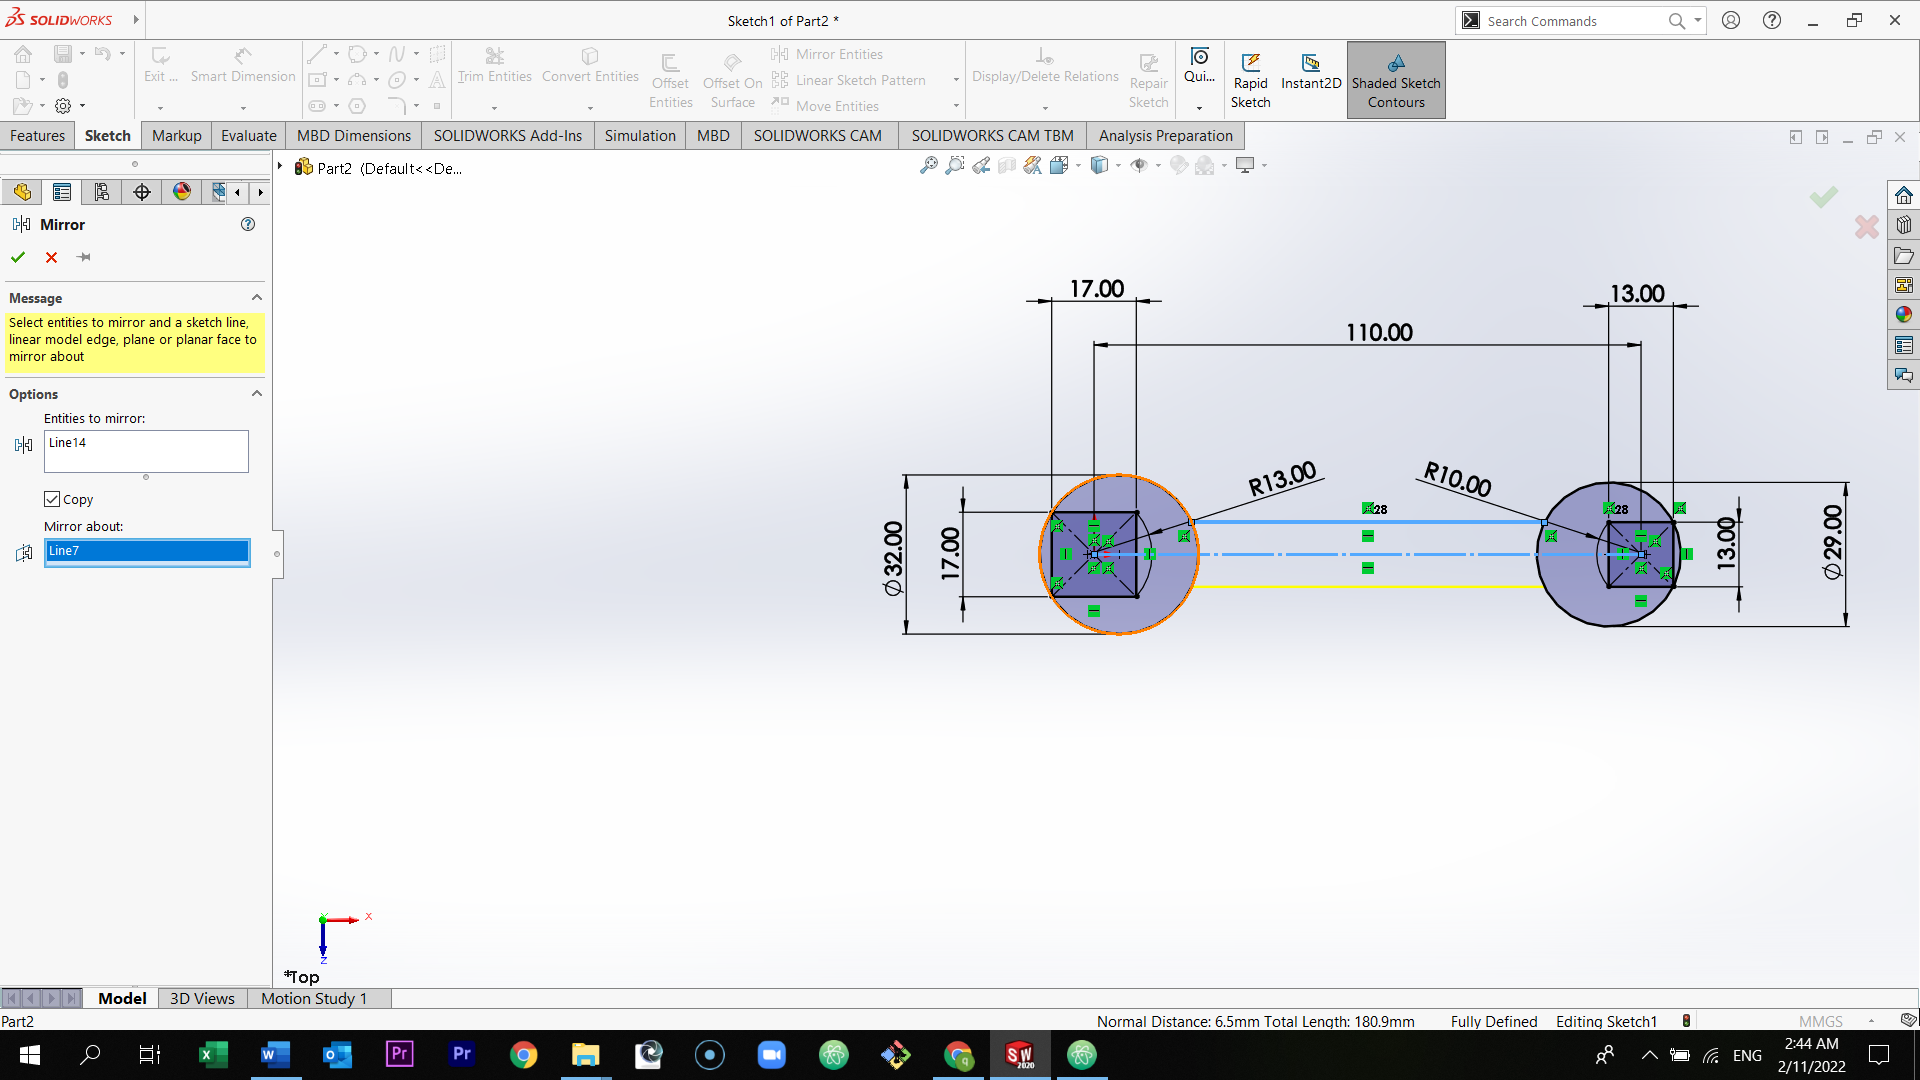
Draw a line from one of the circles to the another above the construction line.. Then select the mirror icon from the section above.
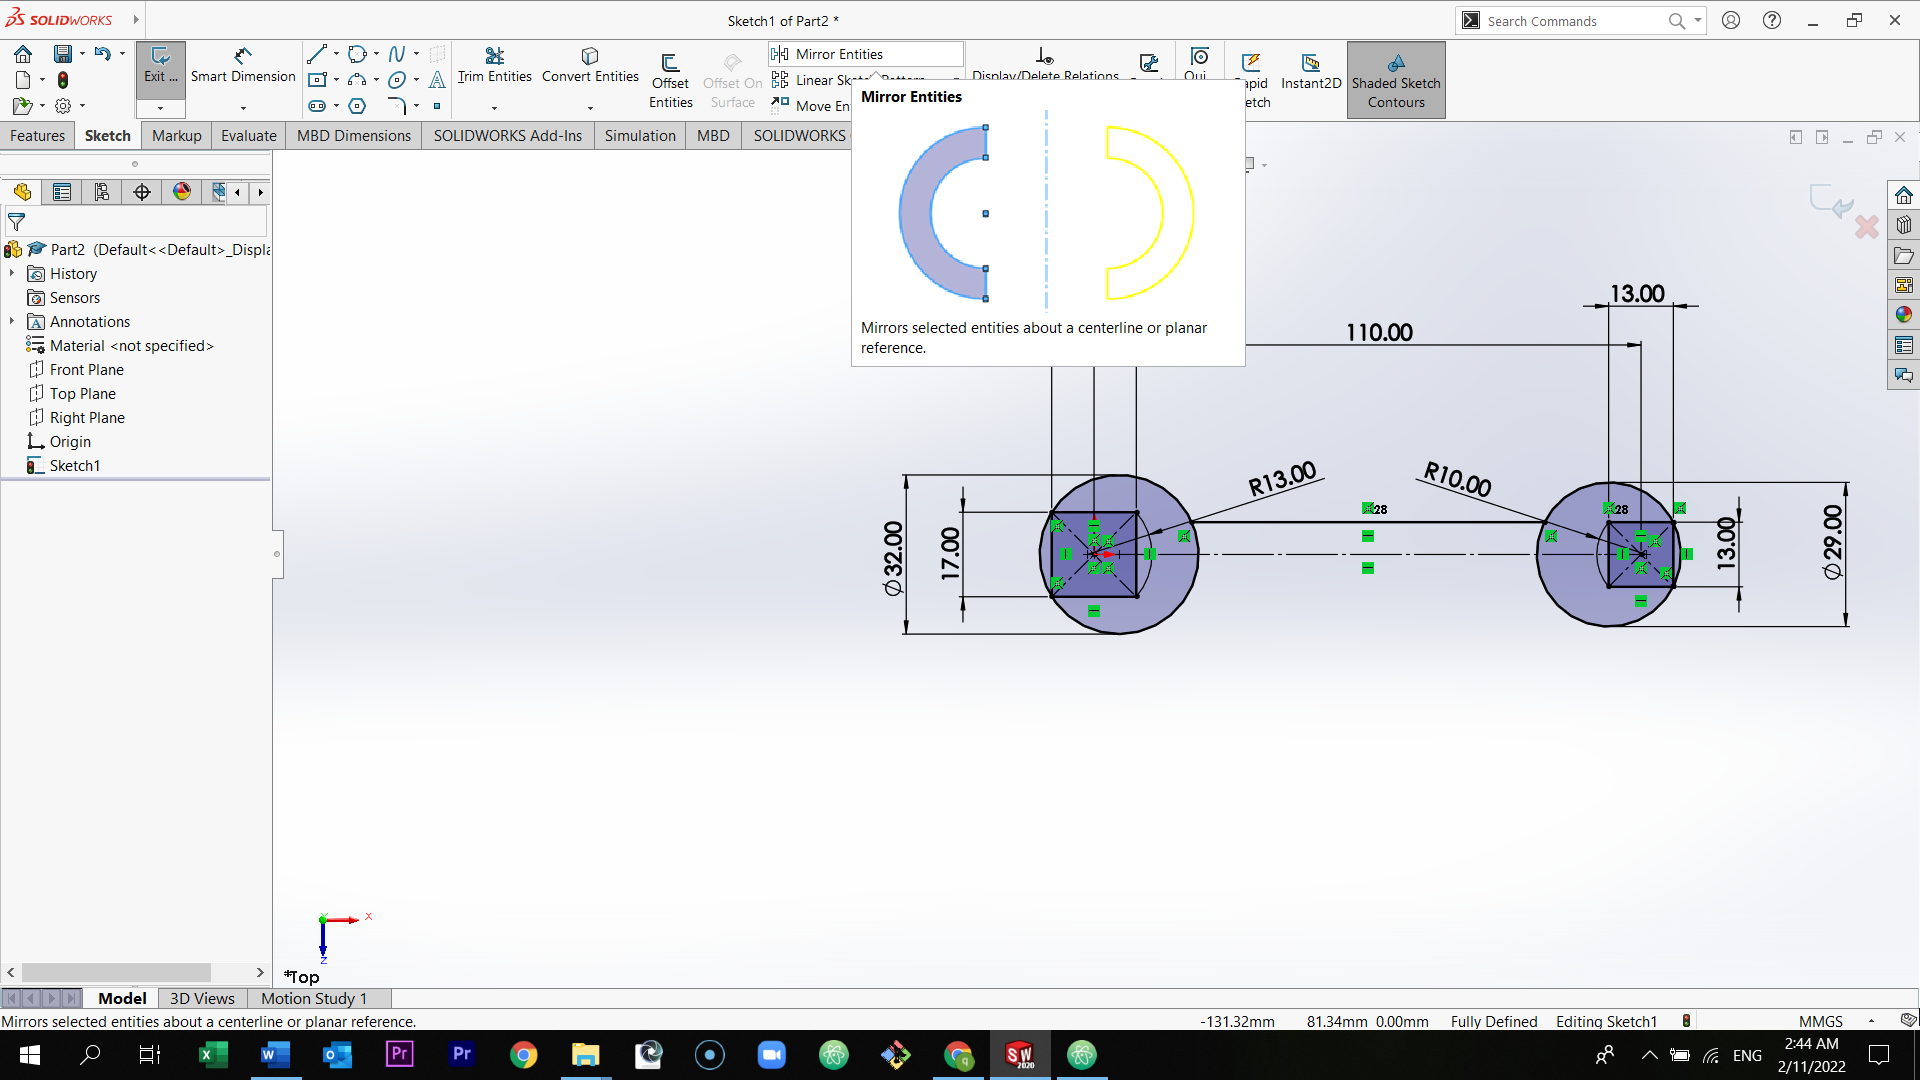
Select the entities you want to mirror, and then select mirror about. (You select these by just clicking on the parts required)
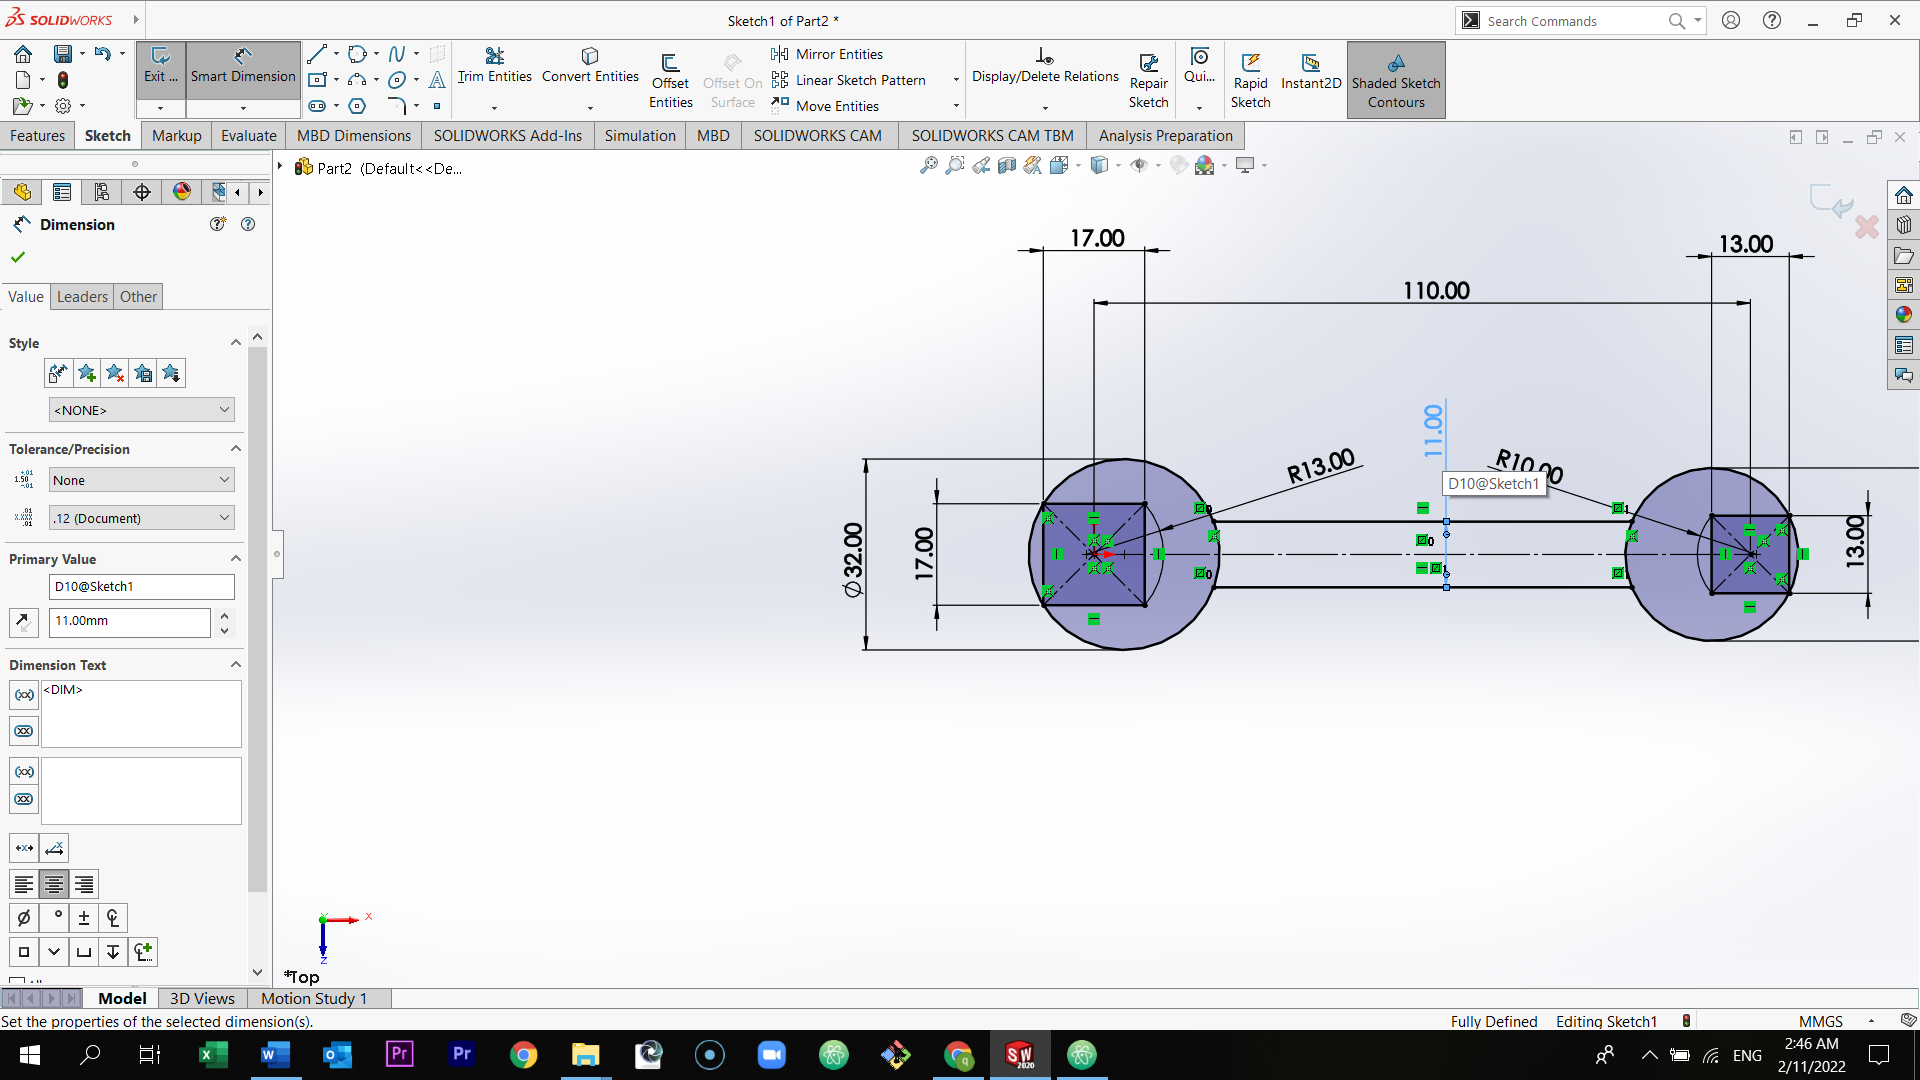
Put the dimension between the two lines.
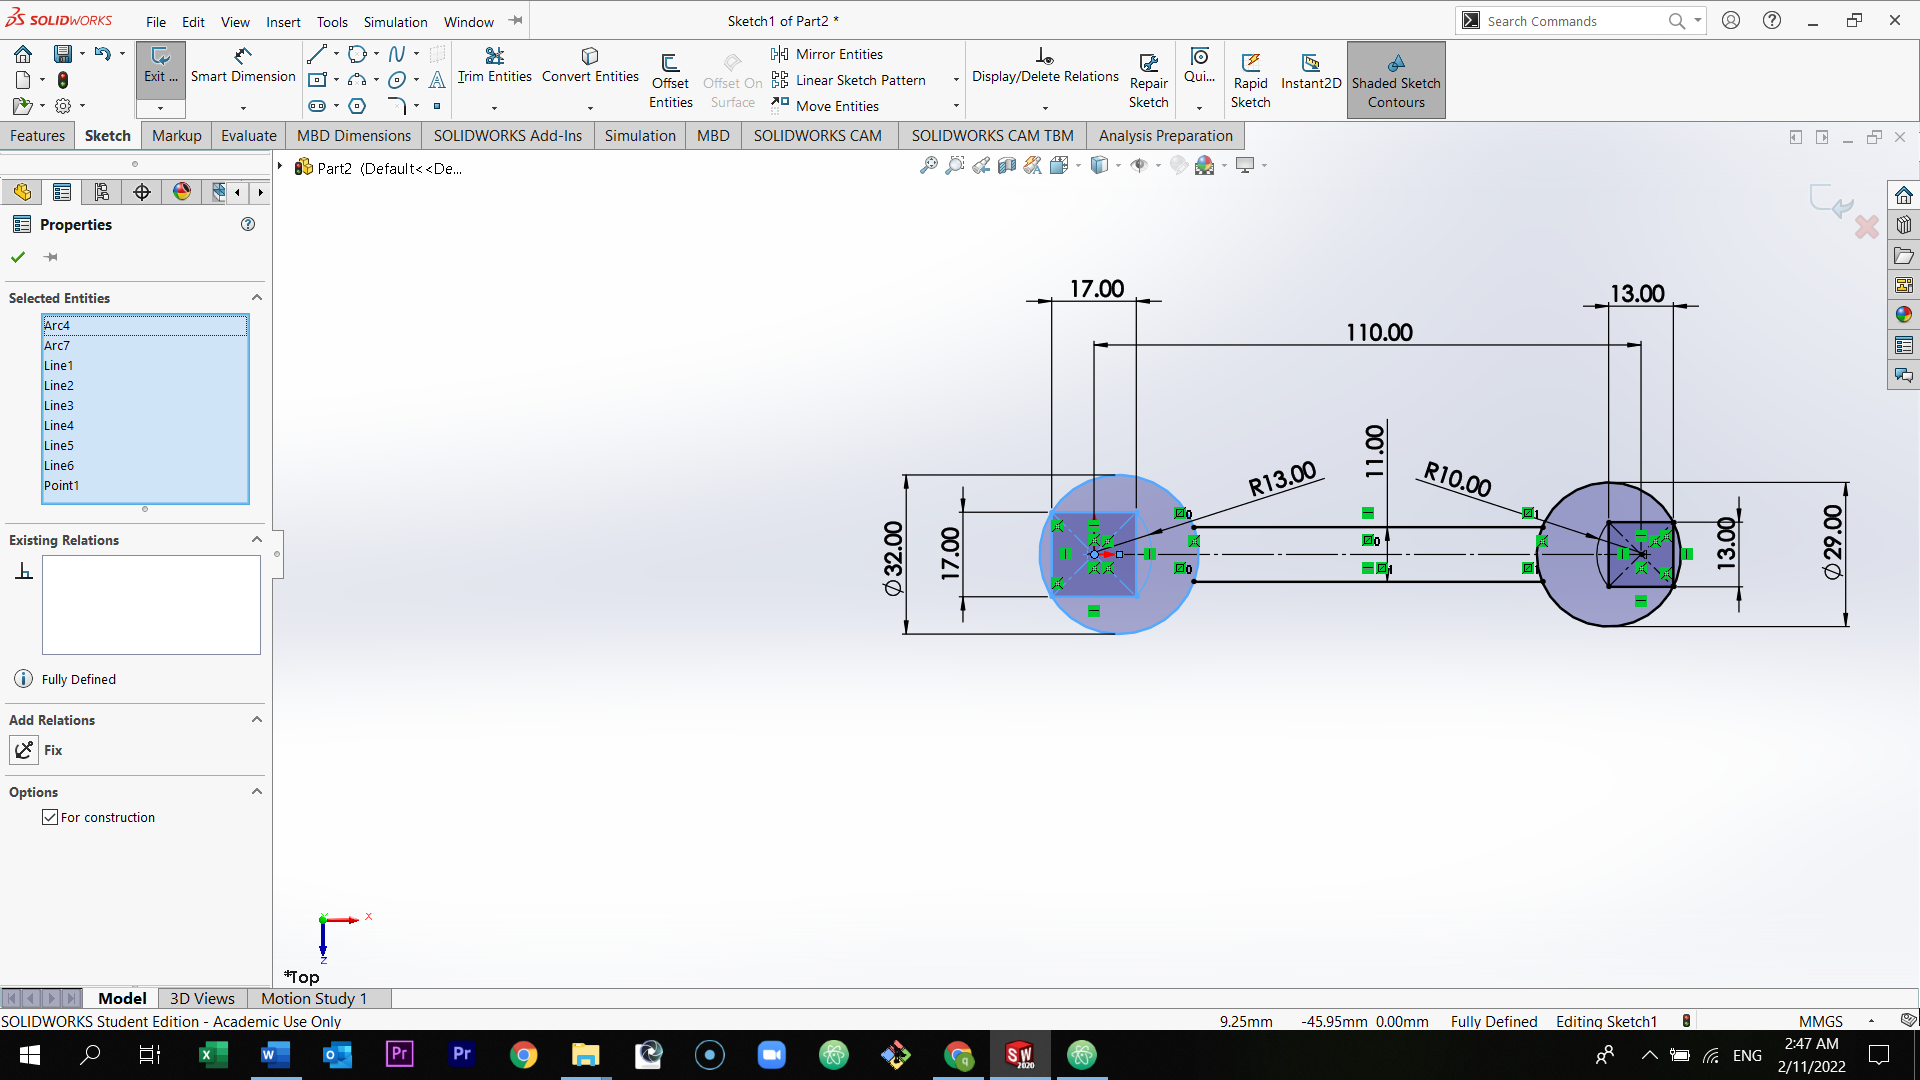
Select the everything inside the first circle.
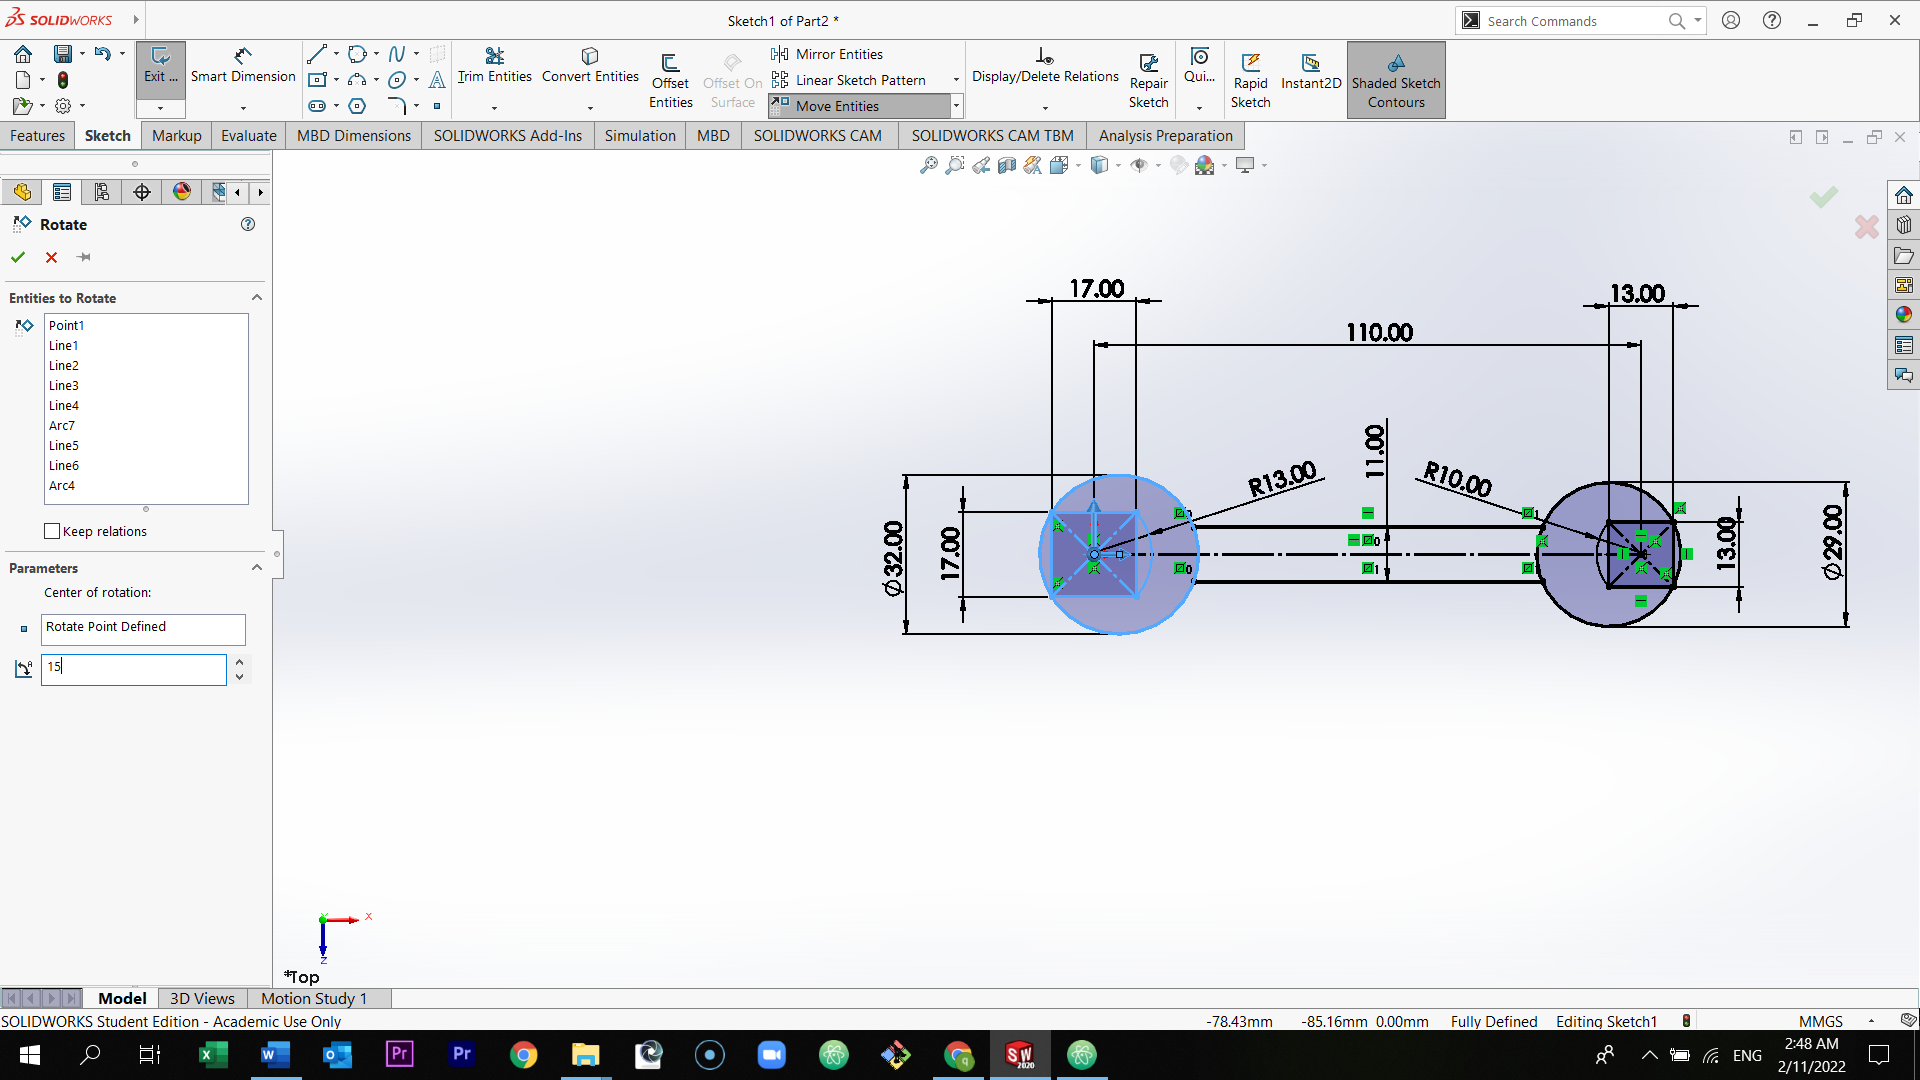
Select move entities from the above section and then select Rotate entities.
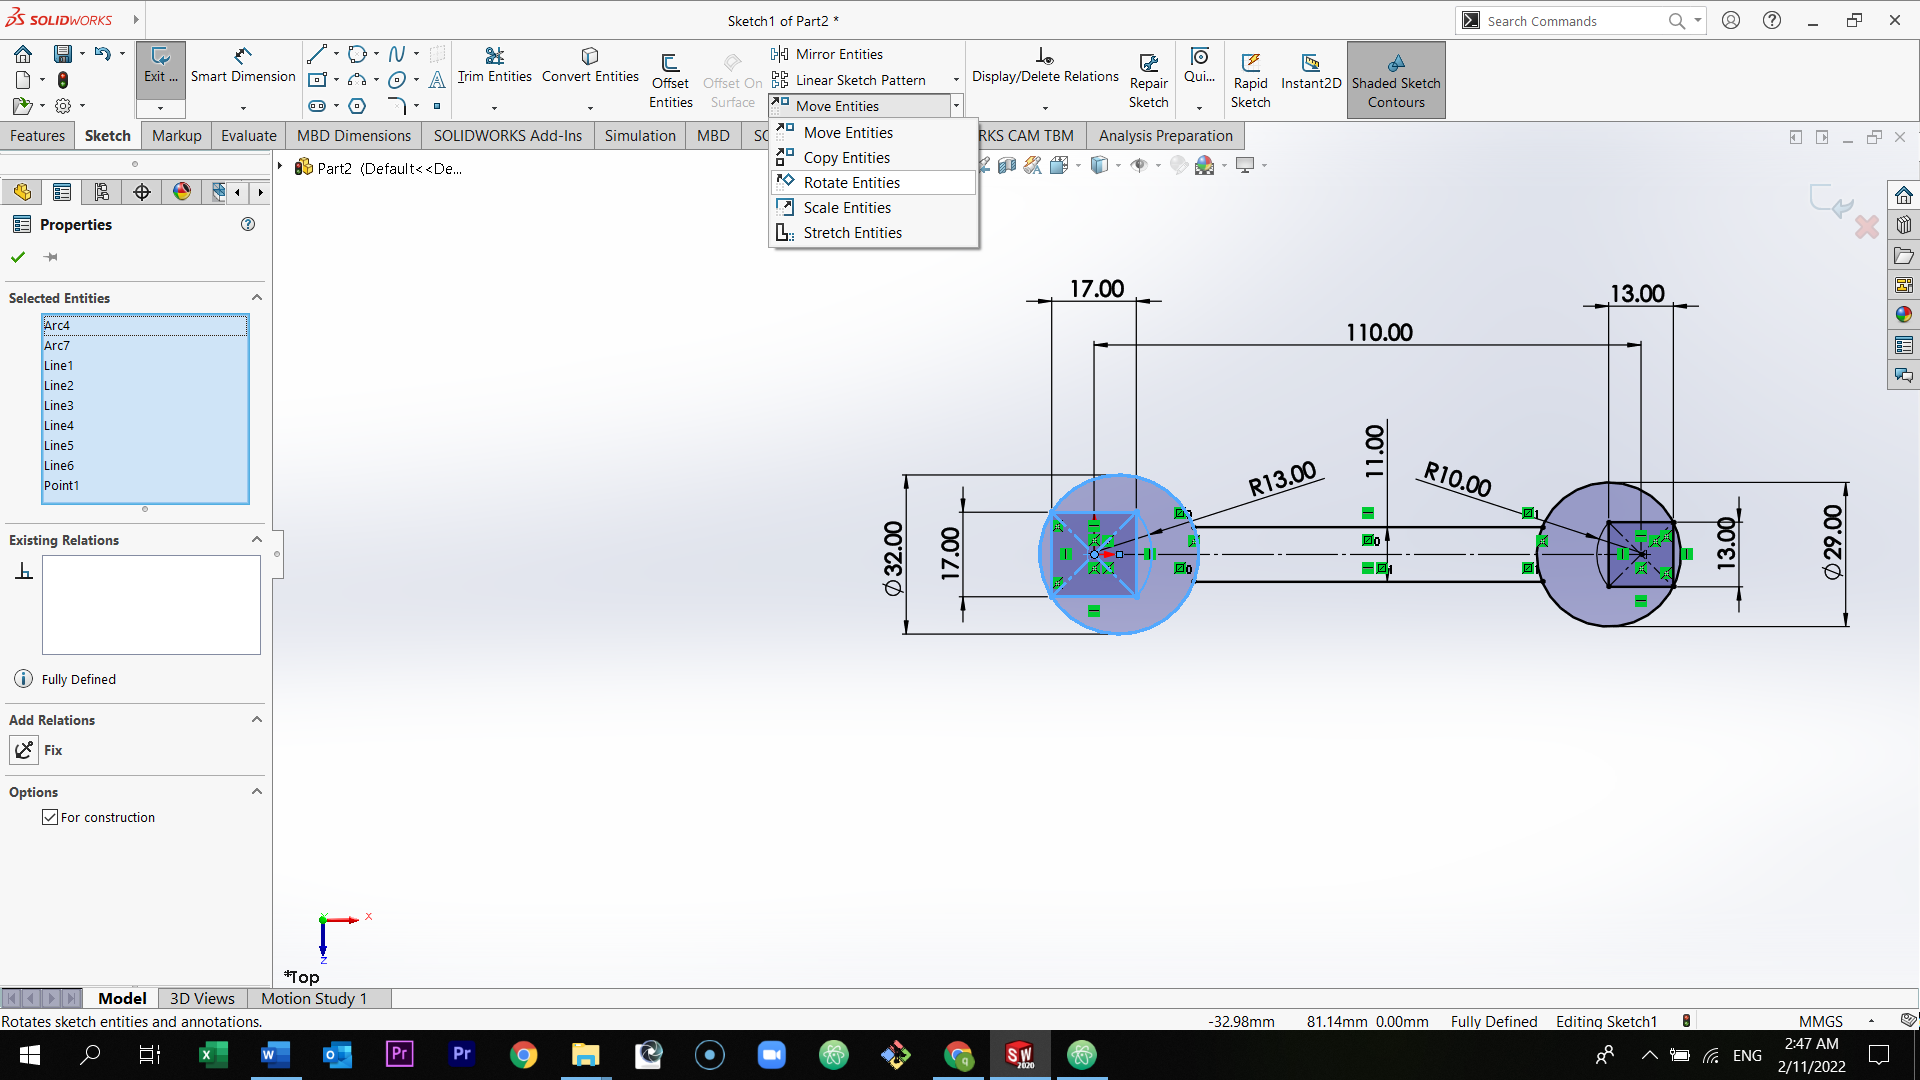
Select the center point of the circle and then type 15 degree.
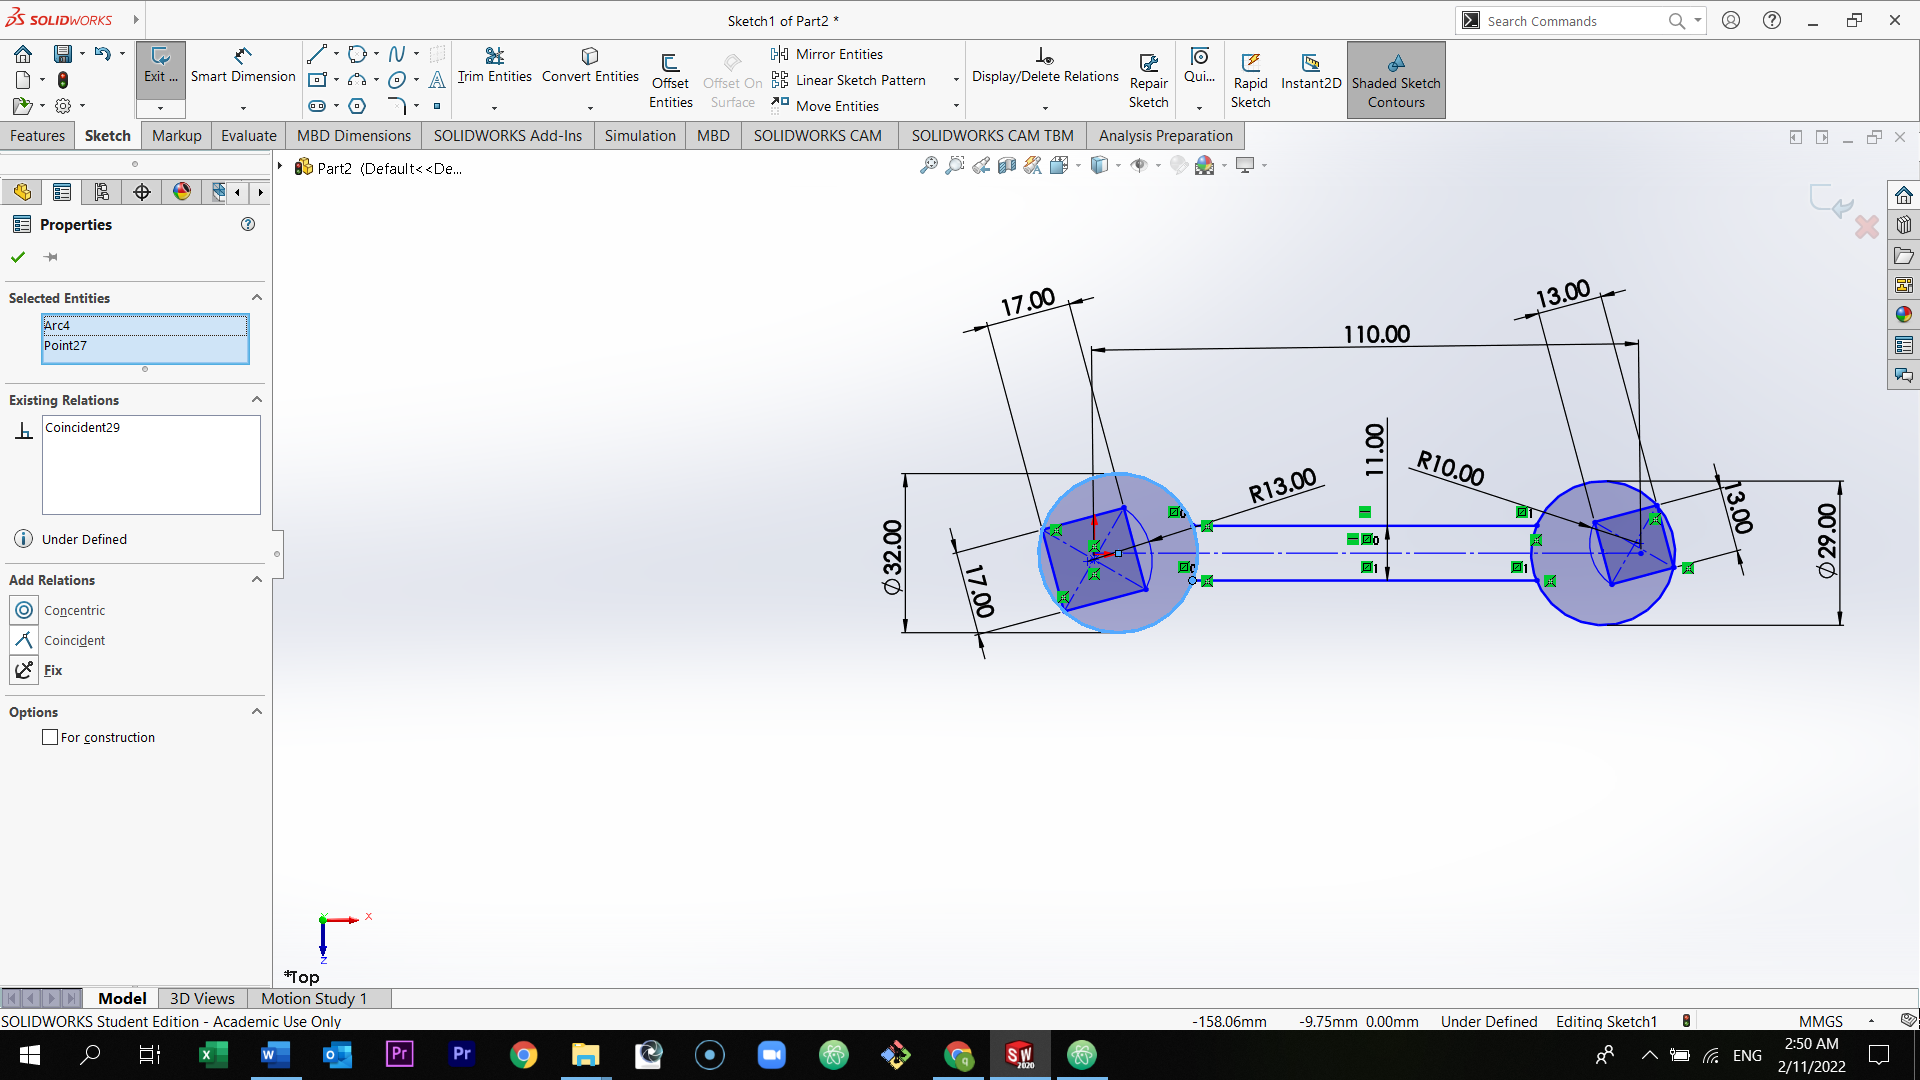
Select every point individually plus the circle and select coincident.
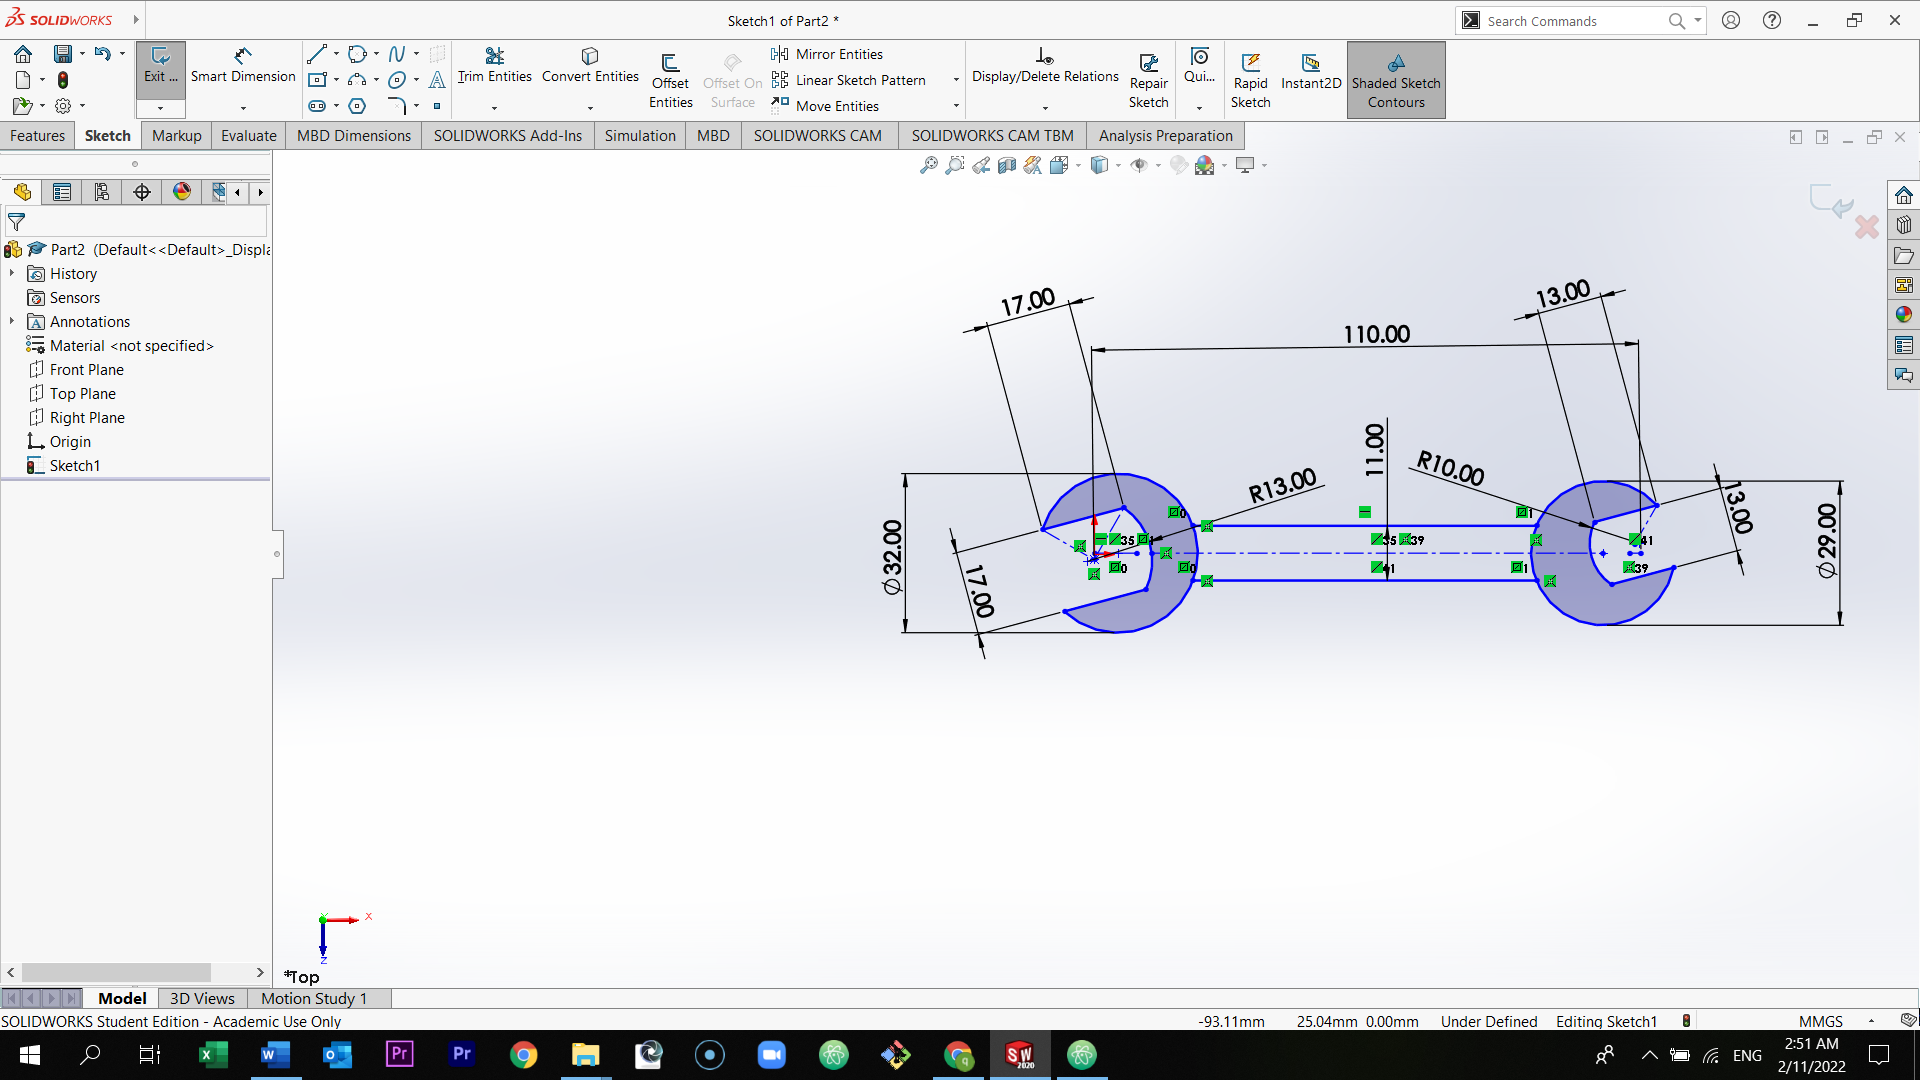
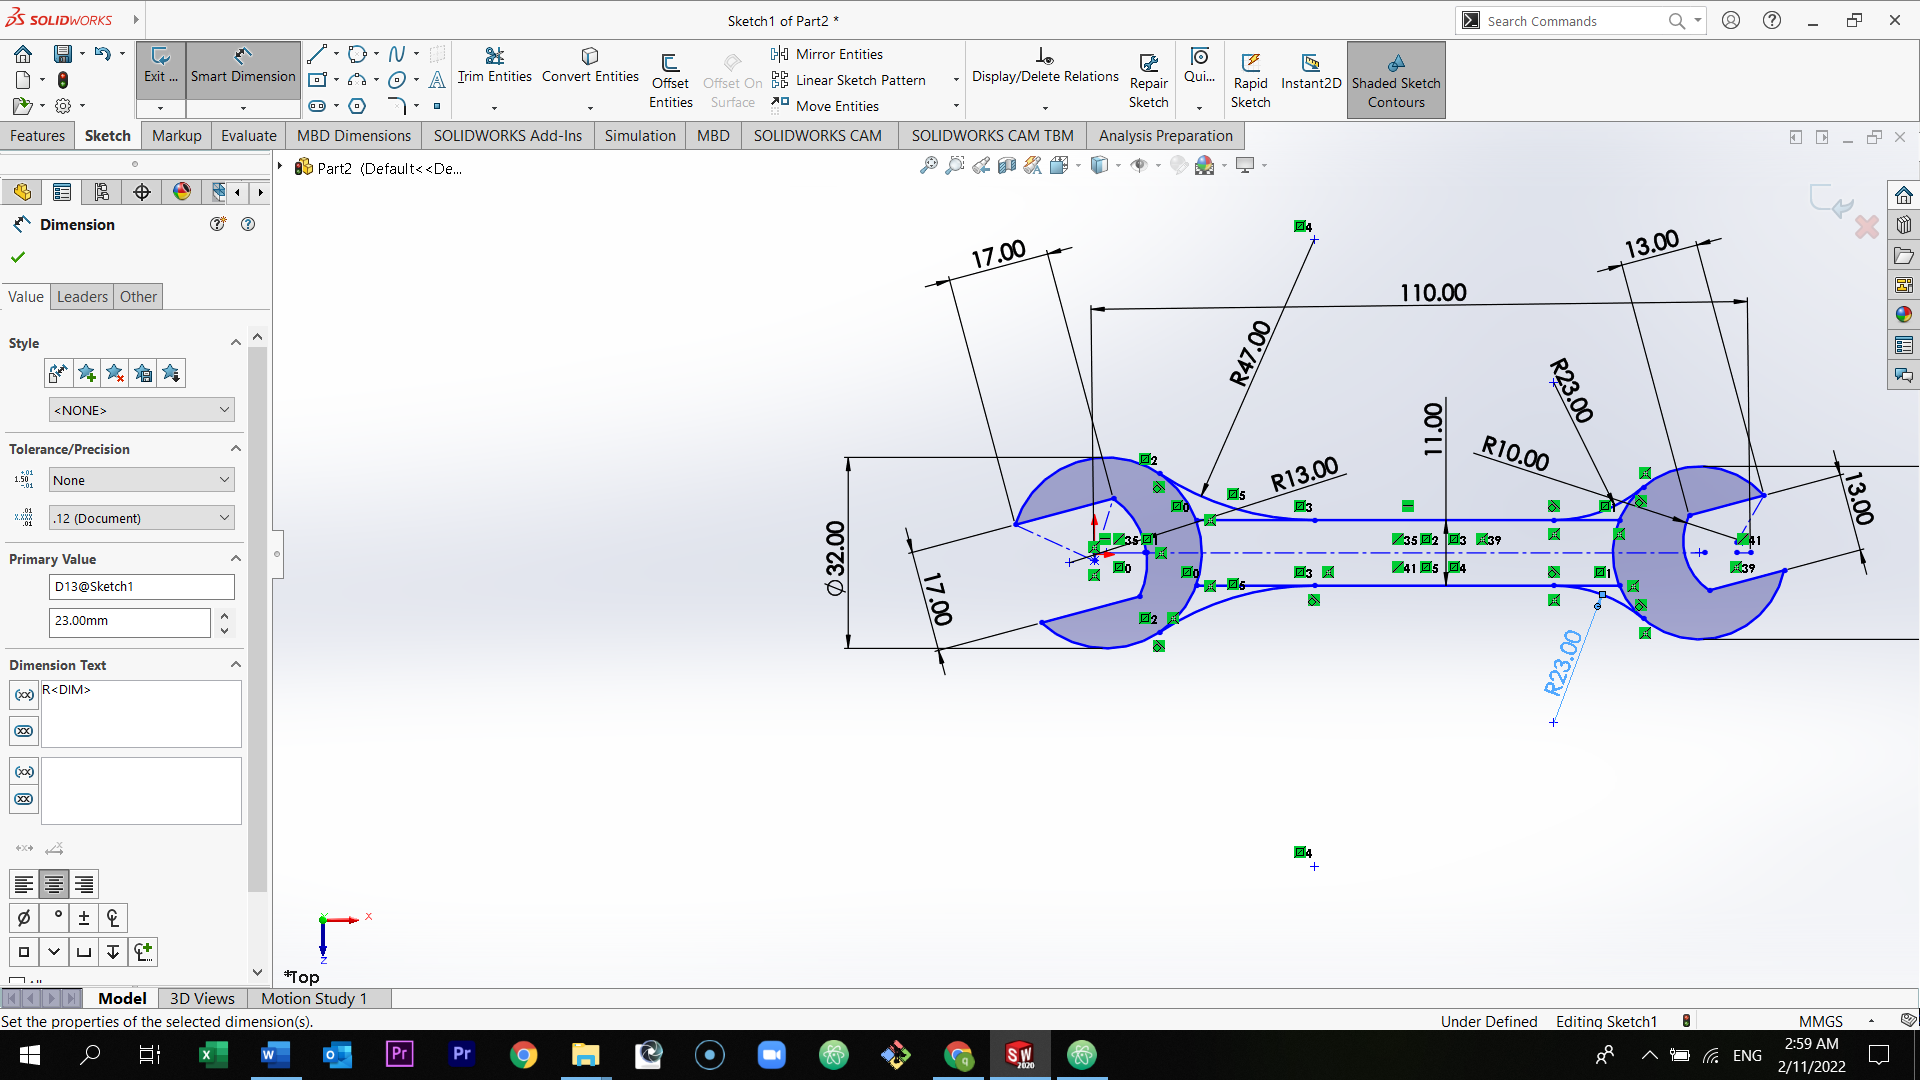
Select trim entities and trim the parts as shown in the picture below.
Select the three point arc and draw it as shown in the picture below.

Do the same thing in the other sides, on the right side and below.
Select every arc + the line + the circle and select tangent. (Do this for all arcs)


Put the dimension.
Trim the part of the line which located under the arc.

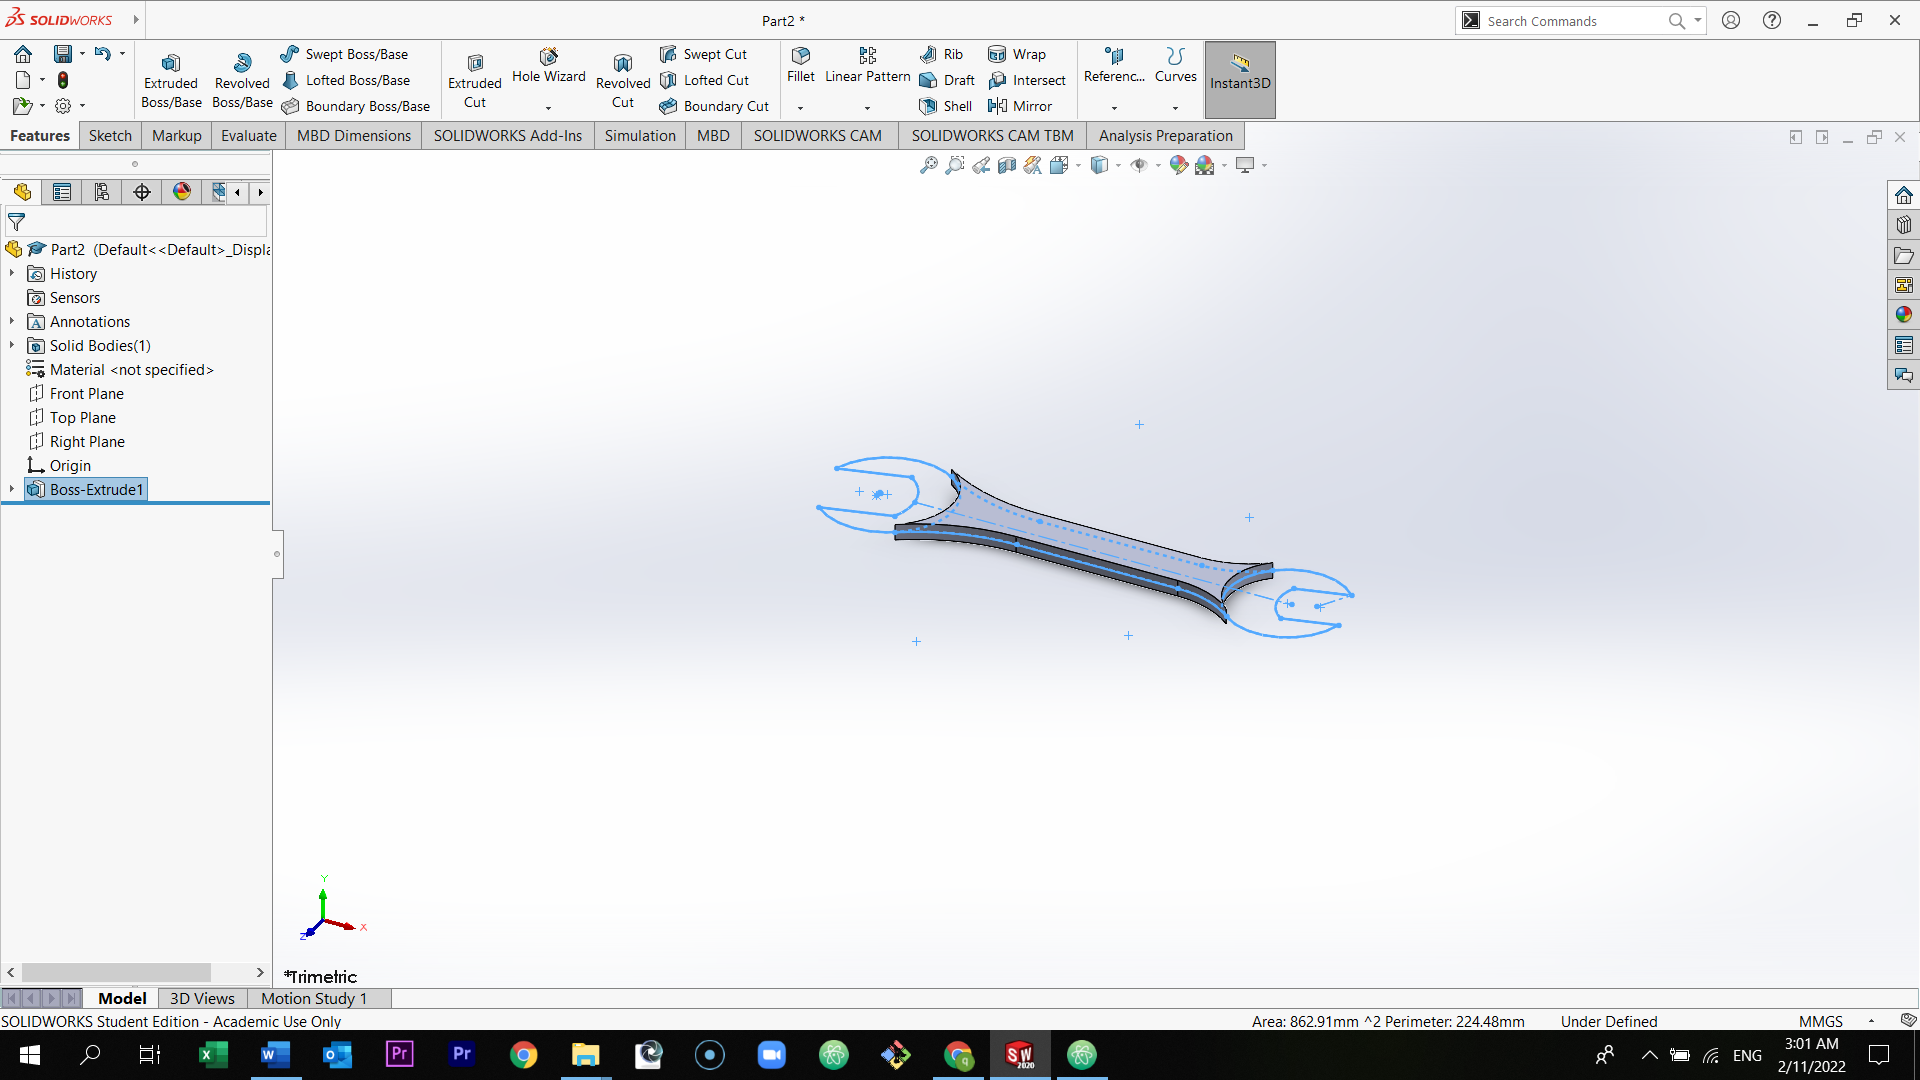
Select feature from the top section, and then select extrude boss/base.
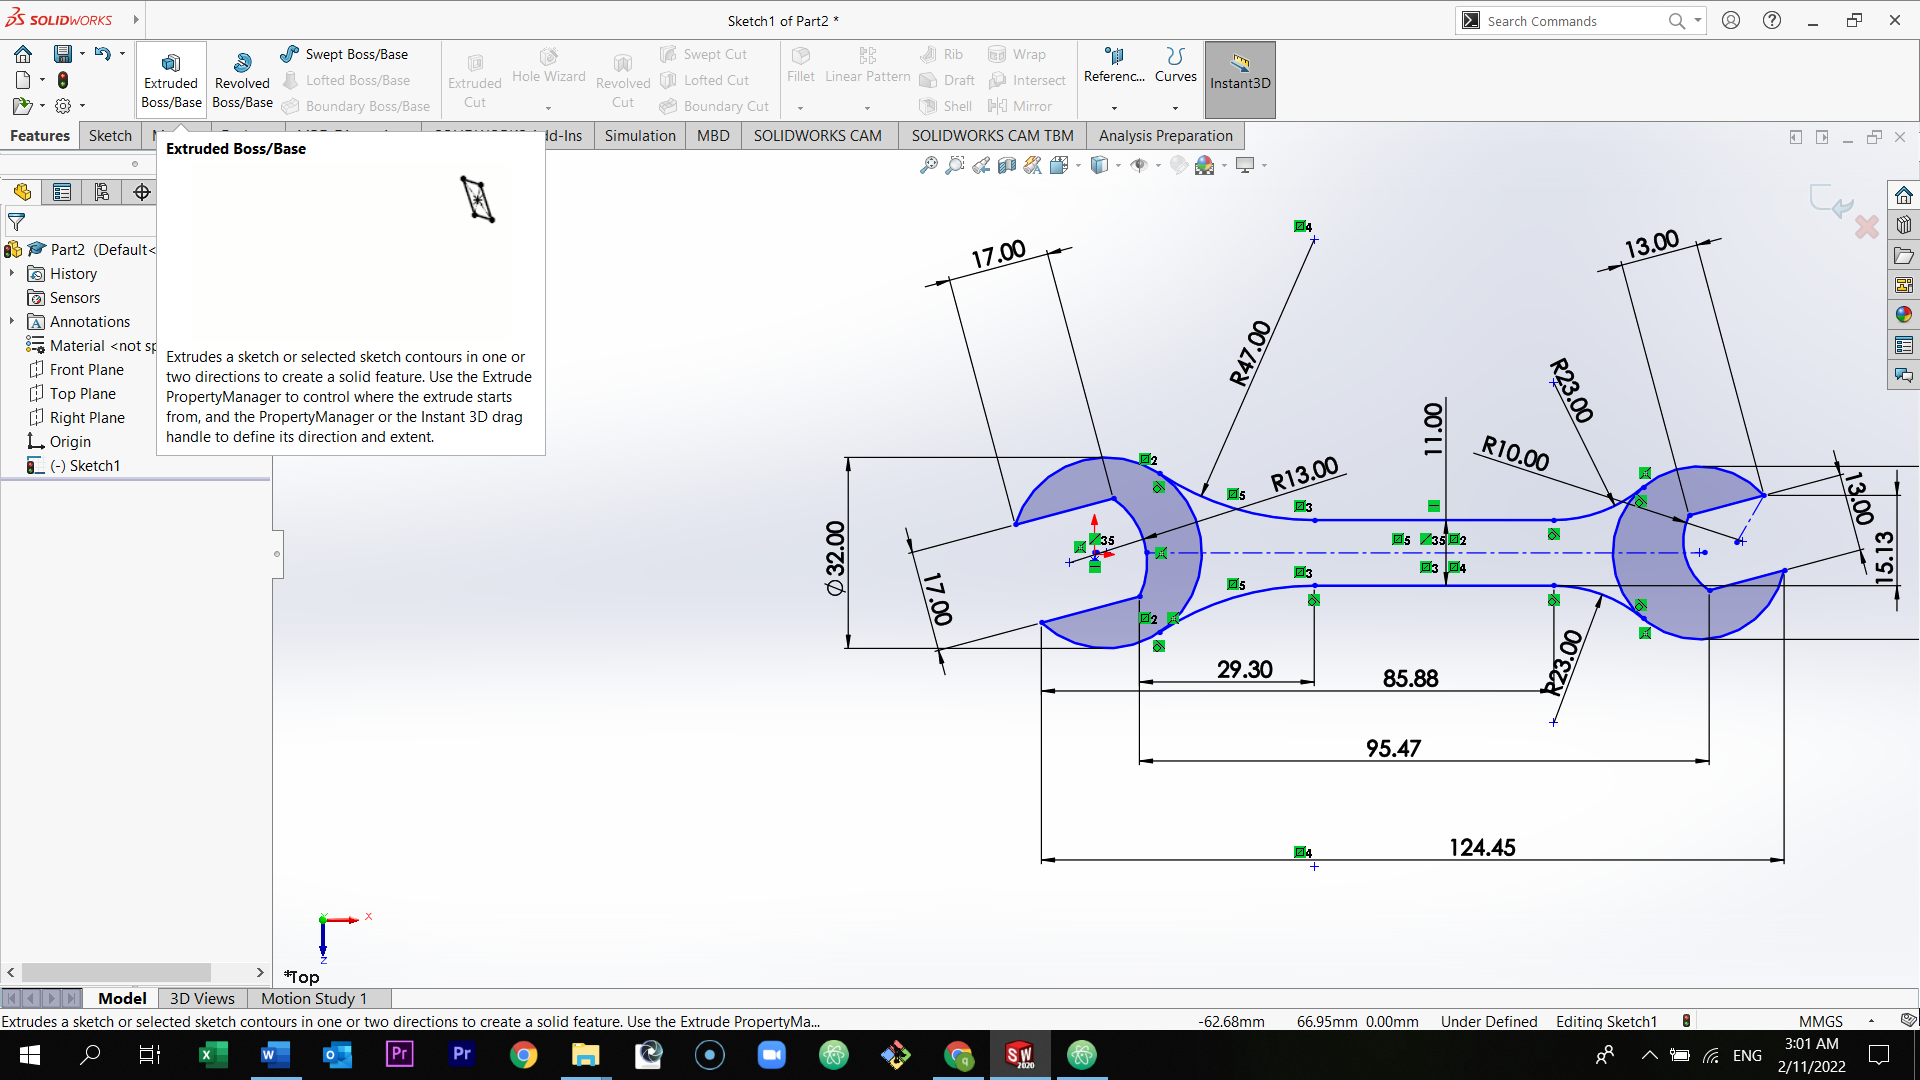
Select the body of the wrench and then in the left side of the page, select in the direction option, mid plane 4mm.
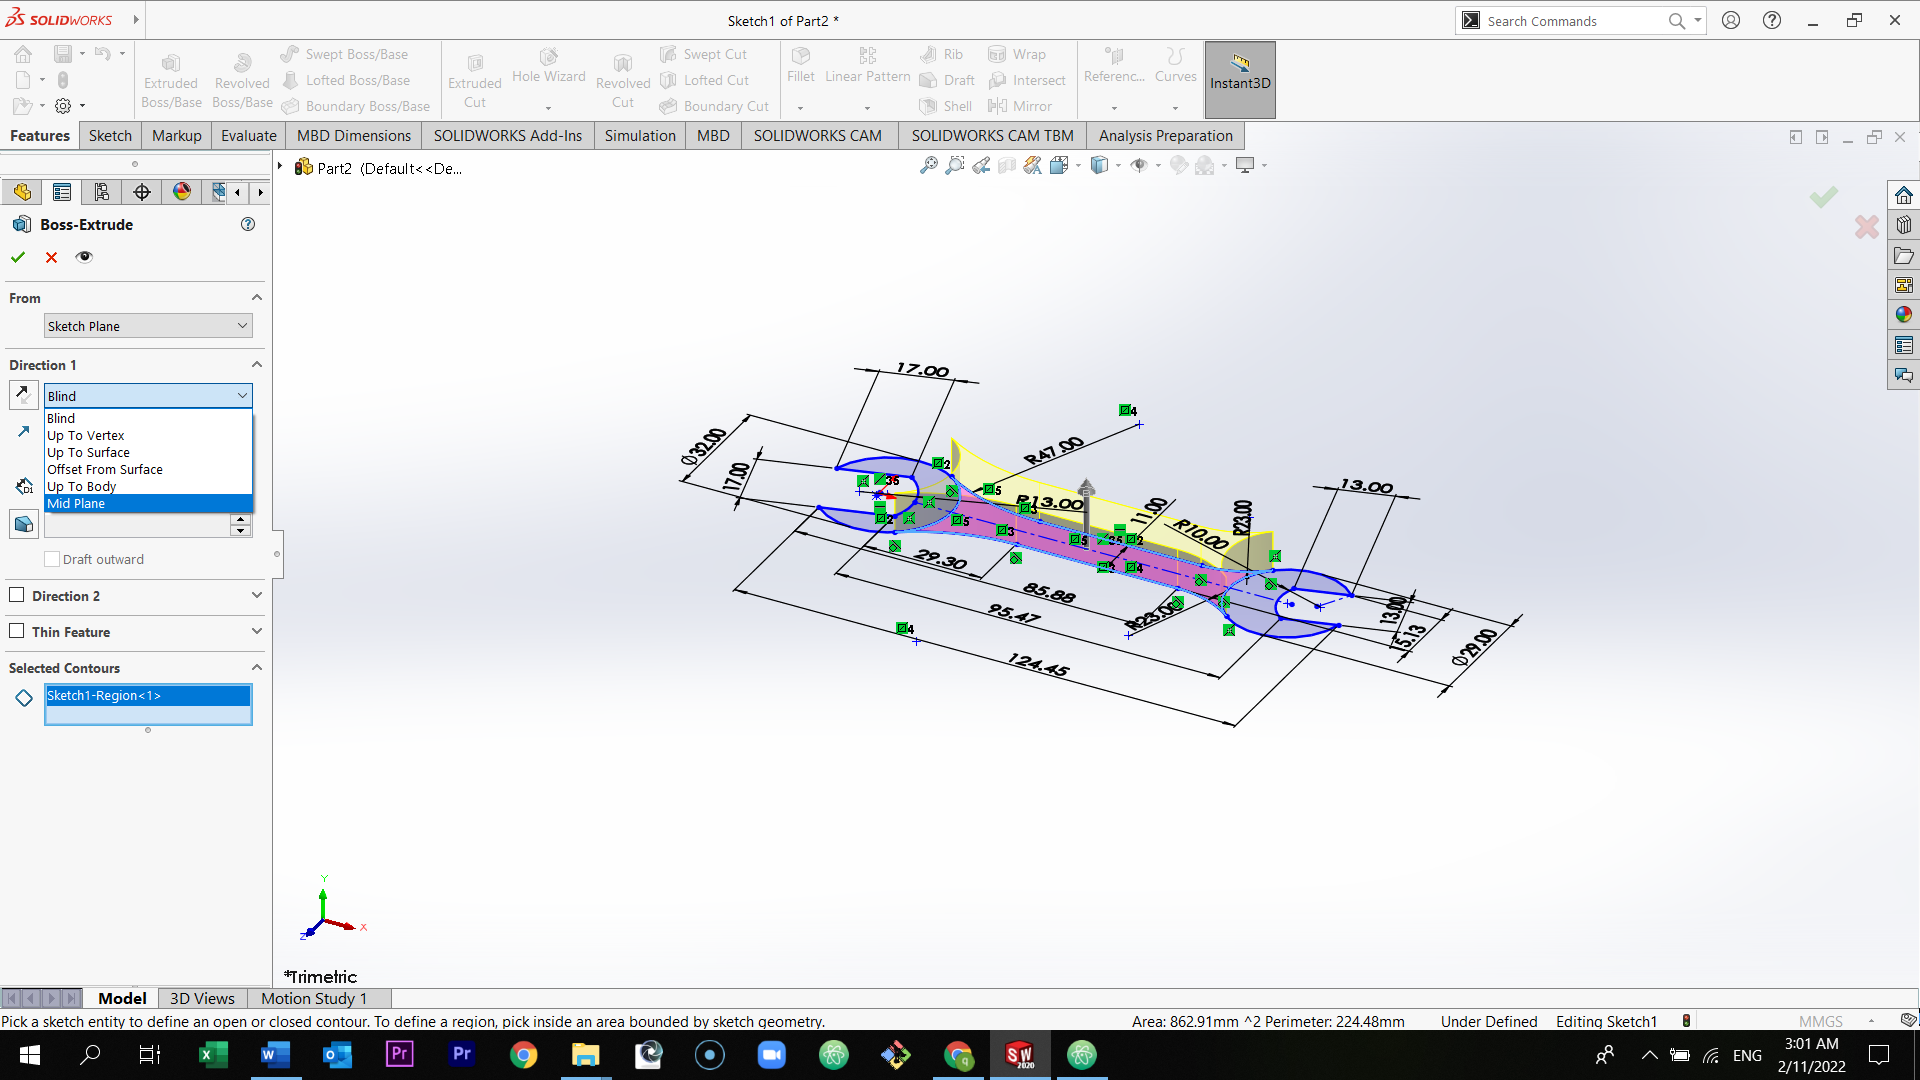
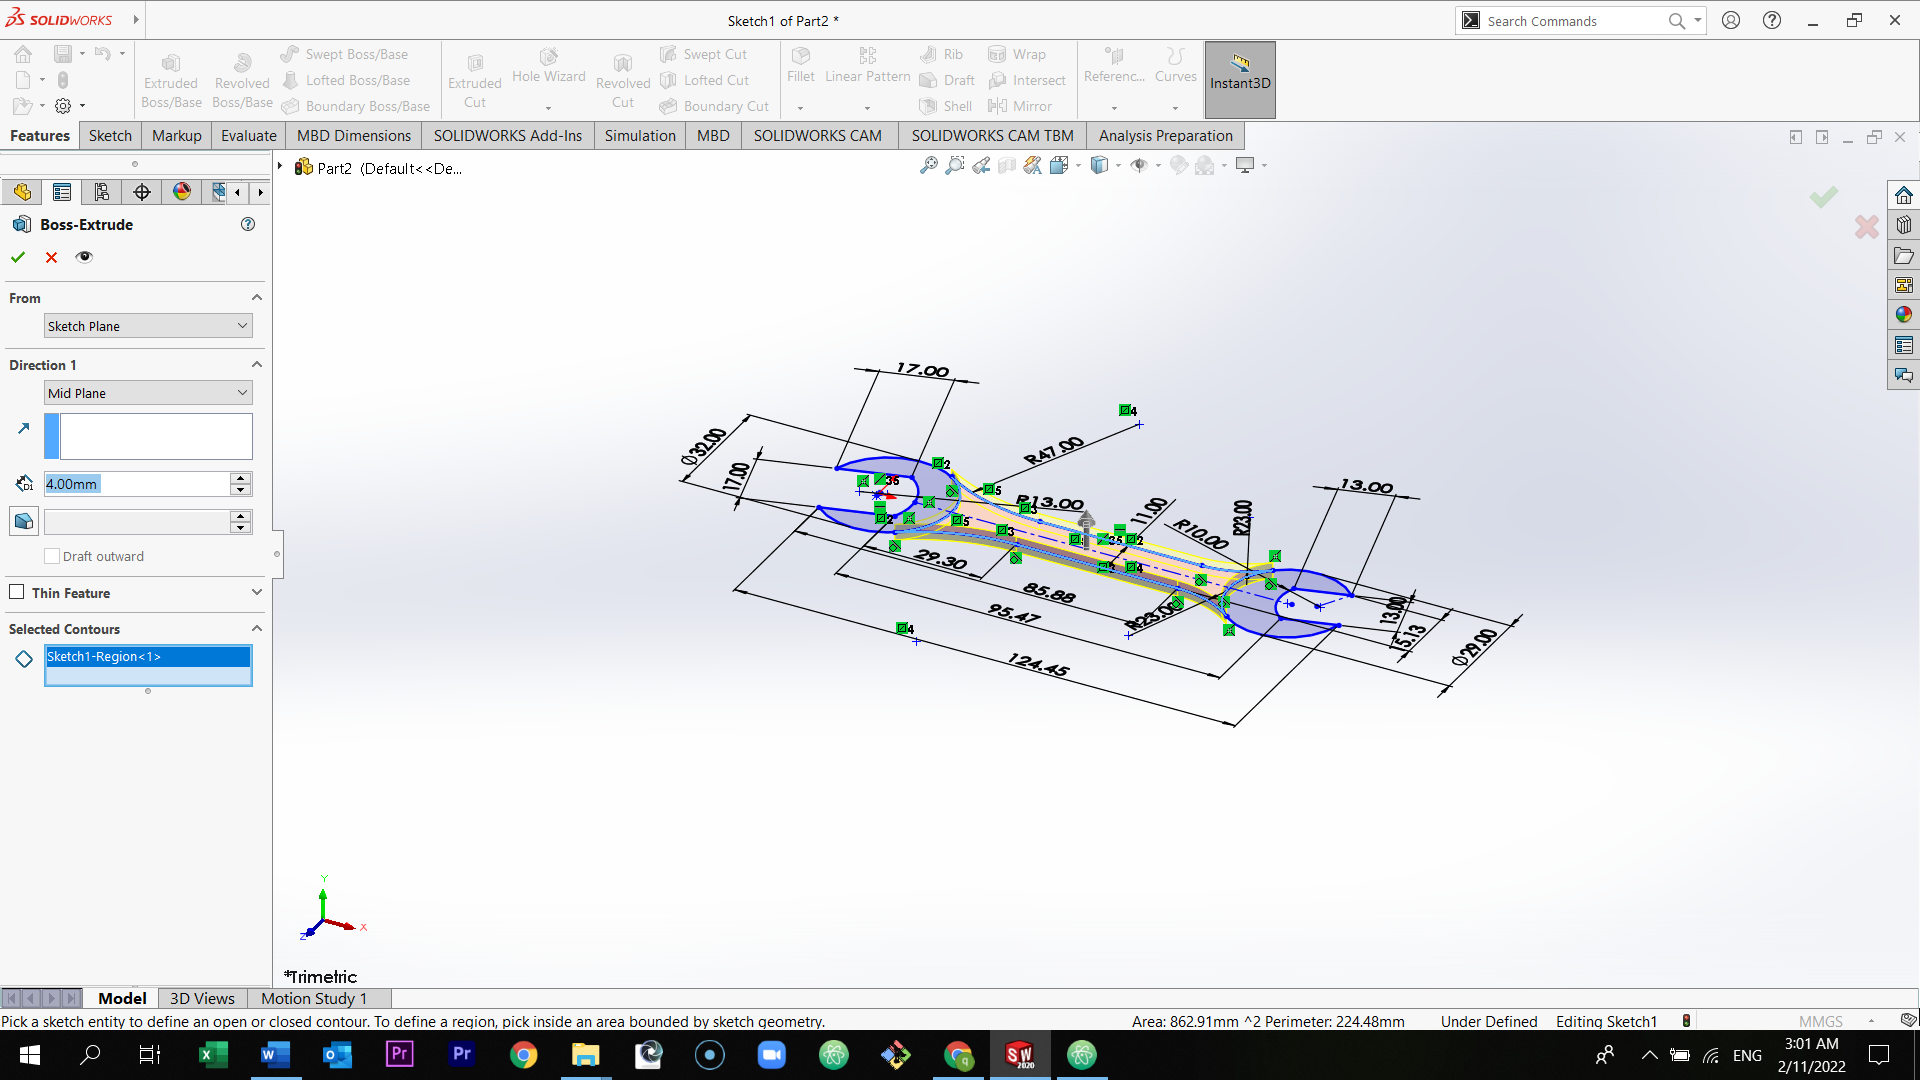
Select the correct icon to extrude.
Select boss extrude and then select at sketch and select extrude boss/base.
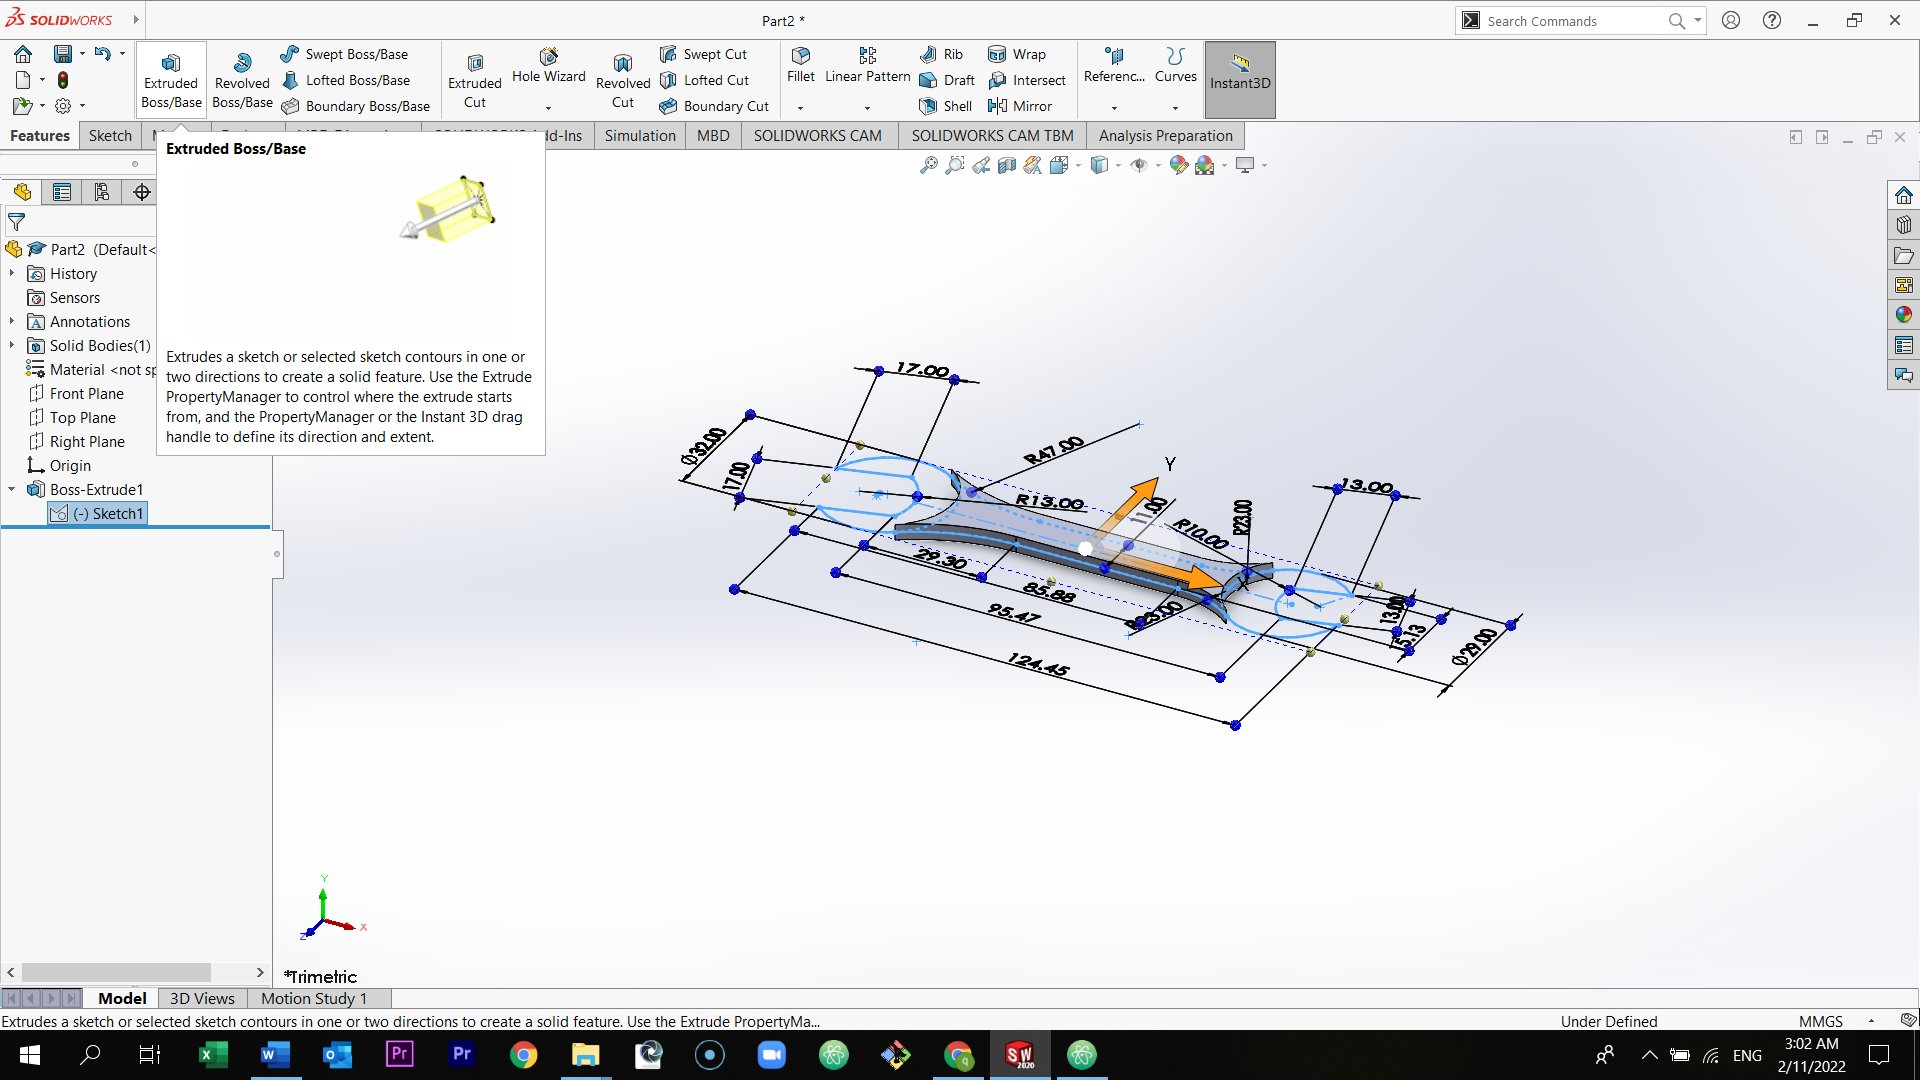
Select the two sides of the wrench and then in the left side of the page, select in the direction option, mid plane 5mm.

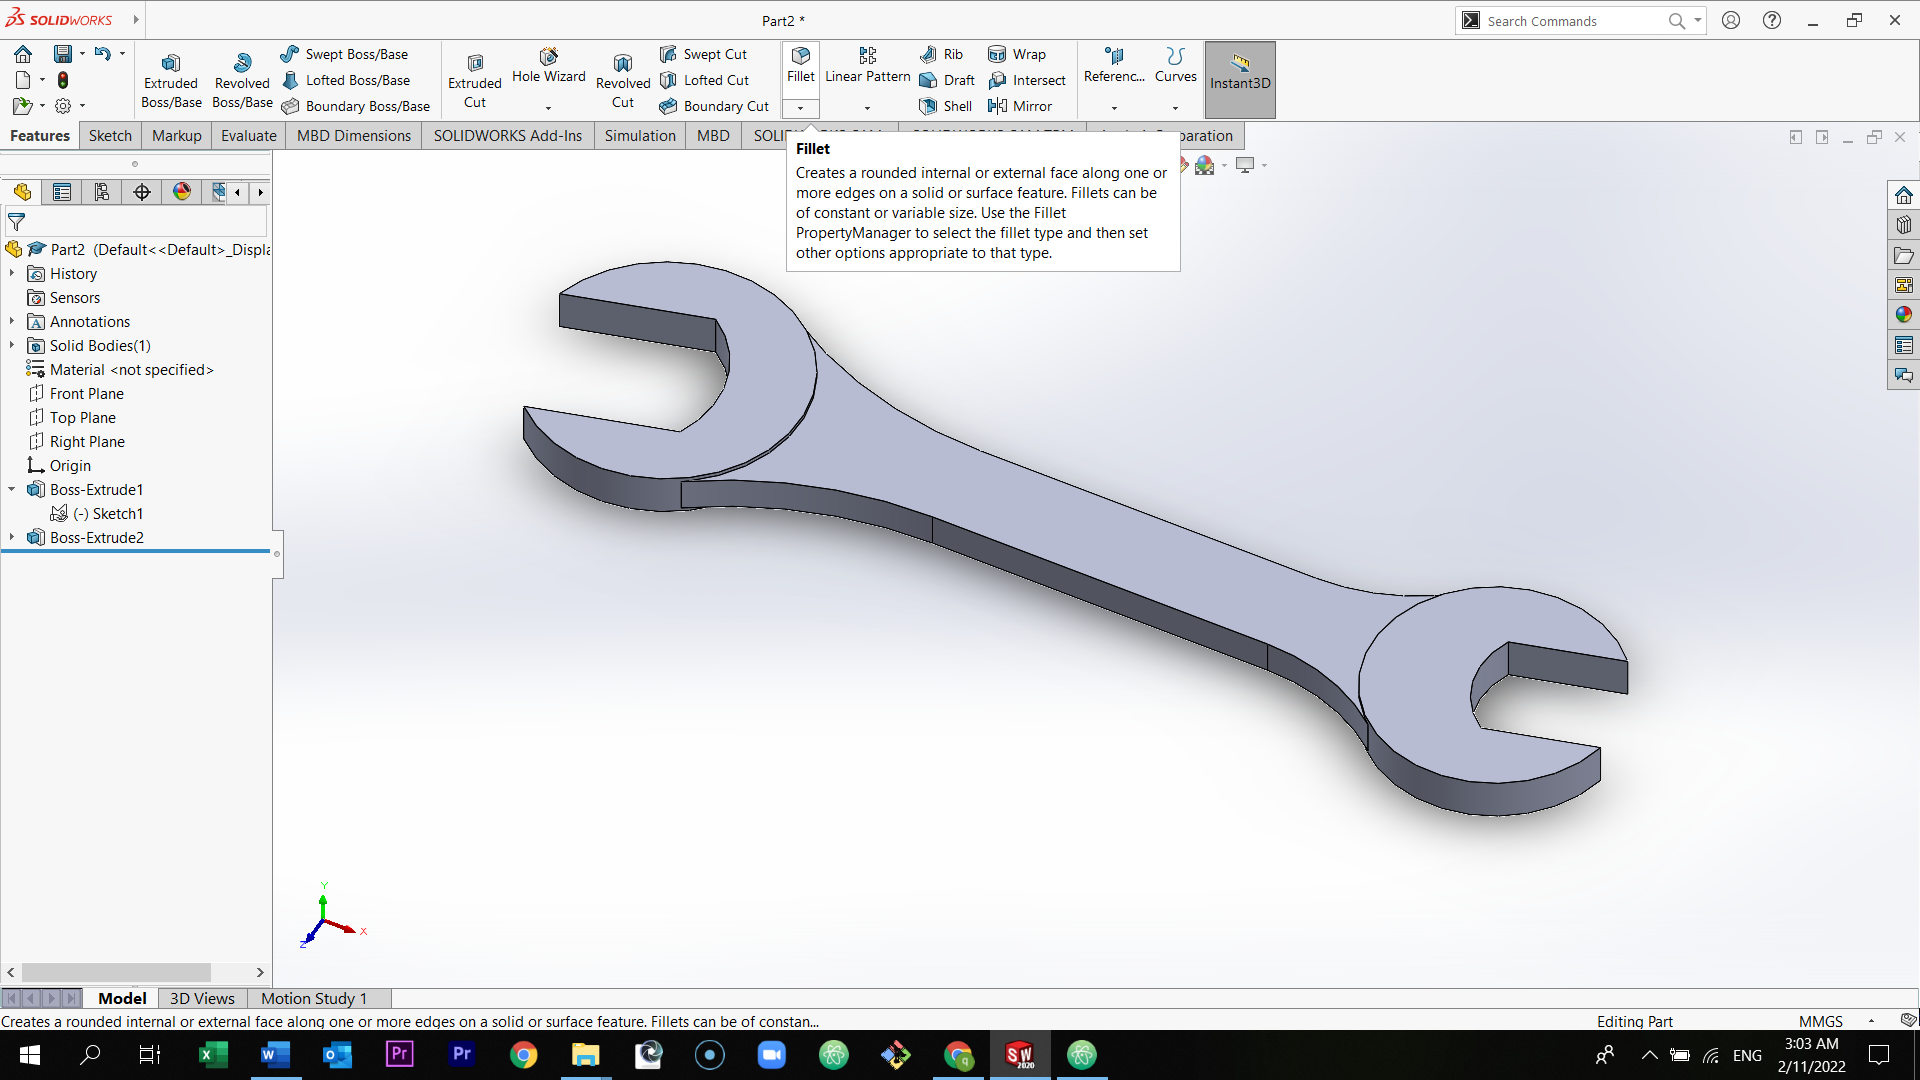
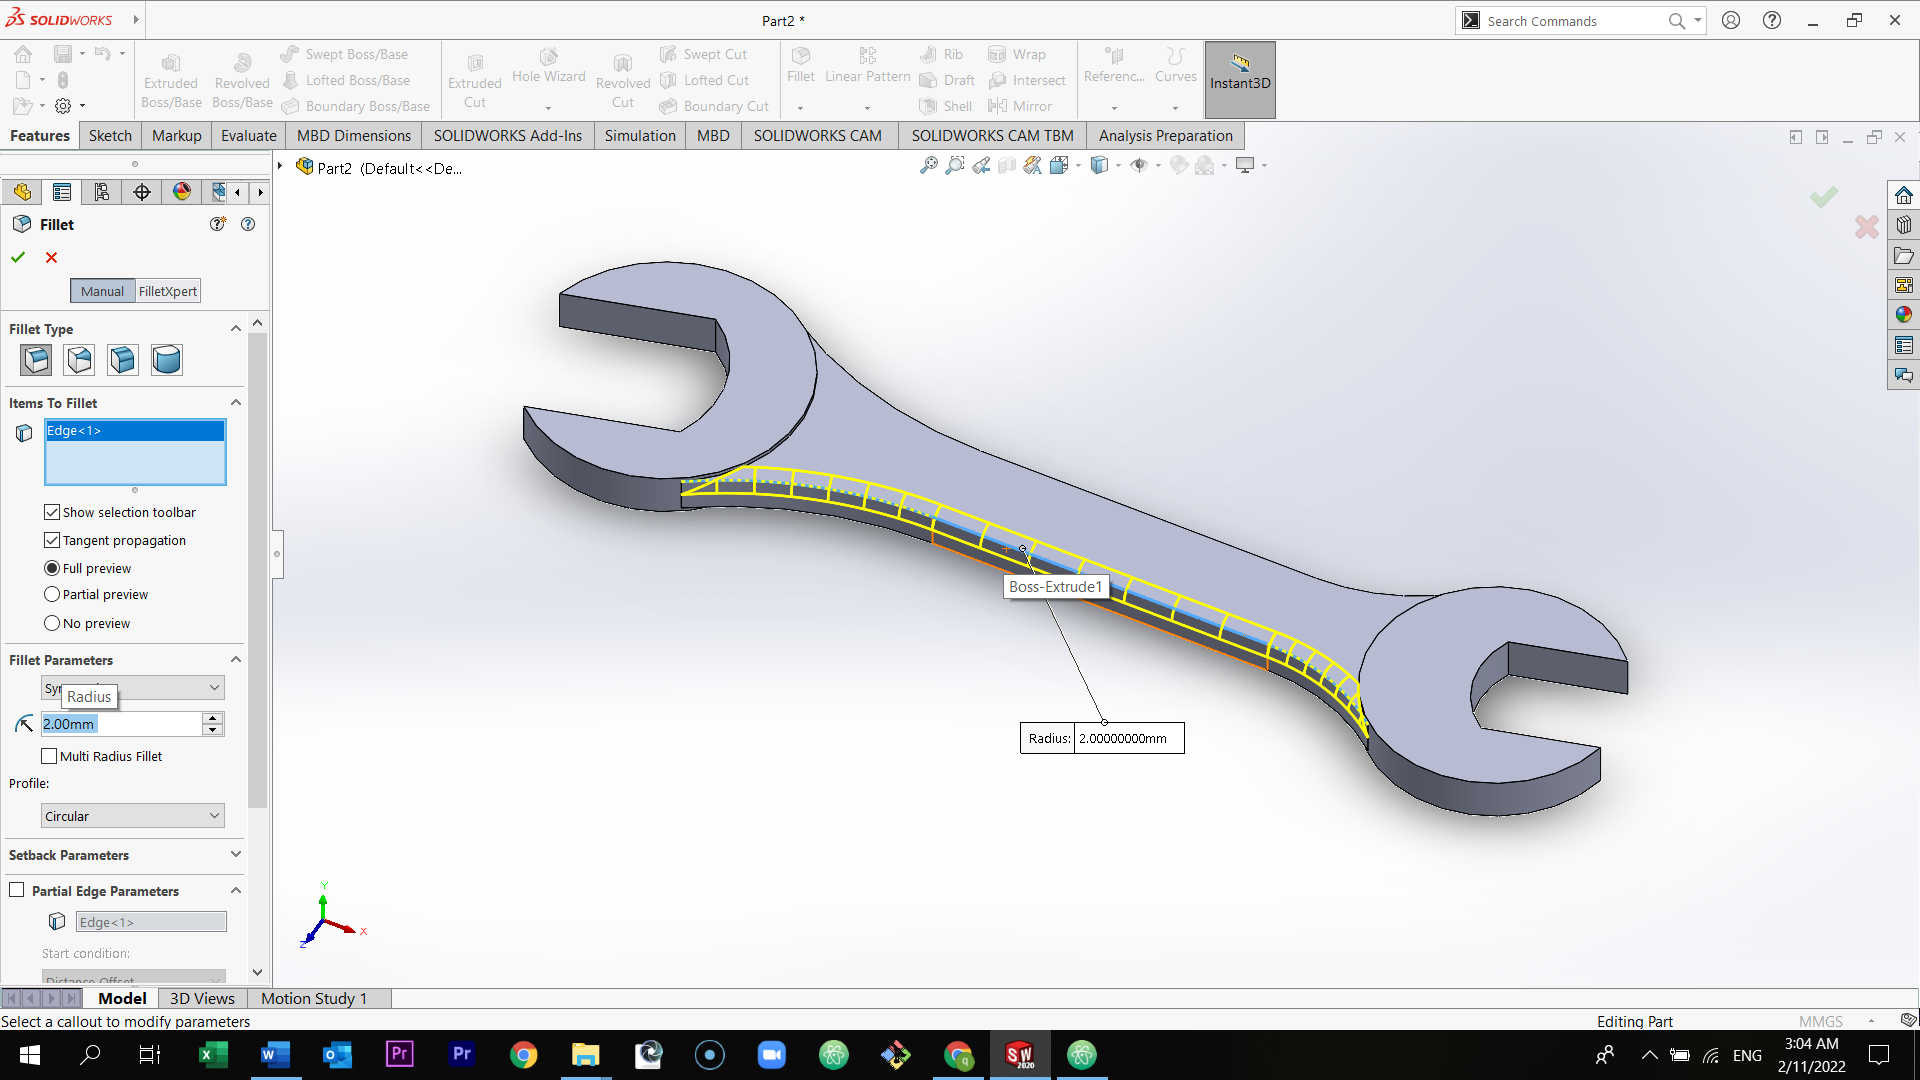
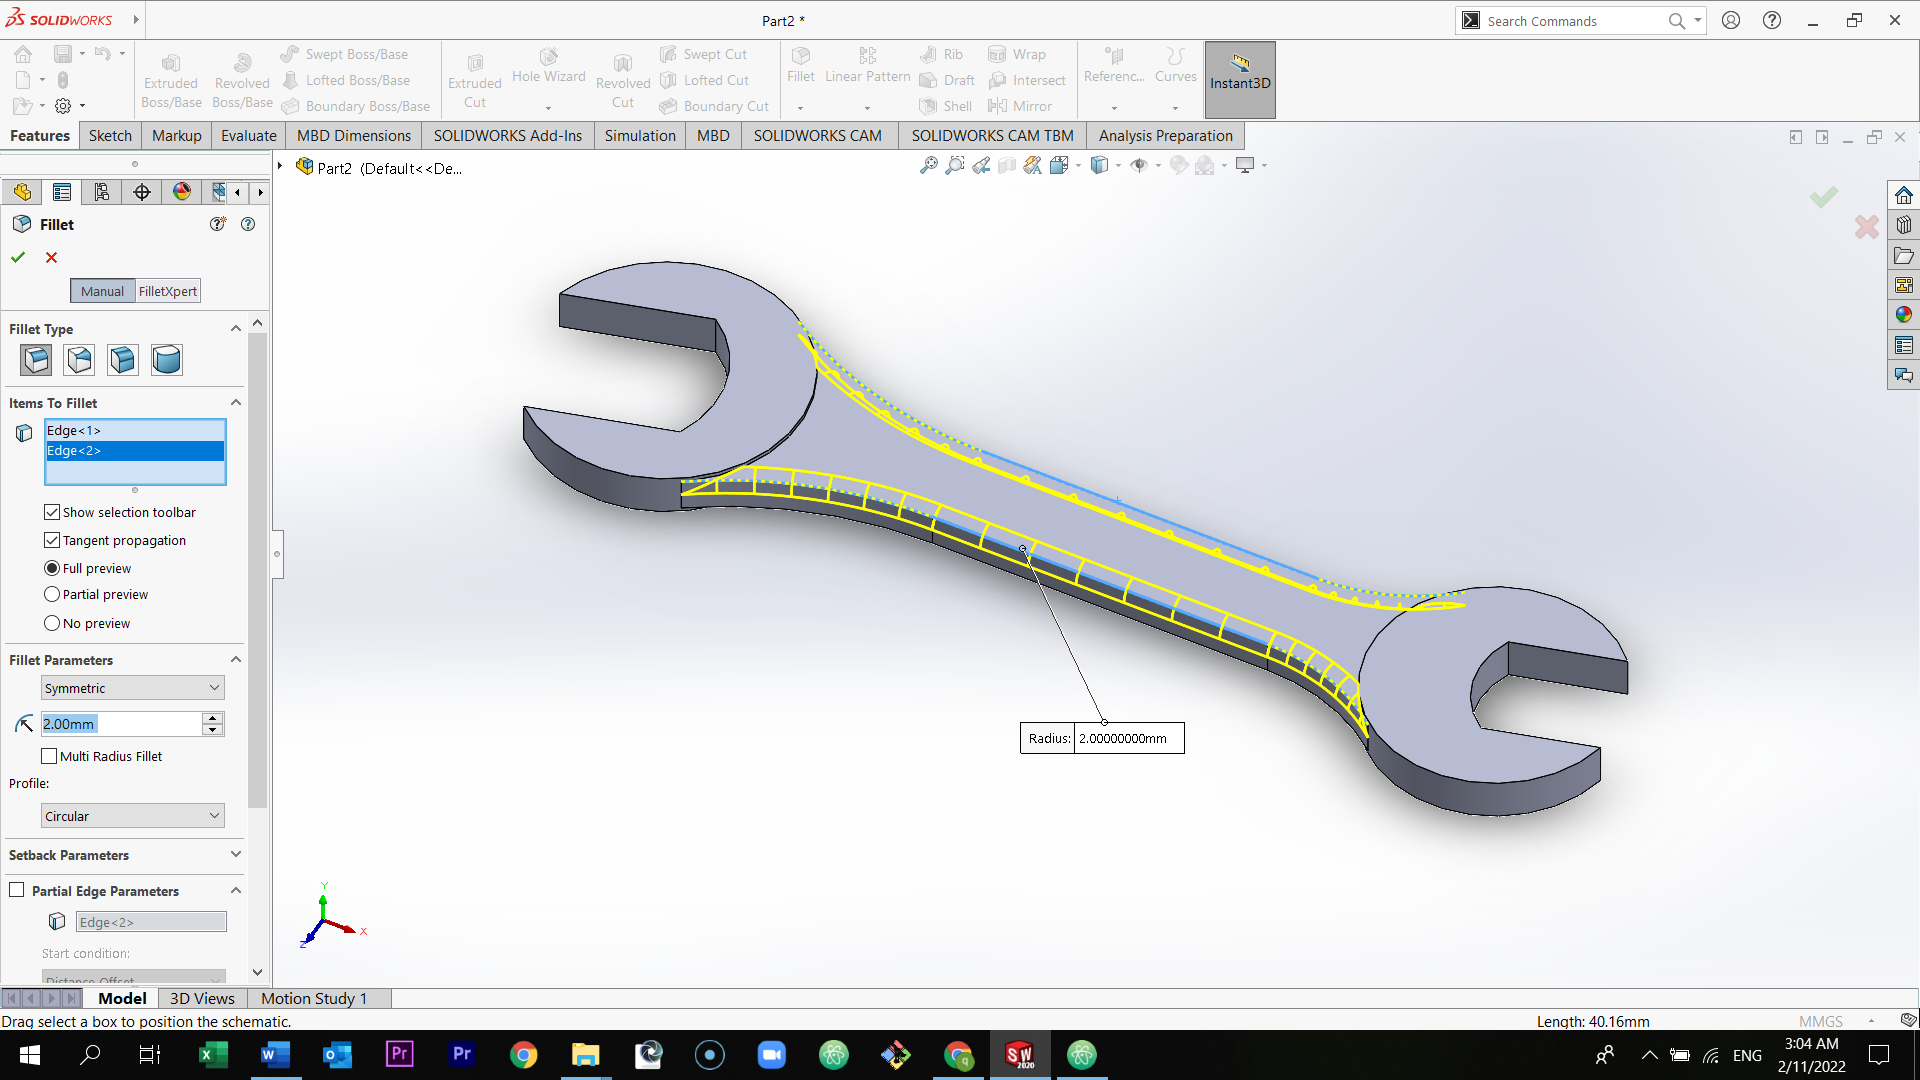
Select fillet from the section above and then select the two sides of the wrench and change the fillet to 2mm.
Select the type of material of the wrench.
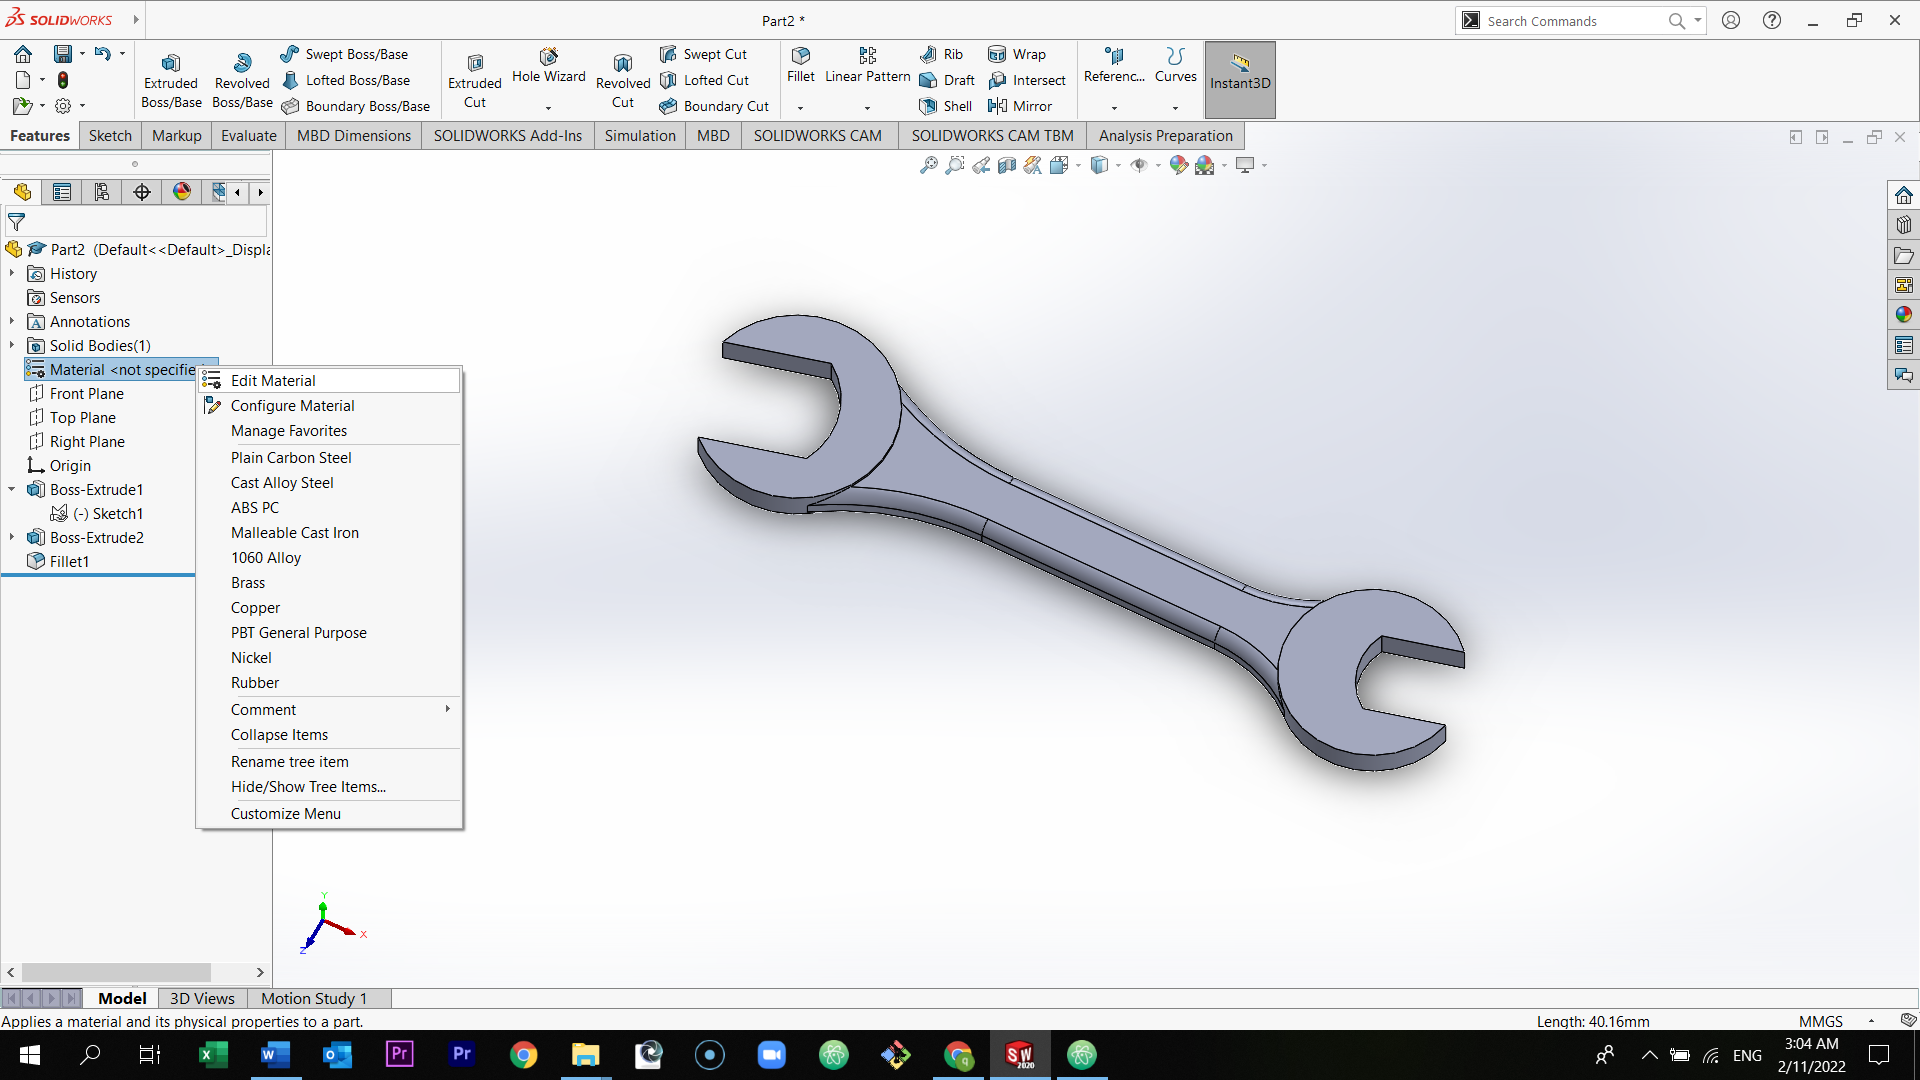
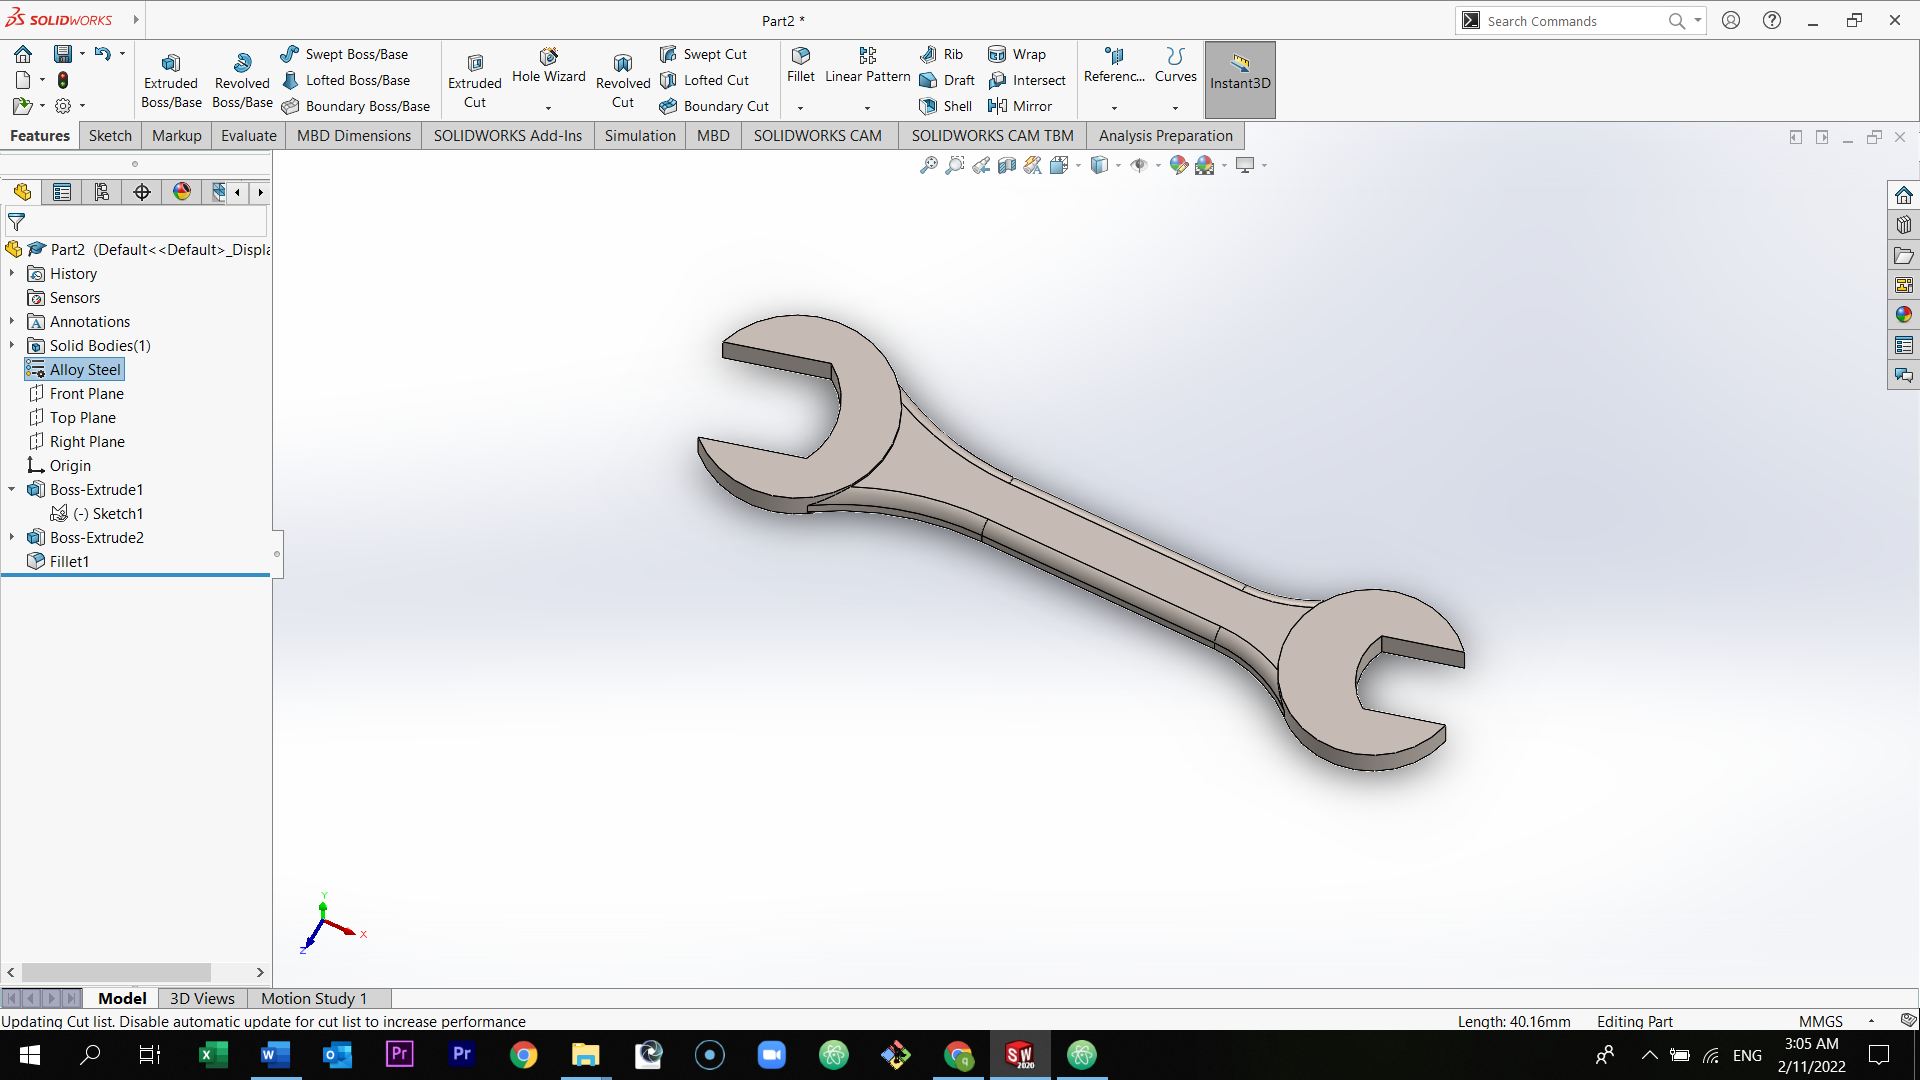
I have selected Alloy Steel. You can select what ever material that suits you.

You can change the color of the wrench be selecting at the colored ball in the right of the page.
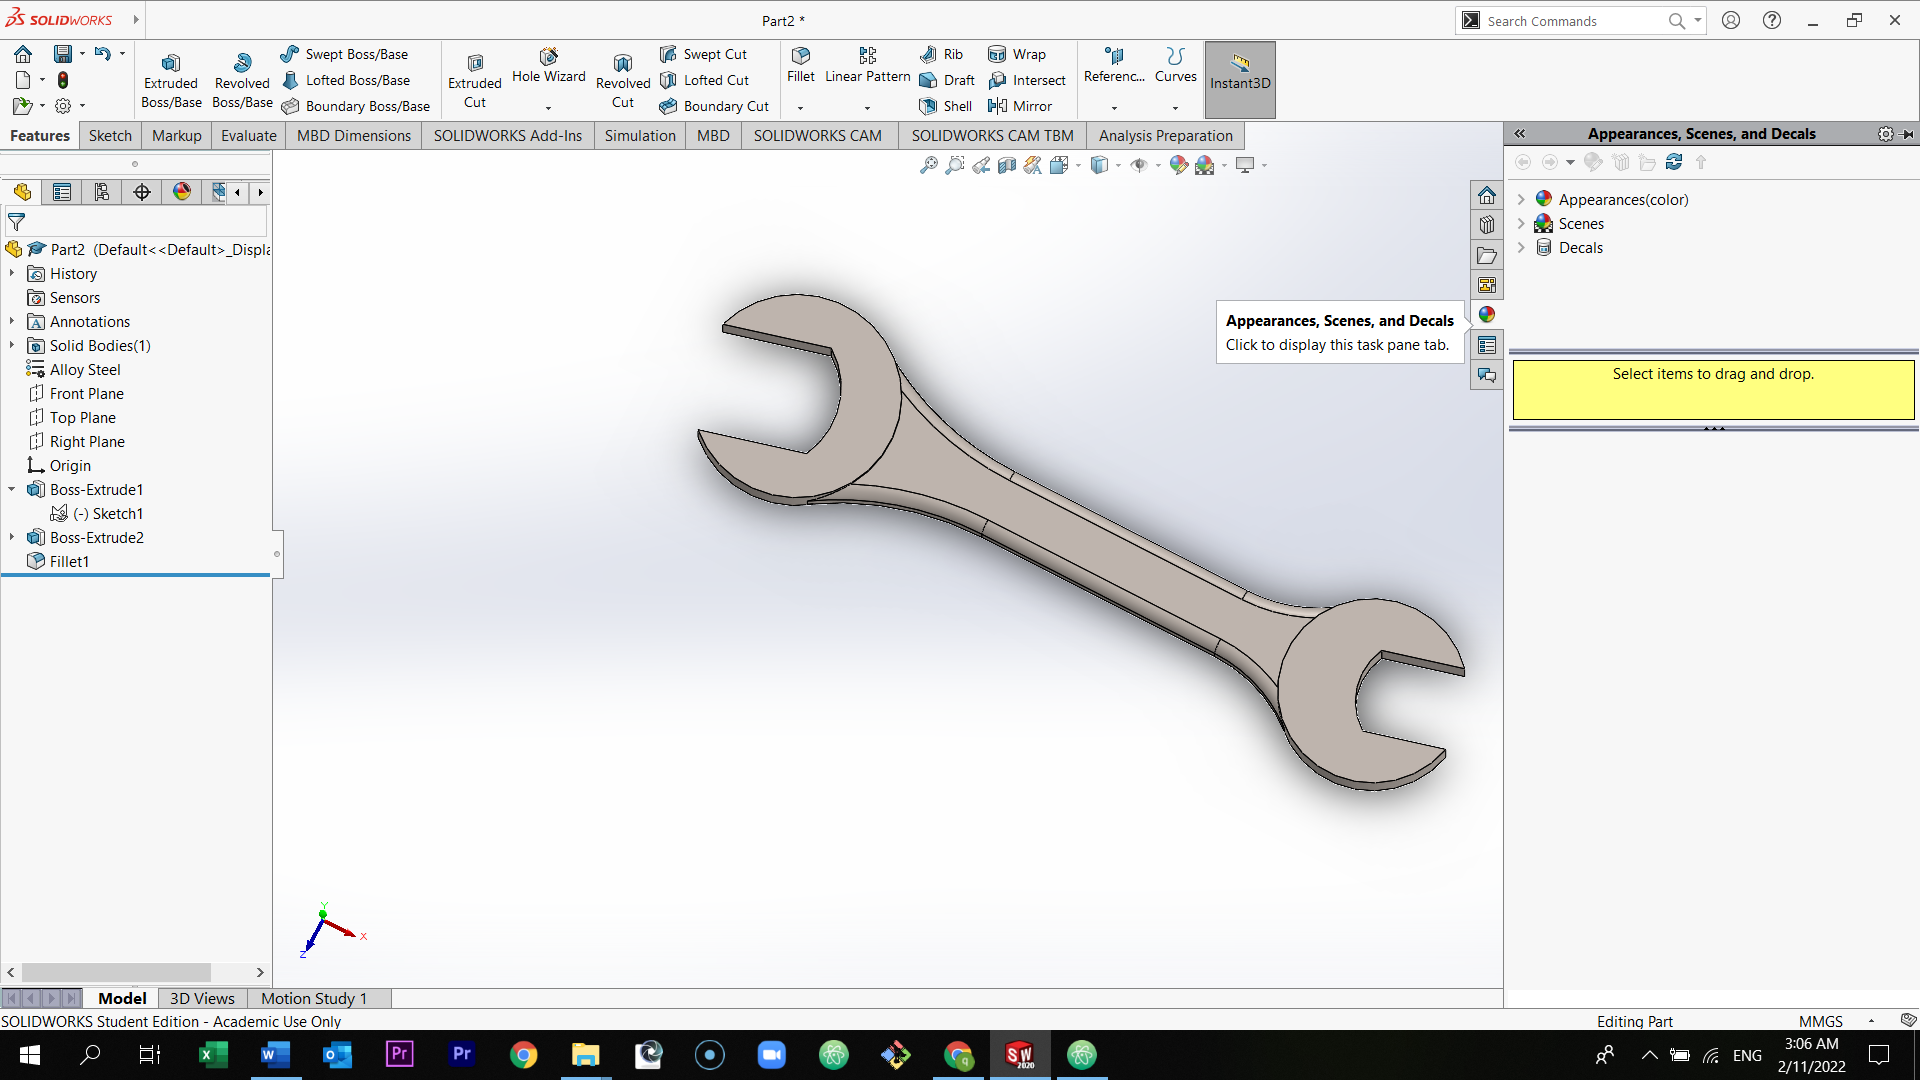
You can select whatever color you want. Just drag the color into the wrench.

Final Result
Preview the model below
Click here to download the Sketchfab 3d model, Scroll down and select Download 3D model
Design files
Click here to download and edit the design
Milling, Molding and Casting Process:
Molding definition
is the process of manufacturing by shaping liquid or pliable raw material using a rigid frame called a mold or matrix.
Click here to read more about molding and casting
Casting definition
is a manufacturing process in which a liquid material is usually poured into a mold, which contains a hollow cavity of the desired shape, and then allowed to solidify.
Click here to read more about molding and casting
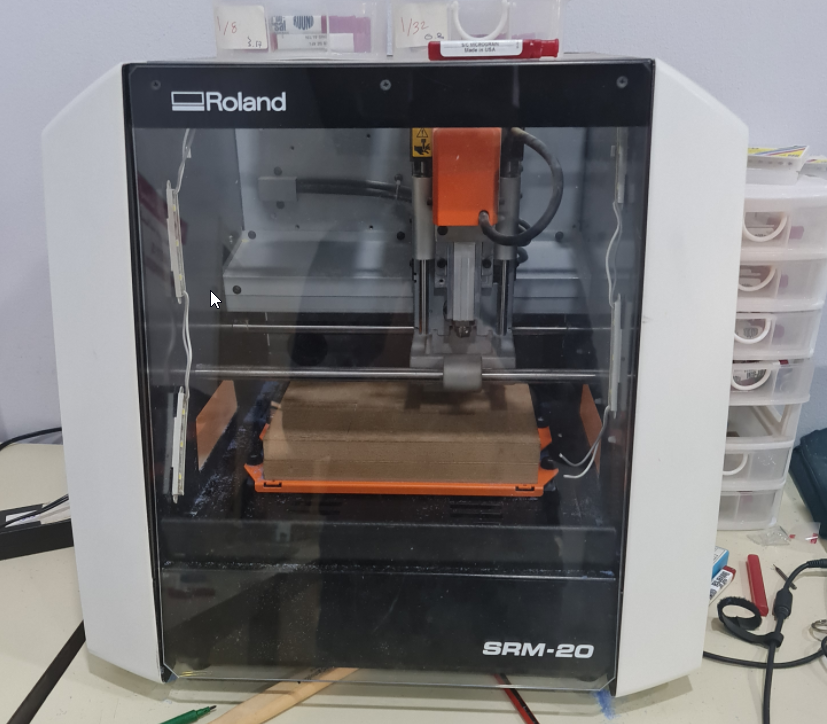
Milling process
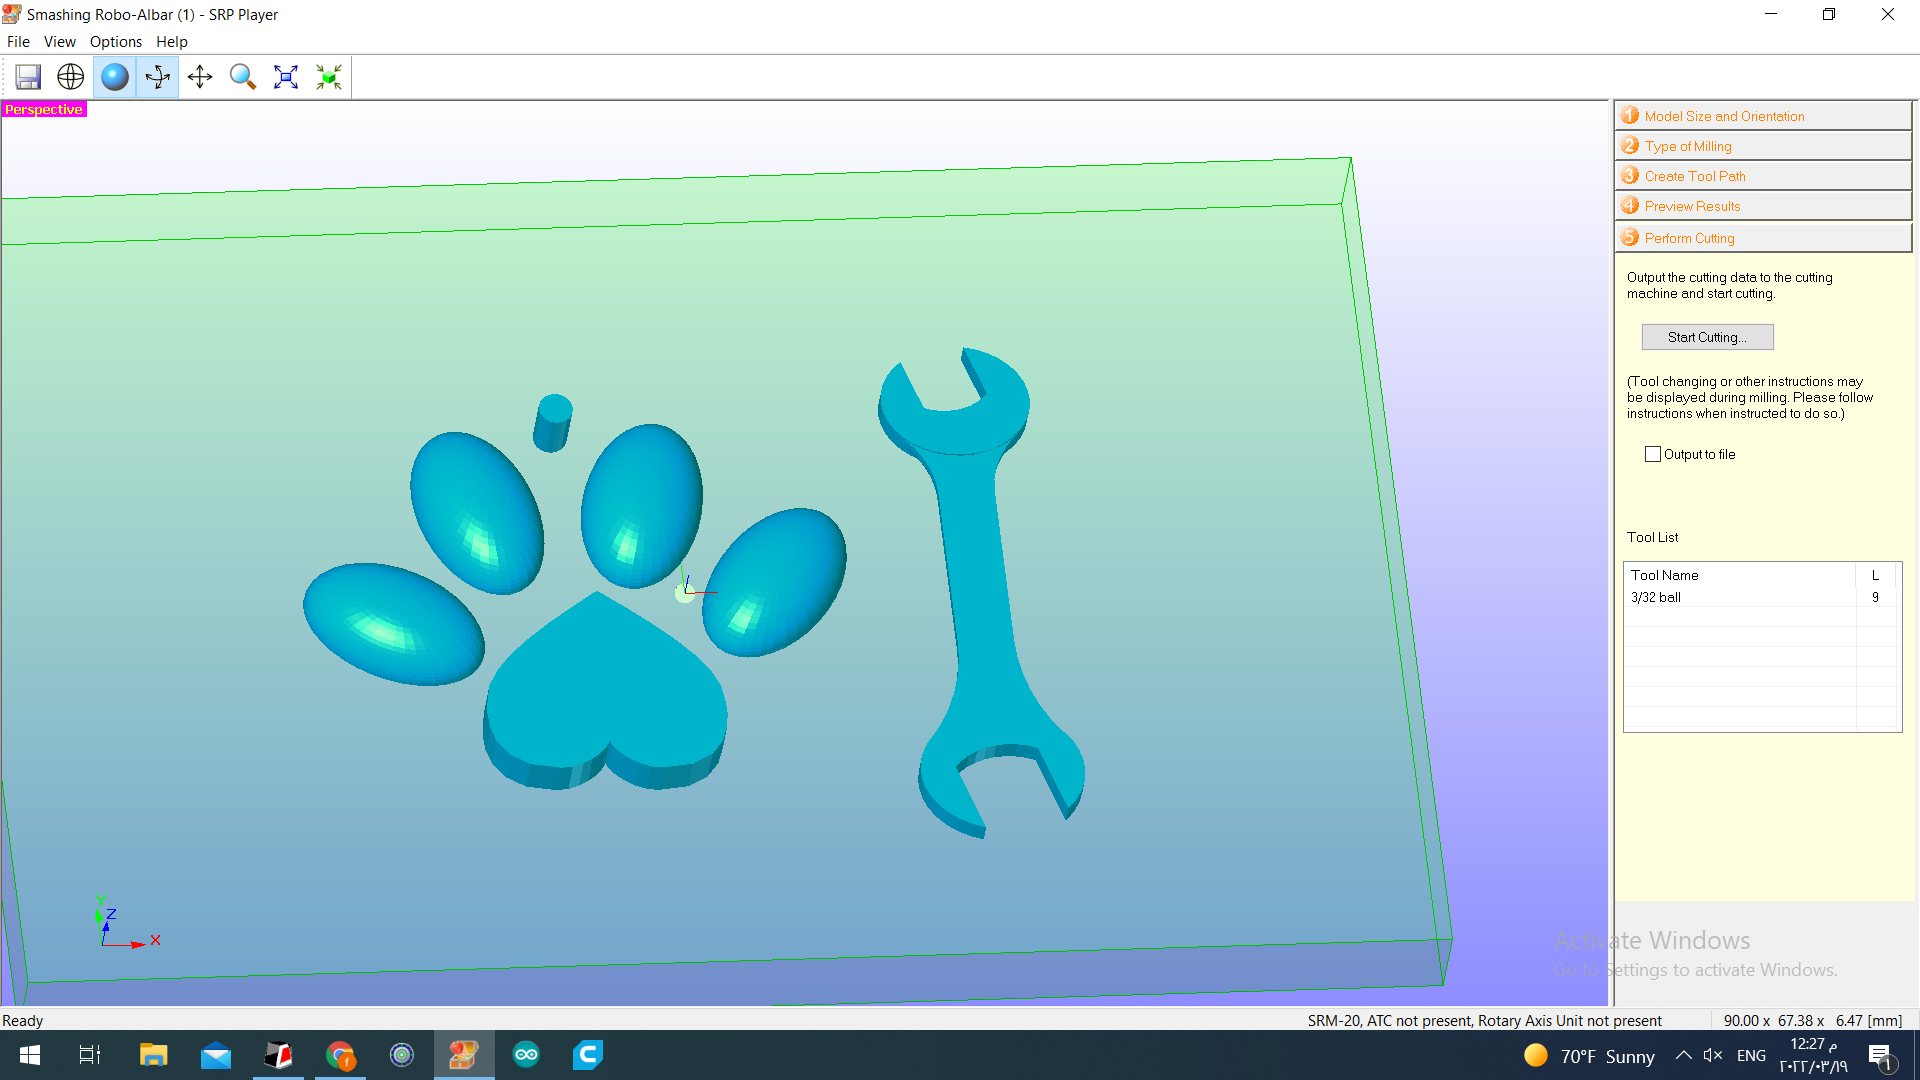
Machinable wax is used in the milling operation, and the machine used for the milling process is called Roland SRM-20.
First, I have used Tinker CAD software to put my 3d design and my partner’s design in one sheet. We have used tinkercad to adjust the sizes of our designs.
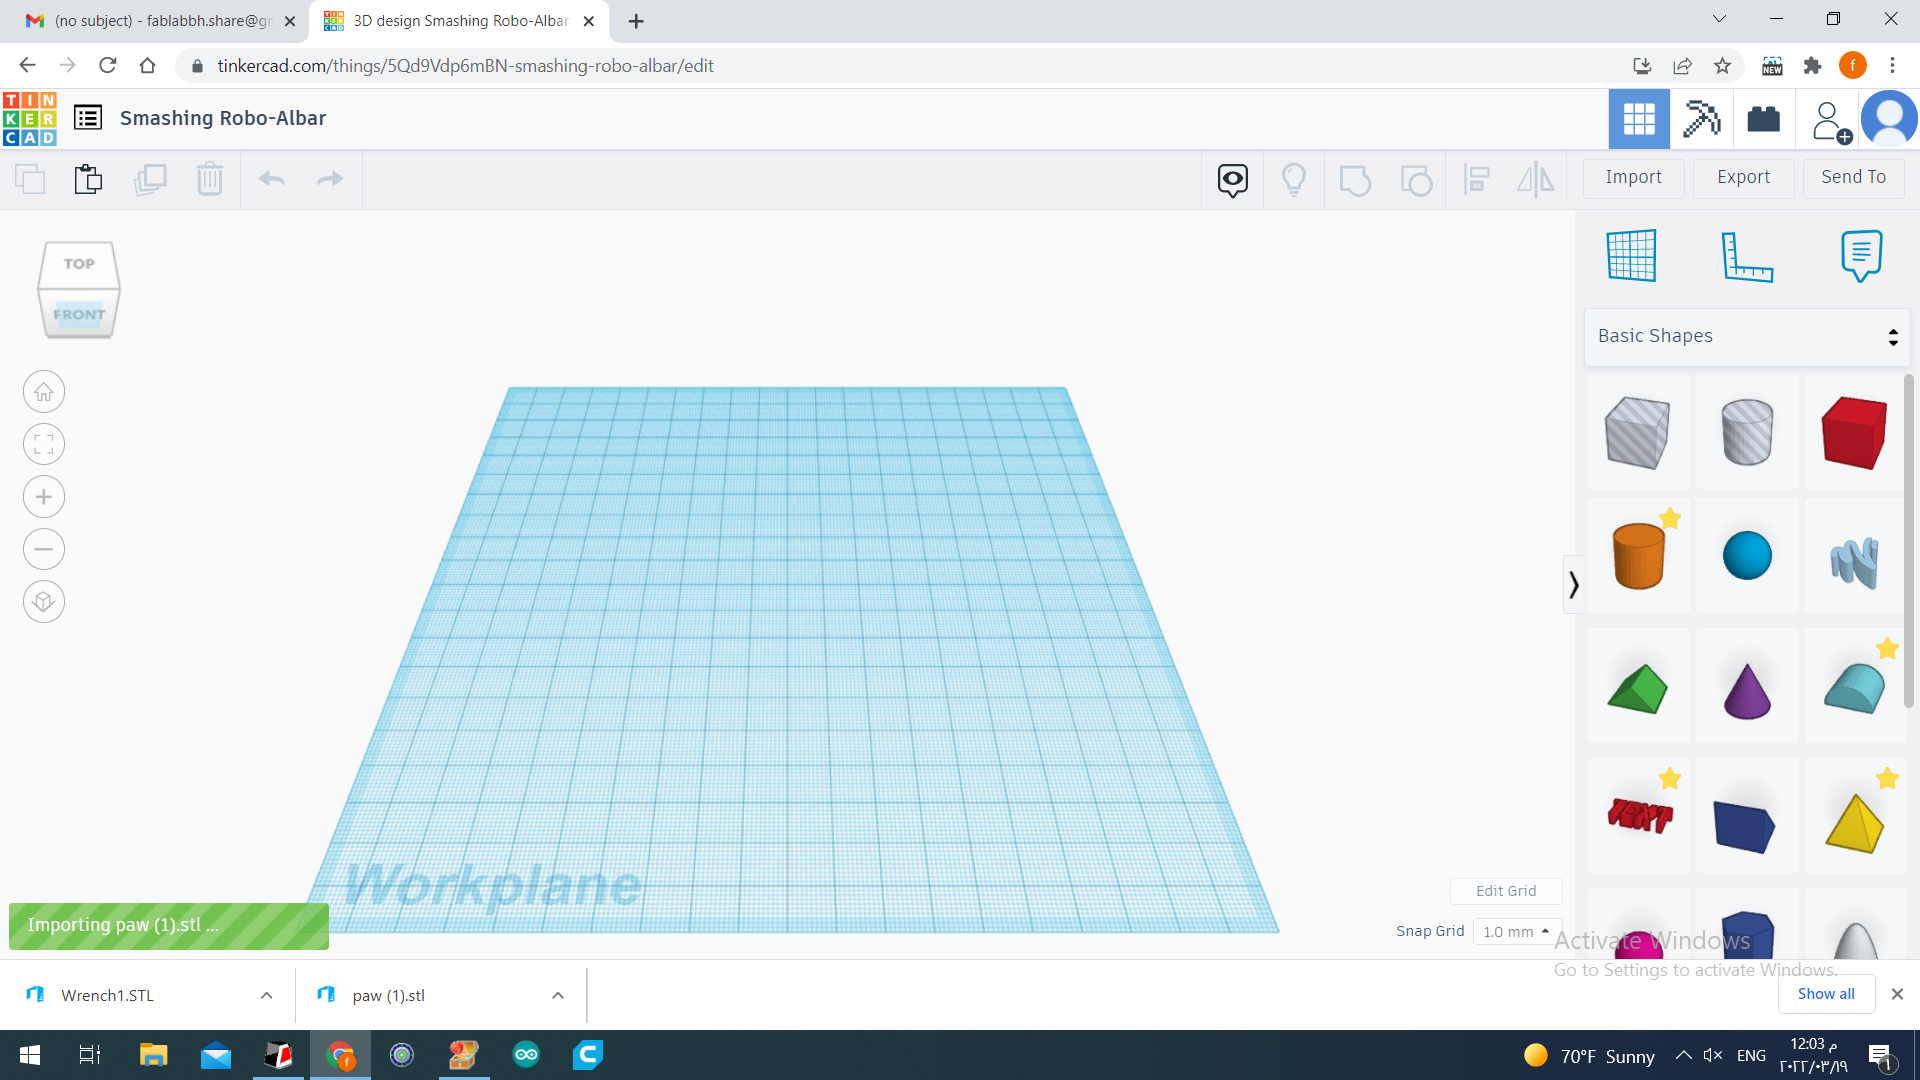
Then we opened our design on a program called VPanel for SRM-20 (SRP Player) to start the milling process.
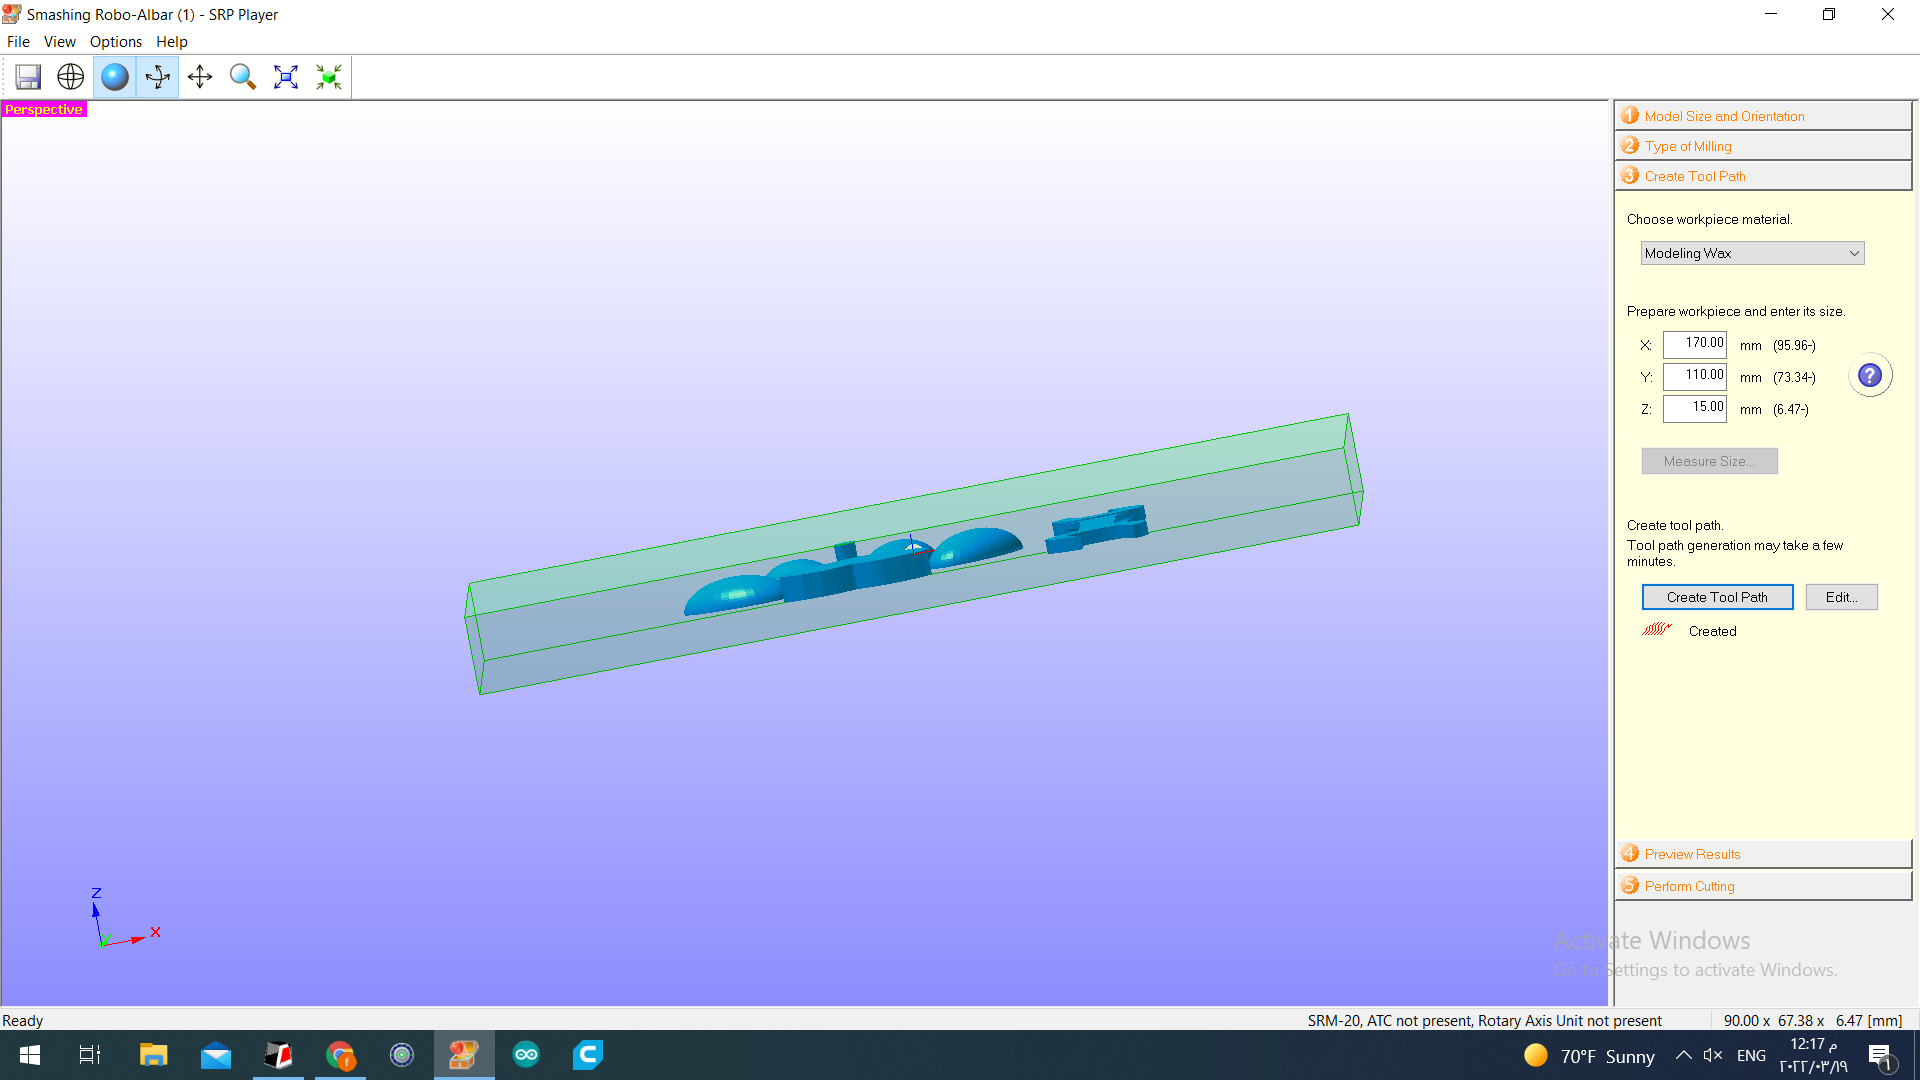
First step was to change the model size and orientation as shown below.

Then change the type of milling as shown below.
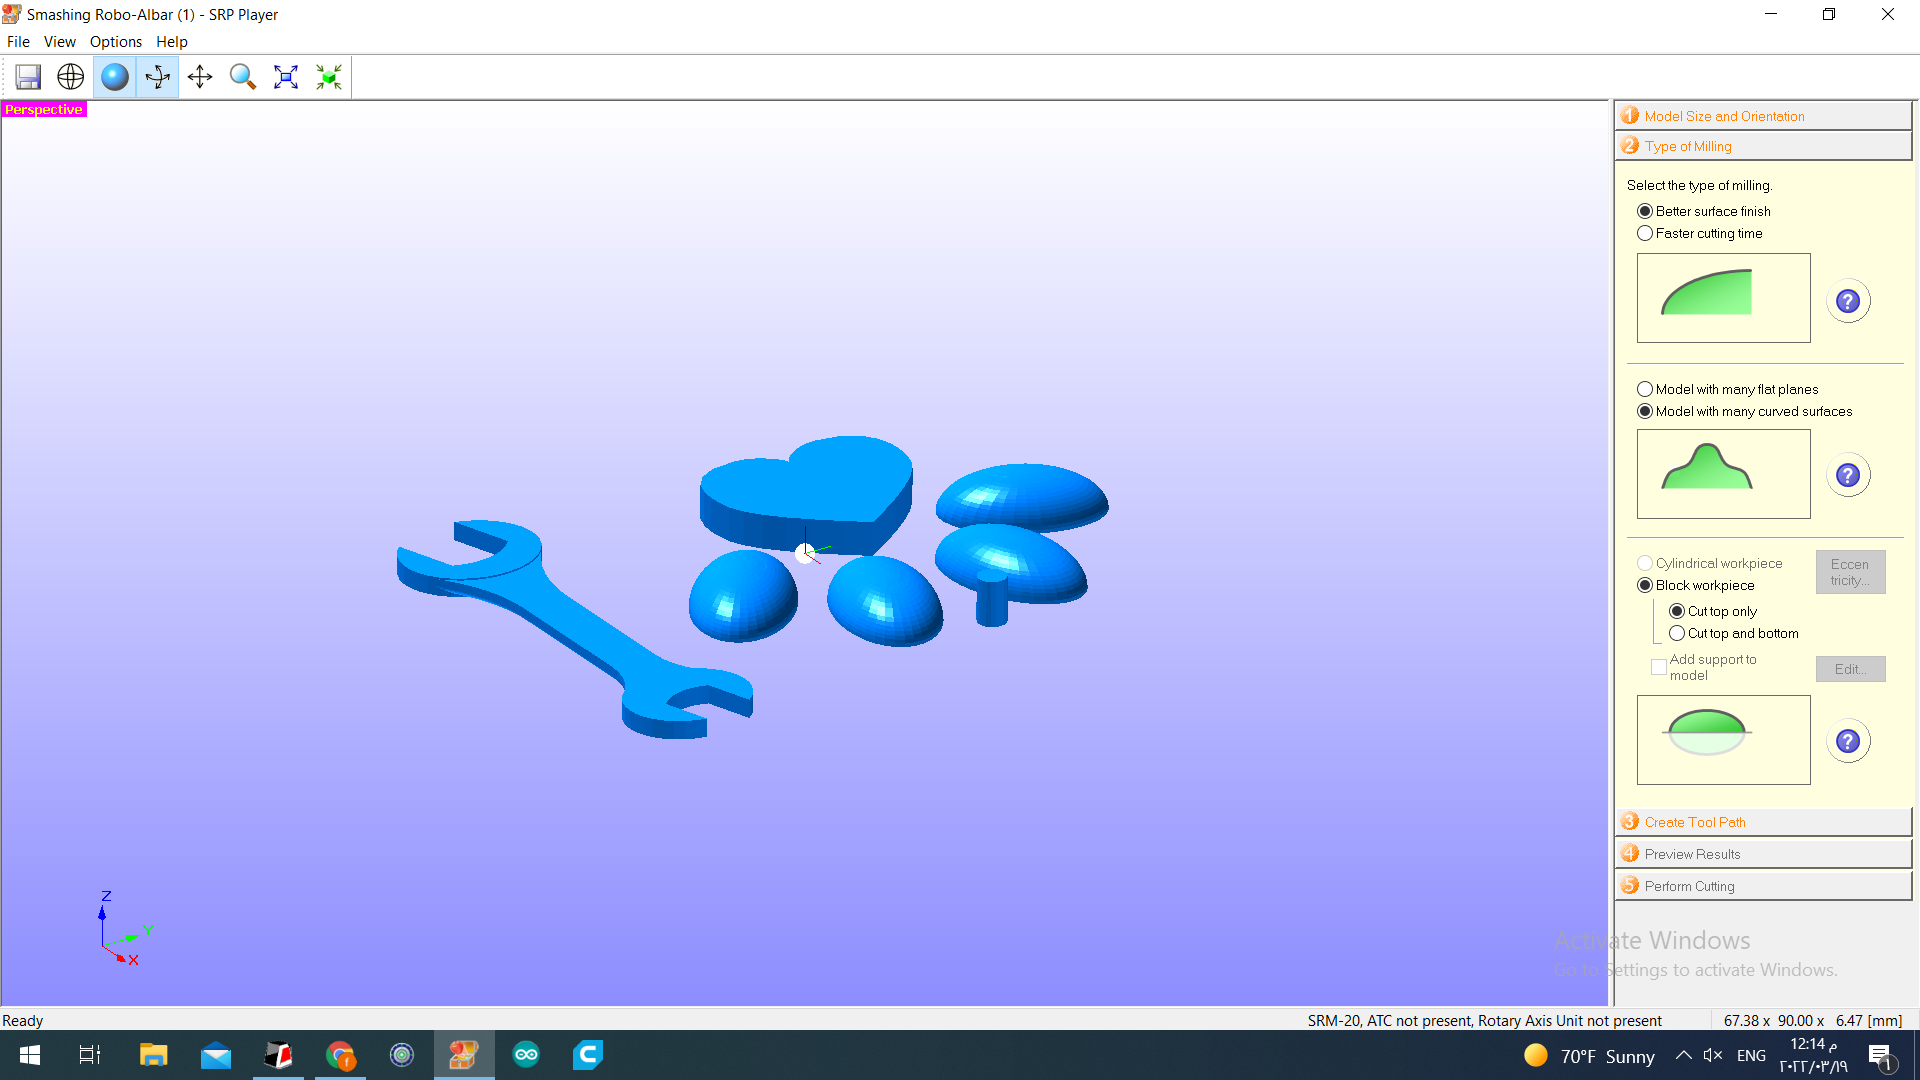
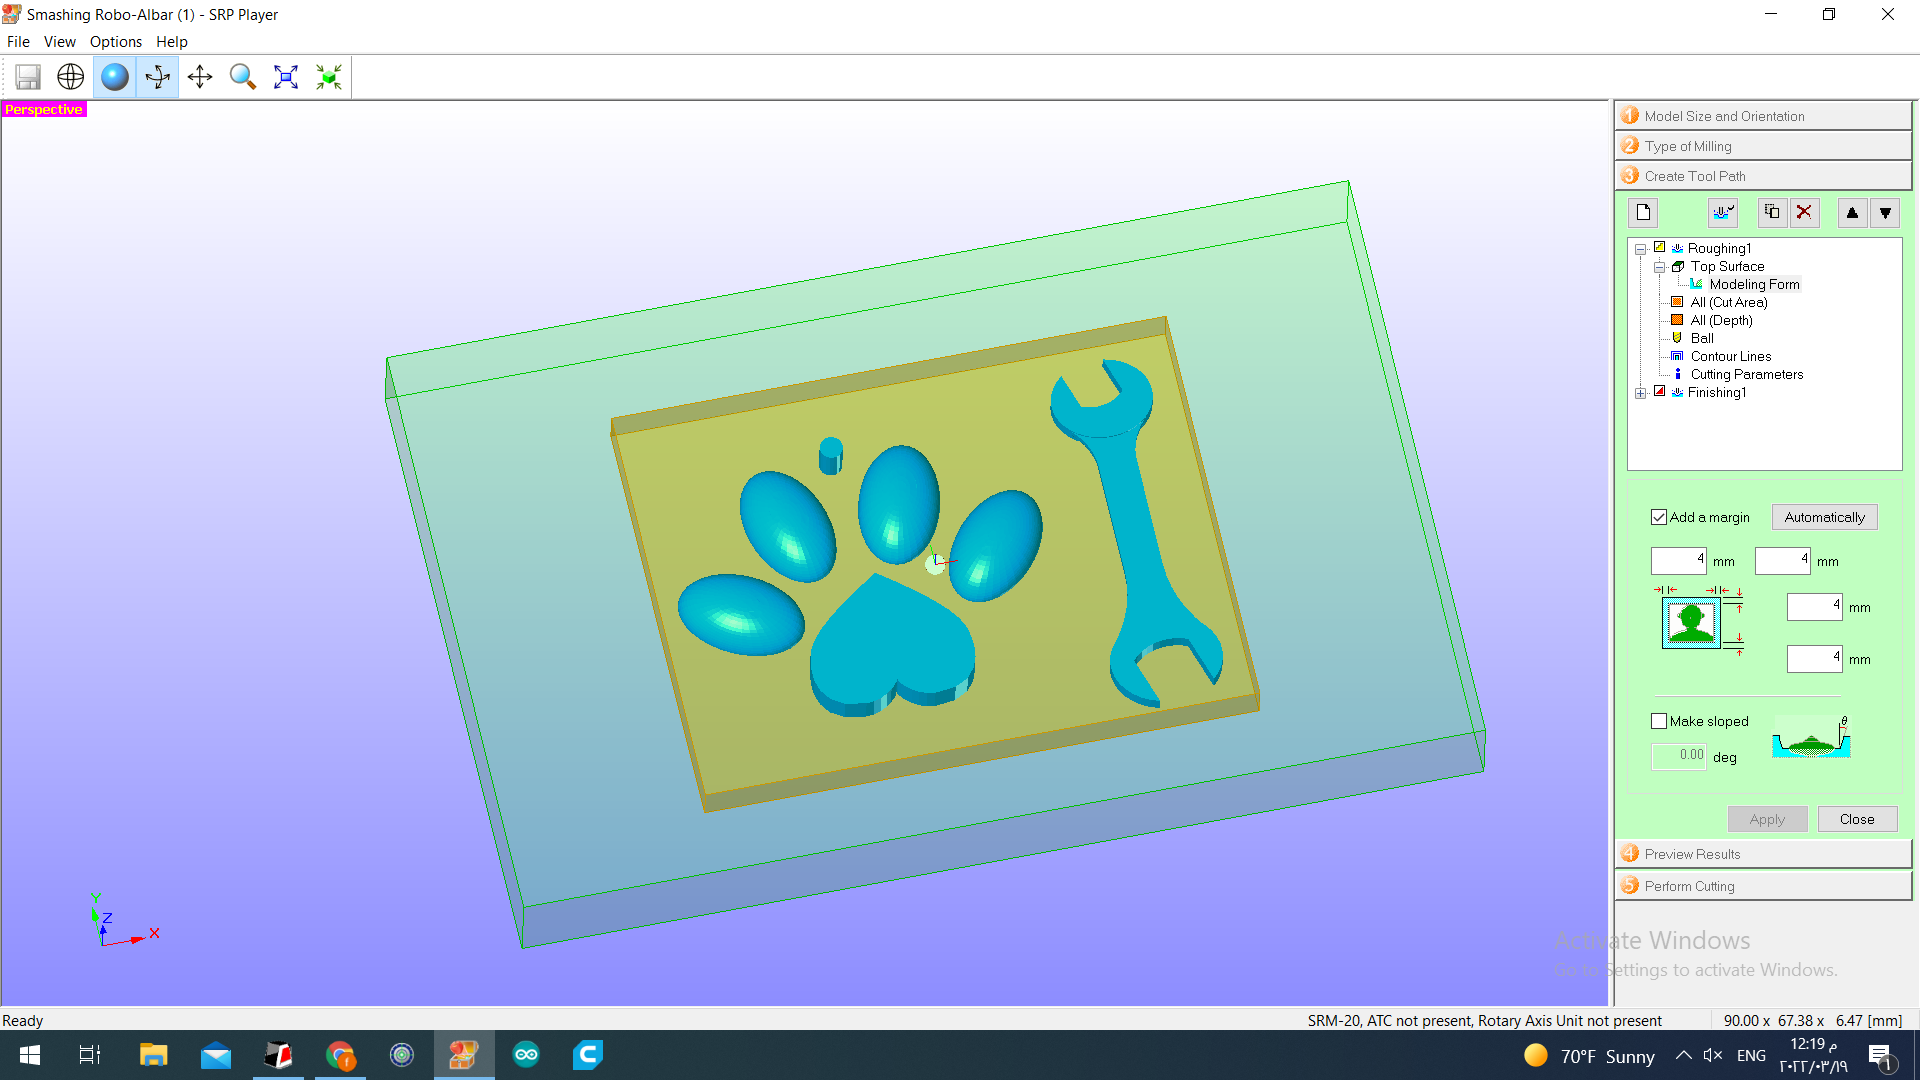
After changing the type of milling, create toolpath and adjust the setting as shown below.
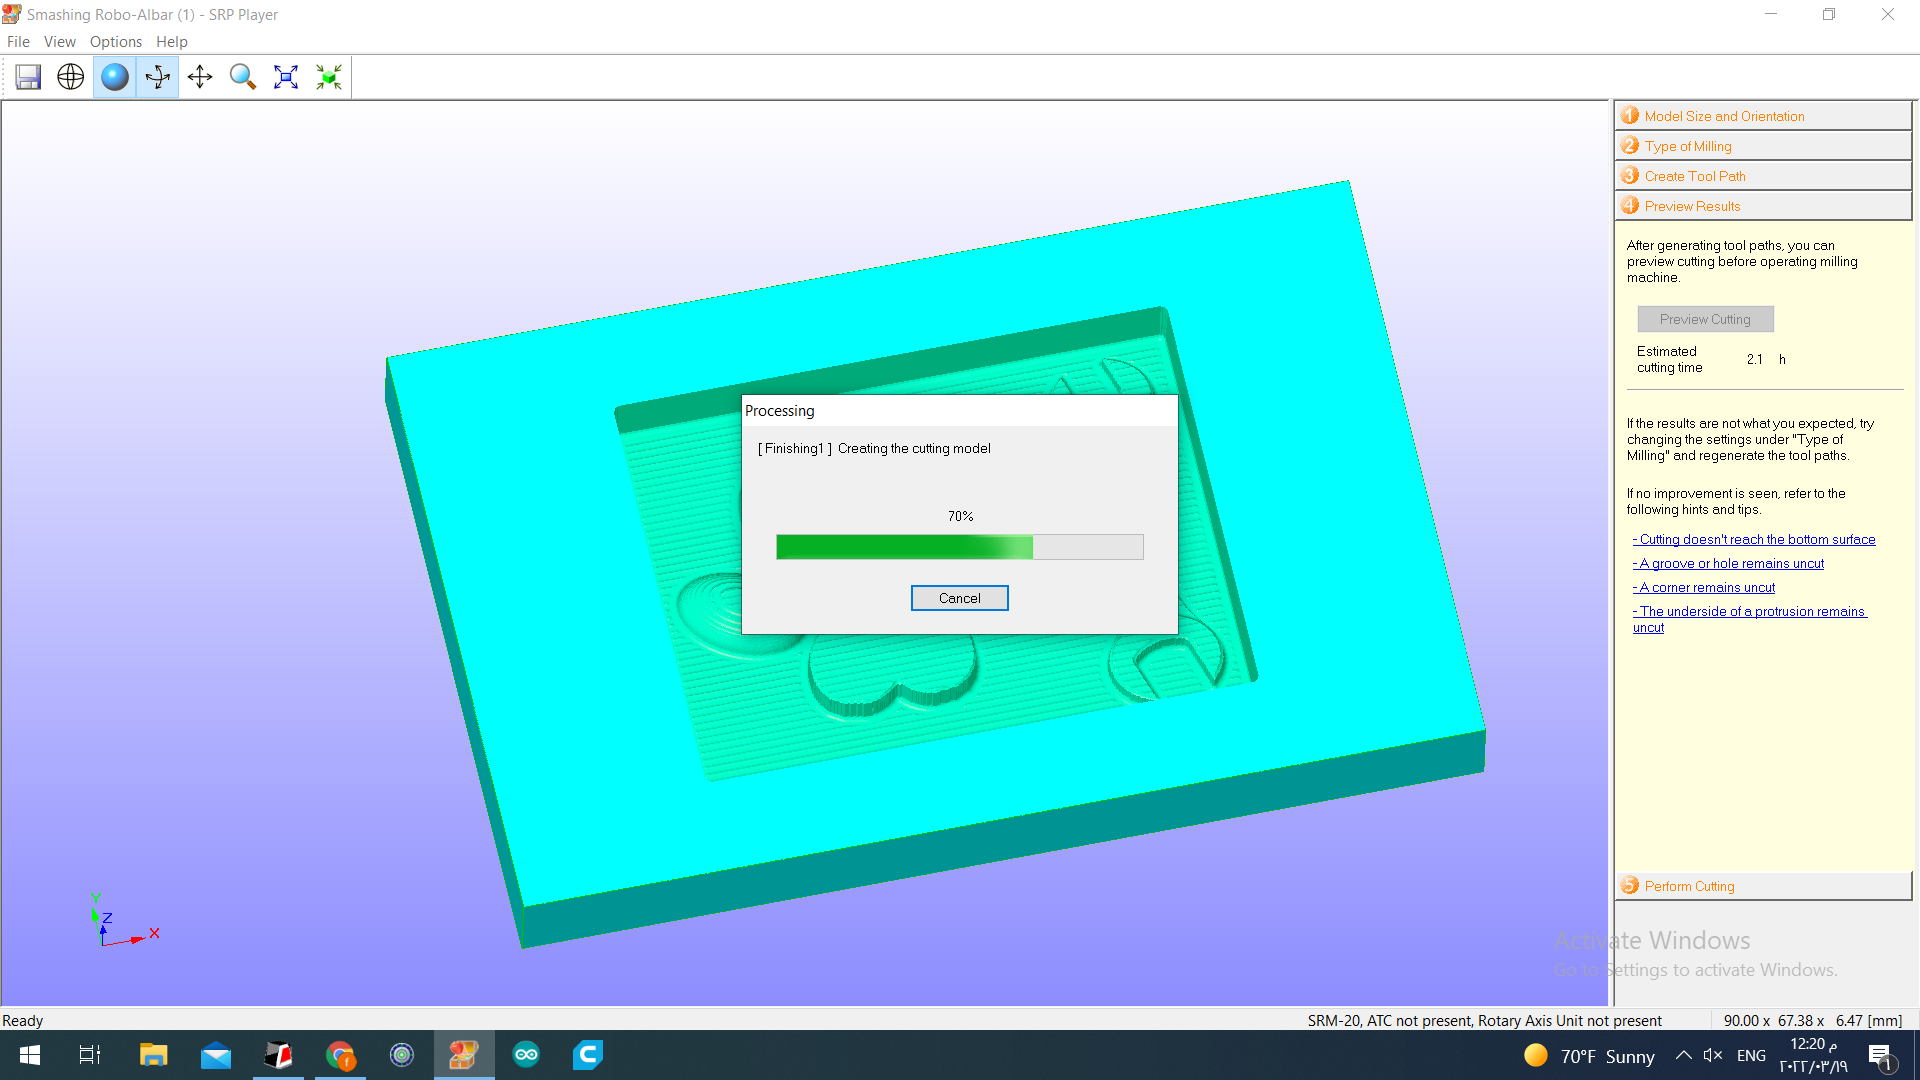
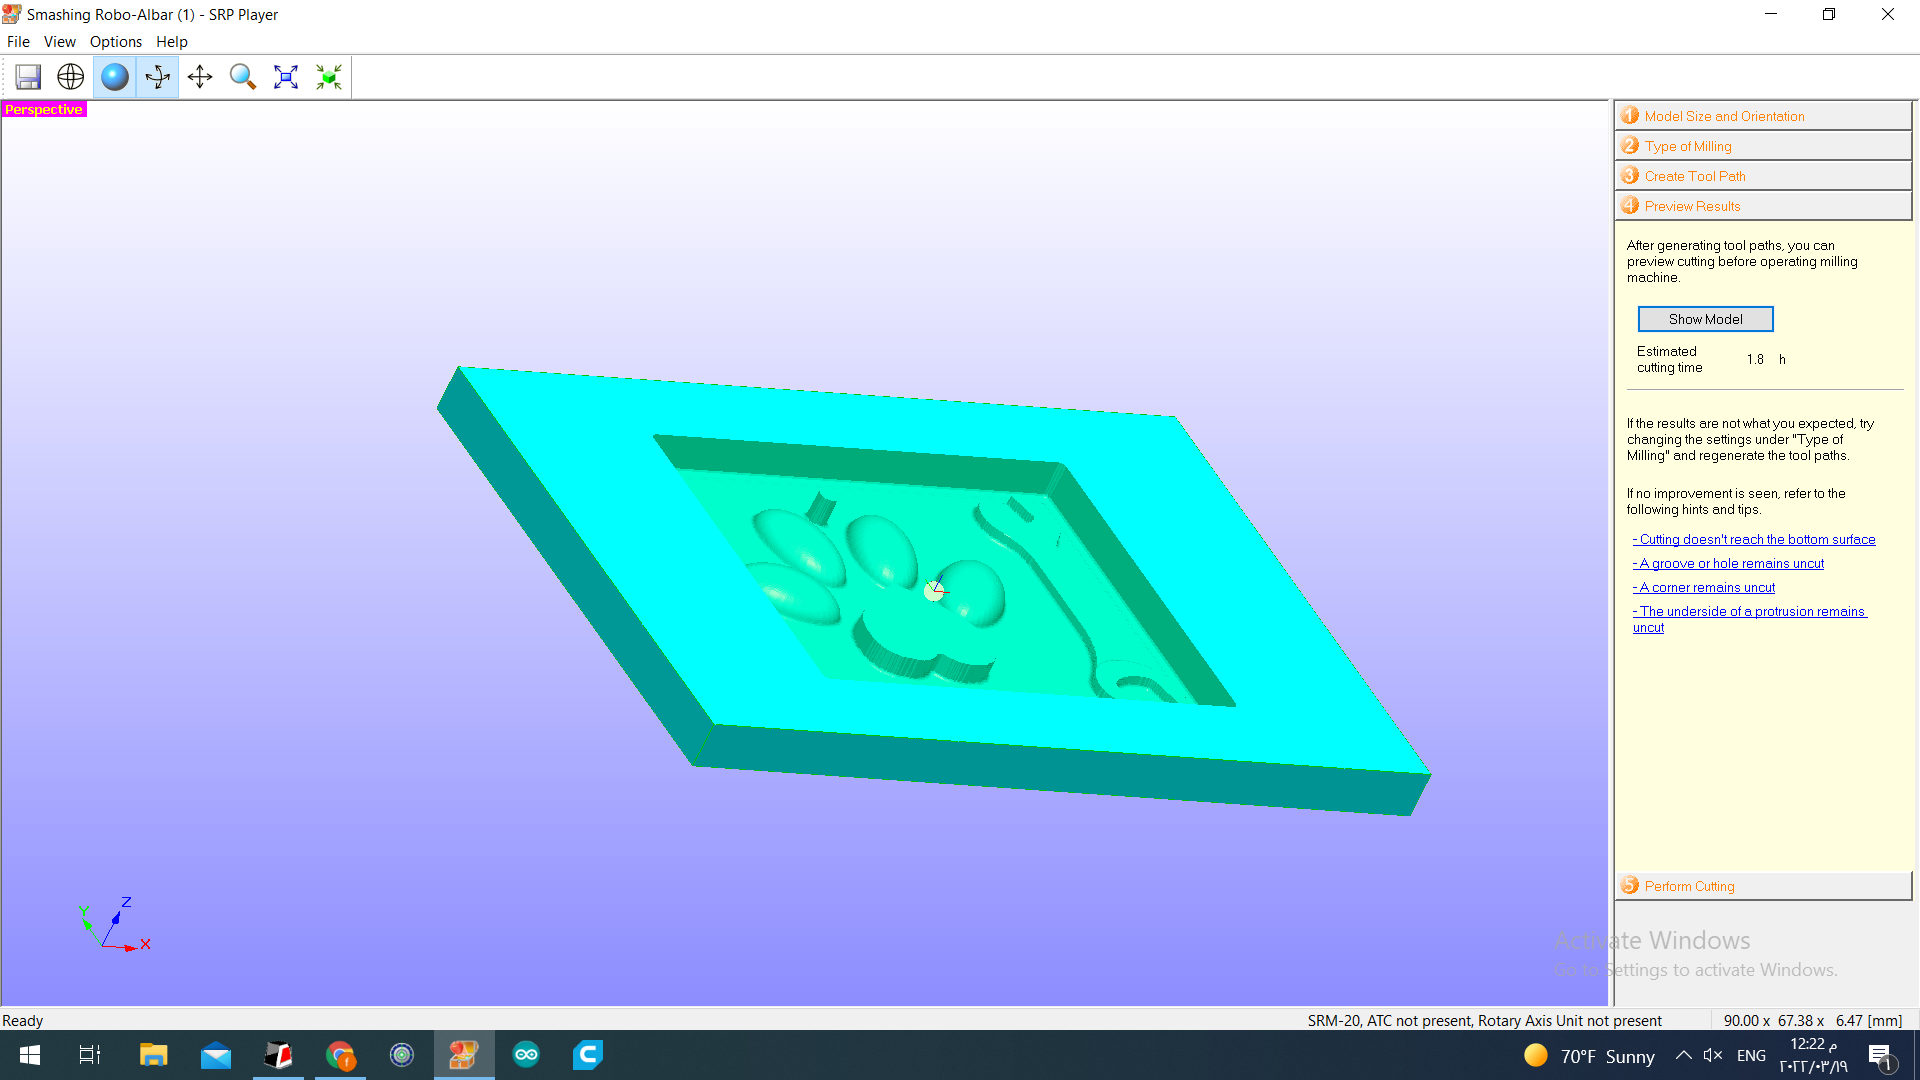
Preview the result.
Adjust the panel.
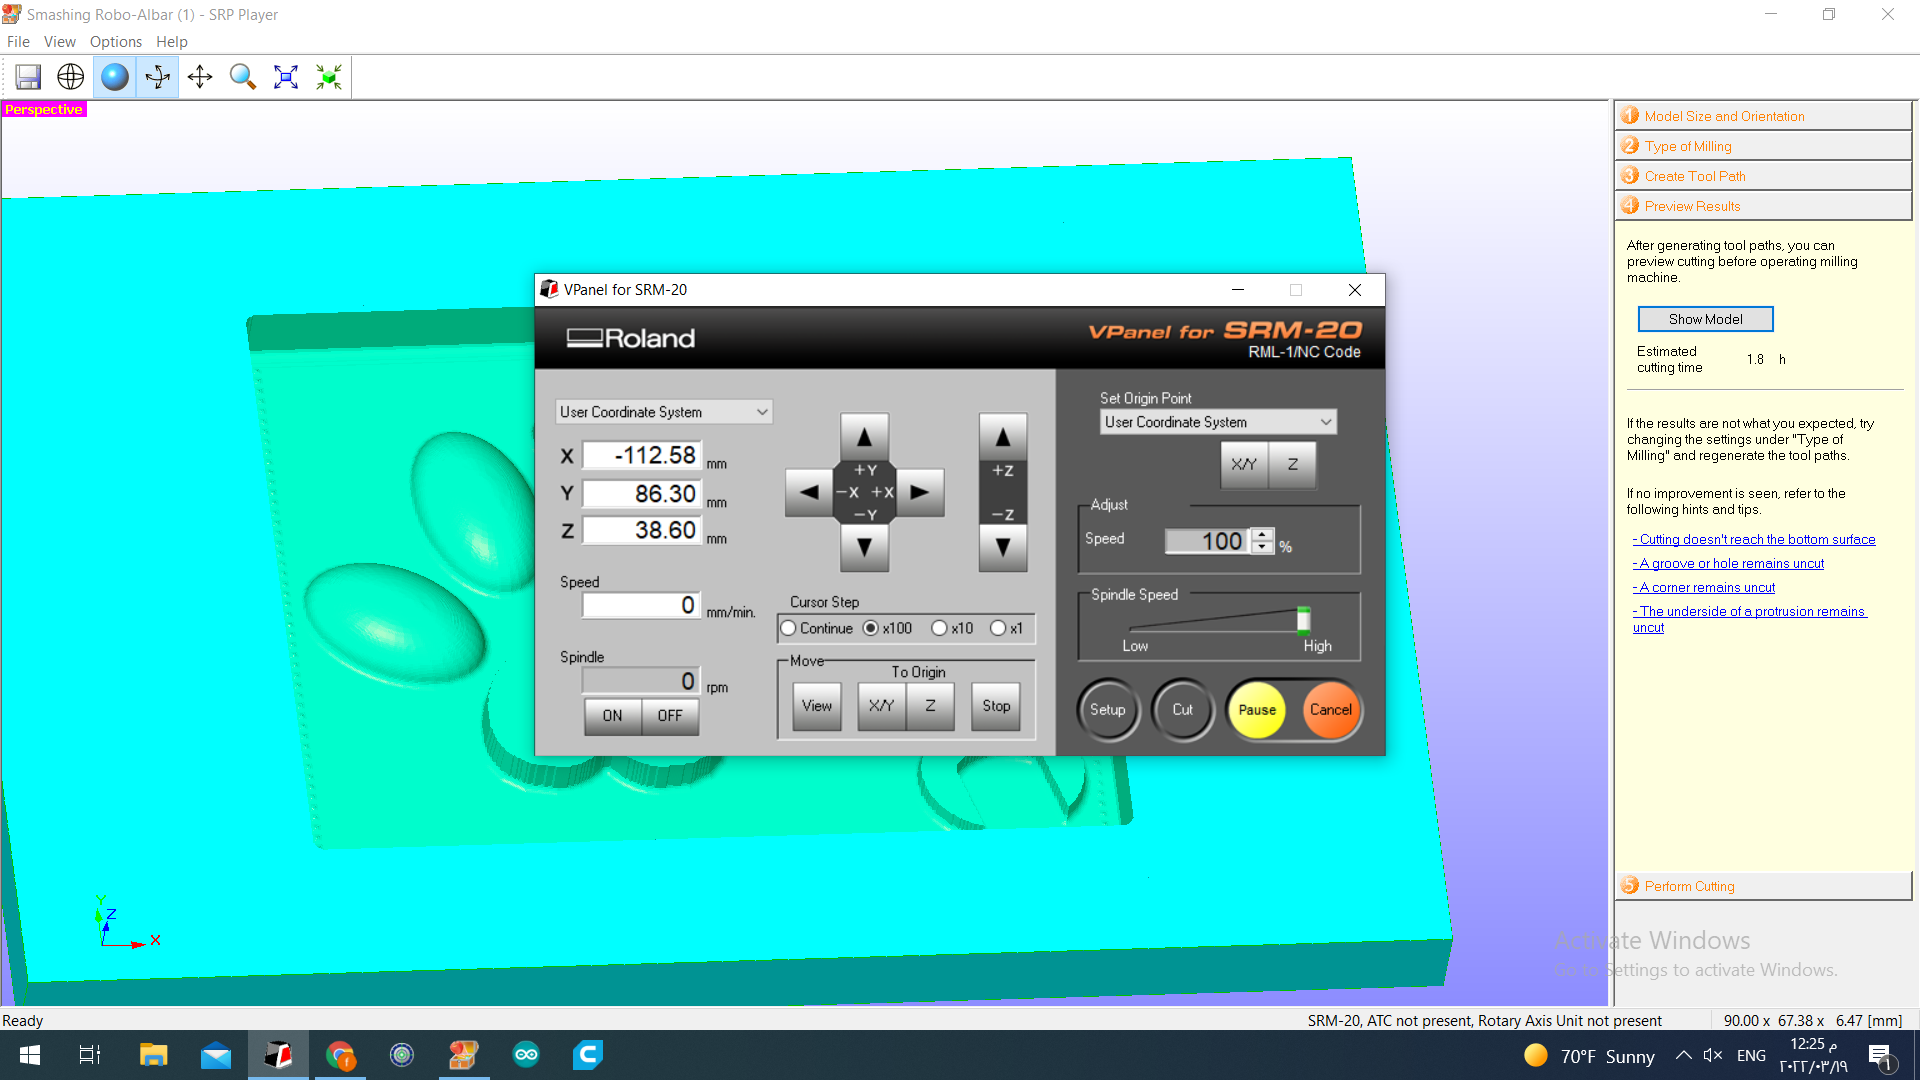
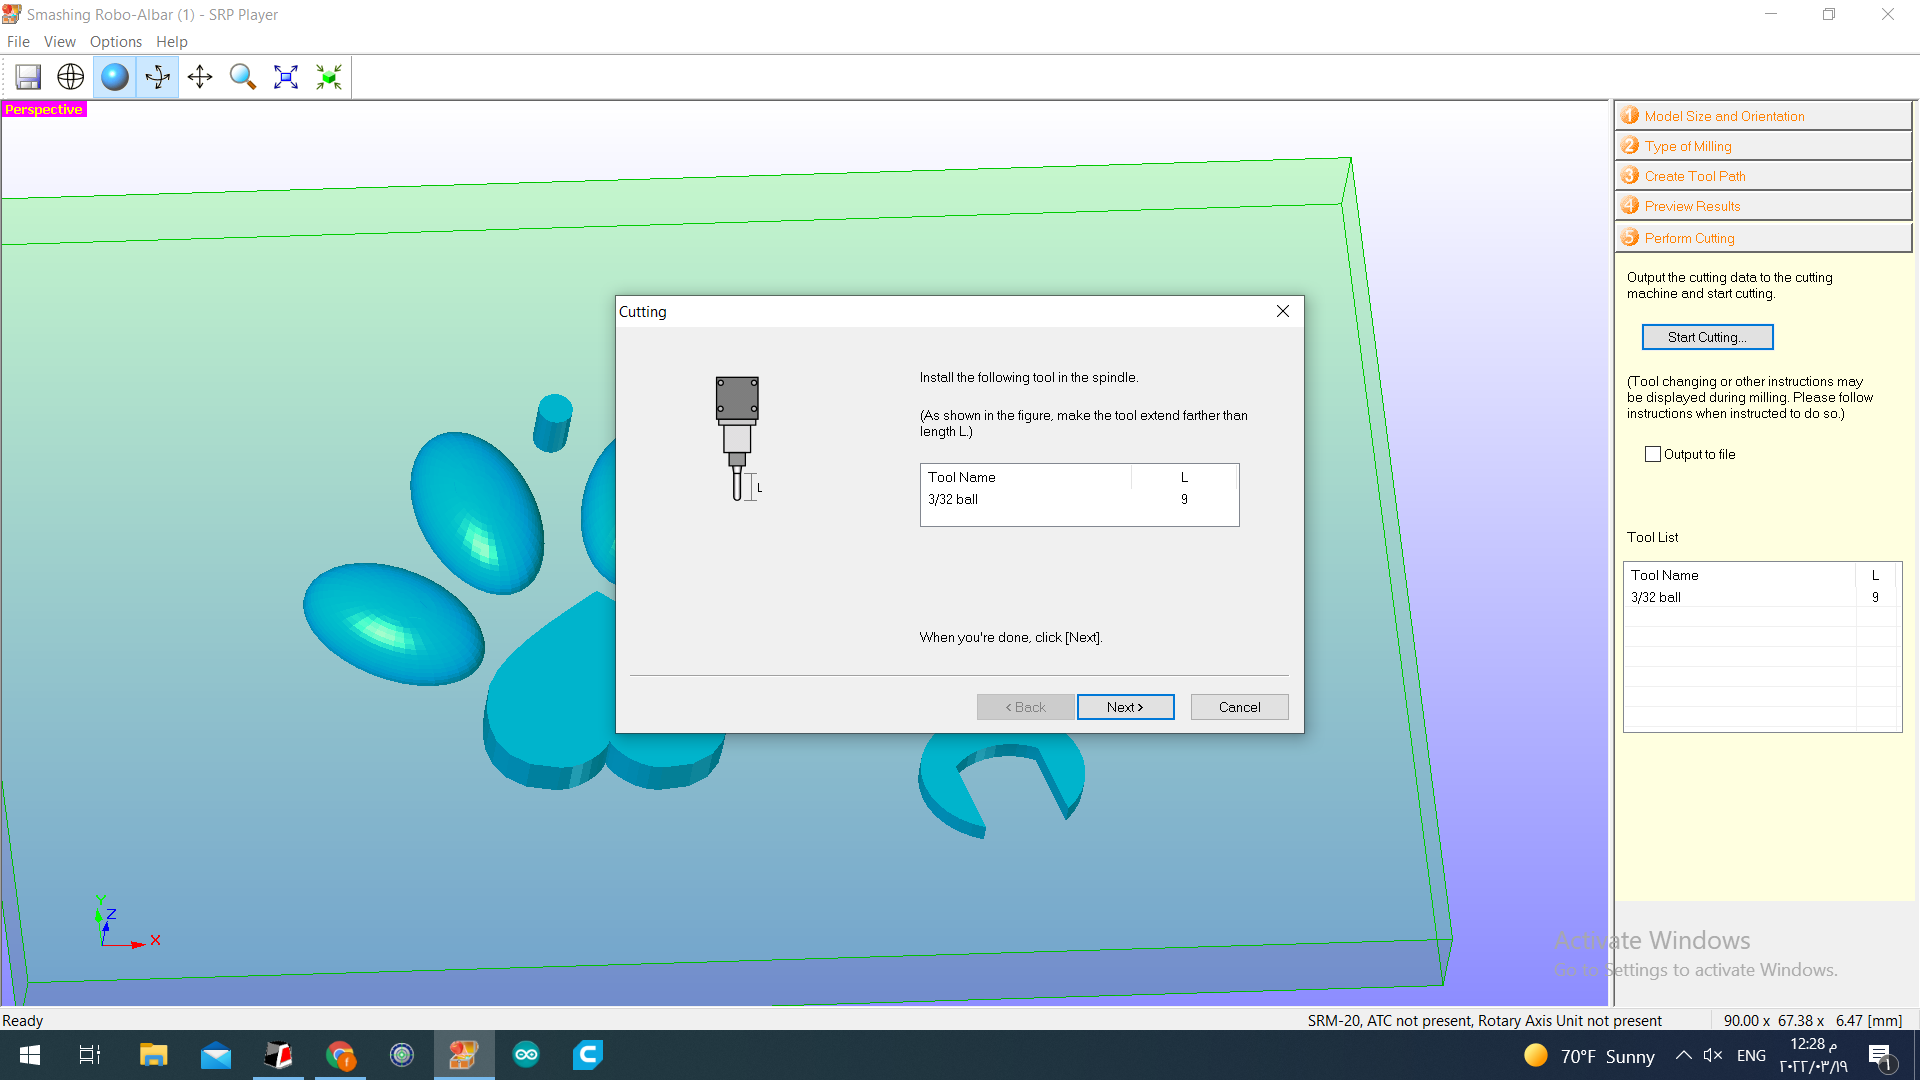
Start cutting.
The process of cutting will approximately take 2 to 3 hours
Rough Result

Molding Process
I have used two different silicones (Silicone-A and Silicone-B). One of the silicones dries quickly, while the other one dries in 24 hours. The mixing ratio was 1:1.The materials required were gloves, two silicon bottles, weight balance, spoon and cups.
1) First pour water inside the rough model in order to estimate the volume of silicon required.
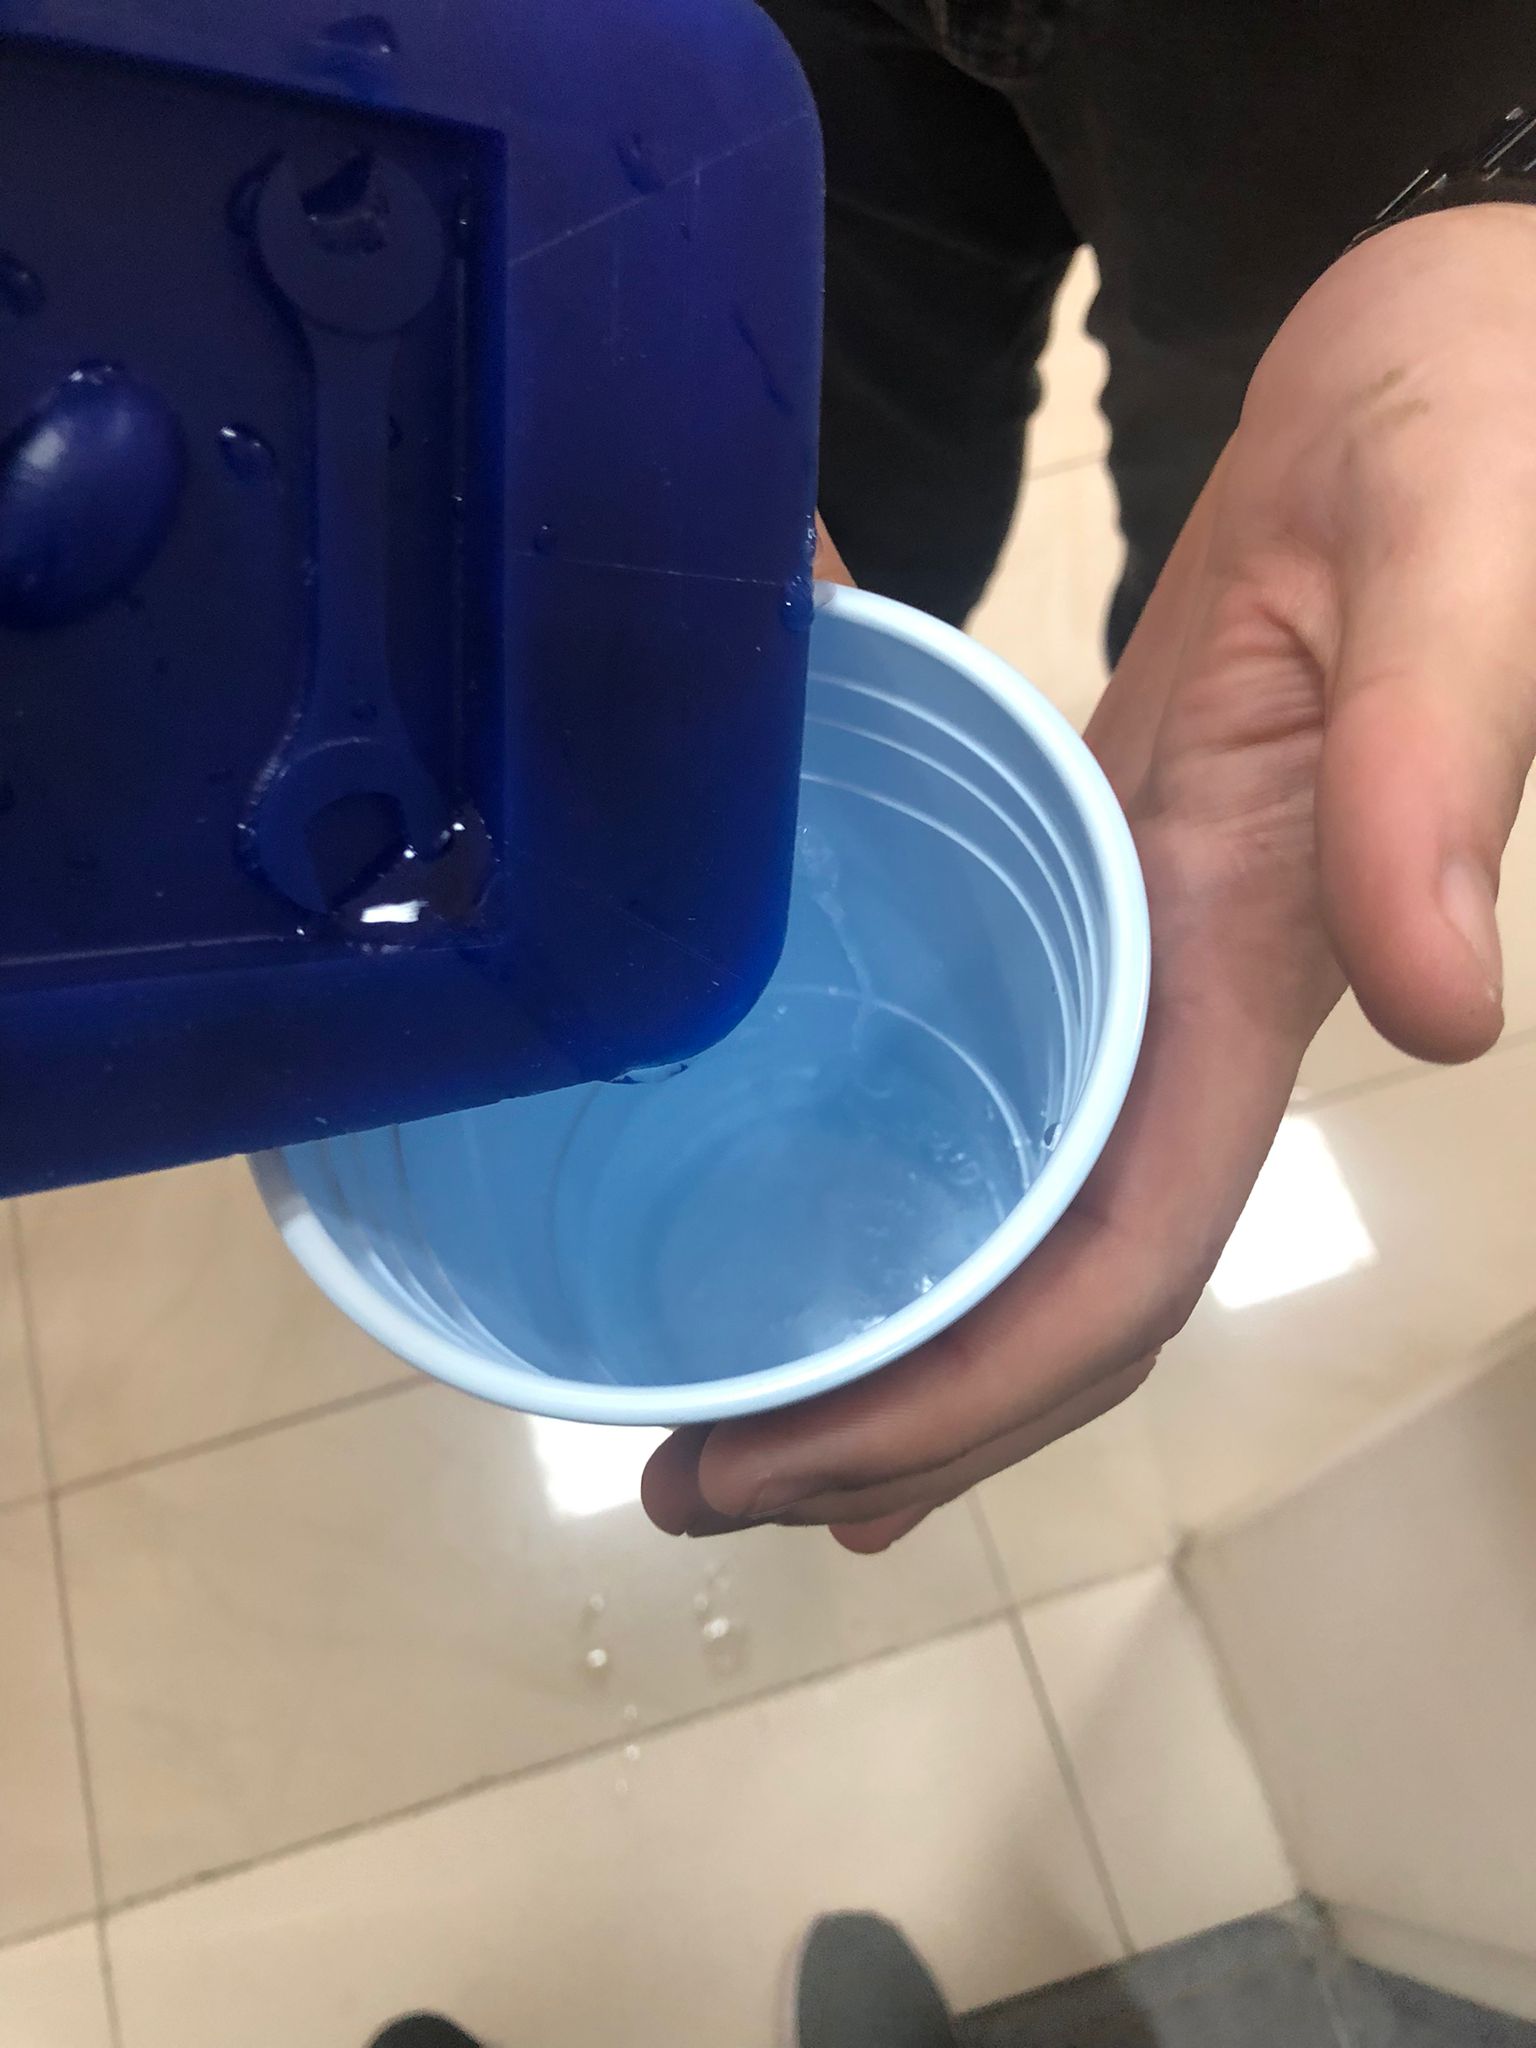
2) Put the first silicon inside a plastic cup.
3) Put the second silicon inside the plastic cup.
4) Mix both of the silicones together.
5) Pour the mixed silicon inside the rough machining wax.
6) Keep it for 24 hours.

Casting Process
As we said after 24 hours, we have removed the dried silicone from the machinable wax. I have decided to use Resin material for casting my 3d part. It is written on one of the sides of the resin bottle that the mixed ratio of resin: hardener is 10:6.
Process:
-
Mix exact ratio of 10 grams of Resin to 6 grams of Hardener.
-
Using the weight scale to measure the mass volume of the mixture.
-
Stir the mixture for 3 minutes.
-
Pour the mixture and spread it over the molded design.
-
After 24 hours the design will be ready.
Hero Shot
Problems and Solutions
Honestly, this week was a very successful week and I did not face any problem except that When I was mixing the resin and the hardener, the ratio was not accurate. The plan was that I should add 10 grams of resin and 6 grams of hardener. However, accidentally I have placed 12 grams of resin. Then, I have fixed the issue by adding more of the hardener till reaching 7.2. Now the ratio is perfect.