Final Project
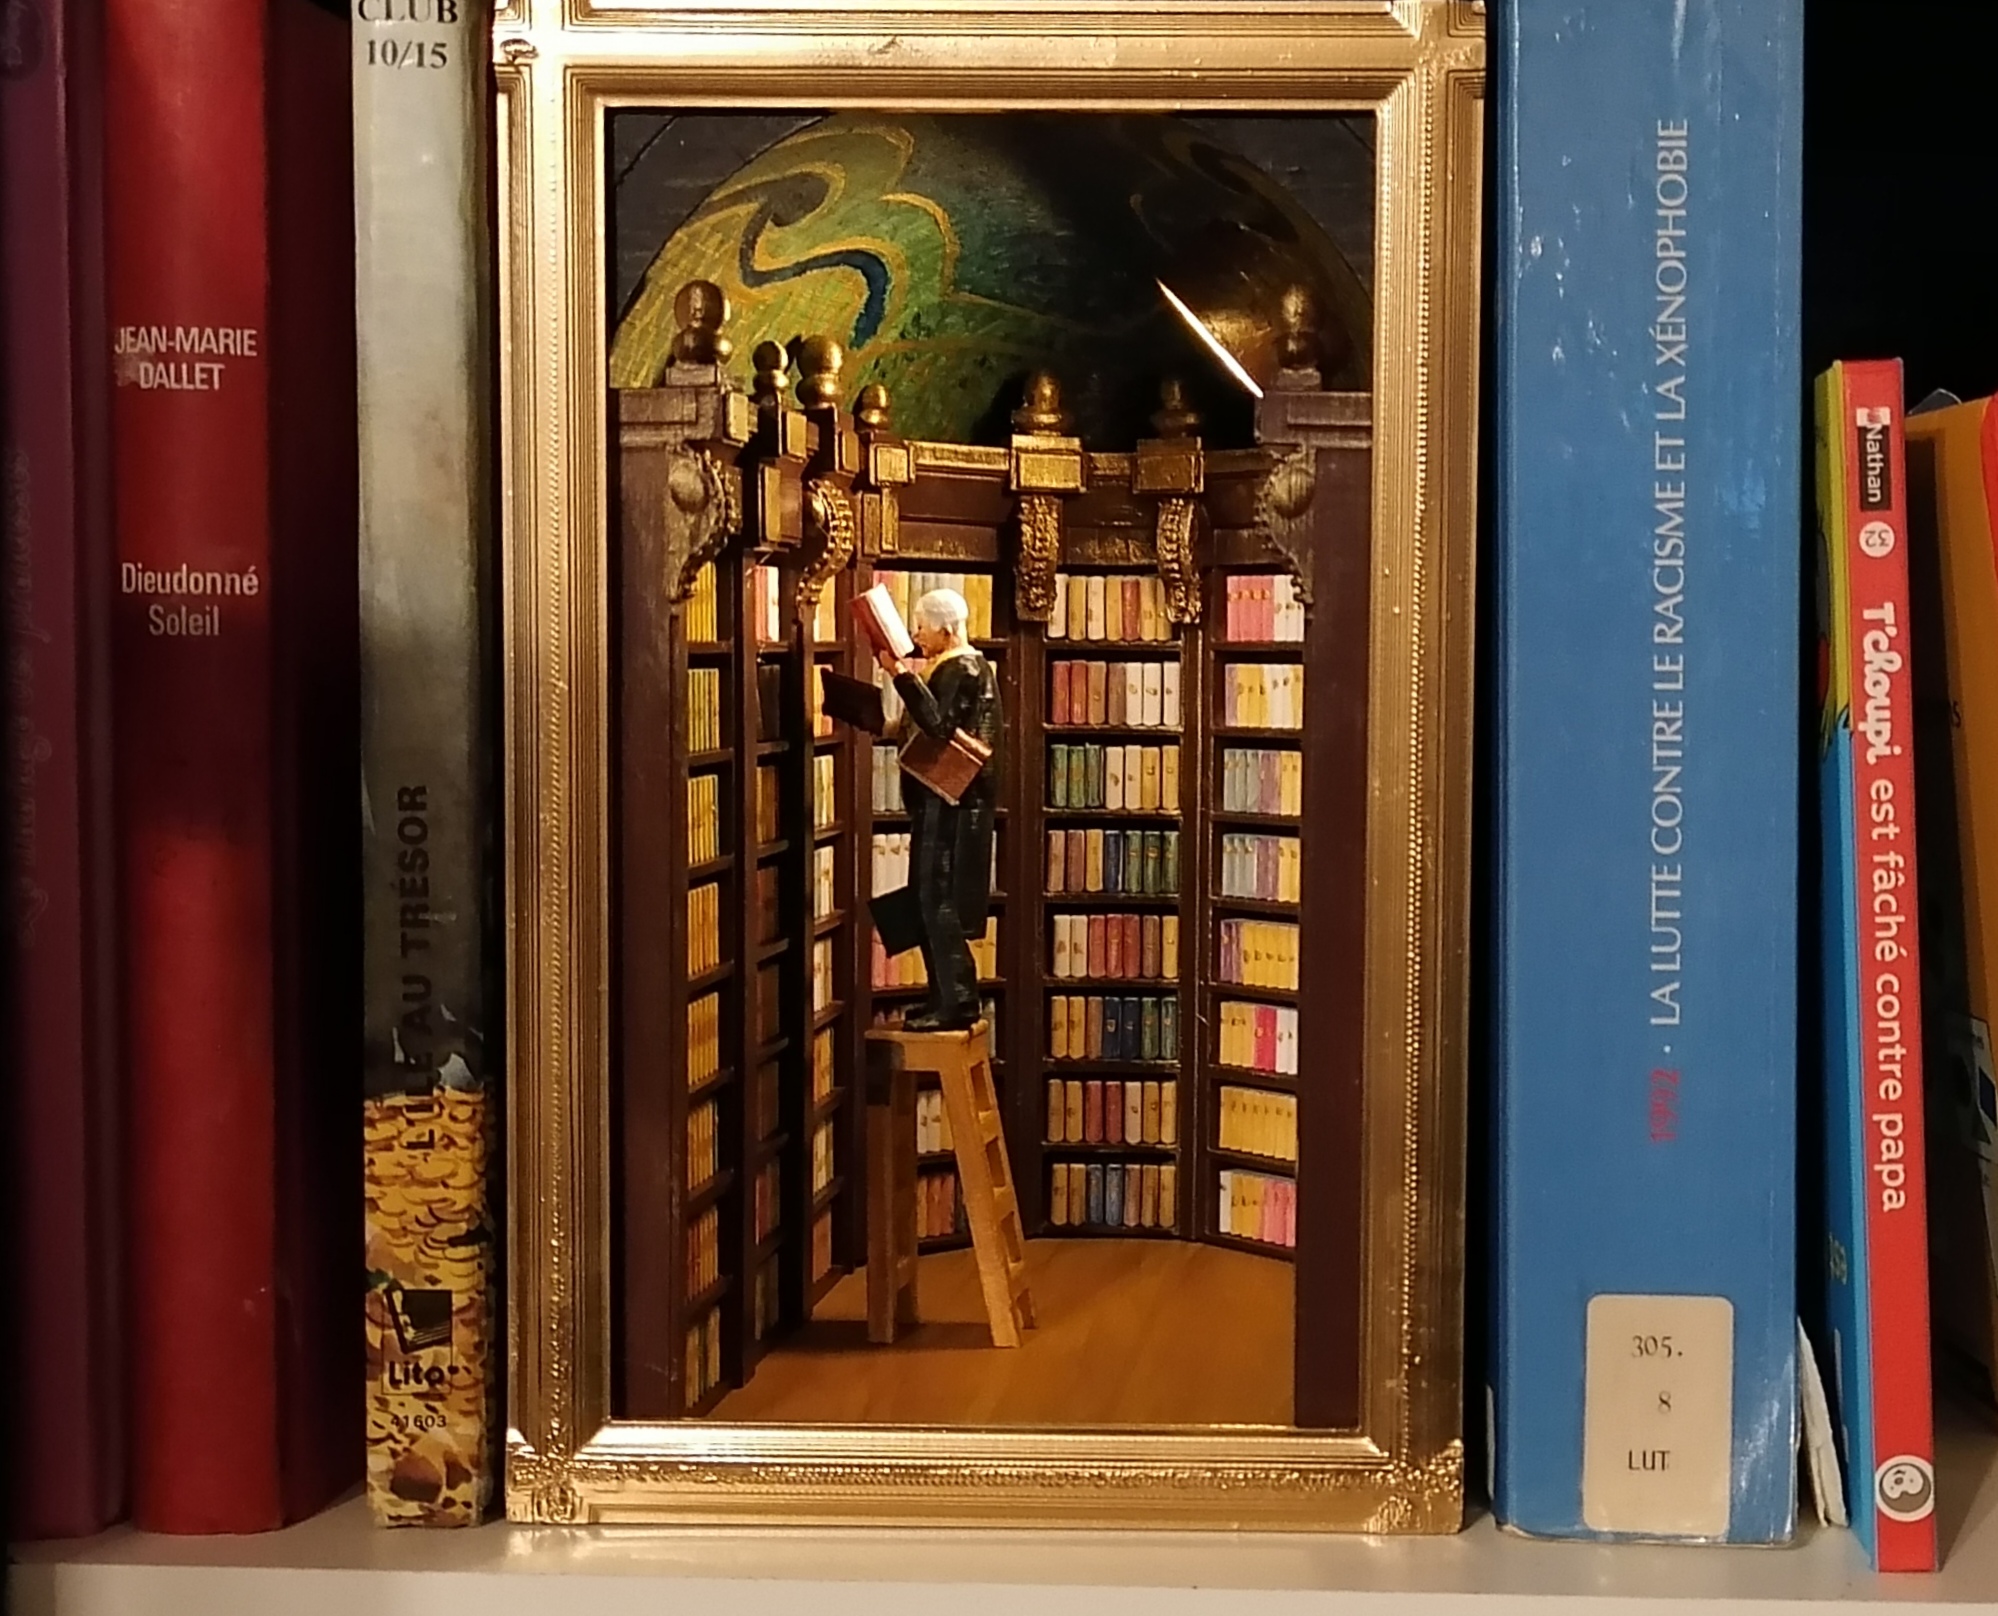
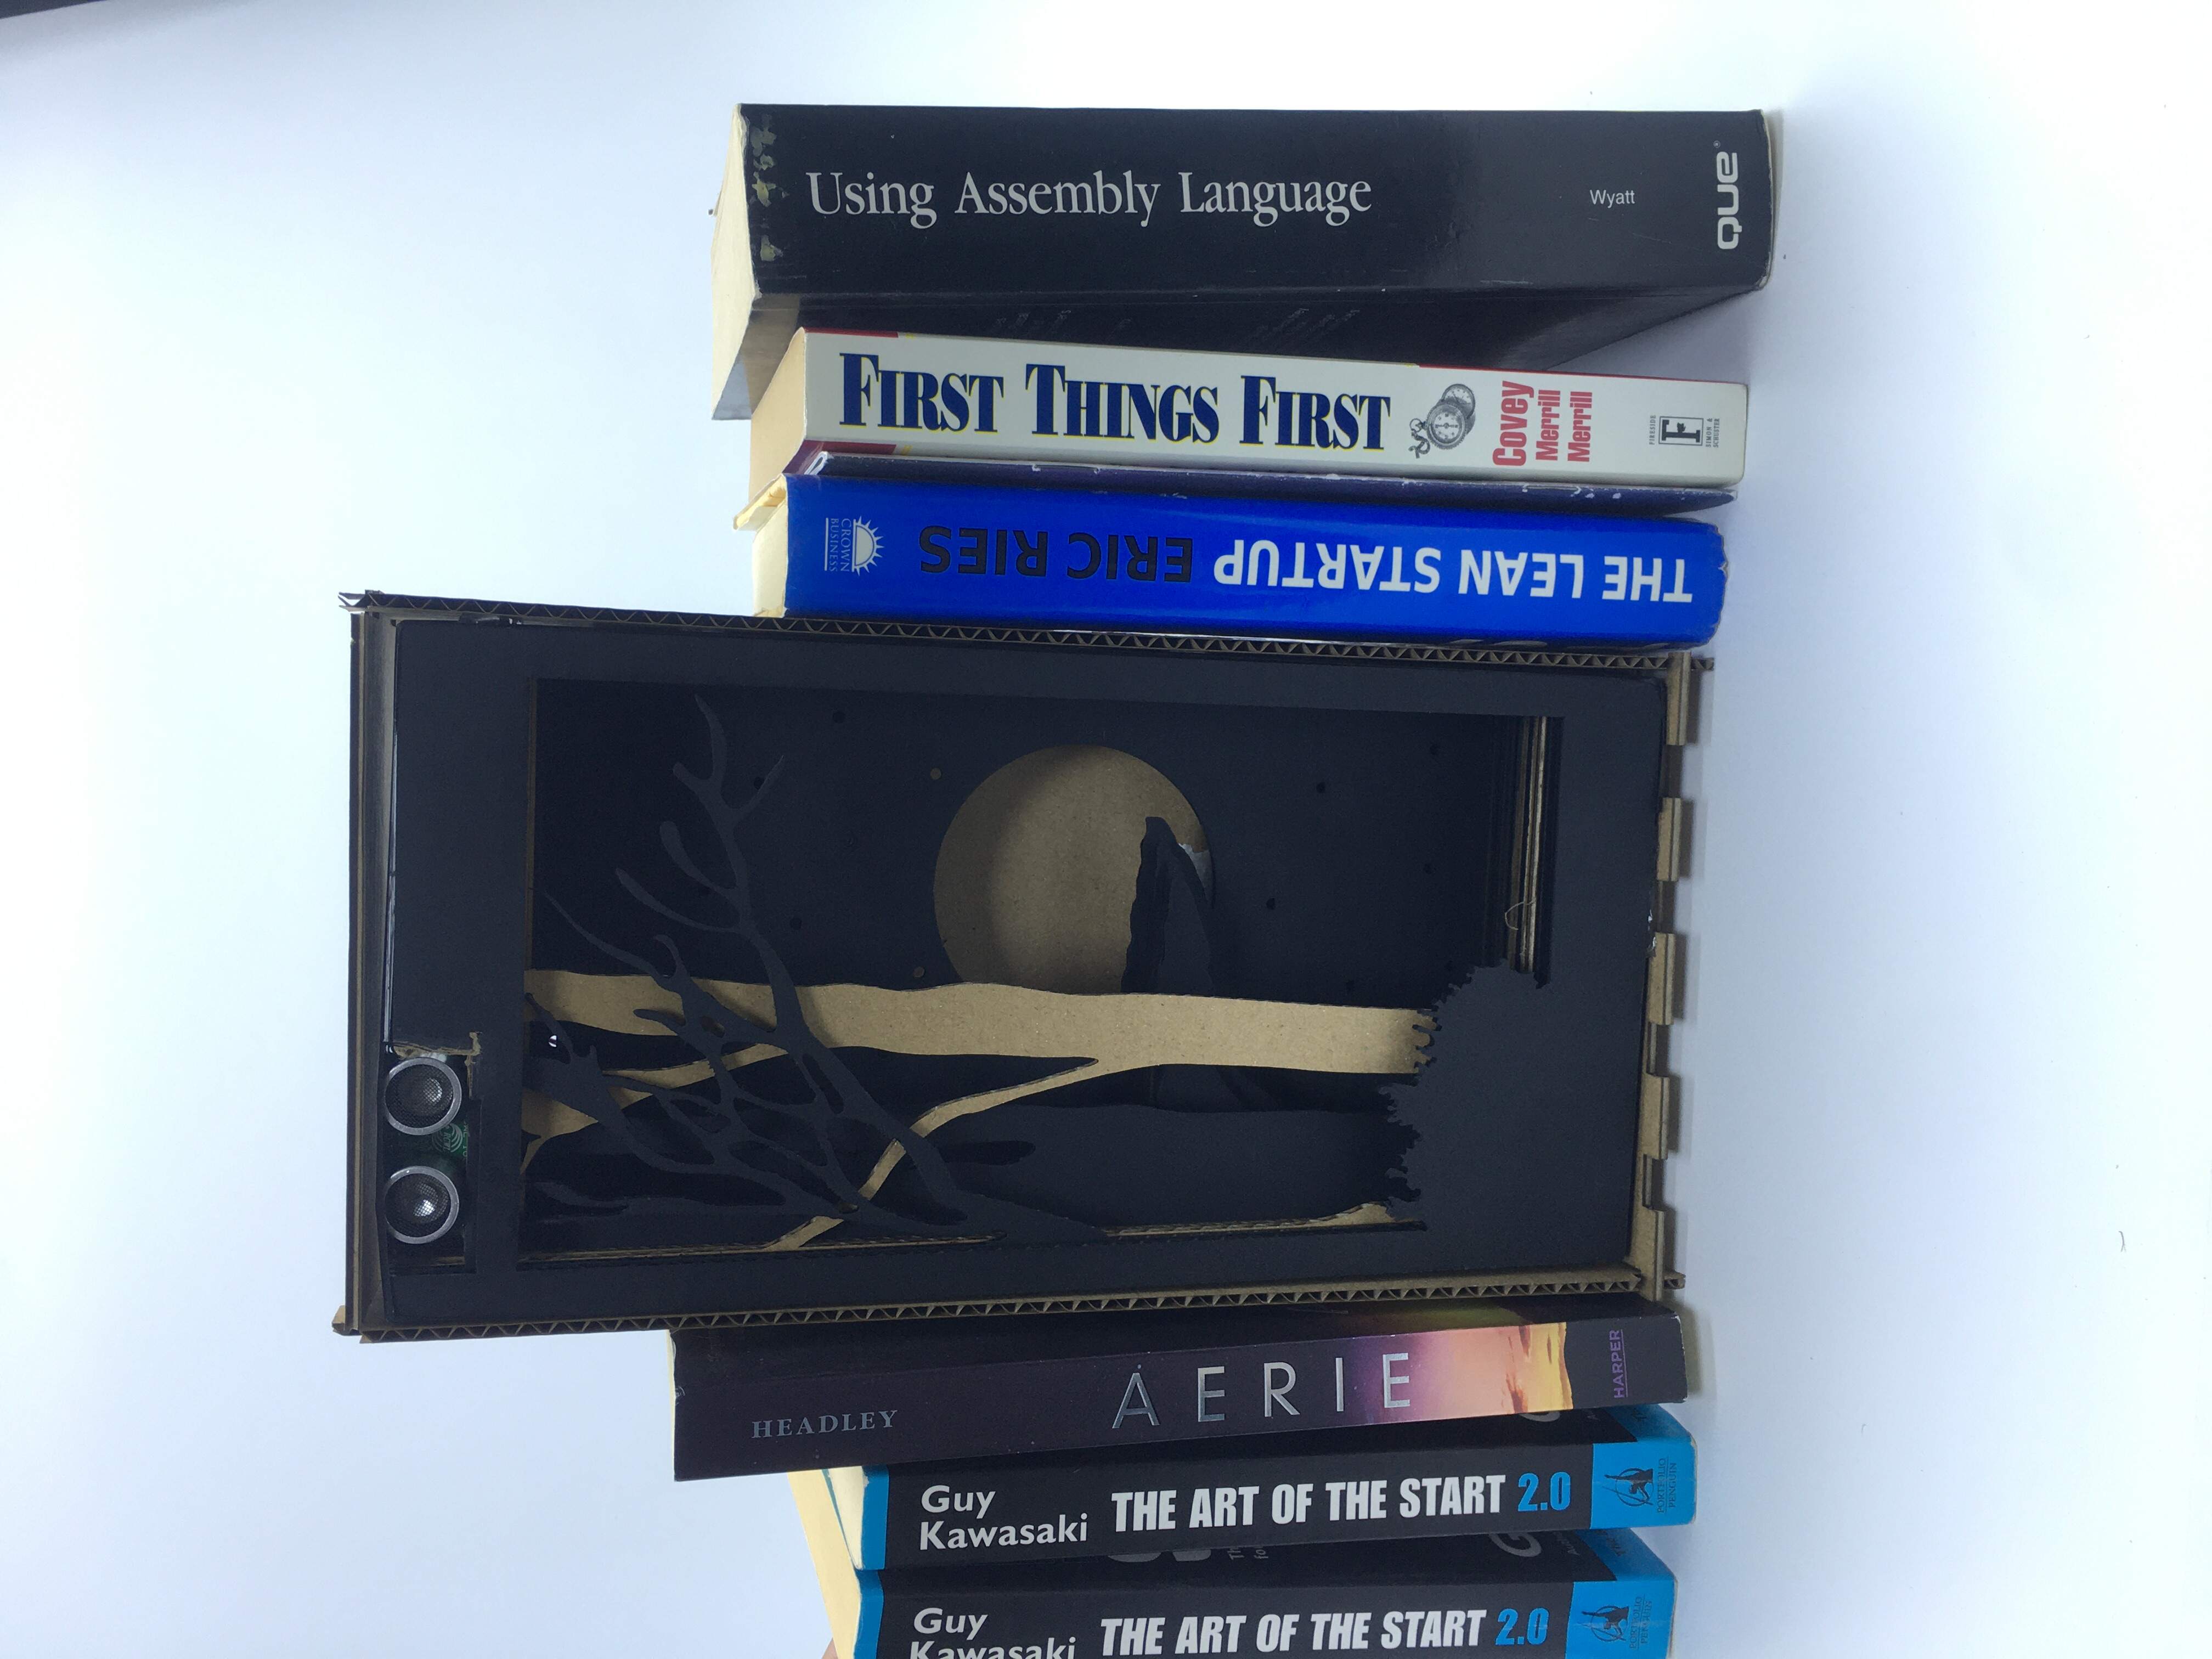
The project I decided to make is a “BOOKSHELF INSERT” or in other words “BOOK NOOK”
what is a bookshelf insert??
a bookshelf insert is a books holder or divider at the same time its bout creating a small scene within your library.
Programming
First thing I did was choosing the “INPUT” & the “OUTPUT”.
-
I wanted my insert TO light up when someone gets close to it.
-
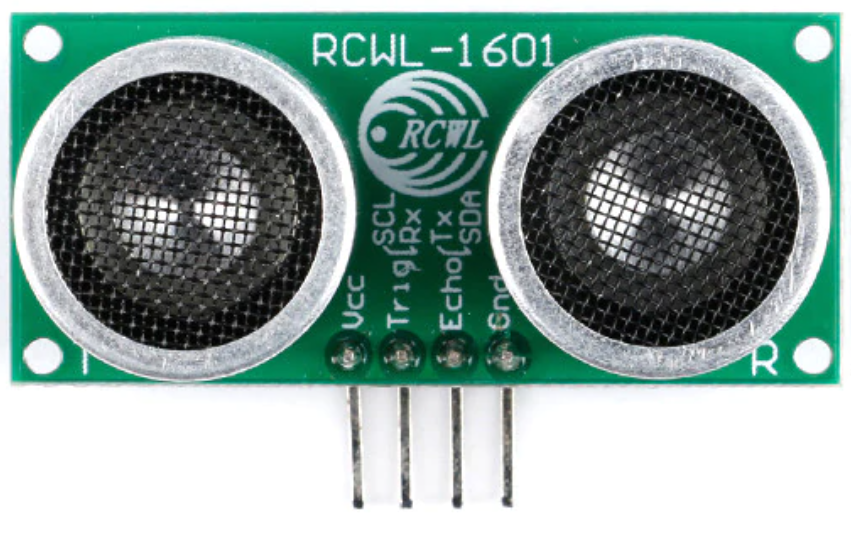
So I needed an “ULTRASONIC SENSOR” and “LIGHT”.
-
The ULTRASONIC SENSOR I will be using is “RCML-1601”
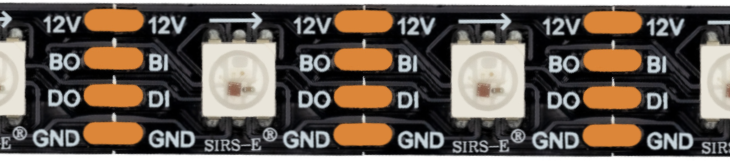
- The lights we decided to go with “Addressable RGB LED” light. as we can program each individual light alone on top of having it as a strip make fixing it easier, and this lights best advantage is the variable colors you can get.
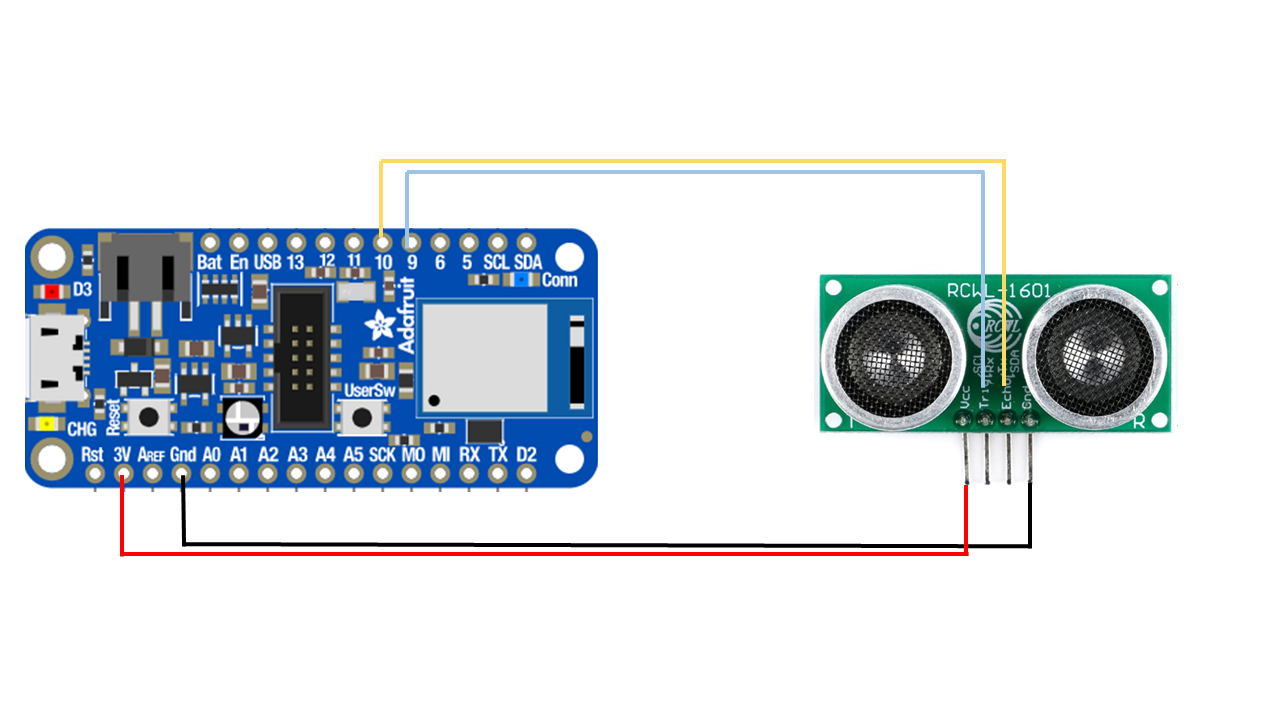
- After choosing them both I researched about how to connect them both to the MICROCONTROLLER and I researched about some codes as well TO Check how they work.
ULTRASONIC SENSOR
- CONNECTION
- CODE
#include <SoftwareSerial.h>

const int trigPin = 9;
const int echoPin = 10;

long duration;
int distance;
void setup() {
pinMode(trigPin, OUTPUT);
pinMode(echoPin, INPUT);
Serial.begin(9600);
}

void loop()
{
  digitalWrite(trigPin, LOW);
  delayMicroseconds(2);
  digitalWrite(trigPin, HIGH);
  delayMicroseconds(10);
 digitalWrite(trigPin, LOW);
  duration = pulseIn(echoPin, HIGH);
  distance= duration*0.034/2;
  Serial.print("Distance: ");
  Serial.println(distance);
}
RGB LED LIGHT
- CODE
#include <Adafruit_NeoPixel.h>
#ifdef __AVR__
 #include <avr/power.h> // Required for 16 MHz Adafruit Trinket
#endif

// Which pin on the Arduino is connected to the NeoPixels?
// On a Trinket or Gemma we suggest changing this to 1:
#define LED_PIN    5

// How many NeoPixels are attached to the Arduino?
#define LED_COUNT 11


#include <SoftwareSerial.h>

const int trigPin = 9;
const int echoPin = 10;

long duration;
int distance;
// Declare our NeoPixel strip object:
Adafruit_NeoPixel strip(LED_COUNT, LED_PIN, NEO_GRB + NEO_KHZ800);
uint32_t white = strip.Color(255, 255, 255);
uint32_t purple = strip.Color(238, 0, 238);
uint32_t darkred = strip.Color(94, 10, 11);
uint32_t midred = strip.Color(148, 26, 28);
uint32_t red = strip.Color(223, 30, 38);
uint32_t midorange = strip.Color(243, 114, 32);
uint32_t orange = strip.Color(251, 163, 26);
uint32_t yellow = strip.Color(255, 213, 0);
uint32_t nothing = strip.Color(0, 0, 0);

void setup() {
  pinMode(11, OUTPUT);
  pinMode(6, OUTPUT);
  pinMode(12, OUTPUT);
  // These lines are specifically to support the Adafruit Trinket 5V 16 MHz.
  // Any other board, you can remove this part (but no harm leaving it):
#if defined(__AVR_ATtiny85__) && (F_CPU == 16000000)
  clock_prescale_set(clock_div_1);
#endif


  strip.begin();           // INITIALIZE NeoPixel strip object (REQUIRED)
  strip.show();            // Turn OFF all pixels ASAP
  strip.setBrightness(30); // Set BRIGHTNESS to about 1/5 (max = 255)

  pinMode(trigPin, OUTPUT);
pinMode(echoPin, INPUT);
Serial.begin(9600);
}


// loop() function -- runs repeatedly as long as board is on ---------------

void loop() {
  digitalWrite(trigPin, LOW);
  delayMicroseconds(2);
  digitalWrite(trigPin, HIGH);
  delayMicroseconds(10);
 digitalWrite(trigPin, LOW);
  duration = pulseIn(echoPin, HIGH);
  distance= duration*0.034/2;
  Serial.print("Distance: ");
  Serial.println(distance);
if (distance < 30){
  strip.fill(yellow , 0 , 11);
   strip.show();
     digitalWrite(11, HIGH);   // turn the LED on (HIGH is the voltage level)
     digitalWrite(12, HIGH);
     digitalWrite(6, HIGH);
}
   else{
      strip.fill(nothing , 0 , 11);
   strip.show();
     digitalWrite(11, LOW);   // turn the LED on (HIGH is the voltage level)
          digitalWrite(12, LOW);
     digitalWrite(6, LOW);
}}
DESIGN
-
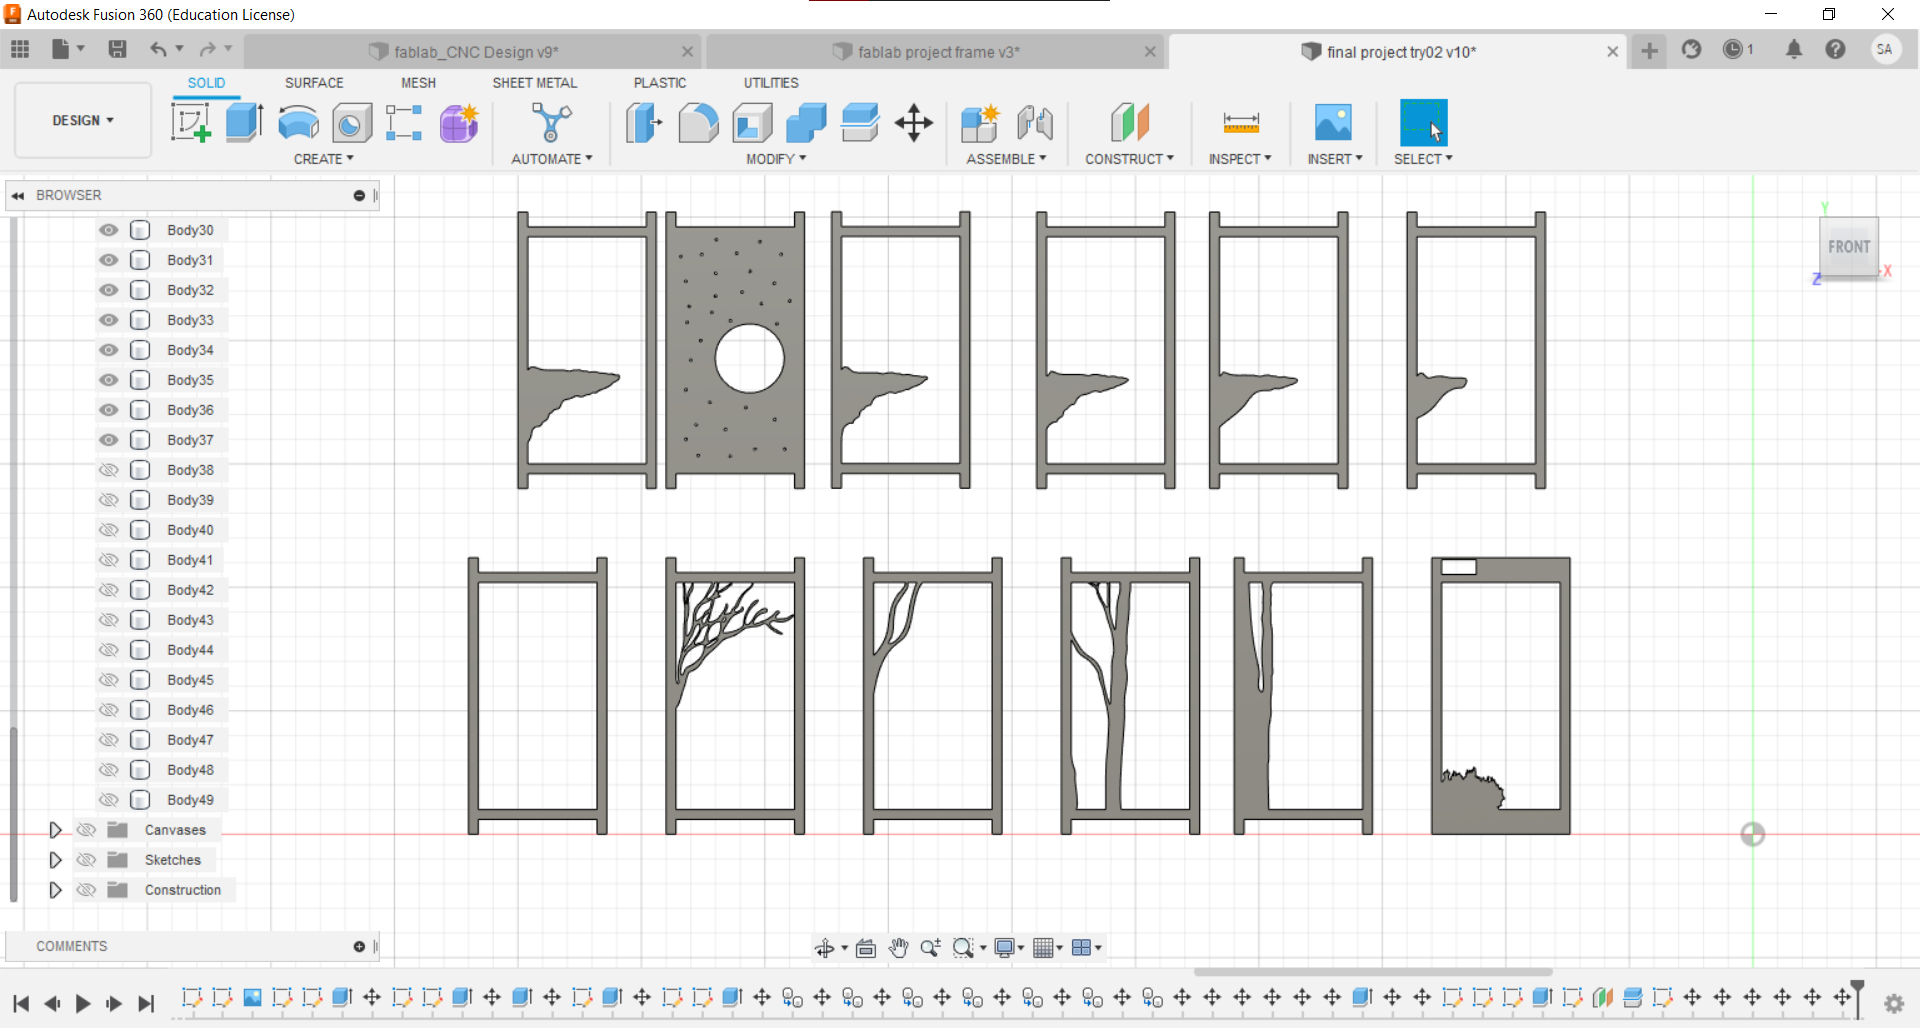
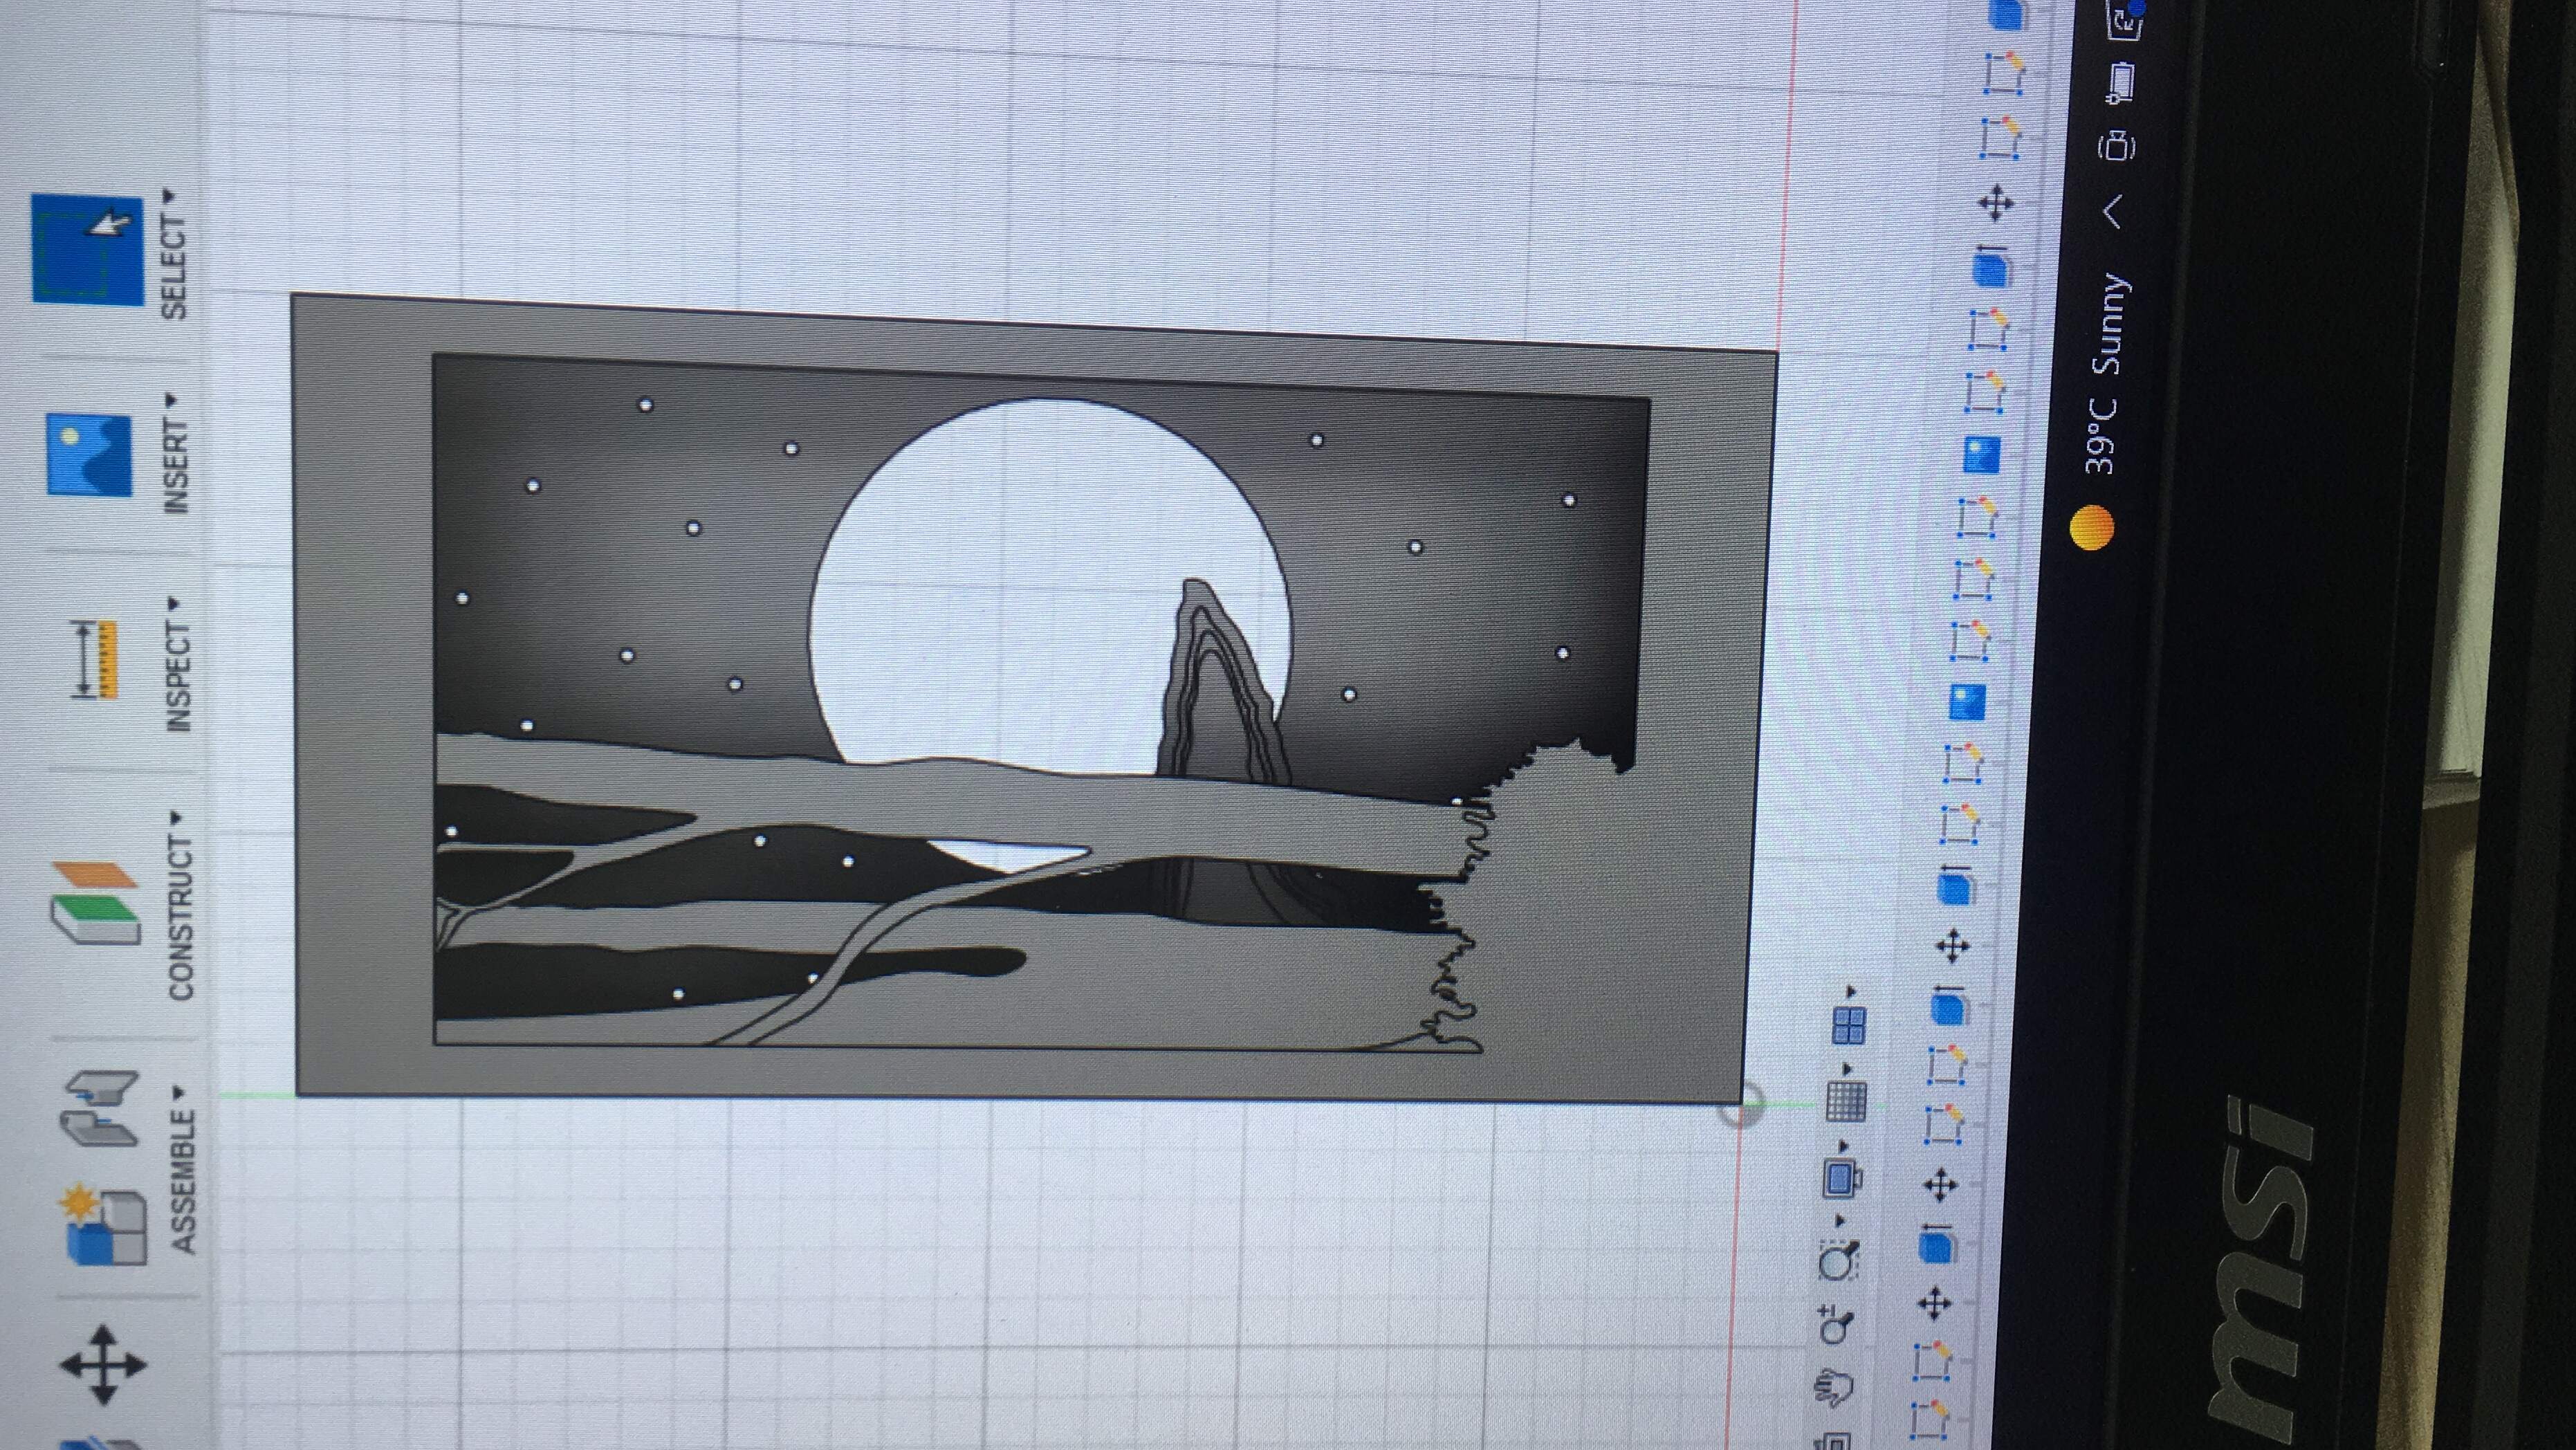
When designing my bookshelf insert I wanted my bookshelf to give mysterious feeling as when there is no light its hard to identify what is in.
-
I decided to go with the Layering technique as it is faster and easier to manipulate how I want to lights and shadows to be.

- I drew each line manually in “FUSION360” while overlapping the layer to be able to see the full bookshelf insert design before fabricating.
Fabricating
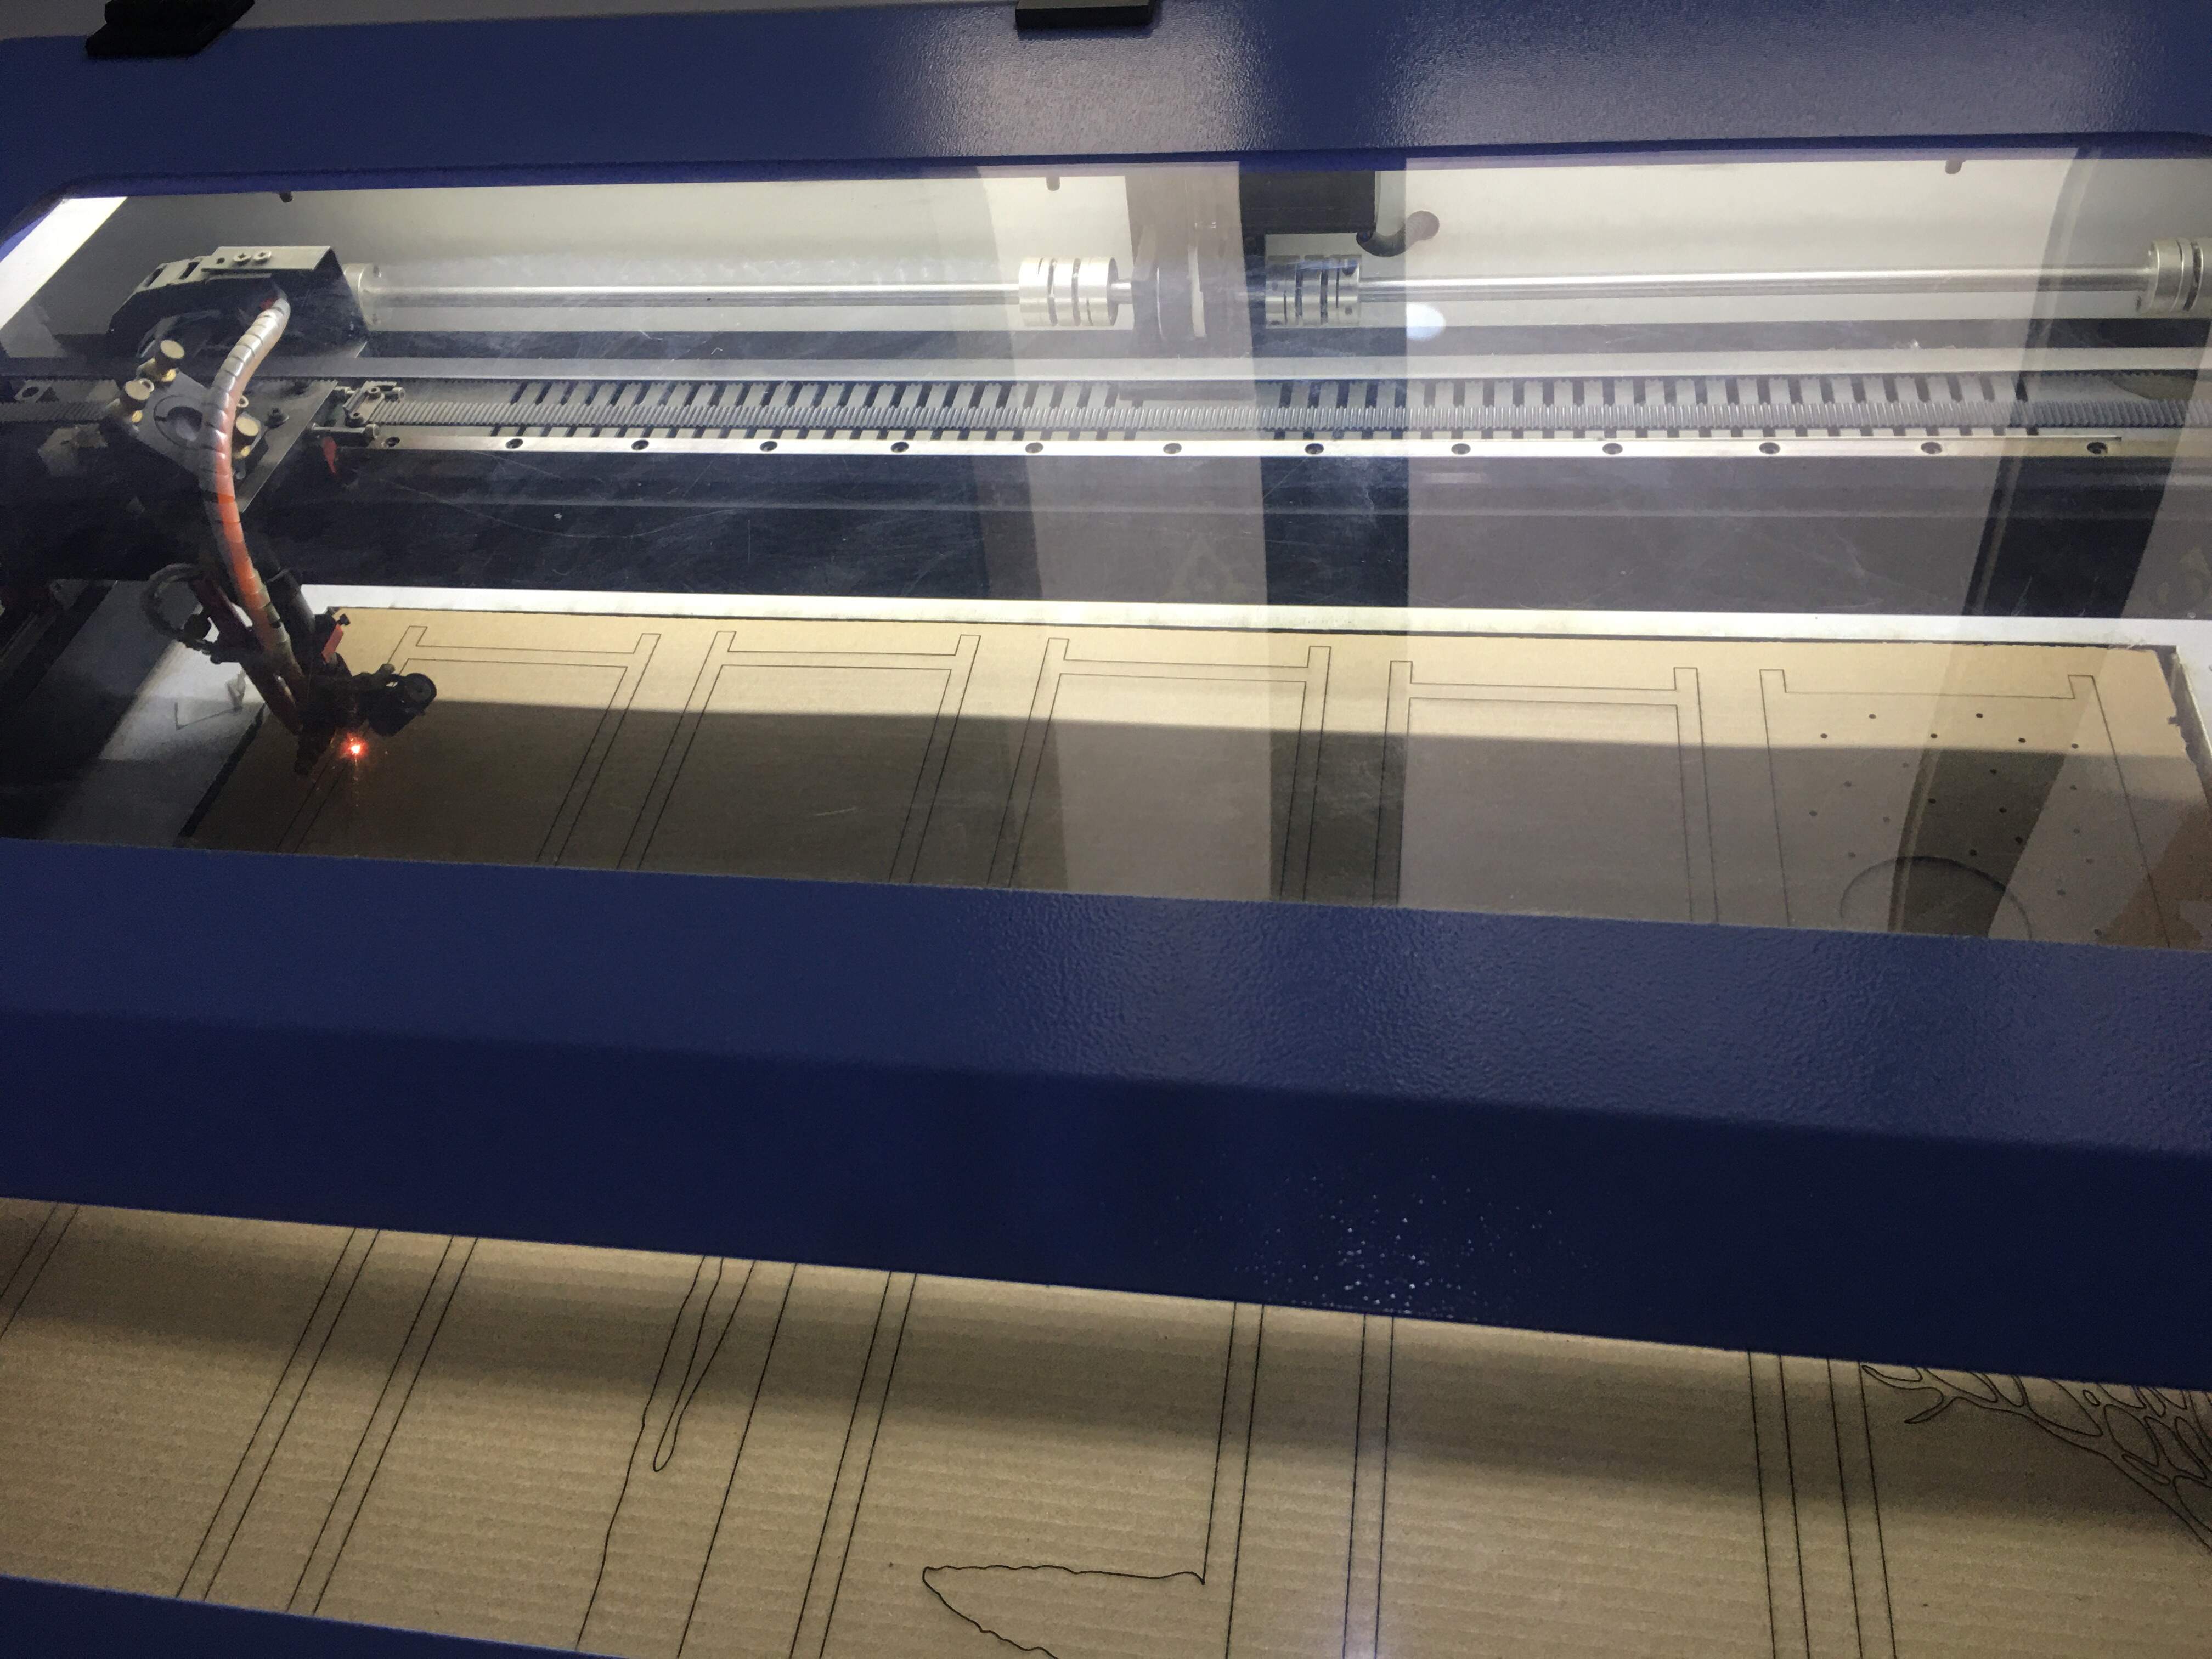
-
I will be using the Laser Cutting Machine and as for the material I decided to use a simple material “Cardboard” for it to be light and for easier light manipulation.
-
since I ma using the same material we used in the laser cutting week I chose the same settings in term of power and speed.
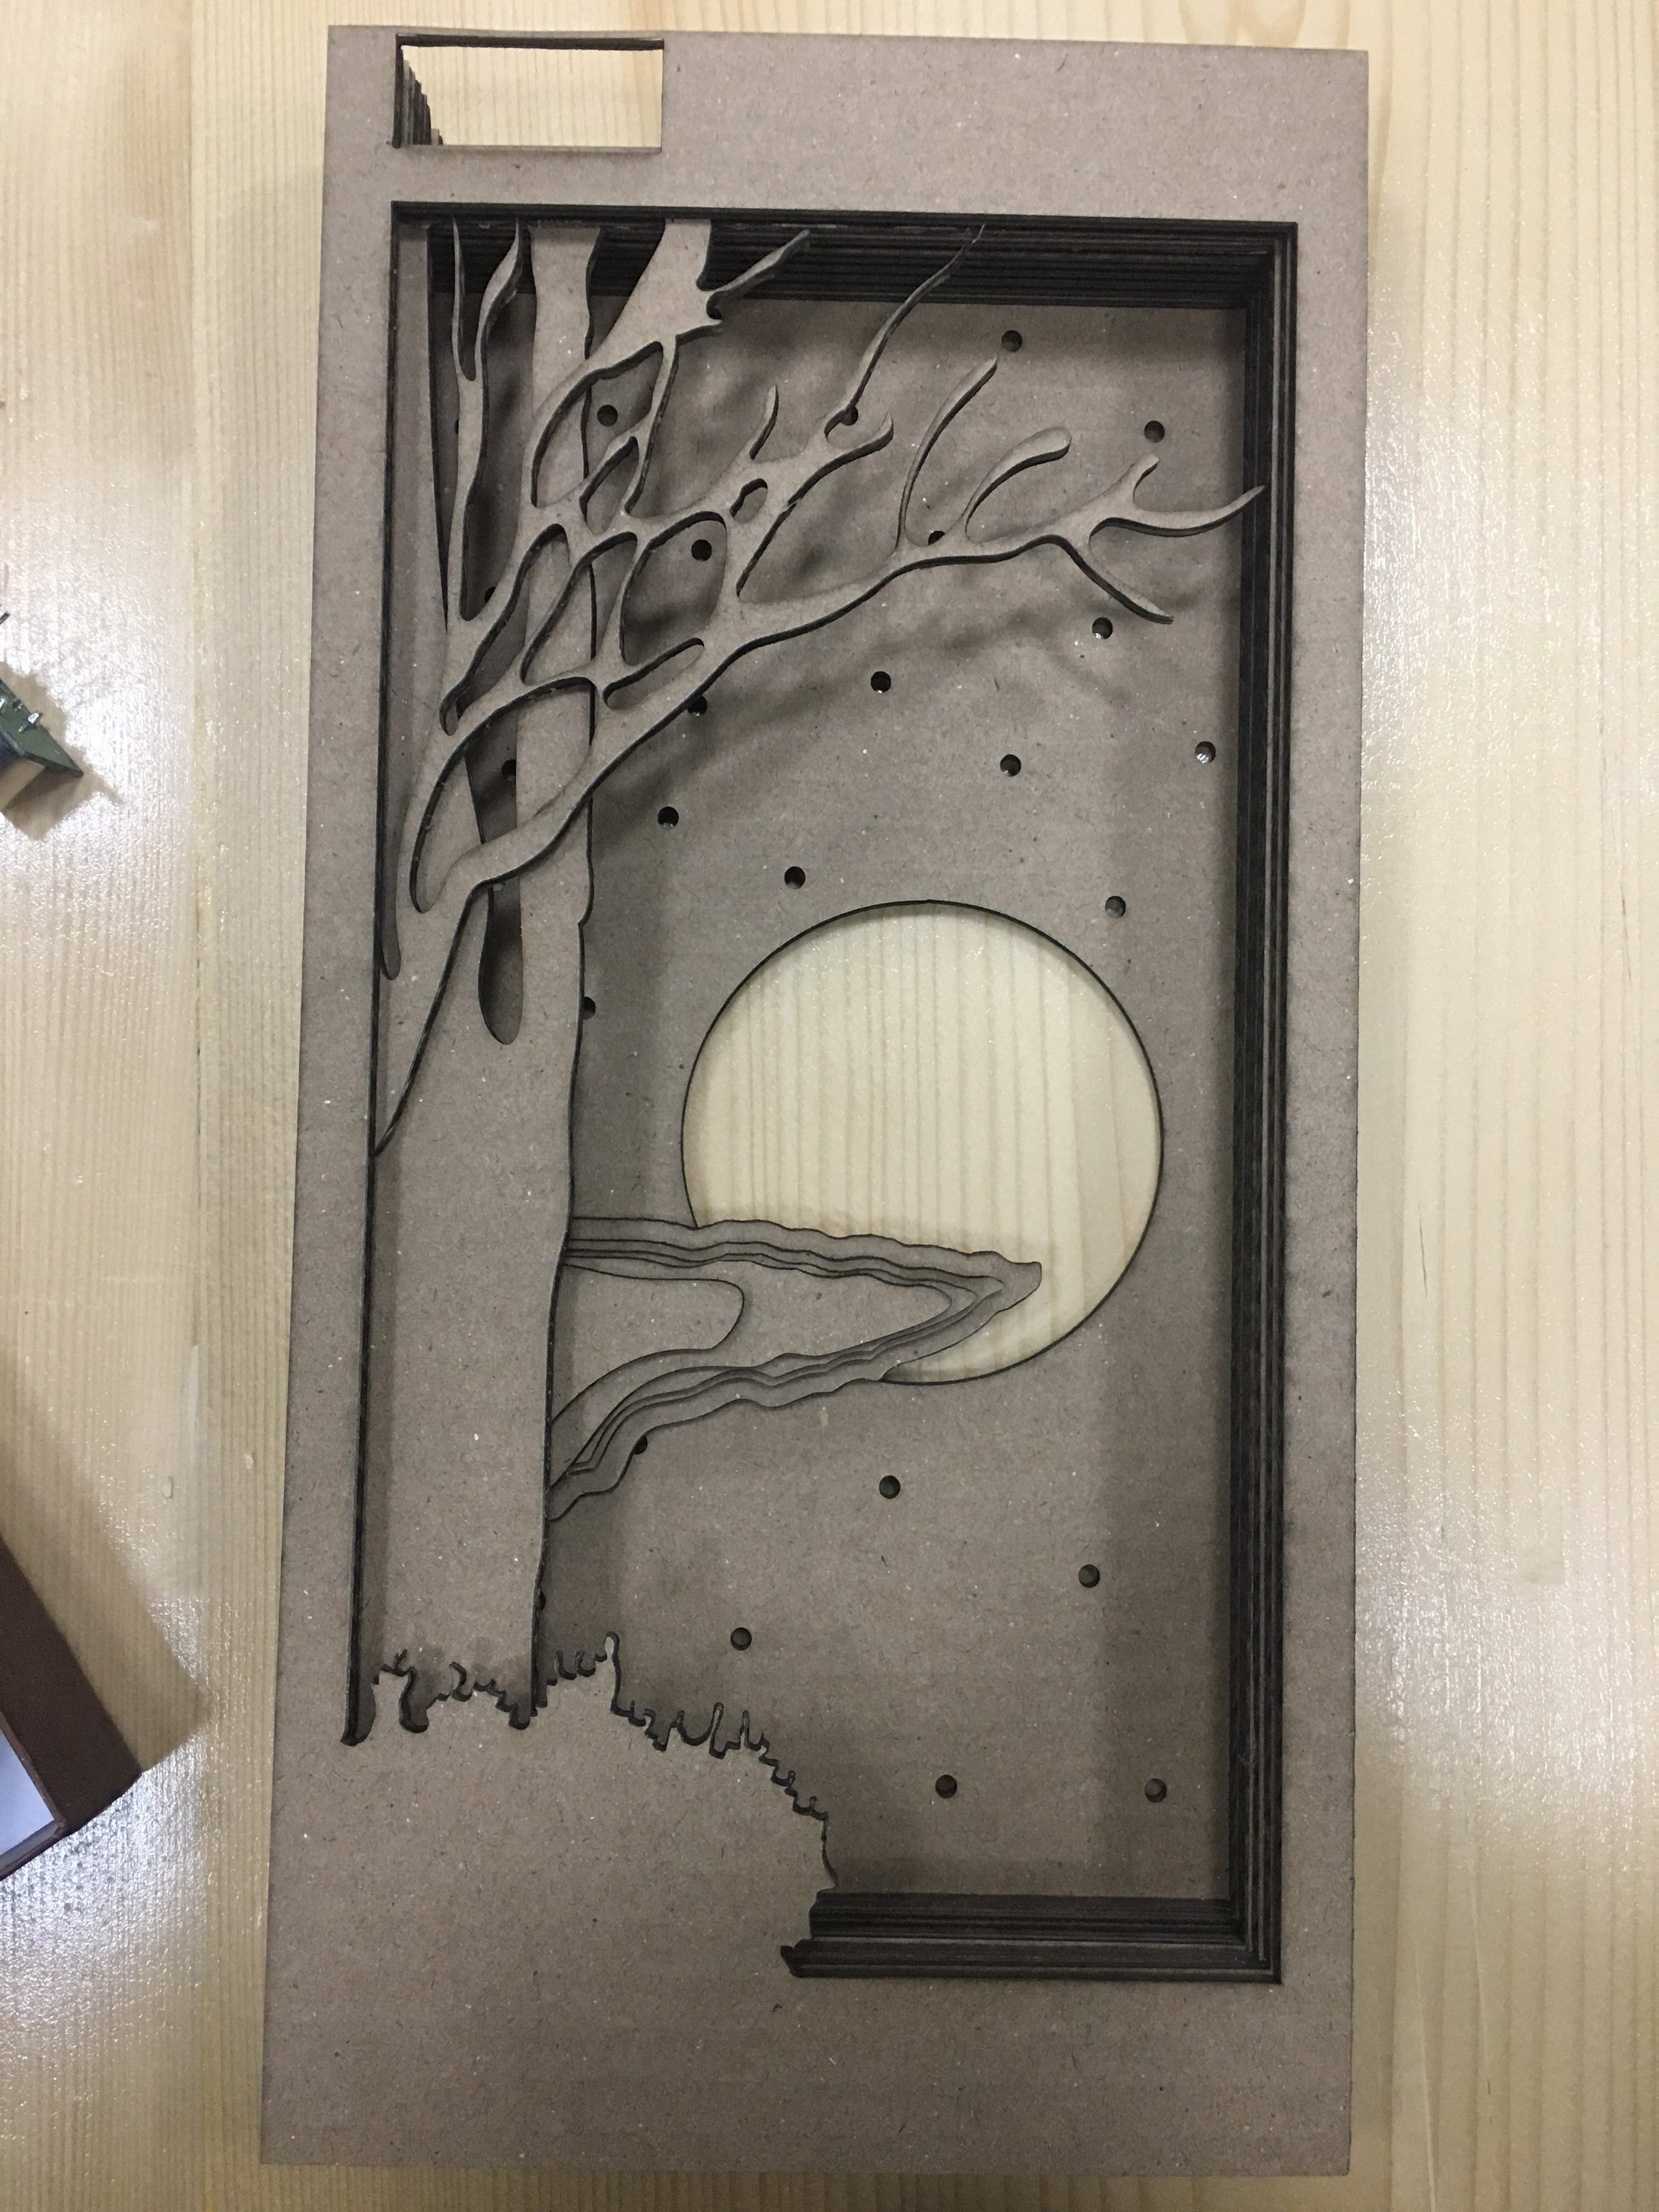
- After cutting the Design I sprayed it with black color spray.

fixing
After cutting the design in the laser machine I sprayed each layer with a black spray.
I made box frame to hold the design and the microcontroller and other parts. However the MAIN FRAME had a small problem in the design that I couldn’t fix on that day however, I fixed it in the design file attached to this page.
after fixing all the stuffs “DESIGN” “MICROCONTROLLER” “SENSOR” “LIGHT”
-
now we moved to the programing part with the help of my instructors to put up together the code.
-
The code indicates that when something comes within 30cm the light will go on , we chose a green light to add to the mysterious feel I wanted.
CODE
#include <SoftwareSerial.h>

const int trigPin = 9;
const int echoPin = 10;

long duration;
int distance;
void setup() {
pinMode(trigPin, OUTPUT);
pinMode(echoPin, INPUT);
Serial.begin(9600);
}

void loop()
{
  digitalWrite(trigPin, LOW);
  delayMicroseconds(2);
  digitalWrite(trigPin, HIGH);
  delayMicroseconds(10);
 digitalWrite(trigPin, LOW);
  duration = pulseIn(echoPin, HIGH);
  distance= duration*0.034/2;
  Serial.print("Distance: ");
  Serial.println(distance);
}
RESULTS
VIDEO
DESIGN FILE
CONCLUSION
The two weeks were challenging for creating an idea from scratch on top of having other work to deal with . Although the bookshelf insert didnt live up to what I had up in mind I still think the result looked fine for a first try.
I would like to thank all my instructors for guiding us and pushing us to complete these weekly challenges.
Lastly, these 10 weeks were longer than I thought they will be ´ V `