Week 1: Project Management
This week, we learned how to access, edit and customize our own MkDocs-based website online and offline.
What is MkDocs?
MkDocs is a static site generator geared towards building project documentation. It is written in Markdown and configured with a YAML configuration file. It is beneficial to use because you can host it anywhere but primarily on GitHub and GitLab. It can also be edited both online and offline, while previewing changes as you work.
Accessing the Website
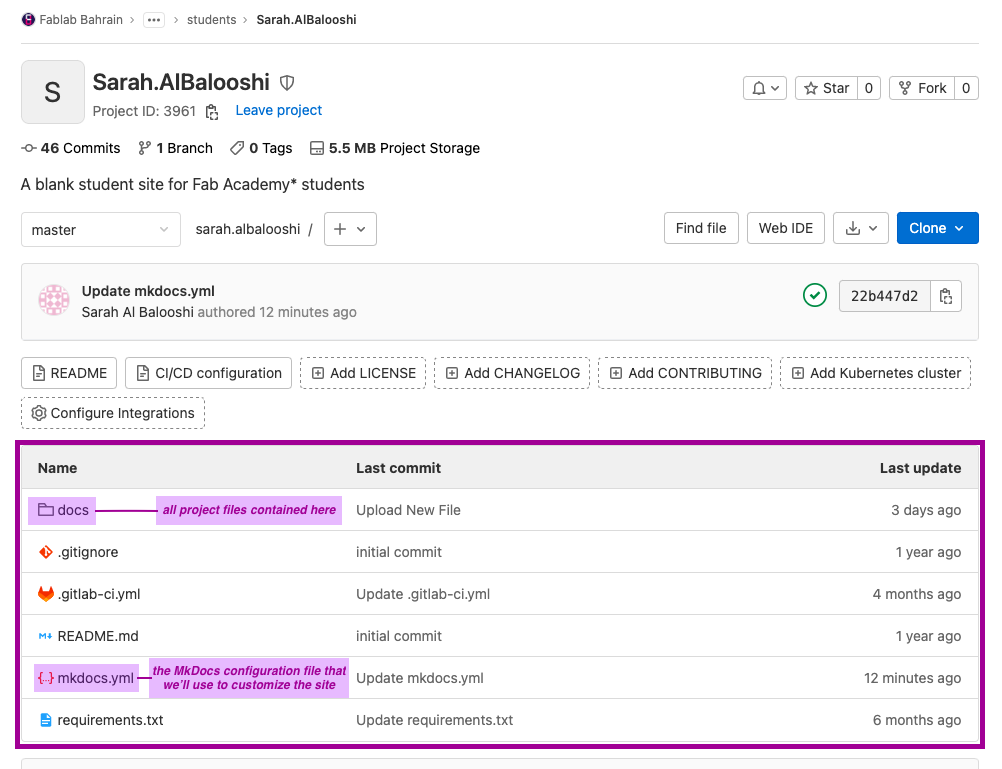
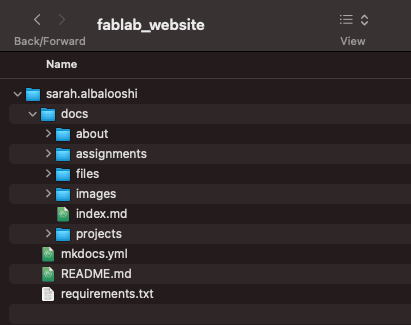
First, start by signing into GitLab with your fablab.io account credentials. You should then be able to access your project, which contains all files pertaining to the website. It should look something like this:
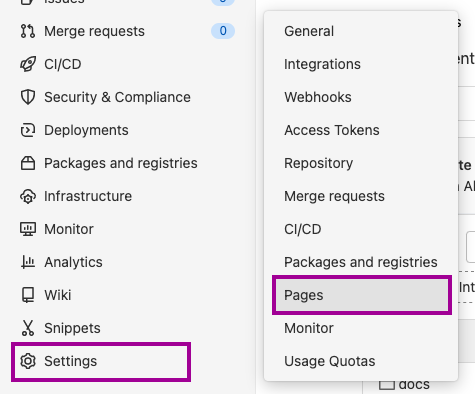
To access the URL of the website, click on Settings and then Pages.
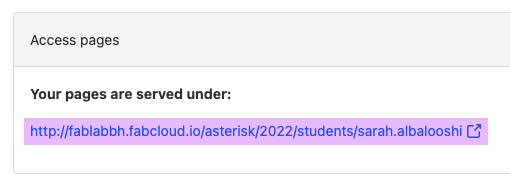
Clicking on the URL will take you to your website.
Editing the Website Online Through GitLab
Customizing the Appearance of the Website
To edit the website appearance and features, we must enter mkdocs.yml, which is the MkDocs YAML configuration file and clicking on Edit. We can edit different features of the website here, including the title, which I will be changing to my name. I’ll also be adding my social media links.
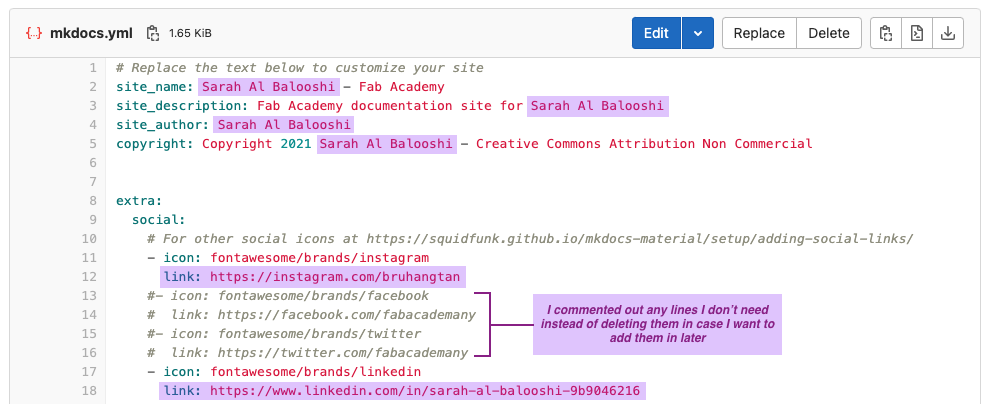
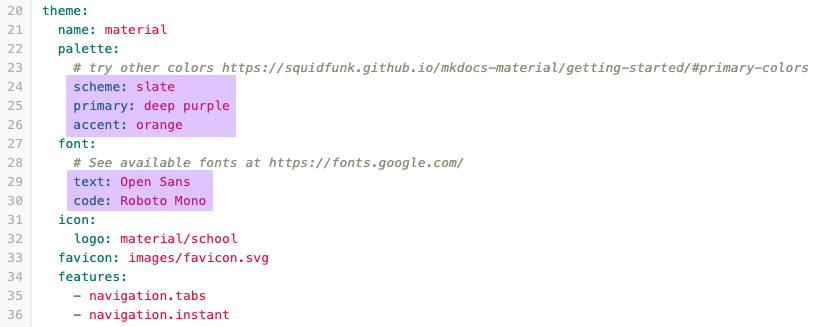
Next, I will be changing the appearance of the website by switching it to dark mode with slate and changing the primary and accent colors to my preference. I will also be changing the font of the website text and the code text by searching through the supported Google Fonts and typing in the font names. You can experiment with different combinations of these and click on Commit changes to see their output based on what you’d like to see.
Editing a Page on the Website
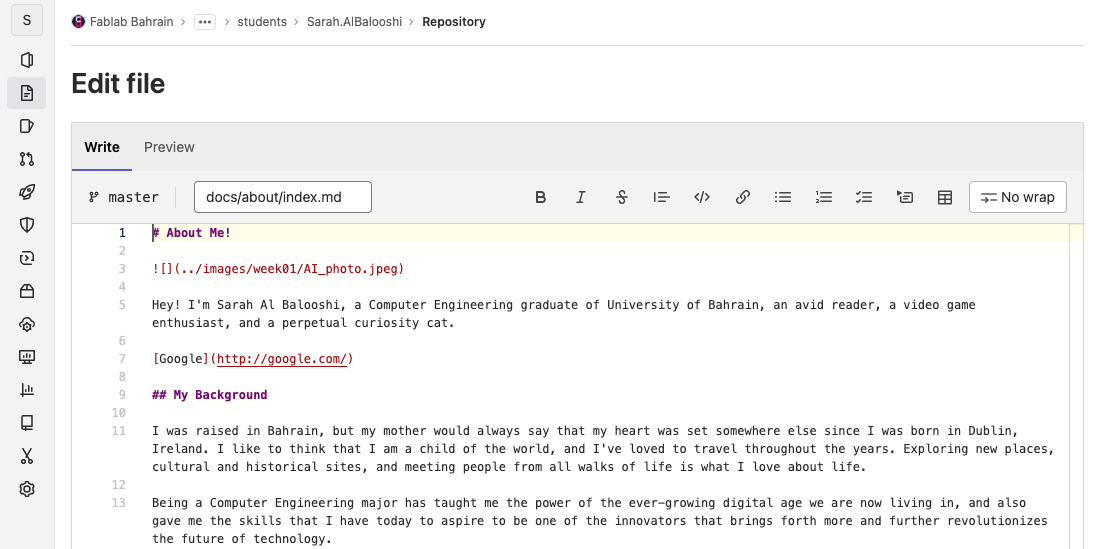
To edit the contents of the website, we must enter docs to access the Markdown files that make up the pages of our website. As an example, we will edit the About Me page. To do this, enter docs > about > index.md where you can now click Edit to start writing text onto the page.
Introduction to Markdown
Markdown is a markup language for creating formatted text using a plain-text editor. It works similarly to HTML but is simpler and easier to catch onto due to its simplified syntax, which is why we will be using it.
Markdown allows you to format text in different ways to make text italic, bold, or even both for greater emphasis, among other things. Here is a handy guide to go back and reference how to format other things, such as links, images, and more. Throughout the writing of this page, I’ve been using hashtags # to write headings and sub-headings.
For now, we will be adding a short introduction to ourselves, and including an image to our page that best describes us.
Uploading and Adding an Image
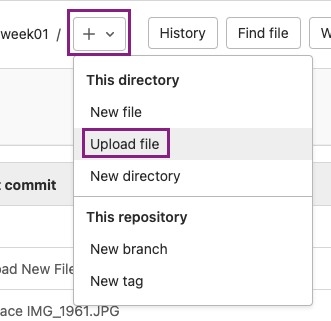
To add an image to any page of your website, it first needs to exist locally in the project files. To do this, we will go to docs > images > week01. Click on the + and then Upload and select or drop an image that you want to use. We can then use Markdown to reference the path of this file in any of our pages to display it. The syntax to adding an image is:

Note
Notice that there is a ".." before the path for the image starts. This is just a simplified way of writing the path, each period indicates the number of folders that precede this path.
Note that there are limitations for the size of the images we can use to keep our project files at a reasonable size for functionality. Keeping any images to some KB or under 1 MB is best practice. If you need to reduce the size of a file, use a file compression tool.
Note
The size of an image file is not the same as the size of the image itself. File size pertains to how much space it takes up in the memory (measured in bytes, kilobytes, etc.), and image dimensions describe how small or large the photo is (measured in pixels).
To save changes and push them onto the website, click on Commit changes. This will make them appear on the website, which you can see after waiting a moment and refreshing the page of the website.
Editing the Website Offline Using Atom
To be able to edit locally, we need to use an editor and connect it to Git. This requires some initial installations.
Note
You must be asking yourself by now: What exactly is Git? How does it relate to GitHub and GitLab? Git is a disturbuted, open-source control system that allows multiple people to work on the same projects together and keep track of changes between each of them for efficiency and functionality. GitHub and GitLab are sites that host these operations to allow users to use them online and host their own work, including websites like the one we’ve been working on.
Installing Atom and Git
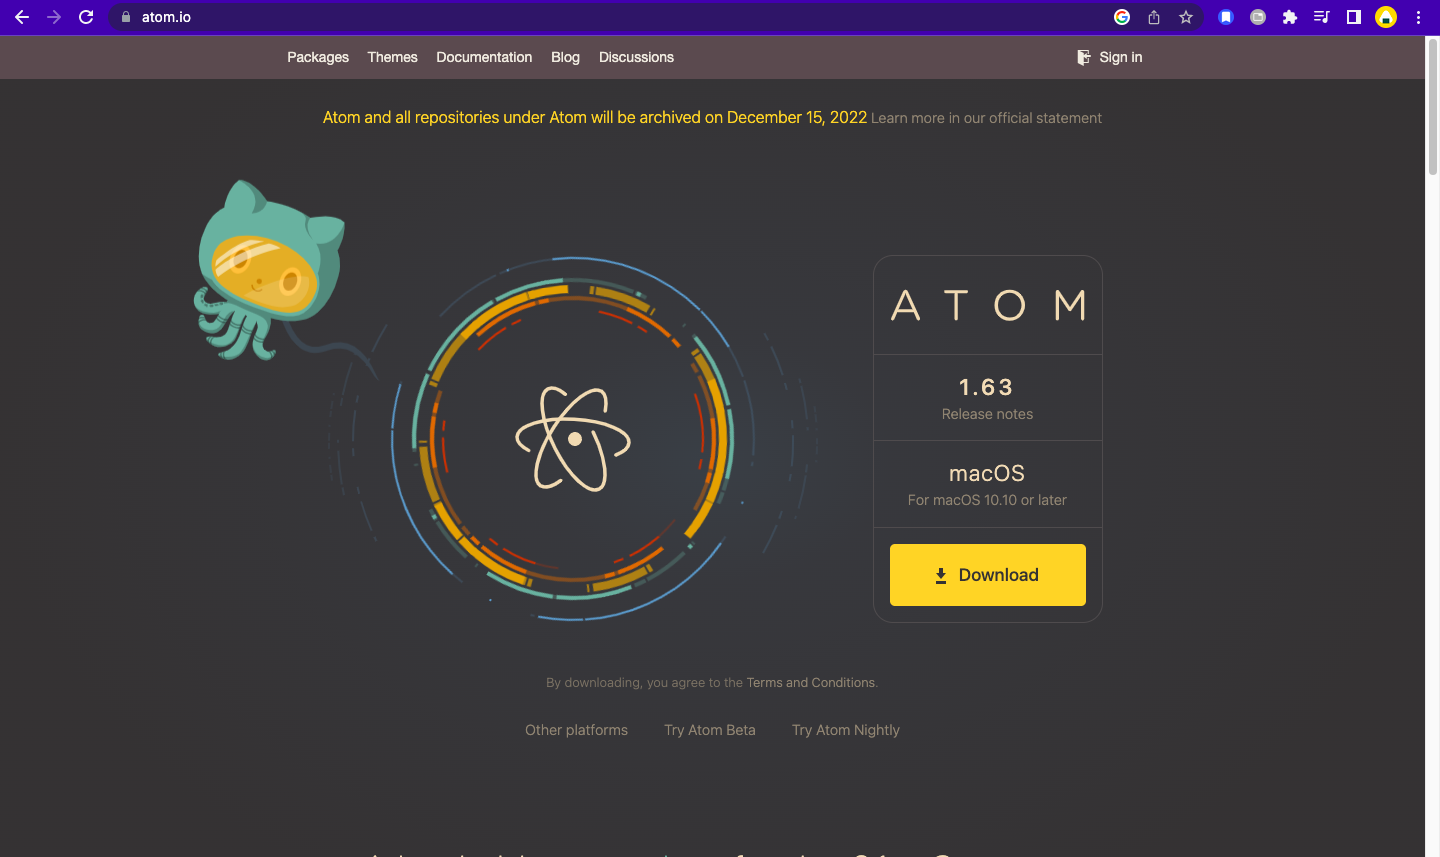
First, we start by downloading Atom, which will be our editor.
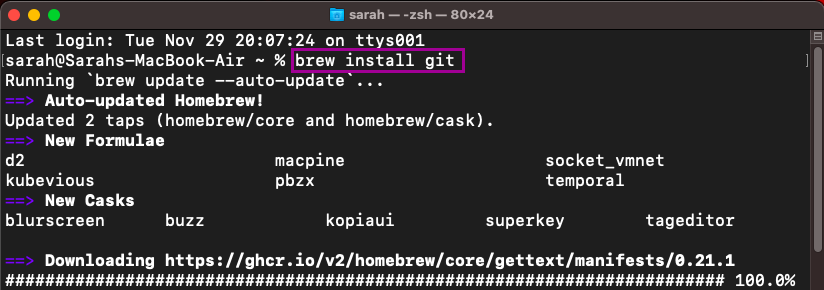
Second, we will need to install Git. The page provides alternative ways to install it on macOS, but I will be choosing to do it with Homebrew since I already have it installed. I need to access the terminal to do this, then enter the following command:
brew install git
I already had git installed, so Homebrew updated it.
Once both are installed, we will need to clone our GitLab repository to a local folder on our computer. We will first need to create an SSH key pair on the terminal to make this possible. To do this, I followed this video.
Creating an SSH Key Pair
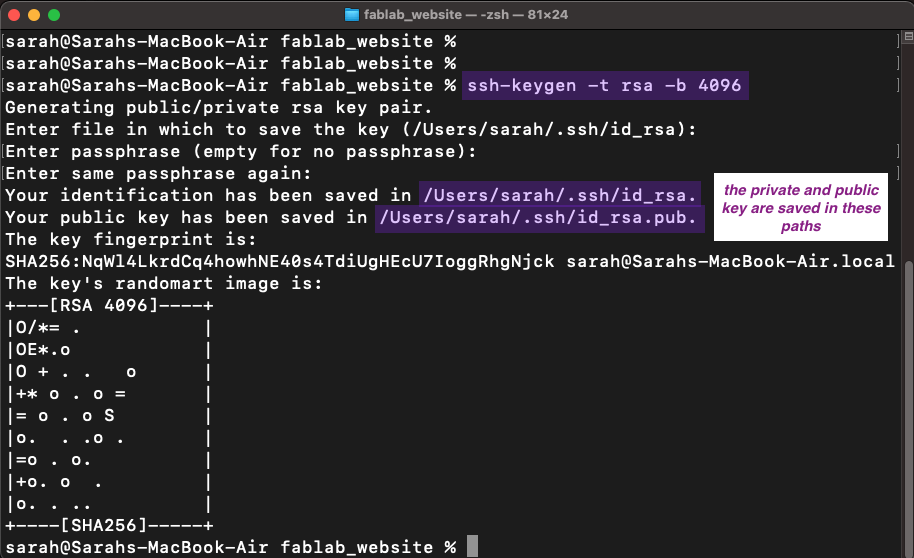
To generate the SSH keys, type the following command:
ssh-keygen -t rsa -b 4096
Note
The -t refers to the type of encryption the key will be made in, for this one it is RSA. The -b refers to the byte size.
The output will be similar to the following, which will be the paths where the key pair are saved:
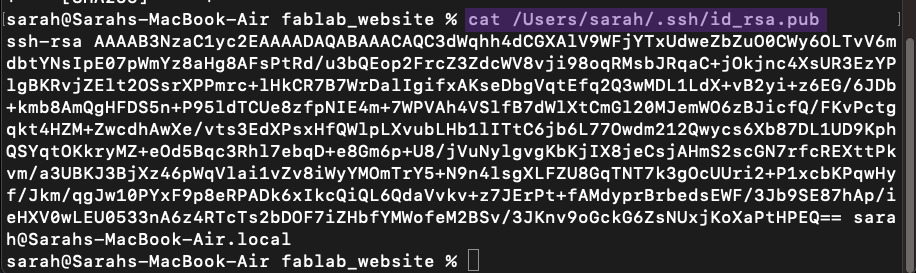
We need to copy this key to then save it as one of our SSH keys on our GitLab user settings. We will use the cat command to get the public key by writing the path that was displayed in the output of previous screenshot. The output will be the entire public key in plaintext, which we will be copying to our clipboard.
Then, go to GitLab and click on your User Profile on the top right corner, then User Settings. Here you will find SSH Keys. Paste your public key here and save it. Don’t set an expiration date so you don’t have to redo this whole process again later.

Cloning the Repository
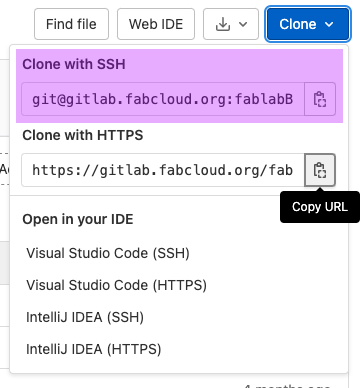
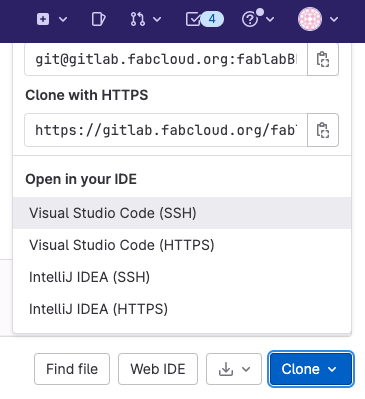
First, go to your Gitlab homepage and click on Clone > Clone with SSH and copy the link that it gives you.
Create a local folder on your computer where you want to have your repository, then open a terminal contained in that folder and write the following command with the link that you just copied:
git clone git@gitlab.fabcloud.org:fablabBH/asterisk/2022/students/sarah.albalooshi.git
When you’re done, you should be able to see all the files of your repository are now saved to you locally.
To start editing, open Atom, then go to Open… and navigate to the folder where you cloned your repository. Now you can access all your files to edit them locally.
Tip
You can preview your Markdown output while on Atom. Go to Packages > Markdown Preview > Toggle Preview. Some things, like admonitions (which are the notes, tips, etc. like this one), will not appear the same on the preview as they do on the site, so keep that in mind.
Using Atom: Fetching, Pushing and Pulling
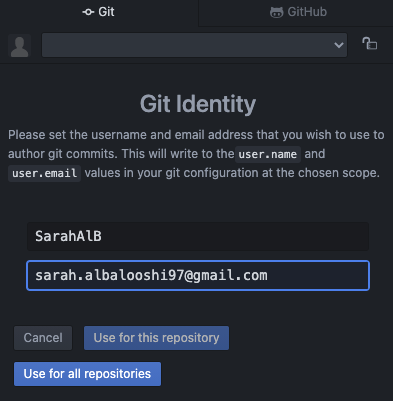
To use Atom for offline editing, sign in with your GitLab credentials on the Git tab on the right-hand side of the application.
Tip
If you can’t see the Git tab, hover your mouse on the right side of the screen until you see an arrow pop up and click on it. Otherwise, try View > Toggle Git Tab
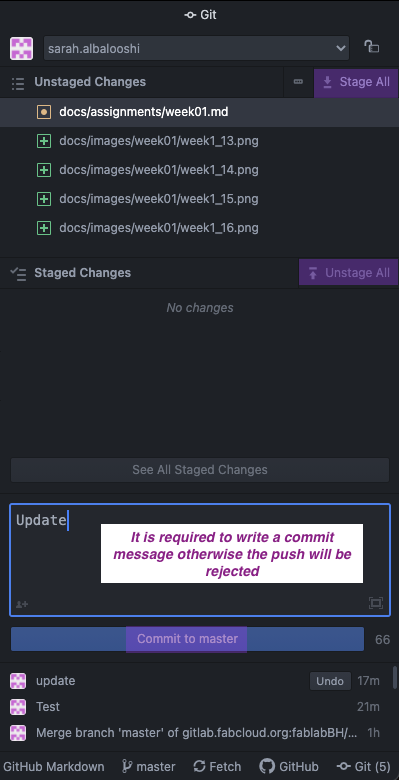
When you’re done editing changes in Atom and would like to commit changes like we did earlier in the online editing section, you need to first save your changes. This will show on you Git tab as Unstaged Changes. Click on Stage All to move it to Staged Changes, then you can add a commit message and click on Commit to master.
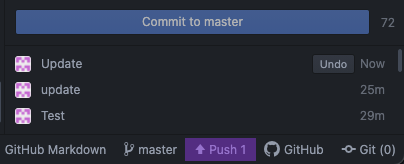
For these changes to show up on your website, you must Push them. Do this by clicking on Push on the bottom right-hand side of the application. You’ll see the arrow moving upwards until it is done.
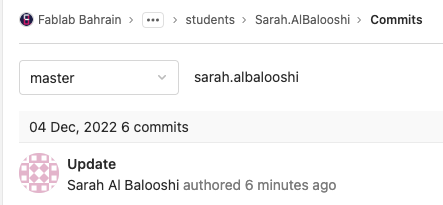
You can now view the changes that you made on your website to confirm that they have been pushed. You can also simply check that the commit has appeared on your GitLab commits.
Alternatively, this also works when you have edited your website online and would like to view the changes on Atom. To do this, click on Fetch and Pull.
Tip
If you cannot see Fetch, try right-clicking on it and then click Fetch.

Note
Pushing means to upload changes to the repository and Pulling means to download changes from the repository. Fetching on the other hand, is when you check if there’s anything to pull.
Using Visual Studio Code
After months of solely using Atom for my remote offline editing, I experienced many technical issues with the application that needed to be constantly resolved. For this reason, I decided to switch to using Visual Studio Code, as it is an editor I’m familiar with, and I know it will be a more reliable option, as I’ve never experienced technical issues with it in the past that could potentially slow down my workflow.
Cloning the Respository… Again
First, start by downloading Visual Studio Code. Once you have it open, navigate to Source Control, where you’ll be managing and cloning your repository.
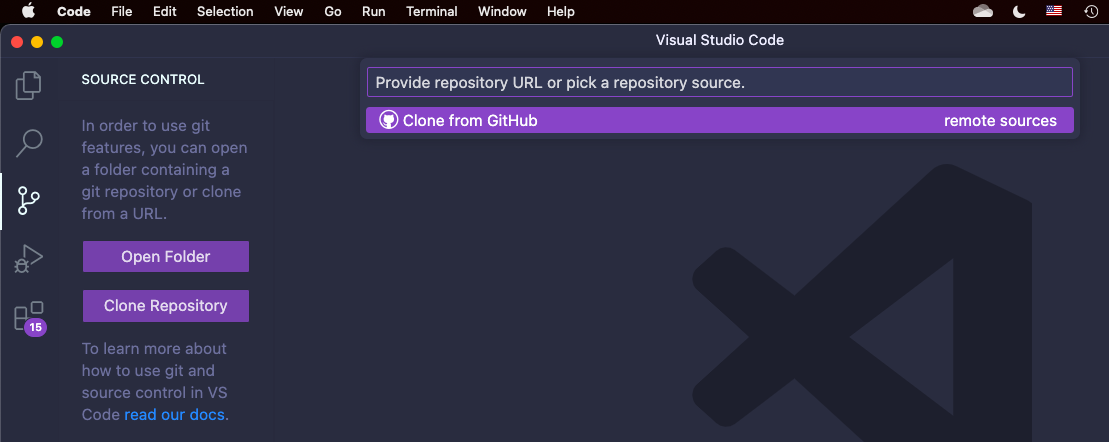
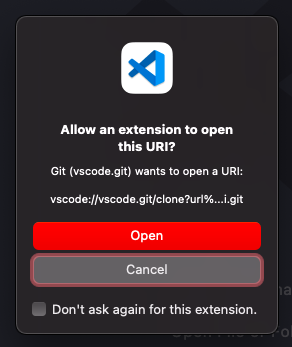
Now navigate to your homepage on GitLab and select Clone > Visual Studio Code (SSH), this will automatically re-direct you to Visual Studio Code, where a pop-up might appear to ask for permission to clone the repository. Click Open.
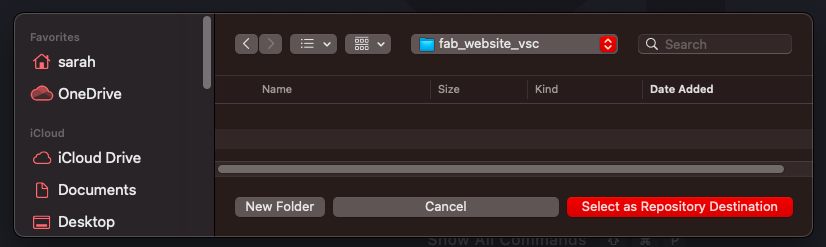
You will now be asked to choose or create a new local folder to house your repository. All your repository files will be saved here. Any changes you make to it here are remote changes, and will only appear on GitLab after committing and pushing them!
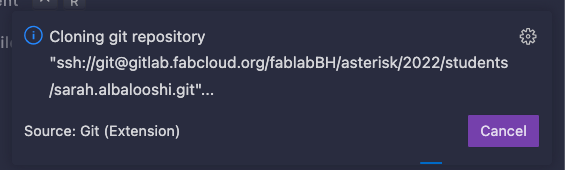
Once you’re done, your repository will automatically start cloning! This is the appliation completeing the steps we took earlier to clone the repository in the Terminal, so this is way quicker and easier for someone not very comfortable with using the Terminal!
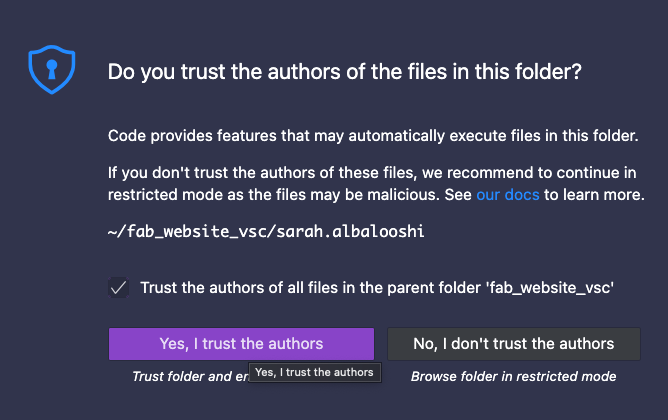
The last step is to confirm that you trust the authors of this repository! This will always pop-up when cloning a new repository, so I checked the box  to avoid seeing it again.
Using Visual Studio Code
To start understanding how to use Visual Studio Code, refer to online resources explaining the User Interface (UI) and different tools and settings you can use on the application. It’s not too different from other editors, but it’s easier to use, and the personalisation and customisation on it makes it fun to use whether you’re remotely editing your website, or coding and programming.
Tip
If you’ve never used Visual Studio Code before, reading through the documentation is very helpful! It’s very intuitive and easy to use; plus you can access the terminal directly from it if you need it!
In this case, using the terminal can help with using git commands, or if you need to change directories, or run some code and check out the output! Additionally, error messages are also more thorough in the terminal, so you can just google the error you’re having to quickly and understand and fix it.
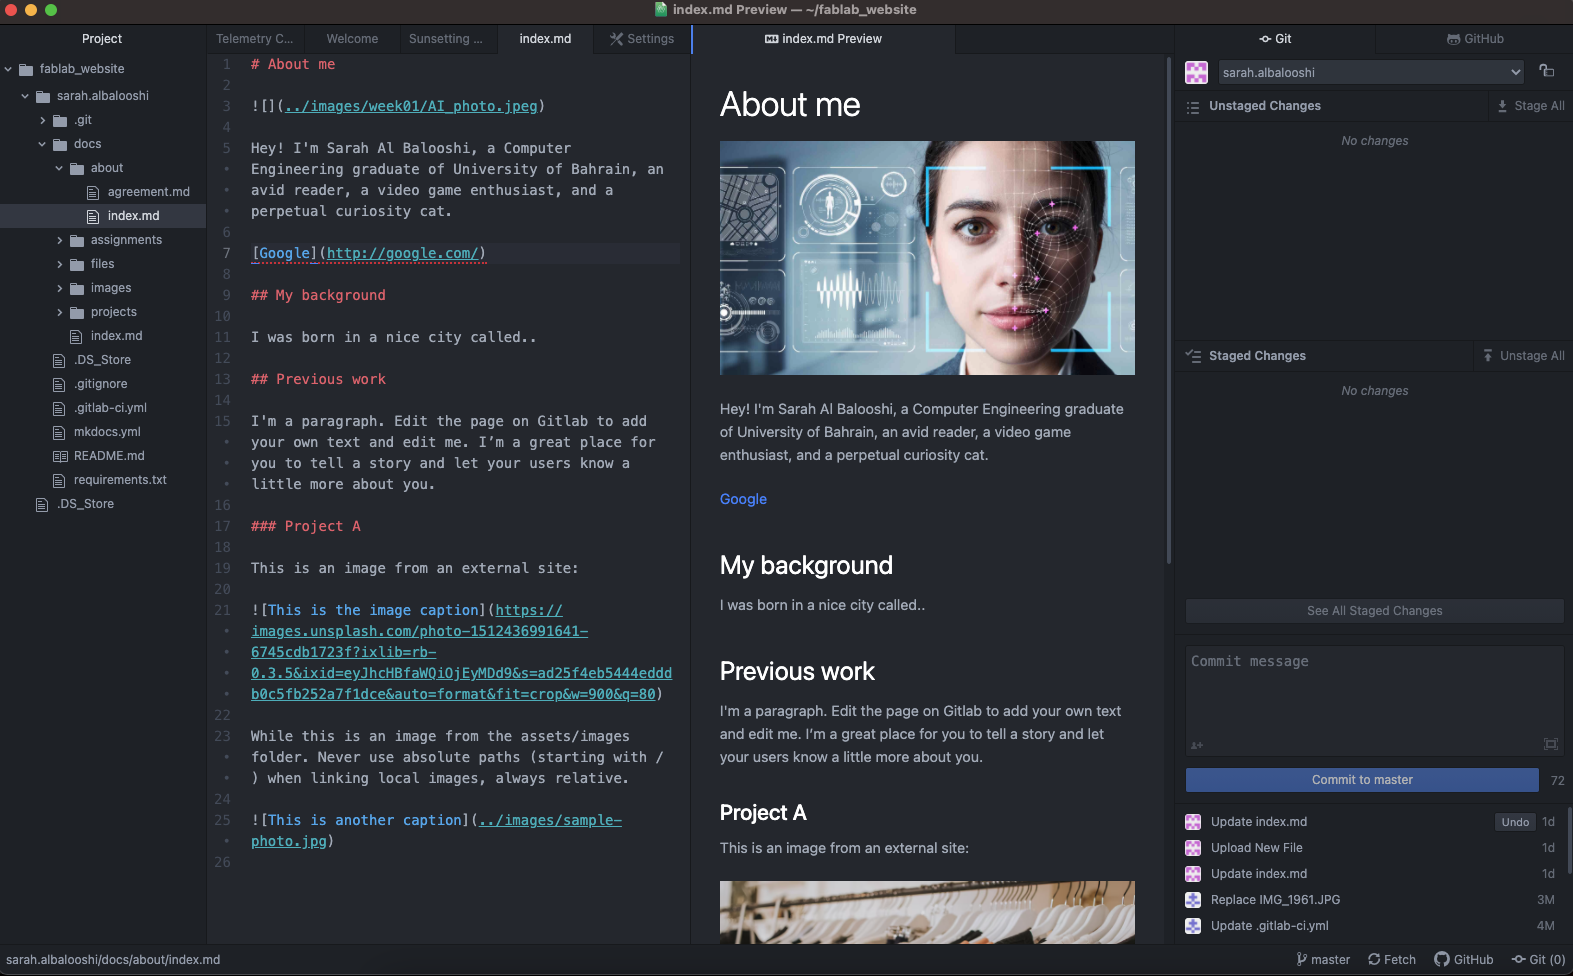
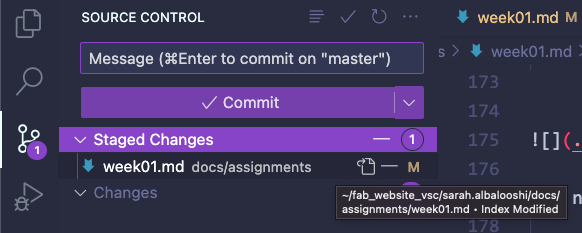
Below, you can see the different important parts of the dashboard labelled. We’ll be working on editing our Markdown files in the Explorer, where we can navigate our files to open which one we’ll edit, or find images and other files to reference in our documentation. The Timeline helps us keep track of current changes to the file, whether its past commits, or when we’ve saved changes in a current file. This is easier to navigate than it is on Atom, because it will only show the relevant commit history for the current file. Furthermore, we will us the Source Control to stage our changes, commit them, and perform fetch, pull and push operations.
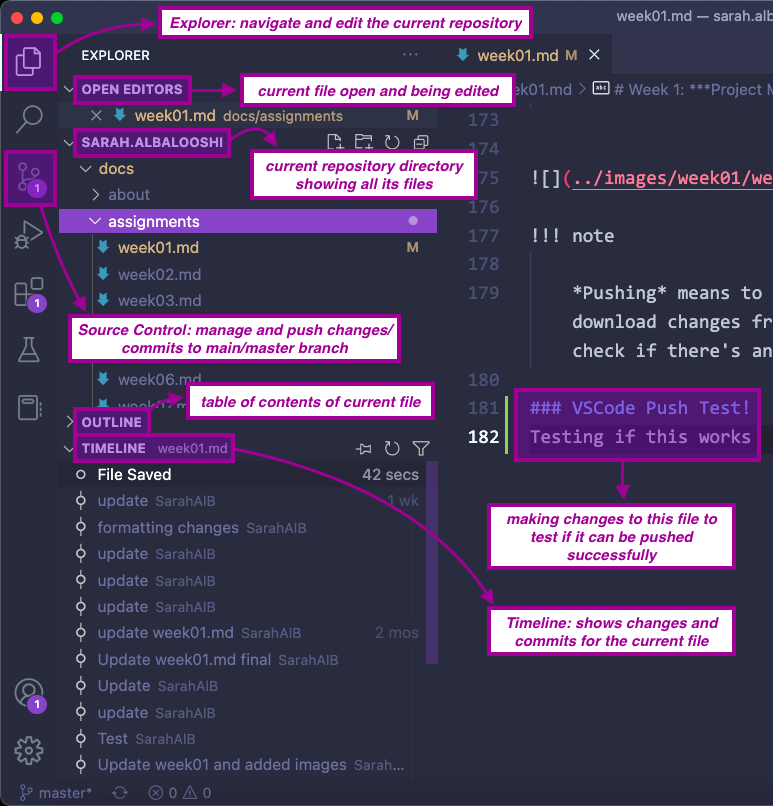
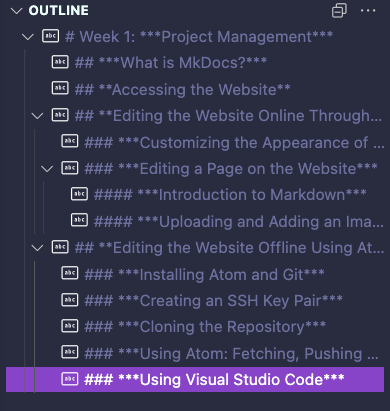
We can scroll through the outline to get to different sections (basically the different headers) in the current Markdown file we’re editing. This is the equivalent to our Table of Contents that you can see on my website on the right-hand side panel! We can also use this to click and navigate to the different sections quickly.
As you can see in the photo above, I made some changes to the current file to test out if I can successfully push them. I’ll switch to Source Control to do this. We can see below that after saving my changes, they have appeared in the Changes tab. These are unstaged changes, which means that we need to stage them to commit and push them. This is a helpful function to have for if you make multiple changes, but don’t want to push all of them at the same time.
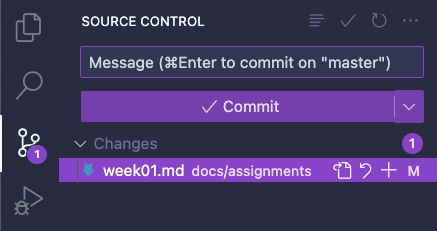
To stage these changes, click on the  Plus sign. Once this is done, it’ll move from the Changes tab to the Staged Changes tab. You can move them around from one to the other by clicking the Plus sign or the
  Minus sign.
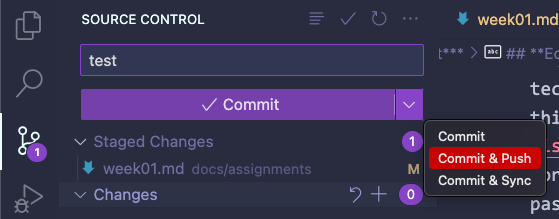
If we click on the  downward arrow, we can see that we can commit our changes after writing a commit message. Remember to always Fetch beforehand to see if there’s anything to Pull, otherwise there will be conflicts between the main/master branch and remote branch. You can do this by clicking on Commit & Sync (Sync means Fetch in VSCode), or just Sync first so you can Commit & Push.
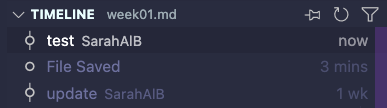
We can see in the Timeline that our changes have been committed!
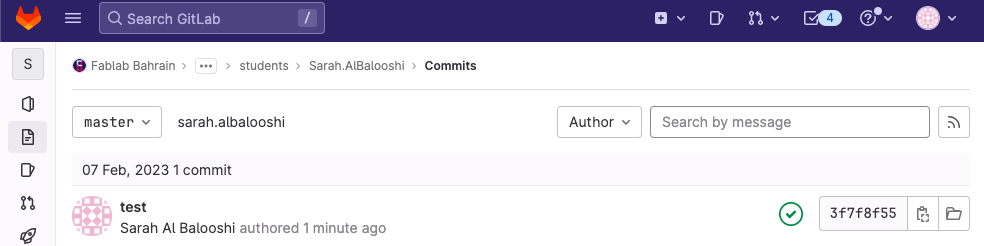
After pushing, we can now view it on GitLab and see that our new commit has appeared so we know our changes are being pushed successfully.
Markdown Tips and Tricks, Exclusive to Visual Studio Code!
Tip
To expand on the Introduction to Markdown section, you can check out their section on Markdown for additional help and tips! I followed this documentation and it helped me work a lot faster!
Tip 1: Internal Reference Links
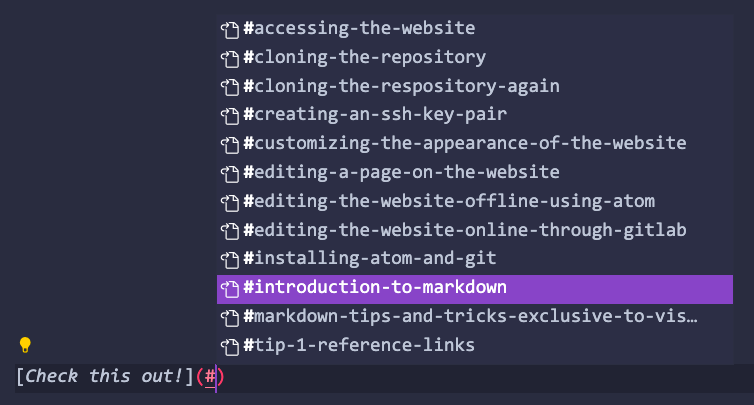
We can make reference links to sections in our current document by using the following syntax. It will show a drop-down menu of the different headers in your current file that are our separate sections. If you can’t see this menu, click on CTRL + SPACE after the pound # sign. You can follow this link here.
Tip 2: External Reference Links
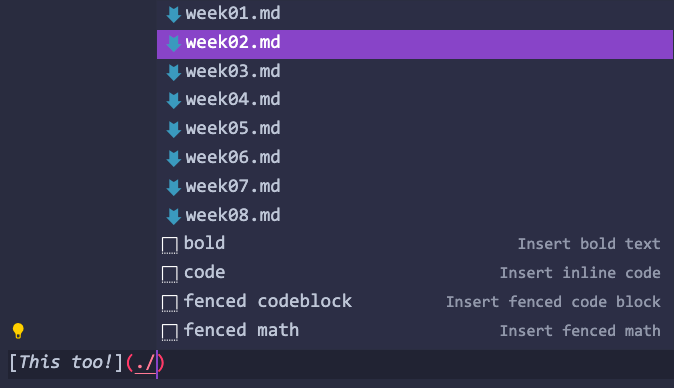
We can also make reference links to sections from another file, but it requires different syntax. First start by referncing the other file with the prefix ./. Another drop-down menu will show up:
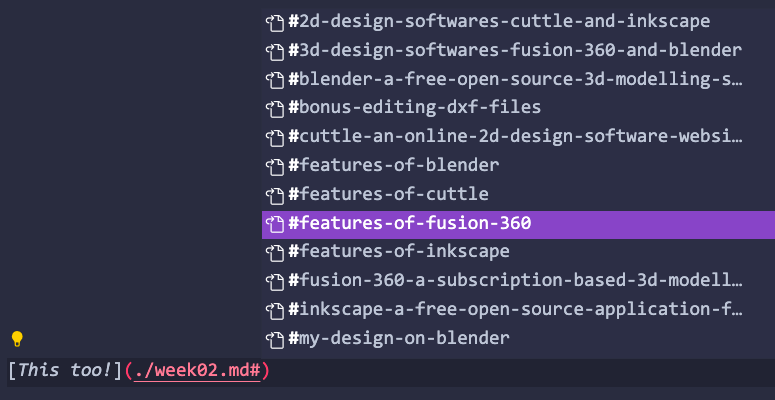
After selecting the file you want to reference from, use the the pound # sign again to choose the specific reference.
If we hover over the link and hold CMD, we can see the section that it links to.
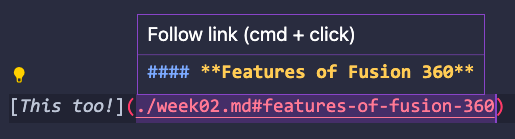
If we click on the link while holding CMD, it will open the file in another tab on VSCode to the section that we specified. You can follow this link here.
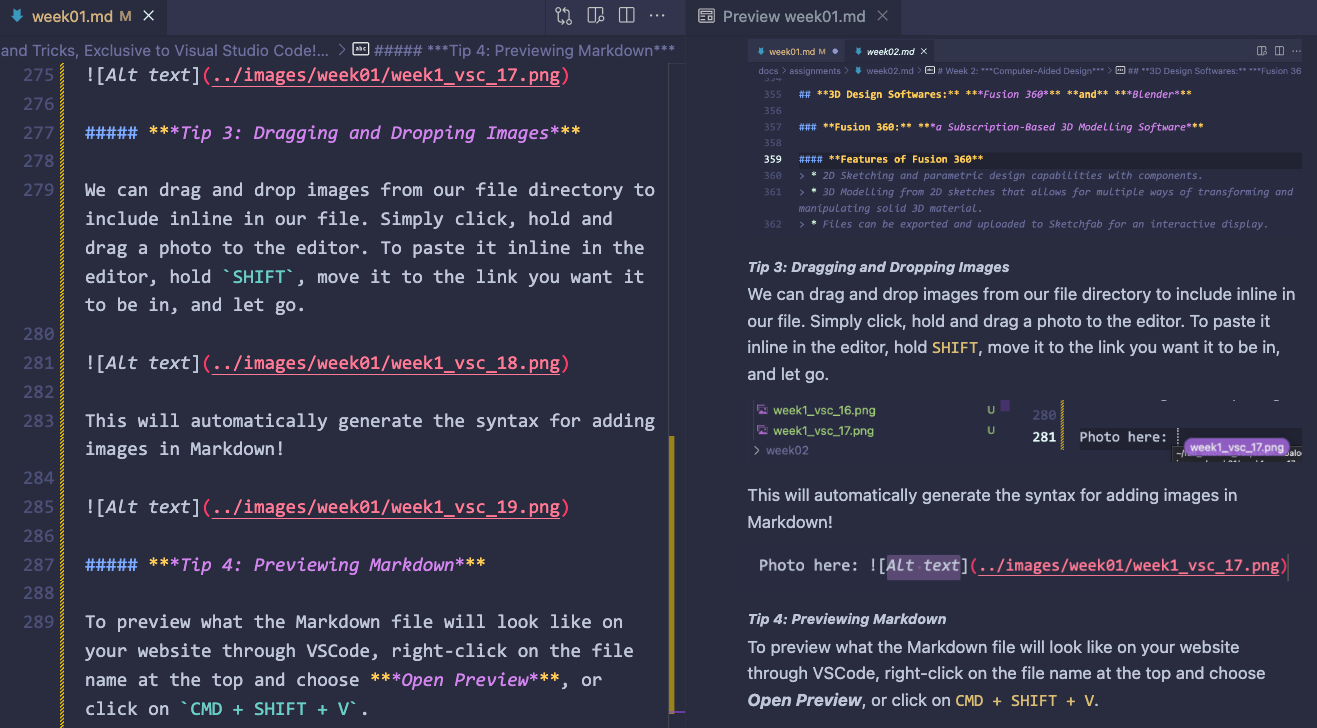
Tip 3: Dragging and Dropping Images
We can drag and drop images from our file directory to include inline in our file. Simply click, hold and drag a photo to the editor. To paste it inline in the editor, hold SHIFT, move it to the link you want it to be in, and let go.

This will automatically generate the syntax for adding images in Markdown!

Tip 4: Previewing Markdown
To preview what the Markdown file will look like on your website through VSCode, right-click on the file name at the top and choose Open Preview, or click on CMD + SHIFT + V.