8. MOULDING AND CASTING
This week, I have been introduced to the process of moulding and then casting. The process starts with using a small replica of the CNC machine to carve the surface of a waxy material that acts as a shell for the molding material to solidify and form a mold. The casting material is then prepared and poured into the mold. Once dry, the casting material can be separated from the mold.
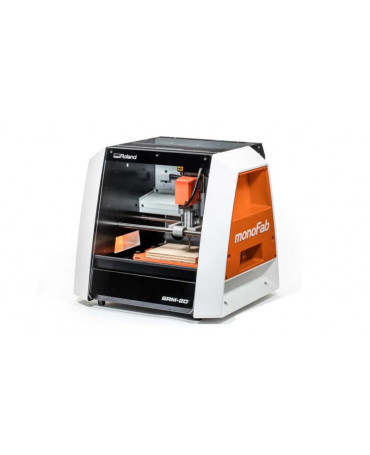
The CNC machine used for this week is shown below:
Introduction And First Assignment
We started this week by learning about the various types of materials used for moulding and casting. each one of us was asked to choose a specific type of either molding or casting material from the various types available.
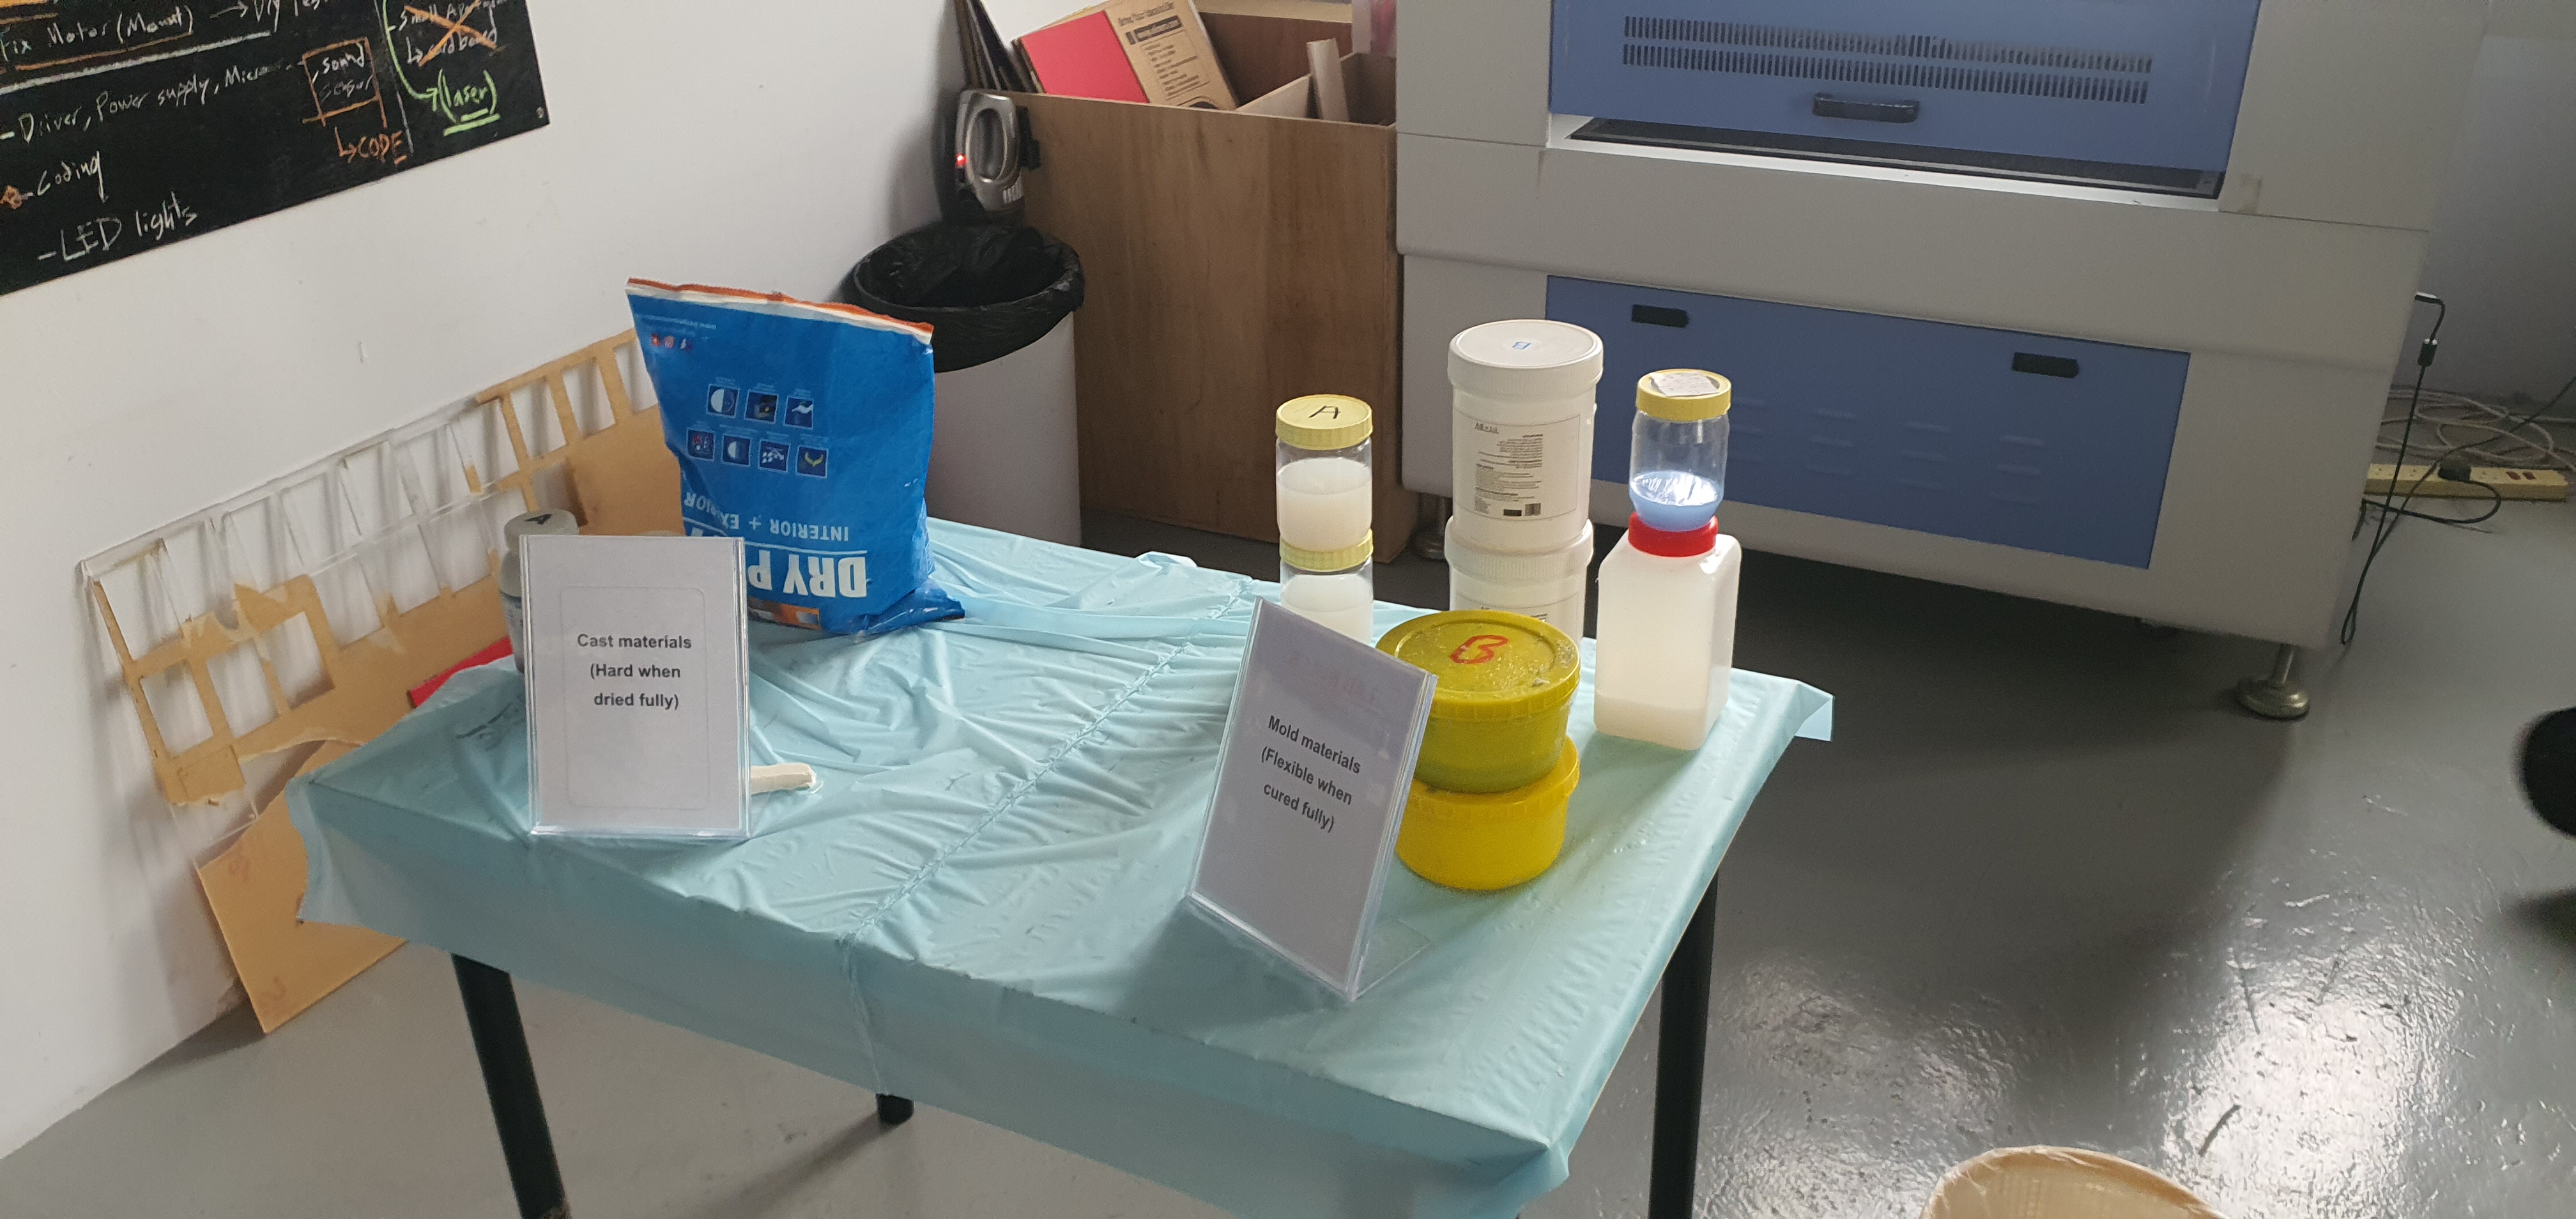
The cast materials include resin, soap, cement and plaster, while the mold materials include various types of silicon materials. Each material has a certain cure time, work time, ratios of agents and safety instructions. As a part of our assignment, we were asked to search about the material we chose and document the safety instructions, cure and work times, process and final state. I decided to choose the GR silicon rubber which consists of two agents B and A.
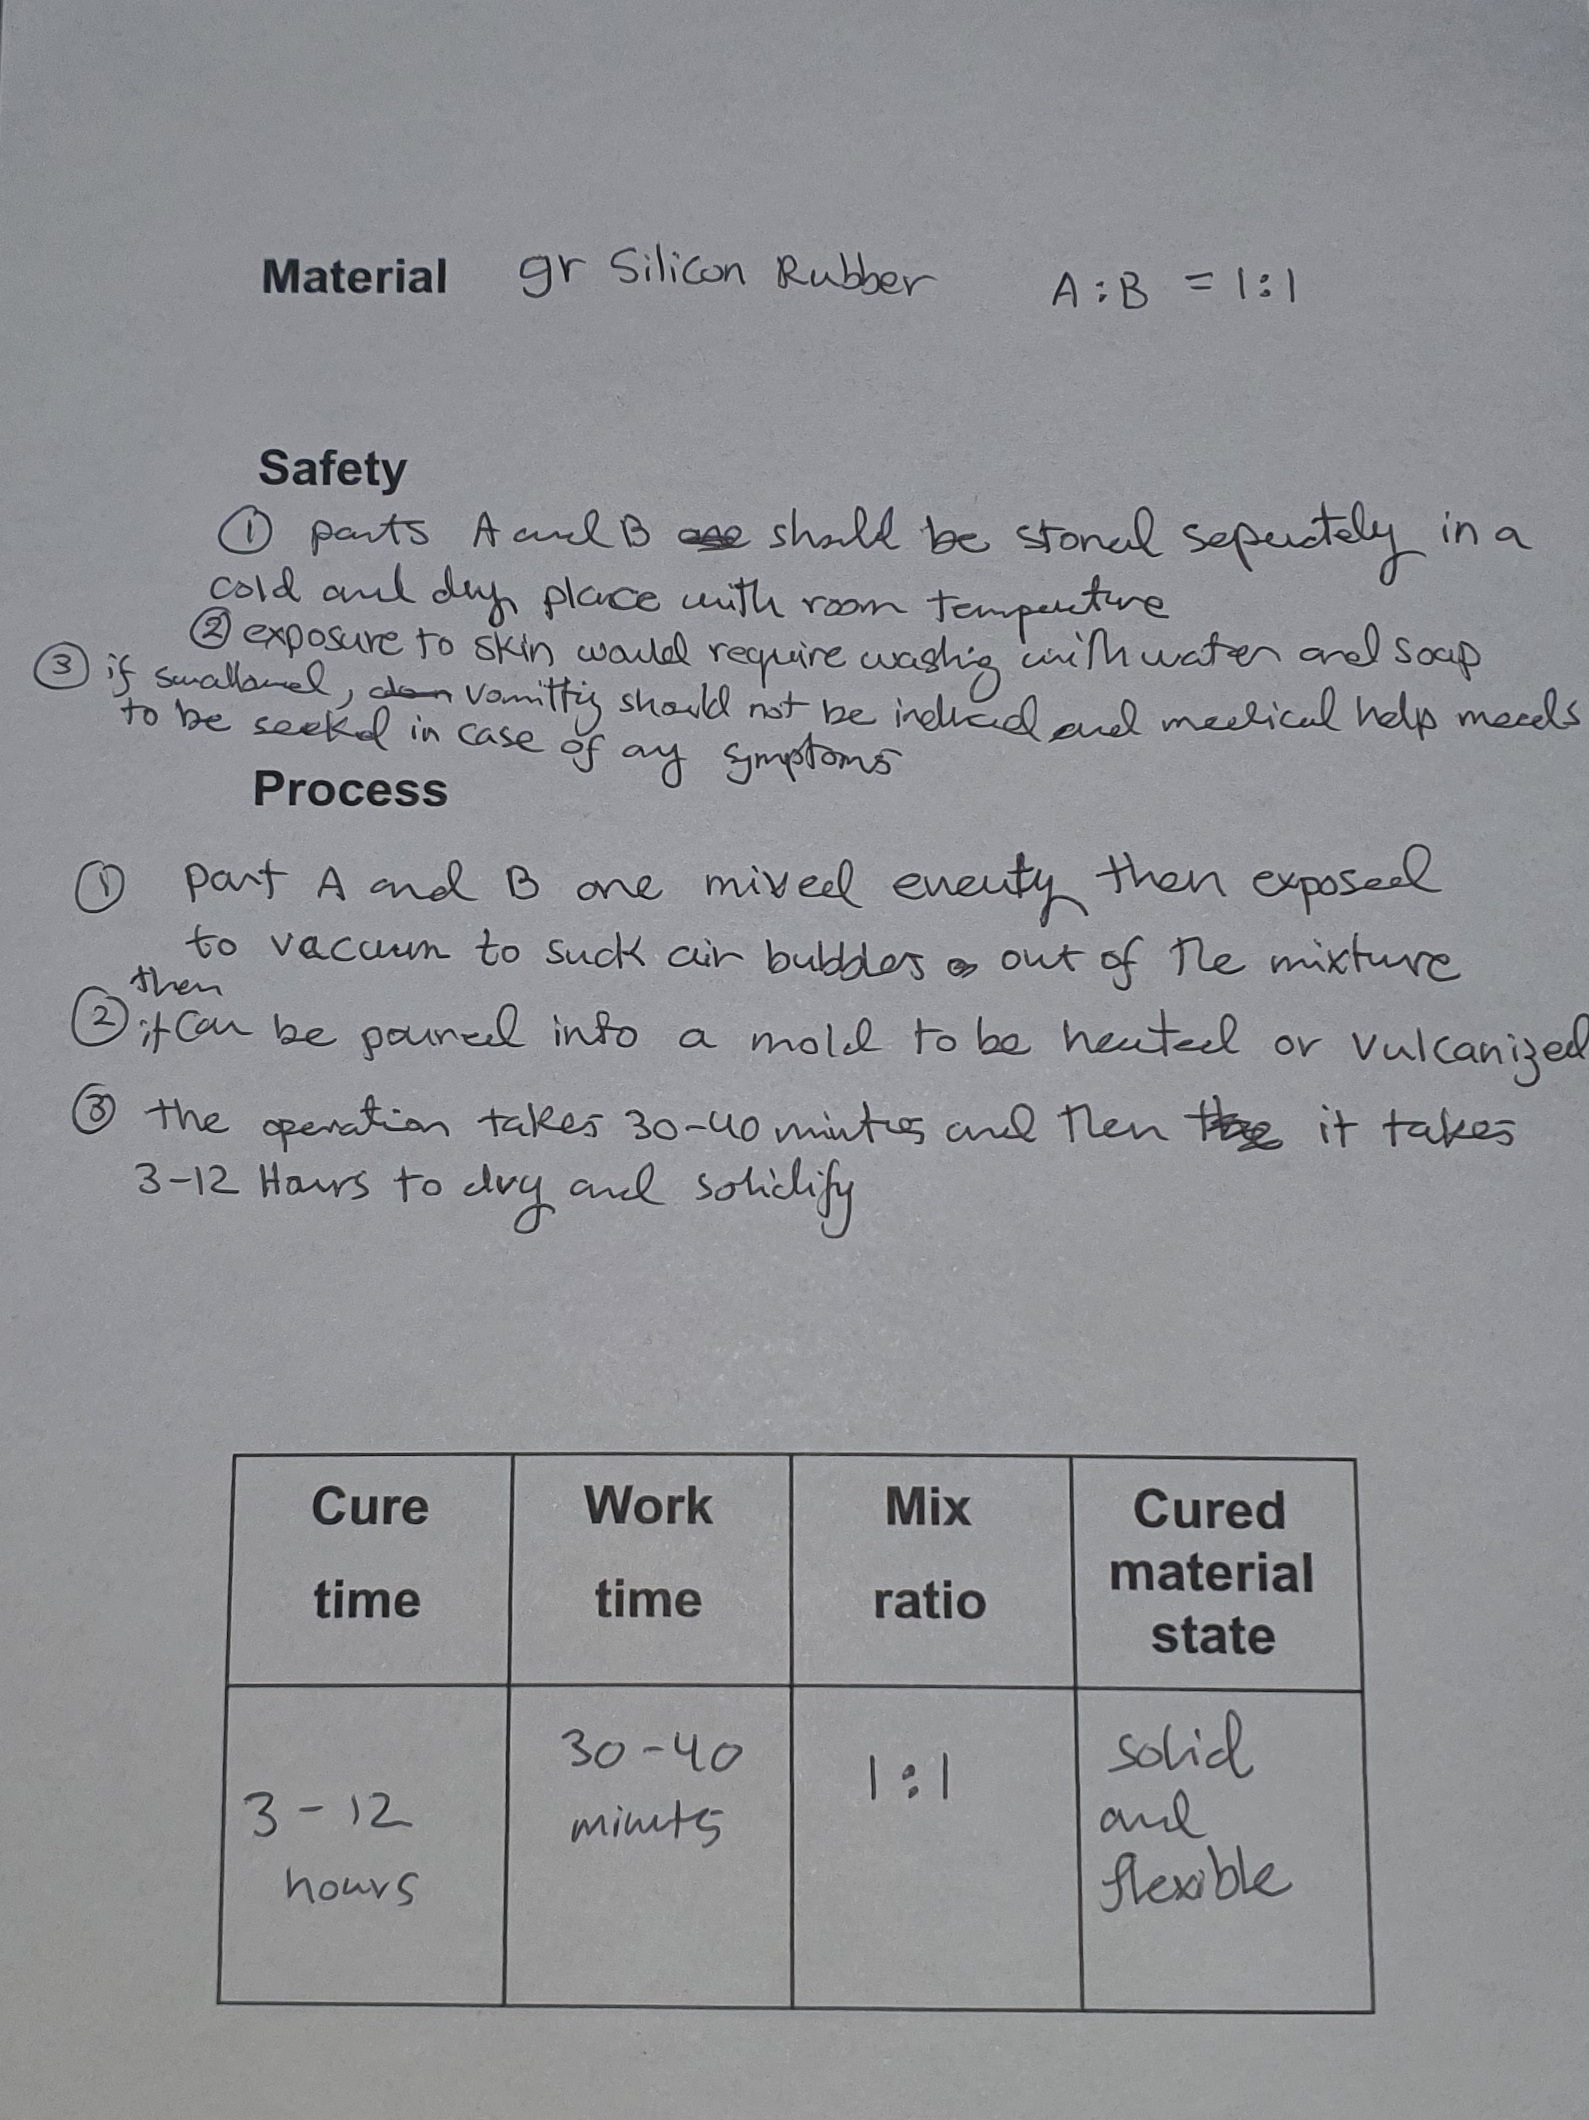
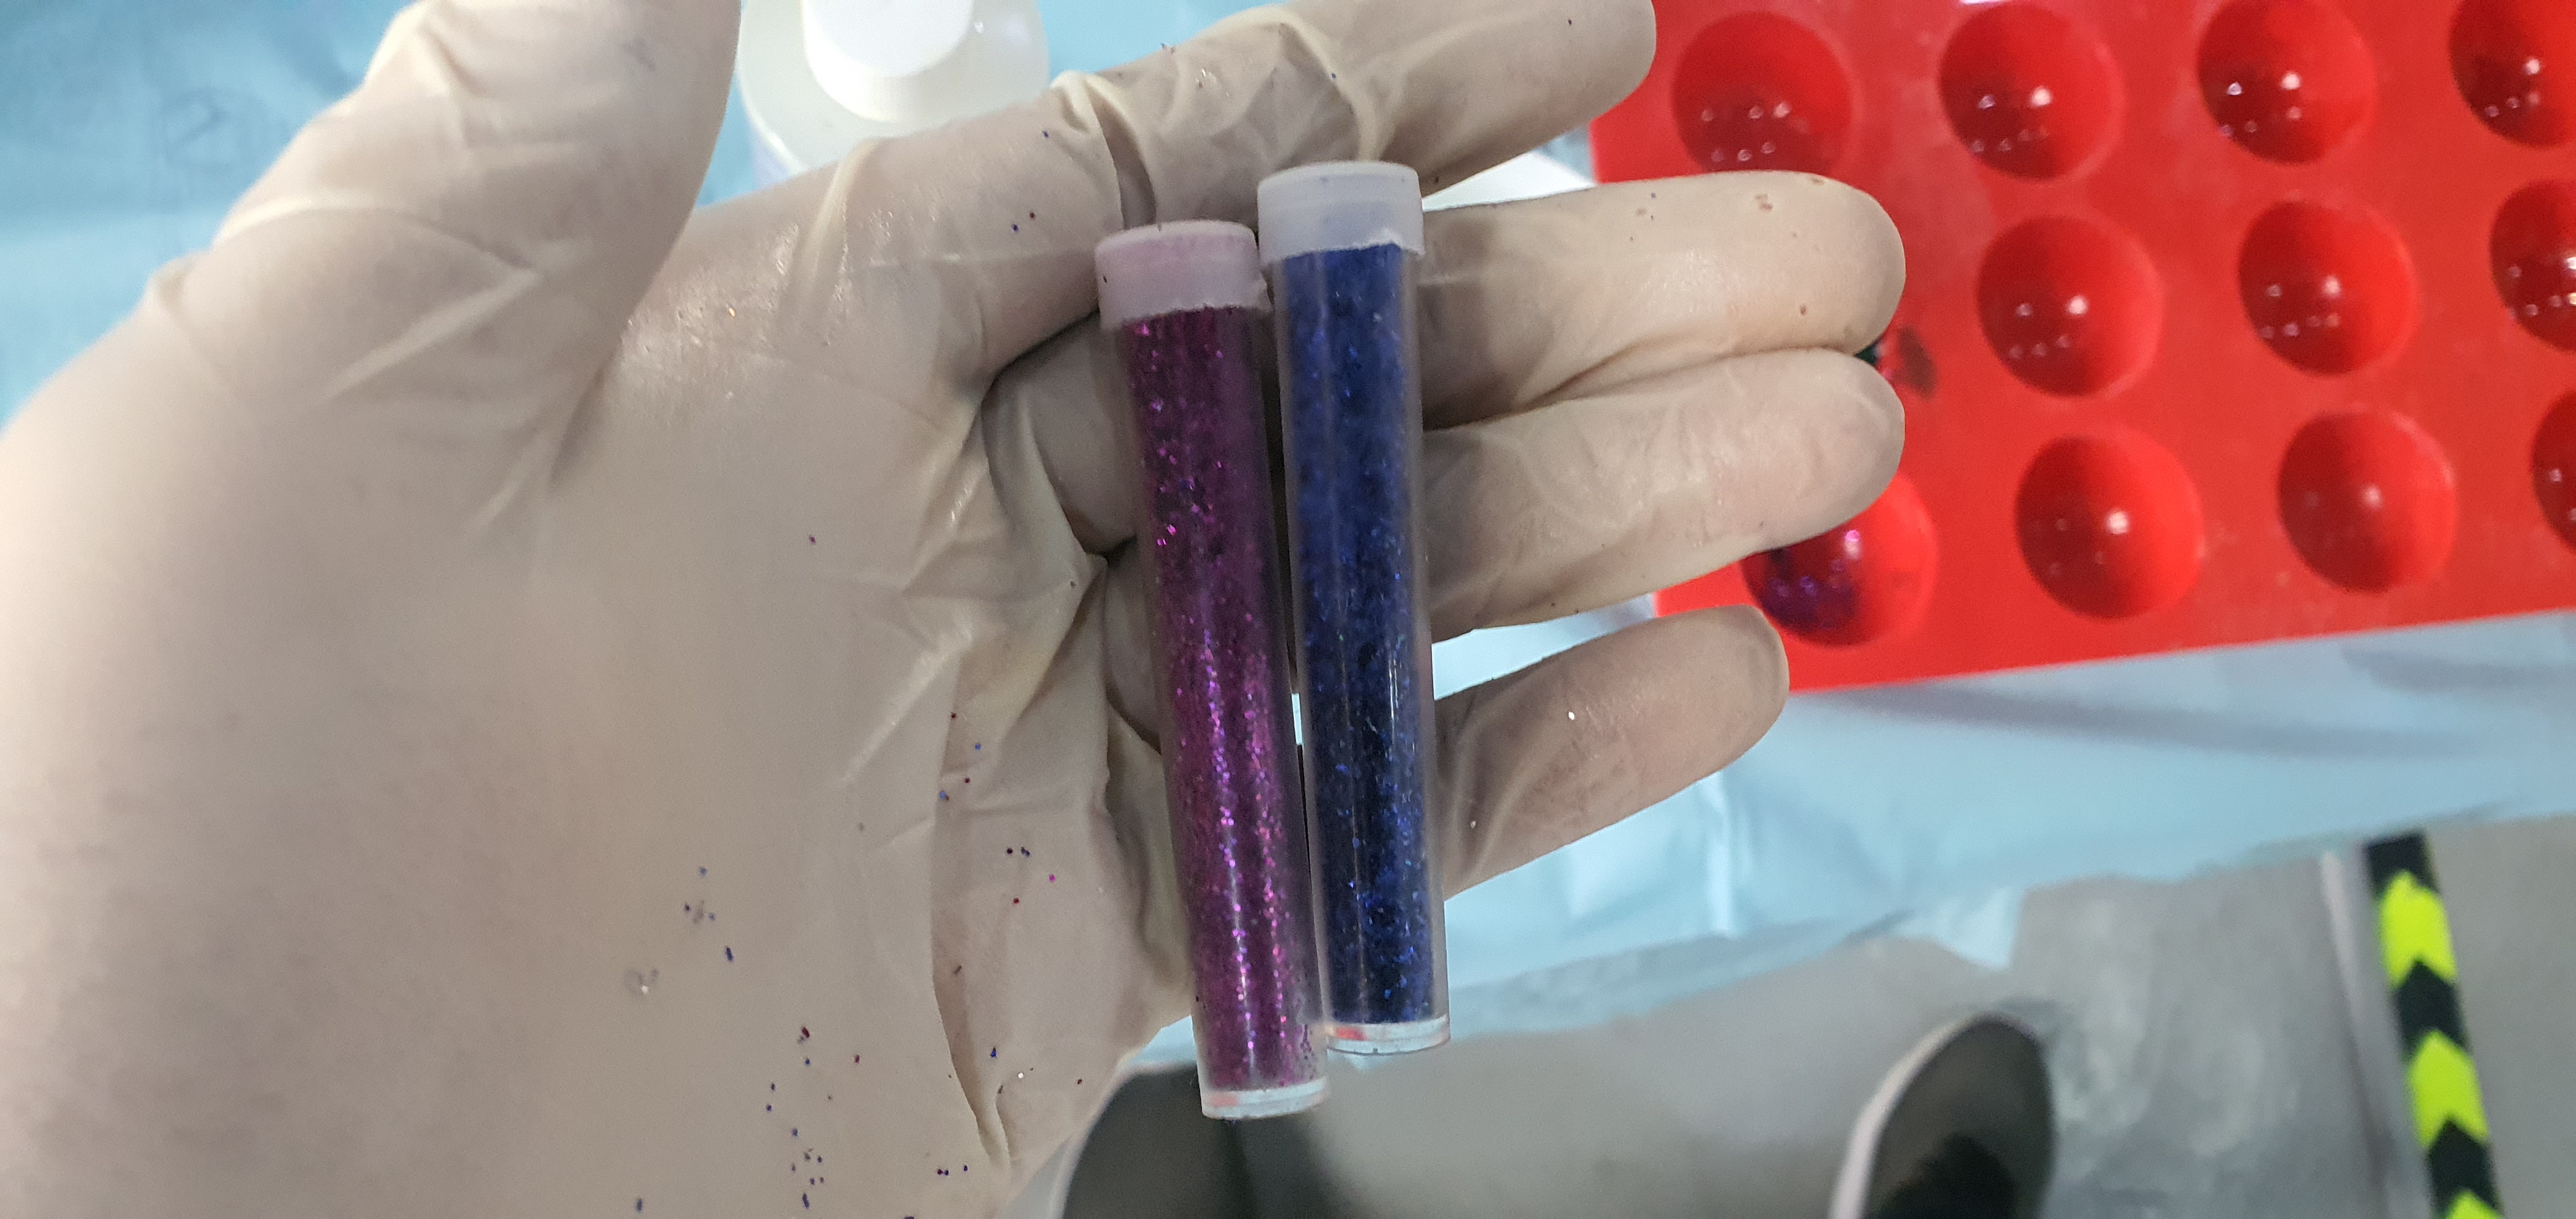
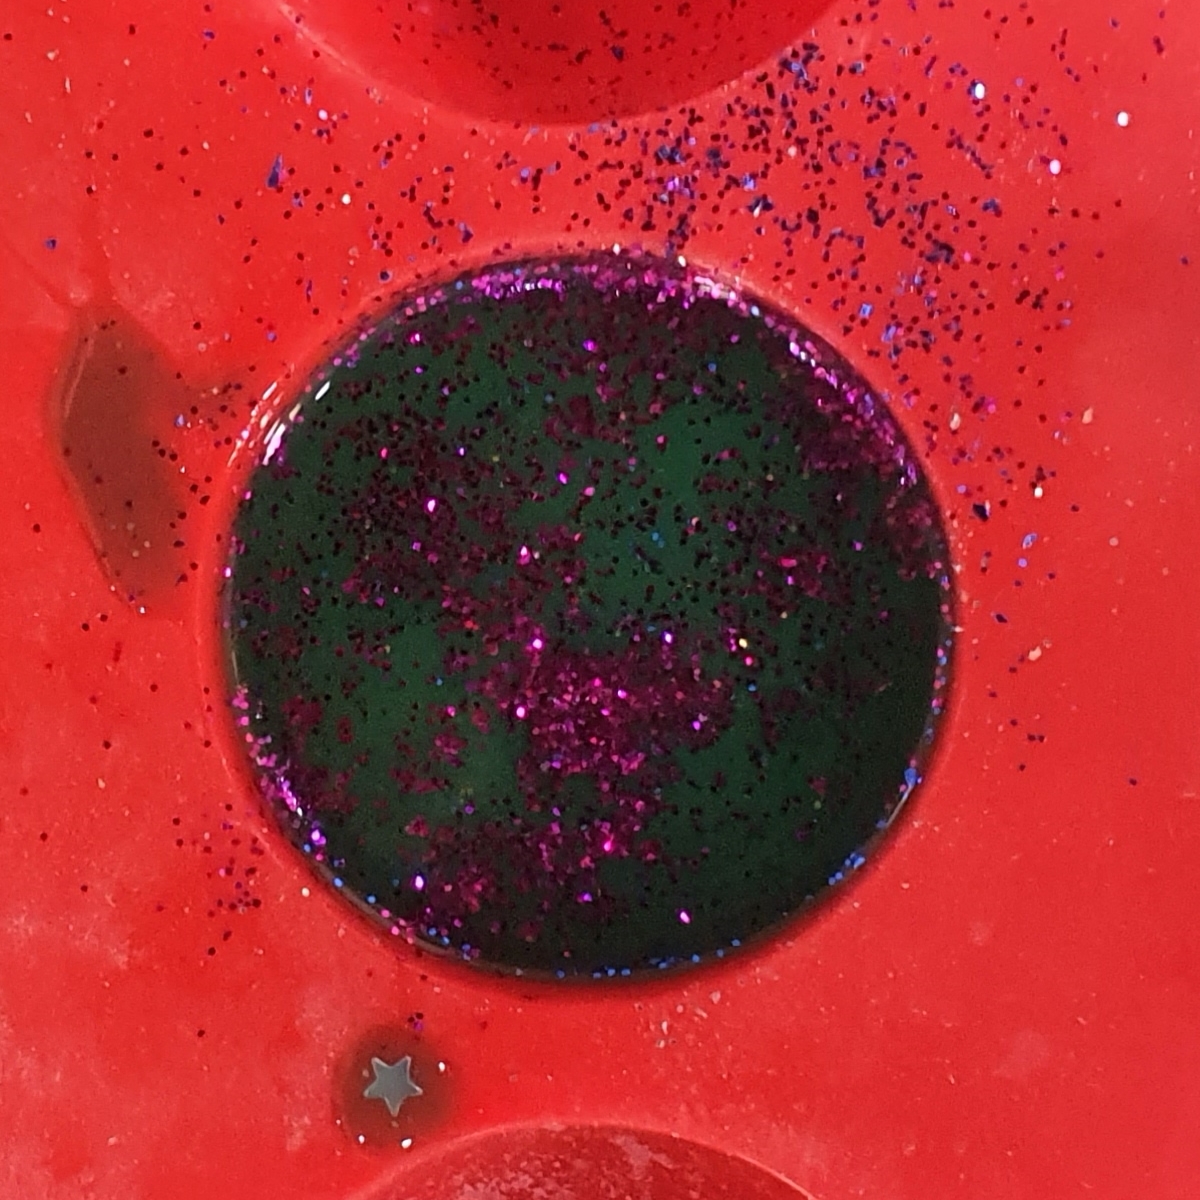
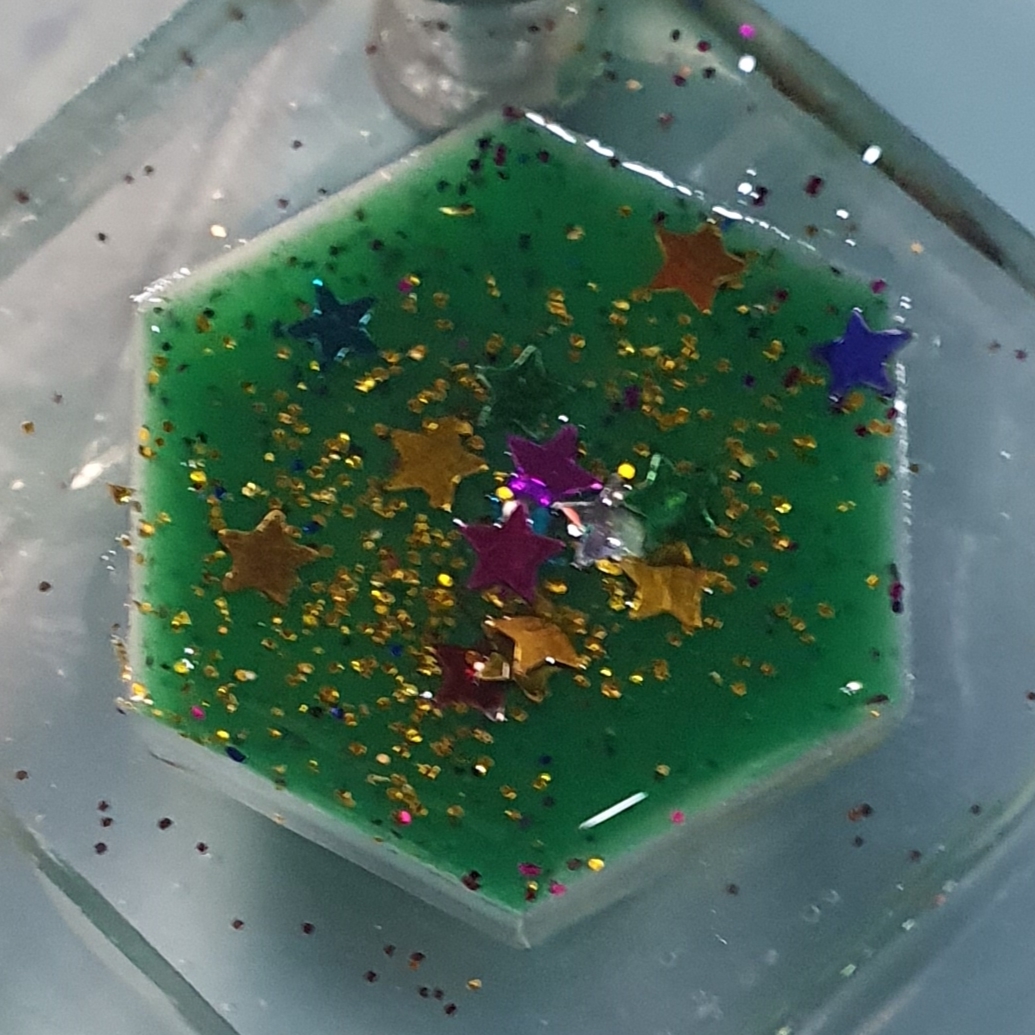
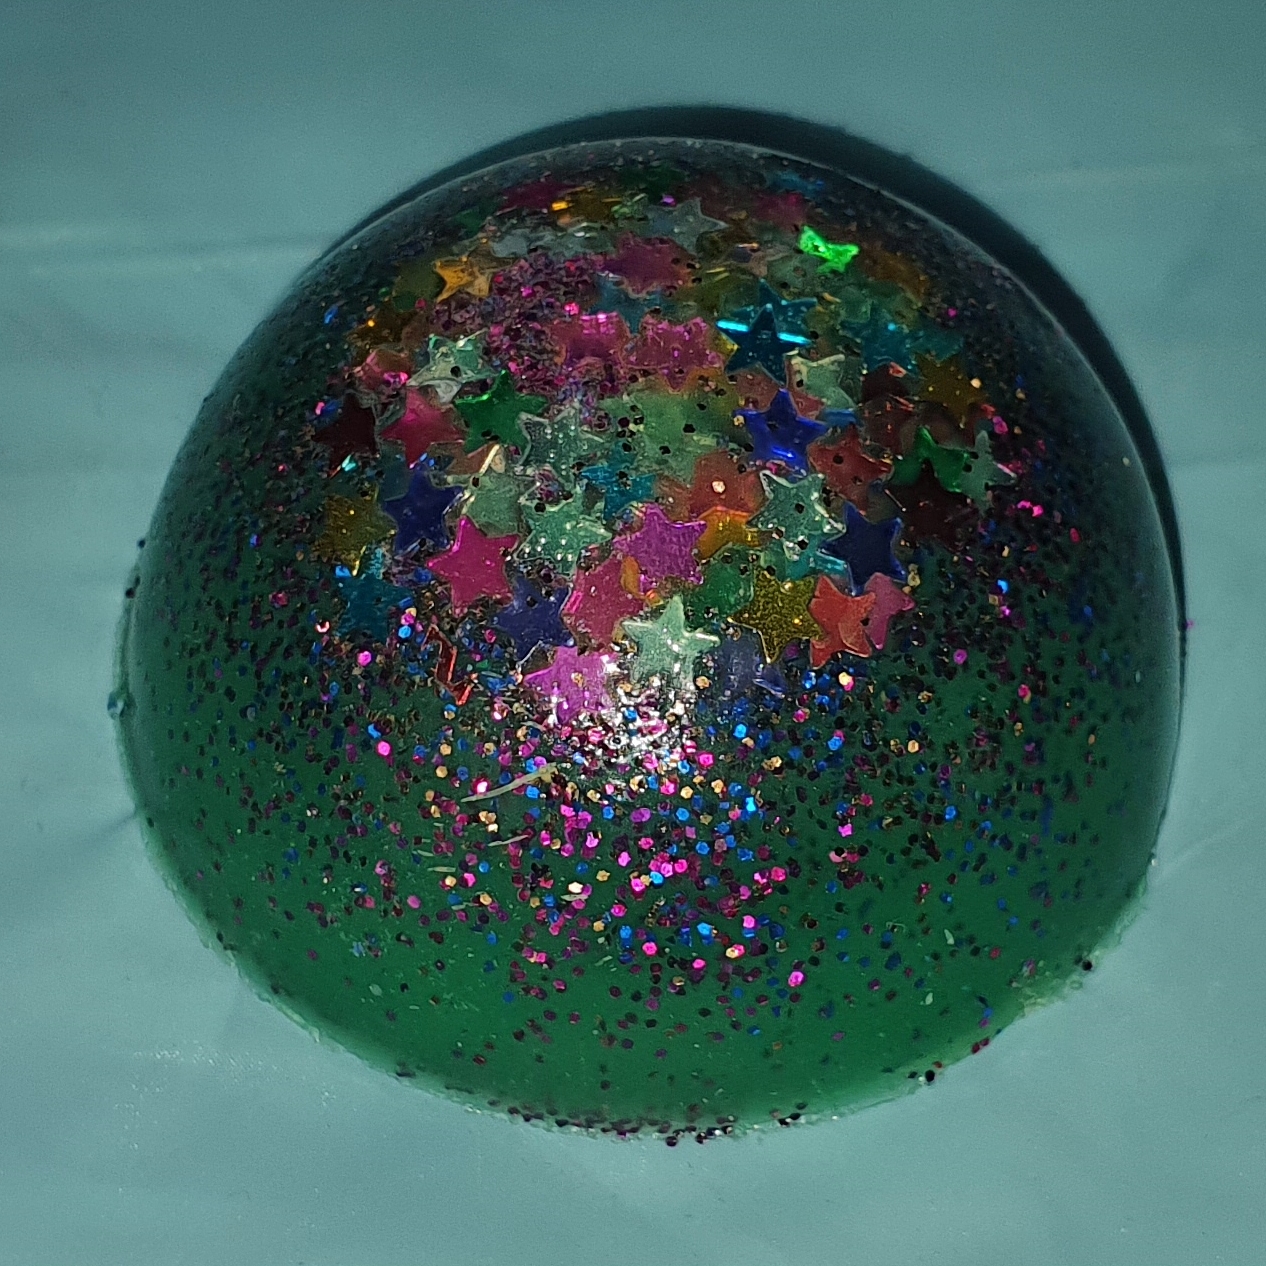
these agents need to be mixed with a 1:1 ratio so equal amounts of A and B need to be measured separately on a small scale in plastic cups. I decided to measure 15g of both A and B. After that, I added A to B and mixed them well. Then, I added green coloring to the mixture and stirred well.
Gloves need to be worn during the process to prevent possible allergic reactions caused by skin exposure to the materials. Also, separate spoons should be used to extract the agents. In addition, the scale must be zero-ed before each measurement to neglect the weight of cups.
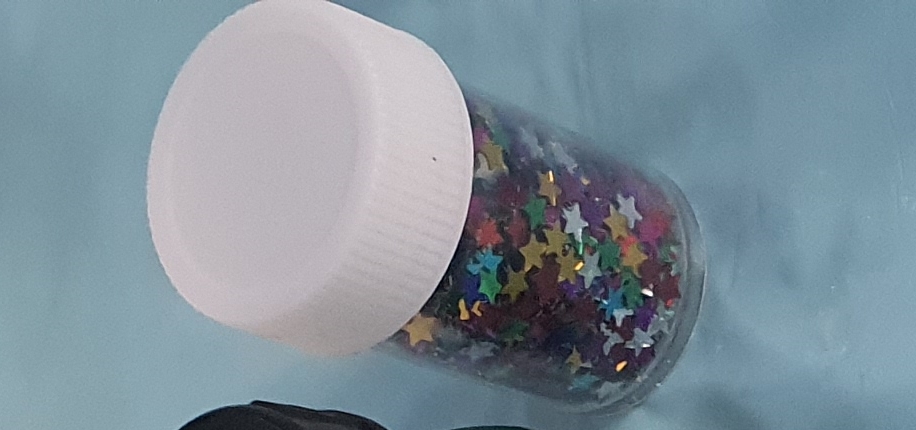
After stirring the mixture, I added sprinkles to the mix.
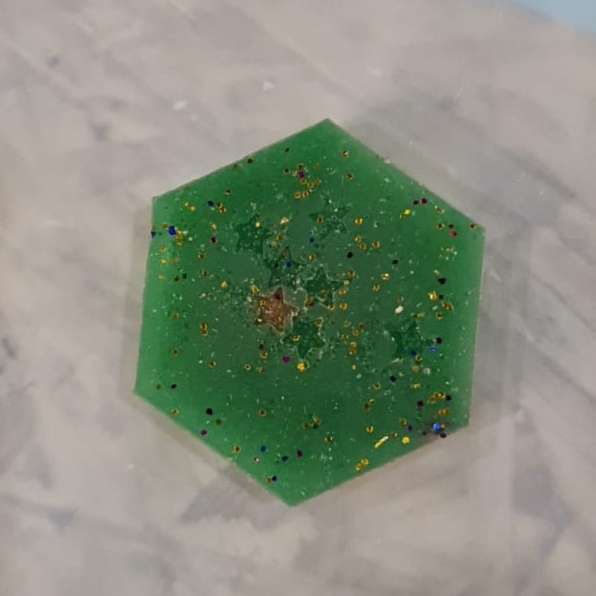
Finally, I poured some of it into a semi-spherical rubbery plastic mold and the remaining portion into a hexagonal shape on a glassy material as shown bellow:
Finally, after 3-12 hours, the two molds dried up.
My colleagues produced great results as well using different cast and mold materials.
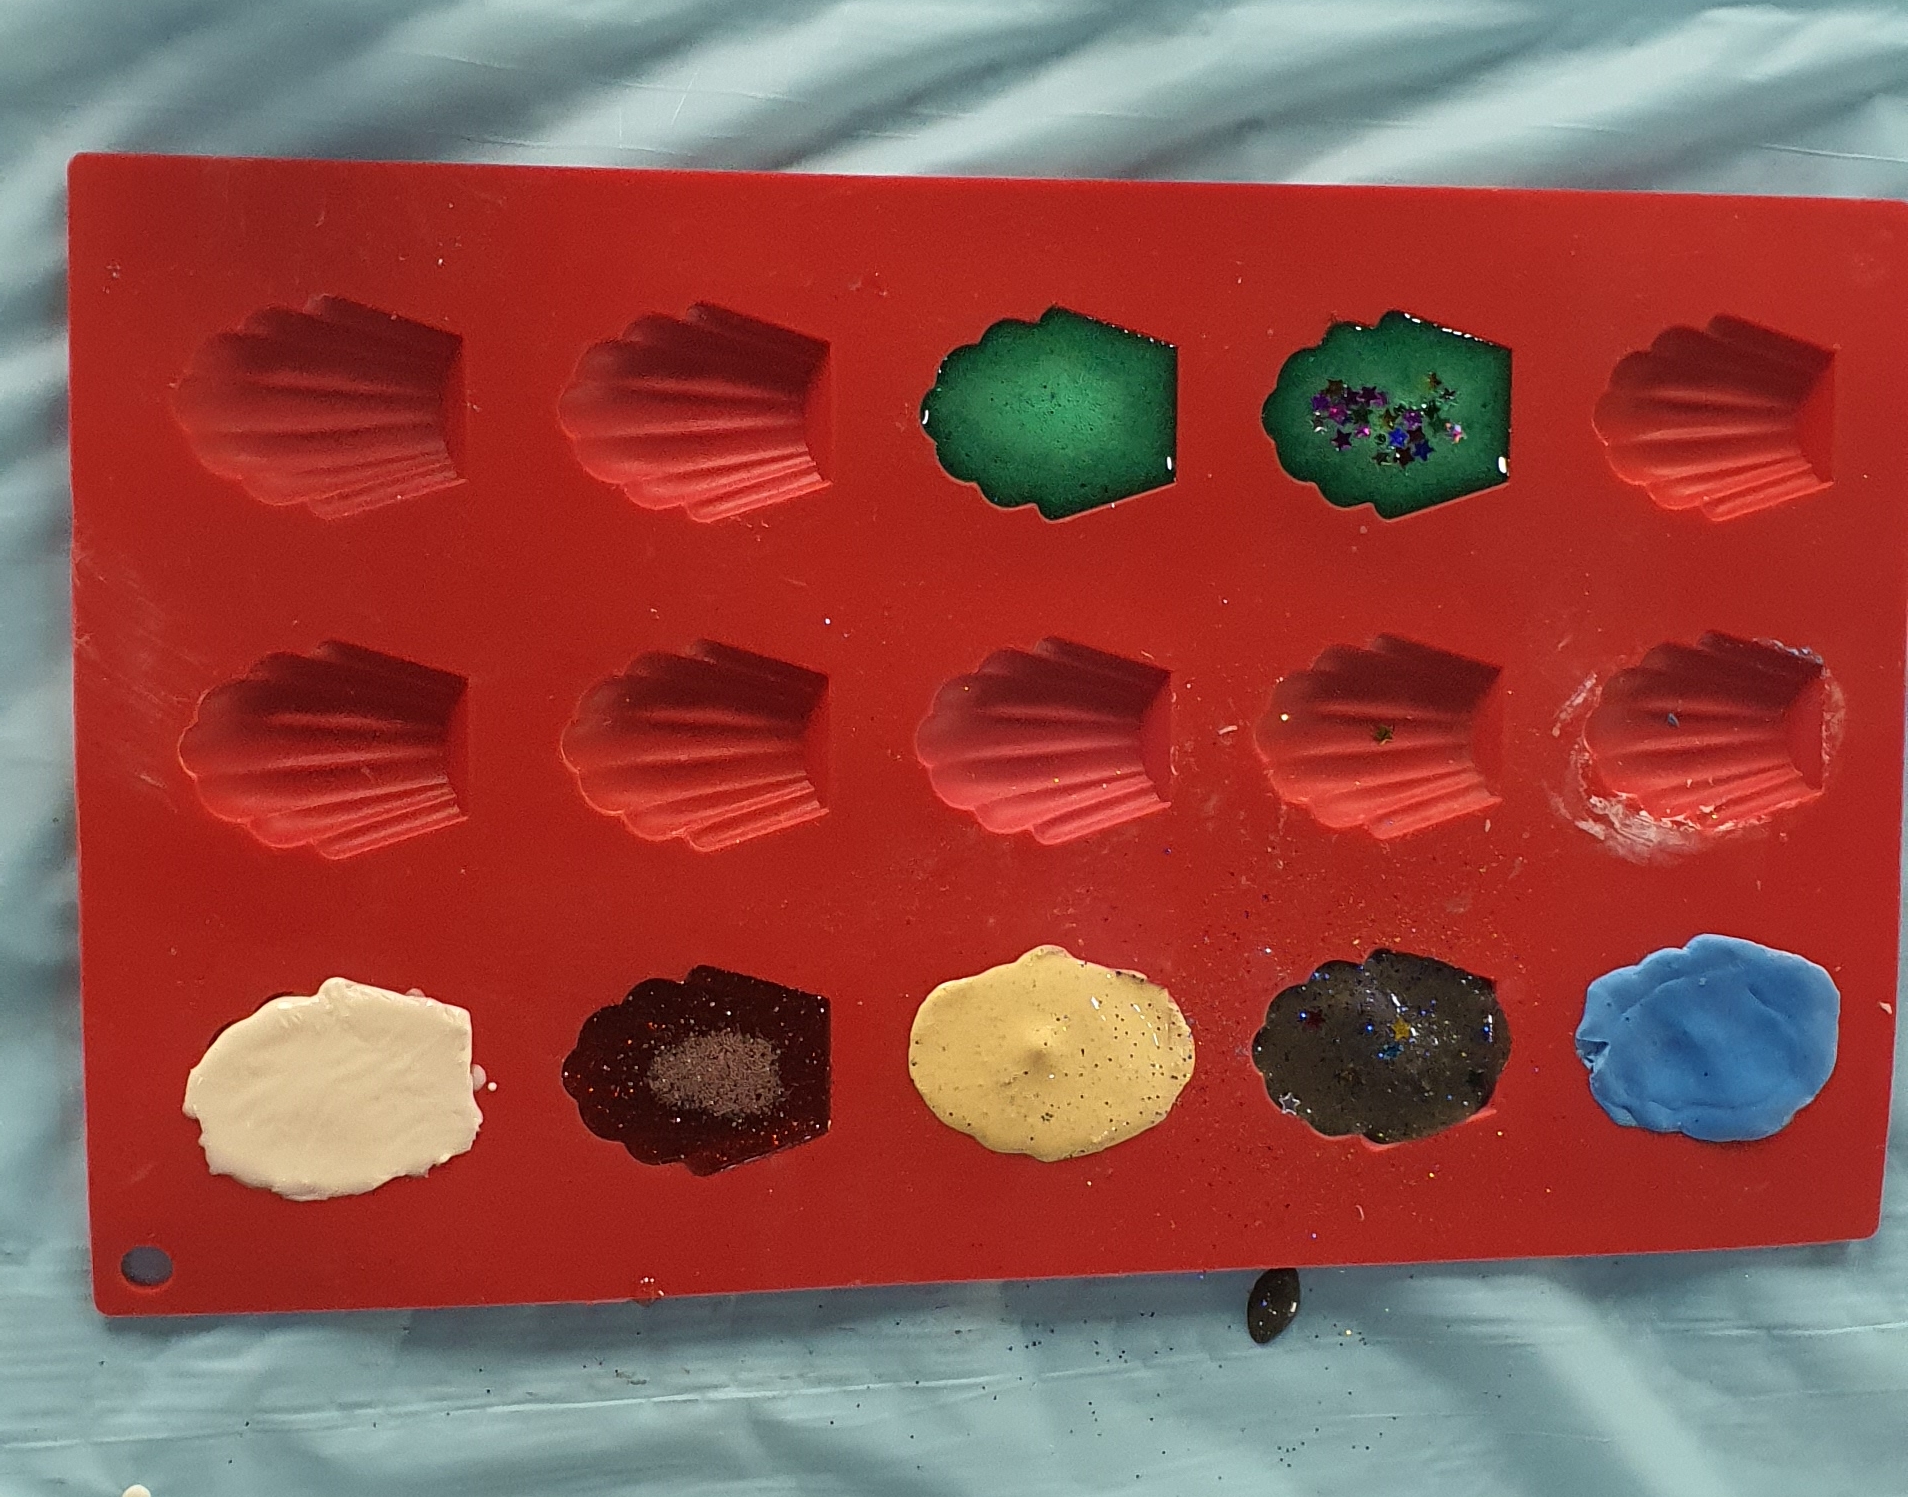
Their work along with the materials they used and the safety instructions can be viewed through their websites:
Moulding And Casting A Self Made 3D Design
3D Design
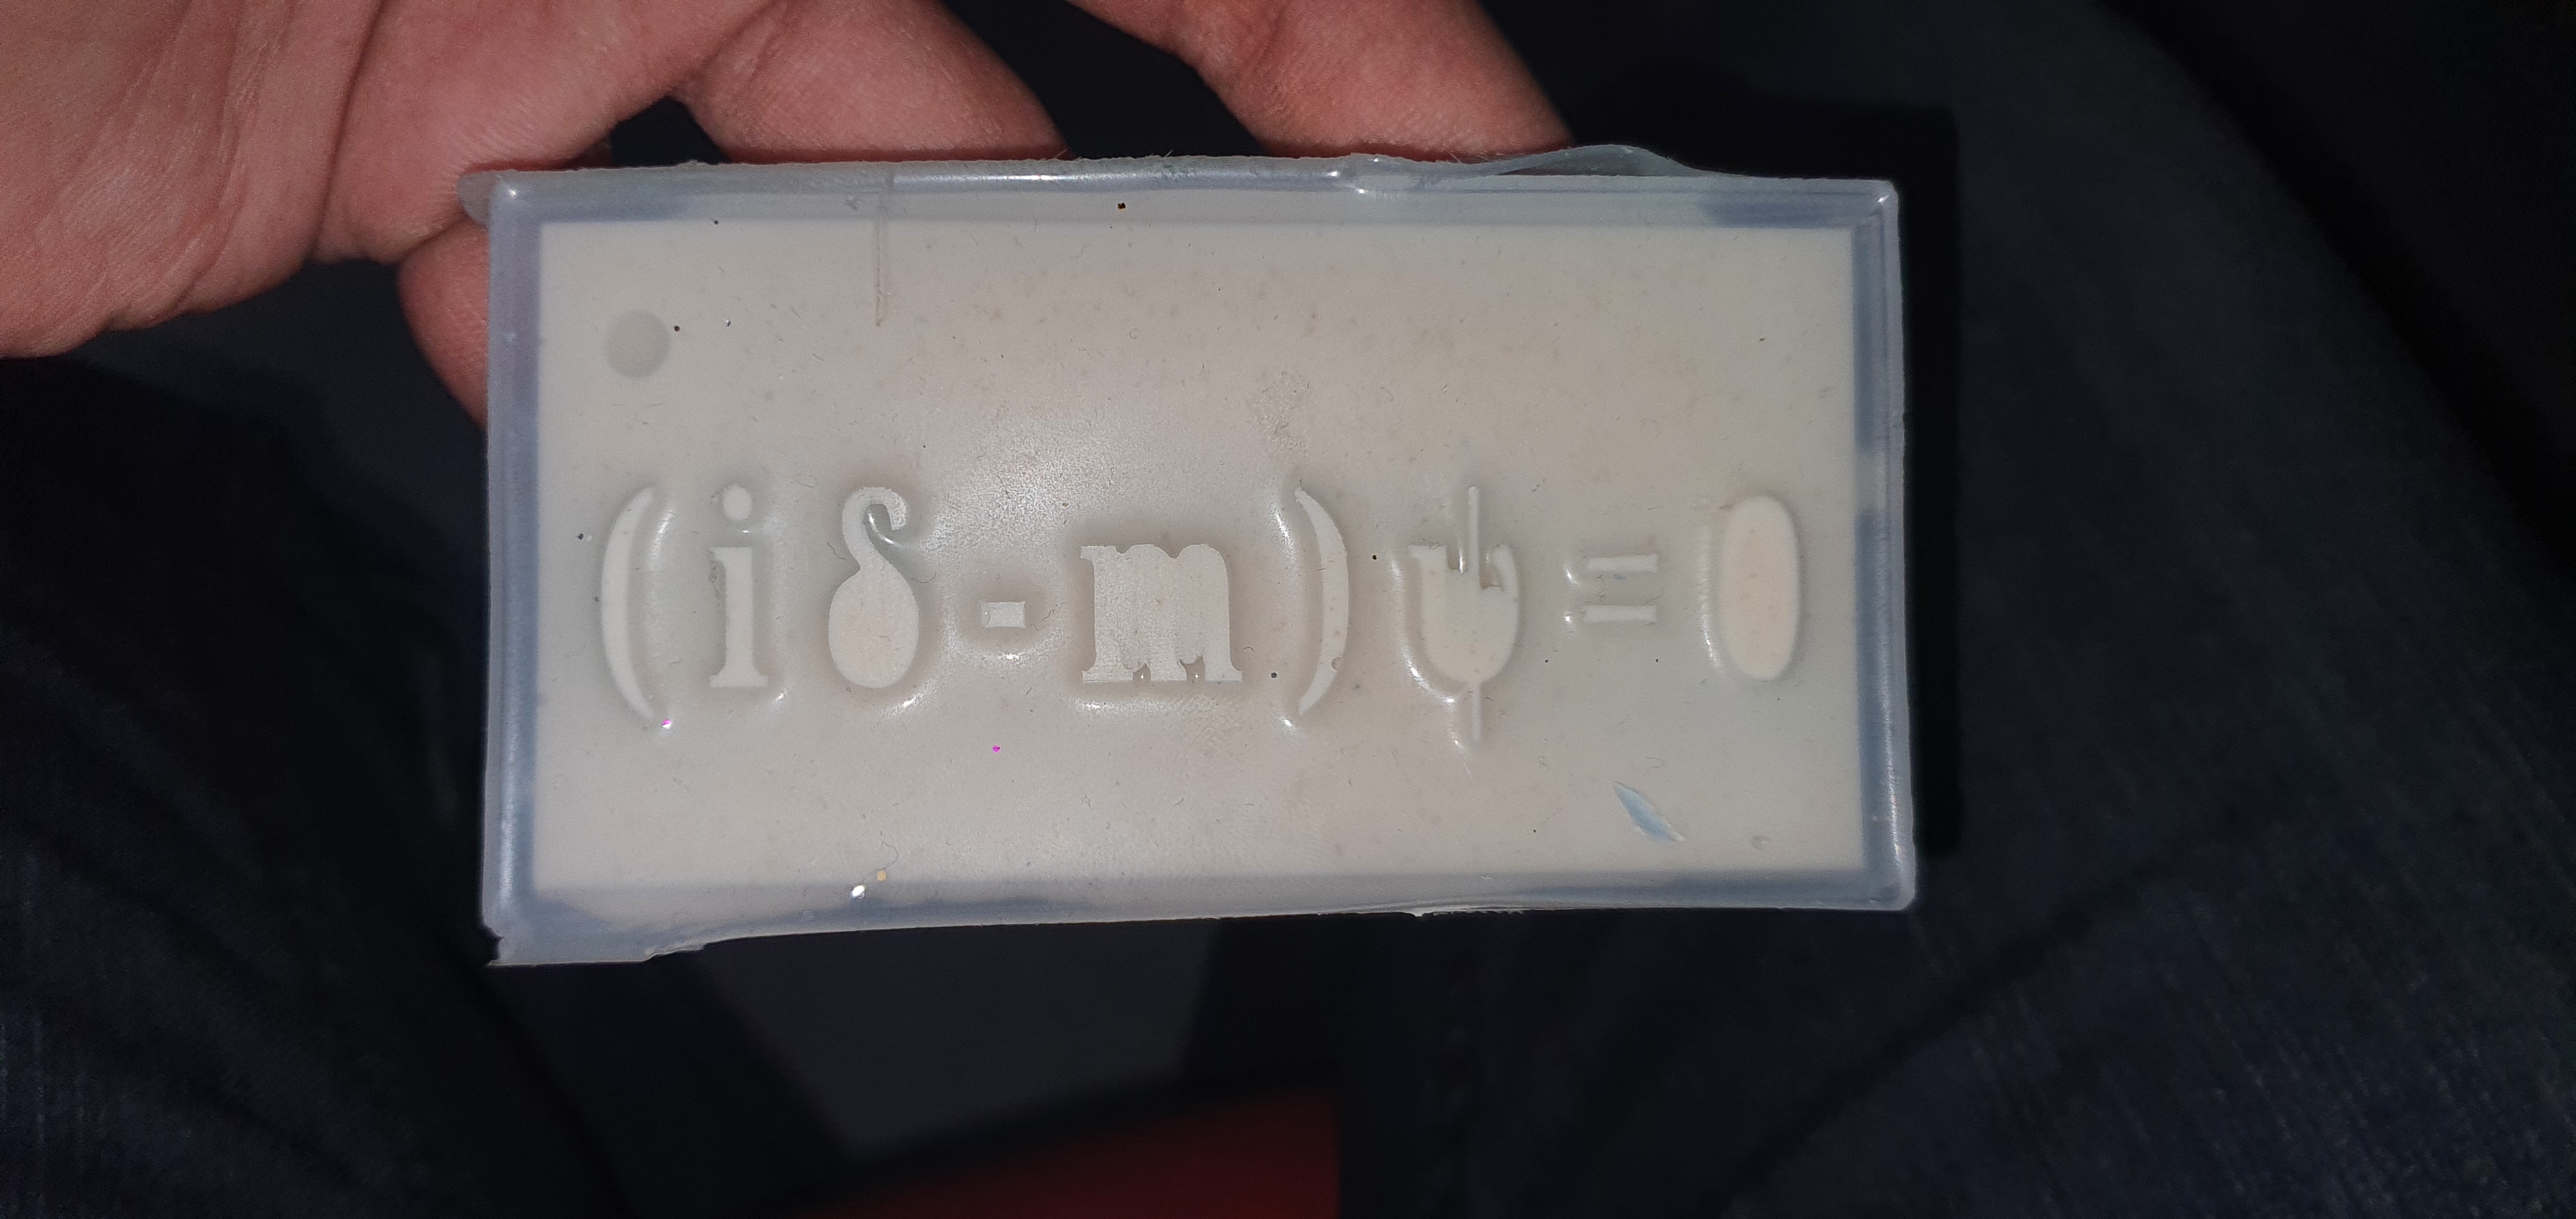
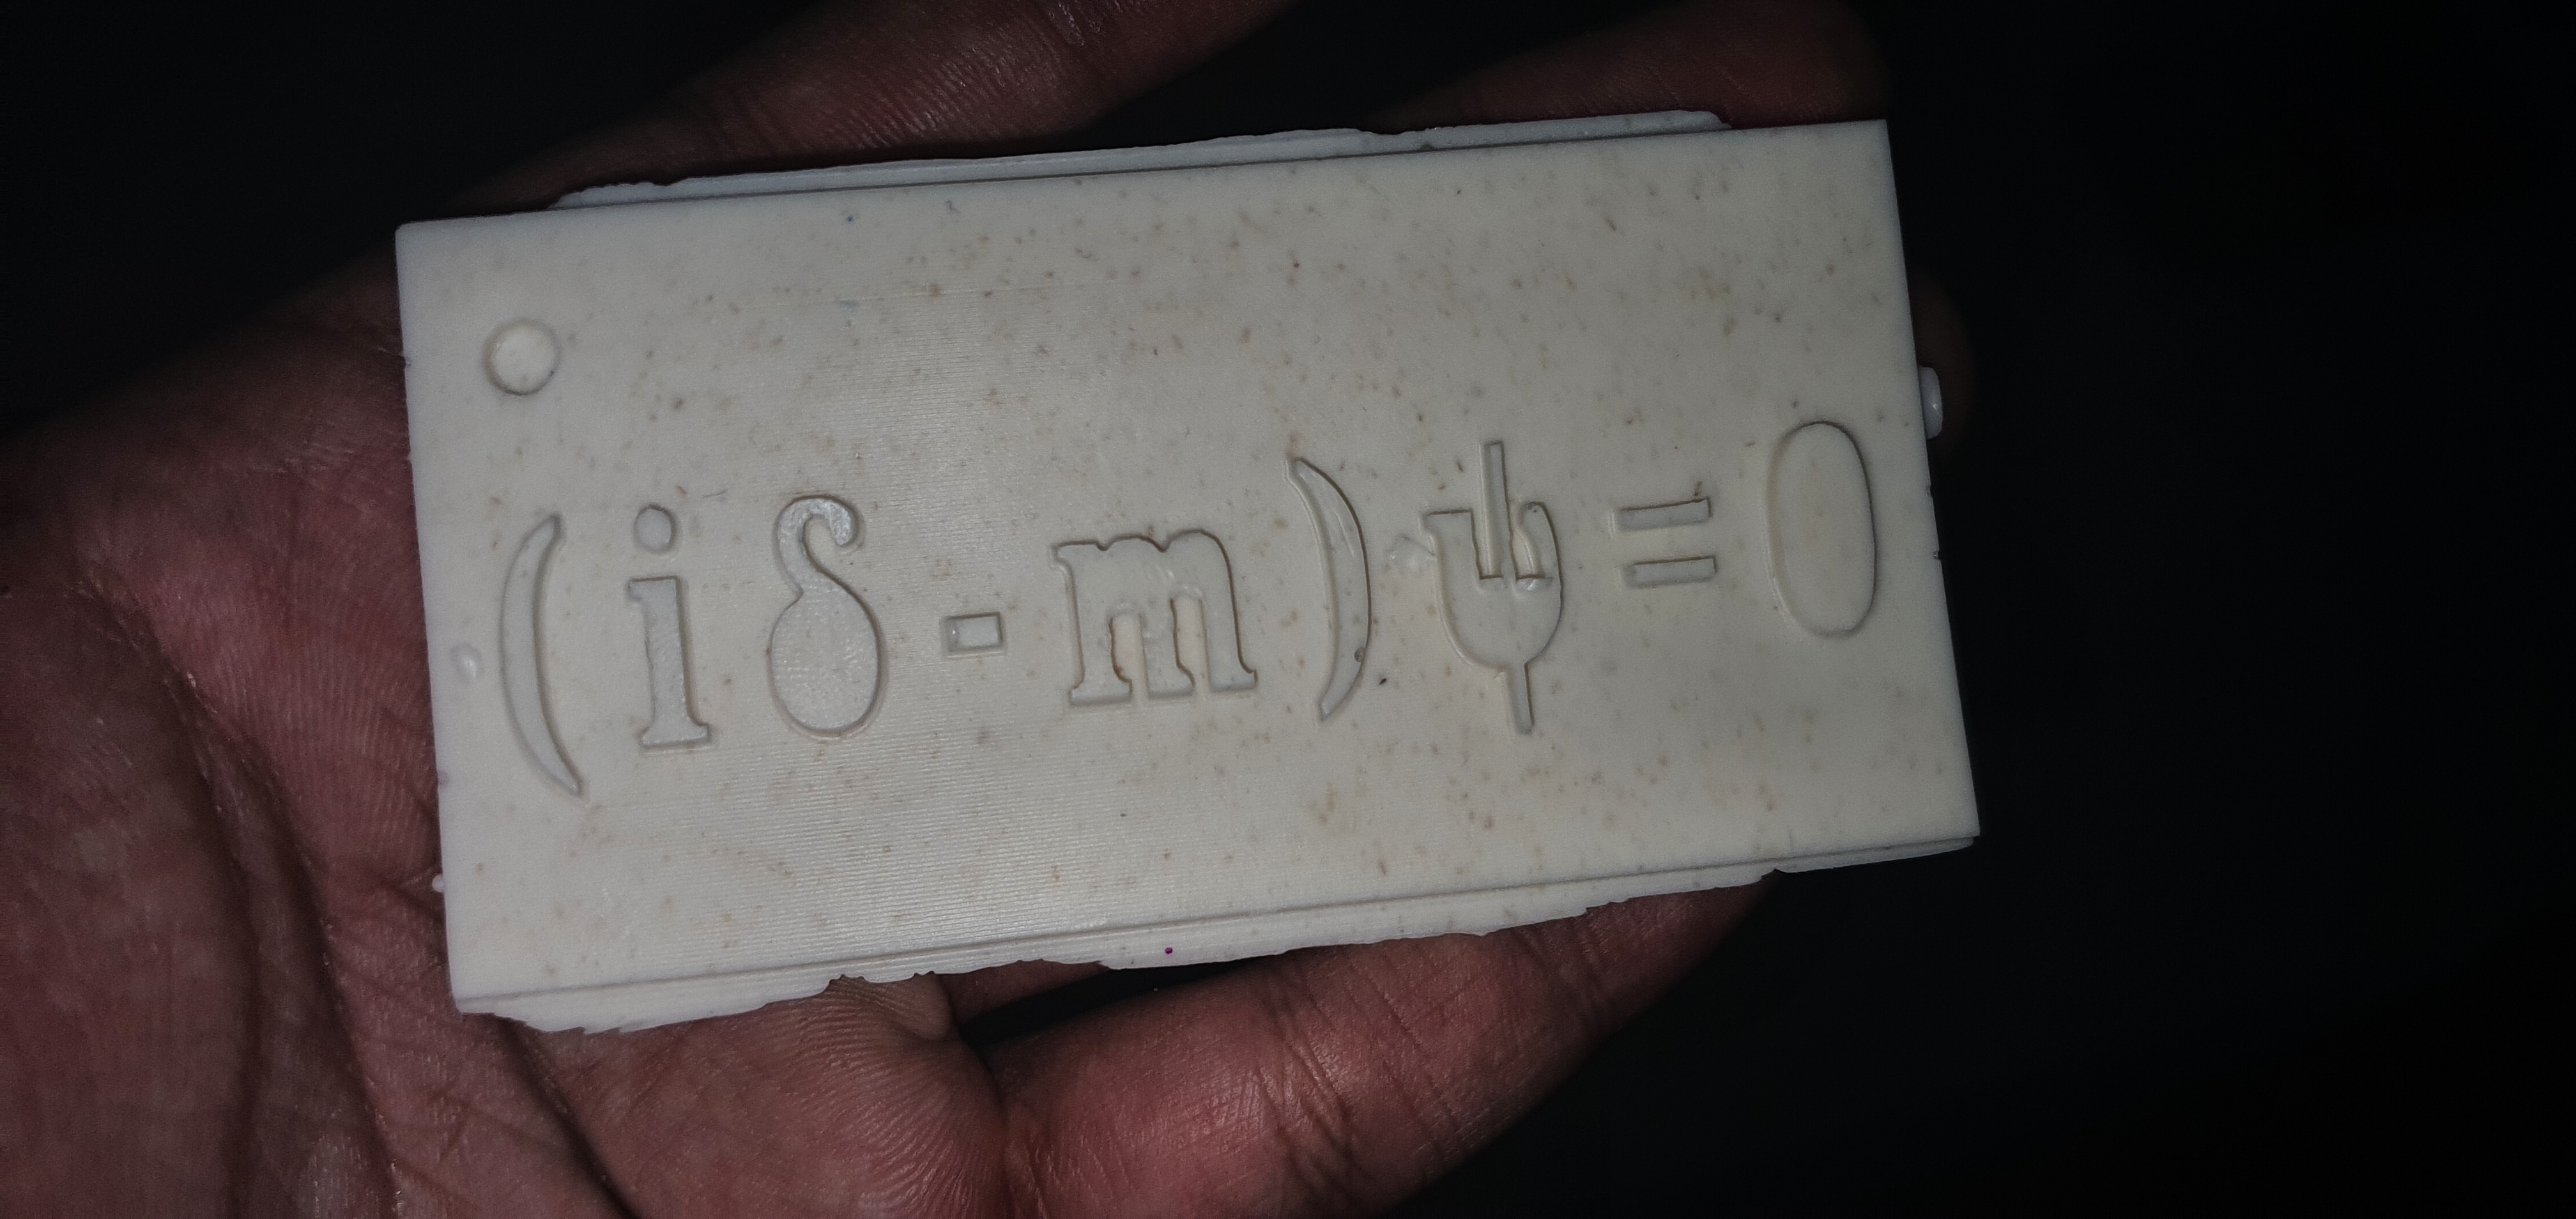
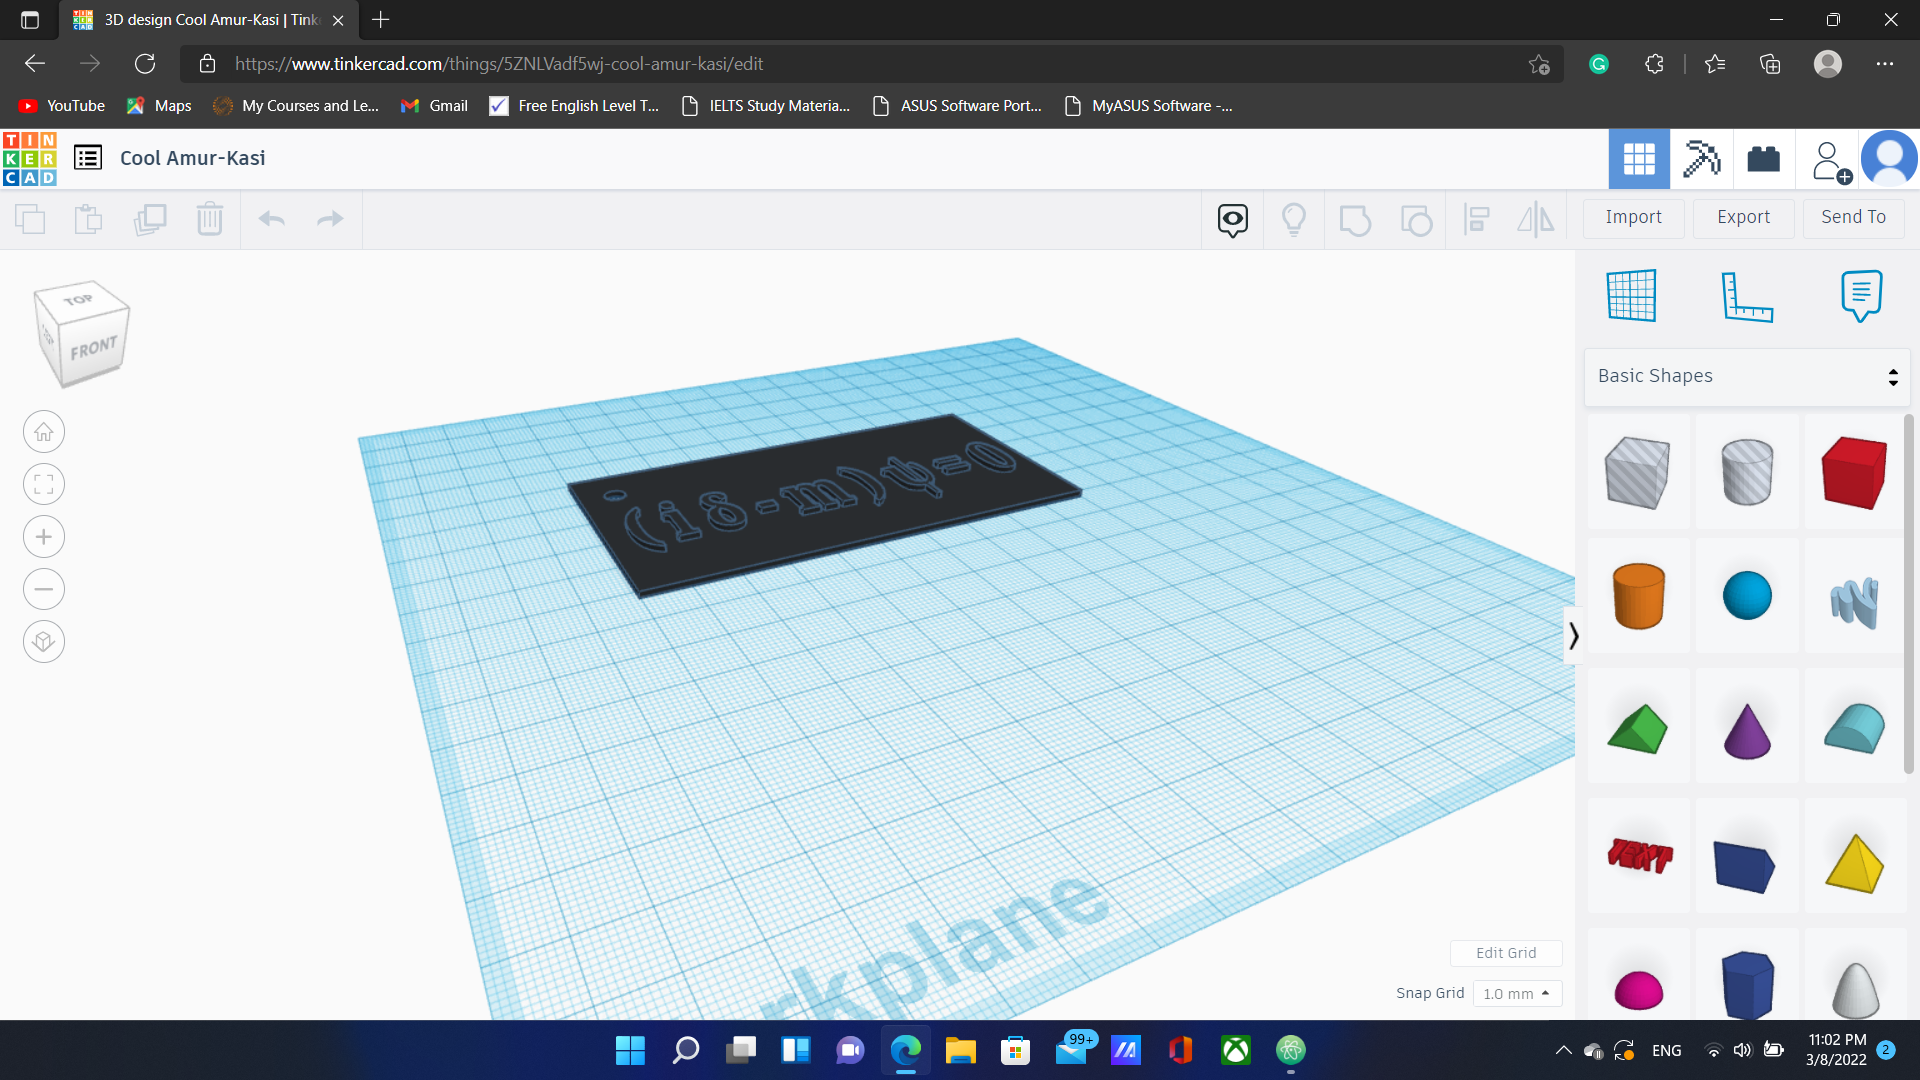
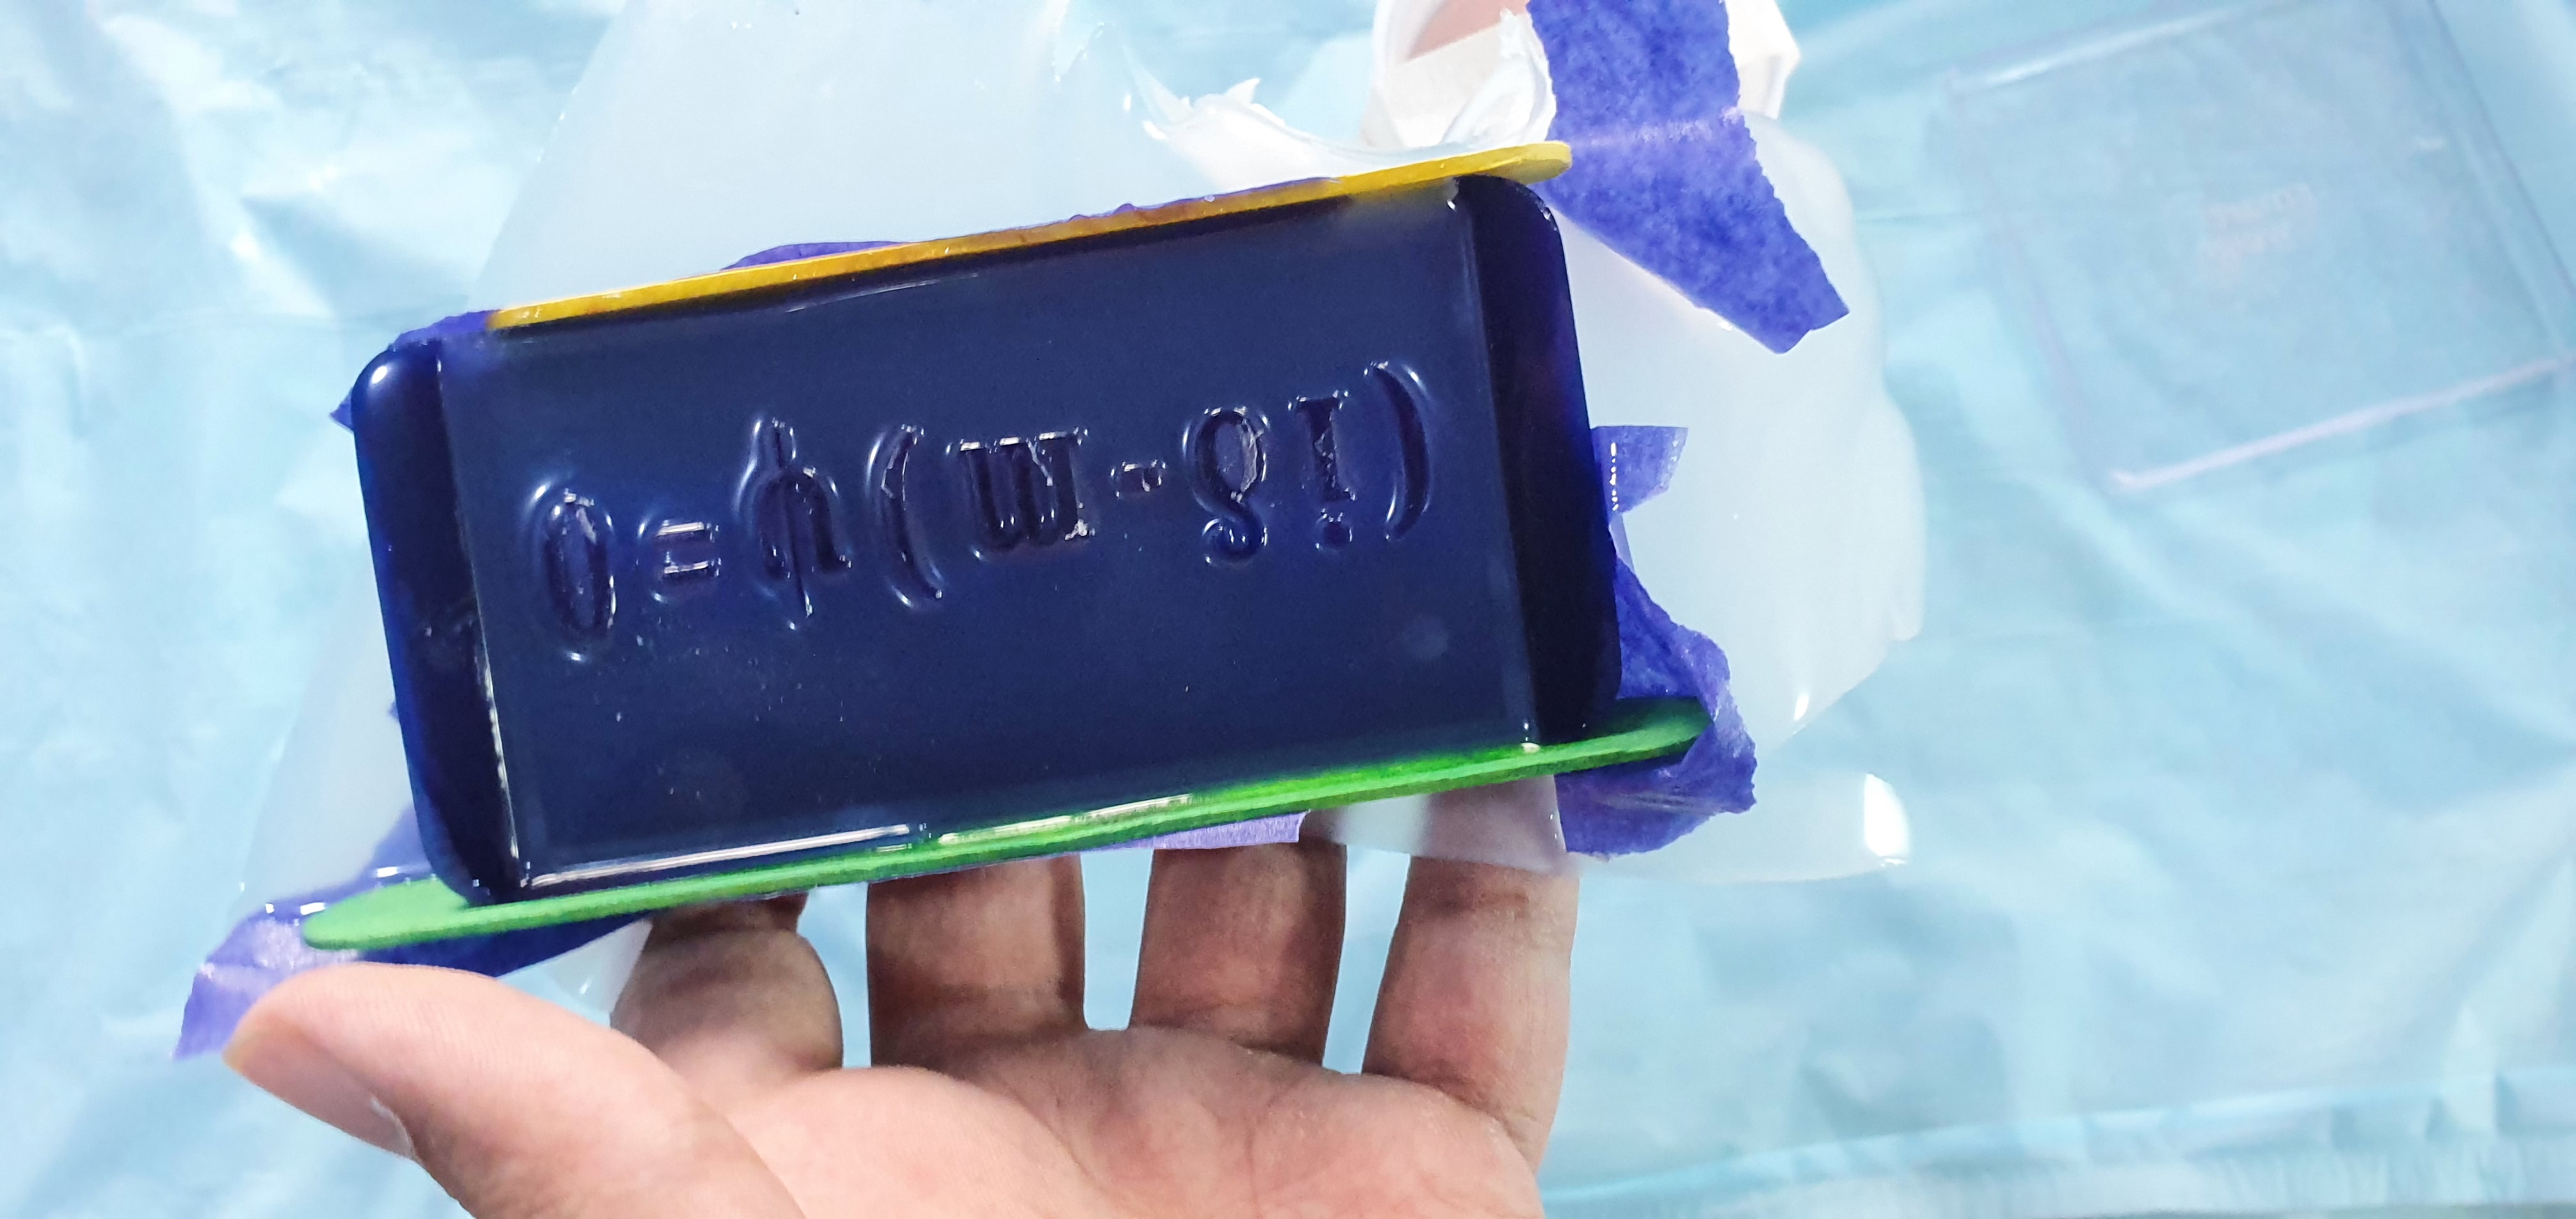
For this assignment, I was asked to create a 3D design and then make it using moulding and casting. I decided to make a medallion with a simplified form of Dirac’s equation written on it.
The video below shows the process and the dimensions I chose:
You can download my design form here You can Tinker my design from here
Milling
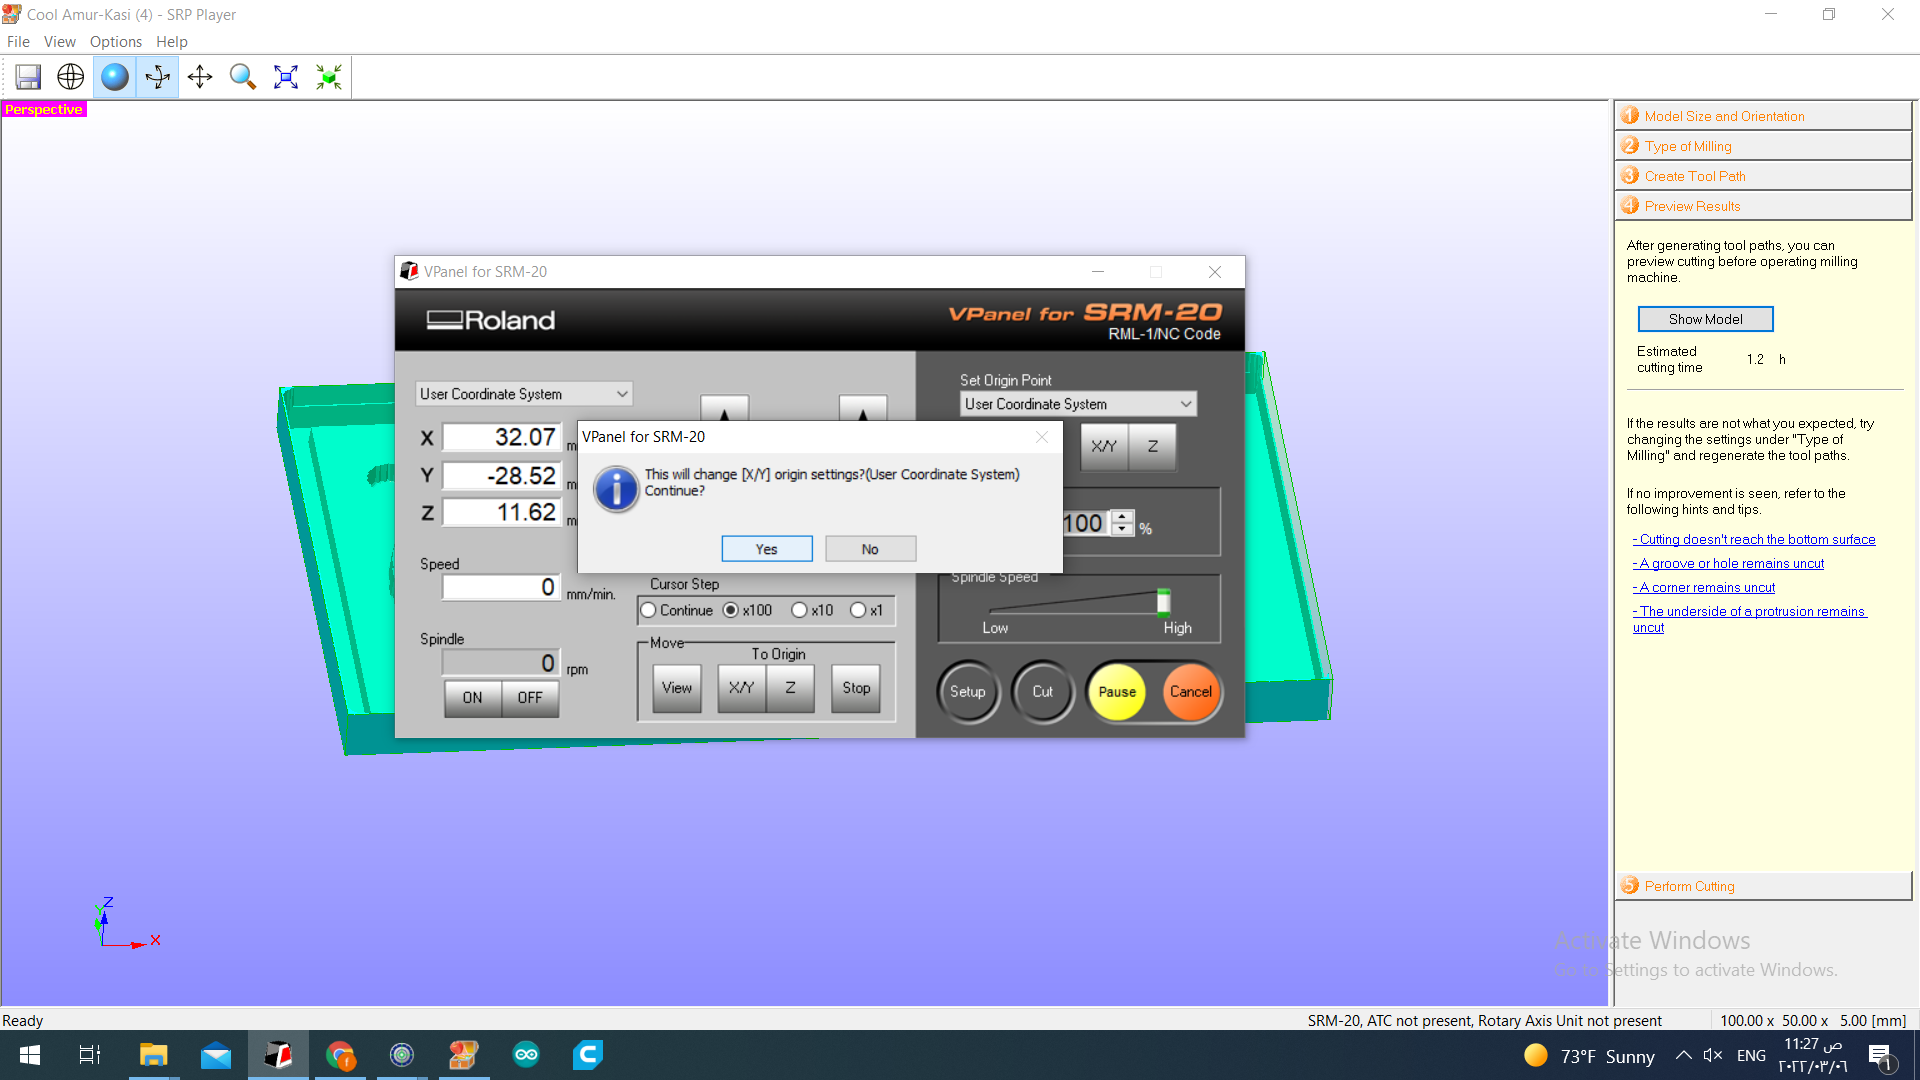
Once I exported the STL file. I sent it to fablab.share@gmail.com to view it in the specialized software called SPR Player. These are the steps I followed:

Finally, the required time turned out to be 1.2 hours and I selected Start Cutting to begin the roughing process.
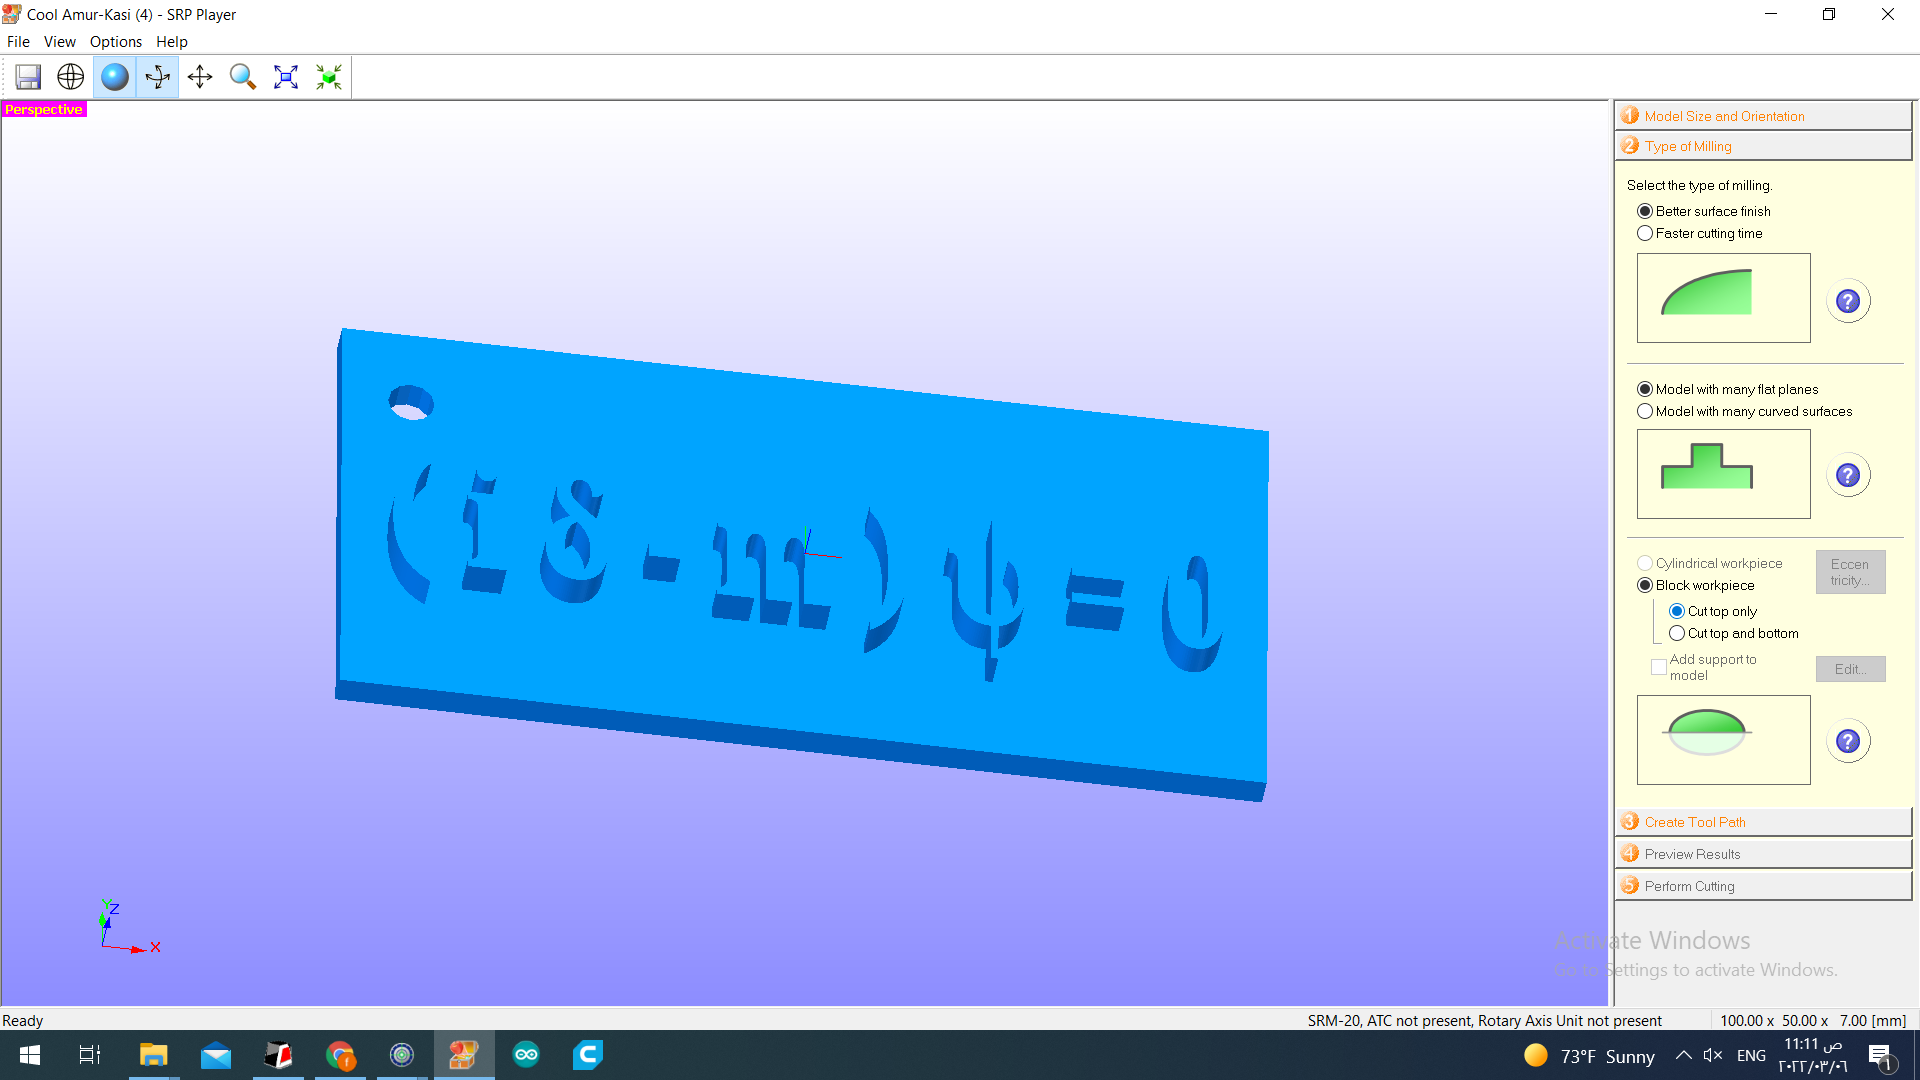
To start the process, I had to first choose a waxy material with suitable dimensions and then mark the central point on it to easily guide the bit to the origin. After that, I attached the waxy block to the base of the small CNC machine using a special double sided tape
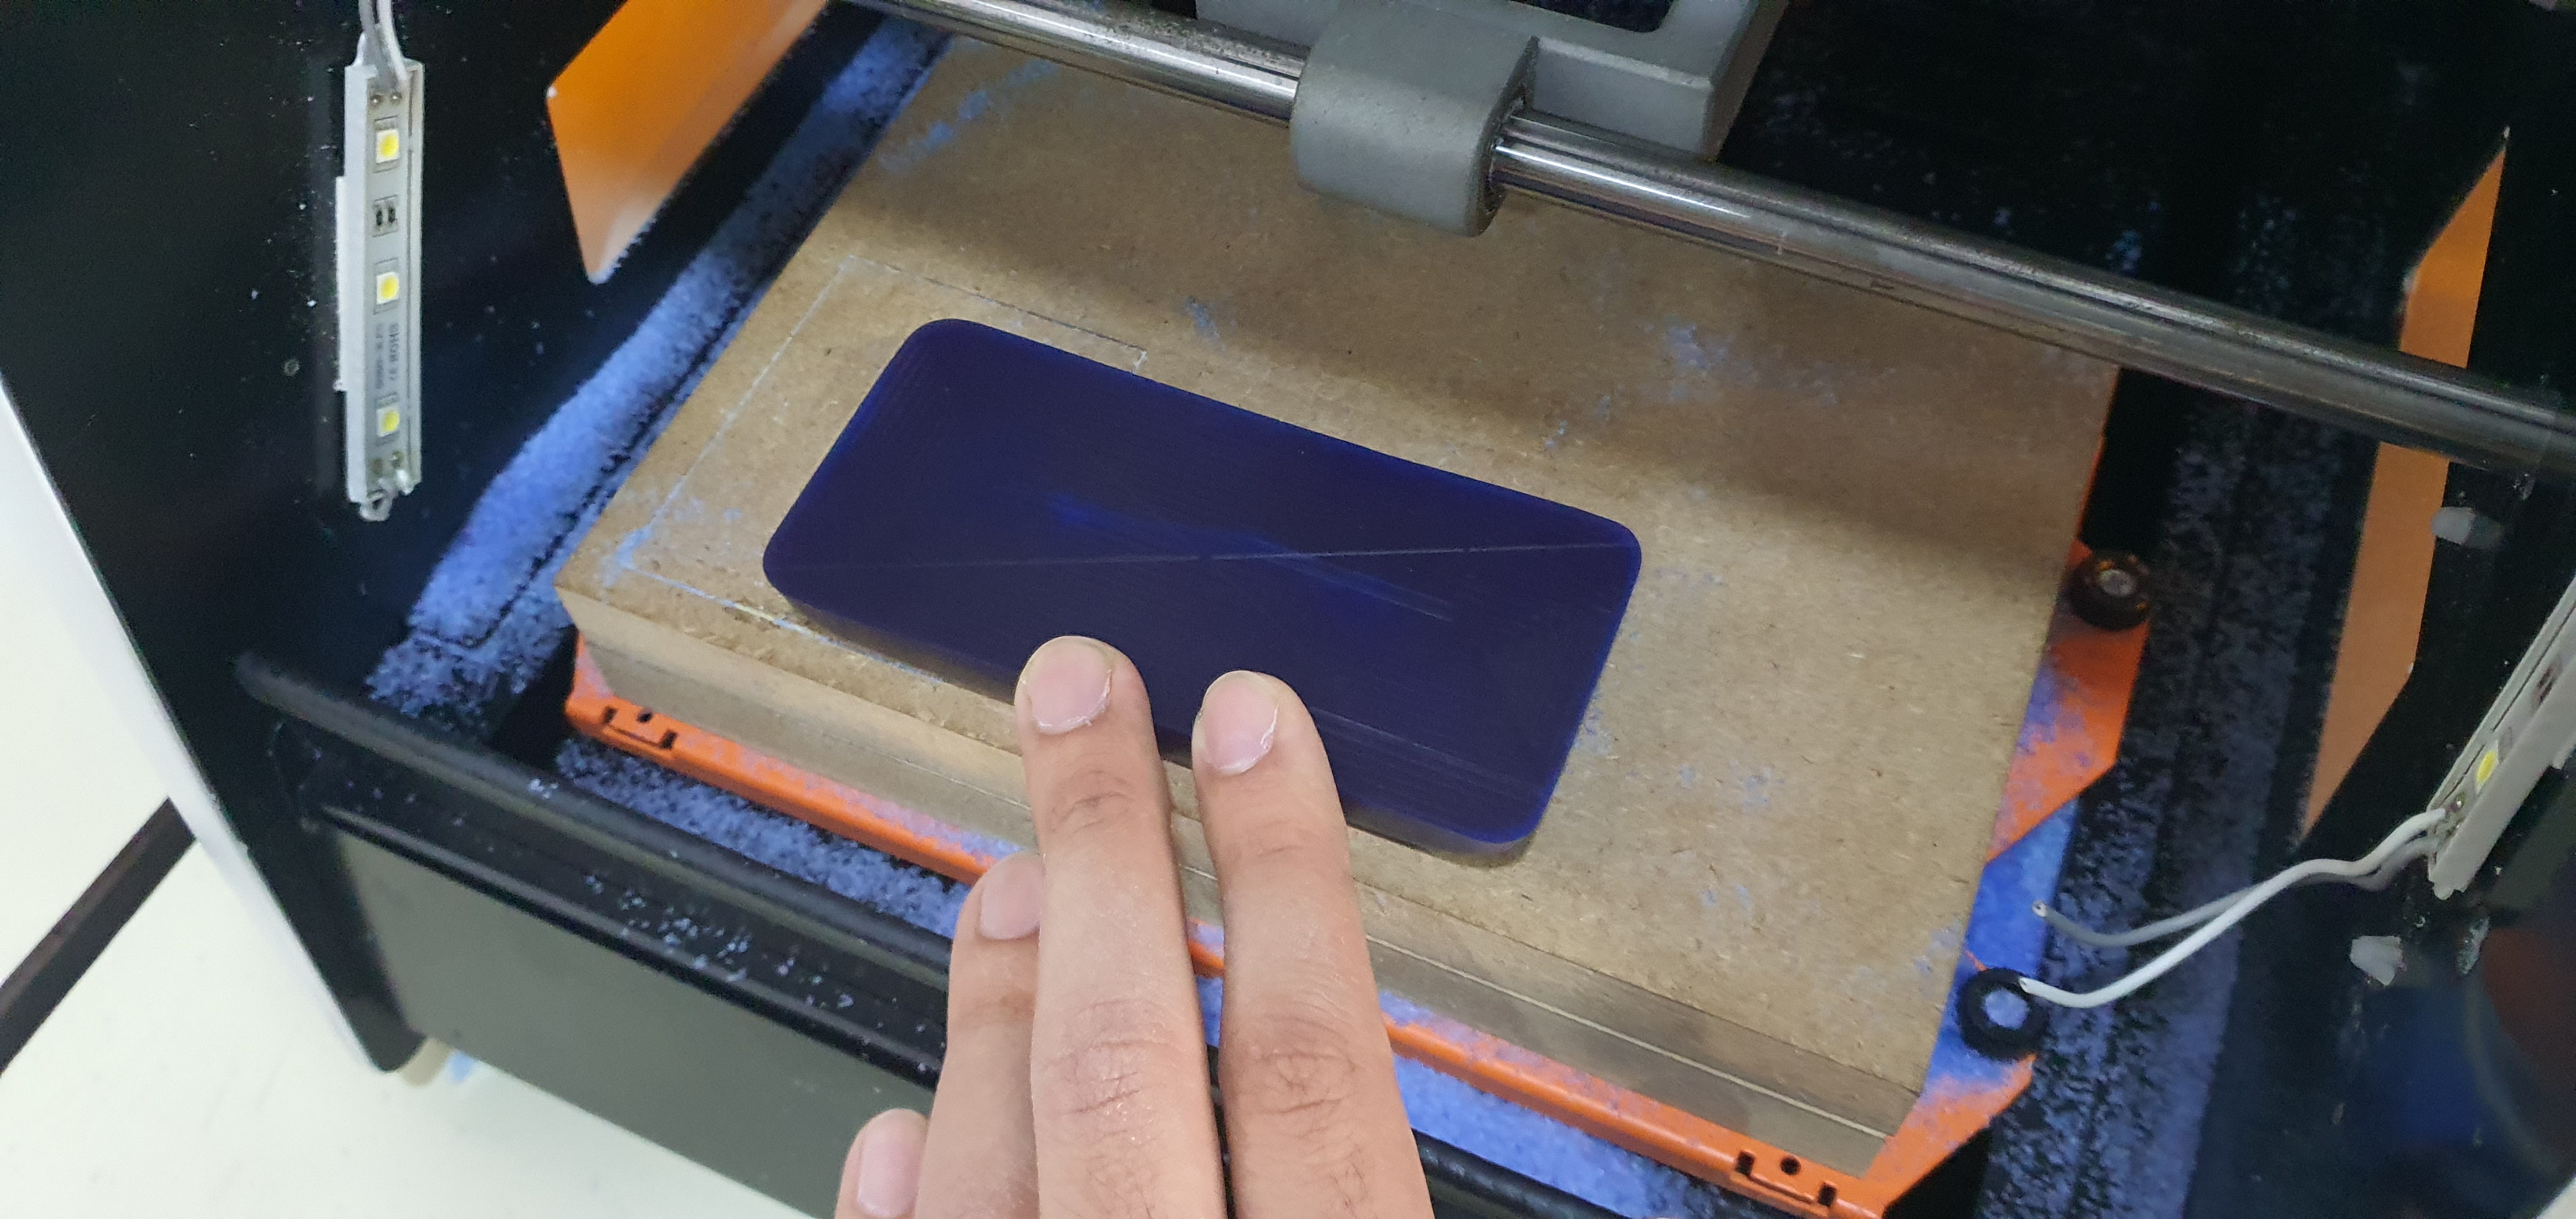
By using the controls in the software, I carefully guided the bit to the center of the block and selected ORIGIN to fix it’s position. Next, I gently fixed the roughing bit above the center and allowed gravity to place it on the surface before tightening it and selecting Z to fix it’s height above the surface.
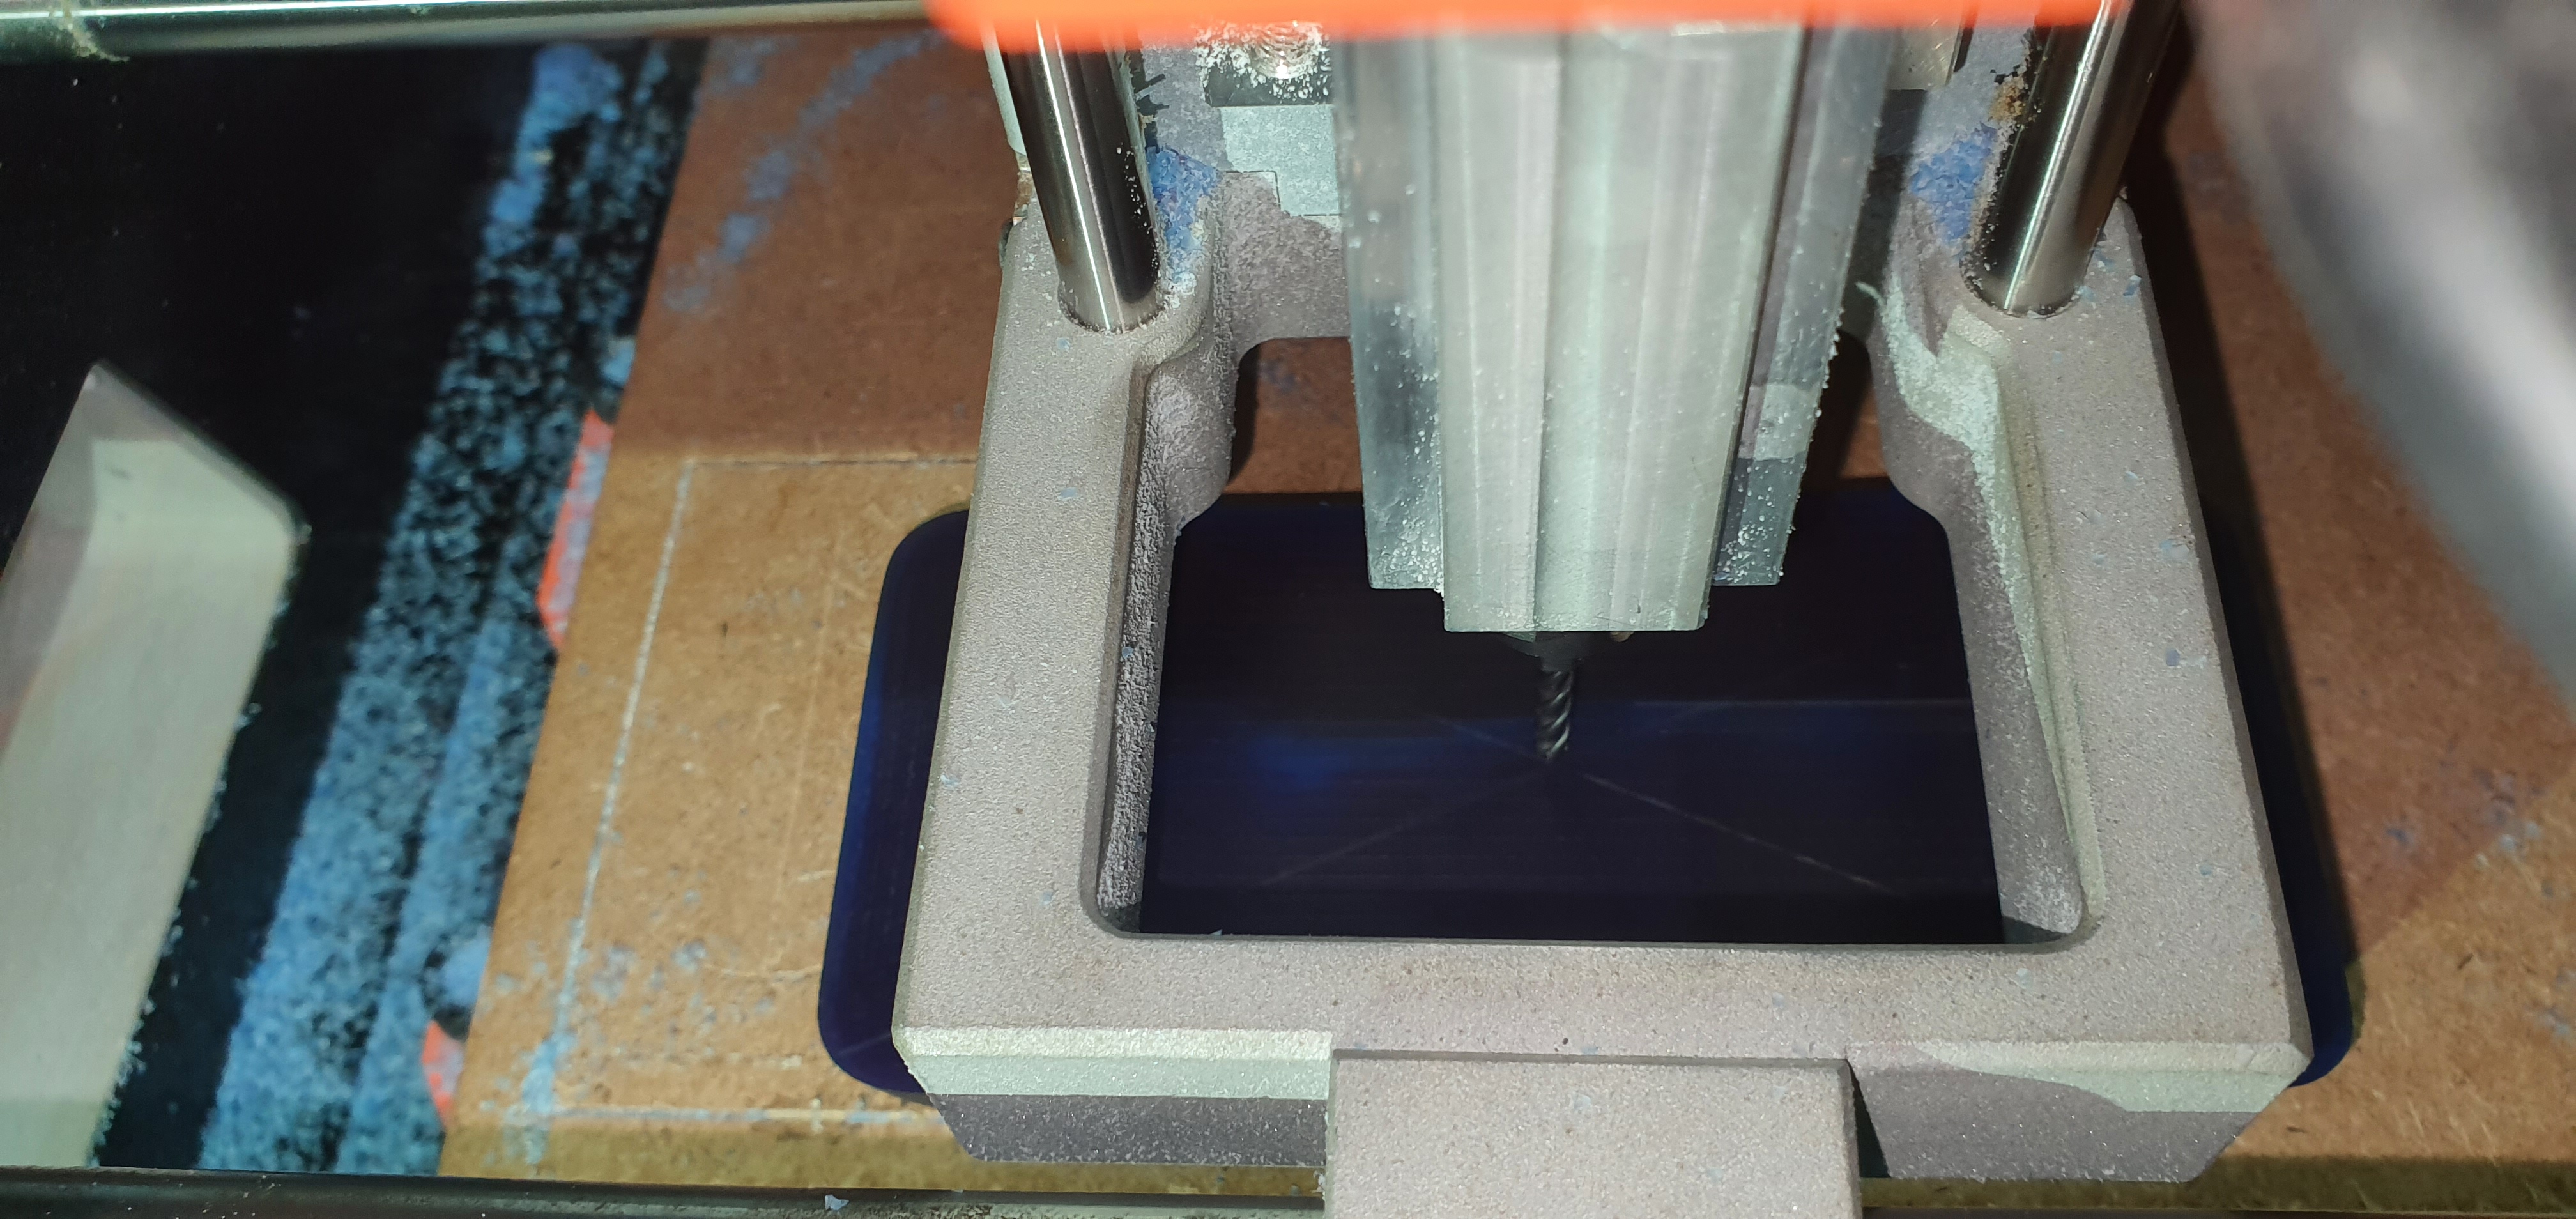
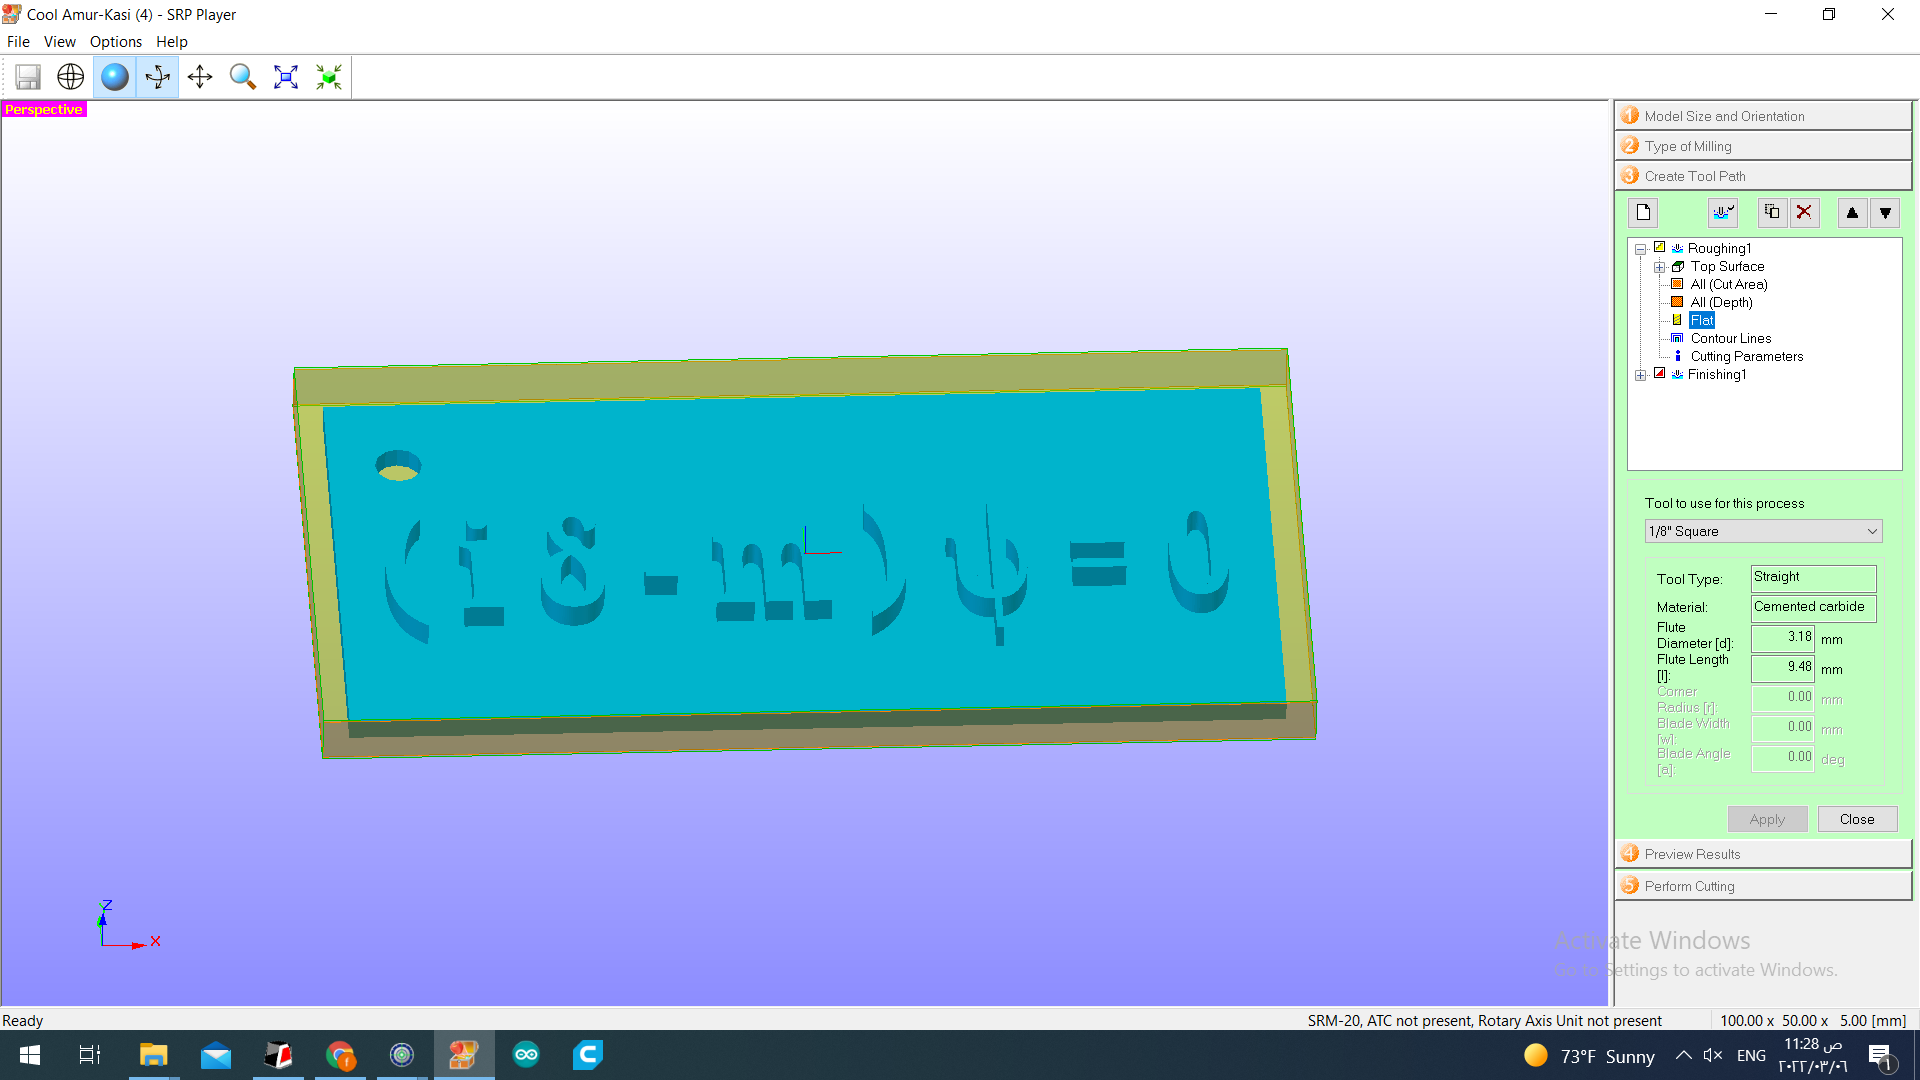
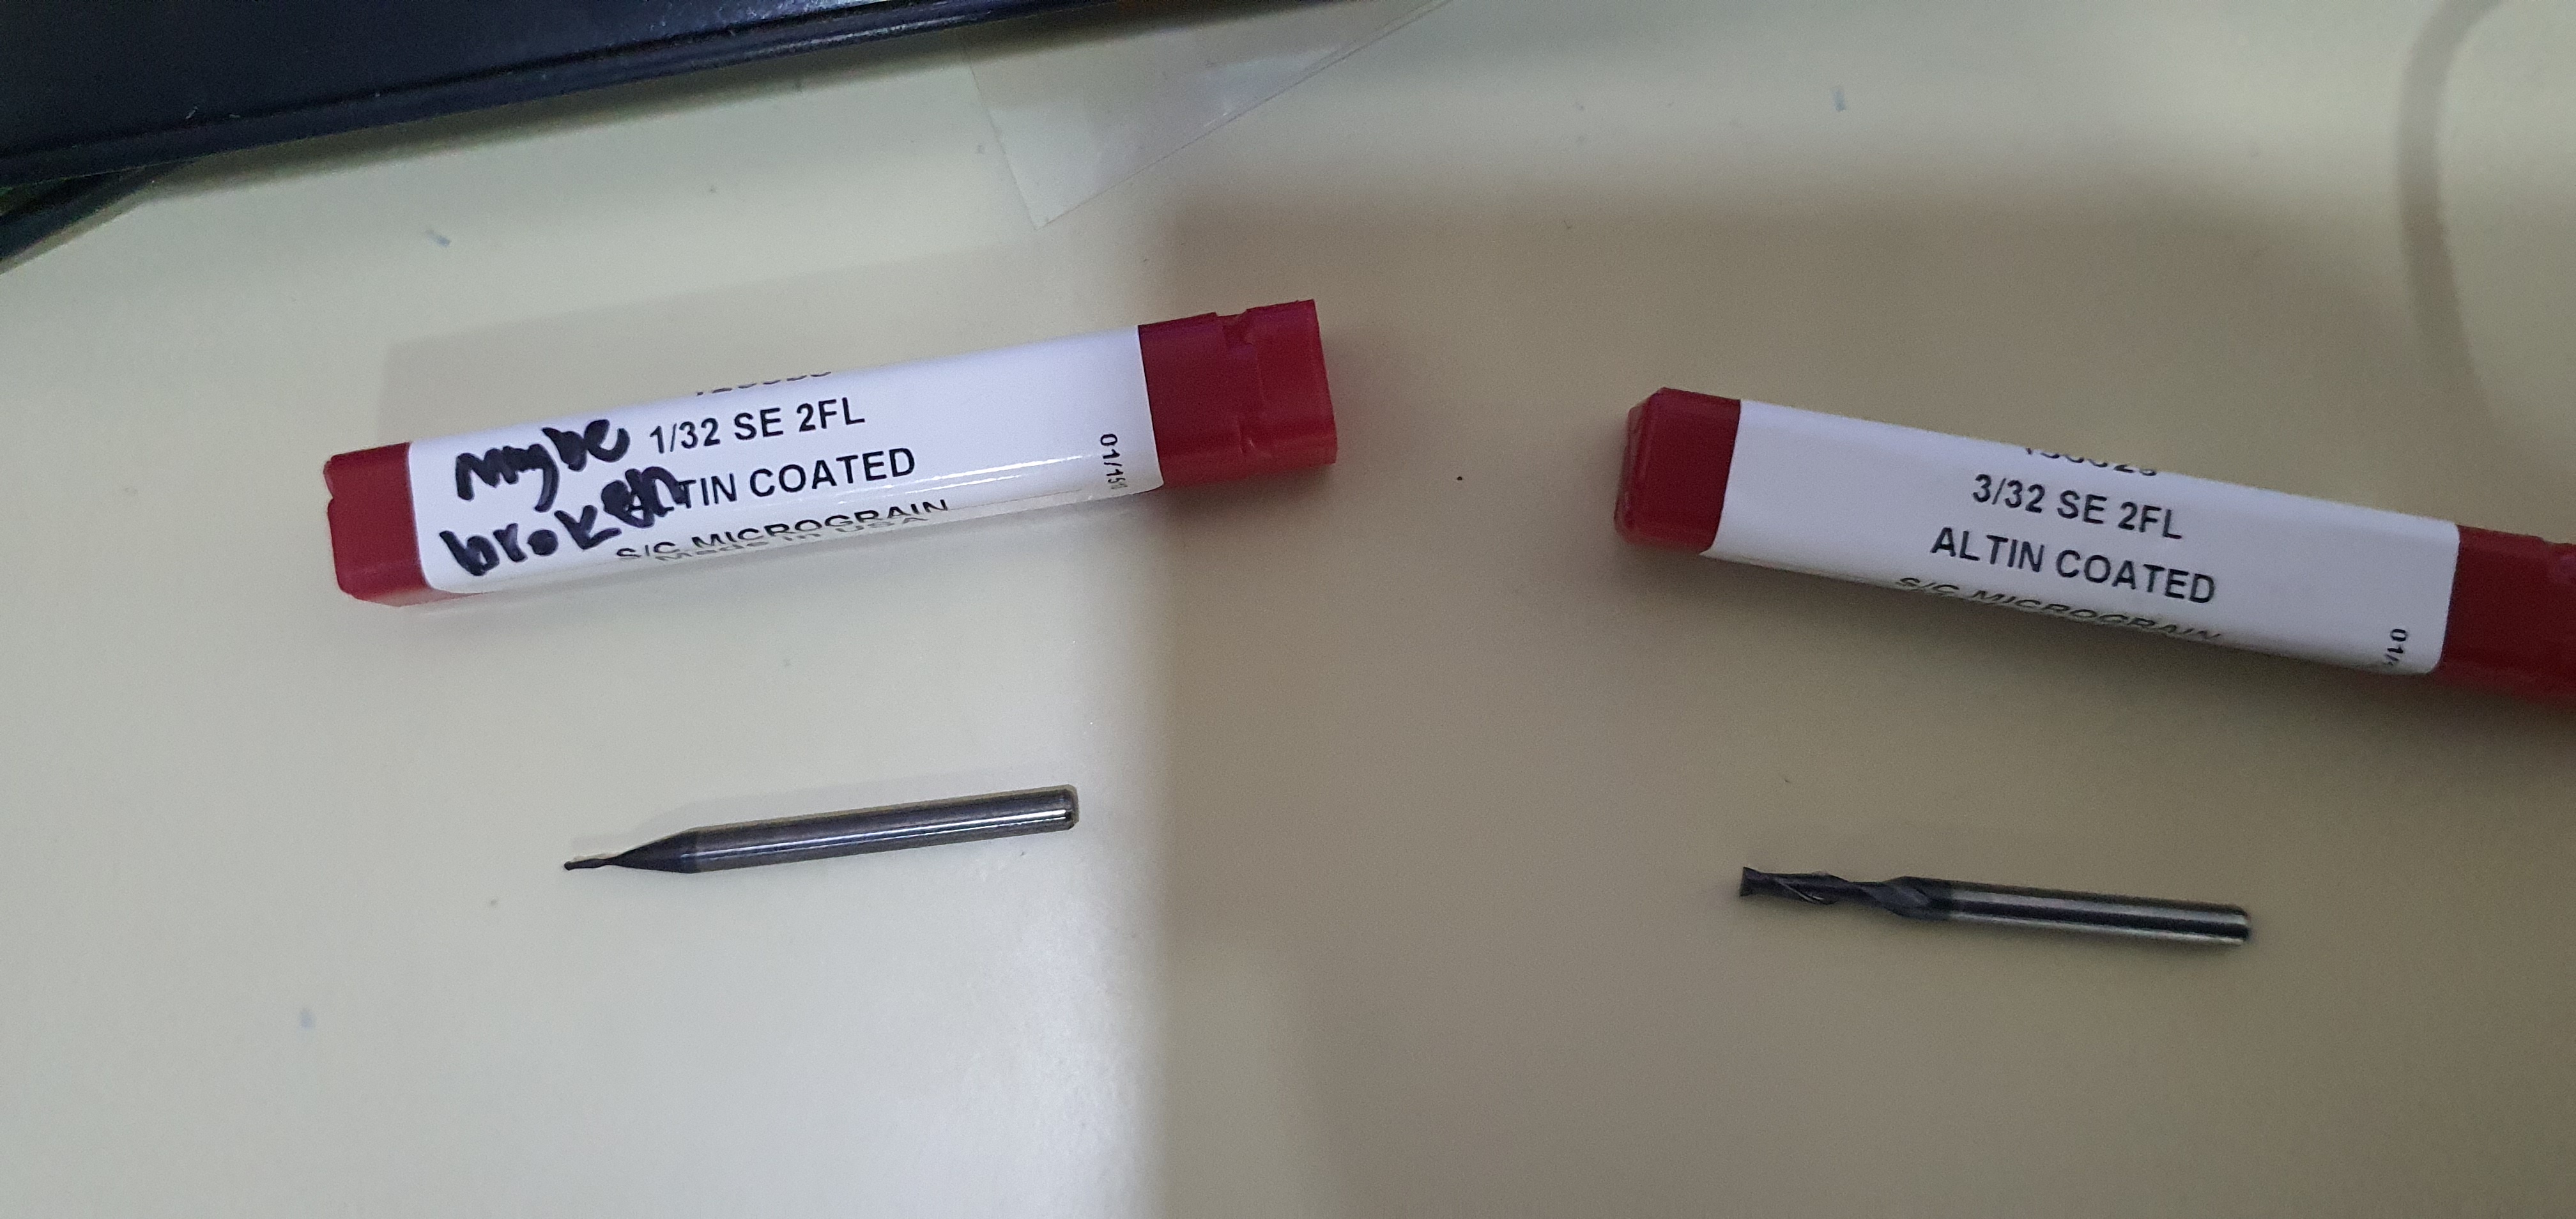
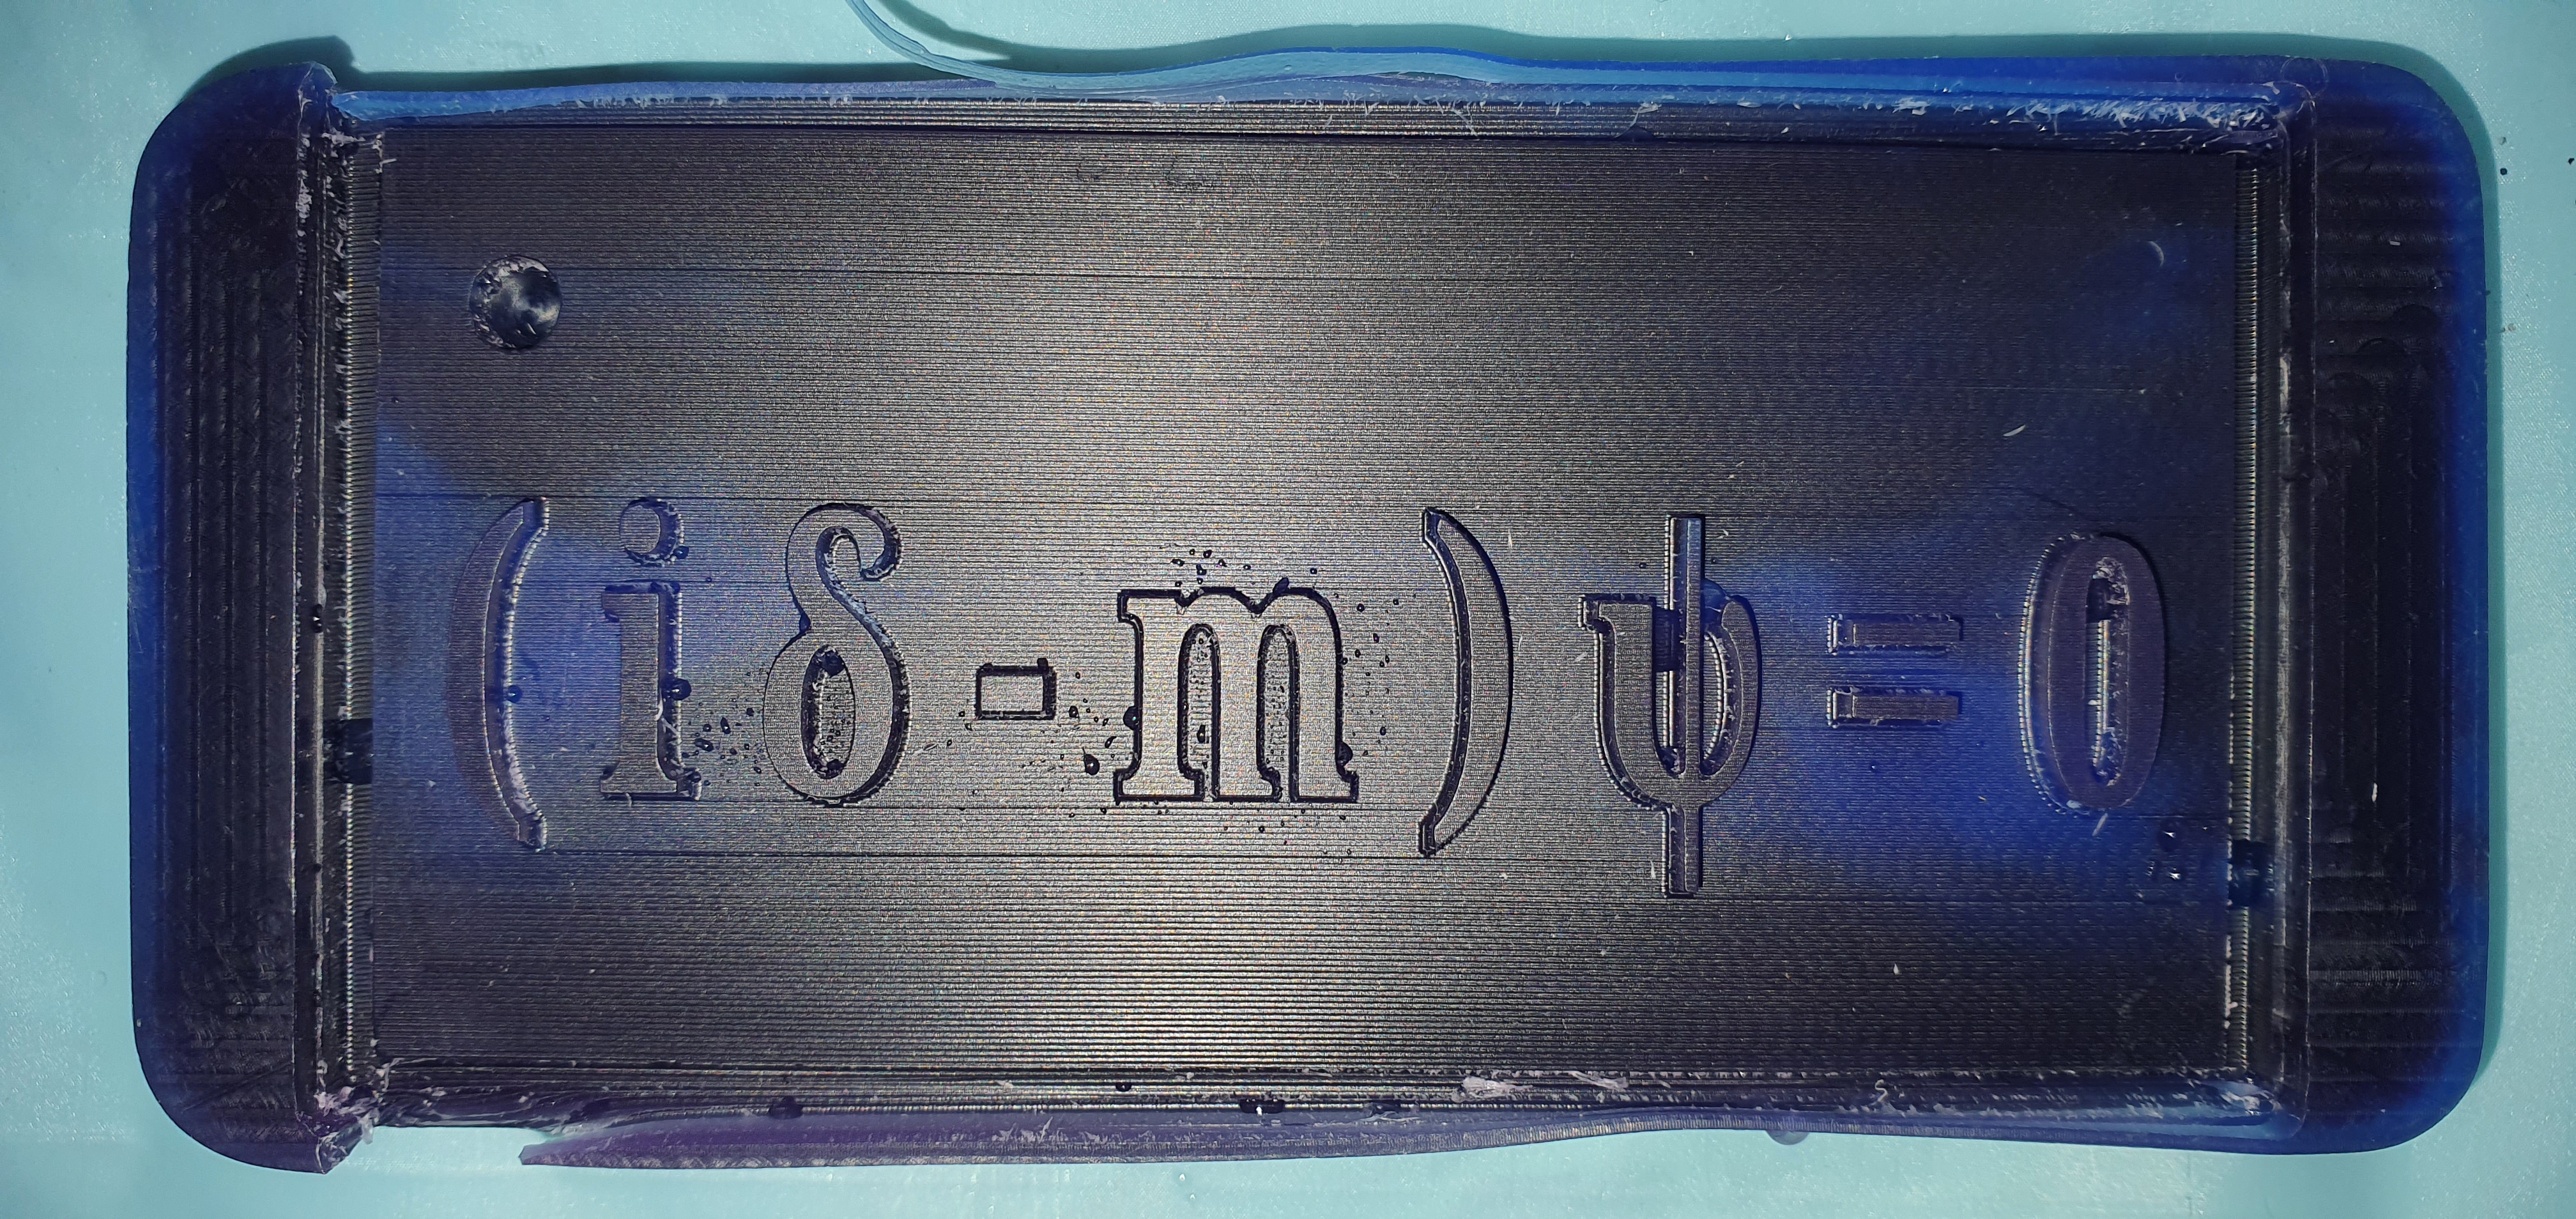
The roughing process took 15 minutes and I had to change the bit and switch to the 1/32” bit to start the finishing process. The result of the roughing process is shown below:
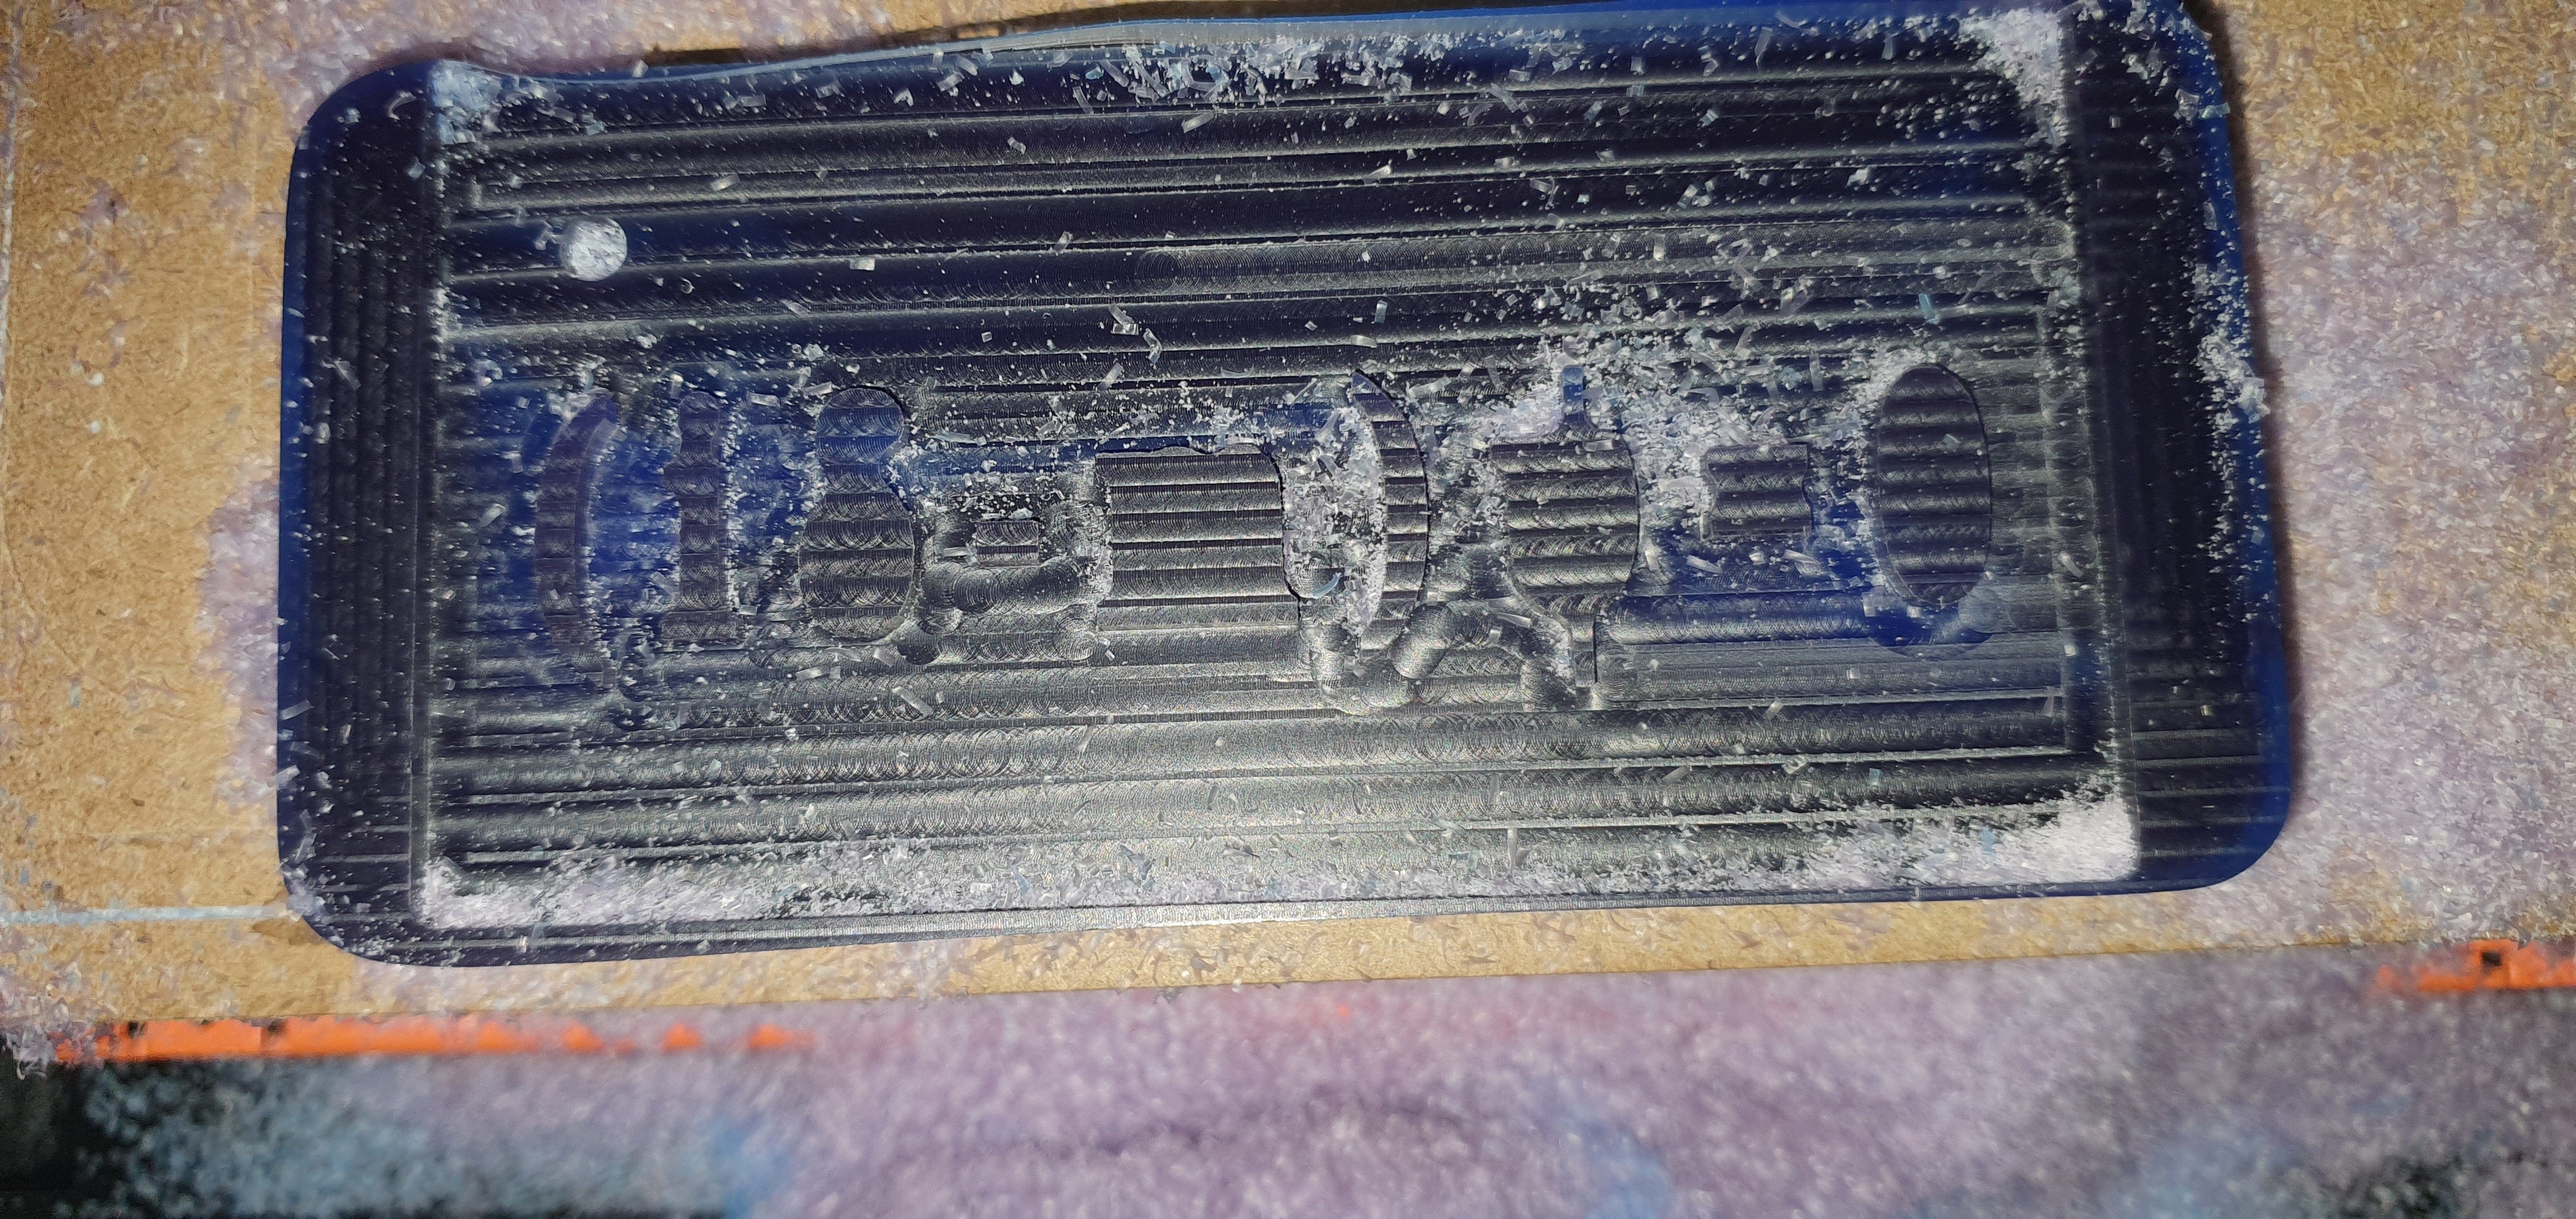
The finishing process took an hour and this is the final result:
I had to clean the powder from the milling process and wash the block to remove extra powder.
Molding
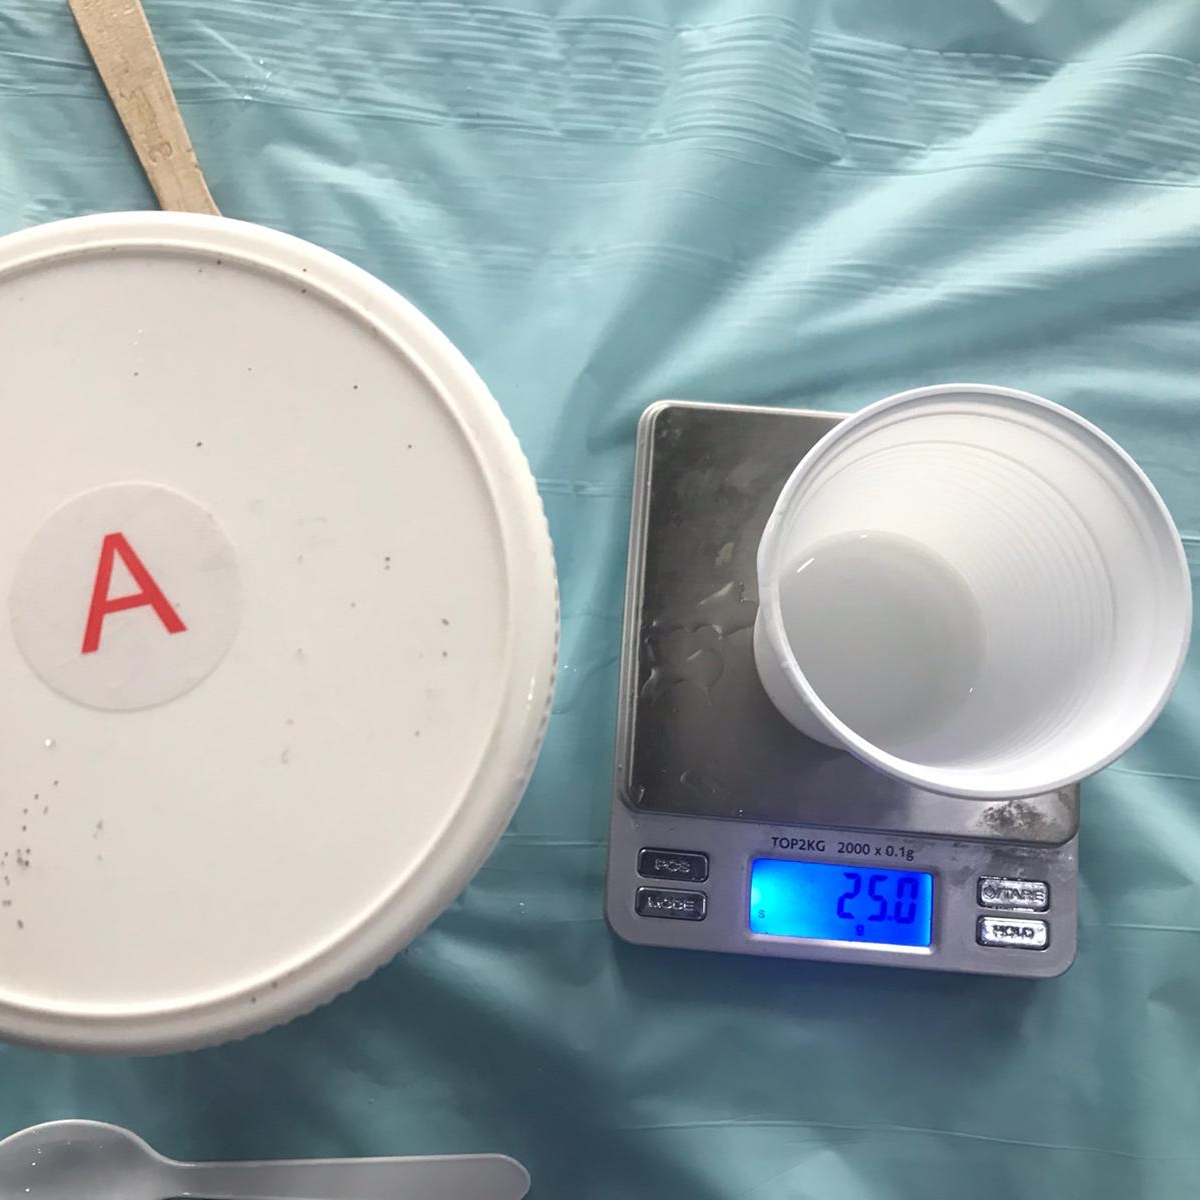
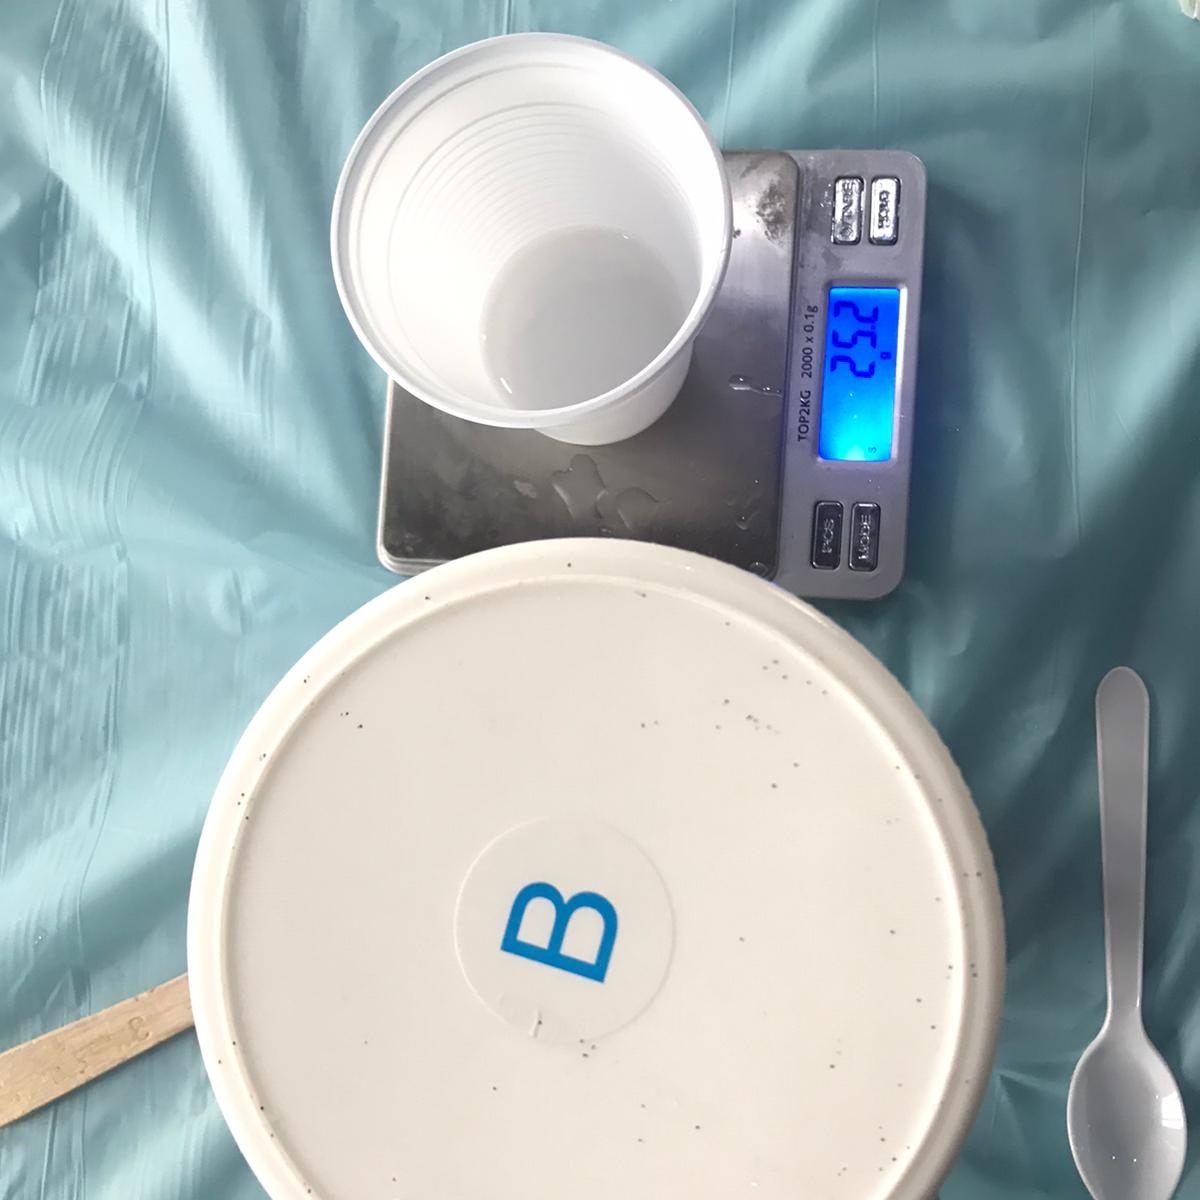
To prepare the mold, I chose the GR Silicon Rubber again and measured 25g of both A and B agents before mixing them together.
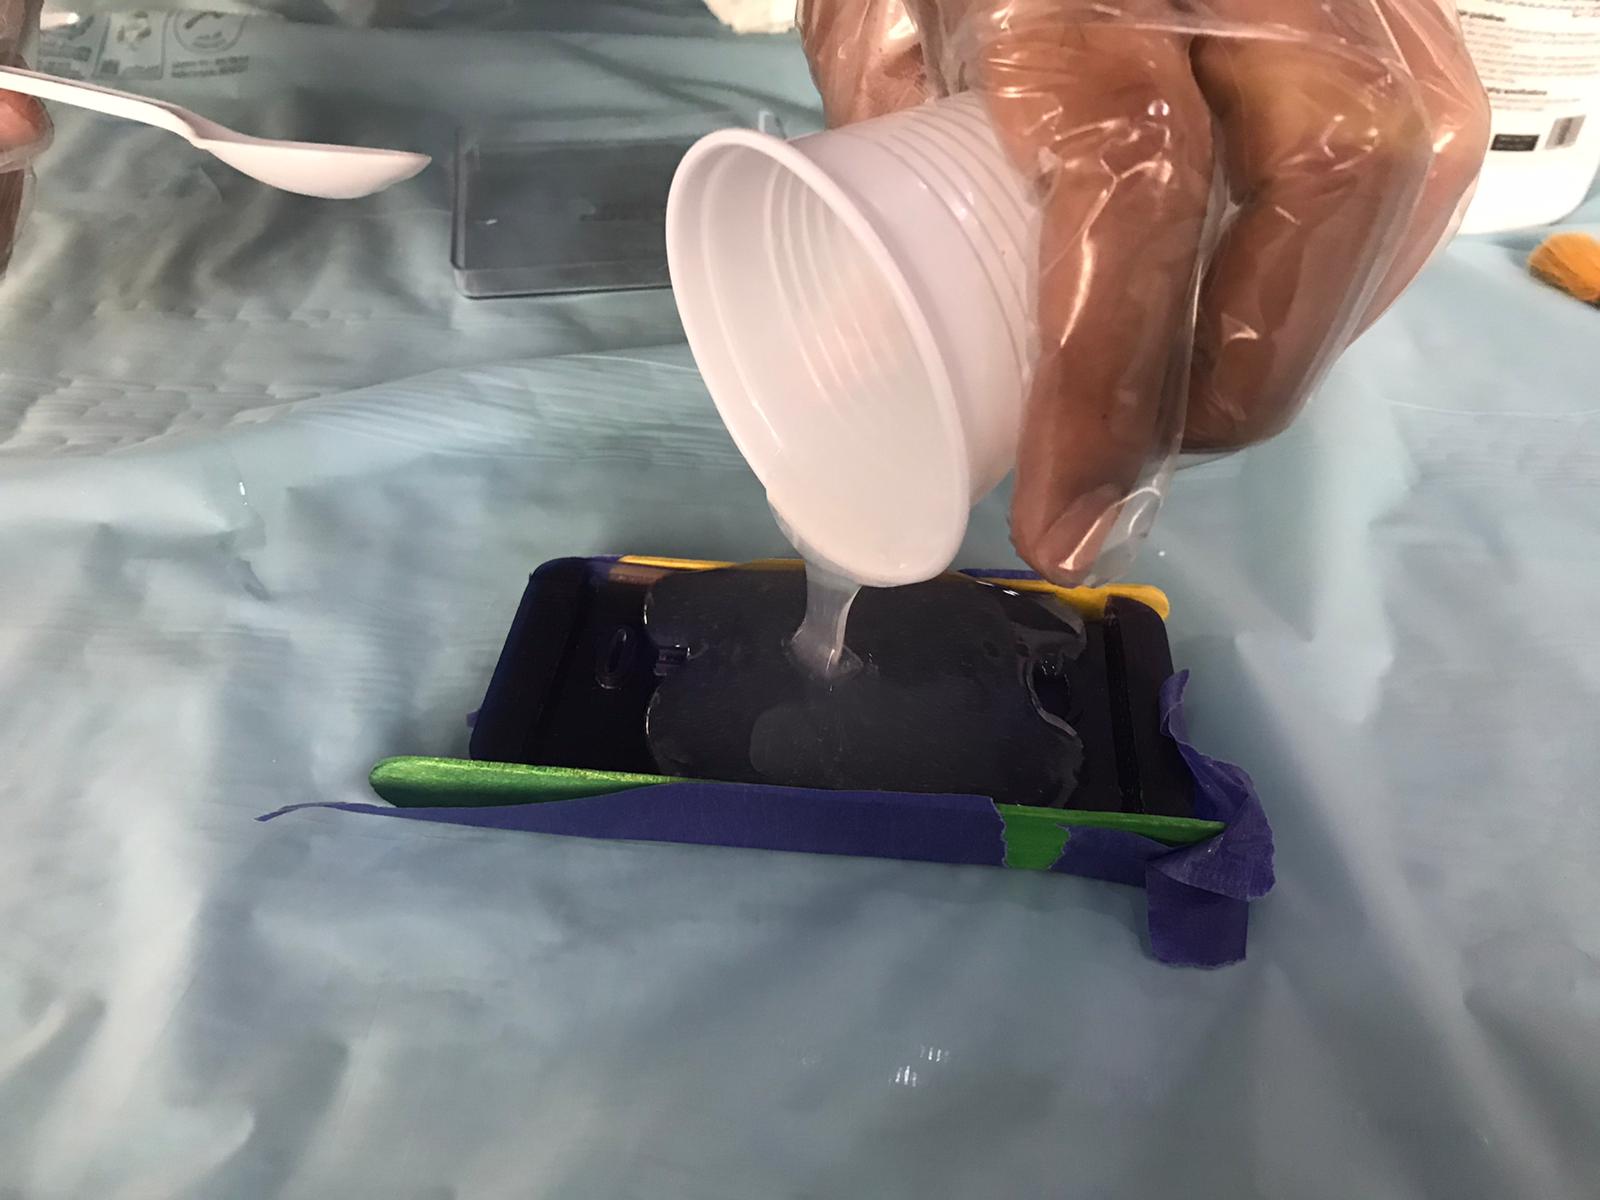
Using a paper tape, I attached two wooden supports on both the top and bottom edges of my carved block to prevent potential leakage of the liquid mold substance.
Finally, I poured the mixture over the carved surface.
Casting
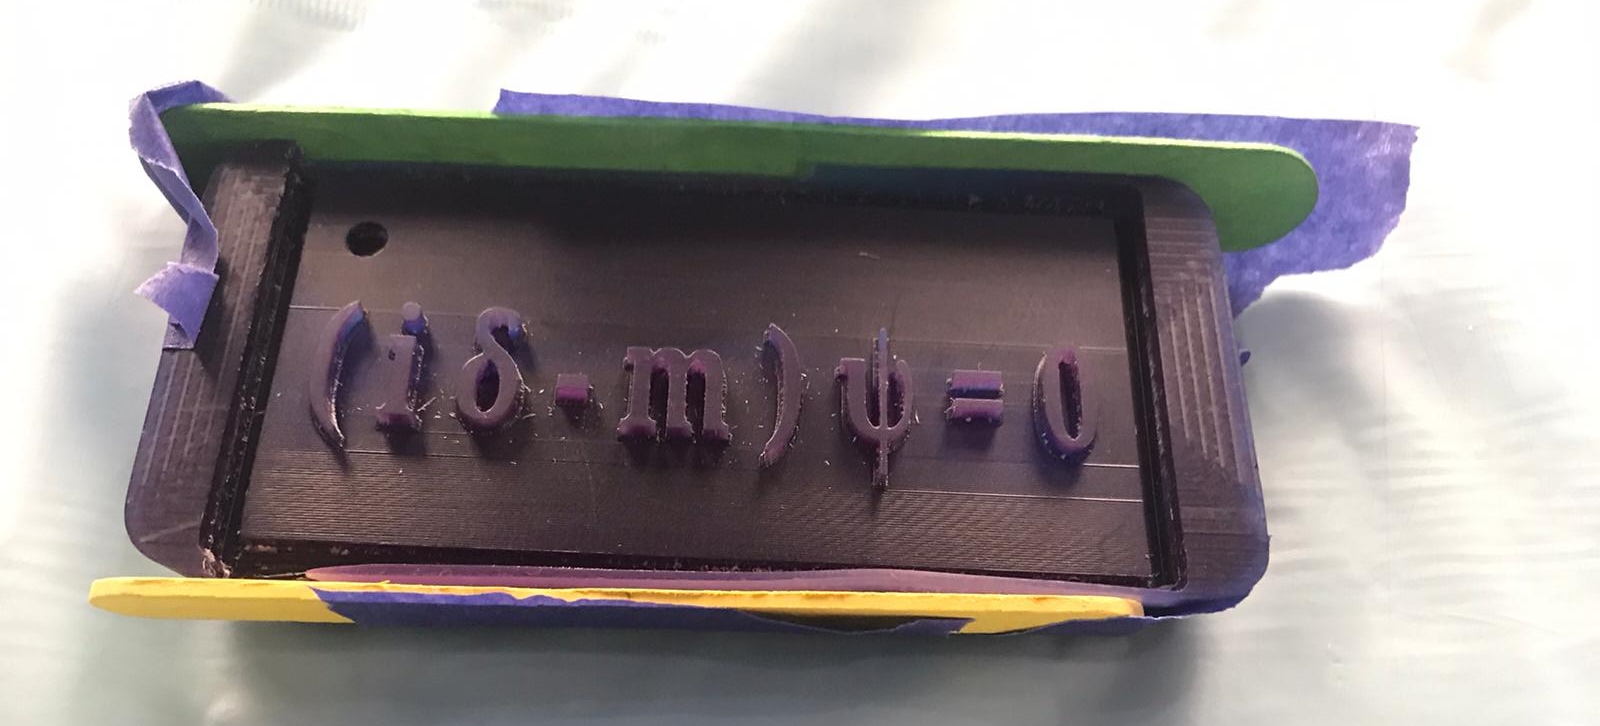
After 24 hours, The liquid mold solidified into a rubbery flexible state. However, I noticed that the mold did not cover the symbols which left empty gaps where the symbols should be so I carefully removed the mold to prevent further deformations.
To fix this problem, I decided to place a piece of the double edged tape beneath the mold below the symbols to allow for casting. I chose to melt small pieces of soap in the microwave for 25 seconds and then cast the liquid soap on to my mold as shown below:
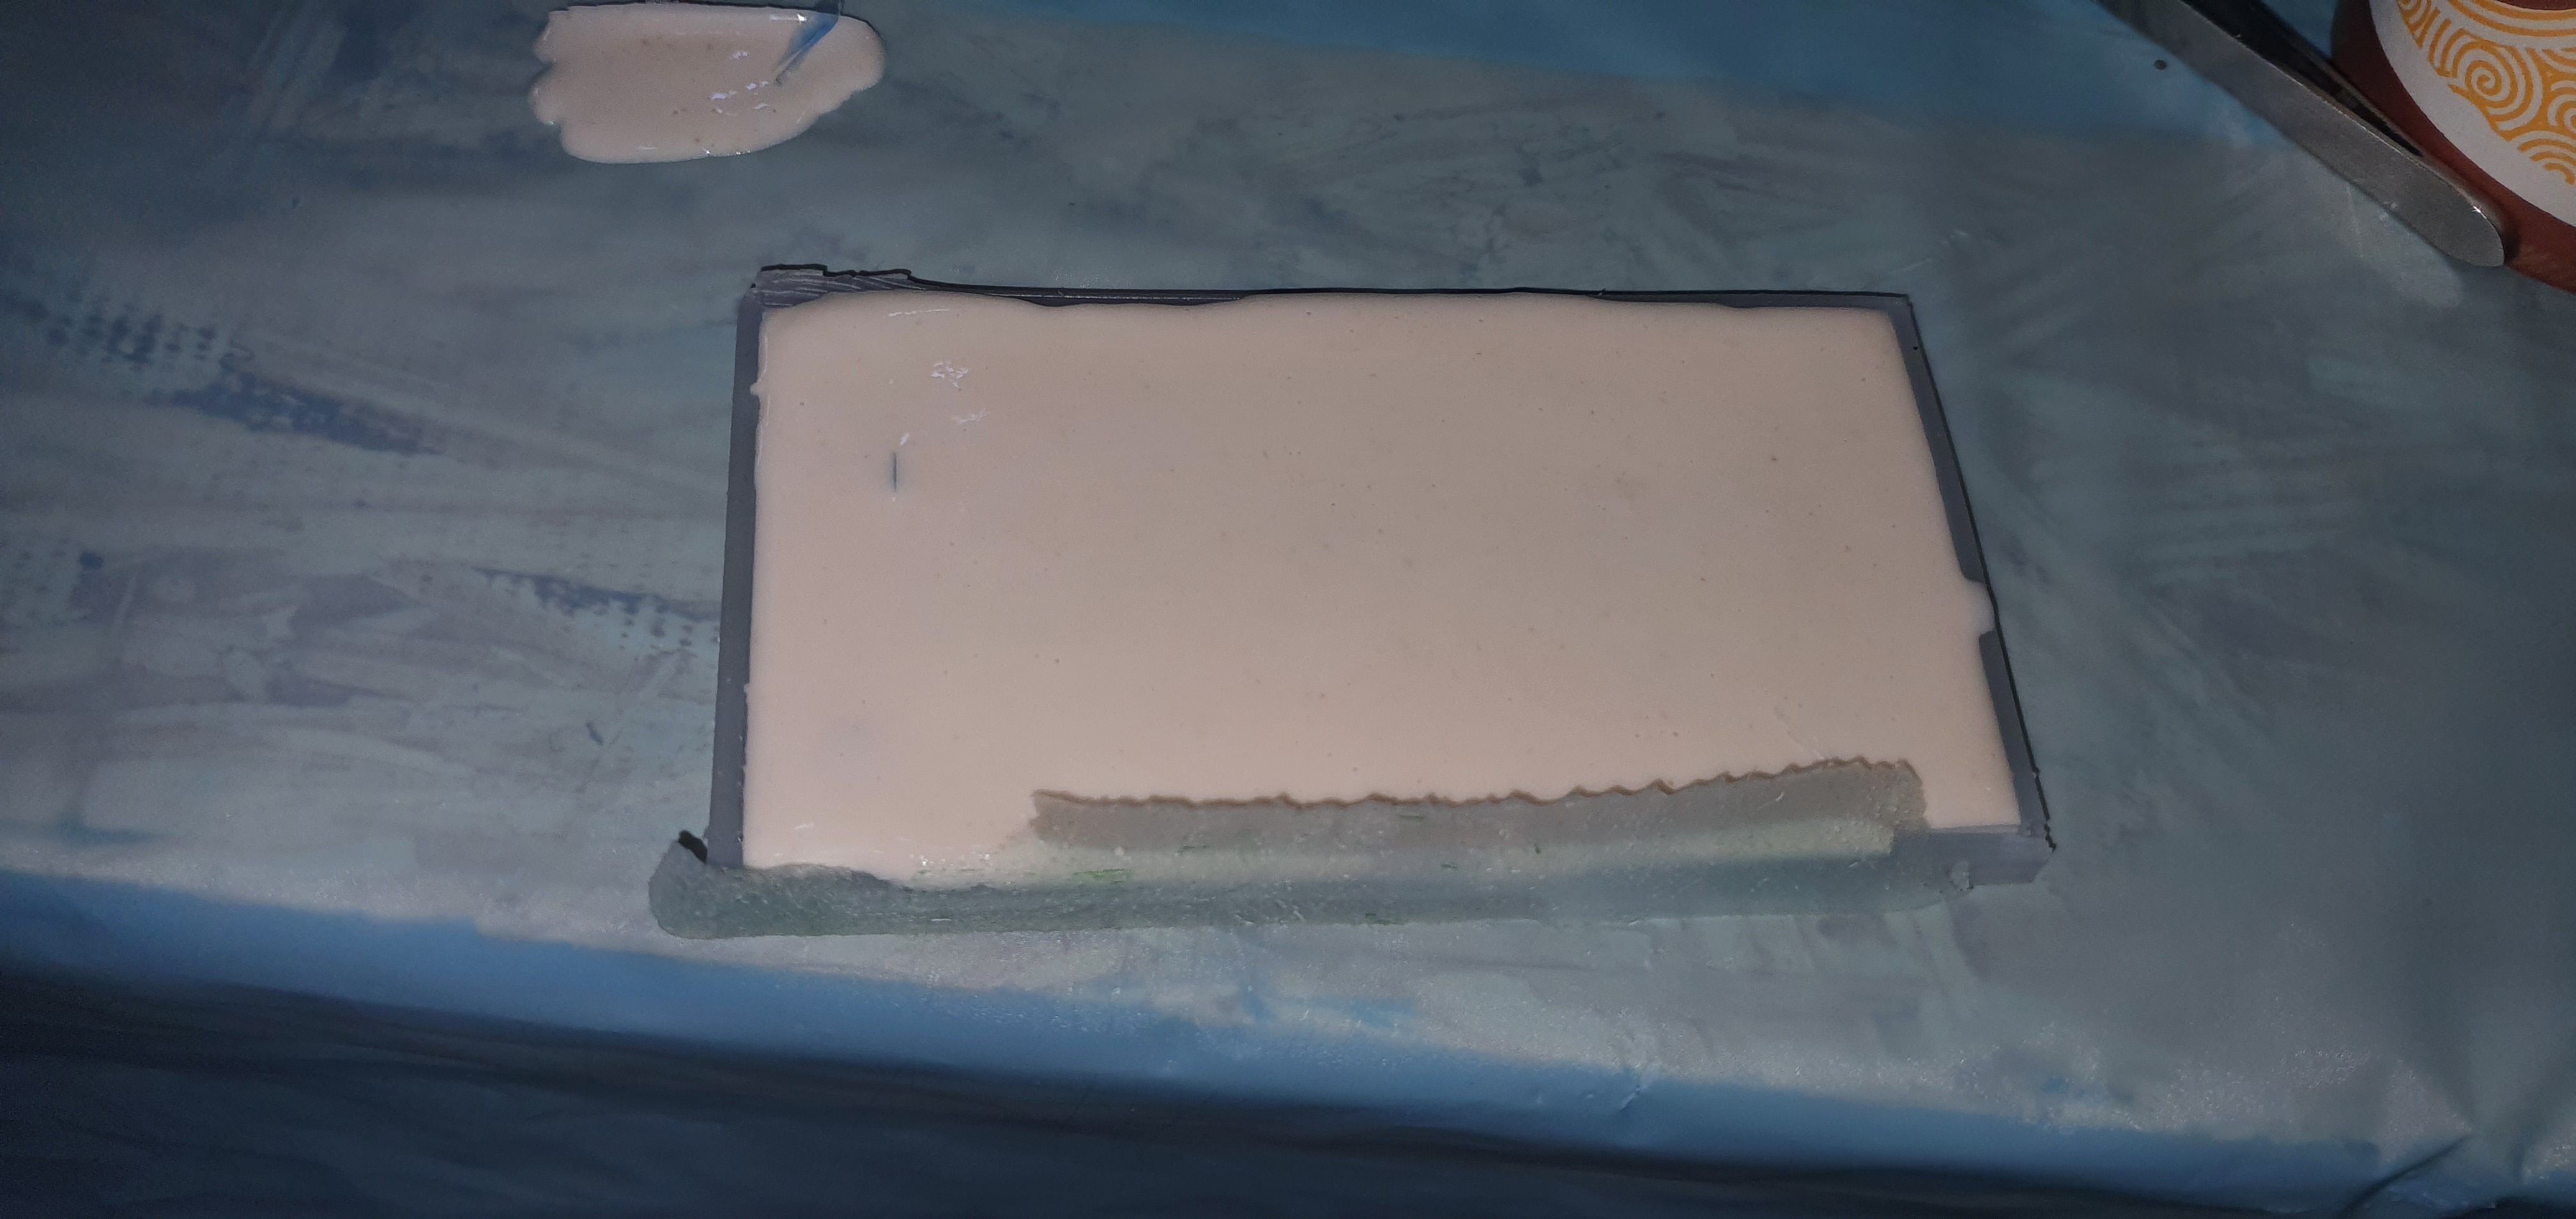
After 20 minutes, the soap solidified and I was able to separate the final result from the mold.