7. Input/Output devices
This week I worked on about input and output devices.
Input Devices
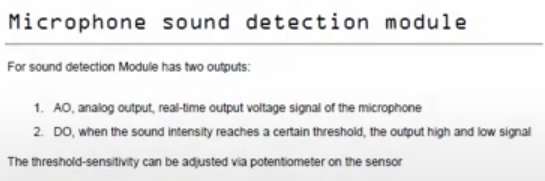
Sound sensor
You can measure changes in the intensity of sound in the environment using this module. The output of this module is both analog and digital.
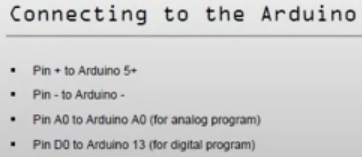
Connecting the sensor
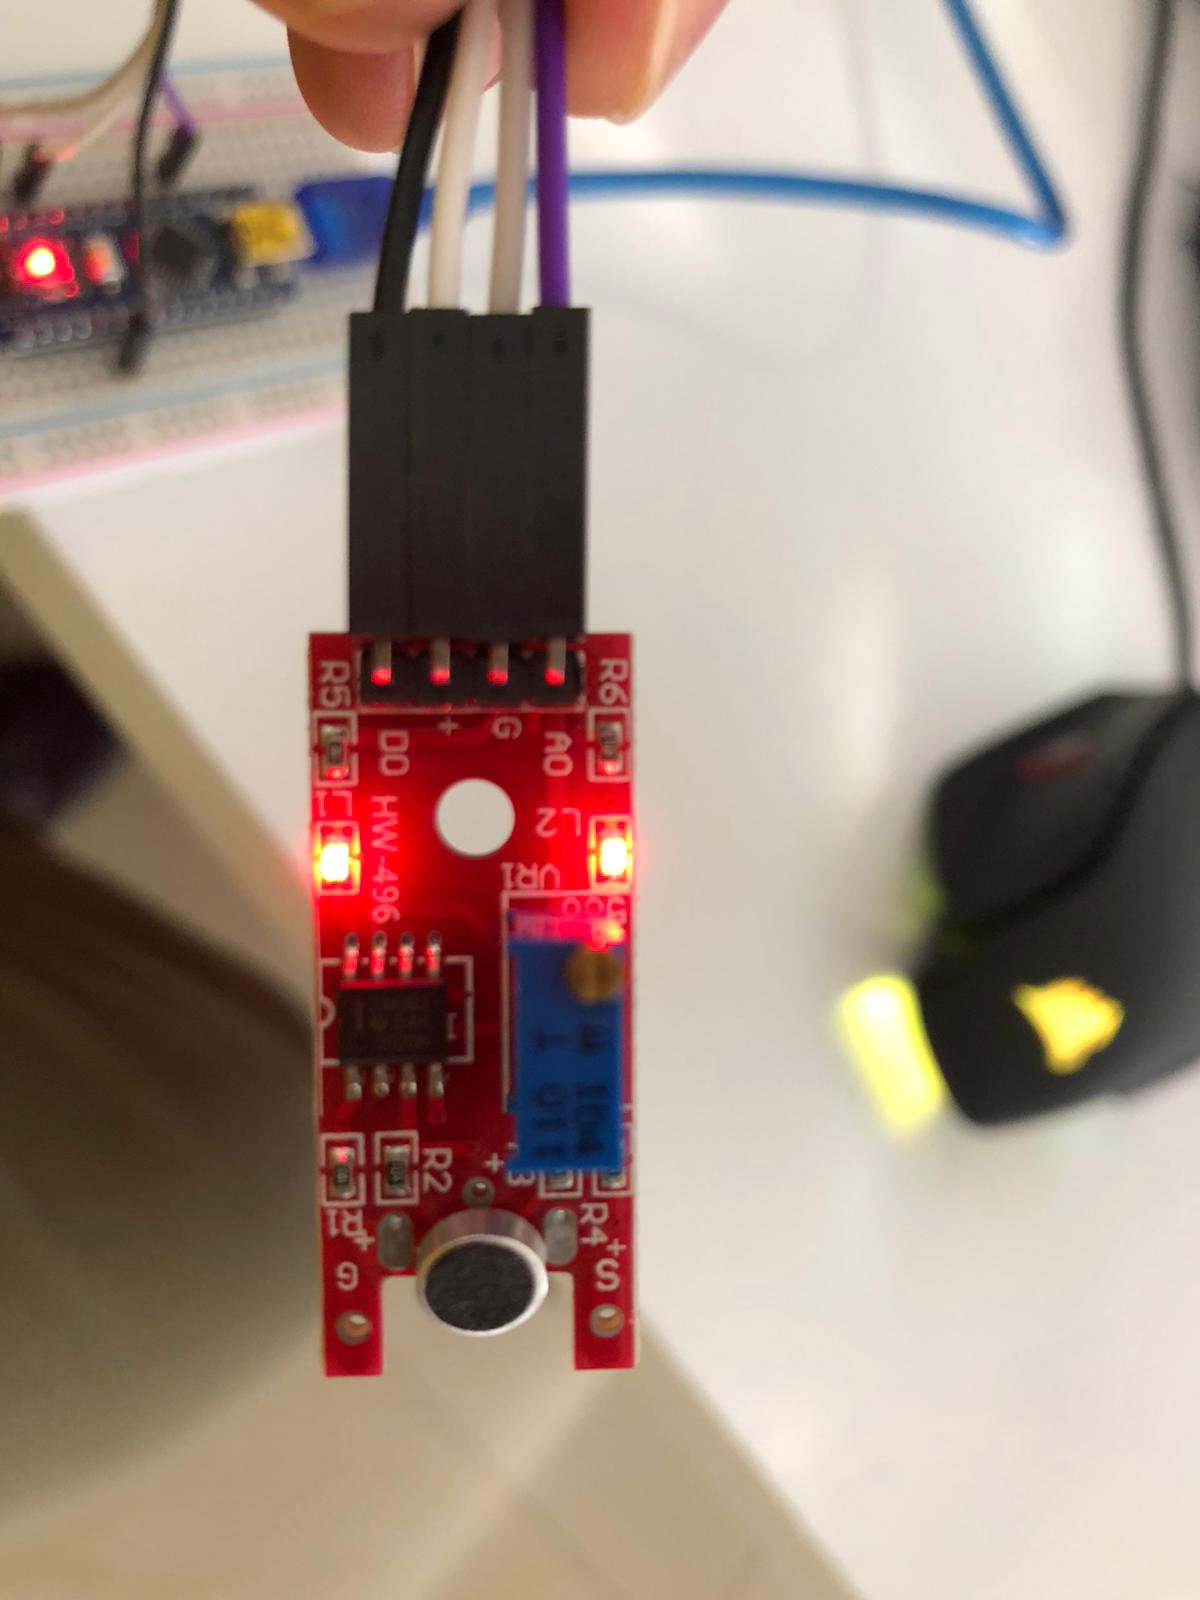
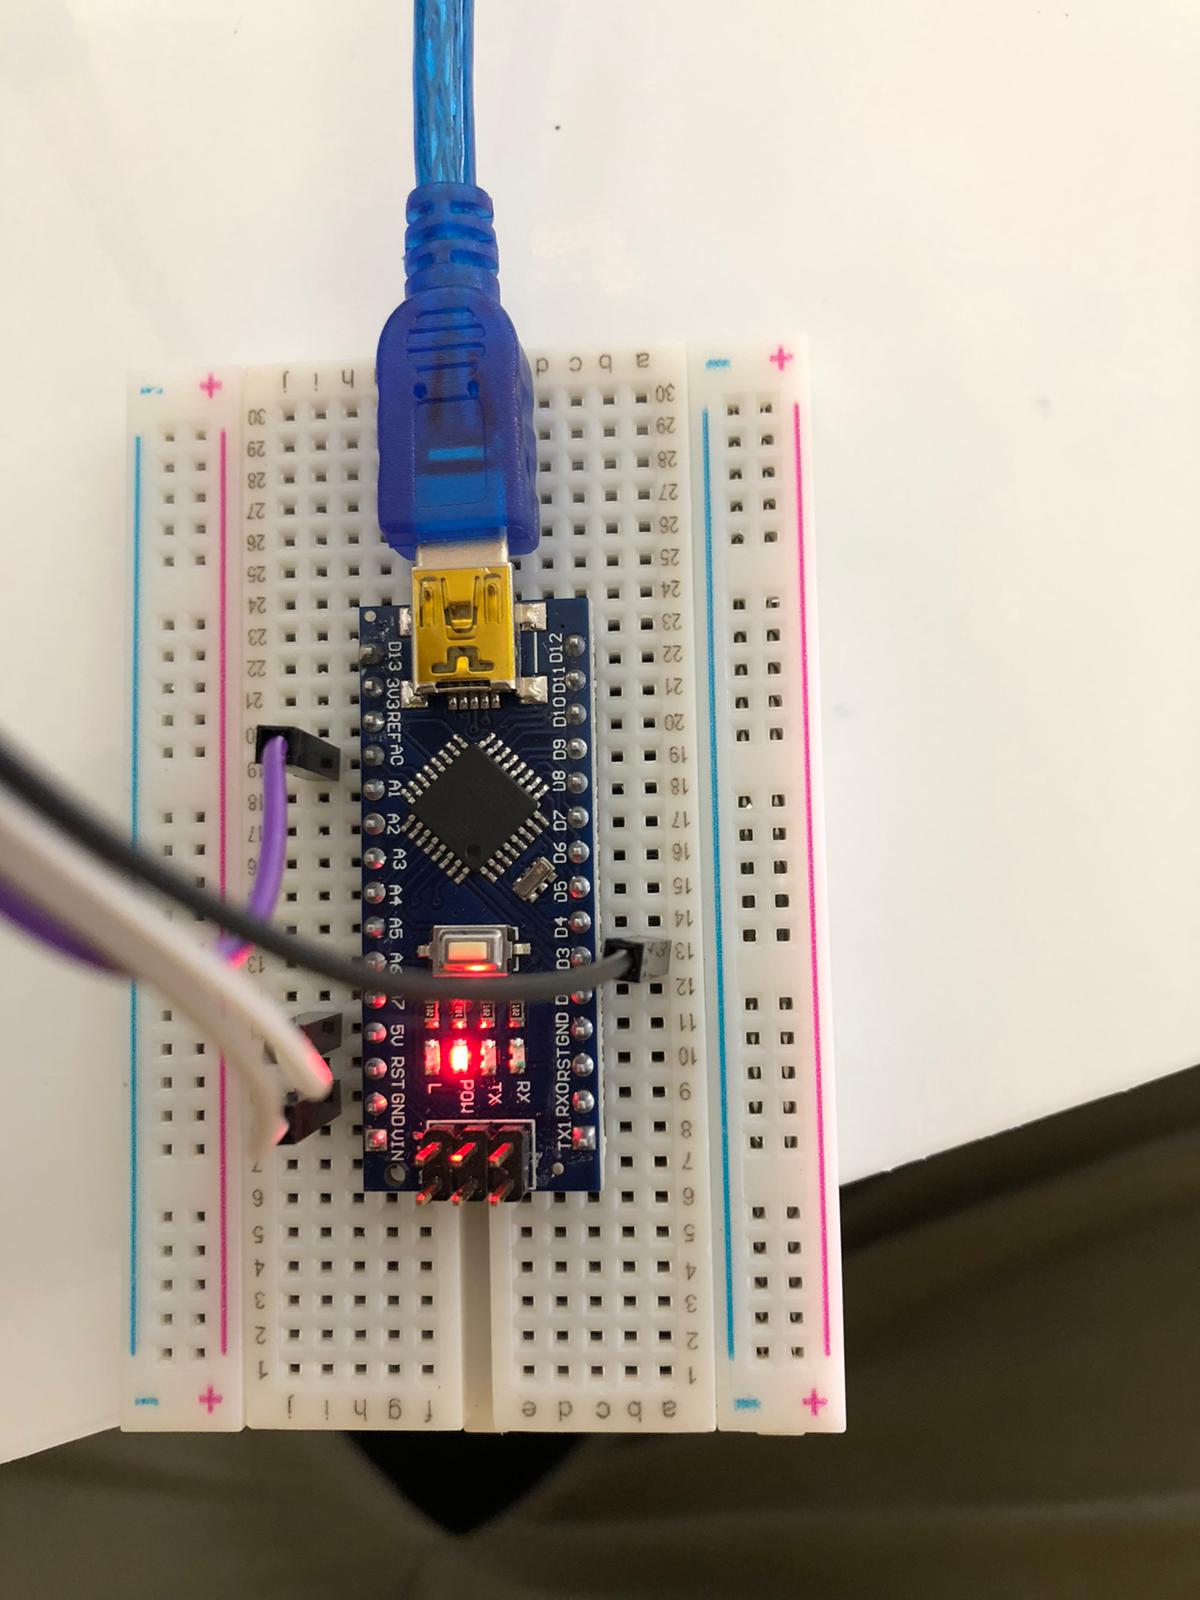
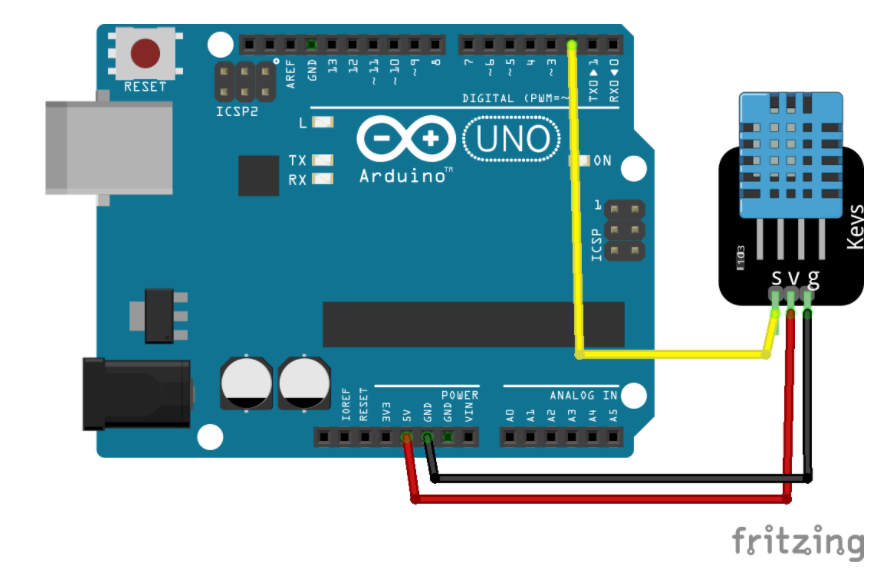
for connecting we used this diagram as a refrence.
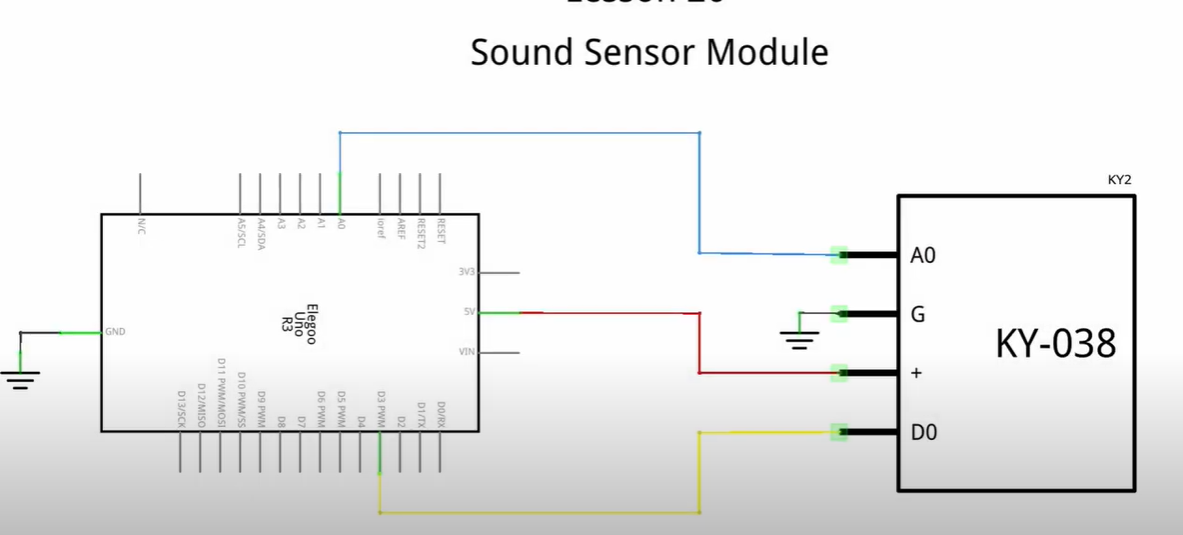
the jumper wires will be used to connect the sensor to the arduino board via the breadboard.

Arduino code
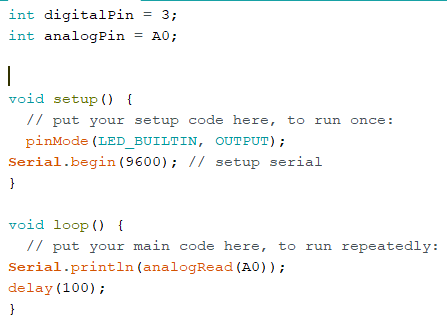
Now that we finished with the connecting process, its time to create the code via arduino program.
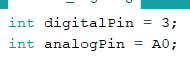
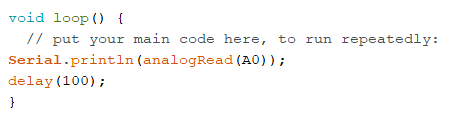
The first step is identify the both the digital and analog pins
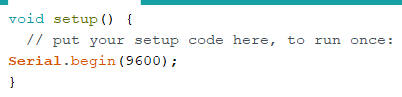
The setup code

Here we let the program read the signal sent by the analog pin and we set the signal to be readid every 0.1 second.
The full code
Uploading the code to the board

Seccesfully uploaded

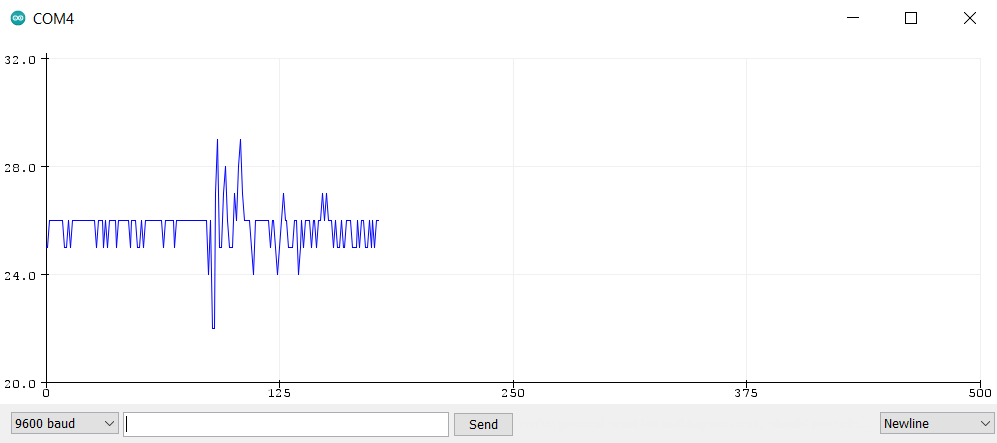
Testing the sound sensor if its sensing sounds.
The plotted amplitude represents sound waves (similar to how your eardrum vibrates when hearing sound). The vibration of the diaphragm is converted by the sensor into an electrical signal that is sent to the program.
The code
int digitalPin = 3;
int analogPin = A0;


void setup() {
  // put your setup code here, to run once:
  pinMode(LED_BUILTIN, OUTPUT);
Serial.begin(9600); // setup serial
}

void loop() {
  // put your main code here, to run repeatedly:
Serial.println(analogRead(A0));
delay(100);
}
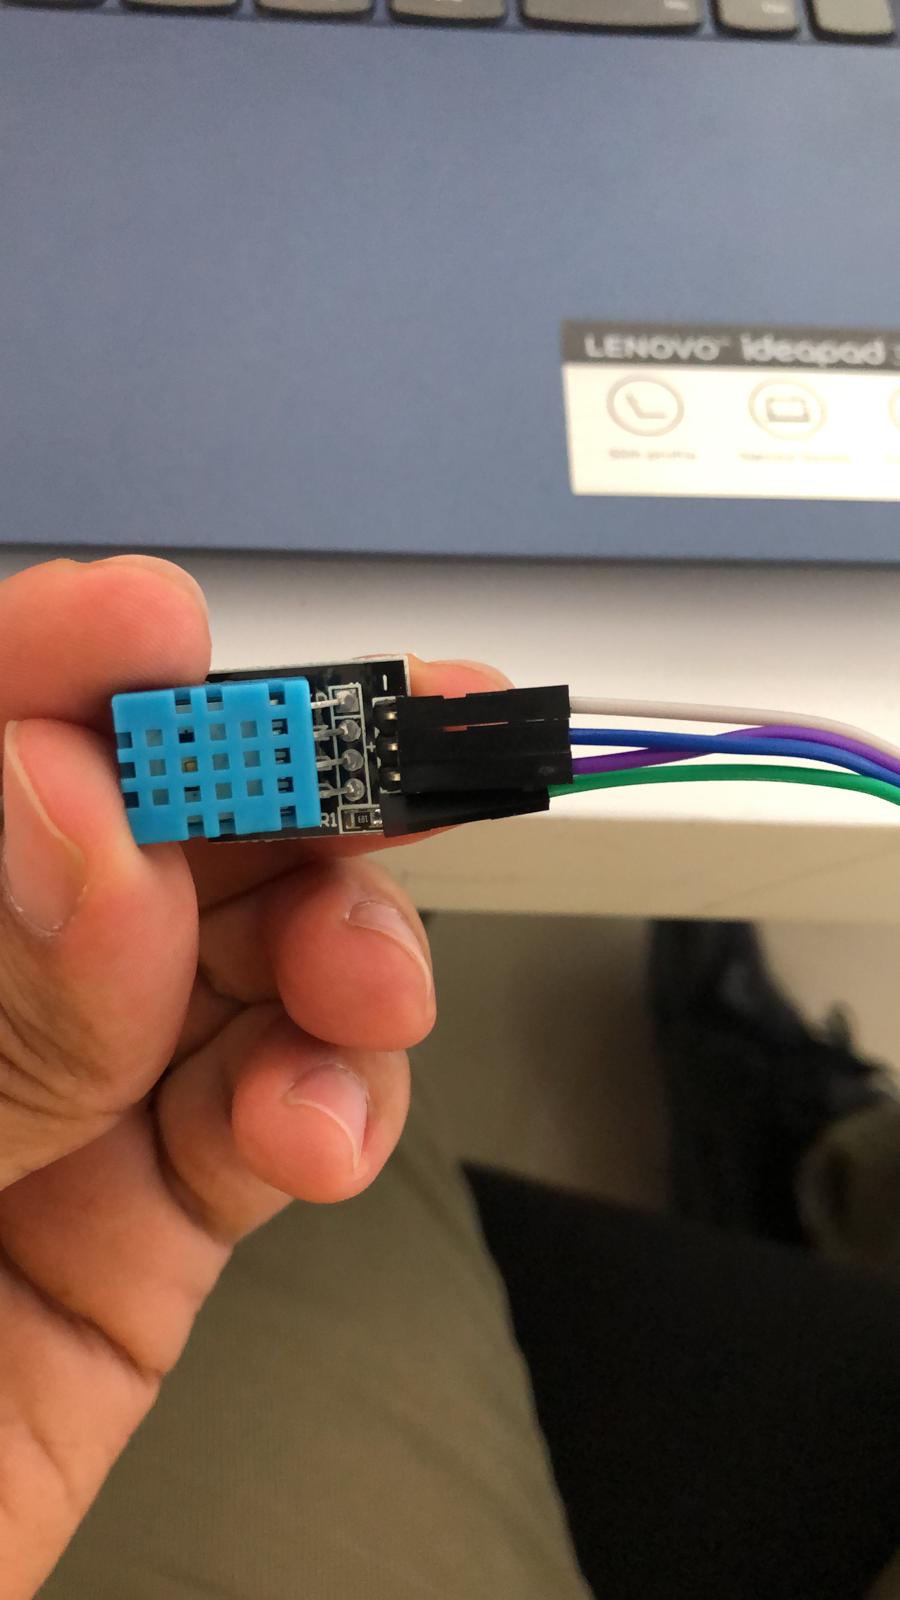
Humedity and Tempreture sensor
From the name this sensor can detect the humedity and tempreture of the surroundings.
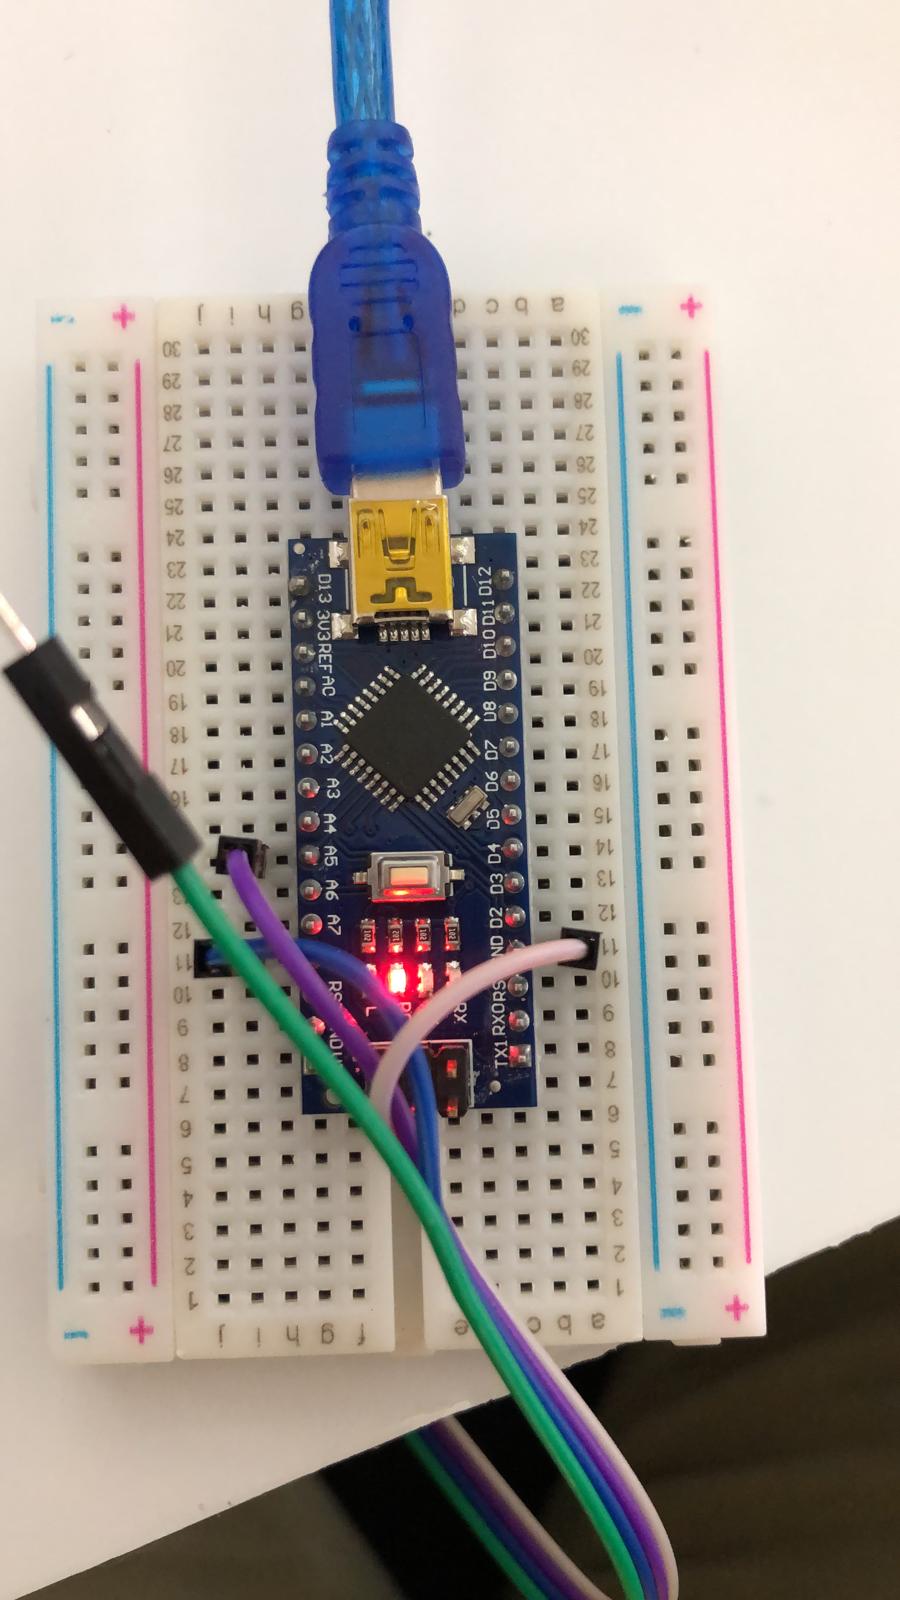
Connecting the sensor
We follow the following diagram for connecting. Where S is the analog pin location in our case A5, v is the voltage pin which is 5V, and finally the g is the ground pin.
Arduino code
Now that we finished with the connecting process, its time to create the code via arduino program.
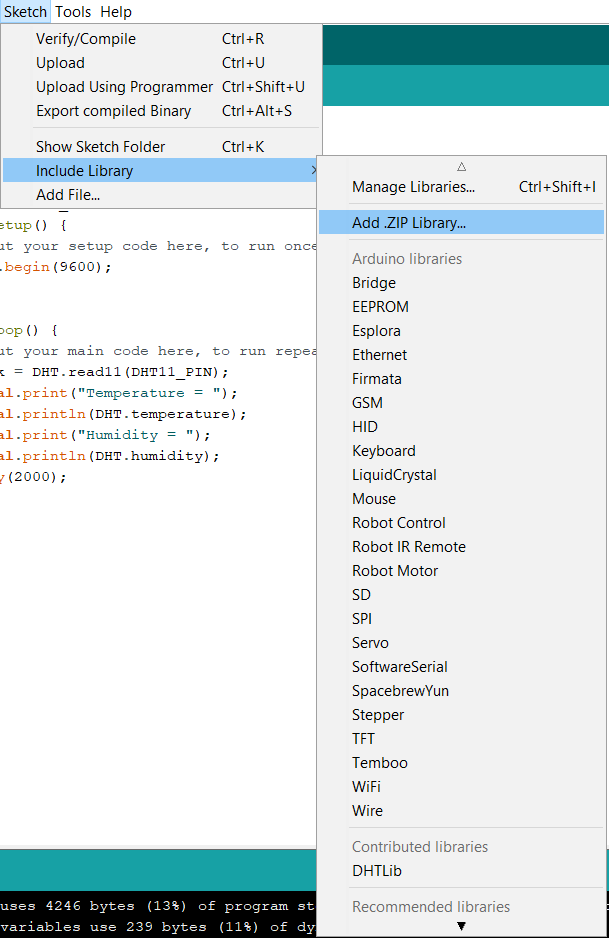
The first step is to install the DHTLib library. It has all the functions needed to get the humidity and temperature readings from the sensor.

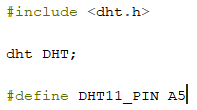
Now we add the library calling code
The setup code
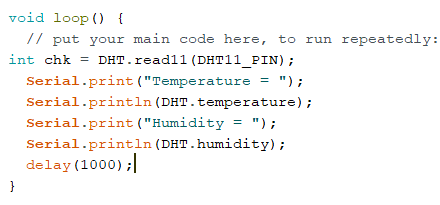
Add the loop code with a 1 second delay between every reading.
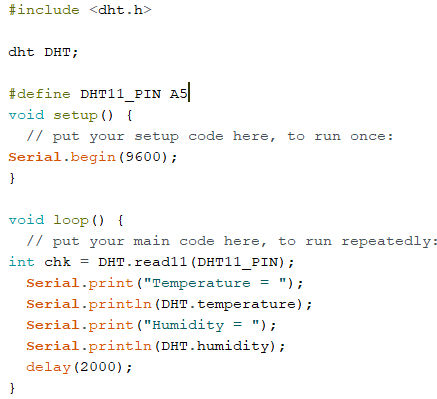
The final Code
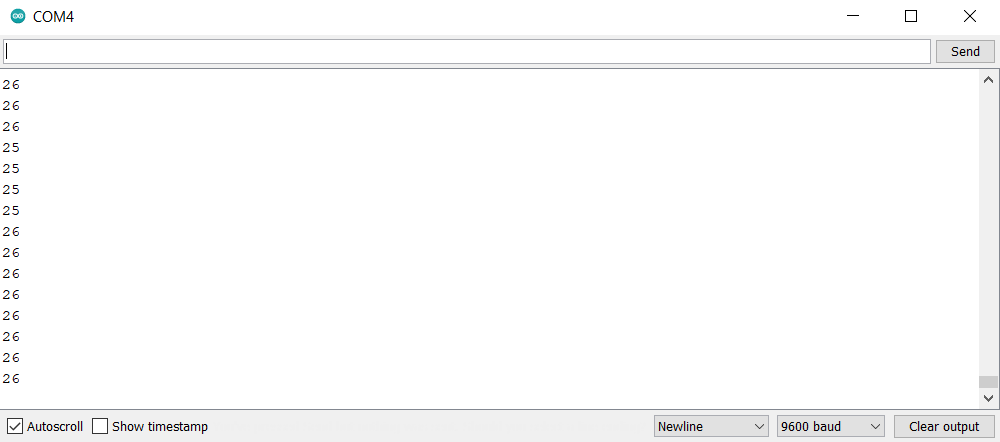
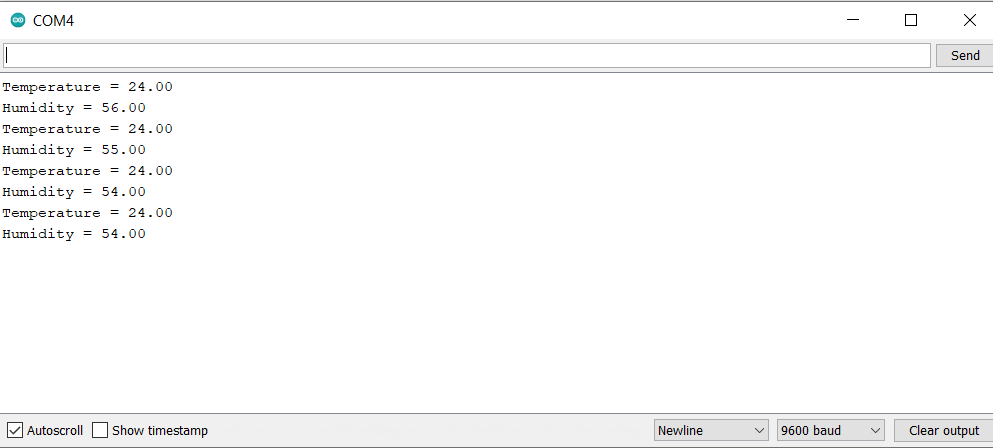
The readings
The code
#include <dht.h>

dht DHT;

#define DHT11_PIN A5
void setup() {
  // put your setup code here, to run once:
Serial.begin(9600);
}

void loop() {
  // put your main code here, to run repeatedly:
int chk = DHT.read11(DHT11_PIN);
  Serial.print("Temperature = ");
  Serial.println(DHT.temperature);
  Serial.print("Humidity = ");
  Serial.println(DHT.humidity);
  delay(2000);
}
Output devices
In a simple definition it is devices that converts the digital information from the program to physical output, like motors of various sorts, relays, solenoids, audio outputs like speakers and buzzers, etc.
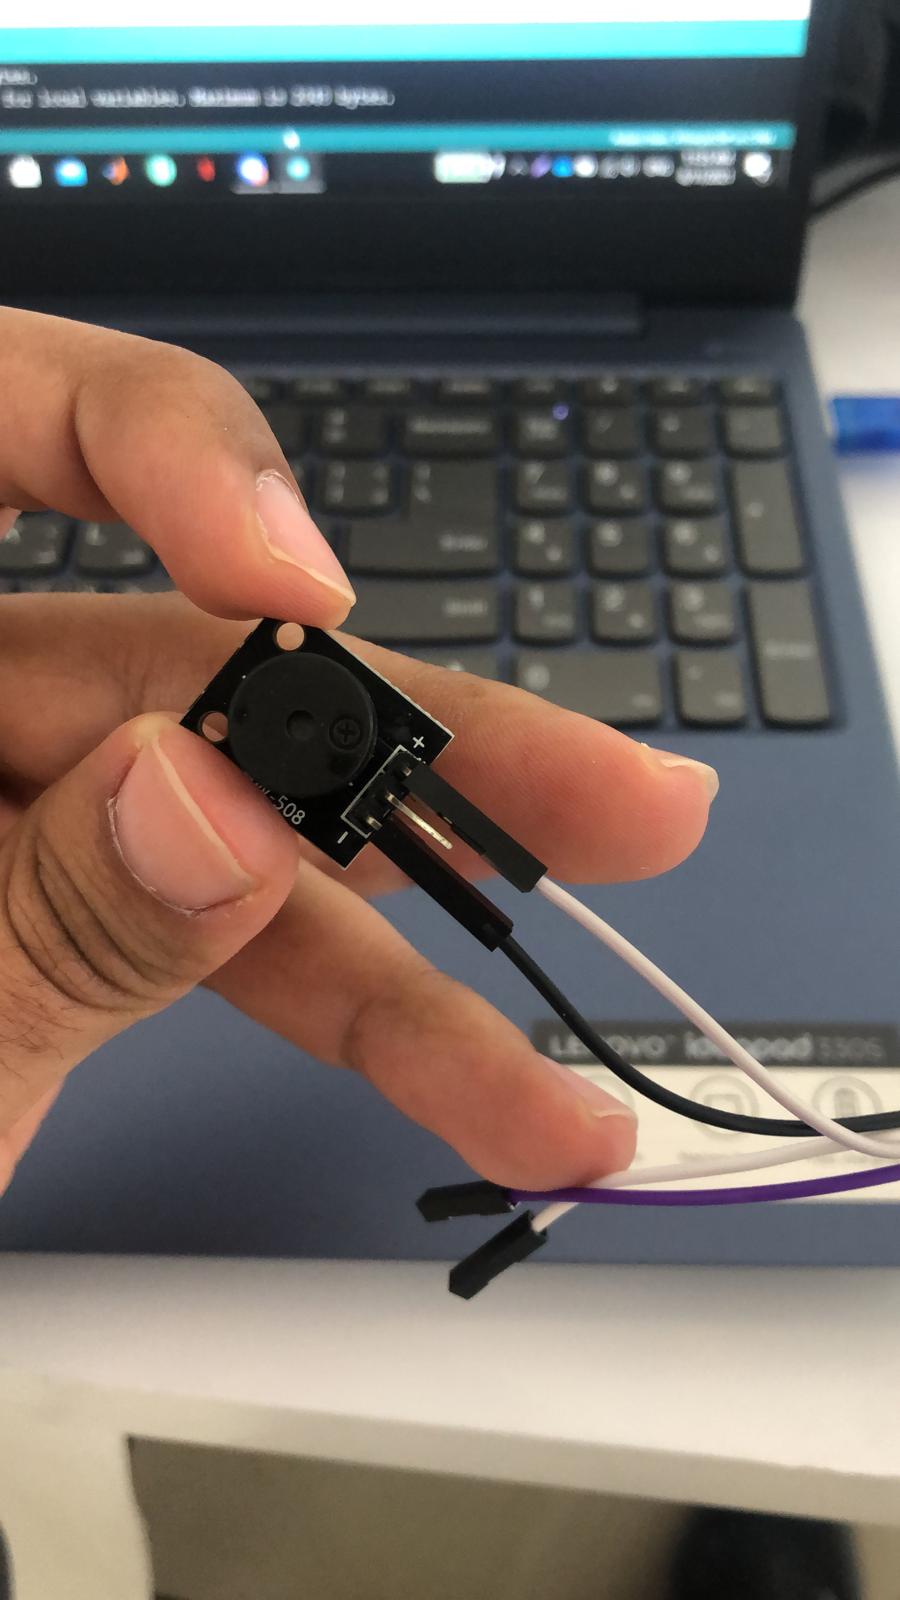
Buzzer sensor
The buzzer that will be using is called piezo buzzer is basically a tiny speaker that you can connect directly to an Arduino.
How does it work
The buzzer consists of an outside case with two pins to attach it to power and ground. When current is applied to the buzzer it causes the ceramic disk to contract or expand. Changing the This then causes the surrounding disc to vibrate. That’s the sound that you hear.
Arduino code
From the Arduino, you can make sounds with a buzzer by using tone. You have to tell it which pin the buzzer is on, what frequency (in Hertz, Hz) you want, and how long (in milliseconds) you want it to keep making the tone.
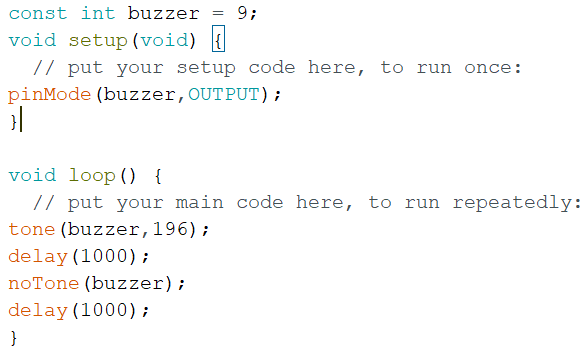
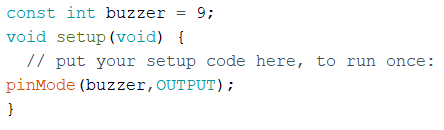
The first step is to define the digital pin.

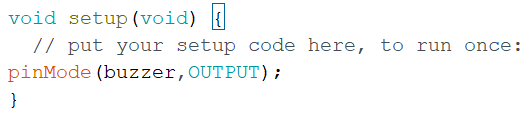
The setup code
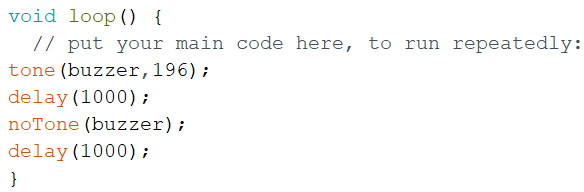
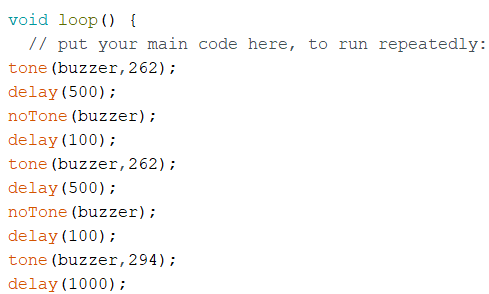
For the loop code we use the tone function to tell it which pin the buzzer is on, what frequency (in Hertz, Hz). to stop the buzzing we use the noTone function.
The full code.
We upload it.

Succesfully uploaded.

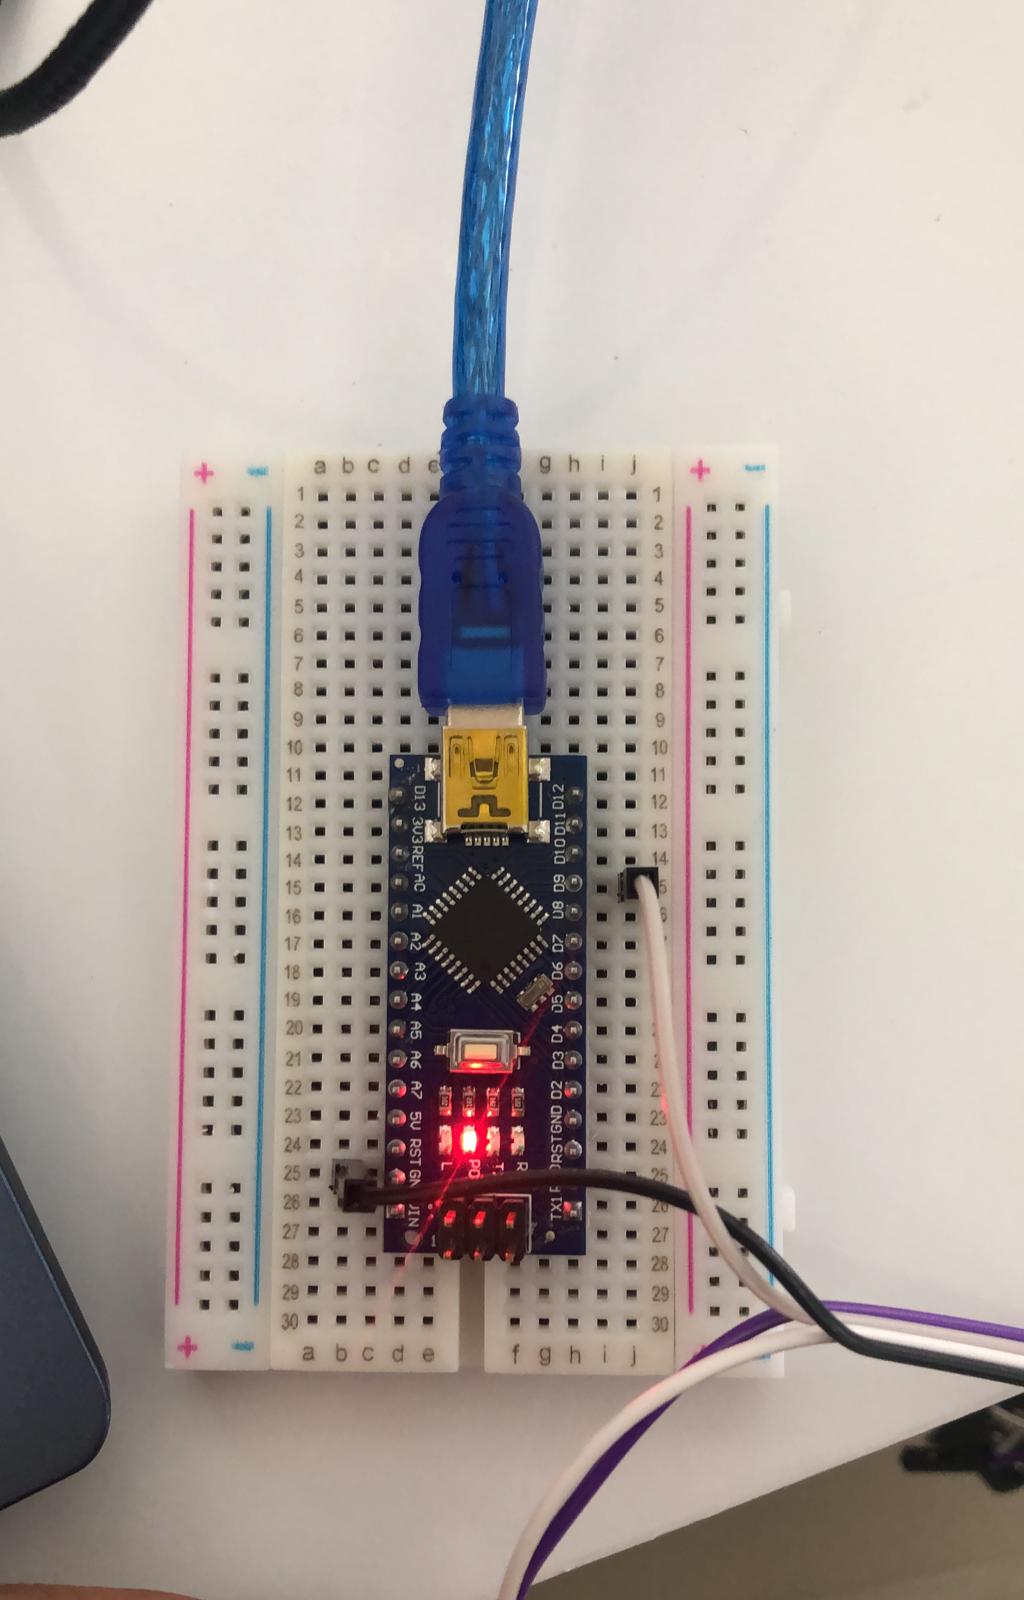
The connection process.
The code
const int buzzer = 9;
void setup(void) {
  // put your setup code here, to run once:
pinMode(buzzer,OUTPUT);
}

void loop() {
  // put your main code here, to run repeatedly:
tone(buzzer,196);
delay(1000);
noTone(buzzer);
delay(1000);
}
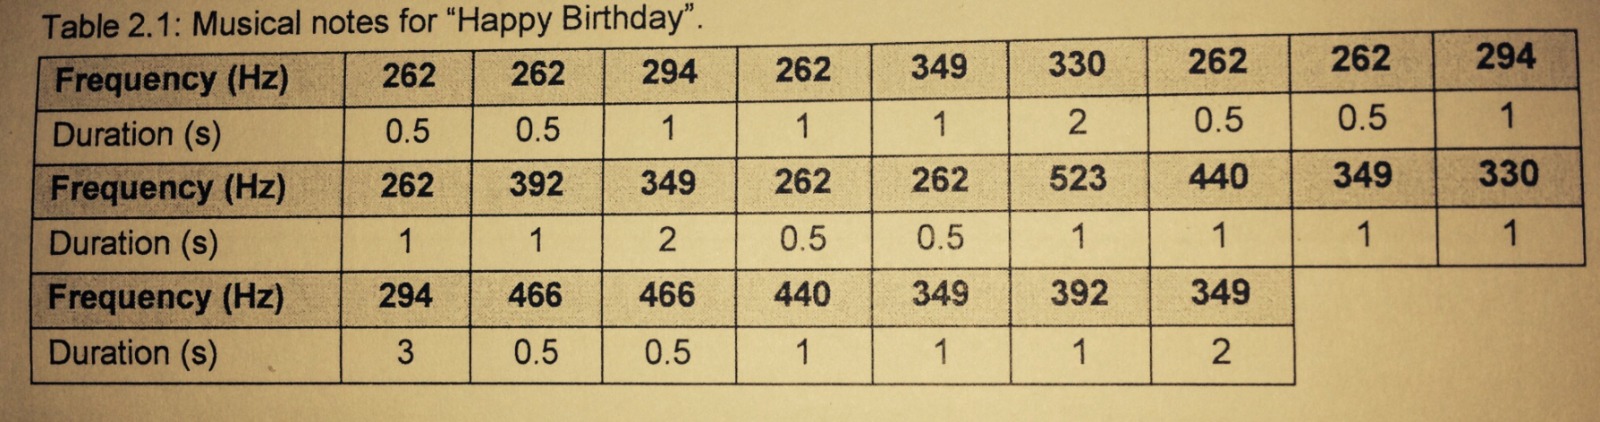
Creating Happy birthday melody
This table shows the frequencies and delays to create the happy birthday melody
The setup code (same as the previous)
Using the same code but multiple times with different frequencies and delays.
The Code
const int buzzer = 9;
void setup(void) {
  // put your setup code here, to run once:
pinMode(buzzer,OUTPUT);
}

void loop() {
  // put your main code here, to run repeatedly:
tone(buzzer,262);
delay(500);
noTone(buzzer);
delay(100);
tone(buzzer,262);
delay(500);
noTone(buzzer);
delay(100);
tone(buzzer,294);
delay(1000);
noTone(buzzer);
delay(100);
tone(buzzer,262);
delay(1000);
noTone(buzzer);
delay(100);
tone(buzzer,349);
delay(1000);
noTone(buzzer);
delay(100);
tone(buzzer,330);
delay(2000);
noTone(buzzer);
delay(100);
tone(buzzer,262);
delay(500);
noTone(buzzer);
delay(100);
tone(buzzer,262);
delay(500);
noTone(buzzer);
delay(100);
tone(buzzer,294);
delay(1000);
noTone(buzzer);
delay(100);
tone(buzzer,262);
delay(1000);
noTone(buzzer);
delay(100);
tone(buzzer,392);
delay(1000);
noTone(buzzer);
delay(100);
tone(buzzer,349);
delay(2000);
noTone(buzzer);
delay(100);
tone(buzzer,262);
delay(500);
noTone(buzzer);
delay(100);
tone(buzzer,262);
delay(500);
noTone(buzzer);
delay(100);
tone(buzzer,523);
delay(1000);
noTone(buzzer);
delay(100);
tone(buzzer,440);
delay(1000);
noTone(buzzer);
delay(100);
tone(buzzer,349);
delay(1000);
noTone(buzzer);
delay(100);
tone(buzzer,330);
delay(1000);
noTone(buzzer);
delay(100);
tone(buzzer,294);
delay(3000);
noTone(buzzer);
delay(100);
tone(buzzer,466);
delay(500);
noTone(buzzer);
delay(100);
tone(buzzer,466);
delay(500);
noTone(buzzer);
delay(100);
tone(buzzer,440);
delay(1000);
noTone(buzzer);
delay(100);
tone(buzzer,349);
delay(1000);
noTone(buzzer);
delay(100);
tone(buzzer,392);
delay(1000);
noTone(buzzer);
delay(100);
tone(buzzer,349);
delay(2000);
noTone(buzzer);
delay(100);
}
Merging input device with output device
The idea is use if statement so that when the sound sensor reached a certain value the output buzzer activates.
Merging both setup codes
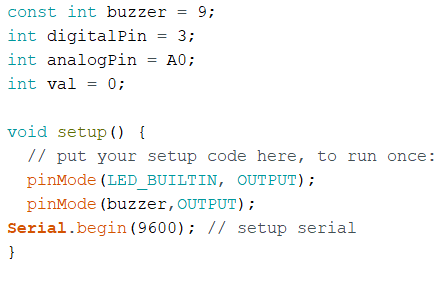
adding if statement with an analog value condition of 30 to activate the buzzer
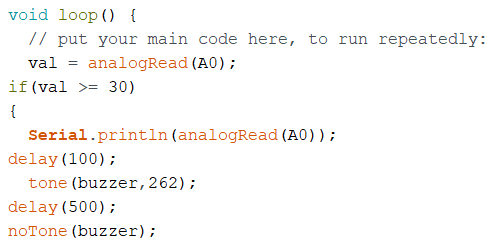
if the value did not reach 30 nothing will happen to the buzzer

upload the code

successfully uploaded

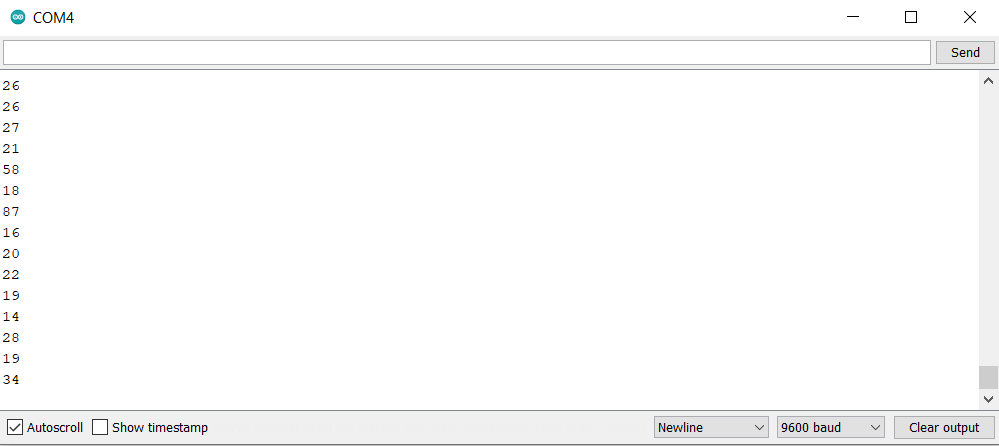
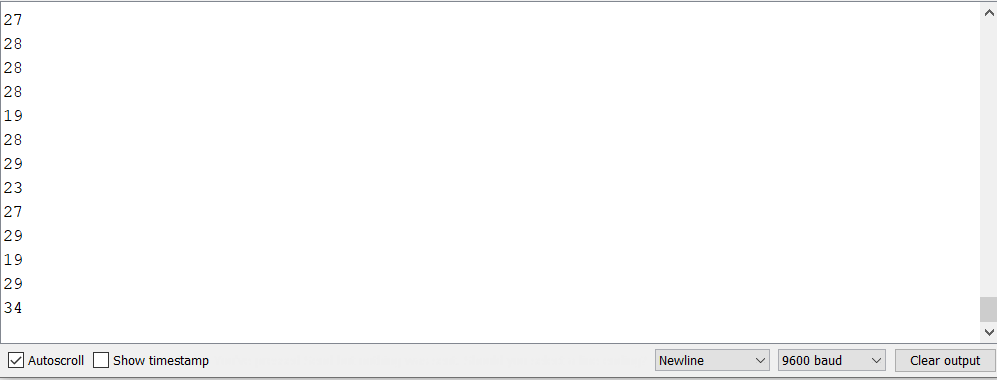
The monitor values until they reached the condition to activate
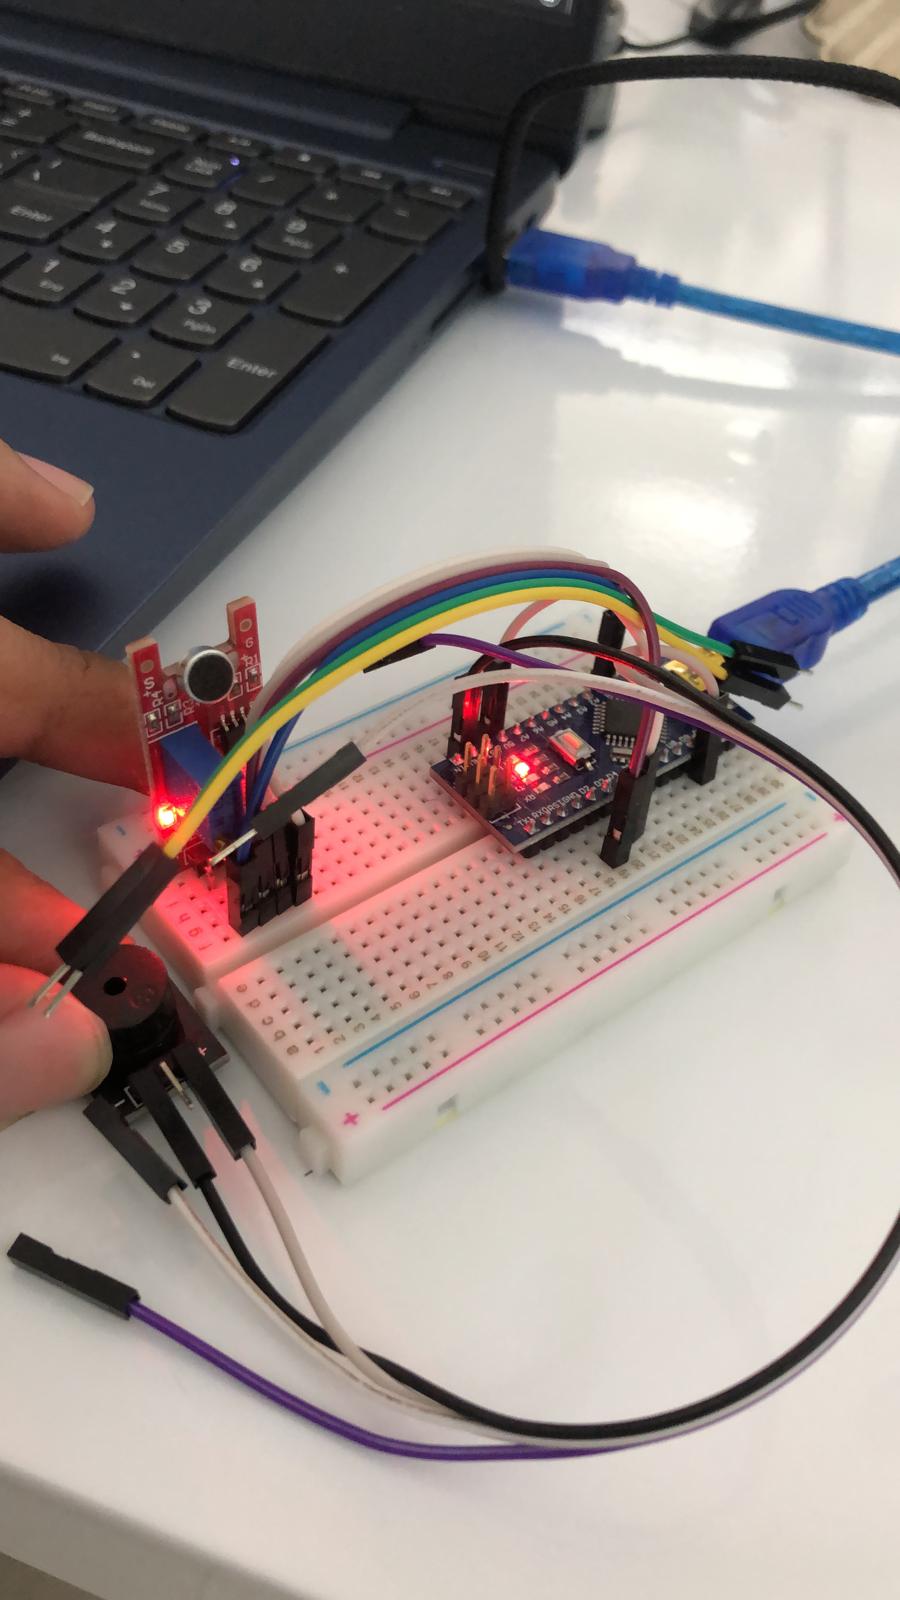
The connections
The Code
const int buzzer = 9;
int digitalPin = 3;
int analogPin = A0;
int val = 0;

void setup() {
  // put your setup code here, to run once:
  pinMode(LED_BUILTIN, OUTPUT);
  pinMode(buzzer,OUTPUT);
Serial.begin(9600); // setup serial
}

void loop() {
  // put your main code here, to run repeatedly:
  val = analogRead(A0);
if(val >= 30)
{
  Serial.println(analogRead(A0));
delay(100);
  tone(buzzer,262);
delay(500);
noTone(buzzer);
delay(100);
tone(buzzer,262);
delay(500);
noTone(buzzer);
delay(100);
tone(buzzer,294);
delay(1000);
noTone(buzzer);
delay(100);
tone(buzzer,262);
delay(1000);
noTone(buzzer);
delay(100);
tone(buzzer,349);
delay(1000);
noTone(buzzer);
delay(100);
tone(buzzer,330);
delay(2000);
noTone(buzzer);
delay(100);
tone(buzzer,262);
delay(500);
noTone(buzzer);
delay(100);
tone(buzzer,262);
delay(500);
noTone(buzzer);
delay(100);
tone(buzzer,294);
delay(1000);
noTone(buzzer);
delay(100);
tone(buzzer,262);
delay(1000);
noTone(buzzer);
delay(100);
tone(buzzer,392);
delay(1000);
noTone(buzzer);
delay(100);
tone(buzzer,349);
delay(2000);
noTone(buzzer);
delay(100);
tone(buzzer,262);
delay(500);
noTone(buzzer);
delay(100);
tone(buzzer,262);
delay(500);
noTone(buzzer);
delay(100);
tone(buzzer,523);
delay(1000);
noTone(buzzer);
delay(100);
tone(buzzer,440);
delay(1000);
noTone(buzzer);
delay(100);
tone(buzzer,349);
delay(1000);
noTone(buzzer);
delay(100);
tone(buzzer,330);
delay(1000);
noTone(buzzer);
delay(100);
tone(buzzer,294);
delay(3000);
noTone(buzzer);
delay(100);
tone(buzzer,466);
delay(500);
noTone(buzzer);
delay(100);
tone(buzzer,466);
delay(500);
noTone(buzzer);
delay(100);
tone(buzzer,440);
delay(1000);
noTone(buzzer);
delay(100);
tone(buzzer,349);
delay(1000);
noTone(buzzer);
delay(100);
tone(buzzer,392);
delay(1000);
noTone(buzzer);
delay(100);
tone(buzzer,349);
delay(2000);
noTone(buzzer);
delay(100);
}
else
{
  Serial.println(analogRead(A0));
delay(100);
}
}
Useful links
- About the sound sensor
- Connection and setup
- About the tempreture and humidity sensor+Library
- About the Buzzer sensor