8. Moulding and casting
This week, we got theoretical lecture about Moulding And Casting processes.
Tasks Overview
- GROUP ASSIGNMENT:
1- Review the safety data sheets for each of your molding and casting materials.
2- Make and compare test casts with each of them.
- INDIVIDUAL ASSIGNMENT:
1- Design a 3D mould around the stock and tooling that you’ll be using, mill it (rough cut + (at least) three-axis finish cut), and use it to cast parts.
Moulding & Casting
This is a 3 step process:
-
Milling (engraving)
-
Creating flexible molds.
-
Final result.
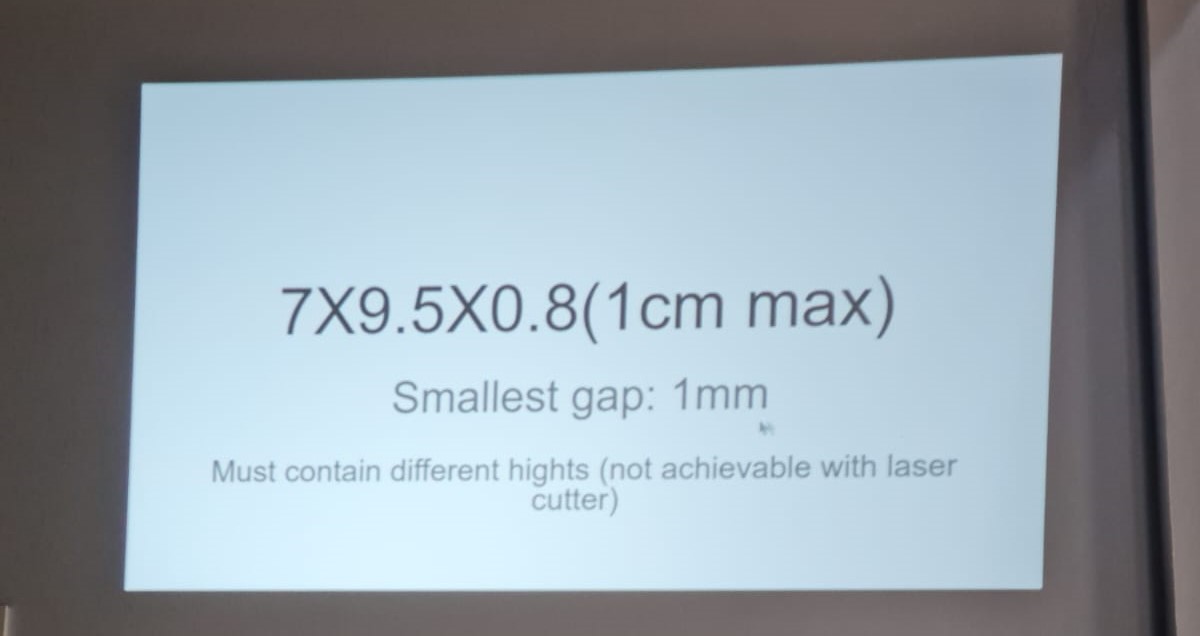
Machinable Wax is a hard material, with different dimensions (7cm x 9.5cm x 1cm).
Then we use Molding material, which is a soft material.
Then again, a new hard casting material is used for filling the mold, to get the final product.
Machine Limitation
They are the following:
-
Machine can’t see details in bottom parts.
-
It can’t do small little details.
-
It can’t do small narrow spaces.
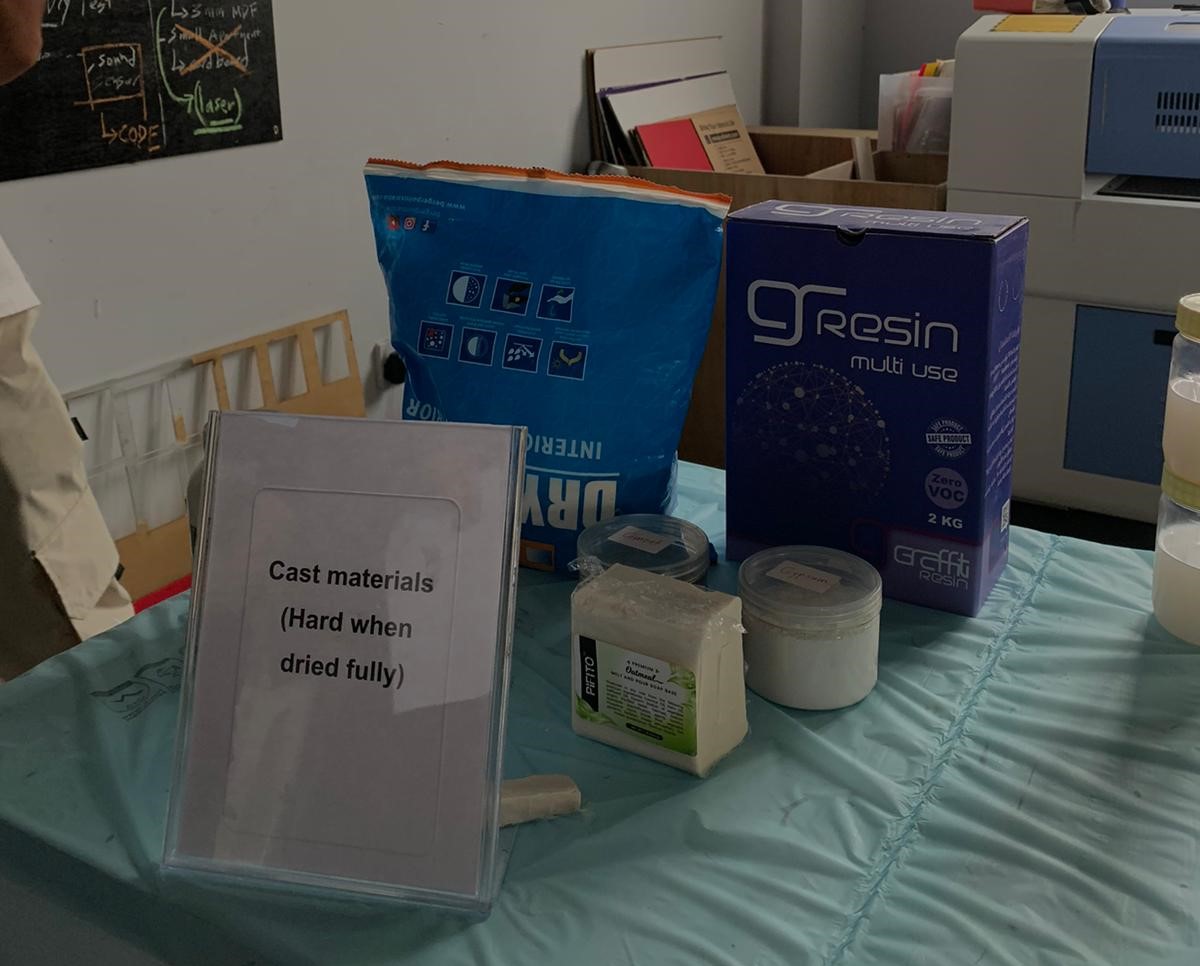
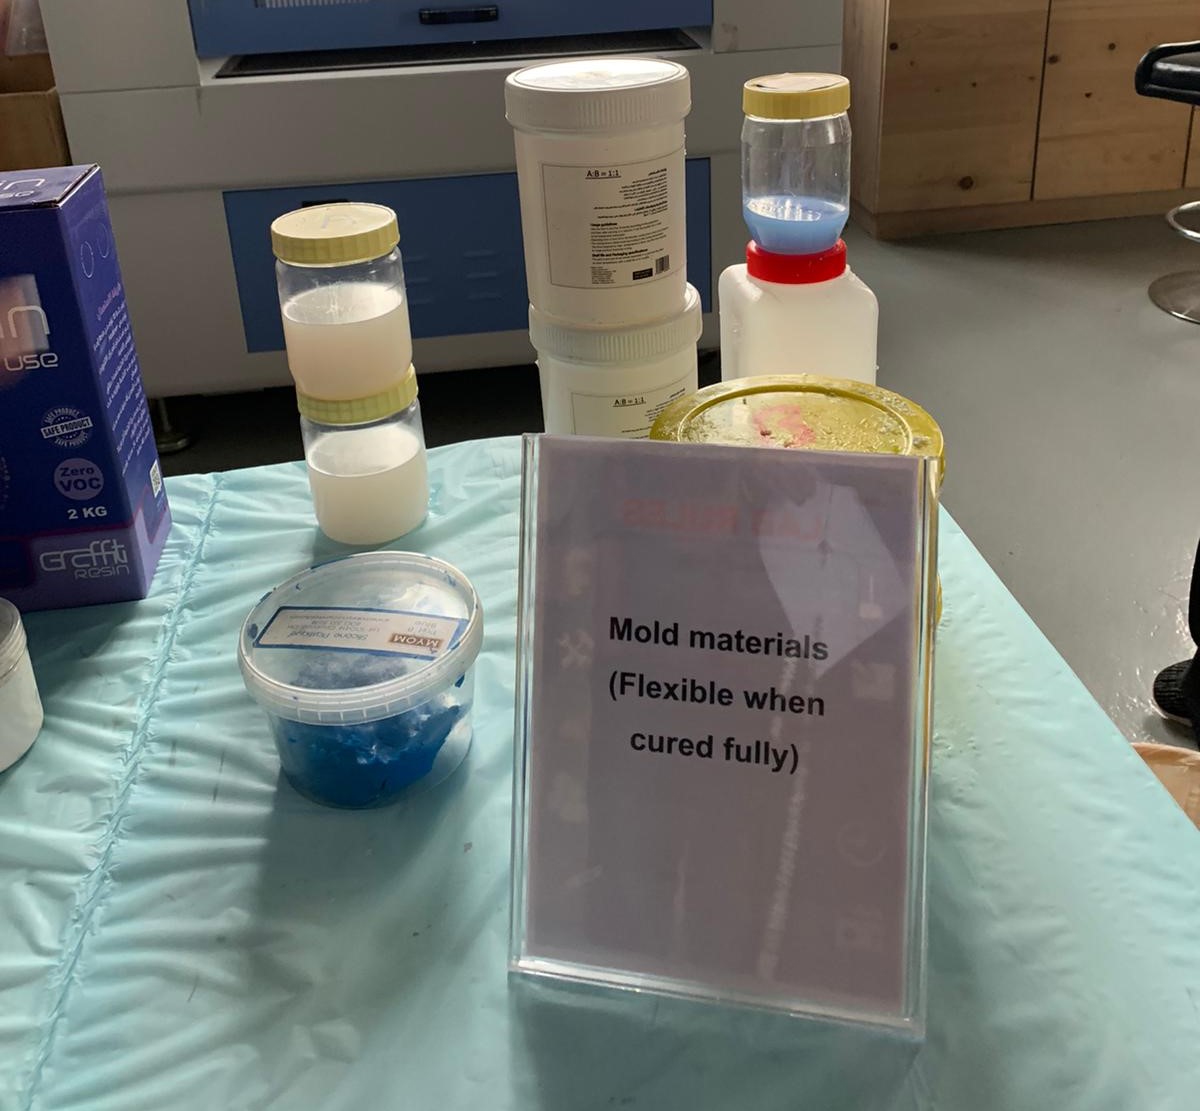
Moulding & Casting Materials
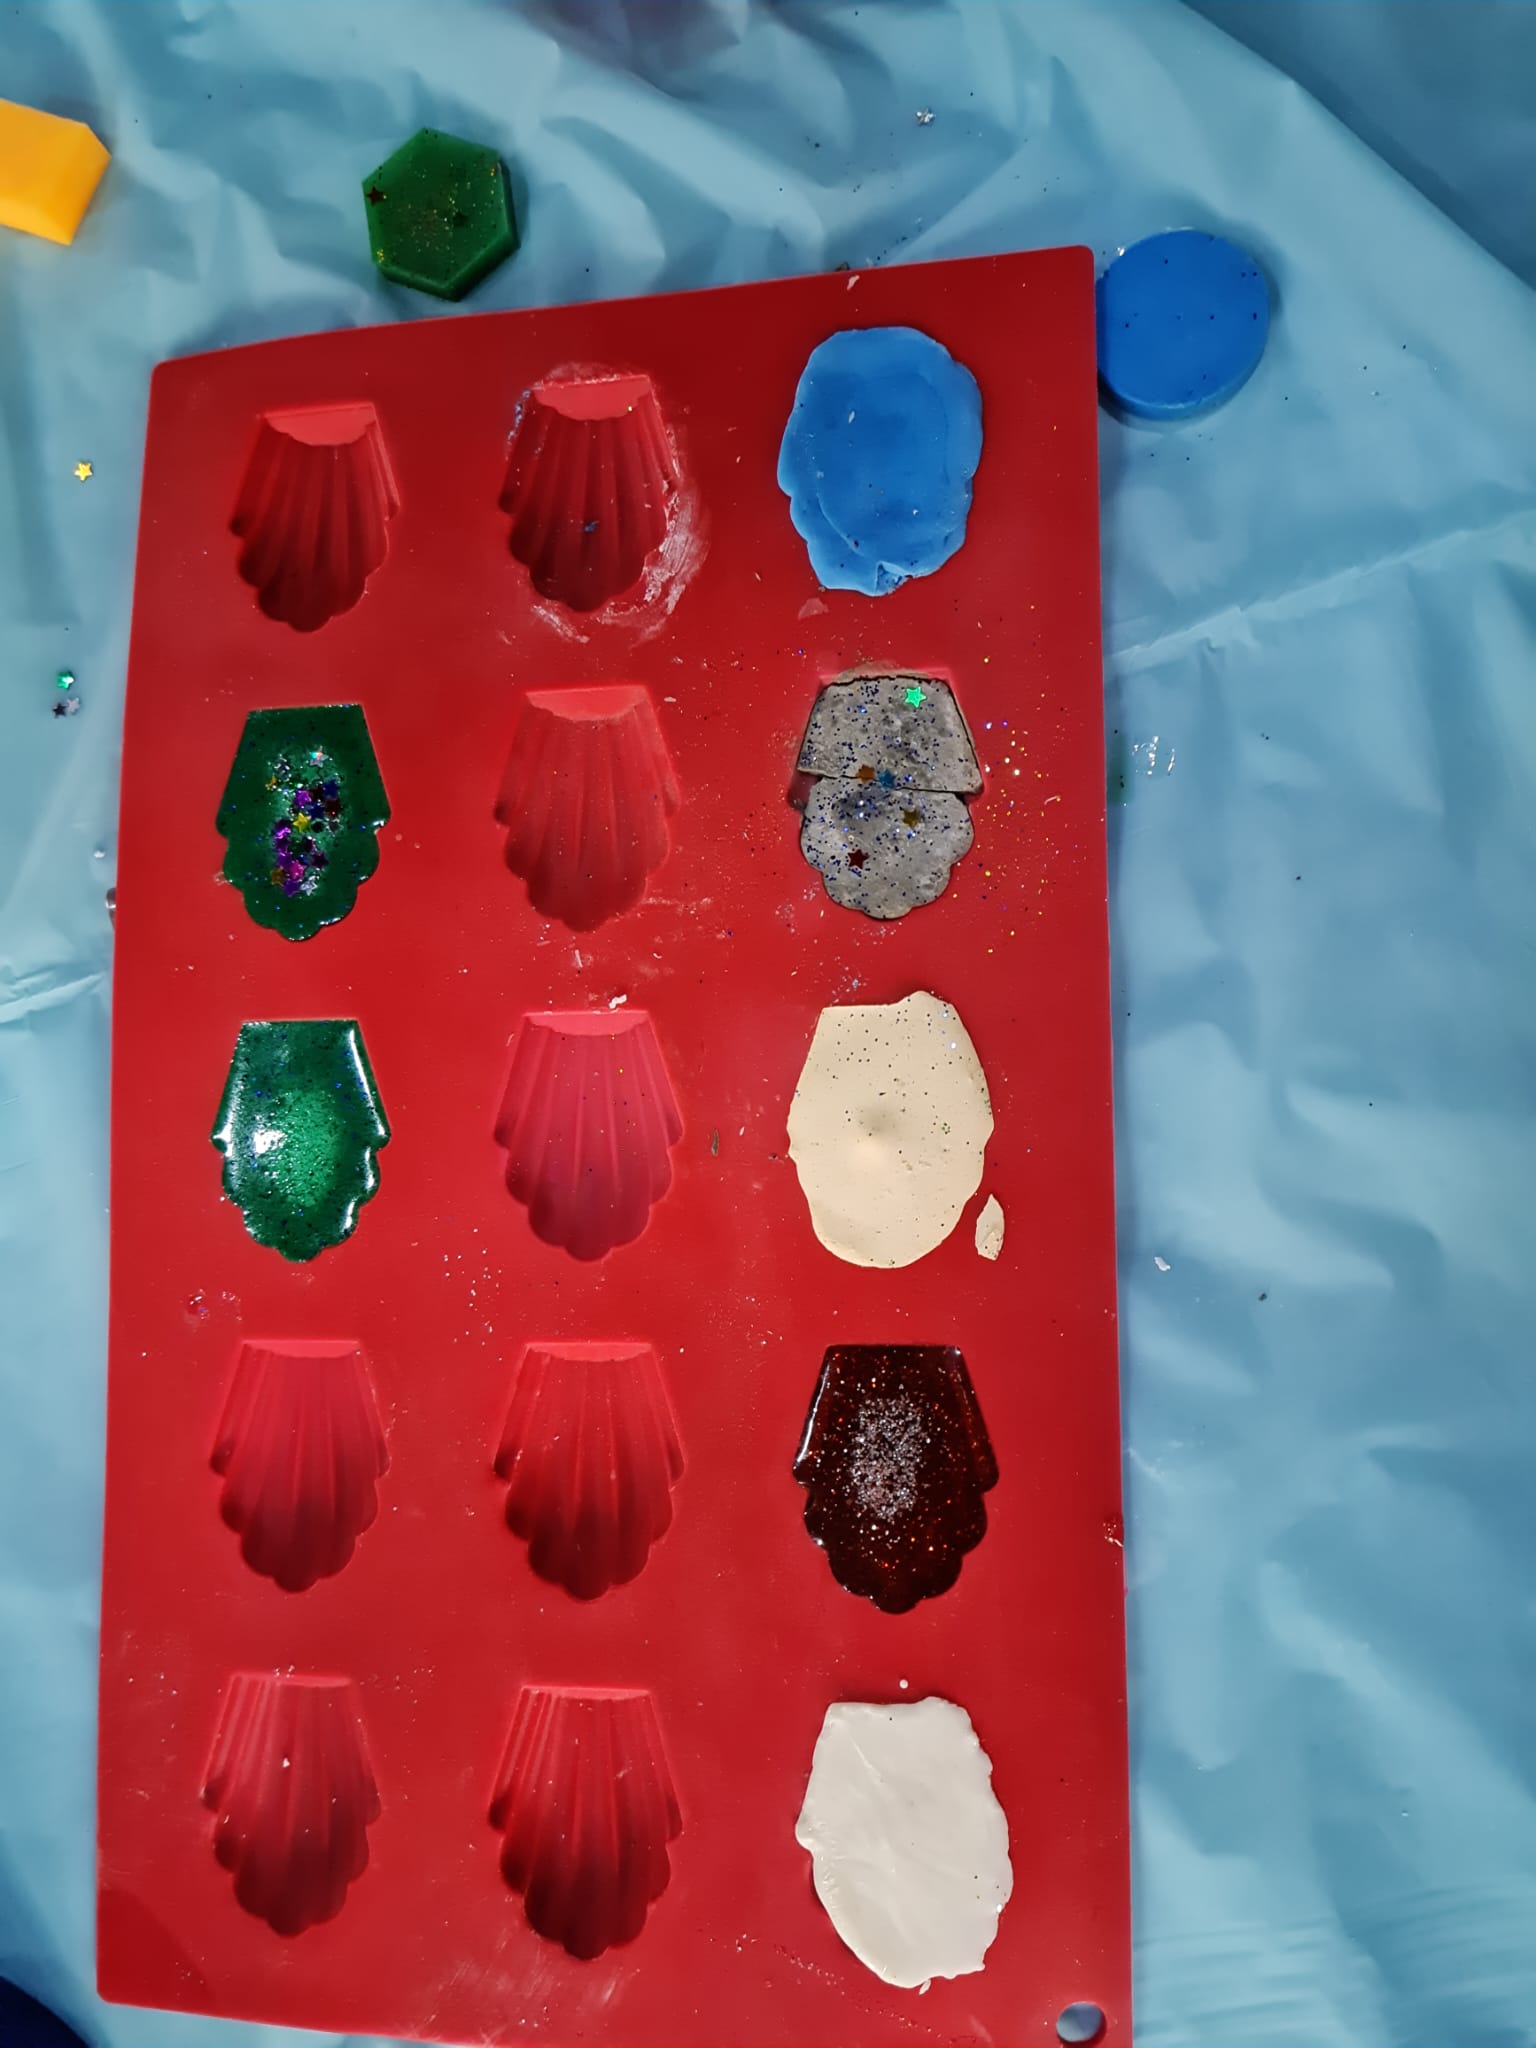
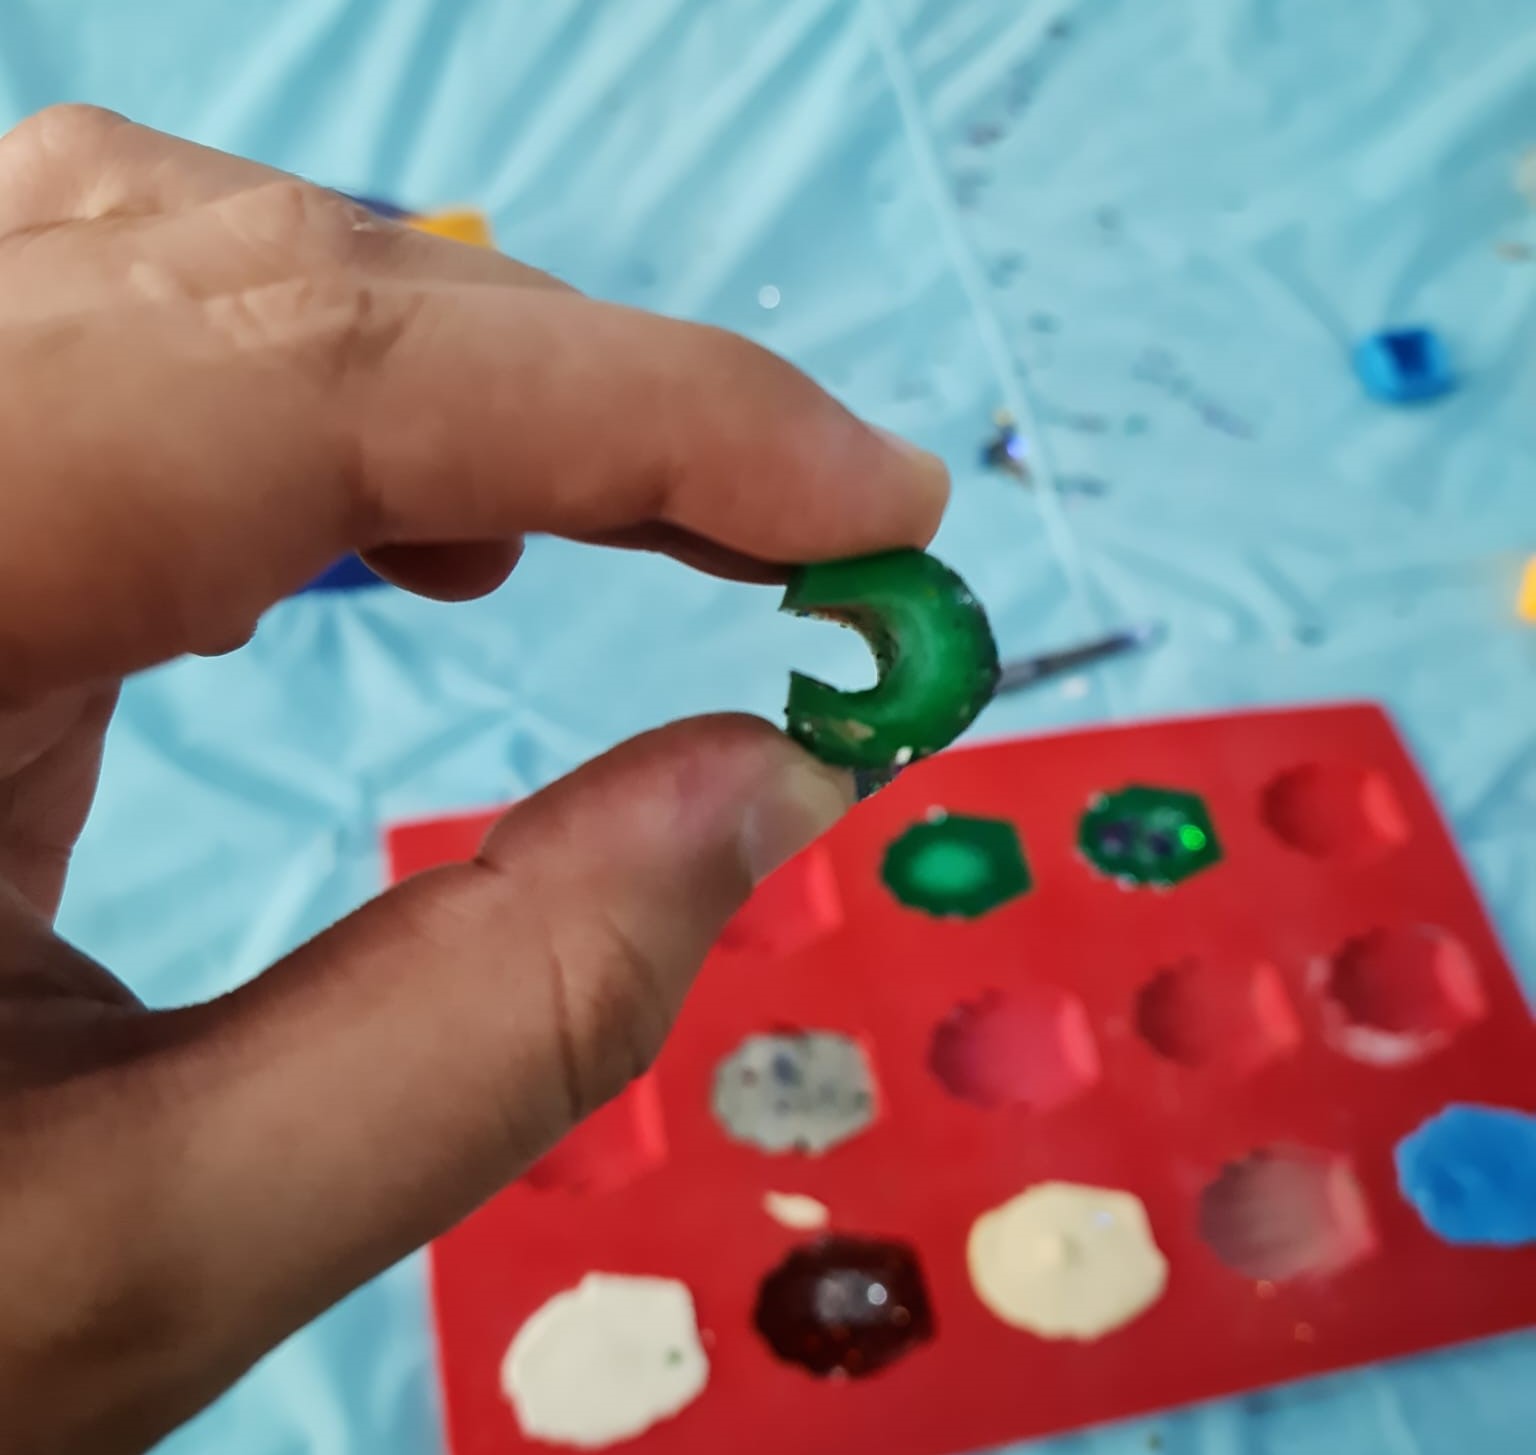
We were shown different materials, for both moulding and casting. And, we were allowed to choose on our own, whichever material we wanted to work with. The cast materials include resin, soap, cement and plaster, while the mould materials include various types of silicon materials. Every material has it’s own specific work and curing times, and their mixing ratios. Safety considerations should be considered, while dealing with either molding or casting materials.
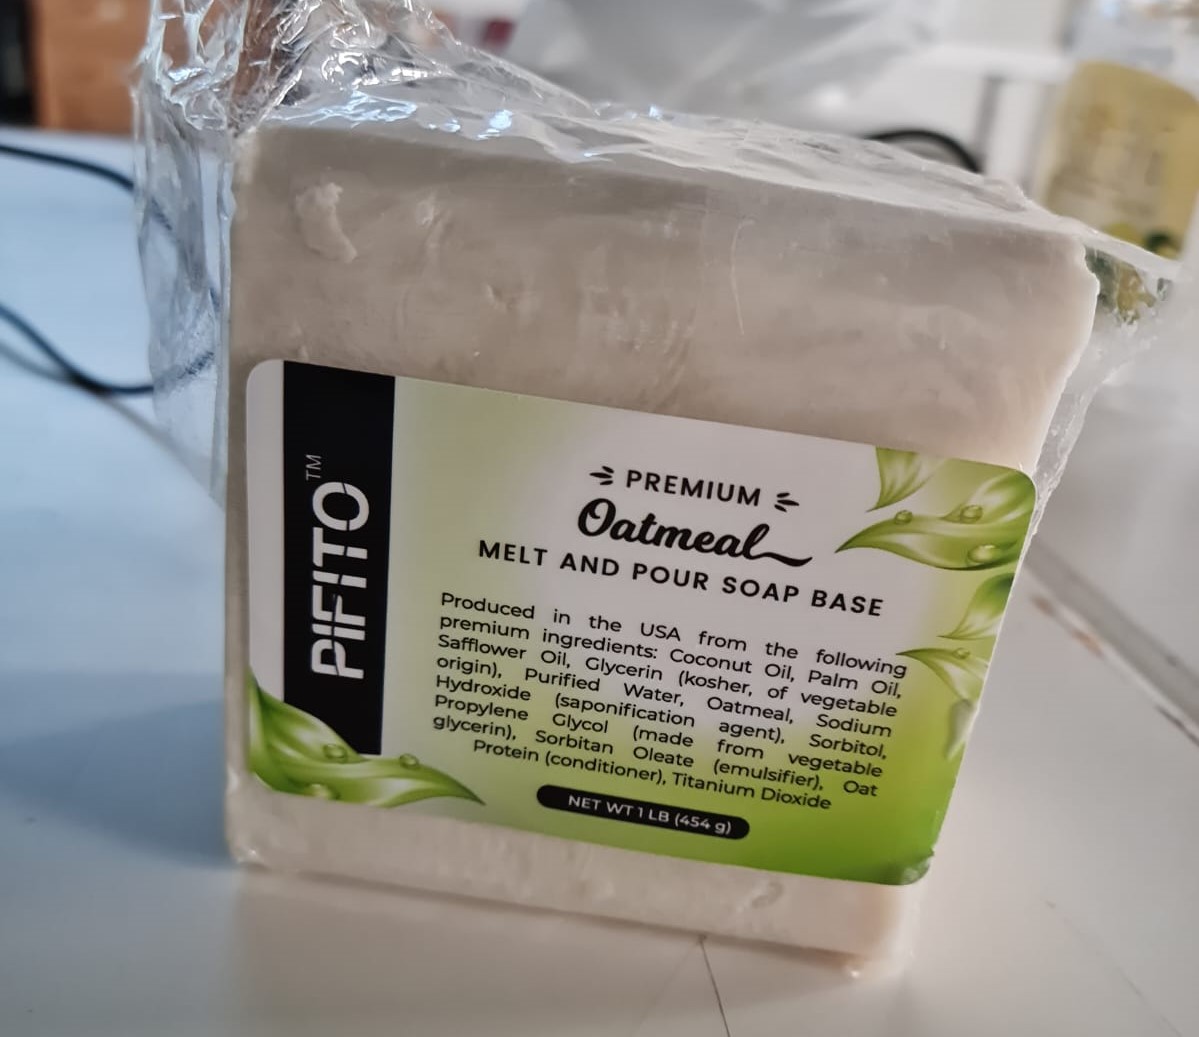
SOAP
I opted for Soap as a casting material, and started searching on it.
Soap Research Links
How to make or Cast Soaps in Mould
Step Process!
After 20 minutes of searching, the following data was found, which I noted down on a small piece of paper.
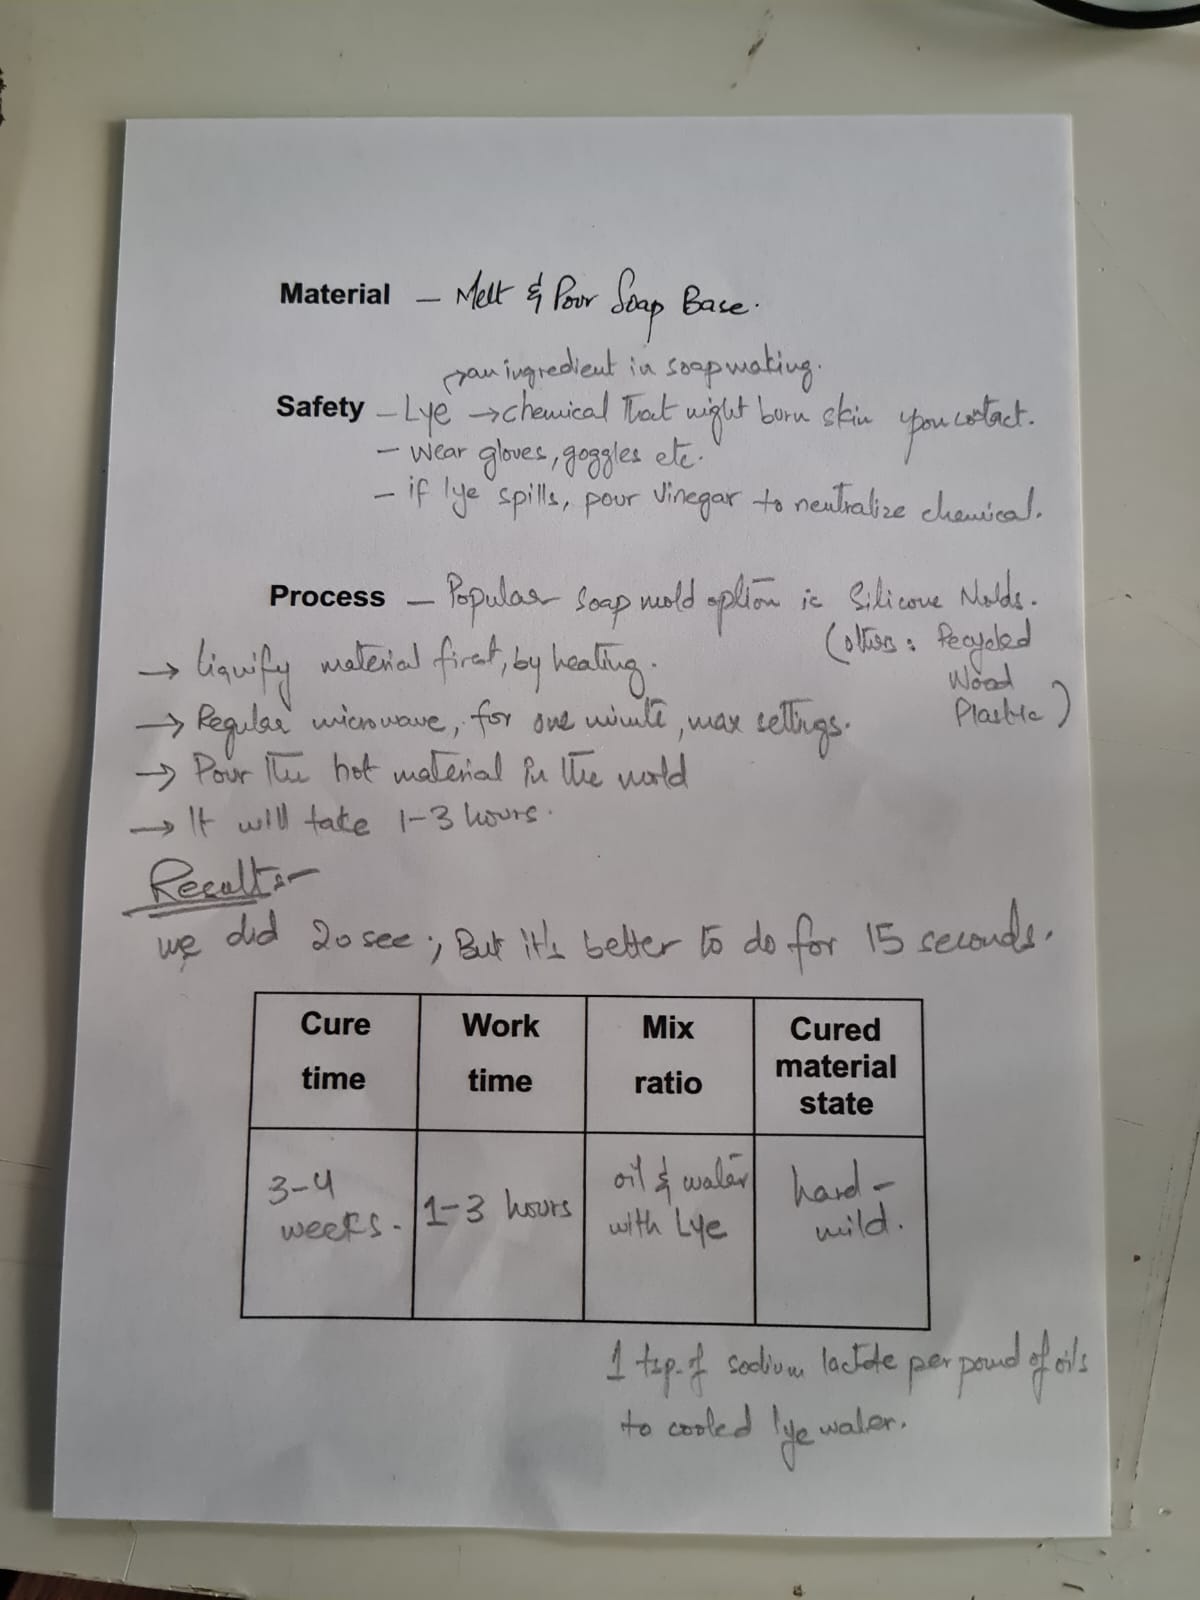
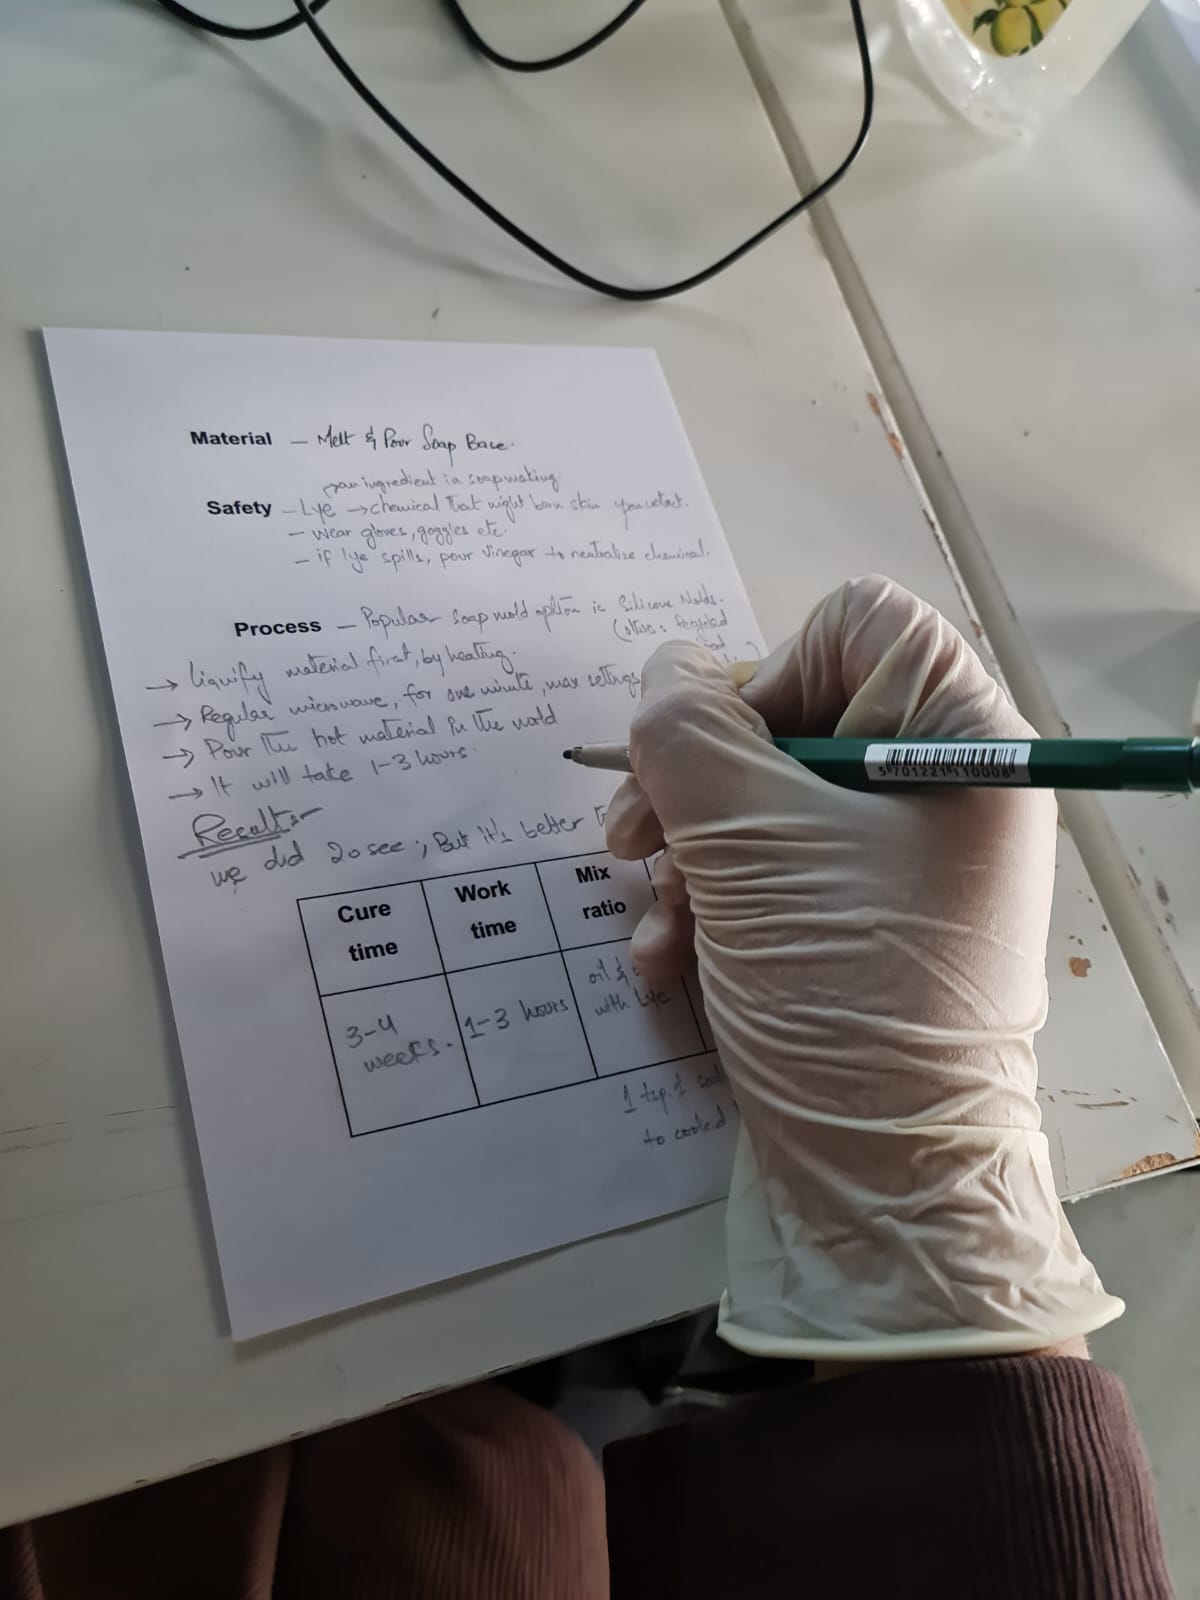
Then my instructor, Duaa, helped and guided me in how to melt the soap, to be fitted in the mould. The step process that I found from the links is as follows:
1- First, a small piece of soap was tested.
2- In order to do that, We went to Microwave, and started melting the soap for the first 10 seconds, so it doesn’t burn. This was to see the timing needed for the soap to melt.
3- We saw that the soap didn’t melt fully, so we microwaved it for another 10 seconds, and it was completely melted.
KEY POINT TO NOTE:
It’s better to melt it for 15 seconds, as 20 seconds was still too much, and a little burning smell could be smelt by us. So we concluded that the best timing for the soap to melt is 15 seconds.
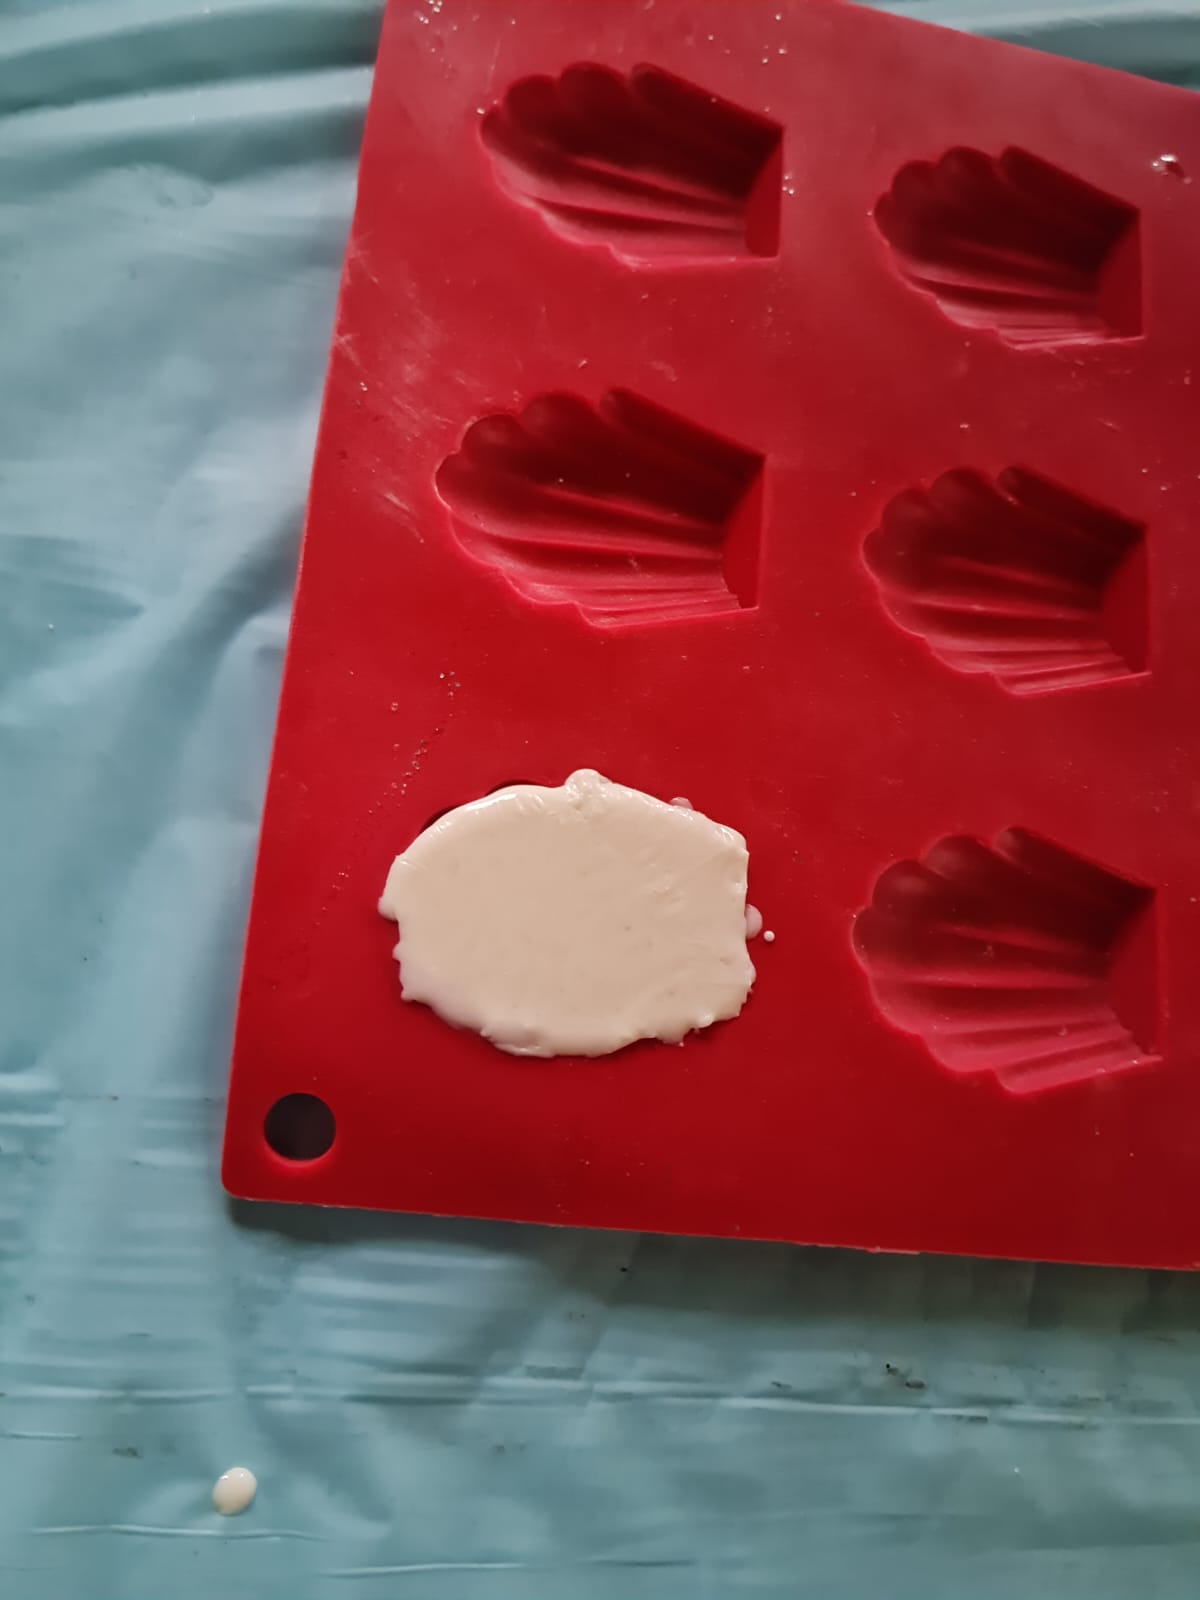
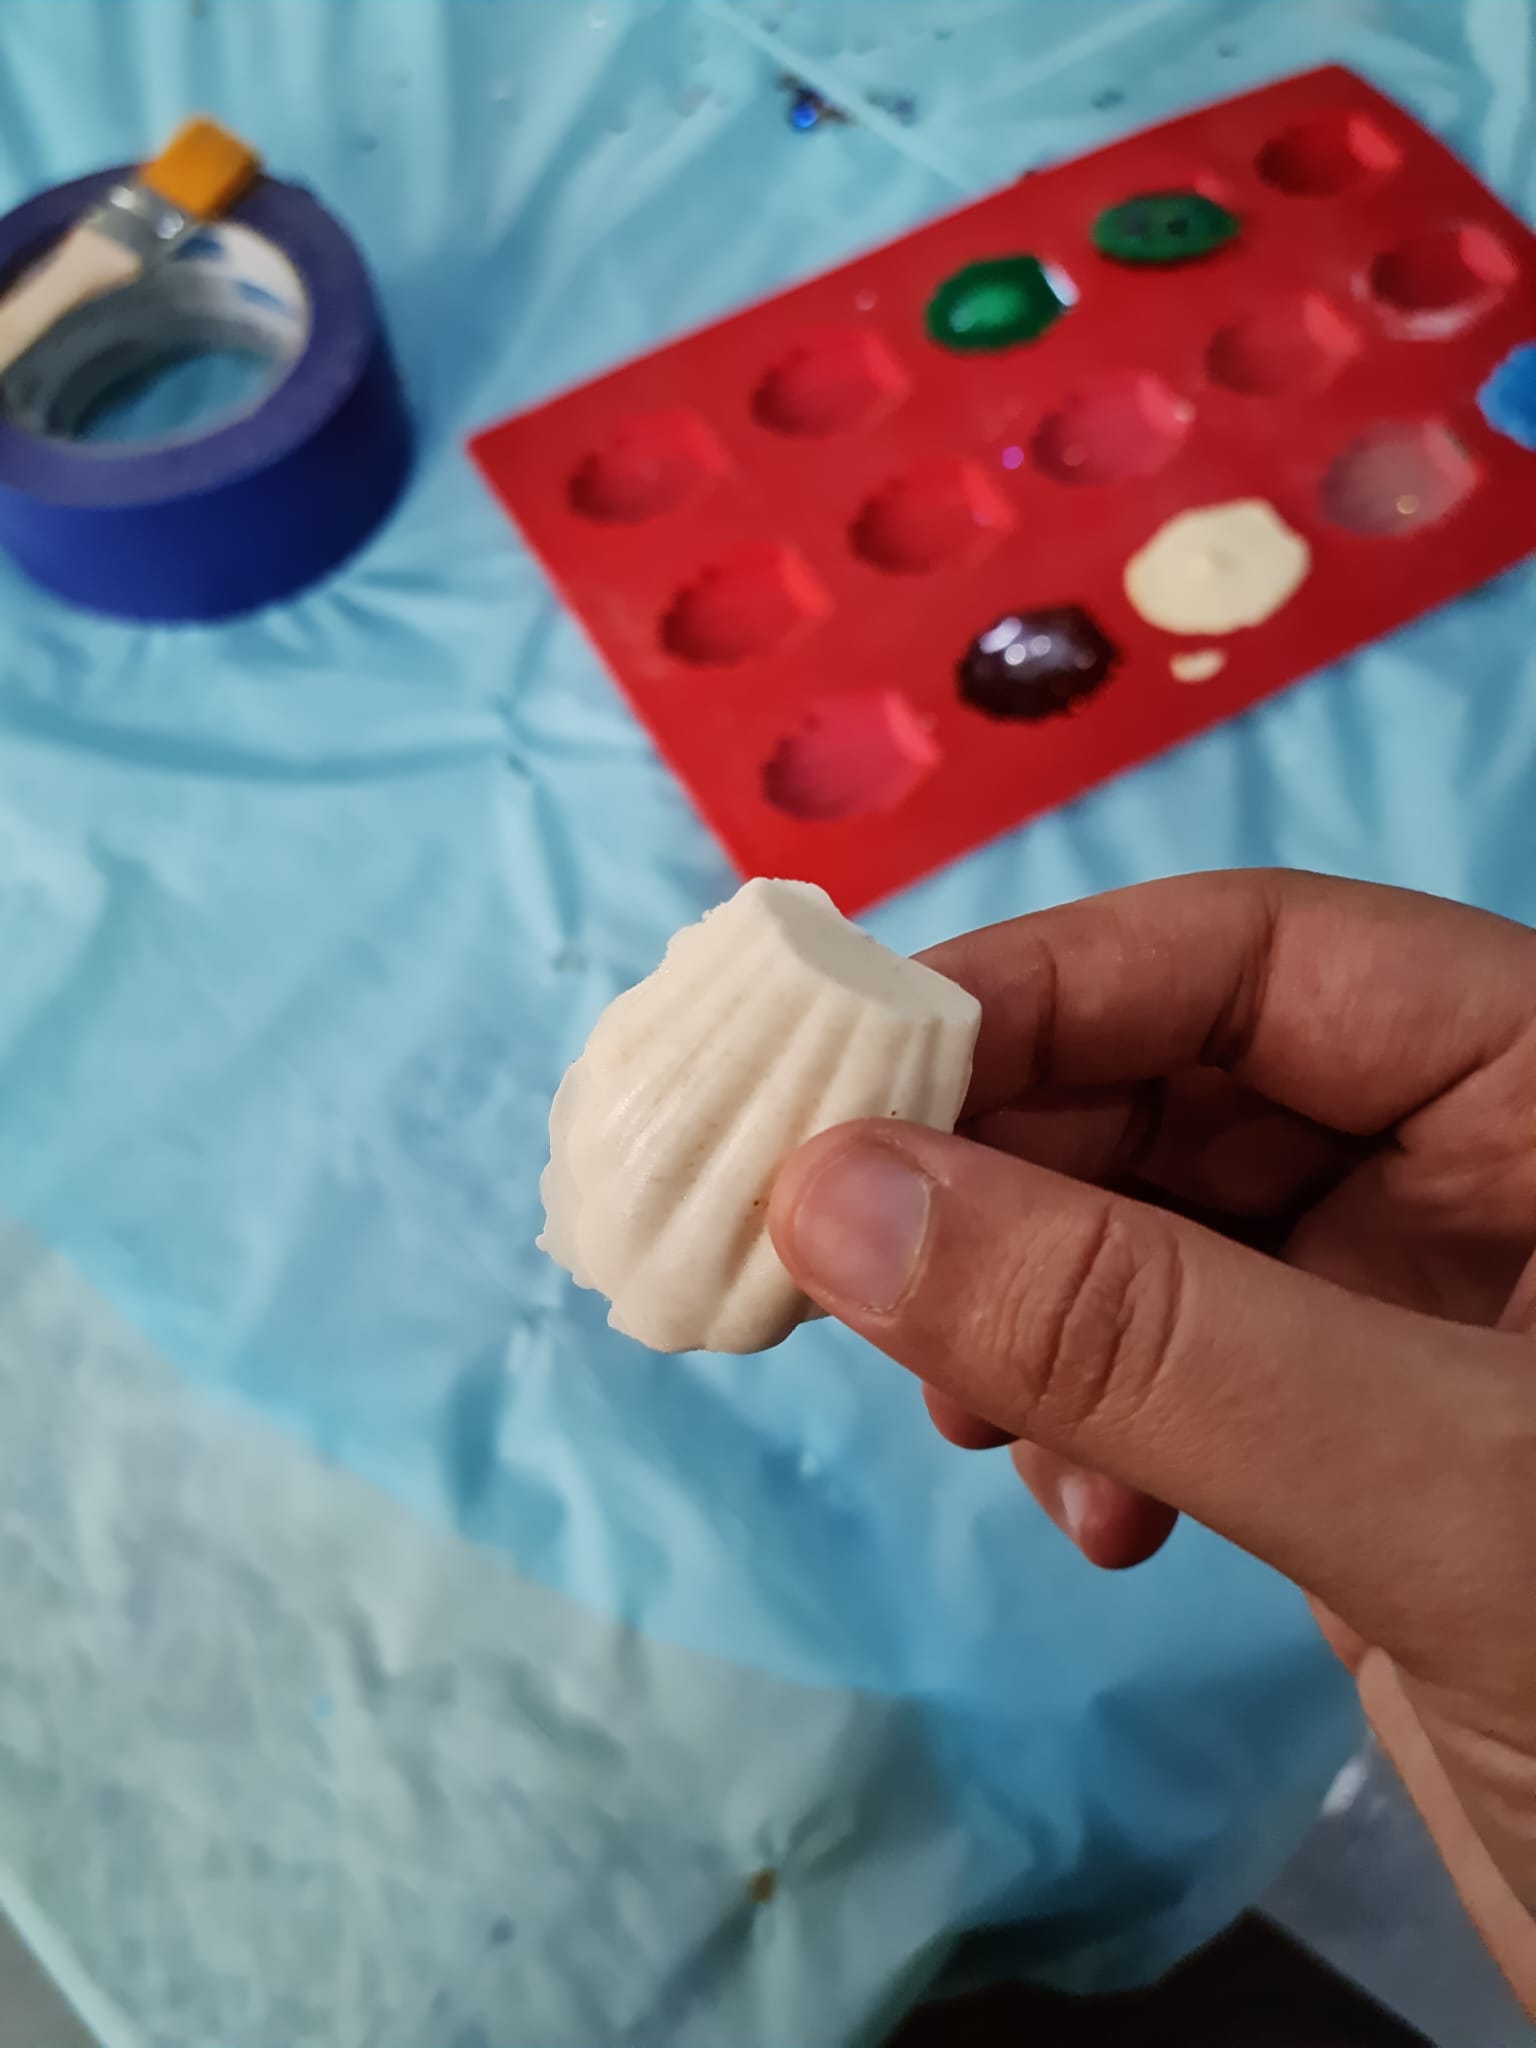
4- After that, we brought it back to the working station, and poured the melted soap in the silicone mould. According to the research, the time illustrated said 1-3 hours, but it seems that different soaps need different timings to melt.
5- Later on, while I left it to harden, I started working on my actual design, in Fusion 360 software.
Videos
Final Result
Links to other groups’ assigned materials
Please do refer to my below mentioned colleagues’ works, to see different materials (with their different mixing ratios, working and curing times) that they used and tried for moulding and casting.
Let’s Design!!
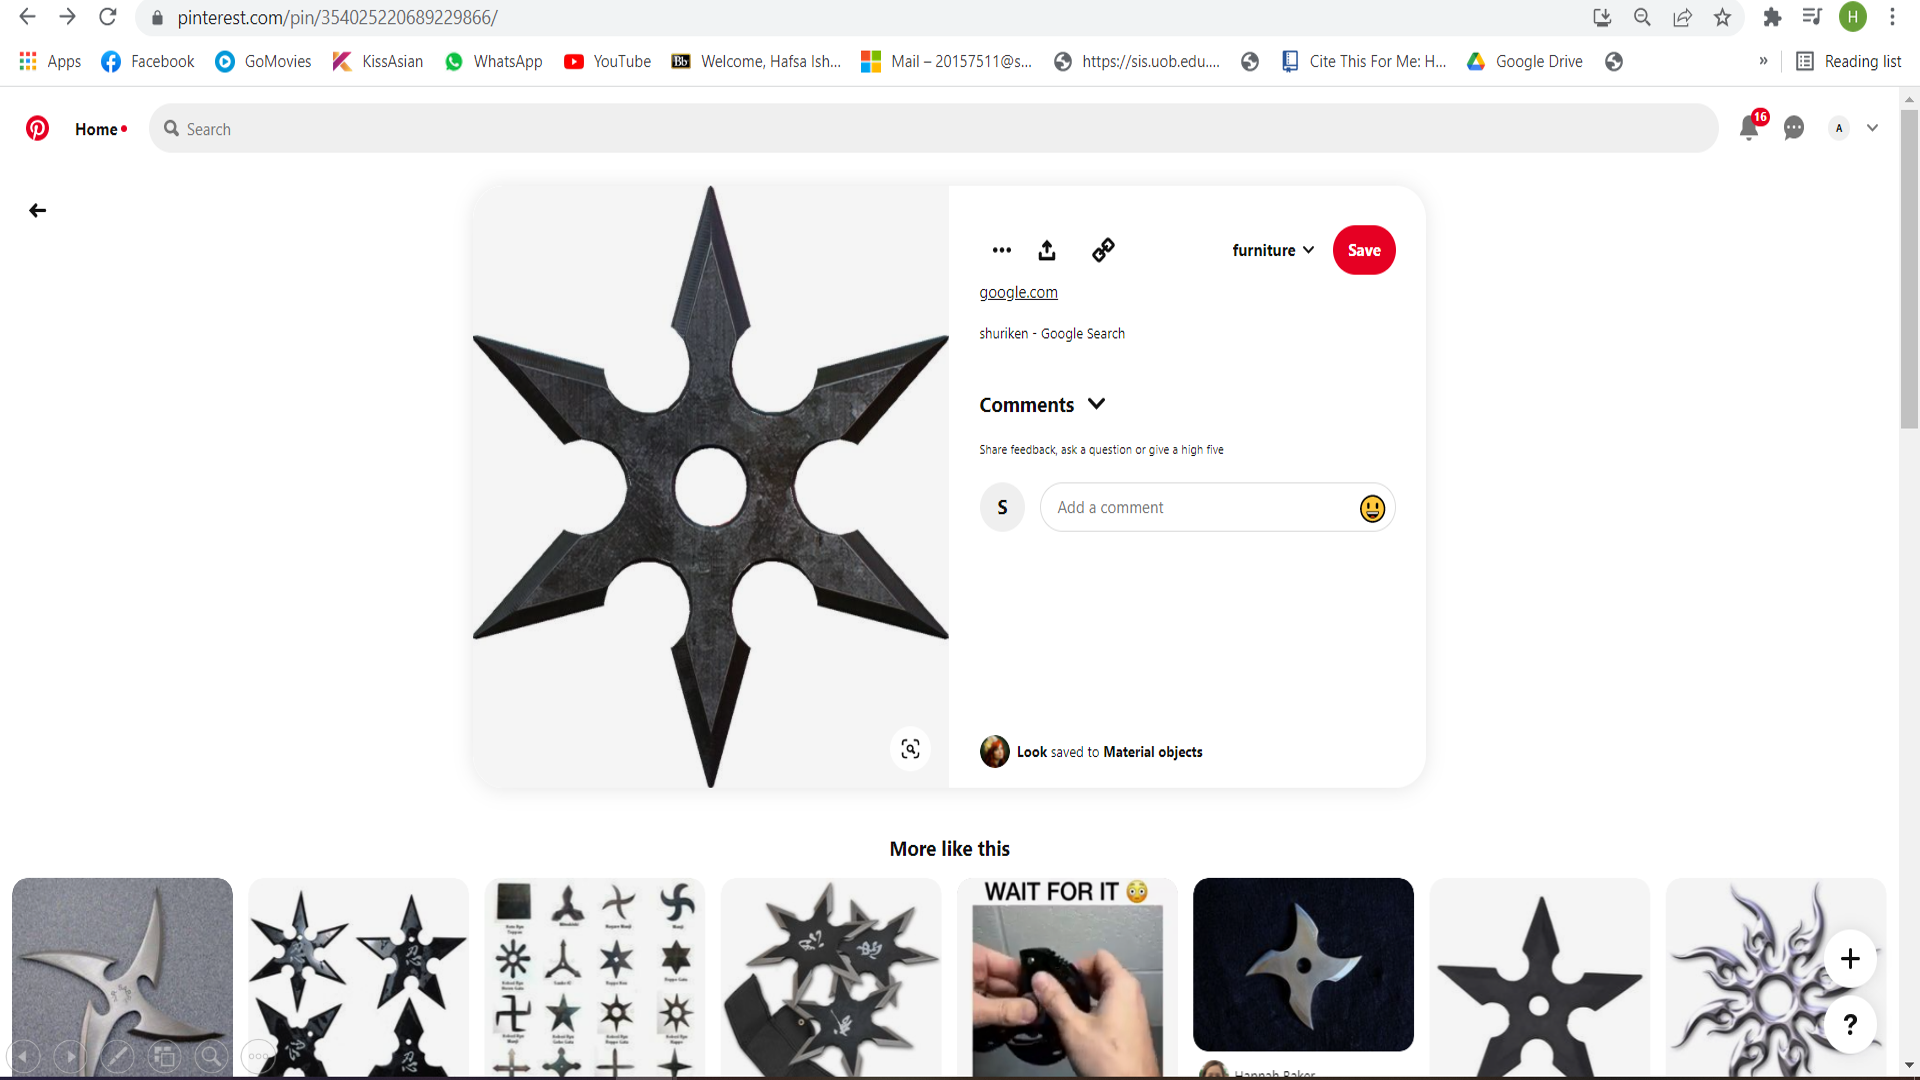
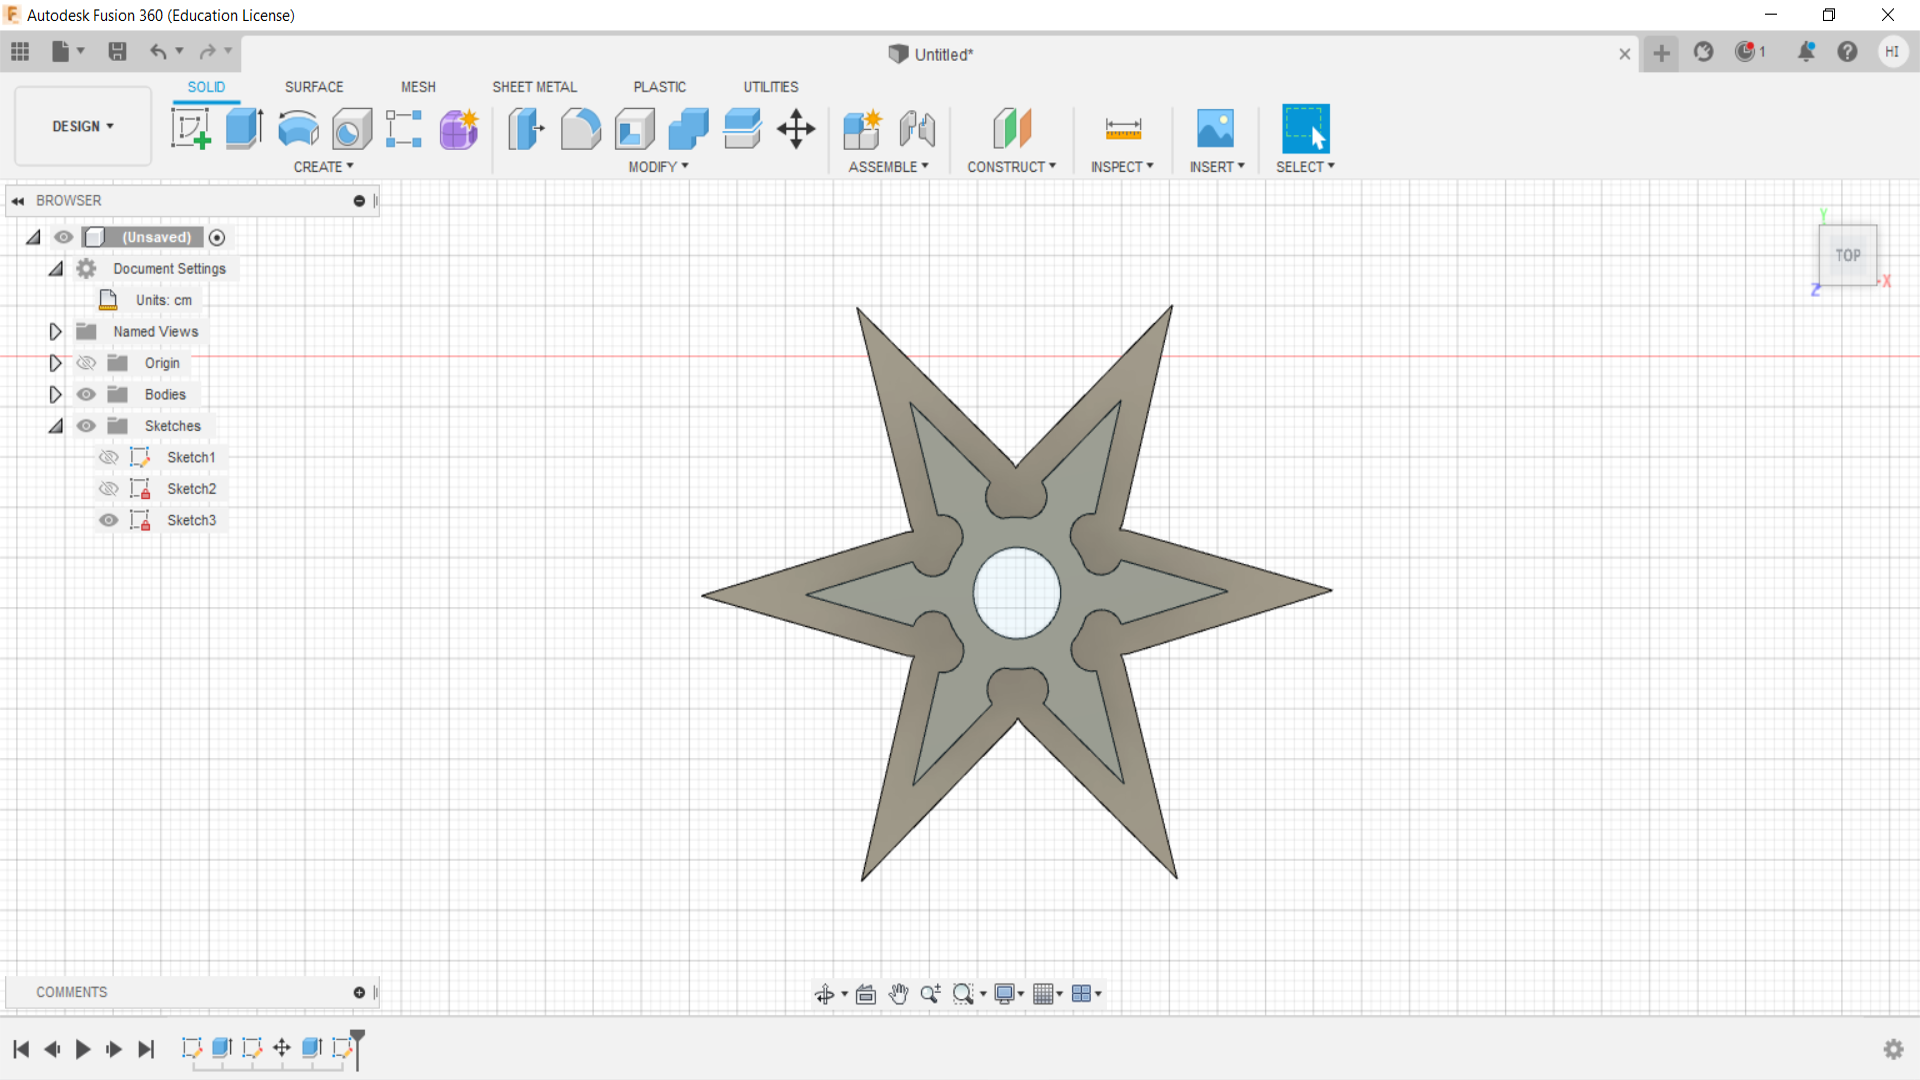
In order to start working on the design, I started searching for different things, ranging from Heart to Diamond shapes, to stars, house designs and 2D cartoon figures etc. etc. But in the end, as I have watched many Japanese Animes, so I settled for a “Shuriken”. It’s a ninja tool, that is mostly used for training purposes, or Assassinations in animes or movies.
Here is a site reference, from where I took the design inspiration: Shuriken Design
I started making the design in Fusion 360.
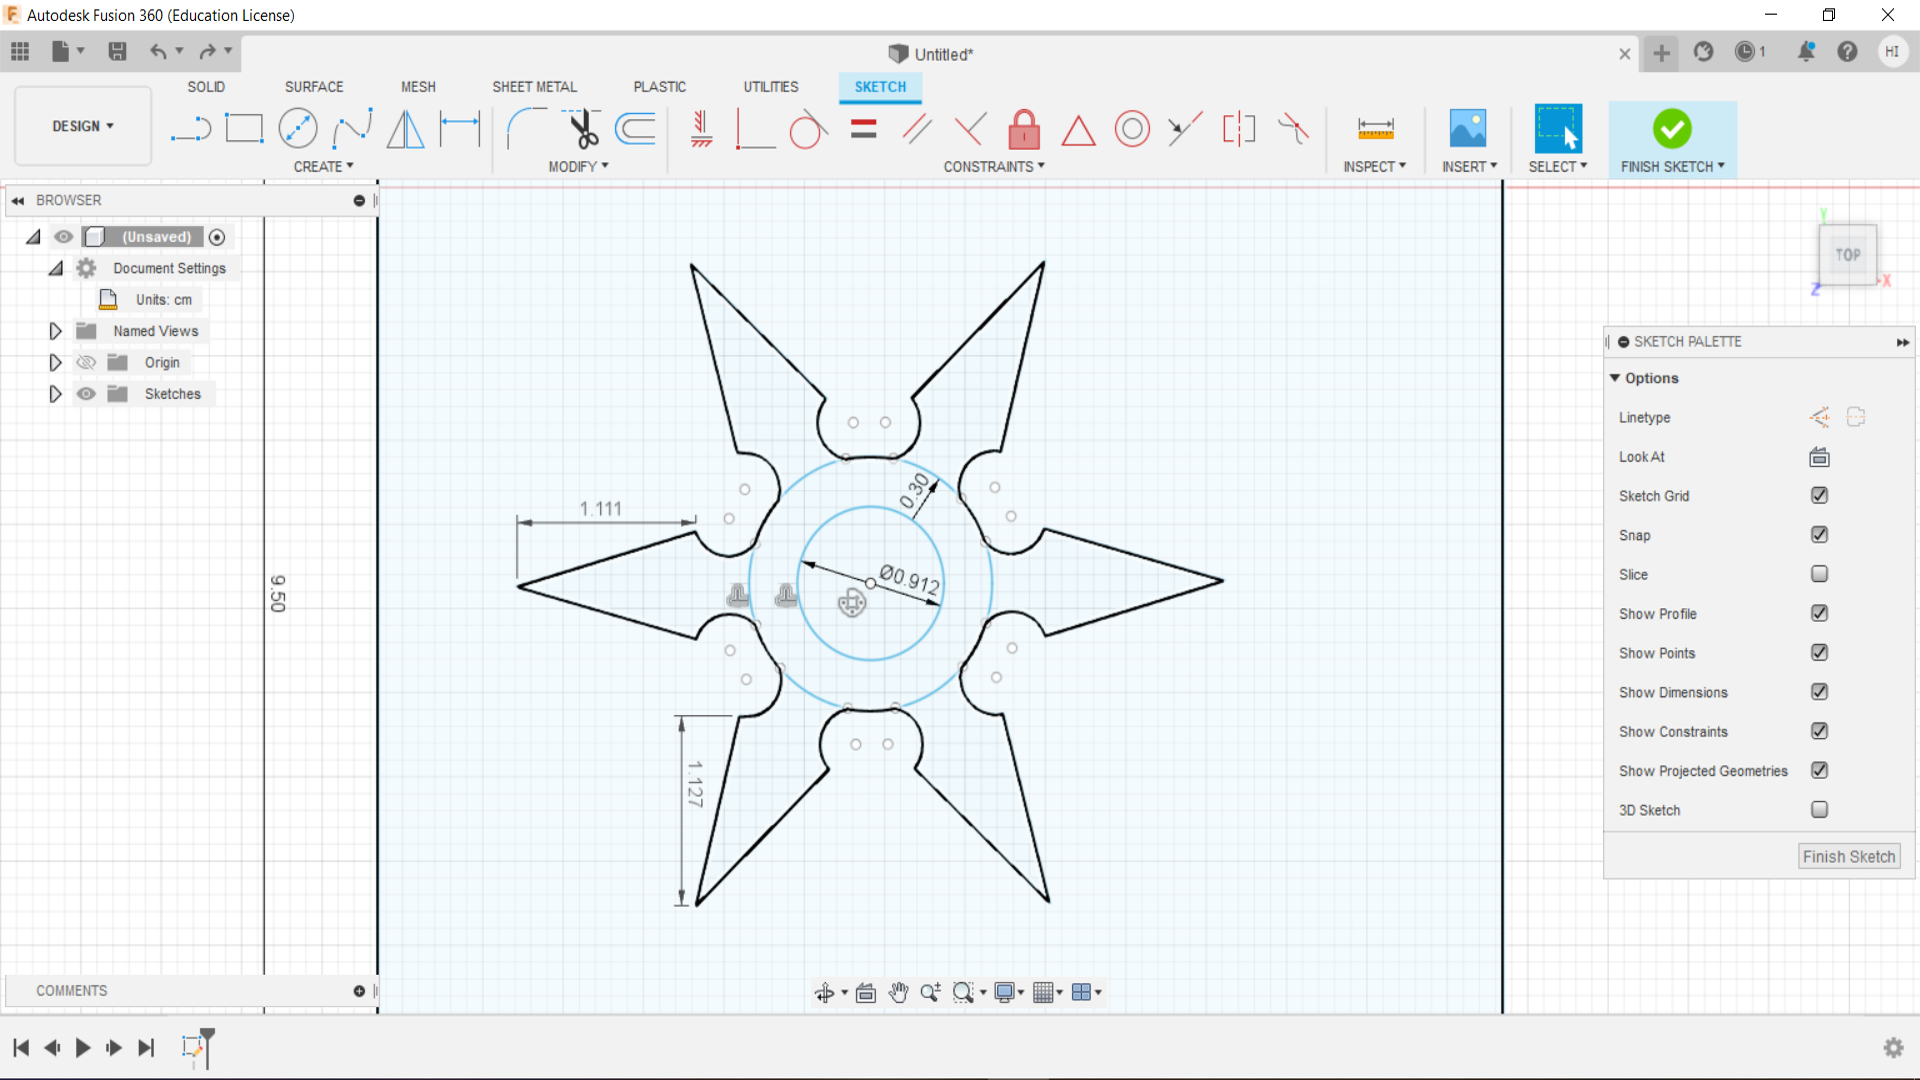
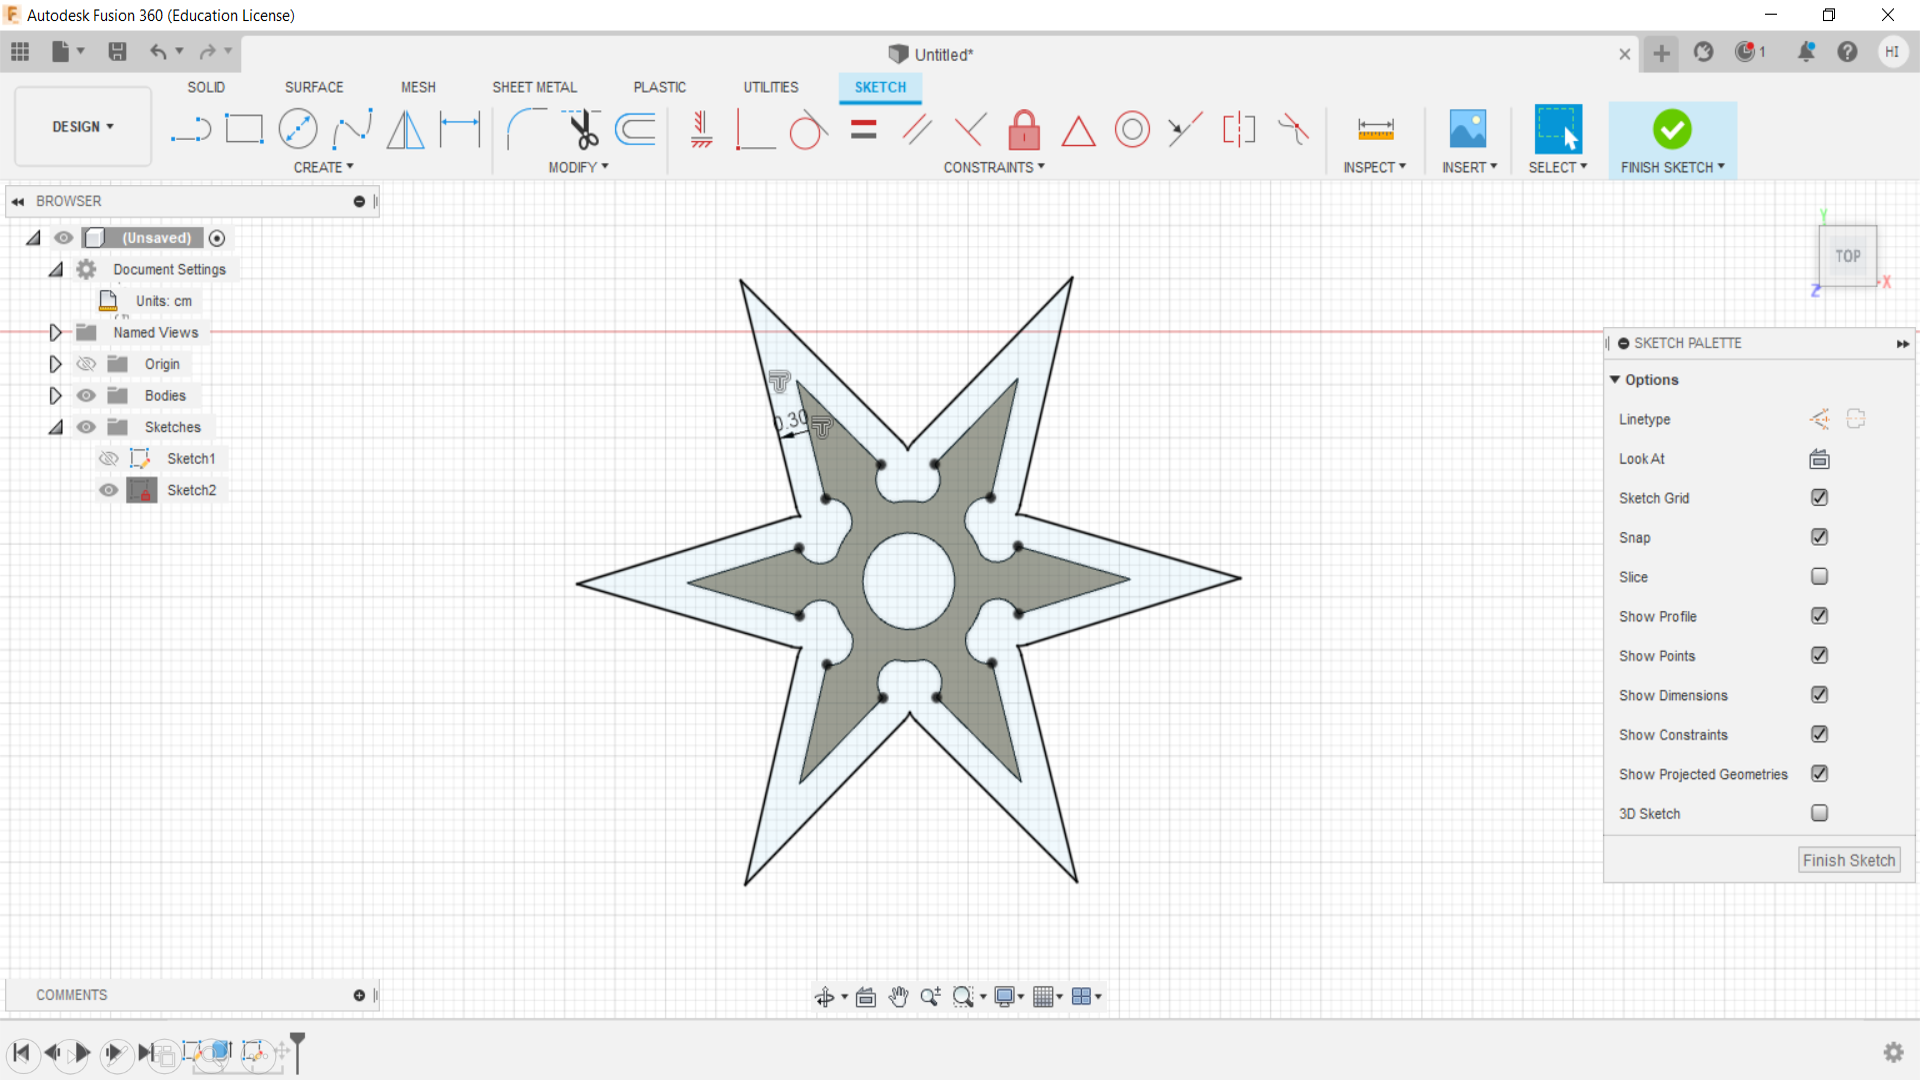
1- First, I sketched the main outline dimensions of the molded wax (7cm x 9.5cm x 1cm) and made them in the software, to make sure that I don’t go outside the limited boundary lines.
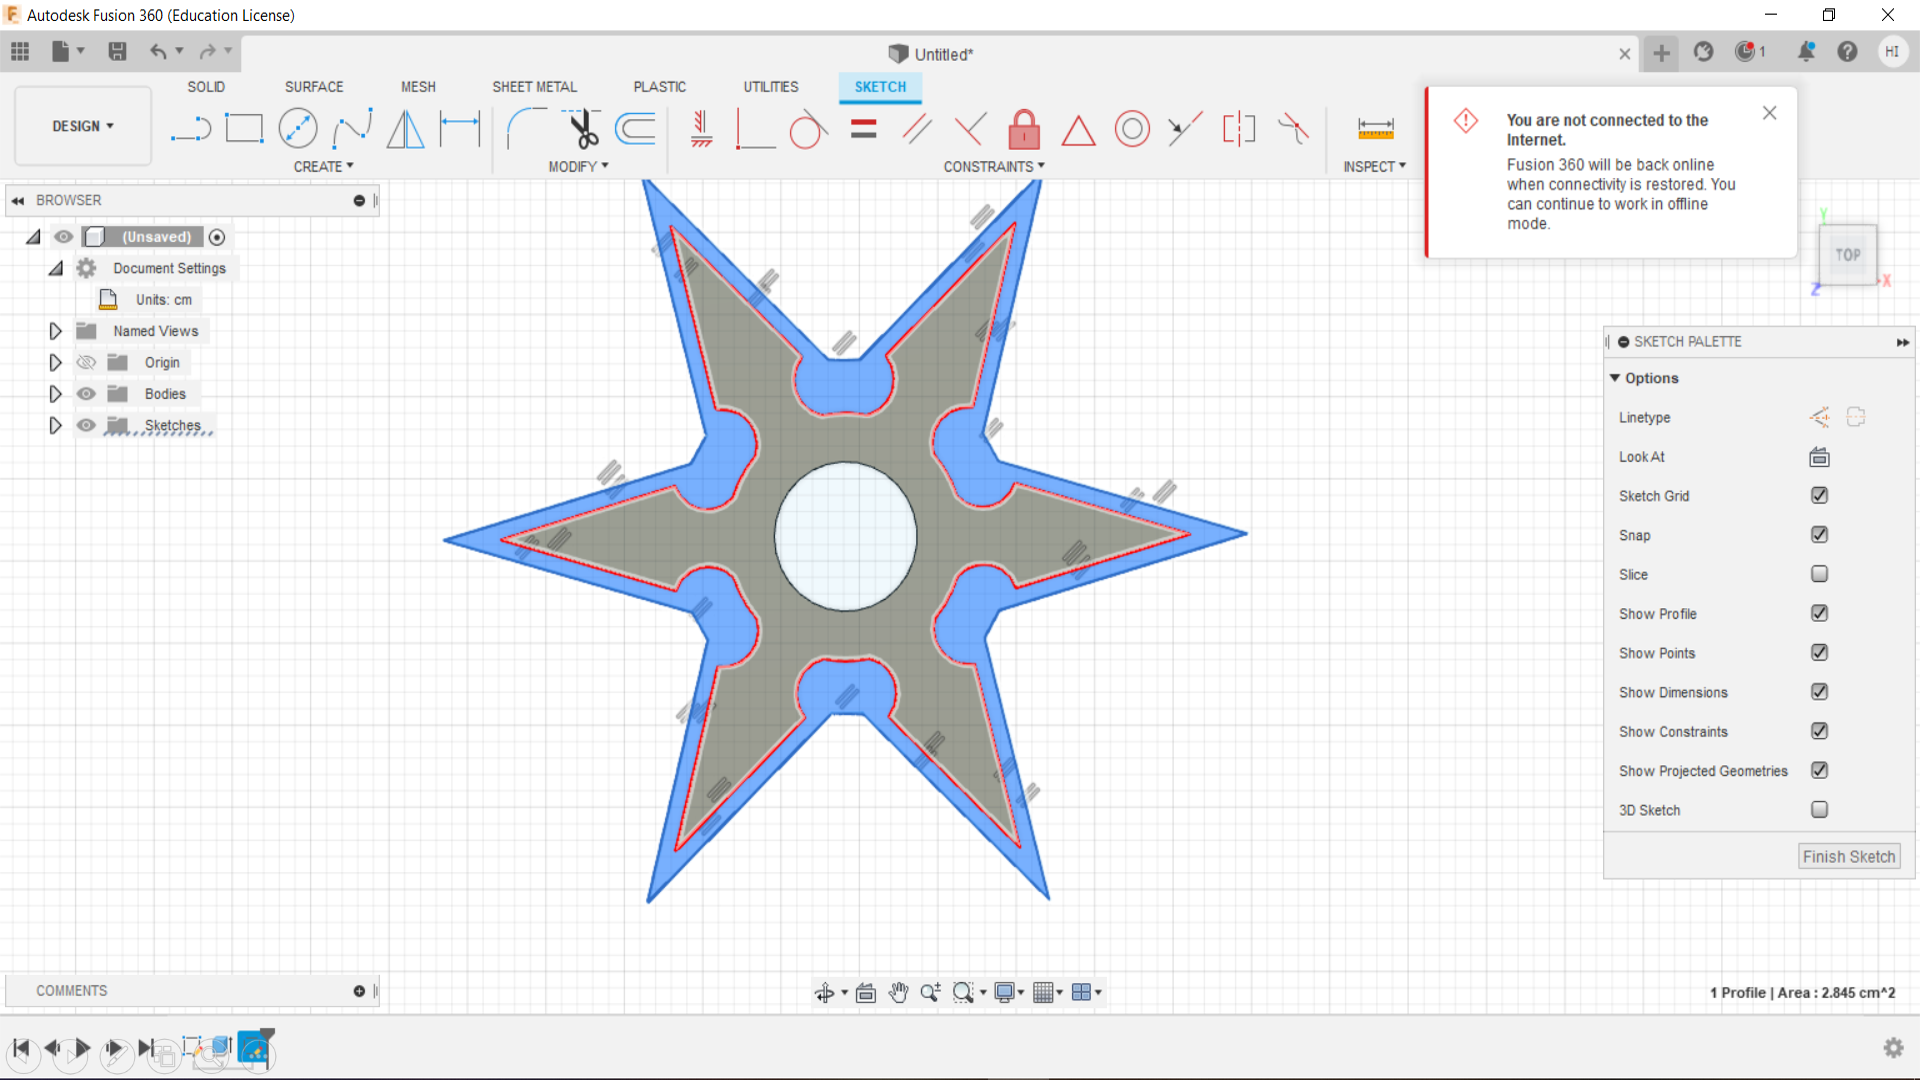
2- Then I started making the shapes, such as circle being the origin point.
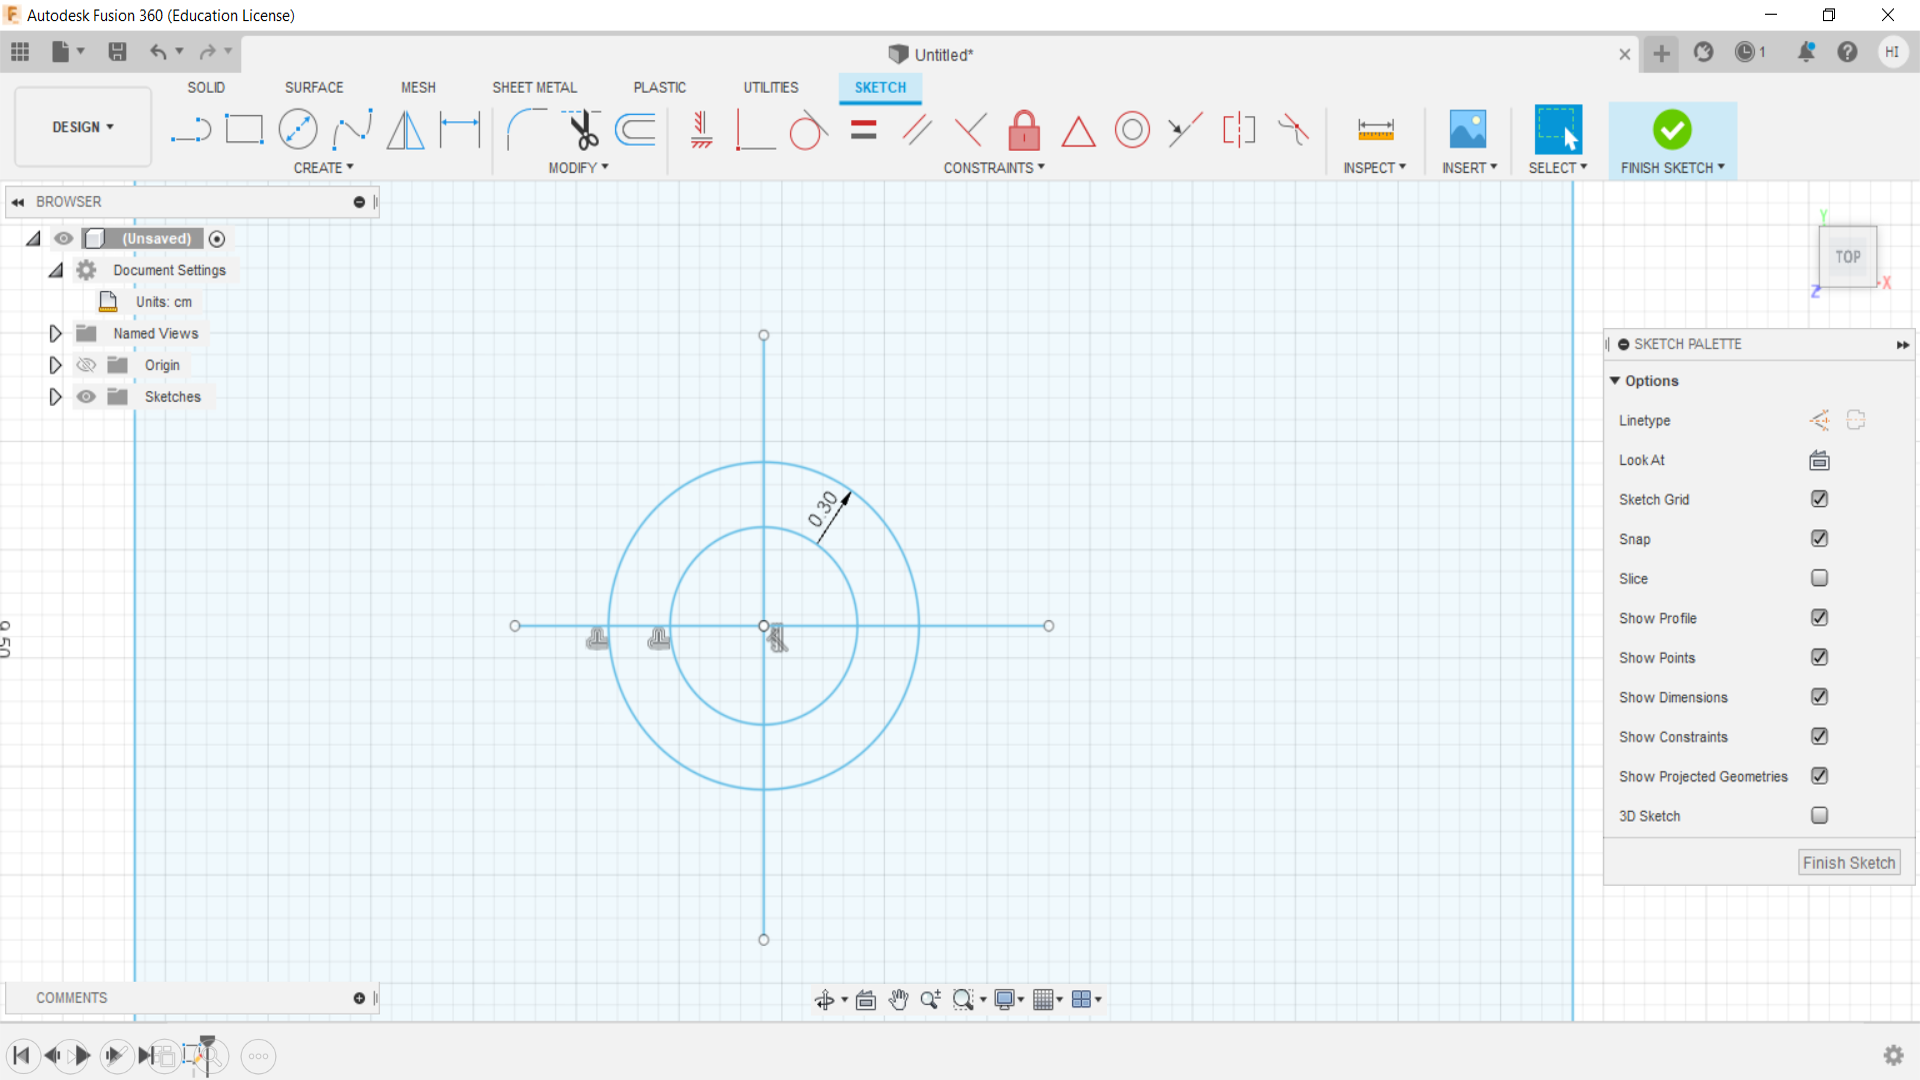
3- After that, I started making small little circles, which would help me in making the curved arcs on the sides.
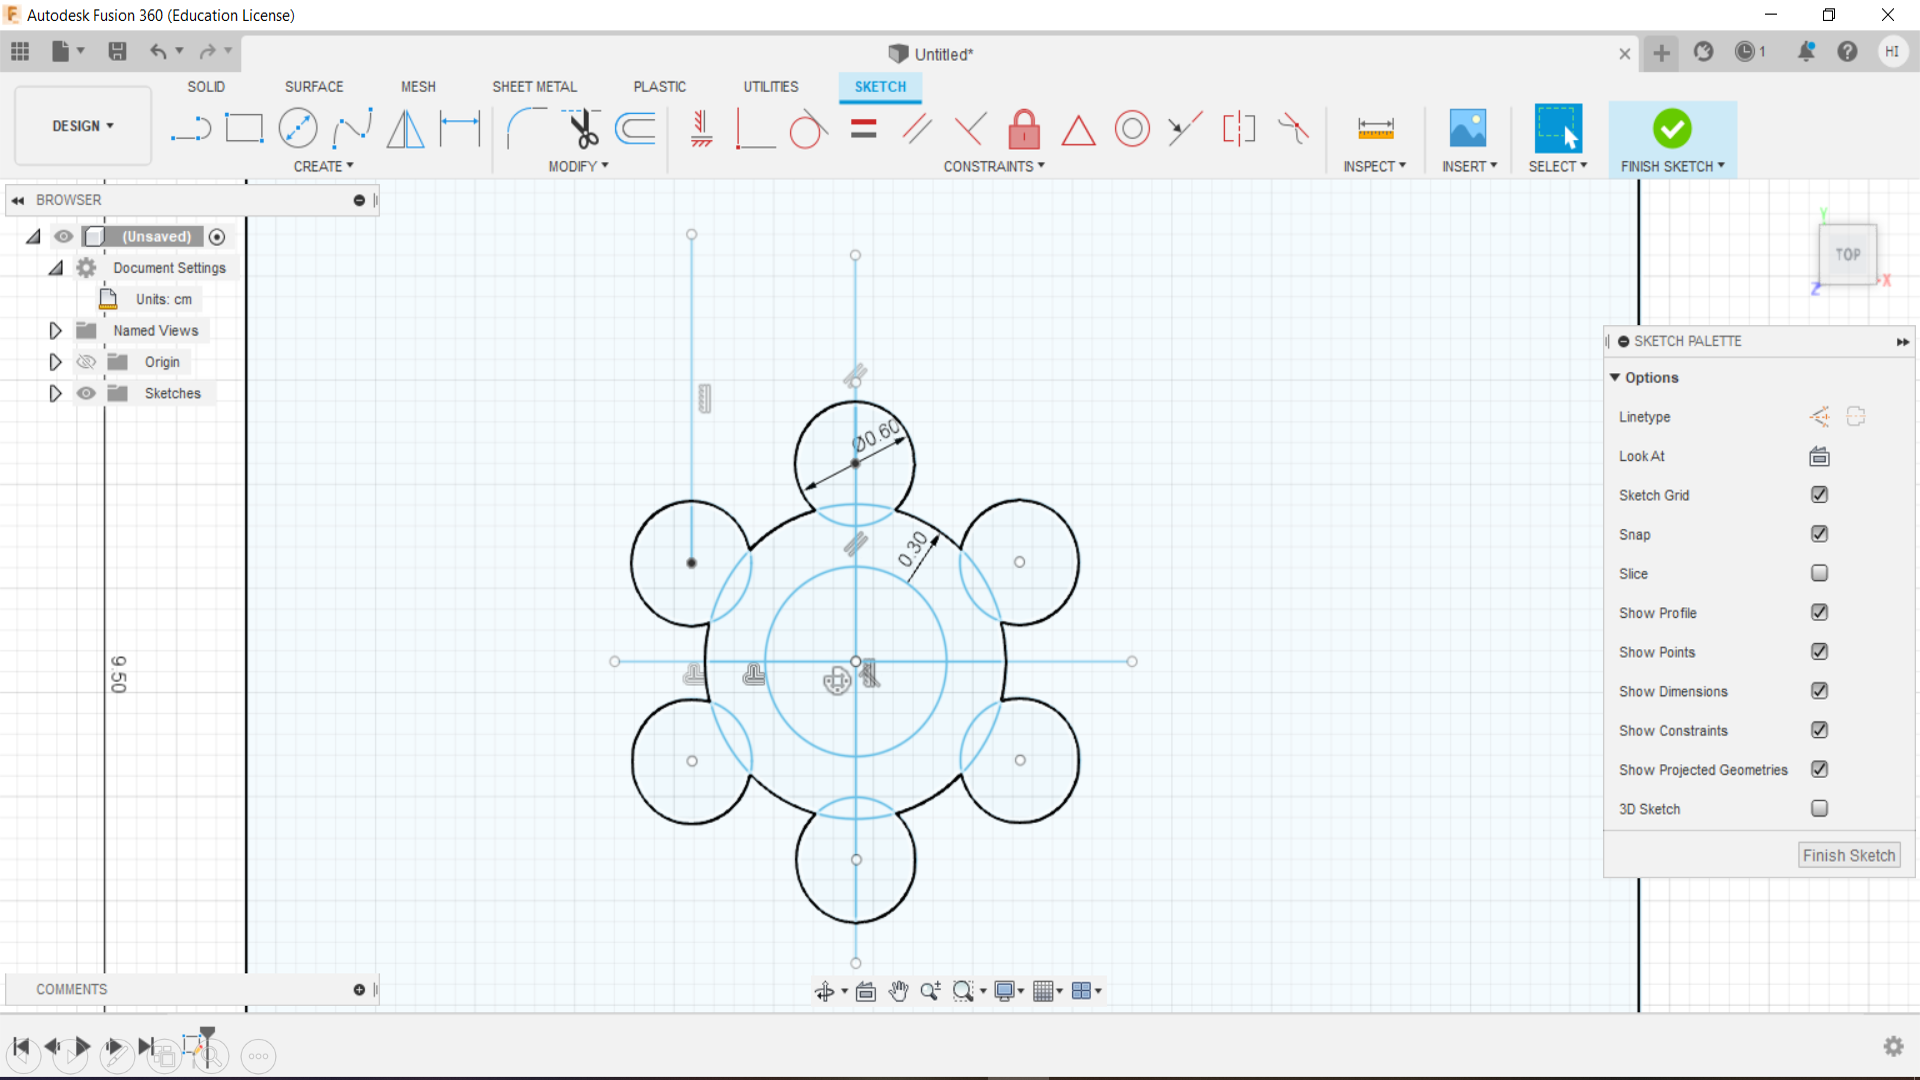
4- After making the curved arcs, I proceeded further to making the triangular shapes, that are the pointed shapes of the shuriken, as seen in the images.
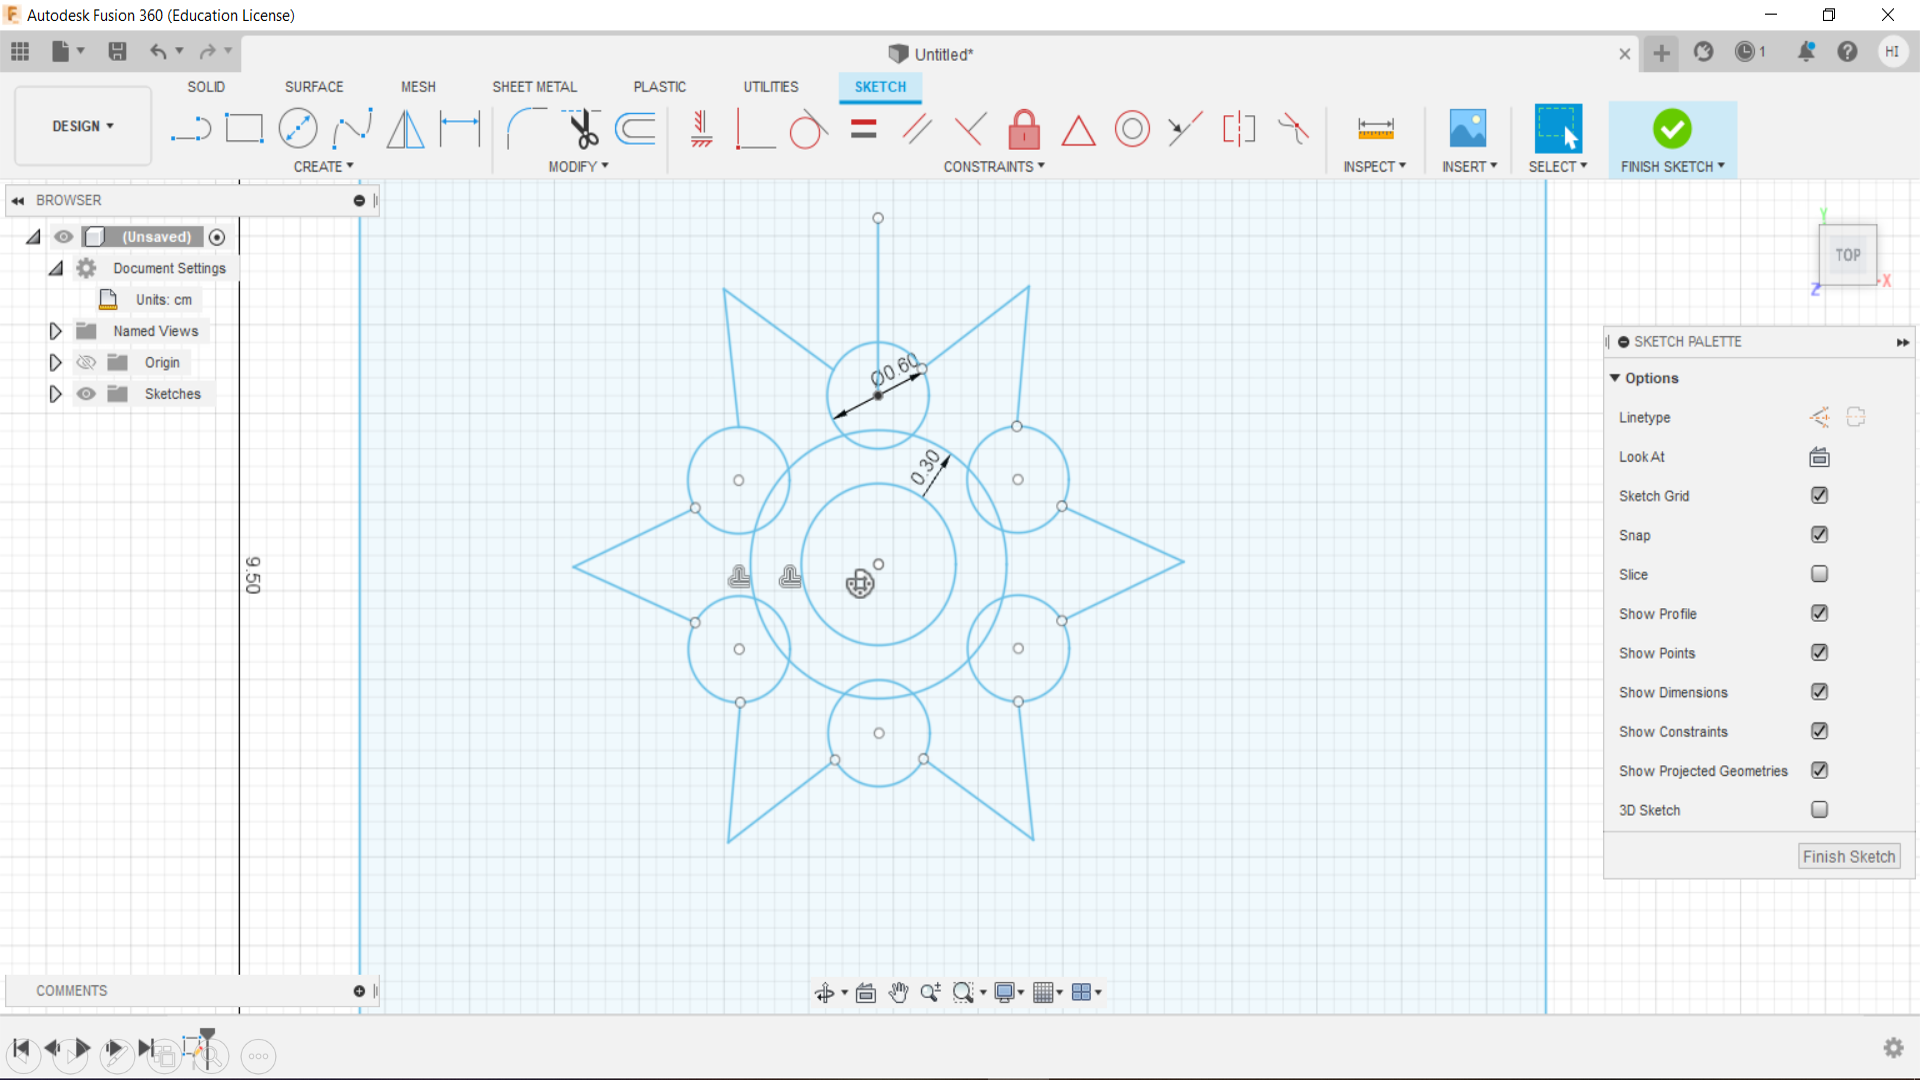
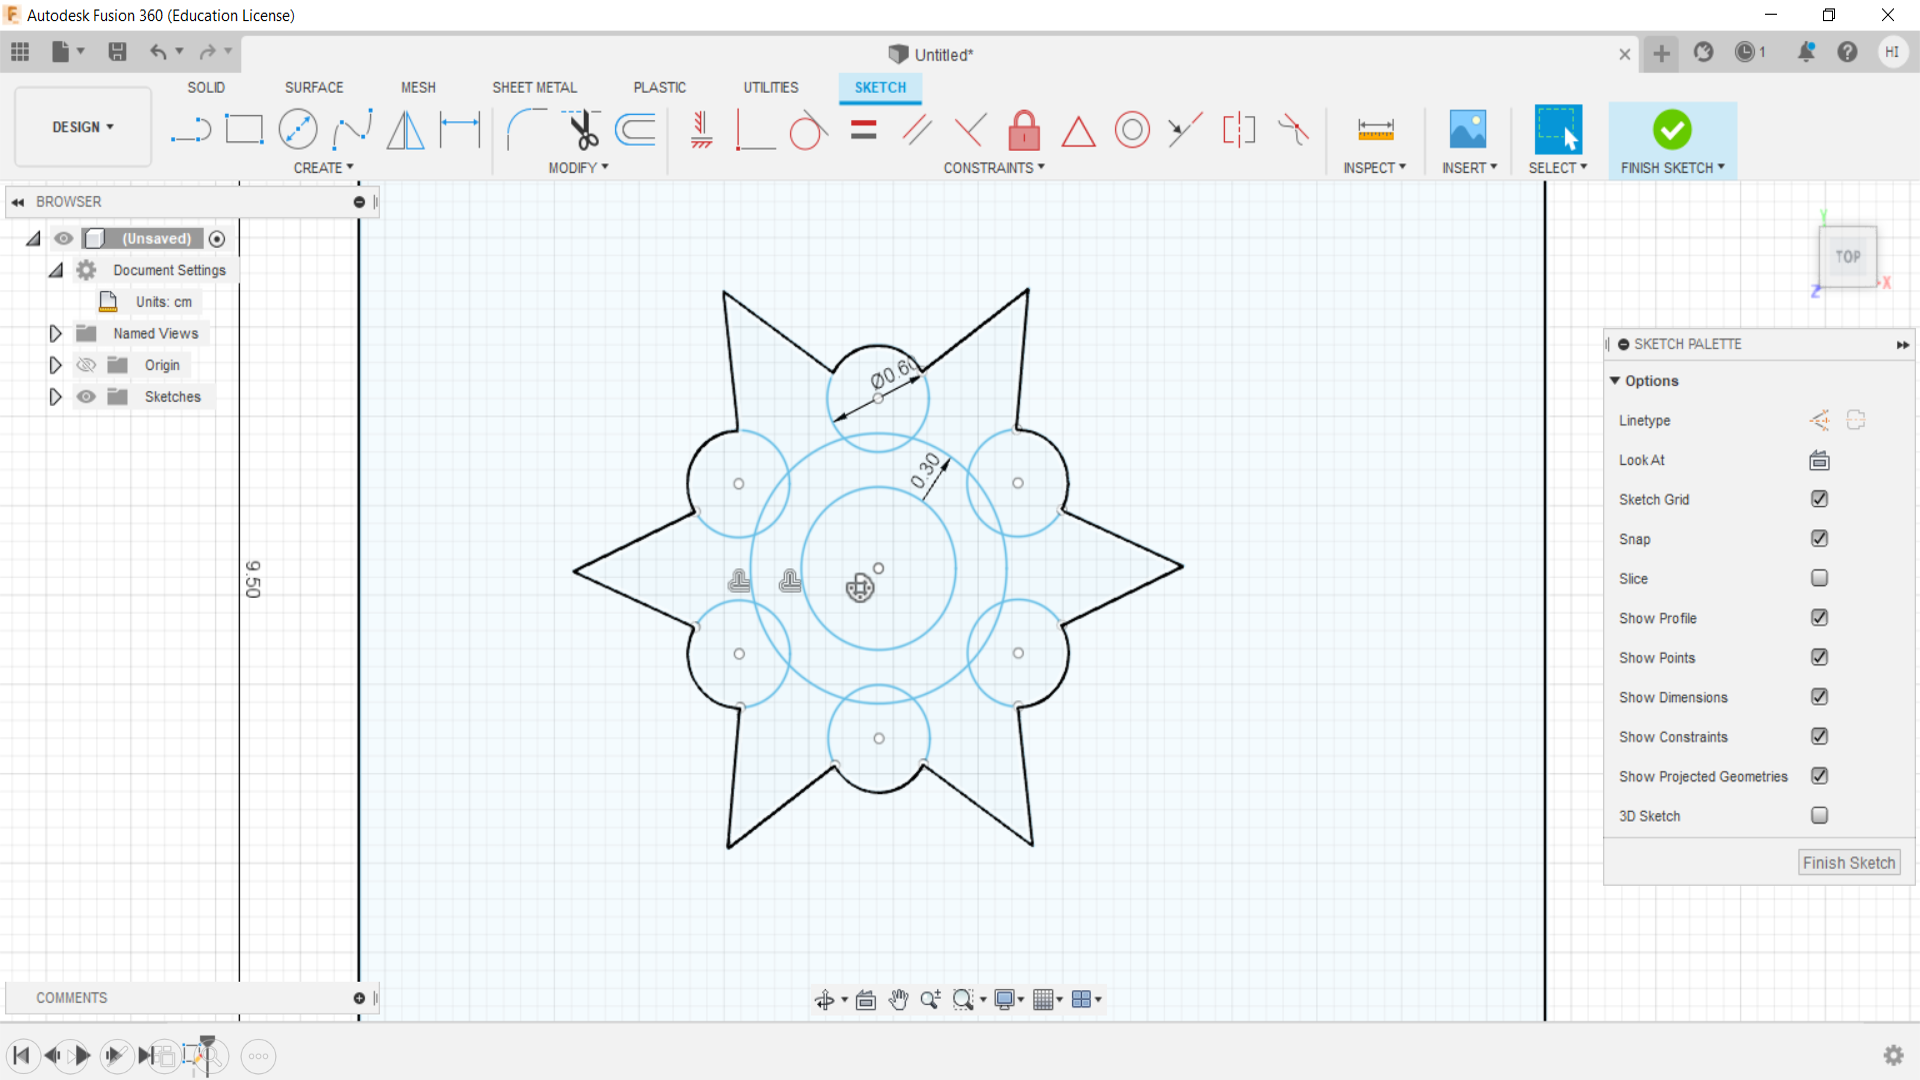
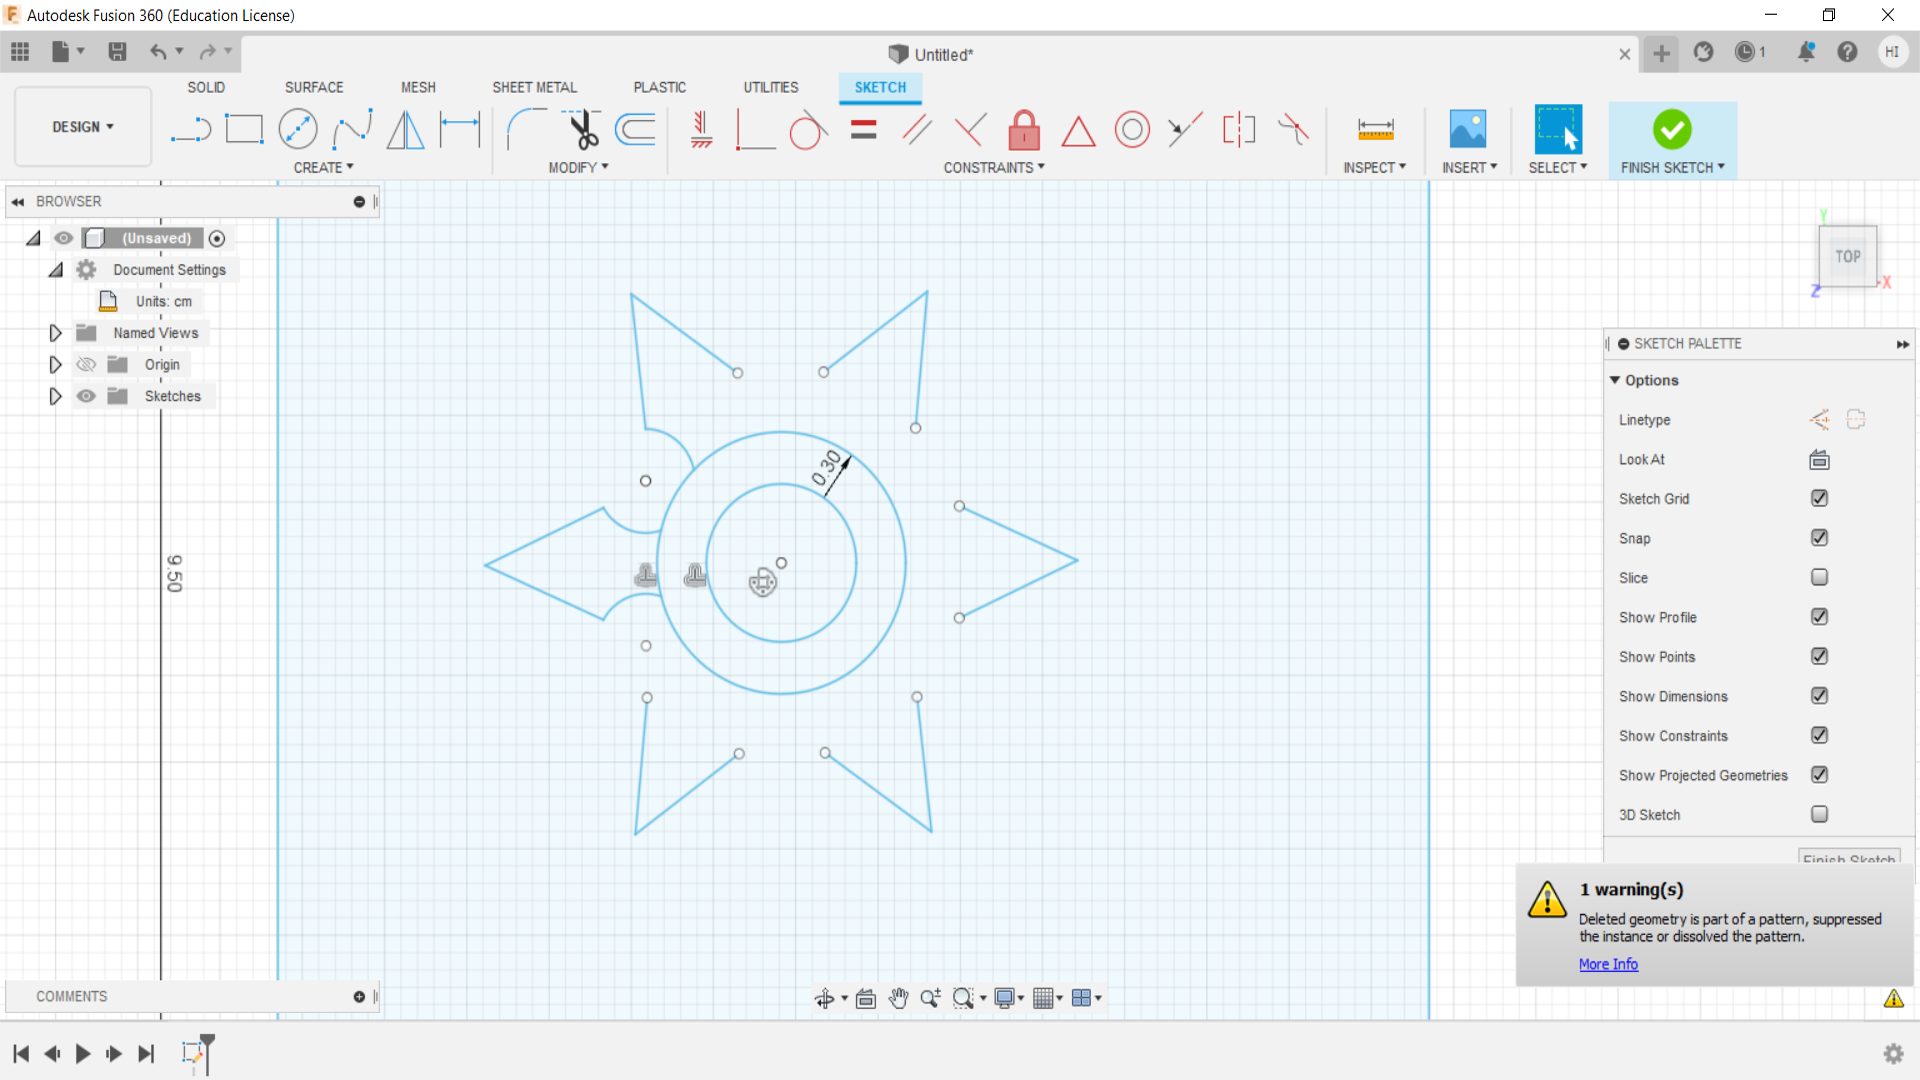
5- They looked little bit smaller in size, so I increased the length of them, and selected “Circular patterns” and copied it on all sides.
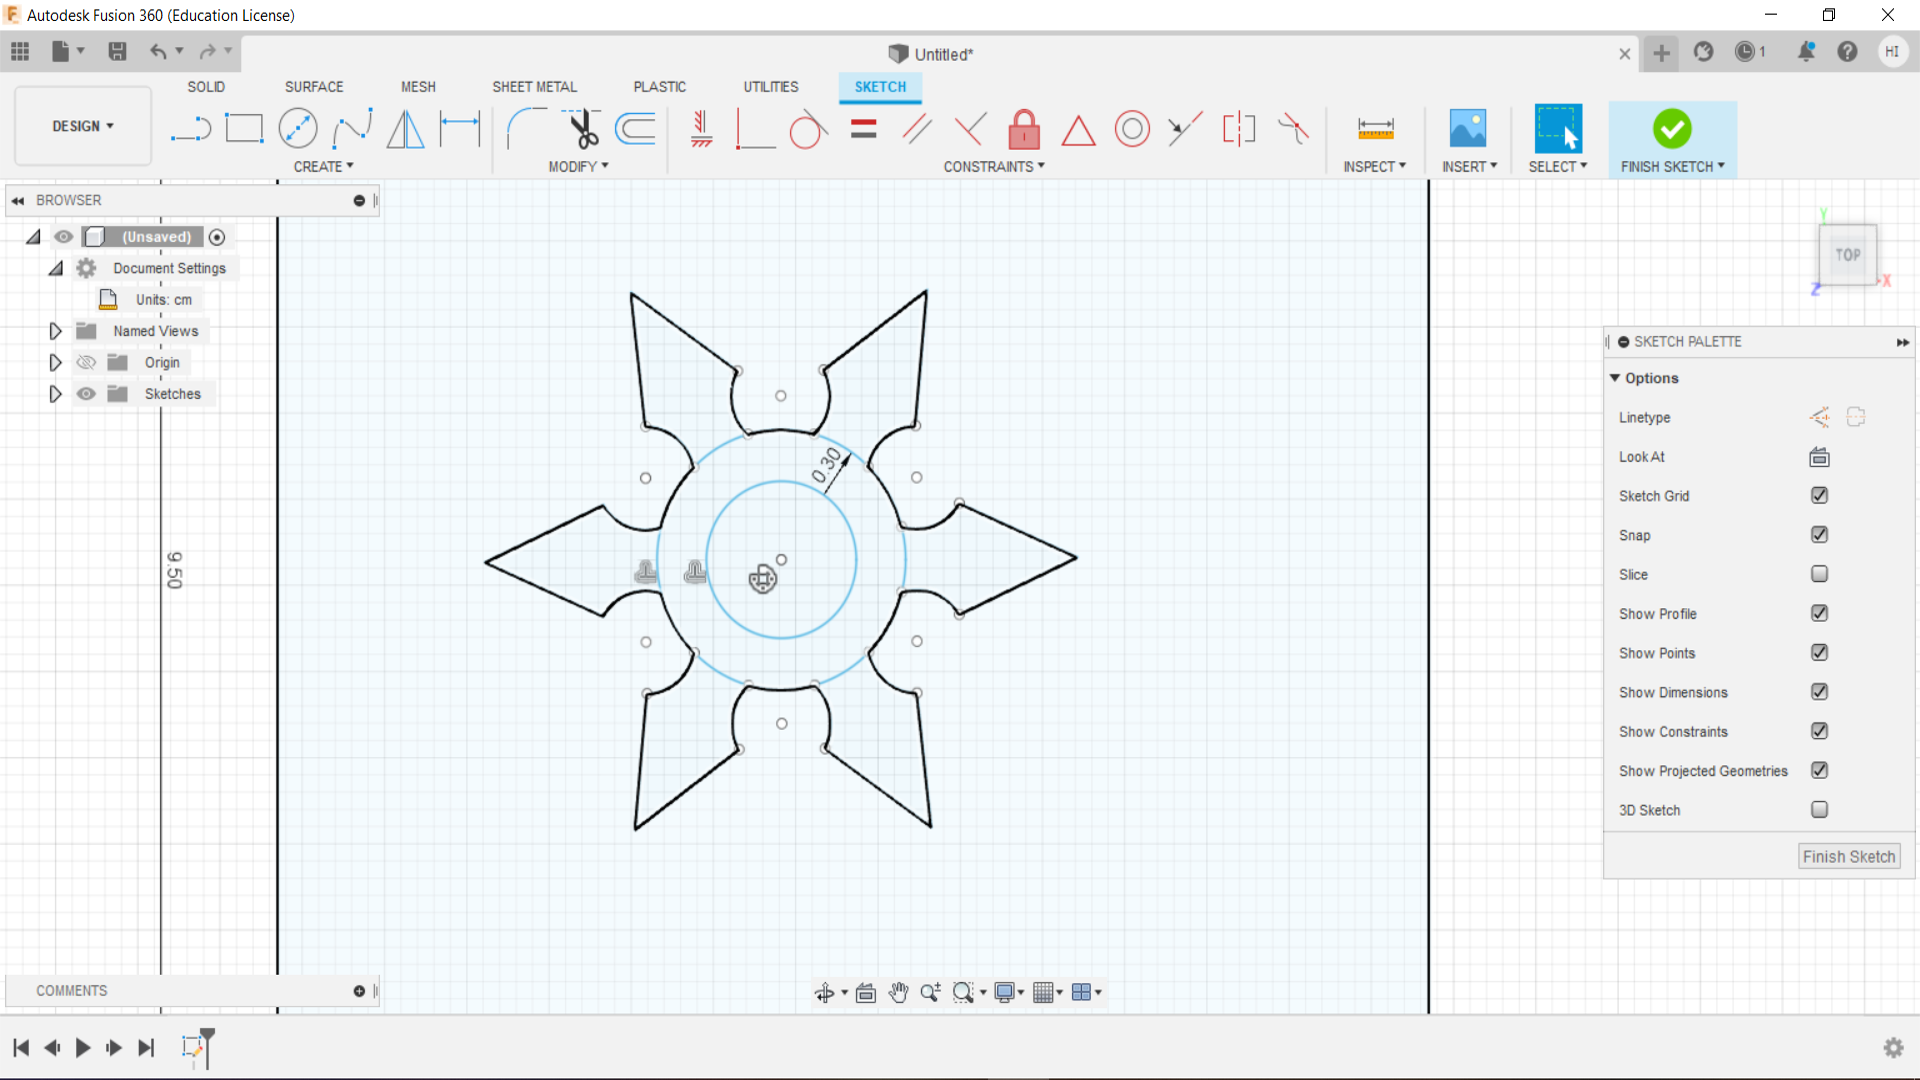
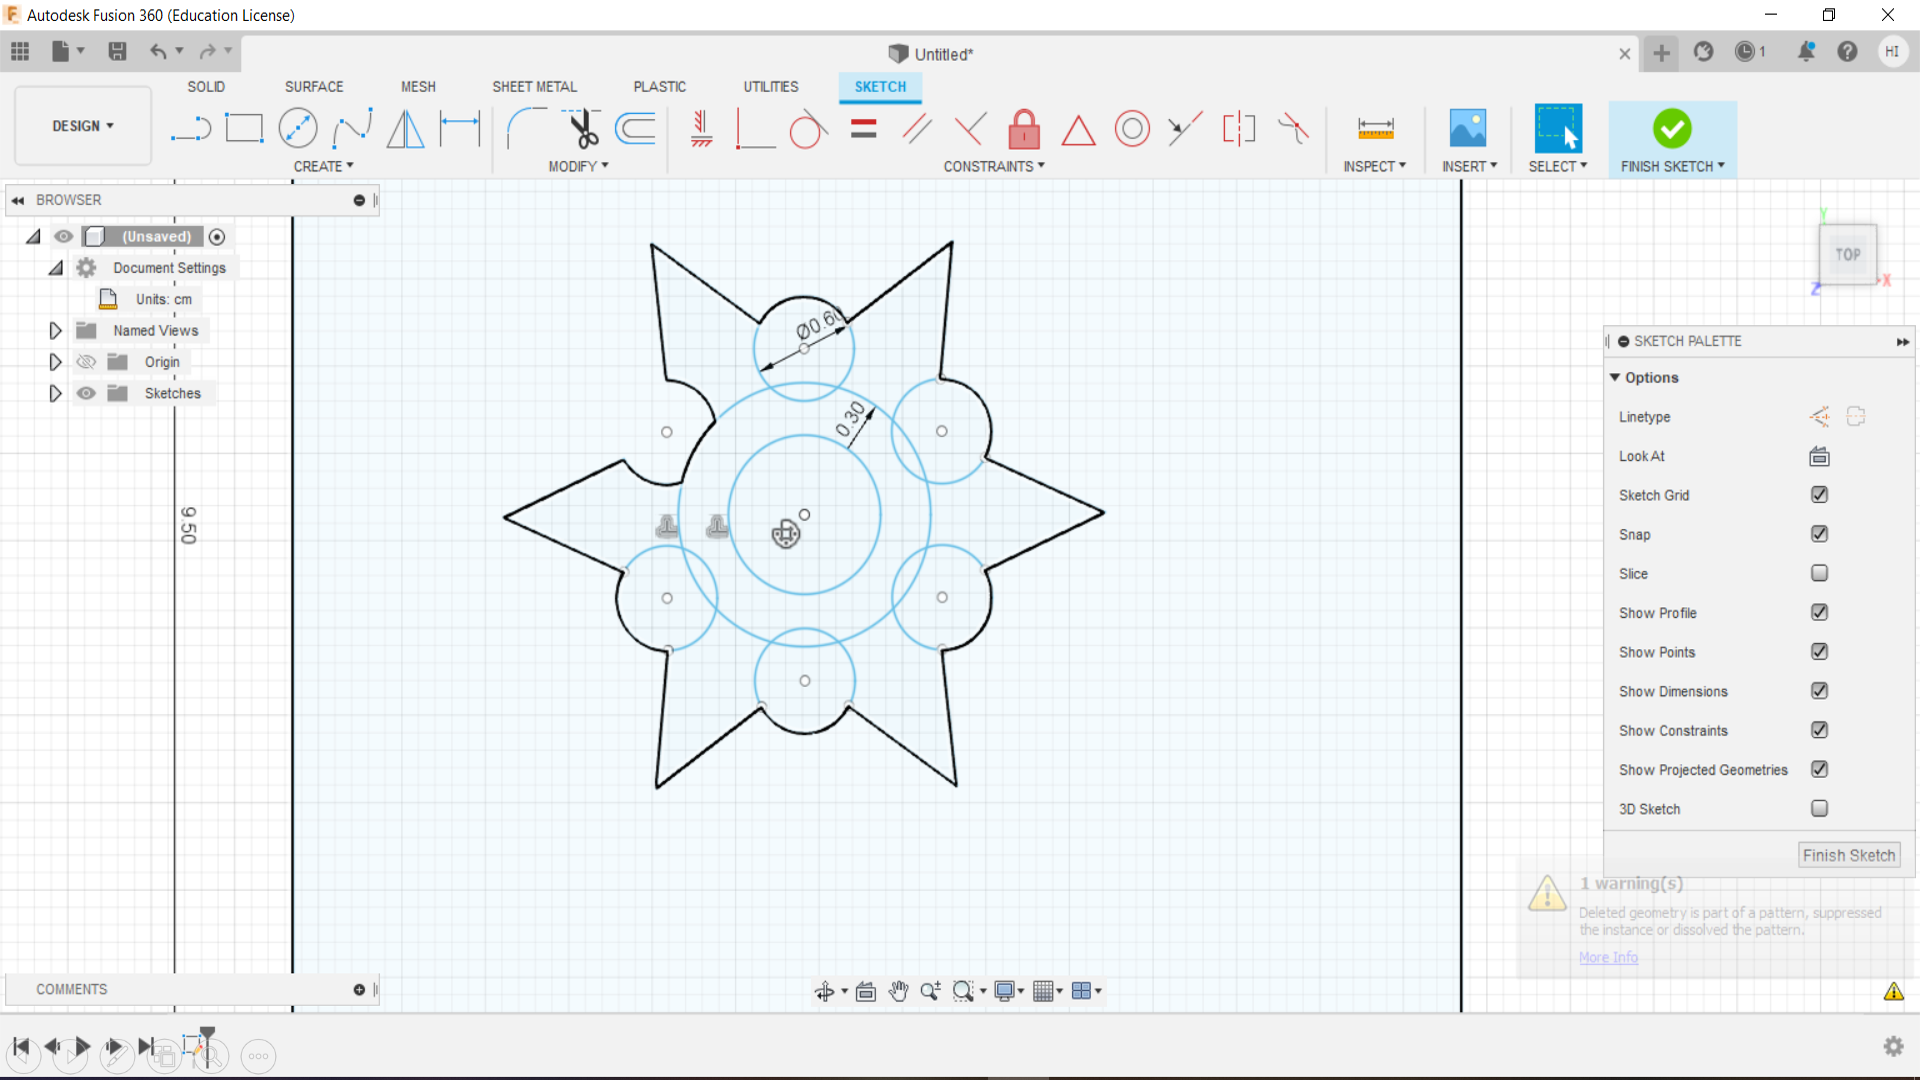
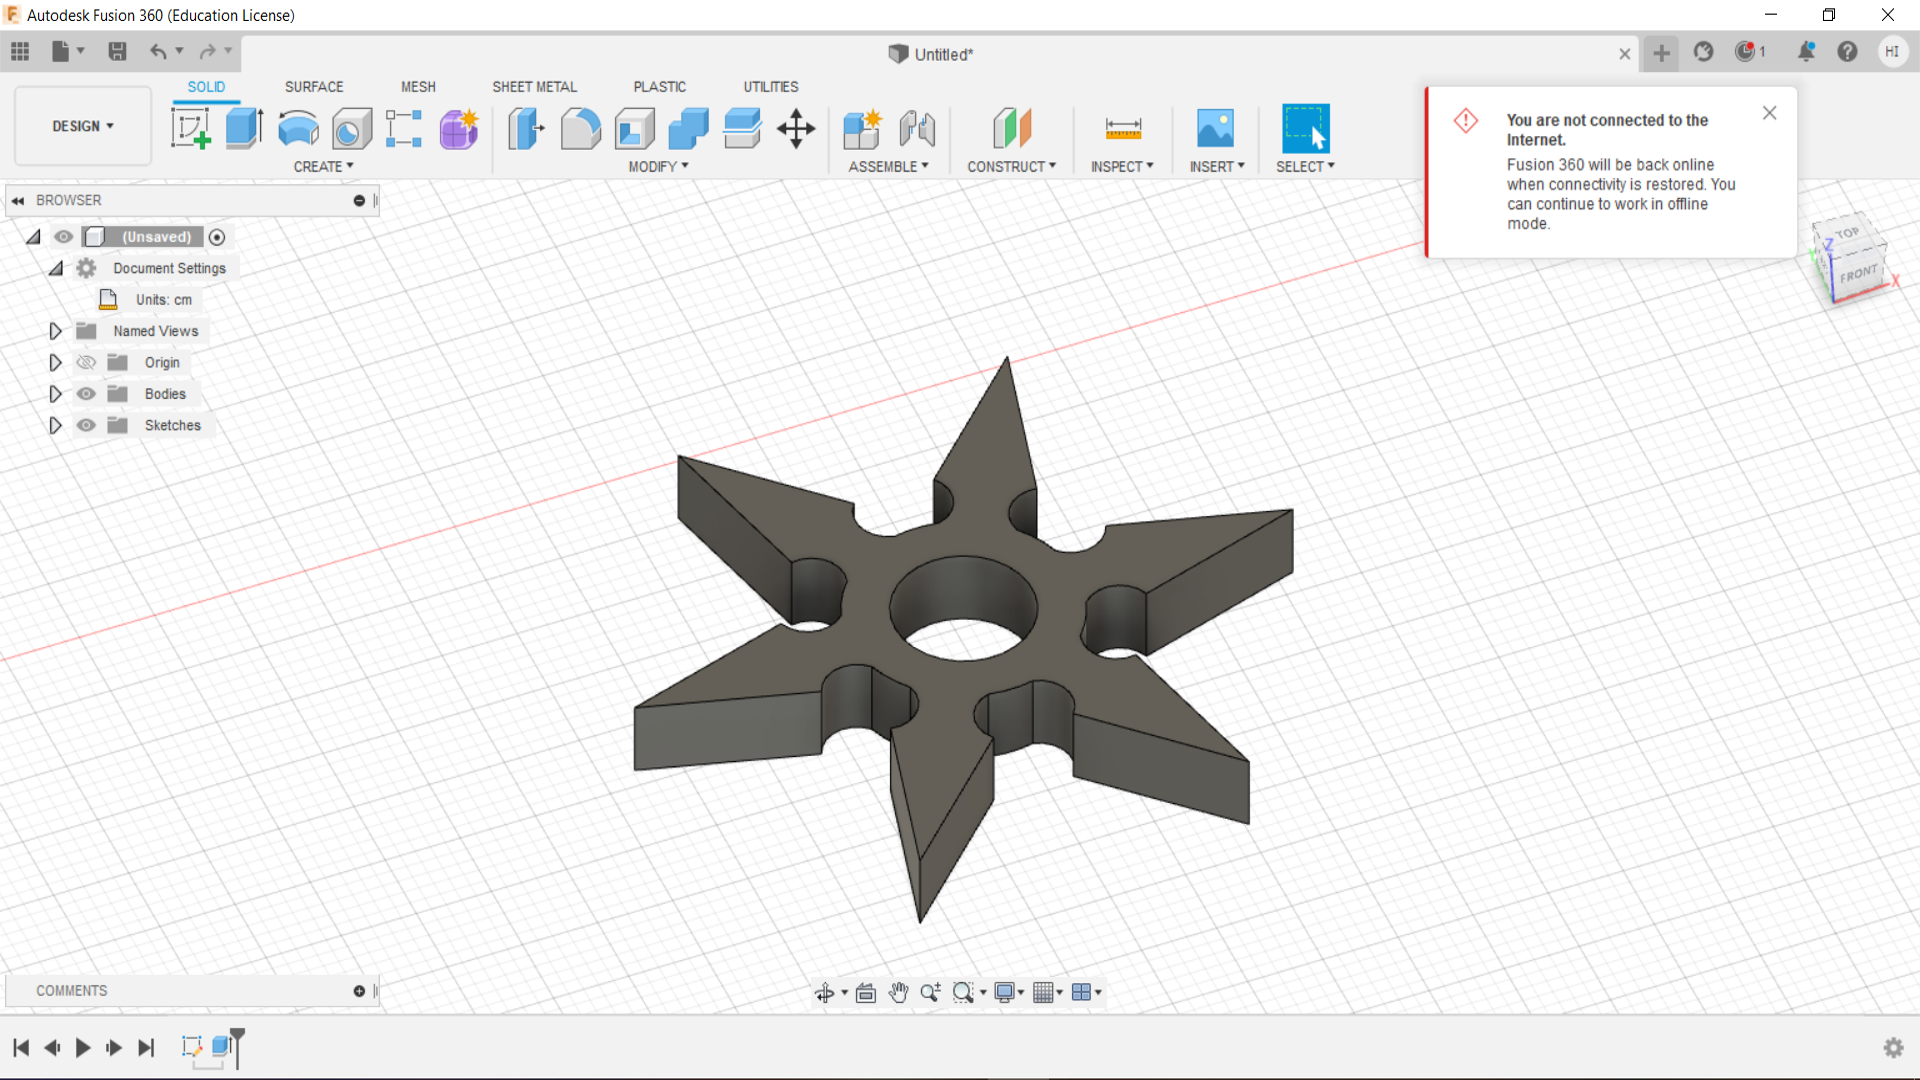
6- After that, I finished the Sketch, and started extruding the process. Extrusion was 0.5 cm.
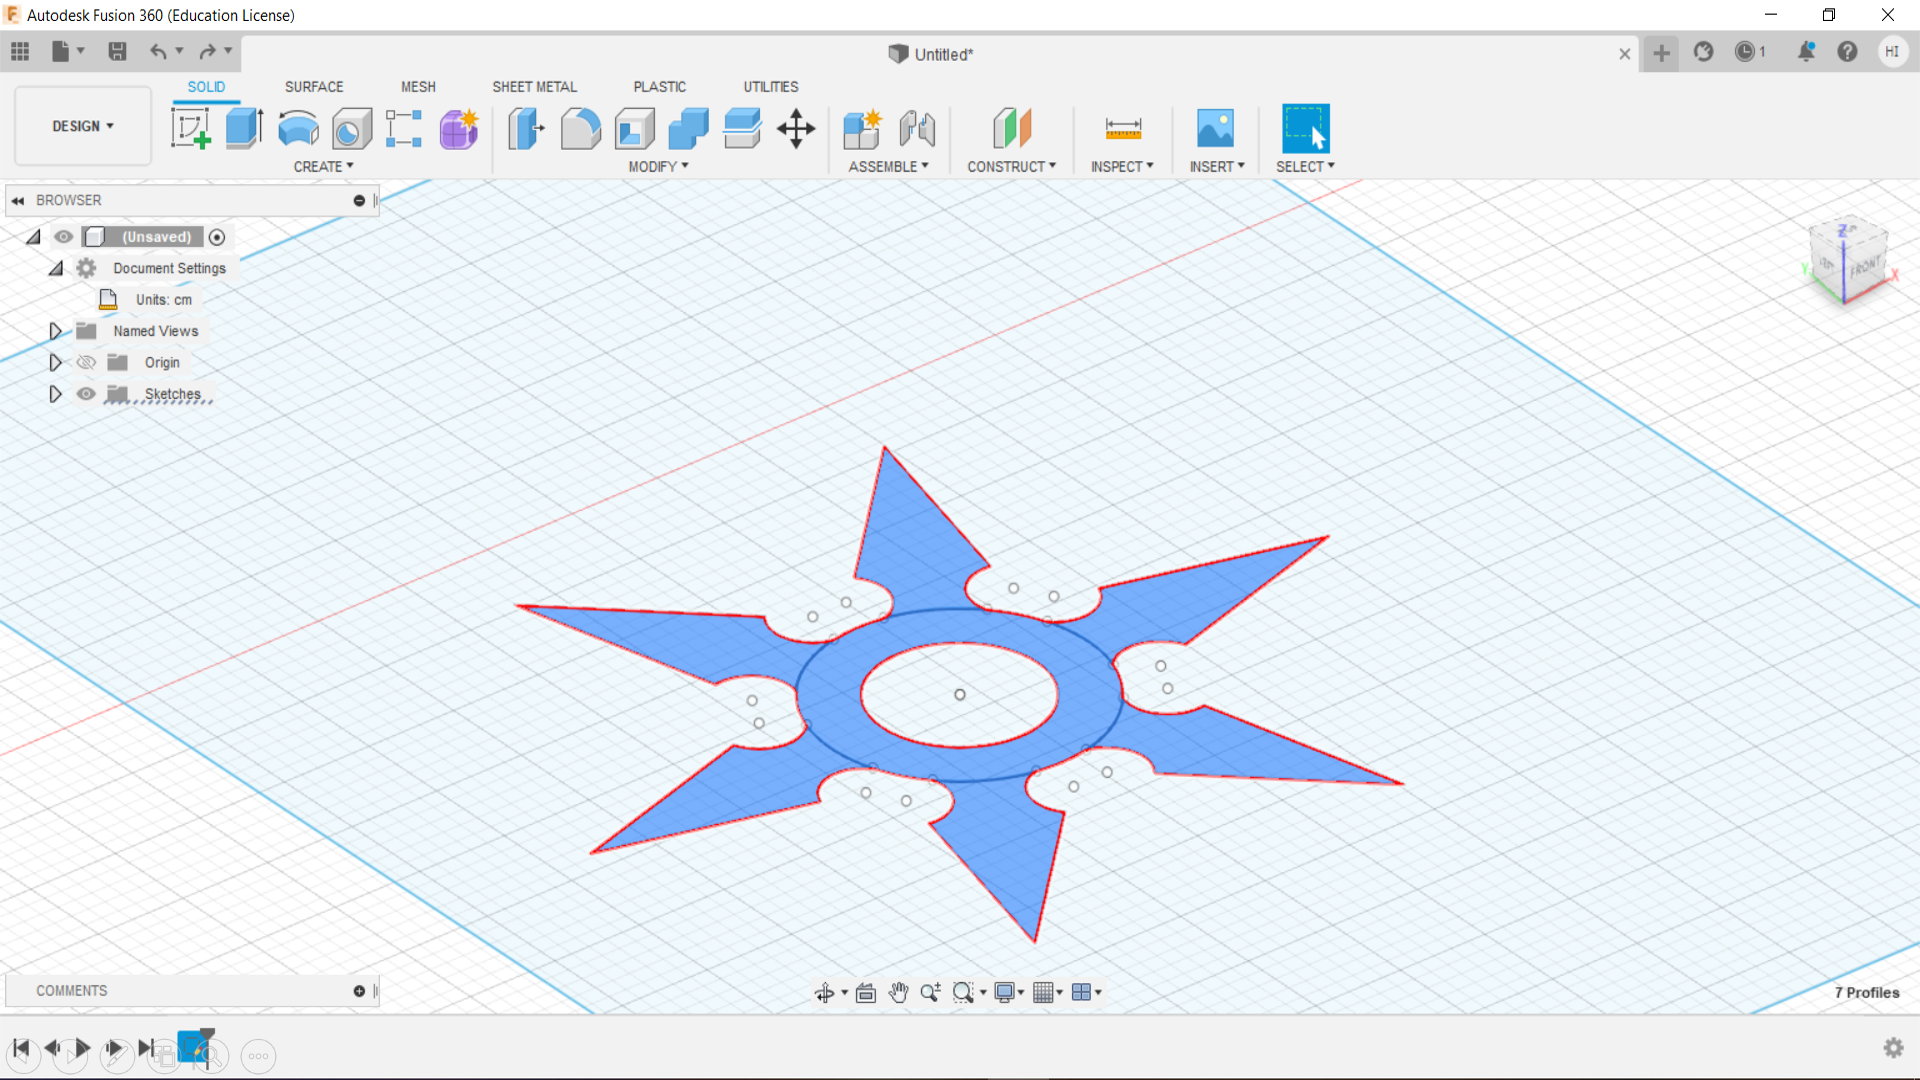
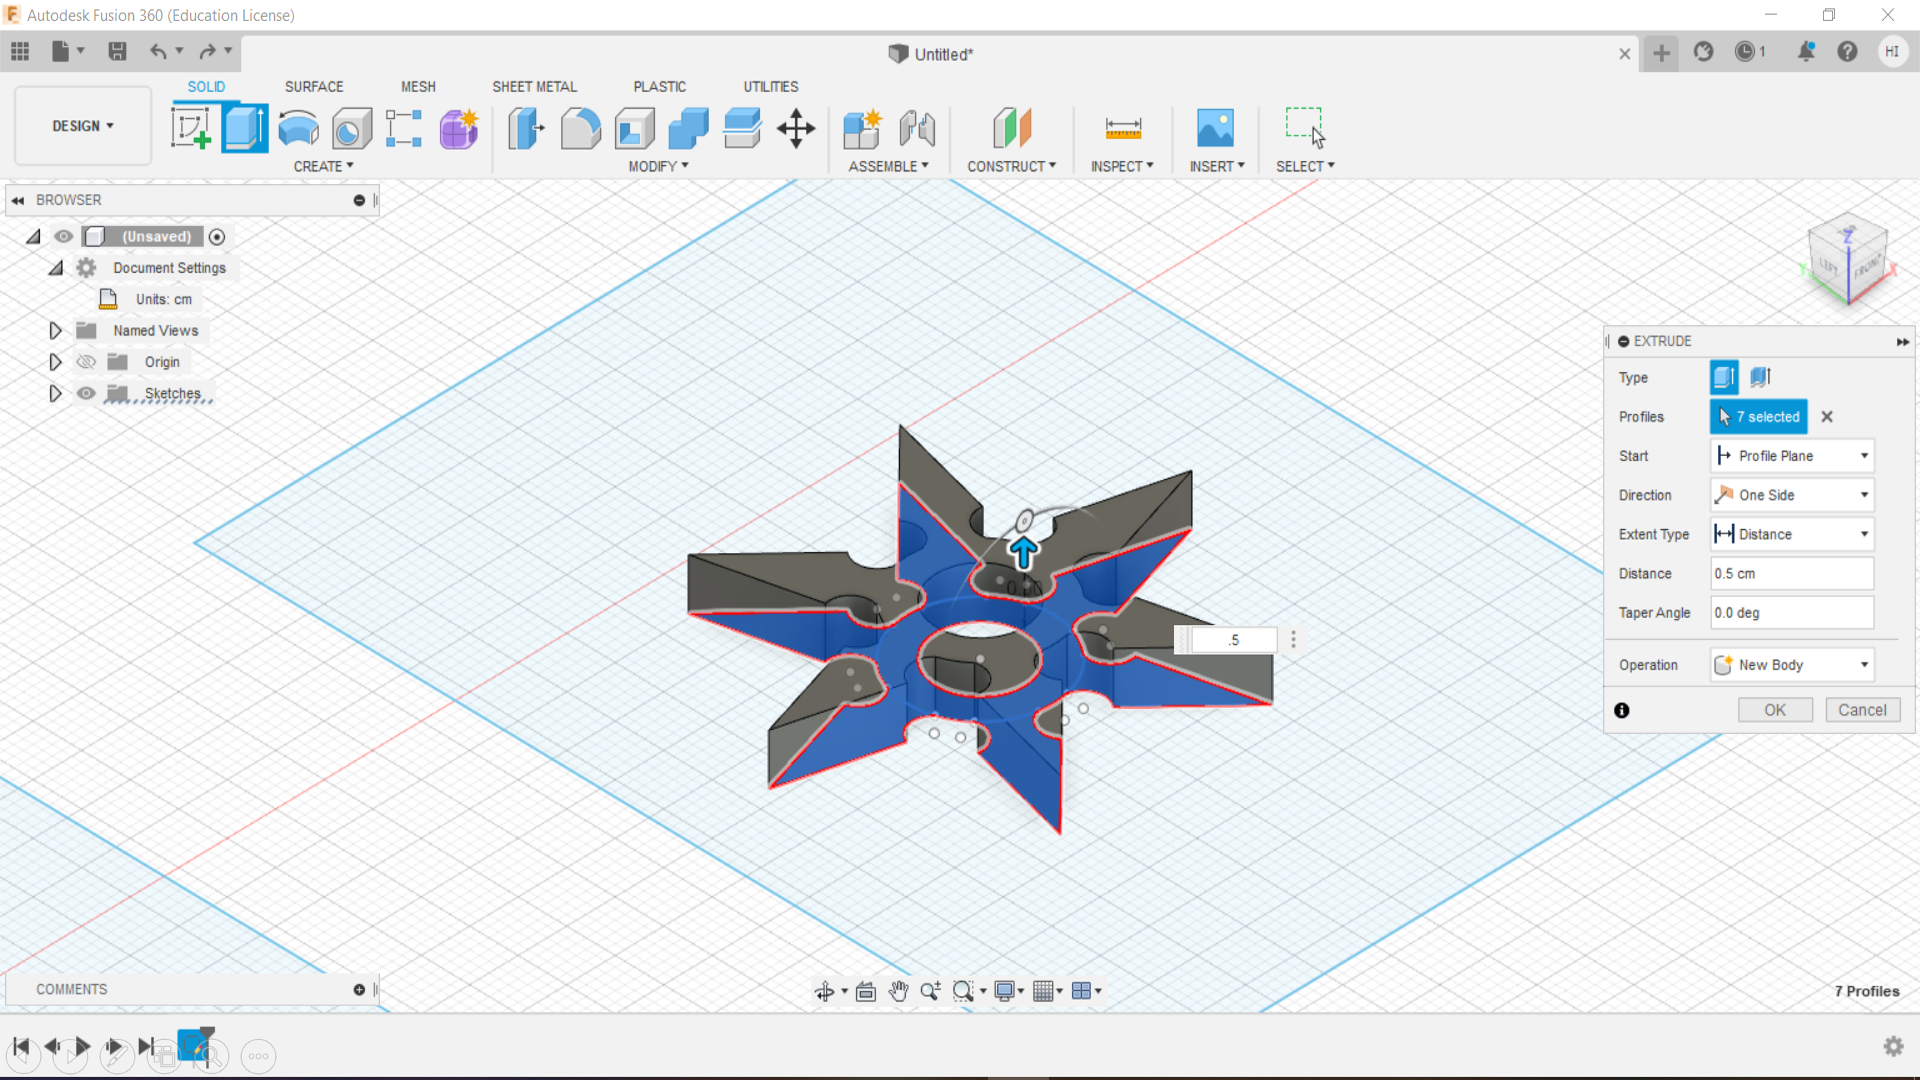
7- After this layer, I tried to make another layer of the shuriken, that would be the base for the whole set above. So, I adjusted the height levels, and brought the layer down, and started sketching the outlining of it.
8- After offsetting it from the corner sides, I finished the sketch, and extruded it to 0.2 cm in height.
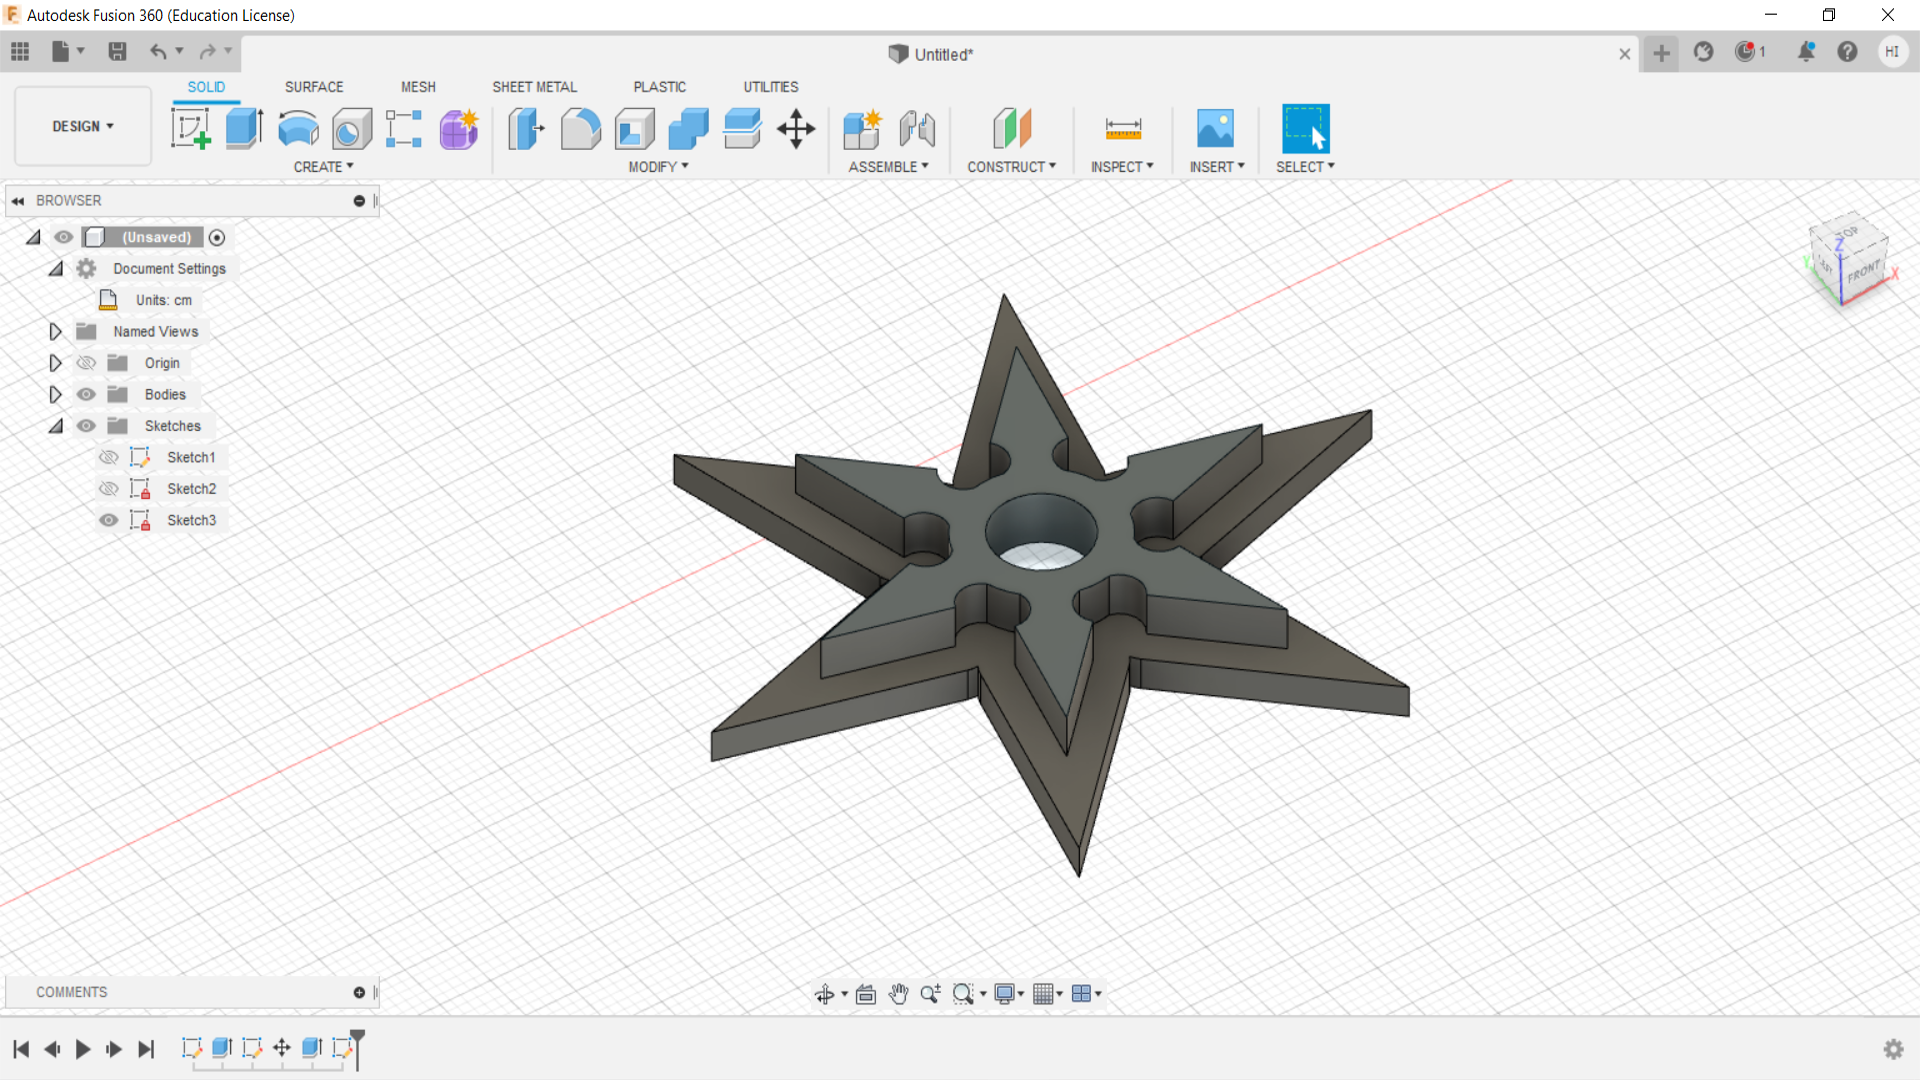
Now, the sketch is complete, and I saved the file, and extruded it to STL format, and sent it to my colleague Yusuf, for printing it on another day.
Now, we wait for the result.
Moulding Step Process!
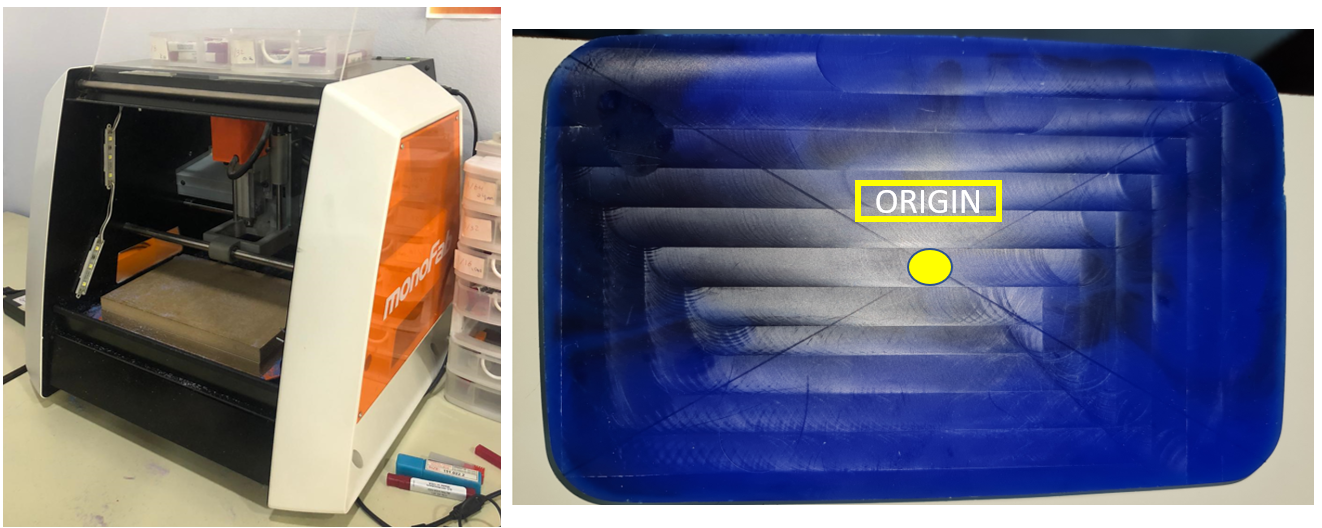
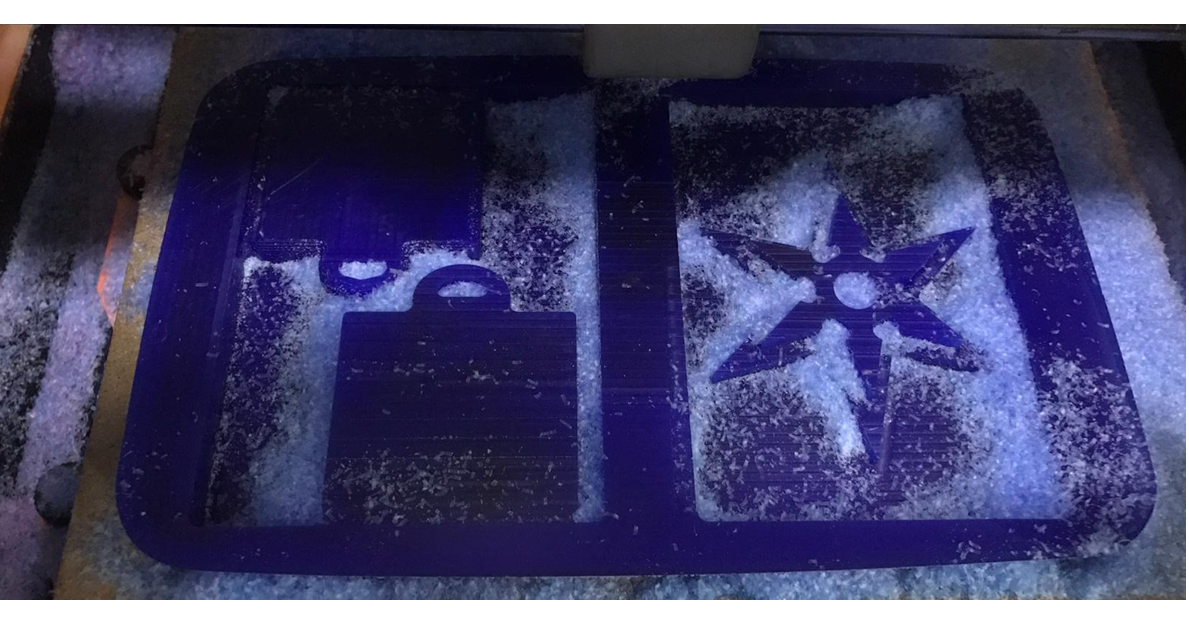
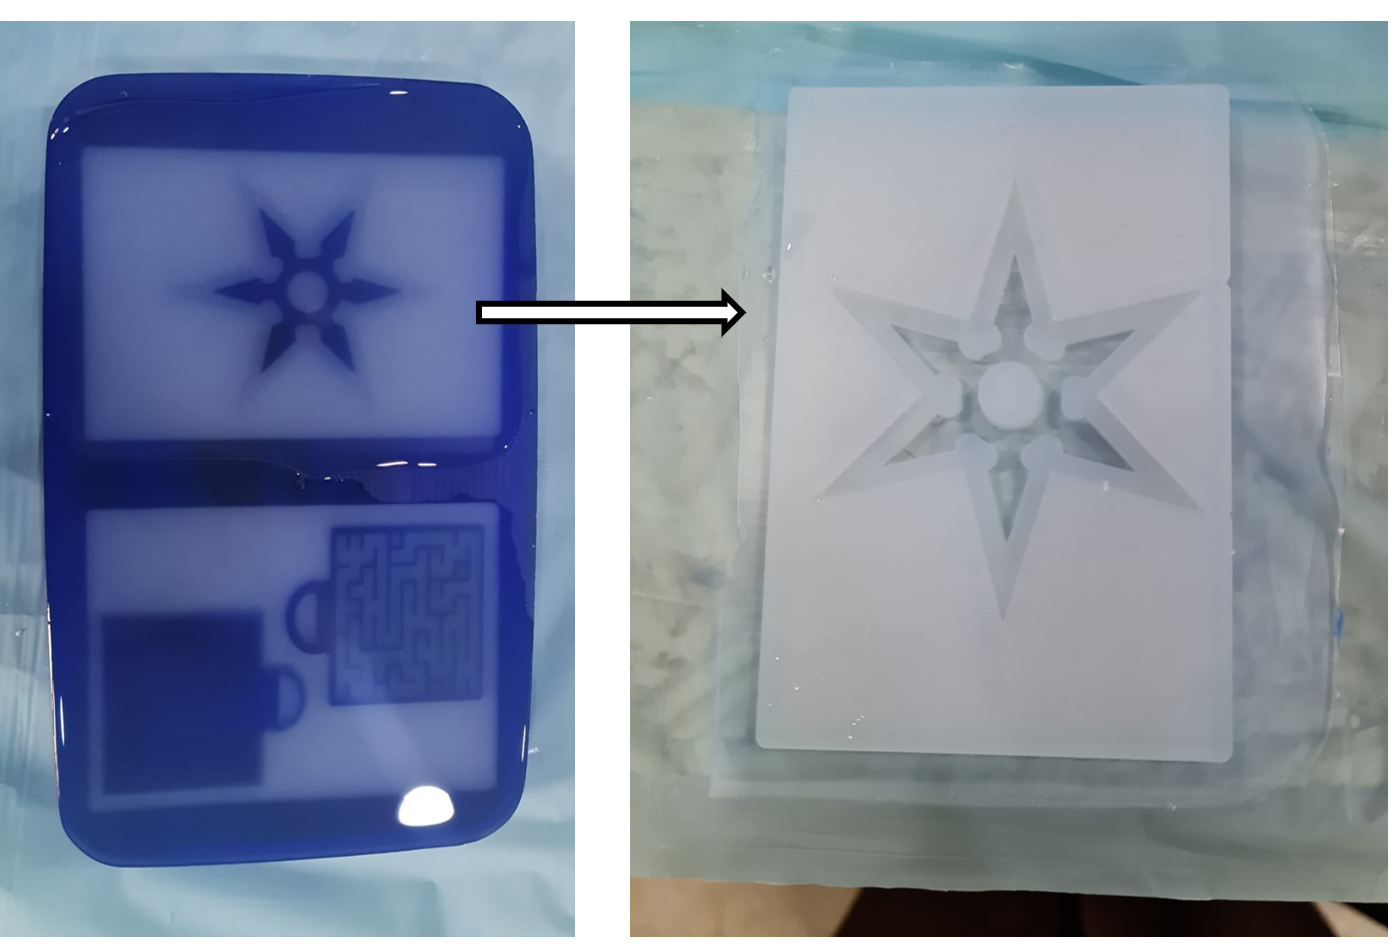
Once I exported the STL file, I sent the file to my colleague, where he added his work and combined both our files together, to be ready for milled design to start. Machinable wax is used for the milling process, where the object is going to be milled, which will later on be moulded and casted with different materials. The machine used for this milling process is Roland-SRM-20.
We mark the plate with pencil, in order to know the origin point, which will be set in the software settings later on. This origin point will be the starting point for the machine to start milling on. Also, a specialized software called SPR Player, was used for this process.
Milling process!
First, we used Tinker CAD software (Refer to Week 04 to know about the software) to put our both designs together. Also, we draw a rectangle below our designs to stimulate the plate that we are gonna cut on it.
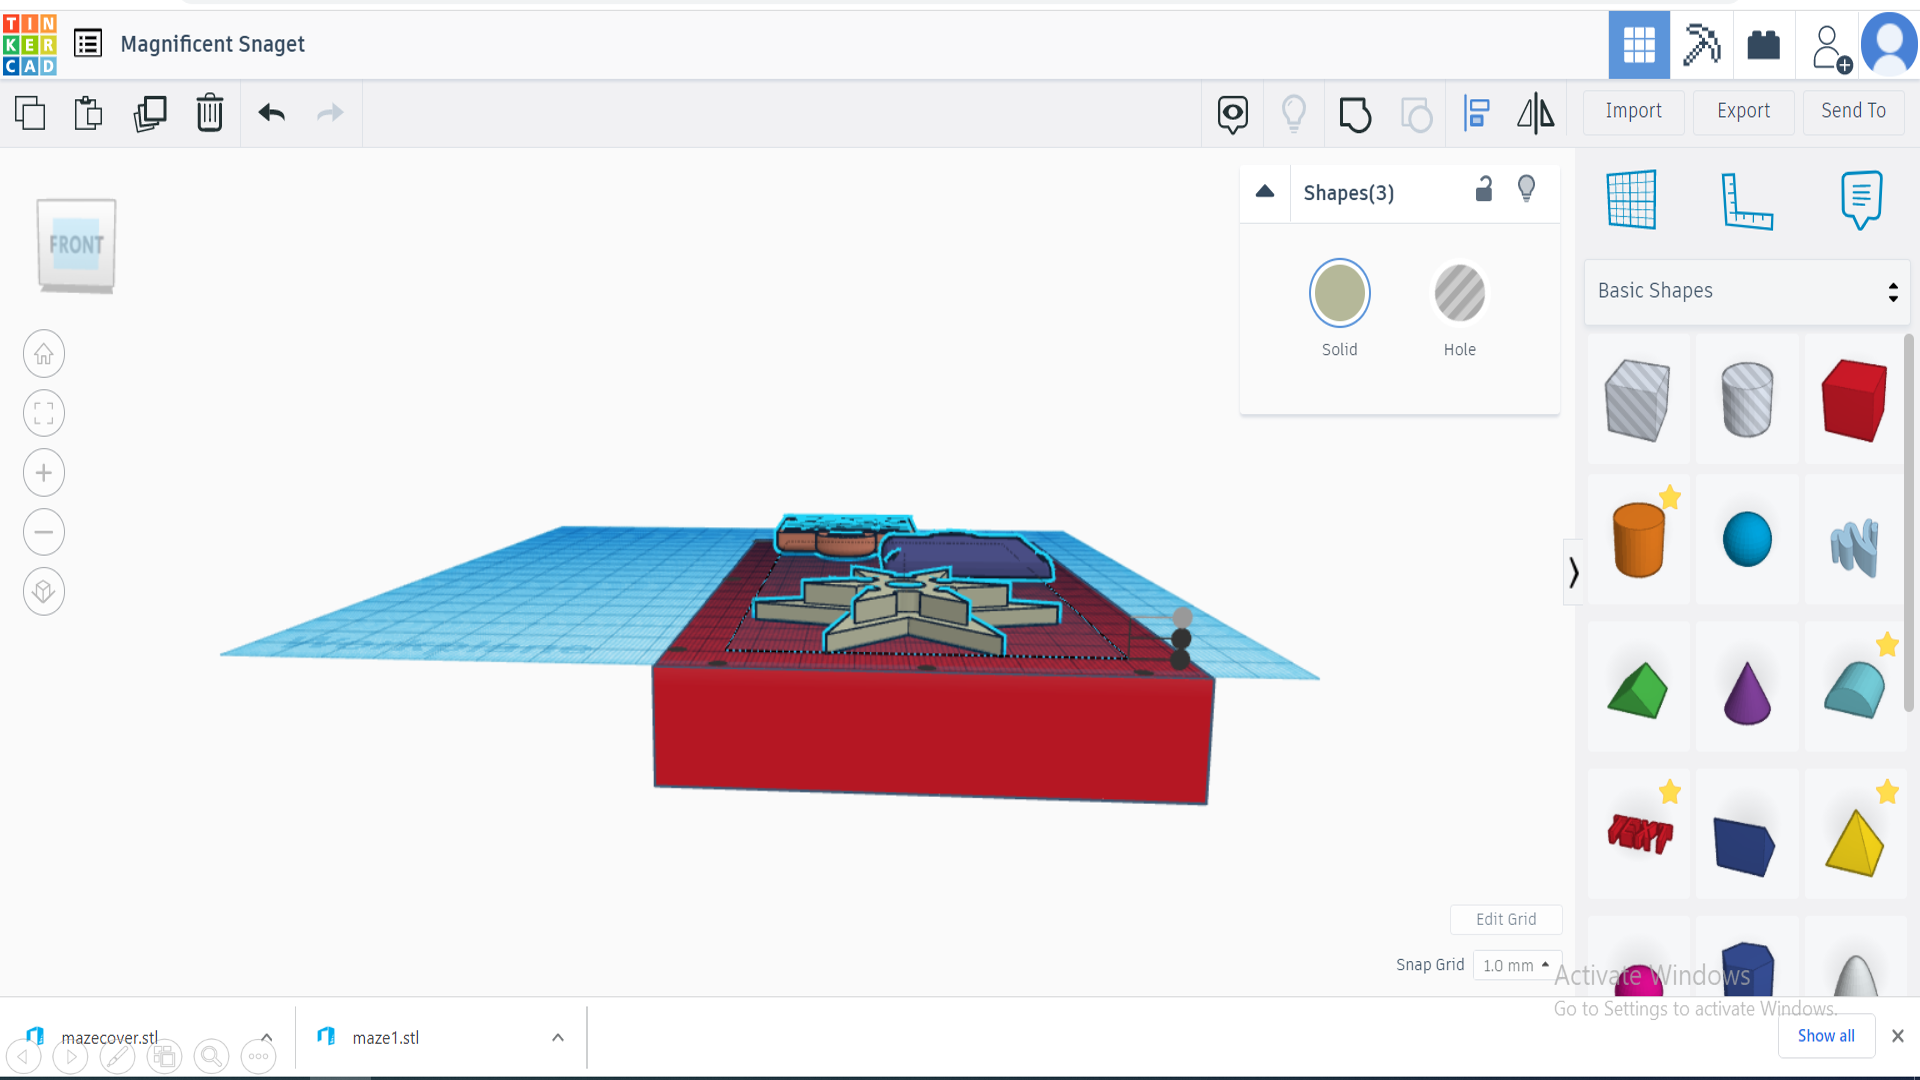
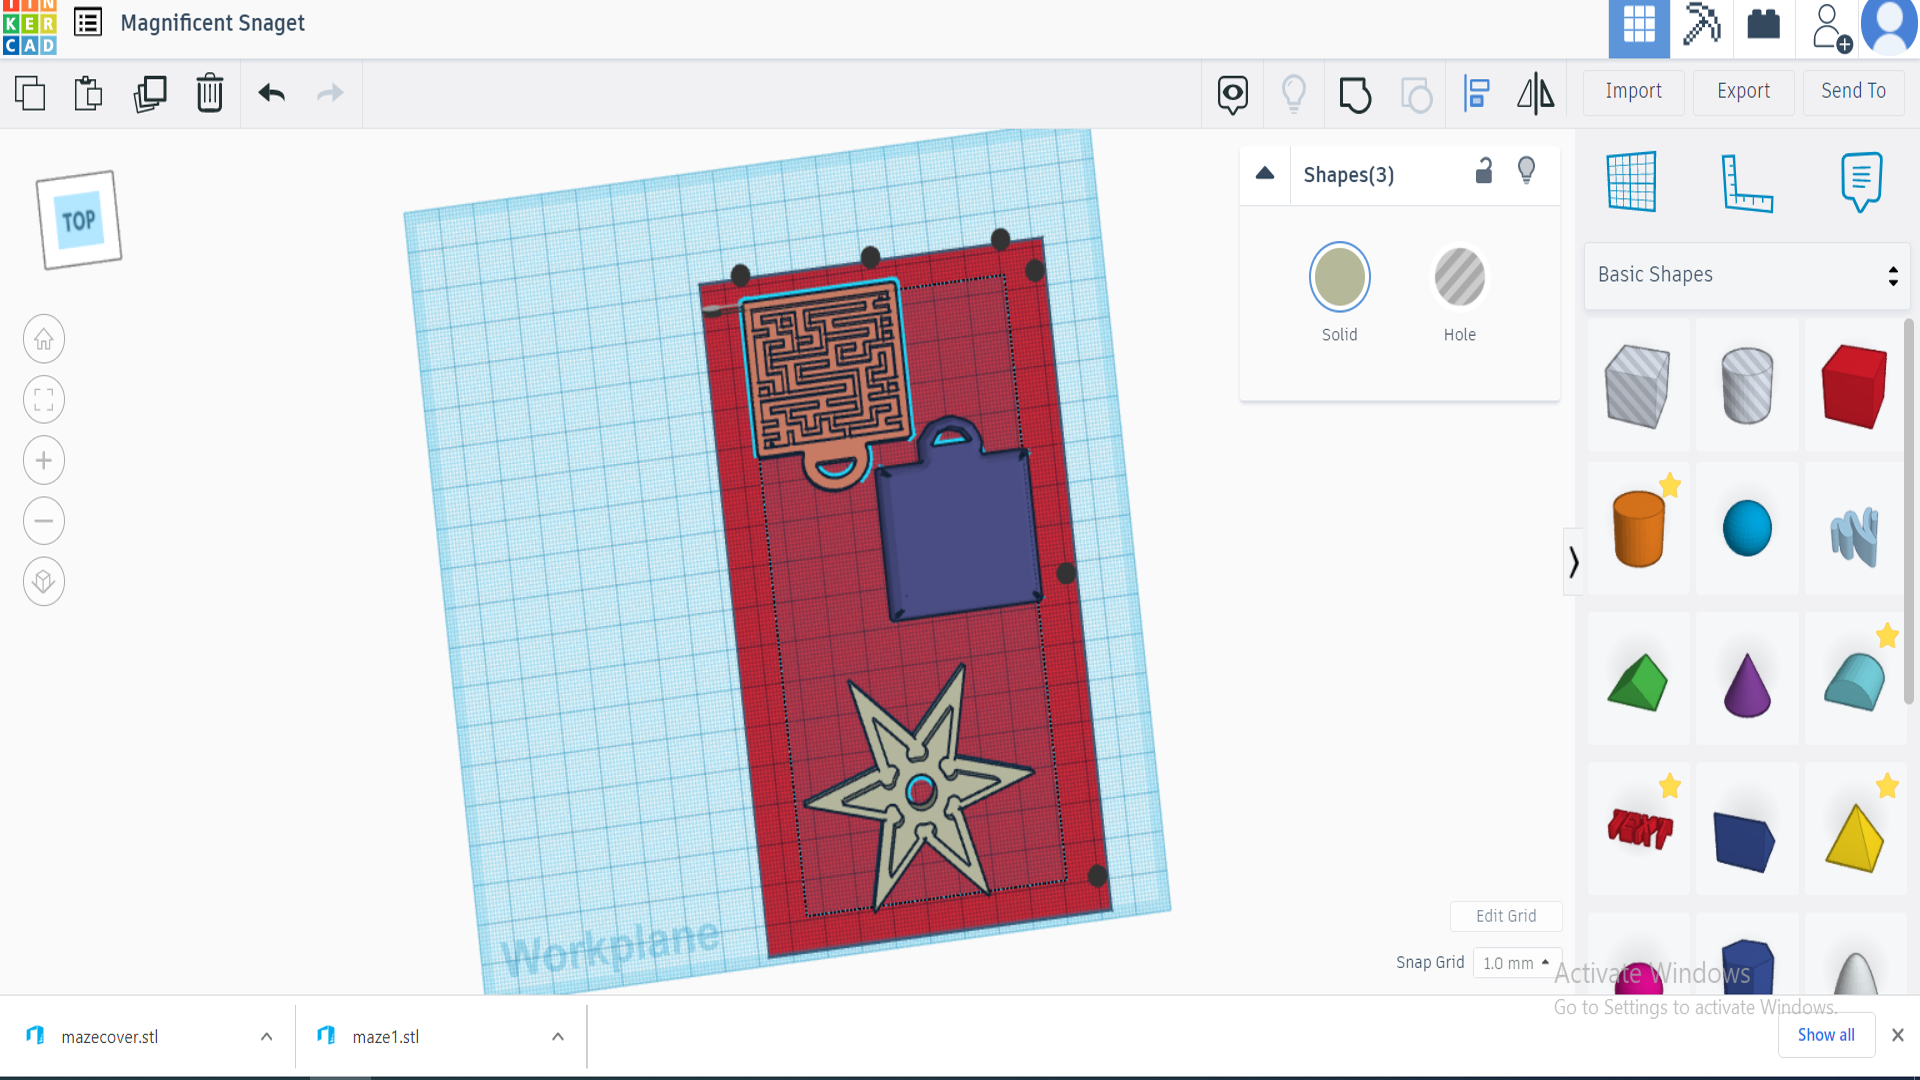
Then we opened our design on a program called Magnificent Snaget, and brought our files in the software, and so we started doing the milling process.
There are a total of 5 steps in this process.
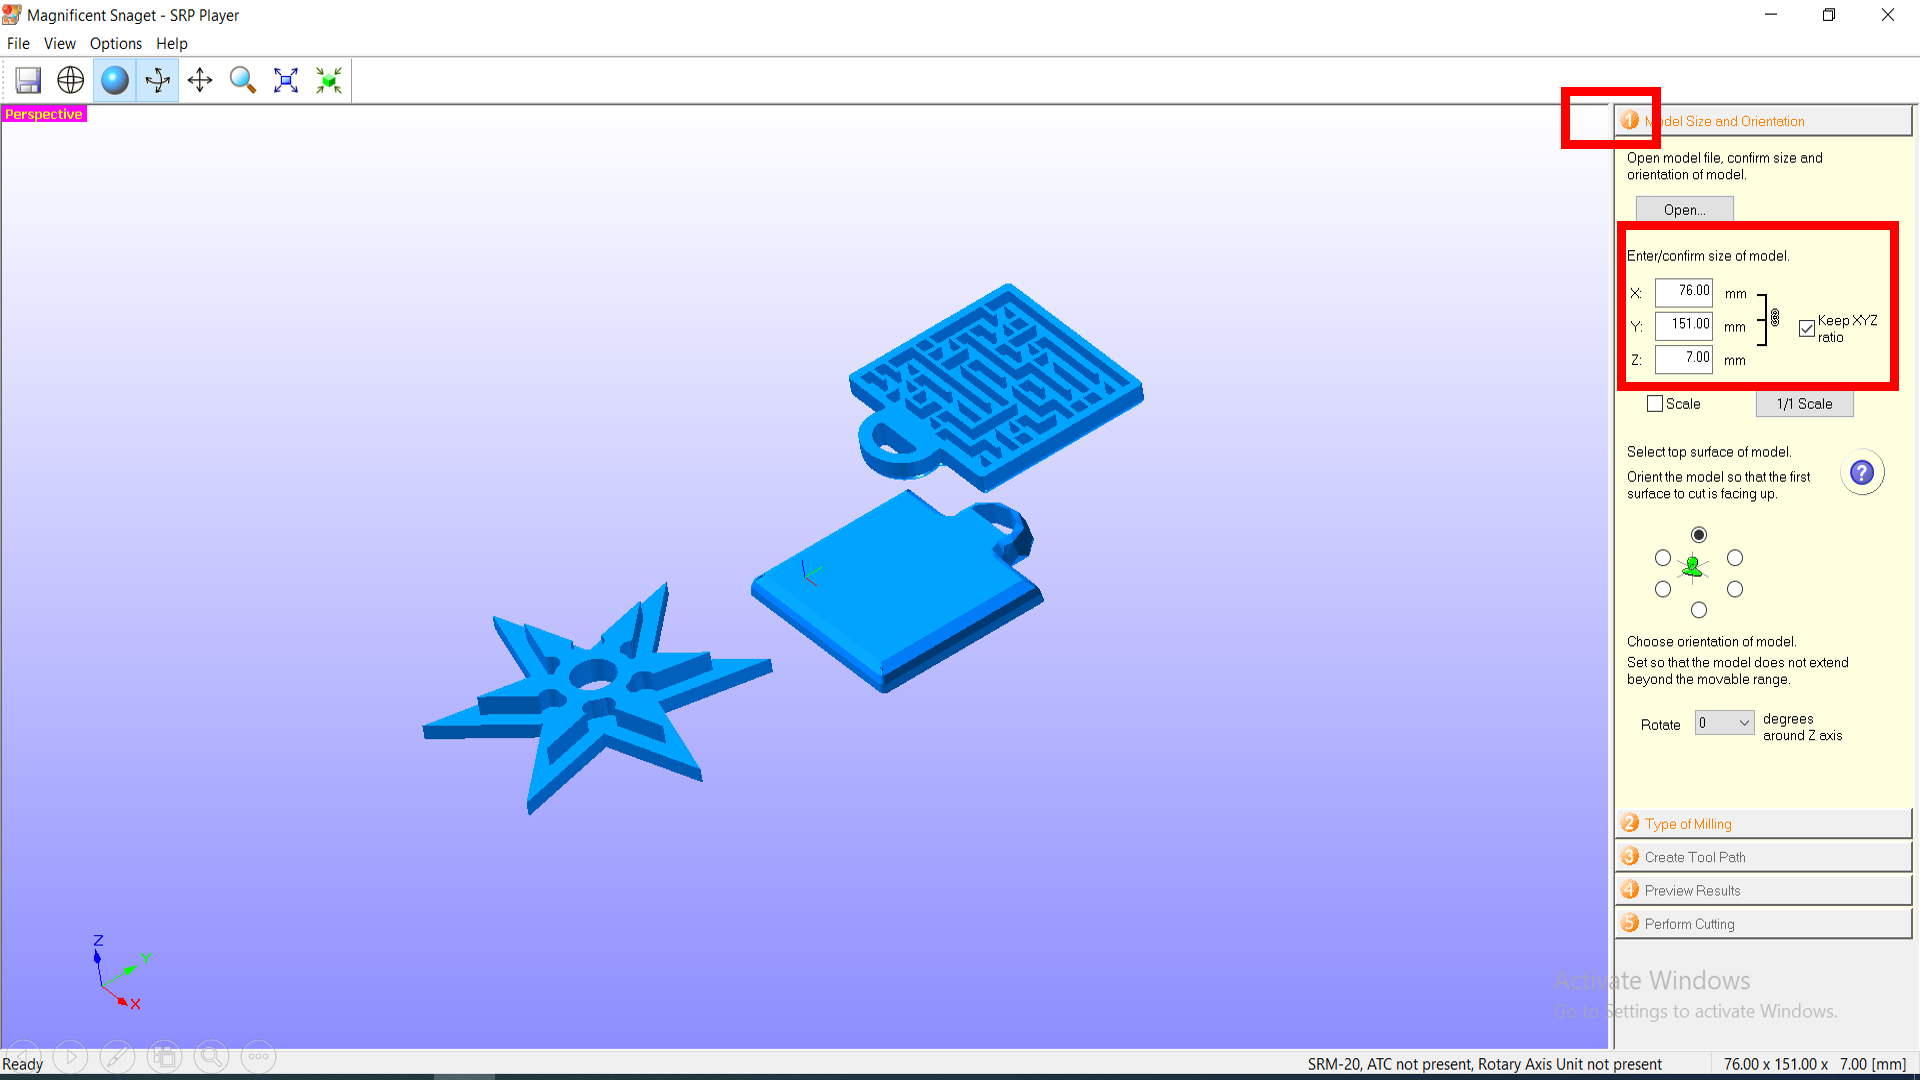
1- First, we set the dimensions of our models in the following settings.
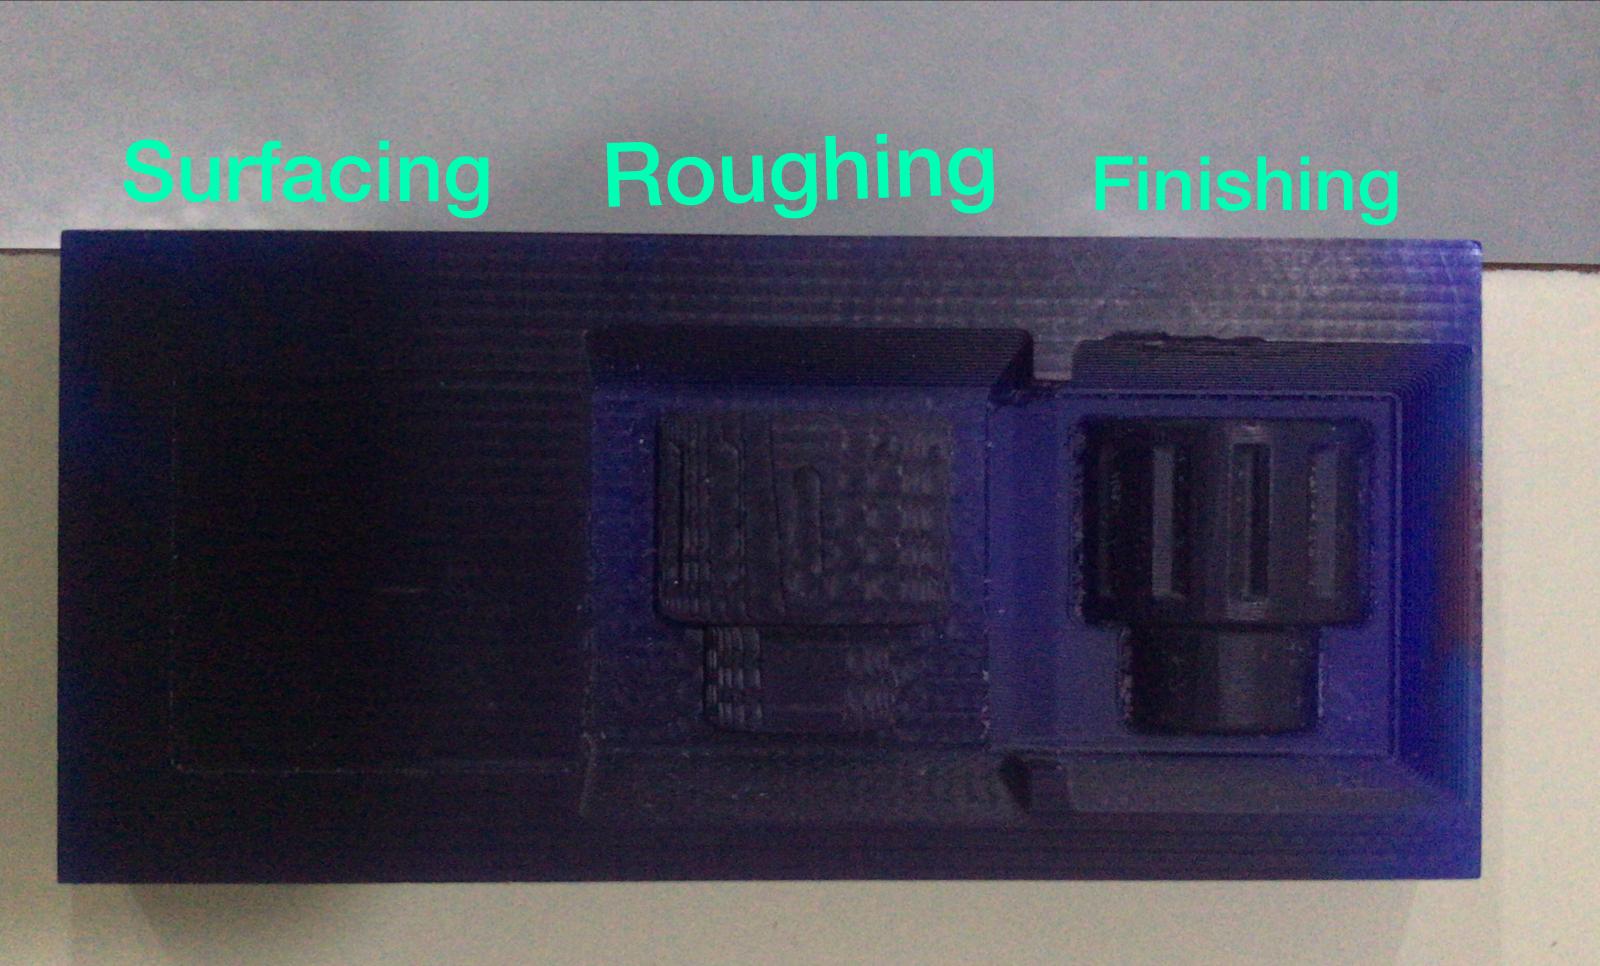
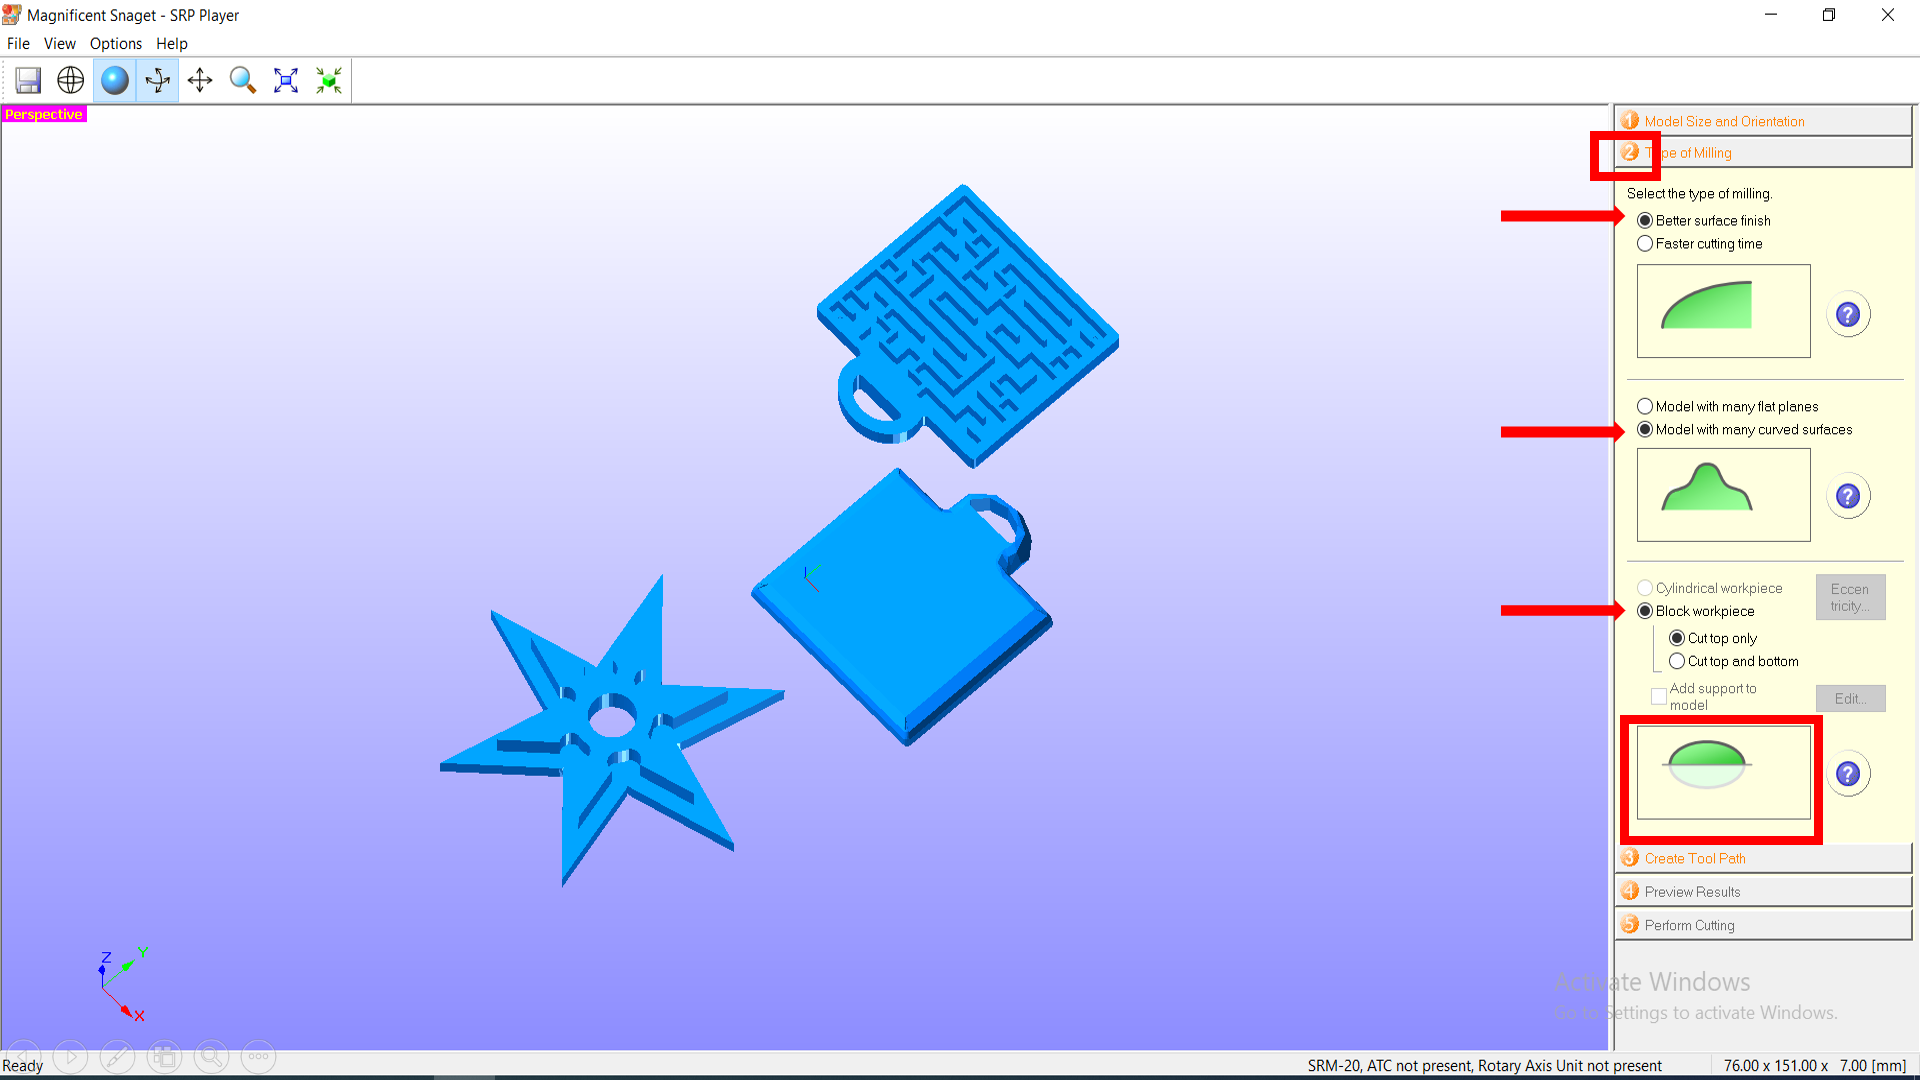
2- Second, we move on to the 2nd step, where we select the “type of milling”. So, since our model is curved and we want a better finish too, so we select these options in the settings, and select the cut option of top part only.
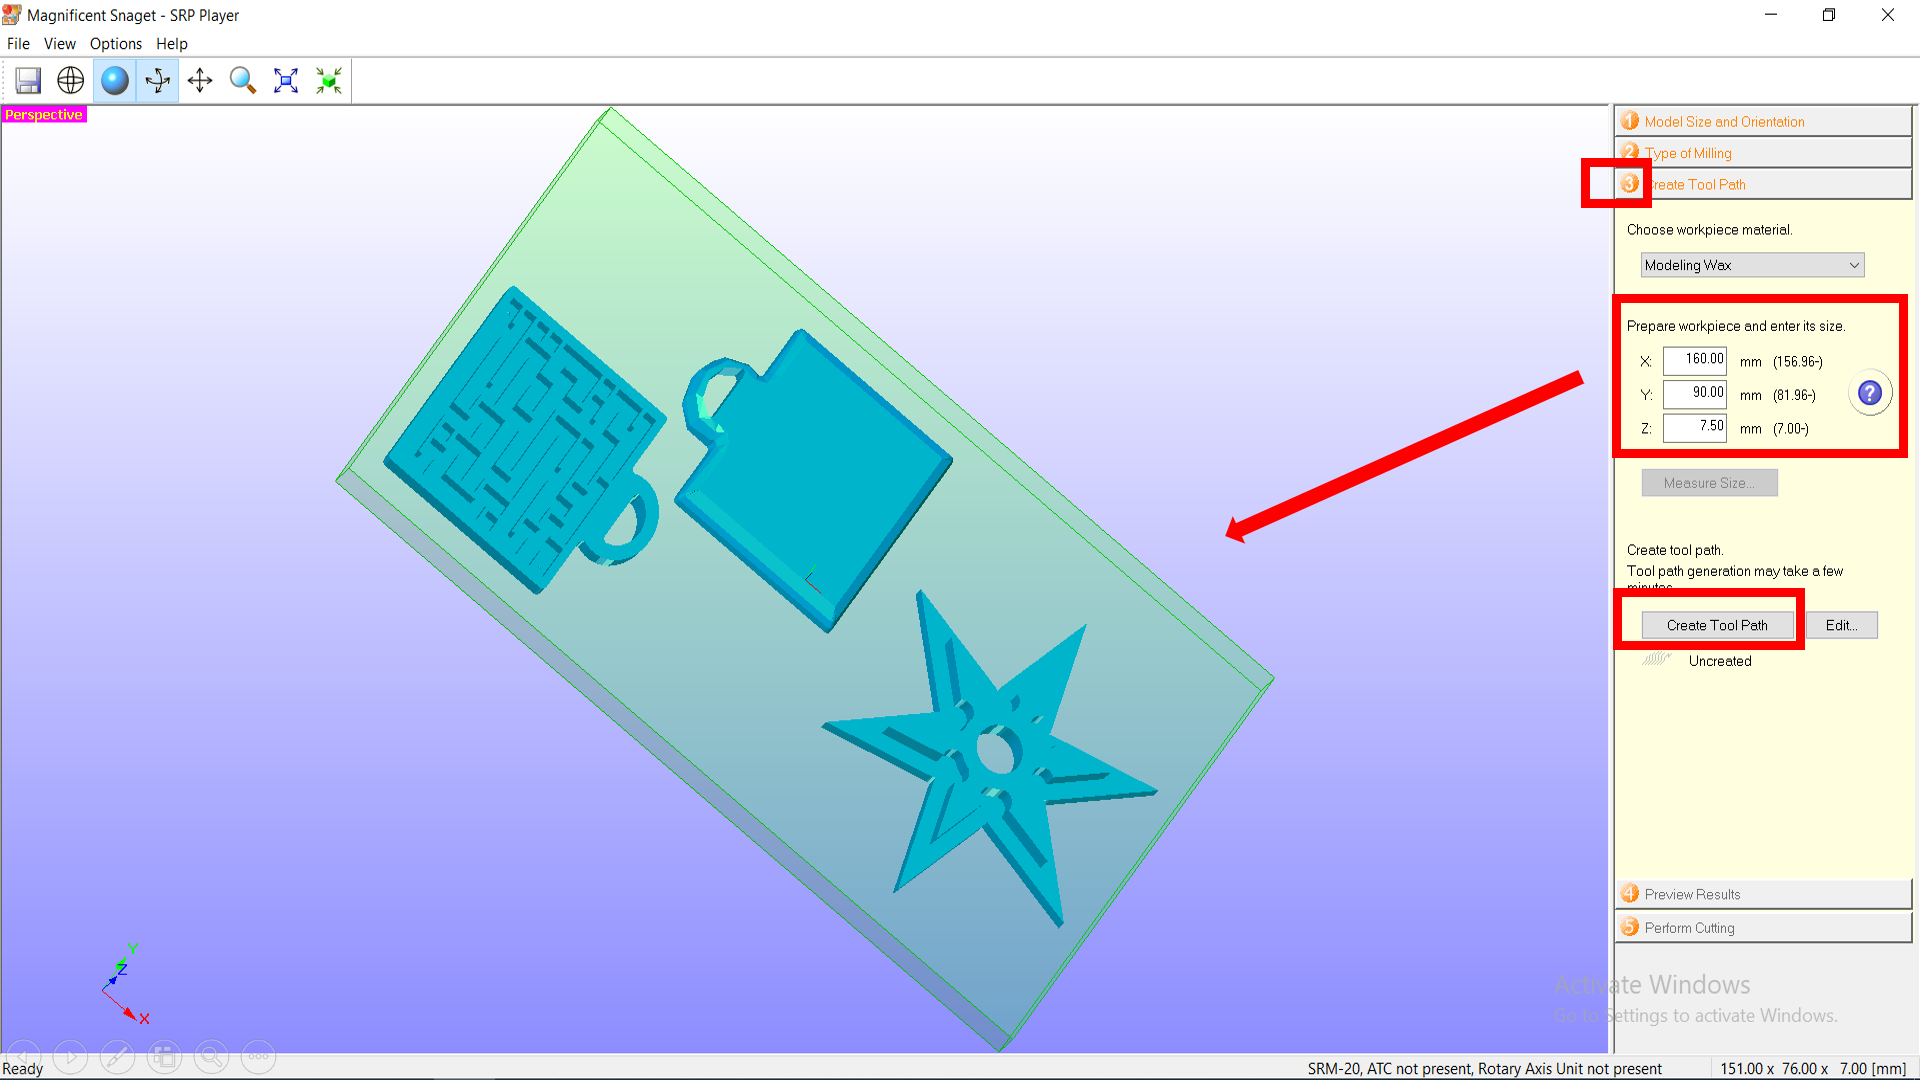
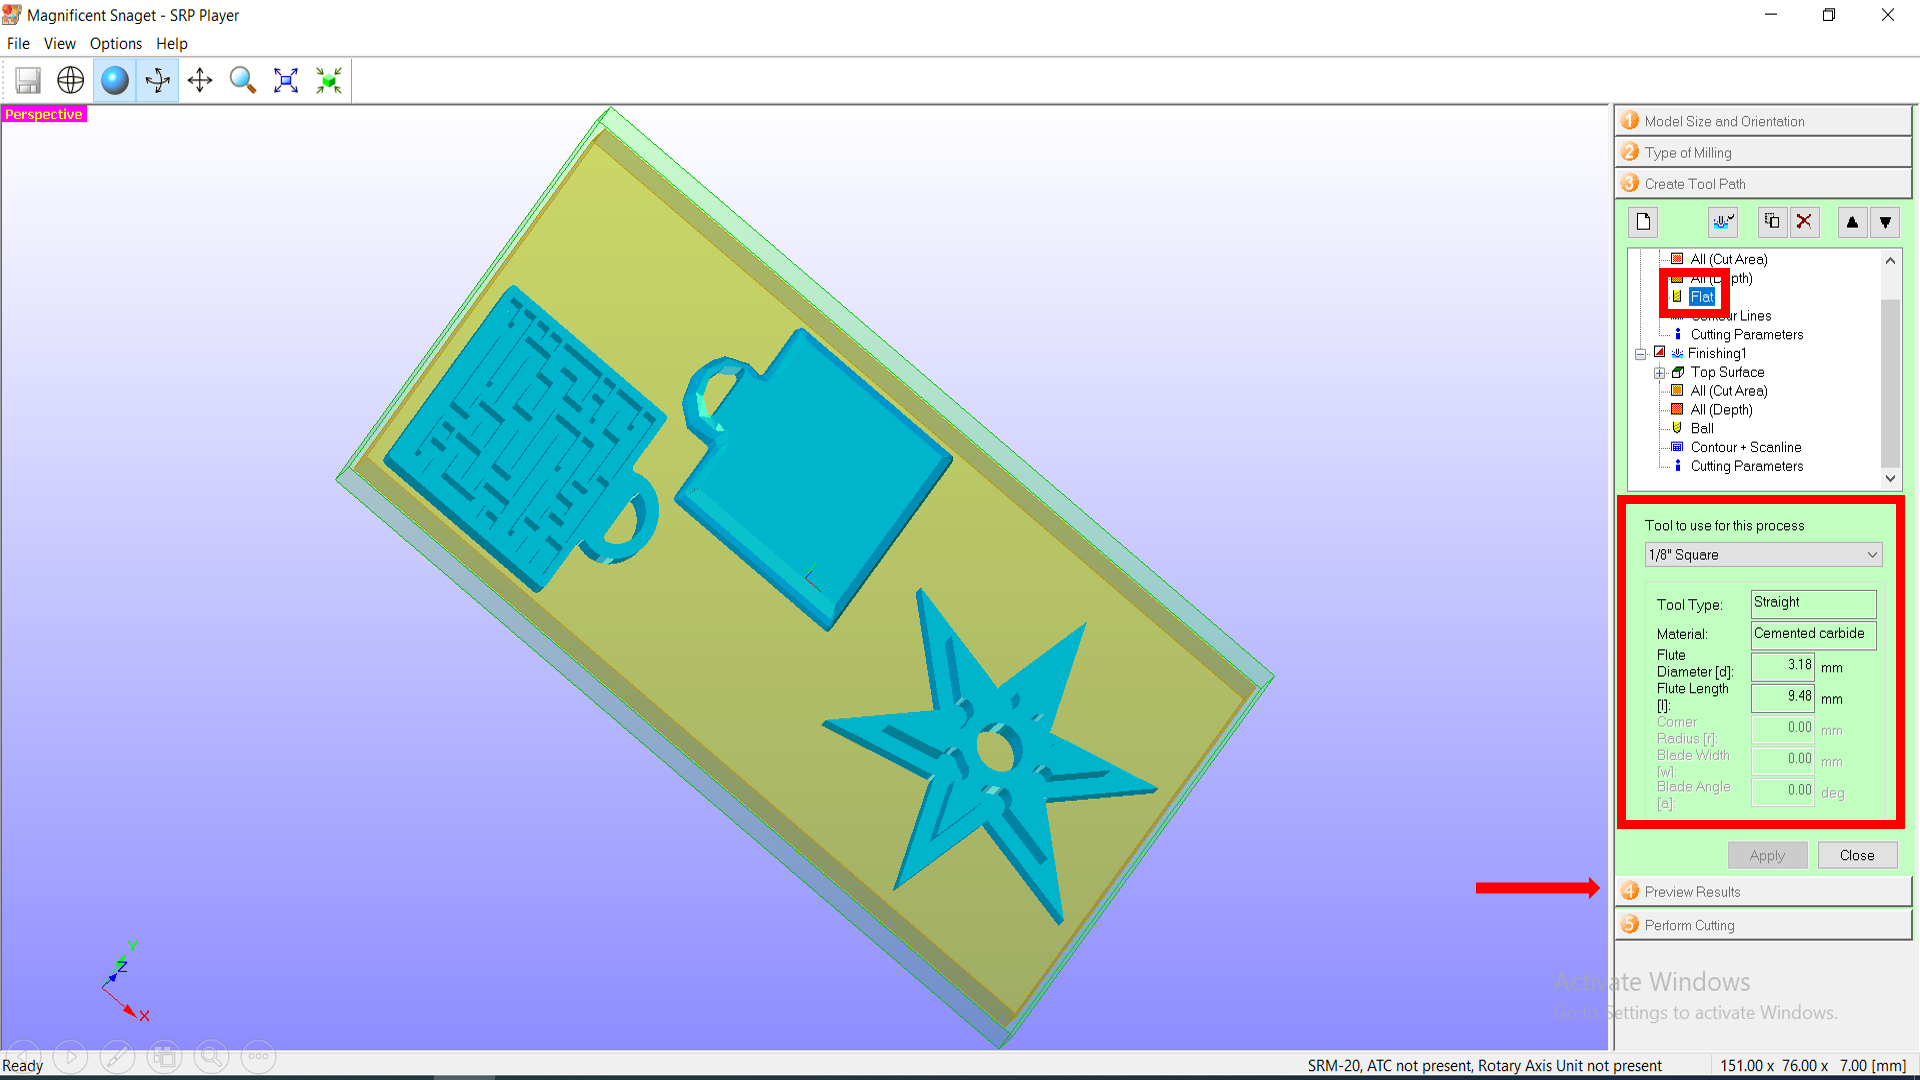
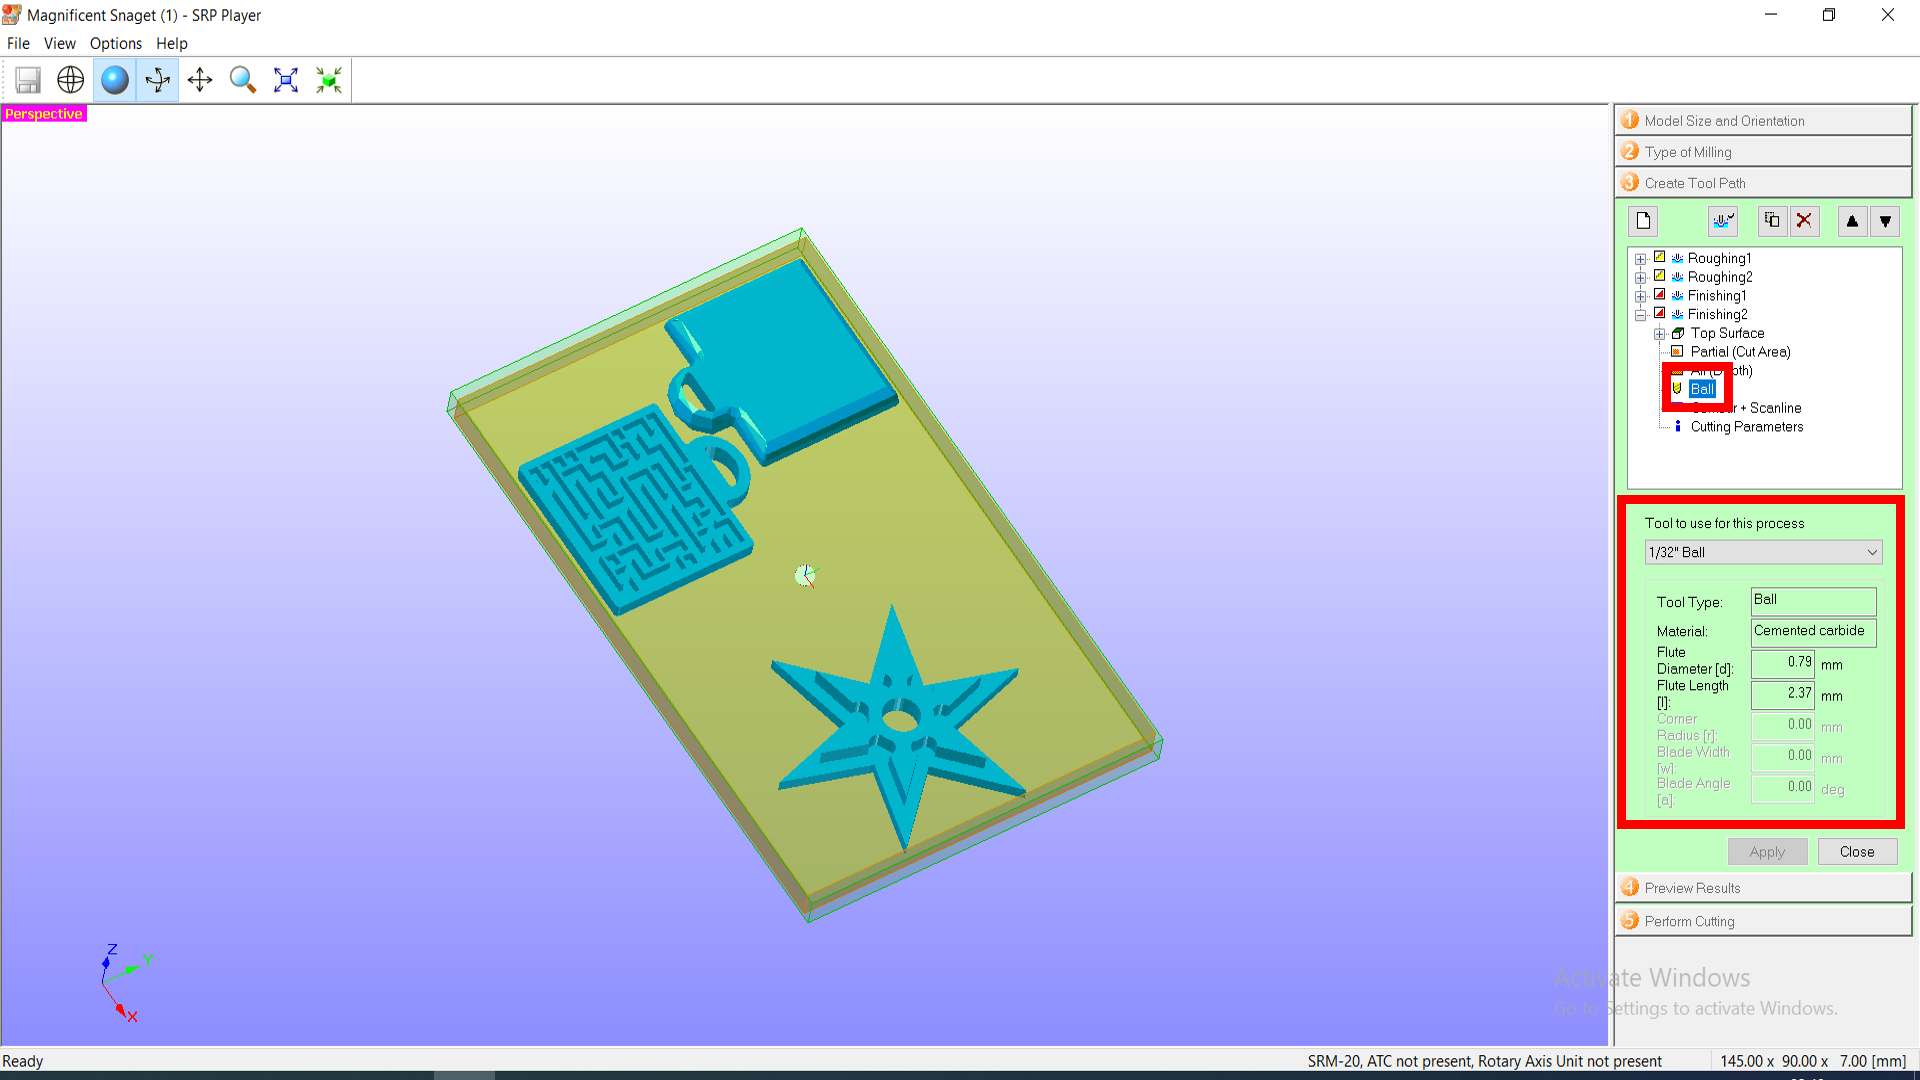
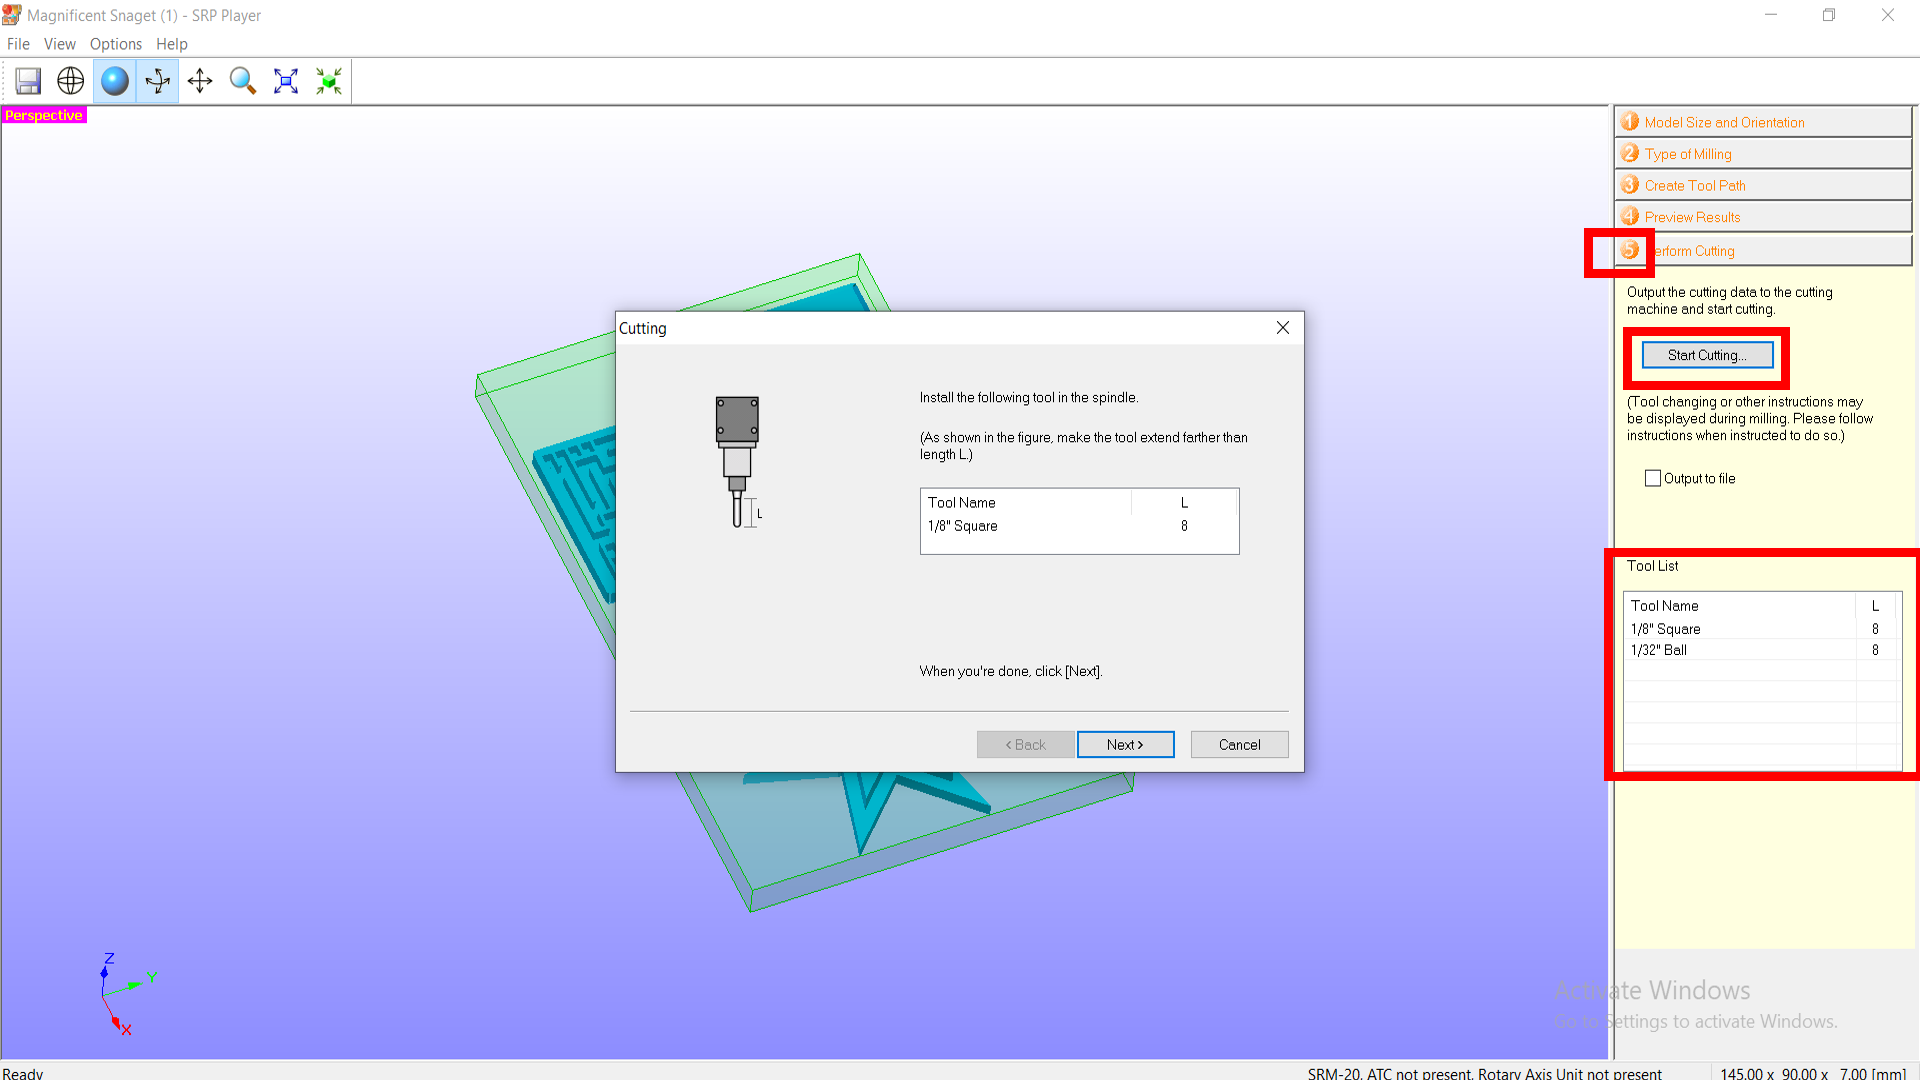
3- Now, we move on to the toolpath. In this section, we give the dimensions for the modelling wax plate, and go to create toolpath. I choose the 1/8” square bit for the Roughing process and the 1/32” bit for the finishing process.
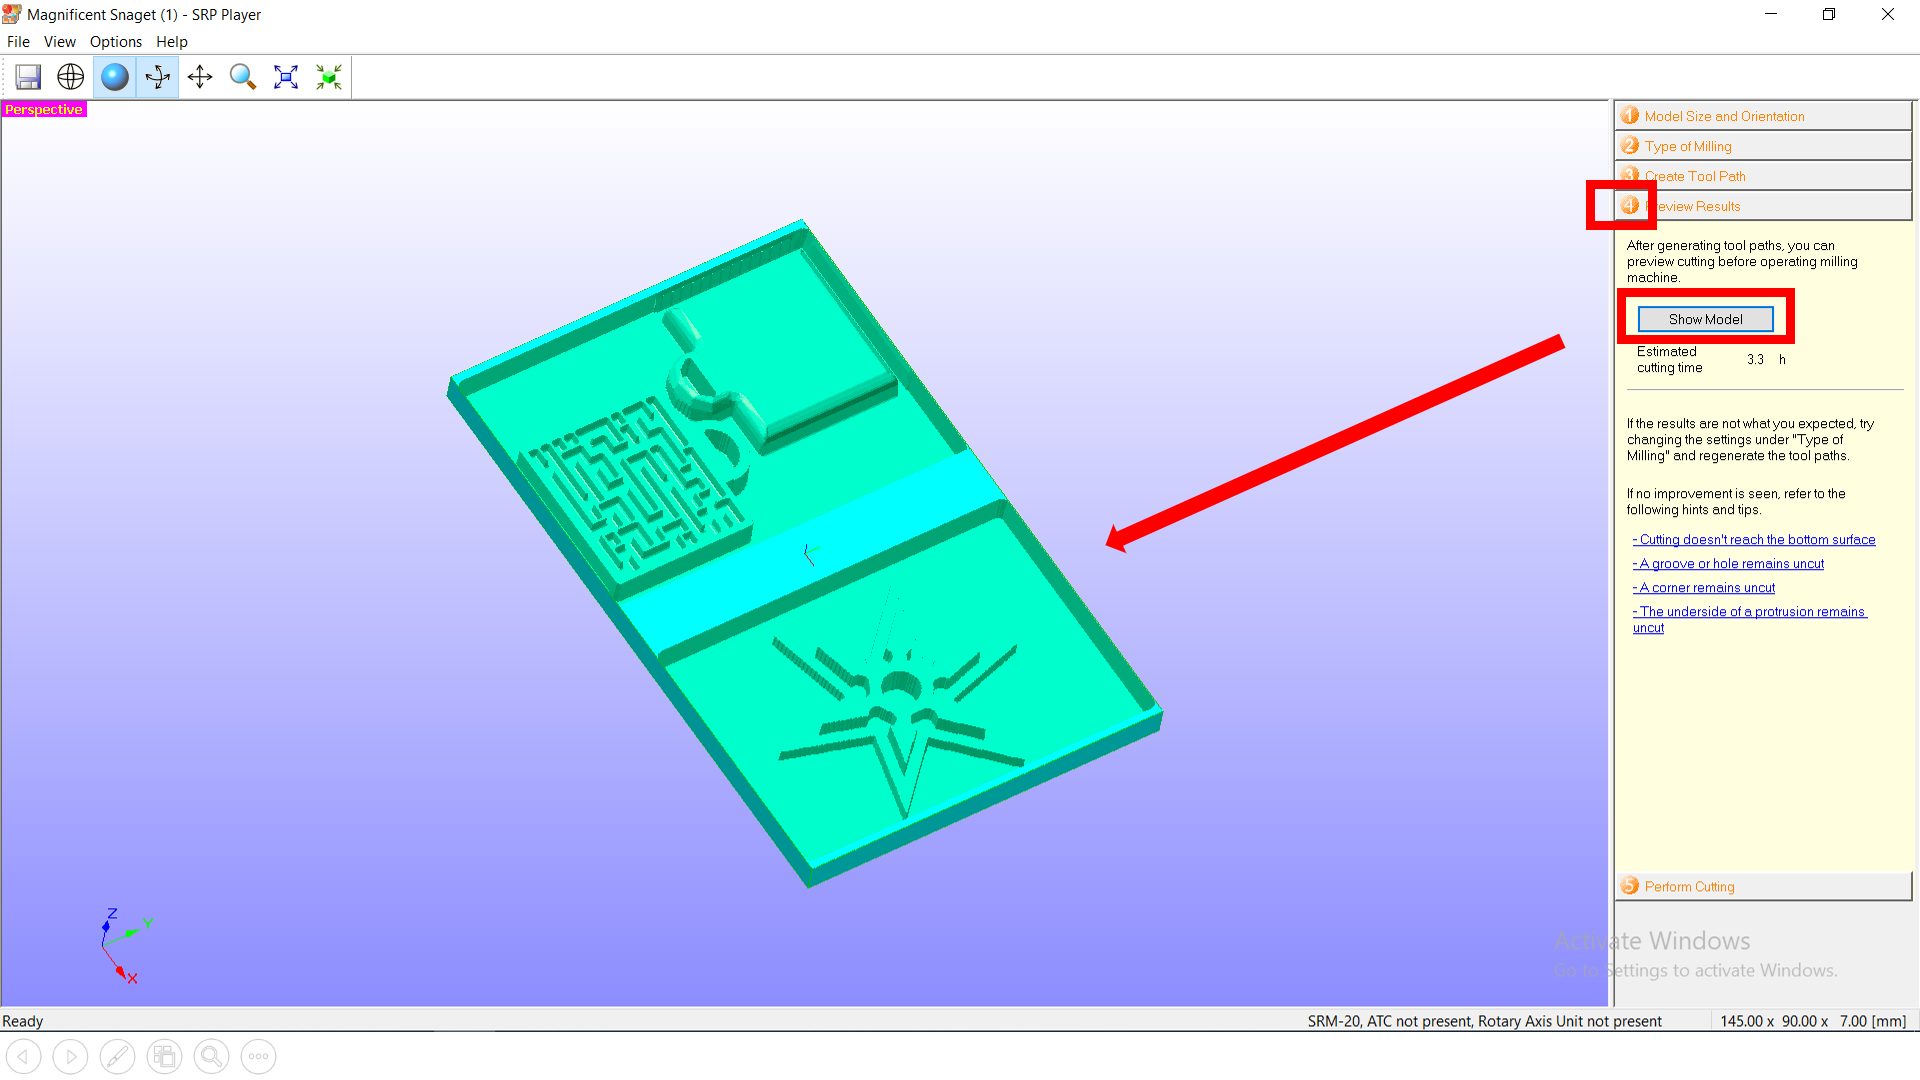
4- Now, after doing the whole process, we can preview our models and see what’s the final shape of the objects are going to look like.
5- After finishing all the above steps, the final step is to perform cutting. By clicking on it, we can see our roughing and finishing bits, and we can click on “Start cutting”.
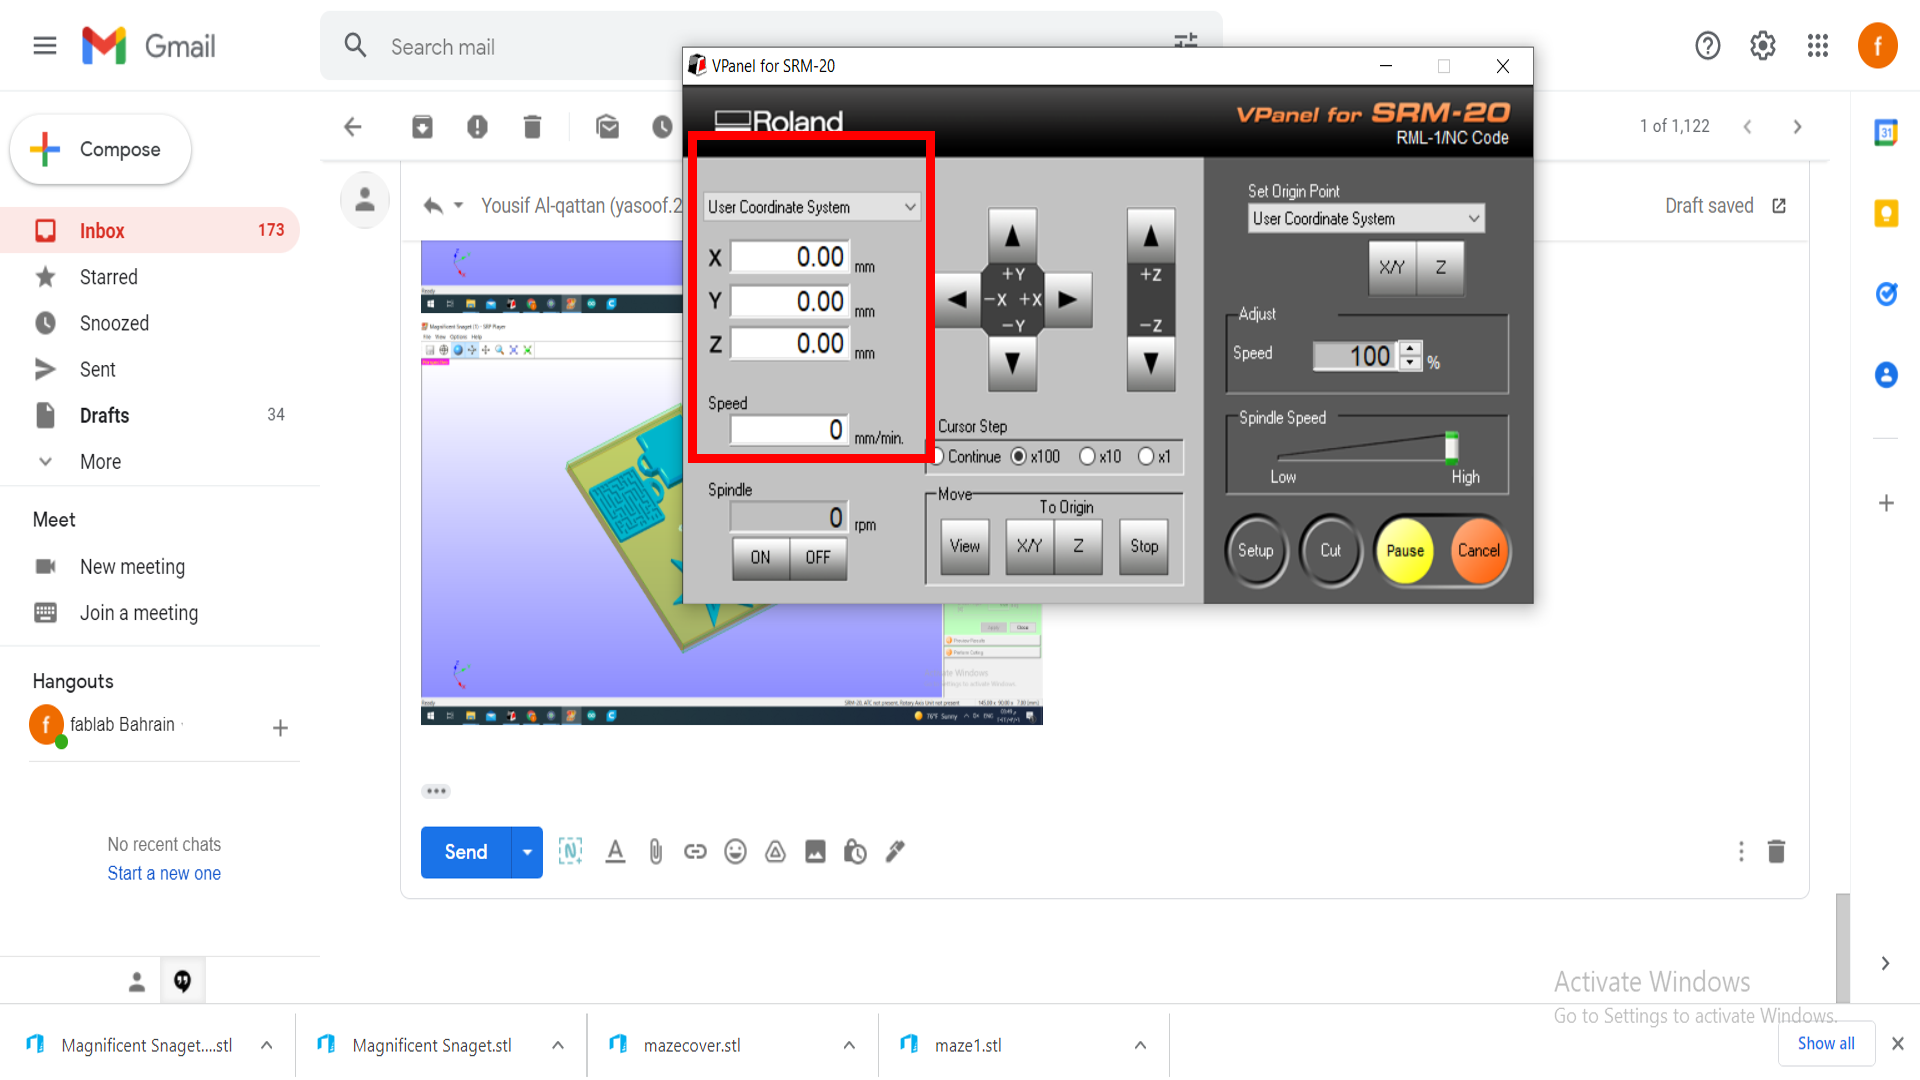
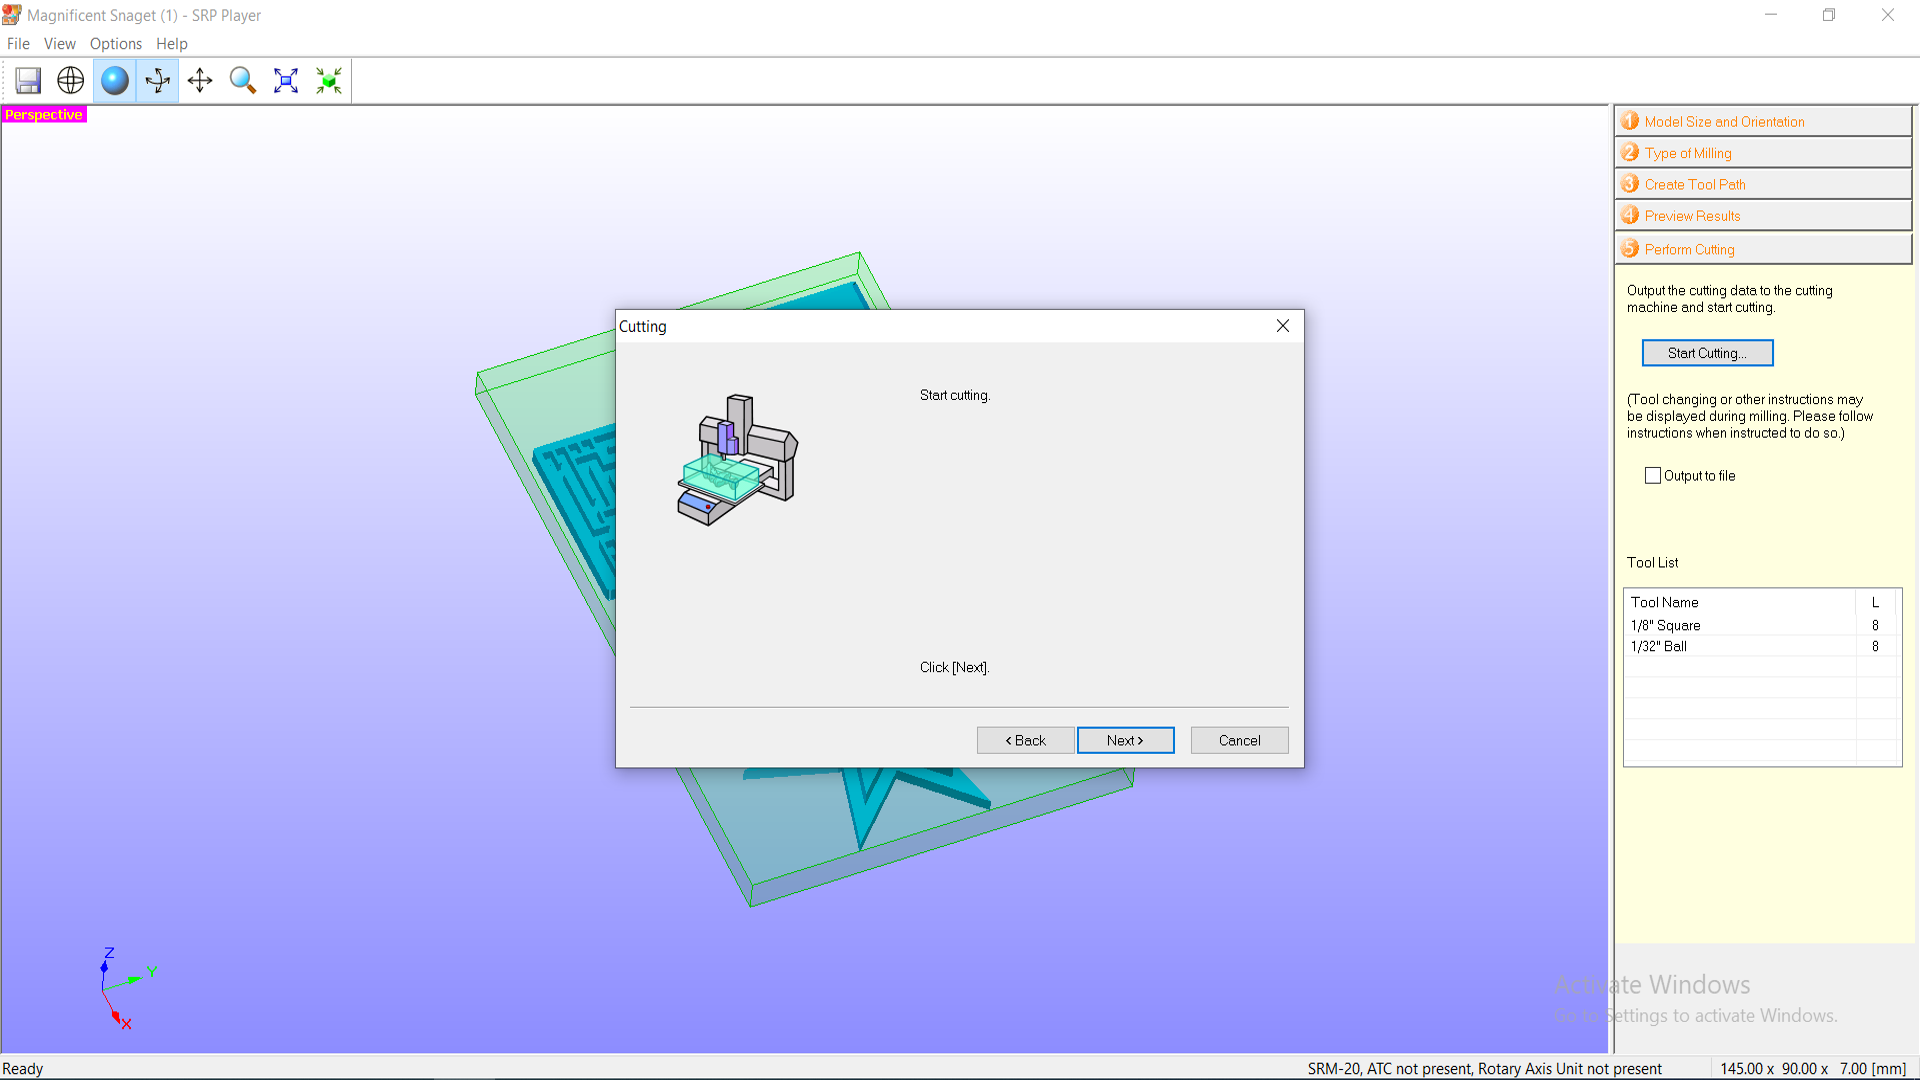
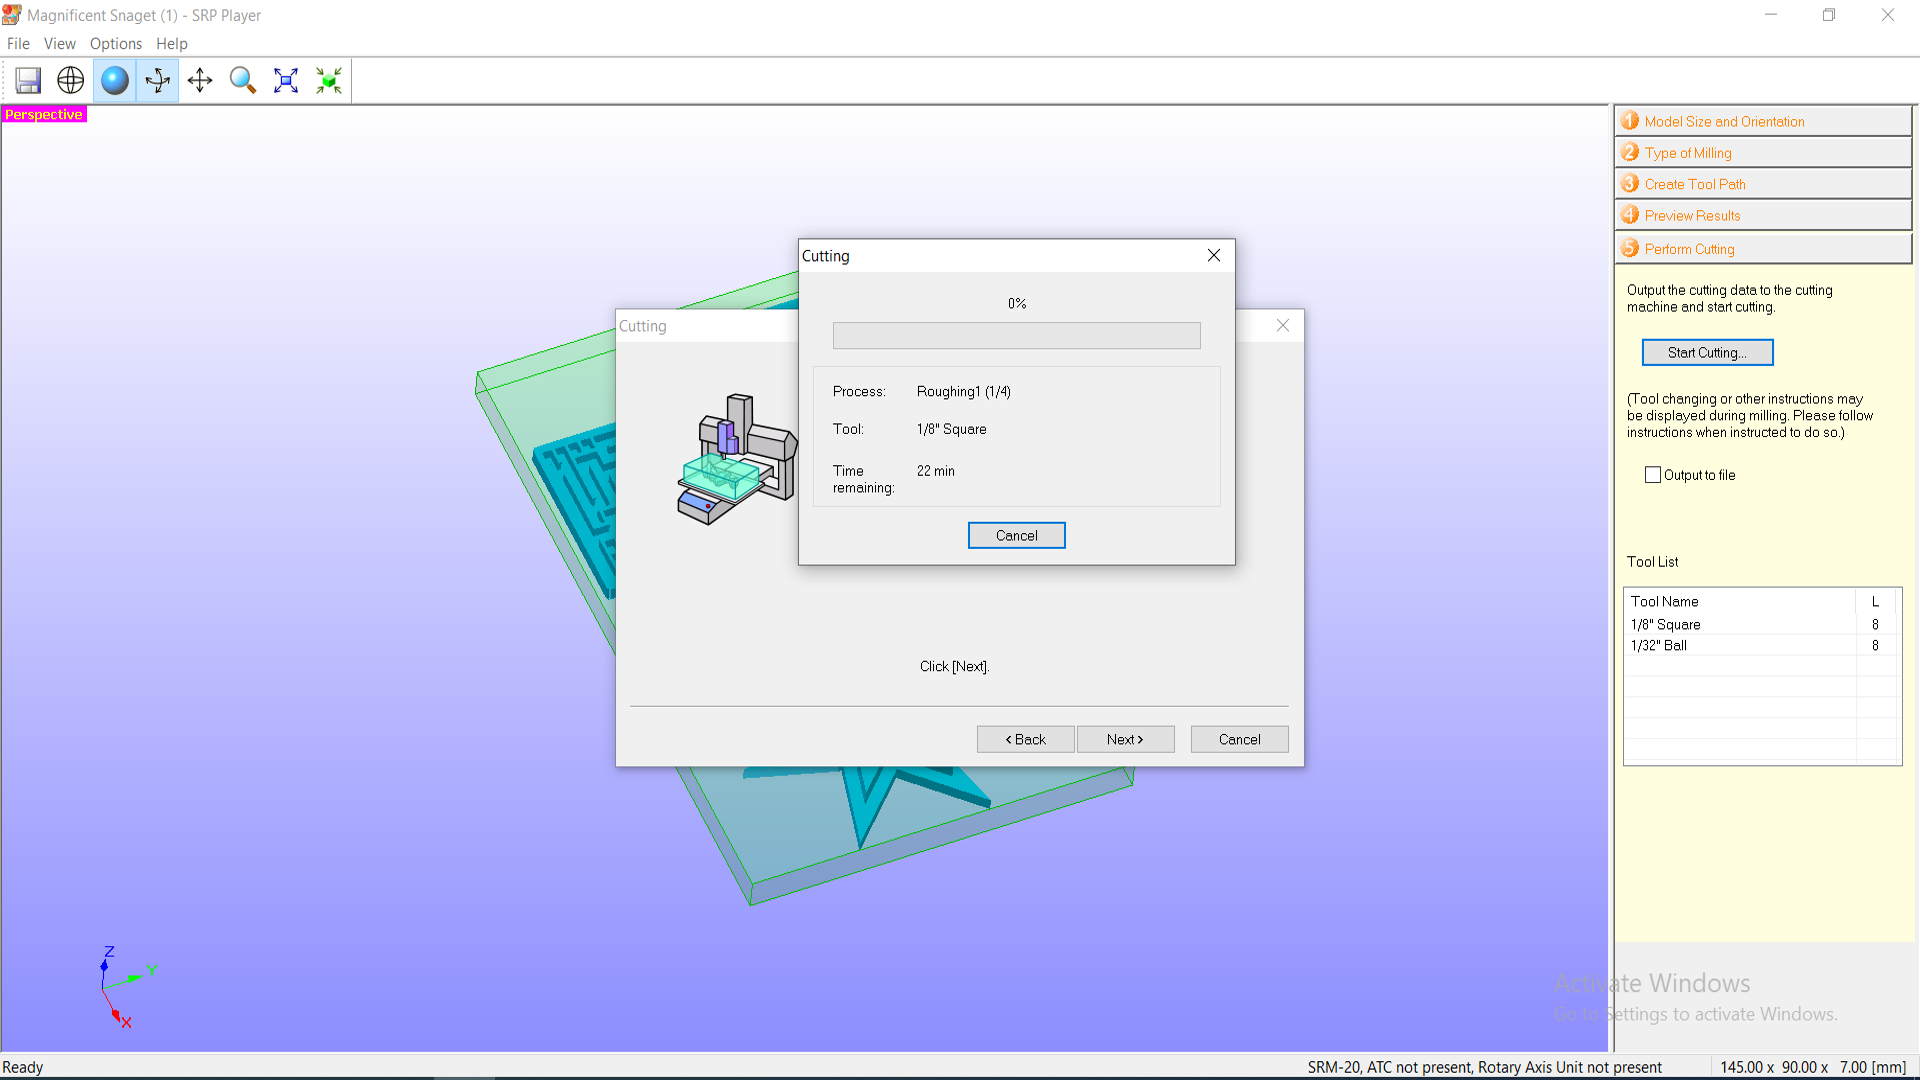
6- Then, after all the steps are done, we set up the machine to start the milling process.
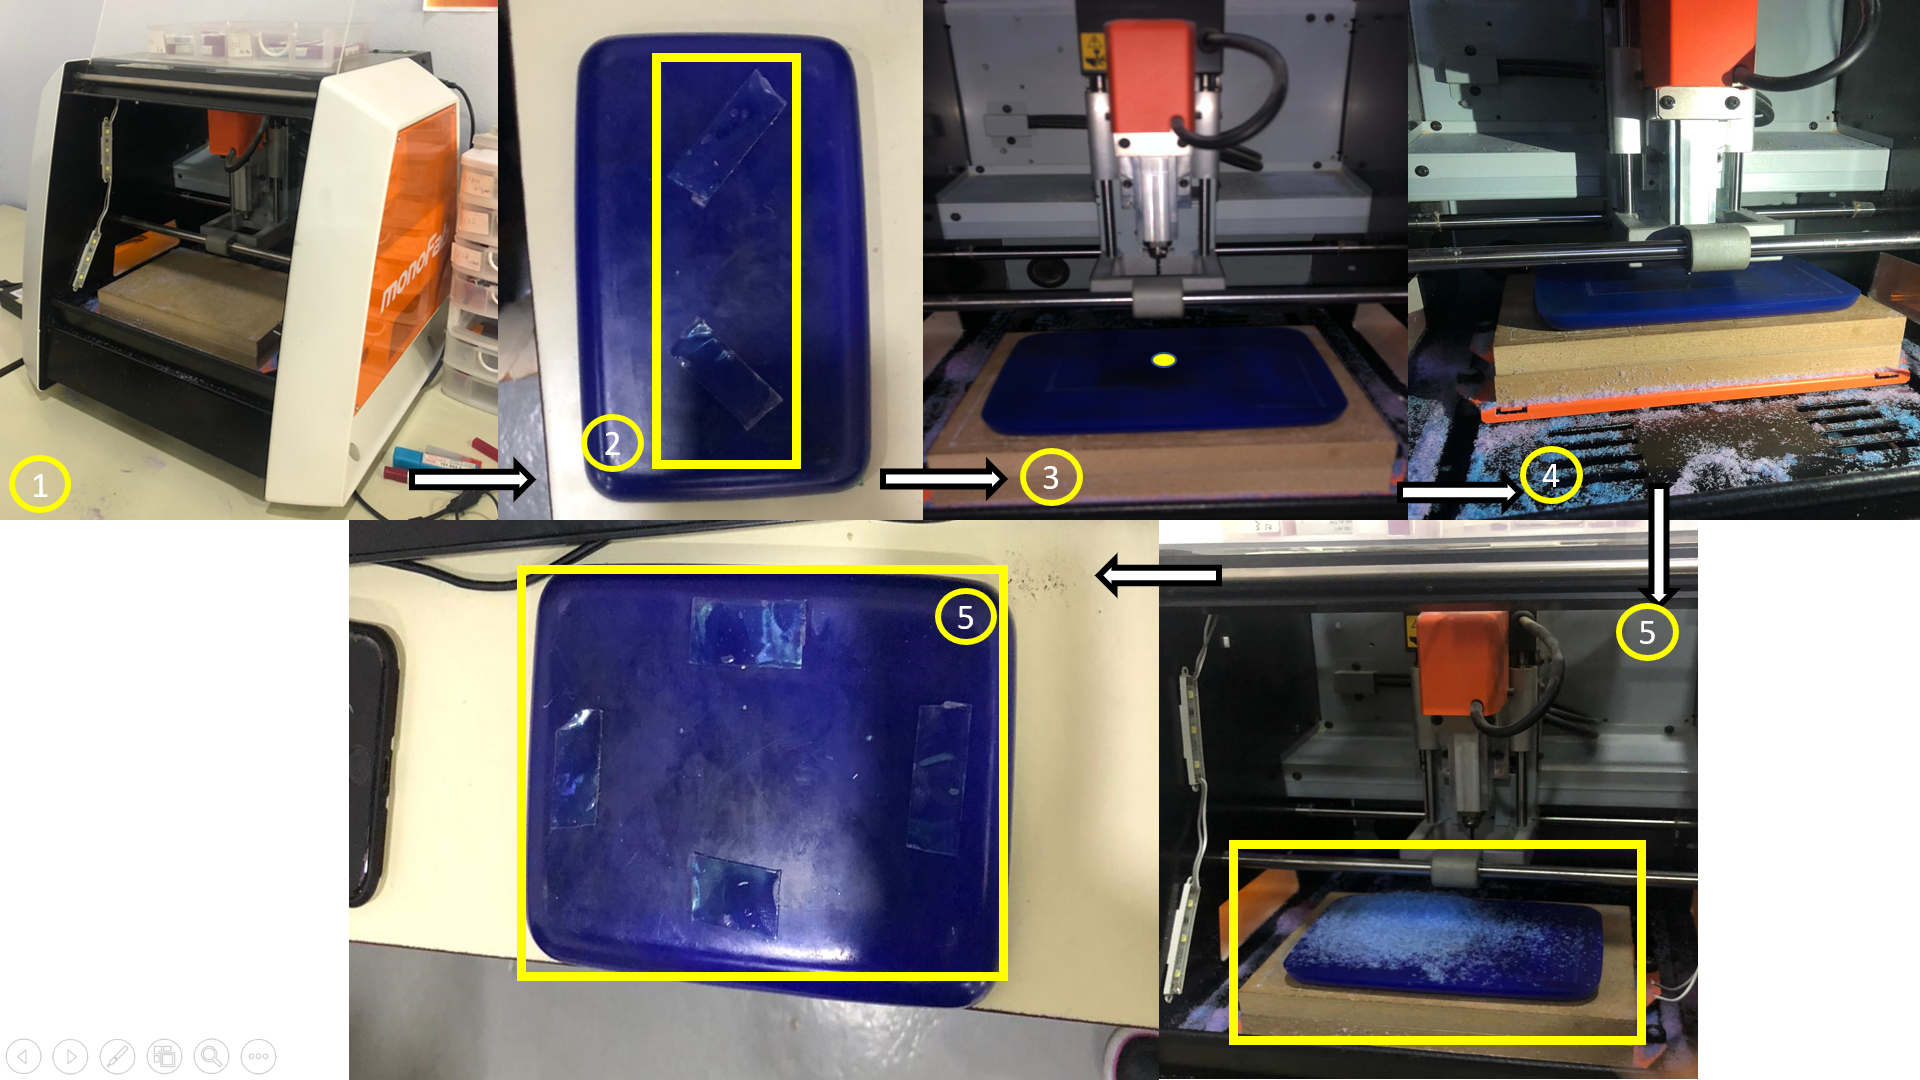
7- We taped the plate from the bottom, with 2 double-sided tape diagonally, and put it in the machine.
Problem
We started to see too much of material coming out of the wax plate, because the levelling was not done right. So, we stopped the process, took the plate out, and removed the previous tapes, and added 4 double-sided tapes on the bottom, so the plate would be evenly flat in the machine.
Video Process!
The process started, and after 2-3 hours, it finally finished.
Post-Roughing Result!
Moulding!
For Moulding process, I opted for silicone mold. We have 2 kinds of silicones, one that dries quickly, but it’s not that flexible. And another one, that dries in 24 hours, and it is quite flexible, as seen in the below images.
So I chose the silicone, that was going to last for 24 hours, and have better flexibility.
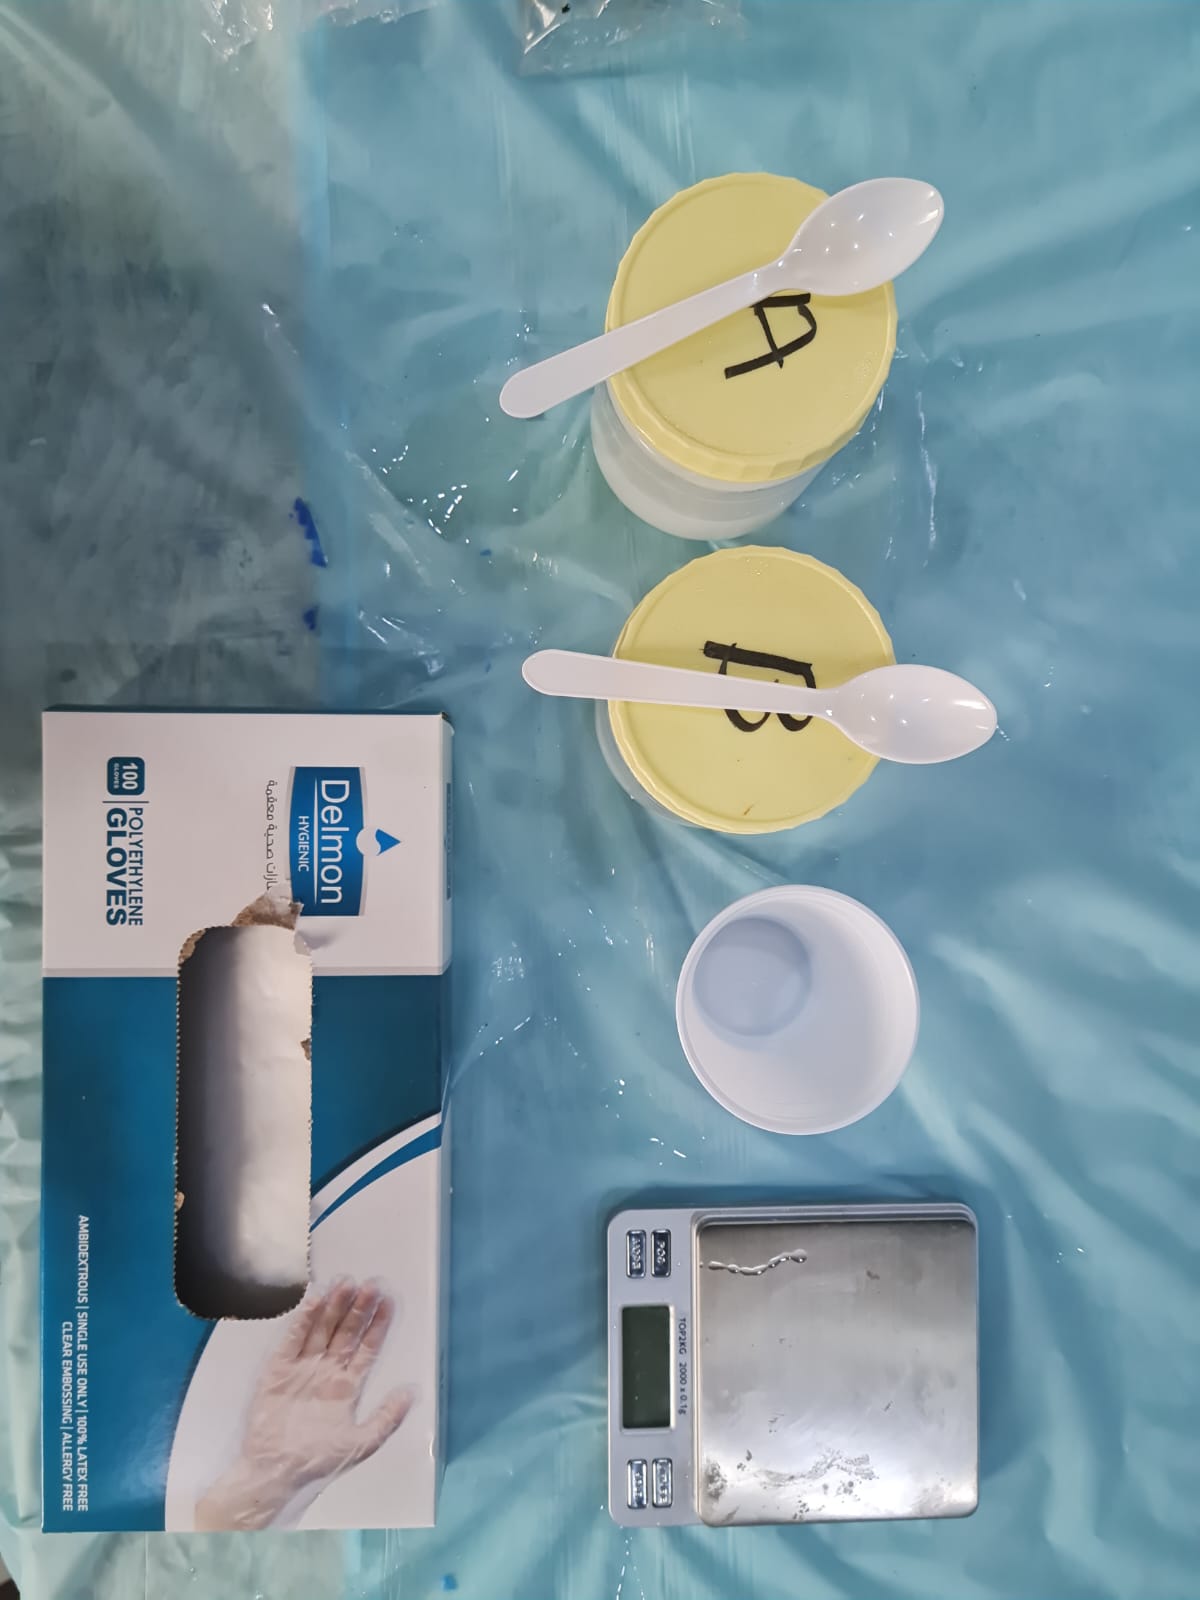
Things we need:
1- Gloves for safety.
2- 2 silicone bottles.
3- Spoon for mixing.
4- Weight tare machine.
Mixing Ratio was 1:1 of both silicones, as one was a silicone material, and the other was a catalyst. So, in the weight tare machine, I took 30 grams of each bottle, making it 60 grams in the end. I thoroughly mixed them, in order to not have any bubbles, and then poured the mixture into the wax plate.
According to the research done by my colleague Yusuf, I decided to have the work time for it to be 5 minutes, and it needs 24 hours for drying it, and making it into a mould.

Video of Mixing and Moulding process!
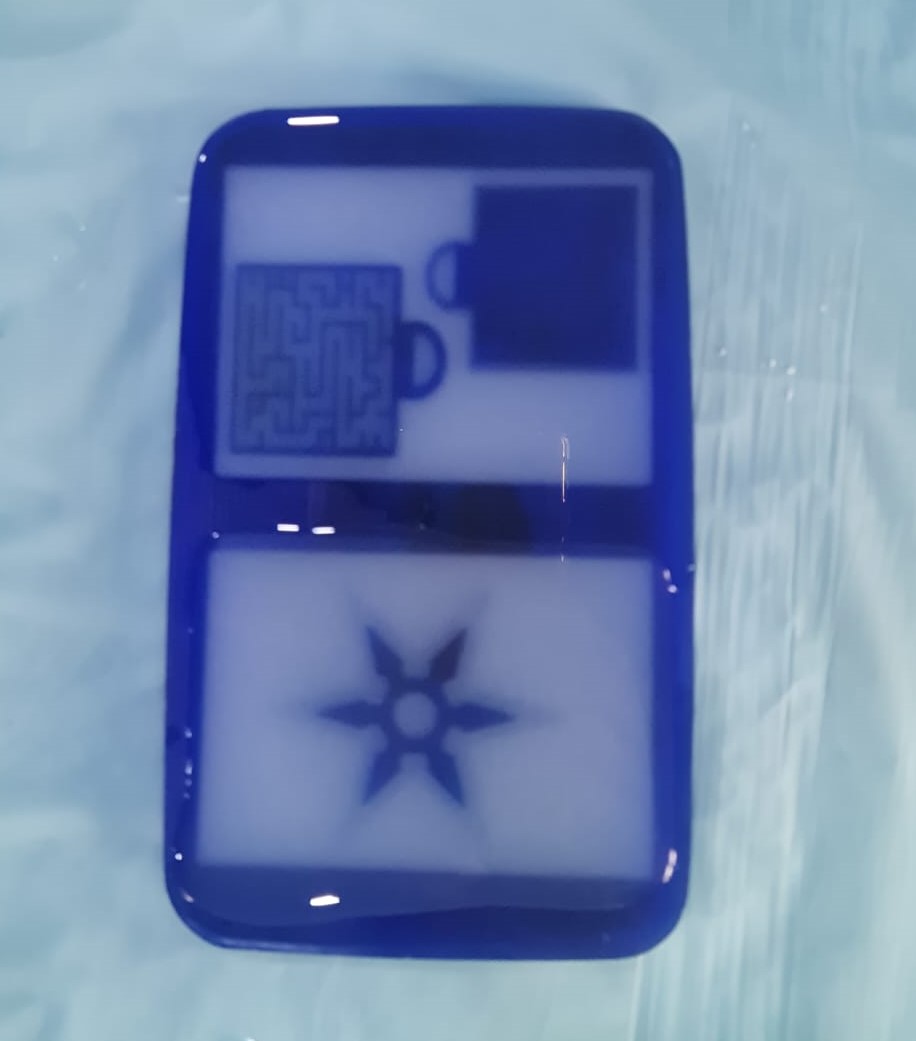
Final Result!
Casting Step Process!
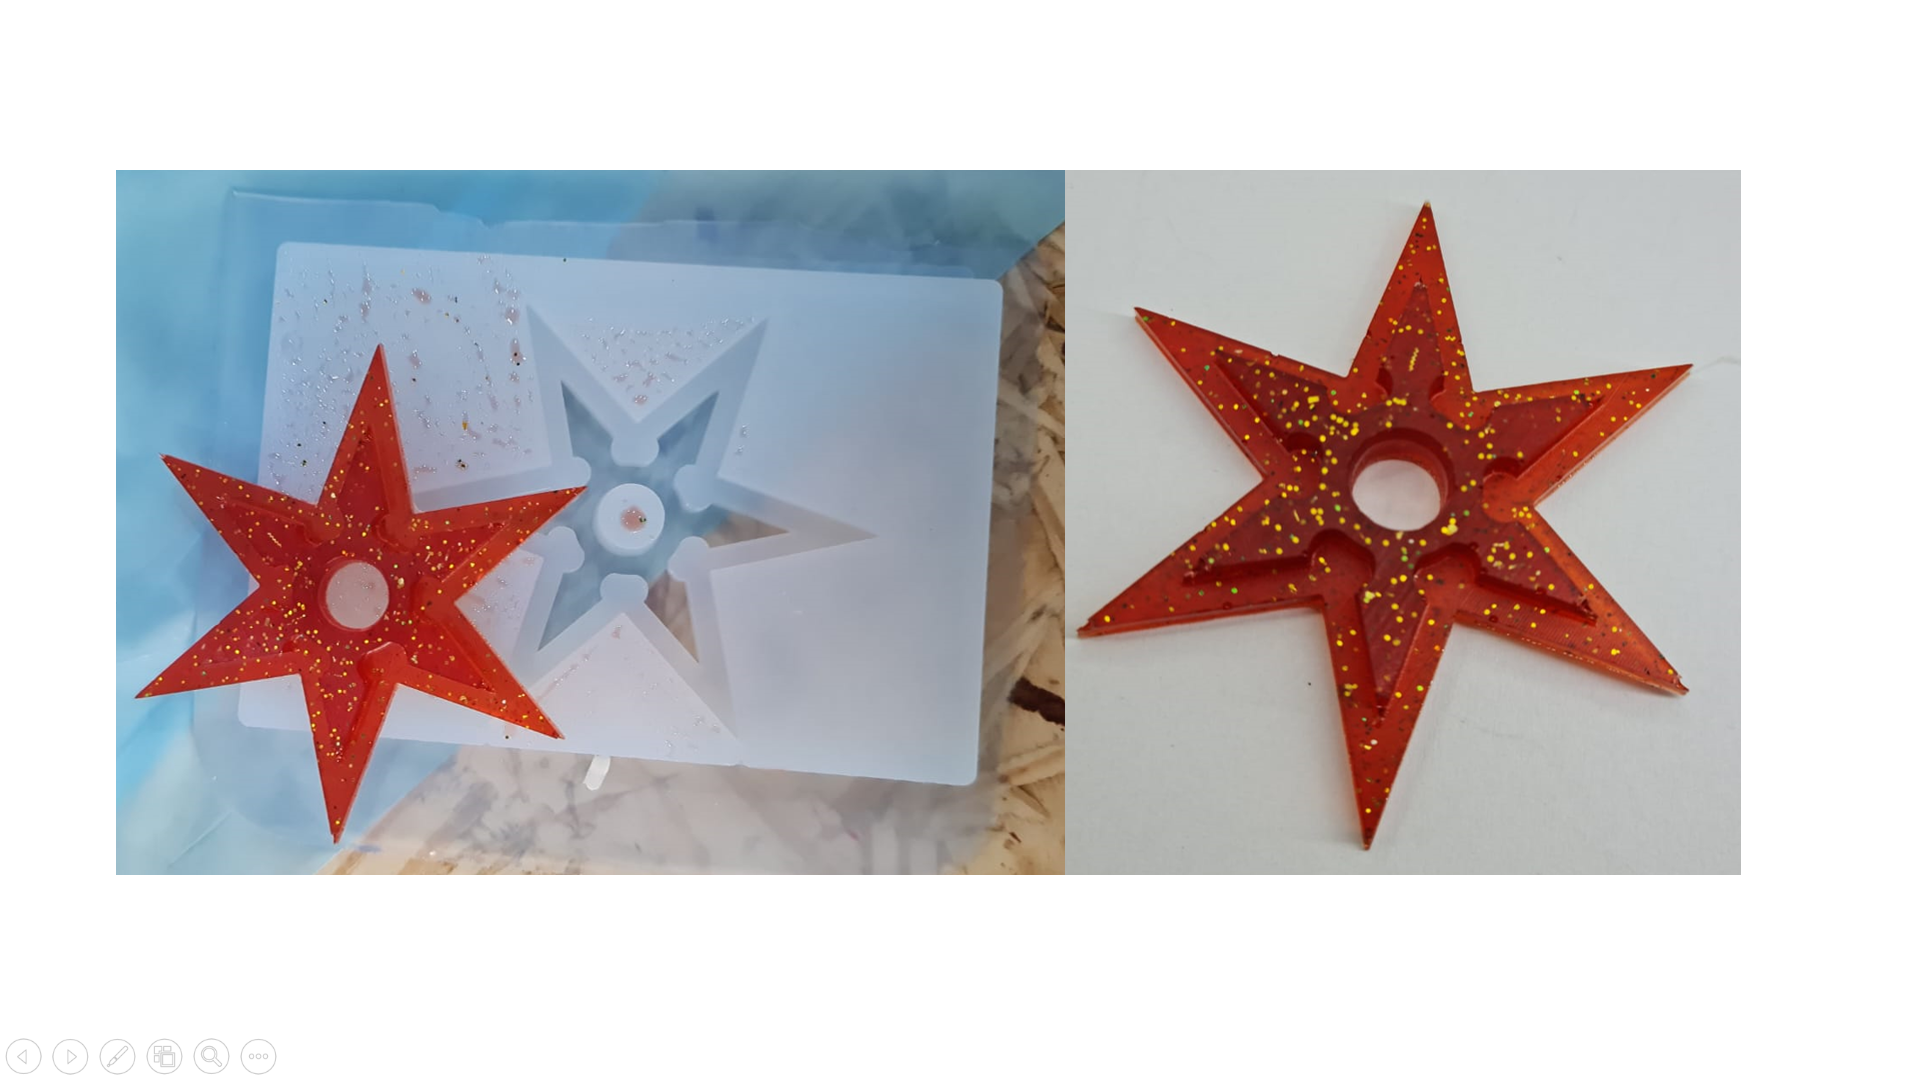
After 24 hours, the Silicone mold was dried, and I started taking out the mold from the machinable wax. It came out easily, without any problems.
Casting Process
This time, instead of SOAP, I wanted to try out RESIN for my final material. So, I started doing the Resin mixture process.
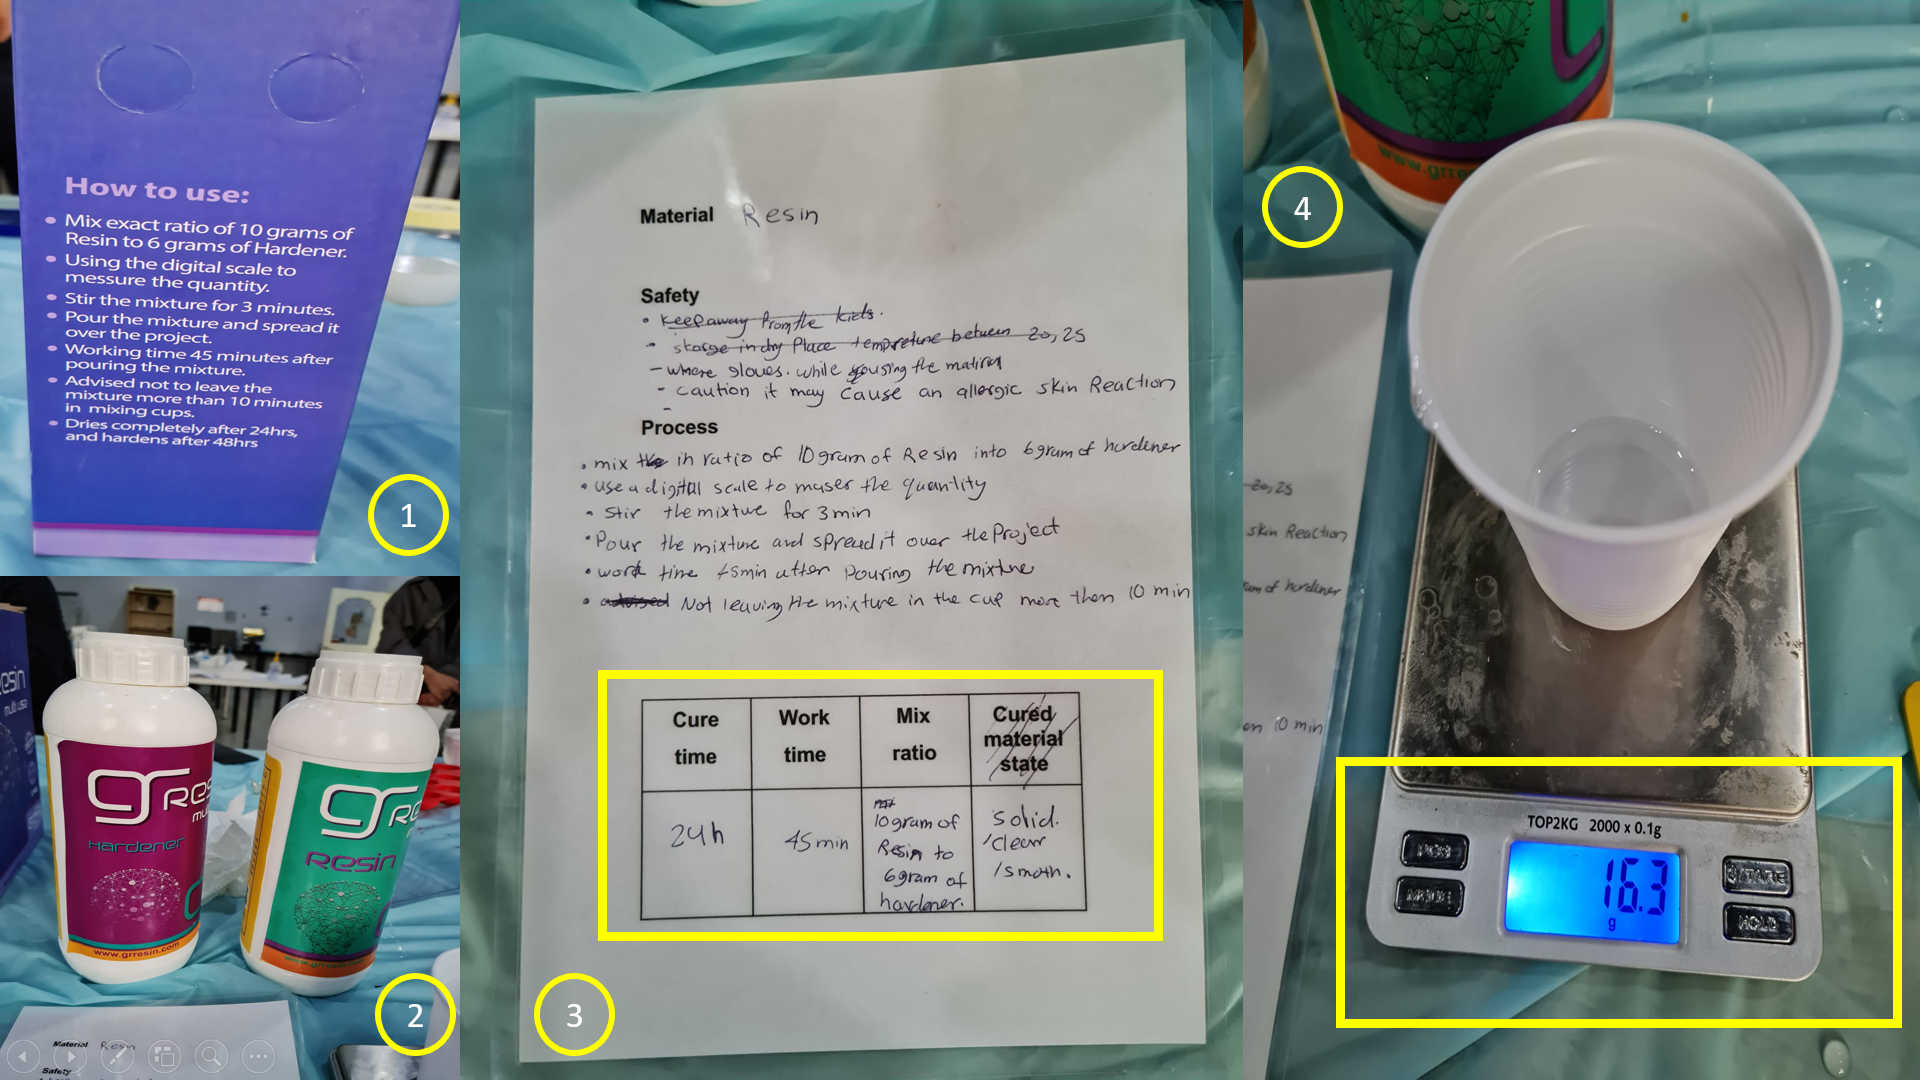
Thanks to my colleague Sarah Eid’s written instructions on the paper, I was able to do the mixing ratio of this process.
The working time I took was 20 minutes for it, so it could be thoroughly mixed, without any bubbles in it. The curing time for it is 24 hours.
Steps!
1- First, We have to do the mixing process. As written on the sides of the RESIN box, the amount of resin to be mixed with hardener is 10:6. That means, 10 grams of resin to be mixed with 6 grams of hardener.
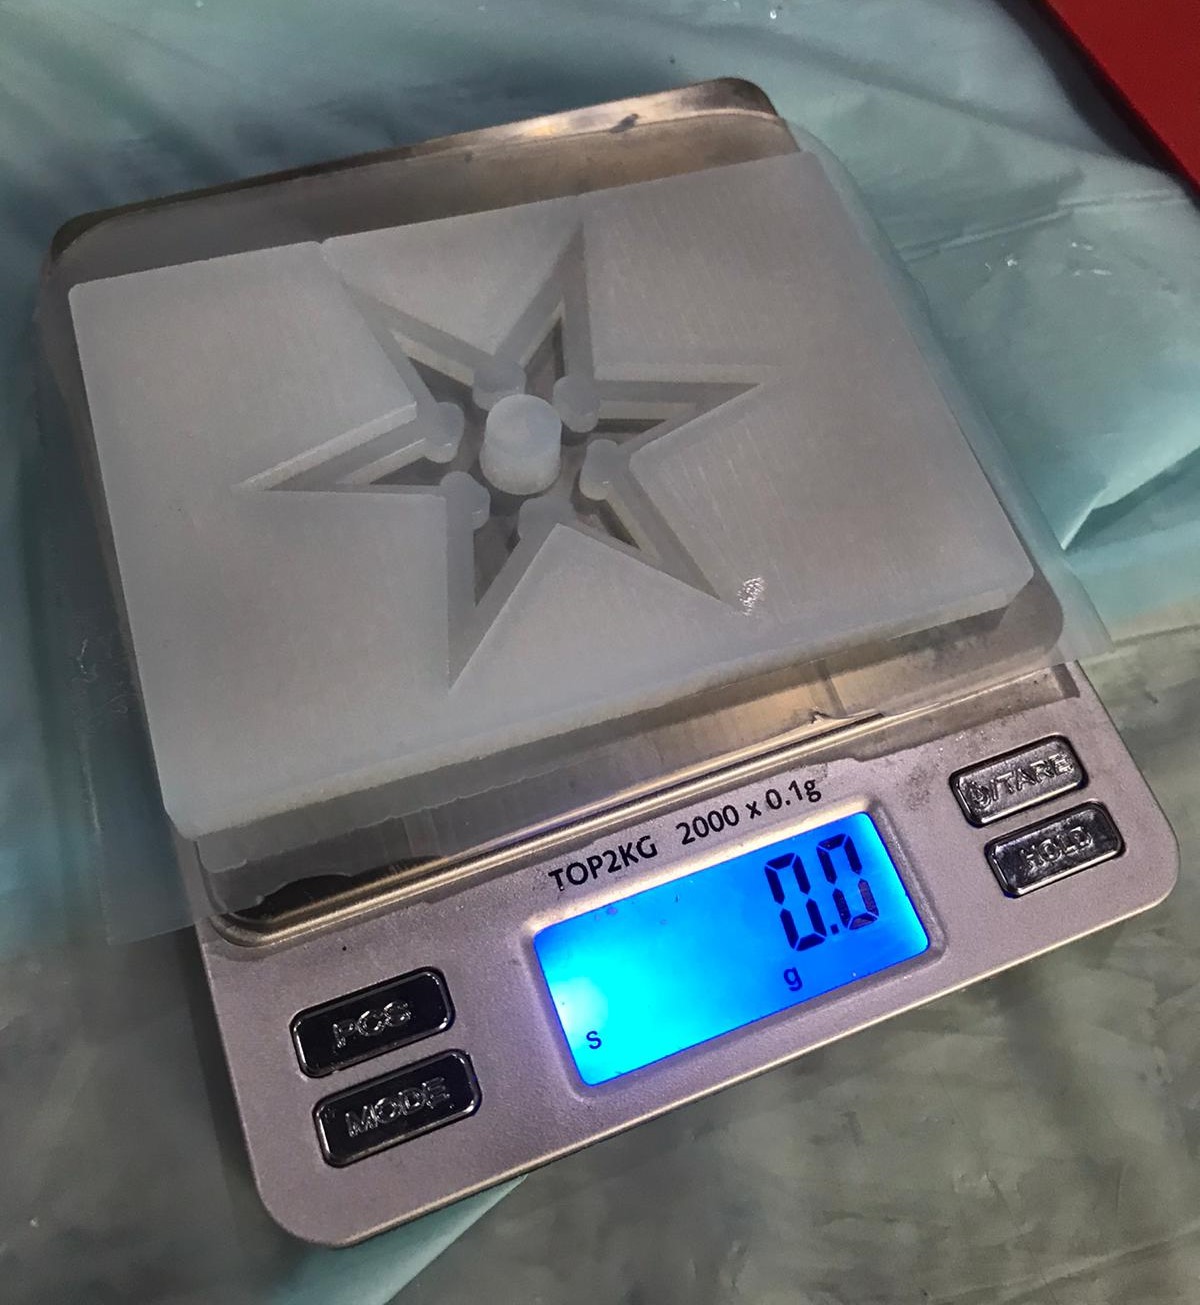
2- Second, I have to now see what amount would be good for my final material to be casted. So in order to do that, I first put the Mould in the weight scale, and tared it, and poured water in it. It seems the weight was 10 grams, which is almost same as the resin, so I decided to keep the ratio same as it is, for the resin. That is, 10:6.
3- I put the cup on the scale, and poured 10 grams of Resin in it, and added 6 grams of hardener, making the total weight to be 16 grams.
4- After that, I started mixing both of them together, and when they were thoroughly mixed, I started adding a color of my choice. Since Shurikens in animes and movies are usually black, but I wanted to try a different color. So, I opted for a Red color, with little bit of sparkling golden and few green glitters in it.
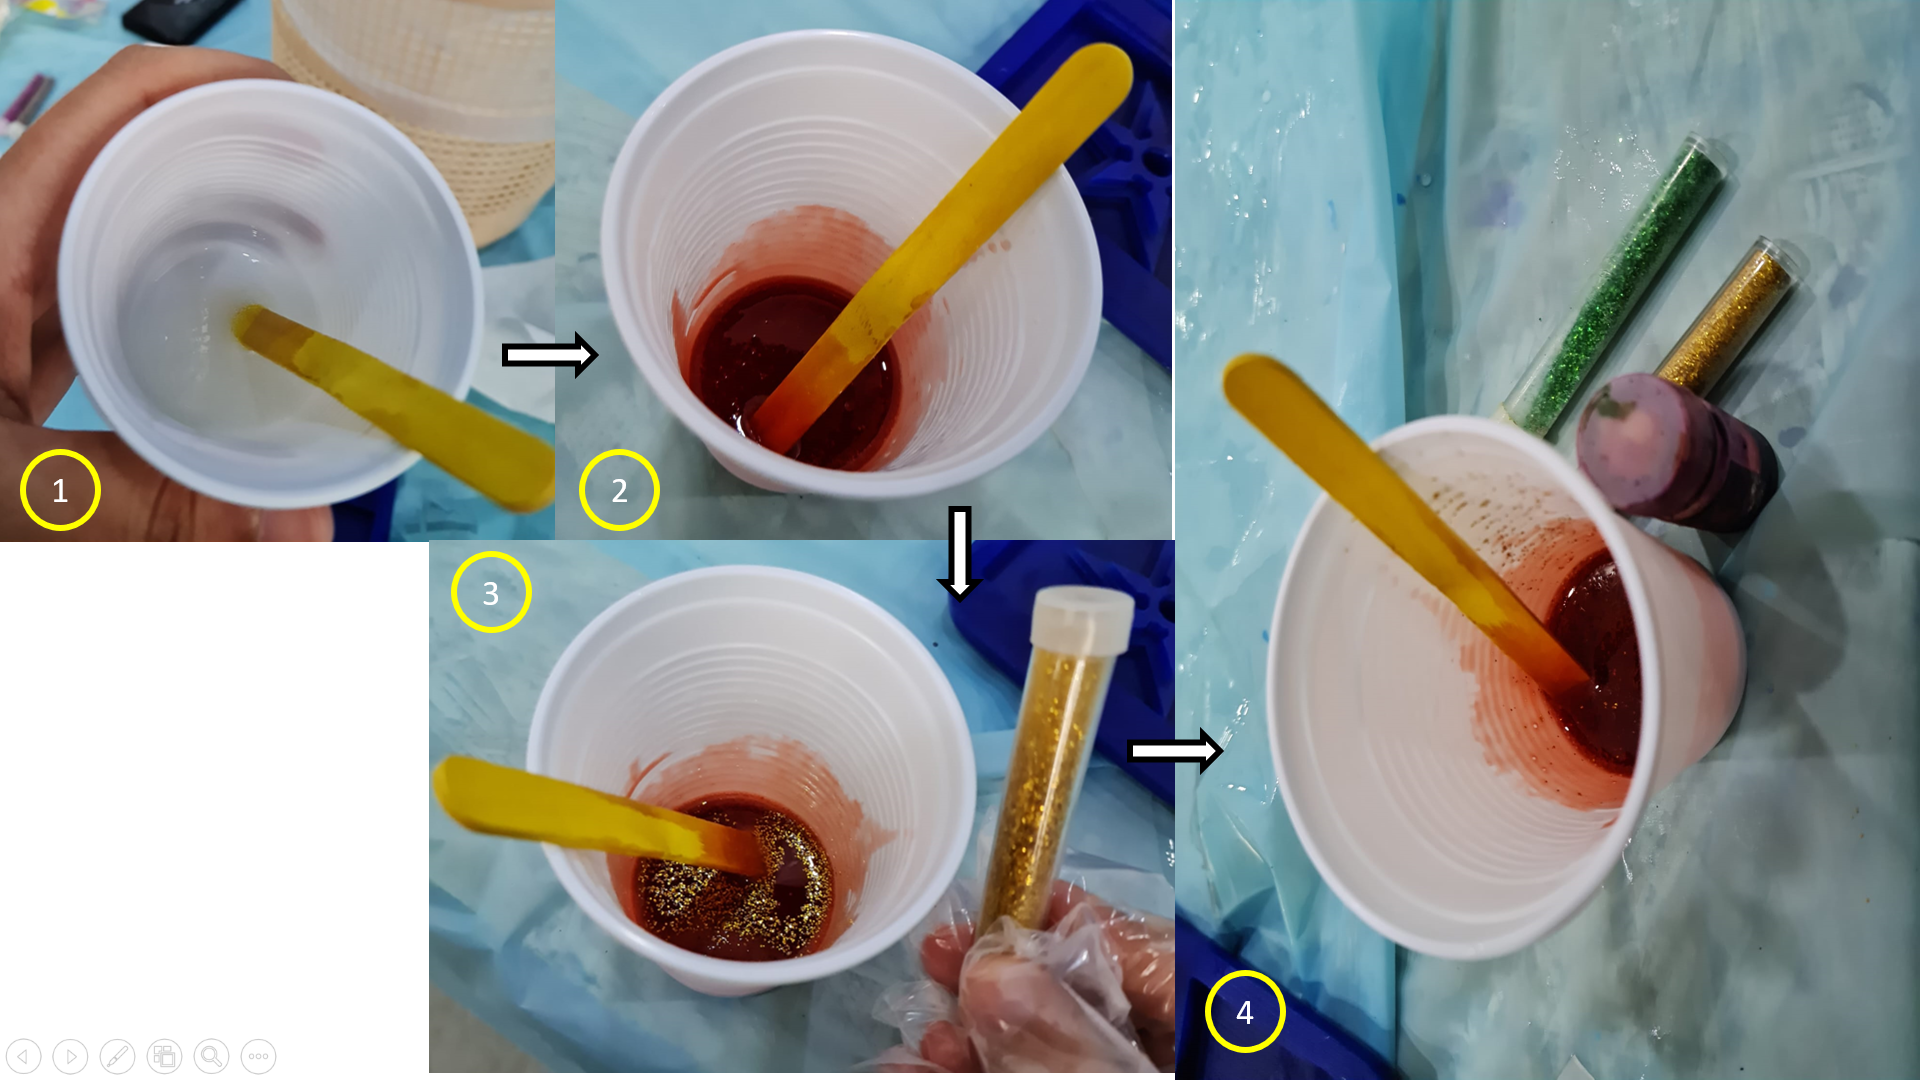
5- After adding them and mixing them, I started pouring the mixture into my mould, and it filled all of it.
VIDEO of pouring Resin in the mould!
Mixture Overflow
6- I felt that the mixture was a bit over the top, indicating it wont be straight flat from the top part, so I tried straightening it out from a cardboard piece, by swiping it from left to right, so it would remove the excess mixtures.
Video of overflow fixing!
7- Then, I tried removing the excess on the mould, with a tissue paper, so it would be easier to break whatever little hardened pieces would form around the object.
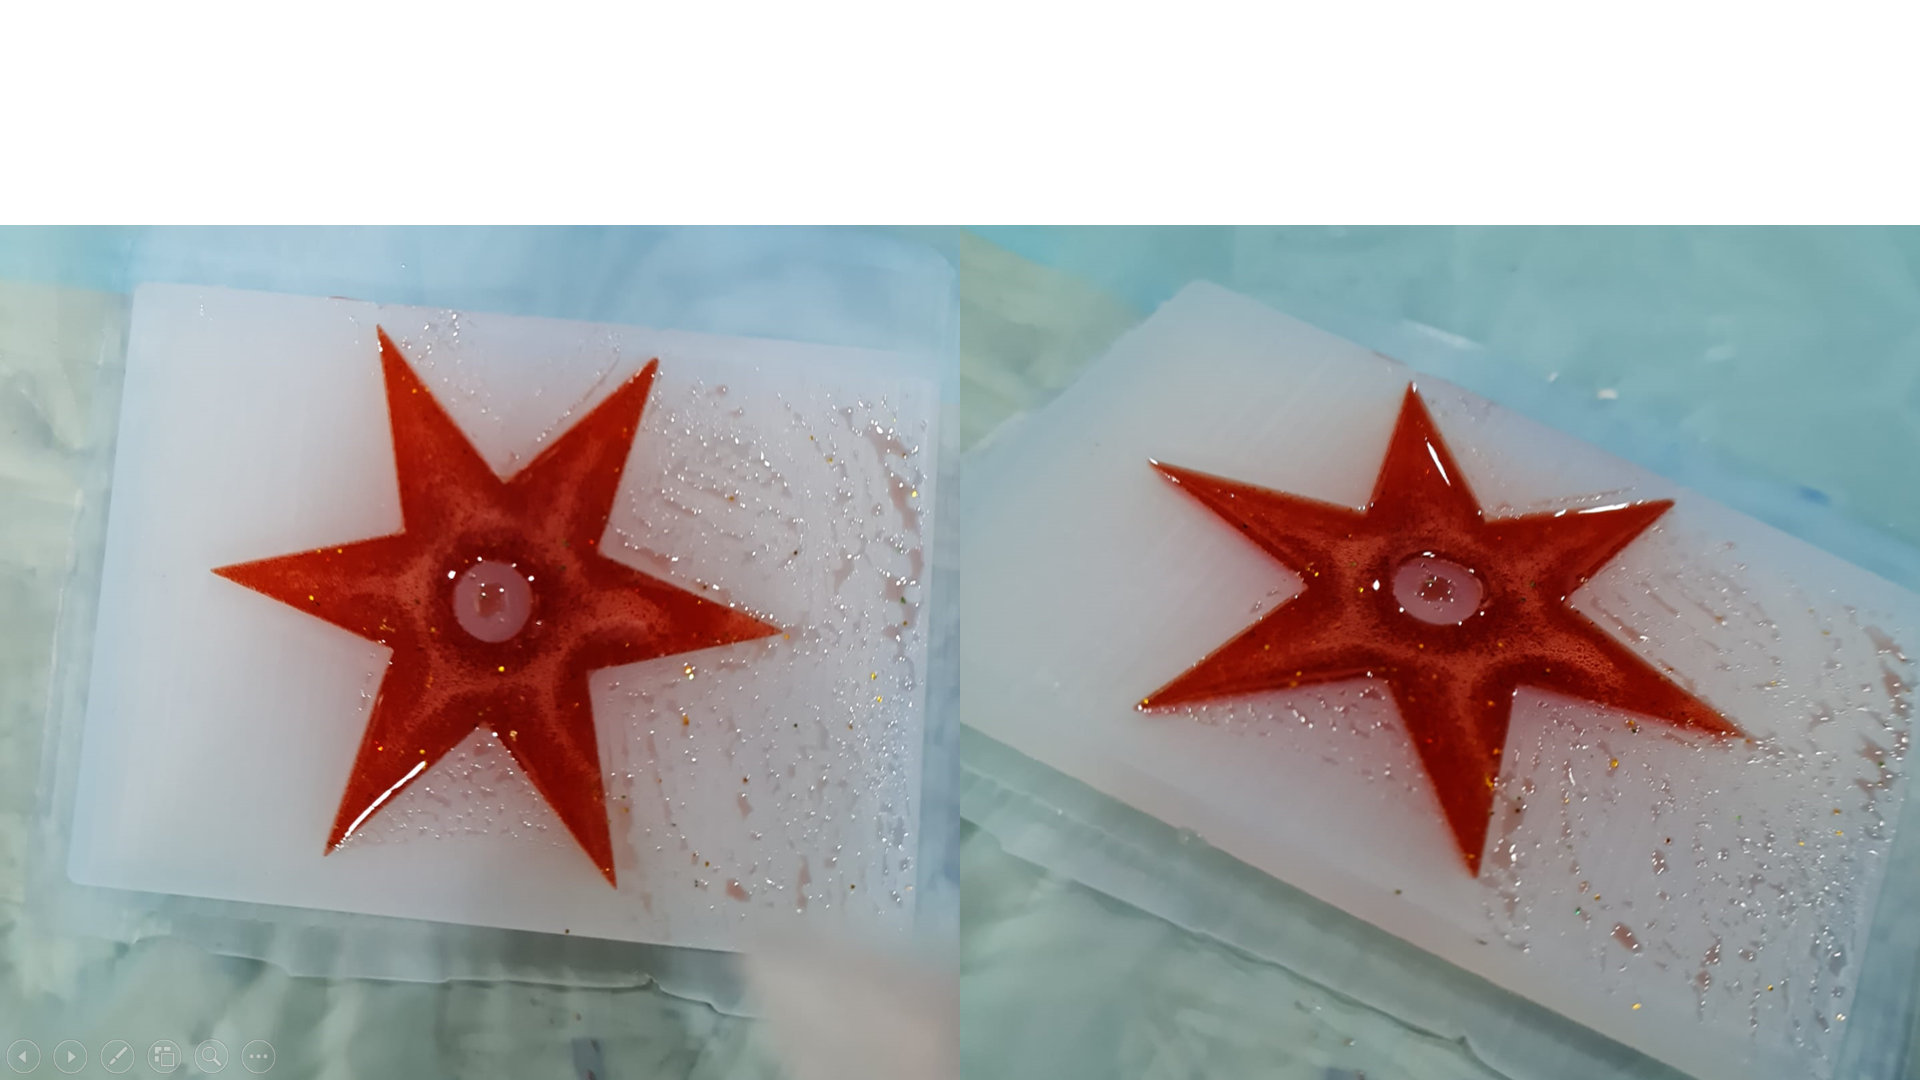
8- Now, we wait for the final result, after 24 hours.
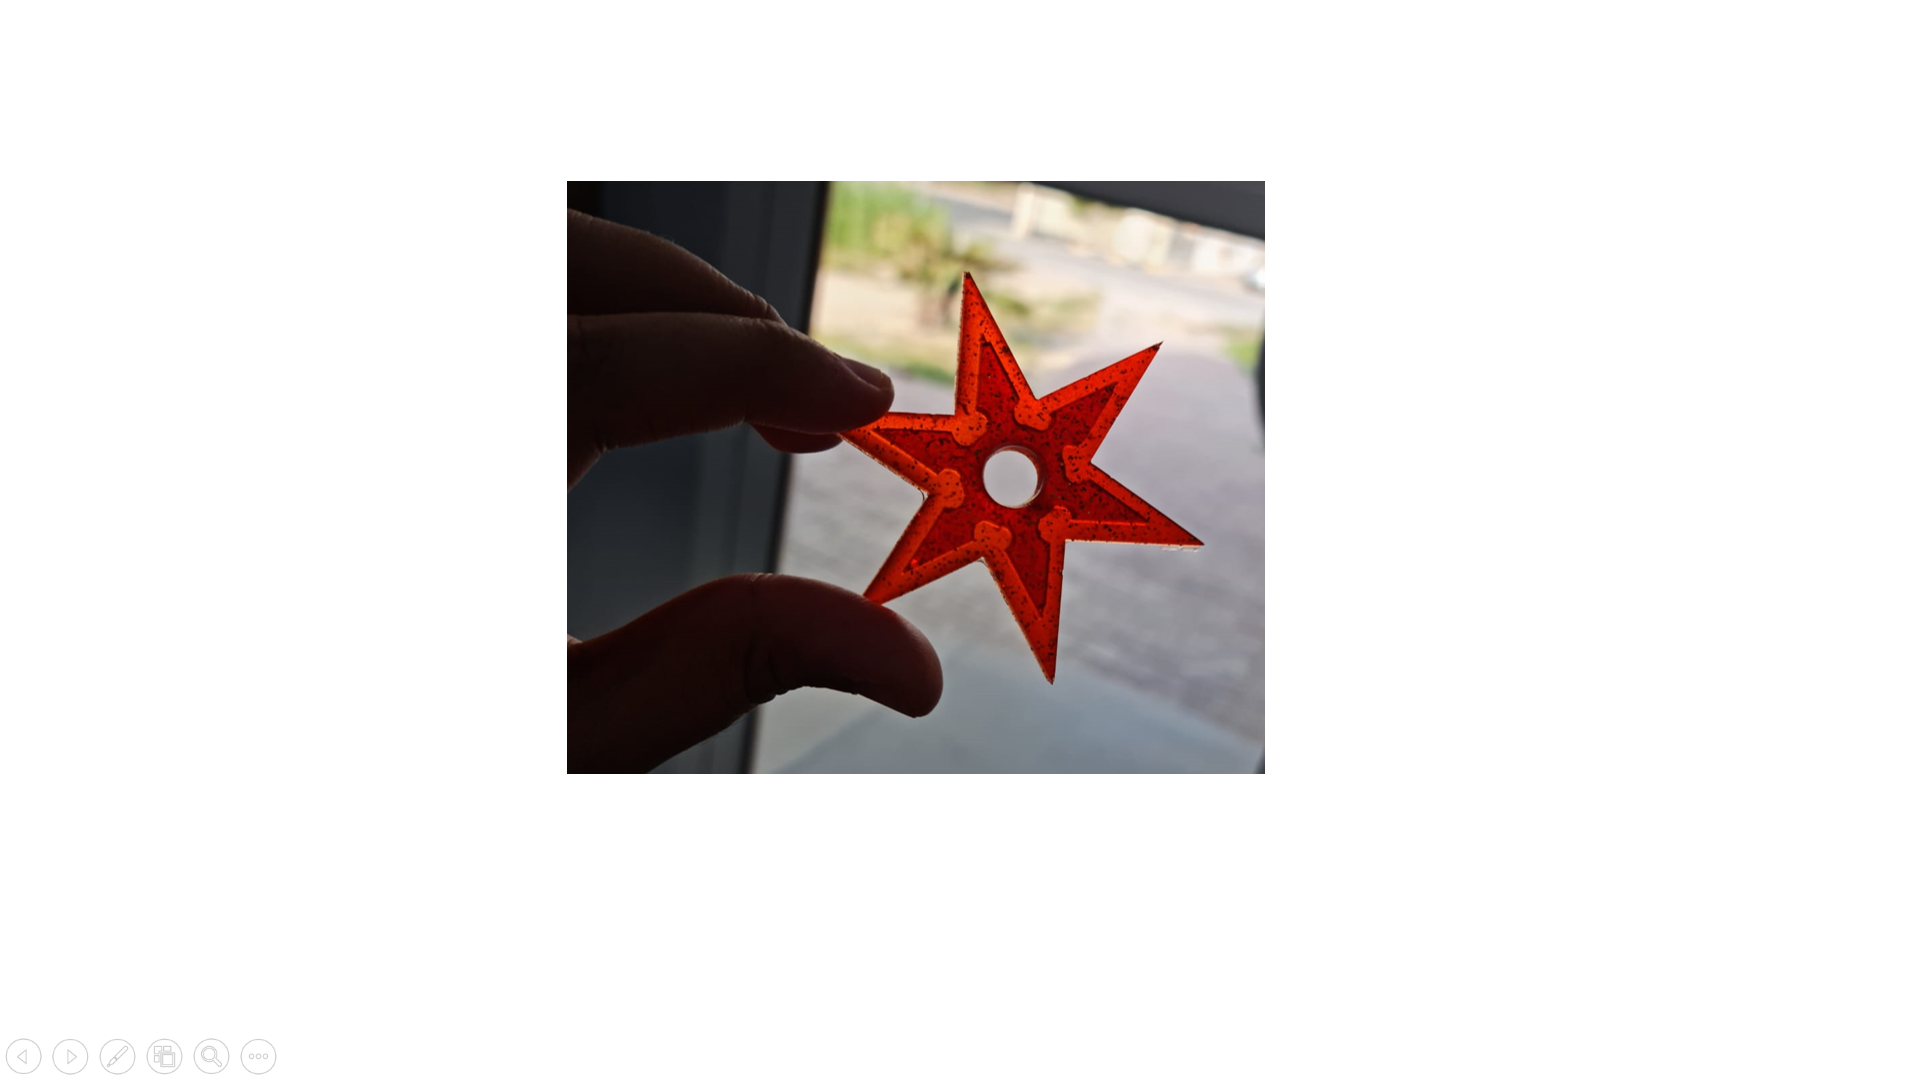
Final Casting Result!!
3D Shuriken Design
STL Design Files!
Click to download the STL design file
Fusion360 Design files
Click to download the fusion360 design files